

Page 1
Life Fitness CT5500 and X9 Cross-Trainers
How To... Install Shaft Collar Service Kit
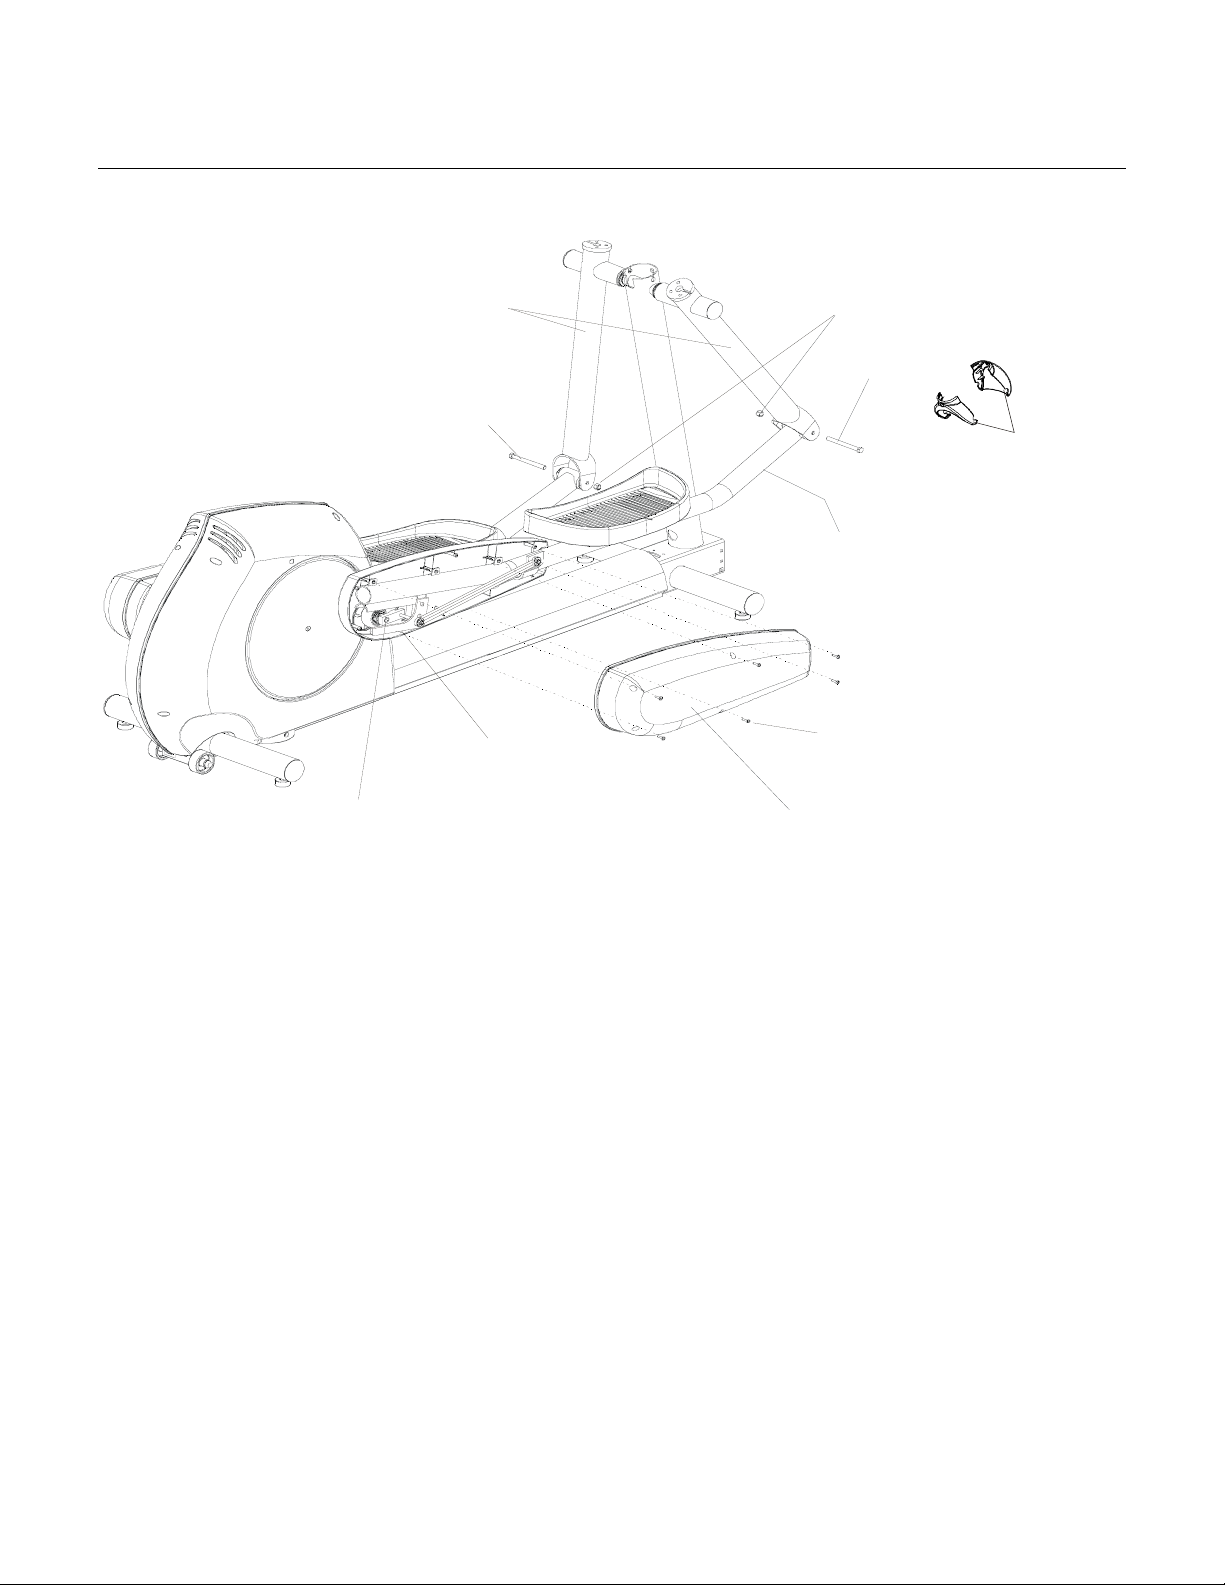
Rocker Arms
Bolt
Pedal Lever Nuts(2)
Torque 30-35 ft lbs
Bolt
Clevis
Covers
Pedal Lever (RT )
Cover Screws(6)
Torque
6-10 in lbs
Arm Extension
Hex Bolt
Anti-Lift
Bracket
Anti-Lift Bolts(2)
Torque 30-35 ft lbs
Outer Link
Cover (RT)
1. Remove the Outer Link Covers by removing six mounting screws from each Outer Link Cover.
2. Remove the Anti-Lift Bracket by removing two mounting bolts from each Bracket.
3. Remove the Clevis Covers from the front of each Pedal Lever Assembly
4. Remove each Pedal Lever Assembly by removing the mounting bolt and nut at each Rocker Arm Joint, and the
hex nut from each Arm Extension.
1
M051-00K61-A080
March 04, 2004
Page 2
A
r
Life Fitness CT5500 and X9 Cross-Trainers
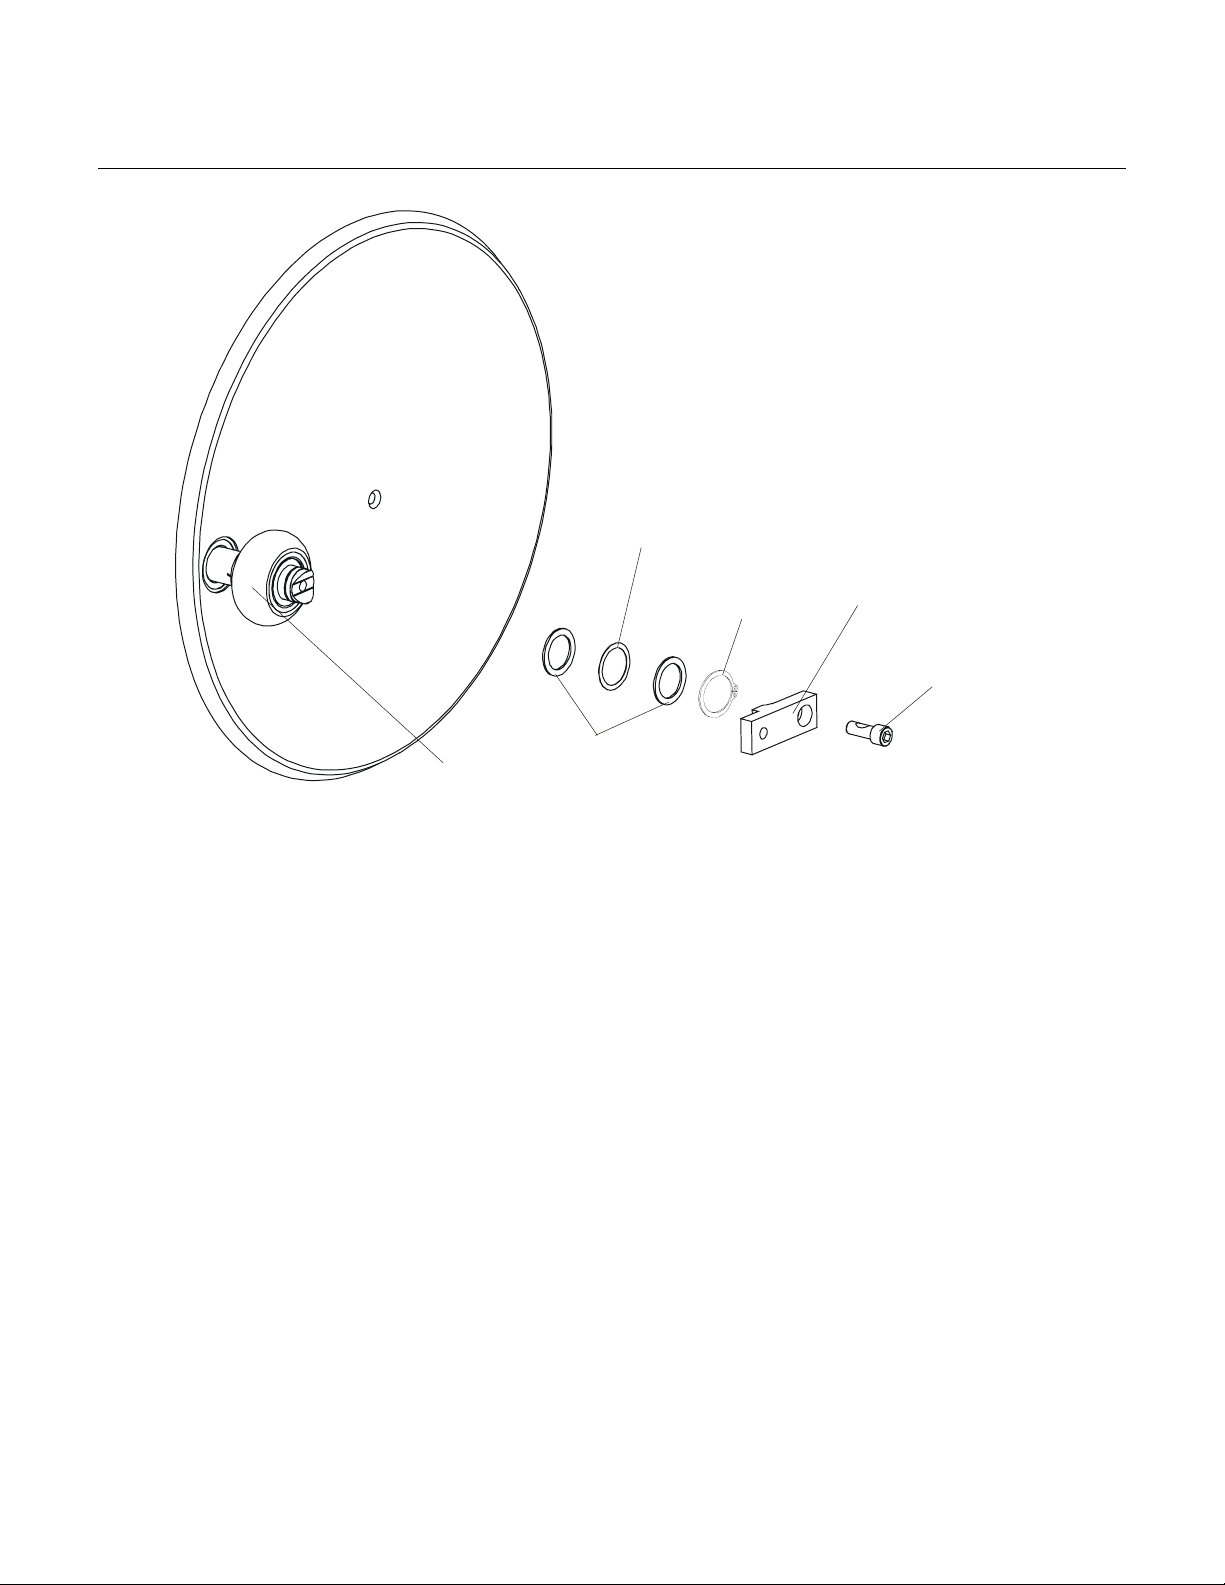
How To... Install Shaft Collar Service Kit (Continued)
Wave
Washer
Snap
Ring
Arm
Extension
llen-Head
Cap Screw
Flat
WashersRolle
5. Remove the Allen-Head Cap Screw from the end of the Arm Extension.
6. Remove the Arm Extension and save the Arm Extension and Allen-Head Cap Screw.
7. Remove the Snap Ring, Wave Washer, and Flat Washers on outside of Roller and discard.
2
M051-00K61-A080
March 04, 2004
Page 3

A
Life Fitness CT5500 and X9 Cross-Trainers
How To... Install Shaft Collar Service Kit (Continued)
Snap
Ring
Flat
Washer
Roller
Shaft
Collar
Arm
Extension
llen-Head
Cap Screw
Torque 30-35 ft lbs
Set Screws
8. Install the new Shaft Collar (as shown in the illustration above) in place of the discarded washers.
9. Make sure the Roller turns freely before tightening the Set Screws on the Shaft Collar.
10. Re-install the Arm Extension, Allen-Head Cap Screw, Pedal Lever Assembly, and Outer Link Cover in reverse
order. Tighten hardware to specified torque values.
3
M051-00K61-A080
March 04, 2004
 Loading...