

LG GDK-186, GDK-34E, GDK-20W, GDK-100, LDK-130 User Manual
...
(APR 2004/ISSUE 2.2)
GDK-186/100/34E/20W
& LDK-130/300/600
WOTS
Wireless Terminal User Guide
MODEL : GDC-345H (GAP)
LGE.

GDK-162/100/FPII/20W & LDK-24/100/300/300E WOTS
Wireless Terminal (GDC-345H) User Guide
REVISED HISTORY
DATE
2002.10
2002.11
2003.03
2003.09
2004.03
* This manual for GDC-345H GAP wireless terminal is applicable for printed date and can be
modified or updated due to production enhancement. If there is any question, please inquire of
UADS (Unit Application Detail Specification) of sale area about questions.
* Unauthorized copying or partial plagiarism is prohibited by law.
ISSUE CONTENTS OF CHANGES REMARK
ISSUE 1.0
ISSUE 1.1
ISSUE 2.0
ISSUE 2.1
ISSUE 2.2
-. Initial Release
-. Added the notice of Ear-Mic.
-. Added the LDK-24 feature
-. Added the LDK-600 feature
-. Added Best Base selection function.
i

GDK-162/100/FPII/20W & LDK-24/100/300/300E WOTS
Wireless Terminal (GDC-345H) User Guide
백지
ii

GDK-162/100/FPII/20W & LDK-24/100/300/300E WOTS
Wireless Terminal (GDC-345H) User Guide
CONTENTS
1. GENERAL DESCRIPTION ......................................................................................................1
1.1 PURPOSE .............................................................................................................................1
1.2 CONTENTS ...........................................................................................................................1
1.3 PREPARATION ......................................................................................................................2
2. WIRELESS TERMINAL TOOL KIT .........................................................................................3
2.1 WIRELESS TERMINAL (GDC-345H).......................................................................................3
2.2 SINGLE-SLOT CHARGER (345H-SSC)...................................................................................4
2.3 BATTERY (1.2V RECHARGEABLE NIMH AAA SIZE 2 CELL)....................................................4
2.4 ADAPTER (330-HAP)............................................................................................................5
2.5 INSTALLATION(BATTERY AND BELT CLIP) ............................................................................5
3. MAINTENANCE.......................................................................................................................6
3.1 WIRELESS TERMINAL (GDC-345H).......................................................................................6
3.2 CHARGER (345H-SSC) ........................................................................................................7
3.3 BATTERY (1.2V RECHARGEABLE NIMH AAA SIZE 2 CELL)....................................................7
4. USER INTERFACE..................................................................................................................8
4.1 LCD DISPLAY.......................................................................................................................8
4.1.1 ANTENNA ICON & RSSI ICON .........................................................................................8
4.1.2 PHONE ICON.................................................................................................................9
4.1.3 KEY LOCK ICON...........................................................................................................9
4.1.4 MESSAGE ICON ...........................................................................................................9
4.1.5 MUTE ICON ...................................................................................................................9
4.1.6 BATTERY ICON ............................................................................................................9
4.1.7 TONE MODE ICON........................................................................................................9
4.1.8 SILENT MODE/VIBRATOR MODE ICON ...................................................................... 10
4.2 BUTTONS & FUNCTIONS ................................................................................................... 10
4.3 TONE................................................................................................................................12
4.4 MESSAGE DISPLAY...........................................................................................................13
4.5 CALL READY STATE..........................................................................................................13
5. TELEPHONE FEATURES ...................................................................................................14
5.1 BASIC FEATURES..............................................................................................................14
5.1.1 POWER ON/OFF........................................................................................................ 14
5.1.2 CALL FUNCTION.........................................................................................................14
i

GDK-162/100/FPII/20W & LDK-24/100/300/300E WOTS
Wireless Terminal (GDC-345H) User Guide
5.2 KEY SYSTEM FEATURES ................................................................................................... 15
5.2.1 CALL SERVICE FUNCTION........................................................................................... 15
5.2.2 KEY SYSTEM SUPPORT FUNCTION .............................................................................. 23
5.3 DECT FEATURES .............................................................................................................43
5.3.1 MOBILITY MANAGEMENT FUNCTION ............................................................................ 43
5.3.2 WIRELESS TERMINAL SERVICE FUNCTION................................................................... 45
6. INSTALLATION OF WIRELESS TERMINAL...................................................................... 59
6.1 SYSTEM ID & AUTHENTICATION CODE .............................................................................. 59
6.2 SUBSCRIPTION ................................................................................................................. 60
6.3 DE-SUBSCRIPTION - I........................................................................................................ 64
6.4 DE-SUBSCRIPTION - II....................................................................................................... 65
6.5 AUTHENTICATION..............................................................................................................68
6.6 CHANGE OF SUBSCRIBED SYSTEM.................................................................................... 69
8. SPECIFICATIONS ...............................................................................................................72
8.1 SYSTEM SPECIFICATION....................................................................................................72
8.2 HAND-HELD TYPE WIRELESS TERMINAL (GDC-345H) SPECIFICATION............................... 73
8.3 CHARGER(345-SSC) SPECIFICATION................................................................................ 73
APPENDIX. A USER MENU TREE ......................................................................................... 74
APPENDIX. B FUNCTION SHORT-KEY TABLE.................................................................... 75
APPENDIX. C THE LCD MESSAGES RELATED TO A CALL............................................... 80
ii
GDK-162/100/FPII/20W & LDK-24/100/300/300E WOTS
Wireless Terminal (GDC-345H) User Guide
1. GENERAL DESCRIPTION
1.1 Purpose
The purpose of this manual is to give a user the right way to use a GDC-345H wireless terminal and its
accessories. This manual lists the matters that a user has to avoid for right use and explains the features
of the wireless terminal as a terminal of GDK-186/100/34E/20W & LDK-130/300/600 systems. The
features which are explained in this manual describe the user-interface for GDK & LDK series DECT key
system of local sale. Also it illustrates the specifications of the terminal and its accessories. The wireless
terminal, GDC-345H (GAP), is designed and manufactured for interface with GDK & LDK series DECT
key system and LGE doesn’t guarantee inter-operability between any other GAP system and GDC-345H
(GAP). Please, refer to ‘GDK & LDK System Installation Manual’ about applicable peripheral items.
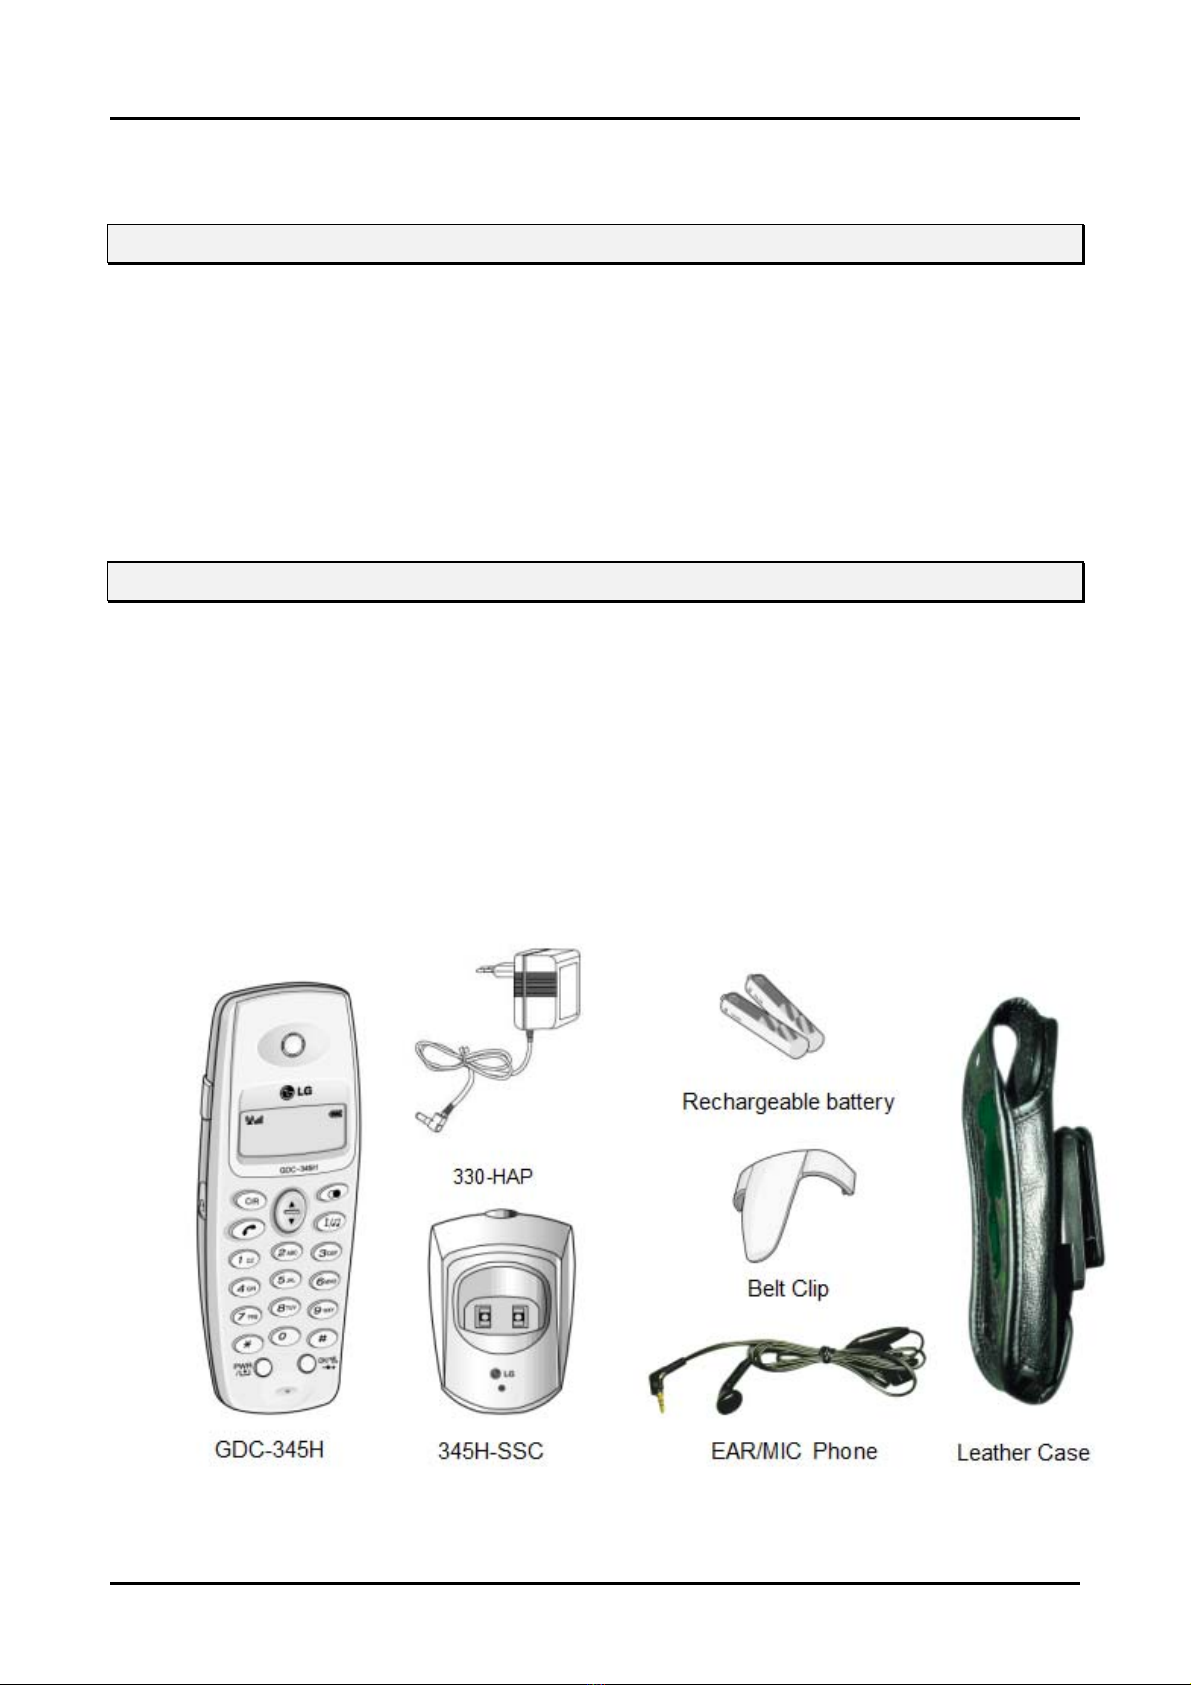
1.2 Contents
The wireless terminal tool kit contains the following items. Please be sure all of the listed items are
contained.
Wireless Terminal User Guide : 1
GDC-345H, Wireless Terminal : 1
345H-SSC, Single-slot Charger : 1
Standard Rechargeable Battery : 2 Cell
330-HAP, AC/DC Adapter : 1
Belt Clip : 1
EAR/MIC Phone : Optional
A leather case : Optional
Note ) The above figure is illustrative purpose only. The actual products may look different.
1
GDK-162/100/FPII/20W & LDK-24/100/300/300E WOTS
)
Wireless Terminal (GDC-345H) User Guide
1.3 Preparation
Below table shows the maximum cell number, maximum registrable terminal number, and
maximum simultaneous wireless call number in different configurations of GDK186/100/34E/20W & LDK-130/300/600 system and the applicable S/W version of GDC-345H
handset. Please note that only one(1) WTIB(with WTIU) board can be installed in GDK186/100/34E/20W system, one(1) WTIB board can be installed in LDK-24 system, two(2)
WTIB(with WTIU) boards can be installed in LDK-130 system and three(3) WTIB(with WTIU)
board can be installed in LDK-300/600 system. (The WTIU board is not prepared in the GDK20W system.)
Items
System
Name
GDK-186
GDK-100
GDK-34E
GDK-20W
LDK-24 WTIB 3 2 12 6 All version
LDK-130
LDK-300/600
1. Board
Name
WTIB 3 5 8~96 by step 8 15
With WTIU 6 5 8~96 by step 8 30
WTIB 4 5 8~64 by step 8 16
With WTIU 8 5 8~64 by step 8 32
WTIB 4 5 8~32 by step 8 16
With WTIU 8 5 8~32 by step 8 16
MBU 1 4 20 4
WTIB 3 4 20 12
WTIB
(MAX. 2)
With WTIU
(MAX. 2)
WTIB
(MAX. 3)
With WTIU
(MAX. 3)
2. Max.
Cell Number
(Base Station
Num.
4 ( x 2 ) 5 8~80 by step 8 32
8 ( x 2 ) 5 8~80 by step 8 64
4 ( x 3 ) 5 8~192 by step 8 48
8 ( x 3 ) 5 8~192 by step 8 96
3. Channels/
Cell
4. Registrable
Max.
Terminal Number
Simultaneous
Wireless Call
5. Max.
6. Applicable
SW version
(GDC-345H)
All version
All version
All version
All version
All version
All version
The wireless terminal should be subscribed before using it. (Please refer to ‘6. Installation of
Wireless Terminal’)
A call may be failed even when free channels exist due to unexpected changes of radio
environment.
When all channels are occupied, no more call can be made. In this case, a user should wait
until a channel becomes free.
The S/W of a wireless terminal can be updated by the manufacturer.
The working area of your hand-held type wireless terminal is limited to the domain of the
coverage area of a wireless system, which may be adjusted to a premise of an organization,
an office, or a company. Using a terminal outside of this area will bring unsatisfied results.
A hand-held type wireless terminal is not specified as intrinsically safe. So do not use it in
hazardous area or intent.
If a user doesn’t use matched configuration, the normal operation can’t be guaranteed.
If you are out from the range of a base station for a long time with your handset power-
on, it may fail to find the base station again when you are in the range. In that case,
refresh the power of the handset or press “[MENU key] + [3] + [OK key]”
2

GDK-162/100/FPII/20W & LDK-24/100/300/300E WOTS
Wireless Terminal (GDC-345H) User Guide
2. WIRELESS TERMINAL TOOL KIT
2.1 Wireless Terminal (GDC-345H)
The GDC-345H is a DECT business wireless terminal that communicates with a GDK-
186/100/34E/20W & LDK– 130/300/600 WOTS (Wireless Office Telephone System) via radio
channels.
A cell is an area effected by the antenna of a fixed part of the system. A Cell of the same wireless
system is overlapped with other cells. The coverage area of a wireless system consists of these
cells. A user can make calls within this area. As a user moves, the effecting cell of the terminal will
be switched over.
Hand-held Type Wireless Terminal : GDC-345H
The hand-held type wireless terminal (GDC-345H) is designed for ease and portable use.
Note:
The above and the following figures are just for illustrative purposes only. An actual product may look
different.
3
GDK-162/100/FPII/20W & LDK-24/100/300/300E WOTS
Wireless Terminal (GDC-345H) User Guide
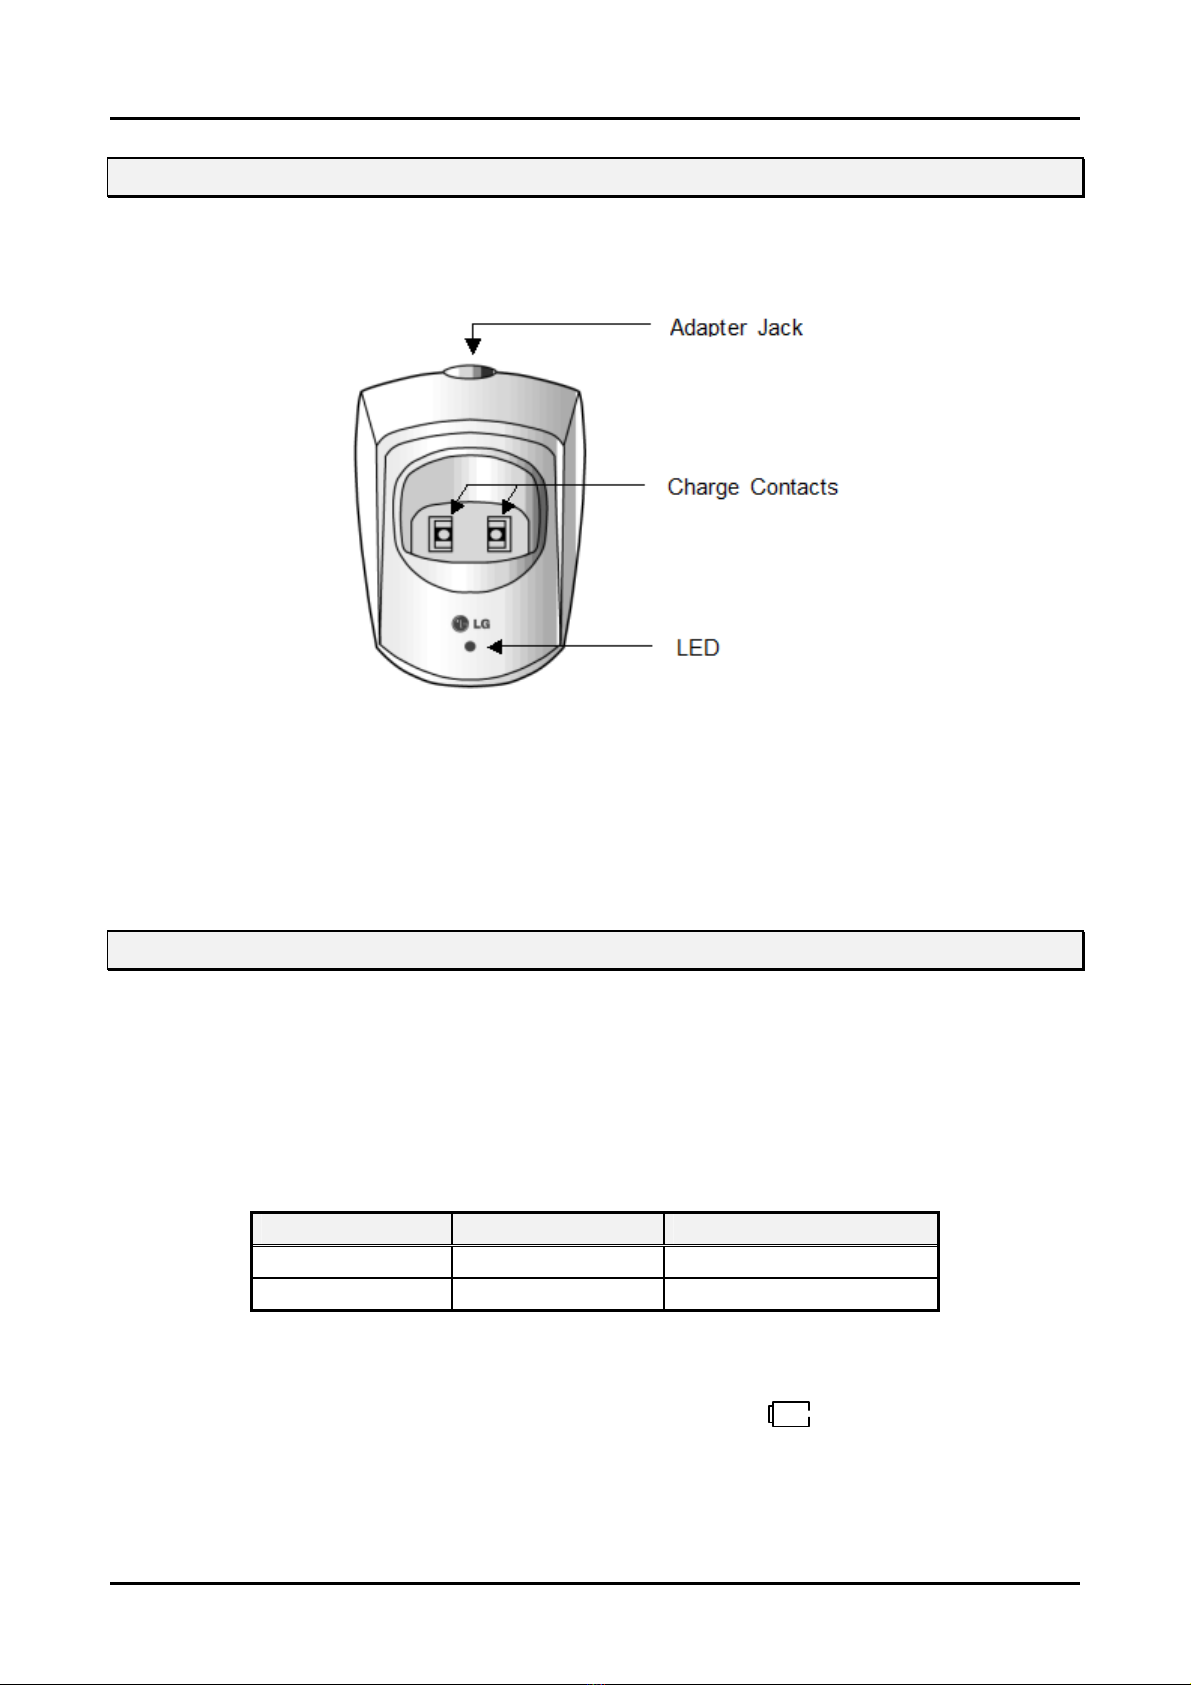
2.2 Single-slot Charger (345H-SSC)
A 345H-SSC is used as a charger of GDC-345H. It uses an AC 230V/50Hz adapter or a AC
220V/110V ~ 50/60Hz adapter, 330-HAP.
Single-slot Charger (345H-SSC)
The LED on the charger indicates that charging is in progress.
The battery is Nickel Metal Hydride(NiMH) type. To maintain the initial duration of the battery,
charge a fully discharged battery.
2.3 Battery (1.2V rechargeable NiMH AAA Size 2 cell)
A standard battery lasts 9 hours in talking mode and 50 hours in standby mode.
According to the charged state, temperature, environment and habits of using, or radio environment
of using place, the duration of a battery will be varied. If a user uses a battery according to the
described maintenance(in the next chapter), a full-charged battery guarantees the duration as
below table. Unless a user follows the maintenance guideline, the duration of a fully charged
battery is not guaranteed.
Bat. Type Rechargeable Full Charging Time
Talking Mode 9 hrs 10 ~ 12 hrs
Standby Mode 50 hrs 10 ~ 12 hrs
< Battery duration and charging time >
When a battery is almost consumed during a call or in an idle state (under 2.3V ± 0.1V), warning
tone will be heard once in every 20 second, and a low-battery icon( ) on the upper right corner
of the LCD will be blinking.
4

GDK-162/100/FPII/20W & LDK-24/100/300/300E WOTS
Wireless Terminal (GDC-345H) User Guide
2.4 Adapter (330-HAP)
330-HAP adapter is used for the charger, 340-SSC. There are two types of adapter. It is dependent
on country adaptation.
Type -Ⅰ
Input : Only AC 230V/50Hz 50mA
Output : DC12V 200mA 2.4VA
Type -Ⅱ
Input : AC 220V or 110V 50/60Hz
Output : DC 12V 200mA
2.5 Installation(Battery and Belt Clip)
How to disassemble the battery cover and insert the battery.
Note :
1. Before the inserting the battery, check the convex pictogram(○+ ○-)compartment in the bas
e and connect the dry cell according to the convex pictogram.
2. Push the dry cell until you hear “clicks” sound.
How to put the belt clip into Handset.
Note :
1. Put belt clip into Handset’s one side slot.
2. Push belt clip into the other side slot until it “clicks” sound.
5

GDK-162/100/FPII/20W & LDK-24/100/300/300E WOTS
Wireless Terminal (GDC-345H) User Guide
3. MAINTENANCE
This chapter mentions what a user has to do and should avoid in order that a user may treat the
wireless terminal and its accessories to keep them in good condition.
The user is responsible for the result caused by violating the below warnings.
3.1 Wireless Terminal (GDC-345H)
A user should keep the followings to use wireless terminal GDC-345H without any harm to the user
or to the product.
Do not expose it to direct sunlight for long period. For operational temperature range, refer to
the section of ‘8. Specifications’.
Spilling or being wet may result impossible condition to be repaired.
Do not remove the rubber lid attached on the left side of GDC-345H. The hole on the side part
is used for ear-microphone and is covered with a rubber lid.
Do not insert any external substance except ear-microphone for GDC-345H in the hole.
Inserting anything except for ear-microphone provided by LGE may cause severe damage to
the terminal.
Do not try to disassemble it. Disassembling the terminal may damage it electronically.
Do not try to alter the external or internal. Trying to alter the terminal may damage severely.
Clean a hand-held type wireless terminal only with a soft and dry cloth. Using soap or any
other cleansing materials may damage it.
Avoid shocks and keep in safe place when it is not used.
Keep it away from any flammable thing or excessive heat. For operational temperature range,
refer to the section of ‘8. Specifications’.
When not used for long period, remove a battery from it and keep separately.
Before initial use, charge fully the battery.
Warning
The ear cap region of this telephone may attract and retain small metal objects.
6

GDK-162/100/FPII/20W & LDK-24/100/300/300E WOTS
Wireless Terminal (GDC-345H) User Guide
3.2 Charger (345H-SSC)
For right use of 345H-SSC, keep the followings:
Do not use it in high temperature or in high humidity area. Spilling or being wet may result
impossible condition to be repaired.
Do not try to disassemble or alter the external or internal.
Avoid shocks and keep in safe place when it is not used.
Keep it away from any flammable thing or excessive heat.
Use only designated adapter, 330-HAP (230V-50Hz or 220V/110V-50/60Hz).
Don’t harm LED, contacting parts to a battery or jointing part to an adapter.
Don’t make a short circuit on contacts.
3.3 Battery (1.2V rechargeable NiMH AAA Size 2 cell)
For right use and keep in good condition of the battery, keep the followings:
Do not use it in high temperature or high humidity area. Spilling or being wet may result
impossible condition to be repaired.
Charge and keep in room temperature. High temperature or low temperature prevents a
battery from full charging. Even enough charging time does not guarantee good using
duration.
Avoid shocks and keep in safe place when it is not used. Shocks or dropping may cause
damage or decreasing duration.
Keep it away from any flammable thing, and do not place it in hot place such as in a car in
summer.
Keep it away from kids.
The battery contains environmental pollutants. If damaged, return it to a collecting point.
Duration of using a battery is decreased gradually, and purchase a new one when the
duration becomes half comparing with initial use.
Once a month, charge fully a discharged battery with the charger (340-SSC). It will
enhance the decreased duration of the battery.
Notice
1. Please use only the rechargeable AAA size battery that is recommended.
2. If you use non-chargeable battery, higher voltage may damage phone seriously.
3. Do not use disposable battery like Alkaline Battery. (It may cause battery leakage)
4. This rechargeable battery may be dischargeable.
In case the rechargeable battery discharge, please use it after you charge the battery.
7
GDK-162/100/FPII/20W & LDK-24/100/300/300E WOTS
Wireless Terminal (GDC-345H) User Guide
4. USER INTERFACE
This chapter explains the function of buttons, state of the LCD, displayed message on the LCD and
the features as the wireless terminal of GDK-186/100/34E/20W & LDK– 130/300/600 system.
4.1 LCD Display
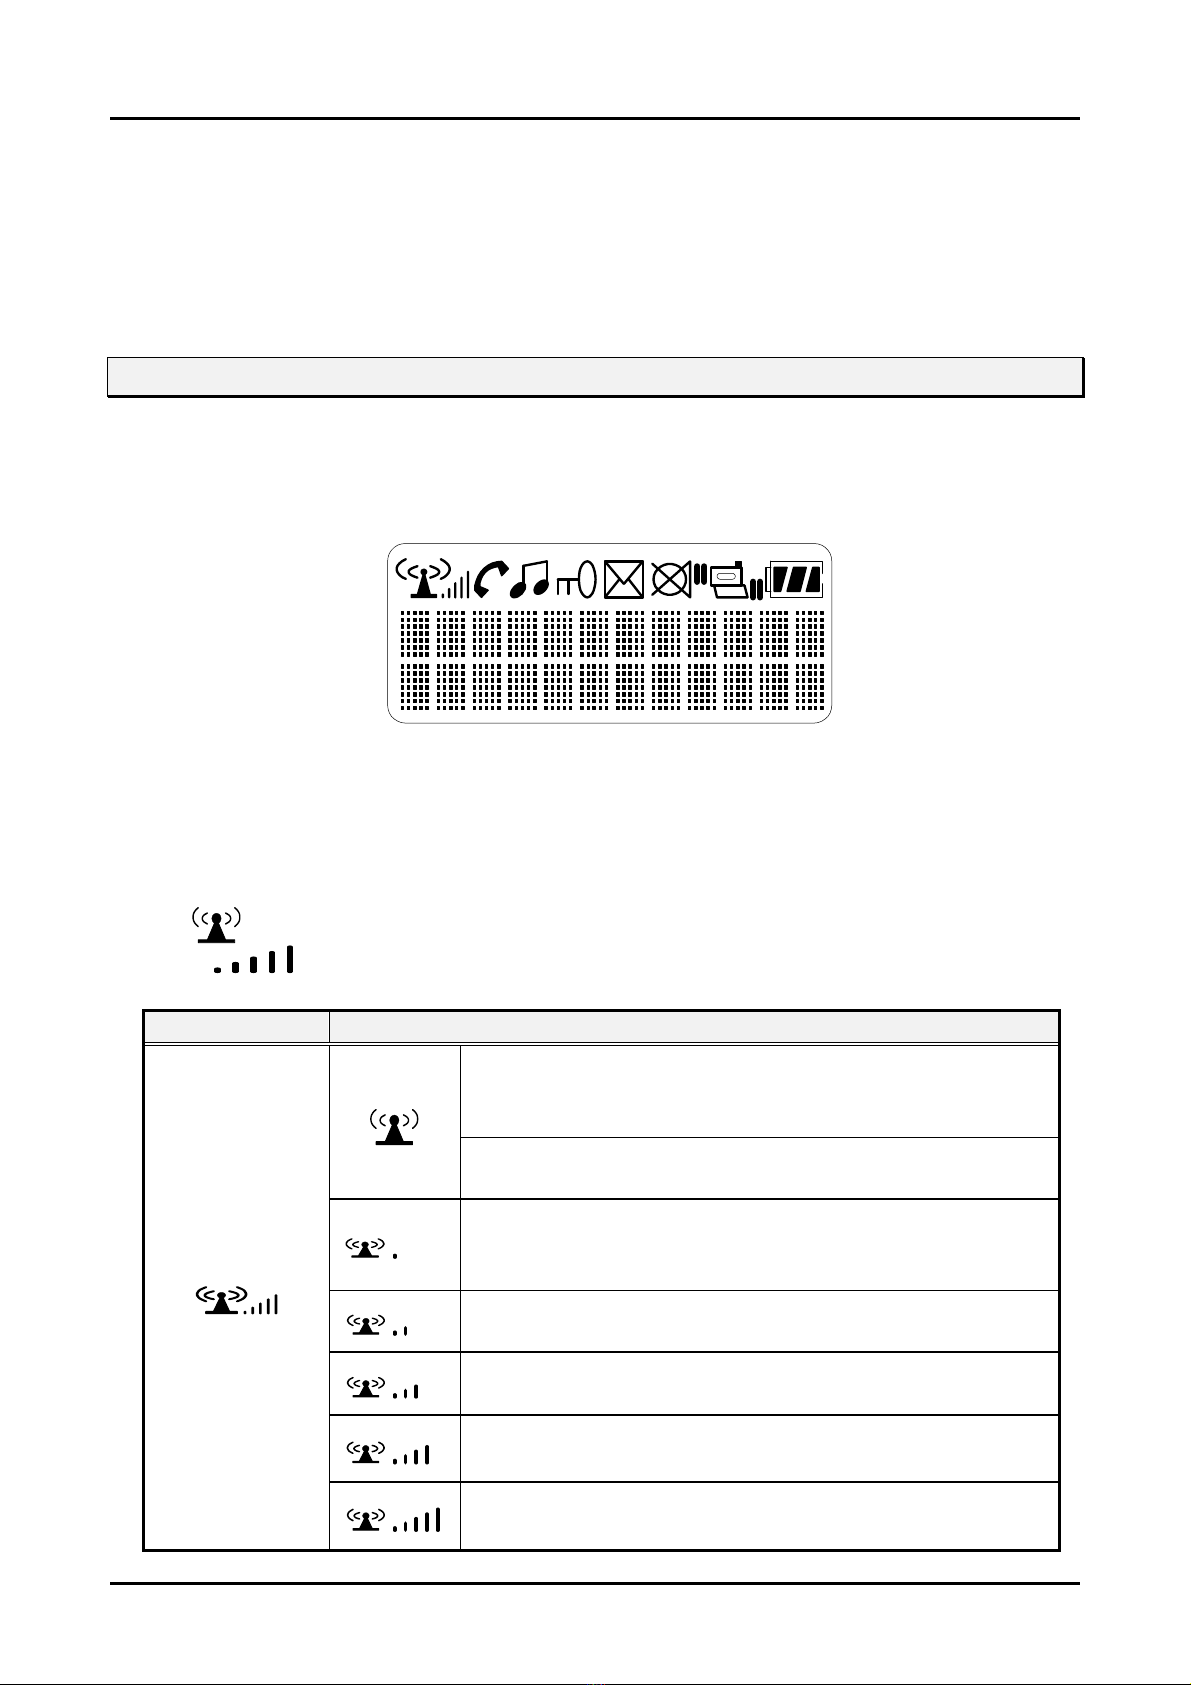
The LCD of GDC-345H GAP has eight icons and 2 x 12 Dot matrix. The LCD shows different
wireless states and displays visual feedback for the actions performed by user.
1) The display provides a user with visual feedback for all the actions performed by user.
2) The displayed status icons and messages are as the followings;
4.1.1 ANTENNA Icon & RSSI Icon
1)
2)
Icon Description
: Antenna Icon
: RSSI Icon
Blinking : When the icon is blinking, the terminal is still not
locked to a base station and the location registration is not
finished either.
Steady : When it stops blinking, the terminal is locked to a
base station but the location registration is not finished.
Location registration is finished. Even though user may
make a call or receive a call, may hear very severe noise.
(Below -86dBm)
Even though user may make a call or receive a call, may
hear severe noise. (-85dBm~-80dBm)
User may make a call or receive a call and may hear some
noise. (-79dBm~-75dBm)
User may make a call or receive a call and the call quality
is normal. (-74dBm~-65dBm)
User may make a call or receive a call and the call quality
is good. (Upper -64dBm)
8
GDK-162/100/FPII/20W & LDK-24/100/300/300E WOTS
Wireless Terminal (GDC-345H) User Guide
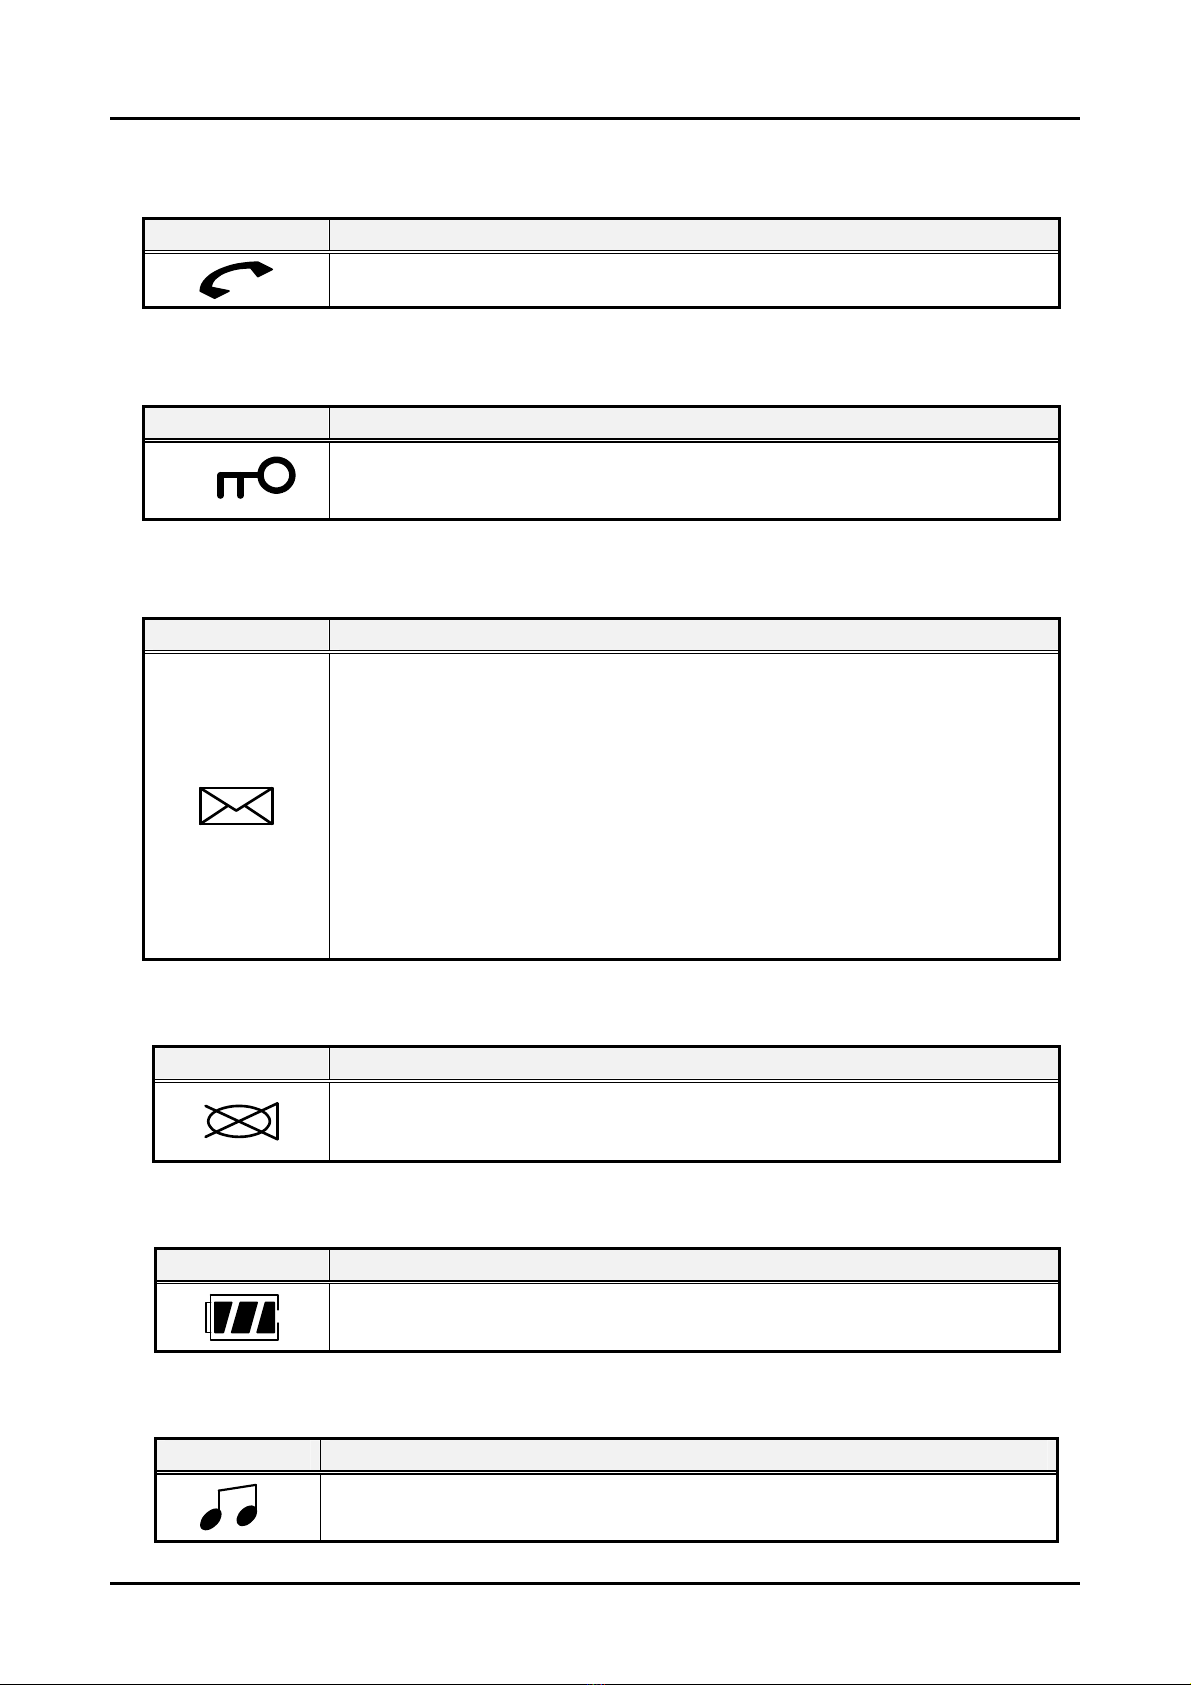
4.1.2 PHONE Icon
Icon Description
- Blinking : Indicates that a call connection is being tried.
- Steady : Indicates that a traffic channel is established.
4.1.3 KEY LOCK Icon
Icon Description
Indicates that the phone is set to lock mode.
4.1.4 MESSAGE Icon
Icon Description
The icon indicates that the system has at least one new message for the
wireless terminal. The message information is updated every 3 minute.
The disconnection with the subscribed system makes impossible to
update the message information and the icon is disappeared. And if the
wireless terminal is connected with the system, this icon is displayed
again on the LCD. If the station message is left, the reserved call is
made by using CALLBACK button and this icon will be disappeared
after the call. In case of voice message through DVU, press FLASH
button to delete a message after checking the message. When all
messages are deleted, the message icon will be disappeared.
Otherwise, this icon will be still remained. Applicable message: DVU
message, CLI message, Station message
4.1.5 MUTE Icon
Icon Description
Indicates that during a call, you can prevent the other party from hearing
any background noise or conversations, by pressing the DOWN button
longer than 1 second.
4.1.6 BATTERY Icon
Icon Description
Indicates charge level of the battery.
4.1.7 TONE MODE Icon
Icon Description
Indicates that the phone is pulse tone mode.
9

GDK-162/100/FPII/20W & LDK-24/100/300/300E WOTS
Wireless Terminal (GDC-345H) User Guide
4.1.8 SILENT MODE/VIBRATOR MODE Icon
Icon Description
Indicates that the phone mode is silent mode or vibrator mode.
4.2 Buttons & Functions
The wireless terminal has 10 digit buttons and 10 feature buttons.
1) Digit Buttons
0, 1, 2, 3, 4, 5, 6, 7, 8, 9
2) Feature Buttons
*, #, [ON/OFF], [FLASH/CLEAR], [REDIAL/PAUSE], [OK/SPEED/FUNCTION],
[TRANSFER/INTERCOM/INTERNAL/HOLD], [PWR/CALLBACK],
[UP/MENU] , [DOWN/MENU]
The function of button is as follows;
Button
Icon
Function Description
[ON/OFF]
- Try to make/release call
- Talking Mode : Register recall
- Flash a call and retry next call
- When using pre-dial :
Pressing longer than 1 second :
[FLASH/CLEAR]
All digits are cleared
Pressing shorter than 1 second :
1 digit backspace
When using local functional operation :
Function cancel
(It should be pressed longer than 1 second)
- Pressing shorter than 1 second
Pre-dial : Redial number saved in handset.
[REDIAL/PAUSE]
Post-dial : Redial number saved in system.
- Pressing longer than 1 second
Pause(pre-dial, post-dial and during CO-line call).
- Menu Mode :
Pressing shorter than 1 second :
Select / Finish a local function(OK).
- Idle Mode :
[OK/SPEED/
FUNCTION]
Pressing longer than 1 second :
Enter the silent mode.
- Post-Dial :
Pressing shorter than 1 second :
System speed dial(SPEED).
Pressing longer than 1 second :
Start / Finish a system function(FUNCTION).
10

GDK-162/100/FPII/20W & LDK-24/100/300/300E WOTS
Wireless Terminal (GDC-345H) User Guide
Button
Icon
Function Description
- Talking Mode :
Pressing shorter than 1 second :
[TRANSFER/
INTERCOM/
INTERNAL/
HOLD]
- In an idle state :
Transfer a call to the other station(TRANS).
Pressing longer than 1 second :
Hold a call / release a holding call(HOLD).
Home DECT : Internal call
Key-telephone DECT : Trying to make a CO line call
or an intercom call
[POWER/
CALL BACK]
- Power-on
- Pressing longer than 1 second : Power Off
- Pressing shorter than 1 second :
Leave a call back or a message
- When using local functional operation :
Start a local function, upper / lower scroll
[UP/DOWN/
MENU]
- Talking Mode :
Up / Down the level of Rx volume, Call by name, CLIP
- Navigate and select among function items in a menu
or submenu
- Go to Pulse (Pressing longer than 1 second)
- ‘#’ Display (Pressing shorter than 1 second)
- Talking Mode (Only when the Camp-On function is
supported by GDK & LDK series) : Camp-On
- Standby Mode :
‘*’ is displayed (Pressing shorter than 1 second)
Go to DTMF (Pressing longer than 1 second)
0~9
- Standard dial button
When pressing
any digit buttons, key tone will be heard.
any feature buttons, key tone will be heard.
[PWR] to turn off the wireless terminal, keep pressing more than 3 seconds until a tone is
heard.
Note :
The above table is available only for the wireless terminal which is subscribed to GDK & LDK series system.
Therefore, LGE may not guarantee normal key functions as described on the above table when a user
operates the wireless terminal which is subscribed to the other system.
11
GDK-162/100/FPII/20W & LDK-24/100/300/300E WOTS
Wireless Terminal (GDC-345H) User Guide
4.3 Tone
The wireless terminal supports many kinds of indication tones. These tones sound through the
buzzer installed in the wireless terminal. The situation which tone is generated is as the followings;
Keypad Tone
When pressing a key, the tone sounds.
Warning Tone and Conformation Tone
In many situations, these tones are provided as indication or warning to a user according to
each situation.
▶ Error indication tone
When a user does invalid operation, it is generated. There is no message displayed on
the LCD.
▶ Low battery warning tone
If battery voltage level is decreased to less than 2.3V±0.1, it is generated. A block in a low
battery icon on the LCD is blinking in every second and this tone is generated once in
every 20 second until battery voltage level reaches over 2.3V±0.1 by recharging the
battery. When a user puts the wireless terminal on the charger provided by LGE, this
tone and the blinking low battery icon are disappeared. If battery voltage level is under
2.2V±0.1V, power will be turned off automatically to protect circuits of the wireless
terminal without low battery warning tone as soon as pressing the power button to turn on
(It is called by ”Auto-power-off” function). It should be recharged.
▶ Out of range warning tone
When a user is about to get out of a coverage of the subscribed system, “OUT RANGE”
message will be shown shortly on the LCD with warning tone.
▶ Call-connection confirmation tone
When an wireless channel between the wireless terminal and the subscribed system is
established, it is generated. Once pressing button, the wireless terminal tries to get
a wireless channel. At this time,
channel is established, this tone is heard and
▶ Power-off conformation tone
When the wireless terminal is turned off, it is generated.
Ring Tone
When a wireless terminal gets an incoming call, it is generated. A user can make the
volume level up and down from level 1 to level 7 in an idle state. The incoming call ring
rhythm (CO line call and intercom call, separately) can be selected by a user among 9 ring
rhythms. The default ring rhythm is selected to normal ring rhythm. In the state that vibrator
function is enabled, when a call is reached to the wireless terminal, ring tone can’t be heard
but a user recognizes the phone’s ringing by phone vibration.
Phone
(
) icon will be blinking. When a wireless
(
phone
) icon will be shown steadily.
12
GDK-162/100/FPII/20W & LDK-24/100/300/300E WOTS
Wireless Terminal (GDC-345H) User Guide
4.4 Message Display
Message Description Display Duration
STA xxx Station number Standby Mode
INVALID Indicate not available operation 3 seconds
NO CHANNEL There is no channel for connection 3 seconds
CALL FAIL A call try is failed 3 seconds
KEY LOCK Indicate key locked state Until restored to key-unlock state
LN XX Connected CO line number During holding CO line
00:00 Call time While maintaining a call
CALL FROM
STA xxx
CALL TO
STA xxx
LN XX
RINGING
※ The parts filled with
When a call is received from intercom, it
indicates a call paging from station xxx
When a call is made to intercom, it
indicates a call paging to station xxx
When received from CO line, it
indicates a paging from CO line x
will be explained in detail in Appendix C.
During ringing and until cutting off a
Call
During ringing and until cutting off a
Call
During ringing
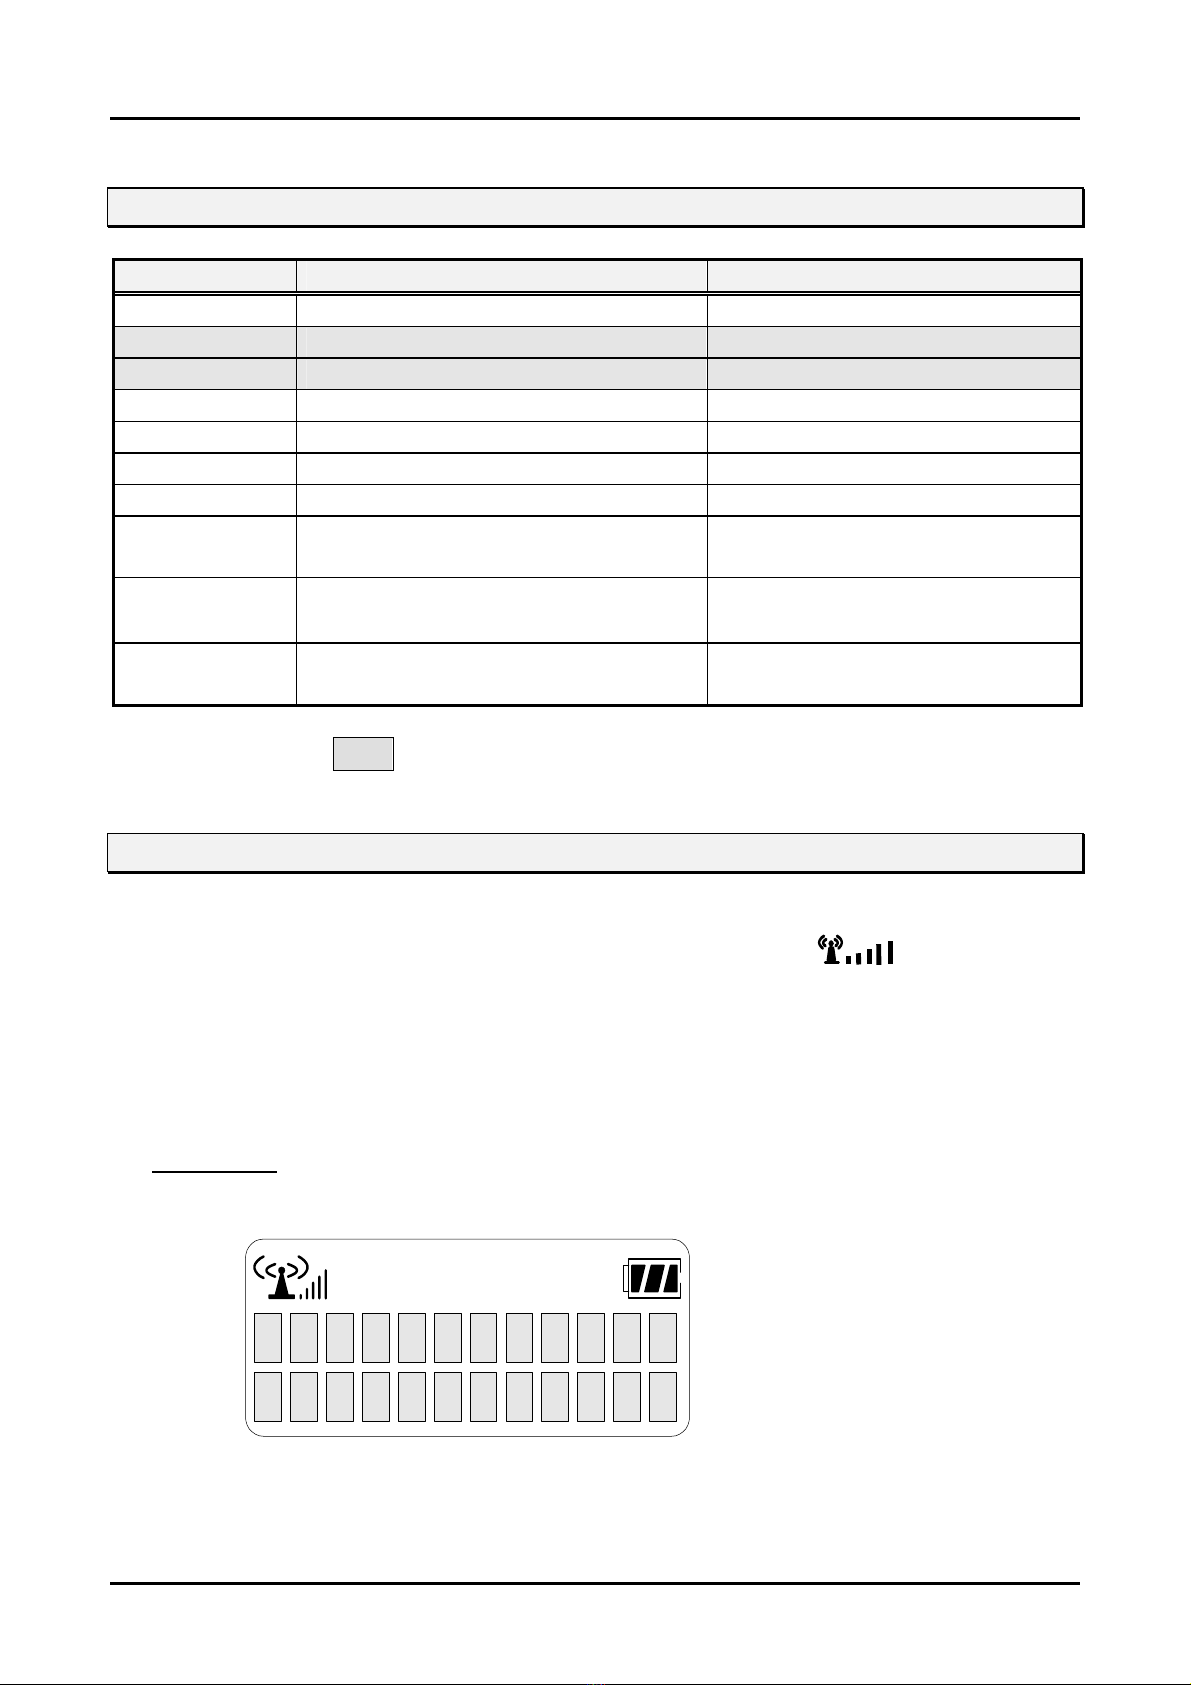
4.5 Call Ready State
1) When a wireless terminal is received a signal from a base station and synchronized with
dummy bearer(Sync.), RSSI(Radio Signal Strength Indicator) icon( ) is displayed.
2) ‘STA xxx’ will be displayed if it is subscribed. The RSSI icon stops blinking when it is locked
and that means the terminal is ready to make or receive a call.
3) If the RSSI icon is blinking, it indicates that a wireless terminal is still trying to synchronize with
the base station of the GDK-186/100/34E/20W & LDK-130/300/600 system that it is
subscribed to.
Display Area
GDC-345H
S
T
A
X
X
X
13
GDK-162/100/FPII/20W & LDK-24/100/300/300E WOTS
Wireless Terminal (GDC-345H) User Guide
5. TELEPHONE FEATURES
5.1 Basic Features
A subscribed wireless terminal to a GDK-186/100/34E/20W & LDK– 130/300/600 system can use
various telephone features.
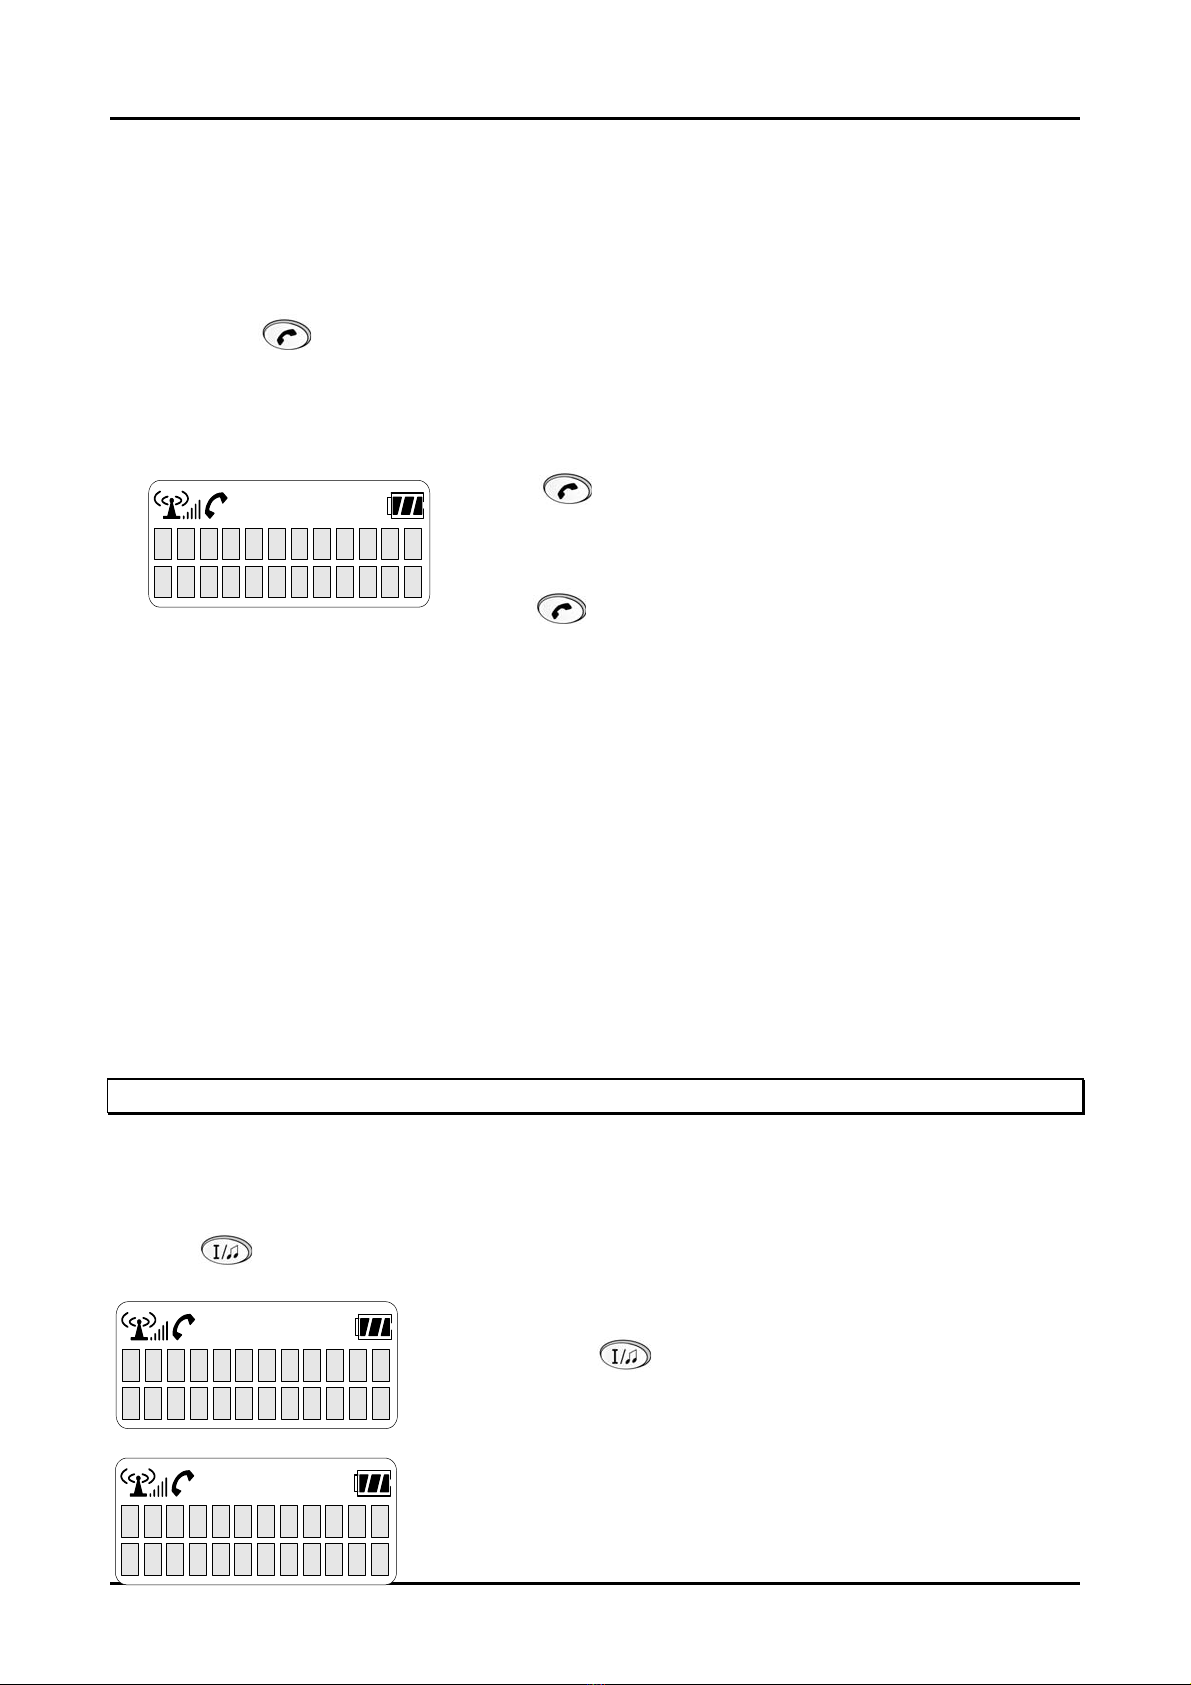
5.1.1 Power ON/OFF
When pressing POWER( ) button, the power is turned on and the wireless terminal goes to
an idle state.
The following describes the sequence of power-on;
① Press POWER button.
② Initialize S/W and H/W variables.
③ Check for station number if subscribed, and display station number : ”STA xxx”, else
display “UNREGISTERED” Only if subscribed to GDK & LDK series, the above message is
displayed on the LCD.
④ Search for system to which it is subscribed and try to do location registration while blinking
Antenna Icon and RSSI level.
⑤ If Antenna Icon and RSSI level stop blinking, it means all procedures for initial setup are
completed. And you can make or received a call.
To turn off the wireless terminal, press POWER( ) button for longer than 3 seconds.
Confirmation tone is heard. And then release POWER( ) button.
5.1.2 Call Function
There are two kinds of calls, a CO line call and an intercom call. The details are described in ‘5.2
Key System Features’ and ‘5.3 DECT Features’. Please refer to ‘Digital Key Telephone System
Programming Manual’ about detail functions and additional functions related to key system.
14

GDK-162/100/FPII/20W & LDK-24/100/300/300E WOTS
Wireless Terminal (GDC-345H) User Guide
5.2 Key System Features
5.2.1 Call Service Function
The following features are available only for GDK & LDK series system. So these functions may not
be operated properly with any other system.
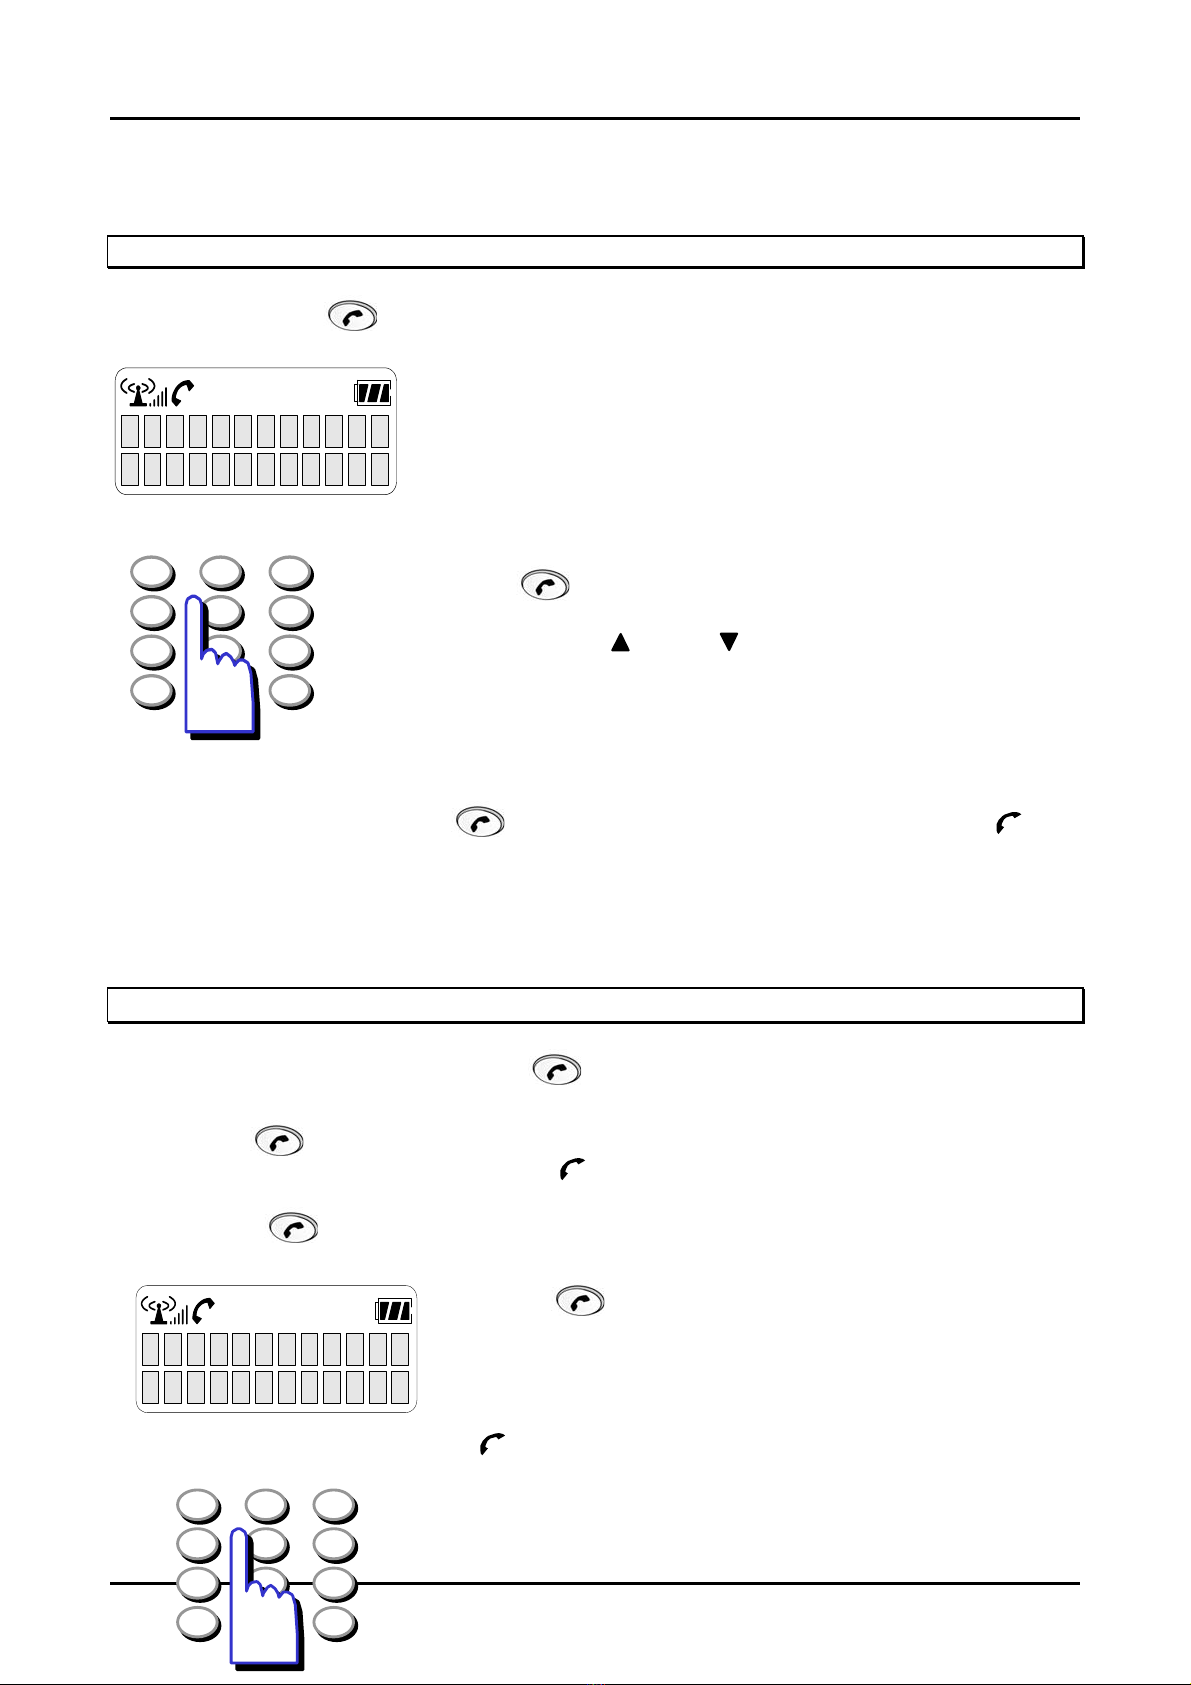
Placing an Outside Call
TALK ON/OFF (
by either pre-dialing or post-dialing.
1) Pre Dial
-. GDK-186/100/34E, LDK-130
CO Line Access Code (9, 8+XX or 88+XX) → Phone Number → → Connection
-. GDK-20W
CO Line Access Code
-. LDK-300/600
CO Line Access Code
123
456
789
*
X
X
9
S
X
X
X
) button is used to make a call or receive a call. To make a call can be done
(9, 8+X or 88+X)
(9, 8+XX or 88+XXX)
You may dial telephone number in an idle state before pressing
→
Phone Number
→
Phone Number
→ →
→ →
Connection
Connection
button (up to 24 digits). Since it is displayed only 12 digits per line on
the LCD. If you dial a wrong digit, a user can erase last 1 digit by
pressing once and if you want to erase all digit dialed, press
for longer than 1 seconds. If you want to insert dialing pause
0
#
among dial numbers, press button for longer than 1 second.
Then “P” is displayed on the LCD.
Dial phone number.
Press .
X
X
X
X
X
X
X
T
A
X
X
X
Phone(
) icon is blinking on the LCD .
The LCD message is displayed as the left figure and
X
X
X
X
X
X
X
0
0
:
0
0
connection tone is heard when connection is completed.
15

GDK-162/100/FPII/20W & LDK-24/100/300/300E WOTS
Wireless Terminal (GDC-345H) User Guide
2) Post Dial
-. GDK-160/100/34E, LDK-130
→ CO Line Access Code (9, 8+XX or 88+XX) → Phone number → Connection ;
(XX means CO line number)
-. GDK-20W
CO Line Access Code (9, 8+X or 88+X) → Phone number → Connection ;
→
(X means CO line number)
-. LDK–300/600
→ CO Line Access Code (9,8+XX or 88+XXX) → Phone number → Connection ;
(XX means CO Group Number, XXX means CO line number)
123
456
789
*
Note :
In case of GDK-20W and LDK-130/300/600 system, if handset was registered by ‘TYPE 3’, it is displayed
12 digits per line on the LCD (This feature is available when MPB version of LDK-130/300/600 is 1.0Ba
above and when MPB version of GDK-20W is 3.0Aa above. In LDK-24 system, this feature is available
without version). Please refer to ‘6.2 Subscription’ for details.
0
S
T
#
A
X
X
You may dial telephone number after pressing button. When
pressing CO line access code (9, 8 + XX, or 88 + XX), CO line dial tone
is heard. Every time pressing each button, it is displayed on the LCD. If
you dial a number late, “
DIALING TOO LATE
” message is displayed on
the LCD. It is displayed up to 10 digits.
Press
X
phone
button. Connection tone is heard and
(
) icon is displayed on the LCD.
Dial CO line access code.
-. GDK-186/100/34E, LDK-130 (9, 8 + XX, or 88 + XX)
X
X
X
X
X
X
X
X
X
X
0
0
:
0
0
-. GDK-20W (9,8 + X, or 88 + X)
-. LDK-300/600 (9,8 + XX, or 88 + XXX)
Dial the desired phone number.
3) Call Release
To release a call, press
terminal will goes to an idle state.
button. The
phone(
) icon will be disappeared and the wireless
4) Assign CO Line/CO Line Group
Available CO lines can be grouped and the accessible CO line groups can be assigned to a
station by Admin programming (For detail programming, refer to “CO LINE GROUPS” and “CO
LINE ACCESS” of “Digital Key Telephone System Programming Manual”). All available CO
lines are assigned to Group 01 by default.
Accessing a CO line is done in three ways as above; (9, 8+CO line group # or 88+CO line #)
And they are;
9 (CO line Access Code) : Connect an available CO line of the assigned CO line group to
the station. CO line selecting method is programmable by Admin programming.
8 + CO line group # : Connect an available CO line of the CO line group. The CO line
group should be assigned to the station before by Admin programming. CO line selecting
16
GDK-162/100/FPII/20W & LDK-24/100/300/300E WOTS
Wireless Terminal (GDC-345H) User Guide
method is programmable by Admin programming.
88+CO line # : Connect the CO line directly. The CO line should be allowed to the station
before by Admin programming.
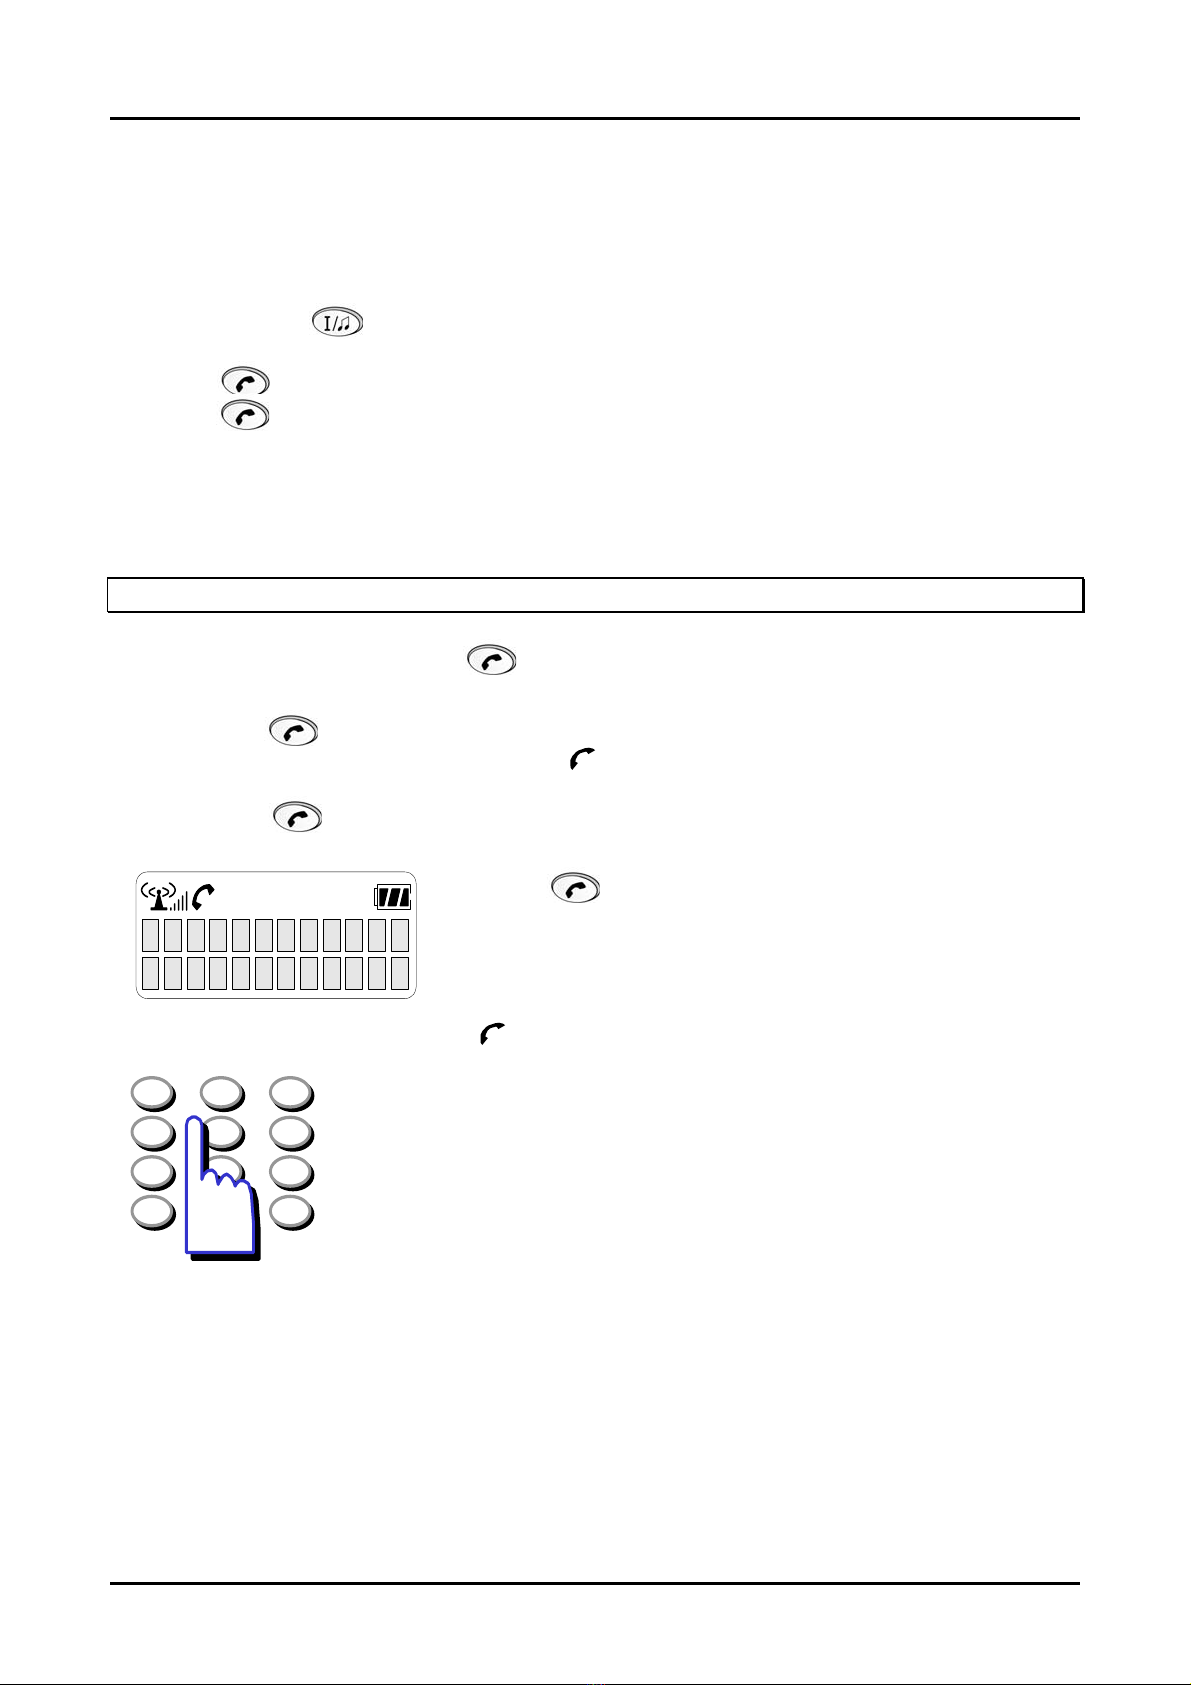
Receiving an Incoming Call
Incoming CO ring →
→ Connection
1. Incoming CO ring is heard and a message is displayed on the
R
I
N
G
I
N
G
LCD.
Notes: If an Ear-Mic is attached to a GDC-345H, it can receive
L
N
X
X
X
an incoming call by pressing a button on the Ear-Mic while a
ring sounds.
123
456
789
Press
button and answer the call.
If pressing UP(
),DOWN( ) button during conversation, the
receiving voice level is controlled.
*
0
#
To hang up the call;
When conversation is over, press
button again to release the call. Then the
phone(
will be disappeared and the call will be cut off.
Notes:
When you release a call, you can do it by pressing a button on Ear-Mic.
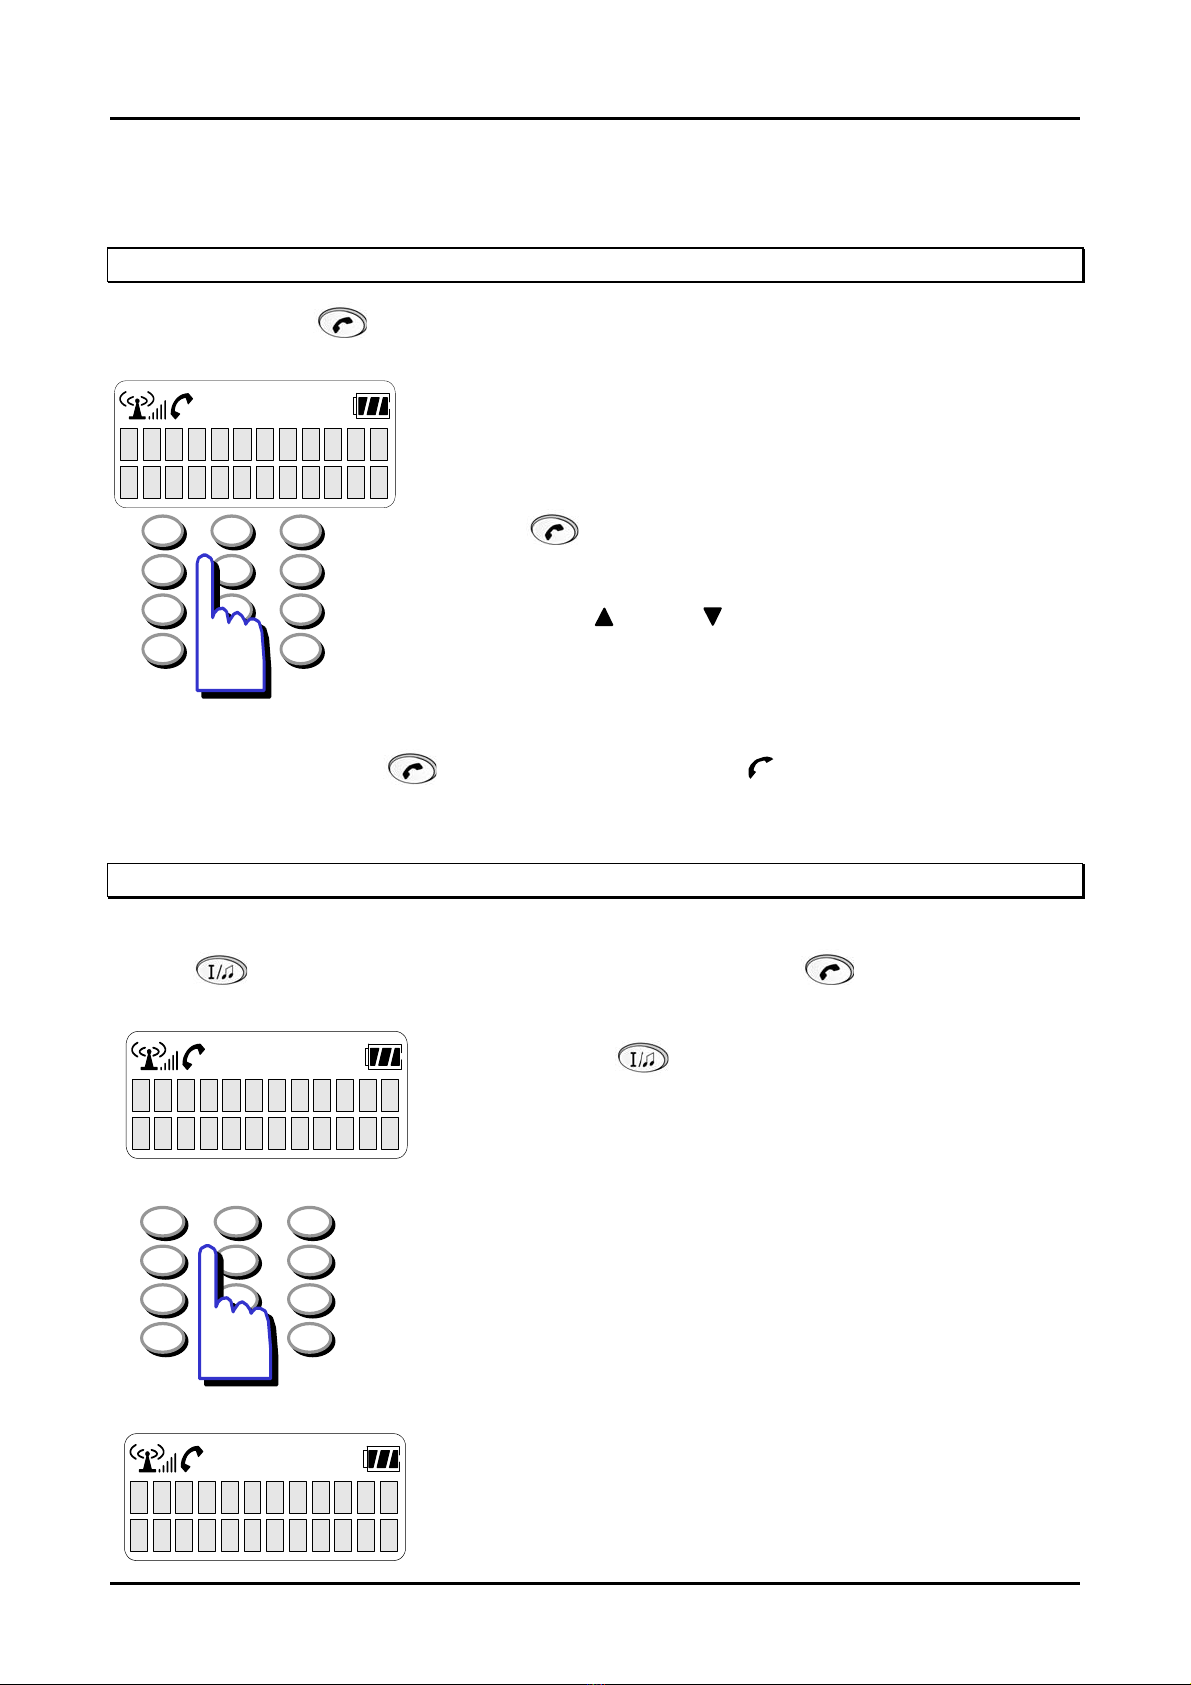
Making an Intercom Group Call
) icon
1) Pre-Dial :
Intercom group number → → Connection
Dial the intercom group number (ex. GDK-186: 620~649).
Press button.
Connection tone is heard and
phone
(
) icon is displayed on the LCD.
2) Post-Dial :
Intercom group number → Connection
→
Press
button.
C
A
L
L
X
X
V
I
A
H
U
N
T
Connection tone is heard and phone(
) icon is displayed on the LCD.
123
456
Dial the intercom group number
(GDK-186:620~649,GDK-100:620~634,
789
17
*
0
#
GDK-162/100/FPII/20W & LDK-24/100/300/300E WOTS
Wireless Terminal (GDC-345H) User Guide
GDK-34E:620~627,GDK-20W:61~64,
LDK-24: 620~629, LDK-130: 620~634
LDK-300/600: 620~667) .
To transfer a CO line;
Press TRANS( )button shorter than 1 second.
Dial the intercom group number.
Press
press button to complete the transfer.
Caution: Intercom line transfer isn’t supported by GDK-186/100/34E/20W WOTS system.
button or when the called extension answers, inform the transfer and
But it is supported by LDK-130/300/600 system.
Making an Intercom Call
1) Pre-Dial :
Intercom number →
→ Connection
Dial the intercom number.
Press
Connection tone is heard and
2) Post-Dial :
A
T
S
Connection tone is heard and phone(
123
456
789
*
According to the ICM answer mode of a called station (in case of a key station), different tone will
be heard in the wireless terminal.
0
1. TN(Tone) mode : Ring back tone. Wait until the called station answers.
2. HF(Hands-free) / PV(Privacy) mode : 3 bursts of tone. Talk after the tone.
X
X
#
button.
phone
Intercom number → Connection
→
Press
X
Dial intercom number.
(
) icon is displayed on the LCD.
) icon is displayed on the LCD.
button.
18
GDK-162/100/FPII/20W & LDK-24/100/300/300E WOTS
Wireless Terminal (GDC-345H) User Guide
Receiving an Intercom Call
Intercom ringing →
→ talk
Intercom ring is heard and a message is displayed on the LCD.
C
A
L
L
F
R
O
S
T
A
X
X
123
456
789
*
0
M
X
Press button and answer the call.
Pressing UP(
#
voice level is controlled.
),DOWN( ) during conversation, the receiving
To hang up the call;
When a talk is over, press
button again. Then the
phone(
) icon will be disappeared and
the call will be cut off.
Call Transfer
This function is to transfer a received call to another user.
Talk → (Press shorter than 1 second) → Intercom number →
While connected to a CO call (not intercom call),
Press TRANS( ) button shorter than 1 second and then
9
X
X
X
X
X
X
0
0
:
0
123
456
789
*
C
S
0
A
L
L
T
T
A
X
X
X
X
X
0
#
O
X
the call is put on hold state
Dial intercom station number
(ex.GDK-186: 100~291, GDK-100:100~235,
GDK-34E: 100~177,GDK-20W: 100~133,
LDK-24: 10~41, LDK-130: 100~227
LDK-300: 100~399, LDK-600: 1000~1599)
At this point, a user can make either a screened or unscreened
the transfer.
19
GDK-162/100/FPII/20W & LDK-24/100/300/300E WOTS
Wireless Terminal (GDC-345H) User Guide
Caution: Intercom line transfer isn’t supported by GDK-186/100/34E/20W WOTS system.
But, it is supported by LDK-130/300/600 system.
Screened Transfer
When the called station answers, inform the transfer.
Press
button to complete the transfer.
Unscreened Transfer
When the called station begins to ring,
Press
button to complete the transfer after ring back
tone is heard. Then, a message is displayed on the LCD of
X
X
X
X
A
T
S
the called station. If the call is not answered within 30
seconds, recall ring is ringing at both stations. At this time,
M
O
R
F
R
E
F
press button then a user will be connected with the
transferred call again.
Answering Screened Transfer
A user will hear intercom ring.
Answer intercom call and receive transfer notice.
If the transferring party hangs up, the outside call will be connected.
Executive/Secretary Transfer
If a station is designated as an Executive station and the station is busy or in DND(Do Not
Disturb), all calls will go to its Secretary station.
If a station is designated as a Secretary station, it may signal its Executive station which is
in DND by using the Call Wait feature.
* This feature is not available in GDK-20W.
Placing a CO Call on Hold
While you use a wireless terminal through CO line, you can use this function when you want to let
the outside caller wait for a moment.
Talk → (Press longer than 1second)
While connected to a CO call (not intercom call),
X
X
X
X
X
X
X
X
X
X
Press HOLD( ) button longer than 1 second for exclusive
hold. (Dial tone will be heard)
0
0
:
0
0
A message is displayed on the LCD as shown, and the hold
music is heard to the outside caller.
H
O
L
D
I
N
G
L
N
X
X
X
You have two kinds of choice, one is to retrieve a call and the
20

GDK-162/100/FPII/20W & LDK-24/100/300/300E WOTS
Wireless Terminal (GDC-345H) User Guide
other is to make another call.
1) To retrieve the call,
H
O
L
D
I
N
G
L
N
X
X
X
Press
HOLD
( ) button longer than 1 second, then the
held outside call will be connected.
X
X
X
X
X
X
X
X
X
X
0
0
:
0
0
2) To make another call,
Press
button if you want to make another intercom or
CO call.
H
X
X
X
N
L
The wireless terminal goes to an idle state.
Press
button again to make a call.
G
N
I
D
L
O
Caution: Intercom line hold isn’t supported by GDK-186/100/34E/20W WOTS system.
But, it is supported by LDK-130/300/600 system.
Flash
During conversation (through CO line or intercom), releasing current call and entering dialing mode
can be done at once by Flash. The FLASH button is also used to transfer a CO line call through a
PABX.
If you are talking with intercom line, press button to
release a call. Then, dial tone will be heard and you may
S
make another call or do the other operation, for example,
X
X
X
A
T
programming using system function and so on.
If you are talking with CO line, press button to release a
call. Then, dial tone will be heard and you may make another
123
456
CO call.
If you want to transfer a CO call to a PABX, dial an internal
station number of a PABX. When ring back tone is heard,
789
*
0
#
hang up the call for unscreened transfer, or inform the
transfer when the called party answers, then hang up the call
for screened transfer.
21
 Loading...