

Page 1

P/No.: 3828A20114D Printed in Korea
P/No.:3828A20091C
Printed in China
① DHB-1260PL-표지영어 2003.10.24 3:7 PM 페이지1
Page 2

Dehumidifier
Owner's Manual
MODELS : DHB1260PL
DHB1660PL
website http://www.lgservice.com
•
Thank you for purchasing this unit.
•
This manual is arranged to get you started easily.
Please read all instructions before using.
Retain this for future reference.
Convenient and Energy Saving
① DHB-1260PL-표지영어 2003.10.24 3:7 PM 페이지2
Page 3
Table Of Contents
2
Safety Precautions 3~ 6
Names and Functions of Parts 7~9
Read the following before using/
How to Use 10
Mode Conversion 11
SPOT Dry 12
Laundry Dry ¥ Continuous/Auto Swing 13
Defrost Operation/FULL Mark 14
Operating the TIMER 15
Removing Collected Water 16
Continuous Drainage 17
Normal Maintenance/
Long-term Storage 18
Tr oubleshooting?
Before you call for service 19~20
Prior to Use
Operating Instructions
How to Use Efficiently
Page 4
ENGLISH
3
Safety Precautions
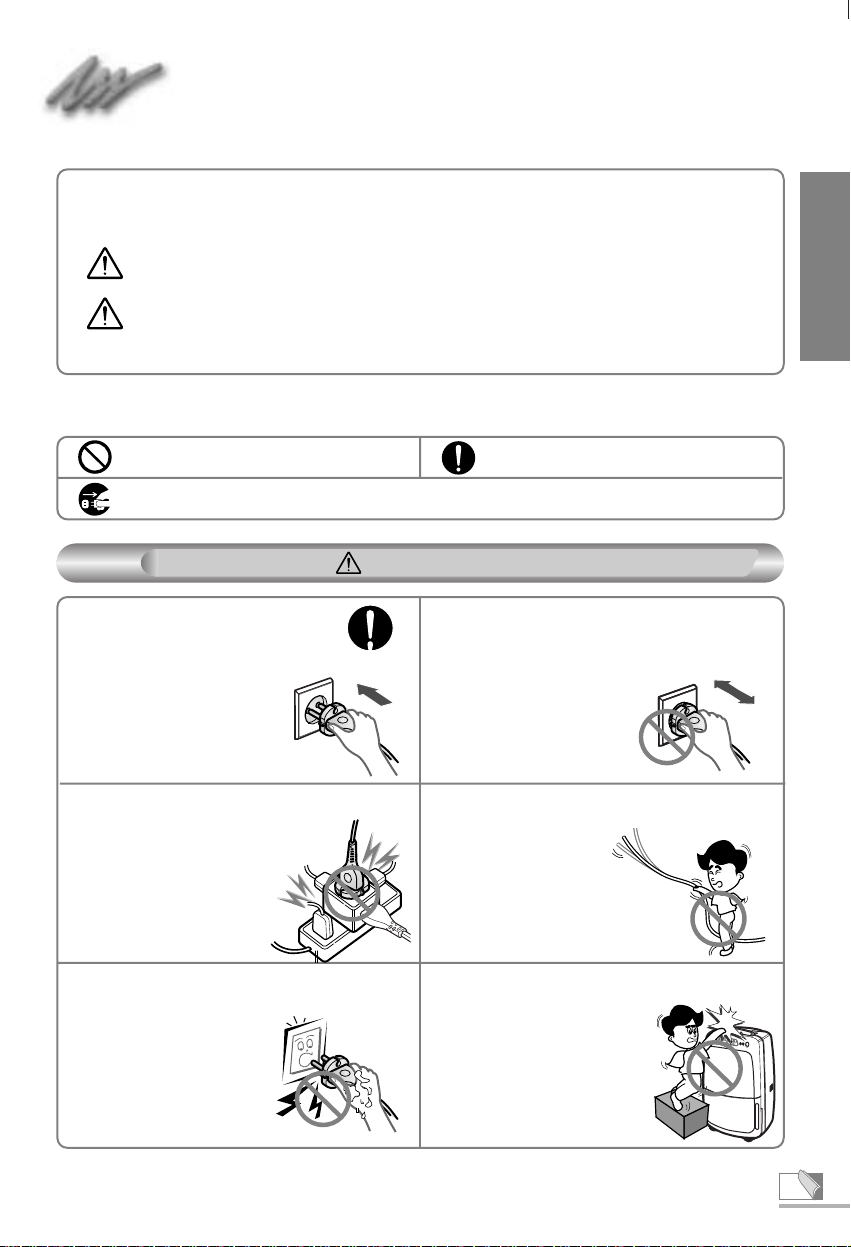
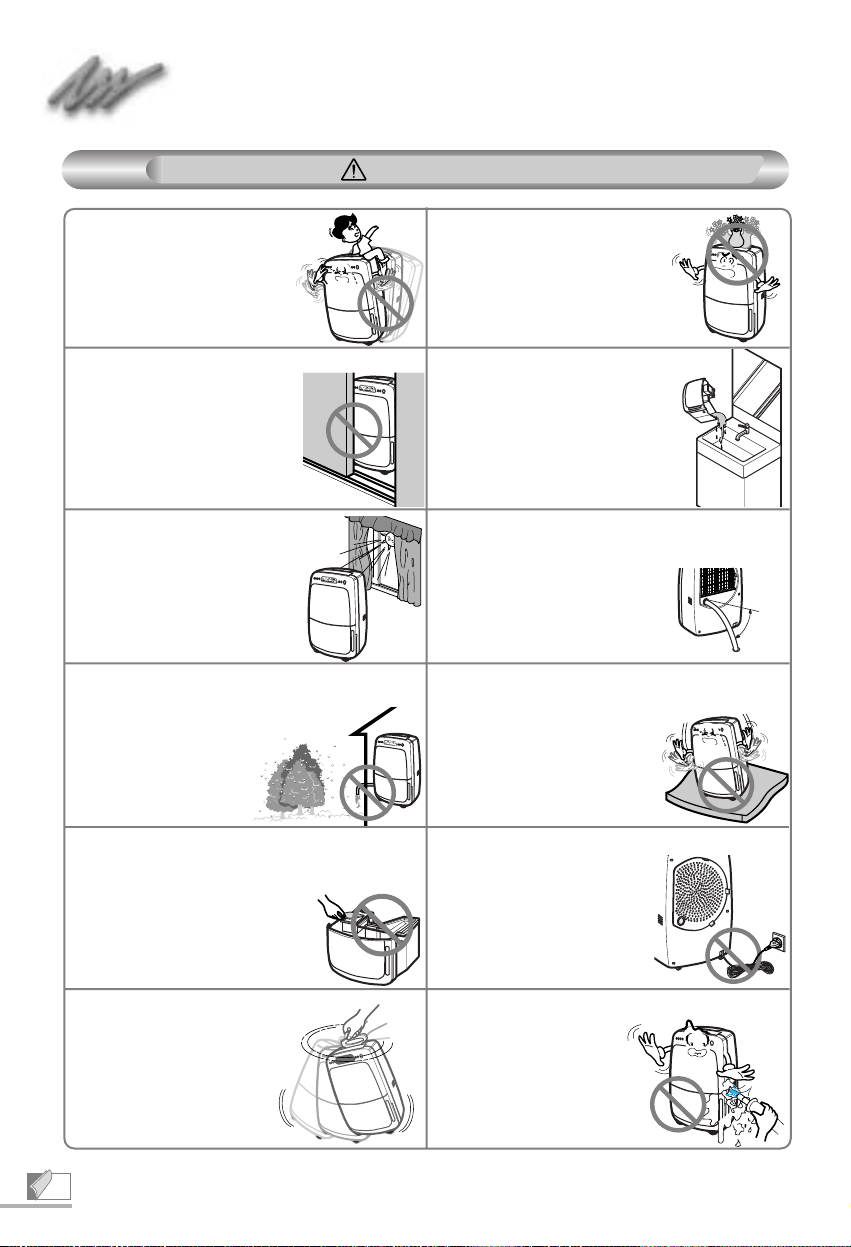
● Read all instructions carefully before using.
● There are two kinds of safety precautions.
● After reading this manual, retain for future reference.
Example of Illustration
This symbol Prohibition allows the user
not to do something.
This symbol alerts the user to do
something.
Remove the plug from the wall outlet.
WARNING: When mishandling, serious injury or death may occur.
CAUTION: When mishandling, injury or material damage may occur.
WARNING
Connect the Power Plug
completely to an AC Outlet.
• Dust or incomplete connection may
cause electric shock or fire.
Do not turn off the Dehumidifier by
pulling out the power cord.
• Electric shock or fire may occur.
Do not connect the power cord in the
line or do not use an
extension cord.
• Electric shock, overheating
or fire may occur.
Do not damage Power Cord.
• Do not put heavy things
on the unit, or add heat,
which may cause electric
shock or fire.
Do not plug or unplug with wet hands.
• Electric shock may occur.
Do not attempt to insert your fingers or
stick to Air Inlet or
Air Outlet.
• Fast rotating fan may cause
injury.
Page 5
Safety Precautions
4
Do not try to repair the Dehumidifier by
yourself.
This may cause electric shock or fire.
Refer servicing to your local dealer or Service
Center.
When abnormal conditions (burning
smell, etc.) occur, stop operating, and
unplug the Power Cord.
Overheating may cause fire or electric shock.
Refer servicing to your local dealer or Service
Center.
WARNING
CAUTION
Never modify the humidifier.
• Shock hazard may occur.
In the case of failure of the
product resulting from
modifications to the product,
you must pay for all labor
charges even during
Warranty period.
Do not place the Dehumidifier near gas
or electric burner.
• This may cause deformation
due to incomplete
combustion or heat.
Do not put a pet or house plant where it
will be exposed to direct airflow.
• This may harm the pet or plant.
When abnormal (burning smell, etc.),
unplug the Power Cord.
• Running the unit under abnormal condition may
cause problems, electric shock or fire.
Refer servicing to your local
dealer or Service Center.
Do not block Air Inlet or Air Outlet.
• This may decrease dehumidifying
capacity or cause problems.
Do not connect to outlet other than
designated one.
• It may cause problems or fire.
Do not wash the Dehumidifier with water.
• It may cause electric shock
or problems.
Do not use the unit near water.
• It may cause fire or electric
shock.
Page 6
ENGLISH
h
5
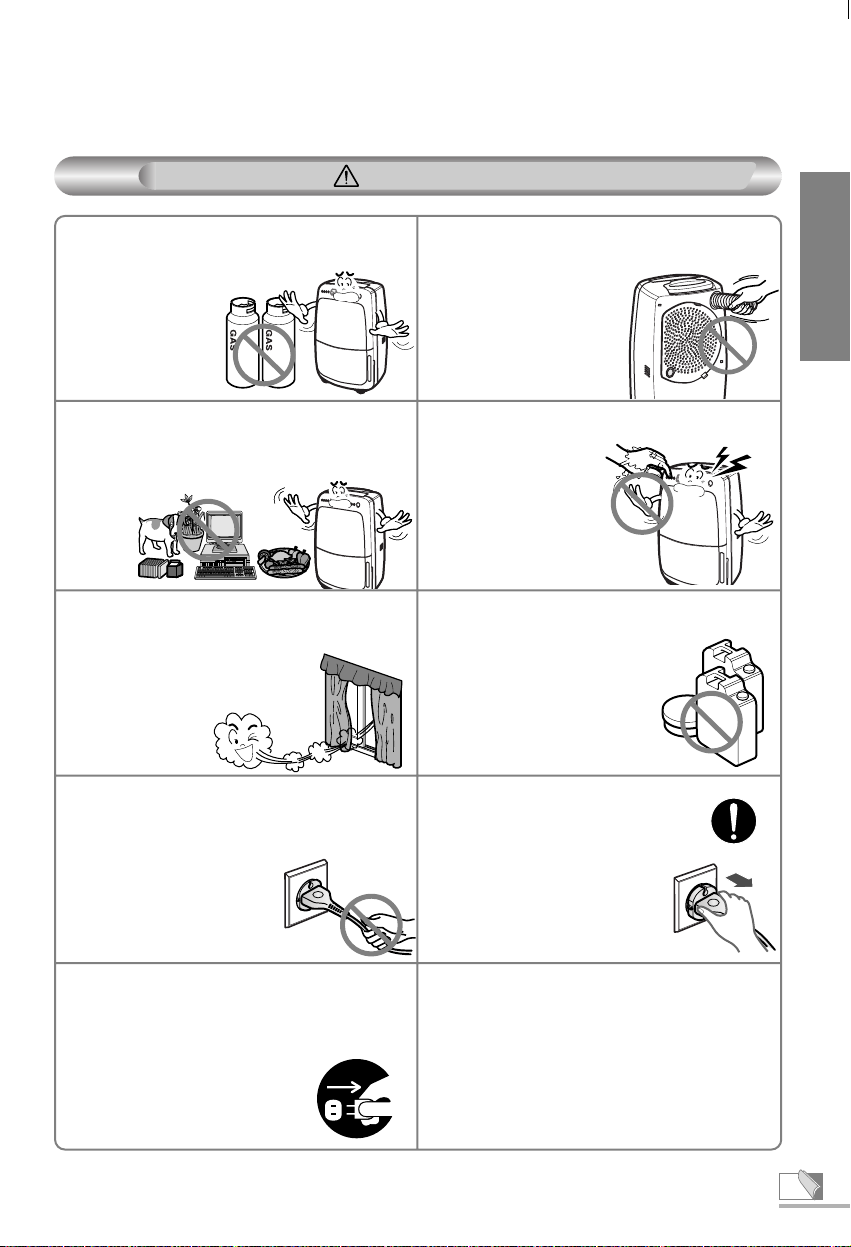
CAUTION
Do not store or use flammable vapors or
liquids in the vicinity of the Dehumidifier.
• If leaked gas accumulates
around the unit, it
may cause fire.
Do not pull the Spot Dry Hose.
• This may cause the hose deformed.
Remove the plug from the wall outlet
when the unit is not in use for a
prolonged period of time.
•Dust may cause overheating or fire.
When using for a prolonged time, check
the room temperature.
•
While using the unit, room temperature may
escalate, so if you use it in closed room, user's
temperature may go up.
•
Be careful especially for children and seniors.
Do not use for other purposes.
• Never use to maintain precision machine,
tableware or art work.
• It may lower its quality.
Ventilate from time to time.
•Be careful, especially when using with gas or
electric burner.
•If ventilation is incomplete, oxygen
may lack.
When unplugging the Power Cord, hold
the plug body.
•If you pull the cord, the line may be cut off,
which may cause fire.
When cleaning your unit, turn it off and
unplug the Power Cord.
•Since fan rotates at high speed,
it may cause injury.
Do not use in places where chemicals
are used. (Hospital, factory, laboratory,
beauty parlor, etc.)
•Chemicals vaporized into the air
or solvents may damage the
unit, so water may leak,
wetting furniture or facilities.
Do not handle with wet hands.
• It may cause electric
shock.
Page 7
h
h
h
h
h
h
Safety Precautions
6
Do not insert foreign objects or pour
water into the humidity
sensor hole.
• It may cause electric
shock or problems.
Avoid locating the unit where
sunlight will fall directly on it, and
also do not expose it to rain.
• Overheating may cause fire or
electric shock.
When performing Continuous Drain, be
sure to check the piping of the drain
hose.
•
Also be careful about bent hose
and water level, and drain securely.
When piping is insecure, water may
soak gauze.
Do not use the tied
Power Cord.
• Overheating may
cause fire.
Do not uncover float.
• Since the float cannot sense whether the bucket is
full or not, spilled water may wet furniture
or cause electric shock, or leakage
of electricity.
Place the unit on a level, flat floor with a
stable horizontal surface.
• If floor is unstable, vibration
or noise may occur.
Besides, inclining the unit
may cause malfunction.
Stop performing Continuous Drain if the
temperature around drain hose
becomes below 0°C.
• Water inside the hose may
be frozen, which cause
wetting furniture.
Do not turn the handle around.
• It may cause handle to
be damaged.
Do not sit on the Dehumidifier,
and do not put objects on it.
• Falling off may cause injury.
Do not put vase or water bottle
on the Dehumidifier.
• When water is spilled, it may
cause fire or electric shock.
When moving the Dehumidifier,
stop operating, and drain
water in the Bucket.
• Dripping water may soak furniture,
or may cause fire or electric
hazard.
Do not use in a narrow
space.
• Incomplete ventilation may
cause fire.
CAUTION
Above
10°
h
h
Page 8

ENGLISH
h
7
Names and Functions of Parts
Front
Front
Front
Front
Front
Front
Front
Front
Front
Front
Front
Front
Front
Front
Front
Front
Front
Front
Front
Front
Front
Front
Rear
Rear
Rear
Rear
Rear
Rear
Rear
Rear
Rear
Rear
Rear
Rear
Rear
Rear
Rear
Rear
Rear
Rear
Rear
Rear
Rear
Rear
Bucket Cover
Bucket Handle
Float
• Check if the water
in the bucket is full.
Bucket
• Contains water that was
dehumidified.
Sensor Part
•Do not block.
Display
Outlet
Louver
• Do not close when
operating the unit.
ON/OFF
Water Level
Indicator
Caster
Handle
•
When moving the unit,
make the handle in an
upright position.
Continuous Drain
Hole
Air Inlet
Air Filter
Hose Cover
Hose
Air Purifying
Filter
• Sucks air or water vapor
in the room.
Power Cord
Page 9

Names and Functions of Parts
8
CONTROL PANEL
CONTROL PANEL
CONTROL PANEL
CONTROL PANEL
CONTROL PANEL
CONTROL PANEL
CONTROL PANEL
CONTROL PANEL
CONTROL PANEL
CONTROL PANEL
CONTROL PANEL
CONTROL PANEL
CONTROL PANEL
CONTROL PANEL
CONTROL PANEL
CONTROL PANEL
CONTROL PANEL
CONTROL PANEL
CONTROL PANEL
CONTROL PANEL
CONTROL PANEL
CONTROL PANEL
Humidity Setting Button
AUTO SWING Button
•Exhaust louver handle converts exhaust direction.
Laundry Dry• Continuous Button
Press it when drying laundry, operating continuously, or
stopping the function. Under continuous operation,
dehumidifying occurs irrespective of humidity of the room.
Spot Dry Button
Mode Button
Each time that the Mode button is pressed, the mode is shifted:
• Automatic Dehumidification → Quiet Operation → Prevent
Moisture condensation → Air Purifying.
• In the sequence above, lamp lights up.
ON/OFF Button
To turn the Dehumidifier
on and off.
Timer Button
Water may remain in the Drain
Bucket, but this is the water
generated when testing in the
factory.
When taking out the bucket,
use both hands carefully.
If you take it with excessive
force, water may spill.
When using the
Dehumidifier first time
Tips when draining water
NOTICE
Handle
Drain Bucket
Page 10

ENGLISH
9
CONTROL PANEL
CONTROL PANEL
CONTROL PANEL
CONTROL PANEL
CONTROL PANEL
CONTROL PANEL
CONTROL PANEL
CONTROL PANEL
CONTROL PANEL
CONTROL PANEL
CONTROL PANEL
CONTROL PANEL
CONTROL PANEL
CONTROL PANEL
CONTROL PANEL
CONTROL PANEL
CONTROL PANEL
CONTROL PANEL
CONTROL PANEL
CONTROL PANEL
CONTROL PANEL
CONTROL PANEL
Water Full Lamp
When water is full, red light will come on.
Defrosting Lamp
Airflow Indicating Lamp
Indicates airflow.
AUTO Swing Lamp
Indicates Louver is swinging.
Quiet Operation Lamp
• Dehumidifies in Low Fan speed.
Prevention Moisture Condensation Lamp
• Prevention Moisture condensation when room
temperature decreases.
Spot Dry Lamp
Air Purifying Lamp
It removes room odor, and clean air.
Humidity Indicating Lamp
Laundry Dry•Continuous Operation Lamp
Automatic Dehumidifying Lamp
• Automatically controls dehumidification.
Timer Lamp
→
None →1h→2h
...7h→
8h
Displays the present humidity and desired one.→ 60 → 70 → 30 → 40 → 50
Page 11

Read the following before using/How to Use
Read the following before using
How to Use
10
Allow at least 20cm of space on all sides
of the unit for good air circulation.
If ventilation is not enough, air suction
efficiency is not good.
Remove the plug from the wall outlet
when the unit is not in use for a
prolonged period of time.
While the Dehumidifier is running,
room temperature is raised by 2-3°C.
A Dehumidifier has no air-conditioning function.
Rather, it generates heat while running.
Hence, room temperature may increase by 2-3°C.
Wait 3 minutes when operating
dehumidification.
Immediately after stopping operation or
plugging the Power Cord, dehumidifying
operation will not occur for about 3 minutes to
protect compressor. When the Dehumidifier
start running, the noise increases.
Operate at room temperature
between 1~40°C.
Over 20cm
Over 20cm
Over 20cm
Set the direction of air flow by
using Louver.
Press the Auto Swing Button to adjust
air flow direction.
To stop operation, press
ON/OFF Button once more.
• Louver gets closed.
• ON Indicator Lamp will light off.
Mode Button can be used to
convert operations.
•Indicator Lamp selected will light up.
•→ Automatic Dehumidification → Quiet Operation →
Prevention Moisture Condensation →Air Purifying
Press the Humidity
Setting.
•Setting Lamp will light up.
•
→60 → 70 → 30 →40 → 50
Press the ON/OFF Button.
• Louver gets open.
• Automatic dehumidifying operation starts.
• Humidity Indicator Lamp
indicates the present humidity.
* Under Automatic Dehumidification
Mode, dehumidifying stops when
humidity drops below
Set humidity.
Connect the Power
Cord to the wall outlet.
Page 12

Mode Conversion
11
ENGLISH
Press the Mode
Button.
Automatic Dehumidification
Quiet Operation
To operate Quietly
• Automatic operation of <low> Fan speed.
To prevent dew, when temperature in
the room is low.
• Automatic operation of <High> Fan speed.
• Desired humidity is automatically set to 40%.
Prvention Moisture condensation
When cigarette smoking, pollen, or bad
odor contaminated the air.
Air Filter makes air clean.
•
At this time, dehumidification will not work.
Air Purifying
To maintain clean air.
•
Maintain humidity Setting by controlling the
dehumidification and air flow.
•
For about 2 minutes after the Dehumidifier starts
operation, dehumidification starts irrespective of the
humidity of the room.
•
If humidity in the room gets below set humidity,
dehumidifying operation stops, but fan will operate.
(When humidity increases, the unit starts operation.)
Page 13

Spot Dry
12
Pressing the Spot Dry Button,
Lamp will light up.
• Wind coming out from the hose is dried,
dehumidified air.
WARNING
Do not move the Dehumidifier by polling
the extension hose.
• This may cause the Dehumidifier to fall off, resulting in
injury.
When the hose is not long enough, use
extension hose.
“COMP may stop for protect products in the case of using SPOT DRY function in
the area where voltage is unstable”.
Take the hose to the direction at
which drying is desired.
Open the Hose Cover.
Take out the hose of the Dehumidifier.
Extension Hose
Hose
Page 14

Laundry Dry•Continuous/AUTO Swing
13
ENGLISH
Dehumidifier can run non-stop to dry laundry, irrespective of room temperature.
By rotating Louver, air flow direction can be changed. Depending on the airflow direction, the sound
level is varied. When sound bothers you, make the Louver in upright position.
Allow laundry to contact air flow.
Dehumidifier can run non-stop whether it is for drying
laundry or not.
Remove water enough so that water drip from
the laundry would not fall on the Dehumidifier.
To stop the operation, press the ON/OFF
Button once again.
Pressing Laundry Dry•Continuous Button,
Laundry Dry•Continuous Lamp comes on.
Louver may stop temporarily due to
location adjustment, but will start to move in a moment.
• When hands or objects touch Louver, consequently changing rotating angle, restart Swing
operation.
• If you stop operation in AUTO Swing mode, next time when starting the unit, AUTO Swing
mode will be selected.
To stop AUTO Swing operation, press the AUTO Swing button once
again.
• When you want to stop the Louver with desired angle, press the Swing button when the
Louver reaches the desired position.
Press the AUTO Swing button.
Do not insert fingers or stick into Air Inlet or Air Outlet. Don't touch the Louver.
Fast-rotating fan may cause injury or malfunction.
CAUTION
Laundry Dr
Laundry Dryy
•
•
Continuous
Continuous
AUT
AUT
O Swing
O Swing
Page 15

Defrost Operation/FULL Mark/Operating thed Timer/Humidity Setting
14
Defrost Operation
Defrost Operation
When the water bucket becomes full, the
operation automatically stops and FULL
Indicator lamp lights up.
• After emptying the bucket, when the bucket is replaced,
FULL Indicator Lamp will turn itself off, and automatically
the operation starts.
• When the water is FULL, Mode conversion is not possible.
WWater FULL Indication
ater FULL Indication
• During Operation, "( )" are displayed and defrosting starts
automatically. (At this time, operation sound changes.)
• When room temperature becomes below about 15°C,
defrosting is executed once per 30 minutes for 5 minutes
depending on room temperature (at the most).
Operating the TIMER
Operating the TIMER
Empty the bucket, and reset the time.
When the bucket gets full of water during TIMER operation, "FULL" indicator will light up and fanning will stop.
Be sure to check if the unit is running.
Press the TIMER button.
• Since TIMER converts in the following sequence, select the time setting.
(1 hour interval)
• For every hour, the residual hours diminishes one by one.
• When time selected elapses, operation stops.
To cancel TIMER
• Press the TIMER button until <No Indication> is displayed.
No Indication (Cancel Setting)
Humidity Setting
Humidity Setting
Press the Temperature Select Button.
• Select Lamp will light up. • For every pressing.
When the air reaches the humidity of your choice,
the Dehumidifier will stop running.
Be sure to check if the unit is running.
To dehumidify room automatically
Page 16

Removing Collected W ater
15
ENGLISH
Take the bucket out.
• Take the bucket out with both hands, while
grasping handles in left/right side of the
bucket.
• Separate the bucket cover.
• When the bucket is full, it weighs about 5.7kg,
so carefully take out.
Pour the water down the drain.
• Carry the bucket by grasping bucket handle.
• After emptying the bucket, wipe water inside.
• If water remains in Float, "AUTO SHUT-OFF" Switch would not
operate properly, when water is full. So, wipe completely.
Replace the bucket properly.
• Make sure that the slots on the cover of
bucket are positioned correctly.
• Push the bucket securely with both hands. If
the bucket is not in the proper position,
FULL Sensor will activate, so the
Dehumidifier will not run.
Bucket Handle
Bucket Handle
• Immediately after stopping the unit, take the bucket out.
The water remaining in the cooling coils may fall to the inside of the unit.
(Wipe dripped water with soft cloth.)
• After taking the bucket out, do not touch any parts inside the unit.
The Sensor that detects Water FULL may not function well.
• Rinse the inside of the water bucket periodically (once a week).
If you do not clean for a prolonged time, the bucket may become
blackened.
• Drain elbow should be cleaned every six months.
When drain elbow clogs, clean using cotton stick.
When drain elbow clogging is removed, water remained in the
unit will come out, so prepare dishes and towels.
• At a low temperature, frost builds up on the coils, so the
amount of water in the bucket diminishes. But this is normal.
CAUTION
Drain
Elbow
Page 17

Continuous Drainage
16
Precautions during continuous drainage
• This Dehumidifier is only for home. Every two weeks, check if filter contamination, drain
hose clogging, restarting due to power failure.
• Do not use drain hose below 0°C.
(Water inside the hose may freeze, causing contamination etc. )
If a floor drain is available, continuous drainage is possible.
When servicing, stop running, and unplug the Power Cord from AC outlet.
Take the bucket out, and open Continuous
Drainage hole.
• Cut the Continuous Drainage hole at the back of the machine
by nipper, and open it so that no object drops inside.
Plug the hose into the drain.
• While pressing Stopper, insert 15 mm hose (inner diameter)
into continuous drainage hole. Make sure that there are no
water leaks.
✵ Replace the bucket properly.
If the bucket is not placed, the unit will not run.
("FULL indicating sensor will operate, and the
Dehumidifier will stop running.)
How to connect hose when making continuous drainage
1. Drain the
water.
2. Make the handle in an
upright position.
3. Transport.
NOTICE
•When moving, pour out the water in the bucket to prevent water leakage.
•Transport by lifting the unit where it is moved to the floor with an unstable surface.
•Besides, avoid moving caster on soft carpet. The carpet surface may be damaged.
Transport. (Use the Caster.)
You can
move it in all
directions.
Over 10cm
Do not
immerse in
water.
Do not
bend.
Page 18

Normal Maintenance
17
ENGLISH
When servicing, unplug the Power Cord.
Cleaning Air Filter
Cleaning Air Filter Clean every two weeks.
Take the filter cover out.
• Remove it by pushing downwards.
• Take the filter out.
Take the Deodorizing Air Purifying Filter.
• Do not wash it in water.
When filtering effect disappear, replace it.
Air Filter
Deodorizing Air
Purifying Filter
Pin
Clean the air filter.
• When the white side (back side) gets brown or
blackened, clean it.
Install the air filter.
• Push the handle until 'tick' sound is heard.
Attach the Deodorizing Air Purifying
Filter to the air filter.
• The Deodorizing Air Purifying Filter is disposed after use.
• Filter life varies depending on the place where it is used,
but it is desirable to replace every 4-5 months.
CAUTION
Page 19

h
h
Normal Maintenance/Long-term Storage
Normal Maintenance
Long-term Storage
18
• Wipe with soft cloth.
• Do not wipe the Main Unit
with water.
If washing the Main Unit
with water, insulation gets
contaminated.
• Never use things as below.
These cause damage to plastics.
(thinner, benzene, acid, scrubber
etc.)
• When using cloth with chemicals,
follow the guideline.
Maintenance of Drain Bucket
Main Unit
Clean the bucket with water.
In order to use safely, check the followings at
least every 6 months or a year:
Check periodically
Check if power cord
is too hot.
Check if power
cord is damaged.
Sponge, etc.
Float
If water remains in the Float, the
"AUTO SHUT-OFF" switch may not work
properly, so wipes water completely.
Soft Cloth
CAUTION
Unplug the Power
Cord from AC outlet.
Remove water in the bucket
completely.
• After removing the lid of the bucket, wipe
the water inside the bucket.
Let the filter dry for about 6 hours where
sunlight will not fall directly on the filter
and where ventilation is good. Then
cover the filter and store in upright
position.
Clean the filter.
• Never wash the Deodorizing Air Purifying
Filter with water.
• Otherwise, this filter will malfunction.
Deodorizing Air
Purifying Filter
Page 20

Troubleshooting ?
19
ENGLISH
Dehumidifier does not start when
operation buttons are pressed.
•
The power cord is not pushed completely into
the outlet.
•
The fuse is blown or circuit breaker is tripped.
•
Bucket is not in the proper position.
•
Water bucket is full.
•
Defrosting is under way. (Defrosting Lamp
lights up.)
- Sensor is operating.
- If room humidity is lower than that you
selected, the operation will stop.
Humidity indicated by the unit is
different from real value.
• Humidity may differ depending on locations.
When fan noise occurs
• Floor is unstable.
• Move the Dehumidifier and after removing
the bucket, replace it.
• Air filter is clogged.
The laundry would not dry as it
should be.
•
Dry air may not contact laundry.
•
Area to be dehumidified is too large.
•
There is too much laundry.
Operation and stop repeats
alternately.
•
Humidity may be automatically controlled by
AUTO dehumiditied Mode.
Water leaks.
• The Dehumidifier may have been skewed or fallen down.
• During continuous drainage, hose connection has been
incomplete or detached.
During Operation Mode,
Dehumidifier does not dry the air as
it should.
• Doors and windows may not be closed tightly.
• Area to be dehumidified is too large.
• There may be any vapor-generating object such as
stove.
•
Air purifying mode is set.
Moisture removed is small.
•
Air filter is clogged or usage period(about 5
months) has passed.
•
Air purifying mode is set.
•
Temperature and humidity in the room are low.
•
Air inlet or air outlet is clogged.
Conditions
Check the following points
Save time and money! Review the chart below first and you may not need
call for service.
Page 21

Troubleshooting ?
20
During operation, noise increases
suddenly.
•
When compressor starts to operate,
( 3 minutes after turning the switch ON, or in
AUTO Mode) the noise increases.
When the unit is used first time,
there is a smell in the wind.
•
As the temperature of heat exchanger
increases, temporarily a smell may be
generated.
Warm wind comes out.
•
Since the air that was dehumidified by cooling
gets warm by the condenser, the airflow gets
warm. (There is no cooling function.)
The angle or operation of Louver is
abnormal.
•
Press the AUTO Swing Button again.
The volume of noise changes.
•
Depending on the angle of Louver, the volume
of noise changes.
During operation startup, operation
conversion, or operation stop, a
weird sound is heard in the unit.
•
Until coolant circulation gets stabilized, the
sound of coolant may be heard.
Compressor will not work.
•
For 3 minutes immediately after the unit is
turned off or Power Cord is plugged, the unit
will not operate to protect the compressor.
•
If the relative humidity in the room gets below
the level you have selected, the Dehumidifier
will turn itself off.
There are liquid or white marks in
the bucket.
•
This is the water generated in the factory test,
or the trace of water evaporation.
This is normal.
The follwing symptoms are normal
Save time and money! Review the chart below first and you may not need
call for service.
 Loading...