

Page 1

NAVIGATION SYSTEM: BASIC FUNCTIONS
SECTION 1
NAVIGATION SYSTEM:
BASIC FUNCTIONS
Basic information before operation
Initial screen 30. . . . . . . . . . . . . . . . . . . . . . . . . . . . . . . . . . . . . . . . . . .
How to use the Remote Touch 31. . . . . . . . . . . . . . . . . . . . . . . . . . .
Inputting letters and numbers/List screen operation 33. . . . . . . . .
Screen adjustment 36. . . . . . . . . . . . . . . . . . . . . . . . . . . . . . . . . . . . .
Help icon 38. . . . . . . . . . . . . . . . . . . . . . . . . . . . . . . . . . . . . . . . . . . . . .
Map screen operation 38. . . . . . . . . . . . . . . . . . . . . . . . . . . . . . . . .
Current position display 38. . . . . . . . . . . . . . . . . . . . . . . . . . . . . . .
Screen scroll operation 39. . . . . . . . . . . . . . . . . . . . . . . . . . . . . . .
Switching the screens 44. . . . . . . . . . . . . . . . . . . . . . . . . . . . . . . . .
Map scale 47. . . . . . . . . . . . . . . . . . . . . . . . . . . . . . . . . . . . . . . . . . .
Foot print map 47. . . . . . . . . . . . . . . . . . . . . . . . . . . . . . . . . . . . . . .
Orientation of the map 48. . . . . . . . . . . . . . . . . . . . . . . . . . . . . . . .
Standard map icons 49. . . . . . . . . . . . . . . . . . . . . . . . . . . . . . . . . .
Speech command system 49. . . . . . . . . . . . . . . . . . . . . . . . . . . . .
Natural speech information 52. . . . . . . . . . . . . . . . . . . . . . . . . . . .
Command list 54. . . . . . . . . . . . . . . . . . . . . . . . . . . . . . . . . . . . . . . .
29
Page 2
NAVIGATION SYSTEM: BASIC FUNCTIONS
Initial screen
When the “ENGINE START STOP” switch
is in ACCESSORY or IGNITION ON
mode, the initial screen will be displayed
and the system will begin operating.
CAUTION
When the vehicle is stopped with the
engine running, always apply the
parking brake for safety.
After a few seconds, the “CAUTION”
screen will be displayed.
After about 5 seconds, the “CAUTION”
screen automatically switches to the map
screen. When selecting “Show Map” or
pushing the “MAP/VOICE” button, the
map screen is displayed.
30
Page 3
NAVIGATION SYSTEM: BASIC FUNCTIONS
How to use the Remote
Maintenance information
This system informs about when to replace
certain parts or components and shows
dealer information (if registered) on the
screen.
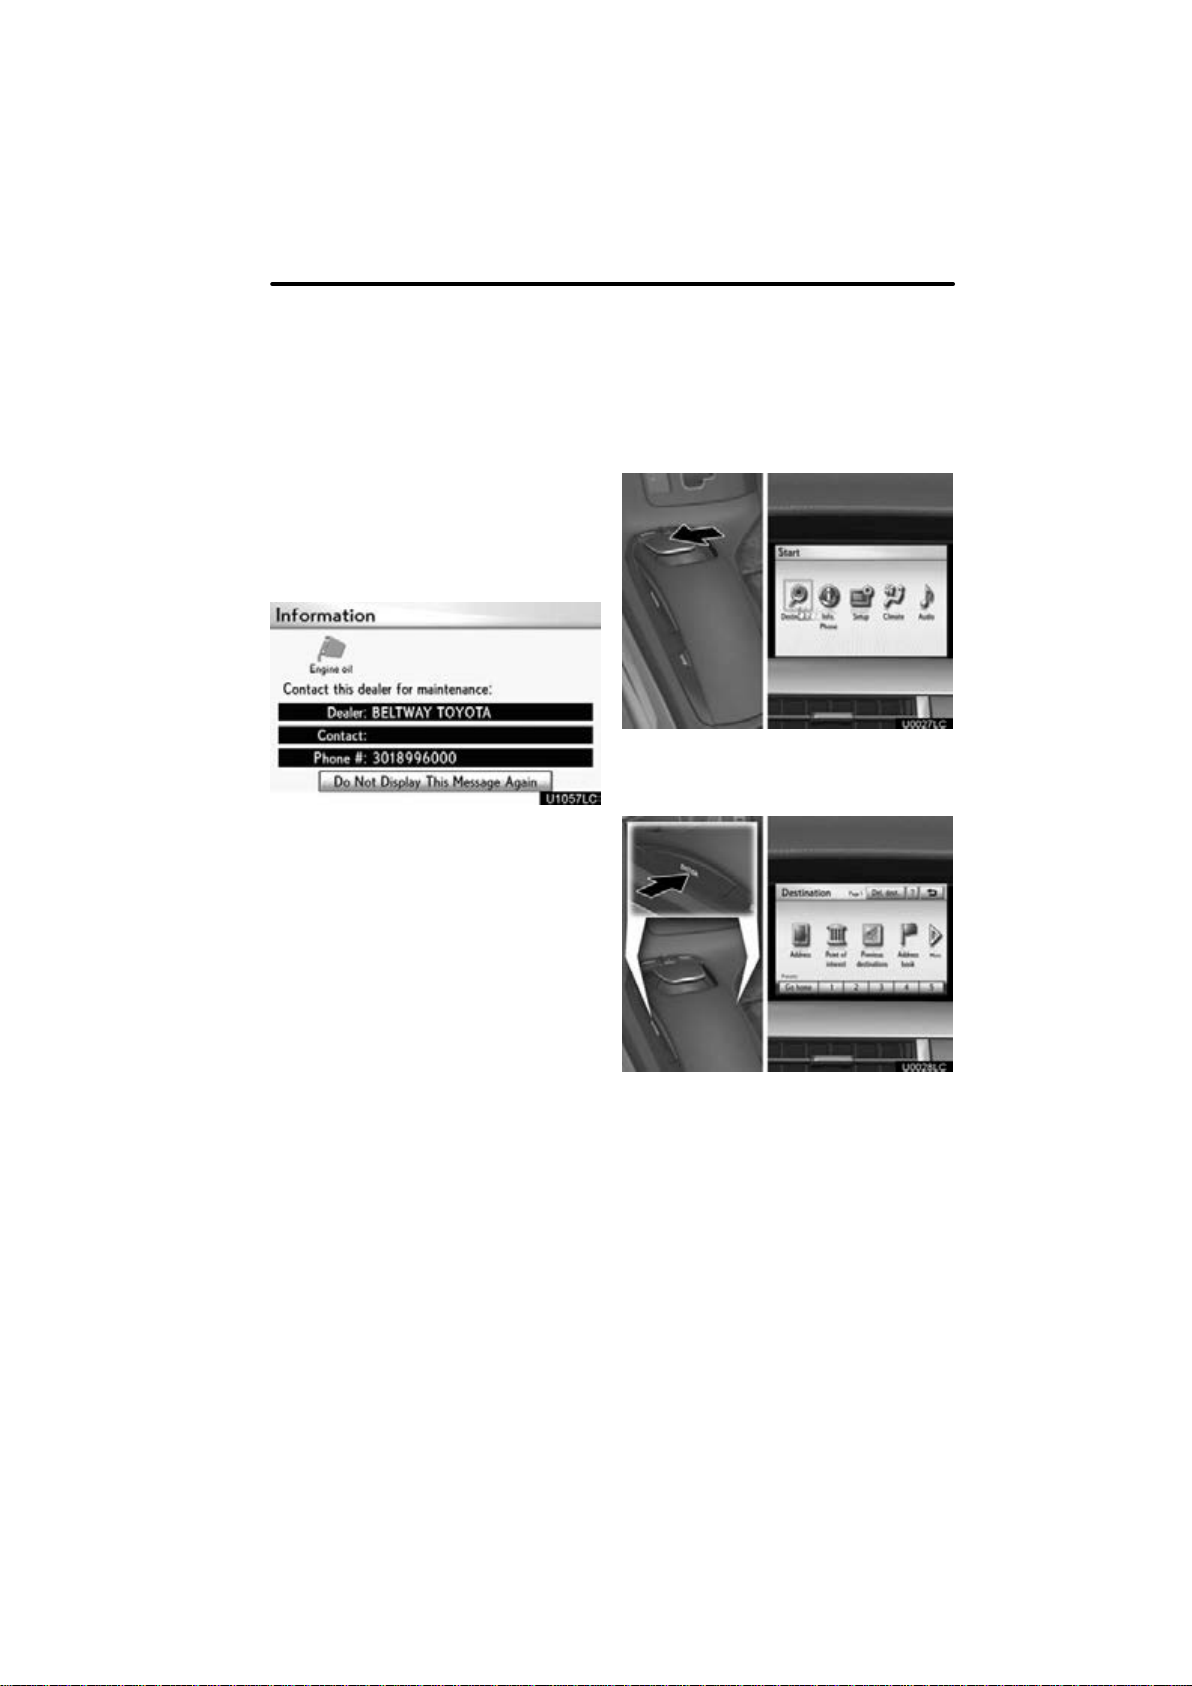
When the vehicle reaches a previously set
driving distance or date specified for a
scheduled maintenance check, the “Information” screen will be displayed when the
navigation system is in operation.
To disable this screen, select “Do Not
Display This Message Again”. This
screen goes off if the screen is not operated for several seconds.
To prevent this information screen from being displayed again, select “Do Not
Display This Message Again”.
To register “Maintenance information”, see
“—Maintenance” on page 384.
Touch
This navigation system can be operated by
the Remote Touch when the “ENGINE
START STOP” switch is in the ACCESSORY or IGNITION ON mode.
A pointer is shown on the screen. Use the
Remote Touch knob to move the pointer
and select the buttons on the screen.
To select a button on the screen, place the
pointer on top of the button and then push
the “ENTER” button on the Remote
Touch. Once a button has been selected,
the screen will change.
When the pointer moves close to a button,
it will be automatically pulled onto that button. The strength of this pull can be adjusted. (See page 321.)
The pointer will disappear from the screen
if it is not moved for 6 seconds. Operation
of the Remote Touch knob will cause the
pointer to reappear.
31
Page 4
NAVIGATION SYSTEM: BASIC FUNCTIONS
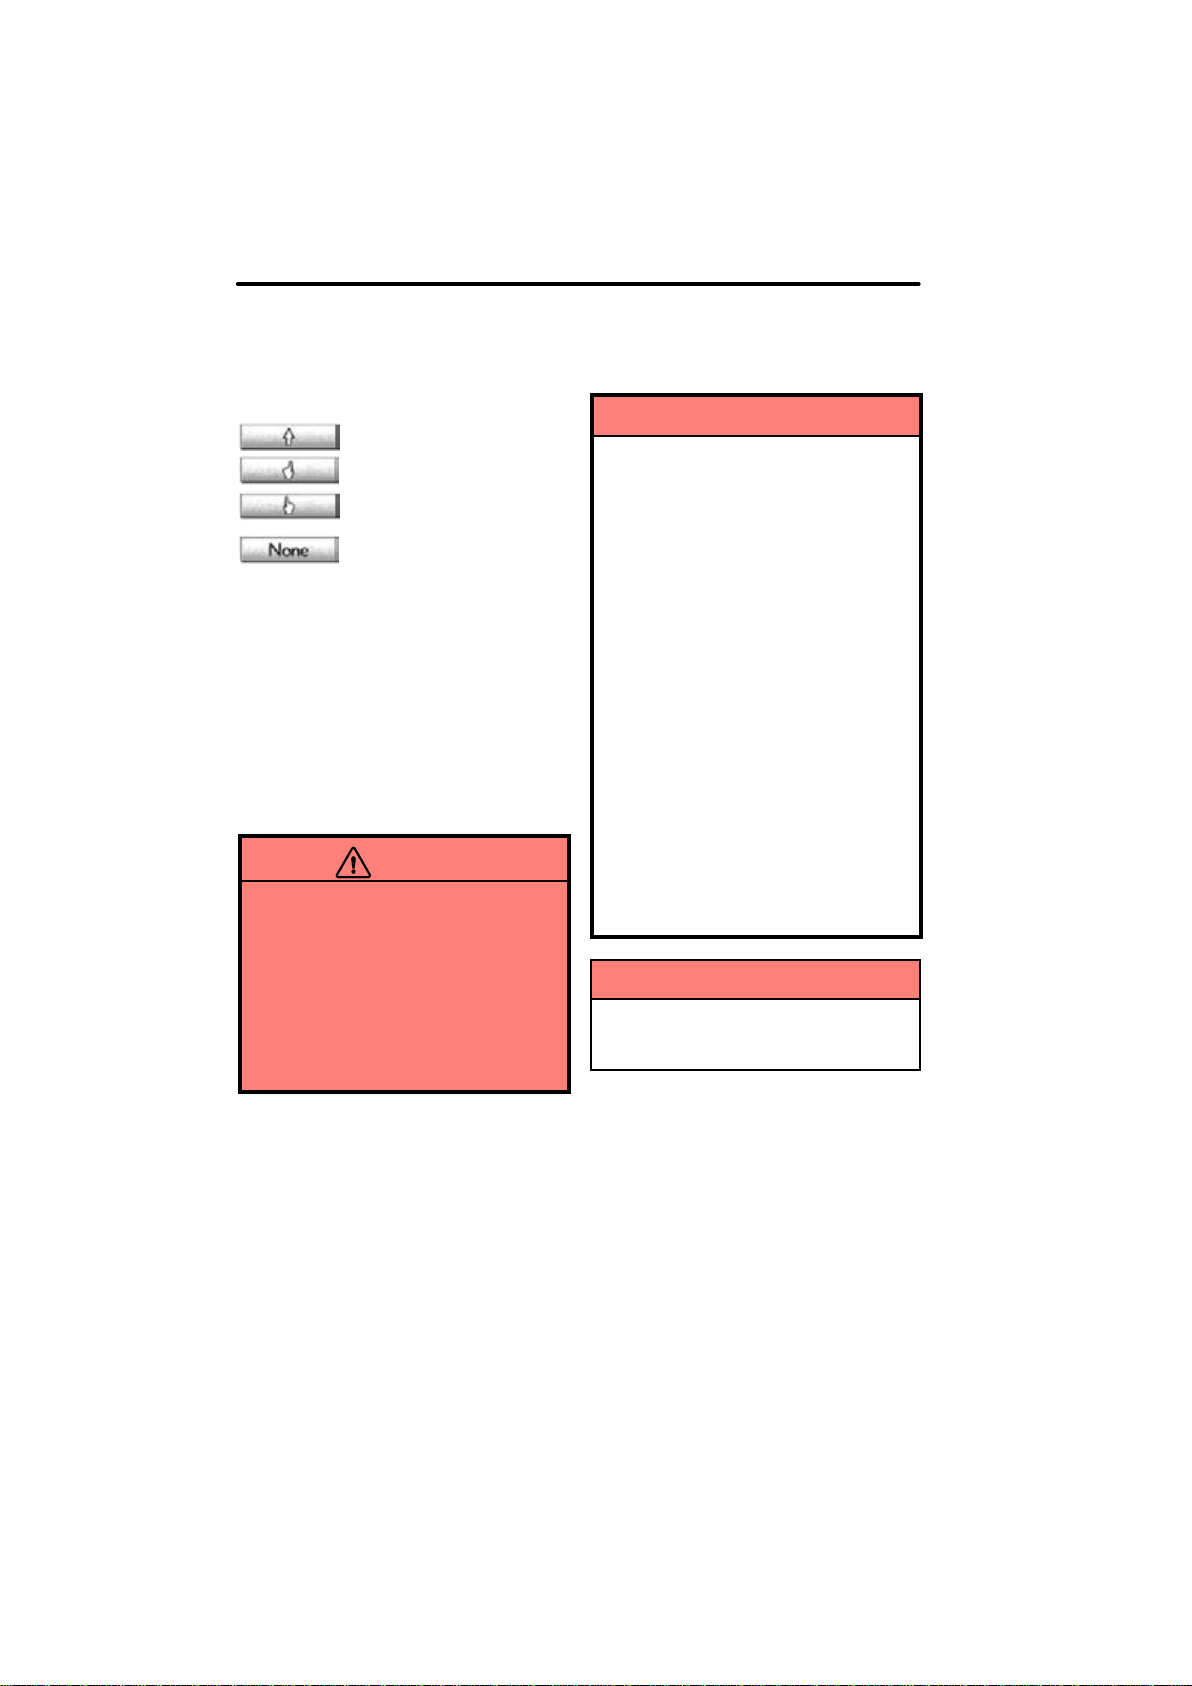
Pointer shape can be changed. (See page
321.)
: Change to an arrow.
: Change to a left hand.
: Change to a right hand.
: Display of the pointer can be
turned off. (Even if display of the pointer is
turned off, the pointer will appear on the
map screen as “+”.)
Push the “Ɯ” button on the Remote Touch
to zoom in on the map screen and “Ɲ” to
zoom out. These buttons can also be used
to scroll up and down on list screens.
Push the “MENU” button to set a destination or adjust settings for the audio system,
air conditioning system, etc.
You can return to the map screen by pushing the “MAP/VOICE” button.
CAUTION
Do not allow fingers, fingernails or
hair to become caught in the
Remote Touch as this may cause
an injury.
Be careful when touching the
Remote Touch in extreme temperatures as it may become very hot or
cold due to the temperature inside
the vehicle.
NOTICE
Do not allow the Remote Touch to
come into contact with food, liquid,
stickers or lit cigarettes as doing
so may cause it to change color,
emit a strange odor or stop functioning.
Do not subject the Remote Touch
to excessive pressure or strong
impact as the knob may bend or
break off.
Do not allow coins, contact lenses
or other such items to become
caught in the Remote T ouch as this
may cause it to stop functioning.
Items of clothing may rip if they be-
come caught on the Remote Touch
knob.
If your hand or any object is on the
Remote T ouch knob when the “ENGINE START STOP” switch is
turned to “ACCESSORY” mode,
the Remote Touch knob may not
operate properly.
INFORMATION
Under extremely cold conditions, the
Remote Touch knob may react slowly.
32
Page 5
NAVIGATION SYSTEM: BASIC FUNCTIONS
Inputting letters and
numbers/List screen
operation
When searching for an address or a name,
or entering, letters and numbers can be input via the screen.
INFORMATION
Keyboard layout can be changed.
(See page 319.)
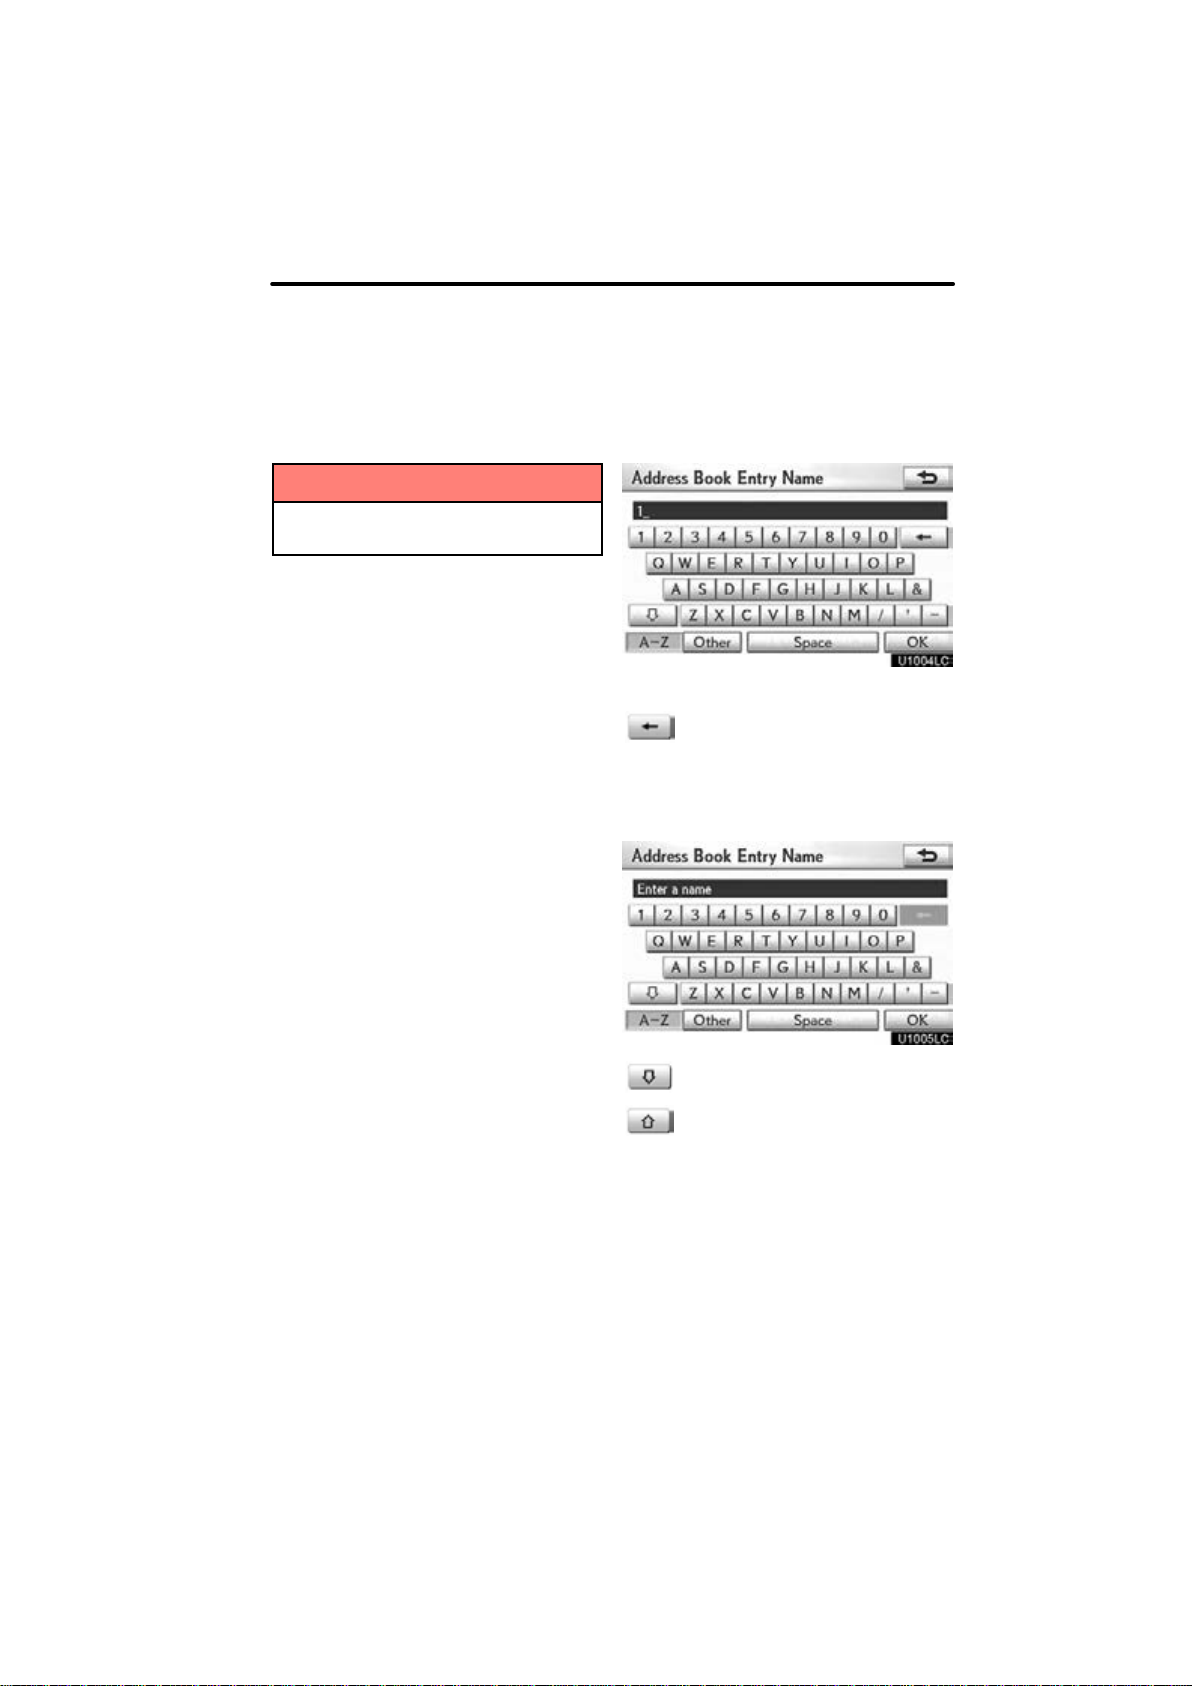
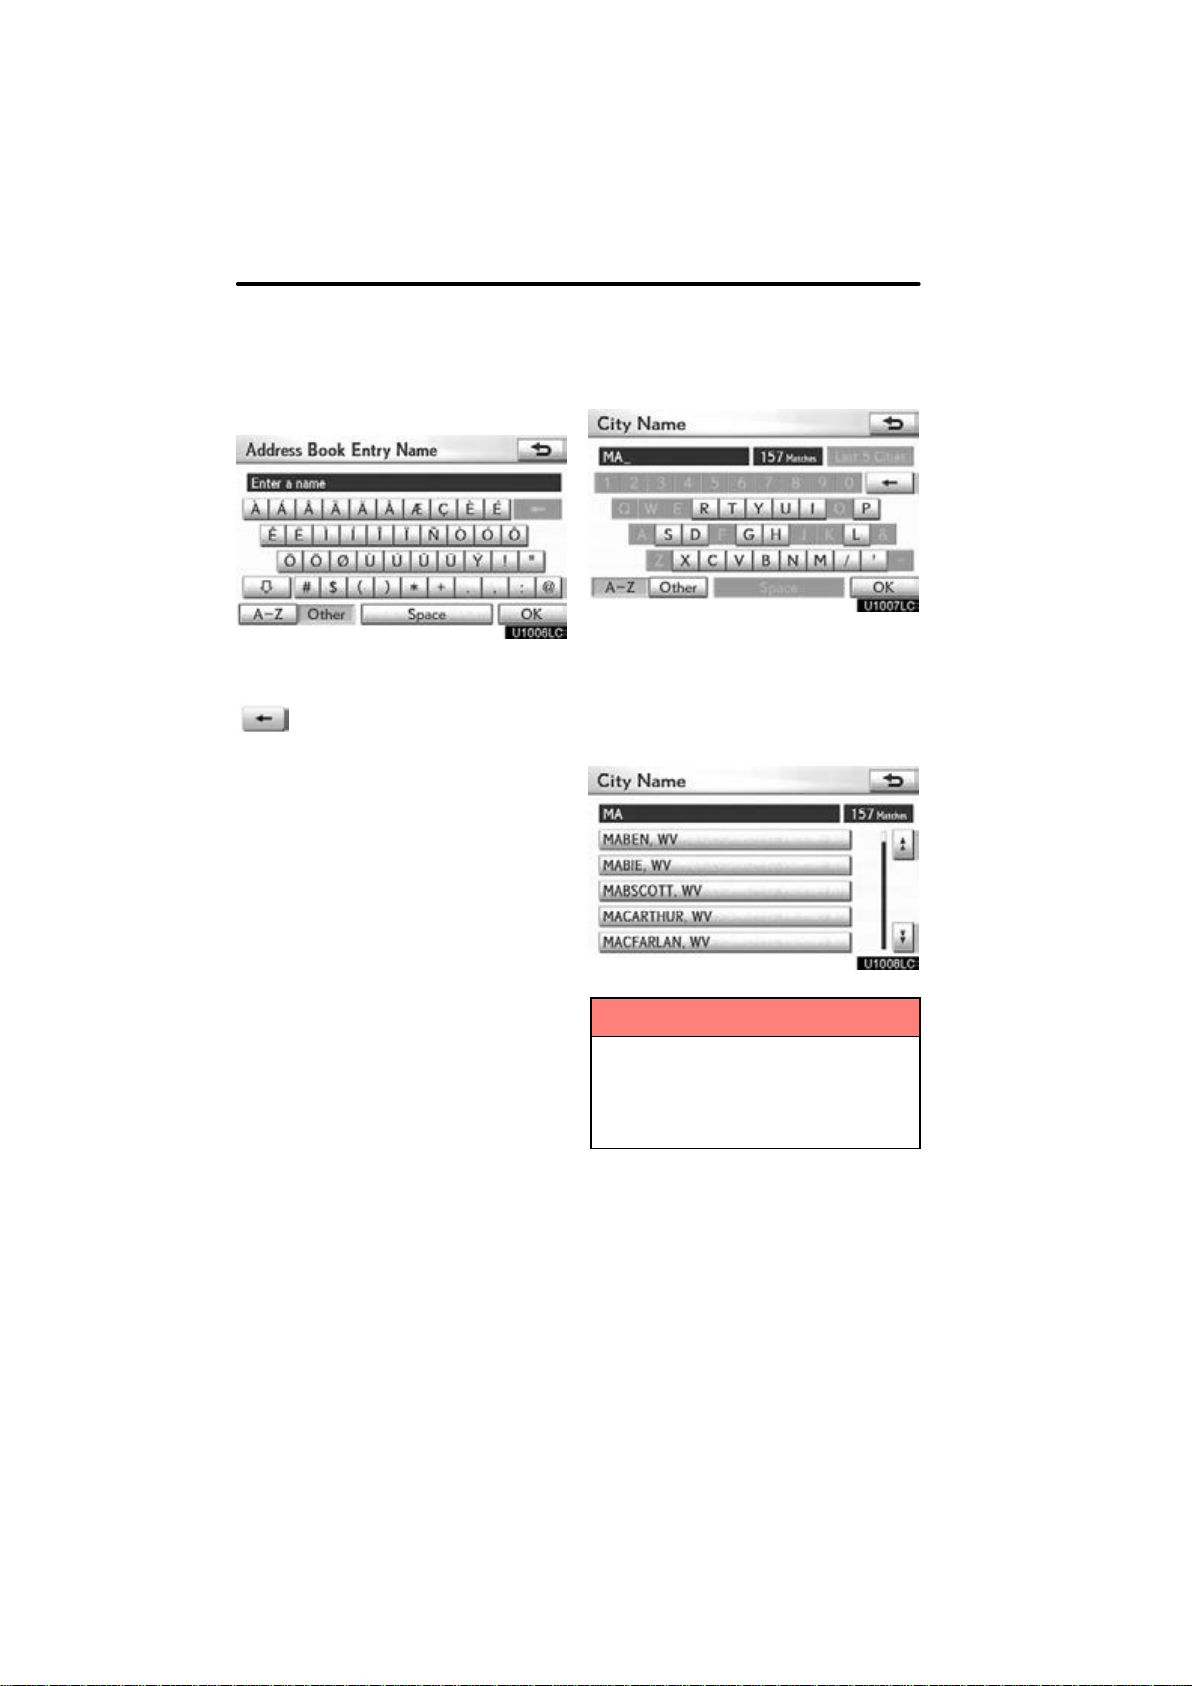
To input letters and numbers
To display the alphabet keys, select
“A−Z”.
Enter letters by selecting the keys directly.
: Selecting this button erases one
letter. By holding this button, letters will continue to be erased.
On certain letter entry screens, letters can
be entered in upper or lower case.
: To enter in lower case.
: To enter in upper case.
33
Page 6
NAVIGATION SYSTEM: BASIC FUNCTIONS
To input symbols
To display symbol keys, select “Other”.
Enter symbols by selecting the symbol
keys directly.
: Selecting this button erases one
letter. By holding this button, letters will continue to be erased.
To display the list
To search for an address or a name, select
“OK”. Matching items from the database
are listed even if the entered address or
name is incomplete.
If the number of matches is five or less, the
list is displayed without selecting “OK”.
34
INFORMATION
The number of matching items is
shown to the right side of the screen.
If the number of matching items is
more than 999, the system displays
∗∗” on the screen.
“
Page 7
NAVIGATION SYSTEM: BASIC FUNCTIONS
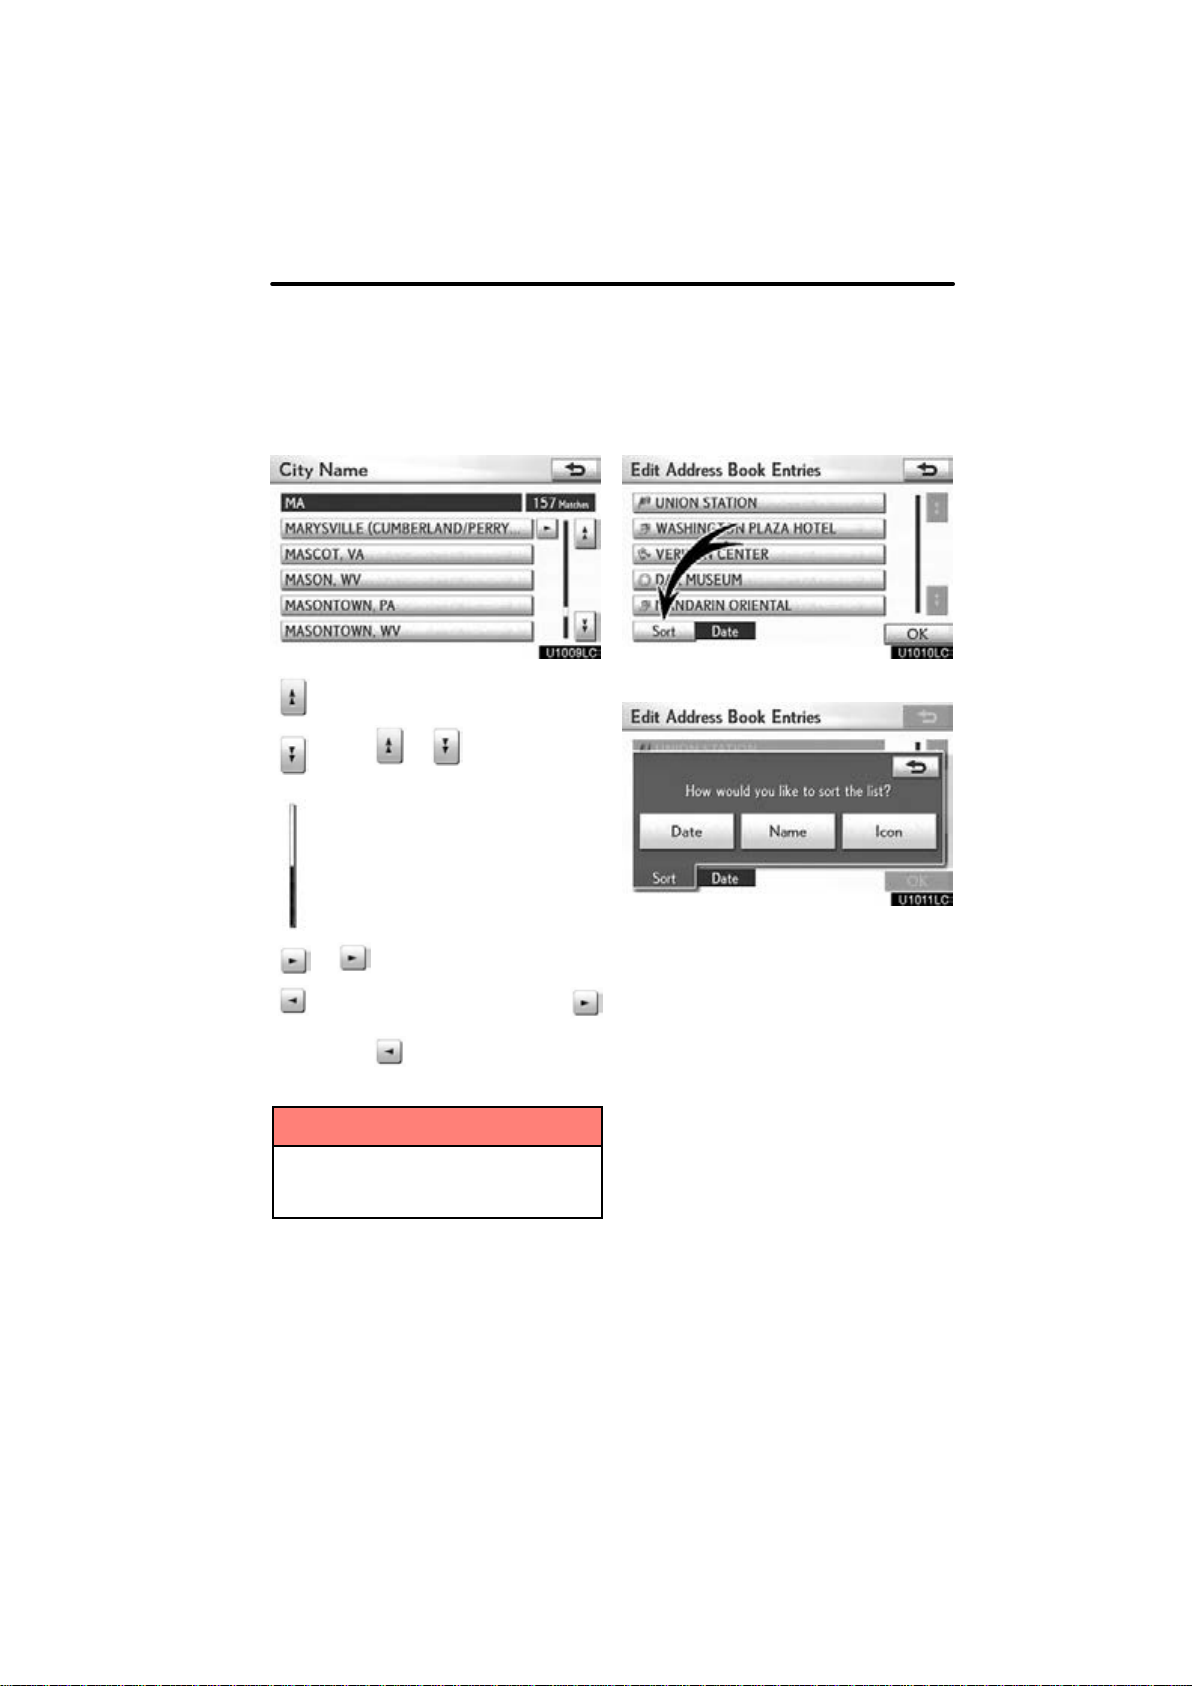
List screen operation
When a list is displayed, use the appropriate button to scroll through the list.
Sorting
The order of a list displayed on the screen
can be rearranged.
To shift to the next or previous
page.
Select or to scroll through
the displayed list.
This expresses a displayed screen
position.
If appears to the right of the
item name, the complete name is
too long for the display. Select
to scroll to the end of the name.
Select to scroll to the beginning
of the name.
INFORMATION
The “Ɯ” or “Ɲ” buttons on the con-
troller can be used to scroll up and
down on list screens.
1. Select “Sort”.
2. Select the desired sorting criteria.
Sorting criteria are as follows:
“Distance”: To sort in the order of dis-
tance from your current location.
“Date”: To sort in the order of the date.
“Category”: To sort in the order of the
category.
“Icon”: To sort in the order of the icons.
“Name”: To sort in order by name.
35
Page 8
NAVIGATION SYSTEM: BASIC FUNCTIONS
Screen adjustment
You can adjust the contrast, brightness,
color and tone of the screen. You can also
turn the display off, and change the screen
to either day or night mode.
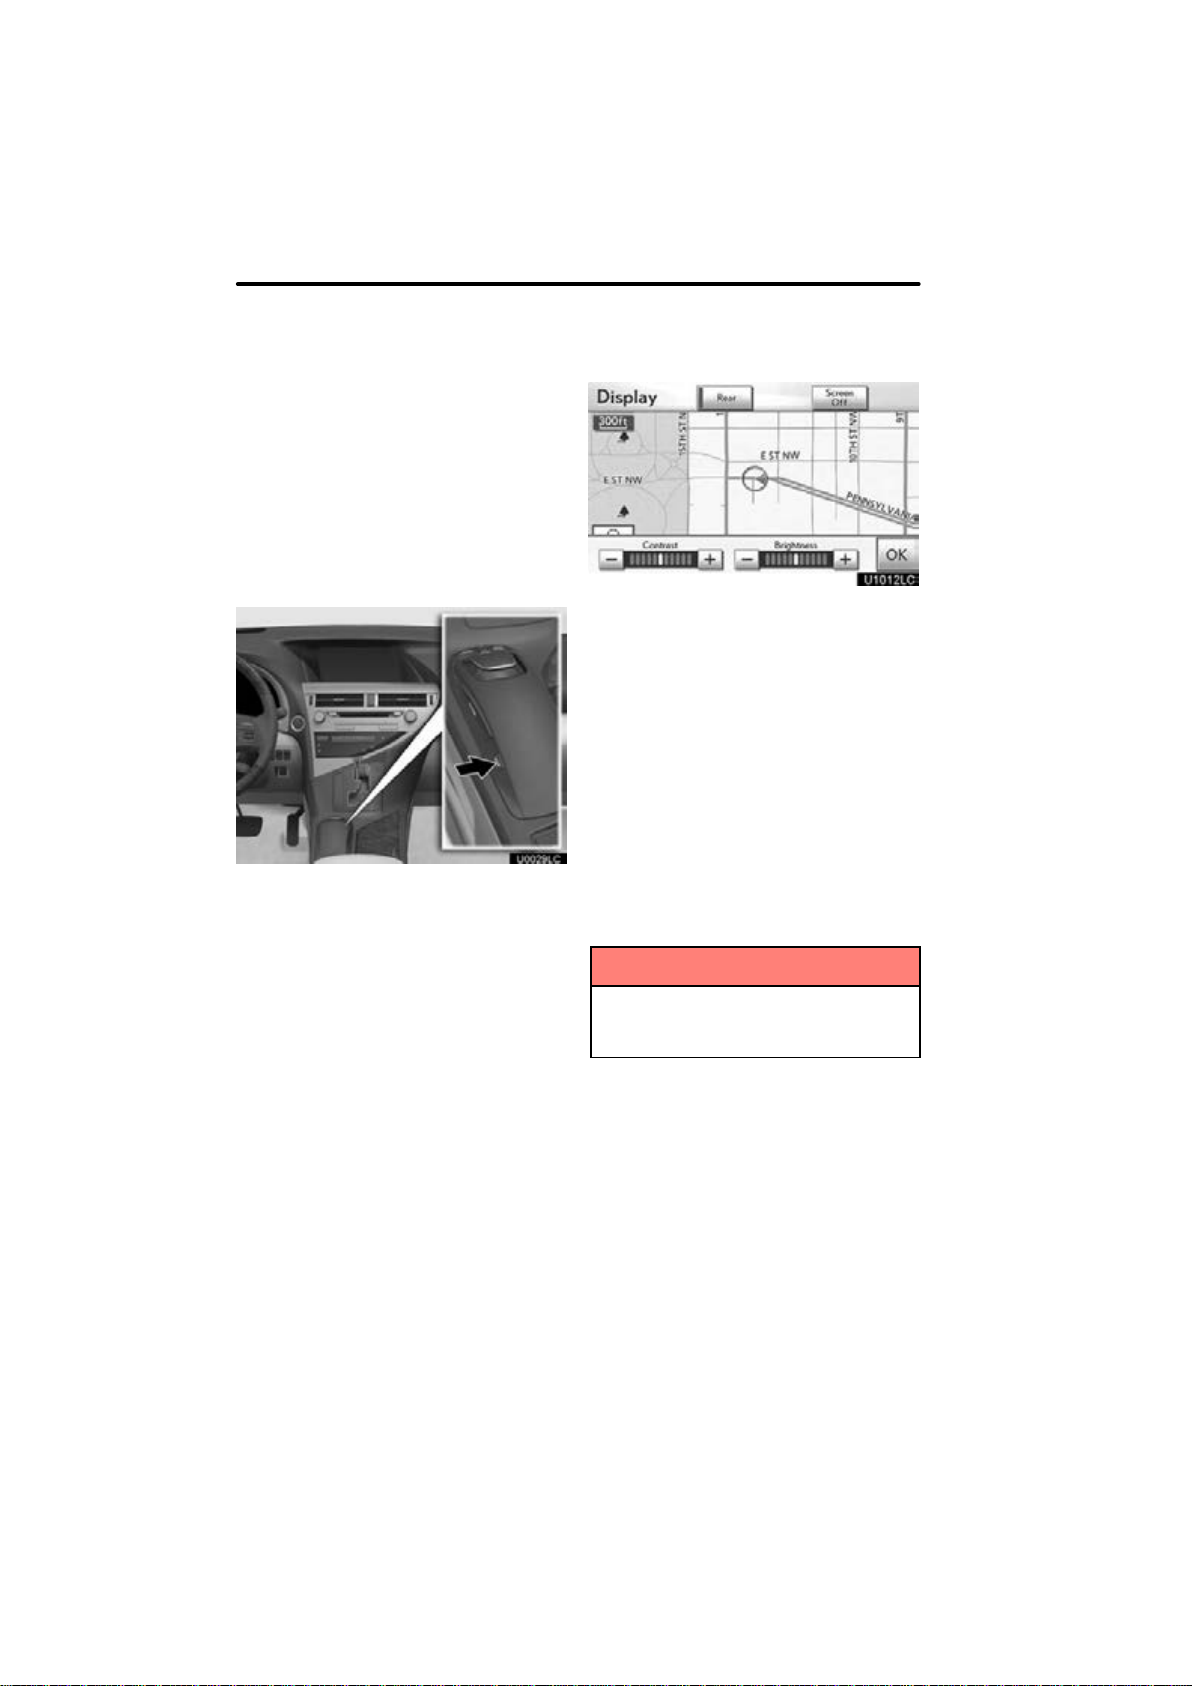
Contrast, brightness, color and tone
adjustment
The contrast, brightness, color and tone of
the screen can be adjusted depending on
the brightness of your surroundings. You
can also turn the display off.
1. Push the “DISP” button.
Contrast and brightness adjustment
2. Select the desired button to adjust
contrast and brightness.
“Contrast” “
of the screen.
“Contrast” “
the screen.
“Brightness” “
“Brightness” “
3. After adjusting the screen, select
“OK”.
The screen goes off when “Screen Off” is
selected. To turn the display screen back
on, push the “DISP” button again.
+”: Strengthens the contrast
–”: Weakens the contrast of
+”: Brightens the screen.
–”: Darkens the screen.
36
INFORMATION
When you do not select any button on
the “Display” screen for 20 seconds,
the previous screen will be displayed.
Page 9
NAVIGATION SYSTEM: BASIC FUNCTIONS
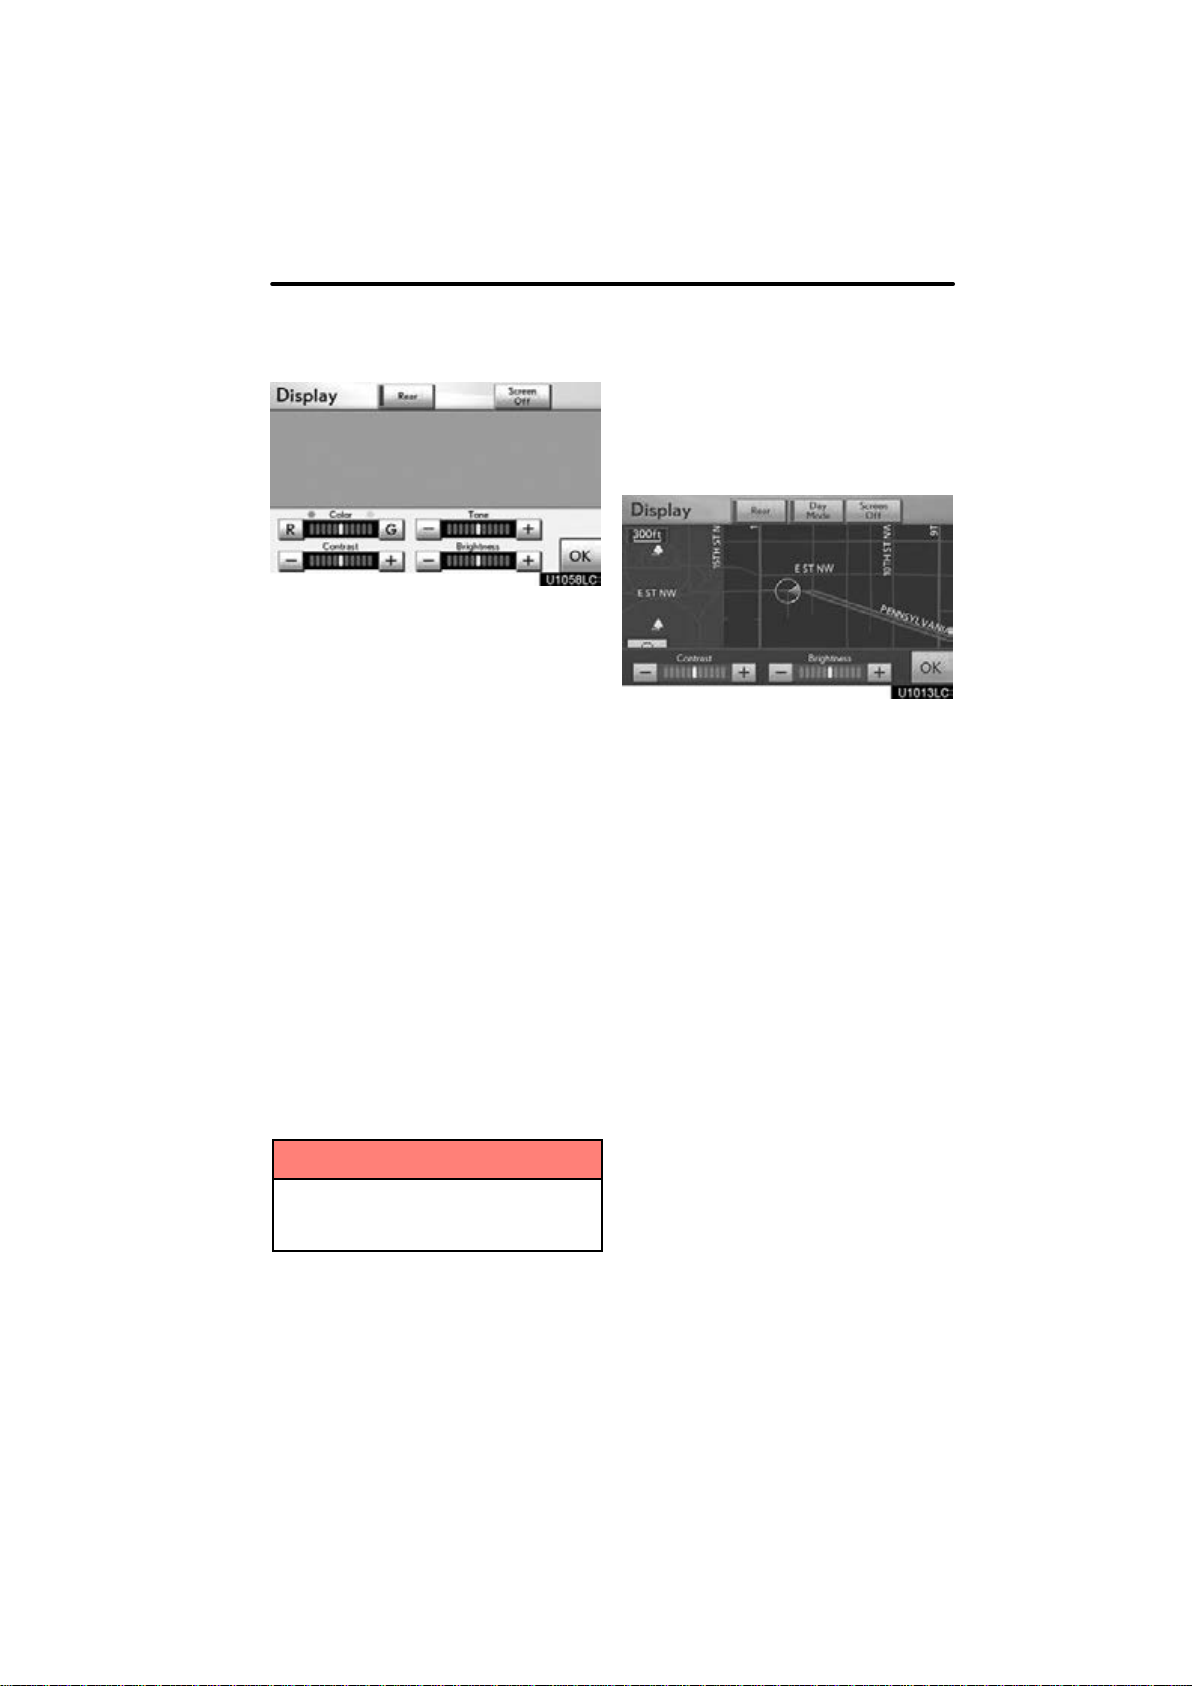
Color and tone adjustment
1. Select the desired button to adjust
color and tone.
You can adjust the color and the tone while
the DVD video, DVD audio and video CD
are being played.
“Color” “R”: Strengthens the red color of
the screen.
“Color” “G”: Strengthens the green color
of the screen.
“Tone” “
screen.
“Tone” “
screen.
2. After adjusting the screen select
“OK”.
If your vehicle is equipped with the rear
seat entertainment system, the rear
screen turns on or off when “Rear” is selected.
The screen goes off when “Screen Off” is
selected. To turn the display screen back
on, push the “DISP” button again.
+”: Strengthens the tone of the
–”: Weakens the tone of the
Changing between day mode and
night mode
Depending on the position of the headlight
switch, the screen changes to day mode or
night mode.
To display the screen in day mode even
with the headlight switch on, select
“Day Mode” on the adjustment screen
for brightness and contrast control.
If the screen is set in day mode with the
headlight switch turned on, this condition is
memorized in the system even with the engine turned off.
INFORMATION
When you do not select any button on
the “Display” screen for 20 seconds,
the previous screen will be displayed.
37
Page 10
NAVIGATION SYSTEM: BASIC FUNCTIONS
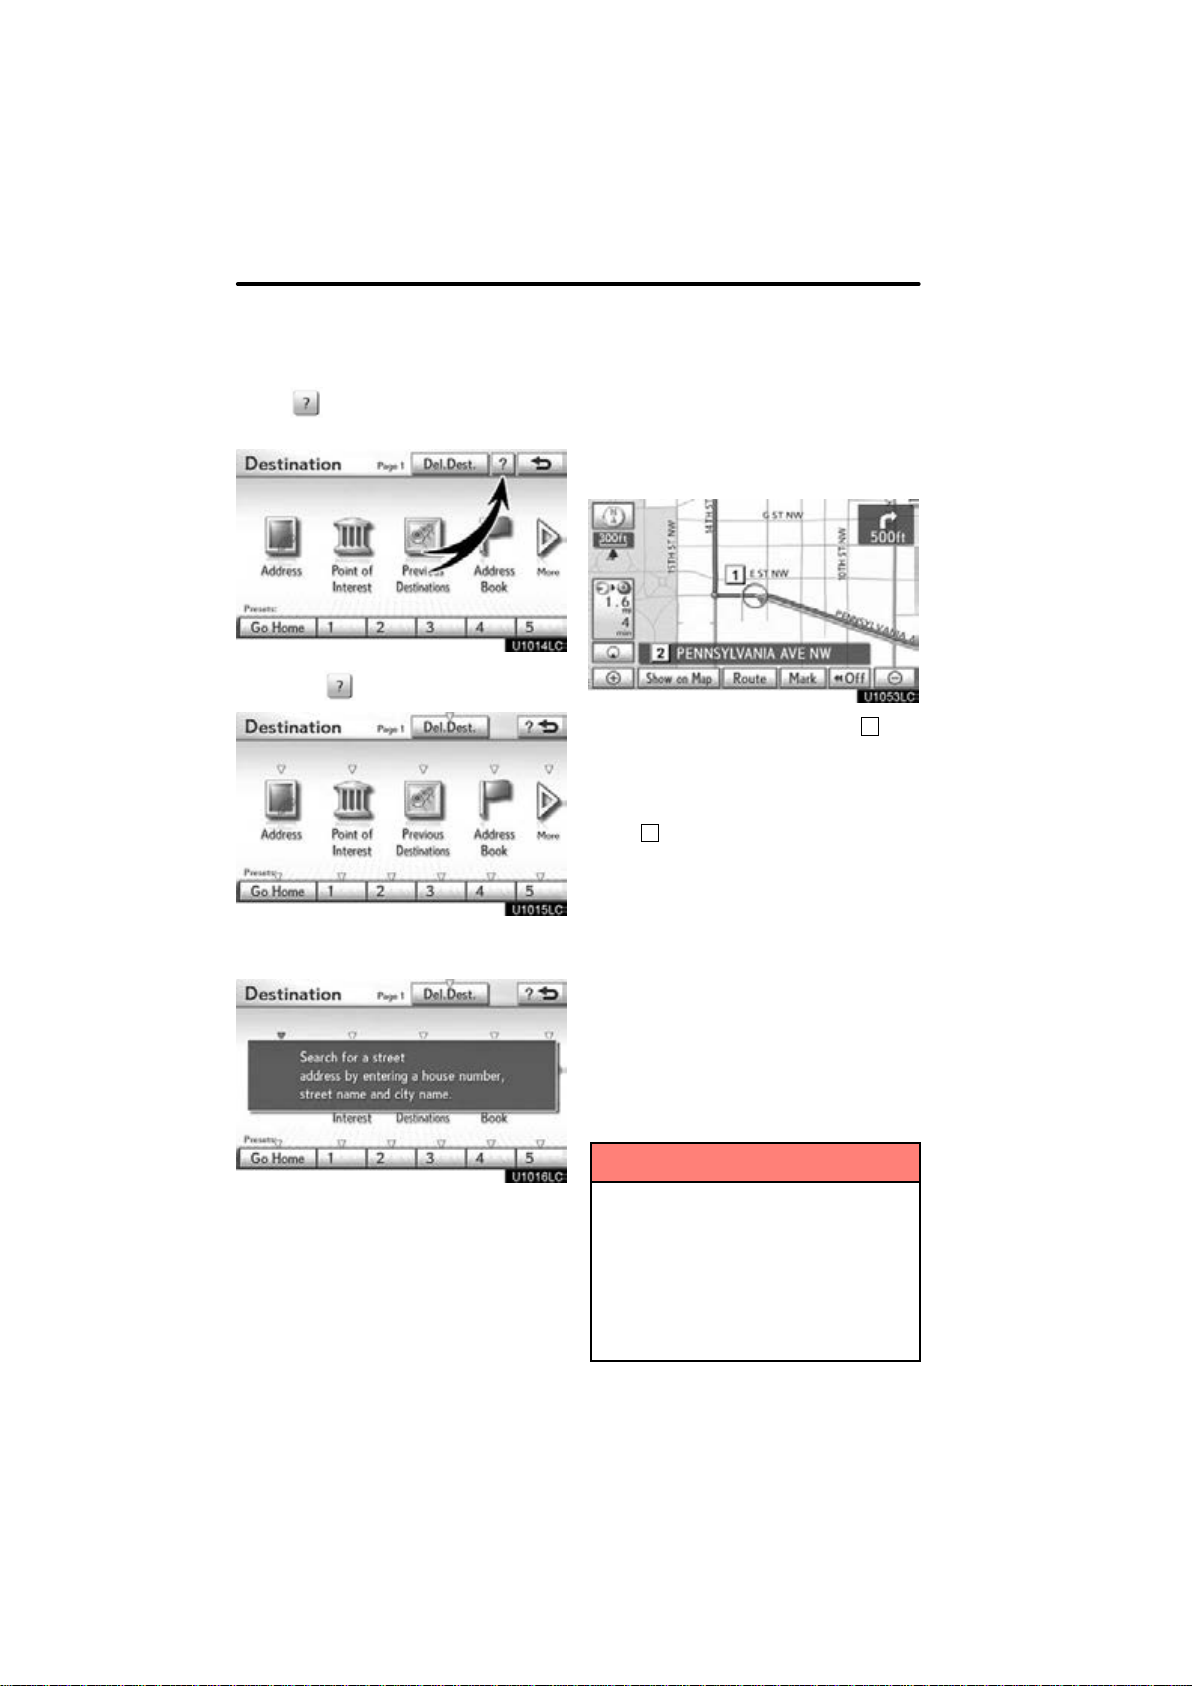
Help icon
Map screen operation —
— Current position display
When appears on the screen, an ex-
planation of the function can be displayed.
1. Select .
2. Select the button of the desired
function.
When starting the navigation system, the
current position is displayed first.
This screen displays the current vehicle
position and a map of the surrounding local
area.
The current vehicle position mark (1) appears in the center or bottom center of the
map screen.
A street name will appear on the bottom of
the screen, depending on the scale of the
2
map (
You can return to this map screen that
shows your current position at any time
from any screen by pushing the “MAP/
VOICE” button.
While driving, the current vehicle position
mark is fixed on the screen and the map
moves.
The current position is automatically set as
the vehicle receives signals from the GPS
(Global Positioning System). If the current
position is not correct, it is automatically
corrected after the vehicle receives signals from the GPS.
).
38
INFORMATION
After battery disconnection, or on
a new vehicle, the current position
may not be correct. As soon as the
system receives signals from the
GPS, the correct current position
is displayed.
To correct the current position
manually, see page 335.
Page 11
NAVIGATION SYSTEM: BASIC FUNCTIONS
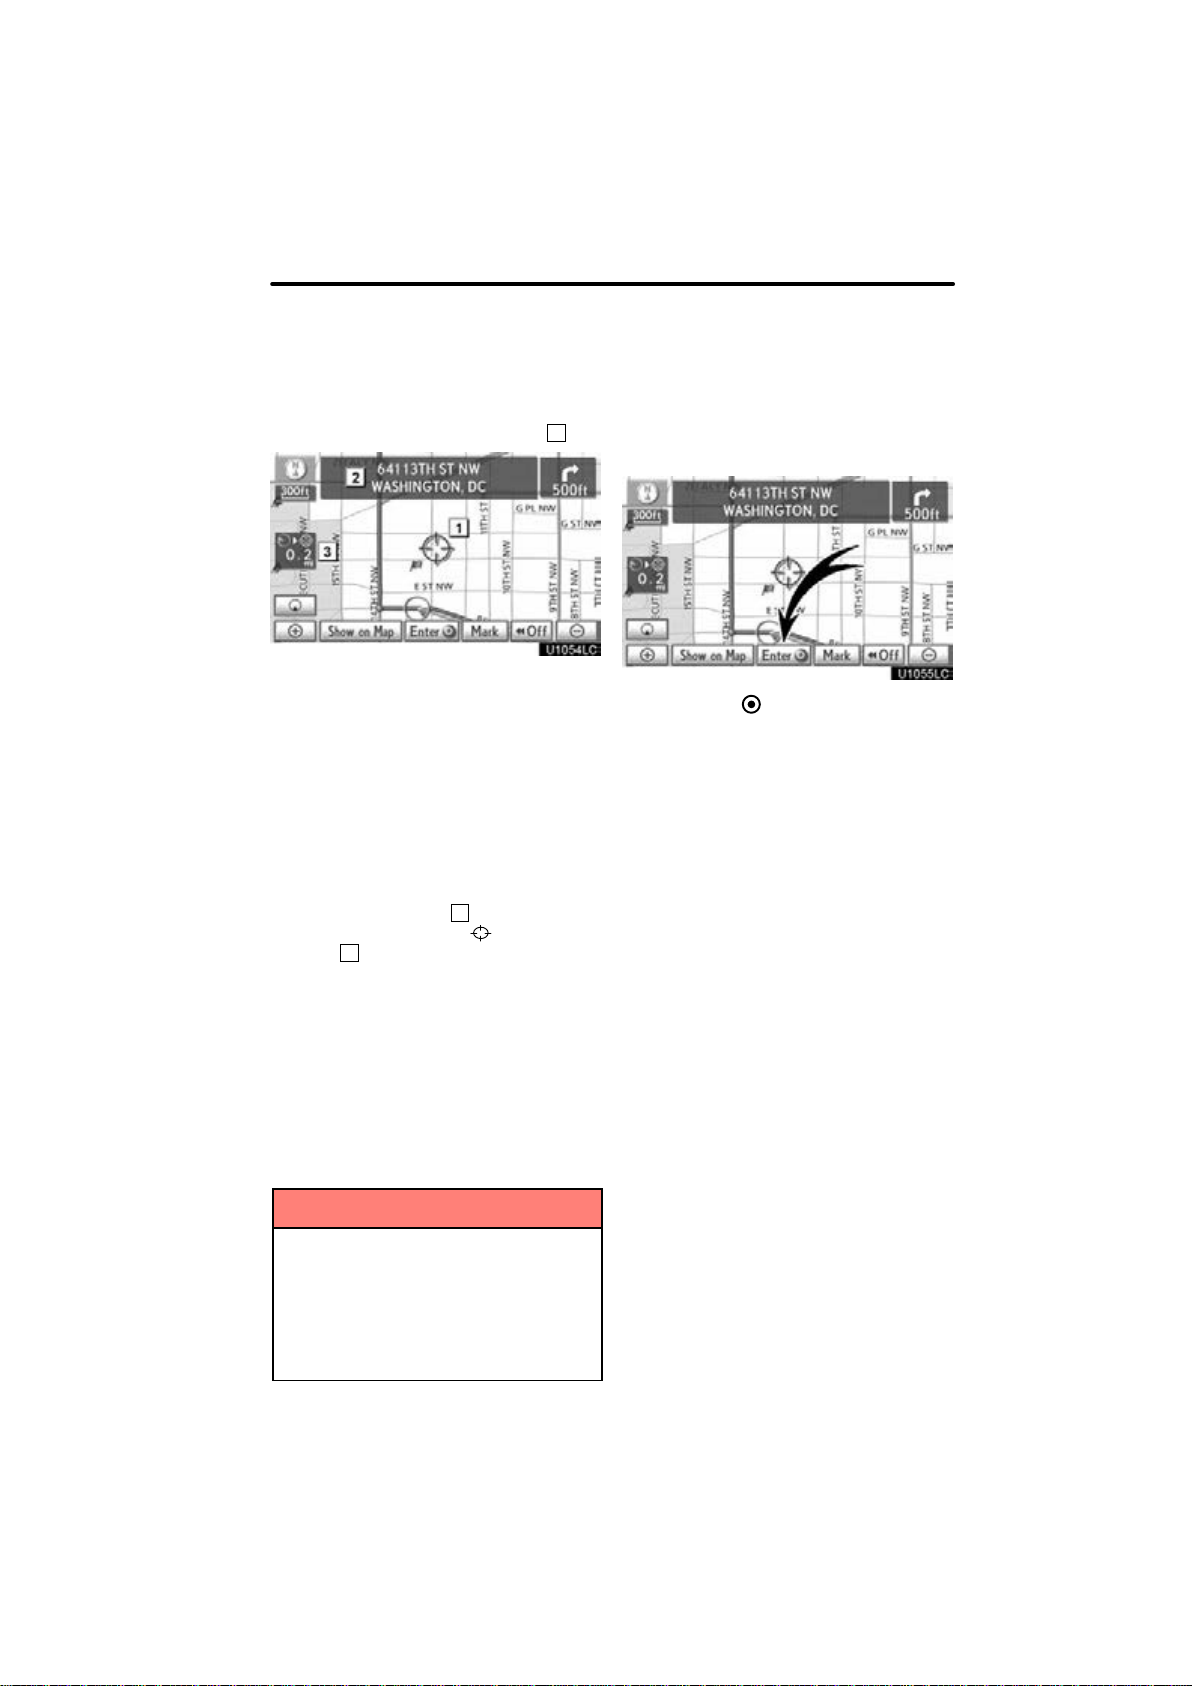
— Screen scroll operation
When any point on the map is selected,
that point moves to the center of the screen
and is shown by the cursor mark (
Use the scroll feature to move the desired
point to the center of the screen for looking
at a point on the map that is different from
the current position of the vehicle.
To scroll over the map, place the pointer in
a position near the desired destination and
then press and hold the “ENTER” button.
The map will continue scrolling in that direction until the button is released.
A street name, city name, etc. of the selected point will be shown, depending on
the scale of the map (
the current position to
shown (
After the screen is scrolled, the map remains centered at the selected location
until another function is activated. The current vehicle position mark will continue to
move along your actual route and may
move off the screen. When the “MAP/
VOICE” button is pushed, the current vehicle position mark returns to the center of
the screen and the map moves as the vehicle proceeds along the designated route.
3
).
2
). Distance from
1
).
will also be
To set the cursor position as a des-
tination
A specific point on the map can be set as
a destination using the scroll function.
Select “Enter ”.
The screen changes and displays the map
location of the selected destination and the
route preference. (See “Starting route
guidance” on page 86.)
When the scroll feature is used, the
current vehicle position mark may
disappear from the screen. Move the
map with a scroll again or push the
“MAP/VOICE” button to return to the
current vehicle position map location
display.
INFORMATION
39
Page 12
NAVIGATION SYSTEM: BASIC FUNCTIONS
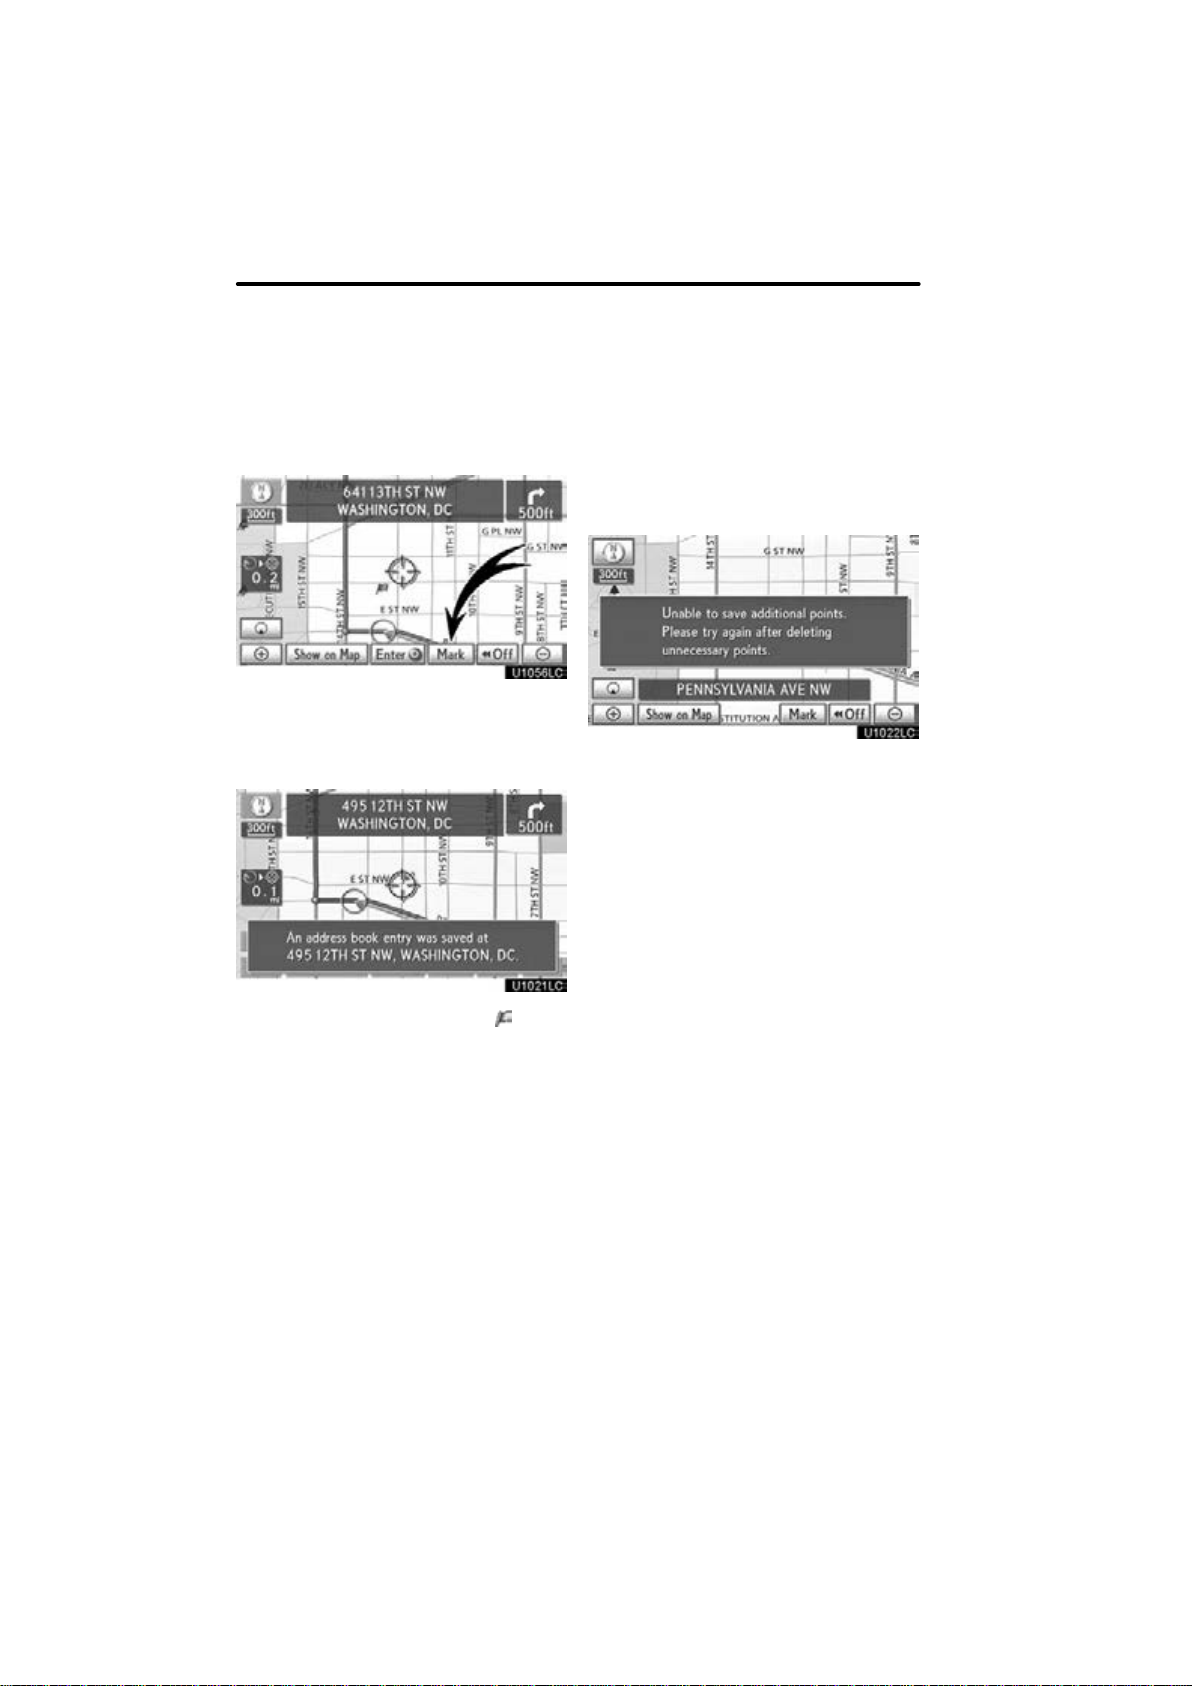
To register the cursor position as an
address book entry
Address book entry registration enables
easy access to a specific point.
Select “Mark”.
When you select “Mark”, the following
screen appears for a few seconds, and
then the map screen returns.
To change the icon or name, etc., see “ (b)
Editing address book entries” on page
124.
Up to 100 address book entries can be registered. If there is an attempt to register
more than 100 address book entries, an
error message will appear.
The registered point is shown by on the
map.
40
Page 13

NAVIGATION SYSTEM: BASIC FUNCTIONS
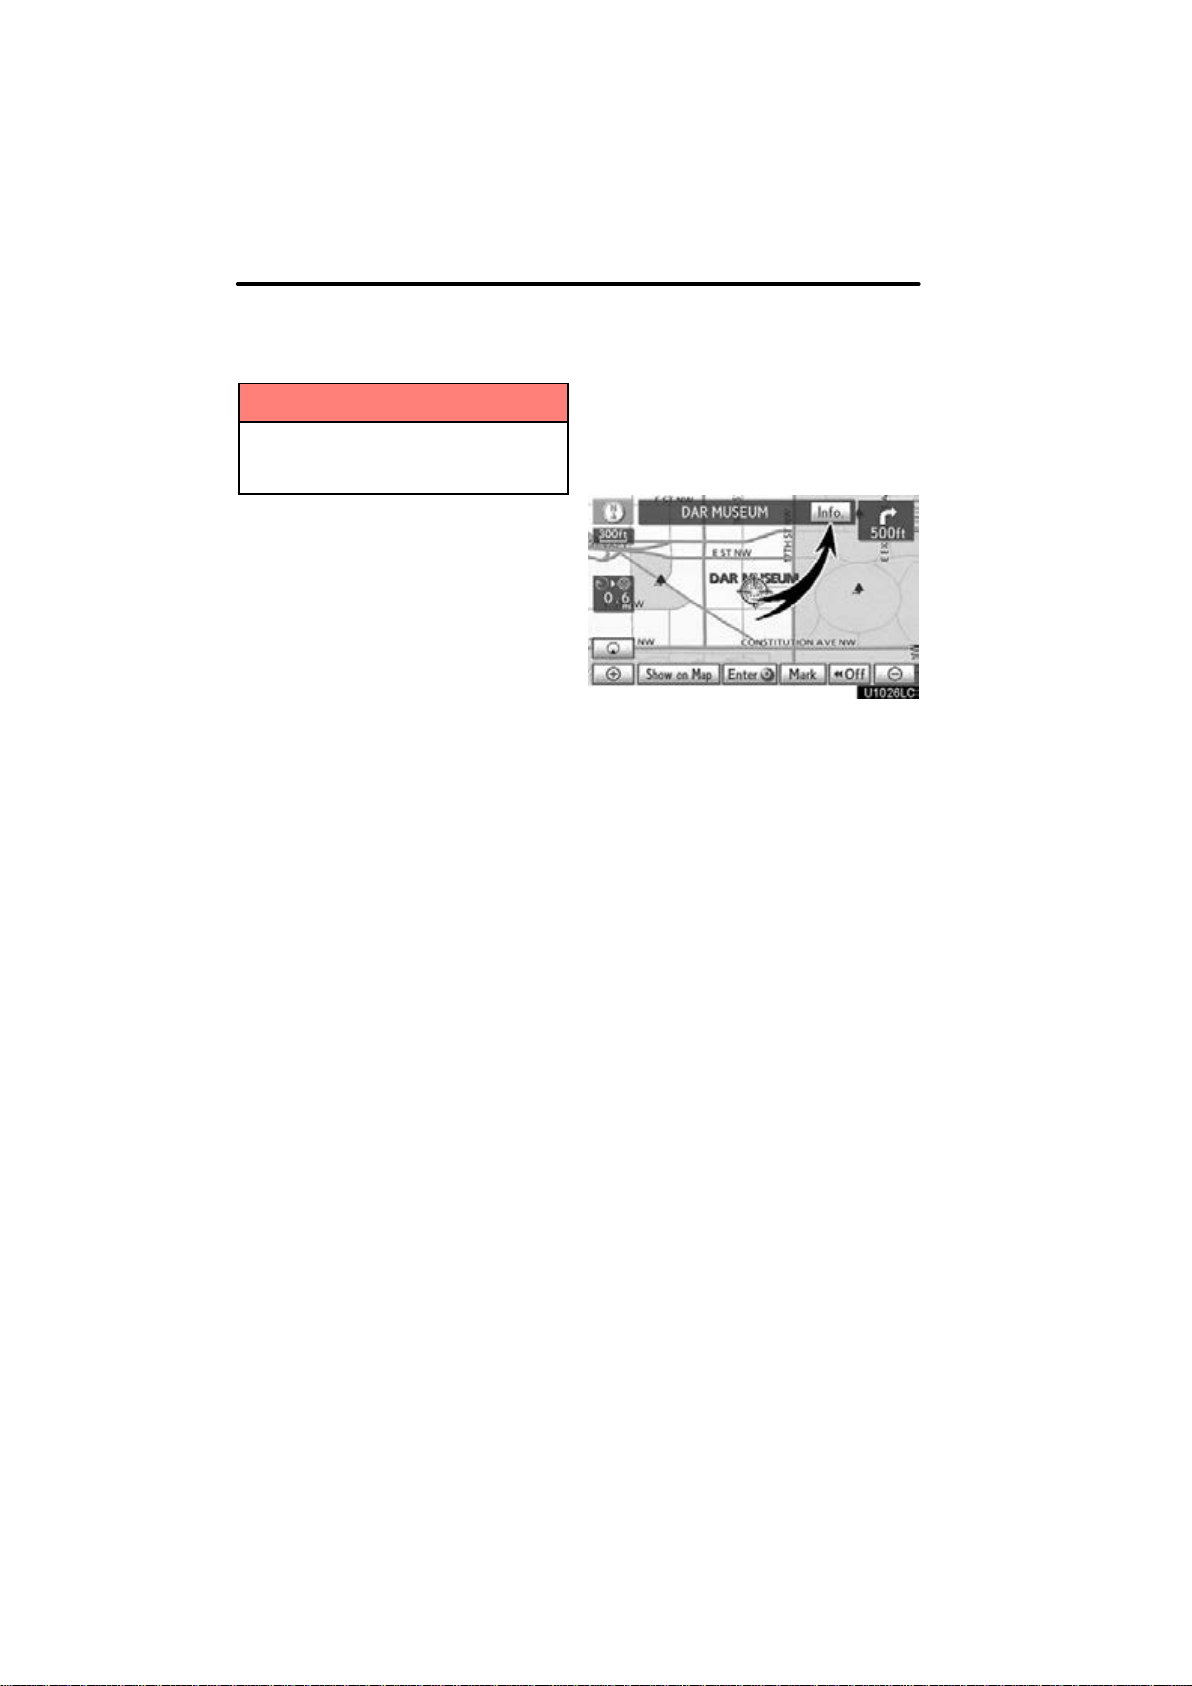
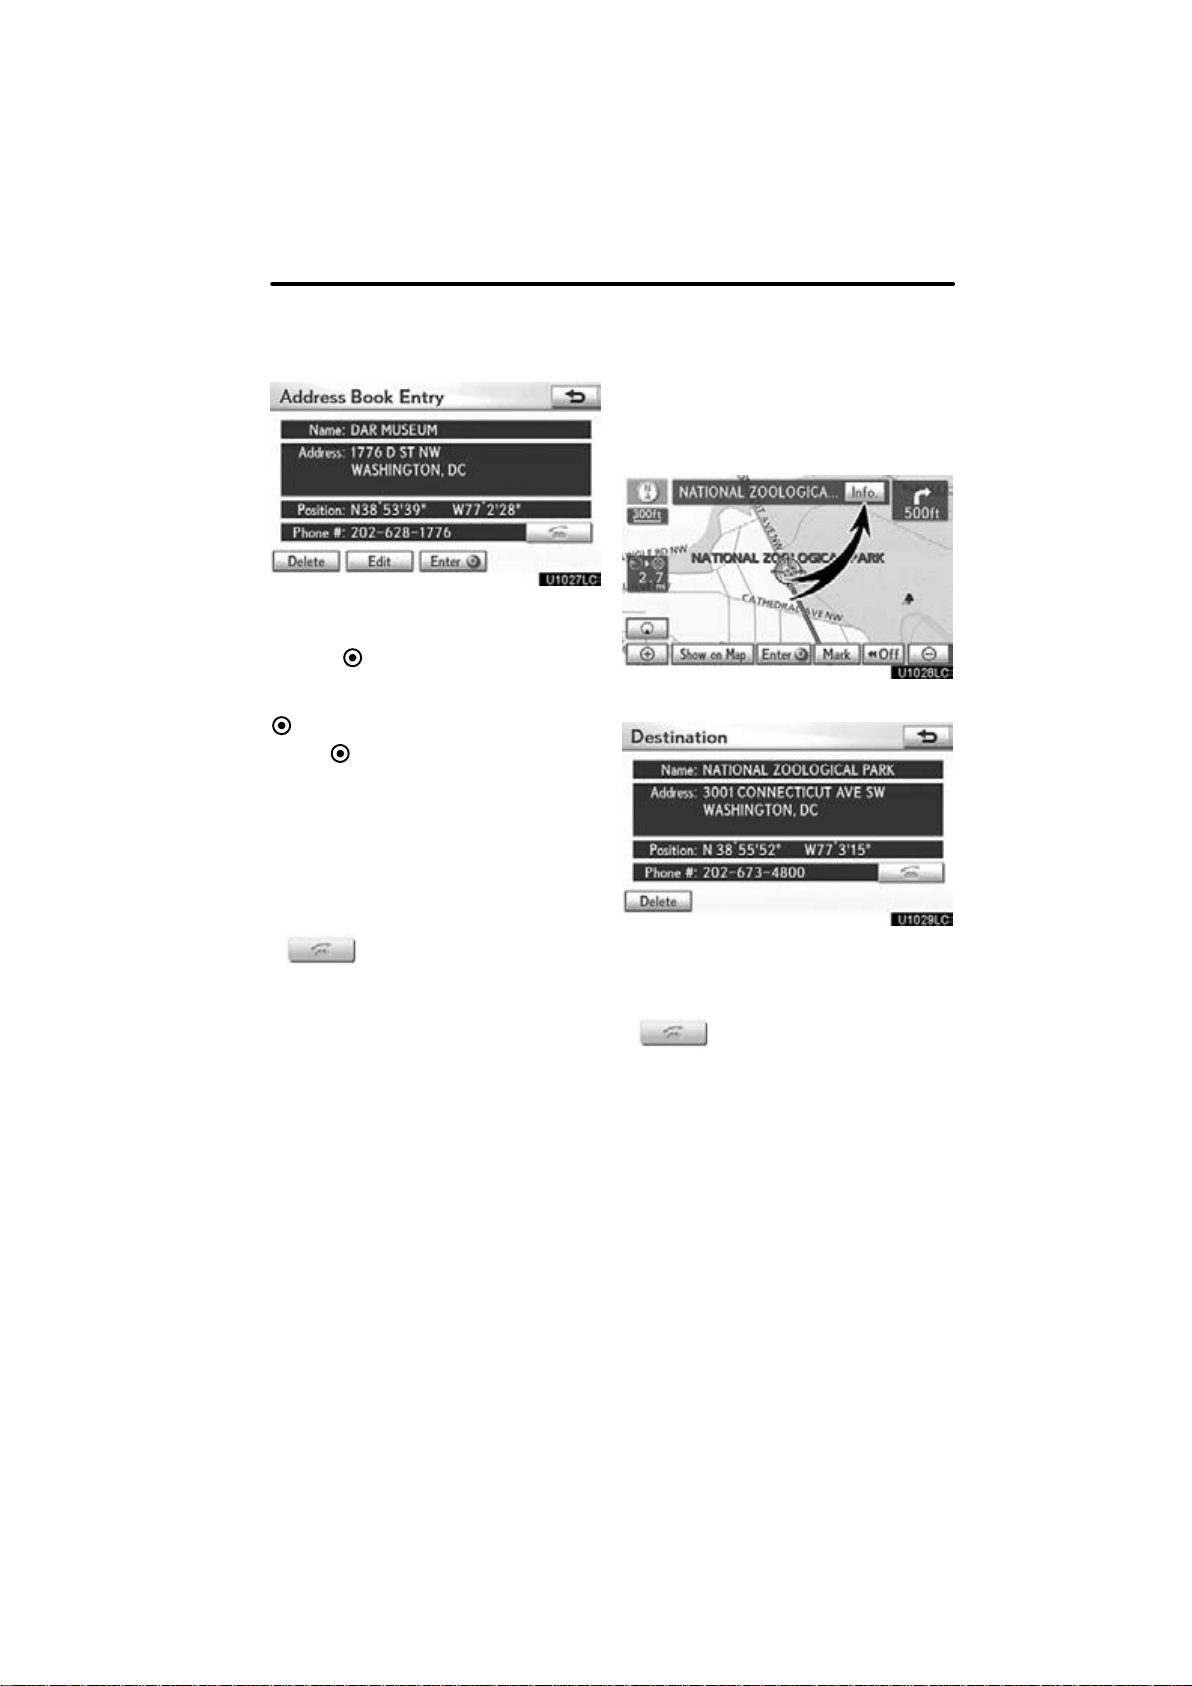
To see information about the icon
where the cursor is set
To display information about an icon, set
the cursor on it.
POI INFORMATION
When the cursor is set on a POI icon, the
name and “Info.” are displayed at the top
of the screen.
Select “Info.”.
Information such as the name, address,
and phone number are displayed.
If “Enter
cursor is set as a destination.
If there is already a set destination, “Go to
” and “Add to Route” are displayed.
“Go to
tions and set a new one.
“Add to Route”: To add a destination.
To register this POI as an address book
entry, select “Mark”. (See page 123.)
If
phone number can be called.
” is selected, the position of the
”: To delete the existing destina-
is selected, the registered tele-
41
Page 14
NAVIGATION SYSTEM: BASIC FUNCTIONS
INFORMATION
The desired Point of Interest can be
displayed on the map screen. (See
“ — Display POI icons” on page 106.)
ADDRESS BOOK ENTRY
INFORMATION
When the cursor is set on an address book
entry icon, the name and “Info.” are displayed at the top of the screen.
Select “Info.”.
42
Page 15
NAVIGATION SYSTEM: BASIC FUNCTIONS
Information such as the name, address,
and phone number are displayed.
If “Enter
cursor is set as a destination.
If there is already a set destination, “Go to
” and “Add to Route” are displayed.
“Go to
tions and set a new one.
“Add to Route”: To add a destination.
To edit an address book entry, select
“Edit”. (See “(b) Editing address book entries” on page 124.)
To delete an address book entry, select
“Delete”.
” is selected, the position of the
”: To delete the existing destina-
DESTINATION INFORMATION
When the cursor is set on a destination
icon, the name and “Info.” are displayed
on the top of the screen.
Select “Info.”.
If
phone number can be called.
is selected, the registered tele-
Information such as the name, address,
and phone number are displayed.
To delete a destination, select “Delete”.
If
phone number can be called.
is selected, the registered tele-
43
Page 16

NAVIGATION SYSTEM: BASIC FUNCTIONS
— Switching the screens
XM NavTraffic TEXT INFORMATION
When you select the XM NavTraffic icon
on the map, the XM NavTraffic info. bar
will appear on the upper part of the screen.
Select “Info.”.
Traffic information is displayed on the
screen.
Select “Detail” to display detailed traffic
event information.
Any one of the screen configurations can
be selected .
1. Select this button to display the following screen.
2. To select the desired screen configuration, select one of the following buttons.
44
Page 17
NAVIGATION SYSTEM: BASIC FUNCTIONS
Depending on the conditions, certain
screen configuration buttons cannot be
selected.
:
To display the single map screen.
(See page 45.)
:
To display the dual map screen.
(See page 46.)
:
To display the compass mode
screen. (See page 46.)
:
To display the freeway screen.
(See page 92.)
:
To display the turn list screen.
(See page 94.)
:
To display the arrow screen. (See
page 94.)
:
To display the intersection guidance screen or the guidance
screen on the freeway. (See page
93.)
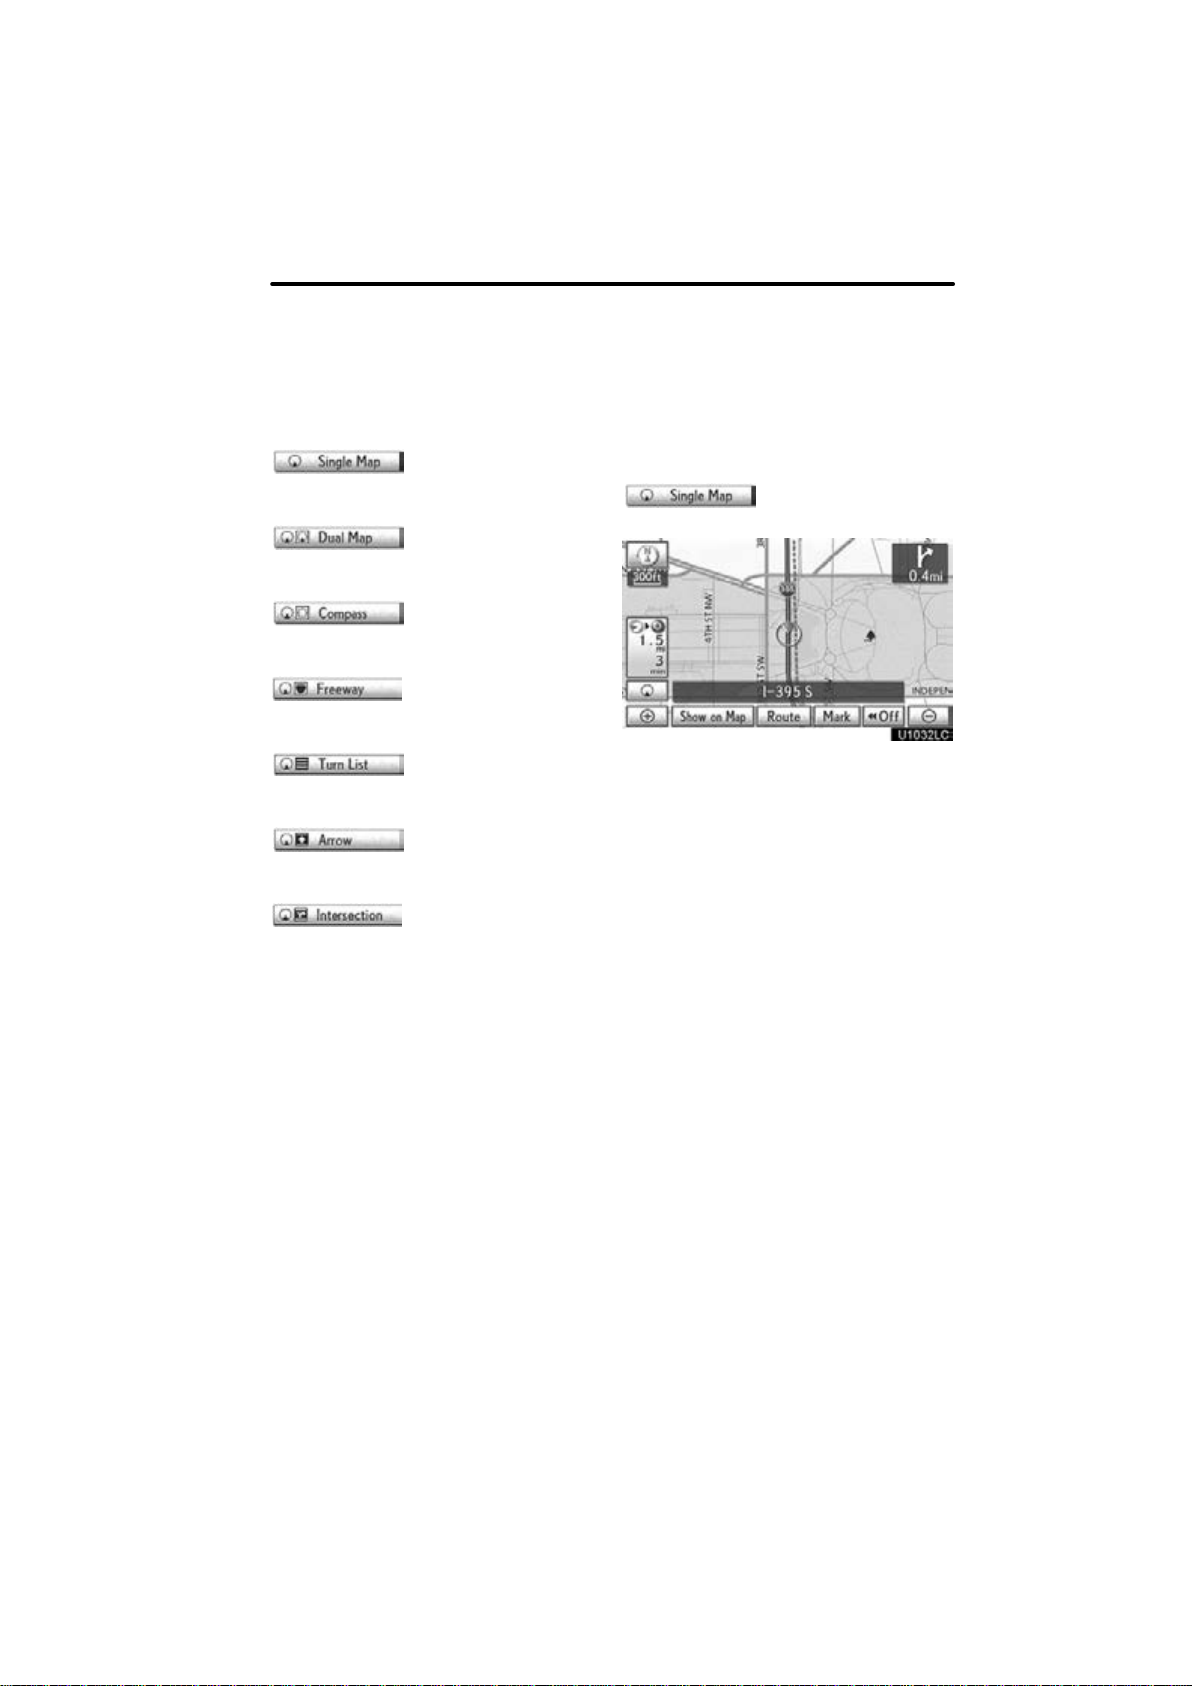
Screen configurations
SINGLE MAP
This is a regular map screen.
While on a different screen, selecting
will display the single
map screen.
The screen shows the single map.
45
Page 18
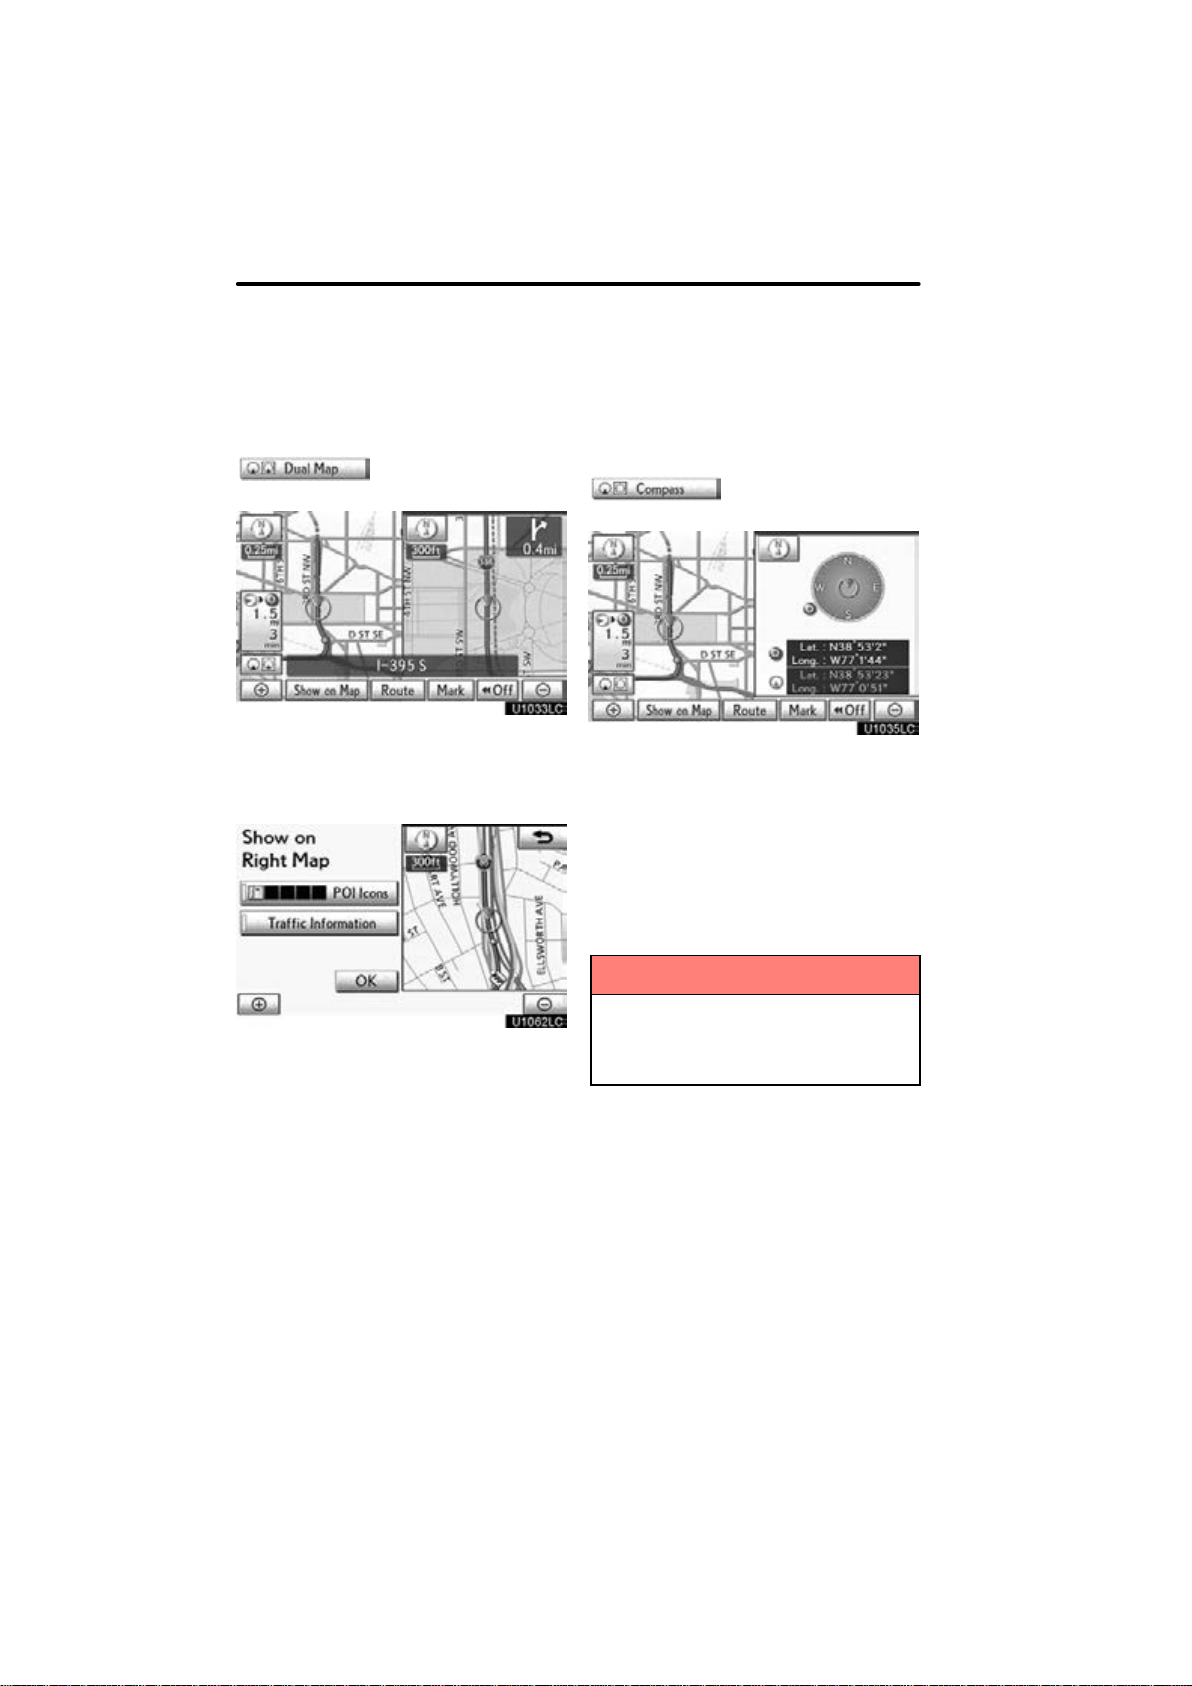
NAVIGATION SYSTEM: BASIC FUNCTIONS
DUAL MAP
A map can be displayed split in two.
While on a different screen, selecting
will display the dual map
screen.
The screen shows the dual map. The map
on the left is the main map.
The right side map can be edited by selecting any specific point on the right side map.
COMPASS MODE
Current vehicle position is indicated with a
compass.
While on a different screen, selecting
will display the compass
mode screen.
Information about the destination and current position, as well as a compass, is displayed on the screen.
The destination mark is displayed in the direction of the destination. When driving refer to the longitude and latitude coordinates, and the compass, to make sure that
your vehicle is headed in the direction of
the destination.
This screen can perform the following procedures:
1. Changing the map scale
2. Displaying the POI icon
3. Show XM NavTraffic Info. (See page
112. )
4. Changing the orientation of the map
Select “OK” when you complete editing.
The screen returns to the dual map screen.
46
INFORMATION
When the vehicle travels out of the
coverage area, the guidance screen
changes to the compass mode
screen.
Page 19

NAVIGATION SYSTEM: BASIC FUNCTIONS
— Map scale
— Foot print map
Select or to change the scale
of the map display. The scale bar and indicator at the bottom of the screen indicates
the map scale menu. The scale range is
150 feet (50 m) to 250 miles (400 km).
For the area which is covered by the foot
print map (Some areas in the following
cities: Detroit, Chicago, N.Y., L.A), you can
switch to the foot print map on a scale of 75
feet (25 m).
To switch to the foot print map
changes into when the map
is scaled down to 150 feet (50 m).
Select
changes normally. By continuing to select
the button, the scale bar changes smoothly.
The scale of the map display can be
changed by selecting the scale bar directly. It is not available while driving.
The map scale is displayed under the
north−up symbol or heading−up symbol at
the top left of the screen.
Push the “Ɯ” button on the Remote Touch
to zoom in on the map screen and “Ɲ” to
zoom out.
or until the scale bar
INFORMATION
When the map scale is at the maximum range of 250 miles (400 km),
is not shown. When the map
scale is at the minimum range of 150
feet (50 m), is not shown. In
areas where the foot print map is
available the map scale changes from
to when at the minimum
range.
To display the foot print map, select
.
To delete the foot print map display, select
.
INFORMATION
If the map or the current position is
moved to the area which is not covered by the foot print map, the
screen scale automatically
changes to 150 feet (50 m).
On the foot print map, a one way
street is displayed by .
It is not possible to perform scroll-
ing on the foot print map while driving.
47
Page 20
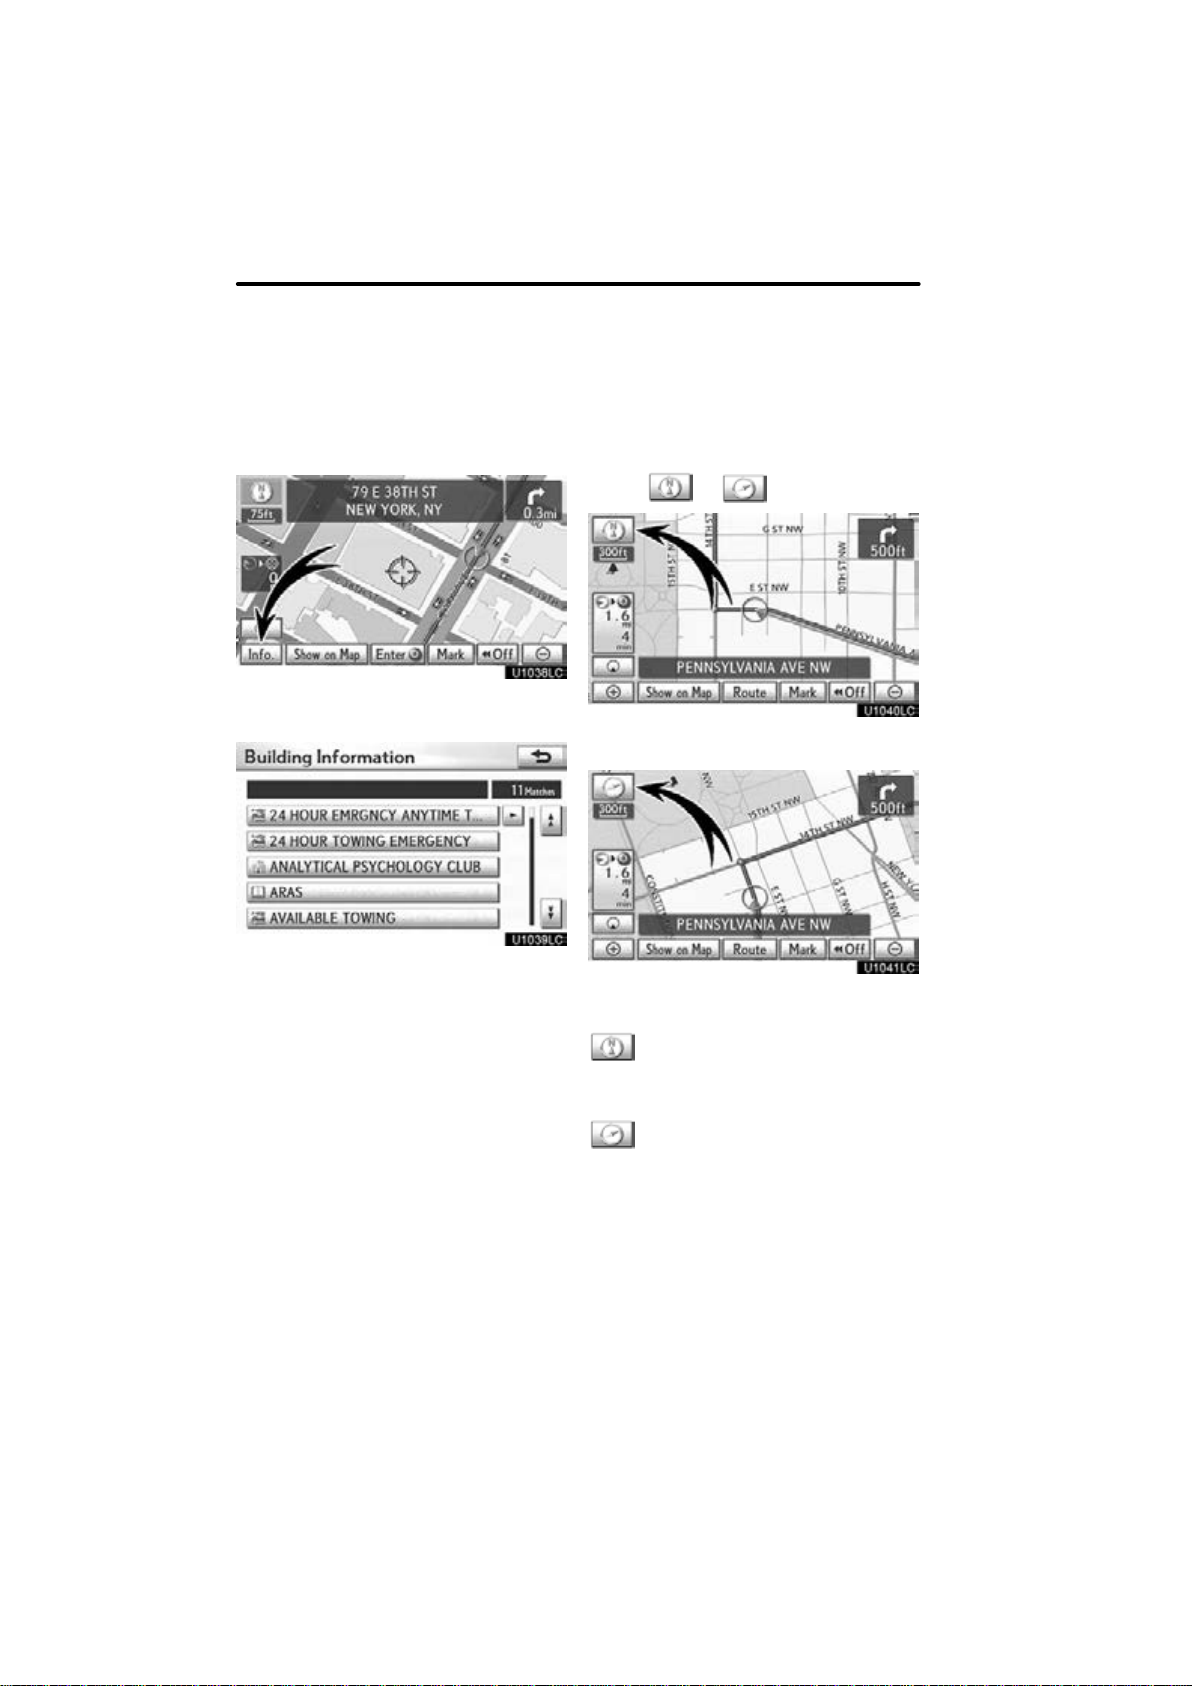
NAVIGATION SYSTEM: BASIC FUNCTIONS
— Orientation of the map
To display building information
Information is available only for buildings
for which information is recorded on the
map disc.
The orientation of the map can be changed
from North−up to Heading−up by selecting
the orientation symbol at the top left of the
screen.
Select “Info.” while the foot print map is
displayed.
Details of POIs in some buildings may be
displayed.
For detailed POI information, select the
building name. You can see details of the
selected POIs.
Select
North−up screen
Heading−up screen
Regardless of the direction of vehicle travel, North is always up.
or .
North−up symbol
Heading−up symbol
48
The direction of vehicle travel is always up.
A red arrow indicates North.
Page 21
NAVIGATION SYSTEM: BASIC FUNCTIONS
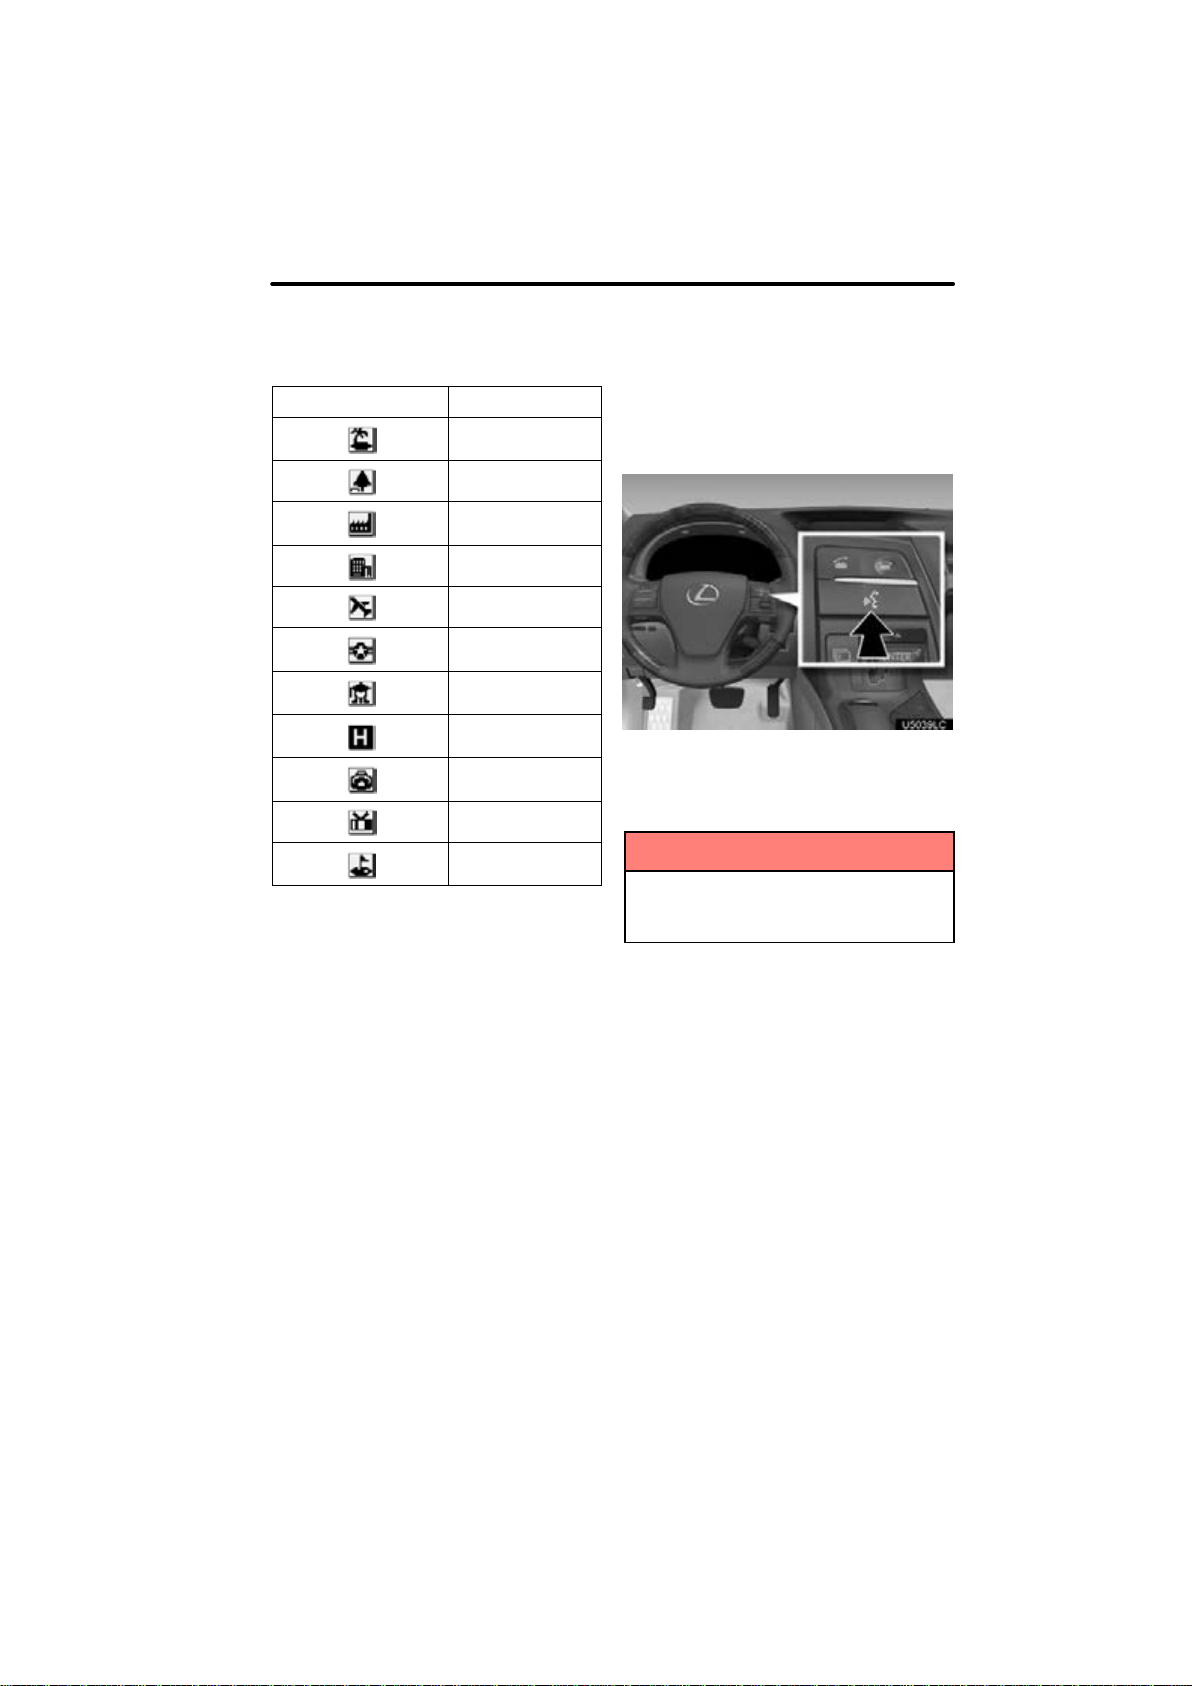
— Standard map icons
Speech command system—
Icon Name
Island
Park
Industry
Business facility
Airport
Military
University
Hospital
Stadium
Shopping mall
Golf
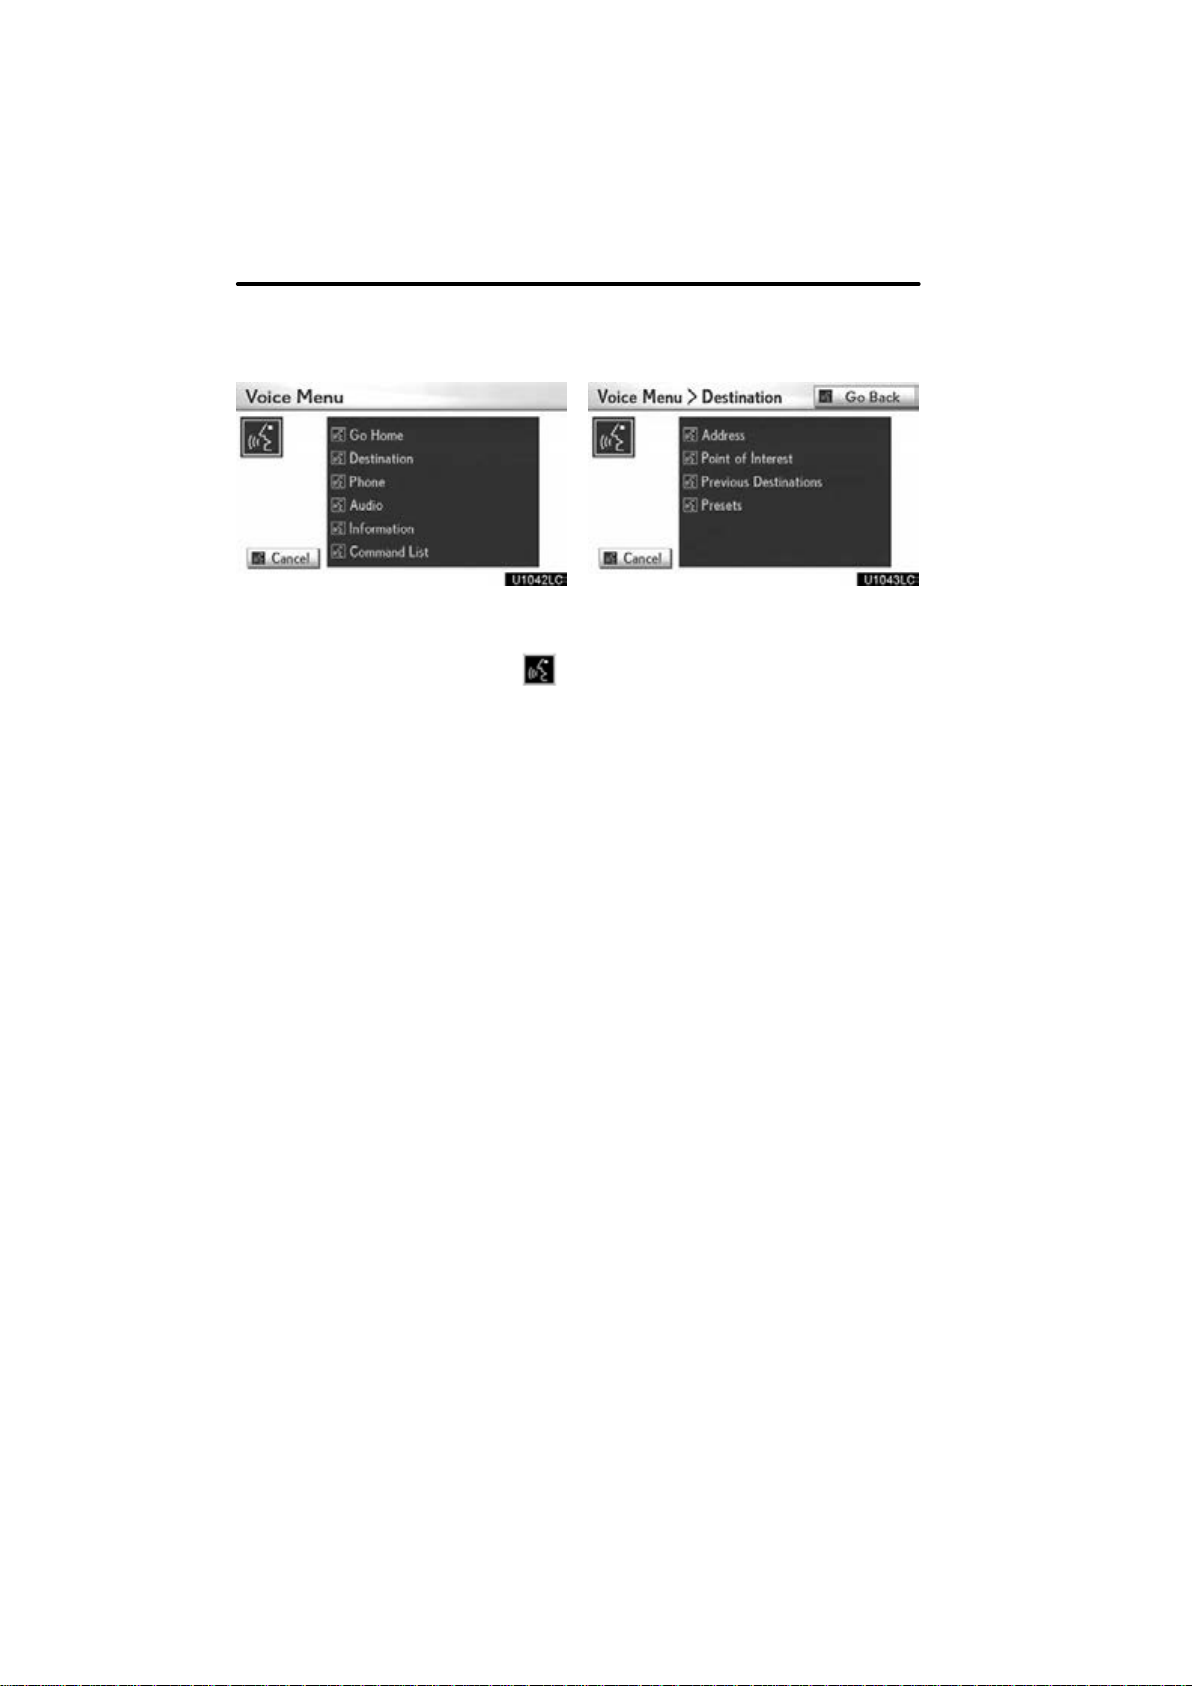
The speech command system enables
you to operate the navigation system, audio system and hands−free system by giving a command.
1. Push the talk switch.
After a beep sounds, the “Voice Menu”
screen is displayed.
INFORMATION
Voice guidance for the speech command system can be skipped by
pushing the talk switch.
49
Page 22
NAVIGATION SYSTEM: BASIC FUNCTIONS
2. After a beep sounds, say the command of your choice.
Speech commands are marked with
Some commonly used commands are displayed on the screen. Speak the commands as displayed on the screen.
If you want to check the all command list,
say “Command list” to display the command list screen. (See “—Command list”
on page 54.)
3. Following voice guidance, say the
command displayed on the screen.
If a desired outcome is not shown, or if no
.
choices are available, say “Go back” or
select “Go Back” to return to the previous
screen.
To cancel speech command recognition,
say “Cancel”, select “Cancel”, or push
and hold the talk switch.
If the navigation system does not respond
or the confirmation screen does not disappear, please push the talk switch and try
again.
If a speech command cannot be recognized within 6 seconds, the voice guidance
system will say “Pardon?” (“Command not
recognized.” will be displayed on the
screen) and speech command reception
will restart.
If a speech command cannot be recognized two consecutive times, the voice
guidance system will say “Paused. To restart voice recognition, push the talk
switch.”, then be suspended.
50
Page 23

NAVIGATION SYSTEM: BASIC FUNCTIONS
Microphone
It is unnecessary to speak directly into
the microphone when giving a command.
INFORMATION
Wait for the confirmation beep be-
fore speaking a command.
Voice commands may not be rec-
ognized if :
Spoken too quickly
Spoken at a low or high volume
The windows or sunroof are open
Passengers are talking while
voice commands are spoken
The air conditioning speed is set
high
The command is not correct or
clear.
Note that certain words, accents,
or speech patterns may be difficult for the system to recognize.
There are some noises such as
wind noise, etc.
Speech command example: Search-
ing for a route to your home.
1. Push the talk switch.
2. Say “Go home”.
If a home address is not registered, the
voice guidance system will say “Your
home is not set” and you will be prompted
to enter a home address. (See page 117.)
When the speech command is recognized, a map of the area around your home
is displayed.
3. Select “Enter” or say “Enter”, and
the system starts searching for a route
to your home.
To return to the “Voice Menu” screen, say
“Go back” or select “Go Back”.
Select “Cancel” or say “Cancel”, and the
speech command system will be canceled.
51
Page 24

NAVIGATION SYSTEM: BASIC FUNCTIONS
— Natural speech
information (English only)
Due to natural language speech recognition technology, this system enables recognition of a command when spoken naturally. However, the system cannot
recognize every variation of each command. In some situations, it is possible to
omit the command for the procedure and
directly state the desired operation.
Voice recognition top screen ex-
pression examples
Command
Go Home Take me home.
Destination I’d like to set a des-
Phone I’d like to make a call.
Audio Audio menu, please.
Information Let me see the infor-
Command List Show me the voice
Expression examples
Let’s go home.
tination.
I need to use the
phone.
Bring up the phone
menu.
mation menu.
Give us the information menu, please.
command list.
Expression examples for each func-
tion
In some situations, It is possible to omit a
command for each procedure and to say
the desired operation directly.
EXPRESSION EXAMPLES WITH THE
“Destination” SCREEN
Normal command recognition —
Destination>Point of Interest>Near
Here>Gas> The gas stations near the cur-
rent location will be listed.
Natural speech recognition —
Destination> What gas stations are
nearby?> The gas stations near the cur-
rent location will be listed.
INFORMATION
Natural speech example:
“Where’s the nearest Mexican restau-
rant?”
“Where is the closest ATM?”
52
Page 25
NAVIGATION SYSTEM: BASIC FUNCTIONS
EXPRESSION EXAMPLES WITH THE
“Phone Menu” SCREEN (when making
a call using a phonebook)
Normal command recognition —
Phone>Dial by Name>Bob>mobile> The
phone number will be displayed.
Natural speech recognition —
Phone>Call to Bob on his mobile.> The
phone number will be displayed.
INFORMATION
Natural speech example:
“Get me Rob Brown on the phone.”
“Please place a call to John on his
mobile.”
EXPRESSION EXAMPLES WITH THE
“Phone Menu” SCREEN (when making
a call by saying a phone number)
Normal command recognition —
Phone>Dial by Number>123−456−789>
The phone number will be displayed.
Natural speech recognition —
Phone>Call to 123−456−789.> The
phone number will be displayed.
EXPRESSION EXAMPLES WITH THE
“Information Menu” SCREEN
Normal command recognition —
Information>XM Nav Weather>Los Angeles, California> The weather informa-
tion will be displayed.
Natural speech recognition —
Information>Give me a weather report
for Los Angeles, California.> The
weather information will be displayed.
INFORMATION
Natural speech example:
“How about Detroit, Michigan?”
EXPRESSION EXAMPLES WITH THE
“Audio Menu” SCREEN (when the audio source is in satellite radio mode)
Normal command recognition —
Audio>Select Channel Number>90> The
channel will be changed to the one selected.
Natural speech recognition —
Audio>Play channel ninety, please> The
channel will be changed to the one selected.
INFORMATION
The above mentioned command for
making a call can also be recognized
on the voice recognition top screen.
Natural speech example:
“I’d like to place a call to
123−456−789.”
“I want to buzz 123−456−789, please.”
INFORMATION
Natural speech example:
“Switch the channel to XM one seven-
ty five.”
VOICE RECOGNITION TOP SCREEN
EXPRESSION EXAMPLES
Normal command recognition —
Command List>Dual Map> The map will
be displayed in dual map mode.
Natural speech recognition —
Switch to dual map mode.> The map will
be displayed in dual map mode.
53
Page 26
NAVIGATION SYSTEM: BASIC FUNCTIONS
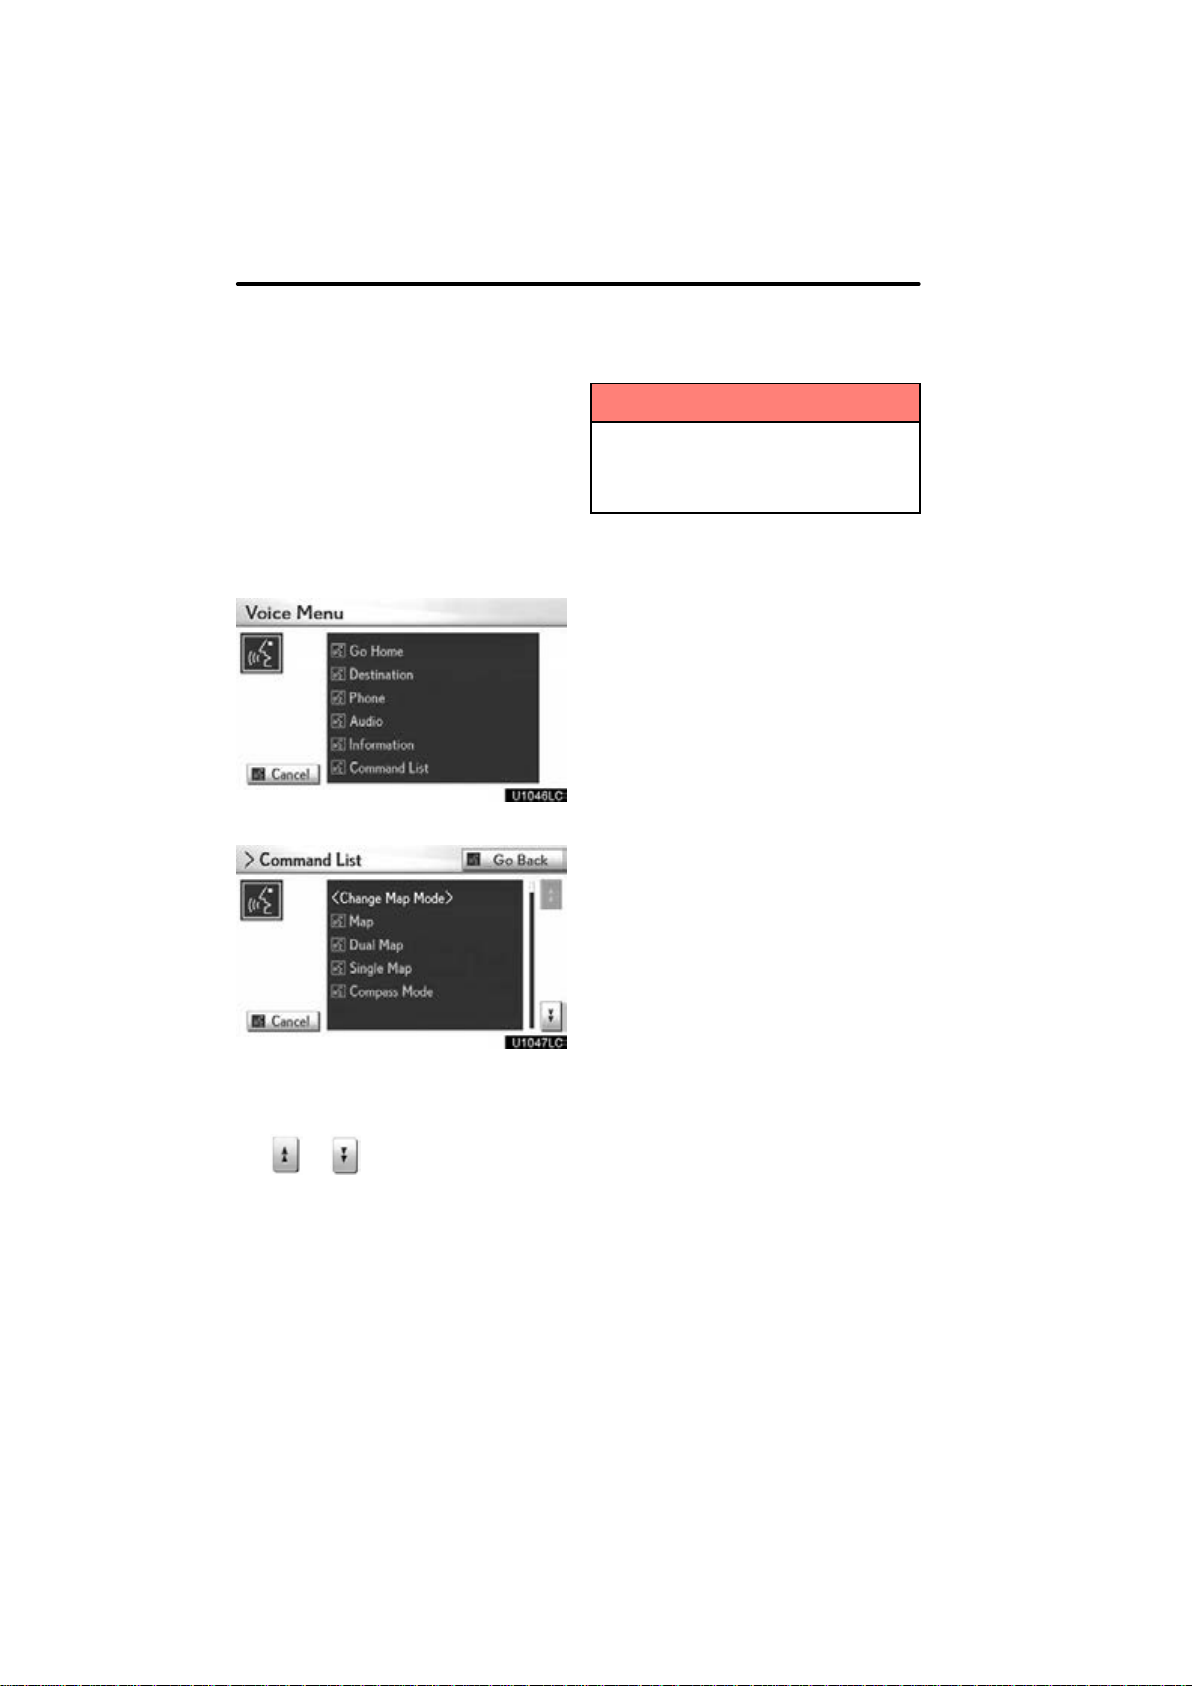
— Command list
The system has a voice recognition command list. You can operate the voice
recognition system by saying any command from the displayed command list.
However, the XM NavTraffic or XM
NavWeather commands cannot be used
where the XM NavTraffic or XM Nav-
Weather service is not available. (For
details, see “XM NavTraffic” page 112.)
1. Push the talk switch.
2. Say “Command list”.
INFORMATION
When the “Voice Menu” screen is displayed, all the commands in the voice
recognition command list can be recognized.
3. Say the command of your choice to
operate the system.
To confirm commands on the screen, se-
lect
mand list. This function is available only
when the vehicle is not moving.
or to scroll through the com-
54
Page 27
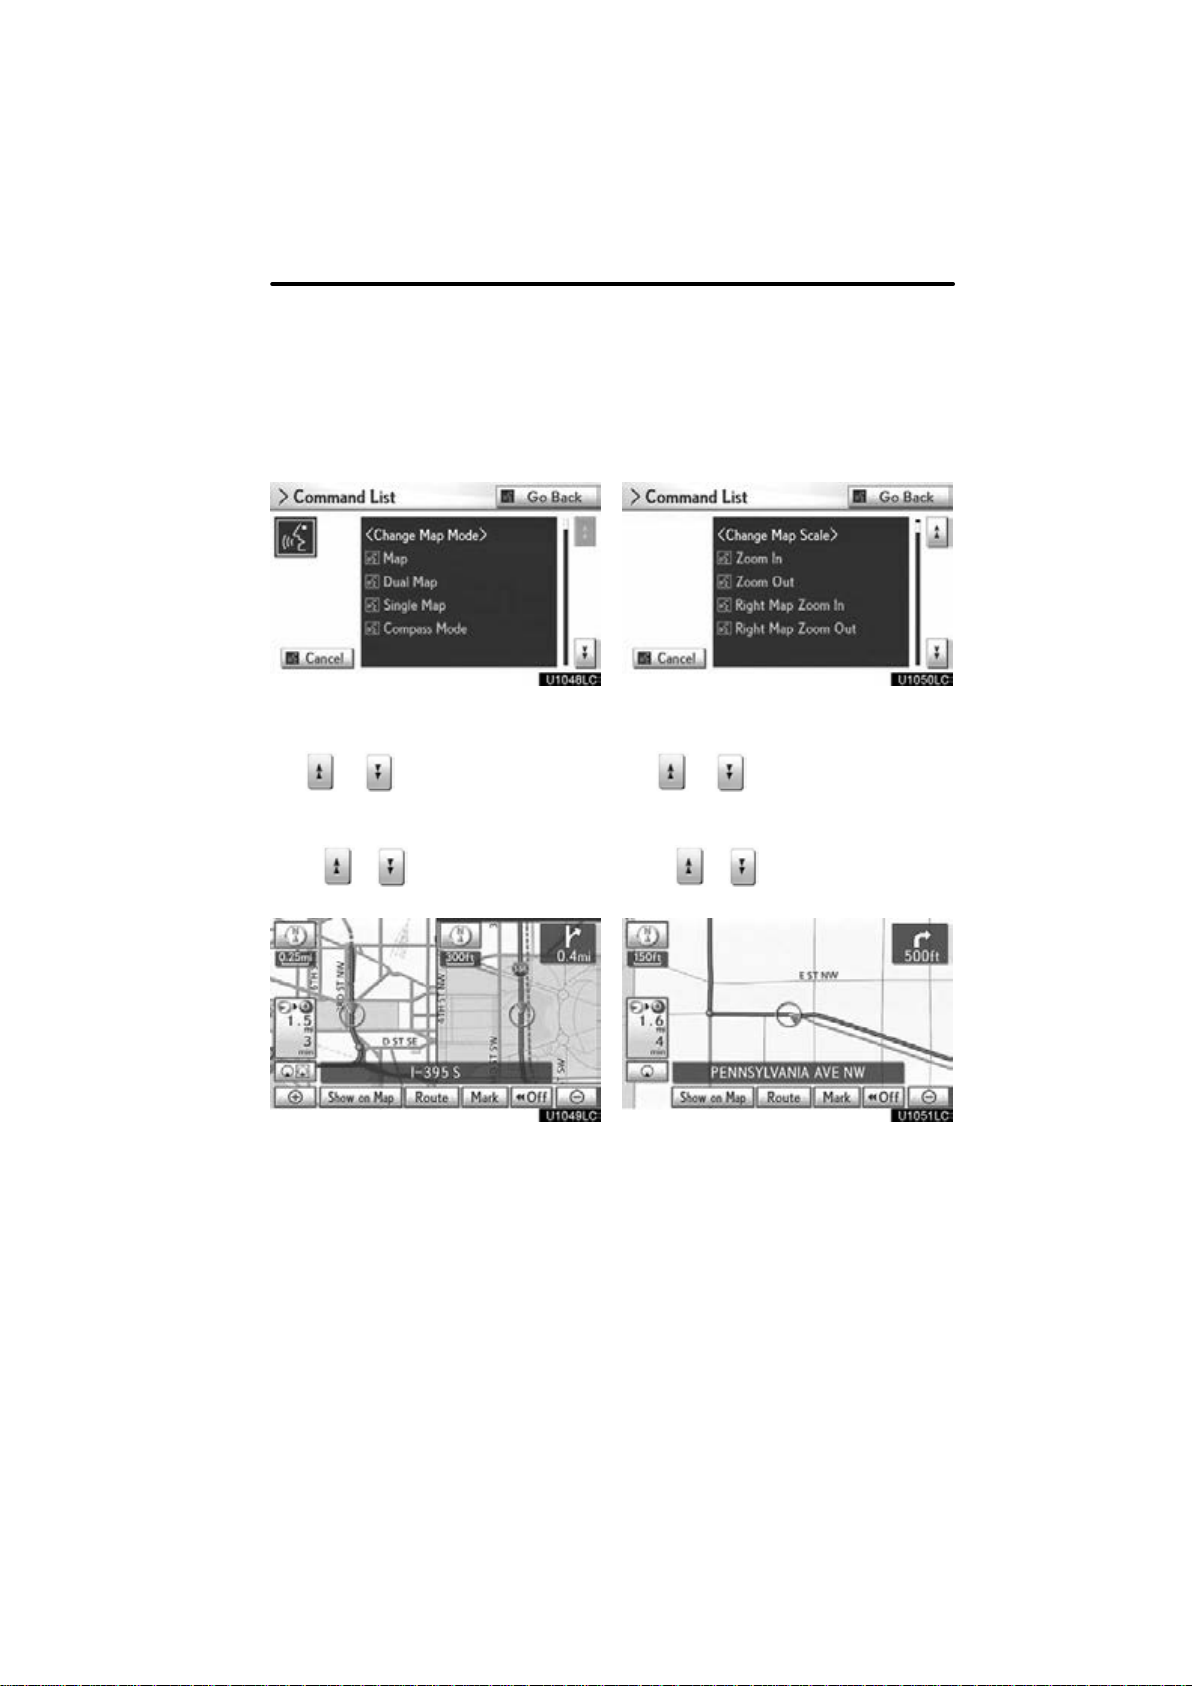
Speech command example: Changing map screen
1. Push the talk switch.
2. Say “Command list”.
NAVIGATION SYSTEM: BASIC FUNCTIONS
Speech command example: Chang-
ing map scale
1. Push the talk switch.
2. Say “Command list”.
3. Say “Dual map”.
To confirm commands on the screen, se-
lect
mand list. This function is available only
when the vehicle is not moving.
When
switch again and say the command.
The screen shows the dual map.
or to scroll through the com-
or is selected, push the talk
3. Say “Zoom in” or “Zoom out”.
To confirm commands on the screen, se-
lect
mand list. This function is available only
when the vehicle is not moving.
When
switch again and say the command.
The scale of the map display is changed.
or to scroll through the com-
or is selected, push the talk
55
Page 28

NAVIGATION SYSTEM: BASIC FUNCTIONS
COMMAND LIST
Change map mode
Command
Map
Dual map
Single map
Compass mode
Change map scale
Command
Zoom in
Zoom out
Right map zoom in
Right map zoom out
Change map orientation
Command
North up
Heading up
Map direction
Right map north up
Right map heading up
Right map direction
Change guidance mode
Command
Arrow mode
Turn list mode
Action
Shows current potion map.
Changes map to dual mode.
Changes map to single mode.
Changes map to compass mode.
Action
Zoom in.
Zoom out.
Zooms right map in.
Zooms right map out.
Action
Changes map bearing to north up.
Changes map bearing to heading up.
Changes map bearing to another direction.
Changes right map bearing to north up.
Changes right map bearing to heading
up.
Changes right map bearing to another
direction.
Action
Changes guidance screen to arrow
mode.
Changes guidance screen to turn list
mode.
56
Page 29

Freeway mode
Intersection mode
Command
Previous start point
Command
Mark this point
Command
Quick route
Short route
Alternate route
Detour
Detour entire route
Command
Route overview
Next destination map
First destination map
Second destination map
Third destination map
Fourth destination map
Fifth destination map
Final destination map
NAVIGATION SYSTEM: BASIC FUNCTIONS
Change guidance mode
Changes guidance screen to freeway
mode.
Changes guidance screen to Intersection mode.
Set a destination
Action
Calculates route to previous start point.
Save a point on the map
Action
Marks the point on the map.
Change route
Action
Changes route to quick route.
Changes route to short route.
Changes route to alternate route.
Calculates detour route.
Calculates detour entire route.
Review route
Action
Shows entire route.
Shows position of next destination.
Shows position of first destination.
Shows position of second destination.
Shows position of third destination.
Shows position of fourth destination.
Shows position of fifth destination.
Shows position of final destination.
57
Page 30

NAVIGATION SYSTEM: BASIC FUNCTIONS
Delete destination
Command
Delete next destination
Delete final destination
Delete all destinations
Guidance options
Command
Pause guidance
Resume guidance
Repeat guidance
Louder
Softer
Traffic information
Command
Traffic information
Show POI icons
Command
GAS
PARKING
AUTO SERVICE & MAINT.
DEALERSHIPS
LEXUS
TOYOTA
PARTS STORES
ROADSIDE ASSISTANCE
AUTOMOBILE CLUBS
CAR RENTAL AGENCIES
CAR WASHES
OTHER AUTOMOTIVE
DINING
Deletes position of next destination.
Deletes position of final destination.
Deletes position of all destination.
Pauses the guidance.
Resumes the guidance.
Repeat voice guidance.
Turns volume up 1 level.
Turns volume down 1 level.
Displays traffic information.
Displays gas station icons.
Displays parking icons.
Displays service & maintenance icons.
Displays DEALERSHIP icons.
Displays LEXUS dealership icons.
Displays TOYOTA dealership icons.
Displays PARTS STORE icons.
Displays ROADSIDE ASSISTANCE
icons.
Displays AUTOMOBILE CLUB icons.
Displays CAR RENTAL AGENCY icons.
Displays car wash icons.
Displays other automotive store icons.
Displays dining icons.
Action
Action
Action
Action
58
Page 31

Command
AMERICAN
BAKERIES & DELIS
BARBECUE & GRILL
CAJUN/CARIBBEAN
CHINESE
COFFEE HOUSES
FAST FOOD
FRENCH
GREEK
INDIAN
ICE CREAM & CANDY
ITALIAN
JAPANESE
KOREAN
LATIN/S.AMERICAN
MIDDLE EASTERN
MEXICAN
PIZZA
SEAFOOD
SPANISH
STEAK HOUSES
THAI
VIETNAMESE
OTHER RESTAURANTS
GROCERIES
SHOPPING MALLS
CONVENIENCE STORES
NAVIGATION SYSTEM: BASIC FUNCTIONS
Show POI icons
Action
Displays American restaurant icons.
Displays BAKERY AND DELI icons.
Displays BARBECUE & GRILL restaurant icons.
Displays Caribbean restaurant icons.
Displays Chinese restaurant icons.
Displays COFFEE HOUSE icons.
Displays fast food icons.
Displays French restaurant icons.
Displays Greek restaurant icons.
Displays Indian restaurant icons.
Displays ICE CREAM & CANDY icons.
Displays Italian restaurant icons.
Displays Japanese restaurant icons.
Displays Korean restaurant icons.
Displays Latin and South American restaurant
Displays MIDDLE EASTERN restaurant
icons.
Displays Mexican restaurant icons.
Displays PIZZERIA icons.
Displays seafood restaurant icons.
Displays SPANISH restaurant icons.
Displays STEAK HOUSE icons.
Displays Thai restaurant icons.
Displays Vietnamese restaurant icons.
Displays other restaurant icons.
Displays grocery store icons.
Displays shopping mall icons.
Displays convenience store icons.
59
Page 32

NAVIGATION SYSTEM: BASIC FUNCTIONS
Show POI icons
Command
HOME IMPROVEMENT
OFFICE & ELECTRONICS
RETAIL & DEPT STORES
DEPARTMENT STORES
BOOK STORES
CLOTHING & SHOES
HOBBIES & CRAFTS
JEWELRY
SPORTING EQUIPMENT
RECREATIONAL VEHICLES
OTHER RETAIL STORES
POLICE STATIONS
FIRE STATIONS
HOSPITALS
PHARMACIES
OTHER MED. FACILITIES
HOTELS
REST AREAS
AIRPORTS
BUS STATIONS
TRAIN STATIONS
PORTS & FERRIES
TAXIS & SHUTTLES
FULL−SERVICE BANKS
ATMs
ATTRACTIONS
Displays HOME IMPROVEMENT icons.
Displays OFFICE AND ELECTRONICS
icons.
Displays RETAIL AND DEPARTMENT
STORE
Displays department store icons.
Displays BOOK STORE icons.
Displays CLOTHING & SHOES icons.
Displays HOBBY & CRAFT icons.
Displays JEWELRY icons.
Displays SPORTING EQUIPMENT
icons.
Displays RECREATIONAL VEHICLE
icons.
Displays other retail store icons.
Displays police station icons.
Displays Fire station icons.
Displays hospital icons.
Displays pharmacy icons.
Displays OTHER MEDICAL FACILITY
icons.
Displays hotel icons.
Displays rest area icons.
Displays airport icons.
Displays bus station icons.
Displays train station icons.
Displays PORTS & FERRY icons.
Displays TAXIS & SHUTTLE icons.
Displays FULL−SERVICE BANKS icons.
Displays ATM icons.
Displays attractions icons.
Action
60
Page 33

Command
ENTERTAINMENT
TOURIST INFORMATION
PARKS & BEACHES
SPORTS & FITNESS
BOWLING CENTERS
GOLF COURSES
HORSE RACING
HEALTH & FITNESS CLUBS
MARINAS
MOTOR SPORTS
SKI RESORTS
SPORTS COMPLEXES
NIGHTLIFE
PERFORMING ARTS
CITY CENTERS
GOVERNMENT
SCHOOLS
DRY CLEANERS
FLORISTS
LIBRARIES
PERSONAL GROOMING
SHIPPING & COPIES
POST OFFICES
OTHER SERVICES
Command
Clear all icons
NAVIGATION SYSTEM: BASIC FUNCTIONS
Show POI icons
Action
Displays entertainment icons.
Displays tourist information icons.
Displays PARK & BEACH icons.
Displays SPORTS & FITNESS icons.
Displays bowling icons.
Displays golf course icons.
Displays horse racing icons.
Displays health and fitness club icons.
Displays marina icons.
Displays motor sports icons.
Displays ski resort icons.
Displays sports complex icons.
Displays nightlife icons.
Displays PERFORMING ART icons.
Displays city center icons.
Displays government icons.
Displays school icons.
Displays dry cleaning icons.
Displays florist icons.
Displays library icons.
Displays PERSONAL GROOMING
icons.
Displays SHIPPING & COPY icons.
Displays post office icons.
Displays OTHER SERVICE icons.
Delete POI icons
Action
Deletes all POI icons.
61
Page 34

NAVIGATION SYSTEM: BASIC FUNCTIONS
Select audio mode
Command
Radio
AM
FM
FM1
FM2
Satellite radio
Satellite radio 1
Satellite radio 2
Satellite radio 3
CD
DVD
CD changer
DVD changer
Auxiliary
Bluetooth audio
iPod
USB audio
Command
Audio on / Audio off
Radio operation
Command
Seek up
Seek down
Type up
Type down
Selects audio mode to radio.
Selects audio mode to AM.
Selects audio mode to FM.
Selects audio mode to FM1.
Selects audio mode to FM2.
Selects audio mode to satellite radio.
Selects audio mode to satellite radio 1.
Selects audio mode to satellite radio 2.
Selects audio mode to satellite radio 3.
Selects audio mode to CD.
Selects audio mode to DVD.
Selects audio mode to CD changer.
Selects audio mode to DVD changer.
Selects audio mode to auxiliary.
Selects audio mode to Bluetooth audio.
Selects audio mode to iPod.
Selects audio mode to USB audio.
Audio On/Off
Turns audio system on and off.
Seeks up for a radio station.
Seeks down for a radio station.
Seeks up for program type.
Seeks down for program type.
Action
Action
Action
62
Page 35

Command
Track up
Track down
Previous track
Disc up
Disc down
Command
Automatic climate control
Raise temperature
Lower temperature
?? degrees (?? is 65 to 85)
Command
Dial by number
Dial by name
Select phone
NAVIGATION SYSTEM: BASIC FUNCTIONS
Disc operation
Action
Tracks up for a track number.
Tracks down for a track number.
Selects previous track.
Disc up.
Disc down.
Climate command
Action
Turns air conditioner on and off.
Turns temperature up.
Turns temperature down.
Selects temperature from 65 to 80 degrees.
Phone
Action
Calls by phone number.
Calls by giving a voice tag in the
phonebook.
Selects phone.
63
Page 36

NAVIGATION SYSTEM: BASIC FUNCTIONS
INFORMATION
The function that cannot be used
according to the vehicle is provided.
Voice recognition language can be
changed. (See “ Selecting a language” on page 318.)
64
Page 37

NAVIGATION SYSTEM: DESTINATION SEARCH
SECTION 2
NAVIGATION SYSTEM: DESTINATION SEARCH
Navigation system: destination search
Destination search 66. . . . . . . . . . . . . . . . . . . . . . . . . . . . . . . . . . . .
Selecting the search area 66. . . . . . . . . . . . . . . . . . . . . . . . . . . . .
Destination search by Home 68. . . . . . . . . . . . . . . . . . . . . . . . . . .
Destination search by Preset destinations 68. . . . . . . . . . . . . . .
Destination search by “Address” 69. . . . . . . . . . . . . . . . . . . . . . .
Destination search by “Point of Interest” 73. . . . . . . . . . . . . . . . .
Destination search by “Previous Destinations” 79. . . . . . . . . . .
Destination search by “Address Book” 80. . . . . . . . . . . . . . . . . .
Destination search by “Emergency” 80. . . . . . . . . . . . . . . . . . . . .
Destination search by “Intersection & Freeway” 81. . . . . . . . . .
Destination search by “Map” 84. . . . . . . . . . . . . . . . . . . . . . . . . . .
Destination search by “Coordinates” 85. . . . . . . . . . . . . . . . . . . .
Deleting set destinations 85. . . . . . . . . . . . . . . . . . . . . . . . . . . . . .
Starting route guidance 86. . . . . . . . . . . . . . . . . . . . . . . . . . . . . . . . .
65
Page 38

NAVIGATION SYSTEM: DESTINATION SEARCH
Destination search —
— Selecting the search area
Change the selected region in order to set
a destination from a different region by using “Address”, “Point of Interest” or “Intersection & Freeway”.
Push the “MENU” button and select
“Destination”.
1. Select “Search Area” to display a
map of the United States and Canada
divided into 12 regions. (For map data-
base information and updates, see “Map
database information and updates” on
page 395.)
You can use one of 10 different methods to
search your destination. (See pages 68
through 85.)
INFORMATION
When searching the destination, the
response to the screen button may be
slow.
66
2. Select one of “US1” through “CAN”
to select a region to search.
3. Select “OK” and the previous
screen returns.
Page 39

NAVIGATION SYSTEM: DESTINATION SEARCH
Button
“US1”
“US2”
“US3”
“US4”
“US5”
“US6”
“US7”
“US8”
U.S.A.
States included in the search
region
Idaho
Oregon
Washington
California
Nevada
Arizona
Colorado
Montana
New Mexico
Utah
Wyoming
Iowa
Kansas
Minnesota
Missouri
North Dakota
Nebraska
South Dakota
Oklahoma
Texas
Illinois
Indiana
Kentucky
Michigan
Ohio
Wisconsin
Arkansas
Alabama
Louisiana
Mississippi
Tennessee
Connecticut
Massachusetts
Maine
New Hampshire
New Jersey
New York
Rhode Island
Vermont
Washington, D.C.
Delaware
Maryland
“US9”
“US10”
Button
“CAN”
New Jersey
Pennsylvania
Virginia
West Virginia
Florida
Georgia
North Carolina
South Carolina
“HI” Hawaii
Provinces and regions included in the search region
All provinces and regions in
Canada included in this button.
Canada
67
Page 40

NAVIGATION SYSTEM: DESTINATION SEARCH
— Destination search by
— Destination search by
Home
1. Push the “MENU” button and select
“Destination”.
2. Select “Go Home”.
The screen changes and displays the map
location for home and the route preference. (See “Starting route guidance” on
page 86.)
If home has not been registered, a message will be displayed and the setting
screen will automatically appear.
To use this function, it is necessary to set
a “Home” address. (To register “Home”,
see page 117.)
INFORMATION
Guidance starts from the current vehicle position to your home if “OK” is
selected even while driving.
Preset destinations
1. Push the “MENU” button and select
“Destination”.
2. Select any of the preset destination
buttons on the “Destination” screen.
The screen changes and displays the map
location of the preset destination point and
the route preference. (See “Starting route
guidance” on page 86.)
If a preset destination point has not been
registered, a message will be displayed
and the setting screen will automatically
appear.
To use this function, it is necessary to set
“Preset Destinations”. (To register “Preset
Destinations”, see page 119.)
INFORMATION
Guidance starts from the current vehicle position to the preset destination point if “Go to ” is selected
even while driving.
68
Page 41

NAVIGATION SYSTEM: DESTINATION SEARCH
— Destination search by
“Address”
There are 2 ways to search a destination
by address.
(a) Search by city
(b) Search by street address
1. Push the “MENU” button and select
“Destination”.
2. Select “Address” on the “Destination” screen.
3. Select the button for the desired
method.
(a) Selecting a city to search
1. Push the “MENU” button and select
“Destination”.
2. Select “Address” on the “Destination” screen.
3. Select “City”.
4. Input a city name.
5. Select the button of the desired city
name from the displayed list.
69
Page 42

NAVIGATION SYSTEM: DESTINATION SEARCH
6. Input the street name and select
“OK”.
7. When the desired street name is
found, select the corresponding button.
The screen changes and displays the map
location of the selected destination and the
route preference. (See “Starting route
guidance” on page 86.)
8. Input a house number.
If the same address exists in more than
one city, the current screen changes to the
address list screen.
70
Page 43

NAVIGATION SYSTEM: DESTINATION SEARCH
SELECTING FROM THE LAST 5 CITIES
1. Select “Last 5 Cities”.
2. Select the button of the desired city
name.
If the navigation system has never been
used, this function will not be available.
The current screen changes to the screen
for inputting a street name. (See “(a) Selecting a city to search” on page 69.)
(b) Search by street address
1. Push the “MENU” button and select
“Destination”.
2. Select “Address” on the “Destination” screen.
3. Select “Street Address”.
4. Select numbers directly on the
screen to input a house number.
After inputting a house number, select
“OK” to display the screen for inputting a
street name.
5. Input the street name and select
“OK”.
71
Page 44

NAVIGATION SYSTEM: DESTINATION SEARCH
6. When the desired street name is
found, select the corresponding button.
The screen changes and displays the map
location of the selected destination and the
route preference. (See “Starting route
guidance” on page 86.)
If the same address exists in more than
one city, the current screen changes inputting the city name or to the address list
screen.
7. Input a city name.
8. Select the button of the desired city
name from the displayed list.
INFORMATION
You can search for a street name using just the body.
Example : S WESTERN AVE
You can input “S WESTERN AVE”,
“WESTERN AVE” or “WESTERN”
72
Page 45

NAVIGATION SYSTEM: DESTINATION SEARCH
— Destination search by
“Point of Interest”
There are 3 ways to search by Points of Interest.
(a) Search by name
(b) Search by category
(c) Search by phone #
1. Push the “MENU” button and select
“Destination”.
2. Select “Points of Interest” on the
“Destination” screen.
3. Select the button for the desired
method.
(a) Search by “Name”
1. Push the “MENU” button and select
“Destination”.
2. Select “Point of Interest” on the
“Destination” screen.
3. Select “Name” on the “Point of Interest” screen.
4. Input the name of the Point of Interest.
5. Select the button of the desired destination.
The screen changes and displays the map
location of the selected destination and the
route preference. (See “Starting route
guidance” on page 86.)
When inputting the name of a specific
Point of Interest, and there are two or more
sites with the same name, the list screen
is displayed.
INFORMATION
To search for a facility name using
multiple search words, put a space
between each word.
73
Page 46

NAVIGATION SYSTEM: DESTINATION SEARCH
Selecting a city to search
Select the button of the desired destination.
If the same name exists in more than one
city, a search can be performed more easily with “City” and “Category”. (See “
Selecting a city to search” on page 74 and
“ Selecting from the categories” on page
75.)
1. Select “City”.
INFORMATION
The desired Point of Interest can be
displayed on the map screen. (See
“ — Display POI icons” on page 106.)
2. Input the city name.
74
3. Select the button of the desired city
name from the displayed list.
INFORMATION
To cancel the city setting, select “Any
City”.
Page 47

NAVIGATION SYSTEM: DESTINATION SEARCH
Selecting from the categories
Select “Category”.
If the desired POI category is on the
screen, select the name to display a detailed list of the POI category.
If the desired POI category is not on the
screen, select “List All Categories” to list
all POI categories.
(b) Search by “Category”
The destination can be set by selecting the
search point and the POI category.
1. Push the “MENU” button and select
“Destination”.
2. Select “Point of Interest” on the
“Destination” screen.
3. Select “Category” on the “Point of
Interest” screen.
Set the search point by the following
method:
1. Set the search point from near the vehicle’s current position
2. Set the search point from along the
chosen route
3. Set the search point from near a city
center
4. Set the search point from near a destination
It is possible to display the names of POIs
located within approximately 200 miles
(320 km) from the selected search point.
When the desired category is selected, the
POI name list screen is displayed.
75
Page 48

NAVIGATION SYSTEM: DESTINATION SEARCH
SETTING THE SEARCH POINT FROM
NEAR HERE
Select “Near Here”.
The search point is set at the current position, and the “POI Category” screen will be
displayed. (See page 78.)
SETTING THE SEARCH POINT FROM
ALONG MY ROUTE
Select “Along My Route”.
The search point is set and the “POI Category” screen will be displayed. (See page
78.)
SETTING THE SEARCH POINT FROM
NEAR CITY CENTER
1. Select “Near City Center”.
2. Input the city center name.
3. Select the button of the desired city
center name.
The search point is set and the “POI Category” screen will be displayed. (See page
78.)
76
Page 49

NAVIGATION SYSTEM: DESTINATION SEARCH
SELECTING FROM THE LAST 5 CITIES
1. Select “Near City Center”.
2. Select “Last 5 Cities”.
3. Select the button of the desired city
center name.
The search point is set and the “POI Category” screen will be displayed. (See page
78.)
SETTING THE SEARCH POINT FROM
NEAR A DESTINATION
1. Select “Near a Destination”.
2. Select the button of the desired des-
tination.
The search point is set and the “POI
Name” screen will be displayed. (See
page 78.)
77
Page 50

NAVIGATION SYSTEM: DESTINATION SEARCH
To search POIs near the search
point
When the search point is set, the “POI
Category” screen will be displayed.
Select the desired POI category.
If the desired POI category is not on the
screen, select “List All Categories” to list
all POI categories.
(c) Search by “Phone #”
1. Push the “MENU” button and select
“Destination”.
2. Select “Point of Interest” on the
“Destination” screen.
3. Select “Phone #” on the “Point of Interest” screen.
4. Input a telephone number.
5. After inputting a telephone number,
select “OK”.
The screen changes and displays the map
location of the selected destination and the
route preference. (See “Starting route
guidance” on page 86.)
If there is more than one site with the same
number, the following screen will be displayed.
Select the desired POI category from
the list.
By selecting the button of the desired item,
the screen changes and displays the map
location of the selected destination and the
route preference. (See “Starting route
guidance” on page 86.)
78
Page 51

NAVIGATION SYSTEM: DESTINATION SEARCH
— Destination search by
INFORMATION
If there is no match for the tele-
phone number inputted, a list of
identical numbers with different
area codes will be displayed.
To set an address book entry as a
destination using the phone number, the number must already be
registered. (See page 127.)
“Previous Destinations”
1. Push the “MENU” button and select
“Destination”.
2. Select “Previous Destinations”
the “Destination” screen.
The previous starting point and up to 100
previously set destinations are displayed
on the screen.
3. Select the button of the desired des-
tination.
“Delete”: To delete the previous destina-
tion. (To delete previous destinations, see
page 133.)
The screen changes and displays the map
location of the selected destination and the
route preference. (See “Starting route
guidance” on page 86.)
on
INFORMATION
The list of previous destinations can
also be deleted by selecting “Delete
Previous Dest.” on the “Navigation
Settings” screen when the vehicle is
stopped. (See “ — Deleting previous
destinations” on page 133.)
79
Page 52

NAVIGATION SYSTEM: DESTINATION SEARCH
— Destination search by
— Destination search by
“Address Book”
1. Push the “MENU” button and select
“Destination”.
2. Select “Address Book” on the “Destination” screen.
A list of registered address book entries is
displayed.
3. Select the button of the desired address book entry.
“Options”: To register or edit address
book. (See page 122.)
The screen changes and displays the map
location of the selected destination and the
route preference. (See “Starting route
guidance” on page 86.)
“Emergency”
1. Push the “MENU” button and select
“Destination”.
2. Select “Emergency” on the second
page of the “Destination” screen.
The display changes to a screen to select
police stations, dealers, hospitals or fire
stations. While driving, only nearby police
stations, dealers, hospitals, or fire stations
are shown. The current position is shown
with an address, and the latitude and the
longitude at the top of the screen.
3. Select the desired emergency category.
The selected emergency category list is
displayed.
80
Page 53

NAVIGATION SYSTEM: DESTINATION SEARCH
— Destination search by
4. Select the button of the desired destination.
The screen changes and displays the map
location of the selected destination and the
route preference. (See
guidance” on page 86.)
“Starting route
INFORMATION
The navigation system does not
guide in areas where route guidance
is unavailable. (See page 394.)
“Intersection & Freeway”
There are 2 ways to search.
(a) Search by intersection
(b) Search by Freeway Entrance/Exit
1. Push the “MENU” button and select
“Destination”.
2. Select “Intersection & Freeway” on
the second page of the “Destination”
screen.
3. Select the button for the desired
method.
81
Page 54

NAVIGATION SYSTEM: DESTINATION SEARCH
(a) Search by “Intersection”
1. Push the “MENU” button and select
“Destination”.
2. Select “Intersection & Freeway” on
the second page of the “Destination”
screen.
3. Select “Intersection” on the “Intersection & Freeway” screen.
7. Input the name of the second intersecting street.
4. Input the name of the first intersecting street which are located near the
destination to be set.
5. Select “OK”.
8. Select the button of the desired
item.
After inputting the two intersecting streets,
the screen changes and displays the map
location of the selected destination and the
route preference. (See “Starting route
guidance” on page 86.)
6. Select the button of the desired
item.
82
Page 55

NAVIGATION SYSTEM: DESTINATION SEARCH
If the same two streets cross at more than
one intersection, the screen changes and
displays the menu to select the city name
where the streets intersect. Select the city,
and the map location of the selected destination and the route preference. (See
“Starting route guidance” on page 86.)
(b) Search by “Freeway Entrance/
Exit”
1. Push the “MENU” button and select
“Destination”.
2. Select “Intersection & Freeway” on
the second page of the “Destination”
screen.
3. Select “Freeway Entrance/Exit” on
the “Intersection & Freeway” screen.
4. To input a freeway name.
Be sure to use the complete name of the
freeway or highway, including the hyphen,
when entering the destination. Freeways
and interstates use an “I” (I−405). US highways use the state designation before the
number (CA−118).
5. Select the desired freeway by se-
lecting the button.
83
Page 56

NAVIGATION SYSTEM: DESTINATION SEARCH
— Destination search by
“Map”
1. Push the “MENU” button and select
“Destination”.
2. Select “Map” on the second page of
the “Destination” screen.
6. Either a freeway “Entrance” or
“Exit” can be selected.
The screen changes and displays the map
location that was previously displayed just
before the destination input operation and
the route preference. (See “Starting route
guidance” on page 86.)
7. To input a freeway entrance or exit
name.
8. Select “OK”.
Guidance starts if “OK” is selected
even while driving. However, the cursor cannot be moved.
INFORMATION
9. Select the button of the desired entrance or exit name.
The screen changes and displays the map
location of the selected destination and the
route preference. (See
guidance” on page 86.)
84
“Starting route
Page 57

— Destination search by
“Coordinates”
— Deleting set destinations
NAVIGATION SYSTEM: DESTINATION SEARCH
1. Push the “MENU” button and select
“Destination”.
2. Select “Coordinates” on the second
page of the “Destination” screen.
3. Input the latitude and the longitude.
4. When the input is finished, select
“OK”.
By selecting the button of the desired
point, the screen changes and displays the
map location of the selected destination
and the route preference. (See
route guidance” on page 86.)
“Starting
A set destination can be deleted.
1. Push the “MENU” button and select
“Destination”.
2. Select “Del. Dest.” on the “Destina-
tion” screen.
When more than one destination is set, a
list will be displayed on the screen.
3. Select the destination for deletion.
“Select All”: To select all destinations on
the list.
“Unselect All”: To unselect all of the se-
lected destinations.
4. Select “Delete”.
A message appears to confirm the request
to delete.
5. To delete the destination(s), select
“Yes”.
If “Yes” is selected, the data cannot be re-
covered.
If “No” is selected, the previous screen
will return.
85
Page 58

NAVIGATION SYSTEM: DESTINATION SEARCH
Starting route guidance
The system searches for the guidance
route again, and displays the entire route.
INFORMATION
Set destinations can also be deleted
by selecting “Route”. (See “ — Deleting destinations” on page 99.)
After inputting the destination, the screen
changes and displays the map location of
the selected destination and the route preference.
1. Scroll the map to the desired point.
“Adjust Location”: To adjust the position
in smaller increments.
86
When an arrow facing the desired point
is selected, the map scrolls in that direction.
The scroll stops when the selection of the
arrow is released.
2. Select “Go to
The system starts route search and displays recommended routes.
If there is already a set destination, “Go to
” and “Add to Route” are displayed.
“Go to
tions and set a new one.
“Add to Route”: To add a destination.
“Info.”: If this button is displayed on the
top of the screen, select it to view items
such as name, address, and phone number.
”: To delete the existing destina-
”.
Page 59

NAVIGATION SYSTEM: DESTINATION SEARCH
1
Current position
2
Destination point
3
Type of the route and the distance
4
Distance of the entire route
3. To start guidance, select “OK”.
“Turn List”: The following screen displays
the list of the roads up to the destination.
“3 Routes”: To select the desired route
from 3 possible routes. (See page 88.)
“Edit Route”: To change the route. (See
page 89.)
INFORMATION
Guidance can be paused or re-
sumed. (See “— Pausing and resuming guidance” on page 105.)
If “OK” is selected until a beep
sounds, demo mode will start.
Push the “MAP/VOICE” button to
finish Demo mode.
The route for returning may not be
the same as that for going.
The route guidance to the destina-
tion may not be the shortest route
nor a route without traffic congestion.
Route guidance may not be avail-
able if there is no road data for the
specified location.
When setting the destination on a
map with a scale larger than 0.5
miles (800 m), the map scale
changes to 0.5 miles (800 m) automatically. Set the destination
again.
If a destination is entered, the road
nearest to the point you selected is
set as the destination.
CAUTION
Be sure to obey traffic regulations
and keep road conditions in mind
while driving. If a traffic sign on the
road has been changed, the route
guidance may provide incorrect information.
87
Page 60

NAVIGATION SYSTEM: DESTINATION SEARCH
3 ROUTES SELECTION
1
1. To select the desired route from 3
routes, select “3 Routes”.
2
3
4
5
Time necessary for the entire trip
Distance of the entire trip
Toll road
Freeway
Ferry
2. Select “Quick”, “Alt.” or “Short” to
select the desired route.
“Quick”: Recommended route.
This route is indicated by an orange line.
“Alt.”: Alternative route.
This route is indicated by a purple line.
“Short”: A route by which you can reach
the destination in the shortest distance.
This route is indicated by a green line.
“Info.”: To display the following information about each of the 3 routes.
88
Page 61

NAVIGATION SYSTEM: DESTINATION SEARCH
Edit route
You can again designate the conditions of
the route to the destination.
Select “Edit Route”.
INFORMATION
Even if the “Freeways” indicator is
dimmed, the route cannot avoid including a freeway in some cases.
If the calculated route includes a
trip by ferry, the route guidance
shows a sea route. After you travel
by ferry, the current vehicle position may be incorrect. Upon reception of GPS signals, it is automatically corrected.
“Add”: To add destinations. (See page
98.)
“Delete”: To delete destinations. (See
page 99.)
“Reorder”: To reorder destinations. (See
page 98.)
“Preferences”: A number of choices are
provided on the conditions which the system uses to determine the route to the destination. (See page 103)
89
Page 62

NAVIGATION SYSTEM: DESTINATION SEARCH
90
Page 63

NAVIGATION SYSTEM: ROUTE GUIDANCE
SECTION 3
NAVIGATION SYSTEM:
ROUTE GUIDANCE
Avigation system: route guidance
Route guidance screen 92. . . . . . . . . . . . . . . . . . . . . . . . . . . . . . . . .
Typical voice guidance prompts 95. . . . . . . . . . . . . . . . . . . . . . . . . .
Distance and time to destination 97. . . . . . . . . . . . . . . . . . . . . . . . .
Setting and deleting destinations 98. . . . . . . . . . . . . . . . . . . . . .
Adding destinations 98. . . . . . . . . . . . . . . . . . . . . . . . . . . . . . . . . . .
Reordering destinations 98. . . . . . . . . . . . . . . . . . . . . . . . . . . . . . .
Deleting destinations 99. . . . . . . . . . . . . . . . . . . . . . . . . . . . . . . . .
Setting route 100. . . . . . . . . . . . . . . . . . . . . . . . . . . . . . . . . . . . . . . . .
Detour setting 100. . . . . . . . . . . . . . . . . . . . . . . . . . . . . . . . . . . . . . .
Route overview 101. . . . . . . . . . . . . . . . . . . . . . . . . . . . . . . . . . . . .
Route preference 103. . . . . . . . . . . . . . . . . . . . . . . . . . . . . . . . . . .
Pausing and resuming guidance 105. . . . . . . . . . . . . . . . . . . . . .
Show on map 106. . . . . . . . . . . . . . . . . . . . . . . . . . . . . . . . . . . . . . . .
Display POI
Route trace 110. . . . . . . . . . . . . . . . . . . . . . . . . . . . . . . . . . . . . . . . .
XM NavTraffic 112. . . . . . . . . . . . . . . . . . . . . . . . . . . . . . . . . . . . . . .
∗
icons 106. . . . . . . . . . . . . . . . . . . . . . . . . . . . . . . . . .
∗
: Point of Interest
91
Page 64

NAVIGATION SYSTEM: ROUTE GUIDANCE
Route guidance screen
During route guidance, various types of
guidance screens can be displayed depending on conditions.
Screen layout
1
Distance to the next turn and the
arrow indicating turning direction
2
Current street name
3
Distance and travel/arrival time to
the destination
4
Current position
5
Guidance route
INFORMATION
If the vehicle goes off the guidance
route, the route is searched again.
For some areas, the roads have not
been completely digitized in our
database. For this reason, the
route guidance may select road
that should not be traveled on.
When you arrive at your destina-
tion, the destination name will be
displayed on the top of the screen.
Selecting “Off” clears the display.
When the head−up display is on,
turn−by−turn guidance arrows will
be displayed on the windshield.
During freeway driving
During freeway driving, the freeway exit information screen will be displayed.
This screen displays the distance to the
next junction and exit, or POIs in the vicinity of the freeway exit.
1
Current position
2
Points of Interest that are close to
a freeway exit
3
Exit number and junction name
4
Distance from the current position
to the exit or junction
5
Current street name
“Map”: To display the selected map of the
exit vicinity.
: To scroll for farther junctions or exits.
: To scroll for closer junctions or exits.
: To scroll for the closest 3 junctions or
exits.
92
Page 65

NAVIGATION SYSTEM: ROUTE GUIDANCE
When approaching a freeway exit or
junction
When the vehicle approaches an exit or
junction, the guidance screen for the freeway will be displayed.
1
Next street name
2
Distance from the current position
to the exit or junction
3
Current position
“Off”: The guidance screen on freeway
disappears and the map screen appears.
When selecting
or push-
ing the “MAP/VOICE” button, the guidance screen on freeway reappears.
When approaching an intersection
When the vehicle approaches an intersection, the intersection guidance screen will
be displayed.
1
Next street name
2
Distance to the intersection
3
Current position
“Off”: The intersection guidance screen
disappears and the map screen appears.
When selecting
ing the “MAP/VOICE” button, the intersection guidance screen reappears.
or push-
93
Page 66

NAVIGATION SYSTEM: ROUTE GUIDANCE
Other screens
TURN LIST SCREEN
On this screen, the list of turns on the guidance route can be viewed.
Selecting
during guid-
ance displays the turn list.
1
Next street name or destination
name
2
Turn direction
3
Distance between turns
4
Current street name
ARROW SCREEN
On this screen, information about next
turns on the guidance route can be viewed.
Selecting
during guid-
ance displays the arrow screen.
1
Exit number, street name containing number or next street name
2
Turn direction
3
Distance to the next turn
4
Current street name
94
Page 67

NAVIGATION SYSTEM: ROUTE GUIDANCE
Typical voice guidance
prompts
The voice guidance provides various messages as you approach an intersection, or
other point where you need to maneuver
the vehicle.
4.7
miles
0.5 miles
4.2 miles
0.5 miles
1
“Proceed about 5 miles to Main
street.”
2
“In half of a mile, right turn onto
Main street.”
3
4
“Right turn.”
(Beep sound only)
INFORMATION
The street names may not be pro-
nounced correctly or clearly due to
text−to−speech function.
On freeways, interstates or other
highways with higher speed limits,
the voice guidance will be made at
earlier points than on city streets in
order to allow time to maneuver.
1
“Proceed about 4 miles to the
traffic circle.”
2
“In half of a mile, traffic circle
ahead, and then 3rd exit ahead
onto Main street.”
3
4
5
“The 3rd exit ahead.”
“The exit ahead.”
(Beep sound only)
95
Page 68

NAVIGATION SYSTEM: ROUTE GUIDANCE
One−way road
One−way road
∗
: The system indicates a U−turn if the distance between two one−way roads (of opposite directions) is less than 50 feet (15
m) in residential areas or 164 feet (50 m)
in non−residential areas.
1
“In half of a mile, make a legal
U−turn.”
The system announces the approach to
the final destination.
1
2
“Your destination is ahead.”
“You have arrived at your destination. The route guidance is
now finished.”
2
3
96
“Make a legal U−turn ahead.”
(Beep sound only)
INFORMATION
If the system cannot determine the
current vehicle position correctly
(in cases of poor GPS signal reception), the voice guidance may be
made early or delayed.
If you did not hear the voice guid-
ance command, push the “MAP/
VOICE” button to hear it again.
To adjust the voice guidance vol-
ume, see “
page 327.
Voice volume” on
Page 69

NAVIGATION SYSTEM: ROUTE GUIDANCE
Distance and time to
destination
When the vehicle is on the guidance route,
the distance and the estimated travel/arrival time to the destination are displayed.
When the vehicle is not on the guidance
route, the distance and the direction of the
destination are displayed.
When driving on the guidance route and
more than one destination is set, the distance and the estimated travel/arrival time
from the current position to each destination are displayed.
1. Select this button to display the following screen.
The distance, the estimated travel time
and the estimated arrival time from the current position to the selected destination
are displayed.
Estimated travel time is displayed.
Estimated arrival time is displayed.
To switch to estimated arrival
time.
To switch to estimated travel
time.
Displayed while driving off the
guidance route. The destination direction is indicated by
an arrow.
2. Select the number button to display
the desired destination.
INFORMATION
When the vehicle is on the guidance
route, the distance measured along
the route is displayed. Travel time
and arrival time is calculated based
on the set vehicle speed information.
(See page 331.) However, when the
vehicle is not on the guidance route,
the distance is the linear distance between the current position and the
destination.
97
Page 70

NAVIGATION SYSTEM: ROUTE GUIDANCE
Setting and deleting
— Reordering destinations
destinations —
— Adding destinations
You can add destinations and search
again for the routes.
1. Select “Route”.
2. Select “Add”.
3. Input an additional destination in
the same way as the destination
search. (See “Destination search” on
page 66.)
When more than one destination is set,
you can change the arrival order of the
destinations.
1. Select “Route”.
2. Select “Reorder”.
4. Select the desired “Add Destination
Here” to determine the arrival order of
the additional destination.
98
3. Select the desired destination and
select “Move Up” or “Move Down” to
change the arrival order.
4. Select “OK”.
5. After selecting the destinations, select “OK”.
The system searches for the guidance
route again, and displays the entire route.
Page 71

NAVIGATION SYSTEM: ROUTE GUIDANCE
— Deleting destinations
A set destination can be deleted.
1. Select “Route”.
2. Select “Delete”.
When more than one destination is set, a
list will be displayed on the screen.
4. To delete the destination(s), select
“Yes”.
If “Yes” is selected, the data cannot be re-
covered.
If “No” is selected, the previous screen
will return.
The system searches for the guidance
route again, and displays the entire route.
3. Select the destination for deletion.
“Select All”: To select all destinations on
the list.
“Unselect All”: To unselect all of the se-
lected destinations.
A message appears to confirm the request
to delete.
99
Page 72

NAVIGATION SYSTEM: ROUTE GUIDANCE
Setting route —
— Detour setting
While the route guidance is operating, you
can change the route to detour around a
section of the route where a delay is
caused by road repairs, or an accident,
etc.
1. Select “Route”.
3. Select the button below to select the
desired detour distance.
“1 mile (km)”, “3 miles (km)” or “5 miles
(km)”: Select one of these buttons to start
the detour process. After detouring, the
system returns to the original guidance
route.
“Whole Route”: By selecting this button,
the system will calculate an entire new
route to the destination.
“Around T raffic”: If you select this button,
the system will search for the route based
on the traffic congestion information received from XM NavTraffic. For details,
see “XM NavTraffic” on page 112.
2. Select “Detour”.
100
Page 73

NAVIGATION SYSTEM: ROUTE GUIDANCE
— Route overview
This picture shows an example of how the
system would guide around a delay
caused by a traffic jam.
1
This position indicates the location of
a traffic jam caused by road repairs or
an accident.
2
This route indicates the detour suggested by the system.
1. Select “Route”.
INFORMATION
When your vehicle is on a freeway,
the detour distance selections are
5, 15, and 25 miles (km).
The system may not be able to cal-
culate a detour route depending on
the selected distance and surrounding road conditions.
2. Select “Overview”.
The entire route from the current position
to the destination is displayed.
“OK”: To start guidance.
“Turn List”: The following screen displays
the list of the roads up to the destination.
“Preview”: To preview the route.
101
Page 74

NAVIGATION SYSTEM: ROUTE GUIDANCE
You can scroll through the list of roads by
selecting
road names in the route may appear on the
list. If a road changes its name without requiring a turn (such as on a street that runs
through two or more cities), the name
change will not appear on the list. The
street names will be displayed in order
from the starting point, along with the distance to the next turn.
or . However, not all
These marks indicate the
direction in which you should
turn at an intersection.
Route preview
1. Select “Route”.
2. Select “Overview”.
Selecting “Map” on the “Turn List”
screen.
The point which you choose is displayed
on the map screen.
102
3. Select “Preview”.
Page 75

NAVIGATION SYSTEM: ROUTE GUIDANCE
— Route preference
: To indicate the next destination.
: To preview the route to the next
destination.
: To preview the route to the next
destination in fast−forward mode.
: To stop the preview.
: To review the route to the previous
destination or starting point.
: To review the route to the previous
destination or starting point in
fast−forward mode.
: To indicate the previous destina-
tion or starting point.
To select route type
You can designate the route conditions of
the route to the destination.
1. Select “Route”.
2. Select “Preferences”.
3. Select “Quick”, “Short” or “Alternate” and select “OK”.
103
Page 76

NAVIGATION SYSTEM: ROUTE GUIDANCE
The entire route from the starting point to
the destination is displayed.
“OK”: To start guidance.
“Edit Route”: To change a route. (See
page 89.)
To select route features
A number of choices are provided on the
conditions which the system uses to determine the route to the destination.
1. Select “Route”.
104
2. Select “Preferences” to change the
conditions that determine the route to
the destination.
3. Select the desired route preference
by selecting the button.
When searching for a route, the system will
avoid routes when the indicator is off.
4. After choosing the desired route
preference, select “OK”.
Page 77

NAVIGATION SYSTEM: ROUTE GUIDANCE
— Pausing and resuming
Starting route from adjacent road
You can start the route guidance from the
adjacent road.
(ex. When route guidance is set on the
freeway, but the vehicle is driven parallel
along the freeway.)
1. Select “Route”.
guidance
T o pause guidance
1. Select “Route”.
2. Select “Preferences”.
3. Select “Start from Adjacent Road”.
When there is no adjacent road, this button
will not be displayed.
2. Select “Pause Guidance”.
INFORMATION
Without route guidance, “Pause
Guidance” cannot be used.
The screen will return to the current position map without route guidance.
105
Page 78

NAVIGATION SYSTEM: ROUTE GUIDANCE
Show on map —
To resume guidance
1. Select “Route”.
— Display POI icons
Points of Interest such as gas stations and
restaurants can be displayed on the map
screen. You can also set their location as
a destination and use them for route guidance.
1. Select “Show on Map”.
2. Select “Resume Guidance”.
The screen will change to the current position map with route guidance.
106
2. Select “Select POI” to display a particular type of Point of Interest on the
screen.
When the Points of Interest to be displayed
on the map screen have already been set,
“Change POI” is displayed.
A screen with a limited choice of Points of
Interest will be displayed. (To change the
displayed POI, see page 333.)
Page 79

NAVIGATION SYSTEM: ROUTE GUIDANCE
Selecting POIs to be displayed
Up to 5 categories of icons can be displayed on the screen.
Select the desired Point of Interest
category to display POI location symbols on the map screen.
By selecting the desired POI category and
then selecting “OK”, the selected POI
icons are displayed on the map screen.
To turn off the Points of Interest icons on
the map screen, select “Clear”.
“Other POIs”: If the desired Point of Interest can not be found on the limited choice
screen, select this button.
“Find Local POI”: When searching for the
nearest Point of Interest, select this button.
Then choose one of the categories. The
system will list the points within 200 miles
(320 km). (See page 108.)
Select “Other POIs” on the “Select POI
Icons” screen.
When a Point of Interest category is selected from either the limited list or the
complete list, the screen will display symbols of those locations on the map screen.
Select the desired POI categories.
The selected category icon appears on the
top left of the screen.
By selecting the desired POI category and
then selecting “OK”, the selected POI
icons are displayed on the map screen.
If the desired POI category is not on the
screen, select “List All Categories” to list
all POI categories.
107
Page 80

NAVIGATION SYSTEM: ROUTE GUIDANCE
Select the desired POI categories from
the list.
The selected category icon appears on the
top left of the screen.
By selecting the desired POI category and
then selecting “OK”, the selected POI
icons are displayed on the map screen.
To return to the POI category selection
screen, select “More”.
To display the local POI list
Points of Interest that are within 200 miles
(320 km) of the current position will be
listed from among the selected categories.
1. Select “Find Local POI” on the “Select POI Icons” screen.
108
2. Select the button of the desired
Point of Interest.
The selected Points of Interest are displayed on the map screen.
“Near...”: To search for Points of Interest
near the current position or along the
route.
Page 81

NAVIGATION SYSTEM: ROUTE GUIDANCE
“Near Here” : When “Near Here” is se-
lected, the list of Points of Interest near the
current position will be displayed.
“Along My Route” : When “Along My
Route” is selected, the list of Points of In-
terest along the route will be displayed.
To set a POI as a destination
You can select one of the Points of Interest
icons on the map screen as a destination
and use it for route guidance.
1. Directly select the Point of Interest
icon that you want to set as a destination.
The map will shift so that the icon is centered on the screen and overlaps with the
cursor
the current position is displayed on the
screen. The distance shown is measured
as a straight line from the current vehicle
position to the POI.
2. When the desired Point of Interest
overlaps with the cursor, select “Enter
The screen changes and displays the map
location of the selected destination and
route preference. (See
guidance” on page 86.)
. At this time, the distance from
”.
“Starting route
109
Page 82

NAVIGATION SYSTEM: ROUTE GUIDANCE
— Route trace
To hide POI icons
1. Select “Show on Map”.
It is possible to store the traveled route up
to 124 miles (200 km) and retrace the route
on the display.
INFORMATION
This feature is available on the map
with more detailed map scale than 30
mile (50 km).
2. Select “POI Icons”.
The “POI Icons” indicator is dimmed.
The map screen will be displayed with the
POI icons hidden.
To display the POI icons again, select “POI
Icons” on the “Show on Map” screen.
110
Page 83

To start recording the route trace
NAVIGATION SYSTEM: ROUTE GUIDANCE
To stop recording the route trace
1. Select “Show on Map”.
2. Select “Route Trace”.
“Route Trace” indicator is highlighted.
1. Select “Show on Map”.
2. Select “Route Trace”. The following
screen will be displayed.
Selecting “Yes” stops recording and the
route trace remains displayed on the
screen.
Selecting “No” stops recording and the
route trace is erased.
111
Page 84

NAVIGATION SYSTEM: ROUTE GUIDANCE
XM NavTraffic
The XM NavTraffic service that allows the
navigation system to display traffic information on the map is available if your satellite radio tuner can receive traffic information.
To receive the XM NavTraffic service, a
subscription to the XM Satellite Radio
with NavTraffic is necessary.
The XM NavTraffic is available in the con-
tiguous 48 U.S. states and some Canadian
cities. For details about the XM NavTraffic service coverage area, refer to
www.xmradio.com
dio.ca (CANADA).
(U.S.A.) or www.xmra-
How to activate the XM NavTraffic
service
To receive the XM NavTraffic service,
it is necessary to activate the service.
To activate the service, an extra fee is
required in addition to subscription
fees for the XM Satellite Radio. For
details about service and activation,
call XM Listener Care Center at
1−877−515−3987 (U.S.A.) or
1−877−438−9677 (CANADA).
Customers should have their radio ID
ready; the radio ID can be found by selecting “channel 000” on the radio. For details,
see “(b) Displaying the radio ID” on page
181.
XM Satellite Radio has the responsibility
for all fees and service, they are subject to
change.
The following operations can be performed.
Show XM NavTraffic Information
Traffic information is displayed on the map.
(See page 113.)
Auto Avoid Traffic
If any heavy congestion or moderate traffic
has been detected on the guidance route,
it may be possible for you to select another
route offered by the system. (See page
332.)
Traffic Voice Guidance
Traffic information is provided using voice
guidance. (See page 327.)
Show Free Flowing Traffic
Freely flowing traffic is shown by the arrow
on the map. (See page 333.)
INFORMATION
Traffic voice guidance is available
only in English. To select English,
Selecting a language” on
see “
page 318.
When the “Traffic Information” in-
dicator is dimmed, “Auto Avoid
Traffic”, “Traffic Voice Guidance”
and “Show Free Flowing Traffic”
will not operate.
112
Page 85

NAVIGATION SYSTEM: ROUTE GUIDANCE
Show XM NavTraffic information
1. Select “Show on Map”.
2. Select “Traffic Information”.
“Traffic Information” indicator is high-
lighted.
XM NavTraffic information is displayed
on the map.
On Map screen
On Freeway information screen
113
Page 86

NAVIGATION SYSTEM: ROUTE GUIDANCE
1
XM NavTraffic icon
When any traffic information has been
received, the XM NavTraffic icon will
appear on the map screen. Selecting the
XM NavTraffic icon on the screen will
start voice guidance for the traffic information. (See page 44.)
INFORMATION
When the XM NavTraffic icon is se-
lected, voice guidance for the traffic
information will start even if “Off” for
“Traffic Voice Guidance” is selected.
2
XM NavTraffic information arrow
When any XM NavTraffic information has
been received, the XM NavTraffic information arrow will appear on the map
screen. The color of the arrow changes
depending on the traffic information received.
“Orange”: Heavy congestion
“Yellow”: Moderate traffic
“Green”: Freely flowing traffic
3
XM NavTraffic indicator
When any XM NavTraffic information has
been received, the XM NavTraffic indicator will appear on the screen. The color of
the indicator changes depending on the
traffic information received.
“White”: Traffic information has been received.
“Yellow”: Traffic restriction information on
the guidance route has been received
(screen button*).
“Orange”: Congestion information on the
guidance route has been received (screen
button*).
*: Selecting the XM NavTraffic indicator
will start voice guidance.
114
Page 87

NA VIGATION SYSTEM: MEMORY POINTS
SECTION 4
NAVIGATION SYSTEM: MEMORY POINTS
Navigation system: memory points
Navigation settings 11 6. . . . . . . . . . . . . . . . . . . . . . . . . . . . . . . . . . .
Setting up the “Home” 117. . . . . . . . . . . . . . . . . . . . . . . . . . . . . . . .
Setting up the “Preset Destinations” 119. . . . . . . . . . . . . . . . . . . .
Setting up the “Address Book” 122. . . . . . . . . . . . . . . . . . . . . . . .
Setting up the “Areas to Avoid” 128. . . . . . . . . . . . . . . . . . . . . . . .
Deleting previous destinations 133. . . . . . . . . . . . . . . . . . . . . . . . .
115
Page 88

NA VIGATION SYSTEM: MEMORY POINTS
Navigation settings —
Points or areas on the map can be registered.
The registered points can be used on the
“Destination” screen. (See “ — Destination
search by Home” on page 68, “ — Destination search by Preset destinations” on
page 68 and “ — Destination search by
“Address Book”” on page 80.)
Registered areas are avoided at the time of
route search.
1. Push the “MENU” button and select
“Setup”.
On this screen, the following operations
can be performed.
No. Function
Sets home
1
(See page 117.)
Sets preset destinations
2
(See page 119.)
Sets address book
3
(See page 122.)
Sets area to avoid
4
(See page 128.)
Deletes previous destinations
5
(See page 133.)
Detailed navigation settings
6
(See page 329.)
2. Select “Navi.”.
116
Page 89

NA VIGATION SYSTEM: MEMORY POINTS
— Setting up the “Home”
If home has been registered, that information can be recalled by using “Go Home”
on the “Destination” screen. (See “— Destination search by Home” on page 68.)
1. Push the “MENU” button and select
“Setup”.
2. Select “Navi.” on the “Setup”
screen.
3. Select “Home”.
(a) Registering home
1. Push the “MENU” button and select
“Setup”.
2. Select “Navi.” on the “Setup”
screen.
3. Select “Home” on the “Navigation
Settings” screen.
4. Select “Set Home”.
Registering home (See page 117.)
Editing home (See page 118.)
Deleting home (See page 119.)
5. Enter the location in the same way
as for a destination search. (See “Des-
tination search” on page 66.)
117
Page 90

NA VIGATION SYSTEM: MEMORY POINTS
When registration of home is completed,
the “Edit Home” screen will be displayed.
6. Select “OK”.
To edit registered information, see “(b)
Editing home” on page 118.
(b) Editing home
1. Push the “MENU” button and select
“Setup”.
2. Select “Navi.” on the “Setup”
screen.
3. Select “Home” on the “Navigation
Settings” screen.
4. Select “Edit”.
118
5. Select “Edit” for the item you want to
change.
“Name”: To edit home name. The names
can be displayed on the map. (See page
126.)
“Location”: To edit location information.
(See page 127.)
“Phone #”: To edit telephone numbers.
(See page 127.)
“Icon”: To select icons to be displayed on
the map. (See page 125.)
6. Select “OK”.
Page 91

(c) Deleting home
— Setting up the “Preset
1. Push the “MENU” button and select
“Setup”.
2. Select “Navi.” on the “Setup”
screen.
3. Select “Home” on the “Navigation
Settings” screen.
4. Select “Delete”.
5. To delete home, select “Yes”. To
cancel the deletion, select “No”.
NA VIGATION SYSTEM: MEMORY POINTS
Destinations”
If preset destination has been registered,
that information can be recalled by using
“Preset Destination” on the “Destination”
screen. (See “— Destination search by
Preset Destinations” on page 68.)
1. Push the “MENU” button and select
“Setup”.
2. Select “Navi.” on the “Setup”
screen.
3. Select “Preset Destinations”.
Registering preset destination (See
page 120.)
Editing preset destination (See page
121.)
Deleting preset destination (See
page 122.)
119
Page 92

NA VIGATION SYSTEM: MEMORY POINTS
(a) Registering preset destinations
1. Push the “MENU” button and select
“Setup”.
2. Select “Navi.” on the “Setup”
screen.
3. Select “Preset Destinations” on the
“Navigation Settings” screen.
4. Select “Set”.
When registration of preset destination is
completed, the “Edit Preset Destination”
screen will be displayed.
7. Select “OK”.
To edit registered information, see “(b)
Editing preset destinations” on page 121.
5. Enter the location in the same way
as for a destination search. (See “Des-
tination search” on page 66.)
6. Select a position for this preset destination.
120
Page 93

(b) Editing preset destinations
1. Push the “MENU” button and select
“Setup”.
2. Select “Navi.” on the “Setup”
screen.
3. Select “Preset Destinations” on the
“Navigation Settings” screen.
4. Select “Edit”.
NA VIGATION SYSTEM: MEMORY POINTS
6. Select “Edit” for the item you want to
change.
“Name”: To edit preset destination names.
The names can be displayed on the map.
(See page 126.)
“Location”: To edit location information.
(See page 127.)
“Phone #”: To edit telephone numbers.
(See page 127.)
“Icon”: To select icons to be displayed on
the map. (See page 125.)
7. Select “OK”.
5. Select the button of the desired preset destination.
121
Page 94

NA VIGATION SYSTEM: MEMORY POINTS
— Setting up the “Address
(c) Deleting preset destinations
1. Push the “MENU” button and select
“Setup”.
2. Select “Navi.” on the “Setup”
screen.
3. Select “Preset Destinations” on the
“Navigation Settings” screen.
4. Select “Delete”.
Book”
Points or areas on the map can be registered.
1. Push the “MENU” button and select
“Setup”.
2. Select “Navi.” on the “Setup”
screen.
3. Select “Address Book”.
5. Select the preset destination for
deletion.
“Select All”: To select all preset destina-
tions on the list.
“Unselect All”: To unselect all of the se-
lected preset destinations.
6. Select “Delete”.
7. To delete preset destination, select
“Yes”. To cancel the deletion, select
“No”.
122
Registering address book entries
(See page 123.)
Editing address book entries (See
page 124.)
Deleting address book entries (See
page 128.)
Page 95

(a) Registering address book entries
1. Push the “MENU” button and select
“Setup”.
2. Select “Navi.” on the “Setup”
screen.
3. Select “Address Book” on the “Navigation Settings” screen.
4. Select “New”.
NA VIGATION SYSTEM: MEMORY POINTS
6. Select “OK”.
To edit registered information, see “(b)
Editing address book entries” on page
124.
INFORMATION
Up to 100 address book entries can
be registered.
5. Enter the location in the same way
as for a destination search. (See “Des-
tination search” on page 66.)
After the address book entry has been registered, the “Edit Address Book Entry”
screen will be displayed.
123
Page 96

NA VIGATION SYSTEM: MEMORY POINTS
(b) Editing address book entries
The icon, name, location and/or telephone
number of a registered address book entry
can be edited.
1. Push the “MENU” button and select
“Setup”.
2. Select “Navi.” on the “Setup”
screen.
3. Select “Address Book” on the “Navigation Settings” screen.
4. Select “Edit”.
6. Select “Edit” for the item you want to
change.
“Name”: To edit address book entry
names. The names can be displayed on
the map. (See page 126.)
“Location”: To edit location information.
(See page 127.)
“Phone #”: To edit telephone numbers.
(See page 127.)
“Icon”: To select icons to be displayed on
the map. (See page 125.)
7. Select “OK”.
5. Select the button of the desired address book entry.
124
Page 97

NA VIGATION SYSTEM: MEMORY POINTS
To change “Icon”
1. Select “Edit” of “Icon”.
2. Select the desired icon.
Change pages by selecting “Page 1”,
“Page 2” or “With Sound” tab.
SOUND ICONS
You can set a sound for some address
book entries. When the vehicle approaches the location of the address book
entry, the selected sound will be heard.
1. Select “With Sound” on the “Address Book Entry Icon” screen.
2. Select the desired sound icon.
The next screen appears when “Bell (with
Direction)” is selected.
Select either or to adjust the
direction. Select “OK”.
The bell sounds only when the vehicle approaches this point in the direction that has
been set.
125
Page 98

NA VIGATION SYSTEM: MEMORY POINTS
To change “Name”
1. Select “Edit” of “Name”.
2. Enter the name using the alphanumeric keys.
Up to 32 characters can be entered.
3. Select “OK”.
The previous screen will be displayed.
DISPLAYING MEMORY POINT NAMES
The name of an address book entry can be
set to display on the map.
To show the name, select “On” on the
“Edit Address Book Entry” screen. To
not show it, select “Off”.
126
Page 99

NA VIGATION SYSTEM: MEMORY POINTS
To change “Location”
1. Select “Edit” of “Location”.
2. Select one of the 8 directional buttons to move the cursor to the desired point on the map.
3. Select “OK”.
The previous screen will be displayed.
To change “Phone #” (telephone
number)
1. Select “Edit” of “Phone #”.
2. Enter the number using number
keys.
3. Select “OK”.
The previous screen will be displayed.
127
Page 100

NA VIGATION SYSTEM: MEMORY POINTS
— Setting up the “Areas to
(c) Deleting address book entries
1. Push the “MENU” button and select
“Setup”.
2. Select “Navi.” on the “Setup”
screen.
3. Select “Address Book” on the “Navigation Settings” screen.
Avoid”
Areas you want to avoid because of traffic
jams, construction work or other reasons
can be registered as areas to avoid.
1. Push the “MENU” button and select
“Setup”.
2. Select “Navi.” on the “Setup”
screen.
4. Select “Delete”.
5. Select the button to be deleted.
“Select All”: To select all addresses in the
address book.
“Unselect All”: To unselect all of the se-
lected addresses.
6. Select “Delete”.
7. T o delete the address book entry, select “Yes”. To cancel the deletion, select “No”.
3. Select “Areas to Avoid”.
Registering areas to avoid (See
page 129.)
Editing areas to avoid (See page
130.)
Deleting areas to avoid (See page
133.)
128
 Loading...