


PLACEHOLDER
COVER
PN: 22W0052

Edition notice
July 2006
The following paragraph does not apply to any country where such provisions are inconsistent with
local law: LEXMARK INTERNATIONAL, INC., PROVIDES THIS PUBLICATION “AS IS” WITHOUT
WARRANTY OF ANY KIND, EITHER EXPRESS OR IMPLIED, INCLUDING, BUT NOT LIMITED TO, THE
IMPLIED WARRANTIES OF MERCHANTABILITY OR FITNESS FOR A PARTICULAR PURPOSE. Some
states do not allow disclaimer of express or implied warranties in certain transactions; therefore, this statement
may not apply to you.
This publication could include technical inaccuracies or typographical errors. Changes are periodically made
to the information herein; these changes will be incorporated in later editions. Improvements or changes in
the products or the programs described may be made at any time.
Comments about this publication may be addressed to Lexmark International, Inc., Department F95/032-2,
740 West New Circle Road, Lexington, Kentucky 40550, U.S.A. In the United Kingdom and Eire, send to
Lexmark International Ltd., Marketing and Services Department, Westhorpe House, Westhorpe, Marlow
Bucks SL7 3RQ. Lexmark may use or distribute any of the information you supply in any way it believes
appropriate without incurring any obligation to you. To obtain additional copies of publications related to this
product, visit the Lexmark Web site at www.lexmark.com.
References in this publication to products, programs, or services do not imply that the manufacturer intends
to make these available in all countries in which it operates. Any reference to a product, program, or service
is not intended to state or imply that only that product, program, or service may be used. Any functionally
equivalent product, program, or service that does not infringe any existing intellectual property right may be
used instead. Evaluation and verification of operation in conjunction with other products, programs, or
services, except those expressly designated by the manufacturer, are the user’s responsibility.
© 2006 Lexmark International, Inc.
All rights reserved.
UNITED STATES GOVERNMENT RIGHTS
This software and any accompanying documentation provided under this agreement are commercial
computer software and documentation developed exclusively at private expense.

Contents
Setup Solutions..................................................................................5
תונורתפ הנקתה....................................................................................18
3

4

Setup Solutions
This guide contains information about:
•
“Safety information” on page 5
•
“Finding information about the printer” on page 5
•
“Using the control panel menus” on page 9
•
“Setup troubleshooting” on page 13
•
“Removing and reinstalling the software” on page 16
Safety information
Use only the power supply and power supply cord provided with this product or the
manufacturer's authorized replacement power supply and power supply cord.
Connect the power supply cord to an electrical outlet that is near the product and easily
accessible.
Refer service or repairs, other than those described in the user documentation, to a
professional service person.
This product is designed, tested, and approved to meet strict global safety standards with the
use of specific Lexmark components. The safety features of some parts may not always be
obvious. Lexmark is not responsible for the use of other replacement parts.
CAUTION: Do not set up this product or make any electrical or cabling connections,
such as the power supply cord or telephone, during a lightning storm.
English
Finding information about the printer
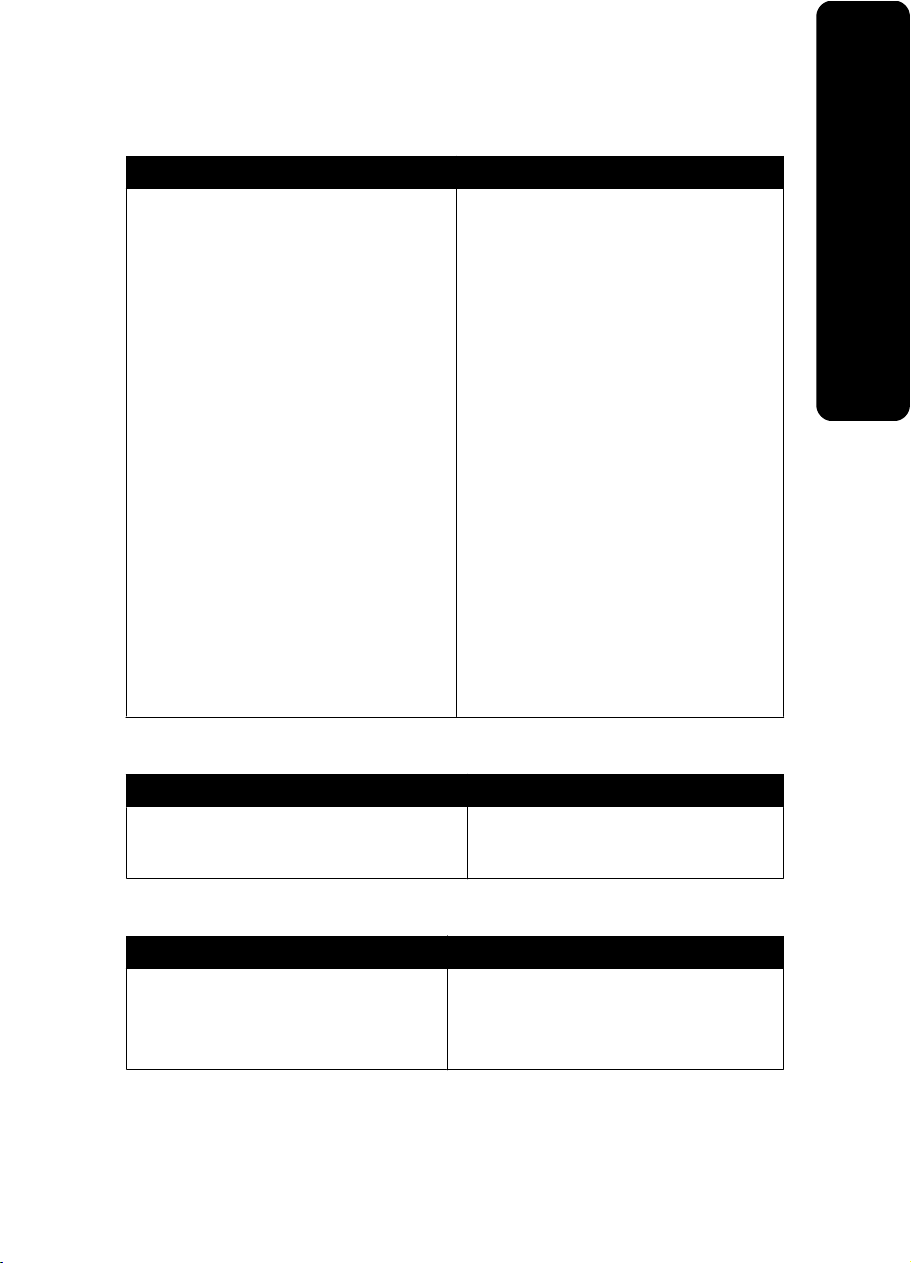
Setup sheet
Description Where to find
The Setup sheet gives you instructions
for setting up hardware and software.
You can find this document in the printer box or
on the Lexmark Web site at
www.lexmark.com.
5

Getting Started or Setup Solutions booklet
Description Where to find
The Getting Started booklet gives you
instructions for setting up hardware and
software (on Windows operating systems)
English
and some basic instructions for using the
printer.
Note: If your printer supports Macintosh
operating systems, see the Mac Help:
1
From the Finder desktop, double-click
the Lexmark 350 Series folder.
2
Double-click the printer Help icon.
The Setup Solutions booklet tells you how
to solve printer setup problems.
Note: These documents do not ship with all
printers. If you did not receive a Getting
Started booklet or a Setup Solutions
booklet, see the User's Guide instead.
You can find this document in the printer box
or on the Lexmark Web site at
www.lexmark.com.
6
User's Guide
Description Where to find
The User's Guide gives you instructions for
using the printer and other information such
as:
•
Using the software (on Windows
operating systems)
•
Loading paper
•
Printing
•
Working with photos
•
Scanning (if supported by your printer)
•
Making copies (if supported by your
printer)
•
Faxing (if supported by your printer)
•
Maintaining the printer
•
Connecting the printer to a network (if
supported by your printer)
•
Troubleshooting problems with printing,
copying, scanning, faxing, paper jams,
and misfeeds
Note: If your printer supports Macintosh
operating systems, see the Mac Help:
1
From the Finder desktop, double-click
the Lexmark 350 Series folder.
2
Double-click the printer Help icon.
When you install the printer software, the
User's Guide will be installed.
1
Click Start Programs or All
Programs Lexmark 350 Series.
2
Click User's Guide.
If the link to the User's Guide is not on your
desktop, follow these instructions:
1
Insert the CD.
The installation screen appears.
Note: If necessary, click Start Run,
and then type D:\setup, where D is the
letter of your CD-ROM drive.
2
Click View User's Guide (including
Setup Troubleshooting).
3
Click Yes.
An icon of the User's Guide appears on
your desktop, and the User's Guide
appears on the screen.
You can also find this document on the
Lexmark Web site at www.lexmark.com.
English
Help
Description Where to find
The Help gives you instructions for using the
software, if your printer connects to a
computer.
While in any Lexmark software program,
click Help, Tips Help, or Help Help
Topics.
Lexmark Solution Center
Description Where to find
The Lexmark Solution Center software is
included on your CD. It installs with the other
software, if your printer connects to a
computer.
To access the Lexmark Solution Center:
1
Click Start Programs or All
Programs Lexmark 350 Series.
2
Select Lexmark Solution Center.
7

Customer support
Description Where to find (North America) Where to find (rest of world)
Telephone support
English
E-mail support
Call us at
•
US: 1-800-332-4120
Monday–Friday (8:00 AM–
11:00 PM EST)
Saturday (Noon–6:00 PM
EST)
•
Canada: 1-800-539-6275
Monday–Friday (9:00 AM–
9:00 PM EST)
Saturday (Noon–6:00 PM
EST)
•
Mexico: 001-888-377-0063
Monday–Friday (8:00 AM–
8:00 PM EST)
Note: Support numbers and times
may change without notice. For the
most recent phone numbers
available, see the printed warranty
statement that shipped with your
printer.
For e-mail support, visit our Web
site: www.lexmark.com.
1
Click CUSTOMER SUPPORT.
2
Click Technical Support.
3
Select your printer family.
4
Select your printer model.
5
From the Support Tools
section, click e-Mail Support.
6
Complete the form, and then
click Submit Request.
Telephone numbers and
support hours vary by country or
region.
Visit our Web site at
www.lexmark.com. Select a
country or region, and then
select the Customer Support
link.
Note: For additional information
about contacting Lexmark, see
the printed warranty that
shipped with your printer.
E-mail support varies by country
or region, and may not be
available in some instances.
Visit our Web site at
www.lexmark.com. Select a
country or region, and then
select the Customer Support
link.
Note: For additional information
about contacting Lexmark, see
the printed warranty that
shipped with your printer.
8
Limited Warranty
Description Where to find (US) Where to find (rest of
Limited Warranty
Information
Lexmark International, Inc.
furnishes a limited warranty
that this printer will be free
of defects in materials and
workmanship for a period of
12 months after the original
date of purchase.
Record the following information (located on the store receipt and the back of the printer),
and have it ready when you contact us so that we may serve you faster:
•
Machine Type number
•
Serial number
•
Date purchased
•
Store where purchased
To view the limitations and
conditions of this limited warranty,
see the Statement of Limited
Warranty included with this
printer, or set forth at
www.lexmark.com.
1
Click CUSTOMER
SUPPORT.
2
Click Warranty Information.
3
From the Statement of Limited
Warranty section, click Inkjet
& All-In-One Printers.
4
Scroll through the Web page
to view the warranty.
world)
Warranty information
varies by country or
region. See the printed
warranty that shipped
with your printer.
English
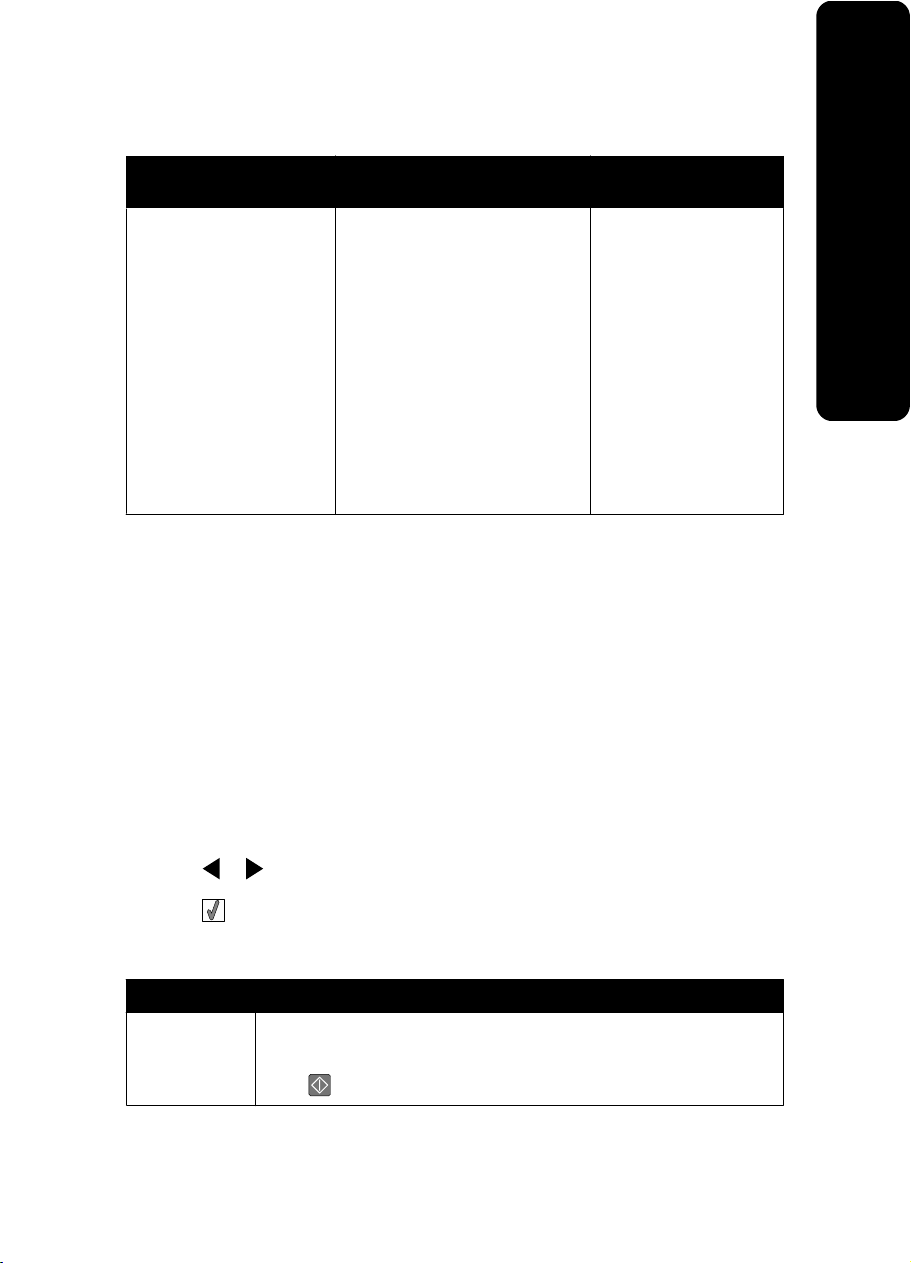
Using the control panel menus
Using the View and Select menu
1
Insert a memory card or flash drive. For more information, see “Inserting a memory card”
or “Inserting a flash drive” in the “Connecting photo storage devices” chapter of the User's
Guide on the CD.
2
Press or repeatedly until View and Select appears on the display.
3
Press .
4
Follow the instructions on the display.
From here You can
View and Select
•
Select one or more photos for viewing and/or printing.
•
Select the number of copies to print.
Press
to go to the Print Preview screen.
9

From here You can
Print Preview See a preview of the photo/s to be printed.
to adjust the print settings, including paper size,
English
You can also press
photo size, layout, print quality, paper type, and passport photo print
settings.
Using the Print Photos menu
This menu lets you select a group of photos for printing.
1
Insert a memory card or flash drive. For more information, see “Inserting a memory card”
or “Inserting a flash drive” in the “Connecting photo storage devices” chapter of the User's
Guide on the CD.
2
Press or repeatedly until Print Photos appears on the display.
3
Press .
From here You can
Print Camera Selections Print Digital Print Order Format (DPOF) selections. This option
Print All N Photos Print all the photos on a memory device. N is the total number of
Print Photos by Date Print photos taken within certain dates.
Print Photo Range Select the first and last photos in a range to be printed.
appears only when there is a valid DPOF file on your memory
card.
images that will be printed. You can select:
•
Photo/s on Paper to view available paper sizes.
•
Index Print to print an index page of photos.
•
Copies Per Photo to select the number of copies to print per
photo.
•
Other Print Settings to choose a paper size, photo size,
layout, print quality, and paper type.
Using the Transfer menu
You can transfer photos from a memory card to a flash drive or a computer (if the printer is
attached to a computer). The photos on the memory card are retained.
1
Insert a memory card. For more information, see “Inserting a memory card” in the
“Connecting photo storage devices” chapter of the User's Guide on the CD.
2
Press or repeatedly until Transfer appears on the display.
3
Press .
10

4
If you want to transfer photos to a USB flash drive, insert the drive.
5
Press or to select either USB Flash Drive or Computer (if the printer is
attached to a computer).
6
Press .
7
Follow the instructions on the printer display.
Using the Slideshow menu
The Slideshow menu lets you view the images stored on a memory card or flash drive.
1
Insert a memory card or flash drive. For more information, see “Inserting a memory card”
or “Inserting a flash drive” in the “Connecting photo storage devices” chapter of the User's
Guide on the CD.
2
Press or repeatedly until Slideshow appears on the display.
3
Press .
4
Press to continue. Each photo is displayed for a few seconds.
5
If you want to move to the previous or next photo manually, press or .
6
Use any of the following buttons:
•
Press to select a photo or photos to print after the slideshow.
•
Press to pause the slideshow. Press again to stop the slideshow.
•
Press to rotate the photo on the display.
When the slideshow is stopped, the photo or photos you selected for printing during the
slideshow are displayed by pressing
.
English
Using the Tools menu
1
Press or repeatedly until Tools appears on the display.
2
Press .
11

From here You can
Device Defaults Select:
•
Language to change the language setting.
•
Country to set the default blank paper size and date format being
English
Print Settings Select a paper size, photo size, layout, print quality, and paper type.
Maintenance Select:
Bluetooth Select:
Customize Select:
used in your location.
•
Power Save to set the length of time before the printer, if left unused,
enters a low power state. During Power Save, the display and
backlight will be turned off. Press any button to restore power to the
printer.
•
View Ink Level to view a graphic representing the ink level in the print
cartridge.
•
Clean Cartridge to clean the print cartridge nozzles.
•
Align Cartridge to align the cartridge.
•
Print Test Page to print a test page.
•
Reset Defaults to reset default settings to factory settings.
•
Bluetooth Enable to enable or disable Bluetooth communication.
•
Discovery Mode to turn the Discovery mode on or off.
•
Device Name to view the Device Name and the Universally
Administered Address (UAA) number automatically assigned to your
Bluetooth-enabled device.
•
Device Address to view the 48-bit address of your Bluetooth-enabled
device.
•
Screen Saver to turn the screen saver function on after 30 seconds,
on after one minute, or off.
•
Replace Screen Saver Photos to select up to four photos to use as
screen savers.
•
Hinting to turn hints on or off. Hints are messages on the control panel
display that give more information on the current selection.
Using the Photo Edit Mode menu
When you are viewing a photo, press to access the Photo Edit Mode menu.
From here You can
Brightness Adjust the brightness of a photo.
Crop Crop a photo.
12

From here You can
Auto Enhance Enhance a photo automatically.
Red Eye Reduction Reduce the red-eye effect caused by light reflection.
Colorized Effect Select whether to print a photo in Black & White, Sepia, Antique Brown,
Rotate Rotate a photo in 90-degree increments clockwise or
Frames Select a style and color to frame a photo.
or Antique Gray.
counterclockwise.
Using the PictBridge menu
The PictBridge default settings menu allows the selection of printer settings if no selections
were specified on your digital camera beforehand. To make camera selections, see the
camera documentation.
1
Connect a PictBridge-enabled digital camera.
2
Press to access the PictBridge menu.
3
Press or to navigate through the following options:
From here You can
Paper Size Select a paper size.
Photo Size Select a photo size.
Layout Select a photo layout.
Print Quality Select a print quality.
Paper Type Select a paper type.
English
4
Press or to make a selection.
5
Press to print.
Setup troubleshooting
Incorrect language appears on the display
1
Press to turn the printer off.
2
Press to turn the printer back on.
3
Press .
13
4
Press .
5
Press to continue.
6
Press or repeatedly until the language you want appears on the display.
English
7
Press to save your selection.
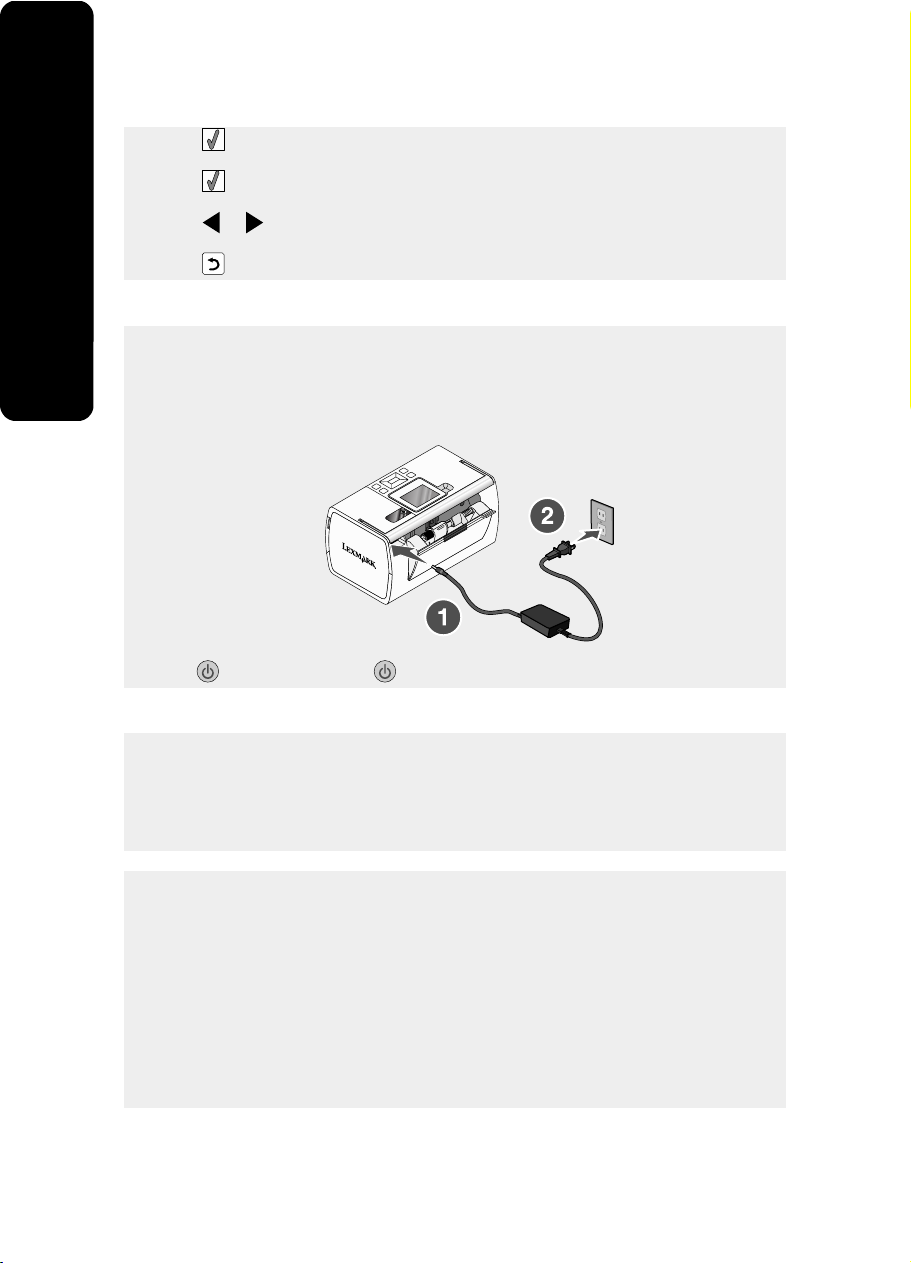
Power button is not lit
Make sure you have disconnected the power supply cord from the printer and then from the
wall outlet.
1
Plug the cord all the way into the power supply port on the printer.
2
Plug the cord into an electrical outlet that other electrical devices have been using.
3
If the light is not on, press .
Software does not install
The following operating systems are supported:
•
Windows 2000
•
Windows XP
•
Windows Vista
•
Mac OS X version 10.3 or later
Solution 1
1
Close all open software applications.
2
Disable any anti-virus programs.
3
Remove the printer software CD from the CD-ROM drive.
4
Restart the computer.
5
When the desktop appears, reinsert the printer software CD. The CD icon is created on
the desktop.
6
Follow the instructions on the computer screen to install the software.
14

Solution 2
1
Remove the printer software CD.
2
Restart the computer.
3
When the desktop appears, cancel all Found New Hardware windows.
4
Reinsert the printer software CD.
5
Follow the instructions on the computer screen.
Solution 3
1
Check the USB cable for any obvious damage.
2
Firmly plug the square end of the USB cable into the back of the printer.
3
Firmly plug the rectangular end of the USB cable into the USB port of the computer.
English
The USB port is marked with the
USB symbol.
Solution 4
Disconnect the USB cable from any other device, such as a USB hub or switch box.
1
2
Directly connect the cable to the printer and the computer.
Photo does not print
Solution 1
If an error message is displayed, see “Error messages” in the “Troubleshooting” chapter of
the User's Guide on the CD.
Solution 2
If the light is not on, see “Power button is not lit” on page 14.
Solution 3
Remove and then load paper. For more information, see “Loading paper” in the “Loading
paper” chapter of the User's Guide on the CD.
Solution 4
Check the ink level, and install a new print cartridge if necessary. For more information, see
“Installing the print cartridge” in the “Maintaining the printer” chapter of the User's Guide on
the CD.
15

Solution 5
If the printer is connected to the computer through another device:
1
Disconnect the USB cable from any other device, such as a USB hub or switch box.
2
English
Directly connect the cable to the printer and the computer.
Solution 6
Press to turn the printer off.
1
2
Disconnect the power supply cord from the wall outlet.
3
Disconnect the other end of the power supply cord from the printer.
4
Reconnect the power supply cord to the printer.
5
Plug the power supply cord into the wall outlet.
6
Press to turn the printer back on.
Cannot print from digital camera using PictBridge
Solution 1
Enable PictBridge printing on the camera by selecting the correct USB mode. For more
information, see the digital camera documentation.
Solution 2
1
Disconnect the camera.
2
Connect a PictBridge-enabled digital camera to the PictBridge port. See the digital camera
documentation to determine whether it is PictBridge-enabled.
Solution 3
Use only the USB cable that came with the camera.
Solution 4
Remove the memory card or the flash drive from the printer.
Removing and reinstalling the software
If the printer is not functioning properly, or if a communications error message appears when
you try to use the printer, you may need to remove and reinstall the printer software.
1
Click Start Programs or All Programs Lexmark 350 Series.
2
Select Uninstall.
3
Follow the instructions on the computer screen to remove the printer software.
4
Restart the computer before reinstalling the printer software.
16

5
Click Cancel on all New Hardware Found screens.
6
Insert the CD, and then follow the instructions on the computer screen to reinstall the
software.
English
17
תונורתפ הנקתה
ךירדמ הז ללוכ עדימ תודוא:
•
"עדימ יתוחיטב "דומעב 18
•
"שופיח עדימ תודוא תספדמה "דומעב 18
•
"שומיש יטירפתב חול הרקבה "דומעב 22
•
"ןורתפ תויעב הנקתה "דומעב 26
•
"הרסה הנקתהו שדחמ לש הנכותה "דומעב 29
עדימ יתוחיטב
שמתשה קר קפסב חוכה לבכבו למשחה םיקפוסמה םע רצומ הז וא קפסב חוכ לבכו למשח יפילח רשואמה
לע-ידי ןרציה.
רבח תא לבכ למשחה עקשל למשח אצמנה ךומסב רצומל שיגנו תולקב.
תורישל םינוקיתו ,דבלמ הלא םירכזומה דועיתב שמתשמל ,הנפ קפסל תוריש יעוצקמ.
םיילבולגו תעב שומישה יביכרב Lexmark
תירבע
רצומ הז דעוימ ,ןחבנ רשואו דומעל ינקתב תוחיטב םירימחמ
םייפיצפס .תונוכת תוחיטבה לש םיקלח םיוסמ ןניא דימת הרורב חרכהב. Lexmark הניא תיארחא שומישל
םיקלחב םייפילח םירחא.
תוריהז: לא ןיקתת רצומ הז לאו עצבת ירוביח םיטוח וא למשח םהשלכ ,ןוגכ קפס חוכ וא ןופלט,
ךלהמב תפוס םיקרב.
שופיח עדימ תודוא תספדמה
ןויליג הנקתה
רואיתןכיה שפחל
ןתינ אוצמל ךמסמ הז תזיראב תספדמה וא רתאב
טנרטניאה לש Lexmark תבותכב www.lexmark.com.
ןויליג ההנקתה קפסמ תוארוה תנקתהל
הרמוחה הנכותהו.
18

תרבוח םידעצ םינושאר וא תונורתפ הנקתה
רואיתןכיה שפחל
ןתינ אוצמל ךמסמ הז תזיראב תספדמה וא רתאב
טנרטניאה לש Lexmark תבותכב
www.lexmark.com.
תרבוחה םידעצ םינושאר תקפסמ תוארוה
תנקתהל הרמוחה הנכותהו) תכרעמב הלעפהה
Windows (תוארוהו תויסיסב לע שומישה
תספדמב.
הרעה: םא תספדמה ךתושרבש תכמות
תכרעמב הלעפהה Macintosh ,האר Mac
Help:
1
ב- Finder ןחלושב הדובעה ,ץחל םיימעפ
לע הייקיתה Lexmark 350 Series.
2
ץחל םיימעפ לע למסה Help.
תרבוחה תונורתפ הנקתה הריבסמ דציכ רותפל
תויעב הנקתה לש תספדמה.
הרעה: םיכמסמה םניא םיקוושמ םע תספדמה.
םא אל תלביק תא תרבוחה םידעצ םינושאר וא
תא תרבוחה תונורתפ הנקתה ,ןייע ןיפוליחל
בךירדמ שמתשמל.
ךירדמ שמתשמל
רואיתןכיה שפחל
הךירדמ שמתשמל ןקתומ ךלהמב תנקתה תנכות
תספדמה.
1
Lexmark 350 Series.
ץחל לע לחתה תוינכות וא לכ תוינכותה
2
ץחל לע הךירדמ שמתשמל.
םא רושיקה לךירדמ שמתשמל וניא אצמנ ןחלושב
הדובעה ,עצב תא תוארוהה תואבה:
1
סנכה תא רוטילקתה.
עיפומ ךסמ הנקתהה.
הרעה: םא שרדנ ,ץחל לע לחתה הלעפה
רחאלו ןכמ דלקה D:\setup ,רשאכ D איה
תוא ןנוכ םירוטילקתה.
2
ץחל לע תגצה ךירדמה שמתשמל) ללוכ
ןורתפ תויעב הנקתה(.
3
ץחל לע ןכ.
למס לש הךירדמ שמתשמל עיפומ ןחלושב
הדובעה הוךירדמ שמתשמל עיפומ ךסמב.
ןתינ אוצמל ךמסמ הז םג רתאב טנרטניאה לש
Lexmark תבותכב www.lexmark.com.
הספדה
תקוזחת תספדמה
תומיסחו וא תונזה תויוגש לש ריינ
הייקיתה Lexmark 350 Series.
הךירדמ שמתשמל קפסמ עדימ לע שומישה
תספדמב עדימו רחא תמגוד:
•
שומיש הנכותב) תכרעמב הלעפהה Windows(
•
תניעט ריינ
•
•
הדובע םע םימולצת
•
הקירס) םא תכמתנ תספדמב(
•
תנכה םיקתעה) םא תכמתנ תספדמב(
•
סקפ) םא ךמתנ תספדמב(
•
•
רוביח תספדמה תשרל) םא ךמתנ תספדמב(
•
ןורתפ תויעב הספדה ,הקתעה ,הקירס סקפ
הרעה: םא תספדמה ךתושרבש תכמות תכרעמב
הלעפהה Macintosh ,האר Mac Help:
1
ב- Finder ןחלושב הדובעה ,ץחל םיימעפ לע
2
ץחל םיימעפ לע למסה Help.
תירבע
19

הרזע
רואיתןכיה שפחל
רשאכ אצמית לכב תינכות לש Lexmark ,ץחל לע
הרזע, תוצע הרזע וא הרזע יאשונ הרזע.
םא תספדמה תרבוחמ בשחמל ,הרזעה קפסת
תוארוה לע שומישה הנכותב.
זכרמ תונורתפה לש Lexmark
רואיתןכיה שפחל
ידכ תשגל זכרמל תונורתפה לש Lexmark:
1
Lexmark 350 Series.
ץחל לע לחתה תוינכות וא לכ תוינכותה
2
רחב תא זכרמ תונורתפה לש Lexmark.
הנכותה זכרמ תונורתפה לש Lexmark הלולכ
רוטילקתב .םא תספדמה תרבוחמ בשחמל,
הנכותה תנקתומ דח םע תונכותה תורחאה.
הכימת תוחוקלב
רואיתןכיה שפחל) ןופצ הקירמא(ןכיה שפחל) ראש םלועה(
ירפסמ ןופלט תועש הכימת םינתשמ
םאתהב הנידמל רוזאלו.
www.lexmark.com .רחב הנידמ
תירבע
Customer Support) הכימת
רקב רתאב טנרטניאה ונלש תבותכב
וא רוזא רחאלו ןכמ רחב תא רושיקה
תוחוקלב(.
הרעה: תלבקל עדימ ףסונ לע תריצי
רשק םע Lexmark ,ןייע תרהצהב
תוירחאה תספדומה תקוושמש םע
תספדמה.
•
הרא"ב: 1-800-332-4120
ינש-ישיש )08:00 דע 23:00
EST(
תבש) םיירהצ דע 18:00 EST(
•
הדנק: 1-800-539-6275
ינש-ישיש )09:00:00 דע 21:00
EST(
תבש) םיירהצ דע 18:00 EST(
•
וקיסקמ: 001-800-377-0063
ינש-ישיש )08:00 דע 20:00
EST(
הרעה: ירפסמ תועשו הכימתה םייושע
תונתשהל אלל העדוה .תלבקל ירפסמ
ןופלטה םינכדועמה םינימזש ,ןייע
תרהצהב תוירחאה תספדומה
תקוושמש םע תספדמה.
הכימת תינופלטרשקתה ונילא
20

רואיתןכיה שפחל) ןופצ הקירמא(ןכיה שפחל) ראש םלועה(
תכימת תועצמאב ראוד ינורטקלא
הנתשמ םאתהב הנידמל וא רוזא
ןכתייו אלש היהת הנימז לכב םירקמה.
רקב רתאב טנרטניאה ונלש תבותכב
www.lexmark.com .רחב הנידמ
וא רוזא רחאלו ןכמ רחב תא רושיקה
Customer Support) הכימת
תוחוקלב(.
הרעה: תלבקל עדימ ףסונ לע תריצי
רשק םע Lexmark ,ןייע תרהצהב
תוירחאה תספדומה תקוושמש םע
תספדמה.
www.lexmark.com.
SUPPORT) הכימת תוחוקלב(.
תלבקל הכימת ראודב ינורטקלא ,רקב
רתאב טנרטניאה ונלש:
1
ץחל לע CUSTOMER
2
ץחל לע Technical Support
)הכימת תינכט(.
3
רחב תא תחפשמ תוספדמה
ךתושרבש.
4
רחב תא םגד תספדמה
ךתושרבש.
5
עטקמב Support Tools) ילכ
הכימת ,(ץחל לע e-Mail
Support) הכימת ראודב
ינורטקלא(.
6
םלשה תא ספוטה רחאלו ןכמ
ץחל לע Submit Request
)חלש השקב(.
הכימת תועצמאב ראוד
ינורטקלא
תוירחא תלבגומ
רואיתןכיה שפחל) הרא"ב(ןכיה שפחל) ראש םלועה(
יטרפ תוירחאה םייושע
תונתשהל םאתהב הנידמל
וא רוזא .ןייע תרהצהב
תוירחאה תספדומה
תקוושמש םע תספדמה.
SUPPORT) הכימת תוחוקלב(.
All-In-One Printers) תוספדמ
תגצהל תולבגהה םיאנתהו לש תוירחא
תלבגומ וז ,ןייע תרהצהב תוירחאה
תלבגומה הלולכש םע תספדמ וז וא רקב
רתאב תבותכב: www.lexmark.com.
ץחל לע CUSTOMER
ץחל לע Warranty Information
)עדימ תוירחא(.
עטקמב לש תרהצה תוירחאה
תלבגומה ,ץחל לע Inkjet &
תקרזה ויד ו- All-In-One.(
לולג ףדב תגצהל תוירחאה.
Lexmark International, Inc.
1
2
3
4
יטרפ תוירחא תלבגומ
תקפסמ תוירחא תלבגומ יכ
תספדמ וז היהת הייקנ םימגפמ
םירמוחב ןפואבו רוצייה ךשמל
12 םישדוח רחאל ךיראת
השיכרה ירוקמה.
םושר תא םיטרפה םיאבה) ןתינ אוצמל םתוא תלבקב השיכרה קלחבו ירוחאה לש תספדמה (רומשו םתוא
גשיהב די התאשכ הנופ ונילא ידכ לכונש תרשל ךתוא רהמ רתוי:
•
רפסמ גוס רישכמה:
•
רפסמ ירודיס:
•
ךיראת השיכר:
•
םש תונחה הב שכרנ:
תירבע
21

שומיש יטירפתב חול הרקבה
שומיש םיטירפתב הגוצת הריחבו
1
סנכה סיטרכ ןורכיז וא ןנוכ קזבה .תלבקל עדימ ףסונ ,האר" תסנכה ןנוכ קזבה "קרפב" רוביח םינקתה
ןוסחאל םימולצת "בךירדמ שמתשמל אצמנה רוטילקתב.
2
ץחל תופיצרב לע וא לע דע שהגוצת הריחבו )View and Select (עיפומ הגוצתב.
3
ץחל לע .
4
עצב תא תוארוהה לעש הגוצתה.
ןאכמךתורשפאב
•
רוחבל םולצת דחא וא רתוי הגוצתל ו/וא הספדה.
•
רוחבל תא רפסמ םיקתעהה הספדהל.
ידכ רובעל ךסמל הגוצת המידקמ.
ץחל לע
הגצה הריחבו )View and Select(
הגוצת המידקמ )Print Preview(גיצהל הגוצת המידקמ לש םימולצתה הספדהל.
ידכ םיאתהל תא תורדגה הספדהה ,ללוכ
תירבע
ךתורשפאב ץוחלל לע
לדוג ריינ ,לודג םולצת ,הסירפ ,תוכיא הספדה ,גוס ריינ תורדגהו
םולצת טרופספ.
שומיש טירפתב תספדה םימולצת
טירפת הז רשפאמ רוחבל תצובקב םימולצת הספדהל.
1
סנכה סיטרכ ןורכיז וא ןנוכ קזבה .תלבקל עדימ ףסונ ,האר" תסנכה ןנוכ קזבה "קרפב" רוביח םינקתה
ןוסחאל םימולצת "בךירדמ שמתשמל אצמנה רוטילקתב.
2
ץחל תופיצרב לע וא לע דע שתספדה םימולצת )Print Photos (עיפומ הגוצתב.
3
ץחל לע .
22

ןאכמךתורשפאב
עצבל תוריחב לש Digital Print Order Format
)DPOF .(תורשפא וז העיפומ קר םא םייק ץבוק
DPOF סיטרכב ןורכיזה.
רפסמה ללוכה לש תונומת וספדויש .ךתורשפאב
רוחבל:
םימולצת לע ריינ )Photo/s on Paper (תגצהל
םיקתעהה הספדהל.
Settings (רוחבל לדוג ריינ ,לדוג םולצת ,הסירפ,
•
ילדוג ריינ םינימז.
•
תספדה סקדניא )Print Index (תספדהל ףד
סקדניא לש םימולצתה.
•
ץחל לע םיקתעה םולצתל ידכ רוחבל תא רפסמ
•
תורדגה הספדה תורחא )Other Print
תוכיא הספדה גוסו ריינ.
סיפדהל םימולצת ומלוצש תרגסמב םיכיראת
םימיוסמ.
תספדה תריחב המלצמ )Print Camera
Selections(
תספדה לכ N םימולצת )Print All N Photos.(סיפדהל לכ םימולצתה סיטרכב ןורכיזה. N אוה
תספדה םימולצת יפל ךיראת )Print Photos by
Date(
תספדה חווט םימולצתרוחבל תא םולצתה ןושארה ןורחאהו חווטב הספדהל.
תירבע
שומיש טירפתב הרבעהה
ךתורשפאב ריבעהל םימולצת סיטרכמ ןורכיז ןנוכל קזבה וא בשחמל) םא תספדמ תרבוחמ בשחמל.(
םימולצתה סיטרכבש ןורכיזה םירמשנ.
1
סנכה סיטרכ ןורכיז .תלבקל עדימ ףסונ ,האר" תסנכה סיטרכ ןורכיז "קרפב" רוביח םינקתה ןוסחאל
םימולצת "בךירדמ שמתשמל אצמנה רוטילקתב.
23
2
ץחל תופיצרב לע וא לע דע שהרבעה )Transfer (עיפומ הגוצתב.
3
ץחל לע .
4
םא ךנוצרב ריבעהל םולצת ןנוכל קזבה USB ,סנכה תא ןנוכה.
5
ץחל לע וא לע ידכ רוחבל ןנוכ קזבה USB וא בשחמ) םא תספדמה תרבוחמ בשחמל(.
6
ץחל לע .
7
עצב תא תוארוהה תגוצתבש תספדמה.

שומיש טירפתב תגוצת תויפוקש
טירפתה תגצה תגוצת תויפוקש רשפאמ גיצהל תונומת תונסחואמה סיטרכב ןורכיז וא ןנוכ קזבה.
1
סנכה סיטרכ ןורכיז וא ןנוכ קזבה .תלבקל עדימ ףסונ ,האר" תסנכה ןנוכ קזבה "קרפב" רוביח םינקתה
ןוסחאל םימולצת "בךירדמ שמתשמל אצמנה רוטילקתב.
2
ץחל תופיצרב לע וא לע דע שתגוצת תויפוקש )Slideshow (עיפומ הגוצתב.
3
ץחל לע .
4
ךשמהל ,ץחל לע .לכ םולצת גצומ ךשמל רפסמ תוינש.
5
םא ךנוצרב רובעל תינדי םולצתל םדוקה וא אבה ,ץחל לע וא לע .
שמתשה לכב דחא םינצחלהמ םיאבה:
ץחל לע הריחבל םולצתב וא םימולצתב הספדהל רחאל תגוצת תויפוקשה.
ץחל לע תייהשהל תגוצת תויפוקשה .תריצעל תגוצת תויפוקש ,ץחל לע בוש.
ץחל לע בוביסל םולצתה הגוצתב
6
•
•
•
הגיצמ תא םולצתה וא םימולצתה תרחבש הספדהל ךלהמב
םע תריצע תגוצת תויפוקש ,הציחל לע
תגוצת תויפוקש.
שומיש טירפתב םילכ
תירבע
•
הפש )Language (תונשל תא תורדגה הפשה.
•
הנידמ )Country (רידגהל תרירב לדחמ לש לדוג
ריינ קיר תינבתו ךיראת םישמשמה םוקמב
ךתואצמיה.
•
ןוכסיח למשחב )Power Save (רידגהל תא ךשמ
ןמזה ובש תספדמה ,םא הניא שומישב ,תרבוע
בצמל לש תכירצ למשח הכומנ .ךלהמב בצמ ןוכסיח
למשחב ,הגוצתה תרואתו עקרה תובוכמ .ץחל לע לכ
ןצחל תרזחהל תנזה למשח האלמ תספדמל.
ריינ.
1
ץחל תופיצרב לע וא לע דע שםילכ )Tools (עיפומ הגוצתב.
2
ץחל לע .
ןאכמךתורשפאב
תורירב לדחמ לש ןקתהה )Device Defaults(רוחבל:
תורדגה הספדה )Print Settings(רוחבל לדוג ריינ ,לדוג םולצת ,הסירפ ,תוכיא הספדה גוסו
24

ןאכמךתורשפאב
הקוזחת )Maintenance(רוחבל:
•
גצה תמר ויד )View Ink Level (גיצהל הקיפרג
תגציימה תא תמר וידה לכימב וידה.
•
יוקינ לכימ ויד )Clean Cartridge (תוקנל תא ירירח
לכימ וידה.
•
רושיי ילכמ ויד )Align Cartridge (רשייל תא לכימ
וידה.
•
תספדה ףד ןויסינ )Print Test Page (סיפדהל ףד
ןויסינ.
•
סופיא תורירב לדחמ )Reset Defaults (ספאל תא
תורדגה תרירב לדחמה תורדגהל ןרציה.
Bluetoothרוחבל:
Bluetoothרשפואמ )Bluetooth Enable (ידכ
Address) UAA (הצקומש ןקתהל רשפואמ
Bluetooth.
Saver Photos (רוחבל דע העברא םימולצת
םישמשמה ירמושכ ךסמ.
•
רשפאל וא לרטנל תרושקת Bluetooth.
•
בצמ רותיא )Discovery Mode (ליעפהל וא תובכל
תא בצמ רותיאה.
•
םש ןקתה )Device Name (גיצהל תא םש ןקתהה
תאו רפסמ ה- Universally Administered
תירבע
•
תבותכ ןקתה )Device Address (גיצהל תבותכ
לש 48 תויביס לש ןקתהה רשפואמ ה- Bluetooth.
המאתה תישיא )Customize(רוחבל:
•
רמוש ךסמ )Screen Saver (ליעפהל תא תייצקנופ
רמוש ךסמה רחאל 30 תוינש ,רחאל הקד תחא וא
תובכל.
•
תפלחה ימולצת רמוש ךסמ )Replace Screen
•
םיזמר )Hinting (ליעפהל וא תובכל תגצה םיזמר.
םיזמר םה תועדוה תגוצתב חול הרקבה םיקפסמה
עדימ ףסונ לע הריחבה תיחכונה.
25
שומיש טירפתב בצמ תכירע םולצת
ידכ תשגל טירפתל בצמ תכירע םולצת.
תעב תגצה םימולצת ,ץחל לע
ןאכמךתורשפאב
תוריהב )Brightness(םיאתהל תא תוריהבה לש םולצתה.
ךותיח )Crop(ךותחל הנומת.

ןאכמךתורשפאב
רופיש יטמוטוא )Auto Enhance(רפשל םולצת תיטמוטוא.
רוא.
קיתע וא רופא קיתע.
ןוויכ ןועשה.
תתחפה ןיע המודא )Red Eye Reduction(תיחפהל טקפא לש ןיע המודא תמרגנה לשב תופקתשה
יטקפא העיבצ )Colorized Effect(רוחבל םא סיפדהל םולצת רוחשב ןבלו ,םוח ההכ ,םוח
בוביס )Rotate(בבוסל םולצת תועיספב לש 90 תולעמ ןוויכב ןועשה וא דגנ
תורגסמ )Frames(רוחבל ןונגס עבצו רוגסמל םולצתה.
שומיש טירפתב PictBridge
תורדגה תרירב לדחמה לש PictBridge תורשפאמ הריחב תורדגהב תספדמ םא אל ונייוצ םדוק ןכל תוריחב
ןהשלכ המלצמב תילטיגידה .עוציבל תוריחב המלצמ ,האר תא דועית המלצמה.
1
רבח המלצמ תילטיגיד תרשפואמ PictBridge.
2
ץחל לע ידכ תשגל טירפתל PictBridge.
3
ץחל לע וא לע ידכ טוונל תויורשפאב תואבה:
ןאכמךתורשפאב
תירבע
לדוג ריינ )Paper Size(רוחבל לדוג ריינ.
לדוג םולצת )Photo Size(רוחבל לדוג םולצת.
הסירפ )Layout(רוחבל תסירפ דומע.
תוכיא הספדה )Print Quality(רוחבל תוכיאב הספדה.
גוס ריינ )Paper Type(רחב תא גוס ריינה.
26
4
עוציבל הריחב ,ץחל לע וא לע .
הספדהל ,ץחל לע .
5
ןורתפ תויעב הנקתה
הפש אל הנוכנ העיפומ הגוצתב
1
ץחל לע ידכ תובכל תא תספדמה.
2
ץחל לע ידכ ליעפהל הרזח תא תספדמה.
3
ץחל לע .

ץחל לע .
ךשמהל ,ץחל לע .
ץחל תופיצרב לע וא לע דע הפשהש היוצרה העיפומ הגוצתב.
ץחל לע ידכ רומשל תא הריחבה.
ןצחלה הלעפה וניא קלוד
סנכה תא לבכה דע ףוסה תאיציב קפס חוכה תספדמב.
רבח תא לבכה עקשל למשח שמשמש ירישכמ למשח םירחא.
םא תירונה הניא תקלוד ,ץחל לע .
תוכמתנ תוכרעמ הלעפהה תואבה:
Windows 2000
Windows XP
Windows Vista
Mac OS X הסרג 10.3 וא תמדקתמ רתוי
4
5
6
7
אדו לבכש קפס חוכה קתונמ תספדמהמ עקשמו למשחה ריקב.
1
2
תירבע
3
אל ןתינ ןיקתהל תא הנכותה
•
•
•
•
27
ןורתפ 1
1
רוגס תא לכ םימושייה םיחותפה.
2
לרטנ תא לכ תנכות יטנאה סוריו.
3
רסה תא רוטילקת תנכות תספדמה ןנוכמ םירוטילקתה.
4
לעפה שדחמ תא בשחמה.
5
םע תעפוה ןחלוש הדובעה ,סנכה תא רוטילקת תספדמה .למס רוטילקתה רצונ ןחלושב הדובעה.
6
עצב תא תוארוהה תוגצומש לע ךסמה ידכ ןיקתהל תא הנכותה.

ןורתפ 2
רסה תא רוטילקת תנכות תספדמה.
1
2
לעפה שדחמ תא בשחמה.
עיפומשכ ןחלוש הדובעה ,לטב תא לכ תונולחה לש" התהוז הרמוח השדח".
3
4
סנכה הרזח תא רוטילקת תנכות תספדמה.
5
עצב תא תוארוהה לעש ךסמ בשחמה.
ןורתפ 3
1
קודב םא םייק קזנ יולג והשלכ לבכב ה- USB.
2
רבח בטיה תא הצקה עבורמה לש לבכ ה- USB הקלחל ירוחאה לש תספדמה.
3
רבח בטיה תא הצקה ינבלמה לש לבכ ה- USB תאיציל ה- USB בשחמב.
.
תאיצי ה- USB תנמוסמ למסב ה- USB
ןורתפ 4
קתנ תא לבכ ה- USB לכמ ןקתה רחא ,תמגוד תזכר USB וא תספוק גותימ.
1
2
רבח תא לבכה תורישי תספדמל בשחמלו.
םולצתה וניא ספדומ
תירבע
ןורתפ 1
םא תגצומ תעדוה האיגש ,האר" תועדוה האיגש "קרפב" ןורתפ תויעב "לש הךירדמ שמתשמל אצמנה
רוטילקתב.
ןורתפ 2
םא תירונה הניא תקלוד ,האר "ןצחלה הלעפה וניא קלוד "דומעב 27.
ןורתפ 3
רסה תא ריינה רחאלו ןכמ ןעט ותוא הרזח .תלבקל עדימ ףסונ ,האר" תניעט ריינ "קרפב" תניעט ריינ"
בךירדמ שמתשמל אצמנה רוטילקתב.
ןורתפ 4
קודב תא תמר וידה ,םאו שרדנ ,ןקתה לכימ ויד שדח .תלבקל עדימ ףסונ ,האר" תנקתה לכימ ויד "קרפב
"תקוזחת תספדמה "בךירדמ שמתשמל אצמנה רוטילקתב.
ןורתפ 5
םא תספדמה תרבוחמ בשחמל תועצמאב ןקתה רחא:
1
קתנ תא לבכ ה- USB לכמ ןקתה רחא ,תמגוד תזכר USB וא תספוק גותימ.
2
רבח תא לבכה תורישי תספדמל בשחמלו.
28

ןורתפ 6
1
ץחל לע ידכ תובכל תא תספדמה.
2
קתנ תא לבכ קפס חוכה עקשהמ ריקב.
3
קתנ תא הצקה ינשה לש לבכ קפס חוכה תספדמהמ.
4
רבח שדחמ תא לבכ קפס חוכה תספדמל.
5
רבח תא לבכ קפס חוכה עקשל ריקב.
6
ץחל לע ידכ ליעפהל הרזח תא תספדמה.
אל ןתינ סיפדהל המלצממ תילטיגיד תועצמאב PictBridge
ןורתפ 1
רשפא תספדה PictBridge המלצמב לע-ידי הריחב בצמב USB ןוכנ .תלבקל עדימ ףסונ ,האר תא דועית
המלצמה תילטיגידה.
ןורתפ 2
1
קתנ תא המלצמה.
2
רבח המלצמ תילטיגיד תרשפואמ PictBridge תאיציל PictBridge .ןייע דועיתב המלצמה תילטיגידה
ידכ עובקל םא איה תרשפואמ PictBridge.
ןורתפ 3
שמתשה קר לבכב USB ףרוצש המלצמל.
ןורתפ 4
רסה תא סיטרכ ןורכיזה וא תא ןנוכ קזבהה תספדמהמ.
תירבע
29
הרסה הנקתהו שדחמ לש הנכותה
םא תספדמה הניא תדקפתמ הרושכ וא תועיפומש תועדוה תאיגש תרושקת תעב ךנהש הסנמ שמתשהל
תספדמב ,ןכתיי ץלאתש ריסהל תא תנקתה תנכות תספדמה רחאלו ןכמ ןיקתהל תא הנכותה שדחמ.
1
ץחל לע לחתה תוינכות וא לכ תוינכותה Lexmark 350 Series.
2
רחב תורשפאב תרסה הנקתה.
3
עצב תא תוארוהה תוגצומש לע ךסמה ידכ ריסהל תא תנכות תספדמה.
4
לעפה שדחמ תא בשחמה ינפל ןיקתתש שדחמ תא תנכות תספדמה.
5
ץחל לע לוטיב לכב םיכסמה לש הרתוא הרמוח השדח.
6
סנכה תא רוטילקתה עצבו תא תוארוהה לעש ךסמה ידכ ןיקתהל שדחמ תא הנכותה.
 Loading...