

Page 1
Ultra Slim COB LED Floodlights
IP66
220-240V
Please read these instructions before commencing installation & retain them for future reference.
Important information
It is recommended that floodlights are installed by a qualified electrician ensuring the installation complies to
current IEE wiring regulations & local building control.
• These products are designed for connection to a 220-240V mains supply.
• We will not accept responsibility for any claims arising from a poor installation.
SPECIFICATIONS:
• Voltage range: 220-240 V/AC
• Frequency: 50/60 Hz
• Power: 10W, 30W, 50W
• Protection against electric shock: Class I. Requires
earth connection
• Ingress Protection: IP66
• Quality/Corrosive rating: Suitable for commercial use
and indoor/outdoor applications
• Material: Die cast Aluminium body with tempered glass
diffuser
• Ambient temperature range: -8 C to +45 C
• Beam Angle: 120°
• Warranty: 3 Years
• Complete with built-in Quinetic Receiver
• r by using Quinetic Wireless Control method: pai ing
S es * (see next page for instructions) witch or QUPIR
• Control distance**: - up to 15m indoor
- up to 60m outdoor
• Not Dimmable
• Adjustable Bracket
• Pre wired with 60cm length of rubberised cable
0 0
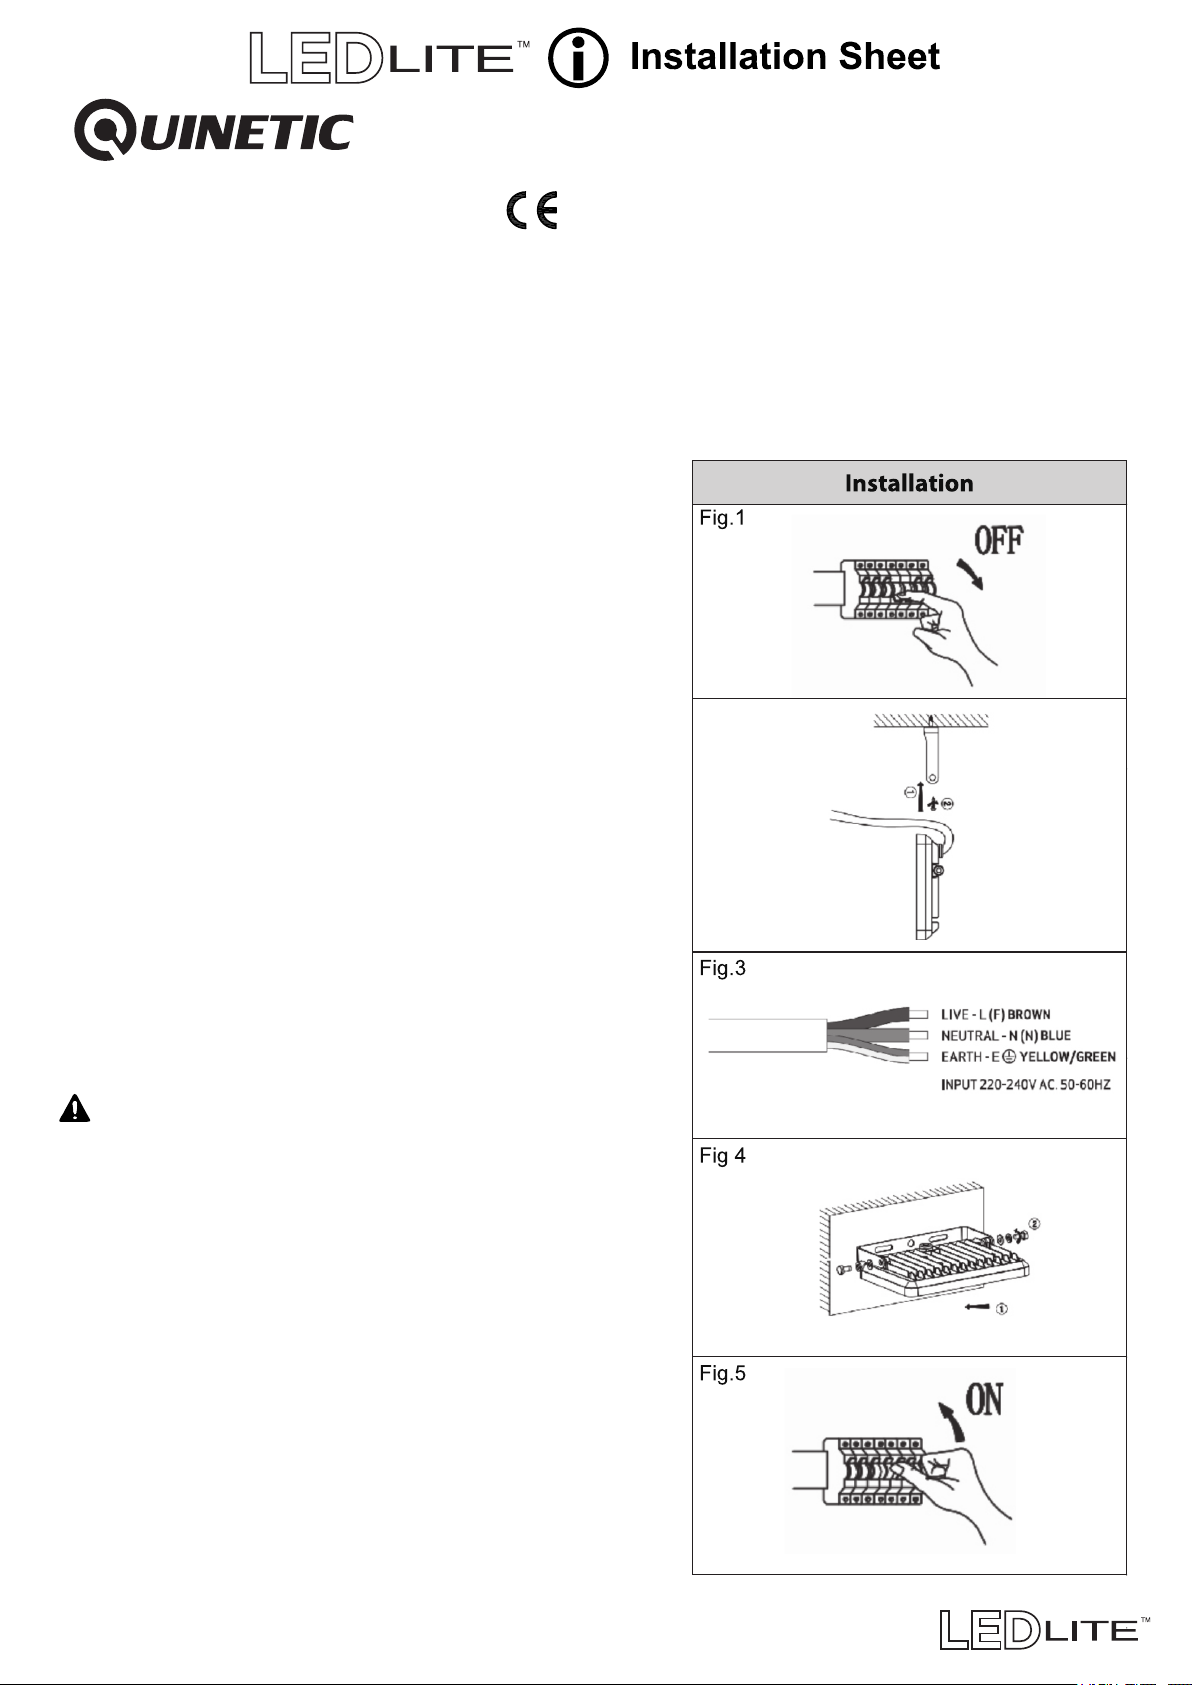
Fig.2
INSTALLATION INSTRUCTIONS:
Always switch off mains supply before servicing.
• Shut off Power. (Fig.1)
• Mount the bracket on the wall (Fig.2)
• Terminate loose ends of wire to an appropriate IP Rated
junction box or similar, ensuring Live, Earth and Neutral
polarities are observed. (Fig. 3)
Live - Brown/Red
Neutral - Blue/Black
Earth - Yellow/Green
• Connect the fitting to its bracket. (Fig.4)
• Turn On Power (Fig.5) and test the luminaire.
• Follow the pairing instructions to pair the floodlight with
the Quinetic Wireless Switch
WARNING: Ensure all items and screws are secure and
fitted correctly.
• Floodlights should not be connected in series.
* Quinetic Wireless Switch sold separately
** Distance comes from Quinetic laboratory test results. The actual distance
in practical use might vary due to environmental difference.
Page 2
Ultra Slim COB LED Floodlights
The Quinetic Ultra Slim Floodlight comes with an integrated wireless Quinetic controller that can be
paired with the Wireless Quinetic energy switch using any combination: a floodlight can be controlled
by a maximum of 10 separate Quinetic switches/PIRs, a switch can pair with an unlimited number of
floodlights. Multiple gang switches are supported, for separate floodlight control.
PAIRING INSTRUCTIONS:
1. Turn off the light by switching off mains then turn it back on again.
2. The light will enter in pairing mode for the first 3 seconds.
3. a. Push Type Switch (dimmable switch / Key Fob switch) - Press the switch quickly 3 times
during the first 3 seconds then wait 5 more seconds for the switch to be paired with the floodlight.
After 5 seconds you can press the switch to turn ON/OFF the floodlight and check if the pairing was
successful.
b. QUPIR Quinetic PIR - Press and hold the pairing button on the PIR sensor for 3 seconds to enter
the PIR pairing mode; the green LED sensor indicator will flash slowly (flashing once per second) and
then release the button. Press the PIR pairing button quickly 3 times during the first 3 seconds then
wait 5 more seconds for the PIR to be paired with the floodlight. After 5 seconds you can move in front
of the PIR to turn ON/OFF the floodlight and check if the pairing was successful.
c. Rocker Type Switch - Press the switch quickly ON/OFF 3 times (3 ON/OFF cycles) during the
first 3 seconds then wait 5 more seconds for the switch to be paired with the floodlight. After 5 seconds
you can press the switch to turn ON/OFF the floodlight and check if the pairing was successful.
NOTE: Do not press the switch again before the 5 seconds as this is the required time for pairing. If the
switch is pressed again before the 5 seconds have passed the switch will not be paired with
the floodlight and step 1 to 3 must be followed again.
4. In order to remove the floodlight stored pairing information follow steps 1 and 2 to enter pairing mode.
Press the switch quickly 5 times (5 ON/OFF cycles for standard rocker switch) during the first 3
seconds until the floodlight flashes - this means that the wireless switch is now unpaired.
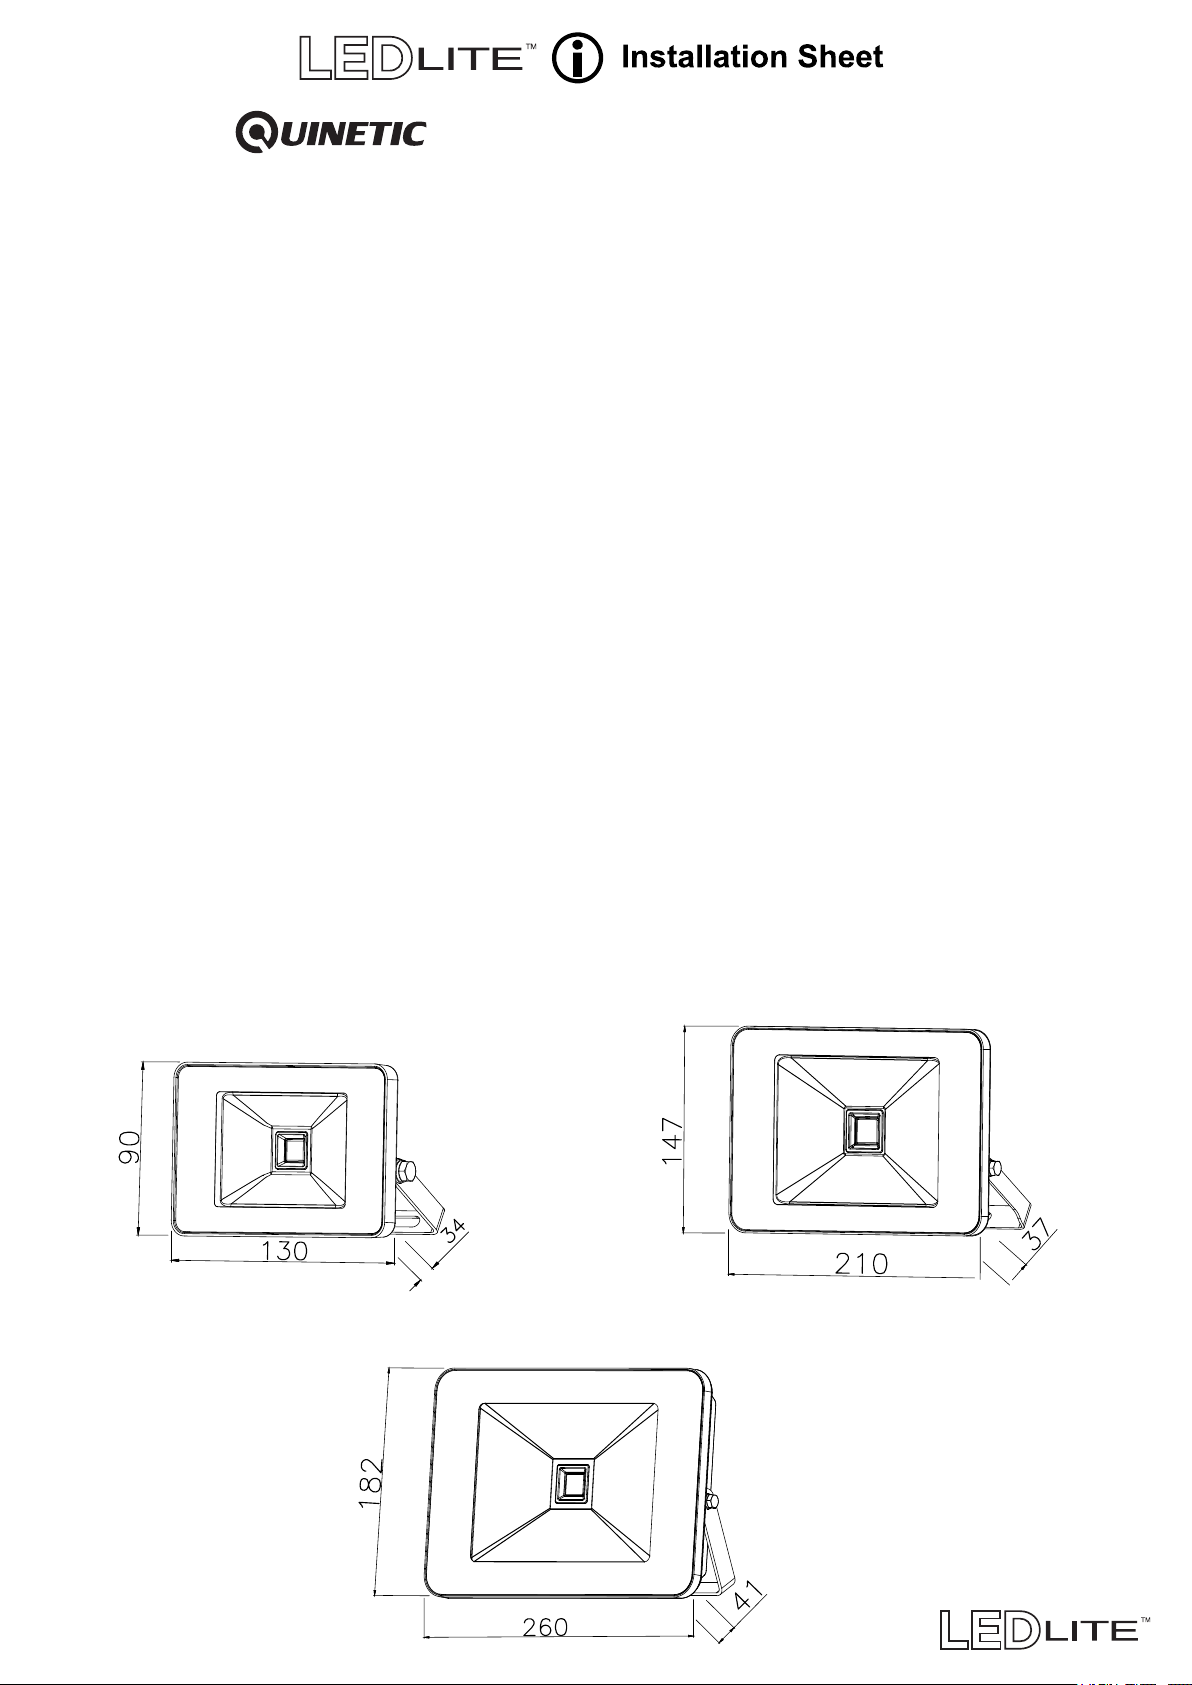
DIMENSIONS(mm):
LTQSF30
LTQSF10
LTQSF50
 Loading...