

Page 1
User Instructions
10W LED PIR Compact Bulkhead
LTWP10PIR
100-240V
50/60Hz
Please read these instructions and retain them for future reference.
Important information
It is recommended that this fitting is installed by a qualified electrician ensuring the installation
complies with current IEE wiring regulations & local building control.
• This product is designed for connection to a 100-240V mains supply.
• We cannot accept responsibility for any claims arising from a poor installation.
Important User Advice
• Always switch off mains supply before installation.
• The light fitting is Class II and does not require an earth connection.
NON DIMMABLE
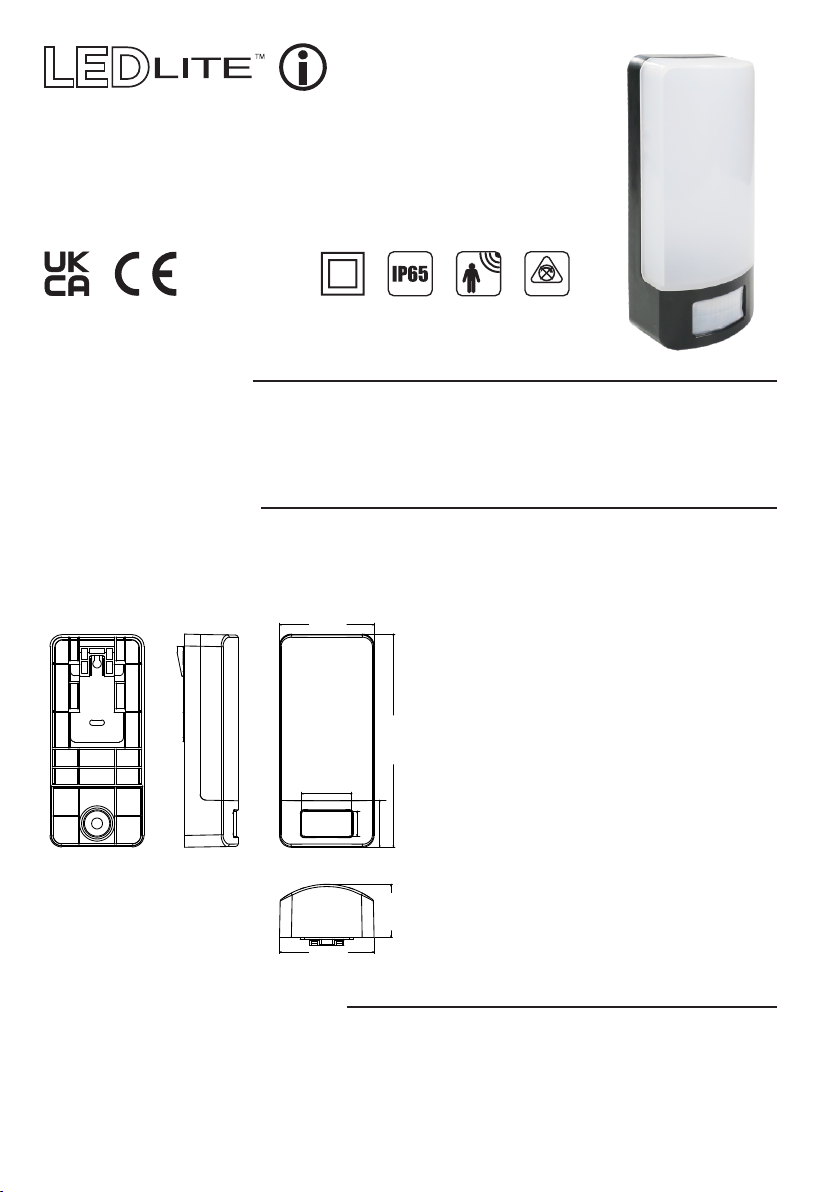
Dimensions:
80mm
42.5mm
80mm
21mm
40mm
180mm
45mm
Specifications:
• Voltage: 100-240V/AC
• Frequency: 50/60Hz
• Power: 10W
• Luminous Flux: 800lm
• Colour temperature: 4000K
• CRI>80
• Material: ABS + PC
• IP Rating: IP65
• Working Temp.: -25 C ~ +50 C
• Working Humidity: ≤85%RH
• Built-in PIR Sensor
• Detection Angle: 140°
• Detection Distance: 5-6m
• Activation Time: 15 seconds
• Lux Threshold: 20 lux
• Installation height: 1.5m~2.5m
0 0
Before you start the installation
Make sure that there are no pipes or cables beneath the mounting surface. •
Check the packaging and make sure that you have all the required parts. •
Follow each assembly step in order to prevent incorrect assembly. •
Make sure all screws / nuts, including electrical connections etc are fully tightened before use. •
• Avoid aiming the motion sensor at pools, heating vents, air conditioners or objects that may
change temperature rapidly.
• Try to avoid pointing the unit at trees or shrubs or where the motion of pets may be detected.
Page 2
Tools required:
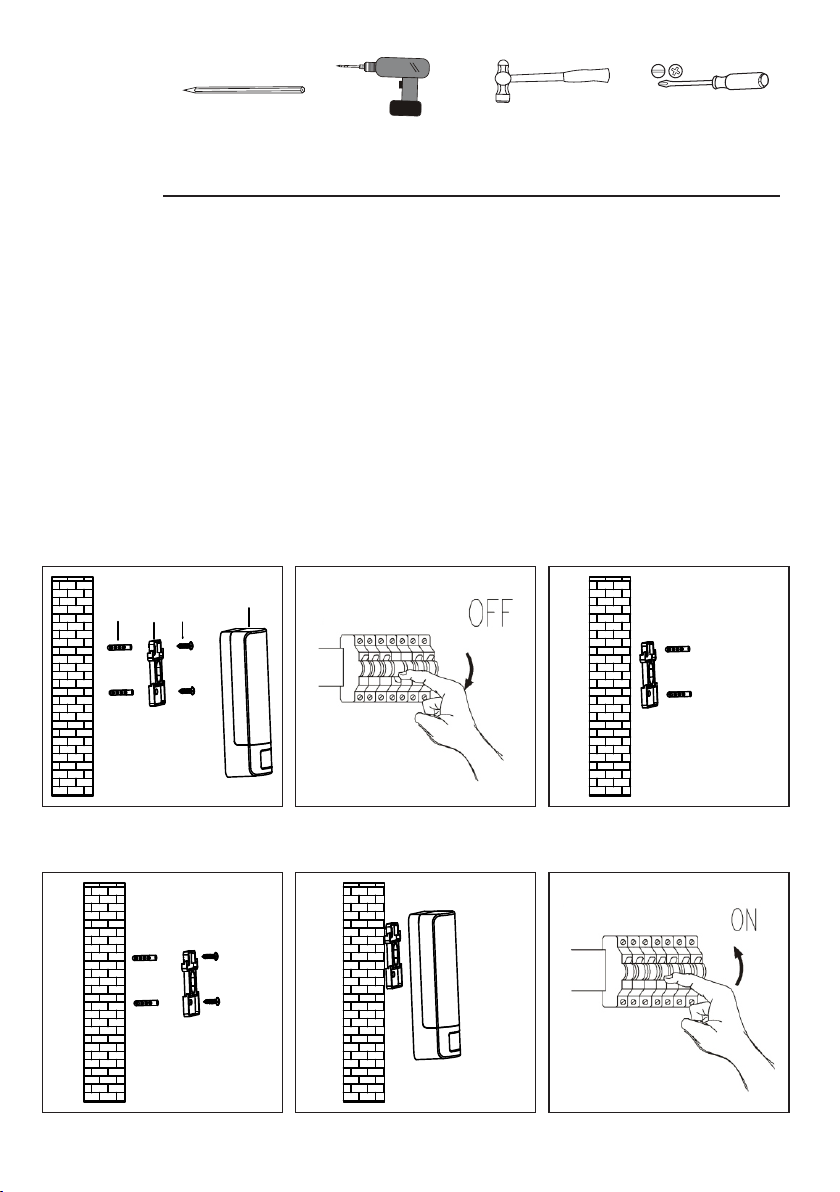
Pencil Electric drill Hammer Screwdriver
Installation
Check all the installation components presented in Fig. 1:
Step 1: Switch off mains supply (Fig.2).
Step 2: Identify the location and direction of any hidden supply cables or service pipes before drilling
fixing holes. Use the mounting kit and mark the position of the fixing holes (Fig.3). Ensure that
the fitting is level and the wall is capable of holding the weight of the product.
Step 3: Fix the wall plugs (Fig.4).
Step 4: Wiring - Connect the cable to the supply via an appropriate IP Rated junction box or similar,
ensuring Live and Neutral polarities are observed: Live - Brown
Neutral - Blue
This is a class II product and does not require an Earth connection.
Step 5: After wiring place the bulkhead onto the installed mounting kit to complete the
installation (Fig 5).
Step 6: Fig.6Power up the fitting to check if it functions correctly ( ).
1. Wall plugs
2. Mounting Kit
3. Screws
4. PIR Bulkhead
1 2
3
Fig.1 Fig.2 Fig.3
Fig.4 Fig.5 Fig.6
4
 Loading...