

Page 1
SLIM LED POLO
LTP3CCT
CCT Changeable / Tri Wattage
9W/14W/18W
220-240V
These instructions should be read carefully and retained after installation for further
reference and maintenance.
IP54 Round Bulkhead
SAFETY
l Before installation, ensure that the mains supply to the luminaire is switched off and the
circuit supply fuses are removed or circuit breaker turned off
l It is recommended that a qualified electrician is consulted or used for the installation of
this luminaire and installed to the current edition of the IEE wiring regulations
l Check that the total load on the circuit, including this luminaire, does not exceed the rating
of the circuit cable, fuse or circuit breaker
RATINGS
l This luminaire is of Class II construction and it does not require an earth connection
l IP54 rated
l F marked, suitable for installation on normal flammable surfaces
l Working situation: -20 C to 40 C
0 0
l 220-240V AC rated
l CE Approved
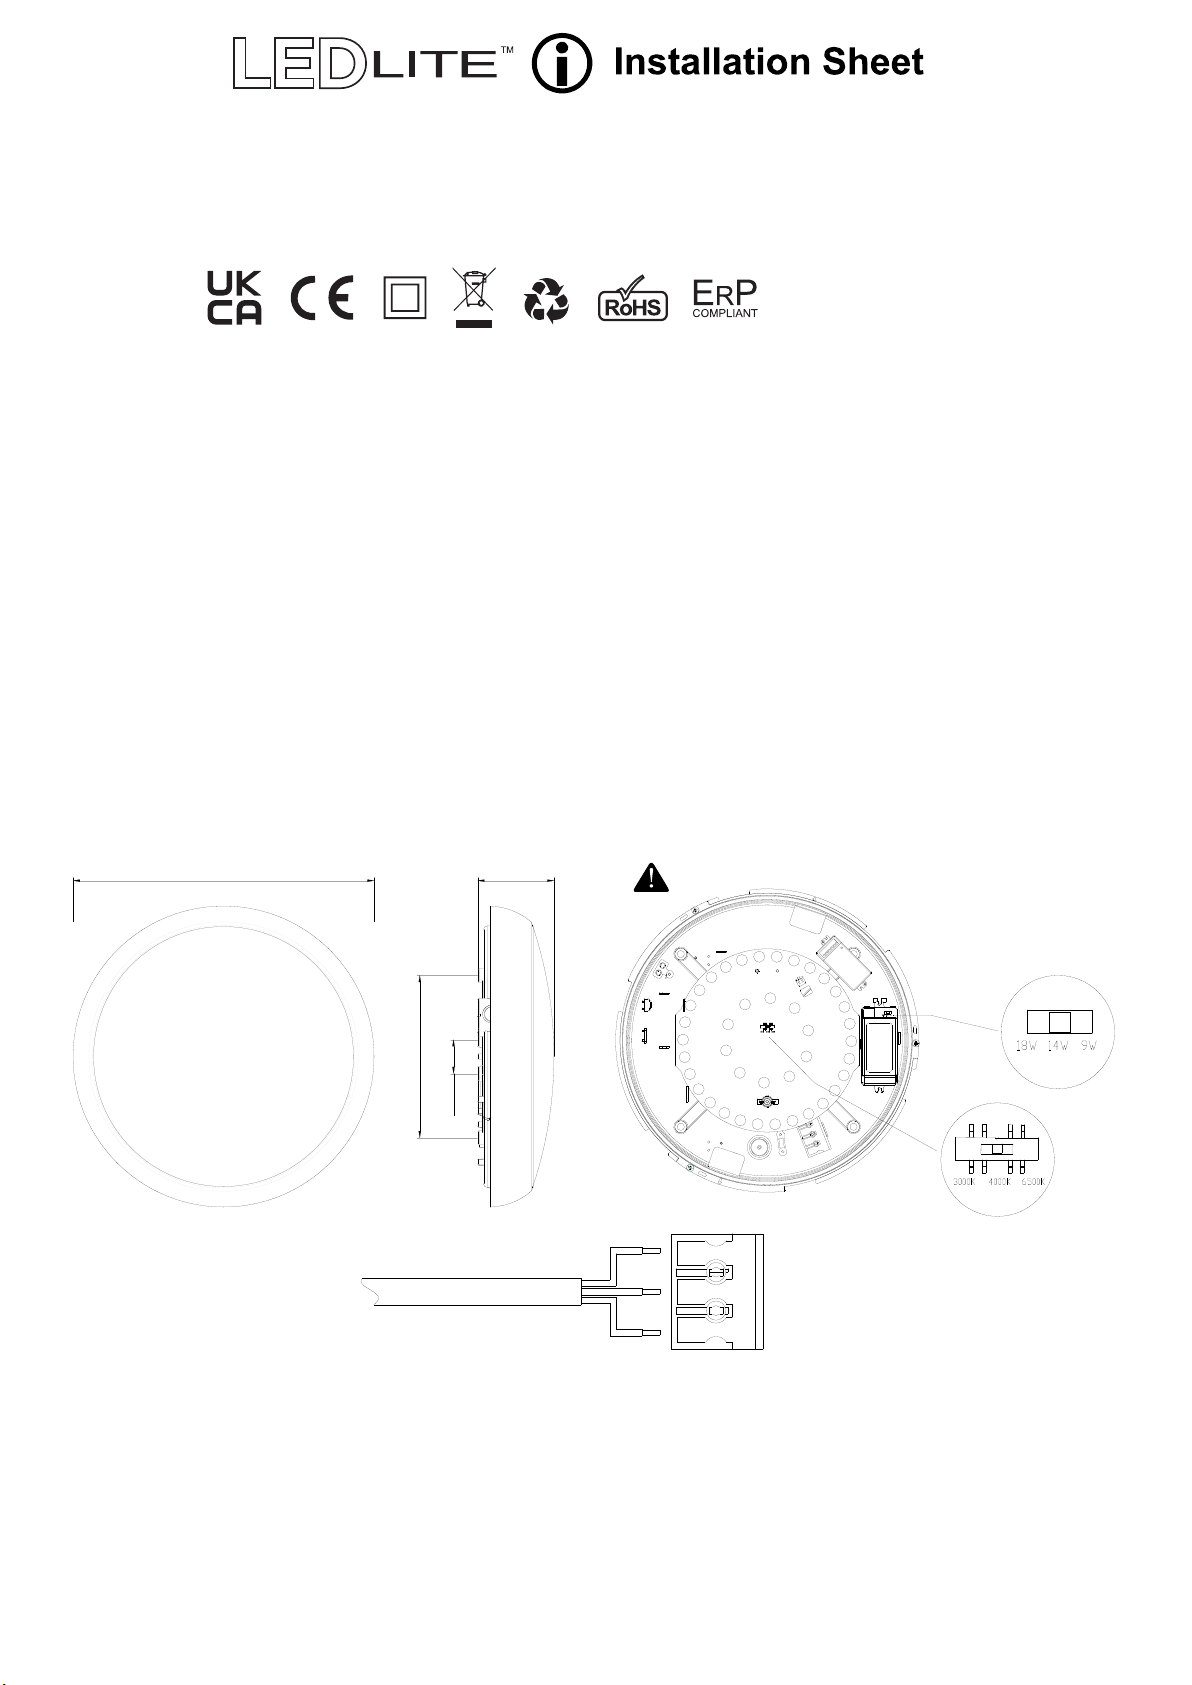
DIMENSIONS:
Ø315mm
170mm
35.5mm
Mains Supply
WIRING DIAGRAM:
TECHNICAL SPECIFICATIONS:
l Input Voltage: 220-240V/AC
Tri-Power Selectable: 9W / 14W / 18Wl
Light Output: 9W - 900lml
14W - 1450lm
18W - 1850lm
CCT Changeable (switch): l
3000K/4000K/6500K
80mm
CCT & POWER ADJUSTABLE:
Switch off the mains supply before changing power or CCT
Brown
Yellow
Green
Blue
L
E
N
Use the LED gear tray switch
to change the CCT temperature
CRI > 80l
IP Rating: IP54l
Protection Class: Class IIl
Housing: PC Body & Diffuserl
Operating Temp.: -15 C to +40 Cl
0 0
Dimensions: Diameter 315mm / depth 80mml
Warranty: 5 years l
Use the driver switch
to change the power
Page 2
INSTALLATION INSTRUCTIONS:
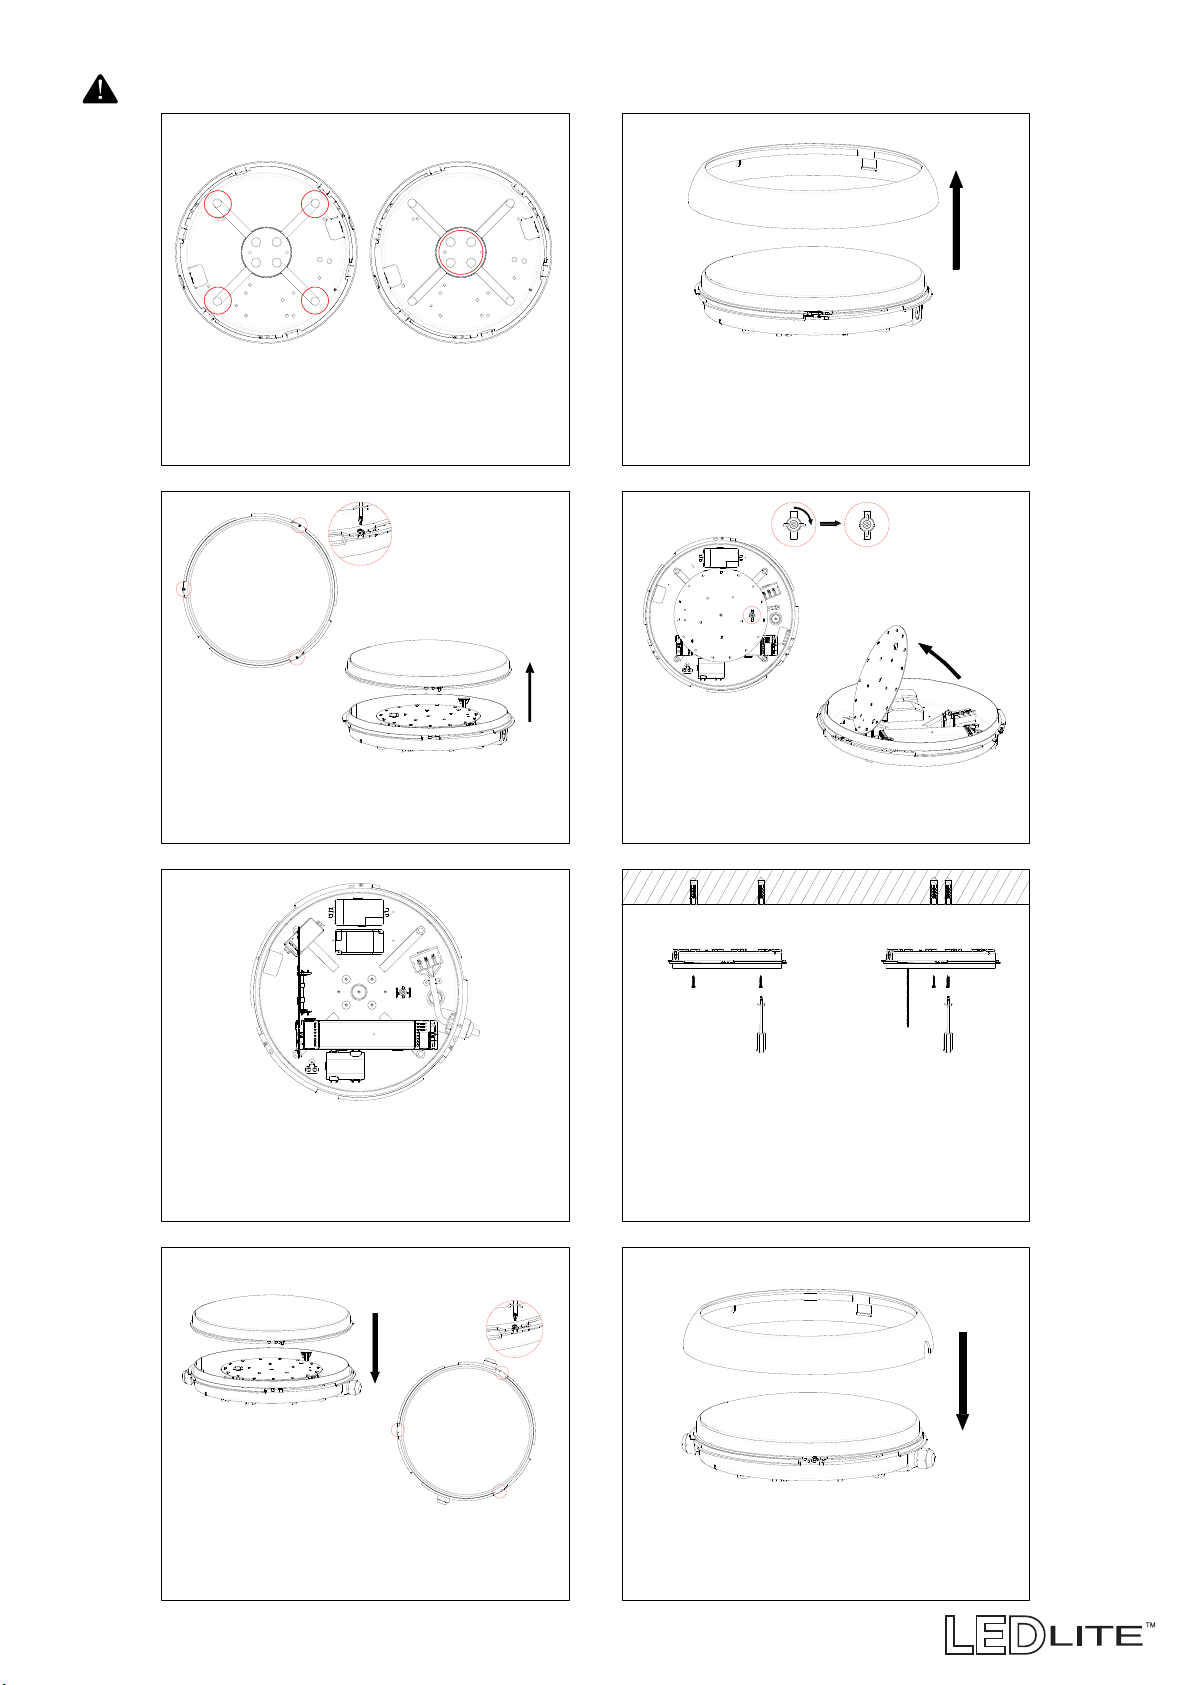
Switch off the mains supply before installation.
A B
1. Chose a suitable flat installation position.
1
2
3. Remove the diffuser screws and separate
it from the base.
2. Remove the clip-on trim ring from the slim
polo body.
1
2
4. Turn the butterfly button to open the hinged
gear tray to allow access to the connections.
5. Enter supply cable into the luminaire ensuring
that the hole is smooth or a grommet is fitted
and connect it to the terminal block (see
wiring instructions).
1
7. Re-fit the diffuser by placing it over the base
and lock into position using the screws.
For further information visit www.tlc-direct.co.uk
6. Position and fix the base to a suitable solid
surface using suitable fixings and close the
hinged LED gear tray
2
8. Install the clip-on trim ring on the body.
 Loading...