

Wireless Thermometer
with Time
Model: CA85152 | Instruction Manual
INTRODUCTION
Temperature at a glance! Everything is at your fingertips with this
Wireless Thermometer: Indoor/Outdoor temperature with MIN/MAX
readings in Fahrenheit or Celsius, outdoor temperature trend arrow,
and manual set time.
SETUP INSTRUCTIONS STEP BY STEP
STEP 1:
Remove battery cover from the Wireless
Thermometer.
Insert 2 NEW AA batteries (not included) into
the back of the Wireless Thermometer.
Observe the correct polarity (see marking
inside the battery compartment).
The Wireless Thermometer will light up and
show, indoor temperature, and time (12:00).
STEP 2:
Ensure that the transmitter is within 10 feet of the
Wireless Thermometer.
Remove battery cover from TX141-B transmitter:
Slide the battery cover down and lift off the front.
Insert 2 NEW AA batteries into the transmitter.
Observe the correct polarity.
Within 3 minutes the Wireless Thermometer will show
readings in the outdoor temperature area on the LCD.
Note: Allow the Wireless Thermometer and the
transmitter to stay within 10 feet of each other for the first 15
minutes of set up.
Do Not Mix Old and New Batteries
Do Not Mix Alkaline, Standard, Lithium or Rechargeable
Batteries
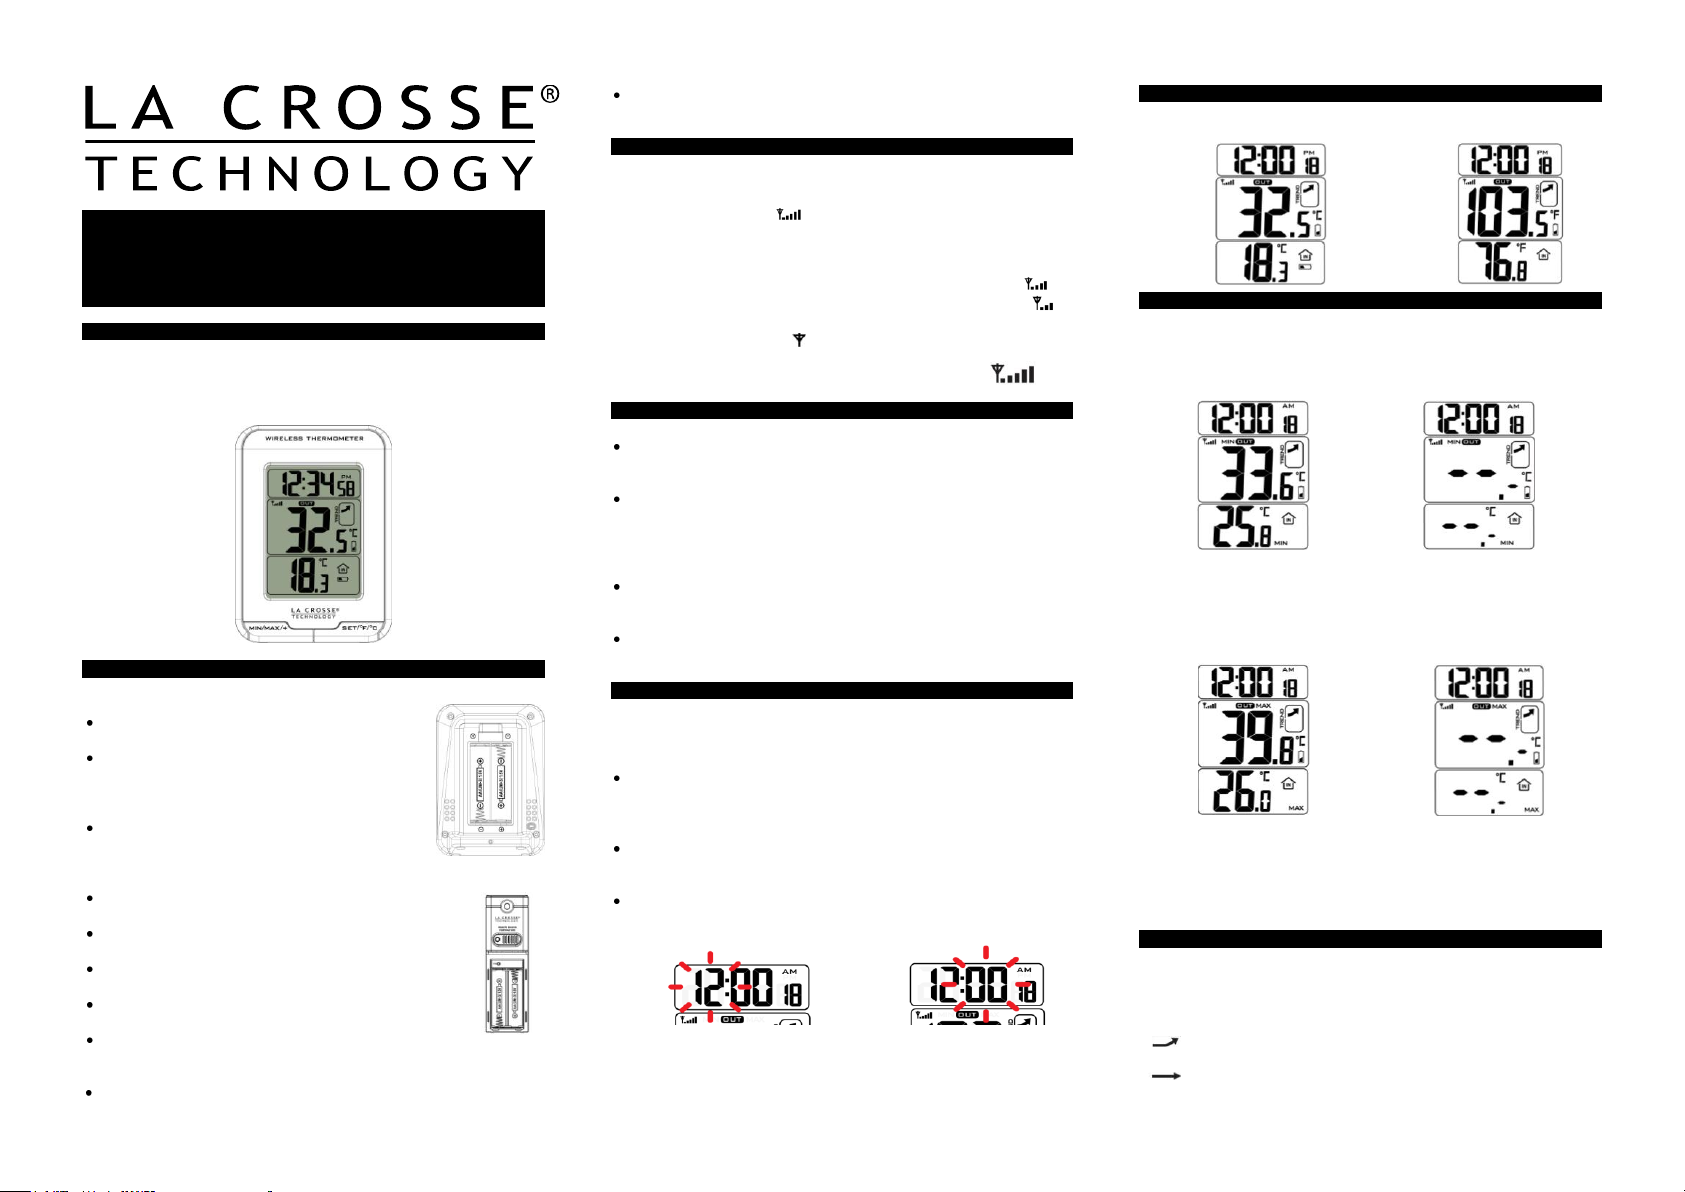
TRANSMITTER SIGNAL STRENGTH INDICATOR
After the batteries are inserted, the Wireless Thermometer will
search for the outdoor temperature transmitter for 3 minutes.
The antenna symbol will flash during reception, and
temperature display will be dashes “---“.
No antenna symbol will show during RF (radio frequency)
synchronization.
If synchronization fails once, the antenna will lose one bar.
If synchronization fails twice, the antenna will lose two bars.
If RF (radio frequency) reception fails five times, the antenna
symbol will be shown as .
The antenna will show full display with successful
RF (radio frequency) reception.
TROUBLE SHOOTING
If the Wireless Thermometer does not display the outdoor
temperature after 3 minutes, remove the batteries from both units
and start the setup process again.
If the outdoor temperature does not show up after a second
attempt, please slide open the battery cover of the outdoor
transmitter to reveal the TX button. Push down on the TX button
for 3 seconds to send a wireless signal to the Wireless
Thermometer.
For optimal 433 MHz signal reception, the outdoor transmitter
should be placed within 200 feet (60 meters) from the indoor
Wireless Thermometer.
Note: Use Alkaline batteries
(or Lithium for temperatures below -28.8°C / -20°F).
SET TIME
The SET/°F/°C button moves through the program menu. The
MIN/MAX/+ button changes the value.
12/24-HOUR TIME: Hold the SET/°F/°C button for 2 seconds.
12H will flash. Press and release the MIN/MAX/+ button to select
24-hour time format. Press and release the SET button once to
move to the hour.
HOUR: The Hour will flash. Press and release the MIN/MAX/+
button until the correct hour is shown. Press and release the SET
button once to move to the minutes.
MINUTES: The Minutes will flash. Press and release the
MIN/MAX/+ button until the correct minutes are displayed. Press
and release the SET button once more to exit the program menu.
FAHRENHEIT/CELSIUS
Press the SET/°F/°C button to select Fahrenheit or Celsius
temperature
readout.
MAXIMUM/MINIMUM TEMPERATURE READINGS
The Wireless Thermometer: will show the daily minimum and
maximum temperatures each day starting at midnight (12:00 AM).
The temperature station automatically resets the min/max
temperatures at midnight (12:00 AM).
VIEW MINIMUM: Press MAX/MIN button to show the minimum
temperature record.
RESET MINIMUM: With the minimum temperatures displayed,
press and hold the MAX/MIN key for 2 seconds to manually clear the
MIN records in memory.
VIEW MAXIMUM: Press MAX/MIN key again, to show the
maximum temperature records. In maximum memory display mode,
RESET MINIMUM: With the maximum temperatures displayed,
press and hold the MAX/MIN key for 2 seconds to manually clear the
MAX records in memory.
TEMPERATURE TREND ICONS
The outdoor temperature trend indicators will update every 30
minutes or less. These trends represent temperature changes over
the past three hours.
Temperature rising more than 1°C/ 2°F in the past three
hours
Temperature has not changed more than 1°C/ 2°F in the
past three hours.
Temperature falling more than 1°C/ 2°F in the past three
hours
The temperature trend indicators are shown next to the indoor
temperature and outdoor temperature readings.
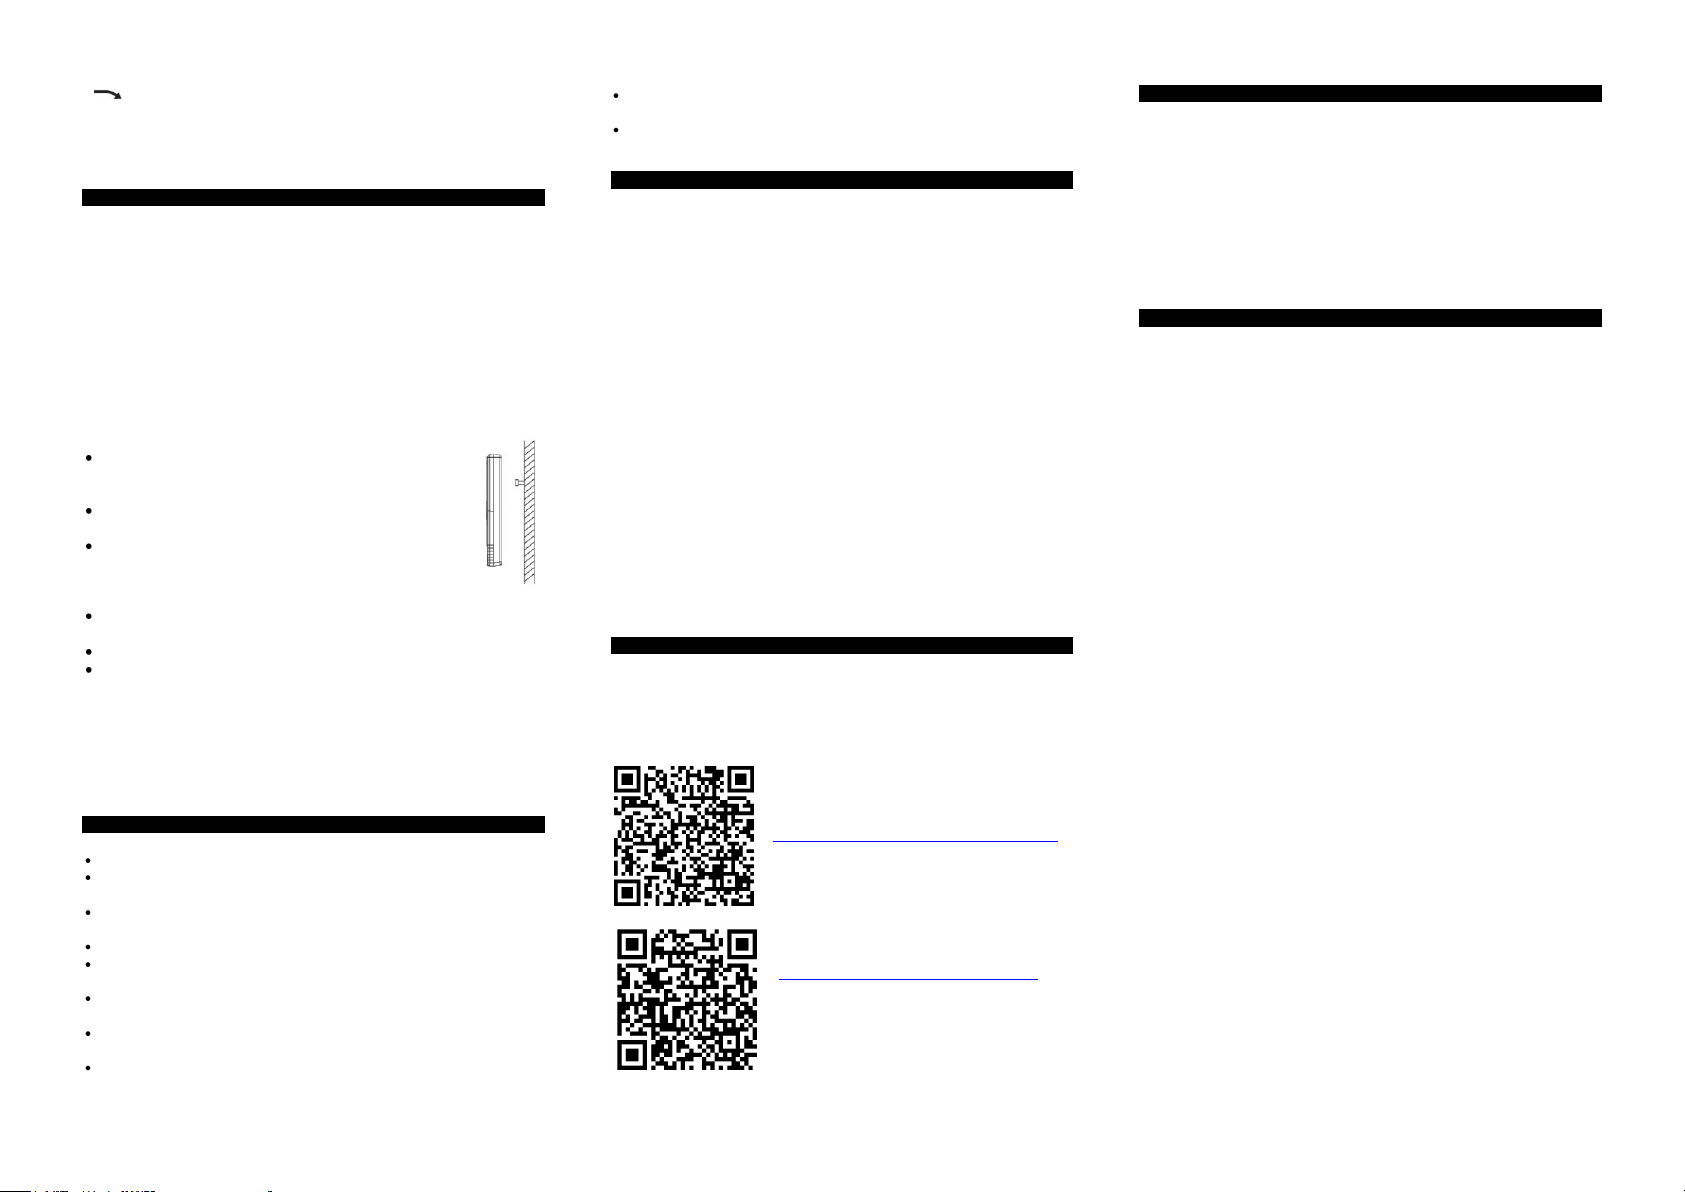
POSITIONING THE TEMPERATURE TRANSMITTER
The remote temperature transmitter should be mounted vertically to
avoid damage. Place both units in the desired shaded locations, and
wait approximately 1-hour before permanently mounting the
transmitter to ensure that there is proper reception. The outdoor
temperature transmitter is water resistant, not waterproof and should
not be placed anywhere it will become submerged in water or
subject to standing water or snow.
WALL MOUNT
Choose a location for the transmitter that is within range of the
Wireless Thermometer and under an overhang for accuracy.
Option 1:
Install one mounting screw (not included) into a wall
leaving approximately ½ of an inch (12.7mm)
extended.
Place the transmitter onto the screw, using the
hanging hole on the backside.
Gently pull the transmitter down to lock the screw into
place.
Option 2:
Insert the mounting screw (not included) through the front of the
transmitter and into the wall.
Tighten the screw to snug (do not over tighten).
To achieve a true temperature reading, mount where direct
sunlight cannot reach the outdoor transmitter. Mount the outdoor
transmitter on a North-facing wall or in any well shaded area.
Under an eave or deck rail work well. The maximum transmitting
range in open air is over 200-feet (60 meters). Obstacles such as
walls, windows, stucco, concrete, and large metal objects can
reduce the range. Place the transmitter at least 6 feet in the air to
improve signal transmission.
CARE AND MAINTENANCE
Do Not Mix Old and New Batteries
Do Not Mix Alkaline, Standard, Lithium or Rechargeable
Batteries
Do not expose the Wireless Thermometer: to extreme
temperatures, vibration or shock.
Keep Wireless Thermometer: dry.
Clean Wireless Thermometer: with a soft damp cloth. Do not use
solvents or scouring agents.
The Wireless Thermometer: is not a toy. Keep it out of reach of
children.
The Wireless Thermometer: is not to be used for medical purpose
or for public information, but is determined for home use only.
The specifications of this product may change without prior notice.
Improper use or unauthorized opening of housing will void the
warranty.
If the unit does not work properly, change the batteries and/or
check the a/c cord connection.
SPECIFICATIONS
Indoor Temperature:
Range: 0°C to + 50°C (32°F to 122°F)
Resolution: 0.1°C/ 0.2°F
Outdoor Temperature:
Range: -40°C to + 60°C (-40°F to 140°F)
Resolution: 0.1°C/ 0.2°F
Power:
CA85152
Wireless Thermometer: 2-AA LR6 alkaline battery
(not included)
TX141-B Transmitter: 2-AA LR6 alkaline battery
(not included)
Battery Life: Battery life is over 24 months when
using reputable battery brands
Dimensions:
CA85152
Wireless Thermometer: 76 x 34 x 106 mm
(3”L x 1.36”W x 4.17”H)
TX141-B Transmitter: 129 x 40.13 x 21mm
(5.08” H x 1.58” W x 0.83” D)
CANADA STATEMENT
This device complies with Industry Canada RSS-210. Operation is
subject to the following two conditions: (1) this device may not cause
interference, and (2) this device must accept any interference,
including interference that may cause undesired operation of the
device.
Product Registration:
www.lacrossetechnology.com/support/register
On the Web at:
www.lacrossetechnology.com/ca85152
Protected under U.S. Patents:
5,978,738
6,076,044
6,597,990
WARRANTY INFORMATION
Limited Warranty: Springfield warrants this instrument to be free
from defects in workmanship and material for a period of 1 year from
date of purchase, and will repair or replace it at our option, without
charge. Please call 1-800-661-6721
For Warranty Service:
Springfield Instruments Canada
Warranty
5151 Thimens Blvd
St Laurent, Quebec H4R 2C8
FCC Statement
This equipment has been tested and found to comply with the limits
for a Class B digital device, pursuant to part 15 of the FCC Rules.
These limits are designed to provide reasonable protection against
harmful interference in a residential installation. This equipment
generates, uses and can radiate radio frequency energy and, if not
installed and used in accordance with the instructions, may cause
harmful interference to radio communications. However, there is no
guarantee that interference will not occur in a particular installation.
If this equipment does cause harmful interference to radio or
television reception, which can be determined by turning the
equipment off and on, the user is encouraged to try to correct the
interference by one or more of the following measures:
—Reorient or relocate the receiving antenna.
—Increase the separation between the equipment and receiver.
—Connect the equipment into an outlet on a circuit different from
that to which the receiver is connected.
—Consult the dealer or an experienced radio/TV technician for help.
This device must not be co-located or operating in conjunction with
any other antenna or transmitter. Operation is subject to the
following two conditions:
(1) this device may not cause harmful interference, and
(2) this device must accept any interference received, including
interference that may cause undesired operation.
Caution!
The manufacturer is not responsible for any radio or TV interference
caused by unauthorized modifications to this equipment. Such
modifications could void the user authority to operate the equipment.
All rights reserved. This manual may not be reproduced in any form,
even in part, or duplicated or processed using electronic, mechanical
or chemical process without the written permission of the publisher.
This booklet may contain errors or misprints. The information it
contains is regularly checked and corrections are included in
subsequent editions. We disclaim any responsibility for any technical
error or printing error, or their consequences.
All trademarks and patents are recognized.

Thermomètre sans fil
avec heure
Modèle CA85152 | Mode d’emploi
INTRODUCTION
La température en un seul coup d’œil! Avec ce thermomètre sans fil, tout
est au bout de vos doigts : les températures intérieure et extérieure avec
les lectures minimum et maximum en degrés Fahrenheit ou Celsius, une
flèche indiquant la tendance de la température extérieure et l’heure à
réglage manuel.
MARCHE À SUIVRE POUR L’INSTALLATION
ÉTAPE 1
Retirer le couvercle du compartiment à piles du
thermomètre sans fil.
Insérer 2 piles NEUVES AA (non incluses) à
l’arrière du thermomètre sans fil en respectant la
polarité indiquée à l’intérieur du compartiment à
piles.
L’écran du thermomètre sans fil devrait s’allumer
et afficher la température intérieure et l’heure
(12:00).
ÉTAPE 2
Placer l’émetteur à 3 m (10 pi) ou moins du thermomètre
sans fil.
Retirer le couvercle du compartiment à piles de
l’émetteur TX141-B : le glisser vers le bas et soulever
l’avant.
Insérer 2 piles NEUVES AA dans l’émetteur en respectant
la polarité indiquée.
Dans les 3 minutes qui suivent, le thermomètre sans fil
affichera à l’écran des valeurs dans l’aire d’affichage de la
température extérieure.
Nota : Laisser le thermomètre sans fil et l’émetteur à une distance de
3 m (10 pi) ou moins l’un de l’autre pendant les 15 premières minutes.
Ne pas combiner de vieilles piles avec des piles neuves.
Ne pas combiner des piles alcalines, standard, au lithium ou
rechargeables.
INDICATEUR DE LA PUISSANCE DU SIGNAL DE L’ÉMETTEUR
Après l’installation des piles, le thermomètre sans fil tente de capter le
signal de l’émetteur de température extérieur pendant 3 minutes.
Le symbole de l’antenne clignote à l’écran pendant la réception
du signal, et des tirets s’affichent dans l’aire d’affichage de la
température (« --- »).
Pendant la synchronisation de la fréquence radio, le symbole de
l’antenne ne s’affiche pas.
Si la synchronisation échoue une fois, le symbole de l’antenne perd
une barre .
Si la synchronisation échoue deux fois, le symbole de l’antenne perd
deux barres .
Si la réception sans fil échoue cinq fois, le symbole suivant s’affiche à
l’écran .
Le symbole de l’antenne s’affiche en entier lorsque la
réception sans fil réussit.
DÉPANNAGE
Si, au bout de 3 minutes, la température extérieure n’apparaît toujours
pas à l’écran, retirer les piles des deux appareils et recommencer
l’installation.
Si, après une deuxième tentative, la température extérieure n’apparaît
toujours pas, ouvrir le couvercle du compartiment à piles de l’émetteur
extérieur pour voir le bouton TX. Appuyer sur ce bouton pendant
3 secondes pour transmettre un signal au thermomètre sans fil.
Afin d’avoir la meilleure réception possible à la fréquence 433 MHz,
placer l’émetteur extérieur à moins de 60 m (200 pi) du thermomètre
sans fil.
Nota : Utiliser des piles alcalines (ou des piles au lithium lorsque la
température descend sous -28,8 °C (-20 °F)).
RÉGLAGE DE L’HEURE
Le bouton SET/°F/°C permet de parcourir le menu de programmation,
alors que le bouton MIN/MAX/+ permet de changer les valeurs.
FORMAT D’AFFICHAGE DE L’HEURE (12 H OU 24 H) : Appuyer sur
le bouton SET/°F/°C pendant 2 secondes : le symbole 12H clignote à
l’écran. Appuyer sur le bouton MIN/MAX/+ pour choisir l’affichage de
l’heure sur 24 h. Appuyer une fois sur le bouton SET pour passer au
réglage de l’heure.
HEURE : L’heure clignote. Appuyer sur le bouton MIN/MAX/+ pour
régler l’heure. Appuyer une fois sur le bouton SET pour passer au
réglage des minutes.
MINUTES : Les minutes clignotent. Appuyer sur le bouton MIN/MAX/+
pour régler les minutes. Appuyer sur le bouton SET une fois de plus
pour quitter le menu de programmation.
FAHRENHEIT OU CELSIUS
Appuyer sur le bouton SET/°F/°C pour choisir l’unité d’affichage de la
température (Fahrenheit ou Celsius).
AFFICHAGE DES TEMPÉRATURES MAXIMUM ET MINIMUM
Tous les jours, à partir de minuit (12:00 AM), le thermomètre sans fil
affichera les températures minimum et maximum de la journée. Le
thermomètre remet automatiquement les températures minimum et
maximum à zéro à minuit (12:00 AM).
AFFICHAGE DE LA TEMPÉRATURE MINIMUM : Appuyer sur le bouton
MAX/MIN pour afficher la plus basse température enregistrée.
REMISE À ZÉRO DE LA TEMPÉRATURE MINIMUM : Lorsque la
température minimum est affichée, appuyer sur le bouton MAX/MIN
pendant 2 secondes pour effacer manuellement de la mémoire les
enregistrements MIN.
AFFICHAGE DE LA TEMPÉRATURE MAXIMUM : Appuyer sur le
bouton MAX/MIN une autre fois pour afficher la plus haute température
enregistrée.
REMISE À ZÉRO DE LA TEMPÉRATURE MAXIMUM : Lorsque la
température maximum est affichée, appuyer sur le bouton MAX/MIN
pendant 2 secondes pour effacer manuellement de la mémoire les
enregistrements MAX.
FLÈCHES DE TENDANCE DE LA TEMPÉRATURE
Les flèches de tendance de la température extérieure sont actualisées
toutes les 30 minutes ou moins. Ces flèches reflètent les changements
de température au cours des trois dernières heures.

La température a augmenté de plus de 1 °C (2 °F) au cours des
trois dernières heures.
La température n’a pas changé de plus de 1 °C (2 °F) au cours
des trois dernières heures.
La température a chuté de plus de 1 °C (2 °F) au cours des trois
dernières heures.
Les flèches de tendance de la température apparaissent à côté de la
température intérieure et de la température extérieure.
CHOIX DE L’EMPLACEMENT DE L’ÉMETTEUR EXTÉRIEUR
L’émetteur de température sans fil doit être placé à la verticale pour
éviter tout dommage. Placer les deux appareils à l’ombre, aux endroits
souhaités, et attendre 1 heure environ avant d’installer l’émetteur en
permanence; de cette façon, on peut être certain que la réception est
adéquate. L’émetteur de température extérieur est résistant à l’eau, mais
n’est pas imperméable; il ne doit pas être placé à un endroit où il y a
risque de submersion ou de contact avec de l’eau stagnante ou de la
neige.
INSTALLATION AU MUR
Pour l’émetteur, choisir un emplacement se trouvant à l’intérieur de la
portée de réception du thermomètre sans fil, sous un surplomb afin
d’obtenir une mesure précise.
Option 1
Insérer une vis de montage (pas inclus) dans le mur en
laissant dépasser la tête d’environ 12,7 mm (0,5 po).
Placer l’émetteur sur la vis en utilisant l’encoche prévue à
cet effet au dos de l’appareil.
Tirer doucement l’émetteur vers le bas pour bien le fixer
sur la vis.
Option 2
Insérer la vis de montage (pas inclus) dans le mur en la
passant à travers l’émetteur.
Bien visser la vis sans trop la serrer.
Afin d’obtenir une lecture exacte de la température, éviter d’installer
l’émetteur extérieur à un endroit exposé directement au soleil.
L’installer sur un mur qui fait face au nord ou dans un endroit bien
ombragé, par exemple, sous une corniche ou une rampe de terrasse.
La portée de transmission maximale, en champ libre, est de 60 mètres
(200 pieds). Les obstacles tels que les murs, les fenêtres, le stuc, le
béton et les gros objets de métal peuvent réduire la portée. Pour
obtenir la meilleure transmission possible, placer l’émetteur à une
hauteur de 1,8 m (6 pi) ou plus.
ENTRETIEN
Ne pas combiner de vieilles piles avec des piles neuves.
Ne pas combiner des piles alcalines, standard, au lithium ou
rechargeables.
Éviter d’exposer le thermomètre sans fil à des températures extrêmes,
aux vibrations ou aux chocs.
Garder le thermomètre sans fil au sec.
Nettoyer le thermomètre sans fil avec un chiffon doux humide. Ne pas
utiliser de solvant ni de produit de récurage.
Le thermomètre sans fil n’est pas un jouet. Le garder hors de la portée
des enfants.
Le thermomètre sans fil ne doit pas être utilisé à des fins médicales ni
pour information publique; il est conçu pour un usage domestique
uniquement.
Les caractéristiques de ce produit peuvent changer sans préavis.
Un usage inapproprié ou l’ouverture non autorisée du boîtier de
l’appareil annule la garantie.
Si l’appareil ne fonctionne pas correctement, changer les piles ou
vérifier s’il est bien branché.
CARACTÉRISTIQUES
Température intérieure
Plage : de 0 °C à 50 °C (de 32 °F à 122 °F)
Précision : 0,1 °C (0,2 °F)
Température extérieure
Plage : de -40 °C à 60 °C (de -40 °F à 140 °F)
Précision : 0,1 °C (0,2 °F)
Alimentation
CA85152
Thermomètre sans fil : 2 piles alcalines AA LR6 (non incluses)
Émetteur TX141-B : 2 piles alcalines AA LR6 (non incluses)
Durée de vie des piles Plus de 24 mois si des piles de marques
Dimensions
reconnues sont utilisées.
CA85152
Thermomètre sans fil : 76 mm x 34 mm x 106 mm
(3 po long. x 1,36 po larg. x 4,17 po
haut.)
Émetteur TX141-B : 129 mm x 40,13 mm x 21 mm
(5,08 po haut. x 1,58 po larg. x 0,83 po
prof.)
DÉCLARATION DE CONFORMITÉ POUR LE CANADA
Cet appareil est conforme à la norme CNR-210 d’Industrie Canada. Son
fonctionnement est soumis aux deux conditions suivantes :
(1) cet appareil ne doit pas causer d’interférences; (2) cet appareil doit
supporter toutes les interférences, y compris les interférences pouvant
causer un fonctionnement indésirable de l’appareil.
Enregistrement du produit :
www.lacrossetechnology.com/support/register
Sur Internet, à :
www.lacrossetechnology.com/ca85152
Protégé par les brevets américains :
5,978,738
6,076,044
6,597,990
GARANTIE
Garantie limitée : Springfield garantit cet appareil contre tout vice de
main-d’œuvre ou de matière pendant une période d’un (1) an à compter
de la date d’achat, et le réparera ou le remplacera gratuitement, à sa
discrétion. Prière de composer le 1-800-661-6721
Pour le service lié à la garantie :
Springfield Instruments Canada
Garantie
5151, boul. Thimens
Saint-Laurent (Québec) H4R 2C8
DÉCLARATION DE LA FCC
Cet appareil a été testé et a été déclaré conforme aux limites pour
appareil numérique de Classe B, au sens de l’article 15 des règlements
de la FCC. Ces limites visent à fournir aux installations résidentielles une
protection raisonnable contre les interférences nuisibles. Cet appareil
génère, utilise et peut diffuser de l’énergie radiofréquence. Par ailleurs,
s’il n’est pas installé et employé conformément aux instructions, il peut
provoquer des interférences nuisibles aux communications radio.
Toutefois, il est impossible de garantir que des interférences ne se
produiront pas dans certaines installations. Si le présent appareil
perturbe la réception de la radio ou de la télévision, ce qui peut être
déterminé en l’allumant puis en l’éteignant, il est recommandé à
l’utilisateur de prendre l’une des mesures suivantes pour corriger la
situation :
— réorienter l’antenne réceptrice ou la changer de place;
— éloigner davantage l’appareil du récepteur;
— brancher l’appareil à une prise relevant d’un circuit différent
de celui du récepteur;
— consulter le fournisseur ou un technicien radio/télévision
d’expérience pour obtenir de l’aide.
Cet appareil ne doit pas être placé à proximité d’un autre émetteur ou
antenne ni fonctionner en même temps qu’un autre émetteur ou antenne.
Son fonctionnement est soumis aux deux conditions suivantes :
(1) cet appareil ne doit pas causer d’interférences nuisibles;
(2) cet appareil doit accepter toute autre interférence reçue, y
compris les interférences pouvant causer un fonctionnement
indésirable.
Avertissement!
Le fabricant ne peut être tenu responsable des interférences
radioélectriques (radio ou télévision) causées par des modifications
apportées à l’appareil sans autorisation. De telles modifications
pourraient faire perdre à l’utilisateur le droit d’utiliser l’appareil.
Tous droits réservés. Ce livret ne peut être reproduit sous aucune forme,
même en partie, ni dupliqué, ni traité par un procédé électronique,
mécanique ou chimique sans l’autorisation écrite de l’éditeur.
Le présent livret peut contenir des erreurs ou fautes d’impression. Les
informations qu’il contient sont vérifiées régulièrement, et des corrections
sont apportées dans les éditions subséquentes. Nous déclinons toute
responsabilité pour toute erreur technique ou erreur d’imprimerie, ou
leurs conséquences.
Toutes les marques de commerce et tous les brevets sont reconnus.
 Loading...