

Page 1
1
INTRODUCTION:
This Atomic Digital Wall Clock features radio-controlled time, and date that is set
automatically and displays indoor and outdoor temperature. The large time digits (4
¼ inches) are easy to read from across the room.
ATOMIC DIGITAL WALL CLOCK:
SETUP INSTRUCTIONS STEP BY STEP:
Step 1:
Do Not Mix Old and New Batteries
Do Not Mix Alkaline, Standard, Lithium or Rechargeable Batteries
Remove battery cover from Atomic Digital
Clock, slide tabs down and pull out to
remove the cover.
Insert 3 NEW C batteries (not included)
into the back of the Atomic Digital Clock.
Observe the correct polarity (see marking
inside the battery compartment).
The Atomic Digital Clock will show, time
(12:00) date (1/1) and indoor
temperature.
Step 2:
Remove the screws, then battery cover from the back of
the KW5012FSK transmitter.
Insert 2 NEW AA batteries (not included) into the
transmitter. Observe the correct polarity.
Keep the Atomic Digital Clock and the transmitter close to
each other (within 10 feet) for 15 minutes.
Within 3 minutes the outdoor temperature should be
displayed.
TROUBLE SHOOTING:
After waiting 3 minutes, if the outdoor temperature does not show up in the
designated area on the Atomic Digital Clock, hold the SEARCH button for three
seconds to search for the transmitter.
Press the TX button on the KW5012FSK transmitter (under the battery cover).
If holding the SEARCH button fails to find the outdoor temperature reading,
remove batteries from both units for 15 minutes and restart from step 1.
For optimal reception performance, of the 915 MHz signal, the outdoor
transmitter should be placed within 330 feet (100 meters) from the Atomic Digital
Clock.
WWVB RADIO CONTROLLED TIME
The NIST radio station, WWVB, is located in Ft. Collins, Colorado and transmits the
exact time signal continuously throughout the United States at 60 kHz. The signal
can be received up to 2,000 miles away through the internal antenna in the Atomic
Digital Clock. However, due to the nature of the Earth’s Ionosphere, reception is
very limited during daylight hours. The Atomic Digital Clock will search for a signal
daily at 2AM when reception is best. The WWVB radio station derives its signal from
the NIST Atomic Clock in Boulder, Colorado.
WWVB RECEPTION ICON
A tower with full signal strength will appear on screen if the reception of atomic time
is successful.
The tower icon will show solid when the Atomic Digital Clock has received the
WWVB signal.
The tower icon will flash when the Atomic Digital Clock is searching
for the WWVB signal.
No tower icon shows. The Atomic Digital Clock was unable to receive a signal at
this time.
Reposition the Atomic Digital Clock for better signal reception or try again at
bedtime.
The Atomic Digital Clock will start searching at: 02:00 and if no reception on the
first attempt they will try again at 03:00, 4:00, and 5:00.
Manual Search: Hold the button to start a manual signal search. If the search
fails, the Atomic Digital Clock will automatically search again the next full hour.
Note: In case the Atomic Digital Clock is not able to detect the WWVB signal
(disturbances, transmitting distance, etc.); the time can be manually set with the
program menu.
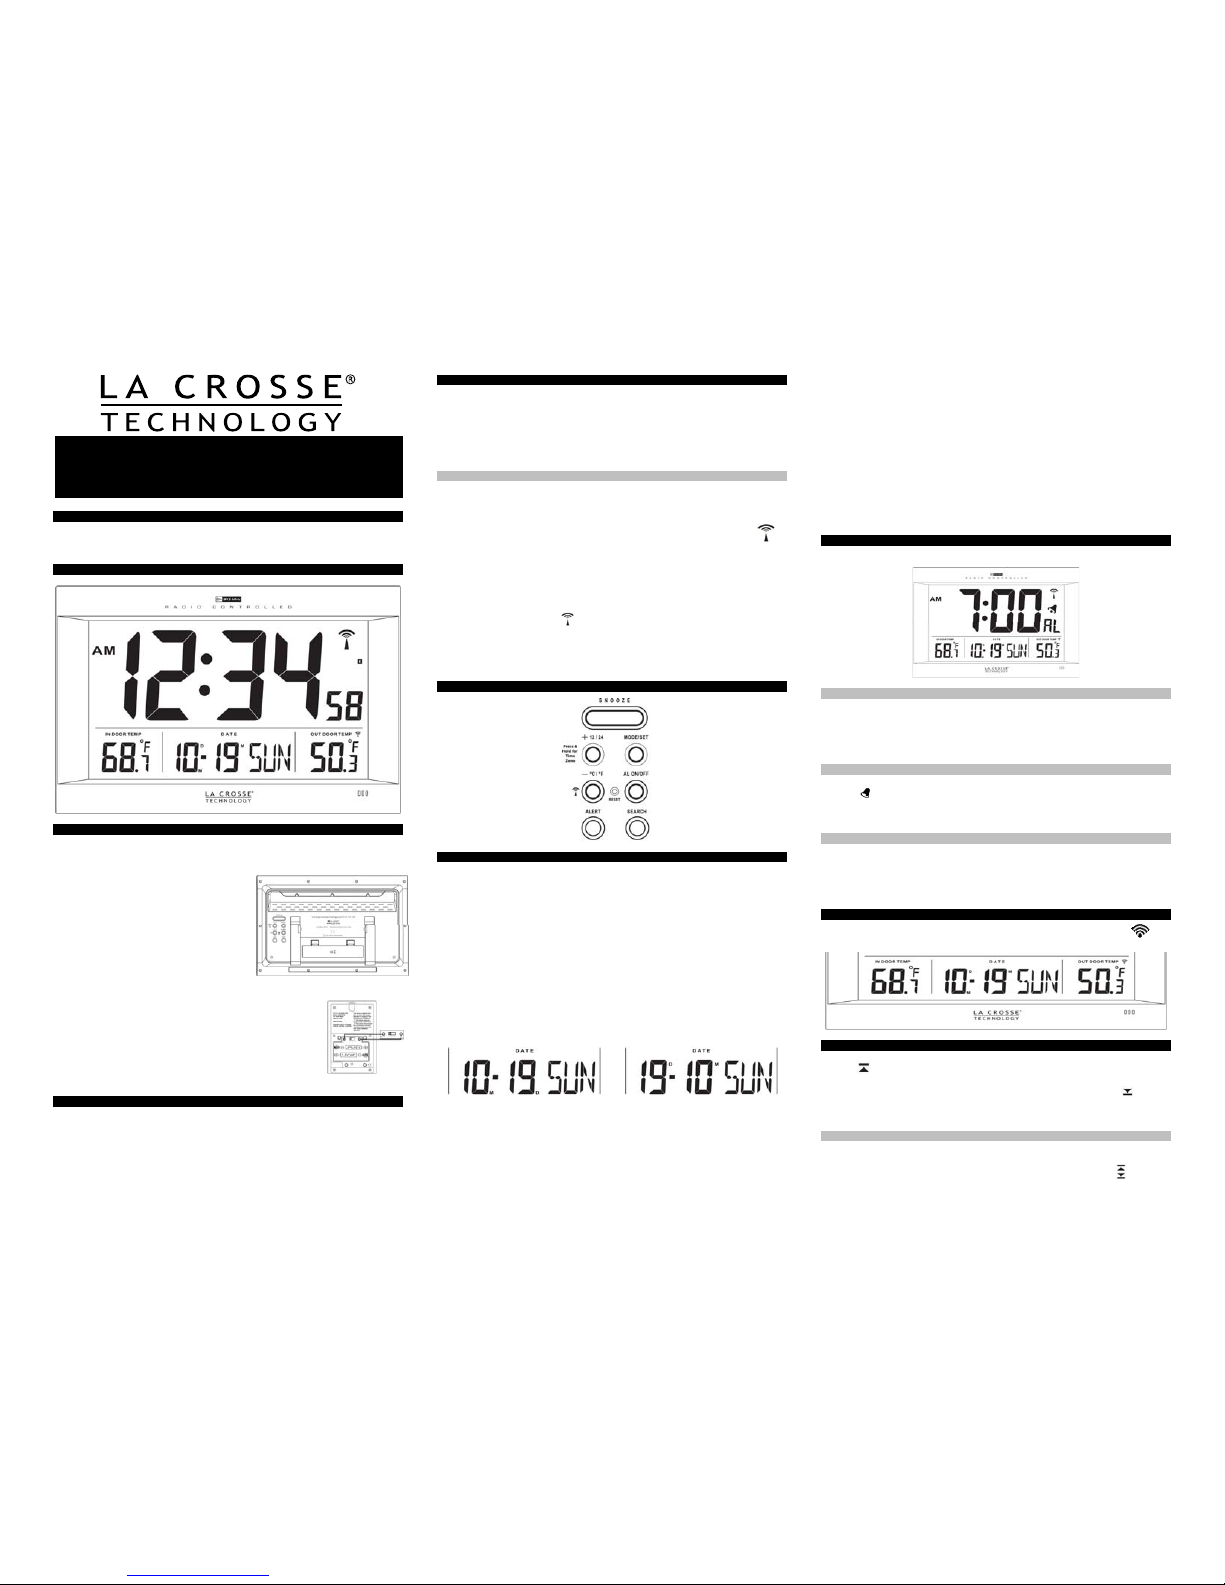
BUTTONS:
PROGRAM MENU:
The MODE/SET button will move through the program menu. The + or - button will
change a value if needed.
HOUR: Hold the MODE/SET button for 3 seconds. The hour will flash. Press
and release the + or - button to select the correct hour. Confirm with the
MODE/SET button and move to the minutes.
MINUTES: The minutes will flash. Press and release + or - button to select the
correct minutes. Confirm with the MODE/SET button and move to the seconds.
SECONDS: The seconds will flash. Press and release + or - button to set the
seconds to zero. Confirm with the MODE/SET button and move to the next item.
YEAR: The year will flash. Press and release the + or - button to select the
correct year. Confirm with the MODE/SET button and move to the month/day
mode.
MONTH/DAY FORMAT: The M/D (month/date) will flash. Press and release +
or - button to select D/M (day/month). Confirm with the MODE/SET button and
move to the month.
OR
Month/Day Day/Month
MONTH: The month will flash. Press and release the + or - button to select the
correct month. Confirm with the MODE/SET button and move to the date.
DATE: The date will flash. Press and release the + or - button to select the
correct date. Confirm with the MODE/SET button and move to DST.
Note: The weekday will set automatically after the year month and date are set.
DAYLIGHT SAVING TIME: DST will flash. Press and release the + or - button
to select DST ON or DST OFF. Confirm with the MODE/SET button and exit the
program menu.
FAHRENHEIT/CELSIUS: Press and release the -/°C/°F button to select
temperature readings in Fahrenheit or Celsius.
CHANGE TIME ZONE: Hold the + 12/24 button for 3 seconds to move the time
zone once. Hold again to change to a different time zone.
This clock has four time zones:
E = Eastern, C = Central, M =Mountain and P = Pacific
12-HOUR OR 24-HOUR TIME FORMAT: Press and release the + 12/24 to switch
between 12-hour time (AM/PM) or 24-hour time fo rmat.
ALARM SET:
Press and release the MODE/SET button to enter Alarm Mode. “AL” will show on
the display.
ALARM TIME:
Hold the MODE/SET button to enter alarm time setting mode.
HOUR: The hour will flash. Press and release the + or - button to select the
correct hour. Confirm with the MODE/SET button and move to the minutes.
MINUTES: The minutes will flash. Press and release + or - button to select the
correct minutes. Press and release the MODE/SET button to confirm and exit.
ALARM ACTIVATION ICON
Press and release the ALARM ON/OFF button to activate the alarm. The alarm
icon appears when alarm is activated.
Press and release the ALARM ON/OFF button to deactivate the alarm. The
alarm icon will disappear when alarm is inactive.
SNOOZE:
When the alarm sounds, press the SNOOZE button to trigger snooze alarm for 5
minutes. The snooze icon Zz will flash above the time, when the snooze feature
is active.
The SNOOZE button can be pressed to repeat the snooze function, up to seven
times.
OUTDOOR TRANSMITTER RECEPTION ICON:
This icon will flash in the outdoor temperature LCD, when searching
for the outdoor transmitter signal.
OUTDOOR TEMPERATURE ALERT
Hold the ALERT button for 3 seconds to enter high alert setting. The high alert
icon will flash. Press and release the + or - button to select the high alert
value.
Press the ALERT button to enter low alert setting. The low alert icon
will
flash. Press and release the + or - button to select the low alert value. Press and
release the ALERT button to confirm and exit alert setting mode.
OUTDOOR TEMPERATURE ALERT ACTIVATION:
Press and release the ALERT button to turn the outdoor temperature alert ON or
OFF.
When the high or low outdoor temperature alert is ON the alert icon will be
displayed after the temperature.
Large Atomic Digital Wall Clock
with indoor/outdoor temperature and date
Model: 513-1311OT | Quick Setup Guide
Page 2
2
Button Press and Release Functions Hold 3 seconds
SNOOZE Trigger snooze alarm (ringing)
+/12/24 1 step forward Fast advance
(Time set mode) (Time set mode)
(Alarm set mode) (Alarm set mode)
(Temperature Alert set) (Temperature Alert set)
Select 12/24-hour time Change Time Zone
MODE/SET Move through program menu Enter program menu, set
(Time set mode) time, date, etc.
(Time set mode)
Move to Alarm Mode Enter Alarm Set
(Alarm set mode) (Alarm set mode)
-/C/F 1 step backward Fast backward
(Time set mode) (Time set mode)
(Alarm set mode) (Alarm set mode)
(Temperature Alert set) (Temperature Alert set)
Select Fahrenheit/ Celsius Search WWVB signal
RESET Press to reset clock
AL ON/OFF Time Alarm ON/OFF
ALERT Move to Temperature Set Temperature Alert
Alert Mode (High, Low)
SEARCH Search for outdoor
Temperature transmitter
POSITIONING THE OUTDOOR TRANSMITTER
The remote temperature transmitter should be mounted vertically to avoid damage.
Place both units in the desired shaded locations, and wait approximately 1-hour
before permanently mounting the transmitter to ensure that there is proper
reception. The outdoor temperature transmitter is water resistant, not waterproof
and should not be placed anywhere it will become submerged in water or subject to
standing water or snow.
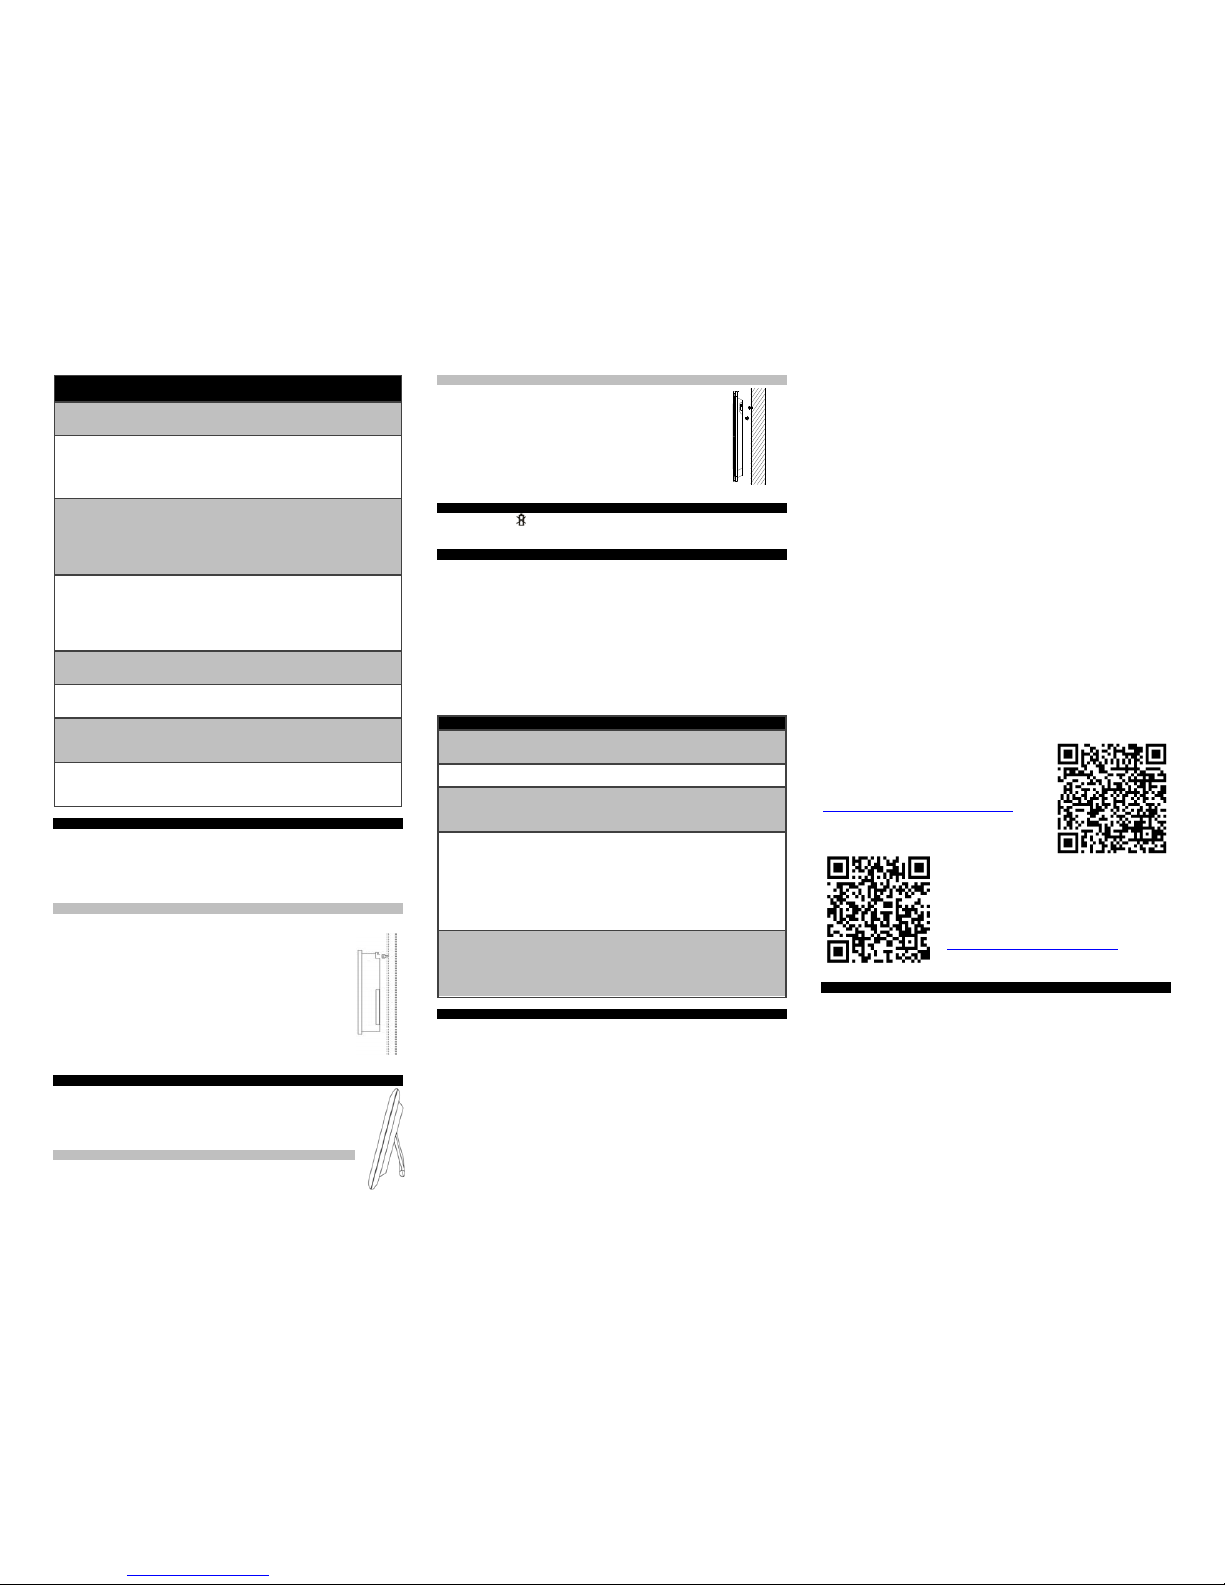
Wall Mount
Choose a location for the transmitter that is within range of the Atomic Digital Clock
and under an overhang for accuracy.
Install one mounting screw (included) into a wall leaving
approximately ½ of an inch (12.7mm) extended.
Place the transmitter onto the screw, using the hanging hole on
the backside.
To achieve a true temperature reading, mount where direct sunlight
cannot reach the outdoor transmitter. Mount the outdoor transmitter
on a North-facing wall or in any well shaded area. Under an eave or
deck rail work well. The maximum transmitting range in open air is
over 330-feet (100 meters). Obstacles such as walls, windows,
stucco, concrete, and large metal objects can reduce the range.
Place the transmitter at least 6 feet in the air to improve signal transmission.
POSITIONING THE CLOCK:
The Atomic Digital Clock should be mounted near an exterior wall with
the front or back facing toward Ft. Collin Colorado for best WWVB
reception. The Atomic Digital Clock should be six feet from other
electronics or wireless devices in order to best receive the outdoor
temperature transmitter signal.
Foldout Table Stand
Pull the stand out from the bottom center edge of the Atomic Digital
Clock, below the battery compartment. Once the foldout table stand is
extended, place the Atomic Digital Clock in an appropriate location.
Wall Mount
Use a straightedge to horizontally space three screw positions on
a wall to match the hanging holes on the back of the clock. Install
three mounting screws (not included) into a wall within
transmission range—leaving approximately 3/16 of an inch
(5mm) extended from the wall.
Place the Atomic Digital Clockonto the screws, using the hanging
holes on the backside.
Gently pull the Atomic Digital Clock down on the screws.
Note: Always ensure that the Atomic Digital Clock locks onto the
screws before releasing.
LOW BATTERY:
When this icon appears in the outdoor (OUT) readings section, replace the
batteries in the outdoor transmitter.
CARE AND MAINTENANCE:
Do Not Mix Old and New Batteries
Do Not Mix Alkaline, Standard, Lithium or Rechargeable Batteries
Do not expose the Atomic Digital Clock to extreme temperatures, vibration or
shock.
Keep Atomic Digital Clock dry.
Clean Atomic Digital Clock with a soft damp cloth. Do not use solvents or
scouring agents.
The Atomic Digital Clock is not a toy. Keep it out of reach of children.
The Atomic Digital Clock is not to be used for medical purpose or for public
information, but is determined for home use only.
The specifications of this Atomic Digital Clock may change without prior notice.
Improper use or unauthorized opening of housing will void the warranty.
If the Atomic Digital Clock does not work properly, change the batteries.
SPECIFICATIONS:
Temperature Range:
Indoor: +32°F to +122°F (0°C to 50°C)
Outdoor: -4°F to 122°F (-20°C to 50°C)
Distance: Over 330 ft. (100 meters)
RF 915MHz (open air)
Power requirements:
Atomic Digital Clock: 3-C, IEC, LR14 batteries (not included)
KW5012FSK Transmitter: 2-AA, IEC, LR6 batteries (not included)
Battery Life:
KW5012FSK Transmitter
Battery Life: Battery life is over 12 months when using
reputable battery brands.
Atomic Digital Clock
Battery Life: Battery life is over 12 months when using
reputable battery brands.
Dimensions:
Atomic Digital Clock: 16.14” W x 1.69” D x 10.63” H
(410 x 43 x 270 mm)
KW5012FSK Transmitter: 3” W x 0.79” D x 4.45” H
(75 x 0.79 x 113mm)
WARRANTY INFORMATION
La Crosse Technology, Ltd provides a 1-year limited warranty on this product
against manufacturing defects in materials and workmanship.
This limited warranty begins on the original date of purchase, is valid only on
products purchased and used in North America and only to the original purchaser of
this product. To receive warranty service, the purchaser must contact La Crosse
Technology, Ltd for problem determination and service procedures. Warranty
service can only be performed by a La Crosse Technology, Ltd authorized service
center. The original dated bill of sale must be presented upon request as proof of
purchase to La Crosse Technology, Ltd or La Crosse Technology, Ltd’s authorized
service center.
La Crosse Technology, Ltd will repair or replace this product, at our option and at no
charge as stipulated herein, with new or reconditioned parts or products if found to
be defective during the limited warranty period specified above. All replaced parts
and products become the property of La Crosse Technology, Ltd and must be
returned to La Crosse Technology, Ltd. Replacement parts and products assume
the remaining original warranty, or ninety (90) days, whichever is longer. La Crosse
Technology, Ltd will pay all expenses for labor and materials for all repairs covered
by this warranty. If necessary repairs are not covered by this warranty, or if a
product is examined which is not in need or repair, you will be charged for the
repairs or examination. The owner must pay any shipping charges incurred in
getting the La Crosse Technology, Ltd product to a La Crosse Technology, Ltd
authorized service center. La Crosse Technology, Ltd will pay ground return
shipping charges to the owner of the product to a USA address only.
The La Crosse Technology, Ltd warranty covers all defects in material and
workmanship with the following specified exceptions: (1) damage caused by
accident, unreasonable use or neglect (including the lack of reasonable and
necessary maintenance); (2) damage occurring during shipment (claims must be
presented to the carrier); (3) damage to, or deterioration of, any accessory or
decorative surface; (4) damage resulting from failure to follow instructions contained
in the owner’s manual; (5) damage resulting from the performance of repairs or
alterations by someone other than an authorized La Crosse Technology, Ltd
authorized service center; (6) units used for other than home use (7) applications
and uses that this product was not intended or (8) the products inability to receive a
signal due to any source of interference.. This warranty covers only actual defects
within the product itself, and does not cover the cost of installation or removal from
a fixed installation, normal set-up or adjustments, claims based on
misrepresentation by the seller or performance variations resulting from installationrelated circumstances.
LA CROSSE TECHNOLOGY, LTD WILL NOT ASSUME LIABILITY FOR
INCIDENTAL, CONSEQUENTIAL, PUNITIVE, OR OTHER SIMILAR DAMAGES
ASSOCIATED WITH THE OPERATION OR MALFUNCTION OF THIS PRODUCT.
THIS PRODUCT IS NOT TO BE USED FOR MEDICAL PURPOSES OR FOR
PUBLIC INFORMATION. THIS PRODUCT IS NOT A TOY. KEEP OUT OF
CHILDREN’S REACH.
This warranty gives you specific legal rights. You may also have other rights
specific to the State. Some States do not allow the exclusion of consequential or
incidental damages therefore the above exclusion of limitation may not apply to you.
For warranty work, technical support, or information contact:
La Crosse Technology, Ltd
2817 Losey Blvd. S.
La Crosse, WI 54601
Contact Support: 1-608-782-1610
Product Registration:
www.lacrossetechnology.com/support/register
Protected under U.S. Patents:
5,978,738
6,076,044
6,597,990
The complete instruction manual is available at:
www.lacrossetechnology.com/513-1311ot
FCC DISCLAIMER
This Device complies with Part 15 of the FCC Rules. Operation is subject to the
following two conditions: (1) This device may not cause harmful interference, and
(2) the device must accept any interference received, including interference that
may cause undesired operation.
NOTE: THE MANUFACTURER IS NOT RESPONSIBLE FOR ANY RADIO OR TV
INTERFERENCE CAUSED BY UNAUTHORIZED MODIFICATIONS TO THIS
EQUIPMENT. SUCH MODIFICATIONS COULD VOID THE USER AUTHORITY TO
OPERATE THE EQUIPMENT
All rights reserved. This handbook must not be reproduced in any form, even in
excerpts, or duplicated or processed using electronic, mechanical or chemical
procedures without written permission of the publisher.
This handbook may contain mistakes and printing errors. The information in this
handbook is regularly checked and corrections made in the next issue. We accept
no liability for technical mistakes or printing errors, or their consequences.
All trademarks and patents are acknowledged.
 Loading...