

Kyocera FS-C8020MFP, FS-8025MFP SERVICEBULLETINS 2KZ 0007 B201 2
Q’
Com
bi
pati-
Component of No.1
*3
Service Bulletin Ref. No.
Subject
(Revised Issue 2)
(Page.1/4)
2KZ-0007 (B201)
<Date> March 16, 2012
Measures against the Fuser Pressure Release Motion Noise
(Rattling Noise)
Model
This time, the description with (-->) was revised from the previous information.
<Number of changes: 2> The serial numbers of the affected machiens were added.
FS-C8020MFP, FS-C8025MFP
Topic
The following change was made in order to reduce the motion noise generated when the axis distance between the
fuser roller and press roller was automatically increased after printing to reduce the fuser pressure in the stand-by
mode.
Content of Changes
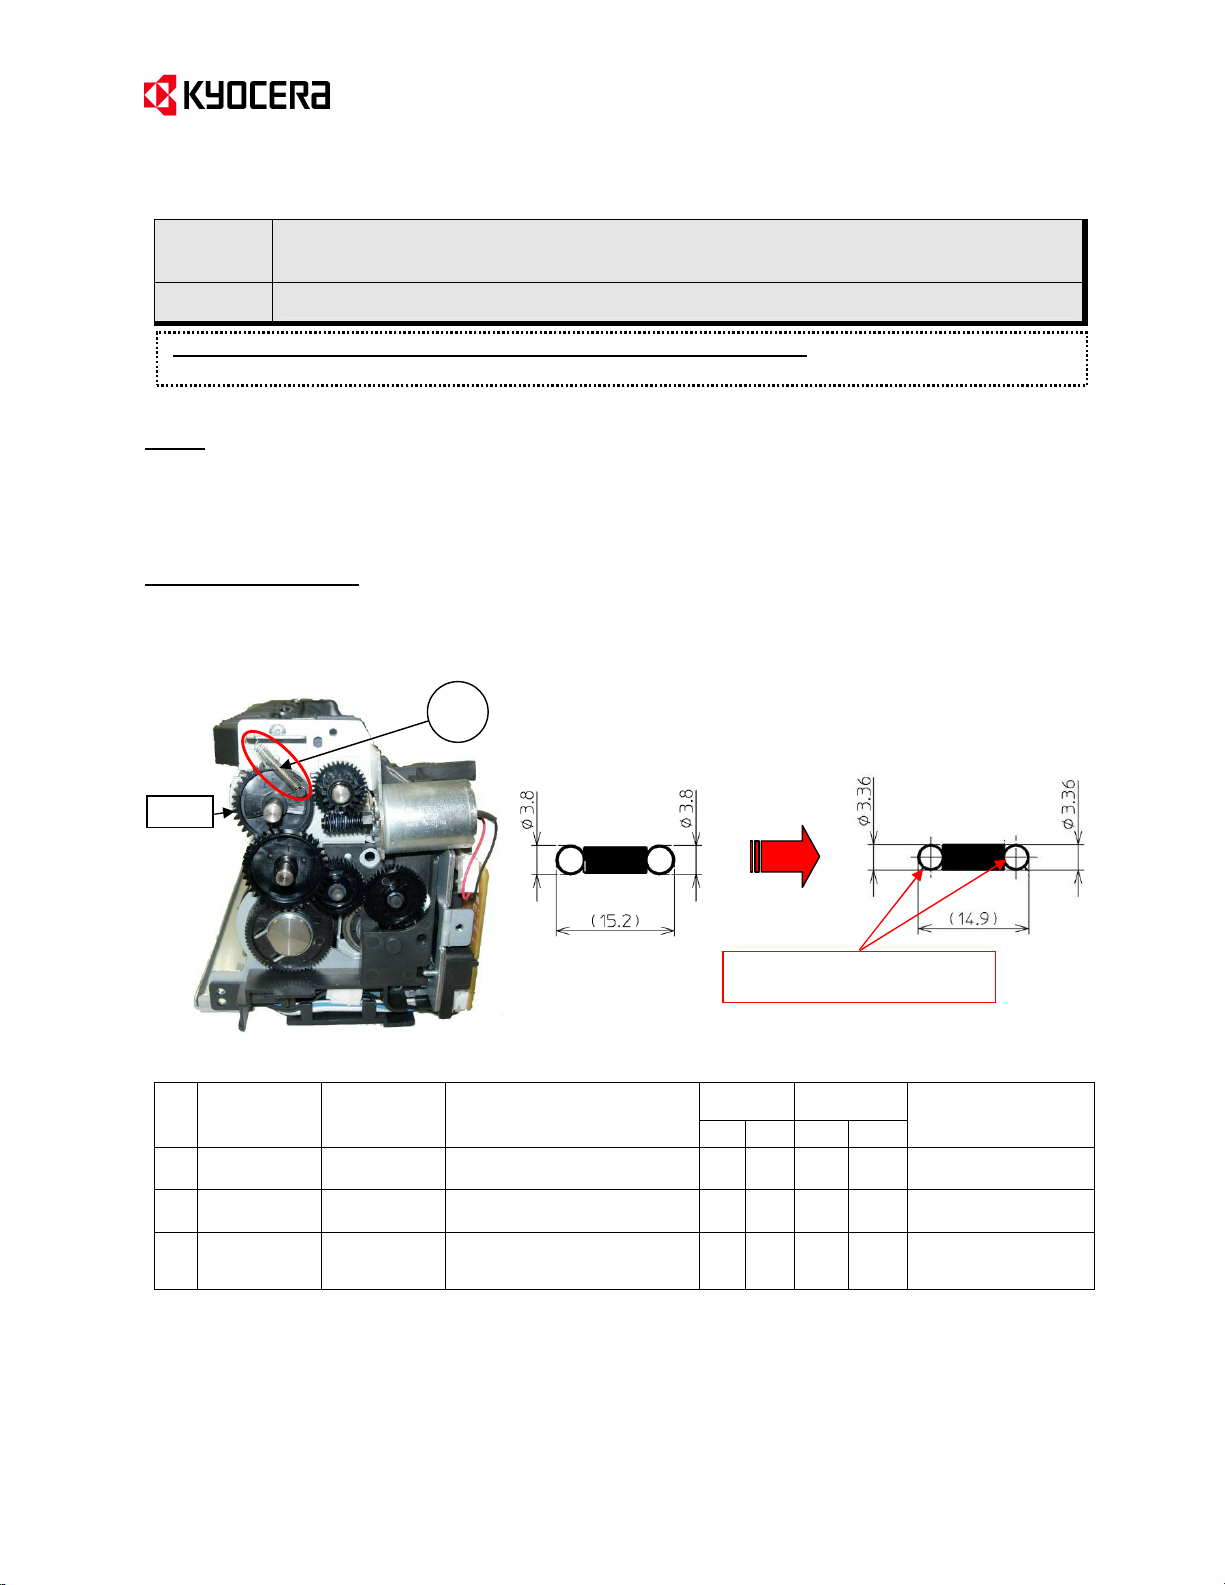
1) The tension of the spring (No.3) was reduced in order to reduce the motion noise (rattling noise) generated
when the gear is pulled to increase the axis distance between the fuser roller and press roller.
No.1
(Old) Spring tension 0.17 N (New) Spring tension 0.062 N
Gear
No.
*3: Newly registered as service part
“+” at the head of part name indicates that it is a component part.
Old Part
No.
302K093090
1
2K093090
302K09K090
2
2K09K090
3 - - - -
New Part
No.
302K093091
2K093091
302K09K091
2K09K091
302K025751
2K025751
European Service & Development Center (ESDC)
<Change of the spring tension>
The hook is with two turns for
distinction.
Description
FK-895 1 1
FK-895(KR) 1 1
+SPRING DRIVE PRESS - 1
KYOCERA MITA Europe B.V.
ty
Old New Old New
lity
X O
X O
- O
Remarks
Except KMKR
For KMKR
and 2
(Revised Issue 2)
Service Bulletin Ref. No.
2KZ-0007 (B201)
(Page.2/4)
<Date> March 16, 2012
KMC’s Classification Entire Stock Rework In-Field modification at next visit
In-Field modification by case No modification necessary
Field Measure:
Please replace the spring with the new one (No.3) in case that the motion noise described above was pointed
by a customer.
(Please refer to the next pages for the procedures to replace the spring (No.3).)
Serial Nos. of the Affected Machines: (-->) Please refer to the tables on Page 4.
<Procedures to replace the spring (No.3)>
No. Procedures Details
Set the fuser pressure to the reduced side before
replacing the spring (No.3). Take out the fuser
unit to securely set it to the reduced side by
following the procedures below.
1
1) Set the machine to the state of “Ready to copy”
2) Open the right cover while the machine is powered ON.
3) Wait for six seconds while the right cover is open.
The fuser pressure is controlled so that it can be
automatically switched to the reduced pressure side even if
the pressure setting is at the increased side.
4) Take out the fuser unit from the machine after six seconds.
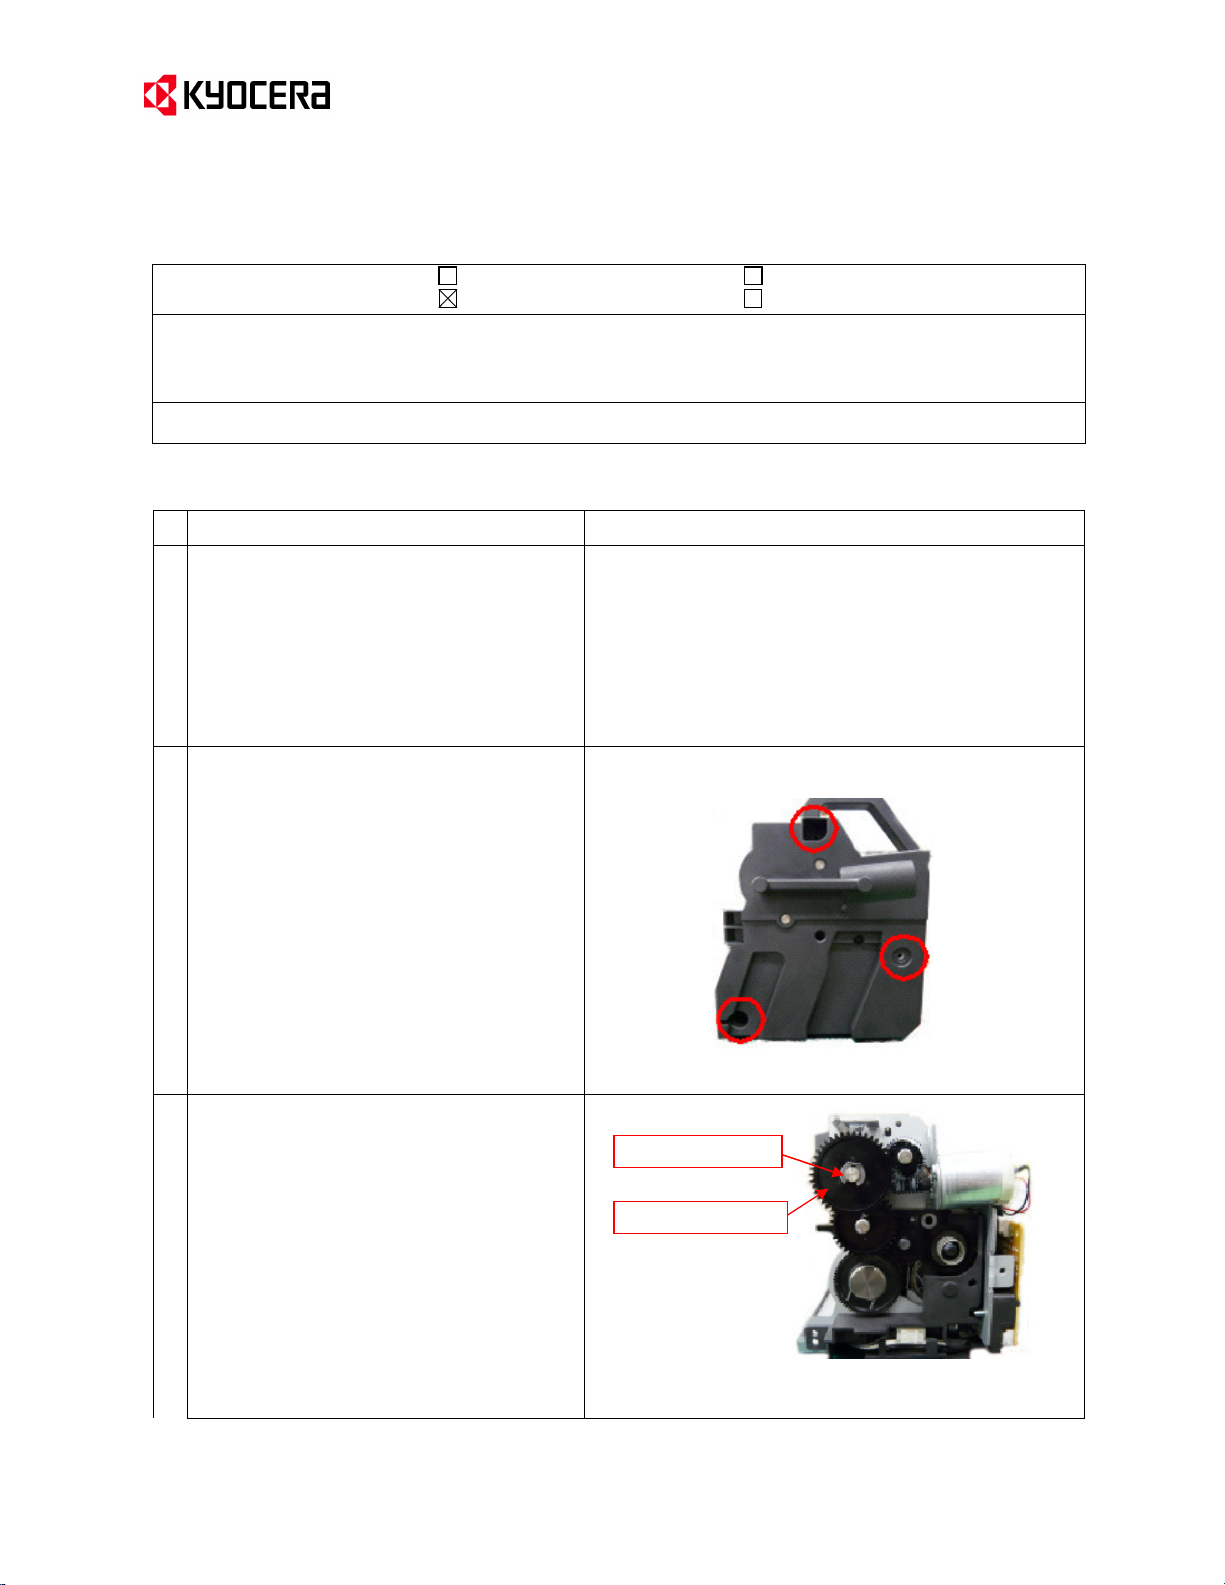
Remove the screw (x3) and take out the front
cover (COVER FUSER FRONT) of the fuser unit.
2
Remove the metal stop ring and take out the gear
(GEAR Z18S-Z43S).
3
Metal stop ring
GEAR Z18S-Z43S
European Service & Development Center (ESDC)
KYOCERA MITA Europe B.V.
 Loading...