

Page 1

7. ENGINE REMOVAL/INSTALLATION
XCITING 500
7
__________________________________________________________________________________
__________________________________________________________________________________
__________________________________________________________________________________
__________________________________________________________________________________
__________________________________________________________________________________
ENGINE REMOVAL/INSTALLATION
__________________________________________________________________________________
SERVICE INFORMATION------------------------------------------------ 7- 1
ENGINE REMOVAL ------------------------------------------------------- 7- 2
ENGINE HANGER --------------------------------------------------------- 7-11
7
7-0
Page 2
7. ENGINE REMOVAL/INSTALLATION
XCITING 500
SERVICE INFORMATION
GENERAL INSTRUCTIONS
• During engine removal and installation, support the scooter on its main stand.
• Support the frame using a jack or other adjustable support to ease of engine hanger bolt removal.
• The following components require engine removal for serviced with the engine installed in the
frame.
ä Oil pump (Section 4)
ä Water pump (Section 6)
ä Cylinder head (Section 8)
ä Cylinder/Piston (Section 9)
ä Drive and driven pulleys/clutch (Section 10)
ä Final reduction (Section 11)
ä Alternator/Starter clutch (Section 12)
• The following components require engine removal for service.
ä Crankshaft/Crankcase/Balancer (Section 13)
SPECIFICATIONS
ITEM SPECIFICATIONS
Engine dry weight 66 kg (145.2 lbs)
Engine oil capacity
TORQURE VALUES
Engine mounting bolt 80 N•m (8 kgf•m, 58 lbf•ft)
Engine mounting nut 80 N•m (8 kgf•m, 58 lbf•ft)
Rear shock absorber lower mounting bolt 40 N•m (4 kgf•m, 29 lbf•ft)
Rear/parking brake caliper mounting bolt 32 N•m (3.2 kgf•m, 23 lbf•ft)
Engine hanger mounting bolt 50 N•m (5 kgf•m, 36 lbf•ft)
Engine hanger rod nut 35 N•m (3.5 kgf•m, 25 lbf•ft)
At draining 2.0 liter (2.1 US qt, 1.8 lmp qt)
At disassembly 2.5 liter (2.7 US qt, 2.2 lmp qt)
At oil filter cartridge change 2.1 liter (2.2 US qt, 1.9 lmp qt)
ALOCK bolt: replace with a new one
7-1
Page 3
7. ENGINE REMOVAL/INSTALLATION
ENGINE REMOVAL
Remove the following:
Luggage box (page 2-3)
Floorboard (page 2-6)
Rear fender (page 2-7)
Side/rear body cover (page 2-8)
Exhaust muffler (page 2-15)
Drain the coolant from the system (page 6-6).
Support the scooter on its main stand.
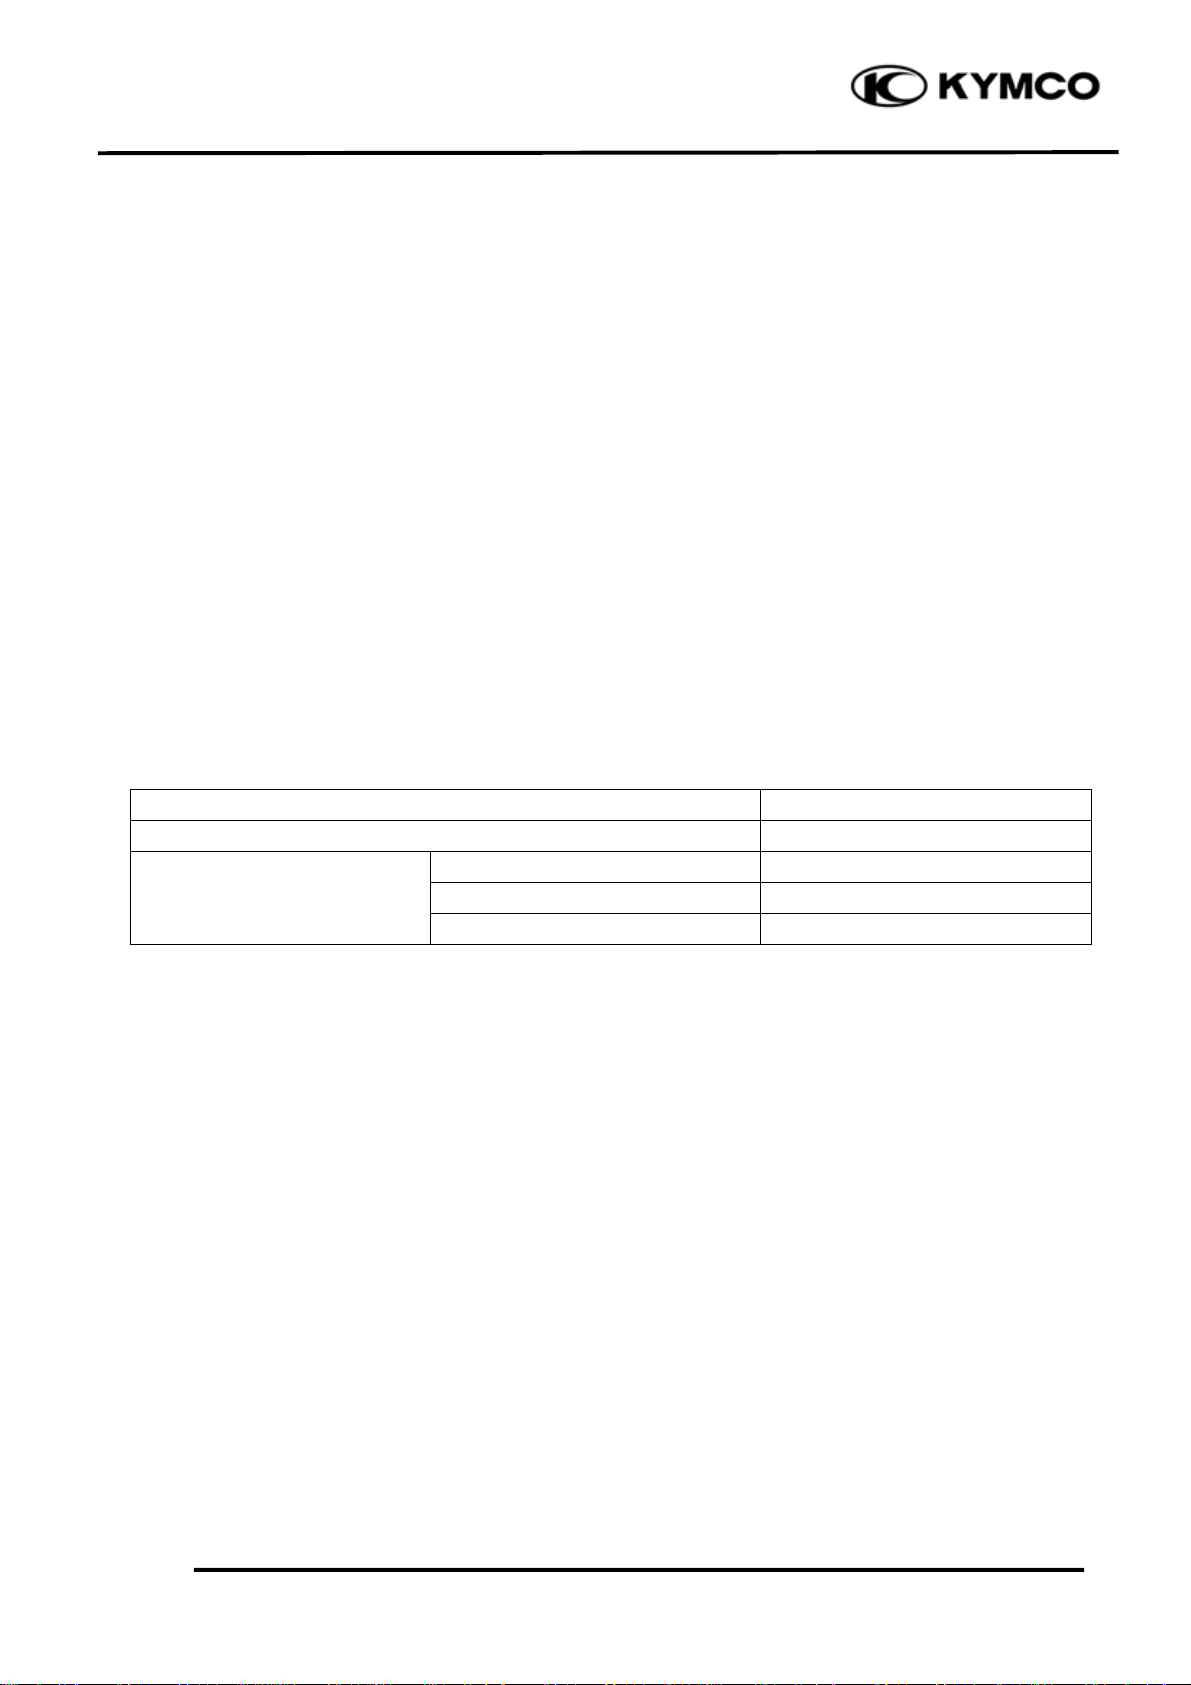
Air Cleaner Clamp Screw
Loosen the air cleaner clamp screw.
Loosen the carburetor clamp screw.
XCITING 500
Remove the carburetor.
Disconnect the fuel hose from the carburetor.
Carburetor Clamp Screw
Fuel Hose
7-2
Page 4
7. ENGINE REMOVAL/INSTALLATION
r
t
XCITING 500
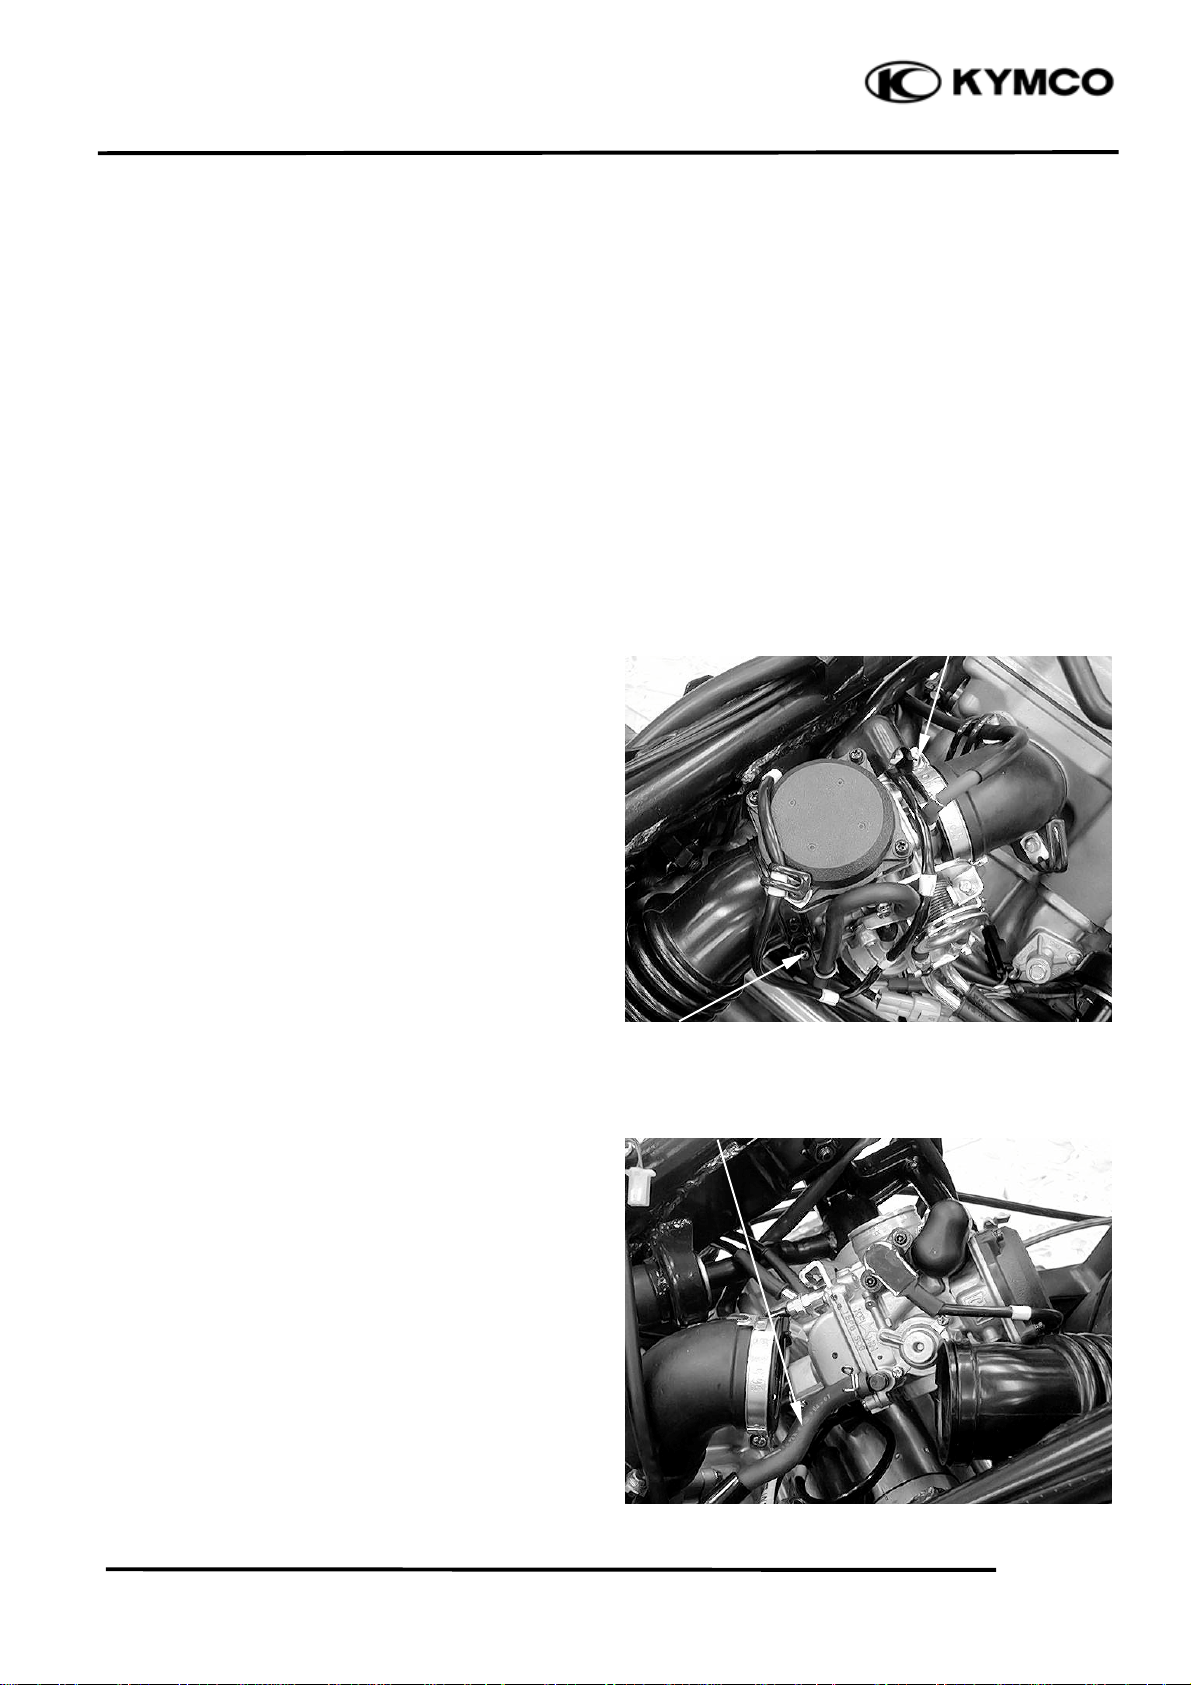
Disconnect the water temperature sensor
connector.
Disconnect AICV air supply hose from the
AICV check valve.
Disconnect the spark plug cap from the
cylinder head.
Disconnect the crankcase breather hose form
the cylinder head cover.
AICV air Supply Hose
Water Temperature Sensor Connecto
Crankcase Breather Hose
Release the rubber cap and remove the
terminal nut to disconnect the starter motor
cable.
7-3
Spark Plug Cap
Rubber Cap
Nu
Page 5

7. ENGINE REMOVAL/INSTALLATION
t
XCITING 500
Disconnect the air bleed hose and water hose
from the water joint.
Disconnect the outer water hose from the oil
cooler.
Air Bleed Hose
Water Hose
Outer Water Hose
Loosen the wire bands and disconnect the
alternator connectors.
Alternator Connectors
Nu
7-4
Page 6

7. ENGINE REMOVAL/INSTALLATION
t
r
XCITING 500
Remove the bolt and engine ground cable.
.
Loosen the hose bands and disconnect the
bypass hose and water hose
Engine Ground Cable
Bol
Bypass Hose
.
Disconnect the oil pressure switch connector.
Water Hose
Oil Pressure Switch
7-5
Oil Pressure Switch Connecto
Page 7

7. ENGINE REMOVAL/INSTALLATION
XCITING 500
Remove the bolts and rear/parking brake
caliper.
Remove the brake hose from clamps.
Disconnect the transmission case breather
hose from transmission case.
Bolts
Remove the bolts and air cleaner.
Transmission Case Breather Hose
Bolts
7-6
Page 8

7. ENGINE REMOVAL/INSTALLATION
t
t
XCITING 500
Remove the rear cushion lower mount bolts
Remove the engine mount nut.
Lower Mount Bolts
Nu
Turn the engine mount bolt counterclockwise
and loosen it.
Pull out the engine mount bolt then removes
the engine from the frame.
.
7-7
Bol
Page 9

7. ENGINE REMOVAL/INSTALLATION
*
At removing the engine, be careful not to
catch your hand or finger between the
engine hanger and crankcase.
XCITING 500
7-8
Page 10

7. ENGINE REMOVAL/INSTALLATION
r
XCITING 500
Remove the collar.
7-9
Colla
Page 11

7. ENGINE REMOVAL/INSTALLATION
r
g
XCITING 500
Pull out the long engine collar.
INSTALLATION
Installation is in the reverse order of removal.
*
● At installing the engine, be careful not
to catch your hand or finger between
the engine hanger and crankcase.
● Check for leakage of the engine oil and
engine coolant.
Torque:
Engine mounting bolt:
80 N•m (8 kgf•m, 58 lbf•ft)
Engine mounting nut:
80 N•m (8 kgf•m, 58 lbf•ft)
Route the brake hoses and wires properly
(page 1-12).
INSPECTION
Inspect the bearing:
Bearings allow play in the right/eft crankcase
or the bearing turns roughly → Replace.
Long Engine Colla
Inspect the engine mount bolt:
Band/Damage → Replace
*
Do not attempt to straighten a bent
engine mount bolt.
Bearin
7-10
Page 12

7. ENGINE REMOVAL/INSTALLATION
XCITING 500
ENGINE HANGER
REMOVAL
Loosen and remove the engine mount nut
(page 7-7).
Loosen and remove the engine mount bolt
(page 7-7).
Remove the engine hanger mount bolts and
outer collars.
Remove the engine hanger and inner collars.
Bolts/Outer Collars
Inner Collars
Remove the nut, washers, rubber washers and
engine hanger rod.
INSTALLATION
Installation is in the reverse order of removal.
Torque:
Engine hanger mounting bolt:
50 N•m (5 kgf•m, 36 lbf•ft)
Engine hanger rod nut:
35 N•m (3.5 kgf•m, 25 lbf•ft)
7-11
Nut Washers
Rubber Washers Engine Hanger rod
Page 13

7. ENGINE REMOVAL/INSTALLATION
XCITING 500
INSPECTION
Inspect the bearing:
Bearings allow play in the engine hanger or
the bearing turns roughly → Replace.
Inspect the bush:
Wear/Damage → Replace.
Outer/Inner Bearings
Bush
7-12
 Loading...