

Kymco MO MXU250 Service Manual - chap19 (imp elettrico)

19. LIGHTS/SWITCHES
MXU 250
19
__________________________________________________________________________________
__________________________________________________________________________________
__________________________________________________________________________________
__________________________________________________________________________________
__________________________________________________________________________________
LIGHTS/SWITHCES
__________________________________________________________________________________
SERVICE INFORMATION------------------------------------------------ 19- 1
BULBS REMOVAL--------------------------------------------------------- 19- 2
HORN (ON ROAD) --------------------------------------------------------- 19- 4
IGNITION SWITCH -------------------------------------------------------- 19- 5
HANDLEBAR SWITCH --------------------------------------------------- 19- 5
NEUTRAL/REVESE SWITCH-------------------------------------------- 19- 7
19
19-0

19. LIGHTS/SWITCHES
SERVICE INFORMATION
● A continuity test can be made with the switches installed on the vehicle.
● All plastic connectors have locking tabs that must be released before disconnecting, and
must be aligned when reconnecting.
● To isolate an electrical failure, check the continuity of the electrical path through the part. A
continuity check can usually be made without removing the pat from the vehicle. Simply
disconnect the connectors and connect a continuity tester to the terminals or connections.
MXU 250
19-1
19. LIGHTS/SWITCHES
BULBS REMOVAL
HEADLIGHT
Remove the front fender. (See page 2-8)
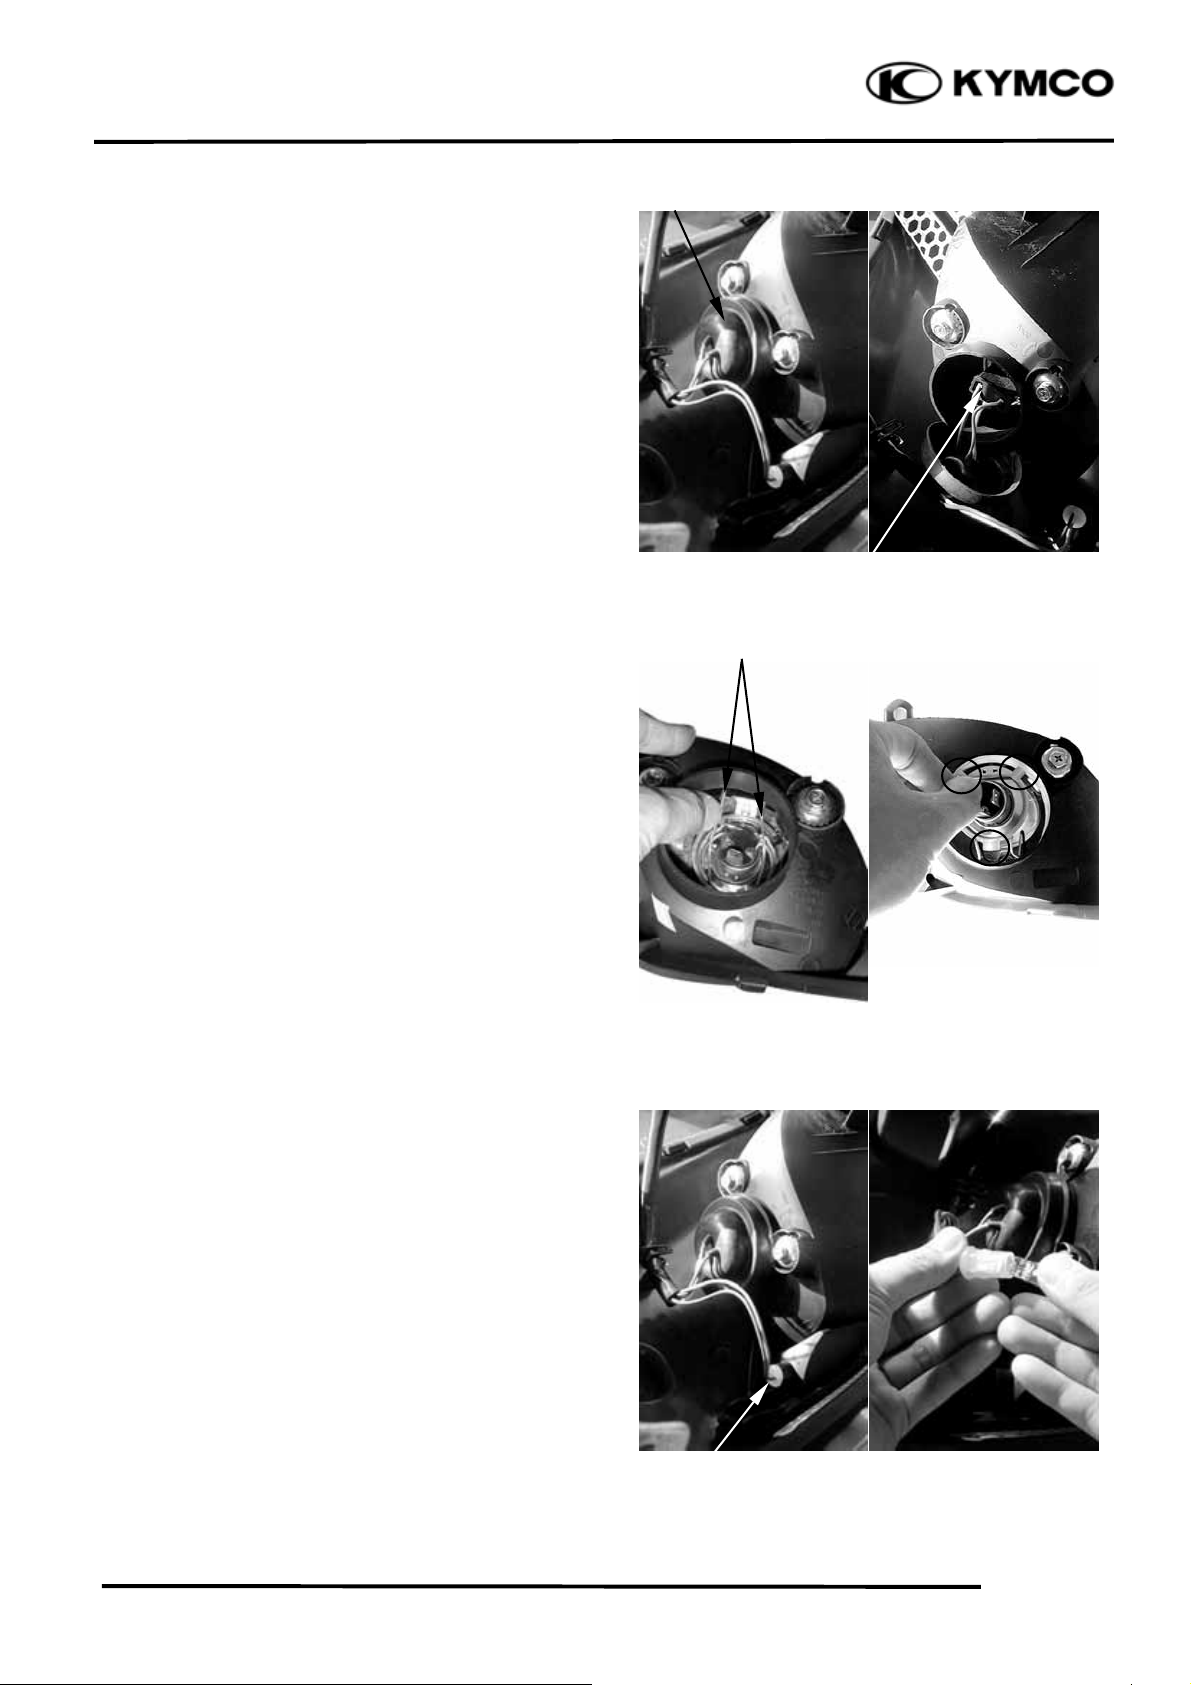
Remove the rubber boot from the headlight
case.
Disconnect the headlight wire connector.
Relax the lock clips to remove the bulb and
replace with a new one.
MXU 250
Rubber Boot
Headlight Connector
Lock Clip
Lock Clips
Install the bulb, aligning the bulb socket
groove with the bulb tab and set the lock
clips.
Connect headlight wire connector.
Install the rubber boot.
Install the front fender in the reverse order
of removal.
POSITION LIGHT
Remove the bulb socket by pulling it out.
Remove the bulb.
Install the bulb in the reverse order of
removal
Bulb Socket
19-2
 Loading...