

Page 1

®
GETTING STARTED GUIDE
for
PC3A8, PC3A7, PC3A6
©2014 Young Chang Co., Ltd. All rights reserved. Kurzweil® is a product line of Young Chang Co., Ltd. Kurzweil®, Young
Chang®, V. A. S. T.®, and PC3A™ are trademarks of Young Chang Co., Ltd. All other trademarks and copyrights are property of
their respective companies. Product features and specications are subject to change without notice.
You may legally print up to two (2) copies of this document for personal use. Commercial use of any copies of this document is
prohibited. Young Chang Co. retains ownership of all intellectual property represented by this document.
Part Number 910567-001
i
Page 2

Kurzweil International Contacts
Contact the Kurzweil oce listed below to locate your local Kurzweil representative.
US Customers:
American Music & Sound
22020 Clarendon Street, Suite 305
Woodland Hills, CA 91367
Tel: 800-431-2609
Fax: 818-597-0411
Email: info@americanmusicandsound.com
www.kurzweil.com
Customers outside the US:
Young Chang Co., LTD.
9th Floor, Bldg 102, I-Park,
Jeongja-Dong, Bundang-Gu, Seongnam-Si,
Gyeonggi-Do
463-859 South Korea
Tel: +82 31 786 7900
support@kurzweil.com
www.facebook.com/kurzweilmusicsystems/
www.twitter.com/KurzweilMusic
www.youtube.com/user/KurzweilTutorials
ii
Page 3

Introduction
Updates and Boot Loader
Introduction
Your new instrument oers amazing acoustic, electric, and synthesizer sounds, combined with
advanced programming features that will let you create almost any sound you can imagine. The
PC3A comes loaded with 256 MB of ROM sounds, including:
• The Original PC3K set.
• The KORE64 expansion set (featuring improved guitar, drums, synth, brass, and woodwind
sounds).
• The German D Grand EXP expansion set (featuring improved acoustic piano sounds).
In Program Mode, press the Exp 1 Bank button to access KORE64 Programs (IDs 3200-3590), or
press the Exp 2 Bank button to access the German D Grand EXP Programs (IDs 3700-3730). By
default, program 3700 will be selected when the PC3A is rst powered on.
How to Use This Guide
This Quick Start Guide describes how to connect and power up your PC3A, and to hook up the
PC3A to your sound system and MIDI system. It provides an overview of the front panel, and a
brief description of the operating modes to help you start playing music with the instrument. It
covers the PC3A in its 88, 76, and 61-note congurations (PC3A8, PC3A7, and PC3A6).
For detailed information on editing and advanced programming features, refer to the PC3A
Musician’s Guide provided on the Kurzweil website:
http://www.kurzweil.com
The best way to read this guide is with your PC3A in front of you. By trying the examples we give
to illustrate various functions, you can get a quick understanding of the basics.
Do I Have Everything?
Your PC3A shipping carton should include the following in addition to your instrument:
• Power cable
• Sustain pedal
• USB cable
• Getting Started manual (this book)
If you don’t have all of these components, please call your Kurzweil/Young Chang dealer.
You may also want to purchase a USB thumb drive for portable backups and storage.
Updates and Boot Loader
Check for new documentation and operating system upgrades before you start using your
instrument. When new software is available for the PC3A, it will be posted at www.kurzweil.
com. You’ll use the PC3A’s Boot Loader to upgrade your instrument to use the new software. To
bring up the Boot Loader, hold down the Exit button (below the cursor buttons, to the right of the
display) while powering on your PC3A. When you’ve downloaded an upgrade, you can install it
yourself in a matter of minutes. Follow the instructions included with the upgrade les.
page 3
Page 4
Introduction
Arp
SW
Overview of the PC3A
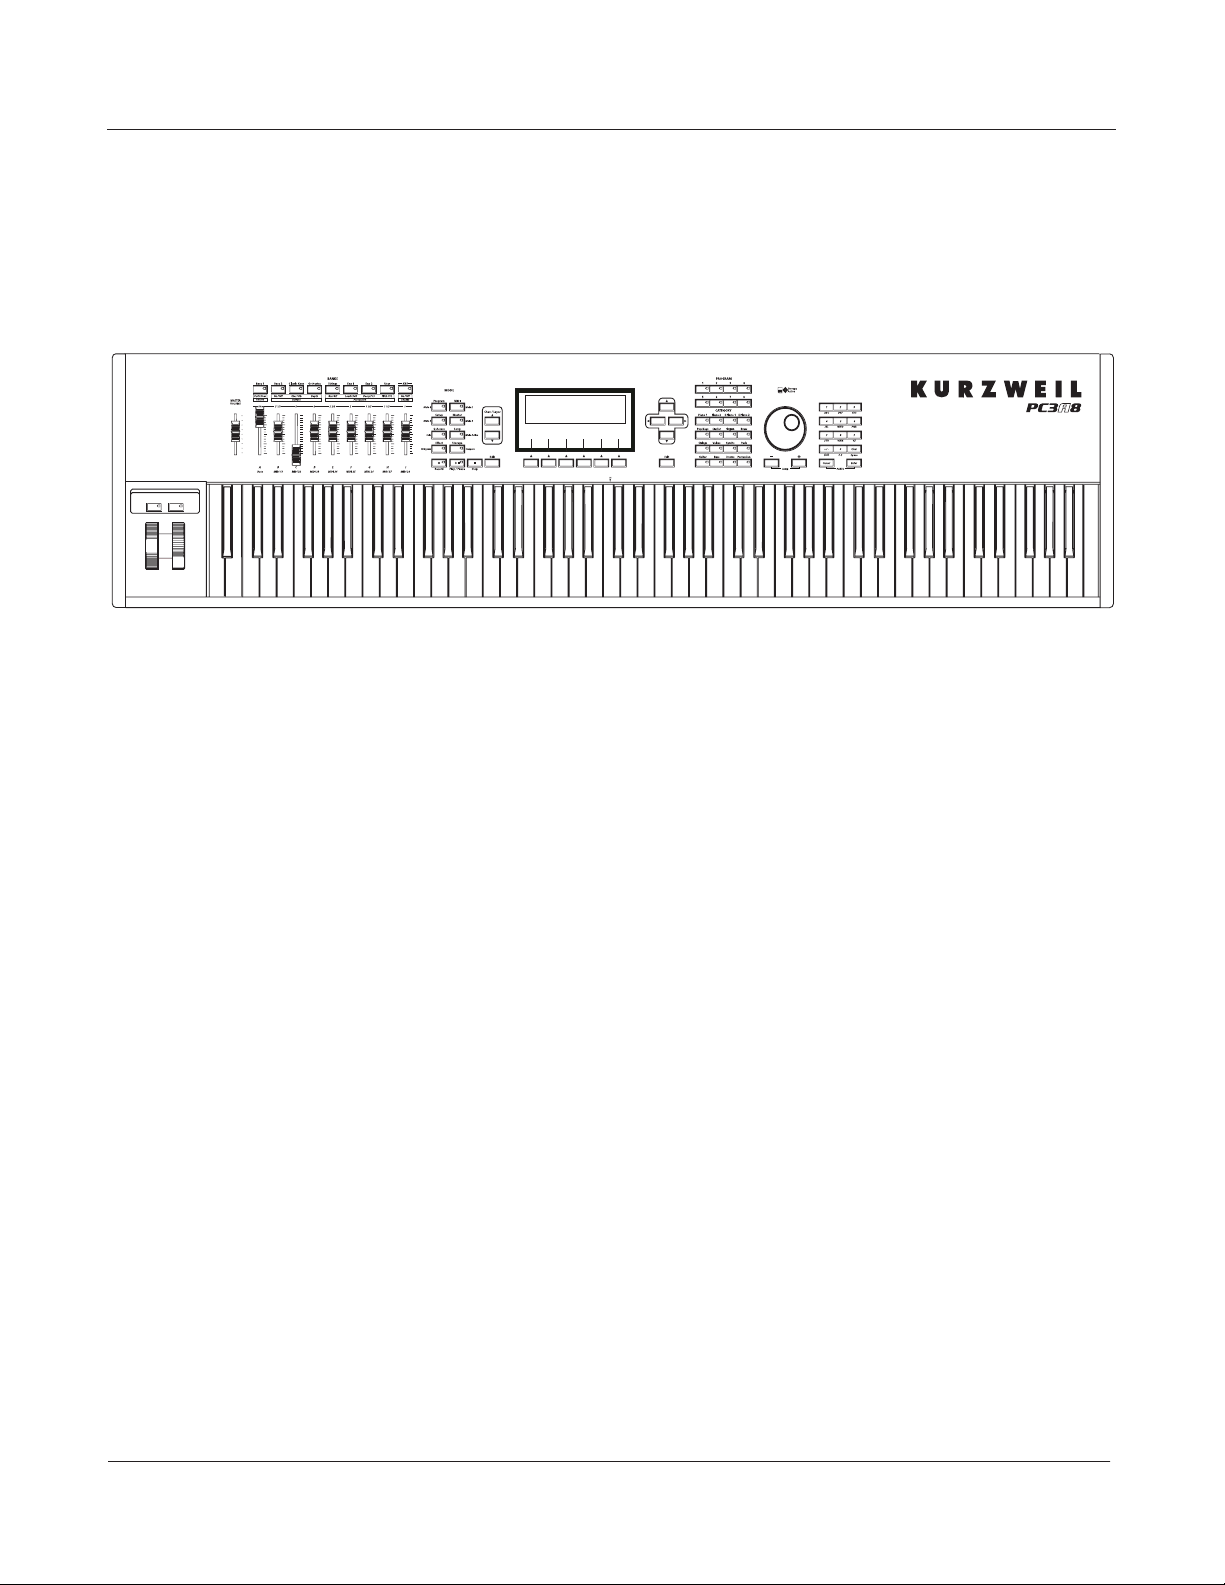
Pictured below is the 88-key PC3A8.
The PC3A’s 1400+ programs include improved piano sounds from the German D Grand EXP
expansion, and improved guitar, drums, synth, brass, and woodwind sounds from the KORE64
expansion. Also included are string sections from the Orchestral and Contemporary sound
blocks, Stereo Triple Strike Piano, Classic Keys for realistic vintage electric piano sounds, and
General MIDI (GM) sounds. Multi-zone performance setups are also provided; many of these
setups use note triggers to play factory-recorded songs that provide grooves and arpeggiation
that make great templates for performance or recording. An on-board sequencer with front panel
transport buttons lets you record your ideas any time inspiration strikes. This sequencer (Song
mode) lets you play back MIDI type 0 or 1 sequences, record and play back your own songs, and
record multi-timbral sequences received via MIDI.
In addition to V.A.S.T. capability, a few of the features that by themselves make the PC3A an
impressive stage and studio machine are:
• 128-voice polyphony
• Fully multi-timbral voices, so that dierent programs can be played on each MIDI channel.
• An on-board digital eects processor provides multiple simultaneous eects, including
real-time eects control, internally or via MIDI.
• More eects processing power than Kurzweil’s own KSP8 studio eects processor.
• Two additional balanced analog outputs in addition to the standard stereo audio output pair,
as well as a digital output. All of the outputs are available simultaneously.
For backup, storage, and moving les, two types of USB ports are provided on the back panel of
the PC3A. A USB storage port allows you to connect a USB device such as a thumb drive, and a
second USB Computer port lets you connect the PC3A to a computer for le transfer and MIDI
connectivity.
page 4
Page 5

Introduction
Options
Ask your Kurzweil dealer about the following PC3A options:
Sound ROM Expansion Card
The PC3A has the KORE64 and German D Grand EXP cards installed as standard components.
Pedals
The PC3A has jacks for three switch pedals (for functions like sustain or program/setup changes)
and two continuous pedals (for functions like volume control and wah). Your Kurzweil dealer
stocks the following optional pedals:
FS-1 Standard box-shaped switch pedal
KFP-1 Single piano-style switch pedal
KFP-2M Double piano-style switch pedal unit
CC-1 Continuous pedal
Ribbon Controller
There’s a dedicated modular jack (like a telephone jack) on the rear panel of the PC3A for
connecting this 600-mm (24-inch) ribbon controller. You can congure the PC3A to use the ribbon
as a single large controller, or a three-section controller with independent settings for each
section.
Breath Controller
You can plug a Yamaha (or equivalent) breath controller into the dedicated jack on the PC3A’s
rear panel.
USB Storage Device
You can plug a USB mass storage device such as a “thumb drive” or memory stick into the PC3A
for backing up, archiving, sharing your work, and updating your software. Any size USB mass
storage device will work, though thumb drives are recommended for their portability, durability,
and low price.
Note: Most USB thumb drives are compatible with the PC3A, but some older USB thumb drives and larger
USB bus powered drives will not work with the PC3A if they require more than 100 mA of current (high
power USB devices). When attempting to use an incompatible USB device, the PC3A will display the
message “USB device requires too much power.” The PC3A is designed to work with low power USB
devicesandcanprovideamaximumof100mAtoaUSBdevice.Powerrequirementspecicationsfor
thumb drives are not always made clearly available by the manufacturer, but a newly purchased thumb
drivewillmostlikelybecompatible.Ifpossible,checkthepowerrequirementspecicationsofyourUSB
device before purchase.
page 5
Page 6
Startup summary
Startup summary
If you are familiar with Kurzweil instruments and are comfortable making system connections,
here is a quick summary of the necessary steps. More detailed instructions are on the following
pages.
Making Connections
1. Set the keyboard on a hard, at, level surface. Make sure to leave plenty of room for
ventilation.
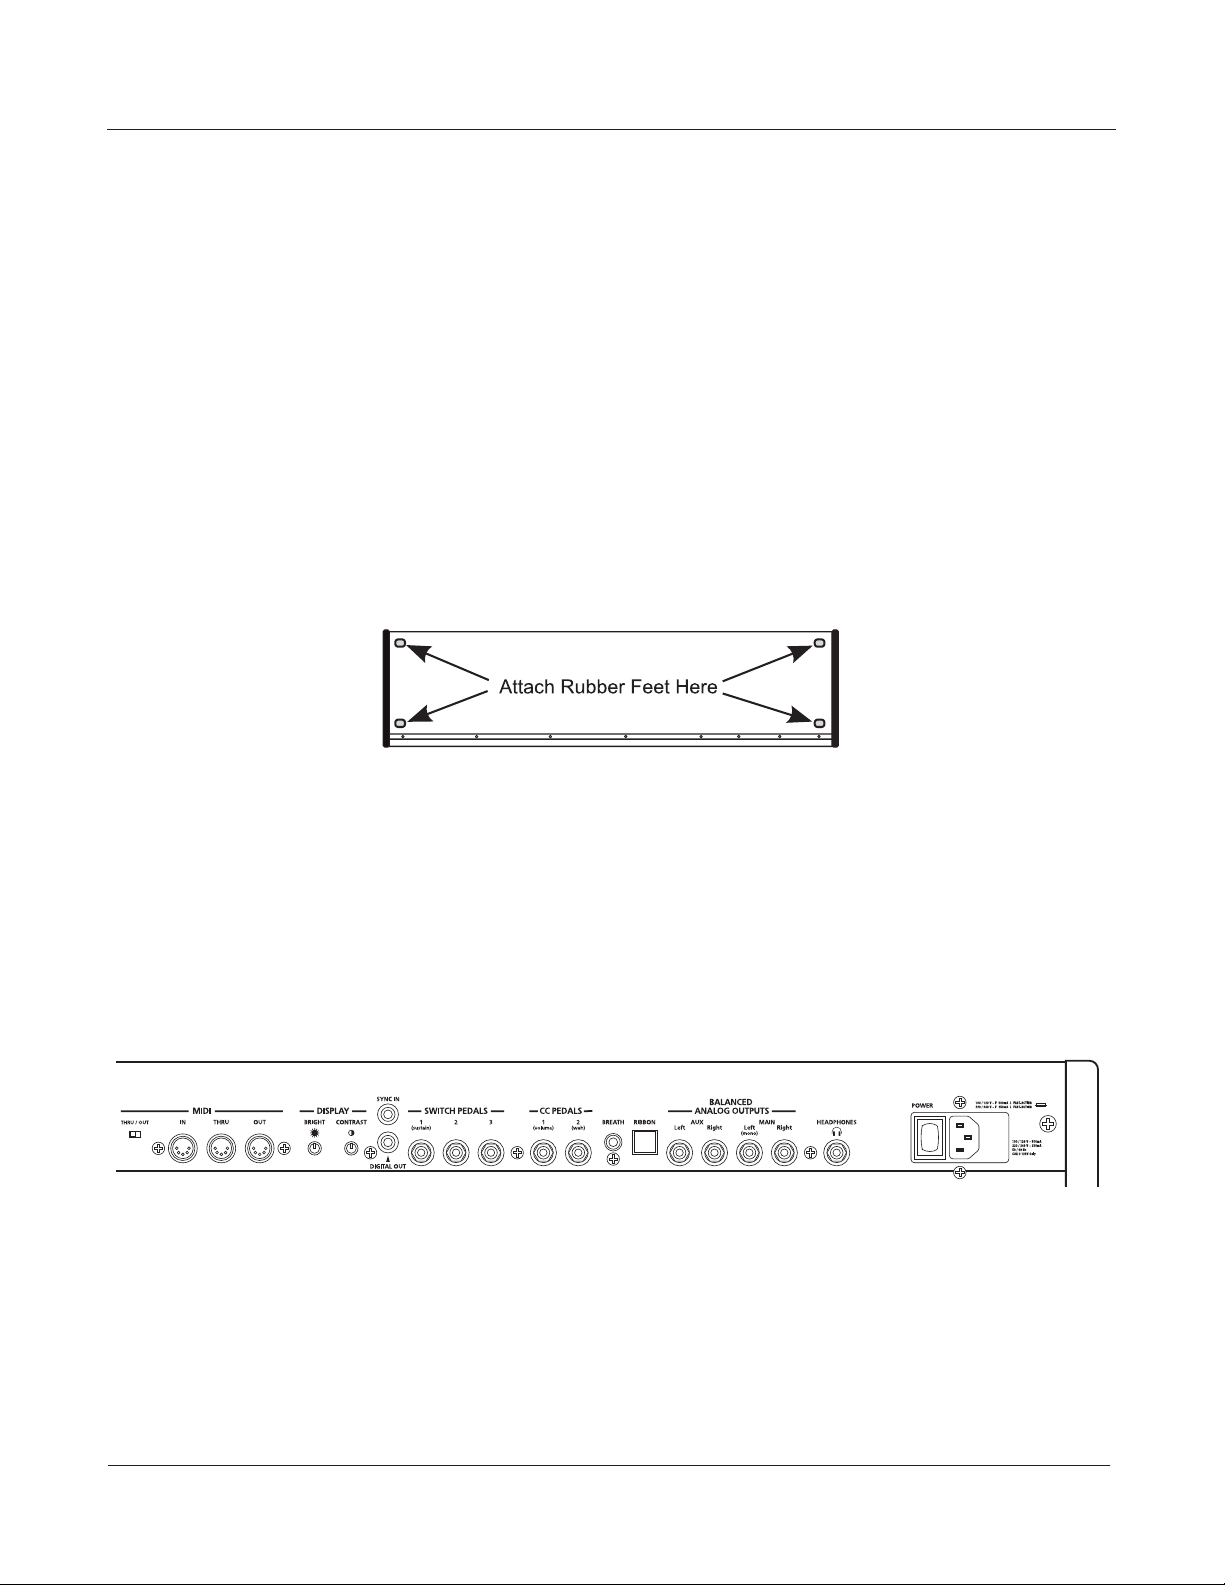
2. Four adhesive-backed rubber feet are provided with your PC3A. If you want to attach them to
the bottom of the PC3A(recommended to prevent scratching your tabletop), carefully turn the
keyboard over, remove the paper backing from the rubber feet and attach them now, near each
corner, all on the same level.
3. Connect the AC power cable to the rear panel.
4. Make sure your sound system is at a safe volume level. Also make sure that the PC3A’s
MASTER VOLUME slider (on the far left side of the front panel) is all the way down.
5. Plug in a pair of stereo headphones to the jack labelled on the rear panel, or run standard
(1/4-inch) audio cables from your amplier or mixer to the MIX audio outputs on the PC3A.
(Use the Main Left out for mono.) Balanced (“TRS” or “Stereo”) cables are recommended.
6. You may also want to adjust the display contrast and brightness, using thetwo small knobs on
the rear panel of the PC3A for this purpose.
Making Music
1. Plug the power cable into an AC source and power up your PC3A with the switch on the rear
panel, next to the power cord connector. Raise the level of the MASTER VOLUME slider, and
check out some of the programs and setups. The PC3A starts up in Program mode by default.
2. If you hear distortion, reduce the gain on your mixing board (or use the pad if it has one).
3. Scroll through the program list with the Alpha Wheel, or the dedicated Category and Program
buttons, to try the PC3A’s many sounds.
page 6
Page 7

Startup in Detail
Startup in Detail
This section walks you through details of setting up your PC3A and connecting optional
components.
Before You Start...
Don’t connect anything until you make sure your PC3A is properly and safely situated. Also, if
your PC3A has been out in the cold, give it time to warm up to room temperature before starting
it, since condensation may have formed inside the PC3A. It is normal for the rear panel near the
MIDI jacks to become warm after a while.
Connecting the Power Cable (Line Cord)
The PC3A runs on AC power: 100, 120, 230, or 240 volts at 50–60 Hz. Your dealer will set the
voltage switch to match the voltage in your area. The voltage level is set with a selector on the
rear panel of the PC3A. Unless you are sure it needs to be changed, you shouldn’t adjust this.
When you’ve connected the cable at the PC3A end (as you face the back of the PC3A, the power
connection is at the right), plug it into a grounded outlet. If your power source does not have the
standard three-hole outlet, you should take the time to install a proper grounding system. This
will reduce the risk of a shock.
Switching On the Power
The PC3A’s power switch is on the rear panel, adjacent to the power cable connection.
When you power up, the display briey shows some startup information. The Program mode
display then appears. The rst time you power up (or after a reset), your instrument will be set to
operate on MIDI Channel 1 (as shown at the far right of the display’s top line). It will look similar
to the diagram below, though your PC3A may be dierent from the example.
page 7
Page 8

Startup in Detail
PC3A
Connecting Audio Cables
Analog
With the level on your sound system turned down, connect the PC3A’s analog audio outputs
using a pair of stereo or mono audio cables. Mono cables will always work. If you are going into
balanced inputs, stereo cables will give a better signal-to-noise ratio and a bit more volume. The
PC3A’s analog outputs are balanced, and generate a “hotter” signal than some previous
Kurzweil instruments.
Four 1/4-inch balanced audio output jacks are on the rear panel. To begin, connect one end of
each audio cable to your mixing board or PA system inputs, and connect the other end to the
jacks marked Main Left and Right on the rear panel of the PC3A. If you have only one input
available, use the PC3A’s Main Left output to get the full signal in mono.
Using Master Mode you can set the Aux outputs to duplicate the Main Outs, which is useful for
monitoring and other operations. They are always in stereo, as is the headphone output.
Digital
For digital audio output from the PC3A, connect a 75-Ohm coaxial cable from the PC3A’s RCA
Digital Out jack to the AES or S/PDIF input of the receiving device. You may need an RCA-toXLR adapter to connect with the receiving device. If the receiving device receives only optical
signals, you’ll need a converter as well. The PC3A’s Master Page (press the Master mode button)
lets you select a range of useful sample rates for the digital output.
The RCA jack labeled “Sync In” allows you to synchronize the PC3A’s S/PDIF Digital Audio
output sample rate to an external S/PDIF source. Although no audio signal is received by the
“Sync In” jack, its clock is received and may be used to set the output sample rate. For details, see
the Master Mode OUTPUT page parameter. NOTE: Sync In is NOT a “Word Clock” input. Only a
valid S/PDIF signal is recognized.
Connecting MIDI
The simplest MIDI conguration uses a single 5-pin MIDI cable, either from the MIDI Out port of
your PC3A to the MIDI In port of another instrument, or from the MIDI Out port of another MIDI
controller to the MIDI In port of the PC3A.
page 8
Page 9

Startup in Detail
There are many possible MIDI congurations. Depending on your system, you may want to use
the PC3A’s MIDI Thru port to pass MIDI information from a MIDI controller to the PC3A and on
to the next device in your system. The MIDI Thru port can be congured to serve as an
additional MIDI Out by sliding the nearby switch to the Out position.
You can also use the PC3A’s USB Computer port to send and receive MIDI. By default the PC3A
will show up as a USB MIDI device. USB MIDI and 5-pin MIDI can be used at the same time; the
MIDI signals will be combined into a single 16-channel MIDI stream.
Pedals
Consult the PC3A Musician’s Guide Chapter on MIDI and Storage Mode for more information on
using the USB ports.
Plug your switch or continuous pedals into the corresponding jacks on the PC3A’s rear panel. Do
not press any of your switch pedals while powering up, because the PC3A veries each pedal’s
orientation during power up.
We recommend using Kurzweil pedals but you can use almost any switch or continuous pedal,
as long as it adheres to the following specications (as most pedals do): If you use a third-party
(non-Kurzweil) switch pedal, make sure it’s connected before you turn on your PC3A. This
ensures that the pedal will work properly.
Switch pedals
Continuous pedals 10-kOhm linear-taper potentiometer,
1
/
-inch tip-sleeve plug
4
1
/
-inch tip-ring-sleeve plug
4
with the wiper connected to the tip.
page 9
Page 10

Startup in Detail
Breath
The default settings for the ve pedals you can use with the PC3A are:
Switch Pedal 1 Controller 64 (Sustain)
Switch Pedal 2 Controller 66 (Sostenuto)
Switch Pedal 3 Controller 67 (Soft)
Continuous Control Pedal 1 Controller 11 (Expression / Volume)
Continuous Control Pedal 2 Controller 4 (Foot Pedal) producesa“wah”eectinmanysetups
The pedals are independently programmable within each zone of every setup. Consult the PC3A
Musician’s Guide for instructions on programming.
The 3.5mm jack labeled Breath accepts a standard breath controller, which sends standard MIDI
Breath (MIDI 2) messages. The PC3A’s preset programs and setups don’t respond to Breath, but
if you have other instruments that do respond to Breath, you can control them from the PC3A via
MIDI.
You can also program the PC3A so that the breath controller sends a dierent MIDI message. This
would enable you to use a breath controller to aect the PC3A, but then other instruments
receiving MIDI from the PC3A would no longer respond to the PC3A’s breath controller (unless
you also programmed them to receive the same MIDI Controller that the PC3A’s breath
controller is sending).
Ribbon
Plug the optional Kurzweil Ribbon Controller into the modular Ribbon jack on the rear panel.
The ribbon controller itself should rest on a at surface; it ts nicely between the keys and the
buttons and sliders on the front panel.
The ribbon is a continuous controller. You can program the ribbon controller to send MIDI
Controller messages 1–127, as well as several specialized messages. It generates values of 0–127
for whatever MIDI Controllers you assign it to send. Just press it, and slide your nger along the
ribbon to change the value of the message it’s sending.
You can congure the ribbon to have one control section that runs its entire length, or to have
three sections of equal length. It sends its highest values when you press it at the end where the
cable connects. When you congure it to have three sections, each section sends its highest values
at the end closest to the cable.
CAUTION: The modular jack is designed for connection to the Kurzweil Ribbon Controller
option only. Do not plug any other modular plugs into the Ribbon jack.
page 10
Page 11

Startup in Detail
USB Storage Port
You can plug a USB mass storage device such as a “thumb drive” into the PC3A for backing up,
archiving, sharing your work, and updating your software. Any size USB mass storage device
will work.
NOTE: Do not remove a USB device while the display says Loading... or Saving.... Removing a USB
deviceduringaletransfercancausedatacorruption.
USB Computer Port
The USB Computer port on the rear panel works for MIDI (transmit and receive) or to connect
your PC3A to a computer for le transfer. By default, the USB port is set to MIDI mode. When
selecting USB PC connection in Storage mode, USB MIDI will temporarily be disabled.
We recommend that you use the USB cable provided with your PC3A and do not use extension
USB cables. The PC3A’s USB Computer port is only intended for connection to a USB Type A
port.
In USB Storage mode, a “PC3A” virtual drive will appear on your computer desktop. One
important thing to know here is that this is a virtual drive. You can save to this drive from the
PC3A, but you must immediately transfer that le to your desktop (or other folder). You must
copy data from the PC3A virtual drive to your computer’s drive or else the data will be lost.
When you leave Storage Mode, a prompt will tell you that the PC3A is turning back into a USB
MIDI device. Depending on your computer’s operating system, you may sometimes see a device
removal warning on your desktop (for example, when the PC3A leaves the Boot Loader). You
may disregard such a message without worries of damage to your PC3A or computer.
Setting the Clock
The rst time you start up your PC3A is probably a good time to set the instrument’s clock to
your current local time. Select Master mode from the front panel (described below) and click the
softbutton for CLOCK. The clock will time-stamp your les that have been stored via USB.
Battery
The PC3A uses a CR2032 battery to power its clock. The battery should last ve years, and a
message will tell you when the battery needs replacing. The access panel on the bottom of the
PC3A (which you can easily remove with a screwdriver) allows you to get at the battery for
removal and replacement.
.
CAUTION: Danger of explosion if battery is incorrectly replaced. Replace only with the same or
equivalent type (CR2032).
page 11
Page 12

Startup in Detail
Front Panel Overview
Front Panel Overview
1
2
3
4
5
9
A
A
106
7
8
Arp
SW
11
12
13
14
1 Pitch and Modulation Wheels
2 Arpeggiator & Software buttons
3 Bank Buttons
4 Sliders
5 Record/Playback controls
6 Mode Selection buttons
7 Channel/Layer buttons
page 12
8 Display and Soft buttons
9 Cursor navigation buttons
10 Edit and Exit buttons
11 Program & Category buttons
12 Plus & Minus buttons
13 Alpha Wheel
14 Alphanumeric buttons
Page 13

Startup in Detail
Front Panel Overview
1 - Pitch and Modulation wheels
Push the Pitch Wheel away from you to raise the pitch of the note(s) you are playing. Pull it
towards you to lower the pitch. Most programs are set so that the pitch wheel will raise and
lower pitch by a whole step, although some programs use the pitch wheel to lower pitch by as
much as an octave. The Pitch Wheel has a spring so that it will snap back to place (i.e., back to the
original pitch) when you release it.
The Mod Wheel performs a variety of functions. Dierent programs may use it for lter sweeps,
tremolo/vibrato, wah, or layer volume.
2 - Arp and SW buttons
The Arp button turns on and o the PC3A’s Arpeggiator.
The SW button (MIDI 29) can be programmed to do a variety of things. Often it is used for layer
enable or eect enable.
3 - Bank Buttons
The Bank buttons let you choose dierent banks of programs (e.g., KB3 programs or Classic Keys
programs). Within each bank, you can use the Program and Category buttons to select individual
programs. The Bank buttons have special functions in KB3 mode, indicated by labels beneath
each button.
4 - Sliders
In KB3 mode, the PC3A’s nine sliders emulate an organ’s drawbars. For example, slider A
emulates an organ’s 16’ drawbar. In other modes, the sliders can be used to send values for
dierent MIDI controllers. Press the Info soft button on the Program mode or Setup mode main
page to see the slider assignments of the current program or setup.
5 - Record/Playback controls
These control the recording and playback of songs from any mode. However, you’ll need to make
sure that the Demo Button parameter on Master Mode Page 2 is set to “O.” Otherwise these
buttons are used for Easy Audition (described below).
6 - Mode Selection buttons
The eight primary operating modes are described below . Each mode button has an LED that
lights to indicate the current mode. Only one mode can be selected at a time.
7 - Channel/Layer buttons
The function of these buttons depends upon the current mode. In Program mode, for example,
they shift through the MIDI channels, showing the program assigned to each channel. In Quick
Access mode, they scroll through the Quick Access banks, and in Song mode they scroll through
recording tracks. They are also useful in the Program and Setup editors.
page 13
Page 14

Startup in Detail
Front Panel Overview
8 - Display and Soft buttons
9 - Cursor navigation buttons
10 - Edit and Exit buttons
This is the primary interface with the PC3A. As you press various buttons, the display reects the
commands you enter and the editing changes you make.
The soft buttons are called “soft” because their functions change depending on the currently
selected mode and page. The bottom line of the display indicates each button’s current function.
If a soft button’s label is in all capital letters (KEYMAP, for example), pressing the corresponding
soft button takes you to a page of parameters. If the soft button is labeled in lower-case or mixedcase letters (Save, for example), the soft button performs some kind of function.
These move the display screen cursor around the currently selected page, in the direction
indicated by their labels. The cursor is a highlighted (reversed) rectangle (sometimes it’s an
underscore). It marks the value of the currently selected parameter. Programming the PC3A
involves selecting various parameters with the cursor and changing their values. You can change
the highlighted value with the Alpha Wheel, alphanumeric buttons, or plus/minus buttons.
The Edit button activates each of the PC3A’s editors, and acts as a shortcut to many pages within
the Program Editor. There are editors accessible from just about every operating mode.
Press Exit to leave the current editor. If you’ve changed the value of any parameter while in that
editor, the PC3A will ask you whether you want to save your changes before you can leave the
editor. If at some point you have diculty navigating, pressing Exit one or more times will return
you to Program mode.
11 - Program and Category buttons
Use the Program and Category buttons, in conjunction with the Bank buttons, to select PC3A
programs by Bank type and instrument category. Each Bank contains 128 programs divided into
16 categories. Each of the 16 categories contains 8 programs.
12 - Plus and Minus buttons
The Plus button increases the value of the currently selected parameter by one, and the Minus
button decreases it by one. These buttons are most useful when you’re scrolling through a short
list of values, or when you want to be sure you’re changing the value by one increment at a time.
13 - Alpha Wheel
Use the Alpha Wheel to quickly enter large or small changes in value. One click to the right will
increase the value of the currently selected parameter by one increment; to the left decreases the
value. Turning it rapidly jumps by several increments. You can also use the Alpha Wheel to enter
names when you’re saving objects.
page 14
14- Alphanumeric buttons
These let you enter numeric values, and to enter names one character at a time. Depending on
where you are, the PC3A automatically enters letters or numerals as appropriate.
Page 15

Startup in Detail
How the PC3A Works
How the PC3A Works
The PC3A integrates three MIDI-driven components:
• a MIDI controller (the keyboard, or an external MIDI controller)
• a sound engine
• and an eects processor that employs the same eects used in Kurzweil’s KSP8.
The sound engine responds to the MIDI events generated by the MIDI controller, and turns them
into sounds that are processed within the variable architecture of the algorithms—or by
oscillators for KB3 programs. The resulting sound can then be routed through the PC3A’s eects
and to the audio outputs.
Operating Modes
The PC3A is always in one of eight primary operating modes.
Program mode Select and play programs, and modify them with the Program Editor.
Setup mode Select and play setups (16 keyboard zones with independent MIDI
channel, program and control assignments), and modify them with the
Setup Editor.
Quick Access mode Select from a list of preset banks, each containing a list of ten programs
Eect mode Enable/disable eects or set Aux overrides for Program Mode (or a
MIDI mode Dene how your PC3A sends and receives MIDI information, and
Master mode Dene performance and control characteristics for the entire PC3A.
Song mode Use the PC3A’s sequencer to record and play back your keyboard
Storage mode Interface with the PC3A’s USB storage or computer ports to load and save
The PC3A’s tone wheel organ emulation is called KB3 mode. You automatically enter this mode
when you select a KB3 program. The KB3 Bank button takes you there directly.
Consult the PC3A Musician’s Guide for more detailed descriptions of the modes.
VAST Synthesis
The PC3A’s Variable Architecture Synthesis Technology (V.A.S.T.) lets you build sounds from
realistic instrumental samples and sampled synth waveforms—then modify the nature of those
sounds through a wide variety of digital signal-processing (DSP) functions. The PC3A also
generates its own synth waveforms, which can be combined with the samples or used on their
own. The PC3A’s Variable Architecture lets you arrange a combination of DSP functions from a
long list of choices. The functions you choose dene the type of synthesis you use.
and/or setups that can be viewed in the display for easy selection. Modify
the preset banks and create your own with the Quick Access Editor.
program selected from Quick Access mode.)
congure each channel to receive independent program, volume, and pan
messages that override the normal Program mode settings.
performance, play Type 0 and Type 1 MIDI sequences, and record multitimbral sequences received via MIDI.
programs, setups, and more.
page 15
Page 16

Startup in Detail
How the PC3A Works
KB3 Tone Wheel Emulation
Each layer of every program has its own DSP architecture, or algorithm. Within each algorithm,
you can select from a variety of DSP functions. Each function can be independently controlled by
a variety of sources including LFOs, ASRs, envelopes, a set of unique programmable functions
(FUNs), as well as any MIDI control message. The many dierent DSP functions and the wealth
of independent control sources give you an extremely exible, truly vast collection of tools for
sound creation and modication. When you’re ready to jump in and start creating programs,
consult the PC3A Musician’s Guide.
In addition to VAST synthesis, the PC3A oers many oscillator-based programs that give you the
classic sound of tone-wheel organs like the Hammond B3. KB3 mode, as it is called, is completely
independent of VAST, and has its own set of editing procedures. Nine dedicated sliders on the
PC3A’s front panel give you real-time drawbar control over these organ sounds. Buttons above
the sliders control rotating speaker speed, percussion, and other organ features.
The quickest way to get to the KB3 programs is by pressing the KB3 button (above the sliders, to
the left of the screen). The blue LED in the KB3 button will light when the current program is a
KB3 program.
PC3A Programs
The PC3A powers up in Program mode, where you can select and play programs (called patches,
presets, or voices on other instruments). Programs are preset sounds composed of up to 32 layers
of samples or waveforms. If you’ve left Program mode, just press the Program mode button or
Exit button to return.
Selecting Programs
When you are in Program mode, there are three basic ways to select a PC3A program:
• Press one of the Bank buttons (above the sliders on the left side of the front panel) to select a
bank, then press a Category button and a Program button. The Category and Program
buttons are on the front panel, between the screen and the alpha wheel.
Note: The instrument names above the Category buttons are relevant for Banks 1 and 2 (Base 1
and Base 2). For all other Banks, the Category buttons select a group of 8 programs to be selected by
the Program buttons, but the group of programs may not match the instrument name of the selected
Category button.
• Type the program’s ID (number) on the alphanumeric buttonpad, then press Enter. If you
make a mistake, press Clear, then start over.
• Scroll through the list using the Alpha Wheel, the Plus or Minus button under the Alpha
Wheel, or the cursor buttons (the arrow buttons to the right of the display).
The PC3A has various settings for responding to MIDI Program Change commands from
external sources. These are explained in the PC3A Musician’s Guide, which can be downloaded at
www.kurzweil.com.
page 16
Page 17

Startup in Detail
How the PC3A Works
Easy Audition
Any time you want to hear what a program sounds like, highlight the program’s name (while in
Program mode) then press the Play/Pause button to play a brief sample. The Demo Button
parameter on the Master Mode MAIN page must be on for Easy Audition to work; the parameter
is on by default. Master mode is described in detail in the PC3A Musician’s Guide.
VA-1 Programs
The VA-1 (Virtual Analog Synthesizer) programs included with the PC3A oer realistic
emulations of classic analog synthesizers, built from Kurzweil’s unique anti-aliased DSPgenerated oscillators. The PC3A’s power-shaped oscillators let you transition smoothly from one
waveform into another in real time, without using cross-fades.
VA-1 programs are scattered throughout the PC3A. Look for them in the Synth Category and the
Classic Keys Bank. You’ll see “KVA Oscillator” appear in the Keymap screen on the left hand side
of the display.
Program Mode Display
Take a minute to familiarize yourself with the Program mode display. It gives you some helpful
basic information, like the MIDI transposition, what MIDI channel you’re on, and which
program is currently selected.
Info Box
At the left side of the display is an outlined area which displays information about the current
program. This info box contains details about the dierent layers in each program, usually
indicating the keymap used in each layer. The line under the keymap name indicates the layer’s
keyboard range. In the case shown above, only the rst two displayed layers extend across the
entire keyboard (A 0 to C 8). A double circle innity symbol ( ∞ ) to the right of each layer shows
that the keymap is a stereo keymap.
Soft buttons
On most PC3A screens, the bottom line of the display identies the function of each of the
buttons beneath the display. These are called soft buttons, because they do dierent things
depending on the current software mode, as shown in the label displayed.
In Program and Quick Access modes, you can change octaves with the Octav- and Octav+
buttons under the display. The Info soft button shows you relevant details about the current
item. The Xpose-/Xpose+ buttons are a shortcut for quick transposition in semitone (half step)
increments. You can use them to transpose the entire PC3A as much as three octaves up or down.
The top line of the display shows the current amount of transposition (Xpose). Press both Xpose
buttons simultaneously to return transposition to zero.
page 17
Page 18

Startup in Detail
Quick Access
KB3 Programs
Setups
The Panic button (or a double press of Cancel and Enter at the bottom of the alphanumeric
keypad) sends an All Notes O message and an All Controllers O message—both to the PC3A
and over all 16 MIDI channels.
KB3 (organ) programs dier from VAST programs in that they don’t have layers. Instead they
rely on oscillators that mimic the tone wheels used in many popular organs. Consequently, the
info box shows only the waveform used in the program. Because of their architecture, KB3
programs require dierent processing within the PC3A. KB3 programs play only on a single
channel at a time (VAST programs will work ne on that channel, too).
The quickest way to get to the KB3 programs is by pressing the KB3 button above the sliders.
Setups are preset combinations of programs. Setups can have up to 16 zones, each of which can
be assigned to any range of the keyboard (overlapping or split). Each zone can have its own
program, MIDI channel, and MIDI control assignments, as well as ri and arpeggiator settings.
Press the Setup mode button to the left of the display. Its LED will light, telling you that you’re in
Setup mode. Notice that the Setup mode display is similar to the Program mode display. If the
setup has four or fewer zones, the box at the left shows you the programs assigned to each of the
setup’s zones. If the setup is composed of more than four zones, the box displays the rst four
zones; text at the top of the box will show the total number of zones. See the PC3A Musician’s
Guide for a more detailed description.
Many setups include arpeggiation and note-triggered songs to create some pretty amazing
grooves that you can use as is, or as templates for your own material. As you play with these
setups, experiment with the sliders and other controllers for a wide range of eects. Some of
these grooves keep playing after you’ve released the keys that got them going. When you want to
stop them, select another setup, or press the Setup mode button (or Stop for ris).
Quick Access
A really convenient way to select programs and setups is to use Quick Access mode, where you
select a Quick Access bank from a list of factory preset or user-programmed banks. Each bank
contains ten memory slots, or entries, where you can store any combination of programs or
setups. While you’re in Quick Access mode, you can select any program or setup in the bank with
buttons 0 through 9 or the cursor keys.
The PC3A comes with a few Quick Access banks already programmed so you can get an idea of
how they work. You’ll probably create your own Quick Access banks to help you select programs
and setups with a minimum of searching. Press the Quick Access mode button to the left of the
display. Its LED lights, to tell you you’re in Quick Access mode.
page 18
Page 19

Startup in Detail
Other Operating Modes
The top line of the display tells you which Quick Access bank is selected. Use the Chan/Layer
buttons (to the left of the display) to scroll through the banks. The names of each of the ten entries
in the bank are listed in the center of the display. Many of their names will be abbreviated. The
currently selected entry’s full name is shown near the bottom of the display. The amount of
transposition is displayed to the left of the entry name. If the current entry is a program, you’ll
see the current keyboard (MIDI) channel displayed to the right of the entry’s name. If it’s a setup,
you’ll see the word Setup.
The entries on the Quick Access page are arranged to correspond to the layout of the numeric
buttons on the alphanumeric pad.
When you’re ready to create your own Quick Access banks, consult the PC3A Musician’s Guide
learn about the Quick Access Editor.
Other Operating Modes
The four other modes - Eects, Master, MIDI, Song and Storage mode- allow you to adjust
specic performance characteristics and system functions. These are described in detail in the
complete PC3A Musician’s Guide, which can be downloaded at www.kurzweil.com.
page 19
 Loading...