

Konica Minolta PI1800 00-GB User Manual

Pi1800
User Manual


Table of contents
1 Introduction
1.1 Welcome to Minolta......................................................................1-1
1.2 Roadmap of this manual..............................................................1-3
Where to find what in this User’s Manual........................................1-3
Brief explanation of special type styles and
method of presentation...................................................................1-4
2 Connecting the copier
2.1 System requirements....................................................................2-1
2.2 Connecting the copier to a personal computer (PC).................2-2
2.3 Integrating the copier in a network.............................................2-3
3 Installing the printer driver
3.1 Notes on installing the printer driver..........................................3-1
Don’t be afraid of the installation!....................................................3-1
General information on the printer driver........................................3-2
Information on installing a network printer......................................3-2
3.2 CD-ROM installation ....................................................................3-3
4 Copier settings
(Windows NT 4.0 only)
4.1 Points to watch!............................................................................4-1
4.2 Calling up the printer properties.................................................4-2
4.3 Defining the printer settings........................................................4-3
5 Working with the printer driver
5.1 Points to watch!............................................................................5-1
5.2 Displaying the printer driver settings.........................................5-2
Displaying the settings in Windows 95/98.......................................5-2
Displaying the settings in Windows NT 4.0.....................................5-4
5.3 Setting the printer driver to suit your needs..............................5-6
Selecting a paper size.....................................................................5-6
Defining the paper source...............................................................5-7
Defining the orientation of the paper...............................................5-8
Pi1800 TOC-1

Defining the number of copies........................................................5-9
Defining the order of printing........................................................5-10
Defining the resolution..................................................................5-11
Defining a pattern for the print raster............................................5-12
Defining the brightness.................................................................5-13
Defining a gamma value...............................................................5-14
Defining the method of compression............................................5-15
6Printing
6.1 Starting a print job........................................................................6-1
Status indications of printer LED....................................................6-2
Combining functions.......................................................................6-2
6.2 Cancelling a print job...................................................................6-3
6.3 Resetting the printer....................................................................6-4
7 Troubleshooting
7.1 If printing is not possible.............................................................7-1
7.2 Error messages in printer menu.................................................7-2
Message: Load Paper....................................................................7-2
Message: Size Error.......................................................................7-3
Message: No Match Size................................................................7-3
Message: No Cassette...................................................................7-4
8 Appendix
8.1 Technical specification................................................................8-1
8.2 CE symbol (Declaration of Conformity).....................................8-2
8.3 End-user licence agreement........................................................8-4
8.4 Index............................................................................................8-16
TOC-2 Pi1800

Introduction
1 Introduction
1.1 Welcome to Minolta
Thank you for your decision to purchase a Minolta printer controller.
To achieve the best possible results and to use your printer effectively,
this User’s Manual provides you with information on the following topics:
G installing the printer controller,
G working with the printer driver,
G troubleshooting.
Read this User’s Manual carefully before ope rating your printer for the first
time, and always keep the manual within easy reach.
1
Pi1800 1-1

1
Introduction
These documents may not be reproduced, transmitted, transcribed,
stored in an archive system or tran slated withou t the express prior written
consent of Minolta Co. Ltd.
We reserve the right to make changes to the content of this manual.
Trademarks
®
Microsoft
Windows
IBM
Inc.
is a registered trademark of Microsoft Corporation.
®
is a registered trademark of Microsoft Corporation.
®
is a registered trademark of the International Business Machines,
1-2 Pi1800
Introduction
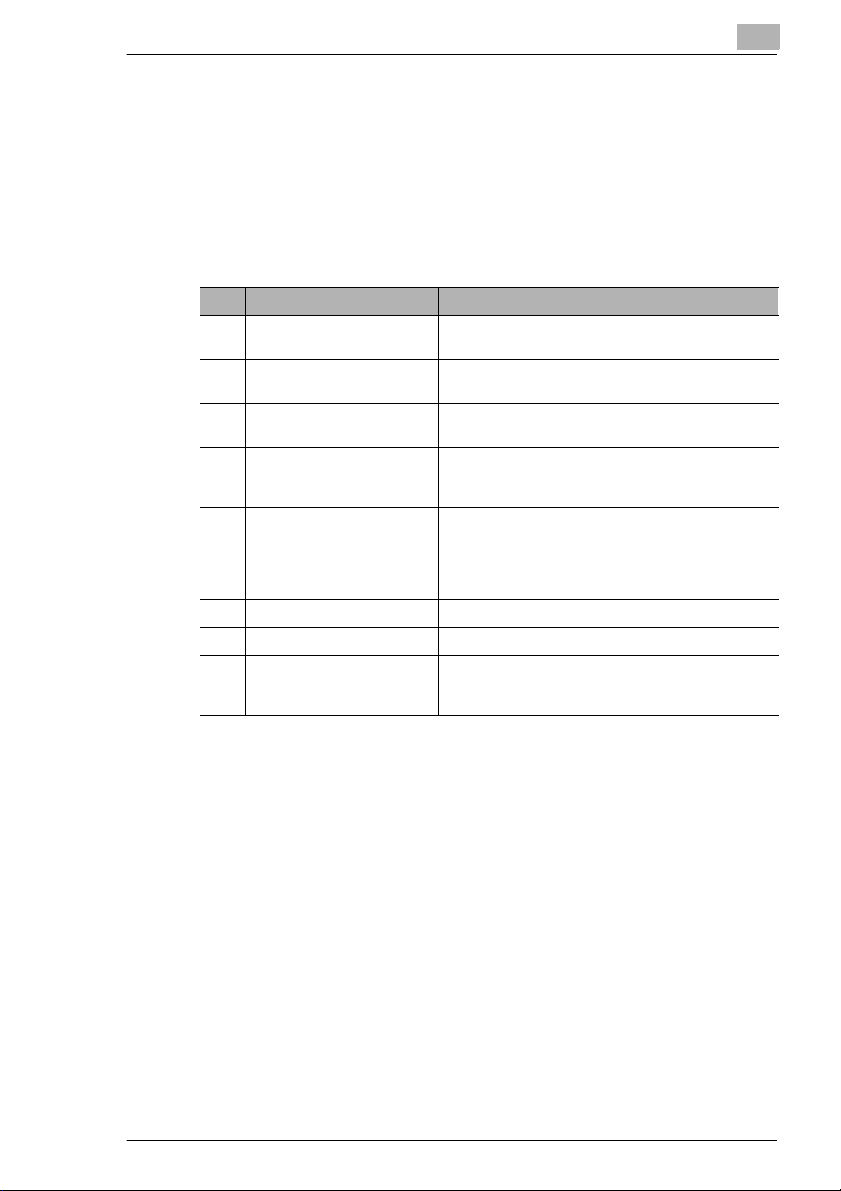
1.2 Roadmap of this manual
Where to find what in this User’s Manual
You don’t know exactly where to find the information you need? The
following table is designed to help you.
To find information on a specific problem quickly and precisely, please
refer to the index at the end of the User’s Manual.
No. Title of chapter Content of chapter
1 Introduction Introductory remarks and information on how to use
2 Connecting the copier The options available for connecting the copier to
3 Installing the printer driver A step-by-step explanation of the routine for installing
4 Copier settings
(Windows NT 4.0 only)
5 Working with the printer
driver
6 Printing Details of how to start and stop print jobs.
7 Troubleshooting Help with analysing and rectifying faults.
8 Appendix A collection of helpful additional information, e.g.:
this User’s Manual.
your personal computer (PC).
the printer driver.
Details of the various additional settings you need to
carry out when using the Windows NT 4.0 operating
system.
Details of the various settings you can carry out in the
printer driver, e.g.:
• selecting the paper size
• defining the number of copies
• choosing the order of printing
• technical specification
• index
1
Pi1800 1-3
1
Introduction
Brief explanation of special type styles and method of presentation
Special type styles and methods of presentation are used in this User’s
Manual to highlight various circumstances. The following examples will
help you to recognize and deal with the most important of these.
CAUTION
This is a warning!
A warning alerts you to danger to life and limb or to damage that could
result to the machine by treating it improperly.
➜ The arrow refers you t o safety measures that must be taken to prevent
the hazard.
[MENU] key on the control panel / button on the printer driver with
the description “Menu“
ERROR Shows you the display with the message 'Error'
➜ Single action to be performed (there are no other steps)
Step 1 of a series of actions
1
Step 2 of a series of actions, etc.
2
Help is available here.
?
➜ The approach that is sugge sted
here is sure to get you to your
desired result.
Here you can see what has to be done.
✎
This is a helpful tip
Text passages t hat are identifie d in this mann er provide you wi th tricks
and handy tips to make it even easier to work with the printer.
1-4 Pi1800

Connecting the copier
2 Connecting the copier
2.1 System requirements
When you wish to use your copier as a printer for your PC, the following
system requirements are necessary in order to ensure trouble-free
printing.
G Software:
❍ Microsoft Windows 95
❍ Microsoft Windows98 or
❍ Microsoft WindowsNT Version 4.0
G Hardware:
❍ IBM PC/AT-compatible with 486-66MHz Processor or better,
❍ min. 16MB RAM,
❍ min. 8MB hard drive space,
❍ CD-ROM drive.
G Interface:
❍ parallel port (IEEE 1284 type B)
2
Pi1800 2-1
2
Connecting the copier
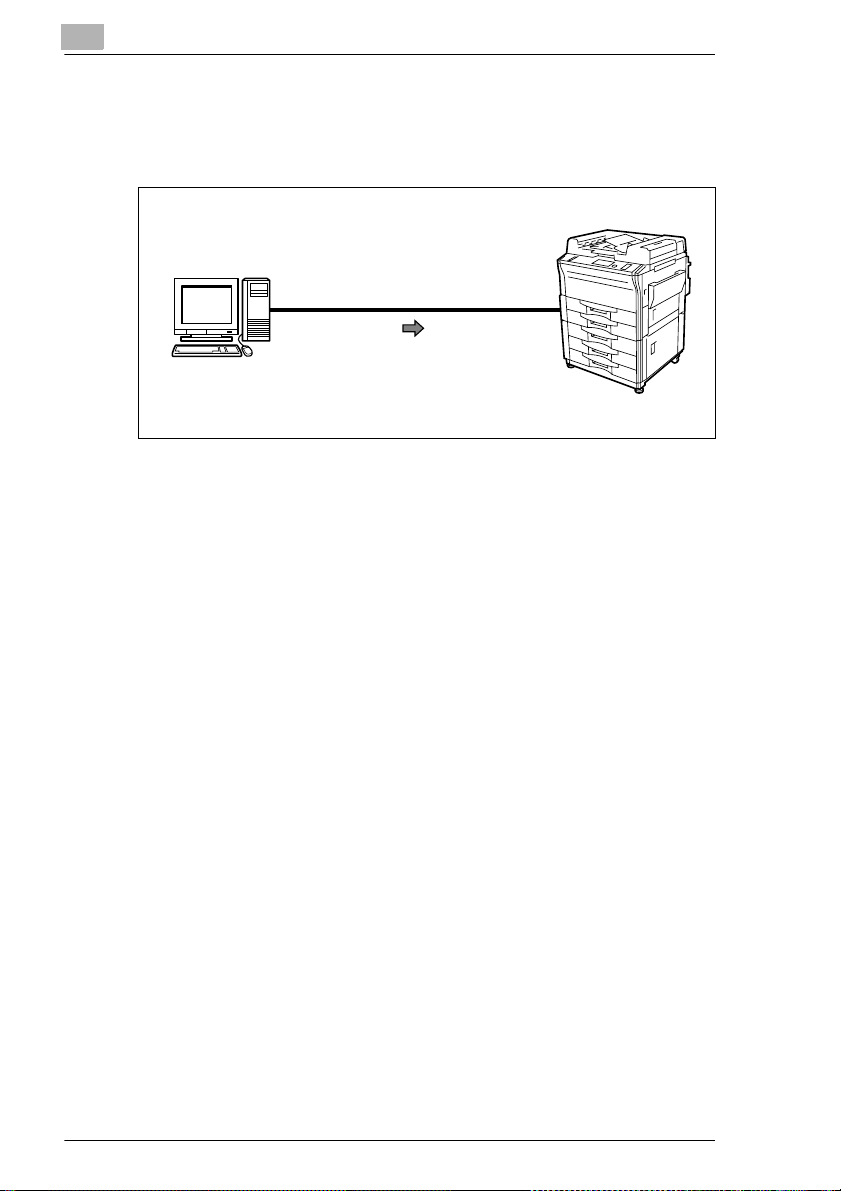
2.2 Connecting the copier to a personal computer (PC)
Connect the copier to the PC by means of a parallel cable or a USB
parallel adapter cable.
Parallel cable
IEEE 1284 type B
USB (parallel adapter cable)
USB parallel converter cable
or
Personal computer
CopierPC
Di181 + Pi1800
Please note the following points:
✚ The parallel connecting cable should not be lo nger than 2m, otherwise
the standards coveri ng e le ctro ma gne tic c omp ati bil ity wil l b e in frin ged.
✚ If the copier is not to be connected to a PC, then the parallel
connecting cable should be removed from the copier’s parallel port.
This protects the copier against electrostatic discharges which could
otherwise cause the copier to malfunction.
✚ A USB parallel adapter cable is required when connecting to a USB.
2-2 Pi1800

Connecting the copier
2.3 Integrating the copier in a network
Connect the copier to a n etwork server or a printer serv er. To do th is, use
a parallel connecting cab le (IEEE 128 4 type B) o r a USB paralle l adapt er
cable.
Always consult the network’s system administrator for advice.
Please note the following points:
✚ The parallel connecting cable should not be lon ger than 2m, otherwise
the standards coveri ng e lec tro ma gne tic co mp ati bil ity w il l be in frin ged .
✚ If the copier is not to be connected to a PC, then the parallel
connecting cable should be removed from the copier’s parallel port.
This protects the copier against electrostatic discharges which could
otherwise cause the copier to malfunction.
✚ A USB parallel adapter cable is required when connecting to a USB.
2
Pi1800 2-3

2
Connecting the copier
2-4 Pi1800

Installing the printer driver
3 Installing the printer driver
3.1 Notes on installing the printer driver
Don’t be afraid of the installation!
The MINOLTA installation program is designed so that even people not
accustomed to work in g w ith co mp ute r s c an e as ily ac co mp lis h i t. Yo u w il l
be led step by ste p th rou gh t he i ns t al lati on proc es s. All you need to do is
follow the installation program.
Before you begin the installation, you should be clear on the following
points:
G What operating system is running on your computer?
G What is the letter for your CD-ROM drive (D, E, etc.)?
G Is your printer a local printer or a network printer?
❍ Local printer:
when the printer is connected directly to your computer via a parallel
interface cable.
❍ Network printer:
when the printer is integrated in a computer network.
3
✎
More questions?
If you are still not certain about which setting is appropriate, you can
display additional information on screen by using the HELP button.
Pi1800 3-1

3
Installing the printer driver
General information on the printer driver
The printer driver is contained on a CD-ROM supplied with the printer. If
your computer has no CD-ROM drive , you can downloa d the printer dr iver
from the Internet. You will find the latest vers ion of the printer dr iver under
the address http://www.minoltaeurope.com.
Information on installing a network printer
You can install th e printer as a local pri nter or as a network pr inter. Please
note the following points when installing as a network printer:
G If you would lik e to access the printer from a serv er based on W indows
95, first install the printer driver from the server using the installation
program. Do not use the hardware wizard for printer installation.
G If your printer will not be printing any documents in a network
environment, set the data spool format of the client to RAW.
3-2 Pi1800
Installing the printer driver
3.2 CD-ROM installation
Make certain that the printer is connected to your printer locally or
1
through a network.
Switch on the printer.
2
Switch on the computer and start Windows95, Windows 98 or
3
Windows NT 4.0.
Place the Pi1800 printer driver CD in the CD-ROM drive of your
4
computer.
The installation program starts automatically.
The installation program does not start automatically?
?
➜ Call up Windows Explorer and open the directory for the CD.
➜ Double-click on “Minolta.exe“ to start the ins tallation program.
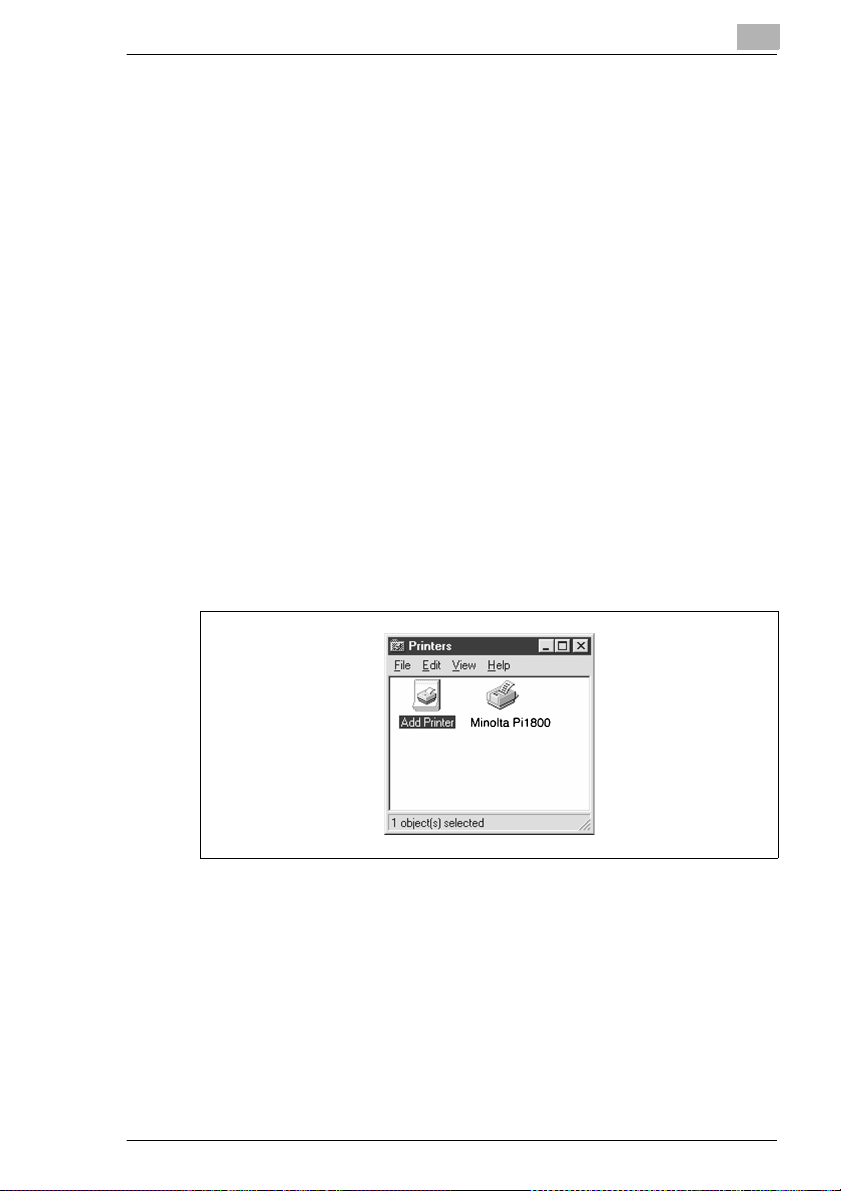
Follow the subsequent instructions of the installation program.
5
If the printer driver was successfully installed, then the icon for the
“Minolta Pi1800“ printer appears in the printer folder.
3
Pi1800 3-3

3
Installing the printer driver
3-4 Pi1800

Copier settings (Windows NT 4.0 only)
4 Copier settings
(Windows NT 4.0 only)
4.1 Points to watch!
If you are using the Win dows NT 4.0 opera ting system , then you will nee d
to make a few additional adjustments to the printer software.
These settings define:
G the paper drawers/trays available on your copier, and
G which size of paper is placed in which drawer/tray.
If you change the arrangement of drawers/trays in the copier, then this
change will also have to be reflected in the software.
If the printer driver settings do not match the settings on the copier, then
this can lead to unwanted results!
4
Pi1800 4-1
4
Copier settings (Windows NT 4.0 only)
4.2 Calling up the printer properties
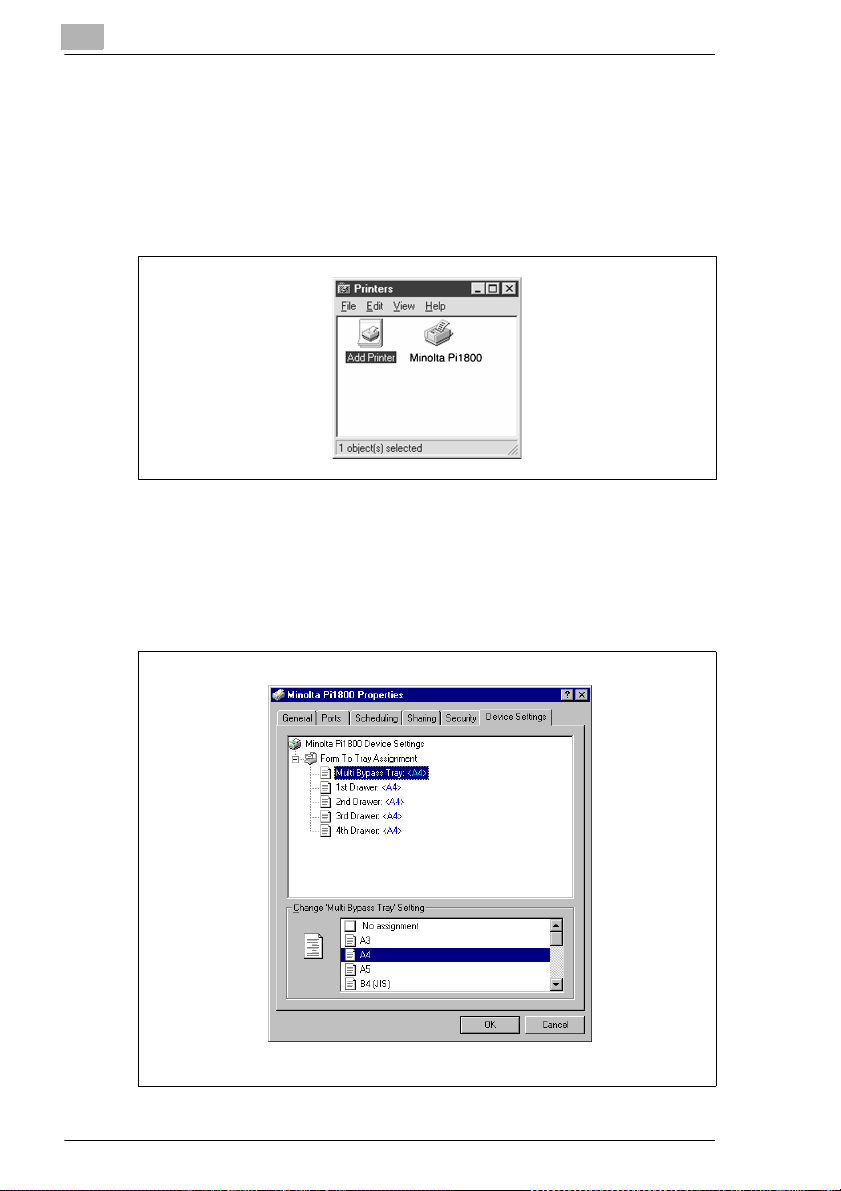
In the START menu, select “Settings – Printers“.
1
The “Printers“ dialog box appears.
Click on the “Minolta Pi1800“ icon.
2
In the “File“ menu, selec t “Properties“.
3
This opens the “Pi1800 properties“ dialog box.
Click on the “Device settings“ index card.
4
The printer settings appear in the dialog box.
4-2 Pi1800
Copier settings (Windows NT 4.0 only)
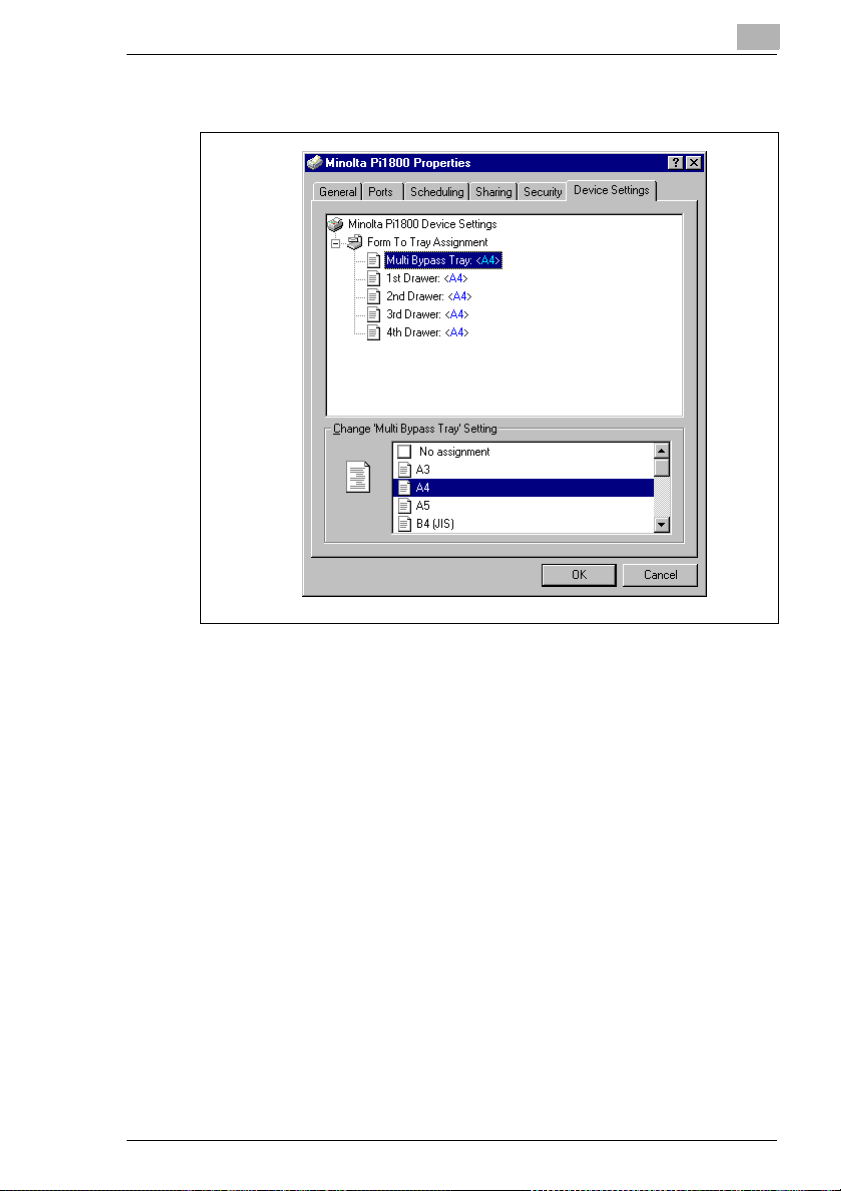
4.3 Defining the printer settings
4
Check the following:
1
❍ Which paper drawers/trays are fitted to your copier?
❍ Which size of paper is placed in which drawer/tray?
Call up the printer properties (see page 4-2).
2
In the top window of the dialog box, select a paper drawer/tray.
3
In the bottom windo w of the di alog box, sel ect th e pape r forma t whi ch
4
is placed in the selected drawer/tray.
What should I do when this paper drawer/tray is not available on
?
the copier?
➜ Set “No assignment“.
Repeat steps 1 and 2 for every paper drawer/tray available on the
5
copier.
Confirm the settings by clicking on [OK].
6
Pi1800 4-3
 Loading...