

Page 1

Scanning To An SMB Mailbox
Using Mac OS X
Version A1
Page 2

Page 3
Scanning To An SMB Mailbox Using Mac OS X
Scanning to an SMB mailbox using Mac OS X
Note – This procedure was performed on Mac OS X 10.4 “Tiger”. It should be similar in other versions of
OS X but some of the screens may differ.
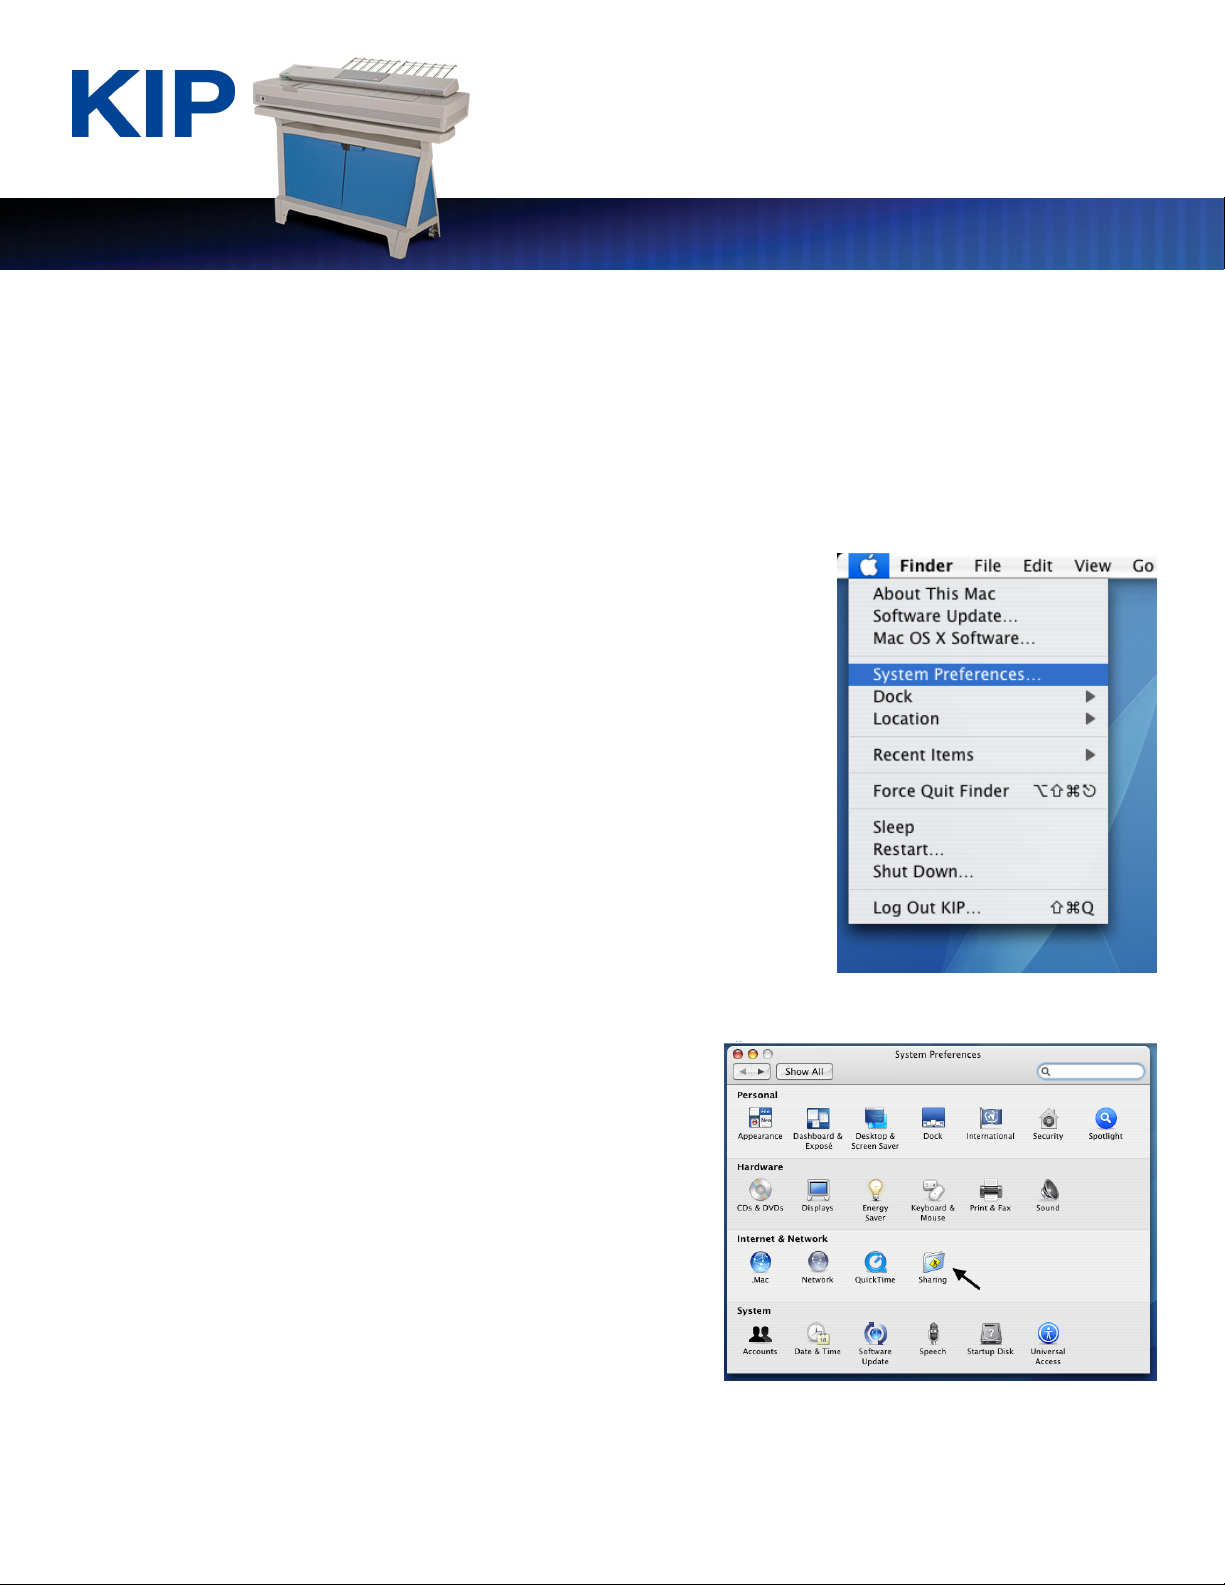
1. Windows file sharing must be enabled in order for the KIP to
see the Mac on the network. Run “System Preferences” from
the dock, or use the mouse to select the apple in the upper
left-hand corner and choose “System Preferences…” from
the pull down list.
2. Under System Preferences, select “Sharing” from
“Internet & Network”
This information is solely for use of KIP Personnel and KIP Authorized Dealers. No part of this publication may be copied,
reproduced or distributed in any form without express written permission from KIP. © 2008 KIP.
- 1 -
Page 4

Scanning To An SMB Mailbox Using Mac OS X
3. In the list of Services, highlight “Windows Sharing”
and select “Start”
4. Select “Enable Accounts” to set up the
user(s) whose home directory that you
want to share.
5. Select the user name(s) from the list.
This information is solely for use of KIP Personnel and KIP Authorized Dealers. No part of this publication may be copied,
reproduced or distributed in any form without express written permission from KIP. © 2008 KIP.
- 2 -
Page 5

Scanning To An SMB Mailbox Using Mac OS X
6. Enter the password associated with
that user to authenticate.
7. When complete, select “Done”
and close System Preferences. The
user you selected will now have
their home directory shared and
visible. The user name in our
example is “KIP”.
8. Create a folder under the home directory for scanning. Browse the
hard drive and open up the “Users” folder.
This information is solely for use of KIP Personnel and KIP Authorized Dealers. No part of this publication may be copied,
reproduced or distributed in any form without express written permission from KIP. © 2008 KIP.
- 3 -
Page 6

Scanning To An SMB Mailbox Using Mac OS X
9. Open the home folder of the
user you will be scanning to.
10. Inside the folder, create a new folder to be the
mailbox. Select “File” and then select “New Folder”.
11. Give the folder an appropriate name that will
be easy to remember. The folder in the
example is called “scans”
12. Write down the name of the user’s home folder, the mailbox folder you created, and the IP
address of the Mac workstation. The IP address can be found in “About this Mac” as well as
under “Network” in the System Preferences.
This information is solely for use of KIP Personnel and KIP Authorized Dealers. No part of this publication may be copied,
reproduced or distributed in any form without express written permission from KIP. © 2008 KIP.
- 4 -
Page 7

Scanning To An SMB Mailbox Using Mac OS X
13. Setup the SMB mailbox on the KIP. The destination server is the IP address of the Mac workstation
you are scanning to. For the share path, enter the name of the shared home directory, a
backslash, and the name of the mailbox folder you created on the Mac. In the example, the
home directory is “kip” and the mailbox folder is “scans”. Enter in the appropriate user name
and password used to log on to the Mac workstation and select “Test SMB”. It will change to say
“OK” indicating the KIP is connected to the Mac. Select “OK” to close setup. The mailbox will
now appear in the list on the “scan” screen.
\
This information is solely for use of KIP Personnel and KIP Authorized Dealers. No part of this publication may be copied,
reproduced or distributed in any form without express written permission from KIP. © 2008 KIP.
- 5 -
Page 8

U.S.A. Canada
Phone: (800) 252-6793 Phone: (800) 653-7552
Email: info@kipamerica.com
Website: www.kipamerica.com
All product names mentioned herein are trademarks of their respective companies. All
specifications and pricing are subject to change without notice. No part of this
publication may be copied or used in any form without express written permission KIP.
©2008 KIP.
Email: info@kipcanada.com
Website: www.kipcanada.com
 Loading...