

Page 1

Mac/Unix Printing
Configuring a KIP system for
TCP/IP Printing
in Macintosh/Unix environments
v.A4
Page 2

Mac/Unix Printing
Contents
Introduction .............................................................................................................................................................. 3
System Requirements .............................................................................................................................................. 3
Configuring a TCP/IP Desktop printer in Macintosh OS X ................................................................................. 4
Method #1 – Print to file, then use PrintNET ................................................................................................. 4
Method #2 – Direct Printing from Mac application to the KIP IPS ........................................................... 5
Setup overview ................................................................................................................................................ 5
Printing overview ............................................................................................................................................. 5
Method #2 – Macintosh Printer Setup ......................................................................................................... 6
Adding the KIP PPD to the Macintosh system ............................................................................................ 6
Add a Macintosh Printer ................................................................................................................................ 8
Create a Desktop Print on the Macintosh................................................................................................. 11
Configuring the Print Parameters for the Queue Name on the KIP IPS for Mac and Unix printing .......... 12
Create a folder for the Print Parameters: .................................................................................................. 13
Configure the Color Printing Parameters .................................................................................................. 15
Example LPD/LPR Names and Configurations ......................................................................................... 16
This information is solely for use of KIP Personnel and KIP Authorized Dealers. No part of this publication may be copied,
reproduced or distributed in any form without express written permission from KIP. 2012 KIP. vii_iv
Page 3

Mac/Unix Printing
Introduction
Mac and Unix printing to the KIP Monochrome and Color systems is accomplished
via standard LPD/LPR printing. On Mac systems, a standard Postscript output is
directed to queue name on the KIP IPS. On Unix systems, the application
responsible for print output can be directed to transmit any of the compliant file
formats to the queue name of the KIP IPS. On the KIP IPS, each queue name is
configured for several print options such as scaling, folding/stamping, copy
count, and media type.
System Requirements
Current Macintosh systems such as OSX are compatible with LPD/LPR output and
it is mainly necessary to verify the file format e xported to file (TIF, JPE G, PDF, EPS/PS) for
use in PrintNET or file data transmitted via LPD/LPR (usually Postscript) to the KIP IPS.
Unix systems mainly require that the application output any of the accepted
formats that the KIP systems are compatible with including HPGL, HPGL/2 ,HP-RTL,
Monochrome TIF and Cals Group 4, TIF (Grayscale or Color), JPEG, PDF, and EPS/PS.
Version A4
Page 4
Mac/Unix Printing
j
Configuring a TCP/IP Desktop printer in Macintosh OS X
There are two mains methods of printing from Macintosh based systems to KIP Monochrome and Color
systems.
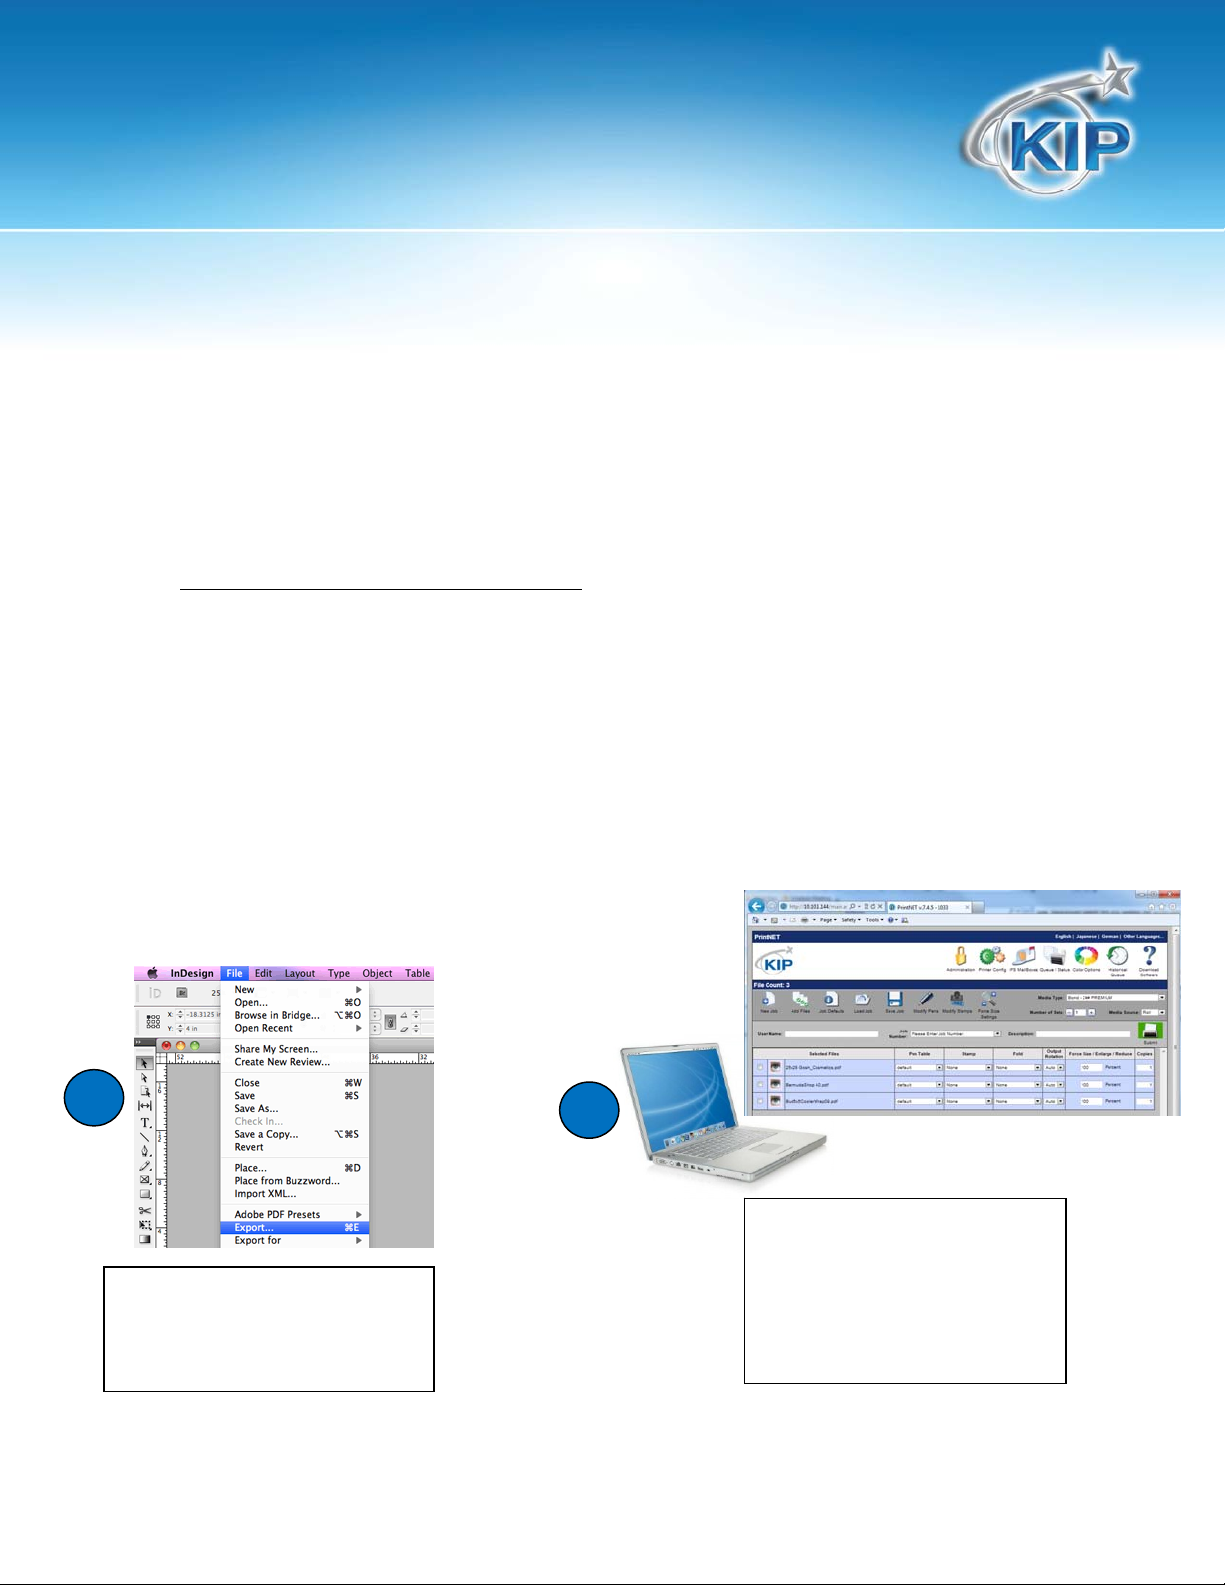
Method #1 – Print to file, then use PrintNET
In the first method, the operator uses the Macintosh application to generate an acceptable file
format (PDF, PS/EPS, Jpeg, TIF etc) and then uses PrintNET via the Macintosh web browser to send
the print data. No additional setup or configurat ion is required on the Mac or IPS system. Simply
export to an acceptable file format and open the browser on the Mac and type in the IP address of
the KIP system. Add the files to print and use any of the following print parameters:
Copy Count
Change Page Size via Percentage or Force Size
Color vs Monochrome setting (for KIP Color systems)
Collated set
Recall and reprint
Save job/recall job
KIP Track Accounting data
Mange the Print Queue (admin only)
Alter the Printer settings (admin only)
1
On Mac graphics application:
Export file to local drive.
(TIF,PDF,Jpeg,EPS/PS)
2
On Mac – use Safari or other
web browser to access KIP
PrintNET via IP address of
printer, choose files and
Submit a
ob
Version A4
Page 5
Mac/Unix Printing
Method #2 – Direct Printing from Mac application to the KIP IPS
In this method, the operator will use the Macintosh systems built-in Postscript output to transmit
Postscript data via LPD/LPR to a specific queue name l ocated on the IPS. The Macintosh system
can generate large format page sizes based on reading the page sizes from the KIP PPD (Postscript
Printer Definition File). Each queue name on the IPS can be strictly setup for a series of parameters:
Copy Count
Percentage/Force Size
Color/ Monochrome
The setup process will require an admin or technician to access the KIP IPS and also the
knowledge of adding the KIP PPD to the Mac system. Each LPD/LPR Queue can contain 1 set of
print parameters configured by the admin and cannot be altered from the Macintosh based
system prior to printing. Note: this is the least flexible method of print ing but it does allow direct
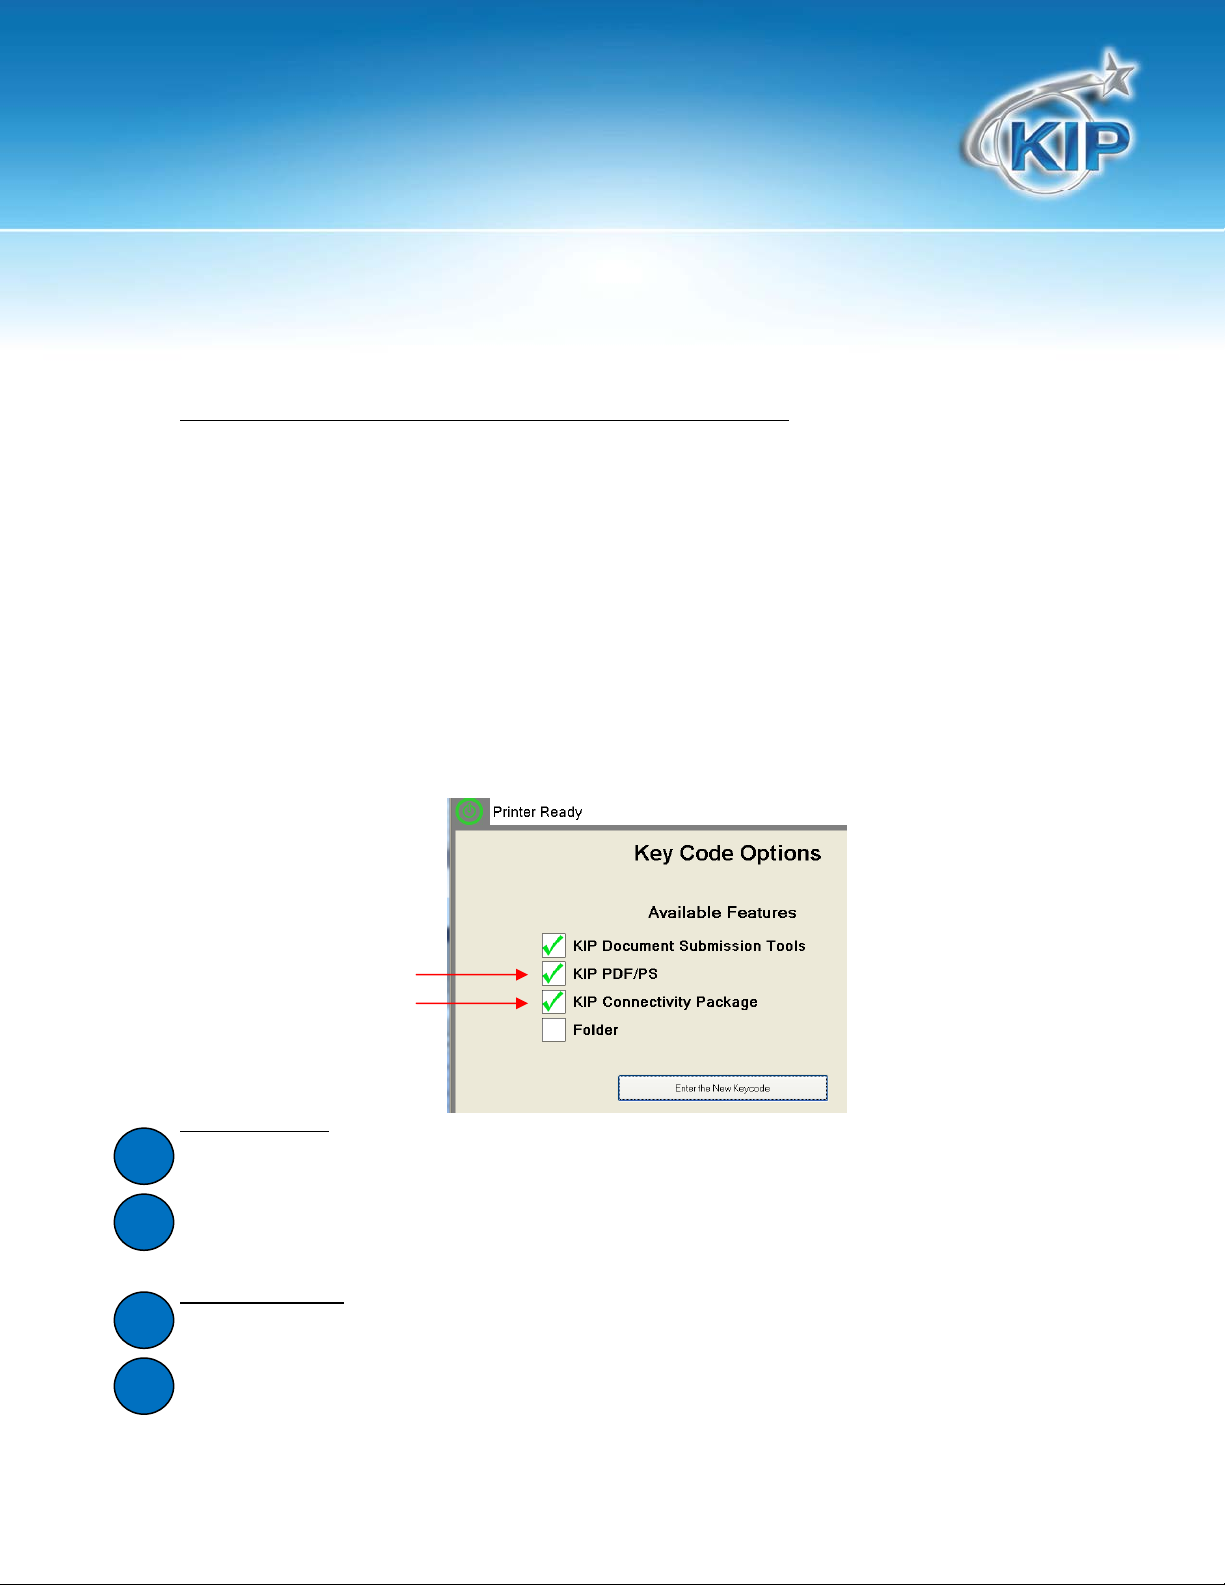
printing from the application. Note: for the KIP Color systems – it is necessary to purchase both
the “KIP PDF/PS” option for Postscript printing and the “KIP Connectivity Package” option
keycodes (KIP Item # DIGMACLPR-C7800) that supports LPD/LPR based printing.
Setup overview
MAC – setup the Mac system with KIP PPD and point it to an LPD/LPR Printer to the KIP IP address
1
and Queue name such as KIP, IPS, IPS1, IPS2, or IPS3.
KIP IPS (at the printer) – configure the Print Parameters for LPD/LPR Queue names: KI P, IPS, IP S1, IPS2,
2
or IPS3.
Printing overview
Mac – print to the Mac printer object configured for one of the Queue names.
1
KIP IPS (at the printer) – by reading the LPD/LPR Queue name in the header, the IPS will
2
automatically use the configured Print Parameters to convert and print the PS data coming from the
Mac system.
Version A4
Page 6
Mac/Unix Printing
Method #2 – Macintosh Printer Setup
The following steps will walk you through the procedure for setting up a Macintosh system for TCP/IP
printing. These steps apply to Macintosh OS X:
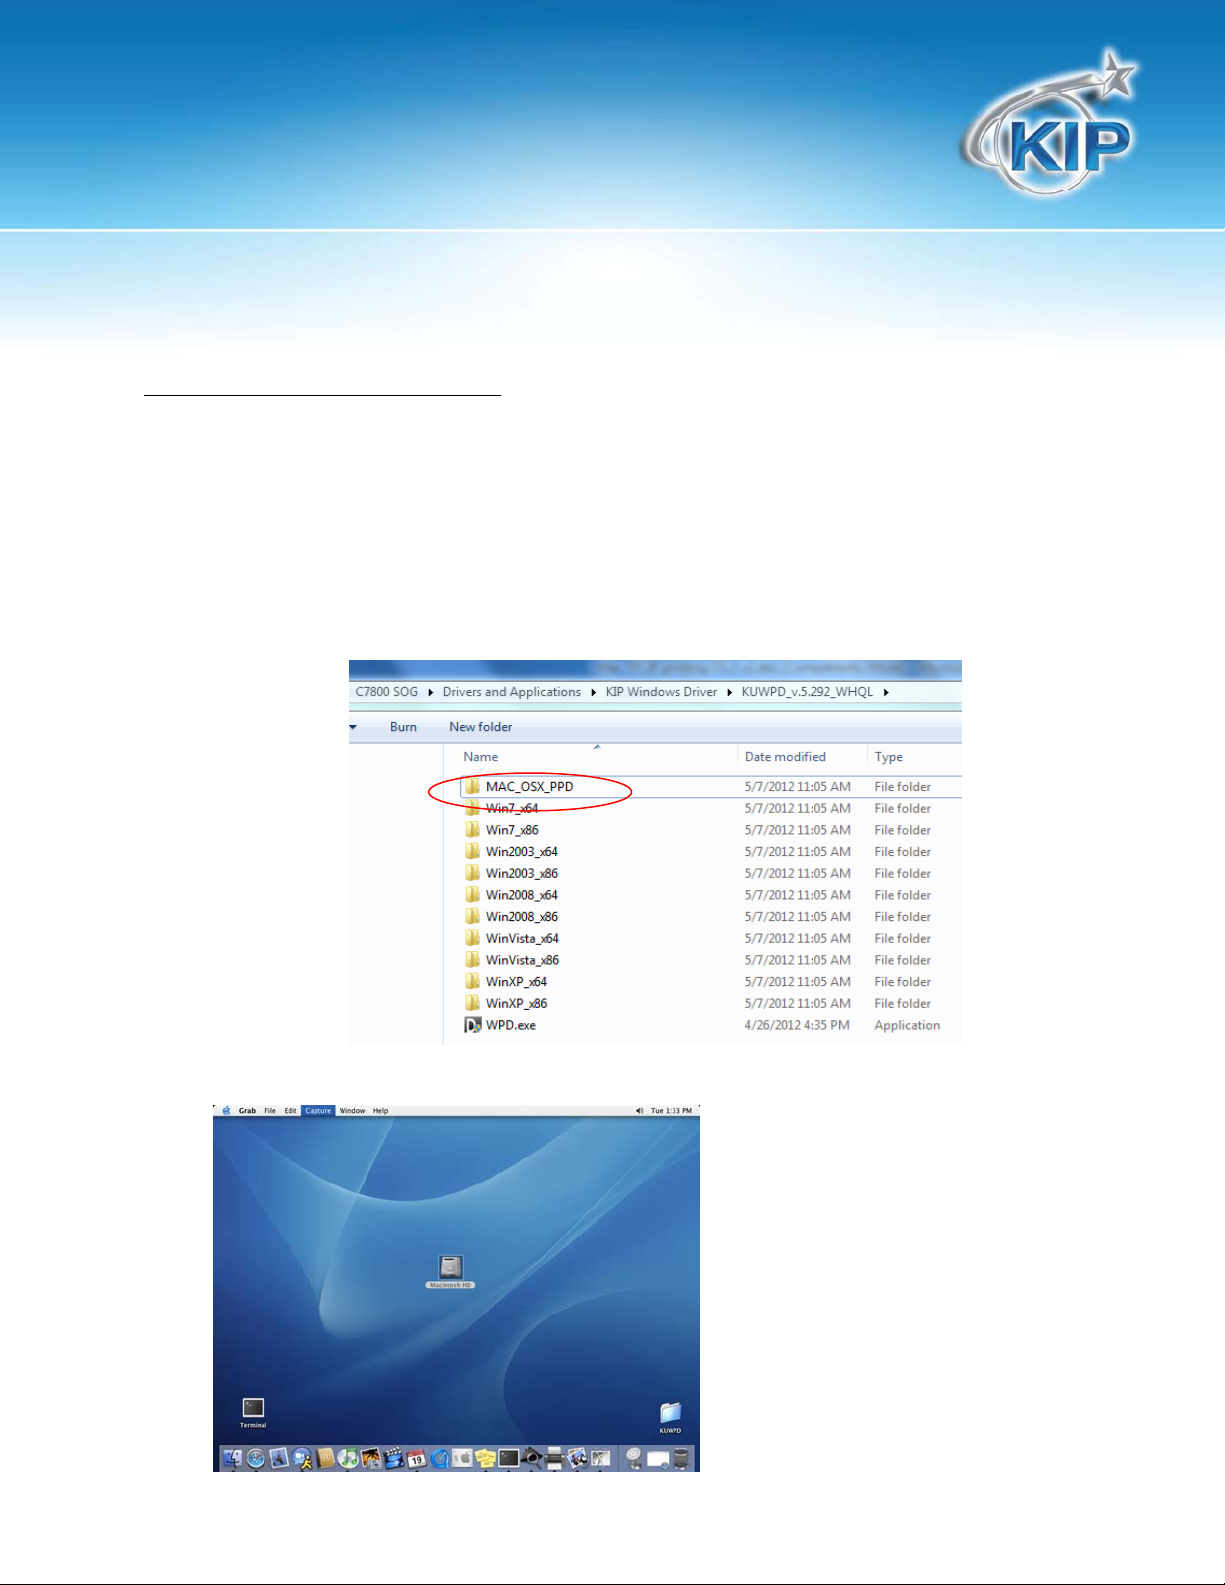
Adding the KIP PPD to the Macintosh system
1. Locate the KIP PPD (Page Definitions) stored with the Windows Driver in the directory
MSC_OSX_PPD either on the KIP Software Operation Guide Disk or contained in the Windows
Driver installer when downloaded from the IPS via PrintNET (IPS address of the printer). Place this
on a flashdrive or copy it to the desktop of the Mac system.
2. On the desktop open the Mac hard drive
Version A4
Page 7

Mac/Unix Printing
3. Once the hard drive is open select the “A pplications” folder
4. Once the Applications folder is open select the “Utilities” folder
Version A4
Page 8

Mac/Unix Printing
5. Once the Utilities folder is open find the “Printers Setup Utility”
Add a Macintosh Printer
6. On the top menu bar select “Printers” and then “Add a Printer”
Version A4
Page 9

Mac/Unix Printing
7. On the next screen you will need to set the following:
a. In the first pull down select “IP Printing”
b. In the second “Printer Type” pull down select LPD/LPR
c. In the third area “Printer Address” set this to your printer IP Address
d. In the fourth area “Queue Name” set the queue name to KIP, IPS, IPS1, IPS2, or IPS3
(these are the default Queue names already created on the IPS – configuration of the Print
Parameters for each Queue name is detailed below)
e. In the fifth area “Printer Model” select “Other”
8. Locate the desired .PPD file (ex. KIP600.PPD) select “choose”
Version A4
Page 10

Mac/Unix Printing
9. Select “Add”
10. You should now see the printer you just set up in your Printer List
Version A4
Page 11

Mac/Unix Printing
Create a Desktop Print on the Macintosh
11. Go to the menu bar on top and select Printers then select “Create Desktop Printer” from the pull
down choices.
Once the above steps are completed on the Macintosh system, it is necessary to configure the
Print Parameters for each Queue Name that will be used. This is completed by a qualified
technician via a remote session using WinVNC to remote into the system via the IP address of the
IPS.
Version A4
Page 12

Mac/Unix Printing
Configuring the Print Parameters for the Queue Name on the
KIP IPS for Mac and Unix printing
The KIP IPS stores the Job Ticket and Print Parameters for each Queue Name. In order to access
and configure the Queue Names on the IPS, it is necessary to temporarily shut down the IPS
Touchscreen UI to access the IPS Unattend Queue View software. This can only be
accomplished by a qualified technician. Once the Touchscreen UI is shut down, the menu for
the IPS Unattend software allows for configuring the Print Parameters of each LPD/LPR Queue
Name.
1. Exit the IPS Touchscreen UI (by qualified technician only).
2. If the IPS Unattend UI is not obviously present it is likely running in a minimized fashion.
Maximize the IPS Unattend by selecting the yellow U. If it is not running it can be accessed in
the Start or Diagnostics menus.
Version A4
Page 13

Mac/Unix Printing
Create a folder for the Print Parameters:
Select “Configuration”
1
Select “Set Monitor Paths”
2
2
1
3
Note the section that contains the two fields for LPD configuration.
The “LPD Directory Path” entry is used for storing the Print Parameters; therefore the name
3
you type should always be a local drive and directory on the IPS such as
“D:\monpath1\Color” or other directory name. The IPS Unattend UI will automatically
create the folder based on what you type into this entry.
Version A4
Page 14

Mac/Unix Printing
3. Enter the LPR/LPD Queue name
The “LPD Printer Name” entry on the IPS must match the “Queue Name” from the Mac
system. The list of IPS Queue Names already on the system can be viewed in the Windows
Printers section on the IPS; they are defaulted to KIP, IPS, IPS1, IPS2, and IPS3. Type in one of
these 5 queue names. Note: These are NOT shared printers, they are only used for LPR based
printing.
5
4. Configure the Print Parameters for the LPD Printer Name.
Choose “Configure LPD Directory” to set the Print Parameters. The items configured
here will be used every time a file is printed to this LPD Printer Name.
Print Parameters:
4
5
Enlarge/Reduce: set to a Percentage or one of the Force Size schemes in this list. This setting will always be used
when printing to the Queue Name/LPD Printer Name.
Media Type:
#of Copies:
Rotate/Fold:
set to a Media Type that will always be used when prin ting to the Queue Nam e/LPD Printer Name.
set the number of copies tha t will always be used with this LPD Printer Name.
set the rotation and KIP Folding parameters that will always be used with this LPD Printer Name.
Version A4
Page 15

Mac/Unix Printing
Configure the Color Printing Parameters
5. Configure the Color Parameters ( for KIP Color Systems)
Select OK and then a Color Options window will show and allow for choosing one of
the color presets such as: CAD-Line, CAD-GIS, etc that will be assigned to the LPD/LPR
Queue name. The settings for these buttons are configured in PrintNET.
6
6
7
Version A4
Page 16

Mac/Unix Printing
Example LPD/LPR Names and Configurations
Separate LPD/LPR Printers and Queue Names (KIP, IPS, IPS1) should be used for different types of
printing. For example:
Image Type
Monochrome KIP KIP
Color Technical IPS IPS
Color Graphics IPS1 IPS1
Once OK is selected, the LPD Directory Path is created and a job ticket stored in this
directory. Each time file data arrives via LPD/LPR with the Mac based Qu eue Name in the
LPD/LPR Queue Name on
Mac
7
LPD Printer Name on KIP
IPS
Color Option selection
file header, the IPS Unattend will match it to the LPD Printer Name and use the configured
Print Parameters to print that file. Be sure to reboot the system or restart the Touchscreen UI
once all steps have been completed.
Version A4
7
Page 17

Page 18

U.S.A. ■
Phone: (800) 252-6793
■
Email: info@kipamerica.com
■
Website: www.kip.com
CANADA ■
KIP is a registered trademark of the KIP Group. All other product names mentioned herein are trademarks of their respective companies.
All product features and specifications are subject to change without notice. Complete product specifications are available upon request.
Phone: (800) 653-7552
■
Email: info@kipcanada.com
■
Website: www.kip.com
 Loading...