

Kohler K-1800, K-1801, K-1805 Installation Manual
Installation Guide
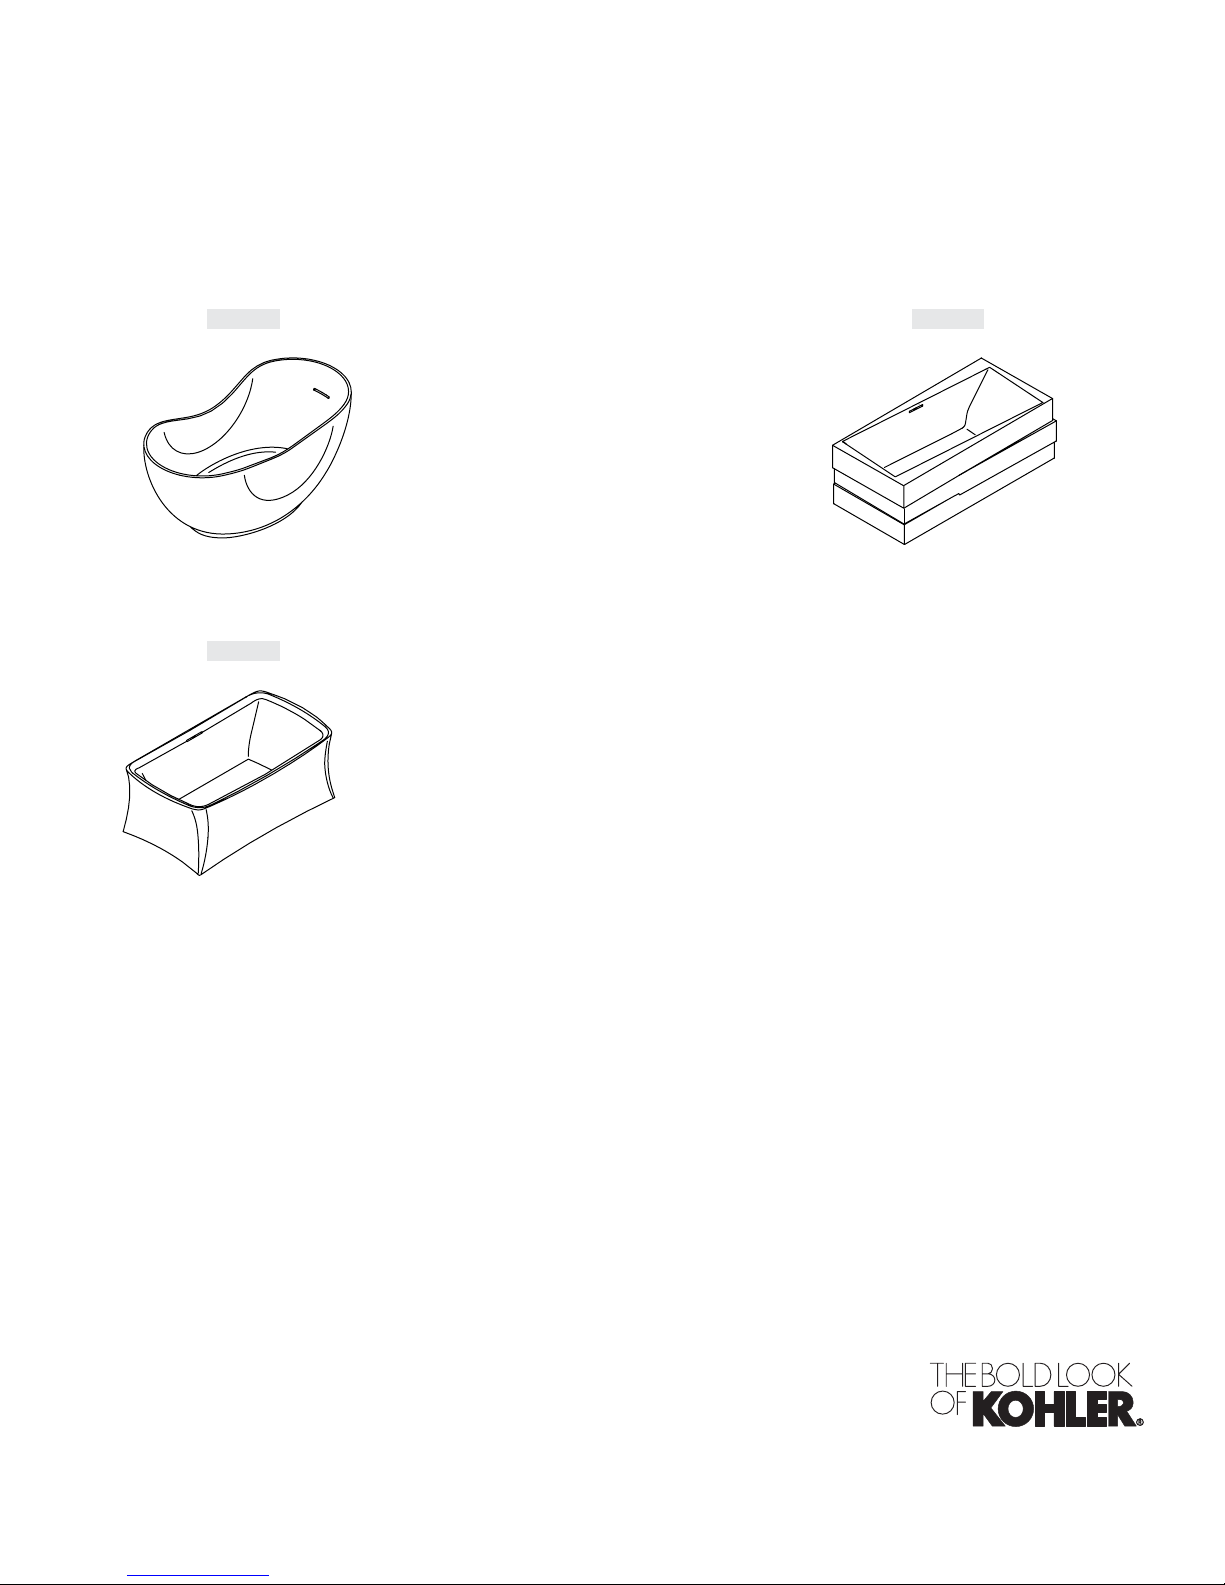
Freestanding Bath
K-1800 K-1801
K-1805
M product numbers are for Mexico (i.e. K-12345M)
Los números de productos seguidos de M corresponden a México
(Ej. K-12345M)
Français, page “Français-1”
Español, página“ Español-1”
1145130-2-A
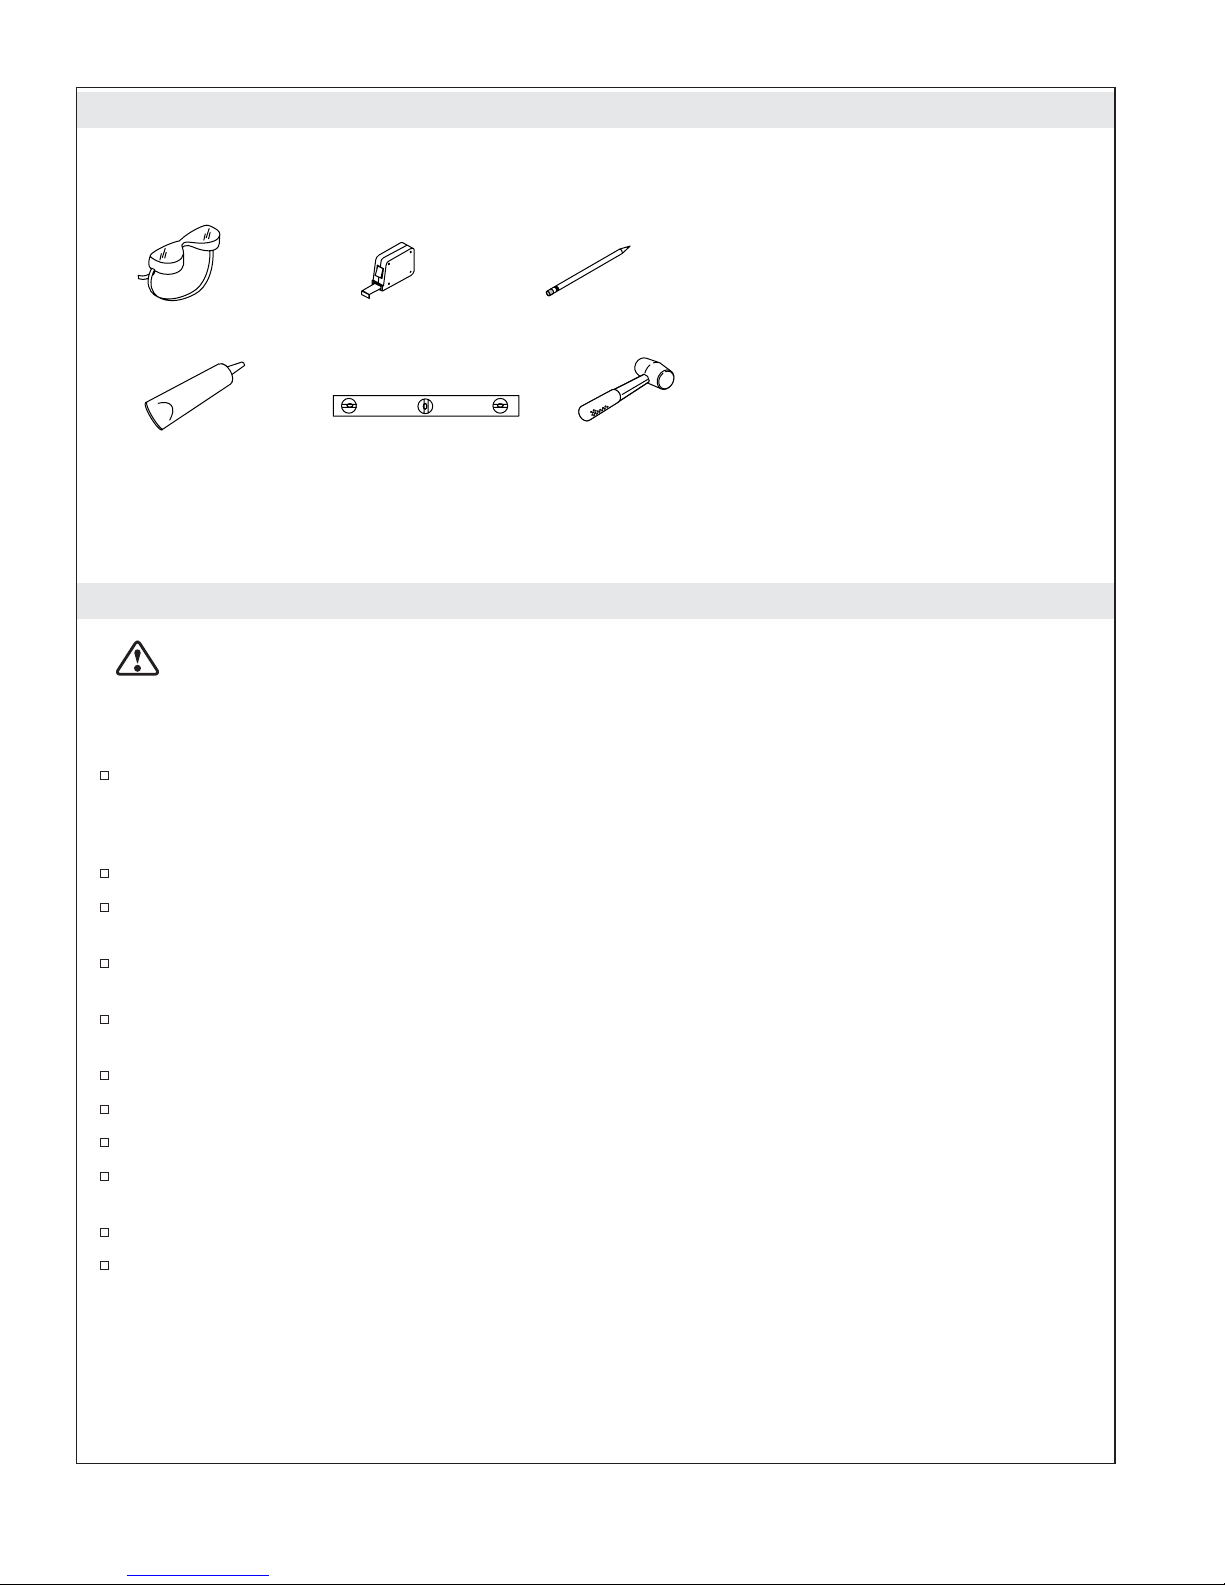
Tools and Materials
Safety Glasses
Tape Measure
Pencil
Plus:
• Drop Cloth
• Lifting Straps
• Shims
• 2x4's
• Common Woodworking Tools
• Short 1-1/2" D. PVC Pipe or Coupling
Silicone Sealant
Level
Rubber Mallet
Before You Begin
CAUTION: Risk of personal injury. This bath is extremely heavy. Obtain sufficient help and use
lifting straps to carefully lift or move the bath.
IMPORTANT! To ensure a successful installation it is important that you install the bath on a level
finished floor.
Observe all local plumbing and building codes.
IMPORTANT! The drain cover and gaskets are included in a small box within the carton. Make sure you
locate and retain this small box before discarding the carton and packing material.
Unpack and inspect the bath for damage. Return the bath to the carton until installation.
To simplify future maintenance, make sure all plumbing connections around the bath are easily
accessible.
Carefully plan moving the bath into the installation area. This bath is heavy and will not easily fit
through doorways.
Install the bath to an adequately supported, level finished floor. Refer to the roughing-in information
packed with the bath for floor loading requirements.
This bath is designed for a freestanding installation only.
This bath features a factory-installed drain and an integral, cast overflow.
Install a floor- or ceiling-mounted bath filler with this freestanding bath.
Illustrations shown may not look like your actual product but they are still correct for this
installation.
This bath conforms to ANSI Standard Z124.1.2. All dimensions are nominal.
Kohler Co. reserves the right to make revisions in the design of products without notice, as specified
in the Price Book.
1145130-2-A 2 Kohler Co.
Drain
Pipe
2-1/8"
(5.4 cm)
Finished Floor
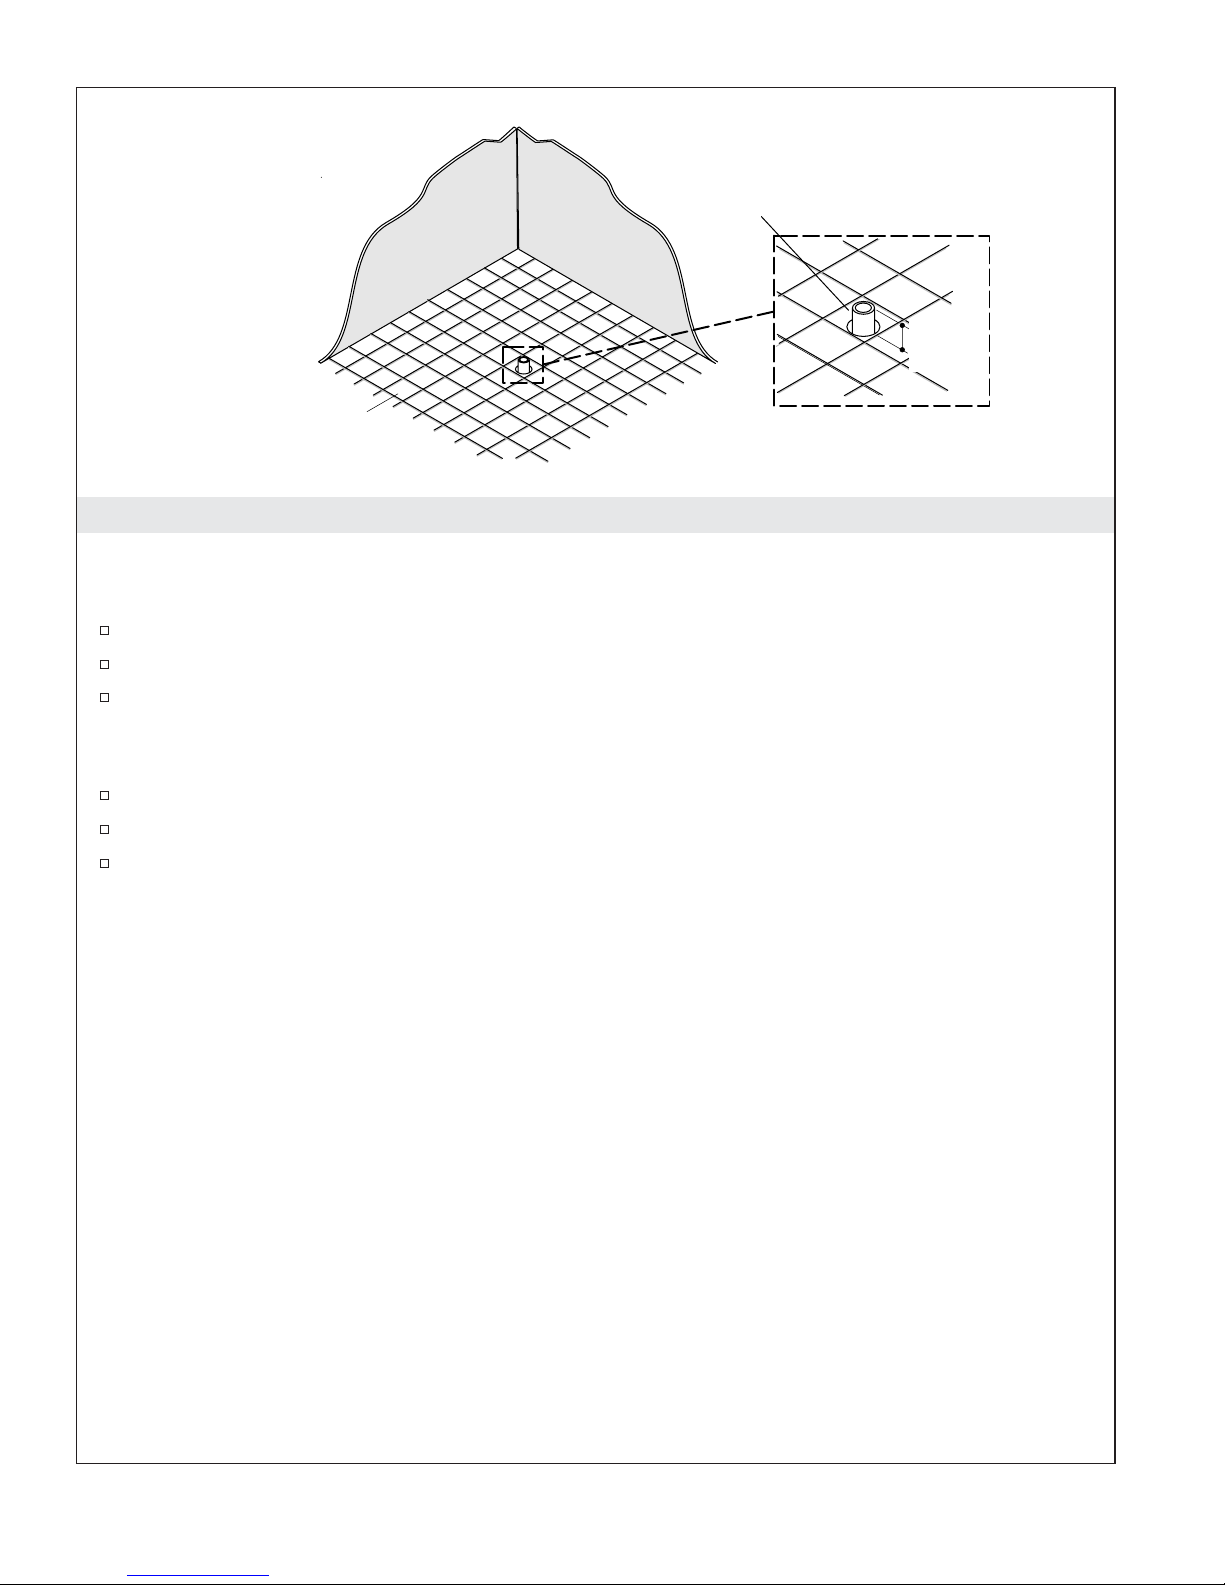
1. Prepare the Site
NOTICE: Provide adequate floor support. Consult the roughing-in document packed with your bath for
specific floor loading requirements.
Determine the location of the bath.
Make sure the subfloor offers adequate support for your bath.
Ensure the subfloor is level.
IMPORTANT! To ensure a successful installation, it is critical that you install the bath on a level finished
floor.
Install the finished floor material.
Make sure the finished floor is level before proceeding.
Position and install a standard PVC or brass bath drain pipe according to the roughing-in
information packed with the bath. Install the drain pipe so it extends 2-1/8″ (5.4 cm) above the
finished floor.
Kohler Co. 3 1145130-2-A
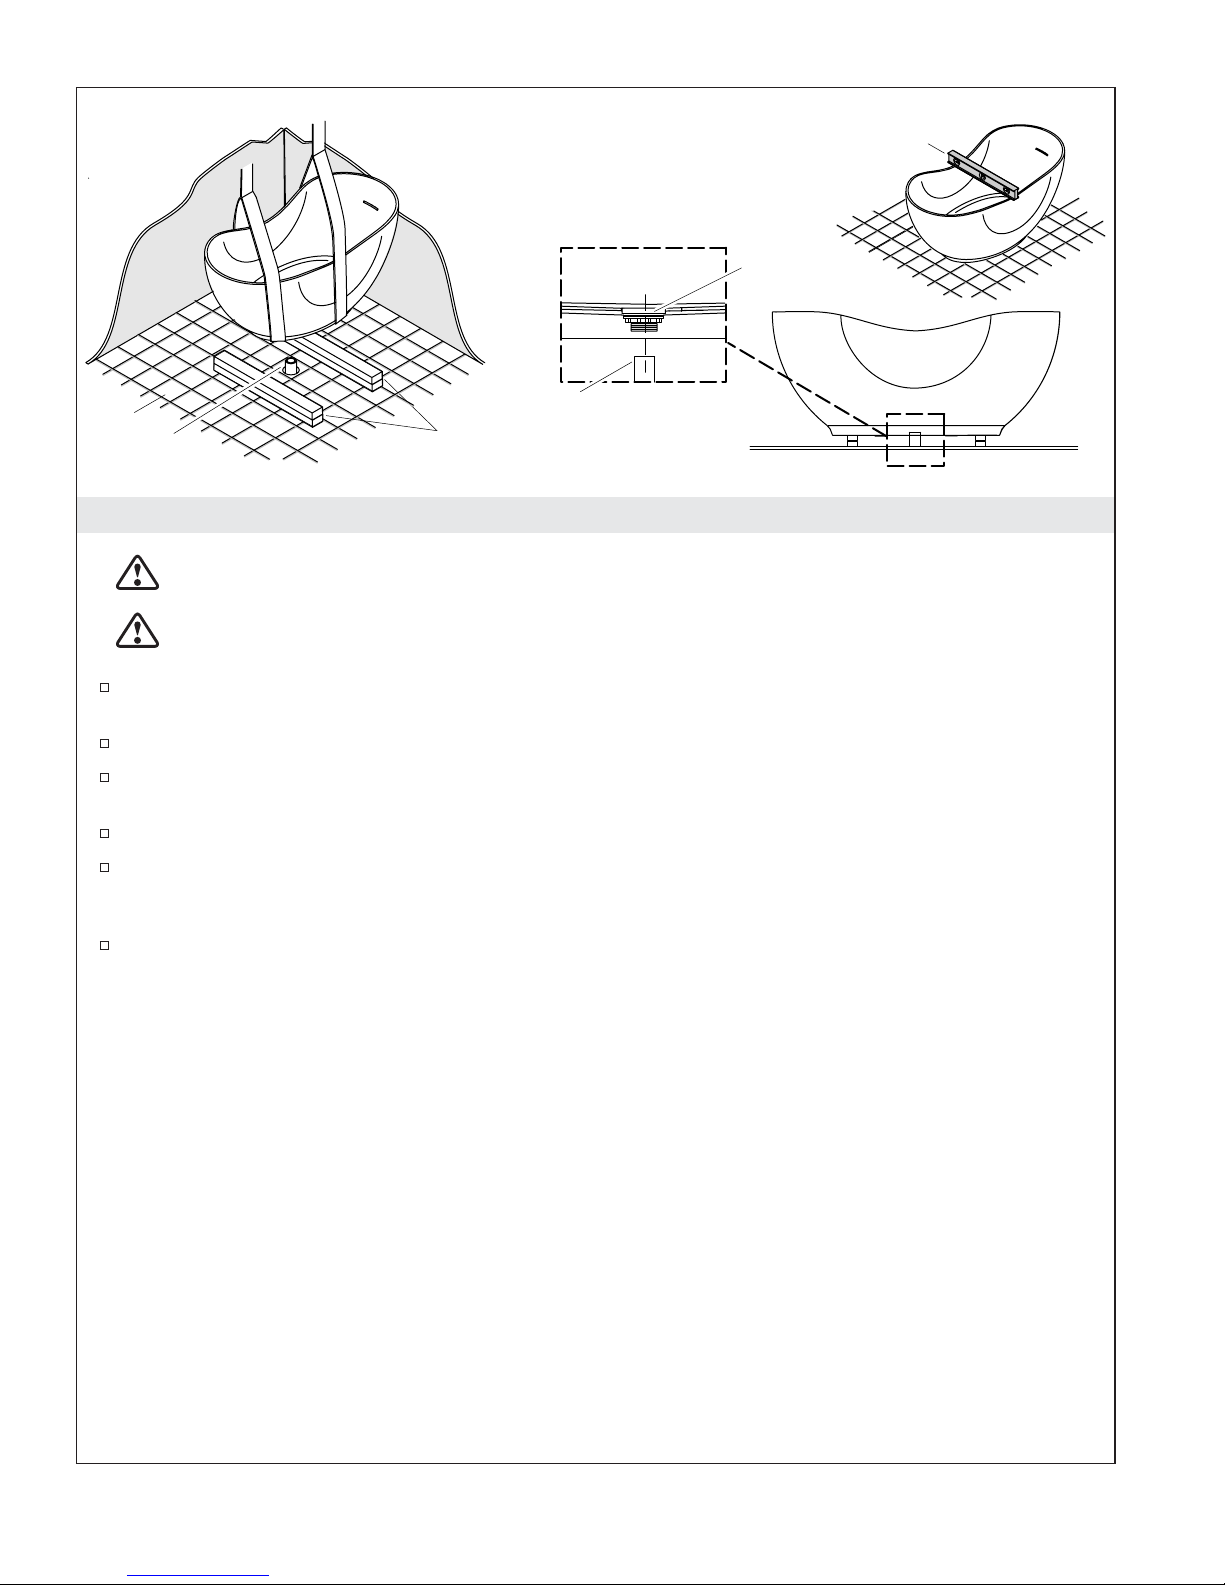
Level
Drain Pipe
Align.
Drain Pipe
2x4's
Bath Drain
2. Install the Bath
CAUTION: Risk of property damage. Make sure the factory-installed drain connections have not
become loose during shipping. Tighten as needed to prevent leakage.
CAUTION: Risk of personal injury. This bath is extremely heavy. Obtain sufficient help and use
lifting straps to carefully lift or move the bath.
Stack together two 6’ (1.8 m) lengths of 2x4 lumber. Secure each set of stacked 2x4’s together with
nails or screws.
Position the stacked 2x4’s on each side of the drain pipe to temporarily support the bath.
With help, use lifting straps to carefully lift the bath into position on the 2x4’s so the bath drain is
over the drain pipe.
Carefully reposition the bath as needed so the bath drain is directly over the drain pipe.
Use lifting straps and get additional assistance to remove the 2x4 supports and carefully set the bath
on the floor. Adjust the bath position as needed to ensure that the drain pipe is in the center of the
bath drain hole.
Verify that the bath is level and that all support feet are in contact with the finished floor. Carefully
install shims under the support feet as needed.
1145130-2-A 4 Kohler Co.
Drain
Gasket
Apply silicone
sealant to
both sides.
Drain
Cover
Bath
Drain
Body
Drain Pipe
Tab
Drain
Body
Slot
Bath
Check for leaks.
3. Install the Plumbing
CAUTION: Risk of property damage. Make sure a watertight seal exists on all bath drain
connections.
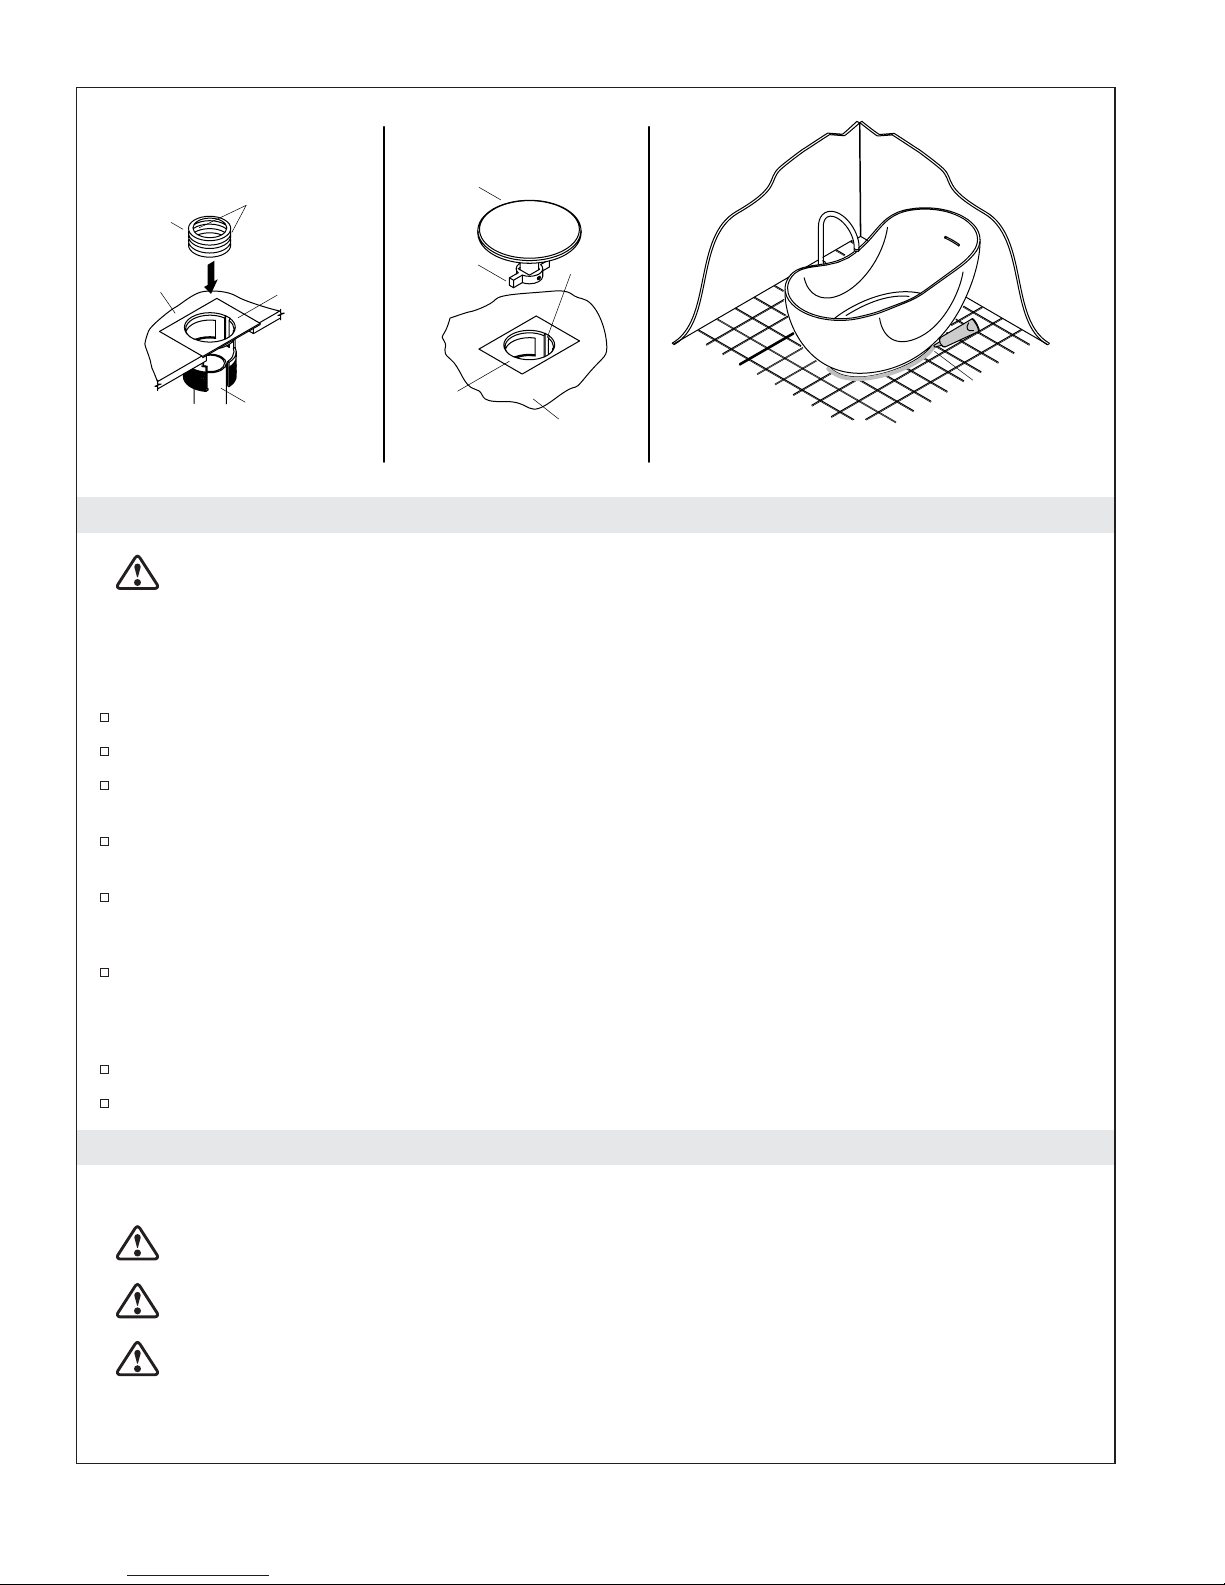
Make the Drain Connections
NOTE: The drain cover and gaskets are included in a small box located within the carton.
Choose the thin drain gasket for PVC drain pipes or the thick gasket for brass pipes.
Apply silicone sealant to the inside and outside surfaces of the drain gasket to act as a lubricant.
Use a rubber mallet and short section of 1-1/2″ PVC tubing to install the drain gasket onto the drain
pipe.
Line up the tabs on the drain cover with the slots in the drain body, and insert the drain cover
assembly into the flange.
Press the drain cover several times to make sure the drain opens and closes properly.
Apply sealant.
(optional)
Apply Sealant - Optional
If desired, apply a thin, continuous bead of clear or color-matched silicone sealant to the seam
between the bath and the finished floor.
Install the Bath Filler
Install the faucet valve and trim according to the faucet manufacturer’s instructions.
Close the bath drain. Fill the bath to the overflow, and check for leaks.
4. Clean-Up
Clean-Up
CAUTION: Risk of product damage. Do not allow cleaners containing petroleum distillates to
remain in contact with the surface for long periods of time.
CAUTION: Risk of product damage. Do not use abrasive cleaners, as they may scratch and dull
the bath surface. Use warm water and a liquid, non-abrasive detergent to clean the surface.
CAUTION: Risk of product damage. Do not use metal scrapers, wire brushes, or other metal tools
to remove stains, paint, plaster, or tar. Use turpentine or paint thinner to remove stains, paint, or
tar. Use a powder-type detergent on a damp cloth to provide mild abrasive action to any residual
plaster.
Kohler Co. 5 1145130-2-A

Clean-Up (cont.)
Clean and rinse the bath completely with water immediately after applying cleaners. Rinse and dry
any overspray that lands on nearby surfaces.
1145130-2-A 6 Kohler Co.
 Loading...