

Page 1
All-in-One Printer
7
User Guide
print copy scan
Page 2

Eastman Kodak Company
Rochester, New York 14650
© Eastman Kodak Company, 2008
Kodak is a trademark of Eastman Kodak Company.
The Bluetooth® word mark and logos are owned by the Bluetooth SIG, Inc., and any use of such marks is under
license.
©1989-2007 I.R.I.S. (Image Recognition Integrated Systems), All Rights Reserved
P/N 1K3279 C
October 2008
Page 3

Table of Contents
1. Getting Help 1
Help menu. . . . . . . . . . . . . . . . . . . . . . . . . . . . . . . . . . . . . . . . . . . . . . . . . . . . . . . . . . . . . . . . . . . .1
Getting answers to frequently-asked questions . . . . . . . . . . . . . . . . . . . . . . . . . . . . 2
Contacting Kodak Customer Service & Support . . . . . . . . . . . . . . . . . . . . . . . . . . . . 2
Support at Kodak.com . . . . . . . . . . . . . . . . . . . . . . . . . . . . . . . . . . . . . . . . . . . . . . . . . . 2
2. Printer Overview 3
All-in-One printer features. . . . . . . . . . . . . . . . . . . . . . . . . . . . . . . . . . . . . . . . . . . . . . . . . . 3
Major components of the ESP 7 All-in-One printer . . . . . . . . . . . . . . . . . . . . . . . . . 4
Support for connecting digital memory devices to the printer . . . . . . . . . . 5
Memory card slots. . . . . . . . . . . . . . . . . . . . . . . . . . . . . . . . . . . . . . . . . . . . . . . . . . . 5
Memory cards supported . . . . . . . . . . . . . . . . . . . . . . . . . . . . . . . . . . . . . . . . . . . . 5
USB host port . . . . . . . . . . . . . . . . . . . . . . . . . . . . . . . . . . . . . . . . . . . . . . . . . . . . . . . . 6
Control panel layout . . . . . . . . . . . . . . . . . . . . . . . . . . . . . . . . . . . . . . . . . . . . . . . . . . . . 7
LCD screen . . . . . . . . . . . . . . . . . . . . . . . . . . . . . . . . . . . . . . . . . . . . . . . . . . . . . . . . . . . . . . 8
Using the control panel. . . . . . . . . . . . . . . . . . . . . . . . . . . . . . . . . . . . . . . . . . . . . . . . . . . . . . 9
Adjusting the control panel position . . . . . . . . . . . . . . . . . . . . . . . . . . . . . . . . . . . . 9
Using the 4-way navigation buttons . . . . . . . . . . . . . . . . . . . . . . . . . . . . . . . . . . . . 9
Using the OK button . . . . . . . . . . . . . . . . . . . . . . . . . . . . . . . . . . . . . . . . . . . . . . . . . . . 10
Using the Menu button . . . . . . . . . . . . . . . . . . . . . . . . . . . . . . . . . . . . . . . . . . . . . . . . .11
Using the Zoom buttons . . . . . . . . . . . . . . . . . . . . . . . . . . . . . . . . . . . . . . . . . . . . . . . .11
Using the Start button . . . . . . . . . . . . . . . . . . . . . . . . . . . . . . . . . . . . . . . . . . . . . . . . . . 12
Using the Cancel button . . . . . . . . . . . . . . . . . . . . . . . . . . . . . . . . . . . . . . . . . . . . . . . 12
Using the on-screen keyboard . . . . . . . . . . . . . . . . . . . . . . . . . . . . . . . . . . . . . . . . . 12
Using the All-in-One printer menus. . . . . . . . . . . . . . . . . . . . . . . . . . . . . . . . . . . . . . . . 13
Menu layout . . . . . . . . . . . . . . . . . . . . . . . . . . . . . . . . . . . . . . . . . . . . . . . . . . . . . . . . . . . 13
Menu structure . . . . . . . . . . . . . . . . . . . . . . . . . . . . . . . . . . . . . . . . . . . . . . . . . . . . . . . . 14
Status lights . . . . . . . . . . . . . . . . . . . . . . . . . . . . . . . . . . . . . . . . . . . . . . . . . . . . . . . . . . . . 15
All-in-One printer Home Center software . . . . . . . . . . . . . . . . . . . . . . . . . . . . . . . . . 17
Home Center for Windows . . . . . . . . . . . . . . . . . . . . . . . . . . . . . . . . . . . . . . . . . . . . 17
Home Center for Macintosh . . . . . . . . . . . . . . . . . . . . . . . . . . . . . . . . . . . . . . . . . . . 18
Kodak ESP 7 Printer User Guide i
Page 4

Table of Contents
3. Setting Up Your Printer 21
Selecting a printer location. . . . . . . . . . . . . . . . . . . . . . . . . . . . . . . . . . . . . . . . . . . . . . . . . 21
Configuring printer settings . . . . . . . . . . . . . . . . . . . . . . . . . . . . . . . . . . . . . . . . . . . . . . . . 21
Configuring basic settings . . . . . . . . . . . . . . . . . . . . . . . . . . . . . . . . . . . . . . . . . . . . . . 21
Printer settings options . . . . . . . . . . . . . . . . . . . . . . . . . . . . . . . . . . . . . . . . . . . . . . . . 22
Setting your Kodak printer as the default . . . . . . . . . . . . . . . . . . . . . . . . . . . . . . 23
For Windows XP . . . . . . . . . . . . . . . . . . . . . . . . . . . . . . . . . . . . . . . . . . . . . . . . . . . . 23
For Windows Vista . . . . . . . . . . . . . . . . . . . . . . . . . . . . . . . . . . . . . . . . . . . . . . . . . 23
For Macintosh . . . . . . . . . . . . . . . . . . . . . . . . . . . . . . . . . . . . . . . . . . . . . . . . . . . . . . 23
Configuring network settings . . . . . . . . . . . . . . . . . . . . . . . . . . . . . . . . . . . . . . . . . . . . . . 23
Networking resources . . . . . . . . . . . . . . . . . . . . . . . . . . . . . . . . . . . . . . . . . . . . . . . . . . 23
Configuring an Ethernet network connection . . . . . . . . . . . . . . . . . . . . . . . . . . 23
Ethernet setup . . . . . . . . . . . . . . . . . . . . . . . . . . . . . . . . . . . . . . . . . . . . . . . . . . . . . .24
Configuring a wireless network connection . . . . . . . . . . . . . . . . . . . . . . . . . . . .24
What you need to know before you connect. . . . . . . . . . . . . . . . . . . . . . . . 25
Configuring basic wireless (Wi-Fi) settings . . . . . . . . . . . . . . . . . . . . . . . . 26
Network Settings options . . . . . . . . . . . . . . . . . . . . . . . . . . . . . . . . . . . . . . . . . . .26
Wi-Fi setup wizard. . . . . . . . . . . . . . . . . . . . . . . . . . . . . . . . . . . . . . . . . . . . . . . . . . 26
Connecting to a listed network. . . . . . . . . . . . . . . . . . . . . . . . . . . . . . . . . 26
Connecting to an unlisted network. . . . . . . . . . . . . . . . . . . . . . . . . . . . . 28
Scanning for Wireless Networks . . . . . . . . . . . . . . . . . . . . . . . . . . . . . . . 29
Setting up an IP address . . . . . . . . . . . . . . . . . . . . . . . . . . . . . . . . . . . . . . . . . . . . . . . . 29
To obtain the IP Address on a Windows operating system:. . . . 29
To obtain IP Address on a Macintosh operating system: . . . . . . 29
Verifying network configuration . . . . . . . . . . . . . . . . . . . . . . . . . . . . . . . . . . . . . . .30
Printing network configuration . . . . . . . . . . . . . . . . . . . . . . . . . . . . . . . . . . . . . . . . .30
Installing your printer on additional computers on the same network .30
For Windows . . . . . . . . . . . . . . . . . . . . . . . . . . . . . . . . . . . . . . . . . . . . . . . . . . . . . . .30
For Macintosh . . . . . . . . . . . . . . . . . . . . . . . . . . . . . . . . . . . . . . . . . . . . . . . . . . . . . . 31
Switching the printer connection type . . . . . . . . . . . . . . . . . . . . . . . . . . . . . . . . . 31
For Windows . . . . . . . . . . . . . . . . . . . . . . . . . . . . . . . . . . . . . . . . . . . . . . . . . . . . . . . . . . . 31
USB to Wi-Fi . . . . . . . . . . . . . . . . . . . . . . . . . . . . . . . . . . . . . . . . . . . . . . . . . . . . . . . . 31
USB to Ethernet setup . . . . . . . . . . . . . . . . . . . . . . . . . . . . . . . . . . . . . . . . . . . . . . 32
Wi-Fi to Ethernet . . . . . . . . . . . . . . . . . . . . . . . . . . . . . . . . . . . . . . . . . . . . . . . . . . . 32
Ethernet to Wi-Fi . . . . . . . . . . . . . . . . . . . . . . . . . . . . . . . . . . . . . . . . . . . . . . . . . . . 32
For Macintosh . . . . . . . . . . . . . . . . . . . . . . . . . . . . . . . . . . . . . . . . . . . . . . . . . . . . . . . . . . 32
USB to Wi-Fi . . . . . . . . . . . . . . . . . . . . . . . . . . . . . . . . . . . . . . . . . . . . . . . . . . . . . . . . 32
USB to Ethernet Setup . . . . . . . . . . . . . . . . . . . . . . . . . . . . . . . . . . . . . . . . . . . . . . 33
Wi-Fi to Ethernet . . . . . . . . . . . . . . . . . . . . . . . . . . . . . . . . . . . . . . . . . . . . . . . . . . . 33
Ethernet to Wi-Fi . . . . . . . . . . . . . . . . . . . . . . . . . . . . . . . . . . . . . . . . . . . . . . . . . . . 33
4. Handling Paper 35
Handling paper . . . . . . . . . . . . . . . . . . . . . . . . . . . . . . . . . . . . . . . . . . . . . . . . . . . . . . . . . . . . . 35
Loading the paper trays . . . . . . . . . . . . . . . . . . . . . . . . . . . . . . . . . . . . . . . . . . . . . . . . . . . . 35
Things to keep in mind . . . . . . . . . . . . . . . . . . . . . . . . . . . . . . . . . . . . . . . . . . . . . . . . . 35
Loading plain paper . . . . . . . . . . . . . . . . . . . . . . . . . . . . . . . . . . . . . . . . . . . . . . . . . . . . 36
ii Kodak ESP 7 Printer User Guide
Page 5

Table of Contents
Loading photo paper . . . . . . . . . . . . . . . . . . . . . . . . . . . . . . . . . . . . . . . . . . . . . . . . . . . 37
Loading envelopes . . . . . . . . . . . . . . . . . . . . . . . . . . . . . . . . . . . . . . . . . . . . . . . . . . . . . 38
Loading legal size paper . . . . . . . . . . . . . . . . . . . . . . . . . . . . . . . . . . . . . . . . . . . . . . . . 38
Loading originals . . . . . . . . . . . . . . . . . . . . . . . . . . . . . . . . . . . . . . . . . . . . . . . . . . . . . . . . . . . 39
Loading an original for copying or scanning . . . . . . . . . . . . . . . . . . . . . . . . . . . . 39
5. Viewing and Printing Photos 41
Viewing photos. . . . . . . . . . . . . . . . . . . . . . . . . . . . . . . . . . . . . . . . . . . . . . . . . . . . . . . . . . . . .42
Configuring photo print settings . . . . . . . . . . . . . . . . . . . . . . . . . . . . . . . . . . . . . . . . . . . 42
Print Photos Options . . . . . . . . . . . . . . . . . . . . . . . . . . . . . . . . . . . . . . . . . . . . . . . . . . .43
Printing photos . . . . . . . . . . . . . . . . . . . . . . . . . . . . . . . . . . . . . . . . . . . . . . . . . . . . . . . . . . . . .44
Printing photos from a PictBridge camera . . . . . . . . . . . . . . . . . . . . . . . . . . . . .44
Printing photos from non–PictBridge digital cameras, memory
cards, and USB flash drives . . . . . . . . . . . . . . . . . . . . . . . . . . . . . . . . . . . . . . . . . . . .44
Printing tagged images . . . . . . . . . . . . . . . . . . . . . . . . . . . . . . . . . . . . . . . . . . . . . . . .46
Printing from a Bluetooth–enabled device . . . . . . . . . . . . . . . . . . . . . . . . . . . . . .46
Range . . . . . . . . . . . . . . . . . . . . . . . . . . . . . . . . . . . . . . . . . . . . . . . . . . . . . . . . . . . . . . . 47
Printing multiple photos . . . . . . . . . . . . . . . . . . . . . . . . . . . . . . . . . . . . . . . . . . . . . . . .47
Printing panoramic photos . . . . . . . . . . . . . . . . . . . . . . . . . . . . . . . . . . . . . . . . . . . . .47
Zooming and cropping photos . . . . . . . . . . . . . . . . . . . . . . . . . . . . . . . . . . . . . . . . . . . . .48
Transferring images to a computer . . . . . . . . . . . . . . . . . . . . . . . . . . . . . . . . . . . .49
Transferring images to a Windows computer . . . . . . . . . . . . . . . . . . . . . . . . . . 49
Transferring images to a Macintosh computer . . . . . . . . . . . . . . . . . . . . . . . . . 50
6. Copying 51
Simple copying . . . . . . . . . . . . . . . . . . . . . . . . . . . . . . . . . . . . . . . . . . . . . . . . . . . . . . . . . . . . . 51
Adjusting copy settings . . . . . . . . . . . . . . . . . . . . . . . . . . . . . . . . . . . . . . . . . . . . . . . . . . . . 51
Copy Document Options . . . . . . . . . . . . . . . . . . . . . . . . . . . . . . . . . . . . . . . . . . . . . . . 52
Copy Photo Options . . . . . . . . . . . . . . . . . . . . . . . . . . . . . . . . . . . . . . . . . . . . . . . . . . . . 53
7. Scanning 55
Before you start . . . . . . . . . . . . . . . . . . . . . . . . . . . . . . . . . . . . . . . . . . . . . . . . . . . . . . . . . . . . 55
Simple scanning . . . . . . . . . . . . . . . . . . . . . . . . . . . . . . . . . . . . . . . . . . . . . . . . . . . . . . . . . . . . 56
Simple document scans . . . . . . . . . . . . . . . . . . . . . . . . . . . . . . . . . . . . . . . . . . . . . . . . 56
Simple image scans . . . . . . . . . . . . . . . . . . . . . . . . . . . . . . . . . . . . . . . . . . . . . . . . . . . . 57
Scanning multiple originals simultaneously . . . . . . . . . . . . . . . . . . . . . . . . . . . . 57
Adjusting scan settings . . . . . . . . . . . . . . . . . . . . . . . . . . . . . . . . . . . . . . . . . . . . . . . . . . . . 57
Scan options . . . . . . . . . . . . . . . . . . . . . . . . . . . . . . . . . . . . . . . . . . . . . . . . . . . . . . . . . . . 58
8. Maintaining Your Printer 59
General care. . . . . . . . . . . . . . . . . . . . . . . . . . . . . . . . . . . . . . . . . . . . . . . . . . . . . . . . . . . . . . . . 59
Cleaning the scanner glass . . . . . . . . . . . . . . . . . . . . . . . . . . . . . . . . . . . . . . . . . . . . . . . . .60
Cleaning the scanner lid. . . . . . . . . . . . . . . . . . . . . . . . . . . . . . . . . . . . . . . . . . . . . . . . . . . .60
Monitoring and adjusting the printer's performance. . . . . . . . . . . . . . . . . . . . . . . 61
Maintenance Options . . . . . . . . . . . . . . . . . . . . . . . . . . . . . . . . . . . . . . . . . . . . . . . . . .62
Replacing ink cartridges. . . . . . . . . . . . . . . . . . . . . . . . . . . . . . . . . . . . . . . . . . . . . . . . . . . . 62
Replacing the printhead . . . . . . . . . . . . . . . . . . . . . . . . . . . . . . . . . . . . . . . . . . . . . . . . . . . . 65
Kodak ESP 7 Printer User Guide iii
Page 6

Table of Contents
9. Troubleshooting 71
Upgrading the printer software - for Windows . . . . . . . . . . . . . . . . . . . . . . . . . . . .69
Upgrading the printer software - for Macintosh . . . . . . . . . . . . . . . . . . . . . . . . . . . 70
Troubleshooting “quick start”. . . . . . . . . . . . . . . . . . . . . . . . . . . . . . . . . . . . . . . . . . . . . . 71
General troubleshooting . . . . . . . . . . . . . . . . . . . . . . . . . . . . . . . . . . . . . . . . . . . . . . . . . . . 71
Printer fails to power on . . . . . . . . . . . . . . . . . . . . . . . . . . . . . . . . . . . . . . . . . . . . . . . . 71
Device not recognized . . . . . . . . . . . . . . . . . . . . . . . . . . . . . . . . . . . . . . . . . . . . . . . . . 72
Ink cartridge not recognized . . . . . . . . . . . . . . . . . . . . . . . . . . . . . . . . . . . . . . . . . . . 73
Multiple paper feed . . . . . . . . . . . . . . . . . . . . . . . . . . . . . . . . . . . . . . . . . . . . . . . . . . . . 73
Multiple pictures not scanned properly . . . . . . . . . . . . . . . . . . . . . . . . . . . . . . . .74
No communication with computer . . . . . . . . . . . . . . . . . . . . . . . . . . . . . . . . . . . . .74
No paper feed . . . . . . . . . . . . . . . . . . . . . . . . . . . . . . . . . . . . . . . . . . . . . . . . . . . . . . . . . . 75
One or more of the colors on the calibration sheet is missing . . . . . . . . . . 75
Paper jam . . . . . . . . . . . . . . . . . . . . . . . . . . . . . . . . . . . . . . . . . . . . . . . . . . . . . . . . . . . . . . 76
Printer not responding . . . . . . . . . . . . . . . . . . . . . . . . . . . . . . . . . . . . . . . . . . . . . . . . . 76
Transfer pictures failure . . . . . . . . . . . . . . . . . . . . . . . . . . . . . . . . . . . . . . . . . . . . . . . . 77
User guide on the CD is obsolete . . . . . . . . . . . . . . . . . . . . . . . . . . . . . . . . . . . . . . 77
Wrong paper size . . . . . . . . . . . . . . . . . . . . . . . . . . . . . . . . . . . . . . . . . . . . . . . . . . . . . . 77
Macintosh OS X troubleshooting . . . . . . . . . . . . . . . . . . . . . . . . . . . . . . . . . . . . . . 78
Non-intel Mac only: black screen or screen freeze occurs when
applying printer settings via the Home Center software . . . . . . . . . . . . 78
Windows Vista troubleshooting . . . . . . . . . . . . . . . . . . . . . . . . . . . . . . . . . . . . . . . 78
WIA (Windows Image Acquisition) error: service has
stopped working . . . . . . . . . . . . . . . . . . . . . . . . . . . . . . . . . . . . . . . . . . . . . . . . . . . . 78
Home Center software on Windows works incorrectly following
software upgrade . . . . . . . . . . . . . . . . . . . . . . . . . . . . . . . . . . . . . . . . . . . . . . . . . . . . . . 78
Print troubleshooting. . . . . . . . . . . . . . . . . . . . . . . . . . . . . . . . . . . . . . . . . . . . . . . . . . . . . . . 79
Envelope printing incorrect . . . . . . . . . . . . . . . . . . . . . . . . . . . . . . . . . . . . . . . . . . . . 79
Multiple-page document not printing in first-page-first order
(Macintosh only)
. . . . . . . . . . . . . . . . . . . . . . . . . . . . . . . . . . . . . . . . . . . . . . . . . . . 79
PictBridge camera not detected . . . . . . . . . . . . . . . . . . . . . . . . . . . . . . . . . . . . . . . .80
Picture cropped . . . . . . . . . . . . . . . . . . . . . . . . . . . . . . . . . . . . . . . . . . . . . . . . . . . . . . . .80
Picture print smudged . . . . . . . . . . . . . . . . . . . . . . . . . . . . . . . . . . . . . . . . . . . . . . . . . .80
Picture will not print . . . . . . . . . . . . . . . . . . . . . . . . . . . . . . . . . . . . . . . . . . . . . . . . . . . . 81
Poor print quality . . . . . . . . . . . . . . . . . . . . . . . . . . . . . . . . . . . . . . . . . . . . . . . . . . . . . . . 81
Print skewed or slanted . . . . . . . . . . . . . . . . . . . . . . . . . . . . . . . . . . . . . . . . . . . . . . . . 82
Print spotted . . . . . . . . . . . . . . . . . . . . . . . . . . . . . . . . . . . . . . . . . . . . . . . . . . . . . . . . . . . 82
Print too dark . . . . . . . . . . . . . . . . . . . . . . . . . . . . . . . . . . . . . . . . . . . . . . . . . . . . . . . . . . . 82
Print too light . . . . . . . . . . . . . . . . . . . . . . . . . . . . . . . . . . . . . . . . . . . . . . . . . . . . . . . . . . . 83
Printing slow . . . . . . . . . . . . . . . . . . . . . . . . . . . . . . . . . . . . . . . . . . . . . . . . . . . . . . . . . . . 83
Printing stops . . . . . . . . . . . . . . . . . . . . . . . . . . . . . . . . . . . . . . . . . . . . . . . . . . . . . . . . . . 83
White edges on borderless prints . . . . . . . . . . . . . . . . . . . . . . . . . . . . . . . . . . . . . .84
Copy troubleshooting . . . . . . . . . . . . . . . . . . . . . . . . . . . . . . . . . . . . . . . . . . . . . . . . . . . . . .84
Copy cut off . . . . . . . . . . . . . . . . . . . . . . . . . . . . . . . . . . . . . . . . . . . . . . . . . . . . . . . . . . . .84
Scan troubleshooting. . . . . . . . . . . . . . . . . . . . . . . . . . . . . . . . . . . . . . . . . . . . . . . . . . . . . . .84
iv Kodak ESP 7 Printer User Guide
Page 7

Table of Contents
Scan fails . . . . . . . . . . . . . . . . . . . . . . . . . . . . . . . . . . . . . . . . . . . . . . . . . . . . . . . . . . . . . . .84
Scanned image blank . . . . . . . . . . . . . . . . . . . . . . . . . . . . . . . . . . . . . . . . . . . . . . . . . . . 85
Network troubleshooting. . . . . . . . . . . . . . . . . . . . . . . . . . . . . . . . . . . . . . . . . . . . . . . . . . . 85
Wired network troubleshooting . . . . . . . . . . . . . . . . . . . . . . . . . . . . . . . . . . . . . . . . 85
Computer unable to detect the All-in-One printer . . . . . . . . . . . . . . . . . . 85
No TCP/IP . . . . . . . . . . . . . . . . . . . . . . . . . . . . . . . . . . . . . . . . . . . . . . . . . . . . . . . . . .87
Printer not found. . . . . . . . . . . . . . . . . . . . . . . . . . . . . . . . . . . . . . . . . . . . . . . . . . . . 87
No IP address with cable modem (without a router) . . . . . . . . . . . . . . .90
Wireless troubleshooting . . . . . . . . . . . . . . . . . . . . . . . . . . . . . . . . . . . . . . . . . . . . . .90
No SSID . . . . . . . . . . . . . . . . . . . . . . . . . . . . . . . . . . . . . . . . . . . . . . . . . . . . . . . . . . . . .90
Weak signal. . . . . . . . . . . . . . . . . . . . . . . . . . . . . . . . . . . . . . . . . . . . . . . . . . . . . . . . . 92
Cannot connect to network . . . . . . . . . . . . . . . . . . . . . . . . . . . . . . . . . . . . . . . . . 92
Unsupported authentication or encryption type . . . . . . . . . . . . . . . . . . . . 93
Invalid WEP Key . . . . . . . . . . . . . . . . . . . . . . . . . . . . . . . . . . . . . . . . . . . . . . . . . . . . 93
Invalid WPA Passphrase. . . . . . . . . . . . . . . . . . . . . . . . . . . . . . . . . . . . . . . . . . . .94
Another device connected to the access point. . . . . . . . . . . . . . . . . . . . . .94
10. Product and Safety Specifications 95
Print Performance . . . . . . . . . . . . . . . . . . . . . . . . . . . . . . . . . . . . . . . . . . . . . . . . . . . . . . . . . . 95
Photo Printing Features . . . . . . . . . . . . . . . . . . . . . . . . . . . . . . . . . . . . . . . . . . . . . . . . . . . . 95
Copy Document Features . . . . . . . . . . . . . . . . . . . . . . . . . . . . . . . . . . . . . . . . . . . . . . . . . .96
Copy Photo Features . . . . . . . . . . . . . . . . . . . . . . . . . . . . . . . . . . . . . . . . . . . . . . . . . . . . . . .96
Scanning Features. . . . . . . . . . . . . . . . . . . . . . . . . . . . . . . . . . . . . . . . . . . . . . . . . . . . . . . . . . 97
Paper Tray Features. . . . . . . . . . . . . . . . . . . . . . . . . . . . . . . . . . . . . . . . . . . . . . . . . . . . . . . . 97
Ink Tanks . . . . . . . . . . . . . . . . . . . . . . . . . . . . . . . . . . . . . . . . . . . . . . . . . . . . . . . . . . . . . . . . . . . 97
Connectivity. . . . . . . . . . . . . . . . . . . . . . . . . . . . . . . . . . . . . . . . . . . . . . . . . . . . . . . . . . . . . . . . 97
Software Support. . . . . . . . . . . . . . . . . . . . . . . . . . . . . . . . . . . . . . . . . . . . . . . . . . . . . . . . . . .98
Physical Specifications . . . . . . . . . . . . . . . . . . . . . . . . . . . . . . . . . . . . . . . . . . . . . . . . . . . . . 98
Warranty . . . . . . . . . . . . . . . . . . . . . . . . . . . . . . . . . . . . . . . . . . . . . . . . . . . . . . . . . . . . . . . . . . .98
System Requirements . . . . . . . . . . . . . . . . . . . . . . . . . . . . . . . . . . . . . . . . . . . . . . . . . . . . . .99
Windows PC . . . . . . . . . . . . . . . . . . . . . . . . . . . . . . . . . . . . . . . . . . . . . . . . . . . . . . . . . . .99
Macintosh . . . . . . . . . . . . . . . . . . . . . . . . . . . . . . . . . . . . . . . . . . . . . . . . . . . . . . . . . . . . . .99
Papers Supported . . . . . . . . . . . . . . . . . . . . . . . . . . . . . . . . . . . . . . . . . . . . . . . . . . . . . . . . . . 99
Paper Types. . . . . . . . . . . . . . . . . . . . . . . . . . . . . . . . . . . . . . . . . . . . . . . . . . . . . . . . .99
Paper Sizes for PC and Macintosh computers . . . . . . . . . . . . . . . . . . . . . 100
Safety Specifications . . . . . . . . . . . . . . . . . . . . . . . . . . . . . . . . . . . . . . . . . . . . . . . . . . . . . .100
Parts . . . . . . . . . . . . . . . . . . . . . . . . . . . . . . . . . . . . . . . . . . . . . . . . . . . . . . . . . . . . . . . . . . 101
Power . . . . . . . . . . . . . . . . . . . . . . . . . . . . . . . . . . . . . . . . . . . . . . . . . . . . . . . . . . . . . . . . . 101
Location . . . . . . . . . . . . . . . . . . . . . . . . . . . . . . . . . . . . . . . . . . . . . . . . . . . . . . . . . . . . . . . 101
Environment . . . . . . . . . . . . . . . . . . . . . . . . . . . . . . . . . . . . . . . . . . . . . . . . . . . . . . . . . . 102
Regulatory Compliance . . . . . . . . . . . . . . . . . . . . . . . . . . . . . . . . . . . . . . . . . . . . . . . . . . . 102
FCC Compliance and Advisory . . . . . . . . . . . . . . . . . . . . . . . . . . . . . . . . . . . . . . . . 102
FCC and Industry Canada . . . . . . . . . . . . . . . . . . . . . . . . . . . . . . . . . . . . . . . . . . . . . 103
IC Radiation Exposure Statement . . . . . . . . . . . . . . . . . . . . . . . . . . . . . . . . . . 103
Canadian DOC Statement . . . . . . . . . . . . . . . . . . . . . . . . . . . . . . . . . . . . . . . . . 104
German Compliance Statement . . . . . . . . . . . . . . . . . . . . . . . . . . . . . . . . . . . . . . . 104
Kodak ESP 7 Printer User Guide v
Page 8

Table of Contents
A. Glossary 105
B. If you need to call Customer Support 111
Waste Electrical and Electronic Equipment Labeling . . . . . . . . . . . . . . . . . . 104
Index 113
vi Kodak ESP 7 Printer User Guide
Page 9
1
Getting Help
This user guide helps you learn to operate your All-in-One printer from the control panel.
Kodak also provides online help in the Home Center software installed when you set up
your printer, and helpful information about common tasks from the LCD screen on the
printer control panel.
Help menu
Note: Home Center software must be open on your computer to access its help.
Note: The “Start Here” booklet that came in the printer box provides instructions
for setting up and configuring this All-in-One printer.
You can get instructions for performing the following tasks from the menu displayed on the
LCD screen.
Help menu options
Install Ink Cartridges
Copy a Document
Copy a Photo
Print a Photo
Scan a Document
Scan a Photo
Wi-Fi Setup
To display Help menu information on the LCD screen:
1 From the printer control panel, press
2 Press
3 As needed, press
4 Follow the prompts on the LCD screen to view the available information.
until Help is the highlighted option on the Main menu, and then press OK.
until the desired option is highlighted, and then press OK.
Menu.
Tip: Press and as needed to scroll up and down to see all the available
information.
Kodak ESP 7 Printer User Guide 1
Page 10

Getting Help
Getting answers to frequently-asked questions
See “Troubleshooting” on page 71 for help resolving a number of issues about printing,
copying, scanning, and configuring the wireless service on your printer.
Contacting Kodak Customer Service & Support
Kodak provides several resources to help you answer questions about your printer.
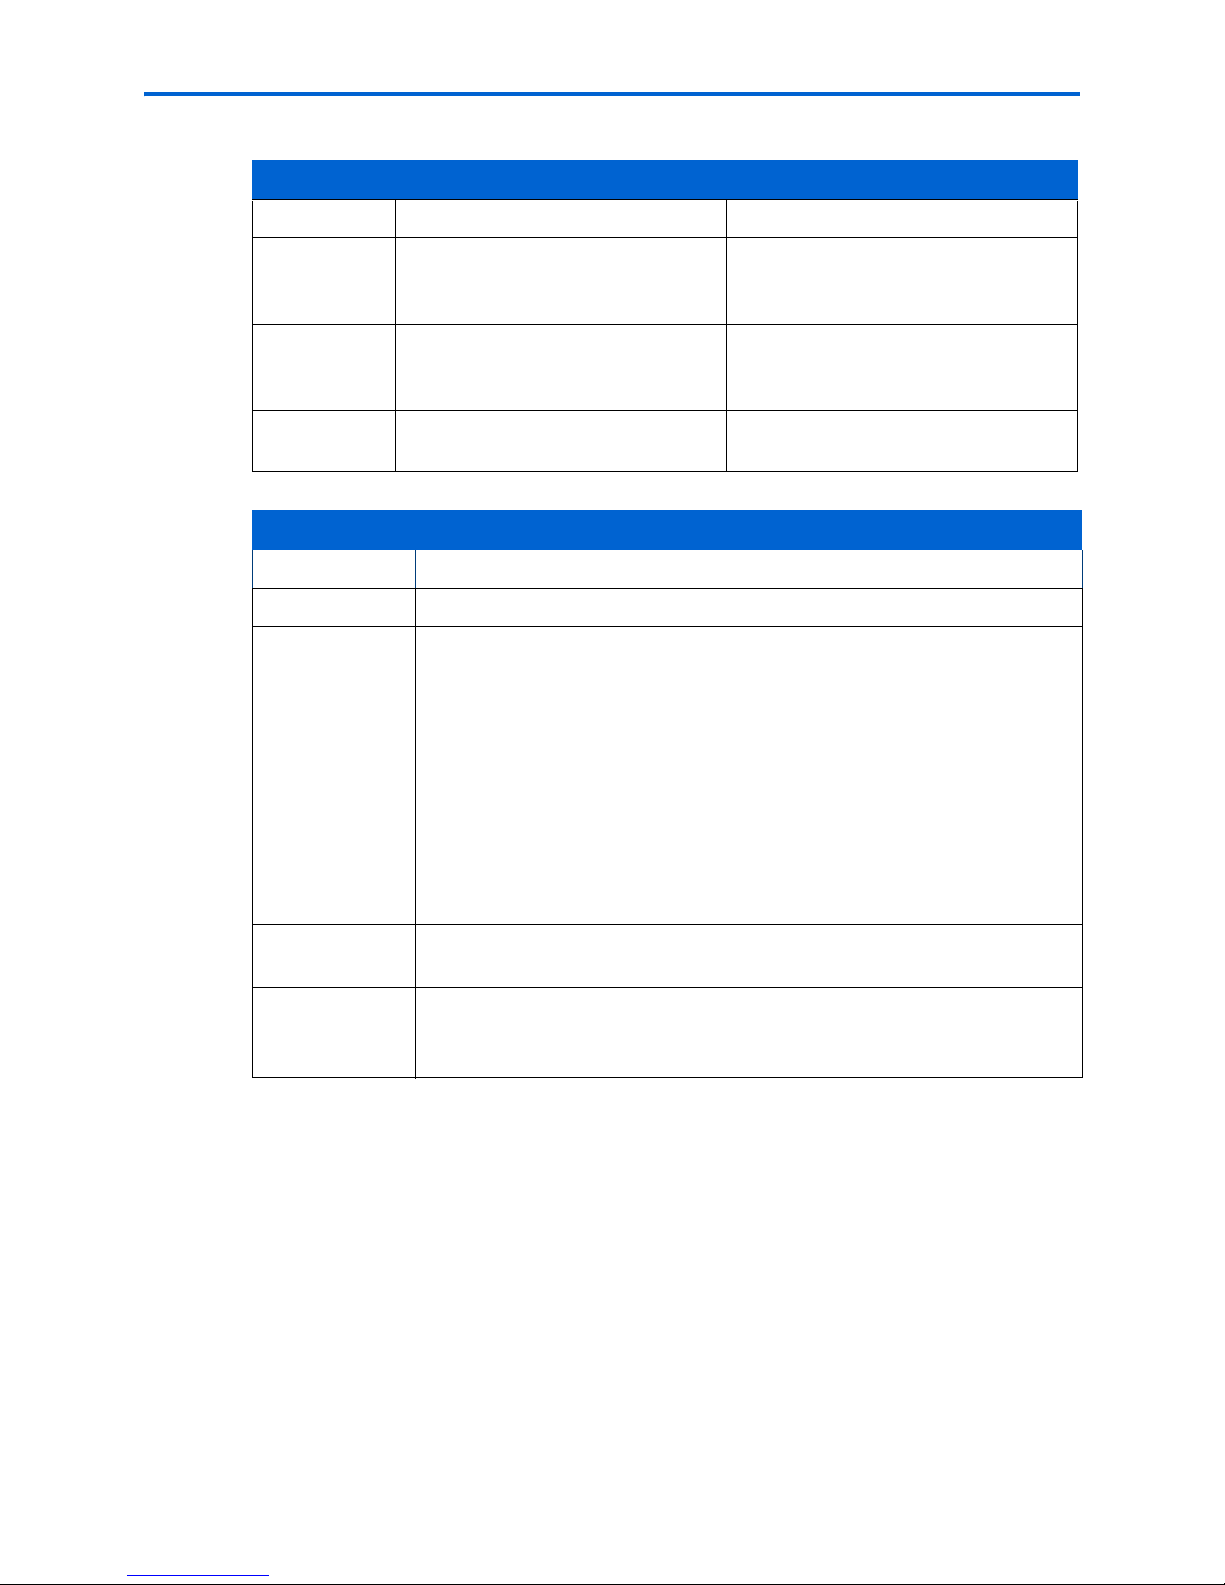
Support at Kodak.com
Support Description Internet Address
All-in-One
printer
support
Software View online tutorials for using Home
Wi-Fi and
Ethernet
Support Center home page www.kodak.com/go/support
Get support for your product (FAQs,
troubleshooting information, etc.).
Tip: Print a test page before
contacting Kodak support (
you need to call Customer Support”
on page 111).
Purchase a full range of digital
camera and printer accessories.
Download latest printer software,
firmware, drivers, setup booklet, and
user guide for your printer.
Center software (Windows only).
Get information on Kodak EasyShare
software.
Get help with the Windows operating
system and working with digital
images.
Get help with the Wi-Fi and Ethernet. www.kodak.com/go/inkjetnetworking
see ““If
www.kodak.com
www.kodak.com/go/accessories
www.kodak.com/go/downloads
www.kodak.com/go/howto
www.kodak.com/go/easysharesw
www.kodak.com/go/pcbasics
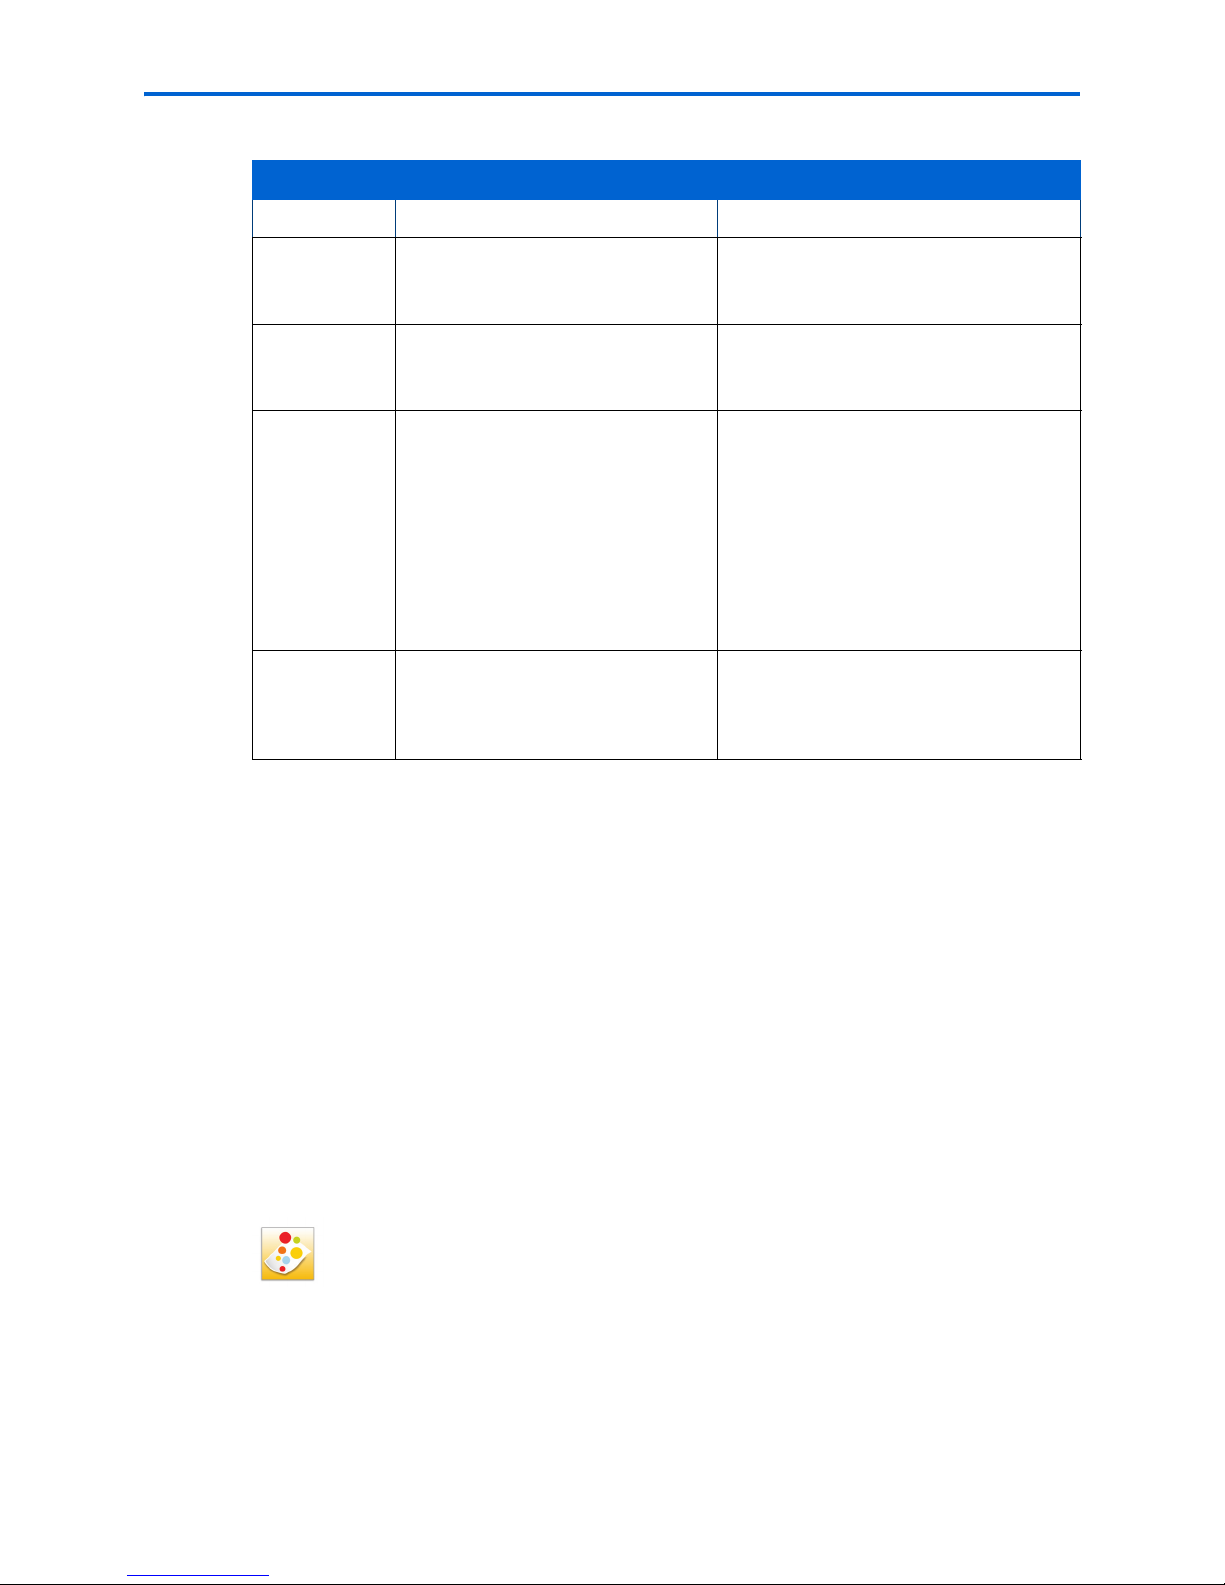
Other
2 Kodak ESP 7 Printer User Guide
Learn ways to use your
printer to create fun and memorable
projects
Register your printer. www.kodak.com/go/register
Locate Telephone Customer Support
numbers in various countries
All-in-One
www.kodak.com/eknec
and then click the Tips & Projects
Center
tab on the page
www.kodak.com/go/dfiswwcontacts
Page 11

2
Printer Overview
The Kodak ESP 7 All-in-One printer allows you to print, copy, and scan images and
documents. Although many functions can be operated directly from the control panel, you
may also print, store, and manage digital images from a Windows or Macintosh computer
connected to the printer via Kodak’s All-in-One printer Home Center software, which
installs during the printer setup process. In addition, this printer supports networking,
allowing you to access the printer over a wireless (Wi-Fi) or wired (Ethernet) network.
All-in-One printer features
This printer includes:
• A printhead system with two Kodak high-quality pigmented ink cartridges
• An integrated printing accessory that produces two-sided printing from a connected
computer
• A bottom paper tray that supports multiple media, including A4, Letter, Legal, 8x10, 5x7
4x6, 4x7, and 4x12 paper, transparencies, and envelopes
• A top paper tray that supports 4x6, 4x7, and 5x7 photo paper and engages and
disengages automatically
• A scanner capable of scanning up to A4 (length) and Letter-width originals
• Multi-format memory card support
• A Universal Serial Bus (USB) host port on the front of the printer for connecting a
variety of external devices to the printer, including Picture Transfer Protocol (PTP)
enabled digital cameras, USB flash (“thumb”) drives, and Kodak Bluetooth USB 2.0
adapters (“dongles”)
• A client USB device port on the back of the printer, for connecting the printer to host
Windows or Macintosh computers
• Energy-saving low power mode
• Networking capability, including wireless (Wi-Fi) and wired (Ethernet)
• A control panel with push buttons, light indicators, and a 3-inch LCD screen
• One network (Ethernet) port
Kodak ESP 7 Printer User Guide 3
Page 12

Printer Overview
Major components of the ESP 7 All-in-One printer
The graphics below show the main components of the printer.
Number Component name
1 Scanner lid
2 LCD display
3 Top paper tray
4 Bottom paper tray extender tab
5 Bottom paper tray
6 Paper-edge guide
7 Paper output tray
8 USB host port
9 Memory card slots
10 Control panel
11 Recessed handle for printer access door
12 Power cord connection port
13 Ports for connecting printer to the computer or Ethernet
14 Two-sided printing accessory
15 Scanner glass
16 Paper output tray extender
4 Kodak ESP 7 Printer User Guide
Page 13
Number Component name
17 Rear-access cleanout area
18 Printer access door
19 Printhead
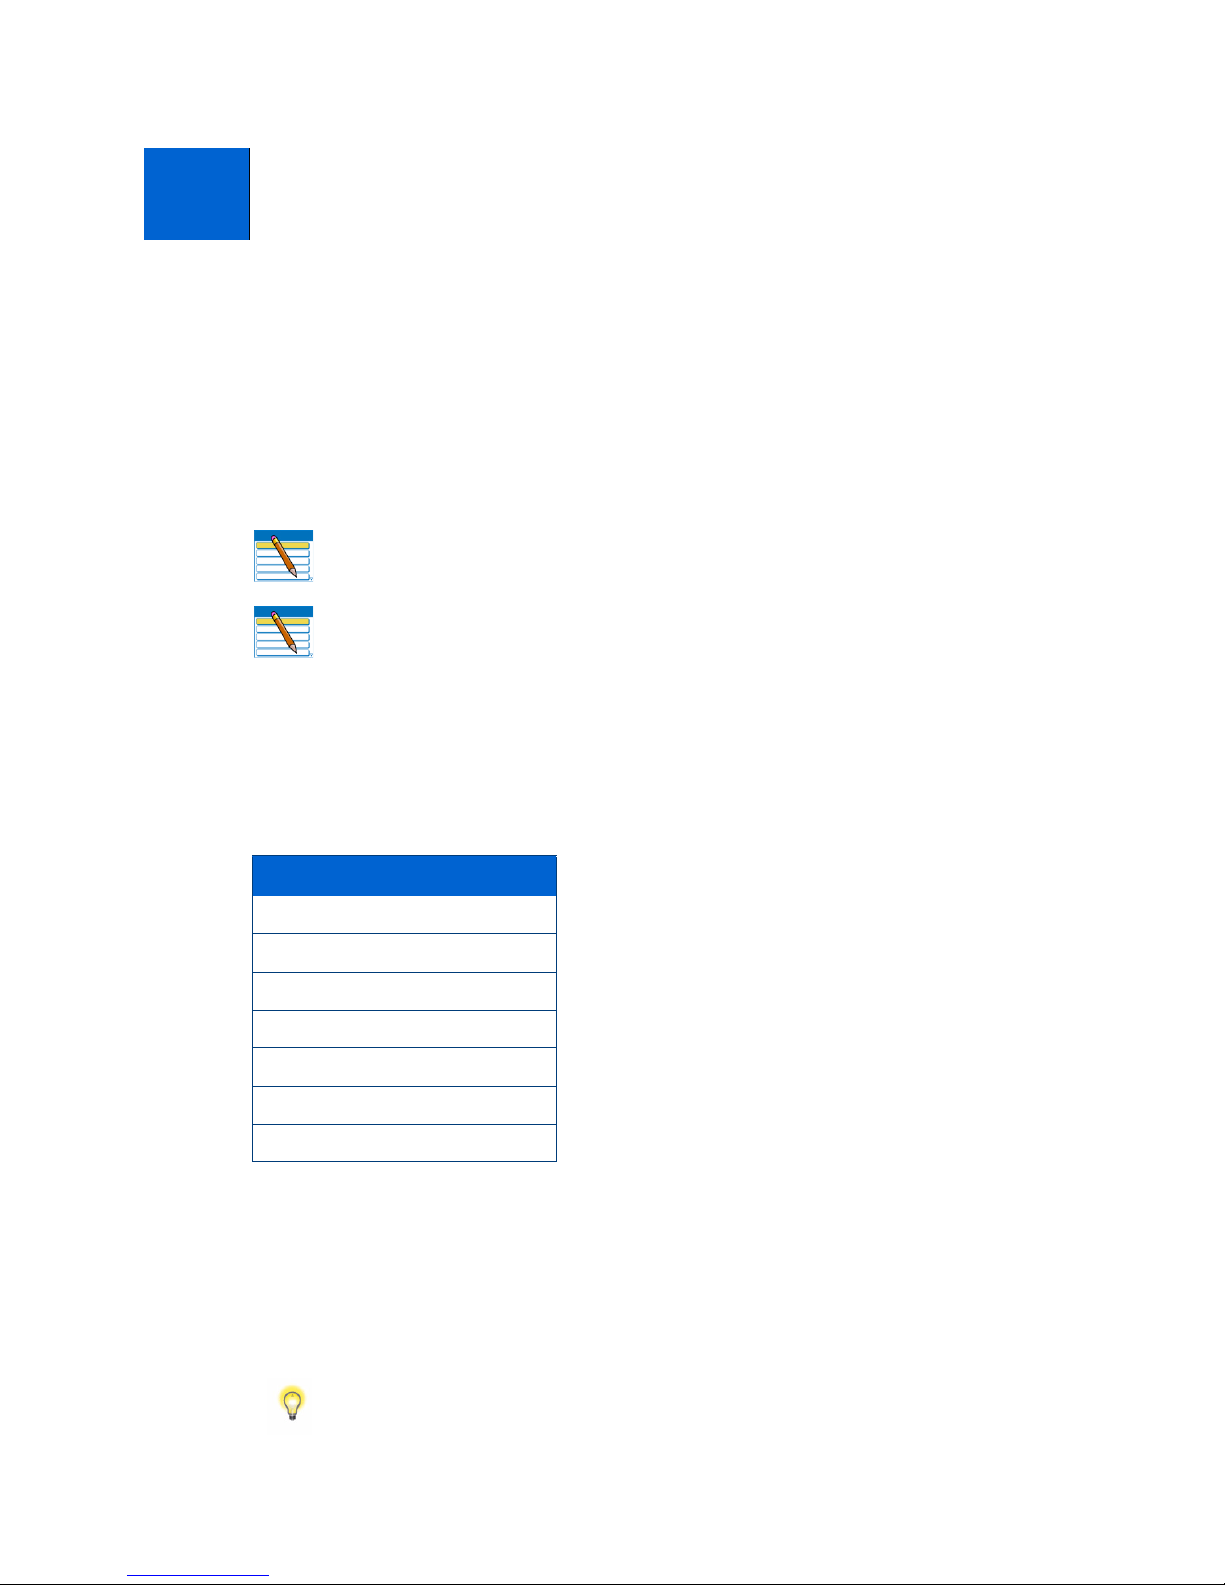
Support for connecting digital memory devices to the printer
Your All-in-One printer allows you to connect both digital camera memory cards and USBconnected devices for previewing and printing. You can also transfer photos and document
files to your connected computer.
Caution: Connect only one external memory device to your printer at a time. If
both memory card slots, or any memory card slot and the host USB port have a
device connected to them simultaneously, the printer cannot access the photos
or documents contained on any of them. If your printer cannot recognize a device
you have connected to it, make sure that only one device is connected at a time.
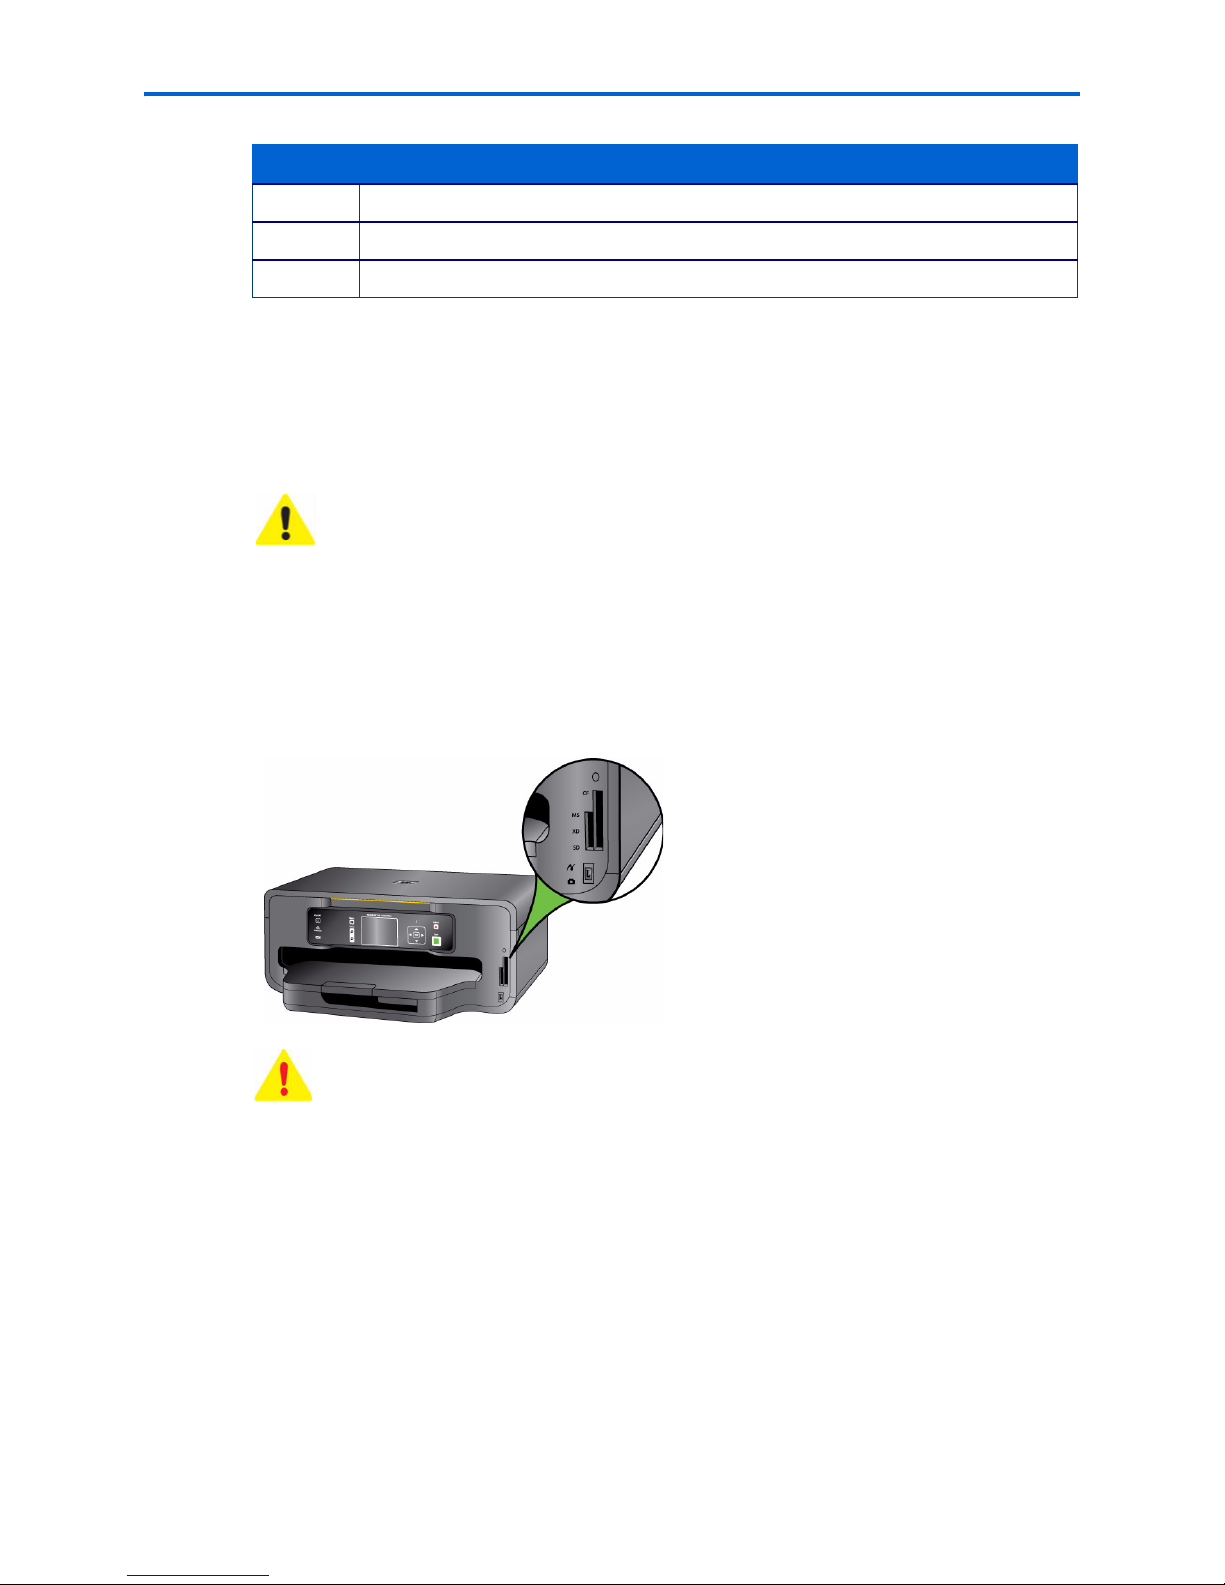
Memory card slots
Chapter 2
Although this All-in-One printer has two card slots, insert and use only one memory card
at a time.
Warning: Do NOT remove the memory card while the light blinks, or you may
damage the card.
A blue light, located above the memory card slots, blinks while the card is being accessed
and stays lit while the card remains in the slot and the printer is on.
Memory cards supported
The Kodak ESP 7 All-in-One printer supports the following memory cards, used in most
digital cameras:
XD xD-Picture Card
MS Memory Stick, Memory Stick Pro and Magic Gate
SD Secure Digital Card, Multi-Media Card
Kodak ESP 7 Printer User Guide 5
Page 14
Printer Overview
CF Compact Flash type I and type II, including micro drives
SDHC Secure Digital High Capacity cards
Additionally, the printer supports the following memory cards used with Memory Stick and
SD/MMC card slot adapters, which you will need to purchase separately:
• Memory Stick Duo and Memory Stick Duo Pro
• miniSD
• MicroSD (TransFlash)
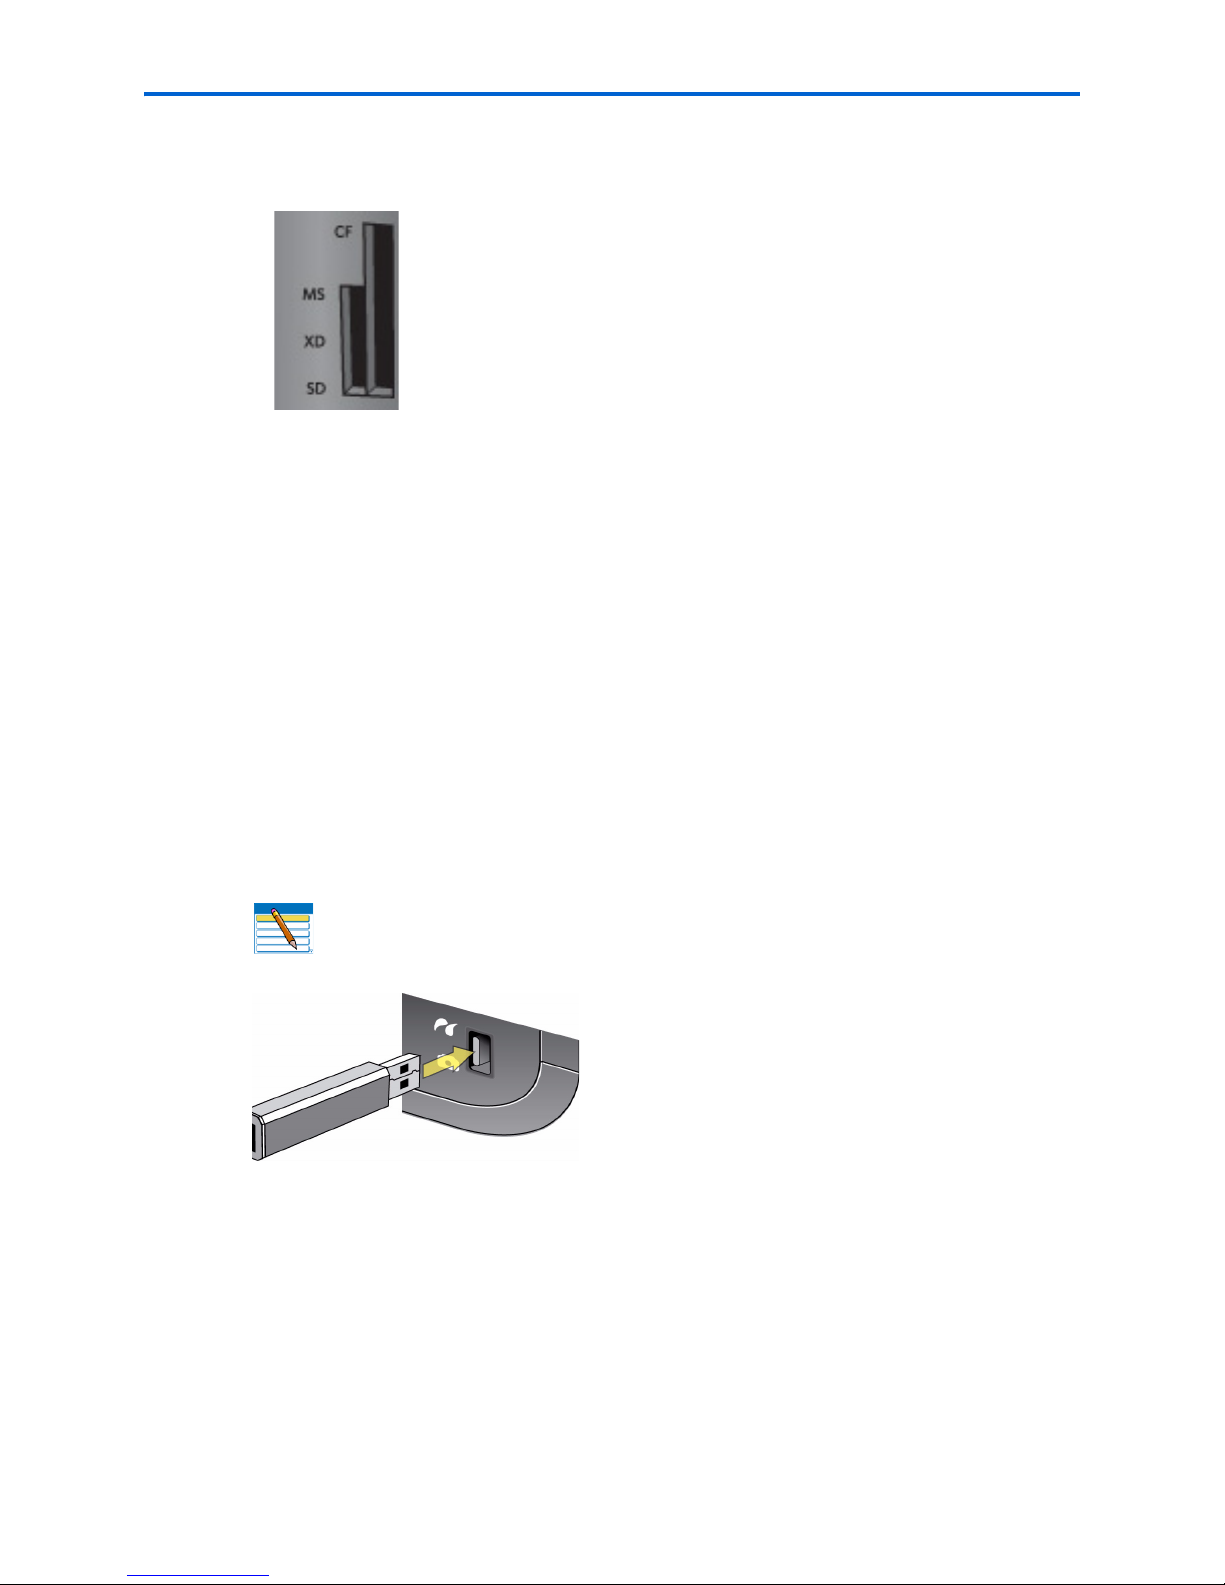
USB host port
This All-in-One printer works with most digital cameras. Using the USB port located on the
front of the printer, you can connect one of the following devices to the printer at a time:
• PictBridge camera
• USB portable storage drive
• Kodak Bluetooth dongle
• Digital cameras
Note: This printer can read only one memory card OR one portable USB drive
OR one Kodak Bluetooth dongle at a time.
6 Kodak ESP 7 Printer User Guide
Page 15
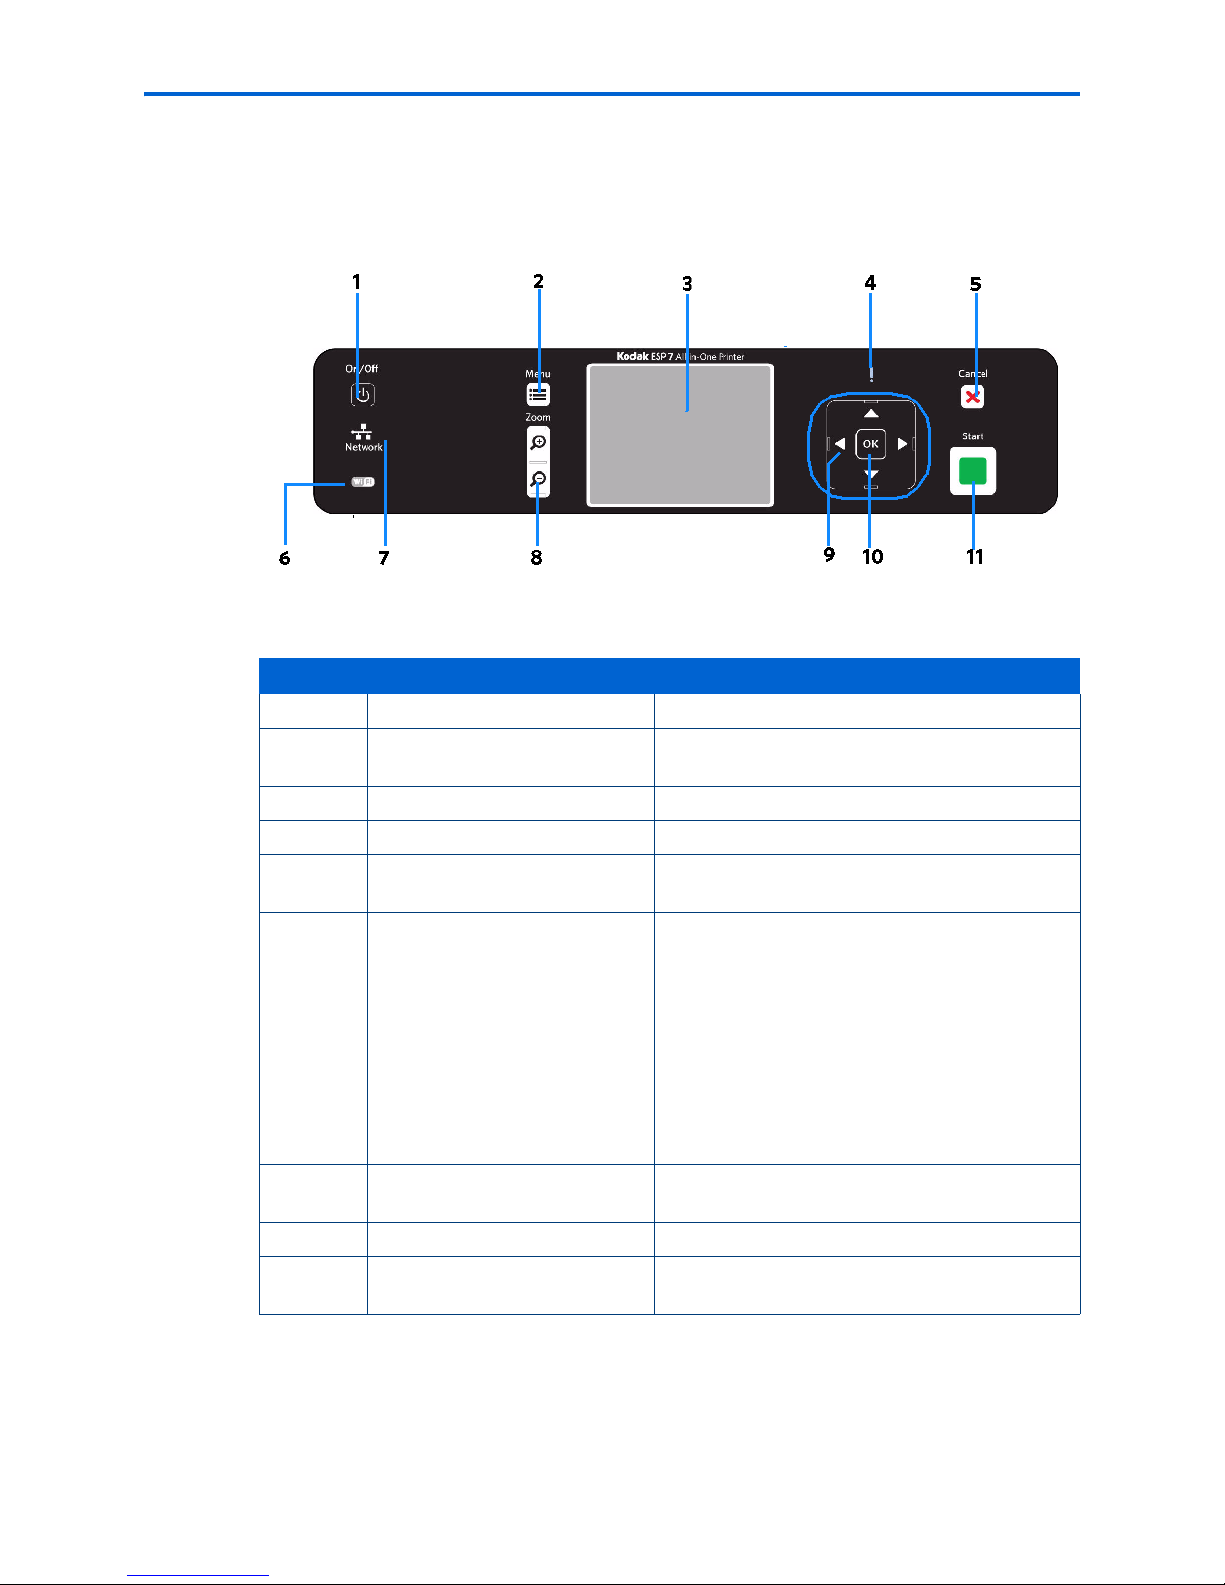
Control panel layout
The legend describing the numbered parts of the control panel illustration is in the table
below.
Chapter 2
Number Name Description
1 On/Off button Powers the printer ON or OFF.
2 Menu button Displays the menu, and toggles between
parameters screens and preview screens.
3 Screen Displays photos, messages, status, and menus.
4 Attention light Blinks or flashes when an error occurs.
5 Cancel button Cancels the current operation and control panel
navigation, and returns you to the menu.
6 Wireless network status light When lit, signals that a wireless (Wi-Fi)
network connection is active. If the LED is
illuminated, you may not be connected to the
network yet. Go to Network Settings, View
Network Configuration, and verify that it says it
is Network and Connected.
Blinks when searching for an available Wi-Fi
network within range, or when the existing
signal is too weak to transmit or receive
wireless signals.
7 Ethernet network status light When lit, signals that an Ethernet network
connection is active.
8 Zoom buttons Lets you zoom in and out of a photo.
9 4-way navigation buttons Enable you to navigate menus and photos, and
pan around a zoomed photo.
Kodak ESP 7 Printer User Guide 7
Page 16
Printer Overview
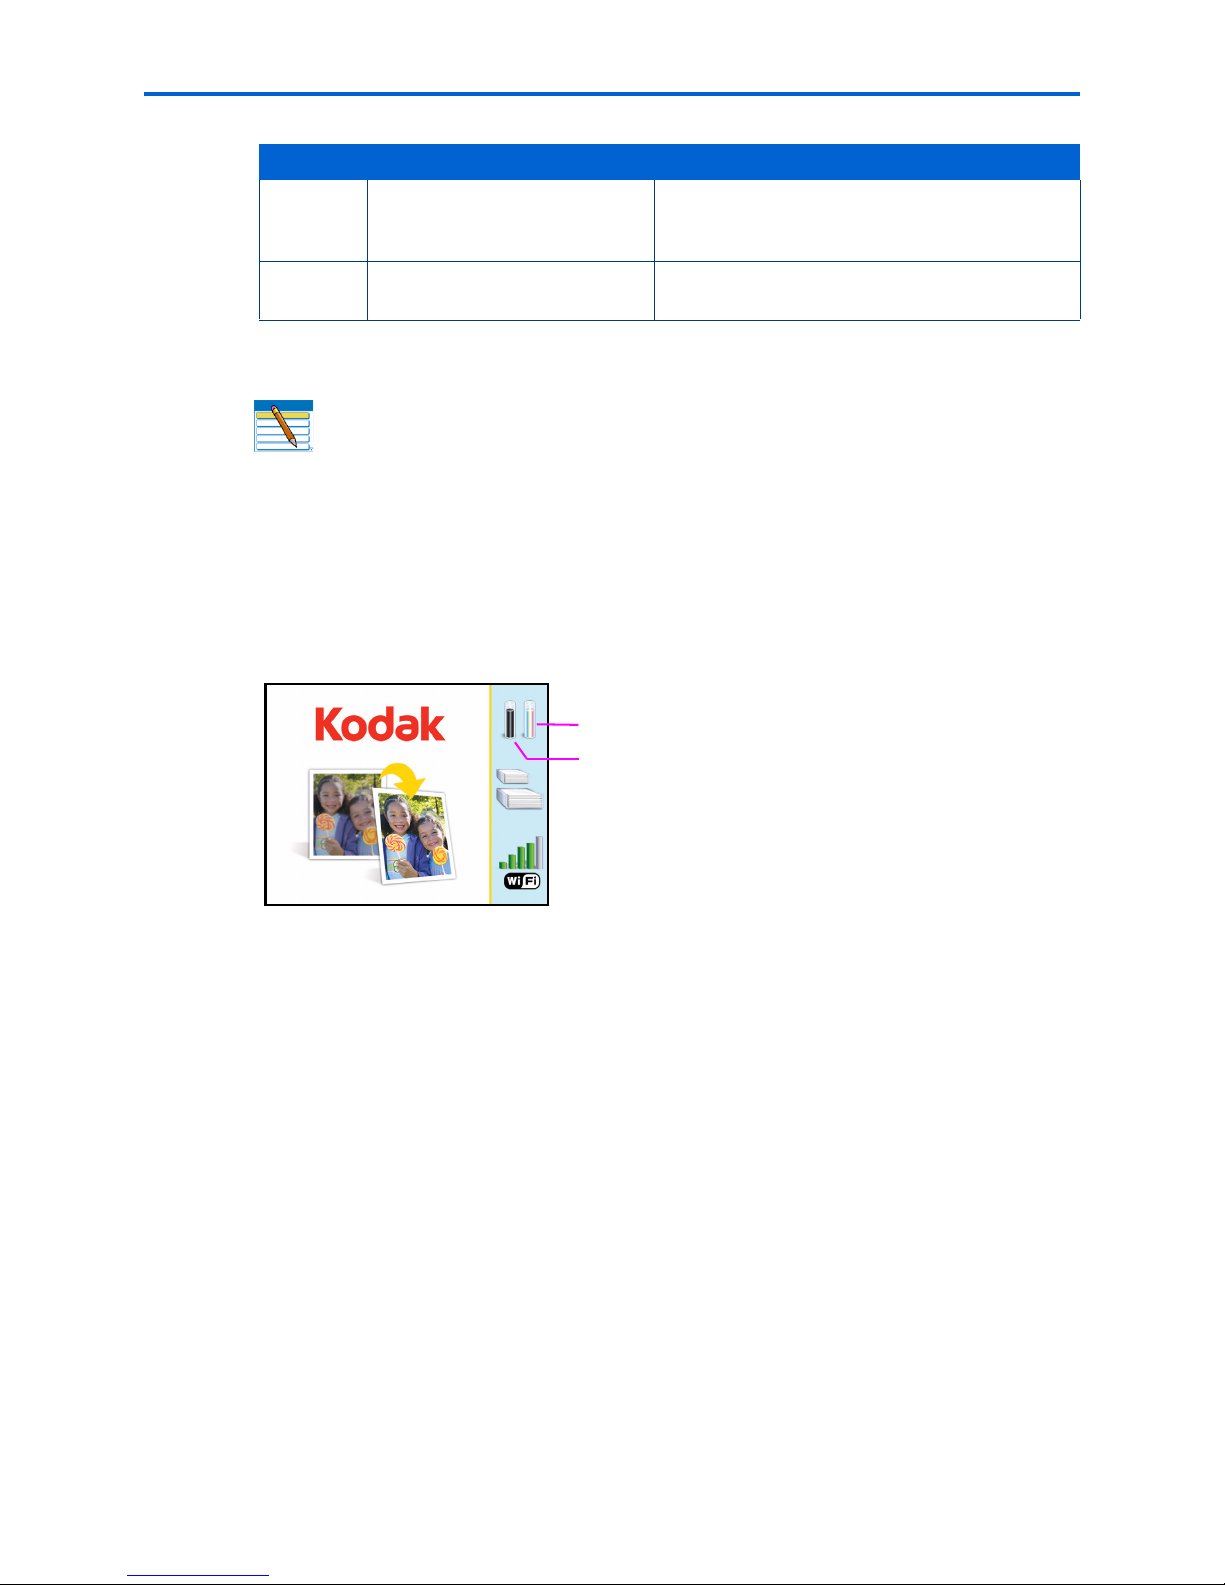
Color ink level monitor
Black ink level monitor
Number Name Description
LCD screen
The LCD screen displays photos, messages, instructions, and menu items. Menu
navigation is accomplished with the 4-way Navigation buttons on the control panel.
The LCD Start-Up screen displays whenever the printer is ready for operation but is not
performing a task. The Start Up screen also displays the current level of black and color ink.
10 OK button Enables you to complete a menu selection or
photo print command, or allows you to continue
with the current operation.
11 Start button Starts the following operations: copy, scan,
print, and transfer.
Note: See “Adjusting the control panel position” on page 9 for instructions on
raising and lowering the control panel so that it is easier to use.
The first time you use your Kodak ESP 7 All-in-One printer and press the
Menu button
(described on page 11) on the control panel, the Main menu displays on the LCD screen.
The contents displayed in the Main menu include:
• Copy Document
• Copy Photo
• View and Print Photos
• Scan
• Network Settings
• Printer Settings
• Maintenance
• Help
To review the tasks you perform when you use the options available on the Main menu,
see “Using the All-in-One printer menus” on page 13.
8 Kodak ESP 7 Printer User Guide
Page 17
Using the control panel
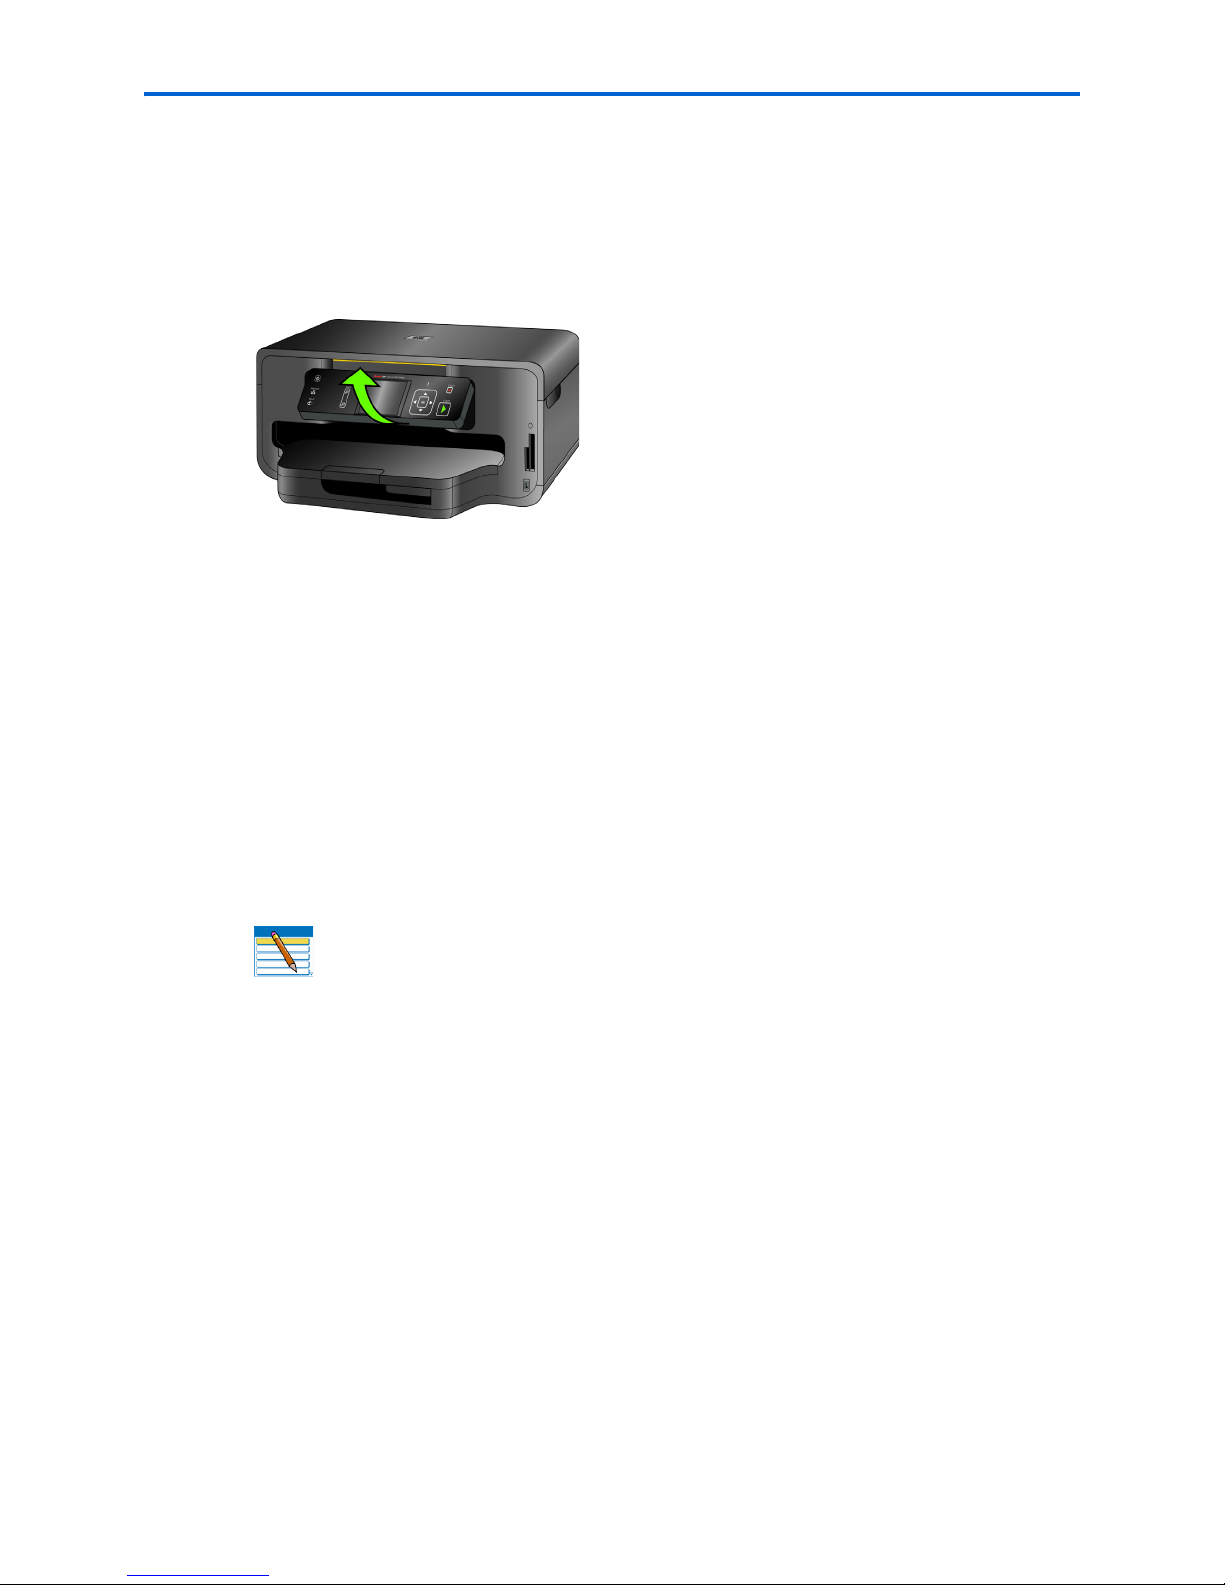
Adjusting the control panel position
The position of the control panel can be adjusted from its default position (flush against
the front of the printer) to lifted upward at an angle.
To adjust the control panel position:
1 On the rear side of the control panel, locate the release tab.
2 Press the front of the control panel and the release tab toward each other with your
thumb and fingers; maintain this position and pull the control panel toward you gently.
Chapter 2
3 When you are satisfied with the position of the control panel, let go.
4 To return the control panel to its default position, squeeze the release tab and gently
push the control panel away from you. Let go when the panel is seated against the front
panel of the printer.
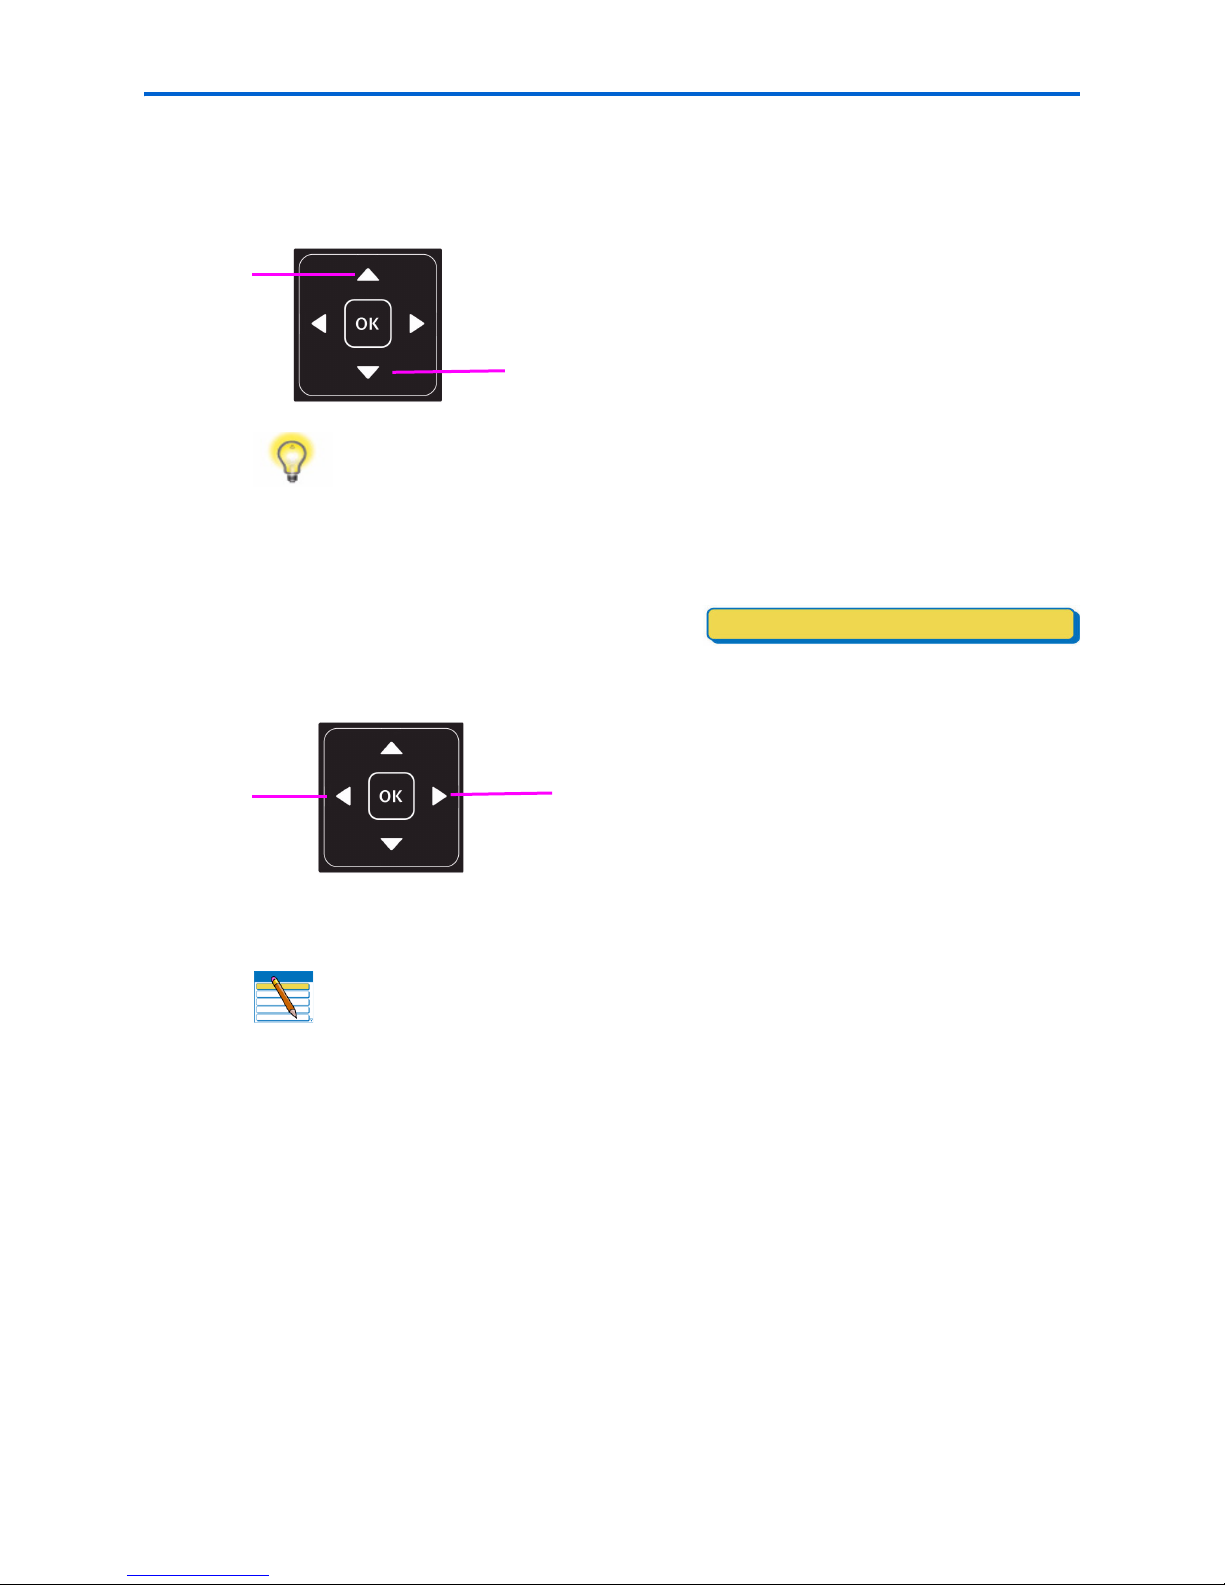
Using the 4-way navigation buttons
Note: The OK button is located in the center of the 4-way navigation buttons on
the control panel. Its use is described on page 10.
The 4-way navigation buttons allow you to update the content displayed on the LCD
screen.
• Pressing highlights the next row down in the visible menu. When the last row in a
menu is highlighted, pressing
following page in a multi-page menu, with the top row highlighted; in a one-page menu,
this action highlights the top item.
• Pressing returns you to the previous page in a multi-page menu.
causes the visible page to be replaced with the
Kodak ESP 7 Printer User Guide 9
Page 18
Printer Overview
Preview Yes
• After you have initiated the process of zooming when a photo is shown on the LCD
screen, pressing
page 11)
• When there are two or more options for the
setting shown on the selected menu row,
the current value is displayed between the
and symbols. Pressing oron the control panel scrolls through the choices.
or pans the focus up or down. (See “Using the Zoom buttons” on
Tip: When you have selected a photo or document shown on the LCD screen to
be printed, pressing
have selected more than one item for printing, you can specify a different quantity
for each one. The LCD screen displays the number of copies of each selected item
to be printed. Using this feature does not change the number of files stored on
your camera or portable USB drive, however.
or increases or decreases the output quantity. If you
• When a photo is displayed on the LCD screen, after you have pressed the Zoom+
button pressing
Note: The Zoom+ and Zoom- buttons on the control panel are discussed on
page 11.
• When you are viewing a group of photos stored on a portable memory storage device
such as a USB drive, pressing the
images.
• Continuing to press any of the 4-way navigation buttons causes them to repeat the
action until you release it.
Using the OK button
Press OK to
• Accept the setting displayed in the selected row in the current menu.
• Accept the preview on the LCD screen of something that you want to print, copy, or
scan.
, moves the focus in the direction you have used.
or the button allows you to scroll through the
10 Kodak ESP 7 Printer User Guide
Page 19
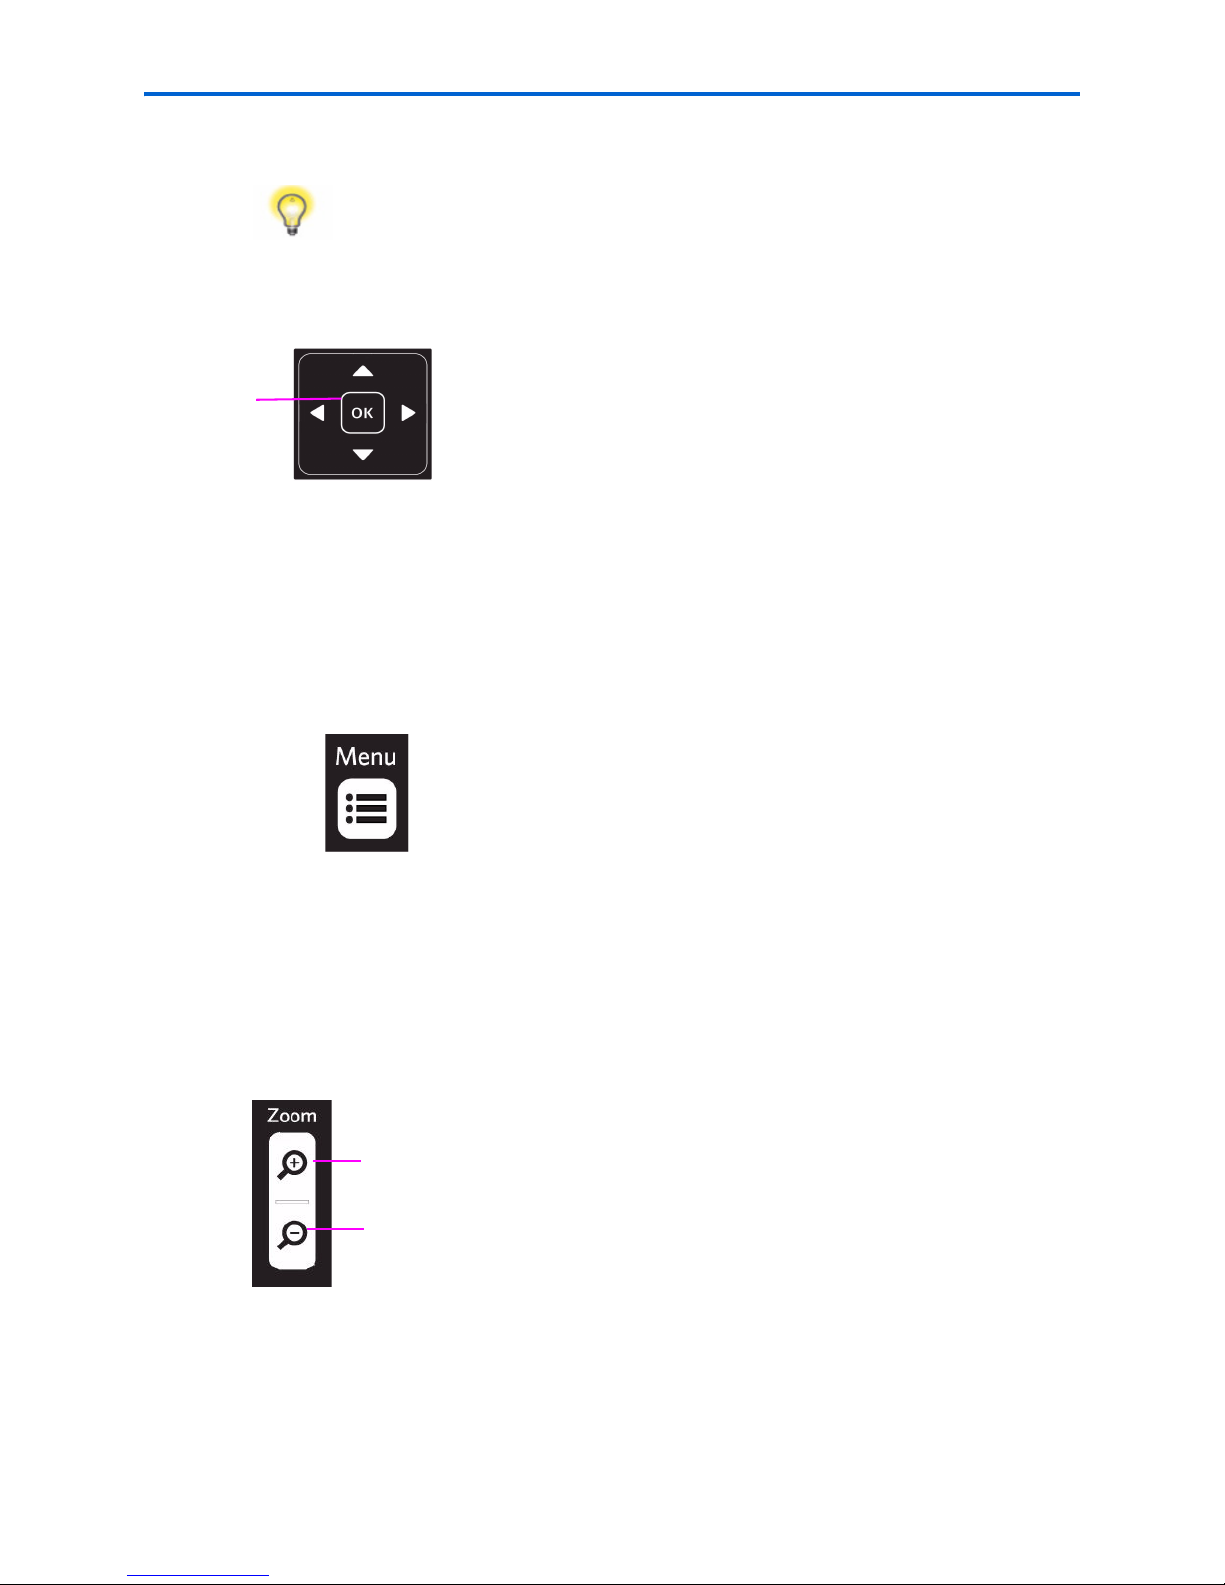
• Select a photo for printing.
Zoom in
Zoom out
Tip: When previewing a group of images from a digital camera, portable USB
drive, or memory card connected to the printer, press and hold
of the images not previously selected for printing in the default quantity stored
in your printer. (Images already selected will not be affected.) Press and hold
OK again to deselect all images.
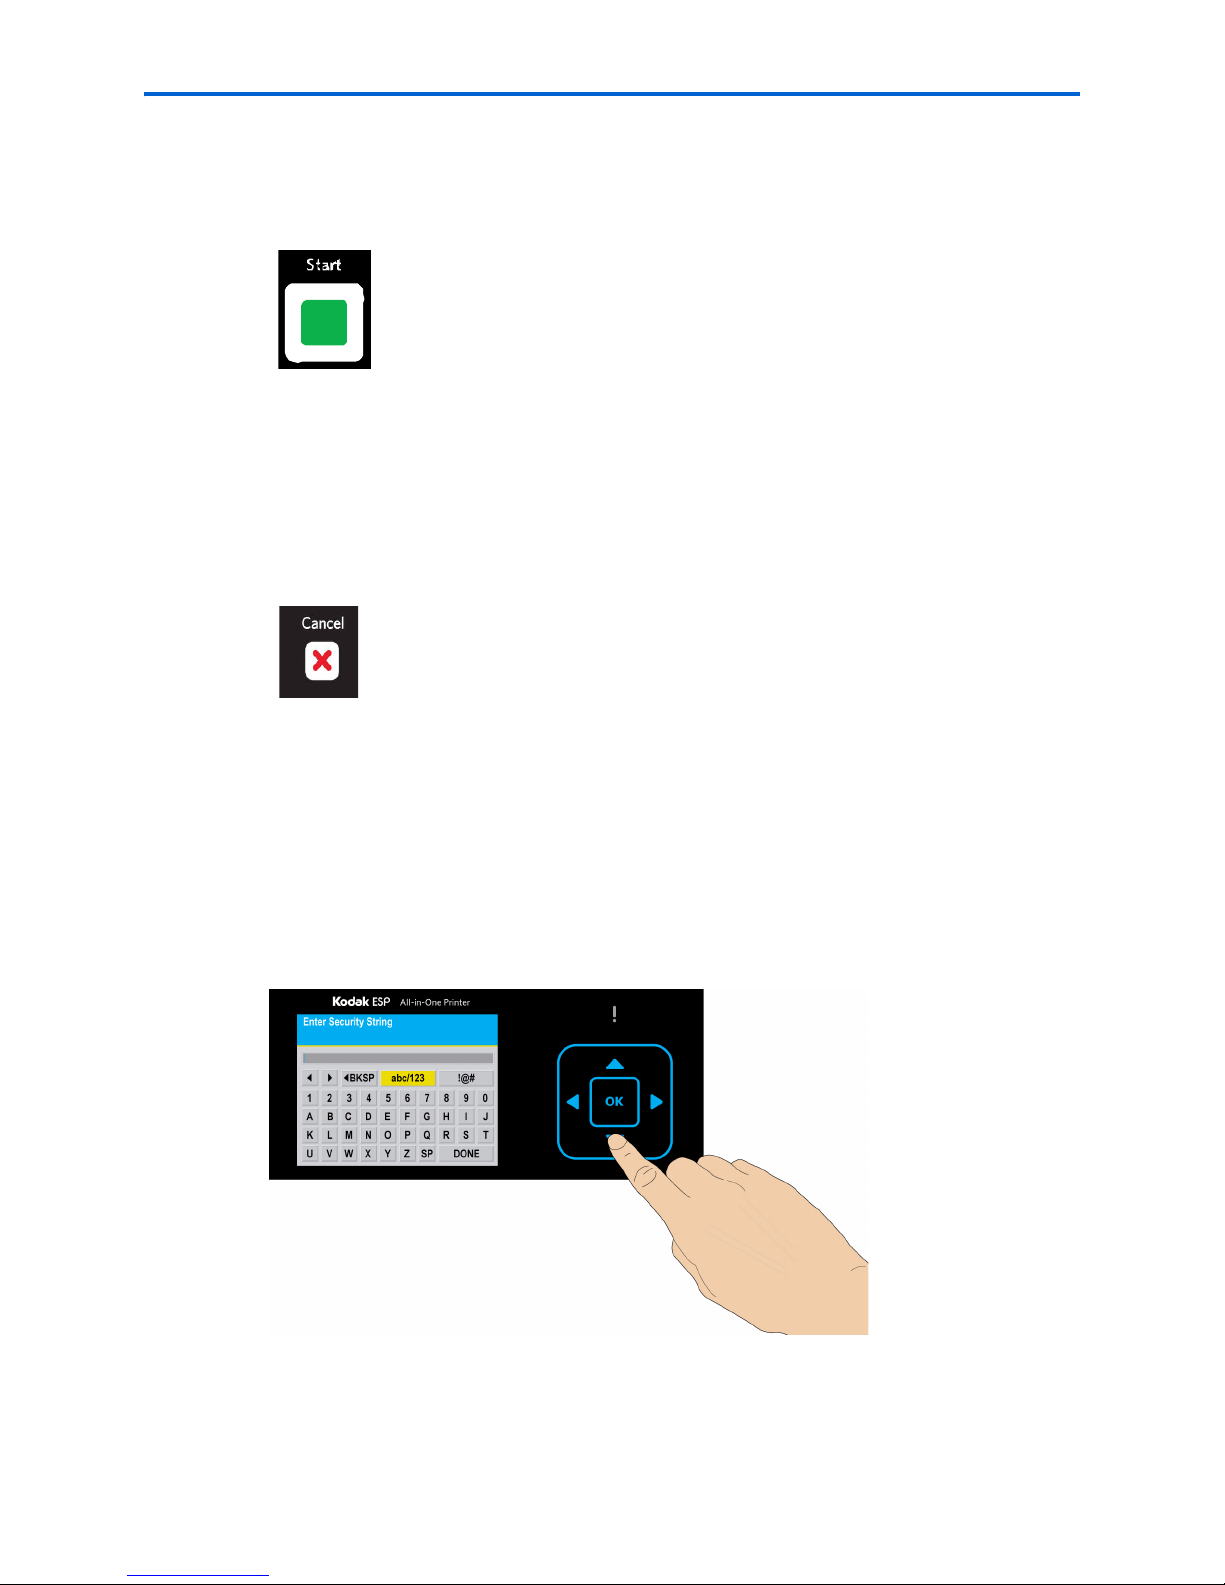
Using the Menu button
Press Menu when:
• You want to set up a new task and anything other than a menu is visible on the LCD
screen
Chapter 2
OK to select all
• You are viewing an image on the LCD screen and want to use Photo Options menu .
• You want to view the parent of the last menu displayed.
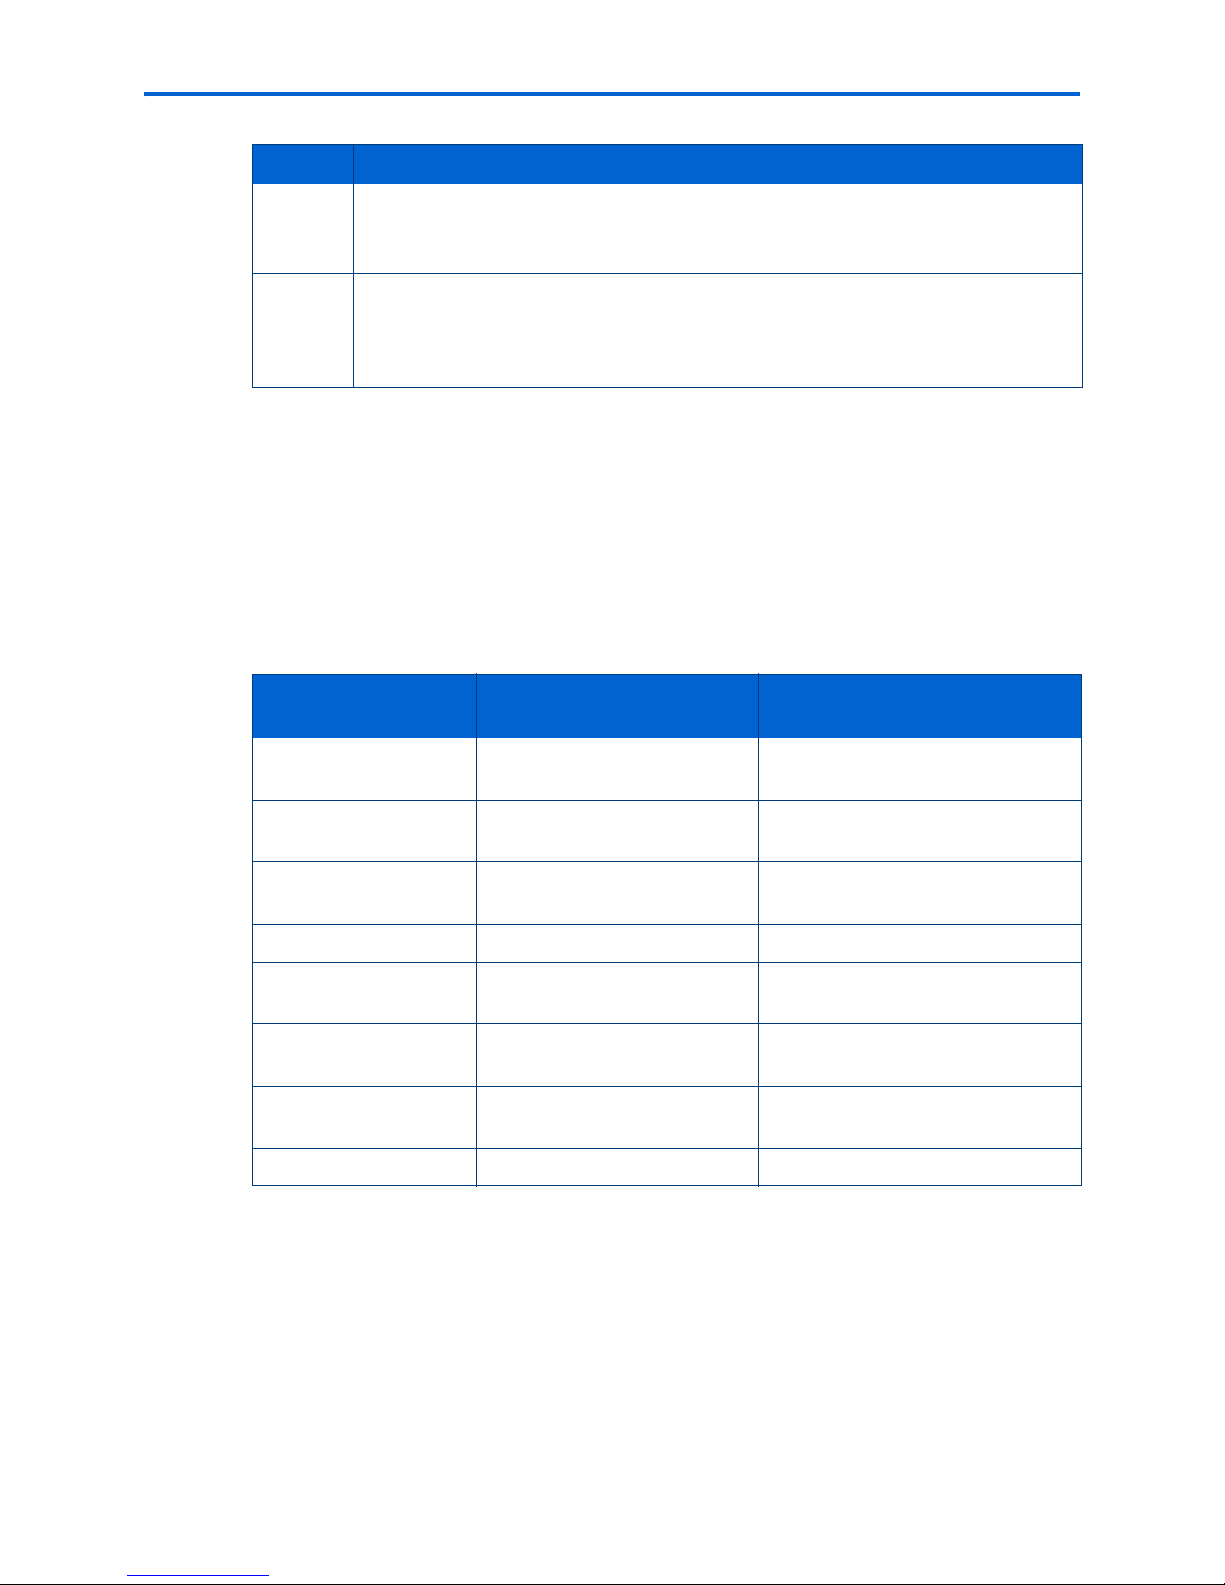
Using the Zoom buttons
Press Zoom+ when an image is displayed on the LCD screen and you want to adjust the
area to be printed, copied, or scanned. When this feature is available, the printer displays a
prompt to press
Once you have activated zoom for the selected item, you can then use both the
(zoom in) and the
Zoom on the image shown on the LCD screen.
Zoom– (zoom out) buttons.
Zoom+
Kodak ESP 7 Printer User Guide 11
Page 20
Printer Overview
Using the Start button
Press Start to initiate the print, copy, or scan task you are working on with the current
settings.
Using the Cancel button
Press Cancel when:
• You want to interrupt an operation that has already started.
• You are viewing a menu that you opened by selecting an option on a different menu,
and then decide that you want to view the previous one.
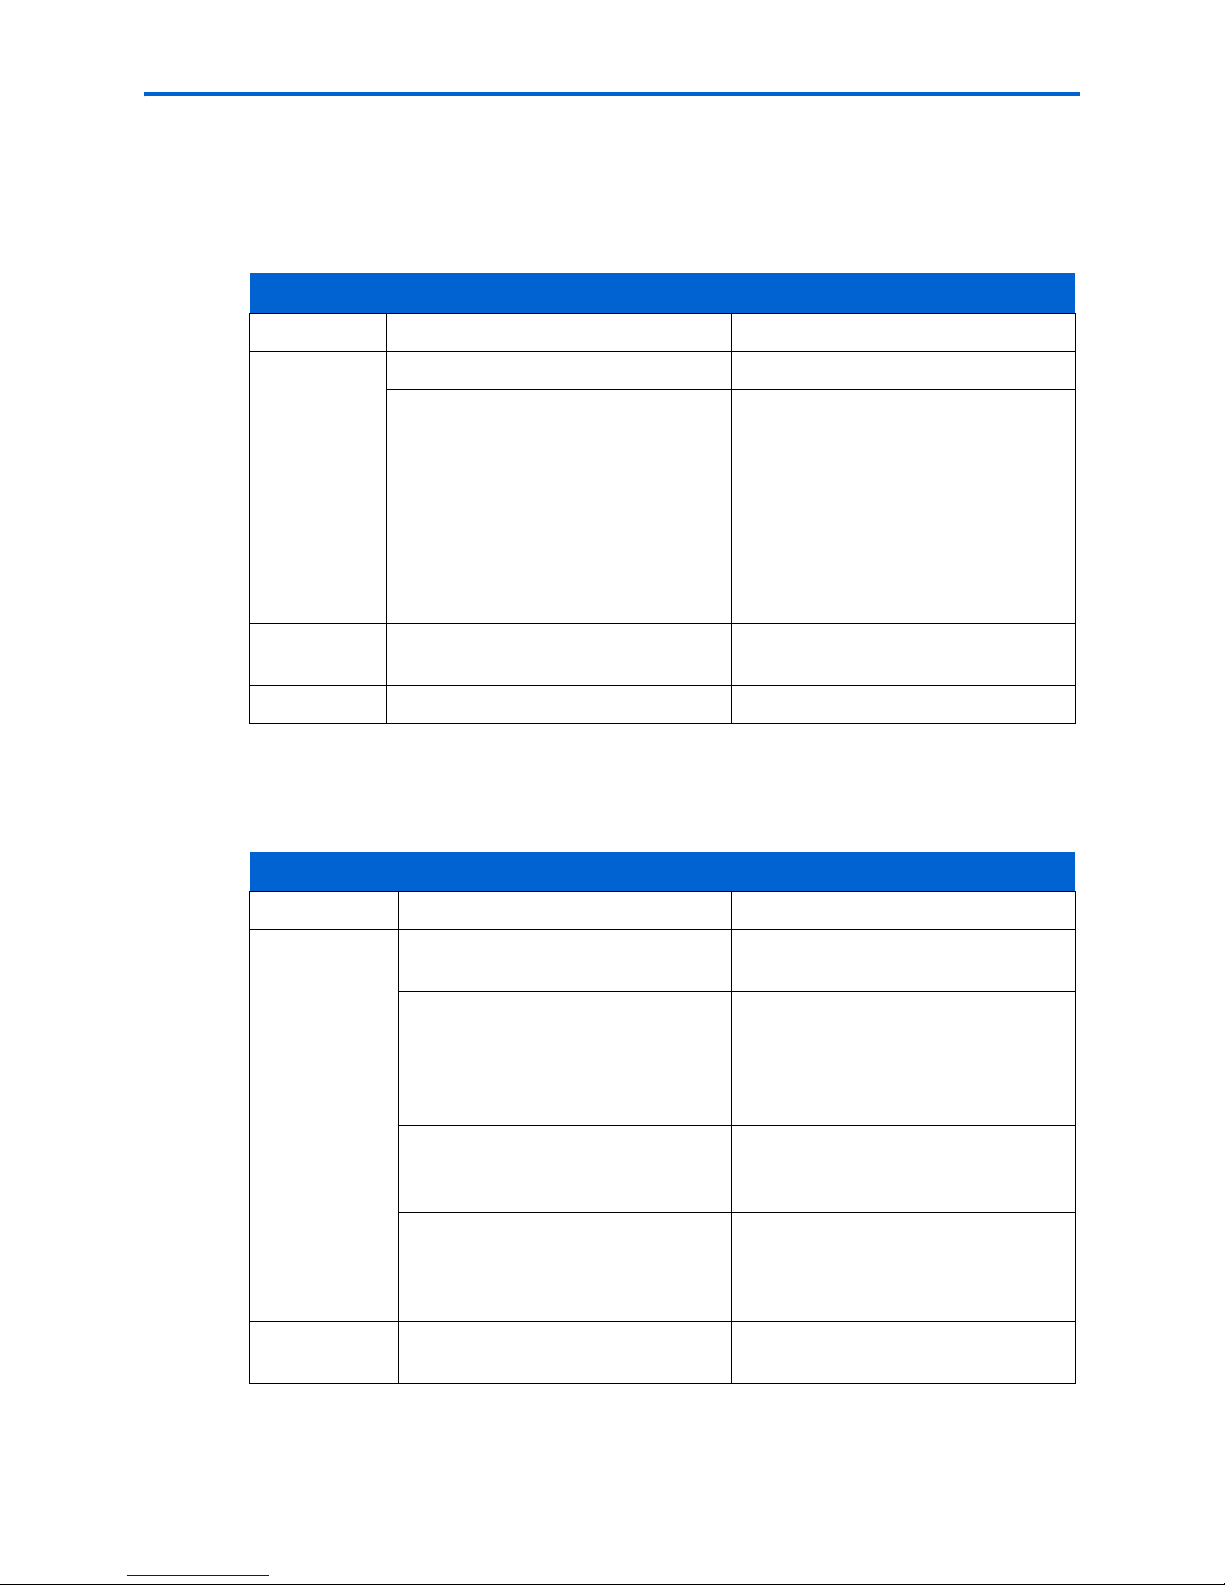
Using the on-screen keyboard
The on-screen keyboard displays in the ESP 7 All-in-One printer LCD screen for the
following tasks performed on the control panel:
• Entering authentication information, such as a security string, for connecting the printer
to a wired (Ethernet) or wireless (Wi-Fi) network, in the Network Settings menu
To maneuver around the on-screen keyboard, use the 4–way navigation buttons, described
on page 9, and the
OK button, described on page 10.
12 Kodak ESP 7 Printer User Guide
Page 21

Using the All-in-One printer menus
1 2
5
4
3
Use the menus on the LCD screen to select stand-alone tasks (that is, tasks that can be
performed without your computer), such as copying documents or photos; printing photos
stored on memory cards, USB drives, Kodak Bluetooth adapter (“dongle”), or digital
cameras plugged into the printer.
Using the appropriate menu, you can also initiate tasks that will be completed on a
computer connected to the printer, such as transferring photos from a compatible device
connected to the printer (such as a memory card, digital camera, or USB drive) to the
computer.
Your printer updates the content of the menu dynamically, according to the tasks you
perform.
Menu layout
A description of how the menus are displayed in the printer control panel is shown in the
illustration and the legend below.
Chapter 2
Number Description
1
2
3
The Menu Title displays at the top of the menu. It names the category of available
options; for example, Copy Document Options, Print Photo Options, etc.
The text displayed in the Quick instruction section, when displayed below the Menu
Title, describes how to activate the selected menu option. For example, “Press OK to
continue”, etc.
Any option in a row with a white background has not been selected. To use the
option in a white row, you must navigate to it by pressing either the
button on the control panel. See “Using the 4-way navigation buttons” on page 9.
Kodak ESP 7 Printer User Guide 13
or the
Page 22
Printer Overview
Number Description
4
5
Menu structure
The top-level menu on your All-in-One printer is called the Main menu. When you press
OK on most Main menu items, another menu displays. You can press Start as specified in
the Quick instruction section beneath the menu title (see item 2 in the “Menu layout”
illustration and accompanying table, above) to initiate a task.
You can review details about each menu available in your All-in-One printer using the
information below:
Main menu option When you press OK:
Copy Document Displays Copy Document
The Current Value content displayed between
setting only when you have more than one setting available. For example, On/Off;
Yes/No; a number representing a quantity; etc..
The option in the row with the golden background is the selected option. Its
functionality is enabled when you press the appropriate control panel button. When
or are pressed, the selected menu option changes according to the direction
used. See “Using the 4-way navigation buttons” on page 9.
Options menu
andsymbols indicates the active
To review details about the
option:
See “Copy Document Options” on
page 52
Copy Photo Displays Copy Photo Options
menu
View and Print Photos Displays Print Photos Options
menu
Scan Displays Scan Options menu See “Scan options” on page 58
Network Settings Displays Network Settings
menu
Printer Settings Displays Printer Settings
menu
Maintenance Displays Maintenance menu See “Maintenance Options” on
Help Displays Help menu See “Help menu” on page 1
See “Copy Photo Options” on
page 53
See “Print Photos Options” on
page 43
See “Network Settings options” on
page 26
See “Printer settings options” on
page 22
page 62
14 Kodak ESP 7 Printer User Guide
Page 23
Status lights
The tables below describe the meaning of each light and condition, and offer tips on what
action to take.
Chapter 2
On/Off Light
Light Status
Off
Blinks
On
Most power supplies used with this ESP All-in-One printer are equipped with a status light which
illuminates when electricity is applied. If you cannot determine if the power supply is working properly
contact Kodak Service & Support for assistance.
Light Status Cause Action/Solution
The printer is turned off. Press On/Off to turn the printer on.
The printer does not have power
applied.
The printer is initializing or busy. None. Allow the printer to finish the
The printer is ready. None.
Cause Action/Solution
Ensure that the printer power cord is
properly plugged into the back of the
printer.
Verify that the power supply and or
power cord LED is lit.
Check that the power supply is
connected to the power cord, and that
it is properly connected to the
electrical outlet.
initialization process.
Printer Power Cord Light
Off The printer power cord is not
properly connected to the printer.
The electrical power cord is not
properly connected to your electrical
outlet.
The electrical outlet has no power. Plug a working device into the wall
The problem may lie with the power
supply.
On The power supply is supplying power
to the printer.
Kodak ESP 7 Printer User Guide 15
Reconnect the printer power cord plug
to the printer.
Reconnect the cord to the electrical
outlet. Ensure that the electrical
power cord is fully connected to the
alternating current (AC) adapter at
the end of the printer power cord.
outlet to test it, or have it checked by
an electrician.
Check the power supply status light, if
available. As needed, visit Kodak.com
for additional troubleshooting steps,
or contact Kodak Service & Support.
None.
Page 24
Printer Overview
Light Status Cause Action/Solution
Memory Card Slot Light
Off Either the memory card is not
inserted or is improperly inserted in
the card slot.
Blinks The internal card reader is
initializing or communicating with a
memory card.
On A memory card is properly inserted
in the card slot.
Attention Light
Light Status Error
Off None.
Blinks (slow)
The LCD screen
describes the
error.
Paper jam.
Paper tray empty.
Paper carriage stall.
Paper size or type mismatch.
Change ink cartridge.
Ink cartridge not readable.
Printhead not calibrated.
Unit open, scanner lid open, rear access door open.
Too many image sources.
Printhead not installed.
Unable to read memory card or USB host device.
Remove and reinsert the memory card.
None.
None.
Blinks (fast) Ink cartridge(s) inserted incorrectly.
Ink cartridge(s) not installed.
On Media sensor failure.
Printhead failure.
Scanner failure.
16 Kodak ESP 7 Printer User Guide
Page 25
Wi-Fi Status Light
Light Status Cause Action/Solution
Chapter 2
Off This indicates that the Wi-Fi radio
is turned off and the printer is not
connected to a wireless network.
Blinks
continuously
Blinks
intermittently
The LCD
screen
displays an
error
message
On The Wi-Fi radio is turned on and
If you acknowledge the error message by pressing OK, the light will go off. However, if the
Wi-Fi radio is not turned off and the printer cannot establish a connection to an existing Wi-Fi
network, the light will resume blinking, and the error message will display again.
The Wi-Fi radio is turned on and
the printer is searching for available
wireless networks within range.
The Wi-Fi radio is turned on and:
• The printer cannot find any
available wireless networks
within range.
or
• The Wi-Fi network connection
has been interrupted, or is too
weak to send signals to and
from the printer.
there is a working connection
between the printer and a wireless
network.
None.
None, unless you want to stop the
connection process. If so, turn the Wi-Fi
radio off.
Press OK to turn off the error message
on the LCD screen and then turn the
Wi-Fi radio off.
Run the Wi-Fi Setup Wizard to find and
connect to an available wireless network
within range.
None.
All-in-One printer Home Center software
Kodak Home Center software is installed on your computer during the setup process. The
software functionality for Windows or Macintosh users is described below.
Home Center for Windows
Once installed, Kodak All-in-One printer Home Center software allows you to print, copy,
scan, and configure your All-in-One printer from your Windows XP or Vista computer.
To open the Home Center software window on your computer, use the Home Center icon
on the Desktop or in the Start Menu.
From the All-in-One printer Home Center main menu, selecting one of the six menu items
enables you to:
• Scan pictures and documents
Kodak ESP 7 Printer User Guide 17
Page 26

Printer Overview
• Enhance and copy pictures
• Enhance and print images
• Configure settings for printing, copying, and scanning from the control panel
• Access the Kodak Tips and Projects Center Web site
• Order supplies from the Kodak Web site
The functions of the three small icons located in the upper-right corner of the Home Center
window are shown below:
Returns you to the main Home Center window
Displays the Status Monitor
Displays a Help panel for the Home Center software
Home Center for Macintosh
After installing the software on your Macintosh OS X computer, you can select the Home
Center from the System Preference's
in the Printer List, clicking the
use the Home Center icon displayed in your Dock.
Print & Fax pane by selecting your All-in-One printer
Print Queue button, and clicking the Utility icon. Or, you can
The Home Center window displays three tabs: Select, Setup, and Maintenance.
From the
printers.
From the
settings:
AiO Printer: This option lets you:
Select tab, you can select your All-in-One printer from a list of connected
Setup tab, you can configure stand-alone printing, copying, and scanning
• Synchronize your printer’s date and time to the computer
• Select what quality you prefer for printing on plain (not photo-quality) paper
• Specify whether a date will be printed on the front of a photo printed from the
All-in-One printer
• Specify whether the printer automatically applies “scene balance” to digital pictures
it prints
• Change the name of the printer
Scan: This option lets you configure settings for scanning, saving, and specifying the
application(s) used for opening and editing scanned pictures and documents.
18 Kodak ESP 7 Printer User Guide
Page 27

Chapter 2
From the Maintenance tab, you can:
• Print a test page
• Align the printhead
• Run a printhead nozzle correction
• Clean the printhead
• Click About this Printer to view the printer model number, its Kodak Service Number,
and the version of printer firmware used to operate the printer
From both the
Setup and Maintenance tabs you can:
• Order Supplies: This option allows you to order supplies online from the Kodak web
site.
• View/Hide Status: This option opens a drawer displaying the configuration status of
your All-in-One printer.
Kodak ESP 7 Printer User Guide 19
Page 28

Printer Overview
20 Kodak ESP 7 Printer User Guide
Page 29

3
Setting Up Your Printer
Use this chapter to set up and start using your Kodak All-in-One printer.
Selecting a printer location
Place your printer on a clean, flat surface in a dry, well-ventilated location, away from
direct sunlight. Avoid areas with high levels of dust and debris. Do not expose the printer
and paper to ventilation ducts, open doors, or high traffic, as airborne particles can affect
picture quality.
Allow enough space on all sides of the printer to comfortably connect and disconnect
cables, change ink cartridges, and remove or load paper.
To ensure getting good signals from your networked computer(s), minimize obstacles
between the network router and the printer (and other wireless devices, such as
Bluetooth–enabled camera phones, etc.). The printer will function best with as clear a “line
of sight” as possible between it and the router.
In addition, keep the printer away from microwaves, and away from 2.4 GHz wireless
telephone handsets.
Configuring printer settings
Printer settings can be adjusted in two ways: via the control panel or the Home Center
software that comes with your printer (see Home Center Help for more details).
Configuring basic settings
1 From the control panel, press Menu.
2 Press
3 Press
4 Press
until Printer Settings is selected, and then press OK.
until the parameter you want to configure is selected, and then press OK. To
review the available options and settings, see “Printer settings options” on page 22.
or to configure the Date and Time, Tagged Image Printing, Control Panel
Settings
, Language, or Reset All Settings.
Kodak ESP 7 Printer User Guide 21
Page 30
Setting Up Your Printer
5 Press or as needed to change the default value. The default value is displayed at
the right margin of the setting. When the setting is highlighted, the current value is
bracketed between the
andsymbols.
6 Press
OK to save the setting(s).
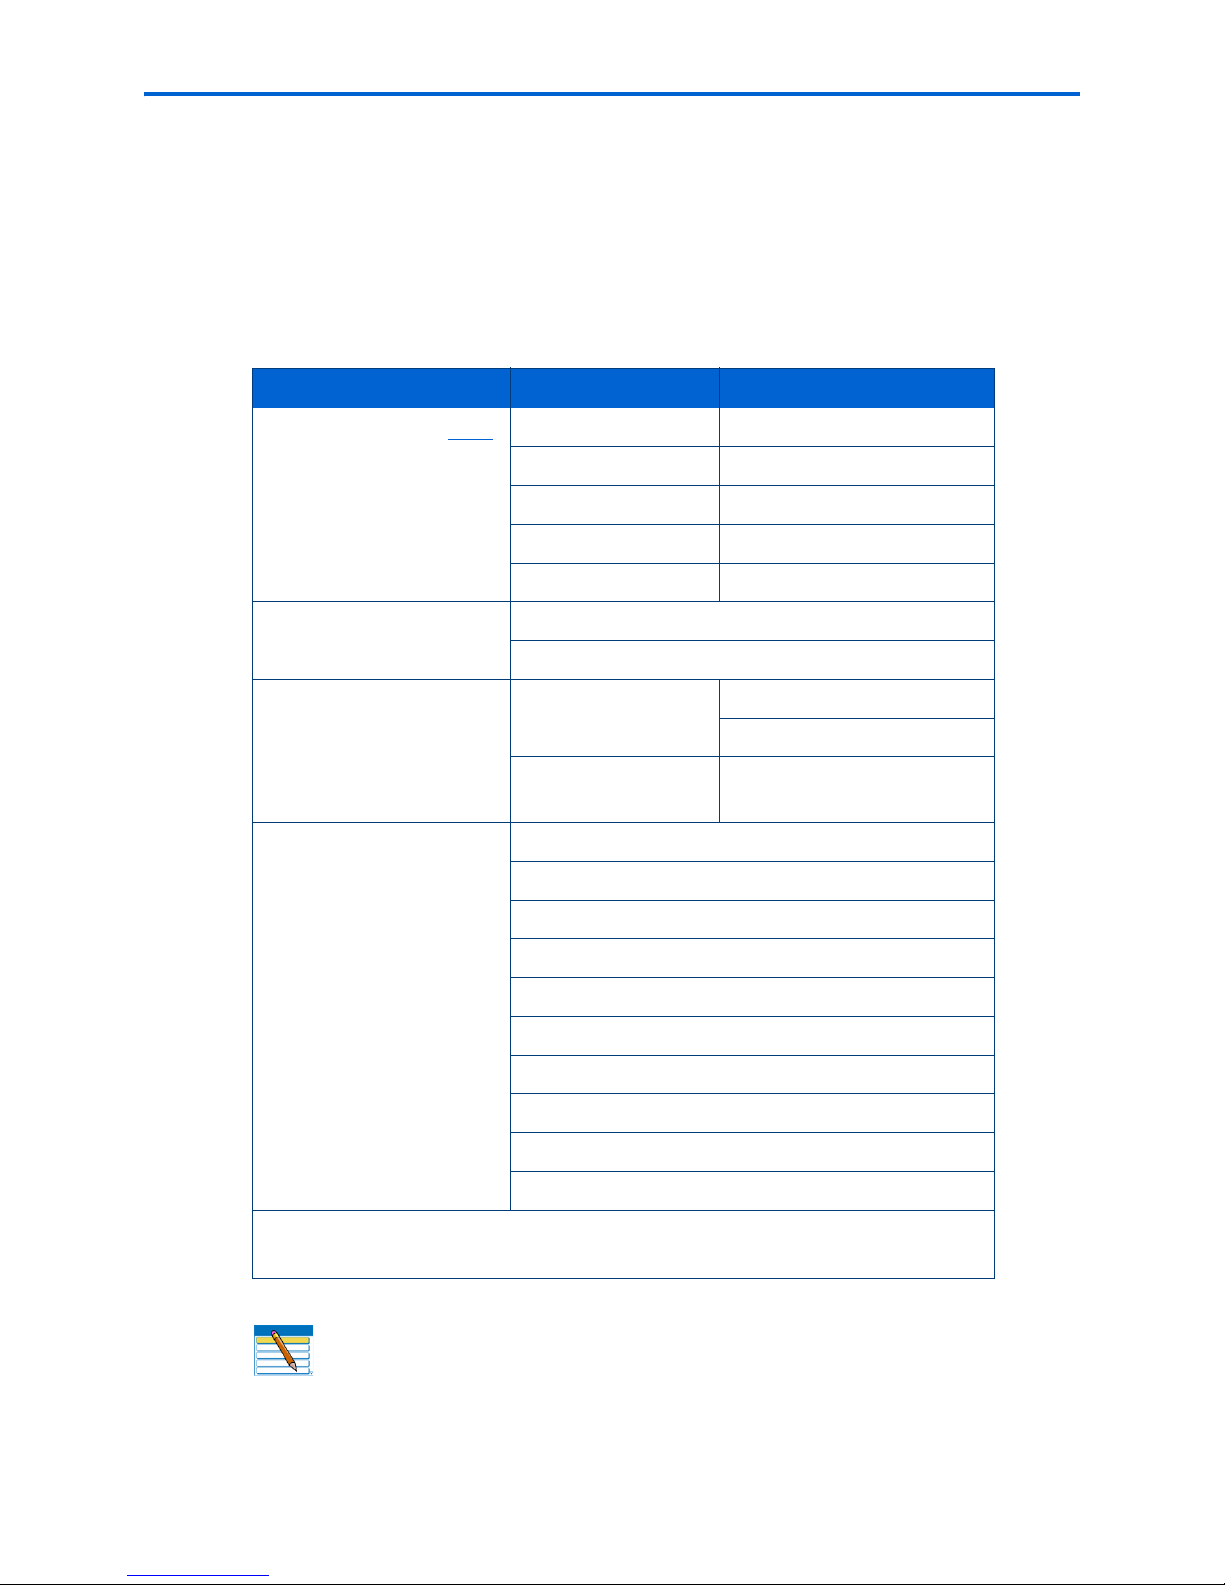
Printer settings options
Menu Options Options Settings
Date and Time (
below)
Tagged Image Printing
Control Panel Settings Button Sounds
see Note
Year 2007 - 2099
Month January - December
Day 1 - 31
Hour 0 - 12 or 0 - 23
Minute 00 - 59
On
Off
On
Off
Time to Low Power
1-4 hours, in .5 hour
increments
Language
Note:
Restoring the factory defaults from the Reset All Settings option will not
English (U.S.)
English (International)
Deutsch
Français
Français (Canada)
Italiano
Español
Castellano
Português
Nederlands
change the settings for any of the following:
Note: Setting the date and time via the control panel is a separate task from
stamping the date and time on photo prints. You can also synchronize the printer's
date and time using the Home Center software.
Language, Date and Time.
22 Kodak ESP 7 Printer User Guide
Page 31

Setting your Kodak printer as the default
For Windows XP
1 Click Start, point to Settings, and then double-click Printers and Faxes.
Chapter 3
2 Right-click the icon for the Kodak ESP 7 printer, and then select
Printer
on the shortcut menu.
For Windows Vista
1 Click Start, click Control Panel.
2 Click
3 Right-click the icon for the Kodak ESP 7 printer, and then select
Hardware and Sound and then click Printers.
Printer
on the shortcut menu.
For Macintosh
Whenever a new printer is installed on the Macintosh operating system, it becomes the
default printer. If you have more than one printer connected to your computer, use the
following steps to change your default printer.
1 Click
2 In the
3 Select the Kodak ESP 7 printer from the list of available printer as the default.
System Preferences.
Hardware section click Print & Fax.
Configuring network settings
Set as the Default
Set as the Default
You can connect your ESP All-in-One printer to a wired (Ethernet) network or to a wireless
(Wi-Fi) network. You may refer to the “Start Here” booklet that came with your printer, or
review the following sections as needed.
Networking resources
This section only covers how to setup your printer with your existing network. It presumes
you have a working understanding on how your network is configured. Additional
resources for related topics, information, and network troubleshooting are available at
www.kodak.com/go/inkjetnetworking.
If you are unsure of how your network is configured, please contact your network
administrator or your internet service provider for assistance.
Configuring an Ethernet network connection
You will need the following items to connect the All–in–One printer to a wired (Ethernet)
network:
Kodak ESP 7 Printer User Guide 23
Page 32

Setting Up Your Printer
• A functional Ethernet network that includes a router, switch, or hub with an
Ethernet port
• A CAT-5 (or higher) Ethernet cable
Ethernet setup
1 Plug one end of the Ethernet cable into the Ethernet port located on the back of the All–
in–One printer and the other end into an available port on your Ethernet router or hub.
2 Turn on the printer, if necessary.
3 From the control panel, press
until Network Settings is selected.
Press
4 Press
5 Verify the connection.
OK.
Menu.
Configuring a wireless network connection
You can connect your printer to aN 802.11 wireless (Wi-Fi) network from the All-in-One
printer control panel.
24 Kodak ESP 7 Printer User Guide
Page 33

Chapter 3
The wireless (Wi-Fi) network status light on your printer has the following conditions:
LED Status Description
Fully Lit When lit, signals that a wireless (Wi-Fi) network
connection has authenticated to the router, but
your connection may not be active. You can
verify the connection through the Network
Settings menu.
Blinks when
• searching for an available Wi-Fi network
within range
• existing signal is too weak to transmit
Blinking
The LED has a repetitive cycle of blinking, then
resting for 15 seconds, followed by blinking
again. The Wi-Fi radio will continue to attempt
connection to the network until a connection is
established.
What you need to know before you connect
To connect your ESP 7 All-in-One printer to a wireless network, you will need the
following:
• A laptop or desktop computer equipped with a network interface card or wireless
networking support, and the Kodak software installed
• A working 802.11 wireless network. Kodak recommends that you use a wireless access
point/router that uses Dynamic Host Configuration Protocol (DHCP)
• Internet access (preferably Broadband access such as cable or DSL)
• Your network name (SSID). You can obtain your SSID from the wireless router or the
access point using the router’s embedded web server. See the manufacturer’s
documentation provided with your wireless system for more information.
• Your WEP key or WPA passphrase. You can obtain your WEP Key or WPA passphrase
from the wireless router or the access point using the router’s embedded web server
• Your network security string, if applicable
• Disable your firewall or accept the firewall prompts to allow installation
If you are unsure about any of the items listed above, please contact your network
administrator or your internet provider for assistance.
Kodak ESP 7 Printer User Guide 25
Page 34

Setting Up Your Printer
Configuring basic wireless (Wi-Fi) settings
Note: You will need to know the network name (SSID) of the Wi-Fi network, and
its security string to connect your printer to the network successfully. Contact
your Internet provider or the person who helped you configure your network to
assist you.
Caution: If there is an Ethernet cable plugged into the Ethernet port on the back
of the printer, unplug it before starting this task.
1 From the control panel, press Menu.
2 Press
3 The message states
4 As needed, press
until Network Settings is selected, and then press OK.
Turn Wi-Fi Radio On, press OK. If the message states Turn Wi-Fi
Radio Off
, move to the next step.
, , or to view or configure an item, and then press OK.
Network Settings options
If the printer has not been configured to connect to the Wi-Fi network or the printer Wi-Fi
radio is turned off, the LCD screen displays the options below:
Menu Options Settings / Action
Wi-Fi Setup Wizard
Turn Wi-Fi Radio On / Off
View Network Configuration
Print Network Configuration
Manual IP Address
Press OK to start the Wizard.
Press OK to toggle between the Wi-Fi radio on or off
states.
Press OK to view the configuration on the LCD screen.
Press OK to print the network configuration.
Press OK to display the Manual IP Address menu.
Wi-Fi setup wizard
Review the procedures below and use the one that suits your network setup.
Connecting to a listed network
1 Complete Steps 1 and 2 of “Configuring basic wireless (Wi-Fi) settings” on page 26.
2
Wi-Fi Setup Wizard is the first option; press OK to select it.
Note: The Wi-Fi radio is turned on automatically when Wi-Fi Setup Wizard is
selected.
3 The printer searches for available Wi-Fi networks detected; then displays the list in
alphabetical order on the LCD screen. The illustration below shows an example list. The
row containing each <Network name> listed also shows the strength of the signal
(shown below as xx%) as a percentage between 0 and 100, where 100 is the highest
possible strength.
• For best performance the signal strength should be at least 50%.
26 Kodak ESP 7 Printer User Guide
Page 35

Chapter 3
• If more Wi-Fi networks are detected than can be shown on the LCD screen, the
display includes the
LCD screen. As appropriate, press
network you want to use.
(page down) symbol and/or the (page up) symbol on the
or on the control panel until you locate the
The last two options displayed are
networks
.
Note: In your setup, instead of <Network name> as shown in the illustration
Unlisted network and Rescan for wireless
above, the LCD screen will show the actual network name (SSID), without the
brackets, and the signal strength, displayed as a percentage, of each available
Wi-Fi network within range.
4 With the desired network selected, press
OK. You may need network identification
information such as a security string, in order to authenticate your connection.
Note: You will need to know the network name (SSID) of the Wi-Fi network and
its security string to connect your printer to the network successfully. Contact
your Internet provider or the person who helped you configure your network to
assist you.
5 If you are looking for a Wi-Fi network that does not broadcast its SSID, see “Connecting
to an unlisted network” below.
Note: If your printer was last connected to an available network on the list, the
network settings are saved and the printer will automatically attempt to reconnect
you to that network.
6 If the network requires the entry of a security string, the keyboard will be shown on the
LCD screen. Press
, , orto select a key. Press OK.
7 Enter the security string. The correct upper and lower case characters and numbers are
required.
Note: To erase any letters or numbers entered in error, select <BKSP>
(backspace) and press OK.
Kodak ESP 7 Printer User Guide 27
Page 36

Setting Up Your Printer
Key/Passphrase/
Security String
WEP Key
WPA /WPA2 phrase
5 or 13 ASCI characters; case-insensitive
or
10 or a 26 Hexidecimal digits; case-insensitive.
8-63 printable ASCI; case-sensitive characters.
Description
8 After completing your entry, select the DONE key, and then press OK.
LED Status Description
Fully Lit When lit, signals that a wireless (Wi-Fi) network
connection has authenticated to the router, but
your connection may not be active. You can
verify the connection through the Network
Settings menu.
Blinks when
• searching for an available Wi-Fi network
within range
• existing signal is too weak to transmit
Blinking
The LED has a repetitive cycle of blinking, then
resting for 15 seconds, followed by blinking
again. The Wi-Fi radio will continue to attempt
connection to the network until a connection is
established.
The LED will be continuously lit when you are connected to a wireless network. This does
not guarantee you are connected. You must verify that you are connected. See “Verifying
network configuration” on page 30.
Connecting to an unlisted network
1
Wi-Fi Setup Wizard is the first option; press OK to select it.
2 If your network does not appear in the list and is configured to not broadcast its SSID,
select
Unlisted Network and press OK.
3 Follow the prompts to enter the network name using the keyboard visible on the LCD
screen. Press
, , orto select a key. Enter the alphanumeric string accurately,
using the same upper and lower case letters as your SSID. After completing your entry,
select
DONE, and then press OK.
4 Select
WEP or WPA/WPA2 as required for your network's security setup, and then press
OK.
5 Enter the security information required using the LCD screen keyboard.
• Press , , orto select a key. Select <BKSP to erase any incorrect
characters. Then select
DONE and press OK.
28 Kodak ESP 7 Printer User Guide
Page 37

Chapter 3
6 After the confirmation message appears on the LCD screen, press OK to display the
Network Settings menu.
Scanning for Wireless Networks
If you don’t see your network in a list or want to change your network.
1 Select
2 Press
Rescan for wireless networks.
OK.
Setting up an IP address
If you have discovered that you are connected to the access point but you are not
connected to the network, you may need to set up your IP address on the printer.
1 From the Network Settings menu, select
2 Select one of the options displayed:
• Dynamic (DHCP)
• Automatic (Private)
• Manual (Static)
3 Press
4 Depending on the IP address type specified, you may be prompted to enter an IP
OK to continue.
address, a Subnet Mask, a Gateway Address, and a DNS Server address. Press
making each entry. See your network provider for more information.
All address entries are made in the following format: 000.000.000.000. Any address
or subnet mask that has only 2 characters between stops shall have a leading zero
entered in front of that number. For example:
Manual IP Address and press OK.
OK after
Address or subnet
mask format
149.89.138.149 149.089.138.149
149.2.40.149 149.002.040.149
Printer entry format
To obtain the IP Address on a Windows operating system:
You must use a computer on your network.
a Select
b Type
c Type
Start > Run.
cmd.
ipconfig and then press Enter. If configured, IP Address, Subnet Mask and
Gateway Address (Default Gateway) are shown.
Tip: Your Gateway Address is usually the router address.
To obtain IP Address on a Macintosh operating system:
Kodak ESP 7 Printer User Guide 29
Page 38

Setting Up Your Printer
You must use a computer on your network.
a Open
b Under
System Preferences.
Internet and Network, click Network. Select the Wireless Network. Your IP
address will be shown.
Verifying network configuration
You can verify that you are connected to a network from your ESP 7 All-in-One printer
menu.
1 Press until Network Settings is selected, and then press OK.
2 Press
3 Press
4 Look for the text
until View Network Configuration is selected, and then press OK. When you
select this menu item, the printer displays the configuration settings for both Ethernet
and Wi-Fi networks on the LCD screen.
until the second page appears.
Connected Network SSID. Your network name should be listed.
Printing network configuration
When you select this option, a print of your current network configuration settings is
generated. Settings with no values are displayed as zeros.
1 Press
2 Press until Print Network Configuration is selected, and then press OK
until Network Settings is selected, and then press OK.
Installing your printer on additional computers on the same network
For Windows
To install the printer on another computer in your network, use the following steps:
1 Install the Kodak software that came with your printer on the target computer.
2 Run the Kodak Printer Network Setup Utility. This is located on the
Programs
procedure is not necessary.
3 Select
should be detected and driver installations begin. If you have more than one printer
connected to your network, select the printer then click
4 After the driver installation completes, click Next to proceed.
The printer will be named Kodak ESP 7-XXXXwhere XXXX is a number unique to your
printer.
> Kodak >Kodak Printer Network Setup Utility. If Macintosh, this
Connect via Network - Wireless / Wi-Fi then click Next to proceed. The printer
Next.
Start > All
30 Kodak ESP 7 Printer User Guide
Page 39

Chapter 3
For Macintosh
To install the printer on another computer in your network, use the following steps:
1 Install the Kodak software that came with your printer on the target computer.
2 Click
3 Click
4 Click the + sign to add the printer.
5 Select the Kodak ESP 7printer from the list of available printer(s).
The printer will be named Kodak ESP 7-XXXXwhere XXXX is a number unique to your
printer.
System Preferences.
Print & Fax.
Switching the printer connection type
You can change the way you connect to your All-in-One printer at anytime.
For Windows
USB to Wi-Fi
To convert the USB connection from a PC to a wireless network connection:
1 Disconnect the printer from the computer.
2 Use the Windows Control Panel to delete the printer from you computer.
3 Configure the wireless network from the printer front panel. See “Configuring a wireless
network connection” on page 24.
4 Press
5 Press until Network Settings menu is selected, and then press OK.
6 Select
7 Run the Kodak Printer Network Setup Utility. This is located on the
8 Select
9 After the driver installation completes, click Done to proceed.
10 The printer will be named Kodak ESP7-XXXX where XXXX is a number unique to your
Menu.
View Network Configuration and confirm you have an IP address.
Start > All
Programs
procedure is not necessary.
should be detected and driver installations begin. If you have more than one printer
connected to your network, select the printer then click
printer.
> Kodak >Kodak Printer Network Setup Utility. If Macintosh, this
Connect via Network - Wireless / Wi-Fi then click Next to proceed. The printer
Next.
Kodak ESP 7 Printer User Guide 31
Page 40

Setting Up Your Printer
USB to Ethernet setup
To convert the USB connection from a PC to an Ethernet connection:
1 Disconnect the printer from the computer.
2 Use the Windows Control Panel to delete the printer from you computer.
3 Connect the printer to the network (LAN port on Router) with an Ethernet cable.
4 Run the Kodak Printer Network Setup Utility. This is located on the
Programs
procedure is not necessary.
5 Select
should be detected and driver installations begin. If you have more than one printer
connected to your network, select the printer then click
6 After the driver installation completes, click Done to proceed.
7 The printer will be named Kodak ESP 7-XXXX where XXXX is a number unique to your
printer.
> Kodak >Kodak Printer Network Setup Utility. If Macintosh, this
Connect via Network - Ethernet cable, then click Next to proceed. The printer
Next.
Start > All
Wi-Fi to Ethernet
To convert the Wi-Fi connection from a PC to an Ethernet connection:
1 Connect the printer to the network (LAN port on the Router) with an Ethernet cable.
Ethernet to Wi-Fi
To convert the Ethernet connection from a PC to a Wi-Fi connection.
1 Disconnect the Ethernet cable from the printer.
2 Configure the wireless network from the printer front panel. See “Configuring a wireless
network connection” on page 24.
3 Press
4 Press until Network Settings menu is selected, and then press OK.
5 Select
Menu.
View Network Configuration and confirm you have an IP address.
For Macintosh
USB to Wi-Fi
To convert the USB connection from a Macintosh to a wireless network connection:
1 Disconnect the printer from the computer.
2 Use the Windows Control Panel to delete the printer from you computer.
3 Configure the wireless network from the printer front panel. See “Configuring a wireless
network connection” on page 24.
4 Press
32 Kodak ESP 7 Printer User Guide
Menu.
Page 41

5 Press until Network Settings menu is selected, and then press OK.
Chapter 3
6 Select
7 Open
View Network Configuration and confirm you have an IP address.
System Preferences then click Print & Fax. Click + button to view a list of
available printers that can be added. Network printers are labeled “Bonjour” under
“Kind”.
8 The printer will be named Kodak ESP 7-XXXX where XXXX is a number unique to your
printer.
9 Select your printer and click
Add.
USB to Ethernet Setup
To convert the USB connection from a Macintosh to an Ethernet connection:
1 Disconnect the printer from the computer.
2 Use the Windows Control Panel to delete the printer from you computer.
3 Connect the printer to the network (LAN port on Router) with an Ethernet cable.
4 Open
5 The printer will be named Kodak ESP 7-XXXX where XXXX is a number unique to your
System Preferences then click Print & Fax. Click + button to view a list of
available printers that can be added. Network printers are labeled “Bonjour” under
“Kind”.
printer.
6 Select your printer and click
Add.
Wi-Fi to Ethernet
To convert the Wi-Fi connection from a Macintosh to an Ethernet connection:
1 Connect the printer to the network (LAN port on the Router) with an Ethernet cable.
Ethernet to Wi-Fi
To convert the Ethernet connection from a Macintosh to a Wi-Fi connection:
1 Disconnect the Ethernet cable from the printer.
2 Configure the wireless network from the printer front panel. See “Configuring a wireless
network connection” on page 24.
3 Press
4 Press until Network Settings menu is selected, and then press OK.
5 Select
Menu.
View Network Configuration and confirm you have an IP address.
Kodak ESP 7 Printer User Guide 33
Page 42

Setting Up Your Printer
34 Kodak ESP 7 Printer User Guide
Page 43

4
Handling Paper
Your Kodak All-in-One printer accepts print stock of various types and sizes, including
letter-and legal-size plain paper, photo paper, transparencies, T-shirt transfers, envelopes,
cards, and labels. It automatically detects the size and whether or not photo paper is loaded
into the paper tray. Kodak photo paper contains barcodes that allow your All-in-One printer
to detect the paper type that optimize your photo prints.
The bottom paper tray accepts media from 6 to 9 inches wide, and from 7 to 14 inches long
(see the Note
capacity is 40 sheets of 4X6, 4X7, or 5X7 inch paper.
Handling paper
Follow the precautions below when handling paper:
on page 36); its capacity is 100 sheets of 20 lb. plain paper. The top tray
• Hold the paper by the edges; avoid placing your fingerprints on it.
• Do not touch the glossy side of photo paper.
• Store paper flat, away from direct sunlight and heat (such as in a car parked in the sun).
Loading the paper trays
Things to keep in mind
• Before you start loading any type of media into the printer, lift the paper output tray
• Pull the paper stop (at the edge of paper output tray) until it is fully extended.
• If the paper you are going to use is less than A4 size, lift the hinged end of the paper
stop toward you until it is perpendicular to the paper stop. This prevents the printed
paper from sliding off of the paper output tray as it exits the printer.
Kodak ESP 7 Printer User Guide 35
Page 44

Handling Paper
• If the paper you use is longer than A4 size, including Legal and panoramic photo
paper, make sure that the hinged end of the paper stop lays flat and is NOT pulled
up. The longer paper should balance on the paper output tray without sliding off.
Loading plain paper
Caution: This is crucially important when you are printing two or more
sheets of long paper. Long paper that cannot extend straight to its full
length when output from the printer can fold behind the object ahead of
it. The curl can result in a job that dissatisfies you, and it can also cause
a blockade preventing paper still being printed from exiting the printer
properly.
Although a paper curl should not interrupt a job involving just one sheet
of long paper, when a sheet’s clean exit from the printer is impeded
because the sheet before it is curled by the paper stop, the current
sheet also curls upon itself, generally behind rather than atop the sheet
that came before. This process repeats until the trapped sheets jam the
paper inside the printer.
Note: Review “Things to keep in mind” above.
1 Pull the bottom paper tray toward you.
Note: To load media that is more than A4 size, such as 4X12 inch panoramic
photo paper or legal plain paper, you must first extend the bottom paper tray to its
full length. To do so:
a Remove all paper from the tray, as needed.
b Press and hold the paper tray
extension-release, located on
the inside of the front of the
lower paper tray.
c Pull the tray extension toward
you gently until it stops moving
easily. DO NOT pull the
extension far enough to
disengage from the paper tray.
d Let go of the tray release and then load the paper in the tray.
Tip: To return the lower paper tray to its default size, press and hold the extension-
release and push the tray until the extension stops moving, and then let go.
2 As needed,
squeeze and slide the paper edge guide on the tray to the left so that it does
not block the paper from laying flat.
3 Insert the media into the paper tray, print side down with its near edge against the
paper stop.
4 As needed, squeeze and slide the paper edge guide to align it to the left edge of the
media.
36 Kodak ESP 7 Printer User Guide
Page 45

5 Lower the paper output tray.
6 Gently push the tray forward until it is aligned with the edge of the paper output tray.
Loading photo paper
Note: Review “Things to keep in mind” on page 35.
Chapter 4
1 Remove all other paper from the paper tray you plan to use.
2 Insert photo paper into the paper tray print-side down, with the short edge forward. Do
not overload the tray.
3 Slide the paper forward until it stops.
4 Squeeze the paper edge guide and slide it to the right until it just touches the loaded
paper.
5 Lower the paper output tray.
Gently push the tray forward until it is aligned with the edge of the paper output tray
Kodak ESP 7 Printer User Guide 37
Page 46

Handling Paper
Loading envelopes
Warning: Do not load envelopes with cutouts or cellophane windows in this
printer.
Note: Review “Things to keep in mind” on page 35.
1 Remove all other paper from the paper tray you plan to use.
2 Place one or more envelopes along the right edge of the paper tray, with the front side
down and the envelope flaps pointing toward the left side of the tray.
3 Squeeze the paper edge guide and move it to the right until it just touches the loaded
envelope(s).
4 Close the paper tray and lower the paper output tray.
Loading legal size paper
1 Remove all other paper from the bottom tray.
2 Press and hold the paper tray extension-
release, located on the inside of the front of
the bottom paper tray.
3 Pull the tray extension toward you gently
until it stops moving easily. DO NOT pull the
extension far enough to disengage from the
paper tray.
4 Let go of the tray release and then load the paper in the tray.
5 Squeeze the paper edge guide and move it to the right until it just touches the loaded
paper.
6 Squeeze the paper edge guide and move it towards the printer until it just touches the
loaded paper.
7 Push the paper tray in towards the printer.
8 Press the bottom paper extender tab on the front left edge of the tray while pushing the
paper tray in towards the printer.
38 Kodak ESP 7 Printer User Guide
Page 47

Loading originals
Loading an original for copying or scanning
Chapter 4
To copy or scan a document or photo, place your original directly on the scanner glass,
print side-down, against the silver arrow on the right-front corner.
Kodak ESP 7 Printer User Guide 39
Page 48

Handling Paper
40 Kodak ESP 7 Printer User Guide
Page 49

5
Viewing and Printing Photos
You can print .jpeg (.jpg) photo images directly from PictBridge cameras connected to the
front panel of your All-in-One printer. You can print virtually any file type from digital
cameras, USB flash (“thumb”) drives, and memory cards connected to the front panel on
your All-in-One printer. You can also print files from a PC or Mac computer connected to
your All-in-One printer computer.
Note: For assistance on printing from a connected computer to your printer, refer
to the instructions from the software application (such as a word-processing or
image-editing program) used to send the file to the printer or review your
computer’s operating system instructions.
Although your printer is compatible with the Kodak 8-in-1 USB card reader (sold
separately) as well as other Kodak USB card readers, it may not be compatible with other
manufacturers’ card readers.
Warning: Do not remove a storage device (memory card, USB drive, or digital
camera) from the printer while it is being accessed, or you may damage the files on
it. Safely remove or disconnect the device.
You can safely remove the storage device when the blue status light located
above the memory card slots stops blinking.
Kodak ESP 7 Printer User Guide 41
Page 50

Viewing and Printing Photos
Viewing photos
Insert one of the following devices into the appropriate opening:
Note: Always use the USB host port on the front of the printer. To avoid an error,
use only one slot or port at a time.
Device Type Printer Slot
Memory Card Memory Card Reader
Portable Storage Drive USB port
Digital Camera USB port
Kodak Bluetooth dongle USB port
Note: If Tagged Image Printing is enabled on this printer (see “Configuring printer
settings” on page 21), it detects a Digital Print Order Format (DPOF) file when you
insert a memory card. The printer LCD screen prompts you to verify that you want
to print tagged images. See “Printing tagged images ” on page 46.
Most memory cards will work with this printer. When you insert a memory card, connect a
camera, or portable flash drive to the printer, the last photo taken is displayed first.
Caution: Do not insert more than one device, such as a USB thumb drive or
memory card, into the printer at a time, or you will get an error message. Also,
never remove or disconnect a memory card from its slot unless the blue light
near the slot is not blinking.
Note: Photos stored on a PictBridge camera are displayed on the camera’s LCD
screen only. See “Printing photos from a PictBridge camera ” on page 44, as
needed.
Configuring photo print settings
You can change the factory default print settings for your printer using the control panel.
Windows users may adjust some settings using Home Center software (see Home Center
Help, discussed on page 17, for information on using Home Center).
1 Insert a memory card into the appropriate slot, or plug a USB flash drive or digital
camera to the front panel USB port. The last photo is displayed first.
2 From the control panel, press
3 Press
until the option you want to configure is selected, and then press OK.
Menu.
4 As needed, press
5 Press
42 Kodak ESP 7 Printer User Guide
OK to save the setting for the current print job.
orto change the setting.
Page 51

6 To save the setting as the default value, select Save as Default and press OK.
Chapter 5
7 As needed, press
then press
OK to return to viewing and selecting photos for printing. Or, press Start to
print the selected photo(s) with the selected settings.
Print Photos Options
.
Menu Options View Settings / Select Settings
View Photos OK
Transfer All to PC OK
Rotate This Photo OK
Quantity
Tray Selection
Print Size
or until View Photos is selected in the Print Photos menu, and
or
or
or
1- 99
Top Tray
Bottom Tray
3.5x5
4x6
4x7 (High Def)
Quality
Color
Scene Balance
Add Date to Prints
Save as Defaults OK
or
or
or
or No
4x12 (Panoramic)
5x7
8x10
8.5x11
(2x3) Wallet
Normal
Best
Draft
Color
Black & White
On
Off
Yes
Your All-in-One printer automatically adjusts the print output to the best available
quality for images printed on photo paper. You need to set
Normal or Best only when printing images or documents on plain printer paper.
Kodak ESP 7 Printer User Guide 43
Plain Paper Quality to Draft,
Page 52

Viewing and Printing Photos
This printer is capable of automatically adjusting scene balance improvements (or the
brightness) of photos printed from camera cards and USB connected devices. The default
is
On.
The default setting does not print the date on the photo print.
Printing photos
Printing photos from a PictBridge camera
You can print photos directly from a PictBridge camera, which controls photo selection and
printing.
1 Load the desired paper tray with photo paper, print side down.
2 Connect a PictBridge camera to the USB port located on the front panel of your printer.
3 Use your PictBridge camera to select and print the photos.
Printing photos from non–PictBridge digital cameras, memory cards,
and USB flash drives
Caution: This printer does not support portable USB “flash” drives that:
• Require third party access software
• Are encrypted
• Contain multiple partitions
• Were formatted using any of the following file storage systems:
• New Technology File System (NTFS)
• Mac OS Standard (HFS) or Mac OS Extended (HFS Plus)
The printer can read data stored on USB flash drives formatted using only the
File Allocation Table (FAT) system.
If a flash drive is plugged into the USB port on the front panel that the printer
cannot read, the printer does not display photos, makes an audible sound
(“beep”), and displays an error message on the LCD screen.
See the first Tip on the following page for a work–around if your flash drive
cannot be read by your printer.
44 Kodak ESP 7 Printer User Guide
Page 53

Chapter 5
Tip: If you would like your printer to print photos stored on a non–FAT
formatted device, or stored as non–.jpeg files, you must first send the files to
your computer to be read.
• Windows computers can read NTFS–formatted drives
• Macintosh computers can read HFS– and HFS Plus–formatted drives
• Third–party applications which run on either Windows or Macintosh
computers can read many different image file types
Use your computer to explore the files stored on the flash drive while it is still
plugged in. Navigate to and open the file in the computer, or transfer the file(s)
to the computer hard drive. Then, print the file from your computer.
1 Connect a digital camera or portable USB drive to the front panel USB port or insert a
memory card to the appropriate card reader on the front panel.
The printer displays the photos on the LCD screen, last photo first.
2 Load the paper tray with photo paper, print side down.
3 On the control panel, press
oruntil a photo you want to print is displayed on the
LCD screen.
4 Press
OK to select the photo. A check mark displays on the LCD screen to indicate your
action. If you change your mind and want to de-select the photo from printing, press
OK again; the check mark is removed.
Tip: To select and print all the photos on a memory card or portable USB device
which has not yet been selected, hold down the
down the
OK button again for 2 seconds de-selects all the photos.
OK button for 2 seconds. Holding
5 If you are satisfied with the image shown, you can modify the quantity of copies to be
printed by pressing
decrease any quantity greater than 1, press
6 If you want to specify different print parameters for the photo, press
Print Photos Options menu. A sample of the menu is shown in the illustration
the
until the number you want is shown on the LCD screen. To
until the number you want displays.
Menu to display
below.
7 Here you can press
displayed between the
you want.
Kodak ESP 7 Printer User Guide 45
until the parameter you want to adjust is selected. If a value is
and symbols in the row, pressor to select the value
Page 54

Viewing and Printing Photos
8 Press Start to print the selected photo, or press until View Photos is selected.
9 Press
10 Repeat this process as needed.
oruntil you view another photo you want to print.
Note: Each photo is automatically deselected after it has been printed.
Printing tagged images
The Digital Print Order Format (DPOF) is an industry-standard file that can be created by
some digital cameras. Camera selected photos are photos you tag for printing with your
digital camera. When you select photos with your camera, the camera creates a DPOF file
that identifies which photos have been tagged for printing. Your Kodak All-in-One printer
can read the DPOF file from the memory card so you do not have to re-select the photos to
print.
Note: Not all digital cameras support tagging or the creation of tagged image files.
Refer to your camera’s user guide to ensure it supports this function.
When you print tagged photos, the selected layout is applied unless your camera allows
selection of sizes. If not specified by the DPOF information, the current default print photo
size and other settings will be used.
Printing from a Bluetooth–enabled device
Bluetooth wireless technology allows wireless connectivity between compatible electronic
devices.Your printer allows you to print .jpeg images from a Bluetooth–enabled device,
using an optional Kodak USB Bluetooth 2.0 USB adapter.You can purchase the Kodak
Bluetooth adapter from Kodak at www.kodak.com/go/accessories.
The Kodak Bluetooth adapter (shown below) supports connectivity between your All–in–
One printer and the following Bluetooth–enabled devices:
• Mobile camera phones
• Personal Digital Assistants (PDAs)
• Digital still cameras
• Computers
The Bluetooth adapter will not work when plugged directly into
computers, Kodak printer-docks, other types of Kodak printers or
devices made by other manufacturers. This adapter works exclusively
with Kodak All-in-One printers.
46 Kodak ESP 7 Printer User Guide
Page 55

Chapter 5
To enable Bluetooth wireless connectivity, plug the Kodak Bluetooth adapter into the USB
port located on the front panel of your printer.
Note: Before you can transmit photos to your printer from a Bluetooth–enabled
device, you must first “pair” the printer and the device so that they can
communicate. This “pairing” is performed from your device’s interface. Review the
instructions for pairing that came with you Bluetooth–enabled device, as needed.
When the device is searching for other Bluetooth enabled devices to pair with and
if your printer is within range of the device (see “Range” below), your printer will
appear in the list, with a name starting with
rename it, as appropriate.)
If your device prompts you for the printer’s personal identification number (PIN) to
authenticate and initiate the connection, enter
Bluetooth devices do not use a Print command. You must use the device’s Send function to
transmit an image stored on it to the All–in–One printer. Only one file can be sent from the
device at a time. Once received, your printer will print the image automatically, using the
default settings.
ESP. (Your device may allow you to
1111.
Range
When the device and the printer are connected, you can send photos from your Bluetooth
device to the printer. Your printer supports connectivity to one Bluetooth device at a time.
For the highest transfer speed, Kodak recommends keeping a maximum distance of 10
meters (32.8 feet) between Bluetooth devices, as they may not work reliably beyond this
range.
Printing multiple photos
When you select a print size that is smaller than the paper size, this printer automatically
lays out multiple photos using the least amount of space, minimizing paper waste when
separating the photos.
Printing panoramic photos
You can print a panoramic photo on 4 x 12 paper, or two panoramic photos on U.S. letter or
A4 paper; some cropping will occur.
Kodak ESP 7 Printer User Guide 47
Page 56

Viewing and Printing Photos
Zooming and cropping photos
Your printer enables you to zoom in or out on a specific area of a photo. When you print
the photo, the photo is cropped so only the area bounded by the crop boundaries is
printed.
Caution: You cannot use the zoom or crop functions of this printer on photos
located on a PictBridge camera connected to the printer. All changes made to
photos stored on PictBridge camera are conducted on the camera.
Note: The changes you make to the photo apply only to viewing and printing the
photo, and will not be saved on the memory card or storage device.
1 Select an image from the display. As needed, see “Printing photos from non–PictBridge
digital cameras, memory cards, and USB flash drives” on page 44.
2 As desired, press
Print Size. Press the
Menu to display the Print Photos Options menu. The first option is
andnavigation buttons on the control panel to change the size
of the output that you want for the image, which will affect the zoom and crop displays.
Press
OK when you are satisfied.
3 Press
Zoom + to enable the zoom and crop function. You can enlarge the photo in .25X
increments, up to a 5X magnification. Press
Zoom – to decrease the magnification in
.25X increments, to 1X.
Note: The changes you make to the photo apply only to viewing and printing the
photo; they are not saved on the memory card or storage device.
4 Use the
,
, andnavigation buttons on the control panel to display the part of
the picture you want to print.
5 Press
OK when finished. The photo is displayed with the original view, and a border
(“crop box”) is displayed around the area you want to use.
Tip: You can make more precise zoom and crop adjustments to your photos on
your computer using photo editing software. To send a photo from the All-in-One
printer to your computer, see “Transferring images to a computer” below.
6 If you are satisfied with the image shown, press
crop box. If you want to specify additional print parameters for the photo, press
to display the
illustration below.
48 Kodak ESP 7 Printer User Guide
Start to print the area displayed in the
Menu
Print Photos Options menu. A sample of the menu is shown in the
Page 57

Chapter 5
7 Here you can press until the parameter you want to adjust is selected. If a value is
displayed between the
want.
andsymbols in the row, pressorto select the value you
8 Press
9 Press
10 Repeat this process as needed.
Start to print the selected photo, or press
OK.
oruntil you view another photo you want to print.
Note: If you want to print multiple copies of a photo is displayed on the LCD
screen, you can press
quantity greater than 1 shown, press
until the number you want is shown. To decrease any
Transferring images to a computer
You can transfer .jpg, .mov, or .wav files to your Windows or Macintosh computer from a
digital camera, memory card, device connected to your printer via a Kodak Bluetooth
dongle, and portable (USB) thumb drive connected to this All-in-One printer.
Note: To transfer large files, such as video files, from a memory card to a
computer, Kodak recommends using a card reader attached directly to the
computer instead of transferring the file(s) via the All-in-One printer.
Likewise, Kodak recommends transferring large groups of image files (400 or
more) stored on a memory card to a computer via a card reader connected to the
computer.
until View Photos is selected. Press
until the number you want displays.
Transferring images to a Windows computer
1 Connect the device to the appropriate slot on the front panel of your printer.
2 From the control panel press
screen.
3 Press
4 Press
Kodak ESP 7 Printer User Guide 49
until Transfer All to PC is highlighted, and click OK.
Start.
Menu to display the Print Photos menu on the LCD
Page 58

Viewing and Printing Photos
5 Follow the prompt on the computer.
Transferring images to a Macintosh computer
1 Connect the device to the appropriate slot on the front panel of your printer.
2 From the control panel, press
Menu to display the options on the computer monitor (for
a PictBridge camera) or the printer LCD screen (all other devices).
3 Press
4 Press
5 Press
until Transfer All to PC is highlighted.
OK.
Start.
6 Use iPhoto or Image Capture to complete the transfer.
50 Kodak ESP 7 Printer User Guide
Page 59

6
Copy Document 1
Copying
You can copy both images and documents directly from the control panel of your Kodak
ESP All-in-One printer. The printer produces high–quality color or black and–white copies
on a variety of paper types, including transparencies.
Note: Before using your All-in-One printer to copy a document or photo for the
first time, review the procedures for loading paper and originals in Chapter 4 on
page35.
Simple copying
Note: Copy Document is the first setting on your Kodak All–in–One printer. This
enables you to place a one–page document on the scanner glass, and, if you have no
need to change the default quantity, press
initiate a copying job.
1 Place the original (document or photo) face down at the right front corner of the
scanner glass.
Start from the Main menu to quickly
2 From the control panel, press
3
Copy Document is the first menu option. As
needed, press
4 Modify the quantity of copies to be printed by pressing
number you want is between the
decrease any quantity greater than 1 shown, press
displays.
5 Press
Start to initiate copying the document or photo.
to select Copy Photo.
Adjusting copy settings
You can change the default copy document settings for your printer using the control panel.
Depending on whether you are copying a photo or a document, select the appropriate
option submenu from the main menu.
1 From the control panel, press
Copy Document is the first option. As needed, press to select Copy Photo.
2
Menu.
on the control panel until the
andsymbols is displayed in the menu. To
until the number you want
Menu.
Kodak ESP 7 Printer User Guide 51
Page 60

Copying
3 Press OK to display the Copy Document Options (or Copy Photo Options) menu. A
sample view from the Copy Photo Options menu is shown in the illustration below.
4 You can press
between the
until the option you want to adjust is selected. If a value is displayed
andsymbols in the row, pressorto select the value you want.
5 Any changes you make to the copy settings apply only to the current copy operation
unless you save them as your default settings. To keep the settings as permanent, press
until Save as Defaults is selected; press OK, and then select Yes and press OK to
save the change(s) as the new default settings.
6 Press
Start to initiate copying the document (or photo).
The available copy settings are shown in the table below.
Copy Document Options
Menu Options
Quantity
Copy Size
Photo Paper
Quality
View Settings /
Select
or
or
Settings
1–99
Same Size
20%–500%
Automatic
Plain Paper
Quality
Color
Brightness
Save As Defaults OK
52 Kodak ESP 7 Printer User Guide
or
or
or
Normal
Best
Draft
Color
Black & White
−3 to +3
Page 61

Chapter 6
Scaling is anchored to the upper left corner of the original.
Same Size The copy is the same size as the original. Cropping occurs if the original is
larger than the paper size. The copy will contain white space if the original
is smaller than the paper size.
Scaling Press theorto set the scaling for your image. The choices are Same
Size
, which is 100% or Fit-to-Page to enlarge or reduce the image to fit on
Same Size is the default copy setting.
the page.
Plain paper quality output:
Draft Produces the fastest print speed, but the lowest quality.
Normal
Best
Copy Photo Options
Menu Options
Quantity
Copy Size
Delivers high-quality output and is the default setting. Normal prints
faster than
Best.
Produces the highest quality for all paper and eliminates the banding
(striping) effect that sometimes occurs in
Draft and Normal modes. Best
is the slowest print speed. If Kodak photo paper is loaded in the paper
tray, this setting is used.
View Settings /
Select
or
or
1–99
4x6
4x7 (High Def)
4x12 (Panoramic)
5x7
8x10
Settings
Photo Paper Quality
Plain Paper Quality
Color
Brightness
Kodak ESP 7 Printer User Guide 53
8.5x11
(Wallet) 2x3
or
or
Automatic
Normal
Best
Draft
Color
or
Black & White
or
−3 to +3
Page 62

Copying
Menu Options
Preview
View Settings /
Select
Settings
No
or
Yes
Save As Defaults OK
You need to specify a quality only for plain paper. If photo paper is loaded in the paper
tray, the printer will output the best available quality using the
the settings for plain paper copying, see "
Plain paper quality output
Automatic
setting. To review
" on
page 53
.
54 Kodak ESP 7 Printer User Guide
Page 63

7
Scanning
Scanning converts text and images from documents and pictures placed on the scanner
glass into electronic data; then sends the data to your computer. To scan using the
ESP 7 All-in-One printer, the printer must be connected to a computer. You can scan to the
following destinations:
• Kodak Home Center
• Memory card or USB flash drive connected to the printer using the appropriate opening
on the front panel of the computer
• Third–party scanner software application
• As a file on your computer
Before you start
Before you start scanning with this All-in-One printer, Kodak recommends that you use the
Home Center software to configure the default scan settings. This way, you can easily
manage the scan in your computer. See “All-in-One printer Home Center software” on
page 17 for additional information.
Using the Home Center software, you can adjust the following default settings for scanned
photos and documents:
• Applications used for file destination(s).
Caution: If you save a document scan to an application, the scan cannot
be later accessed by optical character recognition (OCR) software. If you
want to be able to edit the text of the document after scanning it, save
the scanned document as a file.
• File type used to save the scan.
• The default setting for saved documents is .pdf (Portable Document Format).
With third–party .pdf viewer software installed, this type of file can be viewed
on Web pages or computers. You may also save a scanned document as .rtf
(Rich Text Format). This is a standard file type which can be opened and edited
in standard word–processing software applications.
Kodak ESP 7 Printer User Guide 55
Page 64

Scanning
• The default setting for image files is .jpeg (Joint Photographic Experts Group)
format. This standard file type can be opened and edited in standard image
editing software applications, and can be viewed on Web pages.
• File storage location for saved scans.
• Windows: Document scans are saved by default in the My Documents folder,
and images are saved in the My Pictures folder. They are stored by default in
these locations in a folder titled with the current date.
• Rule for naming scan files.
• By default, scans are named “scan1”, “scan2”, etc.
• Default scan resolution and photo enhancement preferences.
• Color or black-and-white (Windows only).
• Print quality for scanning documents.
Before initiating a scan, you can also preview the scan in Home Center, and crop the output
as desired. When you are satisfied with the intended results, you can initiate the scan
directly from Home Center. See Home Center Help for instructions. To review how to
access Home Center help, see “All-in-One printer Home Center software” on page 17.
Scanning with Macintosh computers is accomplished by using the twain driver available
with your Kodak software. Scanning is supported with any twain-enabled software
application.
Simple scanning
Simple document scans
1 Place the original document at the right front corner of the scanner glass.
2 From the control panel, press
3 Press
4 Press
5 Note that the default
6 Press
until Scan is selected. Press OK.
until Scan To is selected. Note that, if your printer is connected to a local
computer, the default setting is
network, all of the available computers are listed in alphabetical order.
until Scan Destination is selected. As needed, press or to specify which
application on the computer will open the file. Kodak Home Center software appears on
the list by default.
Menu.
USB Connected Computer. If you are connected to a
Scan What setting is Document.
7 Press
8 When the Scanner dialog window displays on your computer, follow the prompts to
56 Kodak ESP 7 Printer User Guide
Start.
finish the scanning process.
Page 65

Simple image scans
1 Complete Steps 1–4 from “Simple document scans” on page 56.
Chapter 7
2 Press
3 Complete Steps 6–8 from “Simple document scans” on page 56.
until Scan What is selected. Press to specify Photo.
Caution: Although you can scan a document using the Photo option and save
it as an image (.jpeg) file, you will not be able to edit the text later in your
computer. If you want to edit a scanned document later, make sure that you
scan it as a Document, not as a Photo.
Scanning multiple originals simultaneously
When the Scan What option is set to Photo in the Home Center software, your All-in-One
printer can detect multiple photos placed on the scanner glass. Allow some space on the
scanner glass between each item, and use the Home Center software to save each photo as
a separate file. Any images on the scanner glass that overlap are interpreted by the
software as a single image file.
Caution: Home Center cannot interpret two or more documents, photos, or a
combination of documents and photos, as separate scanned items when the
Scan What option is set to Document.
Adjusting scan settings
You can change the default scan settings for your printer using the control panel. When you
change scan settings from the control panel, the settings apply only to the current scan job.
To apply scan settings to all future scan jobs, you can save your changes.
1 From the control panel, press
2 Press
3 Press
4 Here you can press
until Scan is selected.
OK to display the Scan Options menu. A sample of the menu is shown in the
illustration below.
until the option you want to adjust is selected. If a value is
displayed between the
you want.
Menu.
and symbols in the row, pressor to select the value
Kodak ESP 7 Printer User Guide 57
Page 66

Scanning
5 Any changes you make to the scan settings apply only to the current scan operation. To
keep the settings as permanent, press
press
OK.
until Save as Defaults is selected, and then
6 Press
The available scan settings are in the following table:
Scan options
Scan What
Scan To
Scan Destination
Save As Defaults
If you select
or .rtf) file, even if the original is a photo. If you select
scanned as an image file, and cannot be read by optical character recognition (OCR)
software.
If your printer is connected to a network, more than one computer name will appear in
this list. If your printer is connected to a printer by the USB cable, the computer name in the
menu is called
You must create a list of one or more applications using Home Center software for any
to display by name in the
separate setting in the display. (Kodak Home Center software is displayed by default; you
do not need to configure your destinations to include it.)
Start to initiate the scan.
Menu Options
Document
USB Connected Computer
and save the scan to a
View Settings /
Select
or
or
or
OK
Scan Destination
Settings
Document
Photo
Computer
Memory Card
File
[Application Name]
, the scan is saved as a document (.pdf
File
Photo, a text document will be
.
settings. Each application will appear as a
In addition, before using a
location where the files will be saved and with the file naming setting. This will prevent
problems later in finding the scan file on your computer.
58 Kodak ESP 7 Printer User Guide
Scan Destination
setting of
, familiarize yourself with the
File
Page 67

8
Maintaining Your Printer
Your Kodak ESP 7 All-in-One printer requires little maintenance. However, Kodak
recommends cleaning the scanner glass and lid backing regularly to remove dust and
fingerprints. Fingerprints and other debris on the glass or lid backing could slow down the
printer’s performance, and affect the quality and accuracy of scanning.
Service agreements are available in some countries. Contact dealers for Kodak products
for more information.
For recycling and or disposal information, contact your local authorities. In the U.S., visit
the Electronics Industry Alliance Web site at www.eiae.org
General care
.
Caution: Always disconnect the power on the All-in-One printer before cleaning
it. Do not use harsh or abrasive cleaners or organic solvents on the printer or any
of its parts.
• To clean the printer, wipe the outside with a clean, dry cloth.
• Keep the surrounding area vacuumed and litter-free.
• Protect the printer from tobacco smoke, dust, sand, other small particles (such as
crumbs), and liquid spills.
• Avoid placing objects on the printer.
• Keep the printer supplies away from direct sunlight and out of high-temperature
environments.
• Do not allow chemicals, such as suntan lotion, to come into contact with the painted
surface of the printer.
• If the printer has been exposed to bad weather or has water inside it, turn it off and let it
dry completely. If this does not solve the problem, contact customer support (see
“Contacting Kodak Customer Service & Support” on page 2).
Kodak ESP 7 Printer User Guide 59
Page 68

Maintaining Your Printer
Cleaning the scanner glass
For good copies and scans, ensure the printer's scanner glass and lid backing are clean;
dust the exterior as needed.
Warning: Do not use abrasives, acetone, benzene, or carbon tetrachloride on the
glass, as they can damage it. Do not place or spray liquid directly on the glass. The
liquid might seep under the glass and damage the device.
1 Unplug the printer and raise the lid.
2 Clean the glass with a soft cloth or sponge slightly moistened with a nonabrasive glass
cleaner.
3 Dry the glass with a lint-free cloth.
4 When finished cleaning, plug in the printer.
Cleaning the scanner lid
Minor debris can accumulate on the document backing located underneath the scanner lid
of the Kodak printer.
Warning: Do not use paper-based wipes, as these might scratch the underside of
the scanner lid. Do not use harsh or abrasive cleaners or organic solvents on the
printer or any of its parts.
60 Kodak ESP 7 Printer User Guide
Page 69

Chapter 8
1 Unplug the printer and raise the lid.
2 Clean the underside with a soft cloth or sponge, slightly moistened with a mild soap and
warm water.
3 Wipe the underside gently to loosen debris. Do not scrub.
4 Dry the underside with a chamois or soft cloth.
5 If further cleaning is needed, repeat the previous steps using isopropyl (rubbing)
alcohol, and wipe the underside thoroughly with a damp cloth to remove any residual
alcohol.
6 When finished cleaning, plug in the printer.
Monitoring and adjusting the printer's performance
From the control panel, you can perform many tasks to keep this printer in good working
order. For example, you can check the status of the printer’s inkjet nozzle to ensure highquality prints. Kodak recommends that you run a nozzle check if you are experiencing
changes in image quality. You can also use the
degradation in print quality.
1 Make sure that there are 5
2 Press
3 Press
4 As needed, press
5 Press
6 Follow the prompts on the LCD display to initiate or cancel the task.
Menu to display the main menu.
until Maintenance is selected.
until the desired option is selected.
OK.
These available maintenance options are shown in the following table.
–10 sheets of plain paper loaded in the bottom paper tray.
Printhead Alignment function if you see
Kodak ESP 7 Printer User Guide 61
Page 70

Maintaining Your Printer
Maintenance Options
Check Ink Levels OK
Menu Options Select
Check Paper Levels
Nozzle Check
Printhead Alignment
Clean Printhead
Print Test Page
Format Memory Card
Warning: Formatting will erase all the data on a memory card.
Tip: A printhead alignment and a check of the inkjet nozzle can also be initiated
OK
OK
OK
OK
OK
OK
from the Home Center software.
Windows: Open the Home Center Help panel by clicking Help on the Home
Center window, as needed. Click
Printhead Alignment.
Macintosh: Open Home Center window from the dock, and click Maintenance,
and then click
Nozzle Correction or Printhead Alignment.
Maintenance, and then click Nozzle Check or
Replacing ink cartridges
Your Kodak printer uses separate black and color ink cartridges. The ink levels are shown
on the control panel and in the printer software.
Caution: For the best quality prints, store ink cartridges in locations where the
temperature does not exceed 85°F (30°C).
Warning: Use genuine Kodak ink cartridges to ensure best results and avoid
printhead damage not covered under warranty. Third-party ink cartridges may not
work with your printer.
1 Make sure the printer is turned on.
62 Kodak ESP 7 Printer User Guide
Page 71

Chapter 8
1 Printhead
2 Color ink cartridge
3 Black ink cartridge
2 Open the printer access door by lifting from the recessed hand-holds on the sides of the
unit. .
The printhead moves to an accessible position for handling the ink cartridges. The ink
cartridges are seated in the printhead.
3 Wait until the printhead stops moving, then pinch the latch on the old ink cartridge with
your thumb and forefinger and lift it out of the printhead.
Note: You can take your used ink cartridges to most office supply or electronics
stores for safe disposal.
4 Open the box containing the new ink cartridge.
Kodak ESP 7 Printer User Guide 63
Page 72

Maintaining Your Printer
5 Remove the bagged ink cartridge from the box, tear open the bag at the notch, and
remove the ink cartridge.
Caution: Insert the ink cartridge immediately to prevent any drying of the ink.
6 Remove the orange cap from the cartridge by grasping the top edge and pulling/
rotating it off the ink cartridge. Discard the orange cap.
7 Insert the ink cartridge into the printhead.
64 Kodak ESP 7 Printer User Guide
Page 73

Chapter 8
8 Press down on the tab until you hear a click and feel the latch snap into position.
Note: Listen carefully during this step; make sure you hear the ink cartridges click
into place in the printhead. This seats the cartridges properly, and prevents ink from
being dispensed incompletely during your print or copy jobs.
9 Close the printer access door. The printhead moves to its ready position and prepares
the new ink cartridge for use (this could take up to a minute).
Replacing the printhead
If your printhead is damaged or broken, you may replace it yourself.
1 Make sure your printer is turned on.
2 Open the printer access door by lifting from the recessed hand-holds on the sides of the
unit.
Kodak ESP 7 Printer User Guide 65
Page 74

Maintaining Your Printer
1 Printhead
2 Color ink cartridge
3 Black ink cartridge
The printhead moves to an accessible position for handling the ink cartridges. The ink
cartridges are seated in the printhead.
3 Pinch the latch on the ink cartridge with your thumb and forefinger and lift it out of the
print head. Remove both ink cartridges.
Caution: Insert the ink cartridges into the newly installed printhead as soon as
possible to prevent any drying of the ink.
4 Unlatch the printhead by lifting the rectangular latch on the top of the printhead.
66 Kodak ESP 7 Printer User Guide
Page 75

5 Remove the old printhead from the carriage.
6 Remove the new printhead from its bag.
Chapter 8
Caution: Do not touch copper contacts on the printhead, as this may damage it.
7 Remove and discard the black plastic casing and the orange protective cap.
Kodak ESP 7 Printer User Guide 67
Page 76

Maintaining Your Printer
Listen carefully during this step; make
sure you hear the ink cartridges click
into place in the printhead. This seats
the cartridges properly, and prevents ink
from being dispensed incompletely on
your print or copy jobs.
8 Place the new printhead into the carriage.
9 Push firmly against the target label on the printhead until you hear it click into place.
10 Reinstall the ink cartridges. As needed, see “Replacing ink cartridges” on page 62.
11 Close the printer access door. The printer should now complete a printhead calibration
to ensure that it is ready for normal operation.
68 Kodak ESP 7 Printer User Guide
Page 77

Upgrading the printer software - for Windows
You can upgrade the software and firmware in your All-in-One printer with the most
recent release available. This requires an Internet connection.
Note: The firmware cannot be upgraded when your All-in-One printer is
connected via a network or Wi-Fi. Your All-in-One printer must be connected to
the computer with a USB cable in order to perform a firmware upgrade.
1 If your connection is via Ethernet, disconnect the Ethernet cable. If your connection is
via Wi-Fi, press
Radio off
2 Connect the printer to the computer with a USB cable. The computer must be
connected to the internet.
3 A pop-up window appears at the bottom right corner of your computer monitor stating
“Found New Hardware KODAK ESP 7 AIO, then it will change to “Found New
Hardware. Your new hardware is installed and ready to use.”
4 Open the Kodak AiO HomeCenter.
Menu. Navigate to Network Settings menu and press OK. Select WIFI
.
Chapter 8
5 Click the
6 Under the General Links, click
receive a pop-up window, or you can click on
7 Click
Help button to open the Help Panel.
Maintenance. If there is an update available, you will
Firmware Upgrade.
OK to upgrade. The printer software will begin to load. Do not turn off your printer
while the update is in progress.
8 When the update is complete click
OK.
9 Close the maintenance window. The printer firmware is updated.
10 Next you will update the Home Center software, as well as the printer and scanner
drivers.
11 Under the
Web Links on the Help Panel, click on Check for updates.
12 If an update is available, download it to your computer.
13 When the update is complete, disconnect the USB cable and reconnect your printer to
the Ethernet or Wi-Fi network.
14 Use the
Windows Control Panel to delete the printer from your computer. The USB
printer is named: Kodak ESP7 AiO This will remove the USB drivers.
Kodak ESP 7 Printer User Guide 69
Page 78

Maintaining Your Printer
Upgrading the printer software - for Macintosh
You can upgrade the software and firmware for in your All-in-One printer with the most
recent release available. This requires an Internet connection.
Note: The firmware cannot be upgraded when your All-in-One printer is
connected via a network or Wi-Fi. Your All-in-One printer must be connected to
the computer with a USB cable in order to perform a firmware upgrade.
1 If your connection is via Ethernet, disconnect the Ethernet cable. If your connection is
via Wi-Fi, press
Radio off
2 Connect the printer to the computer with a USB cable. The computer must be
connected to the internet.
3 Open a browser window and enter the following URL:
http://www.kodak.com/go/aiosupport.
4 Select your printer model.
Menu. Navigate to Network Settings menu and press OK. Select WIFI
.
5 Under
Downloads, select Software Driver and Firmware Downloads.
6 Select your operating system from the drop down list.
7 Download the software.
8 Double-click on the *.dmg file.
9 Double-click on
Install Software.
10 Follow the onscreen prompts on the installer.
11 Upon completion of the install, click
Restart. The Home Center software and the printer
and scanner drivers are updated.
12 Next you will update printer firmware.
13 Open a browser window and enter the following URL:
http://www.kodak.com/go/aiosupport.
14 Select your printer model.
15 Under
Downloads, select Software Driver and Firmware Downloads.
16 Select your operating system from the drop down list.
17 Download the firmware.
18 Double-click on the *.dmg file.
19 Double-click on
20 Upon completion of the install, click
70 Kodak ESP 7 Printer User Guide
Kodak AiO Updater.
Quit. The printer firmware is updated.
Page 79

9
Troubleshooting
Troubleshooting “quick start”
Kodak provides several methods to help you troubleshoot your All-in-One printer issues.
Here are some quick tips:
• Turn off your printer and then unplug it. Wait five seconds, and then plug the power
cord back into the printer. Finally, turn the printer back on.
• Confirm that you are using a 2.0 USB cable to connect the printer to your computer. If
you need to buy one, they are available online at www.kodak.com/go/aio
local electronics and printer retailer.
• Make sure that you have the most up-to-date All-in-One printer software and Help files
from the Internet. Visit www.kodak.com/go/support
, or from your
to download the latest files.
• View the troubleshooting information found in Kodak Home Center software on your
computer. After opening Home Center, click the question mark (
• Macintosh: The button is located at the lower-left of the Home Center window.
• Windows: The button is located at the upper-right of the Home Center window.
Use the Help window to view troubleshooting topics. (Windows users can also select
Troubleshoot from the Help panel on the main Home Center window.)
• You can also get troubleshooting help at the Kodak Web site. Visit www.kodak.com/
go/support for support for your Kodak printer.
Note: Many issues with degradation in performance or print quality can be
resolved by meeting or exceeding the recommended system requirements. See
Chapter 10 on page 71.
General troubleshooting
Printer fails to power on
Probable Cause
The power supply is not properly connected.
?) button:
Kodak ESP 7 Printer User Guide 71
Page 80

Troubleshooting
Corrective Action
• Make sure the electrical power cord is connected to the alternating current power
adapter and is plugged into a grounded power outlet or power strip.
• If using a power strip, make sure it is turned on.
• If using a switched power outlet, make sure the switch is on.
• Make sure the power outlet is supplying power.
• Verify the light on the Kodak printer power cord plug is lit.
Probable Cause 2
The USB cable was unplugged from the printer and then reconnected; or, power to the
printer is interrupted.
Corrective Action
Restart the computer.
Probable Cause 3
The USB cable is not 2.0 compliant.
Corrective Action
1 Replace the USB cable with a USB 2.0 compliant cable.
Note: For optimal quality and performance, use a good-quality high speed USB 2.0
cable. When connecting to the Kodak All-in-One printer, use the USB ports located
in the back of the computer. Any USB 2.0 hubs that are used should be selfpowered.
2 Restart the computer.
If none of the above corrects the problem, contact Kodak support.
Device not recognized
Probable Cause
Any of the following can prevent your Kodak All-in-One printer from reading a connected
device (digital camera, USB drive, or memory card).
• The camera is turned OFF.
• The USB connector on a USB drive is not fully inserted into the USB port.
• The memory card is not completely inserted, or is not inserted into the correct card slot.
• The file system on the device is corrupt.
• More than one device is inserted at a time.
• The USB device is not supported.
• The USB cable is faulty.
72 Kodak ESP 7 Printer User Guide
Page 81

Corrective Action
• Correct any connection problems and try again.
• If the file system is corrupt, reformat it.
• Disconnect the unsupported device.
Note: If the USB drive uses an NTFS or HFS formatting system, the printer may not
be able to read it. Macintosh users may need to transfer these files directly to their
computer, and then print to the printer from there.
Ink cartridge not recognized
Probable Cause 1
The color or black ink cartridge installed was not recognized.
Warning: Generic or non-Kodak ink cartridges may not function with the
All-in-One printer. Kodak recommends using genuine Kodak ink cartridges.
Corrective Action
Chapter 9
Install a genuine Kodak ink cartridge.
Probable Cause 2
One of the ink cartridges needs to be replaced.
Corrective Action
Replace the ink cartridge.
Multiple paper feed
Probable Cause
Multiple sheets of paper were pulled through printer.
Corrective Action
Caution: Kodak Inkjet paper is recommended for your Kodak All-in-One printer.
1 Remove the paper from the paper tray.
2 Carefully “fan” the paper to keep the sheets from sticking together.
3 Reload the paper tray. Do not overfill.
4 Press
Kodak ESP 7 Printer User Guide 73
OK.
Page 82

Troubleshooting
Multiple pictures not scanned properly
When scanning or copying, the Kodak printer can detect multiple images on the scanner
glass, straighten them, and create individual files. If you are having trouble with this
feature, check the following:
Probable Cause 1
Your photos are not placed optimally on the scanner glass.
Corrective Action
• Make sure that your photos do not overlap.
• Place photos away from the edges of the scanner glass.
• Some images do not scan well. Light-colored images may not be detected as separate
images.
• You may need to make adjustments to the scanning area using the Preview feature in
the Kodak Home Center.
Probable Cause 2
The scanner glass is dirty.
Corrective Action
Make sure the scanner glass is completely clean or the photos might not scan properly (see
“Cleaning the scanner glass” on page 60).
Probable Cause 3
The scanner lid is dirty.
Corrective Action
Clean the scanner lid (see “Cleaning the scanner lid” on page 60).
Probable Cause 4
The
Scan What Document option on the Scan menu was selected, instead of the
Scan What Photo option.
Corrective Action
Scan the photos again in the appropriate format.
No communication with computer
Probable Cause
Your Kodak printer is not connected to your computer.
Corrective Action
• Make sure your printer is plugged in and turned on.
74 Kodak ESP 7 Printer User Guide
Page 83

Chapter 9
• Make sure you are using the proper USB cable (USB 2.0).
• If you are using a USB hub to connect the USB cable to the computer, make sure that it
has power. Use a self-powered (connected to an electrical outlet) USB hub instead of
one that uses the computer’s internal power.
• Check the connection from your computer to your printer. Ensure that the square end of
the USB cable is plugged in to the USB port on the back of your printer, and the flat end
into a USB port on your computer.
• You may need to disconnect other printers or scanners from your computer.
• After checking connections, restart your computer.
• Make sure your computer meets the minimum system requirements, otherwise
upgrade your system if necessary.
For more information on connecting your printer to your computer, see the
booklet that came with your printer.
No paper feed
Probable Cause
The paper tray may be empty, or there may be a problem with the paper in the tray.
Corrective Action
If the tray is empty, load paper into the paper tray, then resume printing. Check for a
message from the printer status monitor (Windows) or the printer queue window
(Macintosh) on your computer. Check for a problem with the paper in the tray.
To check the paper
1 Inspect the paper and make sure no paper sheets are damaged in any way. Reload with
new paper, if necessary.
2 Carefully “fan” the paper to keep the sheets from sticking together.
3 Reload the paper tray. Do not overfill.
Start Here
Caution: Kodak Inkjet paper is recommended for your Kodak All-in-One printer.
4 Press
OK.
One or more of the colors on the calibration sheet is missing
Probable Cause
The printhead is not installed correctly. If the printhead has been working properly, it may
have come loose.
Kodak ESP 7 Printer User Guide 75
Page 84

Troubleshooting
Corrective Action
If the printhead has come loose:
1 Open the printer access door, then remove the black and color ink cartridges.
2 Press the printhead release button.
3 Lift the printhead out.
4 Reinsert the printhead and ink cartridges.
Note: See “Replacing the printhead” on page 65 for illustrated instructions for
performing this procedure.
Paper jam
Probable Cause
The paper did not advance, was not picked up properly from the paper tray, or is lodged
inside the printer.
Corrective Action
1 Remove the paper from the tray used when the jam occurred.
2 Turn off the printer.
3 Open the rear access area and pull the paper out from the rollers without tearing it.
4 Reload the paper tray, but do not overfill it.
If this does not resolve your printing issue, contact Kodak Service and Support
Caution: Kodak Inkjet paper is recommended for your Kodak All-in-One printer.
Caution: If the paper tears while removing it, make sure you remove all the torn
pieces. More jams are likely to occur when torn pieces are left in the printer.
.
5 Turn the printer on.
6 Press
OK.
Printer not responding
Probable Cause
The firmware or software is not in a ready state.
Corrective Action
• Turn the printer off and turn it back on.
• If the problem persists, unplug the power cord from the power supply and plug it back
in.
• If the problem continues to persist, restart your computer.
76 Kodak ESP 7 Printer User Guide
Page 85

Transfer pictures failure
Problem
Nothing happens when you try to transfer photos to the computer.
Corrective Action
• Remove the memory card or USB device and reinsert it.
• Check the power connection to the computer.
• If you are trying to transfer photos from a memory card and a PictBridge camera is
connected, disconnect the camera.
• Close any unnecessary software applications, and minimize any remaining application
windows. Follow any messages on the screen that may have been hidden by other
windows.
• Disconnect, then reconnect the USB cable from the printer to the computer.
• Make sure you are using a high-quality USB cable which is communicating with the
computer. (See “No communication with computer” on page 74.)
Chapter 9
• If the pictures are on a USB device, make sure it uses a supported file system (see
“Device not recognized” on page 72).
• Make sure your computer meets the minimum system requirements for using your
printer (see “General troubleshooting” on page 71). Upgrade your system if necessary.
User guide on the CD is obsolete
Probable Cause
The User Guide has been updated since the software CD was released.
Corrective Action
• Download the most recent version of the User Guide from Kodak.com.
Wrong paper size
Probable Cause
The print size or paper size you selected may be larger or smaller than the paper found in
the paper tray.
Corrective Action
1 Replace the paper in the paper tray with the correct size.
2 Press
If the situation continues, contact Kodak support.
Kodak ESP 7 Printer User Guide 77
OK.
Page 86

Troubleshooting
Macintosh OS X troubleshooting
Non-intel Mac only: black screen or screen freeze occurs when
applying printer settings via the Home Center software
Probable Cause
This error only occurs with non-Intel Macintosh computers running Leopard OS version
10.5. Apple has confirmed that there are problems running the latest version (Leopard) on
G5 processors.
Corrective Action
Upgrade to Macintosh OS 10.5.2.
Windows Vista troubleshooting
WIA (Windows Image Acquisition) error: service has
stopped working
This results in the inability to connect a camera and transfer pictures from the camera.
Neither the camera nor the printer is visible through the
the Print Photo Options menu.
Transfer All to My PC option on
Probable Cause 1
The USB cable is unplugged and reconnected to the printer.
Probable Cause 2
When a printer-terminated error occurs.
Probable Cause 3
Power is interrupted.
Corrective Action
Restart the computer and printer.
Home Center software on Windows works incorrectly following
software upgrade
Probable Cause
Some changes in the Home Center software on Windows systems may have been affected
by enabled Security and/or User Account Control settings.
Corrective Action
1 Right-click on the Home Center icon (shortcut) on the Desktop.
2 Select
3 Select the Compatibility tab.
78 Kodak ESP 7 Printer User Guide
Properties.
Page 87

4 Check the box that says “Run the program as an administrator”.
Print troubleshooting
Use this section to resolve print problems.
Envelope printing incorrect
Probable Cause
The envelopes are not loaded correctly.
Corrective Action
1 Remove the envelopes from the paper tray.
2 Straighten the stack of envelopes against a flat surface. Reload the stack into the paper
tray print side down, with the envelope flap aligned to the left.
3 Squeeze the paper guide and slide it to the right until it touches the edge of the
envelopes.
Chapter 9
Multiple-page document not printing in reverse order
(Windows only)
Note: On a Macintosh, Reverse Page Order printing is the default setting. See “To
set a Macintosh to print the first page of a document first:” below.
Probable Cause
The print settings on your computer are set to print the first page of your document first.
Corrective Action
Configure the printer to print the document in reverse order, so the pages are in the correct
order when printing is complete.
To set a Windows PC to print in reverse order:
1 On the Windows Desktop, click
2 In the Control Panel window, open Printers or Printers and Faxes.
3 In the Windows Explorer window, Right-click on the Kodak All-in-One printer in the
Name column, and then select Printing Preferences.
4 On the Printing Preferences window, select
Start > Settings > Control Panel.
Print last page first on the General tab.
Multiple-page document not printing in first-page-first order
(Macintosh only)
Probable Cause
The print settings on your computer are set to print the document in reverse order.
Kodak ESP 7 Printer User Guide 79
Page 88

Troubleshooting
Corrective Action
Configure the printer to print the document first-page first.
To set a Macintosh to print the first page of a document first:
1 On the File menu, select
2 On the Print dialog, select
3 Select the
Normal Page Order option.
Print.
Paper Handling.
PictBridge camera not detected
Probable Cause
The camera is not communicating with the printer.
Corrective Action
• Make sure the camera is turned on.
• Check the USB connections from the PictBridge camera to the printer.
• If disconnected, reconnect the USB cable from the PictBridge camera to the printer.
• Make sure the connected camera is PictBridge-compatible. See your camera or device
user’s guide for details.
• Check the camera batteries.
Picture cropped
• Change the picture quality setting (or resolution) on your digital camera to 3:2. See your
camera user’s guide for details.
• Adjust cropped photos using the Kodak Home Center software (Windows only) or
other image editing software on your computer.
• If you are printing from an application on your computer, select the proper paper size
from the printer options.
Note: Cropping may vary, depending on the selected picture size and size of the
output paper.
from each paper size so a portion will be cropped to fit perfectly on whatever paper
size was selected.
Picture print smudged
Probable Cause
Fingerprints are on the glossy side of paper.
Corrective Action
Handle paper by the edges.
The dimensions of the photo on the camera are slightly different
80 Kodak ESP 7 Printer User Guide
Page 89

Picture will not print
A selected picture does not print.
Probable Cause 1
The image file may be corrupt.
Corrective Action
Review the picture on the camera or computer and delete it if necessary.
Probable Cause 2
The image file may not be in JPEG format.
Corrective Action
The Kodak printer can print only JPEG files in stand-alone mode. Connect the printer to a
computer and use software to print other image formats.
Poor print quality
Chapter 9
Probable Cause
Low resolution image file or the printer may need maintenance.
Corrective Action
• Align the printhead (see “Monitoring and adjusting the printer's performance” on
page 61).
• Perform a nozzle check with the Home Center software.
• Clean the printhead from Home Center, or from the Maintenance menu on the printer
control panel. If the printhead is clogged, the printouts should begin to improve with
two or three cleanings. Repeat the cleaning cycle until the printout stops improving.
• If the problem still persists, you may need to replace the printhead (see “Replacing the
printhead” on page 65).
Kodak ESP 7 Printer User Guide 81
Page 90

Troubleshooting
Print skewed or slanted
Probable Cause 1
The paper is not properly loaded in the tray.
Caution: Kodak Inkjet paper is recommended for your Kodak All-in-One printer.
Corrective Action
Realign the paper in the paper tray.
1 Remove paper and check for wrinkles and tears.
2 Slide the paper edge guide away from the paper.
3 Straighten the stack of paper against a flat surface, and reload it into the paper tray.
4 Slide the paper edge guide up against the edge of the paper.
Probable Cause 2
More than one type or size of paper is loaded.
Corrective Action
Load only one type or size of paper at a time.
Print spotted
Probable Cause
Paper may be dirty.
Corrective Action
Use a dry, lint-free cloth to wipe clean. For excessive dirt or debris, thoroughly clean the
paper tray, and load new paper.
Print too dark
• Try taking the picture again with the flash on, or move within the flash range of the
camera. Refer to your camera user’s guide for details.
• Adjust the exposure compensation on your camera and try taking the picture again.
Refer to your camera user’s guide for details.
Note: When you are not using the printer, keep paper tray covers closed to keep
dust and debris from collecting on the paper or inside the printer.
• Edit the picture using Kodak Home Center (Windows only) or other image editing
software.
• Make sure the printer is not placed in direct sunlight or is not operating in a high-
temperature environment.
82 Kodak ESP 7 Printer User Guide
Page 91

Print too light
.
• Make sure the paper is loaded with the print side face down. Reload it if necessary.
• Try taking the picture again with the flash off. Refer to your camera user’s guide for
details.
• Adjust the exposure compensation on your camera and try taking the picture again.
Refer to your camera user’s guide for details.
• Edit the picture on your computer.
Printing slow
Chapter 9
Caution: For best results, use Kodak paper and ink cartridges for your Kodak
All-in-One printer.
Note: When printing a large number of prints, printing may slow down to prevent
the printhead from overheating.
• Make sure the printer is not placed in direct sunlight or is not operating in a high-
temperature environment (higher than 95° Fahrenheit or 35° Celsius).
• Close any unnecessary software applications.
• Make sure your computer meets the minimum system requirements. Upgrade your
system if necessary.
Printing stops
Printing stops during mid-print. Paper stops feeding, and status light may blink.
To check the paper:
1 Remove any loose paper from the printer. Check the paper access door in the rear of the
printer.
2 Inspect the paper supplies and reload with new paper if necessary.
3 Carefully “fan” the paper to keep the sheets from sticking together.
4 Reload the paper tray. Do not overload.
Caution: For best results, use Kodak paper and ink cartridges for your Kodak
All-in-One printer.
5 Press
Kodak ESP 7 Printer User Guide 83
Start to continue.
Page 92

Troubleshooting
White edges on borderless prints
Probable Cause 1
White edges can appear when there are slight misalignments between the printer and
paper. Some software applications are able to “hide” these small misalignments so that the
prints look borderless.
Corrective Action
• Realign the paper in the tray.
• Use the application's Fit to Page/Fill Page option, or resize the picture so it is slightly
larger than the paper size.
Probable Cause 2
If the image's proportions or dimensions are not compatible with the selected paper size,
the print usually will not be borderless. For example, if a square image is printed on 4 x 6inch paper, it will often print as a 4 x 4 inch image, with white edges on each side of the
print job.
Corrective Action 2
Crop the image so it is compatible with the selected paper size.
Copy troubleshooting
Copy cut off
Probable Cause
The original is larger than the paper loaded.
Corrective Action
When the original is larger than the paper loaded, use the
copy size to fit the size of the paper loaded.
Scan troubleshooting
Scan fails
Probable Cause 1
Your computer is not turned ON.
Fit to Page feature to reduce
Corrective Action
Turn on your computer.
84 Kodak ESP 7 Printer User Guide
Page 93

Probable Cause 2
Your Kodak printer is not connected to your computer.
Corrective Action
Connect your Kodak printer to your computer with a standard USB cable.
Probable Cause 3
The Kodak Home Center software is not installed.
Corrective Action
Insert the Kodak printer installation CD and install the software.
Probable Cause 4
Your computer system resources may be low.
Corrective Action
• Turn off your computer and the printer, and then turn them back on.
Chapter 9
• If the problem still persists, try scanning at a lower resolution.
Probable cause 5
The memory card to which you are scanning does not have enough free space to save the
scanned photo.
Corrective action
Remove some files from the memory card to free up some space.
Scanned image blank
Probable Cause
Your original is not placed correctly on the scanner glass.
Corrective Action
Place your original face down in the proper corner of the scanner glass.
Network troubleshooting
Wired network troubleshooting
Computer unable to detect the All-in-One printer
Probable Cause 1
Cables are not connected properly.
Kodak ESP 7 Printer User Guide 85
Page 94

Troubleshooting
Corrective Action
Check the following cables to ensure they are properly connected.
• Cables between the hub or router and your computer
• Cables between the All-in-One printer and the hub or router
• Cables to and from your modem or printer Internet connection (if applicable)
Probable Cause 2
Your Local Area Network card (LAN card) is not set up properly.
Corrective Action
Verify the setup of your LAN card.
To check your LAN card (Windows)
1 Open the Control Panel.
2 Double-click
3 In the
4 Click
System Properties dialog box, click the Hardware tab.
Device Manager.
System.
5 Make sure your card shows up under Network Adapters.
6 Refer to the documentation that came with your card.
To check your LAN card (Macintosh)
1 Click the Apple icon on the Menu bar.
2 Select
3 In the System Profiler, click
About This Mac and then click More Info. The System Profiler is displayed.
Network.
4 Make sure your LAN card appears in the list.
Probable Cause 3
You do not have an active network connection.
Corrective Action
Check to see if you have an active network connection.
To see if you have an active network connection
Check the two Ethernet indicator lights on the top and bottom of the RJ-45 Ethernet jack
on the back of the printer. The lights indicate the following:
Top light If this light is a solid green, the device is properly connected to the
network, and communications have been established. If the top light is
off, there is no network connection.
86 Kodak ESP 7 Printer User Guide
Page 95

Chapter 9
Bottom light This yellow light flashes when data is being sent or received by the
device over the network.
To establish an active network connection
1 Check the cable connections from the All-in-One printer to your gateway, router, or hub
to ensure connections are secure.
2 If the connections are secure, turn off the power on the All-in-One printer, and then turn
it on again. Press the
On/Off button on the control panel to turn the printer off, and
press it again to turn it back on. Also, turn off the power on your router or hub, and then
turn it on again.
No TCP/IP
Probable Cause
Your Local Area Network (LAN) card is not installed properly.
Corrective Action
Make sure your LAN card is installed properly and set up for TCP/IP. See the instructions
that came with your LAN card.
Printer not found
Probable Cause 1
The All-in-One printer is not turned on.
Corrective Action
Turn on the printer.
Probable Cause 2
You do not have an active network connection.
Corrective Action
Make sure you have an active network connection.
To make sure your network connection is active
1 If the connections are secure, turn off the power on the All-in-One printer, and then turn
it on again. Press the
press it again to turn it back on. Also, turn off the power on your router or hub, and then
turn it on again.
2 Check the cable connections from the printer to your gateway, router, or hub to ensure
connections are secure.
On/Off button on the control panel to turn the printer off, and
3 Make sure the printer is connected to the network with a CAT-5 or better Ethernet
cable.
Kodak ESP 7 Printer User Guide 87
Page 96

Troubleshooting
Probable Cause 3
Cables are not connected properly.
Corrective Action
Check the following cables to ensure they are connected properly.
• Cables between the All-in-One printer and the hub or router
• Cables between the hub or router and your computer
• Cables to and from your modem or printer Internet connection (if applicable)
Probable Cause 4
A firewall, anti-virus, or anti-spyware application is preventing the printer from accessing
your computer.
Corrective Action
Many firewall security programs have different levels of firewall security (Block All, High,
Medium, Low), and some high levels of protection may prevent certain software
applications and/or services from being permitted to operate through the network with
enabled firewall security.
Via the firewall security program on your PC, manually allow inbound and outbound
application permission through the firewall for the following services required for the
wireless All-in-One operations:
Bonjour Service
(C:\Program Files\Bonjour\mDNSResponder.exe)
Kodak AiO Network Discovery Service
(C:\Program Files\Kodak\Printer\Center\EKDiscovery.exe)
Kodak AiO Device Service
(C:\Program Files\Kodak\Printer\Center\KodakSvc.exe)
Kodak AiO Home Center
(C:\Program Files\Kodak\Printer\Center\AiOHomeCenter.exe)
Please visit http://www.kodak.com/go/inkjetnetworking for detailed instructions on
adding these firewall permissions for the Kodak printer network services for 20 of the top
rated firewall security programs on the market. Please also visit your firewall
Manufacturer’s online help website if necessary.
More advanced network users may also choose to allow inbound and outbound port
permission through their firewall for the following ports associated with the wireless
printer:
Port 5353 (UDP)
Port 9322 (TCP)
88 Kodak ESP 7 Printer User Guide
Page 97

Chapter 9
Probable Cause 5
A Virtual Private Network (VPN) is preventing the printer from accessing your computer.
Corrective Action
Try temporarily disabling the VPN before proceeding with the installation.
Note: The All-in-One printer functionality will be limited during VPN sessions.
Probable Cause 6
The Ethernet cable is not plugged in to the router, switch, or hub. The cable may also be
defective.
Corrective Action
Try reinserting the cables. Or, if necessary, try a different cable.
Probable Cause 7
The All-in-One printer is assigned an AutoIP address instead of DHCP.
Corrective Action
This indicates that the printer is not connected properly to the network. Check the
following:
• Make sure all cables are connected properly and securely.
• If the cables are connected properly, your access point, router, or home gateway might
not be sending an address. If this is the case, you might need to reset the device.
• Make sure the All-in-One printer is on the correct network.
• Restart your All-in-One printer.
Probable Cause 8
The printer is on the wrong Subnet or gateway.
Corrective Action
Print a network configuration page, and verify that the router and printer are on the same
subnet and gateway.
To print the network configuration page
1 On the control panel of the printer, press
2 Press
until Network Settings is highlighted, and then press OK.
Menu.
3 Press
Kodak ESP 7 Printer User Guide 89
until Print Network Configuration is highlighted, and then press OK.
Page 98

Troubleshooting
No IP address with cable modem (without a router)
Probable Cause
If you have a computer with a cable modem, a separate Local Area Network (LAN) for your
other computers, and no DHCP or router, you must use
the other computers and to the printer.
Corrective Action
To obtain an IP address for the computer with the cable modem
Your Internet Service Provider (ISP) assigns either a static or dynamic IP address to the
computer with the cable modem.
To assign IP addresses to the remaining computers and the All-in-One printer
Use
AutoIP to assign IP addresses to the remaining computers and the printer. Do not
assign a static IP address.
Wireless troubleshooting
AutoIP to assign IP addresses to
No SSID
Probable Cause 1
Your access point is not broadcasting its network name (SSID) because the
SSID
option is turned off.
Corrective Action
Access the Embedded Web Server and turn on the
Probable Cause 2
The access point (infrastructure) or computer (ad hoc) is out of range.
Corrective Action
In order to establish a good signal between the printer and access point (infrastructure) or
computer (ad hoc), try doing the following things separately or in combination.
Broadcast SSID option.
• If there is a long distance between your computer or access point and the printer, move
them closer together.
• If there are metal objects (such as a metal bookcase or refrigerator) in the transmission
path, clear the path between the printer and the computer or access point.
• If a cordless telephone, microwave, or other device that emits radio signals transmitting
at 2.4 GHz is nearby, move it farther away to reduce radio interference.
Broadcast
90 Kodak ESP 7 Printer User Guide
Page 99

Note: Devices like wireless speakers or wireless gaming accessories can emit
radio interference at 2.4 GHz. You can verify this on your wireless desktop or
laptop computer by viewing sporadic signal bars in your Wi-Fi status utility.
Repositioning your computer away from these sources of signal interference can
improve your computer network performance. For example:
• Do place the AP/router in a central room.
• Do not place wireless entertainment devices between the AP/router and
wireless computer.
• Do not place wireless entertainment devices between the AP/router and Wi-Fi
All-in-One printer.
Probable Cause 3
The SSID is not visible because it is at the bottom of the list.
Corrective Action
to scroll to the bottom of the list. Infrastructure entries are listed first and ad hoc
Press
entries last.
Chapter 9
Probable Cause 4
The access point firmware needs updating.
Corrective Action
Check for firmware updates for your access point on the manufacturer's web site. Update
the firmware on the access point.
Probable Cause 5
Your wireless adapter on your computer is not broadcasting the SSID (ad hoc).
Corrective Action
Verify that the wireless adapter is broadcasting the SSID. Print a network configuration
page from the All-in-One printer, and verify that the SSID for the wireless adapter appears
on the network configuration page. If the wireless adapter is not broadcasting the SSID, see
the documentation that came with your computer.
Probable Cause 6
The firmware for the wireless adapter on your computer needs updating (ad hoc).
Corrective Action
Check for firmware updates for your wireless adapter on the manufacturer's Web site, and
then update the firmware.
Probable Cause 7
An Ethernet cable is connected to the printer.
Kodak ESP 7 Printer User Guide 91
Page 100

Troubleshooting
Corrective Action
Unplug the Ethernet cable.
Weak signal
Probable Cause
The access point is too far away or there is interference.
Corrective Action
• If there is a long distance between your computer or access point and the printer, move
them closer together.
• If there are metal objects (such as a metal bookcase or refrigerator) in the transmission
path, clear the path between the printer and the computer or access point.
• If a cordless telephone, microwave, or other device that emits radio signals transmitting
at 2.4 GHz is nearby, move it farther away to reduce radio interference. See Note
page 94.
Cannot connect to network
on
Probable Cause 1
The equipment is not turned on.
Corrective Action
Turn on the networked devices, such as the access point for an infrastructure network, or
the computer for an ad hoc network. For more information on how to turn on the access
point, see the documentation that came with your access point.
Probable Cause 2
The All-in-One printer is not receiving a signal.
Corrective Action
Move the access point and the printer closer together. Then go through setup again.
Probable Cause 3
You have entered the SSID incorrectly.
Corrective Action
Enter the SSID correctly. Remember that the SSID is case-sensitive.
Probable Cause 4
You have entered the WEP key incorrectly.
Corrective Action
Enter the WEP key correctly. Remember that the WEP key is case-sensitive.
92 Kodak ESP 7 Printer User Guide
 Loading...