

Page 1
DP900/1100 Digital Projectors
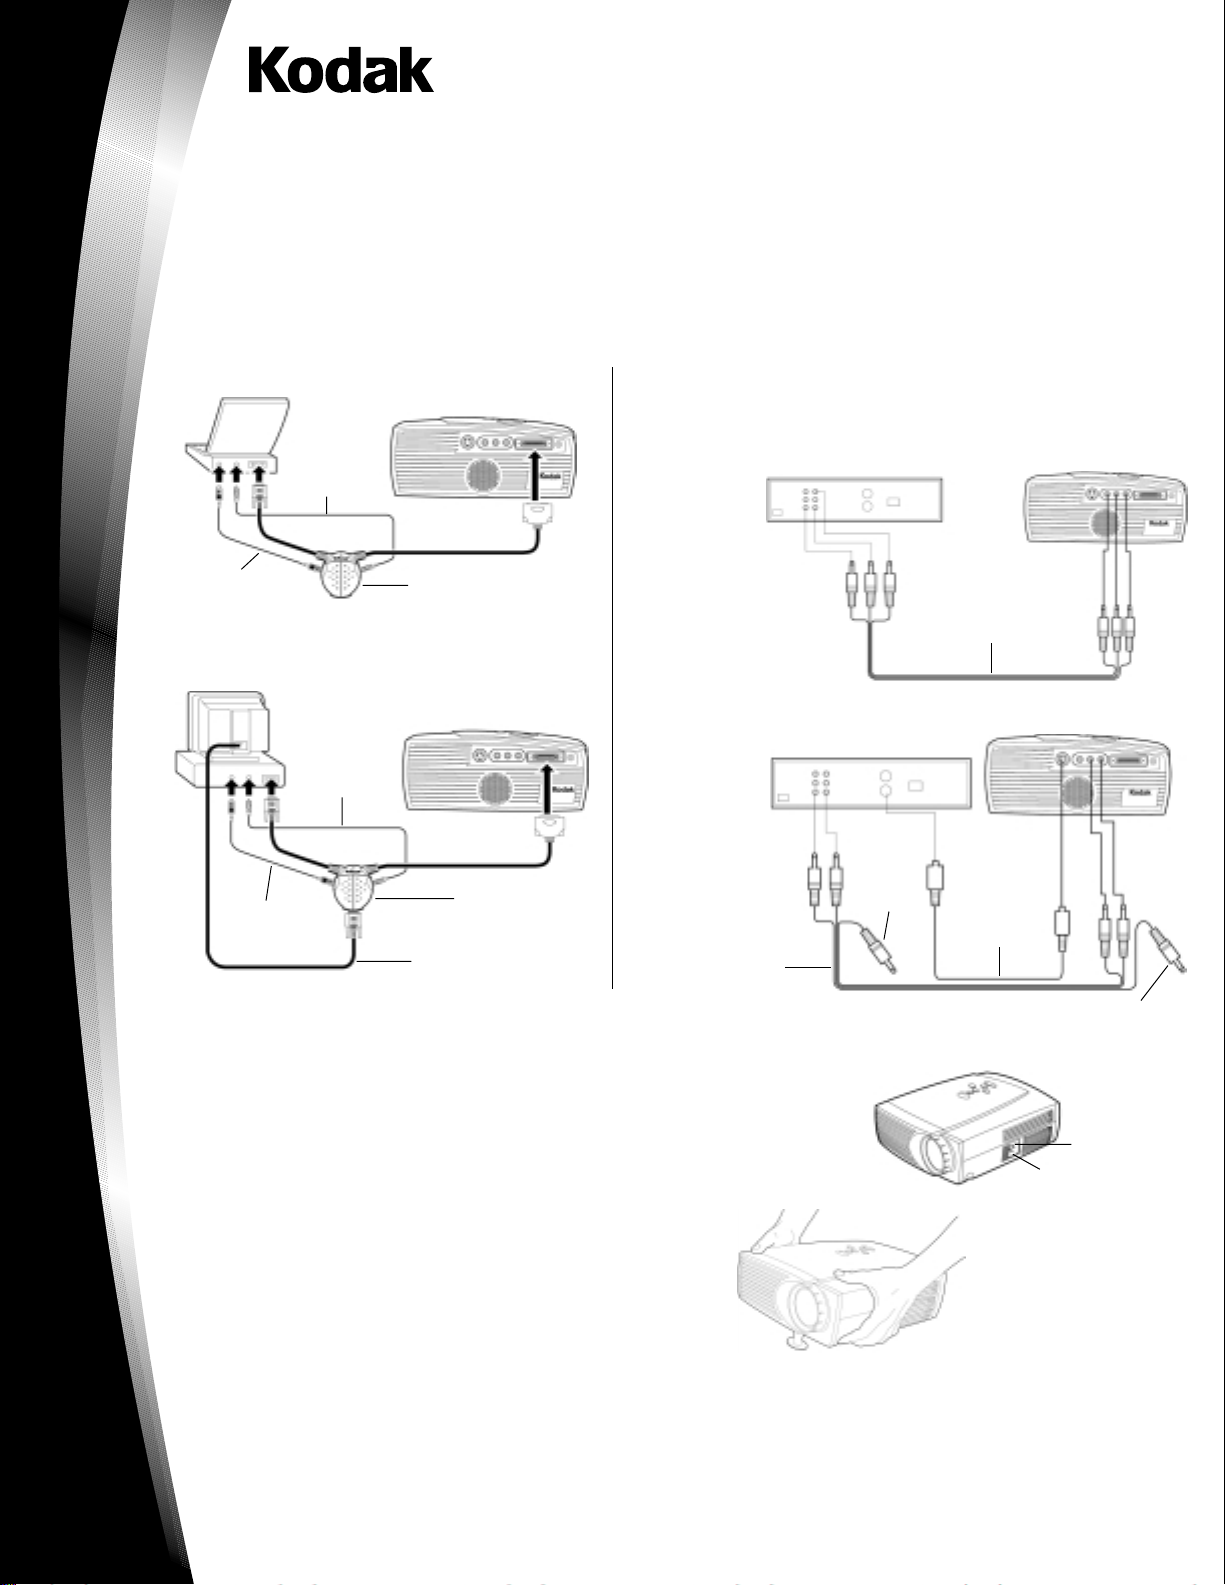
Connecting the Projector
You can connect your projector to a laptop computer, desktop computer, or video player. All connections are made with the aid of icons
on the cables.
Caution: Make sure your projector, computer and video player are turned off before you connect them.
Connecting to a Laptop Computer
Audio cable
Mouse cable
Cable hub connector
Connecting to a Desktop Computer
Audio cable
Mouse cable
Hub connector
Monitor cable
Connecting to a Video Player
If your video player uses a round, four-prong S-video connector, you need an
S-video cable in addition to the A/V cable.
Note: The S-video cable is sold separately.
Connecting
with an
AV Cable
Audio/video cable
Connecting
with an
S-video Cable
Yellow
connector
S-video cable
A/V cable
P/N XXXXXX
Starting the Projector
1. Remove the lens cap.
2. Plug the power cord into the side of the projector, then plug it into your electrical outlet.
3. Press the “I” side of the power switch to turn on the projector.
4. Turn on your video source - a video player or a computer.
5. Position the projector and adjust the zoom setting for the image size you want.
• Adjust the zoom ring
• Focus by rotating focus lens.
• Be sure the projector is at a 90-degree angle to the screen.
• Adjust the height of the projector. Press and hold the elevator button.
Raise the projector to the height you want, then release the button.
Quick Start Guide
Yellow connector
Power switch
Power cord connection
Page 2
DP900/1100 Digital Projectors
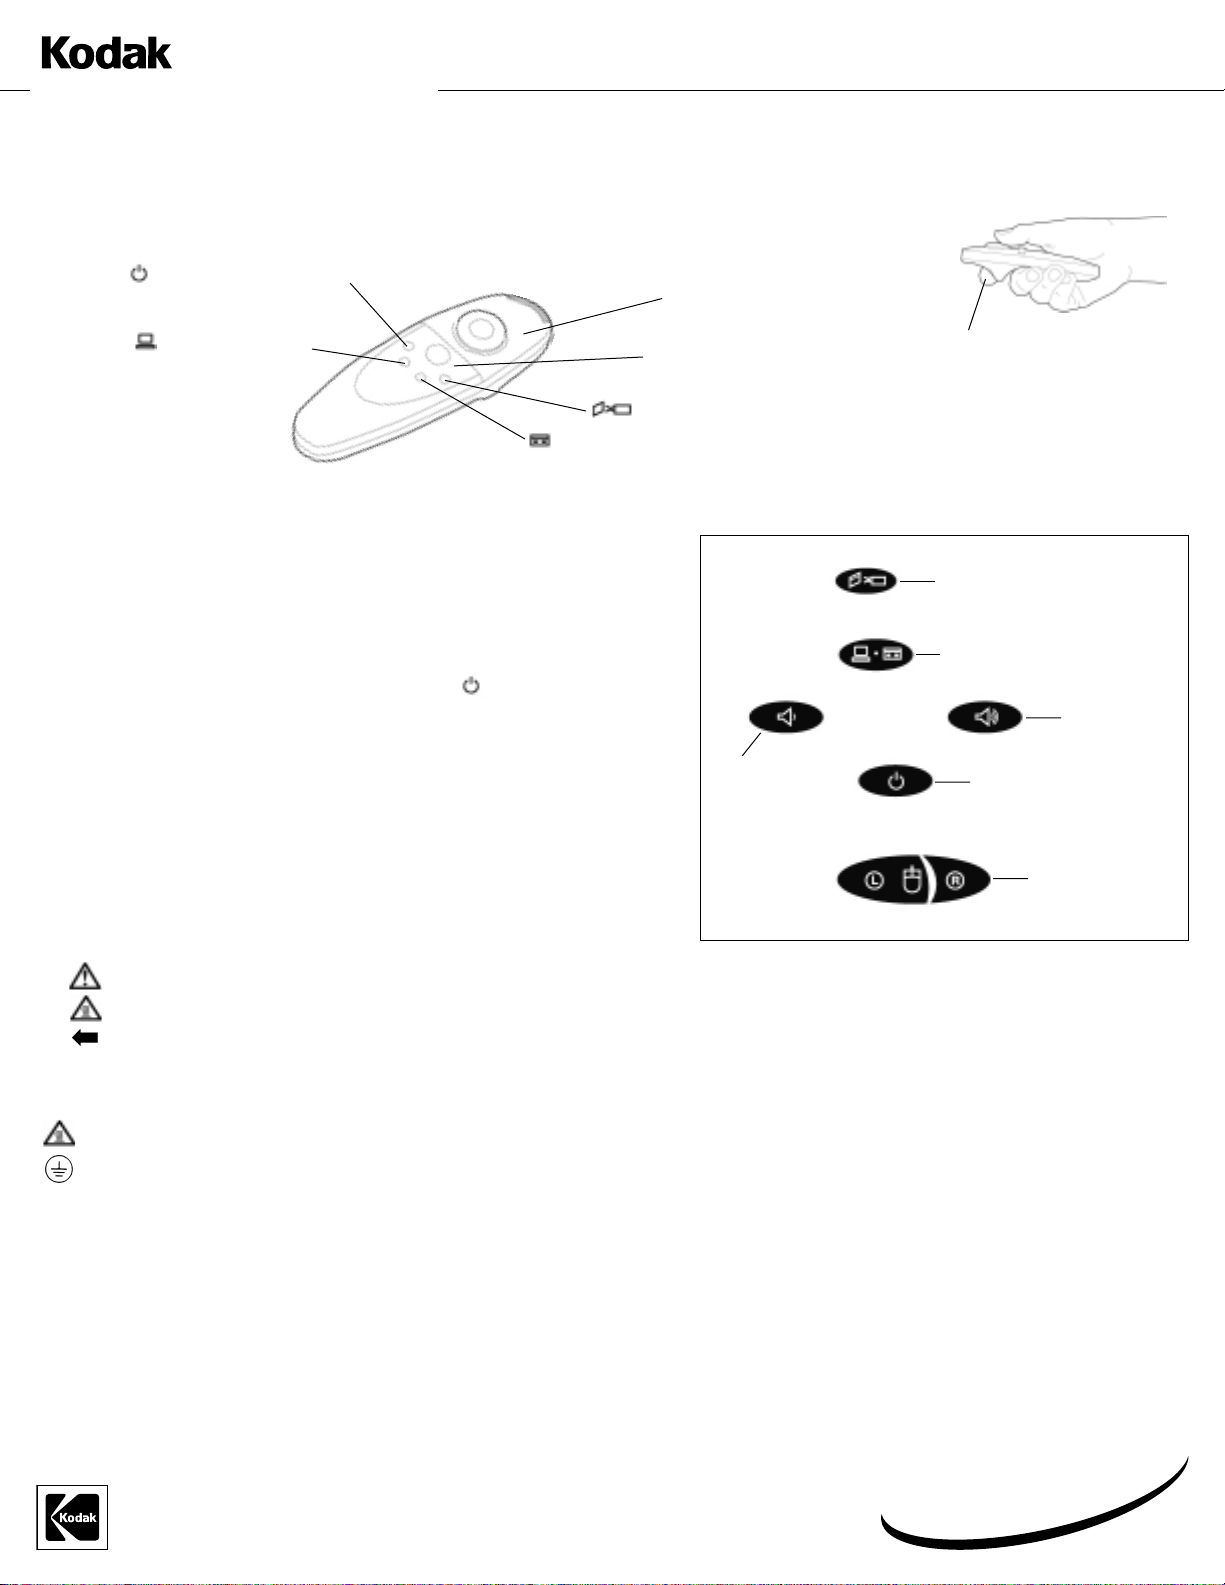
Using the Remote Control
For best results, point the remote directly at the projector.
Standby – turns off the image
without turning off the projector
Computer – selects the
computer as the source Simulates the left mouse button –
Video – selects the video player
as the active source
Using the Keypad
While the menu is displayed, the volume, source, and standby buttons act as navigation buttons.
Use them to select menu items and move to different menus.
Turning Off the Projector
To turn off the projector for a short period of time, press the button on the keypad or
remote control.
To completely turn off the projector, press the “0” side of the power switch on the side of
the projector.
Always unplug the projector from the wall outlet before unplugging the cord at the projector.
use to adjust settings
Menu – displays the menu
Disk Mouse – use to select
menus and menu items
Volume –
decreases
volume
Simulates the right
mouse button – use to
adjust settings
Menu button – displays the menu
Source button – toggles back and
forth between video and computer
sources
Volume –
increases
volume
Standby – turns off the
image without turning off
the projector
Safety Instructions
Safety Definitions
• Warning: Statements identify conditions or practices that could result in permanent personal injury.
• Caution: Statements identify conditions or practices that could result in damage to your equipment.
Safety Symbols
Attention: For information about use of a
feature, please refer to the Reference Manual.
Warning: Hot surface. Do not touch.
An arrow pointing to the lamp door on the projector.
Safety Terms:
• Warning: Don’t look directly into the lens when the projector is turned on.
• Warning: Don’t block ventilation openings.
• Warning: To replace the lamp, turn the power off and unplug the power cord. To
avoid burns, wait 30 minutes before opening the lamp door.
• Warning: Please use the power cord provided. Connect the power cord to a receptacle
with a protective safety (earth) ground terminal.
• Warning: Refer all service to qualified service personnel. Servicing your own projector will void the warranty.
• Caution: Don’t set liquids on the projector. Spilled liquids may damage your projector.
• Caution: Don’t place the projector on a hot surface or in direct sunlight.
• Caution: Do not drop the projector. Transport the projector in a Kodak-approved case.
Simulates left and
right mouse buttons –
use to adjust settings
EASTMAN KODAK COMPANY
Rochester, NY 14650
© Eastman Kodak Company, 1999 Printed in the U.S.A. 8/99
Online registration is quick and easy!
www.kodak.com/go/register
Register your new projector now!
 Loading...