


KitchenAid KSPS22Q, KSRB25Q, KSPB22Q User Manual
KitchenAid"
Kltchen_kld"
No-Frost Refrigerator
Models KSRS22Q KSPS22Q
KSRB22Q KSRS25Q
KSHS22Q KSRB25Q
KSPB22Q
A Note toYou ...................... 2
Impodonl Sofety
Instructions ........................... 3
Paris ond Feolures ............... 4
Installing lhe Refdgerotor ..... 5
Using the Refrigerotor ........... 7
Codng for the
Re_gerotor ........................ 21
Food Sloroge Guide .......... 24
IfYou Need Assidcr_ce
or Service .......................... 26
wam:z_ ............................2s
Call UsWith Questions
Or Comments:
1-800-422-1230
Useand Care Guide
.,q Note to You
Thank you for buying a KitchenAicl ° home appliance.
You have purchased a quality, world-classhome appliance, Years of engineering experience
went Into Itsmanufacturing. To ensure that you enjoy many years of trouble-flee operation, we
developed thisUseand Care Guide. It Isfullof valuable information on how to operate and
maintain your home appliance properly and safely. Pleaseread Itcarefully. Also, please
complete and mall the Ownership RegistrationCard provided with yourhome appliance.
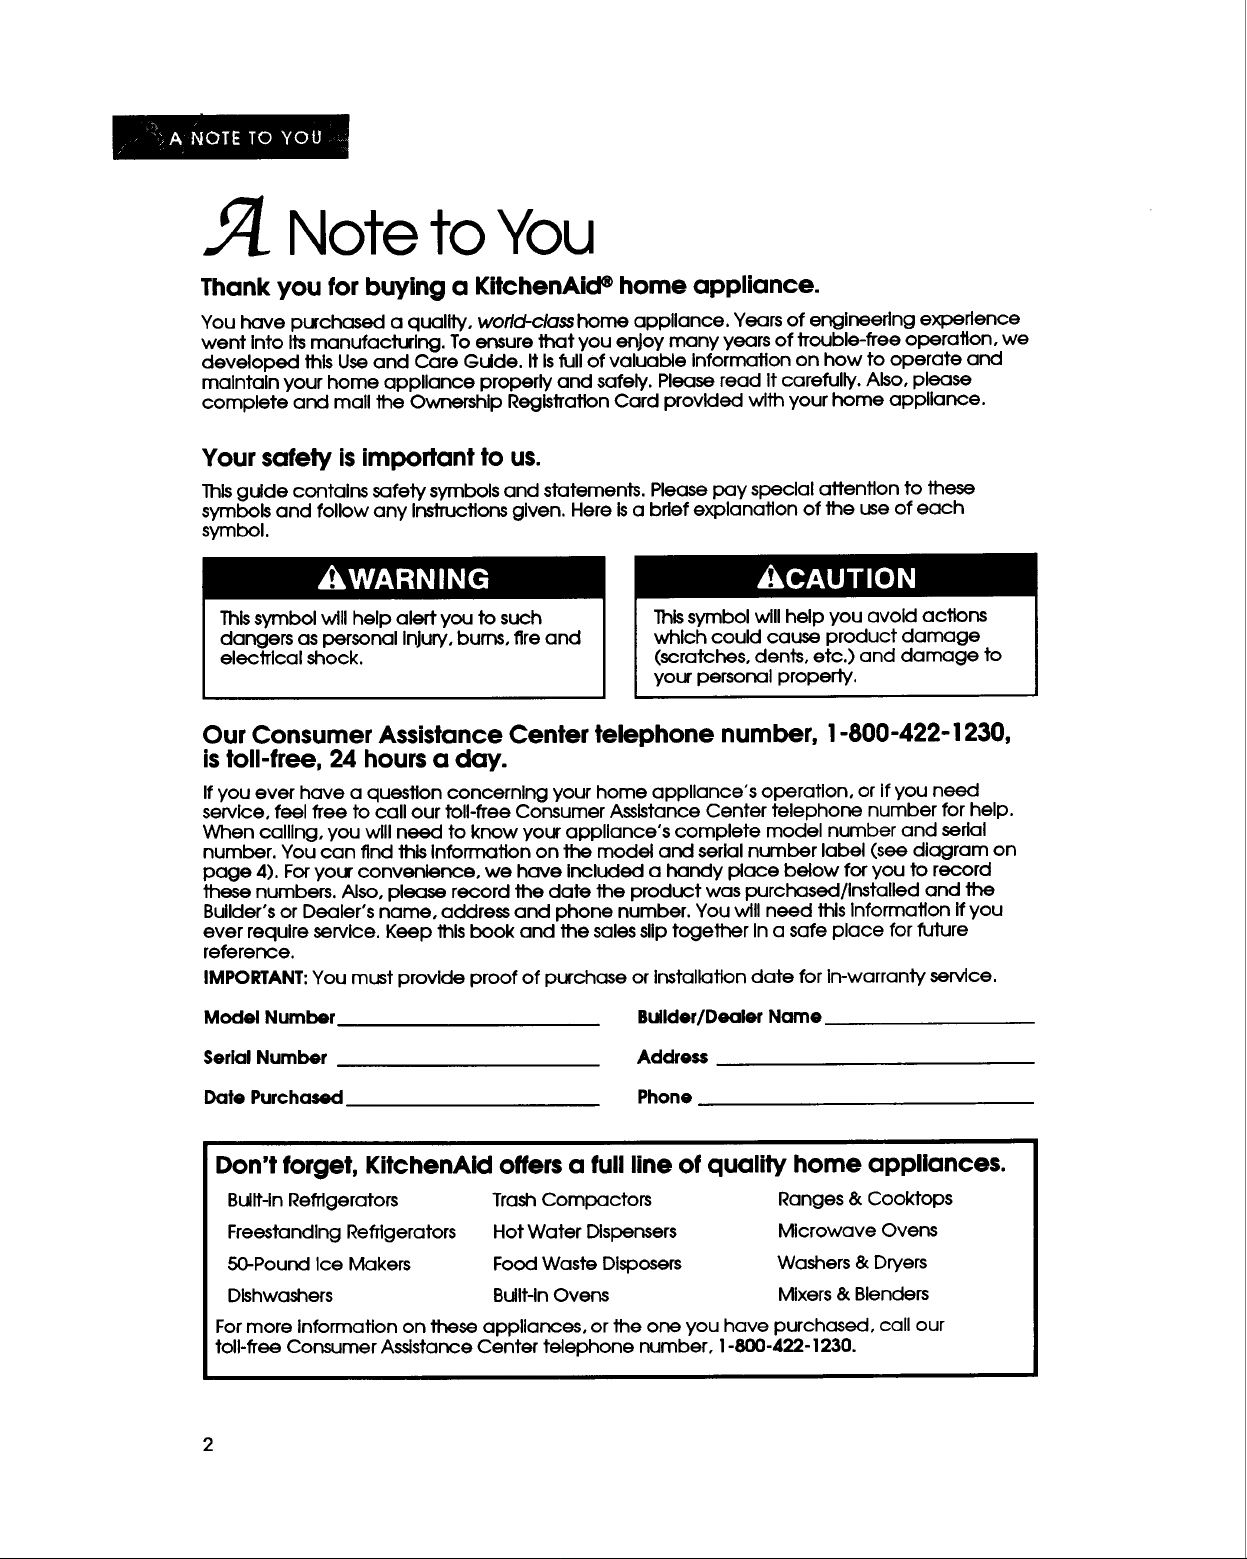
Your safety is important to us.
Thisguide contains safety symbolsand statements. Please pay special attention to these
symbols and follow any Instructions given. Here is a brief explanation of the use of each
symbol.
Thissymbol _11help alert you to such
dangers as personal Injury, burns, fire and
electrical shock.
Thissymbol wUlhelp you avoid actions
which could cause product damage
(scratches, dents, etc.) and damage to
your personal property.
Our Consumer Assistance Center telephone number, 1-800-422-1230,
is toll-free, 24 hours a day.
Ifyou ever have a question concerning your home appliance's operation, or If you need
service, feel free to call our toll-flee Consumer Assistance Center telephone number for help.
When calling, you will need to know your appllance°s complete model number and serial
number. You can find this Information on the model and serial number label (see diagram on
page 4). Foryour convenience, we have Included a handy place below for you to record
these numbers. Also, please record the date the product was purchased/Installed and the
Builder's or Dealer's name, address and phone number. You will need this Information Ifyou
ever require service. Keep this book and the sales slip together In a safe place for future
reference.
IMPORTANT:You must provide proof of purchase or Installation date for In-warranty service.
Model Number
Serial Number Address
Date Purchased Phone
Builder/Dealer Name
Don't forget, KitchenAld offers a full line of quality home appllances.
Built-In RefTIgerators
Freestanding Refrigerators
50-Pound Ice Makers
Dishwashers
Formore Information on these appliances, or the one you have purchased, call our
toll-flee Consumer Assistance Center telephone number, 1-800-422-1230.
TrashCompactors
Hot Water Dispensers
Food Waste Disposers
Built-In Ovens
Ranges & Cooktops
Microwave Ovens
Washers & Dryers
Mixers & Blenders
2
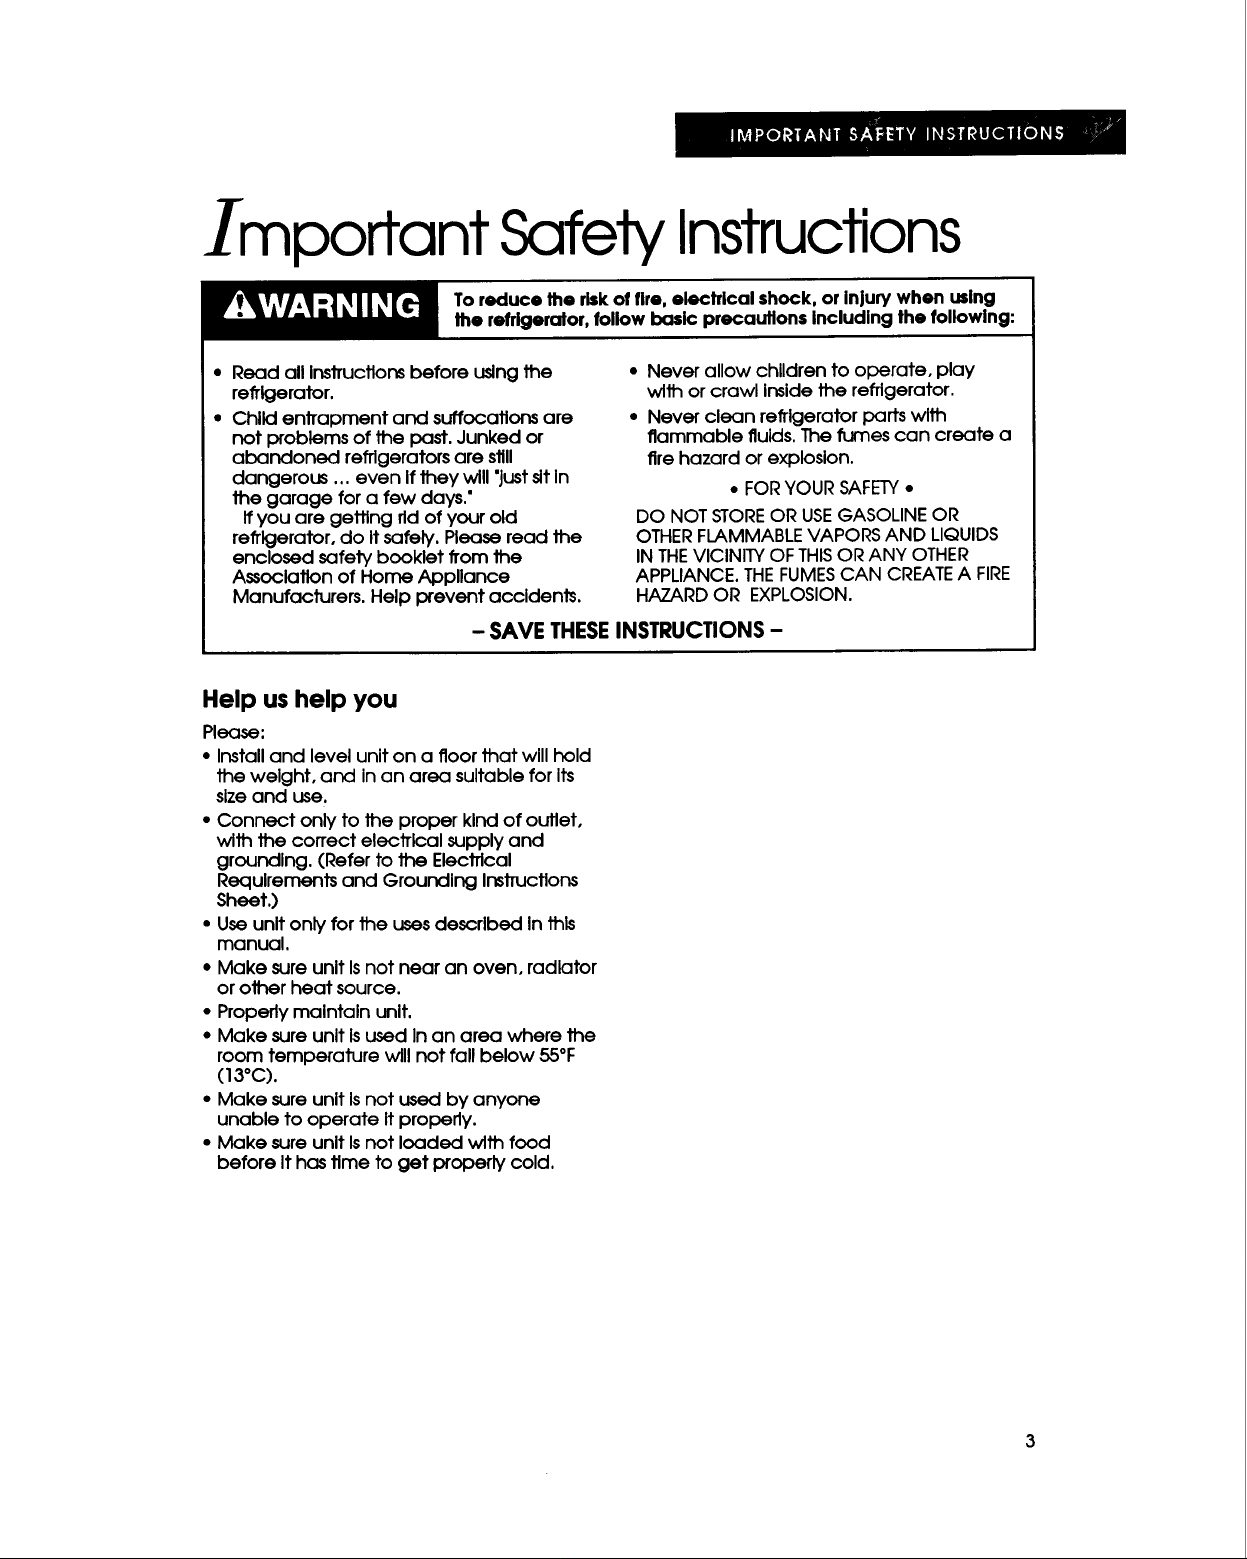
Important Safety Instructions
To r_3=_:cethe riskof fire, e'.: :_ical shock, or Injury when ,__=!ng
the refrigerator, follow .'-=-_-_=!cprocautlons Including the following:
• Read all Instructions before using the
refrigerator.
• Child entrapment and suffocationsare
not problems of the past. Junked or
abandoned refrigerators are still
dangerous.., even If they will 'just sitIn
the garage for a few days."
If you are getting rid of your old
refrigerator, do It safely. Please read the
enclosed safety booklet from the
Association of Home Appliance
Manufacturers. Help prevent accidents.
- SAVE THESE INSTRUCTIONS -
Help us help you
Please:
• Install and level unit on a floor that will hold
the weight, and in an area suitable for Its
sizeand use.
• Connect only to the proper kind of outlet,
with the correct electrical supplyand
grounding. (Refer to the Electrical
Requirements and Grounding Instructions
Sheet.)
• Use unit only for the uses described In this
manual.
• Make sure unit Isnot near an oven, radiator
or other heat source.
• Properly maintain unit.
• Make sure unit Isused Inan area where the
room temperature will not fall below 55°F
(13°C).
• Make sure unit Isnot used by anyone
unable to operate It properly.
• Make sure unit Isnot loaded with food
before It has time to get properly cold.
• Never allow children to operate, play
with or crawl insidethe refrigerator.
• Never clean refrigerator parts with
flammable fluids. The fumes can create a
fire hazard or explosion.
• FORYOUR SAFETY•
DO NOT STORE OR USE GASOLINE OR
OTHER FLAMMABLE VAPORS AND LIQUIDS
IN THE VICINITY OF THIS OR ANY OTHER
APPLIANCE. THE FUMES CAN CREATE A FIRE
HAZARD OR EXPLOSION.
3
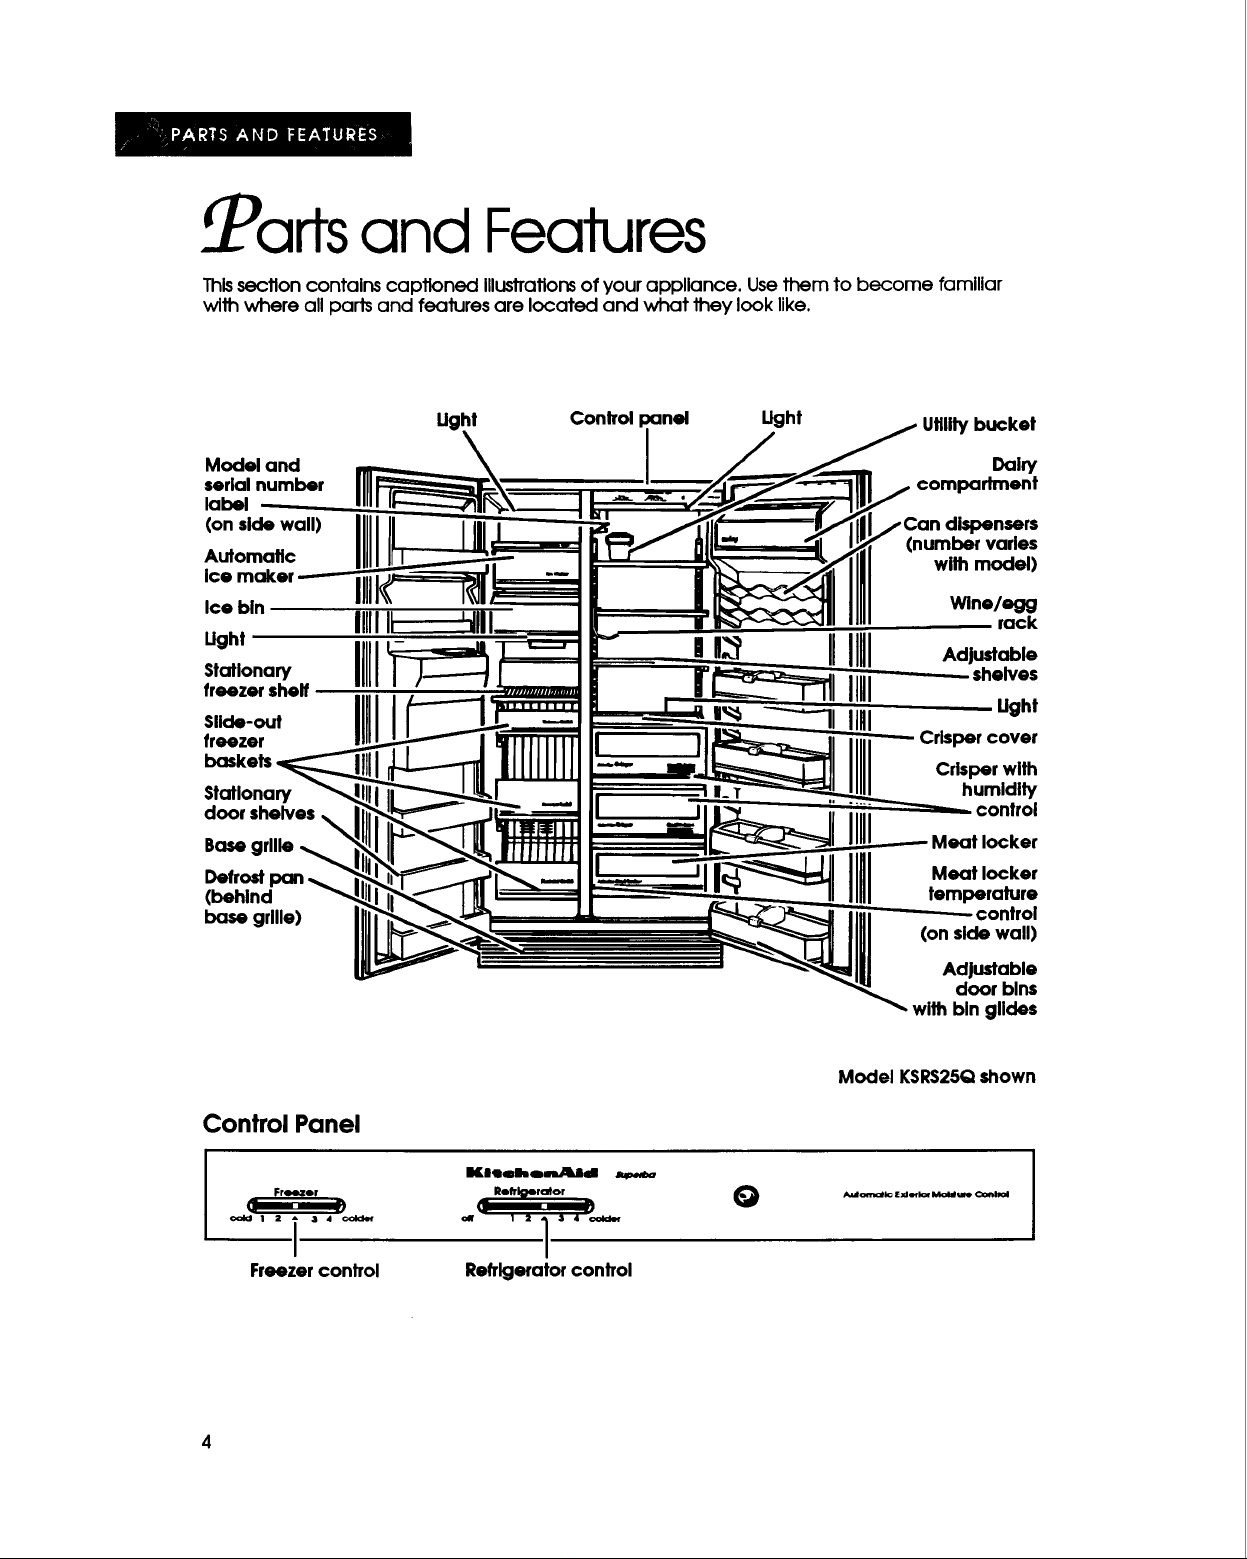
Parts and Features
Thissection contains captioned Illustrations of your appliance. Use them to become familiar
wilh where all pads and features are located and what 1hey look like.
Ught Control panel Ught Utilitybucket
Model and i _aiw
serialnumber n compartment
label
(on side wall)
Automatic
Ice bln
IIIII
Ught
I
dispensers
(number varles
with model)
Wine/egg
rack
n_ IIIII _.,u.a_,°
s,.,ona Ill
freezer shelf
Slide-out
freezer
Stationary
door shelves
Basegrllle
Defrostpan
(behind
base grllle)
I,,_ IIHI Ught
II. humldlty
IlUl ,.elves
Crispercover
Crisper with
control
deaf locker
Meat locker
temperature
control
(on side wall)
Adjustable
door blns
with bln glldes
Control Panel
-- Freezer _
1_. ._
oold 1 2 _ 34 (:older
i
Freezer control
Kl,llehomUllJId
Rolfl_lorotor --
q--
1 2 1 3 4
/
Refrigeratorcontrol
Model KSRS25Qshown
O
Installing the Refrigerator
In ThisSection
Page
Cleaning the refrigerator .......................... 5
Plugging In the refrigerator ....................... 5
i
I
If you want your refrigerator to work properly, you need to Install It properly. This section tells you
all you need to know to Install your refrigerator.
Locatlng the refrigerator properly ............ 6
Leveling the refrigerator ............................ 6
Cleaning the refrigerator
Clean your refrigerator before using It, If nec-
essay/. See cleaning InstTuctlonson pages
21 and 22.
Remove the Consumer Buy Guide Label
and any shipping tape before using the
refrigerator.
To remove any remaining glue:
• Rub briskly with your thumb to make a ball,
then remove.
OR
• Soak area with liquid dishwashing detergent
before removing glue as described above.
IMPORTANT:DO NOT USEsharp Instruments,
rubbing alcohol, flammable fluids or abrasive
cleaners. Thesecan damage the material.
See "important Safety Instructions" on page 3.
DO NOT REMOVEthe Tech Sheet fastened
under the refrigerator, behind the base grille.
Page
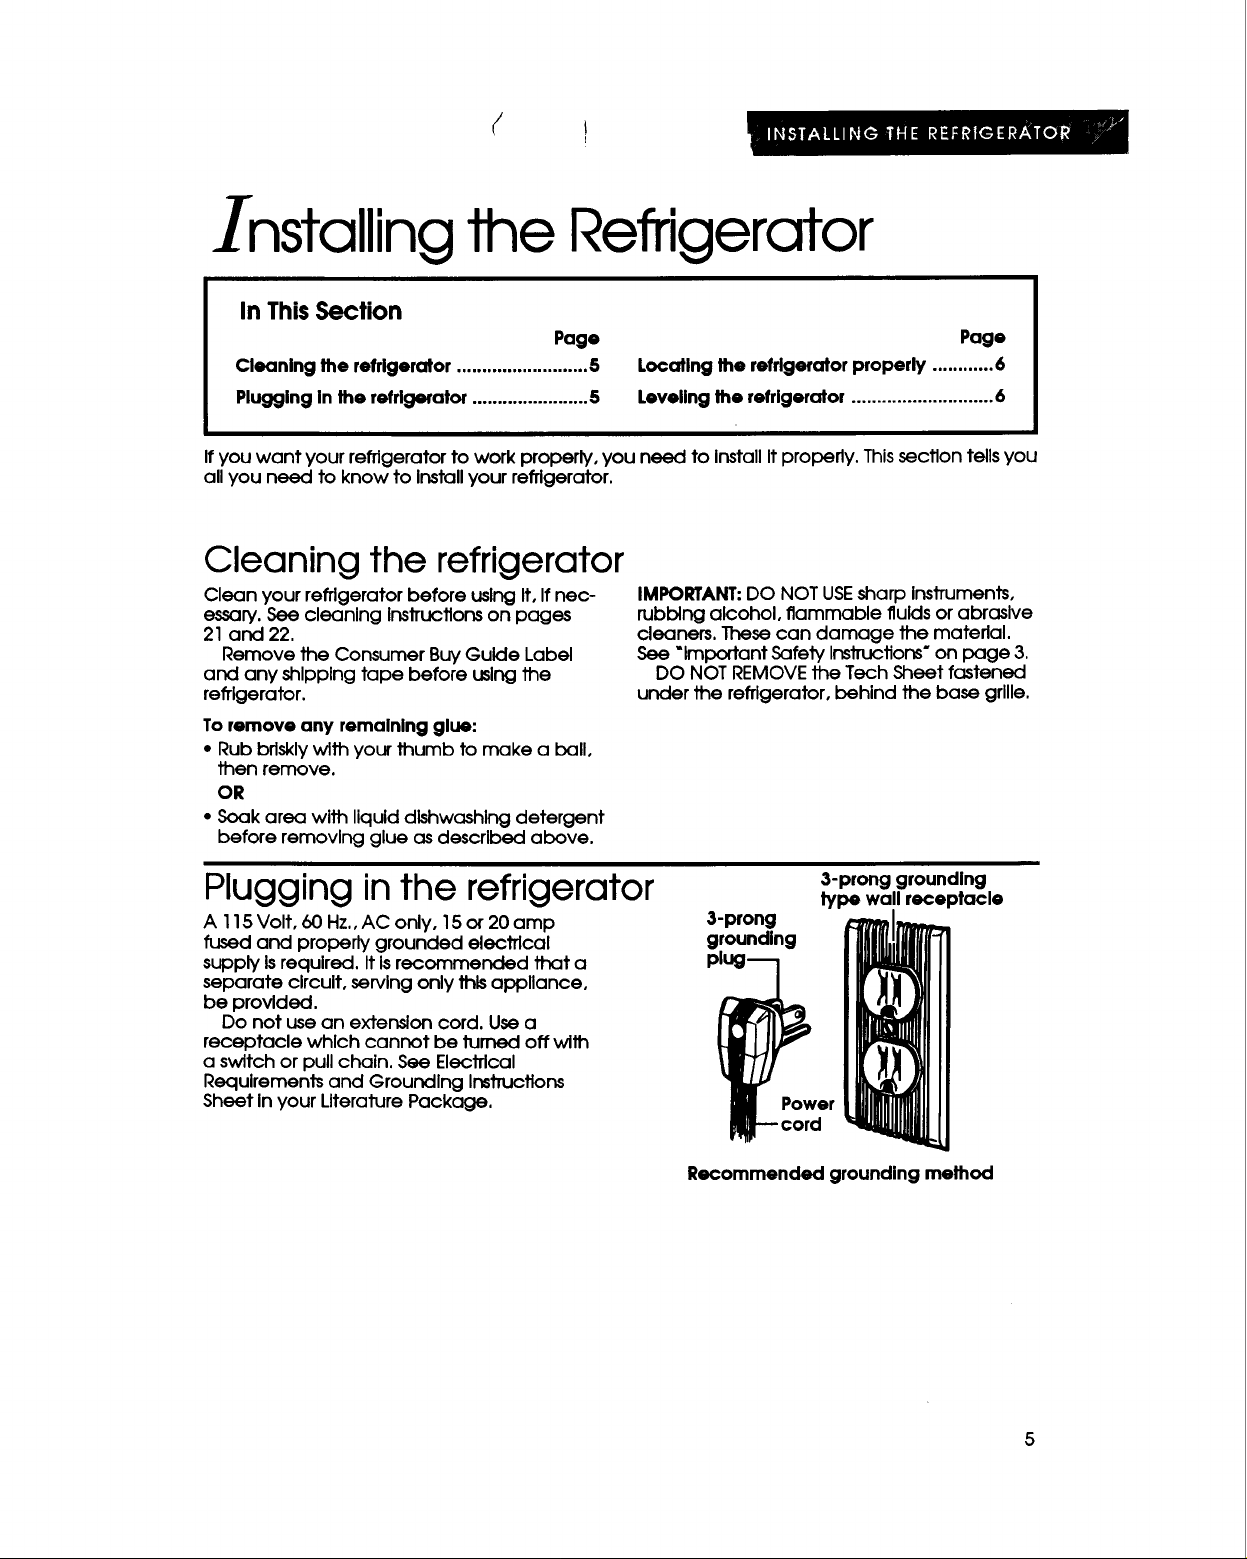
Plugging inthe refrigerator
A 115 Volt, 60 Hz., AC only, 15 or 20 amp
fused and properly grounded electrical
supply is required. It Is recommended that a
separate circuit, serving only this appliance,
be provided.
Do not use an extension cord. Use a
receptacle which cannot be turned off with
a switch or pull chain. See Elecffical
Requirements and Grounding Instructions
Sheet In your Literature Package.
3-prong grounding
type wall receptacle
3-prong
grounding
i Power
core
Recommended grounding method
5
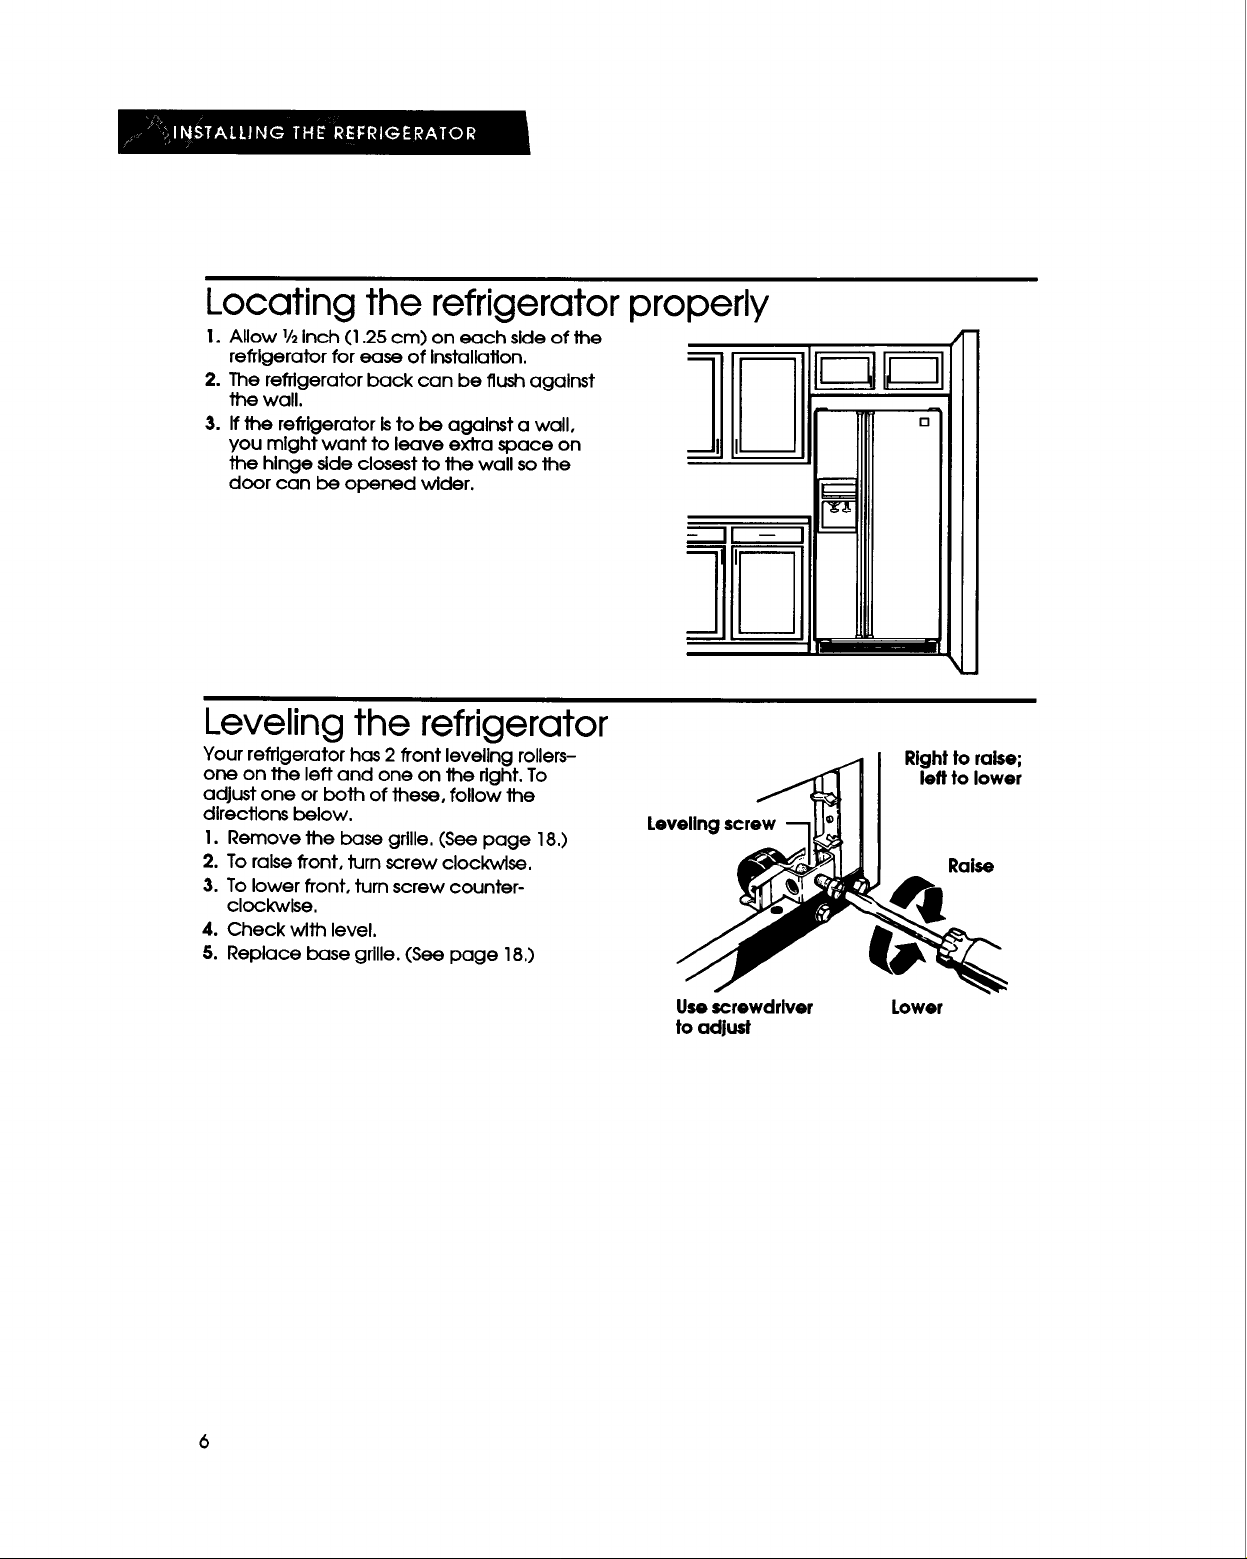
Locating the refrigerator properly
1. Allow 1/2Inch (1.25 cm) on each side of the
refrigerator for ease of Installation.
2. The refrigerator back can be flush against
the wall.
3. If _ refrigerator Isto be against a wall,
you mlght want to leave ex_a space on
the hinge side closest to the wall so the
door can be opened wider.
Leveling the refrigerator
Your refrigerator has 2 front leveling rollers-
one on the left and one on the right. To
adjust one or both of these, follow the
directions below.
1. Remove the base grille. (See page 18.)
2. To raise front, turn screw clockwise.
3. To lower front, turn screw counter-
clockwise.
4. Check with level.
5. Replace base grille. (See page 18.)
Levelingscrew
Rightto raise;
left to lower
Raise
Usescrewdrlver
to adjust
6
Lowor
Using the Refrigerator
In ThisSection
Page
Settingthe controls ...................................7
Changlng the control settings ..................8
Removing the refrlgeratot door blns .......8
Adjusting the bin glldes ............................9
Removing the can dispensers .................9
Adjusting the cantilever
refrlgeratorshelves ...................................9
AdJustlngthe RollerTracTM shelf ............. 10
Uslngthe wlne/egg rack ........................10
Removing the crispersand cover ......... 11
Removing the meat locker .................... 11
Adjustingthe meat locker
temperature control................................ 12
Removing the freezer door
shelffronts ................................................ 12
Removingthe freezer shelf..................... 13
Removingthe freezer baskets ............... 13
Uslngthe Ice maker ................................ 13
Removing the ice maker
storage bln............................................... 14
Usingthe cold water and ice
dispensers................................................ 15
Removing the base grille ....................... 18
Removing the defrost pan ...................... 18
Changlng the light bulbs ........................ 19
Understandlngthe soundsyou
may hear ..................................................20
Savingenergy .........................................20
Page
To obtain the best possible resultsfrom your refrigerator, It IsImportant Jhat you operate It
properly. ThIssection tells you how to do just that.
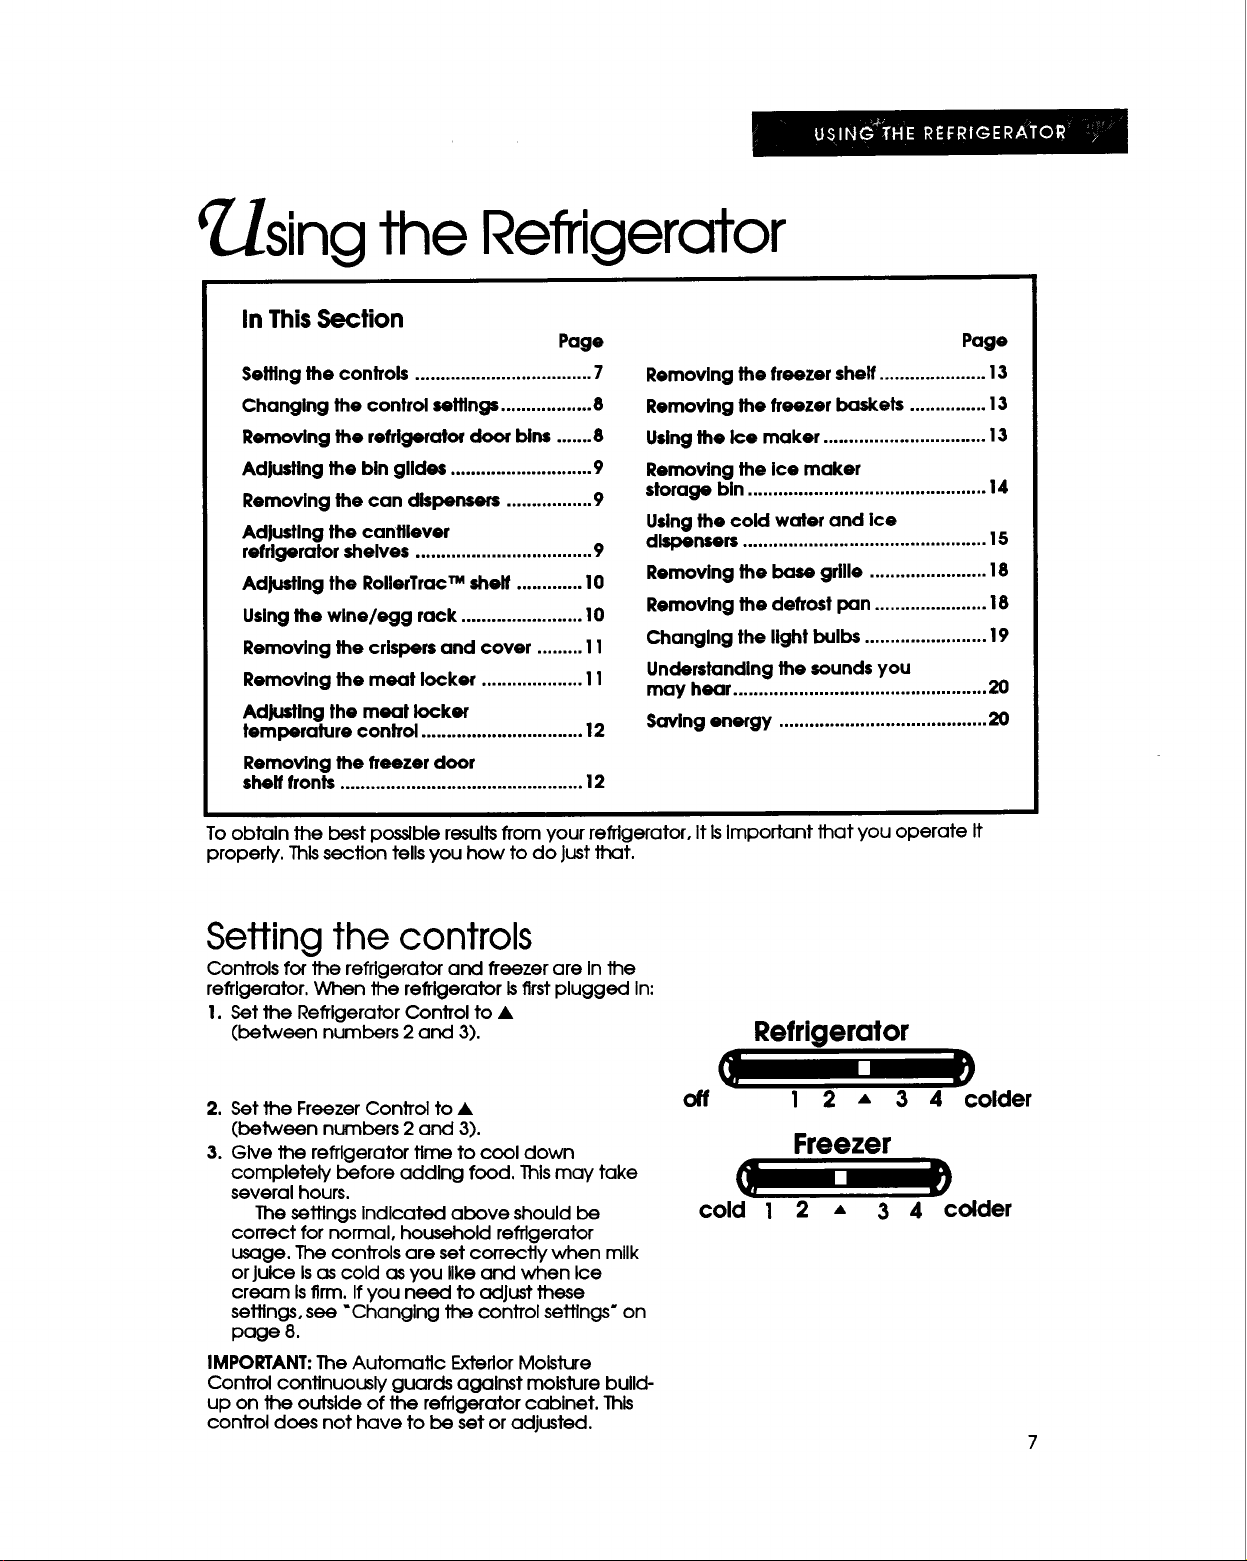
Setting the controls
Controls for the refrigerator and freezer are In the
refrigerator, When the refrigerator Isfirst plugged In:
I. Set the Refrigerator Control to •
(between numbers 2 and 3).
2. Set the Freezer Control to •
(between numbers 2 and 3).
3. Glve the refrigerator time to cool down
completely before adding food. Thismay take
several hours.
The settingsindicated al:x)ve should be
correct for normal, household refrigerator
usage. The controlsare set correctly when milk
or julce Isas cold as you like and when Ice
cream isfirm. If you need to adjust these
seHJngs,see "Changing the controlsettings"on
page 8.
IMPORTANT:The Automatic ExteriorMoIsture
Control continuously guards against moIsture build-
up on the outside of the refrigerator cabinet. This
control does not have to be set or adjusted.
off
Refrigerator
II
I 2 -
3 4 colder
Freezer
cold I 2 - 3 4 colder
Changing the control settings
To change the temperature settings, follow
the steps below:
1. Adjust the Refrigerator Control first.
2, Walt at least 24 hours before making
further adjustments. Thisglves the
refrigerator and/or freezer time to reach
the set temperature.
3. Adjust the Freezer Control If necessary.
Tomake the refrlgerator or freezer colder,
slidethe control toward the number 4 setting.
Tomake the refrigerator or freezer lesscold,
slidethe control toward the number I setting.
Changing elther the Refrigerator Control or
the Freezer ConJTolwill affect the
temperatures of both compartments.
Usethe settingslisted In the chart below as a
guideline when adjusting the temperature
controls.
The following reasons can cause the
conditions listed below:
• Door opened often
• Large amount of food added
• Room temperature too warm
* Room temperature too cold (Refrigerator
can't cycle often enough.)
• Controls not set correctly for your
conditions
• Heavy Ice usage
CONDITION:
Refrigerator section Istoo warm
Freezer section Istoo warm
Refrigerator section Istoo cold
Ice Isn't made fast enough
Both sections are too warm
RECOMMENDEDCONTROLSETTINGADJUSTMENTS:
Refrlgerator Freezer
3 2
3 3
3 3
3 3
3 3
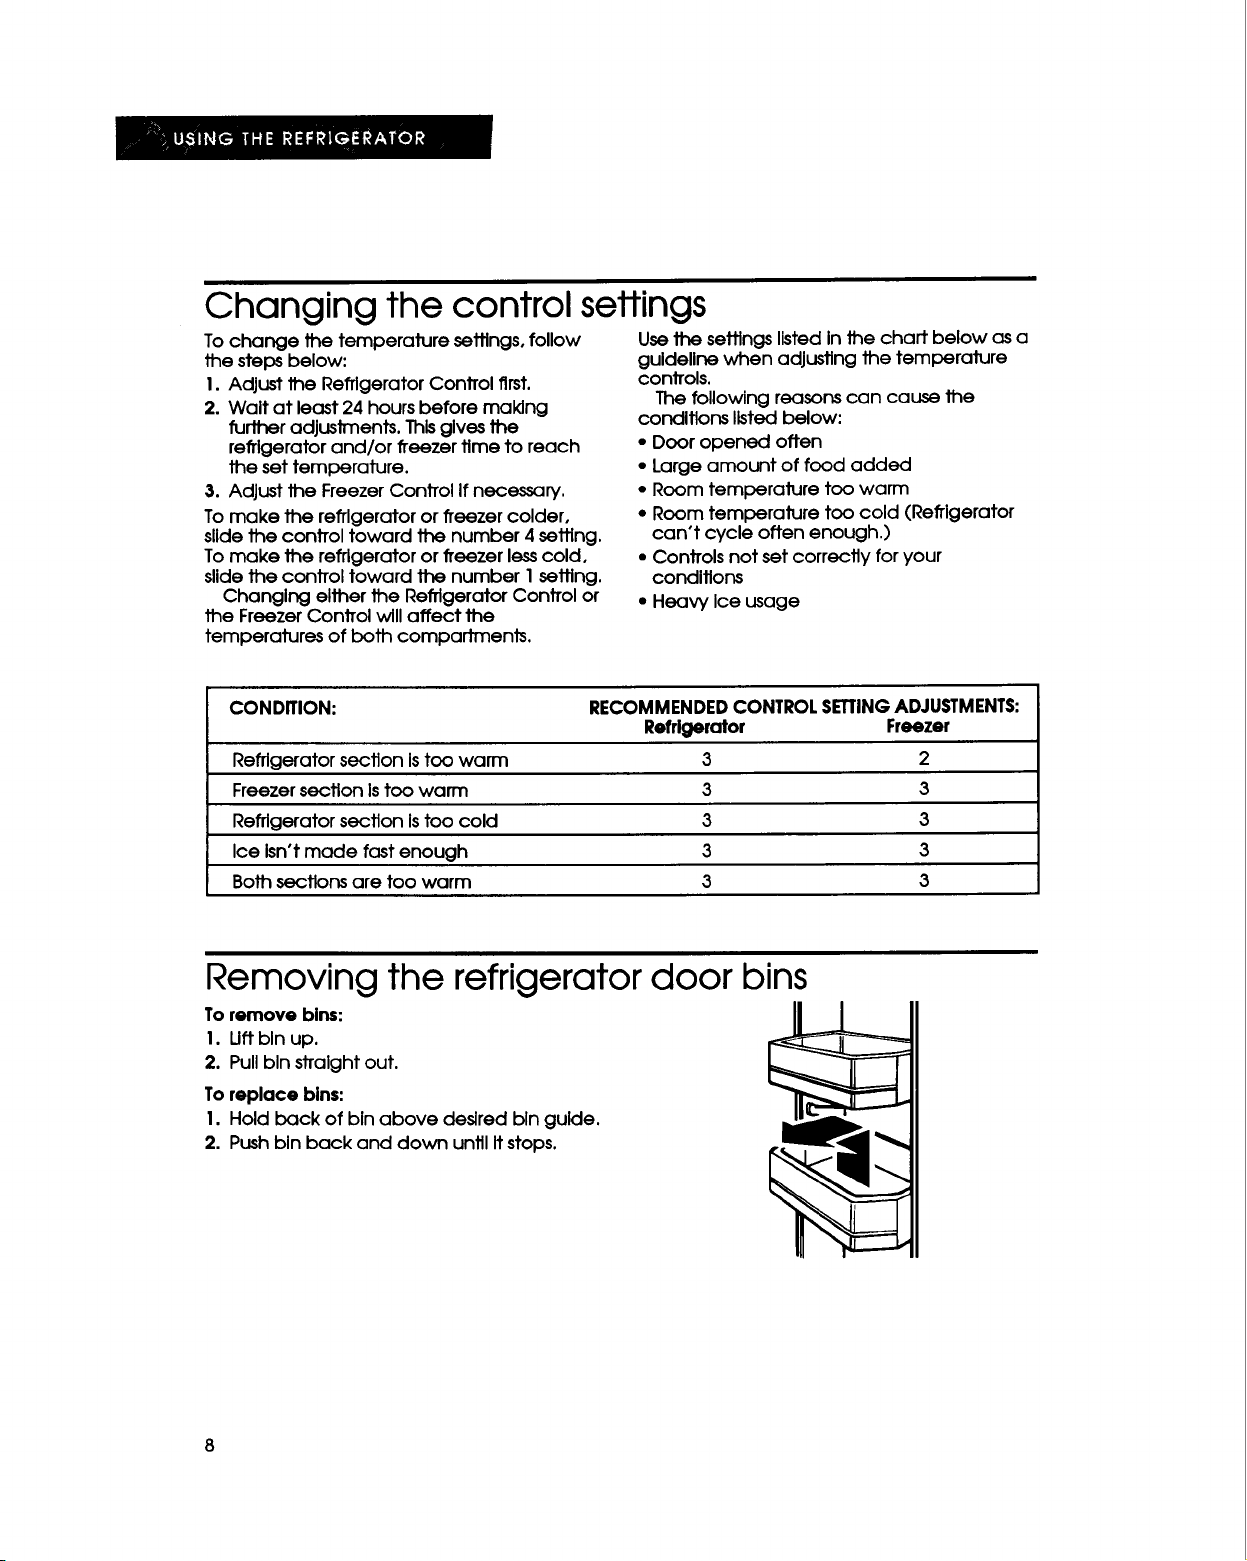
Removing the refrigerator door bins
Toremove bins:
I. LJftbln up.
2. Pullbln straight out.
Toreplace bins:
I. Hold back of bin above desired bin guide.
2. Push bin back and down until It stops.
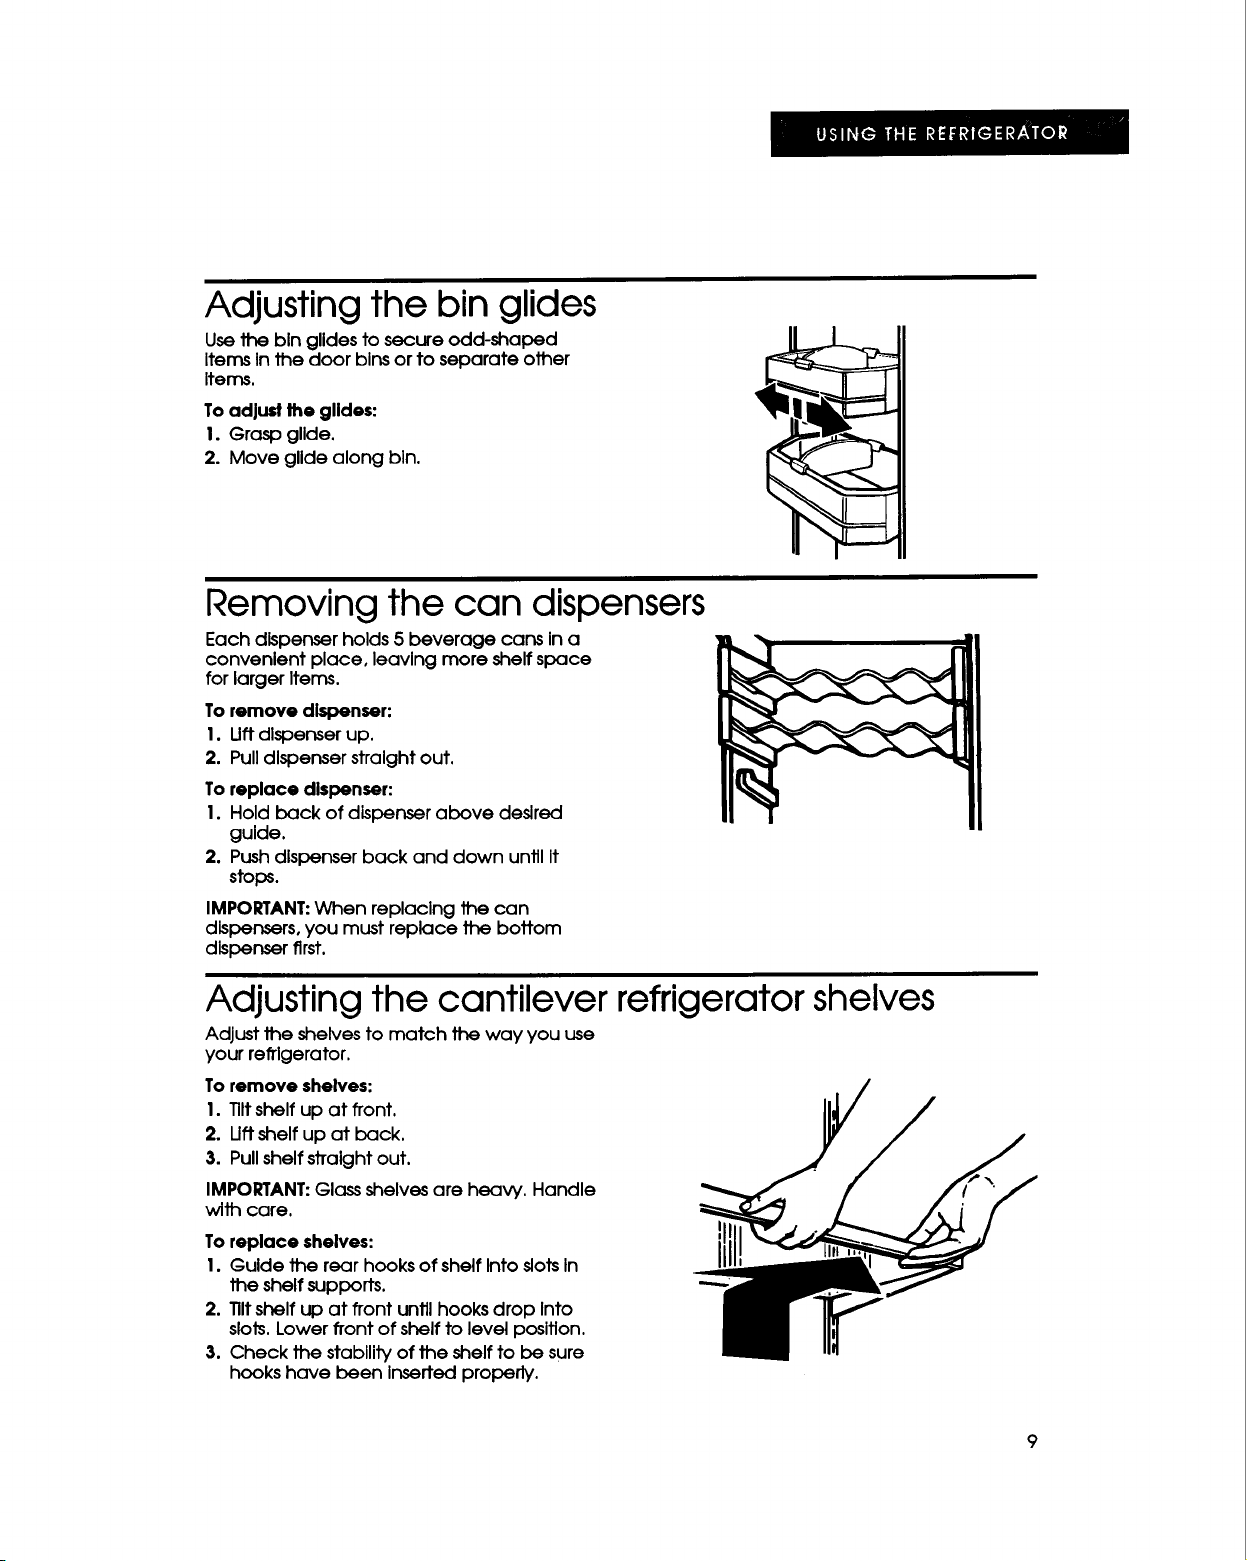
Adjusting the bin glides
Use the bln glldesto secure odd-shaped
ItemsInthe door blnsor to separate other
Items.
Toadjust lhe glides:
I. Grasp gllde.
2. Move glide along bln.
Removing the can dispensers
Each dispenser holds 5 beverage cans In a
convenient place, leaving more shelf space
for larger Items.
Toremove dlslpenser:
I. Uft dlspenserup.
2. Pulldlspenser stralght out.
Toreplace dispenser:
I. Hold back of dispenserabove desired
guide.
2. Pushdispenser back and down untilIt
stops.
IMPORTANT:When replacing the can
dispensers, you must replace the boffom
dispenser first.
Adjusting the cantilever refrigerator shelves
Adjust the shelves to match the way you use
your refrigerator.
To remove shelves:
I. Tiltshelf up at front.
2. Uft shelf up at back.
3. Pull shelf straight out.
IMPORTANT: Glass shelves are heavy, Handle
with care.
To replace shelves:
I. Guide the rear hooks of shelf Into slots In
the shelf supports.
2. Tilt shelf up at front until hooks drop Into
slots. Lower front of shelf to level position.
3. Check the stability of the shelf to be sure
hooks have been inserted properly.
 Loading...