

Page 1

KMM-BT304
KMM-BT204
KMM-304Y
DIGITAL MEDIA RECEIVER
INSTRUCTION MANUAL
ЦИФРОВОЙ МЕДИА-РЕСИВЕР
ИHCTPУKЦИЯ ПO ЭKCПЛУATAЦИИ
B5A-2106-00 (EN/E2N)© 2017 JVC KENWOOD Corporation
Page 2
Information on Disposal of Old Electrical and Electronic Equipment and Batteries (applicable
for countries that have adopted separate waste collection systems)
Products and batteries with the symbol (crossed-out wheeled bin) cannot be disposed as household waste.
Old electrical and electronic equipment and batteries should be recycled at a facility capable of handling
these items and their waste byproducts.
Contact your local authority for details in locating a recycle facility nearest to you. Proper recycling and
waste disposal will help conserve resources whilst preventing detrimental effects on our health and the
environment.
Notice: The sign “Pb” below the symbol for batteries indicates that this battery contains lead.
For Israel
Дата изготовления (месяц/год) находится на этикетке устройства.
В соответствии с Законом Российской Федерации “О защите прав потребителей” срок службы
(годности) данного товара “по истечении которого он может представлять опасность для жизни,
здоровья потребителя, причинять вред его имуществу или окружающей среде” составляет семь (7)
лет со дня производства.
Дополнительные косметические материалы к данному товару, поставляемые вместе с ним, могут
храниться в течение двух (2) лет со дня его производства.
Срок службы (годности), кроме срока хранения дополнительных косметических материалов,
упомянутых в предыдущих двух пунктах, не затрагивает никаких других прав потребителя, в
частности, гарантийного обслуживания KENWOOD, которое он может получить в соответствии с
законом о правах потребителя или других законов, связанных с ним.
Условия хранения:
Температура : от -30°C до +85°C
Влажность : от 0% до 90%
i
Page 3

• Microsoft and Windows Media are either registered trademarks or trademarks of Microsoft
Corporation in the United States and/or other countries.
• “Made for iPod,” and “Made for iPhone” mean that an electronic accessory has been designed to
connect specifically to iPod, or iPhone, respectively, and has been certified by the developer to
meet Apple performance standards. Apple is not responsible for the operation of this device or its
compliance with safety and regulatory standards. Please note that the use of this accessory with iPod
or iPhone may affect wireless performance.
• iPhone, iPod, iPod classic, iPod nano, and iPod touch are trademarks of Apple Inc., registered in the
U.S. and other countries.
• Lightning is a trademark of Apple Inc.
• SPOTIFY and the Spotify logo are among the registered trademarks of Spotify AB.
• The “AAC” logo is a trademark of Dolby Laboratories.
• The Bluetooth® word mark and logos are registered trademarks owned by Bluetooth SIG, Inc. and any
use of such marks by JVC KENWOOD Corporation is under license. Other trademarks and trade names
are those of their respective owners.
• Android is trademark of Google Inc.
libFLAC
Copyright (C) 2000-2009 Josh Coalson
Copyright (C) 2011-2013 Xiph.Org Foundation
Redistribution and use in source and binary forms, with or without modification, are permitted provided
that the following conditions are met:
- Redistributions of source code must retain the above copyright notice, this list of conditions and the
following disclaimer.
- Redistributions in binary form must reproduce the above copyright notice, this list of conditions and
the following disclaimer in the documentation and/or other materials provided with the distribution.
- Neither the name of the Xiph.org Foundation nor the names of its contributors may be used to
endorse or promote products derived from this software without specific prior written permission.
THIS SOFTWARE IS PROVIDED BY THE COPYRIGHT HOLDERS AND CONTRIBUTORS “AS IS” AND ANY
EXPRESS OR IMPLIED WARRANTIES, INCLUDING, BUT NOT LIMITED TO, THE IMPLIED WARRANTIES OF
MERCHANTABILITY AND FITNESS FOR A PARTICULAR PURPOSE ARE DISCLAIMED. IN NO EVENT SHALL
THE FOUNDATION OR CONTRIBUTORS BE LIABLE FOR ANY DIRECT, INDIRECT, INCIDENTAL, SPECIAL,
EXEMPLARY, OR CONSEQUENTIAL DAMAGES (INCLUDING, BUT NOT LIMITED TO, PROCUREMENT OF
SUBSTITUTE GOODS OR SERVICES; LOSS OF USE, DATA, OR PROFITS; OR BUSINESS INTERRUPTION)
HOWEVER CAUSED AND ON ANY THEORY OF LIABILITY, WHETHER IN CONTRACT, STRICT LIABILITY,
OR TORT (INCLUDING NEGLIGENCE OR OTHERWISE) ARISING IN ANY WAY OUT OF THE USE OF THIS
SOFTWARE, EVEN IF ADVISED OF THE POSSIBILITY OF SUCH DAMAGE.
ii
Page 4

Declaration of Conformity with regard to the RE Directive 2014/53/EU
Declaration of Conformity with regard to the RoHS Directive 2011/65/EU
Manufacturer:
JVC KENWOOD Corporation
3-12, Moriya-cho, Kanagawa-ku, Yokohama-shi, Kanagawa, 221-0022, JAPAN
EU Representative:
JVCKENWOOD Europe B.V.
Amsterdamseweg 37, 1422 AC UITHOORN, THE NETHERLANDS
Декларация соответствия относительно Директивы RE 2014/53/EU
Декларация соответствия относительно Директивы RoHS 2011/65/EU
Производитель:
JVC KENWOOD Corporation
3-12, Moriya-cho, Kanagawa-ku, Yokohama-shi, Kanagawa, 221-0022, ЯПОНИЯ
Представительство в EC:
JVCKENWOOD Europe B.V.
Amsterdamseweg 37, 1422 AC UITHOORN, НИДЕРЛАНДЫ
English
Hereby, JVCKENWOOD declares that the radio equipment
“KMM-BT304/KMM-BT204/KMM-304Y” is in compliance
with Directive 2014/53/EU.
The full text of the EU declaration of conformity is available
at the following internet address:
http://www.kenwood.com/cs/ce/eudoc/
Français
Par la présente, JVCKENWOOD déclare que l’équipement
radio « KMM-BT304/KMM-BT204/KMM-304Y » est
conforme à la directive 2014/53/UE.
L’intégralité de la déclaration de conformité UE est
disponible à l’adresse Internet suivante :
http://www.kenwood.com/cs/ce/eudoc/
Deutsch
Hiermit erklärt JVCKENWOOD, dass das Funkgerät
“KMM-BT304/KMM-BT204/KMM-304Y” der Richtlinie
2014/53/EU entspricht.
Der volle Text der EU-Konformitätserklärung steht unter
der folgenden Internetadresse zur Verfügung:
http://www.kenwood.com/cs/ce/eudoc/
Nederlands
Hierbij verklaart JVCKENWOOD dat de radioapparatuur
“KMM-BT304/KMM-BT204/KMM-304Y” in
overeenstemming is met Richtlijn 2014/53/EU.
De volledige tekst van de EU-verklaring van
overeenstemming is te vinden op het volgende
internetadres:
http://www.kenwood.com/cs/ce/eudoc/
Italiano
Con la presente, JVCKENWOOD dichiara che l΄apparecchio
radio “KMM-BT304/KMM-BT204/KMM-304Y” è conforme
alla Direttiva 2014/53/UE.
Il testo integrale della dichiarazione di conformità UE è
disponibile al seguente indirizzo internet:
http://www.kenwood.com/cs/ce/eudoc/
Español
Por la presente, JVCKENWOOD declara que el equipo de
radio “KMM-BT304/KMM-BT204/KMM-304Y” cumple la
Directiva 2014/53/EU.
El texto completo de la declaración de conformidad con la
UE está disponible en la siguiente dirección de internet:
http://www.kenwood.com/cs/ce/eudoc/
Português
Deste modo, a JVCKENWOOD declara que o equipamento
de rádio “KMM-BT304/KMM-BT204/KMM-304Y” está em
conformidade com a Diretiva 2014/53/UE.
O texto integral da declaração de conformidade da UE está
disponível no seguinte endereço de internet:
http://www.kenwood.com/cs/ce/eudoc/
Polska
Niniejszym, JVCKENWOOD deklaruje, że sprzęt radiowy
“KMM-BT304/KMM-BT204/KMM-304Y” jest zgodny z
dyrektywą 2014/53/UE.
Pełny tekst deklaracji zgodności EU jest dostępny pod
adresem:
http://www.kenwood.com/cs/ce/eudoc/
Český
Společnost JVCKENWOOD tímto prohlašuje, že rádiové
zařízení “KMM-BT304/KMM-BT204/KMM-304Y” splňuje
podmínky směrnice 2014/53/EU.
Plný text EU prohlášení o shodě je dostupný na následující
internetové adrese:
http://www.kenwood.com/cs/ce/eudoc/
Magyar
JVCKENWOOD ezennel kijelenti, hogy a „KMM-BT304/
KMM-BT204/KMM-304Y“ rádióberendezés megfelel a
2014/53/EU irányelvnek.
Az EU konformitási nyilatkozat teljes szövege az alábbi
weboldalon érhető el:
http://www.kenwood.com/cs/ce/eudoc/
iii
Page 5

Svenska
Härmed försäkrar JVCKENWOOD att
radioutrustningen “KMM-BT304/KMM-BT204/
KMM-304Y” är i enlighet med direktiv
2014/53/EU.
Den fullständiga texten av EU-försäkran
om överensstämmelse finns på följande
Internetadress:
http://www.kenwood.com/cs/ce/eudoc/
Suomi
JVCKENWOOD julistaa täten, että radiolaite
“KMM-BT304/KMM-BT204/KMM-304Y” on
direktiivin 2014/53/EU mukainen.
EU-vaatimustenmukaisuusvakuutusvaatimus
löytyy kokonaisuudessaan seuraavasta internetosoitteesta:
http://www.kenwood.com/cs/ce/eudoc/
Slovensko
S tem JVCKENWOOD izjavlja, da je radijska oprema
»KMM-BT304/KMM-BT204/KMM-304Y« v skladu z
Direktivo 2014/53/EU.
Celotno besedilo direktive EU o skladnosti je
dostopno na tem spletnem naslovu:
http://www.kenwood.com/cs/ce/eudoc/
Slovensky
Spoločnosť JVCKENWOOD týmto vyhlasuje, že
rádiové zariadenie „KMM-BT304/KMM-BT204/
KMM-304Y“ vyhovuje smernici 2014/53/EÚ.
Celý text EÚ vyhlásenia o zhode nájdete na
nasledovnej internetovej adrese:
http://www.kenwood.com/cs/ce/eudoc/
Dansk
Herved erklærer JVCKENWOOD, at radioudstyret
“KMM-BT304/KMM-BT204/KMM-304Y” er i
overensstemmelse med Direktiv 2014/53/EU.
EU-overensstemmelseserklæringens fulde ordlyd
er tilgængelig på følgende internetadresse:
http://www.kenwood.com/cs/ce/eudoc/
Ελληνικά
Με το παρόν, η JVCKENWOOD δηλώνει ότι ο
ραδιοεξοπλισμός «KMM-BT304/KMM-BT204/
KMM-304Y» συμμορφώνεται με την Οδηγία
2014/53/ΕΕ.
Το πλήρες κείμενο της δήλωσης συμμόρφωσης
της ΕΕ είναι διαθέσιμο στην ακόλουθη διεύθυνση
στο διαδίκτυο:
http://www.kenwood.com/cs/ce/eudoc/
Eesti
Käesolevaga JVCKENWOOD kinnitab, et
„KMM-BT304/KMM-BT204/KMM-304Y“
raadiovarustus on vastavuses direktiiviga
2014/53/EL.
ELi vastavusdeklaratsiooni terviktekst on
kättesaadav järgmisel internetiaadressil:
http://www.kenwood.com/cs/ce/eudoc/
Latviešu
JVCKENWOOD ar šo deklarē, ka radio aparatūra
„KMM-BT304/KMM-BT204/KMM-304Y” atbilst
direktīvas 2014/53/ES prasībām.
Pilns ES atbilstības deklarācijas teksts ir pieejams
šādā tīmekļa adresē:
http://www.kenwood.com/cs/ce/eudoc/
Lietuviškai
Šiuo JVCKENWOOD pažymi, kad radijo įranga
„KMM-BT304/KMM-BT204/KMM-304Y“ atitinka
2014/53/EB direktyvos reikalavimus.
Visą EB direktyvos atitikties deklaracijos tekstą
galite rasti šiuo internetiniu adresu:
http://www.kenwood.com/cs/ce/eudoc/
Malti
B’dan, JVCKENWOOD jiddikjara li t-tagħmir
tar-radju “KMM-BT304/KMM-BT204/KMM-304Y”
huwa konformi mad-Direttiva 2014/53/UE.
It-test kollu tad-dikjarazzjoni ta’ konformità huwa
disponibbli fl-indirizz intranet li ġej:
http://www.kenwood.com/cs/ce/eudoc/
HRVATSKI / SRPSKI JEZIK
JVCKENWOOD ovim izjavljuje da je radio oprema
“KMM-BT304/KMM-BT204/KMM-304Y” u skladu s
Direktivom 2014/53/EU.
Cjeloviti tekst deklaracije Europske unije o
usklađenosti dostupan je na sljedećoj internet
adresi:
http://www.kenwood.com/cs/ce/eudoc/
ROMÂNĂ
Prin prezenta, JVCKENWOOD declară că
echipamentul radio “KMM-BT304/KMM-BT204/
KMM-304Y” este în conformitate cu Directiva
2014/53/UE.
Textul integral al declarației de conformitate UE
este disponibil la urmatoarea adresă de internet:
http://www.kenwood.com/cs/ce/eudoc/
БЪЛГАРСКИ
С настоящото JVCKENWOOD декларира,
че радиооборудването на “KMM-BT304/
KMM-BT204/KMM-304Y” е в съответствие с
Директива 2014/53/ЕС.
Пълният текст на ЕС декларацията за
съответствие е достъпен на следния интернет
адрес:
http://www.kenwood.com/cs/ce/eudoc/
Turkish
Burada, JVCKENWOOD “KMM-BT304/KMM-BT204/
KMM-304Y” radyo ekipmanının 2014/53/AB
Direktifine uygun olduğunu bildirir.
AB uyumluluk deklarasyonunun tam metni
aşağıdaki internet adresinde mevcuttur.
http://www.kenwood.com/cs/ce/eudoc/
Русский
JVCKENWOOD настоящим заявляет, что
радиооборудование «KMM-BT304/
KMM-BT204/KMM-304Y» соответствует
Директиве 2014/53/EU.
Полный текст декларации соответствия
ЕС доступен по следующему адресу в сети
Интернет:
http://www.kenwood.com/cs/ce/eudoc/
Українська
Таким чином, компанія JVCKENWOOD заявляє,
що радіообладнання «KMM-BT304/KMM-BT204/
KMM-304Y» відповідає Директиві 2014/53/EU.
Повний текст декларації про відповідність ЄС
можна знайти в Інтернеті за такою адресою:
http://www.kenwood.com/cs/ce/eudoc/
iv
Page 6

CONTENTS
BEFORE USE 2
BASICS 3
GETTING STARTED 4
1 Select the display language
and cancel the demonstration
2 Set the clock and date
3 Set the initial settings
RADIO 6
USB/iPod/ANDROID 8
AUX 10
Spotify 11
BLUETOOTH® 12
AUDIO SETTINGS 19
DISPLAY SETTINGS 23
TROUBLESHOOTING 24
INSTALLATION/
CONNECTION 26
REFERENCES 30
Maintenance
More information
SPECIFICATIONS 32
BEFORE USE
IMPORTANT
•
To ensure proper use, please read through this manual before using this product. It is especially important that you read and observe
Warning and Caution in this manual.
•
Please keep the manual in a safe and accessible place for future reference.
WARNING
• Do not operate any function that takes your attention away from safe driving.
Caution
Volume setting:
•
Adjust the volume so that you can hear sounds outside the car to prevent accidents.
•
Lower the volume before playing digital sources to avoid damaging the speakers by the sudden increase of the output level.
General:
•
Avoid using the external device if it might hinder safe driving.
•
Make sure all important data has been backed up. We shall bear no responsibility for any loss of recorded data.
•
Never put or leave any metallic objects (such as coins or metal tools) inside the unit to prevent a short circuit.
•
USB rating is indicated on the main unit. To view, detach the faceplate.
•
Depending on the types of cars, the antenna will automatically extend when you turn on the unit with the antenna control wire connected
( 28)
. Turn off the unit or change the source to STANDBY when parking at a low ceiling area.
How to read this manual
•
Operations are explained mainly using buttons on the faceplate of .
•
English indications are used for the purpose of explanation. You can select the display language from the
• [XX]
indicates the selected items.
• ( XX)
indicates references are available on the stated page.
( 3)
[FUNCTION]
menu.
( 5)
2
ENGLISH
Page 7

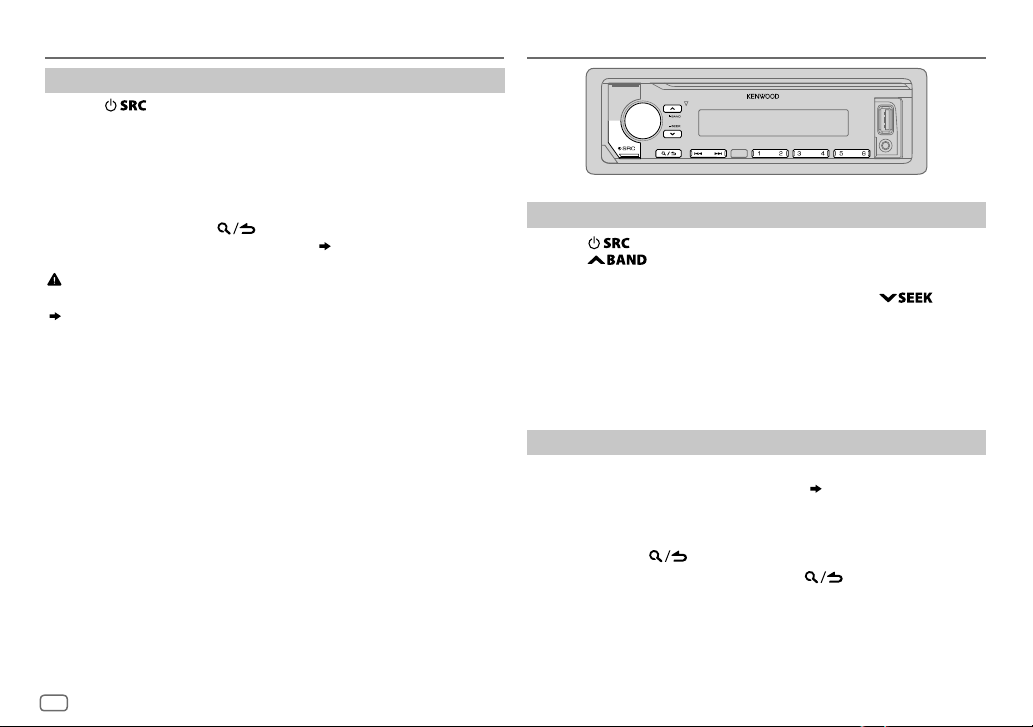
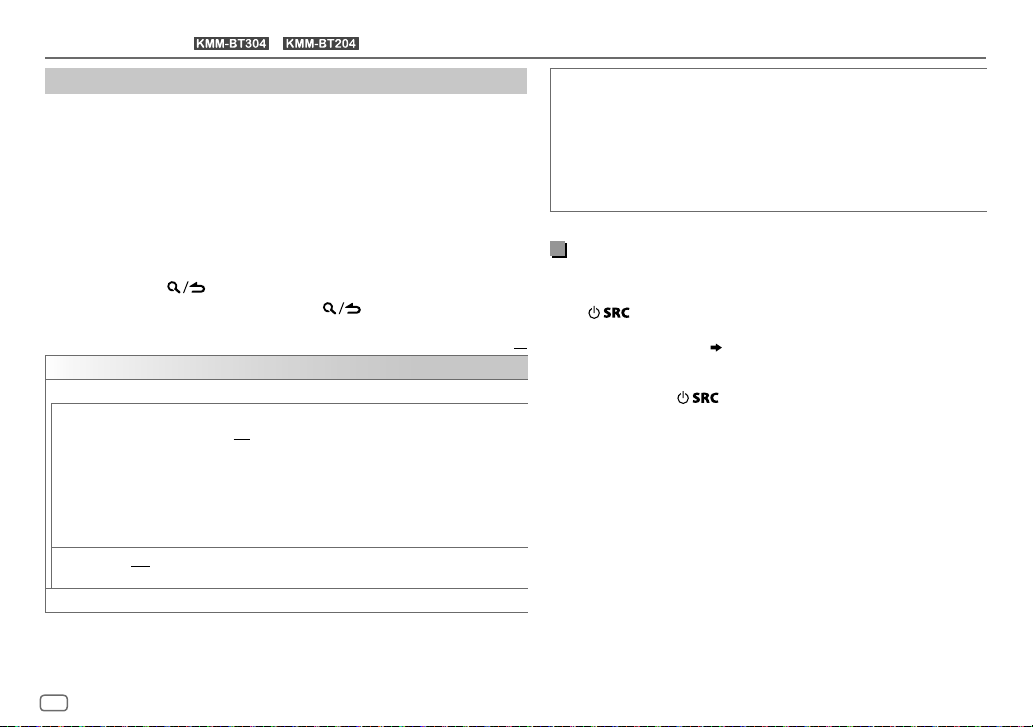
BASICS
Faceplate
Attach
Detach
button
To On the faceplate
Turn on the power
Adjust the volume Turn the volume knob.
Select a source
Change the display information Press DISP repeatedly.
Volume
knob
For
when the unit enters searching status.
Press
• Press and hold to turn off the power.
Press
/ : Flashes
.
repeatedly.
( 31)
For
Lights up when
Bluetooth
connection is
established.
( 12)
:
Detach
How to reset
Reset the unit within 5 seconds
after detaching the faceplate.
ENGLISH
3
Page 8

GETTING STARTED
1
Select the display language and cancel the demonstration
When you turn on the power for the first time (or
[YES], 5
), the display shows: “SEL LANGUAGE” “PRESS” “VOLUME
KNOB”
1 Turn the volume knob to select
[SPA]
(Spanish), then press the knob.
[ENG]
is selected for the initial setup.
Then, the display shows: “CANCEL DEMO”
KNOB”.
[ENG]
2 Press the volume knob.
[YES]
is selected for the initial setup.
3 Press the volume knob again.
“DEMO OFF” appears.
Then, the display shows the selected crossover type:
“2-WAY X ’ OVER” or “3-WAY X ’ OVER”
• To change the crossover type, see “Change the crossover type”.
[FACTORY RESET]
(English),
[RUS]
“PRESS” “VOLUME
(Russian) or
is set to
( 6)
2
Set the clock and date
1
Press the volume knob to enter
2 Turn the volume knob to select
To adjust the clock
3 Turn the volume knob to select
[FUNCTION]
[CLOCK]
[CLOCK ADJUST]
.
, then press the knob.
, then press the knob.
4 Turn the volume knob to make the settings, then press the knob.
Hour
5 Turn the volume knob to select
6 Turn the volume knob to select
To set the date
7 Turn the volume knob to select
8 Turn the volume knob to select
9 Turn the volume knob to select
the knob.
Minute
[CLOCK FORMAT]
[12H]
or
[24H]
[DATE FORMAT]
[DD/MM/YY]
[DATE SET]
or
, then press the knob.
, then press the knob.
, then press the knob.
, then press the knob.
[MM/DD/YY]
, then press
10 Turn the volume knob to make the settings, then press the knob.
Day
Month Year or Month Day Year
11 Press and hold to exit.
To return to the previous setting item, press .
3
Set the initial settings
1
Press repeatedly to enter STANDBY.
2 Press the volume knob to enter
3 Turn the volume knob to select an item
knob.
[FUNCTION]
.
( 5)
, then press the
4 Repeat step 3 until the desired item is selected or activated.
5 Press and hold to exit.
To return to the previous setting item, press .
4
ENGLISH
Page 9

GETTING STARTED
AUDIO CONTROL
SWITCH
PREOUT*
DISPLAY
EASY MENU
TUNER SETTING
PRESET TYPE
SYSTEM
KEY BEEP*
SOURCE SELECT
SPOTIFY SRC
BUILT-IN AUX
P-OFF WAIT
(For )
REAR/SUB-W
connected to the line out terminals on the rear (through an external
amplifier).
(For / )
When entering
ON
:ZONE 1 illumination changes to white color.;
OFF
:ZONE 1 illumination remains as
•
ZONE 2 illumination changes to light blue color when you enter
[FUNCTION]
•
Refer to the illustration on page 23 for zone identification.
NORMAL
(FM1/FM2/FM3/MW/LW).;
button, regardless of the selected band.
ON
:Activates the keypress tone.;
ON
:Enables SPOTIFY in source selection.;
ON
:Enables AUX in source selection.;
Applicable only when the demonstration mode is turned off.
Sets the duration when the unit will automatically turn off (while in
standby mode) to save the battery.
20M
: 20minutes;
Default:
: Selects whether rear speakers or a subwoofer are
( 29)
[FUNCTION]
, irregardless of the
:Memorizes one station for each preset button in each band
40M
: 40minutes;
...
[COLOR SELECT]
[EASY MENU]
MIX
:Memorizes one station for each preset
OFF
:Deactivates.
OFF
60M
setting.
OFF
:Disables.
:Disables.
: 60minutes;
color.
( 11)
( 10)
– – –
( 23)
:Cancels
XX
F/W UPDATE
UPDATE SYSTEM
F/W UP xxxx
FACTORY RESET YES
CLOCK
CLOCK DISPLAY
ENGLISH
РУССКИЙ
ESPANOL
*
Not applicable if 3-way crossover is selected.
YES
:Starts upgrading the firmware.; NO:Cancels (upgrading is not
activated).
For details on how to update the firmware, visit
<www.kenwood.com/cs/ce/>.
:Resets the settings to default (except the stored station).;
NO
:Cancels
ON
:The clock time is shown on the display even when the unit is
turned off.;
OFF
:Cancels.
Select the display language for
information if applicable.
By default,
[ENGLISH]
is selected.
[FUNCTION]
menu and music
ENGLISH
5
Page 10
GETTING STARTED
Change the crossover type
Press repeatedly to enter STANDBY.
1
2 Press and hold number buttons 4 and 5 to enter crossover select.
The current crossover type appears.
3 Turn the volume knob to select “2WAY” or “3WAY”, then press the
knob.
4 Turn the volume knob to select “YES” or “NO”, then press the knob.
The selected crossover type appears.
• To cancel, press and hold
• To adjust the selected crossover settings,
Caution
Select a crossover type according to how the speakers are connected.
( 28, 29)
If you select a wrong type:
• The speakers may damage.
• The output sound level may be extremely high or low.
.
( 20, 21)
.
RADIO
Search for a station
1
Press repeatedly to select RADIO.
2 Press repeatedly to select FM1/FM2/FM3/MW/LW.
3 Press S/T to search for a station.
• To change the searching method for S/T: Press
repeatedly.
AUTO1 : Automatically search for a station.
AUTO2 : Search for a preset station.
MANUAL : Manually search for a station.
• To store a station: Press and hold one of the number buttons (1to6).
• To select a stored station: Press one of the number buttons (1to6).
Other settings
1
Press the volume knob to enter
2 Turn the volume knob to select an item
knob.
3 Repeat step 2 until the desired item is selected/activated or follow
the instructions stated on the selected item.
4 Press and hold to exit.
To return to the previous setting item, press .
[FUNCTION]
.
( 7)
, then press the
6
ENGLISH
Page 11

RADIO
Default:
TUNER SETTING
LOCAL SEEK
AUTO
MEMORY
MONO SET
NEWS SET ON
REGIONAL ON
AF SET ON
TI ON
PTY SEARCH1 Turn the volume knob to select the available Program Type (see the
CLOCK
TIME SYNC
ON
: Searches only stations with good reception. ;
•
Settings made are applicable only to the selected source/station. Once
you change the source/station, you need to make the settings again.
YES
:Automatically starts memorizing 6 stations with good reception.;
NO
:Cancels.
•
Selectable only if
ON
:Improves the FM reception, but the stereo effect may be lost.;
OFF
:Cancels.
: The unit will temporarily switch to News Programme if available. ;
OFF
:Cancels.
: Switches to another station only in the specific region using the “AF”
control.;
: Automatically searches for another station broadcasting the same
program in the same Radio Data System network with better reception
when the current reception is poor.;
:Allows the unit to temporarily switch to Traffic Information if available
(“TI” lights up).;
following), then press the knob.
2
Turn the volume knob to select the PTY language (
GERMAN
3
Press S/T to start searching.
ON
:Synchronizes the unit’s time to the Radio Data System station time.;
OFF
:Cancels.
[NORMAL]
OFF
:Cancels.
OFF
:Cancels.
), then press the knob.
is selected for
OFF
OFF
: Cancels.
[PRESET TYPE]. ( 5)
:Cancels.
ENGLISH/FRENCH
XX
Available Program Type for
SPEECH : NEWS, AFFAIRS, INFO
CULTURE, SCIENCE, VARIED, WEATHER, FINANCE, CHILDREN, SOCIAL
RELIGION, PHONE IN, TRAVEL, LEISURE, DOCUMENT
MUSIC
:
POP M
(music),
CLASSICS, OTHER M
OLDIES, FOLK M
The unit will search for the Program Type categorized under
[MUSIC]
if selected.
•
[LOCAL SEEK]/[MONO SET]/[NEWS SET]/[REGIONAL]/[AF SET]/[TI]/[PTY SEARCH]
selectable only when the band is FM1/FM2/FM3.
• If the volume is adjusted during reception of traffic information or news
bulletin, the adjusted volume is memorized automatically. It will be
applied the next time traffic information or news bulletin is turned on.
/
(information),
ROCK M
(music),
(music)
[PTY SEARCH]
SPORT, EDUCATE, DRAMA
(music),
EASY M
JAZZ, COUNTRY, NATION M
(music),
LIGHT M
(music),
,
(music),
[SPEECH]
,
or
is
ENGLISH
7
Page 12
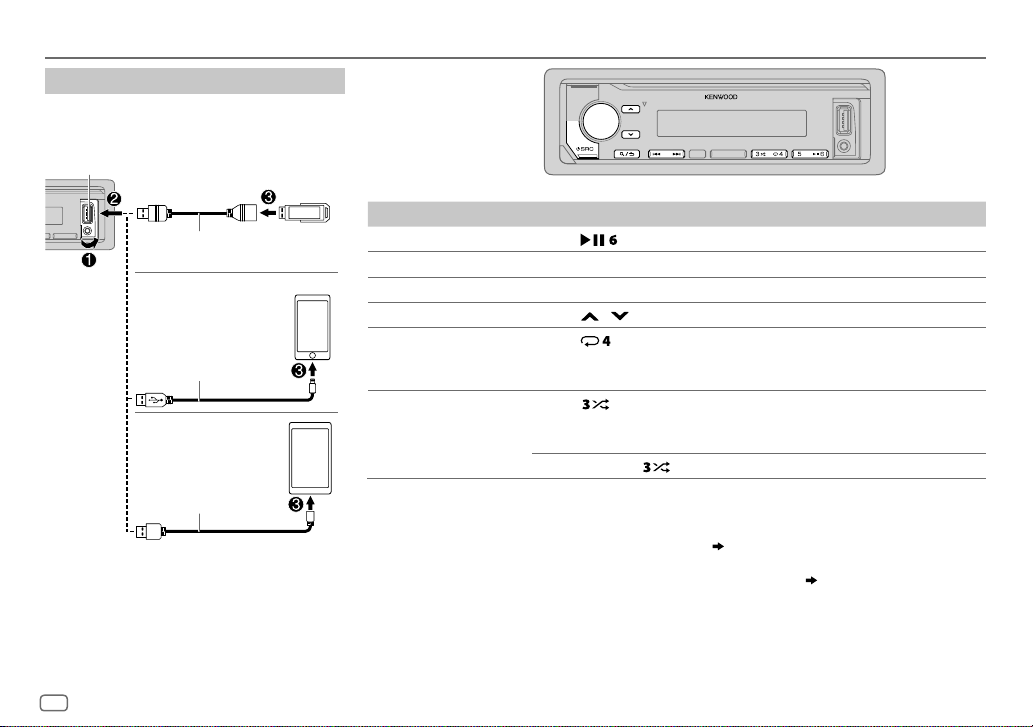
USB/iPod/ANDROID
Start playback
The source changes automatically and playback
starts.
USB input terminal
USB
CA-U1EX (max.: 500mA)
(optional accessory)
iPod/iPhone
KCA-iP102/KCA-iP103
(optional accessory)
or accessory of the iPod/
2
*
iPhone
ANDROID
USB cable
(commercially available)
1
*
KCA-iP102 : 30-pin type, KCA-iP103 : Lightning type
2
*
Do not leave the cable inside the car when not using.
1
*
3
*
2
*
To On the faceplate
Playback/pause Press .
4
Reverse/Fast-forward
Select a file
Select a folder
Repeat play
*
Random play
*
Press and hold S/T.
Press S/T.
5
*
6
6
*
Press / .
Press repeatedly.
FILE REPEAT/FOLDER REPEAT/ALL REPEAT
FILE REPEAT/FOLDER REPEAT/REPEAT OFF
Press repeatedly.
FOLDER RANDOM/RANDOM OFF
: MP3/WMA/AAC/WAV/FLAC file, iPod or
: MP3/WMA/AAC/WAV/FLAC file
: iPod or ANDROID
ANDROID
Press and hold
3
*
When connecting an Android device, “Press [VIEW] to install KENWOOD MUSIC PLAY APP” is shown. Follow the instructions
to select
ALL RANDOM
.
to install the application. You can also install the latest version of KENWOOD MUSIC PLAY application on your Android device
before connecting. For more information, visit <www.kenwood.com/cs/ce/>.
4
*
For ANDROID: Applicable only when
5
*
This does not work for iPod/ANDROID.
6
*
For iPod/ANDROID: Applicable only when
[BROWSE MODE]
is selected.
[MODE OFF]/[BROWSE MODE]
( 9)
is selected.
( 9)
8
ENGLISH
Page 13

USB/iPod/ANDROID
Select control mode
While in iPod USB source, press 5 repeatedly.
MODE ON
: Control iPod using the iPod itself. However, you can still play/
MODE OFF
While in ANDROID source, press 5 repeatedly.
BROWSE MODE
HAND MODE
While in USB source, press 5 repeatedly.
Stored songs in the following drive will be played back.
• Selected internal or external memory of a smartphone (Mass Storage
• Selected drive of a multiple drives device.
While listening to TuneIn Radio, TuneIn Radio Pro or Aupeo, connect the
iPod/iPhone to the USB input terminal of the unit.
• The unit will output the sound from these applications.
For iPod/ANDROID, applicable only when
selected.
pause, file skip, fast-forward or reverse from this unit.
: Control iPod from this unit.
: Control Android device from this unit via KENWOOD
MUSIC PLAY application installed in the Android device.
: Control Android device using the Android device itself via
other media player applications installed in the Android
device. However, you can still play/pause and file skip from
this unit.
Select music drive
Class).
Listen to TuneIn Radio/TuneIn Radio Pro/Aupeo
Select a file from a folder/list
[MODE OFF]/[BROWSE MODE]
is
1 Press .
2 Turn the volume knob to select a folder/list, then press the knob.
3 Turn the volume knob to select a file, then press the knob.
Quick Search
If you have many files, you can search through them quickly.
Turn the volume knob quickly to browse through the list quickly.
Skip Search
Press S/T to search at a preset skip search ratio.
( 10, [SKIP SEARCH])
• Pressing and holding S/T searches at a 10% ratio.
Alphabet search
You can search for a file according to the first character.
For iPod USB source
(applicable only for USB and ANDROID source)
(applicable only for iPod USB and ANDROID source)
(applicable only for iPod USB and ANDROID source)
1 Turn the volume knob quickly to enter character search.
2 Turn the volume knob to select the character.
• Select “
3 Press S/T to move to the entry position.
” to search for a character other than AtoZ, 0to9.
*
• You can enter up to 3characters.
4 Press the volume knob to start searching.
For ANDROID source
1 Press / to enter character search.
2 Turn the volume knob to select the character.
^A^: Upper case letters (A to Z)
_A_: Lower case letters (a to z)
-0-: Numbers (0 to 9)
: Character other than AtoZ, 0to9
***
3 Press the volume knob to start searching.
• To return to the root folder/first file/top menu, press 5.
BT AUDIO source.)
• To return to the previous setting item, press .
• To cancel, press and hold
.
(Not applicable for
ENGLISH
9
Page 14

USB/iPod/ANDROID
Settings to use KENWOOD Remote application
KENWOOD Remote application is designed to control the KENWOOD car
receiver’s operations from the iPhone/iPod (via USB input terminal).
Preparation:
Install the latest version of KENWOOD Remote application on your device
before connecting. For more information, visit
<www.kenwood.com/cs/ce/>.
For
same way as connection via Bluetooth.
/ , you can also make the settings in the
( 18)
AUX
Preparation:
Select
[ON]
for
[BUILT-IN AUX]
Start listening
1
Connect a portable audio player (commercially available).
Auxiliary input jack
for
[SOURCE SELECT]. ( 5)
Portable audio
player
Other settings
1
Press the volume knob to enter
[FUNCTION]
.
2 Turn the volume knob to select an item (see the following table),
then press the knob.
3 Repeat step 2 until the desired item is selected or activated.
4 Press and hold to exit.
To return to the previous setting item, press .
Default:
USB
MUSIC DRIVE DRIVE CHANGE
SKIP SEARCH 0.5%/1%/5%/10%
10
automatically and playback starts.
Repeat steps
the skip search ratio over the total files.
ENGLISH
:The next drive (
1
to 3 to select the following drives.
[DRIVE 1]
to
[DRIVE 4]
: While listening to iPod USB or ANDROID source, selects
) is selected
3.5mm stereo mini plug with “L” shaped connector
(commercially available)
2 Press repeatedly to select AUX.
3 Turn on the portable audio player and start playback.
Set the AUX name
While listening to a portable audio player connected to the unit...
XX
1 Press the volume knob to enter
2 Turn the volume knob to select
3 Turn the volume knob to select
[FUNCTION]
[SYSTEM]
[AUX NAME SET]
.
, then press the knob.
, then press the knob.
4 Turn the volume knob to select an item, then press the knob.
AUX
(default)/
DVD/PORTABLE/GAME/VIDEO/TV
5 Press and hold to exit.
To return to the previous setting item, press .
Page 15

Spotify
Preparation:
Install the latest version of the Spotify application on your device (iPhone/
iPod touch), then create an account and log in to Spotify.
• Select
[ON]
for
[SPOTIFY SRC]
Start listening
1
Open the Spotify application on your device.
2 Connect your device to the USB input terminal.
USB input terminal
3 Press repeatedly to select SPOTIFY.
Broadcast starts automatically.
To On the faceplate
Playback/pause
Skip a track
Thumbs up or thumbs down
Start radio Press and hold 5.
Repeat play*
Random play*
5
5
in
[SOURCE SELECT]. ( 5)
KCA-iP102/KCA-iP103 (optional accessory)
or accessory of the iPod/iPhone
Press
Press S*
4
*
Press / .
2
*
.
3
/T.
Press repeatedly.
REPEAT ALL/REPEAT ONE*3/
Press repeatedly.*
SHUFFLE ON/SHUFFLE OFF
1
*
3
REPEAT OFF
1
*
KCA-iP102 : 30-pin type, KCA-iP103 : Lightning type
2
*
Do not leave the cable inside the car when not using.
3
*
Available for premium account users only.
4
*
This feature is available for tracks in Radio only. If thumbs down is selected, the current
track is skipped.
5
*
Available for tracks in Playlists only.
Save favorite song information
While listening to the Radio on Spotify...
Press and hold the volume knob.
“SAVED” appears and the information is stored to “Your Music” or “Your
Library” on your Spotify account.
To unsave, repeat the same procedure.
“REMOVED” appears and the information is removed from “Your Music”
or “Your Library” on your Spotify account.
Search for a song or station
1
Press .
2 Turn the volume knob to select a list type, then press the knob.
The list types displayed differ depending on the information sent
from Spotify.
3 Turn the volume knob to select the desired song or station.
4 Press the volume knob to confirm.
You can browse through the list quickly by turning the volume knob
quickly.
To cancel, press and hold
.
ENGLISH
11
Page 16

BLUETOOTH®
(for / )
BLUETOOTH — Connection
Supported Bluetooth profiles
– Hands-Free Profile (HFP)
– Advanced Audio Distribution Profile (A2DP)
– Audio/Video Remote Control Profile (AVRCP)
– Serial Port Profile (SPP)
– Phonebook Access Profile (PBAP)
Supported Bluetooth codecs
– Sub Band Codec (SBC)
– Advanced Audio Coding (AAC)
Connect the microphone
Rear panel
Microphone
(supplied)
Microphone
input jack
Adjust the
microphone angle
Secure using cord clamps (not
supplied) if necessary.
Pair and connect a Bluetooth device for the first time
1
Press to turn on the unit.
2 Search and select this unit model name (KMM-BT3**/KMM-BT2**) on the Bluetooth
device.
“PAIRING”
the display.
“PASS XXXXXX” Device name “PRESS” “VOLUME KNOB” appears on
• For some Bluetooth devices, you may need to enter the Personal Identification
Number (PIN) code immediately after searching.
3 Press the volume knob to start pairing.
“PAIRING OK” appears when pairing is completed.
Once pairing is completed, Bluetooth connection is established automatically.
•
•
• This unit supports Secure Simple Pairing (SSP).
• Up to five devices can be registered (paired) in total.
• Once the pairing is completed, the Bluetooth device will remain registered in the unit
even if you reset the unit. To delete the paired device,
• A maximum of two Bluetooth phones and one Bluetooth audio device can be connected
at any time.
However, while in BT AUDIO source, you can connect to five Bluetooth audio devices and
switch between these five devices.
• Some Bluetooth devices may not automatically connect to the unit after pairing. Connect
the device to the unit manually.
• Refer to the instruction manual of the Bluetooth device for more information.
: “BT1” and/or “BT2” indicator on the faceplate lights up.
: “BT1” and/or “BT2” on the display window lights up.
16, [DEVICE DELETE]
( 17)
.
*
For the location of the microphone input jack, refer to page 29.
12
ENGLISH
Page 17

BLUETOOTH®
(for / )
Auto Pairing
When you connect iPhone/iPod touch/Android device to the USB input
terminal, pairing request (via Bluetooth) is automatically activated.
Press the volume knob to pair once you have confirmed the device
name.
Automatic pairing request is activated only if:
– Bluetooth function of the connected device is turned on.
–
[AUTO PAIRING]
– KENWOOD MUSIC PLAY application is installed on the Android device
( 8)
and
[BROWSE MODE]
is set to
[ON]. ( 16)
is selected.
( 9)
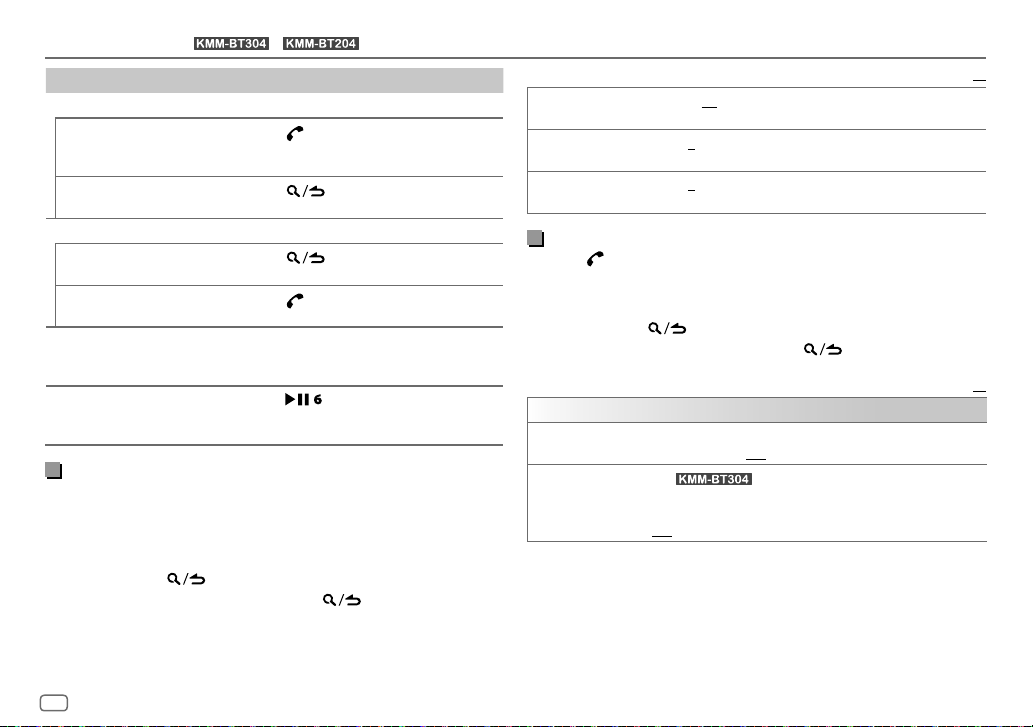
BLUETOOTH — Mobile phone
Receive a call
When there is an incoming call:
•
• The unit answers the call automatically if
selected time.
During a call:
•
[DISPLAY] ( 23)
• If you turn off the unit or detach the faceplate, the Bluetooth
connection is disconnected.
The following operations may differ or not available depending on the
connected phone.
To On the faceplate
First incoming call...
Answer a call
Reject a call
End a call
: ZONE 2 illuminates in green color and flashes.
( 14)
: ZONE 1 illuminates according to the settings made for
and ZONE 2 illuminates in green color.
Press
the number buttons (1 to 6).
Press
Press .
[AUTO ANSWER]
or the volume knob or one of
.
is set to a
ENGLISH
13
Page 18
BLUETOOTH®
To On the faceplate
While talking on the first incoming call...
Answer another incoming
call and hold the current
call
Reject another incoming
call
While having two active calls...
End current call and
activate held call
Swap between the
current call and held call
Adjust the phone volume
[00]
to
[35]
Switch between hands-free
and private talk modes
(for / )
(Default:
[15]
)
Press
.
Press
Press
Press
Turn the volume knob during a call.
• This adjustment will not affect the
volume of the other sources.
Press
• Operations may vary according to the
connected Bluetooth device.
.
.
.
during a call.
Improve the voice quality
While talking on the phone...
1 Press the volume knob to enter
[FUNCTION]
.
2 Turn the volume knob to select an item (see the following table),
then press the knob.
3 Repeat step 2 until the desired item is selected or activated.
4 Press and hold to exit.
To return to the previous setting item, press .
Default:
MIC GAIN –10
NR LEVEL –5
ECHO CANCEL –5
to
+10(–4
number increased.
to+5(0):Adjust the noise reduction level until the least noise is
being heard during a phone conversation.
to+5(0):Adjust the echo cancellation delay time until the least
echo is being heard during a phone conversation.
):The sensitivity of the microphone increases as the
Make the settings for receiving a call
Press to enter Bluetooth mode.
1
2 Turn the volume knob to select an item (see the following table),
then press the knob.
3 Repeat step 2 until the desired item is selected or activated.
4 Press and hold to exit.
To return to the previous setting item, press .
Default:
SETTINGS
AUTO ANSWER
BATT/SIGNAL*
*
Functionality depends on the type of the phone used.
1
to30:The unit answers incoming call automatically in the selected
time (in seconds).;
(For )
AUTO
:Shows the strength of the battery and signal when the unit
detects a Bluetooth device and the Bluetooth device is connected.;
OFF
:Cancels.
OFF
:Cancels.
XX
XX
14
ENGLISH
Page 19

BLUETOOTH®
(for / )
Make a call
You can make a call from the call history, phonebook, or dialing the
number. Call by voice is also possible if your mobile phone has the
feature.
1 Press to enter Bluetooth mode.
“(First device name)” appears.
• If two Bluetooth phones are connected, press again to switch to
another phone.
“(Second device name)” appears.
2 Turn the volume knob to select an item (see the following table),
then press the knob.
3 Repeat step 2 until the desired item is selected/activated or follow
the instructions stated on the selected item.
4 Press and hold to exit.
To return to the previous setting item, press .
CALL HISTORY
(Applicable only if the phone supports PBAP.)
1
Press the volume knob to select a name or a phone number.
•
on the lower part of the display to indicate the previous call status.
•
“M” indicates call missed.
• Press
• “NO DATA” appears if there is no recorded call history.
2
Press the volume knob to call.
: “INCOMING”, “OUTGOING”, or “MISSED” is shown
: “I” indicates call received, “O” indicates call made,
DISP
to change the display category (NUMBER or NAME).
PHONE BOOK
NUMBER DIAL
VOICE
BATT LOW
NO SIGNAL/LOW/MID/MAX*:Shows the strength of the current received signal.
*
Functionality depends on the type of the phone used.
(Applicable only if the phone supports PBAP.)
1
Turn the volume knob quickly to enter alphabet search mode (if the
phonebook contains many contacts).
The first menu (ABCDEFGHIJK) appears.
• To go to the other menu (LMNOPQRSTUV or WXYZ1
/
S/T
symbols.
to call.
(
, #, +).
S/T
Repeat steps
.
, then press the knob.
to move the entry position.
1
and 2 until you finish entering the phone number.
( 16, Make a call using voice
• To select the desired first letter, turn the volume knob or press
Select “1” to search with numbers and select “
2
Turn the volume knob to select a name, then press the knob.
3
Turn the volume knob to select a phone number, then press the knob
•
The phonebook of the connected phone is automatically transferred to
the unit when pairing.
•
Contacts are categorized as: HOME, OFFICE, MOBILE, OTHER, GENERAL or
HM (home), OF (office), MO (mobile), OT (other), GE (general)
•
This unit can display only non-accent letters. (Accent letters such as “Ú”
is shown as “U”.)
1
Turn the volume knob to select a number (0 to 9) or character
2
Press
3
Press the volume knob to call.
Speak the name of the contact you want to call or the voice command
to control the phone functions.
recognition)
/
MID/FULL*:Shows the strength of the battery.
*
” to search with
*
), press
ENGLISH
15
Page 20

BLUETOOTH®
(for / )
Make a call using voice recognition
Press and hold to activate the voice recognition of the
1
connected phone.
2 Speak the name of the contact you want to call or the voice
command to control the phone functions.
• Supported Voice Recognition features vary for each phone. Refer to the
instruction manual of the connected phone for details.
• This unit also supports the intelligent personal assistant function of
iPhone.
Settings in memory
Store a contact in memory
You can store up to 6 contacts into the number buttons (1 to 6).
1 Press to enter Bluetooth mode.
2 Turn the volume knob to select
[NUMBER DIAL]
, then press the knob.
[CALL HISTORY], [PHONE BOOK]
, or
3 Turn the volume knob to select a contact or enter a phone number.
If a contact is selected, press the volume knob to show the phone
number.
4 Press and hold one of the number buttons (1 to 6).
“STORED” appears when the contact is stored.
To erase a contact from the preset memory, select
and store a blank number.
[NUMBER DIAL]
in step 2
Make a call from memory
Press to enter Bluetooth mode.
1
2 Press one of the number buttons (1 to 6).
3 Press the volume knob to call.
“NO MEMORY” appears if there is no contacts stored.
Other settings
1
Press the volume knob to enter
[FUNCTION]
.
2 Turn the volume knob to select an item (see the following table),
then press the knob.
3 Repeat step 2 until the desired item is selected/activated or follow
the instructions stated on the selected item.
4 Press and hold to exit.
To return to the previous setting item, press .
Default:
BT MODE
PHONE SELECT
AUDIO SELECT
DEVICE DELETE
PIN CODE EDIT
(0000)
RECONNECT ON
AUTO PAIRING ON
INITIALIZE YES
Selects the phone or audio device to connect or disconnect.
“
*
” appears in front of the device name when connected.
“
” appears in front of the current playback audio device.
•
You can only connect a maximum of two Bluetooth phones and one
Bluetooth audio device at any time.
1
Turn the volume knob to select a device to delete, then press the knob.
2
Turn the volume knob to select
Changes the PIN code (up to 6 digits).
1
Turn the volume knob to select a number.
2
Press S/T to move the entry position.
Repeat steps
3
Press the volume knob to confirm.
:The unit automatically reconnect when the last connected Bluetooth
device is within range.;
:The unit automatically pair supported Bluetooth device (iPhone/
iPod touch/Android device) when it is connected through USB input
terminal.Depending on the operating system of the connected device,
this function may not work. ;
:Initializes all the Bluetooth settings (including stored pairing,
phonebook, and etc.).;
1
and 2 until you finish entering the PIN code.
OFF
NO
:Cancels.
OFF
:Cancels.
[YES]
:Cancels.
or
[NO]
, then press the knob.
XX
16
ENGLISH
Page 21

BLUETOOTH®
(for / )
Bluetooth test mode
You can check the connectivity of the supported profile
between the Bluetooth device and the unit.
• Make sure there is no Bluetooth device paired.
1 Press and hold .
“PLEASE PAIR YOUR PHONE PIN 0000” appears.
2 Search and select this unit model name
(KMM-BT3**/KMM-BT2**) on the Bluetooth device.
3 Operate the Bluetooth device to confirm pairing.
“TESTING” flashes on the display.
The connectivity result (OK or NG) appears after the
test.
PAIRING: Pairing status
HF CNT: Hands-Free Profile (HFP) compatibility
AUD CNT: Advanced Audio Distribution Profile (A2DP)
PB DL: Phonebook Access profile (PBAP) compatibility
To cancel test mode, press and hold
the unit.
compatibility
to turn off
BLUETOOTH — Audio
While in BT AUDIO source,
you can connect to five
Bluetooth audio devices
and switch between these
five devices.
Audio player via Bluetooth
1
Press repeatedly to select BTAUDIO.
2 Operate the Bluetooth audio player to start playback.
To On the faceplate
Playback/pause Press .
Select group or folder Press
Reverse/Forward skip
Reverse/Fast-forward
Repeat play Press
Random play Press and hold to select
Select a file from a folder/list Refer to “Select a file from a folder/list” on page 9.
Switch between connected
Bluetooth audio devices
*
Pressing the “Play” key on the connected device itself also causes switching of sound output from the device.
Operations and display indications may differ according to their availability on the
connected device.
/ .
Press S/T.
Press and hold S/T.
repeatedly.
ALL REPEAT, FILE REPEAT, REPEAT OFF
• Press
Press 5.
*
to select
RANDOM OFF
ALL RANDOM
.
.
ENGLISH
17
Page 22
BLUETOOTH®
(for / )
Settings to use KENWOOD Remote application
KENWOOD Remote application is designed to control the KENWOOD car
receiver’s operations from the iPhone/iPod (via Bluetooth or via USB input
terminal) or Android smartphone (via Bluetooth).
Preparation:
Install the latest version of KENWOOD Remote application on your device
before connecting. For more information, visit <www.kenwood.com/cs/ce/>.
1 Press the volume knob to enter
[FUNCTION]
.
2 Turn the volume knob to select an item (see the following table), then
press the knob.
3 Repeat step 2 until the desired item is selected or activated.
4 Press and hold to exit.
To return to the previous setting item, press .
Default:
REMOTE APP
SELECT
IOS YES
ANDROID YES
ANDROID LIST
*
Displayed only when
Select the device (IOS or ANDROID) to use the application.
:Selects iPhone/iPod to use the application via Bluetooth or connected via
USB input terminal.;
If IOS is selected, select iPod BT source (or iPod USB if your iPhone/iPod is
connected via USB input terminal) to activate the application.
•
The connectivity of the application will be interrupted or disconnected if:
– You change from iPod BT source to any playback source connected via the
USB input terminal.
– You change from iPod USB source to iPod BT source.
:Selects Android smartphone to use the application via Bluetooth.;
NO
: Cancels.
*:Selects the Android smartphone to use from the list.
[ANDROID]
of
NO
:Cancels.
[SELECT]
is set to
[YES]
.
STATUS
Shows the status of the selected device.
IOS CONNECTED
connected via Bluetooth or USB input terminal.
IOS NOT CONNECTED
ANDROID CONNECTED
Android smartphone connected via Bluetooth.
ANDROID NOT CONNECTED
application.
: You are able to use the application using the iPhone/iPod
: No IOS device is connected to use the application.
: You are able to use the application using the
: No Android device is connected to use the
Listen to iPhone/iPod via Bluetooth
You can listen to the songs on the iPhone/iPod via Bluetooth on this
unit.
Press
• You can operate the iPod/iPhone in the same way as iPod/iPhone
XX
via USB input terminal.
• If you plug in an iPhone/iPod to the USB input terminal while
listening to iPodBT source, the source automatically change
to iPodUSB. Press
connected via Bluetooth.
repeatedly to select iPodBT.
( 8)
to select iPodBT if the device is still
18
ENGLISH
Page 23

BLUETOOTH®
(for / )
Internet radio via Bluetooth
You can listen to Spotify on the iPhone/iPod/Android device
via Bluetooth on this unit.
• Make sure the USB input terminal is not connected to any
device.
Listen to Spotify
Preparation:
Select
[ON]
for
[SPOTIFY SRC]
in
[SOURCE SELECT]. ( 5)
1 Open the Spotify application on your device.
2 Connect your device via Bluetooth connection.
( 12)
3 Press repeatedly to select SPOTIFY (for iPhone/
iPod) or SPOTIFY BT (for Android device).
The source switches and broadcast starts automatically.
• You can operate Spotify in the same way as Spotify via USB
input terminal.
( 11)
AUDIO SETTINGS
While listening to any source...
1 Press the volume knob to enter
(For
) Press AUD to enter
2 Turn the volume knob to select an item (see the following table), then press
the knob.
3 Repeat step 2 until the desired item is selected or activated.
4 Press and hold to exit.
To return to the previous setting item, press .
AUDIO CONTROL
SUB-W LEVEL
MANUAL EQ
62.5HZ LEVEL LEVEL –9
100HZ/160HZ/250HZ
400HZ/630HZ/1KHZ
1.6KHZ/2.5KHZ/4KHZ
6.3KHZ/10KHZ/16KHZ
Q FACTOR 1.35/1.50/2.00
PRESET EQ NATURAL/ROCK/POPS/EASY/TOP40/JAZZ/POWERFUL/USER
BASS BOOST LEVEL1/LEVEL2/LEVEL3/LEVEL4/LEVEL5
LEVEL –50
The sound elements (frequency level, tone level, Q factor) are preset into each
selection.
BASS
EXTEND
/
LEVEL –9
source. (Before making an adjustment, select the source you want to adjust.)
/
/
preset equalizer suitable to the music genre. (Select
made in
Selects your preferred bass boost level.;
[FUNCTION]
to
LEVEL +10 (LEVEL 0
memorize for each source. (Before making an adjustment,
select the source you want to adjust.)
ON
to
LEVEL +9 (LEVEL 0
:Adjust the quality factor.
[MANUAL EQ]
.
[AUDIO CONTROL]
to
: Turns on the extended bass. ;
.)
directly.
): Adjusts the subwoofer output level.
LEVEL +9 (LEVEL 0
):Adjusts the level to memorize for each
or
OFF
:Cancels.
):Adjusts the level to
OFF
[USER]
LV1/LV2/LV3/LV4/LV5
Default:
: Cancels.
: Selects a
to use the settings
:
XX
ENGLISH
19
Page 24

AUDIO SETTINGS
LOUDNESS LEVEL1/LEVEL2
SUBWOOFER SET ON
FADER
BALANCE L15
VOLUME OFFSET –15
SOUND EFFECT
SOUND RECNSTR
(Sound
reconstruction)
SPACE ENHANCE
SND REALIZER LEVEL1/LEVEL2/LEVEL3
STAGE EQ LOW/MIDDLE/HIGH
DRIVE EQ ON
SPEAKER SIZE
X’OVER
DTA SETTINGS
CAR SETTINGS
• : For 2-way crossover:
[SWITCH PREOUT]
•
[SUB-W LEVEL]
20
ENGLISH
produce a well-balanced sound at a low volume level.;
:Turns on the subwoofer output.;
(Not applicable if 3-way crossover is selected.)
R15
to
source you want to adjust.)
(Not applicable for RADIO source and AUX source.)
ON
:Creates realistic sound by compensating the high-frequency components and restoring
the rise-time of the waveform that are lost in audio data compression.;
(Not applicable for RADIO source.)
SMALL/MEDIUM/LARGE
OFF
OFF
speakers.;
: Boosts the frequency to reduce the noise heard from outside the car or running noise
of the tyres.;
Depending on the crossover type you have selected
crossover setting items will be shown.
selected.
For settings,
is set to
is selectable only if
or
LV1/LV2
to
F15 (0
):Adjusts the rear and front speaker output balance.
R15 (0
):Adjusts the left and right speaker output balance.
to +6 (0):Preset the initial volume level of each source. (Before adjustment, select the
:Cancels.
:Cancels.
OFF
:Cancels.
OFF
:Cancels.
22, Digital Time Alignment settings
[SUB-W]. ( 5)
:Selects your preferred low and high frequencies boost to
OFF
:Cancels.
or
SML/MED/LRG
or
LV1/LV2/LV3
or
LOW/MID/HI
[SUB-W LEVEL]/[SUBWOOFER SET]
[SUBWOOFER SET]
:Virtually adjust the sound position heard from the
( 21)
is set to
OFF
:Cancels.
:Virtually enhances the sound space.;
:Virtually makes the sound more realistic.;
( 6)
, 2-way crossover or 3-way
By default, 2-way crossover type is
.
is selectable only if
[ON]
.
OFF
:Cancels.
Crossover settings
Below are the available setting items for 2-way crossover
and 3-way crossover.
SPEAKER SIZE
Selects according to the connected speaker size for
optimum performance.
•
The frequency and slope settings are automatically set
for the crossover of the selected speaker.
•
When 2-way crossover is selected, if
for
[TWEETER]
of
[SPEAKER SIZE]
available.
• When 3-way crossover is selected, if
for
[WOOFER]
[WOOFER]
X ‘ OVER
• [FRQ]
/
[F - HPF FRQ]/[R - HPF FRQ]/[SW LPF FRQ]/[HPF FRQ]
[LPF FRQ]
selected speakers (high pass filter or low pass filter).
If
[THROUGH]
selected speakers.
•
[F - HPF SLOPE]/[R - HPF SLOPE]/[SW LPF SLOPE]/[HPF SLOPE]
[LPF SLOPE]/[SLOPE]:
Selectable only if a setting other than
selected for the crossover frequency.
• [SW LPF PHASE]/[PHASE]:
output to be in line with the other speaker output.
• [GAIN LEFT]/[GAIN RIGHT]/[F - HPF GAIN]/[R - HPF GAIN]
[SW LPF GAIN]/[GAIN]:
selected speaker.
[FRONT], [REAR]
, the
[X ‘ OVER]
setting of the speaker is not
of
[SPEAKER SIZE]
is not available.
: Adjusts the crossover frequency for the
is selected, all signals are sent to the
Adjusts the crossover slope.
Selects the phase of the speaker
Adjusts the output volume of the
and
, the
[NONE]
[SUBWOOFER]
[NONE]
[X’OVER]
[THROUGH]
is selected
for
is selected
setting of
/
/
is
/
Page 25

AUDIO SETTINGS
2-way crossover setting items
SPEAKER SIZE
FRONT SIZE
8CM/10CM/12CM/13CM/16CM/17CM/18CM
4×6/5×7/6×8/6×9/7×10
TWEETER
SMALL/MIDDLE/LARGE/NONE
(not connected)
REAR 8CM/10CM/12CM/13CM/16CM/17CM/18CM/4×6/5×7/6×8/6×9
SUBWOOFER
7×10/NONE
1*2
*
16CM/20CM/25CM/30CM/38CM OVER/NONE
(not connected)
(not connected)
X ' OVER
TWEETER FRQ
1KHZ/1.6KHZ/2.5KHZ/4KHZ/5KHZ/6.3KHZ/8KHZ
10KHZ/12.5KHZ
GAIN LEFT
GAIN RIGHT
FRONT HPF F - HPF FRQ
–8
to
0
–8
to
0
30HZ/40HZ/50HZ/60HZ/70HZ/80HZ/90HZ
100HZ/120HZ/150HZ/180HZ/220HZ/250HZ/
THROUGH
F - HPF SLOPE
F - HPF GAIN
–6DB/–12DB/–18DB/–24DB
–8
to
0
REAR HPF R - HPF FRQ
(Refer
FRONT HPF
R - HPF SLOPE
settings above.)
R - HPF GAIN
SUBWOOFER
1*2
*
LPF
SW LPF FRQ 30HZ/40HZ/50HZ/60HZ/70HZ/80HZ/90HZ
100HZ/120HZ/150HZ/180HZ/220HZ/250HZ
THROUGH
SW LPF SLOPE
SW LPF PHASE
SW LPF GAIN –8
–6DB/–12DB/–18DB/–24DB
REVERSE
(180°)/
NORMAL
(0°)
to
0
3-way crossover setting items
SPEAKER SIZE
/
TWEETER
MID RANGE
WOOFER
/
X ' OVER
TWEETER HPF FRQ
SMALL/MIDDLE/LARGE
8CM/10CM/12CM/13CM/16CM/17CM/18CM/4×6/5×7/6×8/6×9
2
*
16CM/20CM/25CM/30CM/38CM OVER/NONE
(not connected)
1KHZ/1.6KHZ/2.5KHZ/4KHZ/5KHZ/6.3KHZ/8KHZ
/
10KHZ/12.5KHZ
/
MID RANGE HPF FRQ
SLOPE
PHASE
GAIN –8
–6DB/–12DB
REVERSE
(180°)/
NORMAL
(0°)
to
0
30HZ/40HZ/50HZ/60HZ/70HZ/80HZ/90HZ/100HZ
/
120HZ/150HZ/180HZ/220HZ/250HZ/THROUGH
/
HPF SLOPE
LPF FRQ
–6DB/–12DB
1KHZ/1.6KHZ/2.5KHZ/4KHZ/5KHZ/6.3KHZ/8KHZ
/
10KHZ/12.5KHZ/THROUGH
WOOFER
LPF SLOPE
PHASE
GAIN –8
2
*
LPF FRQ 30HZ/40HZ/50HZ/60HZ/70HZ/80HZ/90HZ/100HZ
–6DB/–12DB
REVERSE
(180°)/
to
0
NORMAL
(0°)
/
120HZ/150HZ/180HZ/220HZ/250HZ/THROUGH
/
/
1
*
For : Selectable only when
( 5)
2
*
Selectable only when
SLOPE
PHASE
GAIN –8
[SUBWOOFER SET]
–6DB/–12DB
REVERSE
(180°)/
to
0
[SWITCH PREOUT]
is set to
NORMAL
(0°)
[ON]. ( 20)
is set to
[SUB-W]
ENGLISH
.
21
Page 26

AUDIO SETTINGS
Digital Time Alignment settings
Digital Time Alignment sets the delay time of the speaker output to
create a more suitable environment for your vehicle.
• For more information,
[DTA SETTINGS].
DTA SETTINGS
POSITION
DISTANCE 0CM
GAIN –8DB
DTA RESET YES
CAR SETTINGS
CAR TYPE COMPACT/FULL SIZE CAR/WAGON/MINIVAN/SUV
R-SP LOCATION
Determining the value for [DISTANCE] and [GAIN] of
Selects your listening position (reference point).
ALL
:Not compensating;
FRONT LEFT
• [FRONT ALL]
making an adjustment, select the speaker you want to adjust.)
(Before making an adjustment, select the speaker you want to adjust.)
[POSITION]
Identify your car type and rear speaker location in order to make the
adjustment for
MINIVAN(LONG)
OFF:
Selects the location of the rear speakers in your vehicle to calculate the
furthest distance from the listening position selected (reference point).
• DOOR/REAR DECK
• 2ND ROW/3RD ROW
:Front left seat;
( 6)
to
610CM
to
0DB
:Resets the settings (
to default.; NO:Cancels.
Not compensating.
[OFF], [COMPACT], [FULL SIZE CAR], [WAGON]
as
[MINIVAN]
FRONT RIGHT:
is displayed only when
:Fine adjust the distance to compensate. (Before
:Fine adjust the output volume of the selected speaker.
[DISTANCE]
[DTA SETTINGS]
:Selects the type of vehicle.;
:Selectable only when
:Selectable only when
or
[MINIVAN(LONG)]
FRONT ALL
.
Front right seat;
:Front seat
[2-WAY X’OVER]
and
[GAIN]
[CAR TYPE]
[CAR TYPE]
.
is selected.
) of the selected
/
is selected as
or
[SUV]
is selected
•
Before making an adjustment for
speaker you want to adjust:
When 2-way crossover is selected:
FRONT LEFT/FRONT RIGHT/REAR LEFT/REAR RIGHT/SUBWOOFER
– You can only select
than
[NONE]
is selected for
When 3-way crossover is selected:
TWEETER LEFT/TWEETER RIGHT/MID LEFT/MID RIGHT/WOOFER
– You can only select
[SPEAKER SIZE]. ( 21)
• [R-SP LOCATION]
– 2-way crossover is selected.
– A setting other than
Determining the value for [DISTANCE] and [GAIN] of [DTA SETTINGS]
.
of
[DISTANCE]
[REAR LEFT], [REAR RIGHT]
[REAR]
and
[SUBWOOFER]
[WOOFER]
if a setting other than
[CAR SETTINGS]
[NONE]
is selectable only if:
( 6)
is selected for
[REAR]
If you specify the distance from the center of the
currently set listening position to every speaker,
the delay time will be automatically computed
and set.
1
Determine the center of the currently set
2
Measure the distances from the reference
3
Calculate the differences between the
4
Set the
5
Adjust
Example: When
listening position
and
[GAIN]
of
[DTA SETTINGS]
and
[SUBWOOFER]
of
[SPEAKER SIZE]. ( 21)
[NONE]
is selected for
of
[SPEAKER SIZE]. ( 21)
listening position as the reference point.
point to the speakers.
distance of the furthest speaker (rear
speaker) and other speakers.
[DISTANCE]
individual speakers.
[GAIN]
for individual speakers.
[FRONT ALL]
, select the
if a setting other
[WOOFER]
calculated in step 3 for
is selected as the
of
22
ENGLISH
Page 27

DISPLAY SETTINGS
Zone identification for color and brightness settings
Zone identification for brightness settings
Set the dimmer
Press and hold DISP to turn on or off the dimmer.
• If you have set
hold this button.
Other settings
1
Press the volume knob to enter
2 Turn the volume knob to select an item (see the following table),
then press the knob.
3 Repeat step 2 until the desired item is selected/activated or follow
the instructions stated on the selected item.
4 Press and hold to exit.
To return to the previous setting item, press .
[DIMMER TIME]
, it will be canceled once you press and
[FUNCTION]
.
Default:
DISPLAY
COLOR SELECT
DIMMER
BRIGHTNESS
TEXT SCROLL AUTO/ONCE
*
Preset colors:
BLUE2/BLUE3/SKYBLUE1/SKYBLUE2/LIGHTBLUE/AQUA1/AQUA2/GREEN1
GREEN2/GREEN3/YELLOWGREEN1/YELLOWGREEN2/YELLOW/ORANGE1/ORANGE2
ORANGERED
(For / )
Select color for
1
Select a zone. (See the illustration on the left column.)
2
Select a color for the selected zone.
To make your own color, select
made will be stored in
1
Press the volume knob to enter the detailed color adjustment.
2
Press S/T to select the color (R/G/B) to adjust.
3
Turn the volume knob to adjust the level (0 to 9), then press the knob.
Dim the illumination.
ON
DIMMER TIME
1
Turn the volume knob to adjust the
2
Turn the volume knob to adjust the
(Default:
1
Select a zone. (See the illustration on the left column.)
2 0
automatically, or scroll only once.;
RED1/RED2/RED3/PURPLE1/PURPLE2/PURPLE3/PURPLE4/BLUE1
ALL ZONE, ZONE 1
INITIAL COLOR/VARIABLE SCAN/CUSTOM R/G/B
:Dimmer is turned on.;
:Set the dimmer on and off time.
[ON]: 18:00; [OFF]: 6:00
to 31: Select your preferred brightness level for the selected zone.
:Select whether to scroll the display information
and
[CUSTOM R/G/B]
[CUSTOM R/G/B]
OFF
:Cancels.
)
OFF
ZONE 2
separately.
/preset colors
. The color you have
.
[ON]
time, then press the knob.
[OFF]
time, then press the knob.
:Cancels.
XX
*
/
/
/
ENGLISH
23
Page 28

TROUBLESHOOTING
Symptom Remedy
Sound cannot be heard.
“MISWIRING CHECK WIRING
THEN PWR ON” appears.
“PROTECTING SEND SERVICE”
appears.
General
•
Sound cannot be heard.
•
The unit does not turn on.
•
Information shown on the
display is incorrect.
The unit does not work at all. Reset the unit.
•
Radio reception is poor.
•
Static noise while listening
Radio
to the radio.
“READING” keeps flashing. Do not use too many hierarchical levels or folders.
Elapsed playing time is not
correct.
“LOADING” appears when you
enter search mode by pressing
.
Correct characters are not
USB/iPod
displayed (e.g. album name).
“NA FILE” Make sure the media contains supported audio files.
•
Adjust the volume to the optimum level.
•
Check the cords and connections.
Turn the power off, then check to be sure the
terminals of the speaker wires are insulated properly.
Turn the power on again.
Send the unit to the nearest service center.
Clean the connectors.
Connect the antenna firmly.
This is caused by how the files are recorded.
This unit is still preparing the iPod/iPhone music list.
It may take some time to load, try again later.
•
This unit can only display uppercase letters,
numbers, and a limited number of symbols.
•
Depending on the display language you have
selected
displayed correctly.
( 30)
( 30)
( 3)
( 5)
, some characters may not be
Symptom Remedy
“NO DEVICE” Connect a USB device, and change the source to USB again.
“COPY PRO” A copy-protected file is played.
“UNSUPPORTED DEVICE”
appears.
“UNRESPONSIVE DEVICE”
appears
“USB HUB IS NOT
SUPPORTED” appears.
USB/iPod
•
The source does not
change to “USB” when
you connect a USB
device while listening
to another source.
•
“USB ERROR” appears
“NO MUSIC” Connect a USB device that contains playable audio files.
“iPod ERROR”
•
Sound cannot be heard
during playback.
•
Sound output only
from the Android
device.
ANDROID
•
Check whether the connected device is compatible with
this unit and ensure the file systems are in supported
formats.
( 30)
•
Reattach the device.
Make sure the device is not malfunction and reattach the
device.
This unit cannot support a USB device connected via a
USB hub.
The USB port is drawing more power than the design limit.
Turn the power off and unplug the USB device. Then, turn
on the power and reattach the USB device. If this does not
solve the problem, turn the power off and on (or reset the
unit) before replacing with another USB device.
•
Reconnect the iPod.
•
Reset the iPod.
•
Reconnect the Android device.
•
If in
[HAND MODE]
application on the Android device and start playback.
•
If in
[HAND MODE]
application or use another media player application.
•
Restart the Android device.
•
If this does not solve the problem, the connected
Android device is unable to route the audio signal to
unit.
( 30)
, launch any media player
, relaunch the current media player
24
ENGLISH
Page 29

TROUBLESHOOTING
Symptom Remedy
Cannot playback at
[BROWSE MODE]
“NO DEVICE” or
“READING” keeps
ANDROID
flashing.
Playback is intermittent
or sound skips.
“ANDROID ERROR”/
“NADEVICE”
“DISCONNECTED” USB is disconnected from the head unit. Please make sure
“CONNECTING”
Spotify
“CHECK APP” The Spotify application is not connected properly, or user is
•
Make sure KENWOOD MUSIC PLAY APP is installed on the
Android device.
.
•
Reconnect the Android device and select the appropriate
control mode.
•
If this does not solve the problem, the connected Android
device does not support
•
Switch off the developer options on the Android device.
•
Reconnect the Android device.
•
If this does not solve the problem, the connected Android
device does not support
Turn off the power saving mode on the Android device.
•
Reconnect the Android device.
•
Restart the Android device.
the device is connected properly through USB.
•
Connected via USB input terminal: The device is
connecting to the head unit. Please wait.
•
Connected via Bluetooth: The Bluetooth is disconnected.
Please check Bluetooth connection and make sure both
the device and the unit are paired and connected.
not login. End the Spotify application and restart, then login
to your Spotify account.
( 8)
[BROWSE MODE]. ( 30)
[BROWSE MODE]. ( 30)
Symptom Remedy
No Bluetooth device is
detected.
Bluetooth pairing
cannot be made.
Echo or noise is heard
during a phone
conversation.
Phone sound quality
is poor.
Voice calling method is
not successful.
Sound is being
interrupted or skipped
Bluetooth® (for / )
during playback of a
Bluetooth audio player.
The connected Bluetooth
audio player cannot be
controlled.
•
Search from the Bluetooth device again.
•
Reset the unit.
•
Make sure you have entered the same PIN code to both
the unit and Bluetooth device.
•
Delete pairing information from both the unit and the
Bluetooth device, then perform pairing again.
•
Adjust the microphone unit’s position.
•
Check the
•
Reduce the distance between the unit and the Bluetooth
device.
•
Move the car to a place where you can get a better signal
reception.
•
Use voice calling method in a more quiet environment.
•
Reduce the distance from the microphone when you
speak the name.
•
Make sure the same voice as the registered voice tag is
used.
•
Reduce the distance between the unit and the Bluetooth
audio player.
•
Turn off, then turn on the unit and try to connect again.
•
Other Bluetooth devices might be trying to connect to the
unit.
•
Check whether the connected Bluetooth audio player
supports Audio/Video Remote Control Profile (AVRCP).
(Refer to the instructions of your audio player.)
•
Disconnect and connect the Bluetooth player again.
( 3)
[ECHO CANCEL]
setting.
( 12)
( 12)
( 14)
ENGLISH
25
Page 30

TROUBLESHOOTING INSTALLATION/CONNECTION
Symptom Remedy
“DEVICE FULL” The number of registered devices has reached its limit.
“N/A VOICE TAG” Make sure the same voice as the registered voice tag is
“NOT SUPPORT” The connected phone does not support Voice Recognition
“NO ENTRY”/“NO PAIR” There is no registered device connected/found via
“ERROR” Try the operation again. If “ERROR” appears again, check if
“NO INFO”/“NO DATA” Bluetooth device cannot get the contact information.
“HF ERROR XX”/
“BT ERROR”
Bluetooth® (for / )
“SWITCHING NG” The connected phones might not support phone switching
(For )
Muting upon the reception of a phone call
Connect the MUTE wire to your telephone using a commercial telephone accessory.
( 28)
When a call comes in, “CALL” appears.
•
To continue listening to the audio system during a call, press . “CALL” disappears
and the audio system resumes.
When the call ends, “CALL” disappears.
Retry after deleting an unnecessary device.
DEVICE DELETE)
used.
feature or phonebook transfer.
Bluetooth.
the device supports the function you have tried.
Reset the unit and try the operation again. If this does not
solve the problem, consult your nearest service center.
feature.
(The audio system pauses.)
(The audio system resumes.)
( 16,
Warning
•
The unit can only be used with a 12V DC power supply, negative ground.
•
Disconnect the battery’s negative terminal before wiring and mounting.
•
Do not connect Battery wire (yellow) and Ignition wire (red) to the car chassis or Ground wire
(black) to prevent a short circuit.
•
To prevent short circuit:
– Insulate unconnected wires with vinyl tape.
– Be sure to ground this unit to the car’s chassis again after installation.
– Secure the wires with cable clamps and wrap vinyl tape around the wires that come into
contact with metal parts to protect the wires.
Caution
•
For safety’s sake, leave wiring and mounting to professionals. Consult the car audio dealer.
•
Install this unit in the console of your vehicle. Do not touch the metal parts of this unit during
and shortly after use of the unit. Metal parts such as the heat sink and enclosure become hot.
•
Do not connect the [ wires of speakers to the car chassis or Ground wire (black), or connect
them in parallel.
•
Mount the unit at an angle of less than 30º.
•
If your vehicle wiring harness does not have the ignition terminal, connect Ignition wire (red)
to the terminal on the vehicle’s fuse box which provides 12 V DC power supply and is turned
on and off by the ignition key.
•
Keep all cables away from heat dissipate metal parts.
•
After the unit is installed, check whether the brake lamps, blinkers, wipers, etc. on the car are
working properly.
•
If the fuse blows, first make sure the wires are not touching car’s chassis, then replace the old
fuse with one that has the same rating.
26
ENGLISH
Page 31

INSTALLATION/CONNECTION
Part list for installation
(A)
Faceplate
(C)
Mounting sleeve
(E)
Extraction key
(B)
Trim plate
(D)
Wiring harness
Installing the unit (in-dash mounting)
Hook on the top side
Orientate the trim plate as
illustrated before fitting.
Do the required
wiring.
( 28)
Dashboard of
your car
Bend the appropriate tabs to hold the
mounting sleeve firmly in place.
Basic procedure
1
Remove the key from the ignition switch, then disconnect the
[
terminal of the car battery.
2
Connect the wires properly.
See Wiring connection.
3
Install the unit to your car.
See Installing the unit (in-dash mounting).
4
Connect the [ terminal of the car battery.
5
Press to turn on the power.
6
Detach the faceplate and reset the unit within 5 seconds.
( 28)
( 3)
How to remove the unit
1
Detach the faceplate.
2
Remove the trim plate.
3
Insert the extraction keys deeply into the
slots on each side, then follow the arrows
as shown on the illustration.
ENGLISH
27
Page 32

INSTALLATION/CONNECTION
Wiring connection
If your car does not have an ISO terminal:
We recommend installing the unit with a commercially available custom
wiring harness specific for your car and leave this job to professionals for
your safety. Consult your car audio dealer.
Connecting the ISO connectors on some VW/Audi or Opel
(Vauxhall) automobiles
You may need to modify the wiring of the supplied wiring harness as
illustrated below.
A7 (Red) Ignition wire (Red)
A4 (Yellow)
Default wiring
Battery wire (Yellow)
When connecting to an external amplifier,
connect its ground wire to the car’s chassis to
avoid damaging the unit.
Antenna terminal
Fuse (10A)
UnitVehicle
Yellow (Battery wire)
Red (Ignition wire)
If no connections are made, do not let the wire come out from the tab.
Light blue/yellow
(Steering remote
control wire)
STEERING WHEEL
REMOTE INPUT
REMOTE CONT
To the steering wheel remote control
adapter
Pin
A4 Yellow
A5 Blue/White*
A7 Red
A8 Black
B1
Purple
B2
Purple/black
B3
Gray
B4
Gray/black
B5
White
B6
White/black
B7
Green
B8
Green/black
28
ENGLISH
Color and function (for ISO connectors)
:
Battery
1
:
Power control
:
Ignition (ACC)
:
Earth (ground) connection
]
Rear speaker (right)
:
For 3-way crossover: Tweeter (right)
[
]
]
]
Front speaker (right)
:
For 3-way crossover: Mid range speaker (right)
[
Front speaker (left)
:
For 3-way crossover: Mid range speaker (left)
[
Rear speaker (left)
:
For 3-way crossover: Tweeter (left)
[
Red (A7)
Yellow (A4)
ISO connectors
Blue/White*
2
(Power control wire/
Antenna control wire)
Brown
(Mute control wire)
ANT CONT
P. CONT
MUTE
To the power control terminal when
using the optional power amplifier or
to the antenna control terminal in the
vehicle
To connect the Kenwood navigation
system, refer your navigation manual
(For
To the terminal that is grounded
when the telephone rings or during
conversation.
( 26)
NOTE: Total output for Blue/White wire (*1) + (*2) is 12V 350mA
)
Page 33

INSTALLATION/CONNECTION
Connecting external components
(For
Microphone input jack
/ )
( 12)
/
Rear/Front/Subwoofer output
For 3-way crossover:
Tweeter/Mid Range/Woofer output
Rear/Subwoofer output
For 3-way crossover:
Woofer output
ENGLISH
29
Page 34

REFERENCES
Maintenance
Cleaning the unit
Wipe off dirt on the faceplate with a dry silicone or soft cloth.
Cleaning the connector
Detach the faceplate and clean the
connector gently with a cotton swab,
being careful not to damage the
connector.
More information
For: – Latest firmware updates and latest compatible item list
– KENWOOD original application
– Any other latest information
Visit <www.kenwood.com/cs/ce/>.
Playable files
•
Playable audio file for USB mass storage class device: MP3 (.mp3), WMA (.wma),
AAC (.aac), AAC (.m4a), WAV (.wav), FLAC (.flac)
•
Playable USB device file system: FAT12, FAT16, FAT32
Even when audio files comply with the standards listed above, playback may be
impossible depending on the types or conditions of media or device.
•
For detailed information and notes about the playable audio files, visit
<www.kenwood.com/cs/ce/audiofiles>.
About USB devices
•
You cannot connect a USB device via a USB hub.
•
Connecting a cable whose total length is longer than 5m may result in abnormal
playback.
•
This unit cannot recognize a USB device whose rating is other than 5V and
exceeds 1.5A.
Connector (on the reverse
side of the faceplate)
About iPod/iPhone
•
Via USB
Made for
– iPod touch (5th and 6th generation)
– iPod nano (7th generation)
– iPhone 4S, 5, 5S, 5C, 6, 6 Plus, 6S, 6S Plus, SE, 7, 7 Plus
•
Via Bluetooth
Made for
– iPod touch (5th and 6th generation)
– iPhone 4S, 5, 5S, 5C, 6, 6 Plus, 6S, 6S Plus, SE, 7, 7 Plus
•
You cannot operate iPod if “KENWOOD” or “ ” is displayed on iPod.
•
Depending on the version of the operating system of the iPod/iPhone, some functions may not operate
on this unit.
About Android device
•
This unit supports Android OS 4.1 and above.
•
Some Android devices (with OS 4.1 and above) may not fully support Android Open Accessory (AOA) 2.0.
•
If the Android device supports both mass storage class device and AOA 2.0, this unit always playback via
AOA 2.0 as priority.
About Spotify
•
Spotify application supports:
– iPhone 4S, 5, 5S, 5C, 6, 6 Plus, 6S, 6S Plus, SE, 7, 7 Plus (iOS 8 or above)
– iPod touch (5th and 6th generation)
– Android OS 4.0.3 or above
•
Spotify is a third-party service, therefore the specifications are subject to change without prior notice.
Accordingly, compatibility may be impaired or some or all of the services may become unavailable.
•
Some functions of Spotify cannot be operated from this unit.
•
For issues using the application, please contact Spotify at <www.spotify.com>.
About Bluetooth
•
Depending on the Bluetooth version of the device, some Bluetooth devices may not be able to connect
to this unit.
•
This unit may not work with some Bluetooth devices.
•
Signal conditions vary, depending on the surroundings.
30
ENGLISH
Page 35

REFERENCES
Change the display information
Each time you press
•
If the information is unavailable or not recorded, “NO TEXT”, “NO INFO”, or other information (eg. station name, playing time) appears.
DISP
, the display information changes.
[BATT/SIGNAL]
Display information
Clock (back to the beginning)
(For FM Radio Data System stations only)
Station name Radio text Radio text+ Title/Artist Frequency Clock
(back to the beginning)
(For MP3/WMA/AAC/WAV/FLAC files)
Song title/Artist Album title/Artist Folder name File name Playing time
Clock (back to the beginning)
When
Song title/Artist
(back to the beginning)
Context title
(back to the beginning)
Song title/Artist
(back to the beginning)
is set to
[AUTO]. ( 14)
[MODE OFF]/[BROWSE MODE]
Album title/Artist Playing time Clock
Song title Artist name Album name Playing time Clock
Album title/Artist Playing time Clock
Clock (back to the beginning)
is selected
Source name
STANDBY Source name (Date/Clock)* Source name Clock (back to the beginning)
RADIO Frequency (Date/Clock)* Frequency
(For FM Radio Data System stations only)
Station name (Date/Clock)* Radio text (Date/Clock)* Radio text+ (R.TEXT+)
Song title (Artist) Song title (Date/Clock)* Frequency (Date/Clock)*
(back to the beginning)
USB
iPod USB/iPodBT or
ANDROID
SPOTIFY/SPOTIFY BT Context title (Date/Clock)*
BT AUDIO
AUX Source name (Date/Clock)* Source name
*
: Battery and signal strength of the Bluetooth device will be shown if
(For MP3/WMA/AAC/WAV/FLAC files)
Song title (Artist) Song title (Album title) Song title (Date/Clock)*
File name (Folder name)
(back to the beginning)
When
[MODE OFF]/[BROWSE MODE]
Song title (Artist)
Playing time (Date/Clock)*
Song title (Date/Clock)*
(For
Song title (Artist)
Playing time (Date/Clock)*
File name (Date/Clock)* Playing time (Date/Clock)*
Song title (Album name) Song title (Date/Clock)*
Playing time (Date/Clock)* (back to the beginning)
)
Song title (Album name) Song title (Date/Clock)*
/
is selected
( 9)
:
(back to the beginning)
Song title (Artist) Song title (Album name)
(back to the beginning)
( 9)
:
ENGLISH
31
Page 36

SPECIFICATIONS
FM Frequency Range 87.5 MHz — 108.0 MHz (50 kHz space)
Usable Sensitivity (S/N=30dB) 0.71μV/75Ω
Quieting Sensitivity
(DINS/N=46dB)
Frequency Response (±3dB) 30 Hz — 15 kHz
Signal-to-Noise Ratio (MONO) 64 dB
Tuner
Stereo Separation (1kHz) 40dB
MW
Frequency Range 531kHz — 1611kHz (9kHz space)
(AM)
Usable Sensitivity (S/N=20dB) 28.2μV
LW
Frequency Range 153kHz — 279kHz (9kHz space)
(AM)
Usable Sensitivity (S/N=20dB) 50μV
USB Standard USB1.1, USB2.0 Full Speed
File System FAT12/16/32
Maximum Supply Current DC5V
Frequency Response (±1dB) 20Hz — 20kHz
Signal-to-Noise Ratio (1kHz) 105 dB
Dynamic Range 90dB
USB
Channel Separation 85dB
MP3 Decode Compliant with MPEG-1/2 Audio Layer-3
WMA Decode Compliant with Windows Media Audio
AAC Decode AAC-LC “.aac”, “.m4a” files
WAV Decode Linear-PCM
FLAC Decode FLAC file (Up to 96kHz/24bit)
2.0μV/75Ω
1.5A
Version Bluetooth 3.0
Frequency Range 2.402GHz — 2.480GHz
Output Power +4dBm (MAX), 0dBm (AVE) Power Class 2
Maximum Communication
/ )
Range
Bluetooth
Profile HFP 1.6 (Hands-Free Profile)
(for
Maximum Output Power 50W×4
Full Bandwidth Power 22W×4 (at less than 1% THD)
Speaker Impedance 4Ω—8Ω
Tone Action Band 1: 62.5Hz±9dB
Audio
Preout Level/Load (USB)
Preout Impedance ≤600Ω
Line of sight approx. 10m (32.8ft)
A2DP (Advanced Audio Distribution Profile)
AVRCP 1.5 (Audio/Video Remote Control Profile)
SPP (Serial Port Profile)
PBAP (Phonebook Access Profile)
Band 2: 100Hz±9dB
Band 3: 160 Hz±9dB
Band 4: 250 Hz±9dB
Band 5: 400 Hz±9dB
Band 6: 630Hz±9dB
Band 7: 1kHz±9dB
Band 8: 1.6kHz±9dB
Band 9: 2.5kHz±9dB
Band 10: 4kHz±9dB
Band 11: 6.3kHz±9dB
Band 12: 10kHz±9dB
Band 13: 16kHz±9dB
/ : 4000mV/10kΩ
: 2500mV/10kΩ
32
ENGLISH
Page 37

SPECIFICATIONS
Frequency Response (±3dB) 20Hz—20kHz
Input Maximum Voltage 1000mV
Auxiliary
Input Impedance 30kΩ
Operating Voltage 14.4V (10.5V—16V allowable)
Maximum Current Consumption 10A
Operational Temperature Range –10°C—+60°C
General
Installation Size (W×H×D) 182mm×53mm×100mm
Net Weight (includes Trimplate,
Mounting Sleeve)
Subject to change without notice.
0.6kg
ENGLISH
33
Page 38

CОДЕРЖАНИЕ
ПОДГОТОВКА К
ЭКСПЛУАТАЦИИ 2
ОСНОВНЫЕ СВЕДЕНИЯ 3
НАЧАЛО ЭКСПЛУАТАЦИИ 4
1 Выбор языка отображения и
отмена демонстрации
2 Установка часов и даты
3 Установка начальных настроек
РАДИОПРИЕМНИК 6
USB/iPod/ANDROID 8
AUX 10
Spotify 11
BLUETOOTH® 12
ЗВУКОВЫЕ НАСТРОЙКИ 19
НАСТРОЙКИ ДИСПЛЕЯ 23
УСТРАНЕНИЕ ПРОБЛЕМ 24
УСТАНОВКА И
ПОДКЛЮЧЕНИЕ 26
СПРАВОЧНЫЕ
МАТЕРИАЛЫ 30
Обслуживание
Дополнительная информация
ТЕХНИЧЕСКИЕ
ХАРАКТЕРИСТИКИ 32
ПОДГОТОВКА К ЭКСПЛУАТАЦИИ
ВАЖНО
•
В целях обеспечения надлежащей эксплуатации, пожалуйста, перед тем как приступить к эксплуатации данного изделия, внимательно прочтите нас тоящее
руководство. Особенно важно, чтобы вы прочли и соблюдали все указания в данном руководстве, отмеченные словами Предупреждение и Внимание.
•
Пожалуйста, держите данное руководство в надежном и доступном месте для обращения к нему за справками в будущем.
ПРЕДУПРЕЖДЕНИЕ
•
Не используйте функции, которые отвлекают внимание и мешают безопасному вождению.
Внимание
Настройка громкости:
•
Отрегулируйте громкость таким образом, чтобы слышать звуки за пределами автомобиля для предотвращения аварий.
•
Уменьшите громкость перед воспроизведением, чтобы предотвратить повреждение динамиков из-за внезапного повышения уровня громкости на выходе.
Общие характеристики:
•
Не используйте внешние устройства, если это может отрицательно повлиять на безопасность движения.
•
Убедитесь в том, что созданы резервные копии всех важных данных. Мы не несем ответственность за потерю записанных данных.
•
Никогда не оставляйте металлические предметы (например, монеты или металлические инструменты) внутри устройс тва во избежание коротких замыканий.
•
Напряжение USB указано на главном устройстве. Для просмотра снимите переднюю панель.
•
В зависимости от типа автомобиля антенна может автоматически выдвигаться при включении ус тройства, если подключен провод управления антенной
При парковке в месте с низким потолком выключайте устройство или переключайте источник в режим STANDBY.
Как пользоваться данным руководством
•
Операции объясняются в основном с использованием кнопок на передней панели модели .
•
В объяснительных целях используются индикации на английском языке. Вы можете выбрать язык отображения из меню
• [XX]
обозначает выбранные элементы.
• ( XX)
означает, что материалы доступны на ук азанной странице.
( 3)
[FUNCTION]. ( 5)
( 28)
.
2
РУССКИЙ
Page 39

ОСНОВНЫЕ СВЕДЕНИЯ
Передняя панель
Прикрепление
Кнопка
отсоединения
Ручка регулировки
громкости
Для
когда устройство переходит в состояние
поиска.
/ : Мигает,
Задача На передней панели
Включение питания
Настройка громкости
Выберите источник
Изменение отображаемой информации
Нажмите кнопку .
•
Нажмите и удерживайте нажатой, чтобы отключить питание.
Поверните ручку регулировки громкости.
Нажмите кнопку несколько раз.
Нажмите кнопку
DISP
несколько раз.
Для
Загорается при
установлении
соединения Bluetooth.
( 12)
( 31)
:
Отсоединение
Порядок сброса
Выполните сброс настроек
устройства в течение 5 секунд после
отсоединения передней панели.
РУССКИЙ
3
Page 40

НАЧАЛО ЭКСПЛУАТАЦИИ
1
Выбор языка отображения и отмена демонстрации
При первом включении питания (или если для параметра
установлено значение
информация: “SEL LANGUAGE”
1 Поверните ручку регулировки громкости для выбора
(Aнглийский),
ее.
В качестве начальной настройки выбрано значение
Затем на дисплее отображается: “CANCEL DEMO”
2 Нажмите ручку регулировки громкости.
В качестве начальной настройки выбрано значение
3 Нажмите ручку регулировки громкости еще раз.
Отображается надпись “DEMO OFF”.
Затем дисплей отображает тип выбранного кроссовера:
“2-WAY X ’ OVER” или “3-WAY X ’ OVER”
•
Чтобы изменить тип кроссовера, см. “Изменение типа кроссовера”.
4
РУССКИЙ
[YES], 5
[RUS]
(Pусский) или
) на дисплее отображается следующая
“PRESS” “ VOLUME KNOB”
[SPA]
[FACTORY RESET]
(Испанский), а затем нажмите
[ENG]
.
“PRESS” “ VOLUME KNOB”.
[YES]
.
[ENG]
( 6)
2
Установка часов и даты
Нажмите ручку регулировки громкости для перехода в режим
1
[FUNCTION]
2 Поверните ручку регулировки громкости для выбора элемента
[CLOCK]
Чтобы настроить часы
3 Поверните ручку регулировки громкости для выбора элемента
[CLOCKADJUST]
4 Поворачивайте ручку регулировки громкости, чтобы выбрать
значения параметров, а затем нажмите ее.
Час Минута
5 Поверните ручку регулировки громкости для выбора элемента
[CLOCKFORMAT]
6 Поверните ручку регулировки громкости для выбора
а затем нажмите ее.
Чтобы установить дату
7 Поверните ручку регулировки громкости для выбора элемента
[DATEFORMAT]
8 Поверните ручку регулировки громкости для выбора
или
9 Поверните ручку регулировки громкости для выбора элемента
[DATESET]
10 Поворачивайте ручку регулировки громкости, чтобы выбрать
значения параметров, а затем нажмите ее.
День Месяц Год или Месяц День Год
.
, а затем нажмите ее.
, а затем нажмите ее.
, а затем нажмите ее.
, а затем нажмите ее.
[MM/DD/YY]
, а затем нажмите ее.
, а затем нажмите ее.
[12H]
или
[DD/MM/YY]
[24H]
,
11 Нажмите кнопку и удерживайте ее нажатой для выхода.
Для возврата к предыдущему элементу настройки нажмите кнопку .
3
Установка начальных настроек
Нажмите несколько раз для перехода в режим STANDBY.
1
2 Нажмите ручку регулировки громкости для перехода в режим
[FUNCTION]
3 Поверните ручку регулировки громкости для выбора элемента
( 5)
4 Повторяйте действие 3 до тех пор, пока не будет выбран или
активирован необходимый элемент.
5 Нажмите кнопку и удерживайте ее нажатой для выхода.
Для возврата к предыдущему элементу настройки нажмите кнопку .
.
, а затем нажмите ручку.
Page 41

НАЧАЛО ЭКСПЛУАТАЦИИ
AUDIO CONTROL
SWITCH
PREOUT*
DISPLAY
EASY MENU
TUNER SETTING
PRESET TYPE
SYSTEM
KEY BEEP*
SOURCE SELECT
SPOTIFY SRC
BUILT-IN AUX
P-OFF WAIT
(Для )
REAR/SUB-W
динамика к разъемам “line out” на задней панели устройства (через внешний
усилитель).
(для / )
При переходе в режим
ON
OFF
( 23)
•
При переходе в режим
•
Чтобы определить зону, см. рисунок на стр. 23.
NORMAL
кнопки в каждом диапазоне частот (FM1/FM2/FM3/MW/LW).;
одной радиостанции для каждой запрограммированной кнопки вне зависимости от
выбранного диапазона частот.
ON
ON
ON
Применимо, только если выключен демонстрационный режим.
Выбор времени автоматического выключения устройства (в режиме ожидания) в
целях экономии аккумулятора.
20M
: Выбор подключения задних динамиков или низкочастотного
( 29)
:Цвет подсветки ZONE 1 изменяется на белый.;
:Цвет подсветки ZONE 1 остается таким, каким был задан в
голубой независимо от настройки
:Включение звука нажатия кнопки.;
:Включение варианта SPOTIFY при выборе источника.;
:Включение варианта AUX при выборе источника.;
: 20 минут ;
[FUNCTION]
[FUNCTION]
:Запоминание одной радиостанции для каждой запрограммированной
40M
: 40 минут ;
По умолчанию:
...
[COLOR SELECT]
цвет подсветки ZONE 2 изменяется на светло-
[EASY MENU]
60M
OFF
:Выключение.
: 60минут;
.
OFF
–––
MIX
:Запоминание
OFF
:Отключение.
:Отключение.
:Отмена
( 11)
( 10)
XX
F/W UPDATE
UPDATE SYSTEM
F/W UP xxxx
FACTORY RESET YES
YES
(обновление не запущено).
Для получения более подробной информации об обновлении встроенного
программного обеспечения посетите <www.kenwood.com/cs/ce/>.
радиостанций).;
CLOCK
CLOCK DISPLAY
.
ENGLISH
РУССКИЙ
ESPANOL
*
Не применимо, ес ли выбран 3-полосный кроссовер.
:Запуск обновления встроенного программного обеспечения.; NO:Отмена
:Сброс всех настроек на значения по умолчанию (кроме сохраненных
NO
:Отмена
ON
:Даже в выключенном состоянии на дисплее отображается текущее время.;
OFF
:Отмена.
Выберите язык отображения для меню
информации о музыке.
По умолчанию выбрано значение
[FUNCTION]
[ENGLISH]
и в применимы случая
.
РУССКИЙ
5
Page 42

НАЧАЛО ЭКСПЛУАТАЦИИ
Изменение типа кроссовера
Нажмите несколько раз для перехода в режим STANDBY.
1
2 Нажмите и удерживайте нажатыми нумерованные кнопки 4 и 5,
чтобы перейти в режим выбора кроссовера.
Отобразится текущий тип кроссовера.
3 Поверните ручку регулировки громкости для выбора “2WAY” или
“3WAY”, а затем нажмите ее.
4 Поверните ручку регулировки громкости для выбора “YES” или “NO”,
а затем нажмите ее.
Отобразится выбранный тип кроссовера.
•
Для отмены нажмите и удерживайте нажатой кнопку .
•
Чтобы отрегулировать настройки выбранного кроссовера, см.
Внимание
Выбирайте тип кроссовера в соответствии с конфигурацией подключения
динамиков.
Если вы выберите неправильный тип:
•
Динамики могут повредиться.
•
Уровень выходного звука может быть чрезмерно высоким или низким.
( 28,29)
( 20, 21)
.
РАДИОПРИЕМНИК
Поиск радиостанции
1
Нажмите кнопку несколько раз для выбора RADIO.
2 Нажмите кнопку несколько раз для выбора FM1/FM2/FM3/
MW/LW.
3 Нажмите S/T, чтобы выполнить поиск радиостанции.
• Порядок изменения метода поиска для S/T
AUTO1
AUTO2
MANUAL
• Порядок сохранения радиостанции
• Порядок выбора сохраненной радиостанции
несколько раз.
: Автоматический поиск станции.
: Поиск запрограммированной радиостанции.
: Поиск станции вручную.
одну из нумерованных кнопок (
нумерованных кнопок (
1
1
–6).
–6).
: Нажмите и удерживайте нажатой
Другие настройки
1
Нажмите ручку регулировки громкости для перехода в режим
[FUNCTION]
2 Поверните ручку регулировки громкости для выбора элемента
( 7)
3 Повторяйте действие 2 до тех пор, пока не будет выбран/
активирован желаемый элемент, или следуйте инструкциям,
приведенным для выбранного элемента.
4 Нажмите кнопку и удерживайте ее нажатой для выхода.
Для возврата к предыдущему элементу настройки нажмите кнопку .
.
, а затем нажмите ручку.
: Нажмите кнопку
: Нажмите одну из
6
РУССКИЙ
Page 43

РАДИОПРИЕМНИК
TUNER SETTING
LOCAL SEEK
AUTO
MEMORY
MONO SET
NEWS SET ON
REGIONAL ON
AF SET ON
TI ON
PTY SEARCH
CLOCK
TIMESYNC
ON
: Поиск только станций с хорошим качеством приема. ;
•
Выполняемые настройки применяются только к выбранному источнику/
радиостанции. После переключения источника/радиос танции, настройки требуется
выполнить еще раз.
YES
:Aвтоматический запуск запоминания 6 станций с хорошим качеством приема.;
NO
:Отмена.
•
Доступно только в том случае, если для параметра
значение
[NORMAL]. ( 5)
ON
:Улучшение качества приема в FM-диапазоне (при этом стереоэффект может быть
утрачен).;
OFF
: Устройство временно переключается на программу новостей, если она доступна. ;
OFF
:Отмена.
: Переключение на другую станцию только в определенном регионе с помощью
элемента управления “AF”.;
: Автоматический поиск другой станции, транслирующей эту же программу в данной
сети Radio Data System с более высоким качеством приема, если текущее качество
приема является неудовлетворительным.;
:Позволяет устройству временно переключаться в режим приема сообщений о
движении на дорогах, когда эти сообщения доступны (загорается индикатор “TI”).;
OFF
:Отмена.
1
Поверните ручку регулировки громкости для выбора доступного типа программы
(смотрите ниже), а затем нажмите ручку.
2
Поверните ручку регулировки громкости для выбора языка функции PTY
(
ENGLISH/FRENCH/GERMAN
3
Нажмите S/T, чтобы начать поиск.
ON
:Синхронизация времени устройства со временем станции Radio Data System.;
OFF
:Отмена.
:Отмена.
OFF
:Отмена.
[PRESETTYPE]
OFF
:Отмена.
), а затем нажмите ее.
По умолчанию:
OFF
: Отмена.
выбрано
XX
Доступные типы программ для
:
NEWS, AFFAIRS, INFO
SPEECH
SCIENCE, VARIED, WEATHER, FINANCE, CHILDREN, SOCIAL, RELIGION
PHONE IN, TRAVEL, LEISURE, DOCUMENT
MUSIC
:
POPM
(музыка),
CLASSICS, OTHERM
FOLKM
Устройство выполняет поиск типа программы, выбранного в функциях
или
[MUSIC]
•
Параметр
[PTYSEARCH]
FM1/FM2/FM3.
•
В случае регулировки громкости в процессе приема информации о дорожной
ситуации или новостей настроенная громкость фиксируется в памяти
автоматически. Настройка будет применена при следующем включении
информирования о дорожной ситуации или новостях.
(музыка)
(если тип выбран).
[LOCAL SEEK]/[MONOSET]/[NEWSSET]/[REGIONAL]/[AFSET]/[TI]
доступен для выбора, только когда используется диапазон частот
(информация),
ROCKM
(музыка),
(музыка),
[PTY SEARCH]
SPORT, EDUCATE, DRAMA, CULTURE
EASYM
JAZZ, COUNTRY, NATIONM
(музыка),
LIGHTM
(музыка),
(музыка),
[SPEECH]
,
OLDIES
/
,
,
РУССКИЙ
7
Page 44

USB/iPod/ANDROID
Начало воспроизведения
Происходит автоматическая смена источника, и
начинается воспроизведение.
Входной USB-разъем
USB
CA-U1EX (макс.: 500 мА)
(дополнительный аксессуар)
iPod/iPhone
KCA-iP102 / KCA-iP103
(дополнительный аксессуар)
аксессуар устройства iPod/iPhone
ANDROID
2
*
Кабель USB
(имеется в продаже)
1
*
KCA-iP102 : 30-контактного типа, KCA-iP103 : Типа Lightning
2
*
Не оставляйте кабель в автомобиле, когда он не используется.
1
*
или
2
*
3
*
Задача На передней панели
Воспроизведение/
пауза
Перемотка назад или
4
*
вперед
Выбор файла
5
Выбор папки
Воспроизведение в
режиме повтора
Воспроизведение в
случайном порядке
3
*
При подключении устройства Android отобразится “Press [VIEW] to install KENWOOD MUSIC PLAY APP”. Следуйте инструкциям на экране, чтобы
установить приложение. Вы также можете установить последнюю версию приложения KENWOOD MUSIC PLAY на ваше устройство Android до его
подключения. Для получения дополнительной информации посетите <www.kenwood.com/cs/ce/>.
4
*
Для ANDROID: Применимо, только если выбрано
5
*
Эта функция не работают для устройства iPod/ANDROID.
6
*
Для iPod/ANDROID: Применимо, только если выбрано
*
*
Нажмите кнопку
Нажмите и удерживайте нажатой кнопку S/T.
Нажмите кнопку
Нажмите кнопку / .
Нажмите кнопку несколько раз.
6
FILE REPEAT/FOLDER REPEAT/ALL REPEAT
FILE REPEAT/FOLDER REPEAT/REPEAT OFF
Нажмите кнопку несколько раз.
6
*
FOLDER RANDOM/RANDOM OFF
Нажмите и удерживайте нажатой кнопку для выбора элемента
ALLRANDOM
.
.
S/T.
: Файл MP3/WMA/AAC/WAV/FLAC
: iPod или ANDROID
: Файл MP3/WMA/AAC/WAV/FLAC, iPod или
ANDROID
[BROWSE MODE]. ( 9)
[MODEOFF]/[BROWSE MODE]. ( 9)
8
РУССКИЙ
Page 45

USB/iPod/ANDROID
Выбор режима управления
Когда источником является iPod USB, последовательно нажимайте 5.
MODE ON
: Управление устройством iPod с самого iPod. Однако с помощью
устройства по-прежнему можно управлять паузой/воспроизведением,
MODE OFF
Когда источником является ANDROID, последовательно нажимайте 5.
BROWSE MODE
HAND MODE
Когда источником является USB, последовательно нажимайте 5.
Будут воспроизводиться песни, сохраненные на следующем диске.
•
Выбранная внутренняя или внешняя память смартфона (запоминающее
•
Выбранный привод устройства с несколькими дисками.
При прослушивании TuneIn Radio, TuneIn Radio Pro или Aupeo подсоедините iPod/
iPhone к входному USB-разъему устройства.
•
Устройство будет выводить звук из этих приложений.
Для iPod/ANDROID применимо, только когда выбрано
пропуском файлов, быстрой перемоткой вперед или назад.
: Управление устройством iPod с данного устройства.
: Управление устройством Android с данного устройства через
приложение KENWOOD MUSIC PLAY, установленное на устройстве
Android.
: Управление устройством Android с помощью самого устройства
Android через другие программные медиаплееры, установленные
на устройстве Android. Однако вы по-прежнему можете запускать
воспроизведение/ставить на паузу и пропускать файл с данного
устройства.
Выбор музыкального диска
устройство большой емкости).
Прослушивание TuneIn Radio/TuneIn Radio Pro/Aupeo
Выбор файла из папки/списка
[MODEOFF]/[BROWSE MODE]
1 Нажмите кнопку .
2 Поверните ручку регулировки громкости для выбора папки/списка,
а затем нажмите ручку.
3 Поверните ручку регулировки громкости для выбора файла, а затем
нажмите ручку.
Быстрый поиск
Если у вас имеется большое количество файлов, вы можете выполнить
быстрый поиск по ним.
Для быстрого просмотра списка быстро поворачивайте ручку
регулировки громкости.
Поиск с пропусками
ANDROID)
Нажмите S/T для поиска с предварительно заданным
коэффициентом пропуска при поиске.
•
При нажатии и удержании нажатой кнопки S/T поиск выполняется
с коэффициентом 10
Поиск по алфавиту
ANDROID)
Вы можете выполнить поиск файла по первому символу в имени.
Для источника iPod USB
1 Быстро поверните ручку регулировки громкости для ввода
искомого символа.
2 Поверните ручку регулировки громкости для выбора символа.
• Выберите “ * ” для поиска по символам, отличным от A–Z и 0–9.
3 Нажмите S/T для перемещения положения записи.
• Предусмотрен ввод не более трех символов.
4 Нажмите ручку регулировки громкости, чтобы запустить
поиск.
Для источника ANDROID
1 Нажмите / для перехода к поиску по символу.
2 Поверните ручку регулировки громкости для выбора символа.
^A^
: Буквы верхнего регистра (A–Z)
_A_
: Буквы нижнего регистра (a–z)
-0-
: Цифры (0–9)
.
•
Для возврата к корневой папке/первому файлу/верхнему меню нажмите кнопку
5
.
•
Для возврата к предыдущему элементу настройки нажмите кнопку .
•
Для отмены нажмите и удерживайте нажатой кнопку .
:
***
3
Нажмите ручку регулировки громкости, чтобы запустить поиск.
(Не применимо для источника BT AUDIO.)
(применимо только для источника USB и ANDROID)
(применимо только для источника iPod USB и
( 10, [SKIPSEARCH])
%
.
(применимо только для источника iPod USB и
Символ, отличный от A–Z и 0–9
РУССКИЙ
9
Page 46

USB/iPod/ANDROID
Настройки для использования приложения
KENWOOD Remote
Приложение KENWOOD Remote предназначено для управления операциями
автомобильного приемника KENWOOD с устройства iPhone/iPod (через входной
USB-разъем).
Подготовка:
Установите последнюю версию приложения KENWOOD Remote на ваше устройство
до его подключения. Для получения дополнительной информации посетите
<www.kenwood.com/cs/ce/>.
Для
же образом, как соединение через Bluetooth.
Другие настройки
1
Нажмите ручку регулировки громкости для перехода в режим
[FUNCTION]
2 Чтобы выбрать элемент, поверните ручку регулировки громкости
(см. следующую таблицу), затем нажмите ее.
3 Повторяйте действие 2 до тех пор, пока не будет выбран или
активирован необходимый элемент.
4 Нажмите кнопку и удерживайте ее нажатой для выхода.
Для возврата к предыдущему элементу настройки нажмите кнопку .
USB
MUSICDRIVE DRIVECHANGE
SKIPSEARCH 0.5%/1%/5%/10%
/ : вы также можете выполнить настройки таким
.
автоматически, и начинается воспроизведение.
Для выбора следующих дисков повторите действия
коэффициента пропуска при поиске по всем файлам.
:Следующий диск (с
: При прослушивании с источника iPod USB или ANDROID, выбор
( 18)
[DRIVE 1]
по
[DRIVE 4]
1
– 3.
По умолчанию:
) выбирается
XX
AUX
Подготовка:
Выберите
[ON]
для
[BUILT-IN AUX]
Начало прослушивания
1
Подключите портативный аудиопроигрыватель (имеется в
продаже).
Дополнительный входной разъем
Мини-стереоразъем 3,5мм с разъемом в форме буквы “L”
(имеется в продаже)
2 Нажмите кнопку несколько раз для выбора AUX.
3 Включите портативный аудиопроигрыватель и начните
воспроизведение.
Настройка имени AUX
Во время прослушивания портативного аудиопроигрывателя, подключенного к
устройству...
1 Нажмите ручку регулировки громкости для перехода в режим
[FUNCTION]
2 Поверните ручку регулировки громкости для выбора элемента
[SYSTEM]
3 Поверните ручку регулировки громкости для выбора элемента
[AUXNAME SET]
4 Поверните ручку регулировки громкости для выбора элемента, а
затем нажмите ручку.
AUX
5 Нажмите кнопку и удерживайте ее нажатой для выхода.
Для возврата к предыдущему элементу настройки нажмите кнопку .
.
, а затем нажмите ее.
, а затем нажмите ее.
(по умолчанию)/
для
[SOURCE SELECT]. ( 5)
Портативный
аудиопроигрыватель
DVD/PORTABLE/GAME/VIDEO/TV
10
РУССКИЙ
Page 47

Spotify
Подготовка:
Установите последнюю версию приложения Spotify на ваше устройство (iPhone/
iPod touch), затем создайте учетную запись и войдите в Spotify.
•
Выберите
1
2 Подсоедините ваше устройство к входному USB-разъему.
[ON]
для
[SPOTIFY SRC]
в
[SOURCE SELECT]. ( 5)
Начало прослушивания
Откройте приложение Spotify на вашем устройстве.
Входной USB-разъем
KCA-iP102 / KCA-iP103 (дополнительный аксессуар)
или аксессуар устройства iPod/iPhone
*
1
*
2
1
*
KCA-iP102 : 30-контактного типа, KCA-iP103 : Типа Lightning
2
*
Не оставляйте кабель в автомобиле, когда он не используется.
3
*
Доступно только для пользователей с премиум аккаунтом.
4
*
Данная функция доступна только для дорожек в режиме Радио. Если выбраны большие пальцы вниз,
текущая дорожка пропускается.
5
*
Доступно только для дорожек в списках воспроизведения.
Сохранение информации о любимых песнях
Во время прослушивания радио через Spotify...
Нажмите и удерживайте ручку регулировки громкости.
Отобразится “SAVED” и информация будет сохранена в “Your Music (Ваша музыка)”
или “Your Library (Ваша библиотека)” в вашем аккаунте на Spotify.
Чтобы удалить из памяти, повторите ту же процедуру.
Отобразится “REMOVED” и информация будет удалена из “Your Music (Ваша музыка)”
или “Your Library (Ваша библиотека)” в вашем аккаунте на Spotify.
3 Нажмите кнопку несколько раз для выбора SPOTIFY.
Воспроизведение принимаемого вещания начнется автоматически.
Задача На передней панели
Воспроизведение/пауза
Пропуск дорожки
Большие пальцы вверх или
большие пальцы вниз
Запустить радио Нажмите и удерживайте нажатой
Воспроизведение в режиме
5
повтора*
4
*
Нажмите кнопку
Нажмите кнопку
Нажмите кнопку / .
кнопку
5.
Нажмите кнопку несколько
раз.
REPEAT ALL/REPEAT ONE*
Воспроизведение в случайном
5
порядке*
Нажмите кнопку несколько
3
раз.*
S*
.
3
/T.
3
/
REPEAT OFF
SHUFFLE ON/SHUFFLE OFF
Поиск песни или радиостанции
1
Нажмите кнопку .
2 Поверните ручку регулировки громкости для выбора типа списка, а
затем нажмите ручку.
Отображаемые типы списков отличаются в зависимости от информации,
переданной со Spotify.
3 Поверните ручку регулировки громкости для выбора желаемой
песни или радиостанции.
4 Нажмите ручку регулировки громкости для подтверждения.
Вы можете быстро просматривать список, быстро поворачивая ручку
регулировки громкости.
Для отмены нажмите и удерживайте нажатой кнопку
.
РУССКИЙ
11
Page 48

BLUETOOTH®
(для / )
BLUETOOTH — Подключение
Поддерживаемые профили Bluetooth
–
Hands-Free Profile — профиль громкой связи (HFP)
–
Advanced Audio Distribution Profile — профиль расширенного
распространения звука (A2DP)
–
Audio/Video Remote Control Profile — профиль удаленного
управления звуком и видеоизображением (AVRCP)
–
Serial Port Profile — профиль последовательного порта (SPP)
–
Phonebook Access Profile — профиль доступа к телефонной
книге (PBAP)
Поддерживаемые кодеки Bluetooth
–
Sub Band Codec (SBC)
–
Advanced Audio Coding (AAC)
Подключение микрофона
Задняя панель
Микрофон (входит в
комплект поставки)
Входной разъем
микрофона
Настройка угла
микрофона
*
О расположении входного разъема микрофона см. стр. 29.
При необходимости закрепите с
помощью зажимов шнура (не входят
в комплект поставки).
Сопряжение и подключение устройства Bluetooth в первый раз
1
Для включения устройства нажмите .
2 На устройстве Bluetooth найдите и выберите название модели этого устройства
(KMM-BT3
“PAIRING” “PASS XXXXXX” Имя устройства “PRESS” “VOLUME KNOB” появляется на дисплее.
• Для некоторых устройств Bluetooth может потребоваться ввод персонального
3 Нажмите ручку регулировки громкости, чтобы запустить сопряжение.
При завершении сопряжения отображается надпись “PAIRING OK”.
После того как сопряжение будет завершено, соединение Bluetooth устанавливается автоматически.
•
: Загорится индикатор “BT1” и/или “BT2” на передней панели.
•
: Загорится “BT1” и/или “BT2” в окне дисплея.
•
Данное устройство поддерживает SSP (Secure Simple Pairing).
•
Всего можно зарегистрировать (выполнить сопряжение) до пяти устройств.
•
После сопряжения устройство Bluetooth останется зарегистрированным в устройстве даже при
сбросе его настроек. Чтобы удалить сопряженное устройство,
•
Одновременно могут быть подключены не более двух телефонов Bluetooth и одно аудиоустройство
Bluetooth.
Однако в режиме источника BT AUDIO вы можете подключать до пяти аудиоустройств Bluetooth и
переключать между этими пятью устройствами.
•
Некоторые устройства Bluetooth могут автоматически выполнять подключение после сопряжения.
Подключите такое устройство вручную.
•
Подробные сведения см. в руководстве устройства Bluetooth.
**/KMM-BT2**).
идентификационного кода (PIN) непосредственно после поиска.
16, [DEVICE DELETE]
( 17)
.
12
РУССКИЙ
Page 49

BLUETOOTH®
(для / )
Автоматическое сопряжение
При подсоединении устройства iPhone/iPod touch/Android к входному USBразъему автоматически активируется запрос на сопряжение (через Bluetooth).
Нажмите ручку регулировки громкости для сопряжения после того, как
подтвердите имя устройства.
Автоматически запрос на сопряжение активируется только при условии, что:
–
Функция Bluetooth подсоединенного устройства включена.
–
Для параметра
–
Приложение KENWOOD MUSIC PLAY установлено на устройстве Android
выбрана опция
[AUTO PAIRING]
установлено значение
[BROWSEMODE]. ( 9)
[ON]. ( 16)
( 8)
и
BLUETOOTH — Мобильный телефон
Прием вызова
При поступлении входящего вызова:
•
: ZONE 2 подсвечивается зеленым цветом и мигает.
•
Устройство отвечает на вызов автоматически, если для параметра
[AUTO ANSWER]
Во время вызова:
•
: ZONE 1 подсвечивается в соответствии с настройками,
заданными для параметра
цветом.
•
Если вы отключите устройство или отсоедините переднюю панель, соединение
Bluetooth будет разорвано.
Следующие операции могут отличаться или быть недоступными в зависимости от
подключенного телефона.
установлено выбранное время.
[DISPLAY] ( 23)
, и ZONE 2 подсвечивается зеленым
( 14)
Задача На передней панели
Первый входящий вызов...
Ответ на вызов
Отклонение вызова
Завершение вызова
Нажмите
громкости либо одну из нумерованных
кнопок (
Нажмите кнопку
Нажмите кнопку
или ручку регулировки
1 до 6).
.
.
РУССКИЙ
13
Page 50

BLUETOOTH®
(для / )
Задача На передней панели
Во время разговора при первом входящем вызове...
Ответ на другой входящий
вызов и удержание
текущего вызова
Отклонение другого
входящего вызова
При наличии двух активных вызовов...
Завершение текущего
вызова и активация
удерживаемого вызова
Переключение между
текущим вызовом и
удерживаемым вызовом
Настройка громкости
телефона
(По умолчанию:
Переключение между
режимами громкой связи и
частного разговора
[00]
–
[35]
[15]
)
Нажмите кнопку
Нажмите кнопку
Нажмите кнопку
Нажмите кнопку
Во время вызова поверните ручку
регулировки громкости.
•
Эта настройка не влияет на уровень
громкости других источников.
Во время вызова нажмите
•
Набор доступных функциональных
возможностей зависит от подключенного
устройства Bluetooth.
.
.
.
.
.
Улучшение качества голосовой связи
Во время разговора по телефону...
1 Нажмите ручку регулировки громкости для перехода в режим
[FUNCTION]
2 Чтобы выбрать элемент, поверните ручку регулировки громкости
(см. следующую таблицу), затем нажмите ее.
3 Повторяйте действие 2 до тех пор, пока не будет выбран или
активирован необходимый элемент.
4 Нажмите кнопку и удерживайте ее нажатой для выхода.
Для возврата к предыдущему элементу настройки нажмите кнопку .
.
По умолчанию:
MIC GAIN
NR LEVEL
ECHO CANCEL
От
–10
до
+10(–4
числа.
От
–5
до+5(0):Настраивайте уровень подавления шума, пока шум не будет
минимальным во время телефонного разговора.
От
–5
до+5(0):Настраивайте задержку эхоподавления, пока эхо не будет
минимальным во время телефонного разговора.
):Чувствительность микрофона увеличивается с увеличением
Выполнение настроек для приема вызовов
Нажмите для включения режима Bluetooth.
1
2 Чтобы выбрать элемент, поверните ручку регулировки громкости
(см. следующую таблицу), затем нажмите ее.
3 Повторяйте действие 2 до тех пор, пока не будет выбран или
активирован необходимый элемент.
4 Нажмите кнопку и удерживайте ее нажатой для выхода.
Для возврата к предыдущему элементу настройки нажмите кнопку .
По умолчанию:
SETTINGS
AUTO ANSWER
BATT/SIGNAL*
*
Функционирование зависит от типа используемого телефона.
1
–30:Устройство автоматически отвечает на входящий вызов через
выбранное время (в секундах).;
(Для )
AUTO
:Отображение заряда батареи и силы сигнала при обнаружении
устройством Bluetooth-устройства и подключении Bluetooth-устройства.;
OFF
:Отмена.
OFF
:Отмена.
XX
XX
14
РУССКИЙ
Page 51

BLUETOOTH®
(для / )
Выполнение вызова
Вы можете выполнять вызов из истории вызовов, из телефонной книги или через
набор номера. Вызов по голосовой команде также возможен, если ваш мобильный
телефон поддерживает эту функцию.
1 Нажмите для включения режима Bluetooth.
Отобразится “(Имя первого устройства)”.
• Если подключены два телефона Bluetooth, нажмите еще раз, чтобы
переключить на другой телефон.
Отобразится “(Имя второго устройства)”.
2 Чтобы выбрать элемент, поверните ручку регулировки громкости
(см. следующую таблицу), затем нажмите ее.
3 Повторяйте действие 2 до тех пор, пока не будет выбран/
активирован желаемый элемент, или следуйте инструкциям,
приведенным для выбранного элемента.
4 Нажмите кнопку и удерживайте ее нажатой для выхода.
Для возврата к предыдущему элементу настройки нажмите кнопку .
CALL HISTORY
(Применимо, только если телефон поддерживает PBAP.)
1
Нажмите ручку регулировки громкости для выбора имени или номера телефона.
•
“INCOMING”, “OUTGOING” или “MISSED”, показывающее статус предыдущего
вызова.
•
исходящий вызов, а “M” указывает на пропущенный вызов.
• Нажмите
NAME).
• При отсутствии записей в журнале вызовов отображается сообщение “NO DATA”.
2
Нажмите ручку регулировки громкости, чтобы выполнить вызов.
: В нижней части дисплея отображается сообщение
: “I” указывает на входящий вызов, “O” указывает на
DISP
для переключения отображаемой категории (NUMBER или
PHONE BOOK
NUMBER DIAL
VOICE
BATT LOW/MID/FULL
NO SIGNAL/LOW/MID/MAX
*
Функционирование зависит от типа используемого телефона.
(Применимо, только если телефон поддерживает PBAP.)
1
Быстро поверните ручку регулировки громкости для перехода в режим поиска
(если телефонная книга содержит много контактов).
Отображается первое меню (ABCDEFGHIJK).
• Для перехода к другому меню (LMNOPQRSTUV или WXYZ1
/
• Для выбора желаемой первой буквы поверните ручку регулировки громкости
Выберите “1” для поиска по номерам и “” для поиска по символам.
2
Поверните ручку регулировки громкости для выбора имени, а затем нажмите
3
Поверните ручку регулировки громкости для выбора номера телефона, а затем
•
При сопряжении телефонная книга подключенного телефона автоматически
передается на устройство.
•
Контакты распределяются по следующим категориям: HOME, OFFICE, MOBILE, OTHER,
GENERAL или HM (домашний), OF (рабочий), MO (мобильный), OT (другие), GE
(общий)
•
Данное устройство может отображать только неакцентированные буквы.
(Акцентированные буквы, такие как “Ú”, будут отображаться как “U”.)
1
Поверните ручку регулировки громкости и выберите число (0 – 9) или символ
2
Нажмите
3
Нажмите ручку регулировки громкости, чтобы выполнить вызов.
Произнесите имя контакта, которому нужно позвонить, или голосовую команду для
управления функциями телефона.
распознавания голоса)
*
.
или нажмите
S/T
ручку.
нажмите ее для вызова.
(
, #, +).
S/T
Повторяйте действия
:Отображение заряда аккумулятора.
*
:Отображение силы текущего принимаемого сигнала.
для переноса позиции ввода.
1
и 2 до тех пор, пока не завершите ввод номера телефона.
*
) нажмите
, а затем нажмите ее.
( 16, Выполнение вызова с помощью
РУССКИЙ
15
Page 52

BLUETOOTH®
(для / )
Выполнение вызова с помощью распознавания голоса
Нажмите и удерживайте для активации функции распознавания
1
голоса подсоединенного телефона.
2 Произнесите имя контакта, которому нужно позвонить, или
голосовую команду для управления функциями телефона.
•
Поддерживаемые функции распознавания голоса зависят от телефона.
Подробные сведения см. в руководстве подключенного телефона.
•
Это устройство также поддерживает функцию интеллектуального личного
помощника iPhone.
Настройки в памяти
Сохранение контакта в памяти
Вы можете сохранить до 6 контактов под нумерованными кнопками (1 – 6).
1 Нажмите для включения режима Bluetooth.
2 Поверните ручку регулировки громкости для выбора
[PHONE BOOK]
3 Поверните ручку регулировки громкости для выбора контакта или
ввода номера телефона.
Если контакт выбран, нажмите ручку регулировки громкости для отображения
номера телефона.
4 Нажмите и удерживайте нажатой одну из нумерованных кнопок
(
1 – 6).
После сохранения контакта отображается сообщение “STORED”.
Чтобы удалить контакт из памяти, в действии
сохраните пустой номер.
или
[NUMBER DIAL]
, а затем нажмите ее.
2
выберите
[CALL HISTORY]
[NUMBER DIAL]
и
Выполнение вызова из памяти
Нажмите для включения режима Bluetooth.
1
2 Нажмите одну из нумерованных кнопок (1 – 6).
3 Нажмите ручку регулировки громкости, чтобы выполнить вызов.
При отсутствии сохраненных в памяти контактов отображается сообщение
“NO MEMORY”.
16
РУССКИЙ
Другие настройки
1
Нажмите ручку регулировки громкости для перехода в режим
[FUNCTION]
2 Чтобы выбрать элемент, поверните ручку регулировки громкости
(см. следующую таблицу), затем нажмите ее.
3 Повторяйте действие 2 до тех пор, пока не будет выбран/
активирован желаемый элемент, или следуйте инструкциям,
приведенным для выбранного элемента.
4 Нажмите кнопку и удерживайте ее нажатой для выхода.
Для возврата к предыдущему элементу настройки нажмите кнопку .
.
По умолчанию:
BT MODE
PHONE SELECT
,
AUDIO SELECT
DEVICE DELETE
PIN CODE EDIT
(0000)
RECONNECT ON
AUTO PAIRING ON
INITIALIZE YES
Выбор телефона или аудиоустройства для подключения или отключения.
“
*
” отображается перед именем устройс тва при установлении соединения.
“
” отображается перед текущим воспроизводимым аудиоустройством.
•
Вы можете одновременно подключать не более двух телефонов Bluetooth и одного
аудиоустройства Bluetooth.
1
Поверните ручку регулировки громкости для выбора удаляемого устройства, а
затем нажмите ручку.
2
Поверните ручку регулировки громкости для выбора
нажмите ее.
Изменение PIN-кода (до 6 цифр).
1
Для выбора номера поверните ручку регулировки громкости.
2
Нажмите S/T для переноса позиции ввода.
Повторяйте действия
3
Нажмите ручку регулировки громкости для подтверждения.
:Устройство автоматически повторно подключается, когда устройство Bluetooth,
подключавшееся последним, находится в зоне действия.;
:Устройство автоматически выполняет сопряжение с поддерживаемым
устройством Bluetooth (iPhone/iPod touch/устройство Android), когда оно подключено
к входному разъему USB.В зависимости от операционной системы подключенного
устройства, данная функция может не работать. ;
:Инициализирует все настройки Bluetooth (включая сохраненное сопряжение,
телефонную книгу и т. д.).;
1
и 2 до тех пор, пока не завершите ввод PIN-кода.
NO
:Отмена.
OFF
[YES]
OFF
:Отмена.
:Отмена.
или
[NO]
XX
, а затем
Page 53

BLUETOOTH®
(для / )
Режим тестирования Bluetooth
Можно проверить подключение поддерживаемого профиля
между устройством Bluetooth и данным устройством.
•
Убедитесь в отсутствии какого-либо сопряженного устройства
Bluetooth.
1 Нажмите и удерживайте нажатой кнопку .
Отображается сообщение “PLEASE PAIR YOUR PHONE PIN
0000”.
2 На устройстве Bluetooth найдите и выберите
название модели этого устройства (KMM-BT3
KMM-BT2
3 Используйте устройство Bluetooth для
На дисплее мигает надпись “TESTING”.
После теста отображаются результаты подключения
(“OK” или “NG”).
PAIRING: Состояние сопряжения
HF CNT: Совместимость с профилем громкой связи (Hands-
AUD CNT: Совместимость с профилем расширенного
PB DL: Совместимость с профилем доступа к телефонной
Чтобы отменить тестовый режим, нажмите и удерживайте
**).
подтверждения сопряжения.
Free Profile — HFP)
распространения звука (Advanced Audio Distribution
Profile — A2DP)
книге (Phonebook Access Profile — PBAP)
для отключения устройства.
**/
BLUETOOTH — Звук
В режиме источника BT
AUDIO вы можете подключать
до пяти аудиоустройств
Bluetooth и переключать
между этими пятью
устройствами.
Аудиопроигрыватель через Bluetooth
1
Нажмите кнопку несколько раз для выбора BT AUDIO.
2 Для начала воспроизведения включите аудиопроигрыватель Bluetooth.
Задача На передней панели
Воспроизведение/пауза
Выбор группы/папки Нажмите кнопку
Переход назад или вперед
Перемотка назад или вперед
Воспроизведение в режиме
повтора
Воспроизведение в случайном
порядке
Выбор файла из папки/списка
Переключение между
подключенными
аудиоустройствами Bluetooth
*
Наж атие кнопки “Play” на самом подключенном устройстве также вызывает переключение звука, выводимого с устройства.
Функции и отображаемые элементы могут различаться в зависимости от их наличия на
подключенном устройстве.
Нажмите кнопку
Нажмите кнопку
Нажмите и удерживайте нажатой кнопку
Нажмите кнопку
ALLREPEAT, FILEREPEAT, REPEATOFF
Нажмите и удерживайте нажатой кнопку
выбора элемента
•
Нажмите , чтобы выбрать
См. “Выбор файла из папки/списка” на стр. 9.
Нажмите
*
5.
.
/ .
S/T.
несколько раз.
ALLRANDOM
.
RANDOMOFF
S/T.
.
для
РУССКИЙ
17
Page 54

BLUETOOTH®
(для / )
Настройки для использования приложения KENWOOD Remote
Приложение KENWOOD Remote предназначено для управления операциями
автомобильного приемника KENWOOD с устройства iPhone/iPod (через Bluetooth или
через входной USB-разъем) или смартфона Android (через Bluetooth).
Подготовка:
Установите последнюю версию приложения KENWOOD Remote на ваше устройство до
его подключения. Для получения дополнительной информации посетите
<www.kenwood.com/cs/ce/>.
1 Нажмите ручку регулировки громкости для перехода в режим
[FUNCTION]
2 Чтобы выбрать элемент, поверните ручку регулировки громкости (см.
следующую таблицу), затем нажмите ее.
3 Повторяйте действие 2 до тех пор, пока не будет выбран или
активирован необходимый элемент.
4 Нажмите кнопку и удерживайте ее нажатой для выхода.
Для возврата к предыдущему элементу настройки нажмите кнопку .
.
По умолчанию:
REMOTE APP
SELECT
IOS YES
ANDROID YES
ANDROID LIST
*
О тображается только в том случае, ес ли для параметра
Выберите устройство (IOS или ANDROID) для использования приложения.
:Выбор устройства iPhone/iPod для использования приложения через Bluetooth или
подключения через входной USB-разъем.;
Если выбрано IOS, выберите источник iPod BT (или iPod USB, если ваш iPhone/iPod подключен
через входной USB-разъем), чтобы активировать приложение.
•
Соединение с приложением может быть прервано или разорвано, если:
– вы перек лючите с источника iPod BT на любой источник воспроизведения, подключенный
через входной USB-разъем.
– вы перек лючите с источника iPod USB на источник iPod BT.
:Выбор смартфона Android для использования приложения через Bluetooth.;
NO
: Отмена.
*:Выбор смартфона Android для использования из списка.
NO
[ANDROID]
:Отмена.
в
[SELECT]
установлено значение
[YES]
STATUS
Отображение состояния выбранного устройства.
IOS CONNECTED
подключенного через Bluetooth или входной USB-разъем.
IOS NOT CONNECTED
приложения.
ANDROID CONNECTED
устройства смартфона Android, подключенного через Bluetooth.
ANDROID NOT CONNECTED
использования приложения.
: Вы можете использовать приложение с помощью iPhone/iPod,
: Отсутствует устройство IOS, подключенное для использования
: Вы можете использовать приложение с помощью
: Отсутствует устройство Android, подключенное для
Прослушивание iPhone/iPod через Bluetooth
Вы можете прослушивать песни с iPhone/iPod через Bluetooth на данном
устройстве.
Нажмите кнопку несколько раз для выбора iPodBT.
•
Вы можете управлять iPod/iPhone таким же образом, как устройством iPod/
iPhone через входной USB-разъем.
•
Если вы подсоедините iPhone/iPod к входному USB-разъему во время
XX
прослушивания источника iPodBT, источник автоматически переключится
на iPodUSB. Нажмите
еще подключено через Bluetooth.
.
( 8)
, чтобы выбрать iPodBT, если устройство все
18
РУССКИЙ
Page 55

BLUETOOTH®
(для / )
Интернет-радио по Bluetooth
Вы можете прослушивать Spotify с устройства iPhone/iPod/Android
через Bluetooth на данном устройстве.
•
Убедитесь в том, что входной USB-разъем не подключен ни к
какому устройству.
Прослушивание Spotify
Подготовка:
Выберите
[ON]
для
1 Откройте приложение Spotify на вашем устройстве.
[SPOTIFY SRC]
2 Подключите ваше устройство через соединение
Bluetooth.
3 Нажмите кнопку несколько раз, чтобы выбрать
SPOTIFY (для iPhone/iPod) или SPOTIFY BT (для
устройства Android).
Источник переключится и автоматически запустится
воспроизведение принимаемого вещания.
•
Вы можете управлять Spotify таким же образом, как Spotify через
входной USB-разъем.
( 12)
в
( 11)
[SOURCE SELECT]. ( 5)
ЗВУКОВЫЕ НАСТРОЙКИ
При прослушивании любого источника звука...
1 Нажмите ручку регулировки громкости для перехода в режим
(Для ) Нажмите кнопку
2 Чтобы выбрать элемент, поверните ручку регулировки громкости (см.
следующую таблицу), затем нажмите ее.
3 Повторяйте действие 2 до тех пор, пока не будет выбран или активирован
необходимый элемент.
4 Нажмите кнопку и удерживайте ее нажатой для выхода.
Для возврата к предыдущему элементу настройки нажмите кнопку .
AUD
для прямого перехода в режим
AUDIO CONTROL
SUB-WLEVEL
MANUAL EQ
62.5HZ LEVEL
100HZ/160HZ/250HZ
400HZ/630HZ/1KHZ
1.6KHZ/2.5KHZ/4KHZ
6.3KHZ/10KHZ/16KHZ
Q FACTOR 1.35/1.50/2.00
PRESET EQ NATURAL/ROCK/POPS/EASY/TOP40/JAZZ/POWERFUL/USER
BASS BOOST LEVEL1/LEVEL2/LEVEL3/LEVEL4/LEVEL5
От
LEVEL –50
до
низкочастотного динамика.
Элементы звучания (уровень частоты, уровень тона, добротность) предустановлены для
каждого выбора.
BASS
EXTEND
/
От
LEVEL –9
источнике. (Перед выполнением настройки выберите источник, который необходимо
/
настроить.)
/
предварительно установленный режим эквалайзера, соответствующего музыкальному
жанру. (Чтобы использовать настройки, заданные в
Выбор предпочитаемого уровня подъема нижних частот.;
LEVEL +10 (LEVEL 0
От
LEVEL –9
сохранения в каждом источнике. (Перед выполнением настройки
выберите источник, который необходимо настроить.)
ON
: Включение усиленных нижних частот. ;
до
LEVEL +9 (LEVEL 0
:Настройка коэффициента качества.
): Настройте уровень выходного сигнала
до
LEVEL +9 (LEVEL 0
):Настройте уровень для сохранения в каждом
[MANUAL EQ]
или
[FUNCTION]
[AUDIO CONTROL]
По умолчанию:
):Настройте уровень для
OFF
: Отмена.
: Выберите
, выберите
LV1/LV2/LV3/LV4/LV5
OFF
:Отмена.
[USER]
.
.
XX
.)
:
РУССКИЙ
19
Page 56

ЗВУКОВЫЕ НАСТРОЙКИ
LOUDNESS LEVEL1/LEVEL2
SUBWOOFER SET ON
FADER
BALANCE
VOLUME OFFSETОт –15
сбалансированного звучания при низком уровне громкости.;
:Включение выходного сигнала низкочастотного динамика.;
(Не применимо, если выбран 3-полосный кроссовер.)
От
R15
От
L15
(Перед настройкой выберите источник, который необходимо настроить.)
или
LV1/LV2
:Выбор предпочитаемых низких и высоких частот для получения хорошо
до
F15 (0
):Настройка выходного баланса передних и задних динамиков.
до
R15 (0
):Настройка выходного баланса левых и правых динамиков.
до +6 (0):Программирование первоначального уровня громкости для каждого источника.
SOUND EFFECT
SOUND RECNSTR
(реконструкция звука)
SPACE ENHANCE
SND REALIZER LEVEL1/LEVEL2/LEVEL3
STAGE EQ LO W/MIDDLE/HIGH
DRIVE EQ ON
SPEAKER SIZE
X’OVER
DTA SETTINGS
CAR SETTINGS
•
: Для 2-полосного кроссовера: Элемент
только в том случае, если для параметра
•
Элемент
установлено значение
20
РУССКИЙ
(Не применимо для источника RADIO и источника AUX.)
ON
:Cоздание реалистичного звука путем компенсации высокочастотных компонентов и восстановления
времени достижения максимального эффекта волны, которые были потеряны при аудиокомпрессии
данных.;
OFF
:Отмена.
(Не применимо для источника RADIO.)
SMALL/MEDIUM/LARGE
OFF
:Отмена.
OFF
:Отмена.
через динамики.;
: Усиление частоты в целью снижения шума, слышимого извне автомобиля, или шума шин.;
OFF
:Отмена.
В зависимости от выбранного вами типа кроссовера
2-полосового кроссовера или 3-полосового кроссовера.
кроссовера.
Для настроек,
[SUB-W LEVEL]
доступен только в том случае, если для параметра
[ON]
.
или
SML/MED/LRG
или
LV1/LV2/LV3
или
LOW/MID/HI
OFF
:Отмена.
22, Настройки функции цифровой задержки сигнала
[SWITCH PREOUT]
OFF
:Отмена.
OFF
:Отмена.
:Виртуальное улучшение звукового пространства.;
:Виртуальное повышение реалистичности звучания.;
:Виртуальная регулировка позиции звука, воспроизводимого
( 6)
, будут отображаться элементы настройки
( 21)
По умолчанию выбран тип 2-полосового
.
[SUB-W LEVEL]/[SUBWOOFER SET]
установлено значение
[SUBWOOFER SET]
доступен
[SUB-W]. ( 5)
Настройки кроссовера
Ниже приведены доступные элементы настройки для
2-полосового кроссовера и 3-полосового кроссовера.
SPEAKER SIZE
Выбирается в соответствии с размером подключенного динамика
для обеспечения оптимальных характеристик.
•
Настройки частоты и крутизны для кроссовера выбранного
динамика устанавливаются автоматически.
•
Когда выбран 2-полосный кроссовер, если значение
выбрано для
[SPEAKER SIZE]
доступна.
•
Когда выбран 3-полосный кроссовер, если значение
выбрано для
для
X ‘ OVER
• [FRQ]/[F-HPFFRQ]/[R-HPFFRQ]/[SWLPF FRQ]/[HPFFRQ]
[LPFFRQ]
динамиков (фильтр высоких частот или фильтр низких частот).
Если выбрано
выбранные динамики.
• [F - HPFSLOPE]/[R - HPFSLOPE]/[SWLPFSLOPE]/[HPFSLOPE]
[LPFSLOPE]/[SLOPE]:
Доступно для выбора, только если для частоты кроссовера
выбрана другая настройка, кроме
• [SWLPFPHASE]/[PHASE]:
динамика в соответствии с выходным сигналом другого
динамика.
• [GAINLEFT]/[GAINRIGHT]/[F-HPFGAIN]/[R-HPFGAIN]
[SWLPF GAIN]/[GAIN]:
выбранного динамика.
[TWEETER]
в
, настройка
[WOOFER]
[WOOFER]
не доступна.
: Регулировка частоты кроссовера для выбранных
[THROUGH]
[FRONT], [REAR]
[X ‘ OVER]
в
[SPEAKER SIZE]
, все сигналы передаются на
Регулировка крутизны кроссовера.
и
для данного динамика не
, настройка
[THROUGH]
Выбор фазы выходного сигнала
Регулировка уровня выходного сигнала
[NONE]
[SUBWOOFER]
[NONE]
[X’OVER]
.
/
для
/
/
Page 57

ЗВУКОВЫЕ НАСТРОЙКИ
Элементы настройки 2-полосного кроссовера
SPEAKER SIZE
FRONT SIZE
TWEETER
REAR 8CM/10CM/12CM/13CM/16CM/17CM/18CM/4×6/5×7/6×8/6×9
SUBWOOFER
7×10/NONE
1*2
*
16CM/20CM/25CM/30CM/38CM OVER/NONE
8CM/10CM/12CM/13CM/16CM/17CM/18CM
4×6/5×7/6×8/6×9/7×10
SMALL/MIDDLE/LARGE/NONE
(не подключено)
(не подключено)
(не подключено)
X ' OVER
TWEETER FRQ
GAIN LEFT
GAIN RIGHT
FRONT HPF F - HPF FRQ
F - HPF SLOPE
F - HPF GAIN
1KHZ/1.6KHZ/2.5KHZ/4KHZ/5KHZ/6.3KHZ/8KHZ
10KHZ/12.5KHZ
От
–8
до
0
От
–8
до
0
30HZ/40HZ/50HZ/60HZ/70HZ/80HZ/90HZ
100HZ/120HZ/150HZ/180HZ/220HZ/250HZ/
THROUGH
–6DB/–12DB/–18DB/–24DB
От
–8
до
0
REAR HPF R - HPF FRQ
R - HPF SLOPE
(См. настройки
FRONT HPF
выше.)
R - HPF GAIN
SUBWOOFER
1*2
*
LPF
SW LPF FRQ 30HZ/40HZ/50HZ/60HZ/70HZ/80HZ/90HZ
SW LPF SLOPE
SW LPF PHASE
SW LPF GAINОт –8
100HZ/120HZ/150HZ/180HZ/220HZ/250HZ
THROUGH
–6DB/–12DB/–18DB/–24DB
REVERSE
(180°)/
NORMAL
(0°)
до
0
Элементы настройки 3-полосного кроссовера
SPEAKER SIZE
/
/
/
/
TWEETER
MID RANGE
WOOFER
/
X ' OVER
TWEETER HPF FRQ
/
MID RANGE HPF FRQ
WOOFER
1
*
Для : Дос тупно для выбора, только если для параметра
установлено значение
2
*
Доступно для выбора, только если для параметра
( 20)
SMALL/MIDDLE/LARGE
8CM/10CM/12CM/13CM/16CM/17CM/18CM/4×6/5×7/6×8/6×9
2
*
16CM/20CM/25CM/30CM/38CM OVER/NONE
1KHZ/1.6KHZ/2.5KHZ/4KHZ/5KHZ/6.3KHZ/8KHZ
10KHZ/12.5KHZ
SLOPE
PHASE
GAIN
HPF SLOPE
LPF FRQ
LPF SLOPE
PHASE
GAIN
2
*
LPF FRQ 30HZ/40HZ/50HZ/60HZ/70HZ/80HZ/90HZ/100HZ
SLOPE
PHASE
GAIN
[SUB-W]. ( 5)
–6DB/–12DB
REVERSE
(180°)/
NORMAL
От
–8
до
0
30HZ/40HZ/50HZ/60HZ/70HZ/80HZ/90HZ/100HZ
120HZ/150HZ/180HZ/220HZ/250HZ/THROUGH
–6DB/–12DB
1KHZ/1.6KHZ/2.5KHZ/4KHZ/5KHZ/6.3KHZ/8KHZ
10KHZ/12.5KHZ/THROUGH
–6DB/–12DB
REVERSE
(180°)/
NORMAL
От
–8
до
0
120HZ/150HZ/180HZ/220HZ/250HZ/THROUGH
–6DB/–12DB
REVERSE
(180°)/
NORMAL
От
–8
до
0
[SUBWOOFERSET]
(не подключено)
(0°)
(0°)
(0°)
[SWITCH PREOUT]
установлено значение
РУССКИЙ
[ON]
/
/
/
/
.
21
Page 58

ЗВУКОВЫЕ НАСТРОЙКИ
Настройки функции цифровой задержки сигнала
Функция цифровой задержки сигнала устанавливает время задержки выходного
сигнала динамика для создания более подходящих условий для вашего
автомобиля.
•
Для получения дополнительной информации,
параметров [DISTANCE] и [GAIN] в [DTA SETTINGS]
DTA SETTINGS
POSITION
DISTANCE
GAIN
DTA RESET YES
CAR SETTINGS
CAR TYPE COMPACT/FULL SIZE CAR/WAGON/MINIVAN/SUV
R-SP LOCATION
Выбор позиции прослушивания (контрольная точка).
ALL
:Без компенсации;
FRONT LEFT
• [FRONT ALL]
( 6)
От
0CM
до
выполнением настройки выберите динамик, который необходимо настроить.)
От
–8DB
динамика. (Перед выполнением настройки выберите динамик, который
необходимо настроить.)
:Сброс настроек (
[POSITION]
Задайте тип вашего автомобиля и место расположения заднего динамика, чтобы
выполнить настройки для
MINIVAN(LONG)
Выбор места расположения задних динамиков в автомобиле для расчета
максимального расстояния от выбранной позиции прослушивания (контрольной
точки).
• DOOR/REAR DECK
[CAR TYPE]
или
[SUV]
• 2ND ROW/3RD ROW
[CAR TYPE]
FRONT RIGHT
:Переднее левое сиденье;
отображается, только когда выбрано
610CM
:Тонкая регулировка расстояния для компенсации. (Перед
до
0DB
:Тонкая регулировка уровня выходного сигнала выбранного
[DISTANCE]
на значения по умолчанию.; NO:Отмена.
:Выбор типа автомобиля.;
выбрано
.
выбрано
Определение значения для
.
: Переднее правое сиденье;
FRONT ALL
:Переднее сиденье
[2-WAY X’OVER]
и
[GAIN]
) выбранного параметра
[DTA SETTINGS]
:Доступно для выбора, только когда для параметра
[OFF], [COMPACT ], [FULL SIZE CAR], [WAGON]
:Доступно для выбора, только когда для параметра
[MINIVAN]
.
OFF
: Без компенсации.
или
[MINIVAN(LONG)]
/
.
.
•
Перед тем как выполнять настройки для параметров
выберите динамик, который необходимо настроить:
Когда выбран 2-полосный кроссовер:
FRONT LEFT/FRONT RIGHT/REAR LEFT/REAR RIGHT/SUBWOOFER
– Параметры
[REAR LEFT], [REAR RIGHT]
для параметров
[NONE]. ( 21)
Когда выбран 3-полосный кроссовер:
TWEETER LEFT/TWEETER RIGHT/MID LEFT/MID RIGHT/WOOFER
– Параметры
[SPEAKERSIZE]
•
Параметр
– Выбран 2-полосный кроссовер.
– Для параметра
[REAR]
[WOOFER]
выбрано значение, отличное от
[R-SP LOCATION]
[REAR]
и
[SUBWOOFER]
доступны для выбора, только если для параметров
в
[CAR SETTINGS]
( 6)
в
[SPEAKER SIZE]
[DISTANCE]
и
[GAIN]
и
[SUBWOOFER]
в
[SPEAKER SIZE]
доступны для выбора, только если
выбрано значение, отличное от
[NONE]. ( 21)
доступен для выбора, только если:
выбрано значение, отличное от
в
[DTA SETTINGS]
[WOOFER]
[NONE]. ( 21)
Определение значения для параметров [DISTANCE] и [GAIN] в [DTA SETTINGS]
Если вы укажите расстояние от центра текущей заданной
позиции прослушивания до каждого динамика, будет
автоматически вычислено и установлено время
задержки.
1
Определите центр текущей заданной позиции
прослушивания в качестве контрольной точки.
2
Измерьте расстояния от контрольной точки до
динамиков.
3
Вычислите разницу между расстоянием до самого
удаленного динамика (заднего динамика) и других
динамиков.
4
Установите значение
шаге
3
5
Отрегулируйте параметр
отдельного динамика.
Пример: Когда в качестве позиции прослушивания
выбрано
[FRONT ALL]
[DISTANCE]
, для каждого отдельного динамика.
[GAIN]
для каждого
,
в
, вычисленное в
22
РУССКИЙ
Page 59

НАСТРОЙКИ ДИСПЛЕЯ
Определение зоны для настроек цвета и яркости
Определение зоны для настроек яркости
Настройка затемнения
Нажмите и удерживайте нажатой кнопку DISP, чтобы включить или
выключить затемнение.
•
Если был установлен параметр
при нажатии и удержании этой кнопки.
Другие настройки
1
Нажмите ручку регулировки громкости для перехода в режим
[FUNCTION]
2 Чтобы выбрать элемент, поверните ручку регулировки громкости
(см. следующую таблицу), затем нажмите ее.
3 Повторяйте действие 2 до тех пор, пока не будет выбран/
активирован желаемый элемент, или следуйте инструкциям,
приведенным для выбранного элемента.
4 Нажмите кнопку и удерживайте ее нажатой для выхода.
Для возврата к предыдущему элементу настройки нажмите кнопку .
.
[DIMMER TIME]
, эта настройка будет отменена
По умолчанию:
DISPLAY
COLOR SELECT
DIMMER
BRIGHTNESS
TEXTSCROLL AUTO/ONCE
*
Предустановленные цвета:
BLUE1/BLUE2/BLUE3/SKYBLUE1/SKYBLUE2/LIGHTBLUE/AQUA1/AQUA2/GREEN1
GREEN2/GREEN3/YELLOWGREEN1/YELLOWGREEN2/YELLOW/ORANGE1/ORANGE2
ORANGERED
(для / )
Выбор цвета для
1
Выбор зоны. (См. рисунок в левой колонке.)
2
Выберите цвет для выбранной зоны.
Чтобы создать собственный цвет, выберите
сохранится в in
1
Нажмите ручку регулировки громкости для перехода в режим подробной
2
Нажмите S/T, чтобы выбрать цвет (R/G/B) для настройки.
3
Поверните ручку регулировки громкости для настройки уровня (от 0 до 9), а
Затемнение подсветки.
ON
DIMMER TIME
1
Поверните ручку регулировки громкости для настройки значения времени
2
Поверните ручку регулировки громкости для настройки значения времени
(По умолчанию:
1
Выбор зоны. (См. рисунок в левой колонке.)
2
От 0 до 31: Выберите предпочитаемый уровень яркости для выбранной зоны.
единовременной прокрутки.;
ALL ZONE, ZONE 1
INITIAL COLOR/VARIABLESCAN/CUSTOM R/G/B
*
цвета
[CUSTOM R/G/B]
настройки цвета.
затем нажмите ее.
:Затемнение включено.;
:Настройка времени включения и выключения затемнения.
а затем нажмите ее.
а затем нажмите ее.
[ON]: 18:00; [OFF]: 6:00
:Выбор автоматической прокрутки отображаемой информации или
OFF
OFF
и
.
:Отмена.
:Отмена.
ZONE 2
, отдельно.
[CUSTOM R/G/B]
)
/предустановленные
. Созданный цвет
RED1/RED2/RED3/PURPLE1/PURPLE2/PURPLE3/PURPLE4
РУССКИЙ
/
/
[ON]
[OFF]
/
XX
,
,
23
Page 60

УСТРАНЕНИЕ ПРОБЛЕМ
Симптомы Способы устранения
Звук не слышен.
Отображается надпись “MISWIRING
CHECK WIRING THEN PWR ON”.
Отображается надпись “PROTECTING
SEND SERVICE”.
•
Звук не слышен.
Общие характеристики
•
Устройство не включается.
•
На дисплее отображается
неправильная информация.
Приемник не работает.
•
Слабый радиоприем.
•
Статические помехи при
прослушивании радио.
Радиоприемник
Продолжает мигать текст
“READING”.
Время от начала воспроизведения
неправильное.
“LOADING” отображается при
переходе в режим поиска
посредством нажатия
USB/iPod
Не отображаются правильные
символы (т.е. название альбома).
“NA FILE” Убедитесь, что носитель содержит поддерживаемые
•
Установите оптимальный уровень громкости.
•
Проверьте кабели и соединения.
Выключите питание, затем выполните проверку, чтобы
убедиться, что контакты проводов динамиков должным
образом изолированы. Снова включите питание.
Отправьте устройство в ближайший сервисный центр.
Почистите разъемы.
Выполните сброс устройства.
Плотно вставьте антенну.
Не используйте многоуровневую иерархическую структуру и
много папок.
Причина заключается в способе записи файлов.
Данное устройство еще подготавливает список музыки на iPod/
iPhone. Для загрузки может потребоваться некоторое время,
повторите попытку позже.
.
•
Данное устройство может отображать только буквы
верхнего регистра, цифры и ограниченное число символов.
•
В зависимости от выбранного вами языка отображения
( 5)
неправильно.
аудиофайлы.
( 30)
( 3)
, некоторые символы могут отображаться
( 30)
Симптомы Способы устранения
“NO DEVICE” Подсоедините устройство USB, и снова смените источник на
“COPY PRO” Воспроизводится защищенный от копирования файл.
Отображается надпись
“UNSUPPORTED DEVICE”.
Отображается надпись
“UNRESPONSIVE DEVICE”
Отображается надпись “USB
HUB IS NOT SUPPORTED”.
USB/iPod
•
Источник не переключается
на “USB” при подключении
USB-устройства во время
прослушивания другого
источника.
•
Отображается надпись
“USB ERROR”.
“NO MUSIC” Подключите устройс тво USB, содержащее доступные для
“iPod ERROR”
•
Во время воспроизведения
не слышен звук.
•
Звук выводится только с
устройства Android.
ANDROID
устройство USB.
•
Убедитесь в том, что подключенное устройство совместимо
с данным устройством и что формат файловой системы
поддерживается.
•
Повторно подключите устройство.
Убедитесь в том, что устройство исправно, и повторно подключите
устройство.
Данное устройство не поддерживает USB-устройства, подключенные
через USB-концентратор.
USB-порт отбирает мощность, превышающую конструктивную
предельную нагрузку. Выключите питание и отсоедините
USB-устройство. Затем включите питание и переподсоедините
USB-устройство. Если это не решит проблему, выключите и включите
питание (или выполните сброс настроек устройства) перед тем как
заменить USB-устройство другим.
воспроизведения аудиофайлы.
•
Повторно выполните подключение iPod.
•
Перезапустите iPod.
•
Повторно выполните подключение устройства Android.
•
Если работает режим
программный медиаплеер на устройстве Android и начните
воспроизведение.
•
Если работает режим
программный медиаплеер или используйте другой программный
медиаплеер.
•
Перезапустите устройство Android.
•
Если это не решит проблему, подключенное устройство Android
неспособно передавать аудиосигнал на данное устройство.
( 30)
( 30)
[HAND MODE]
[HAND MODE]
, запустите любой
, перезапустите текущий
24
РУССКИЙ
Page 61

УСТРАНЕНИЕ ПРОБЛЕМ
Симптомы Способы устранения
Не удается воспроизвести
в режиме
[BROWSE
MODE]
.
Продолжает мигать текст
“NO DEVICE” или “READING”.
ANDROID
Прерывистое
воспроизведение или
пропускается звук.
“ANDROID ERROR”/
“NADEVICE”
“DISCONNECTED” USB отсоединено от основного аппарата. Пожалуйста, убедитесь в том,
“CONNECTING”
Spotify
“CHECK APP” Приложение Spotify не подключено надлежащим образом или
•
Убедитесь в том, что приложение KENWOOD MUSIC PLAY APP
установлено на устройство Android.
•
Повторно выполните подключение устройства Android и выберите
соответствующий режим управления.
•
Если это не решит проблему, подключенное устройство Android не
поддерживает
•
Отключите на устройстве Android опции для разработчика.
•
Повторно выполните подключение устройства Android.
•
Если это не решит проблему, подключенное устройство Android не
поддерживает
Выключите режим энергосбережения на устройстве Android.
•
Повторно выполните подключение устройства Android.
•
Перезапустите устройство Android.
что устройство правильно подключено через USB.
•
Подключение через входной USB-разъем: Идет подключение
устройства к основному аппарату. Пожалуйста, подождите.
•
Подключение через Bluetooth: Bluetooth отсоединено. Пожалуйста,
проверьте соединение Bluetooth и убедитесь в том, что и устройство
и данный аппарат сопряжены и соединены.
пользователь не вошел в систему. Завершите приложение Spotify и
перезапустите, затем выполните вход в ваш аккаунт Spotify.
[BROWSE MODE]. ( 30)
[BROWSE MODE]. ( 30)
( 8)
Симптомы Способы устранения
Устройства Bluetooth не
обнаружены.
Не удается выполнить
сопряжение Bluetooth.
Во время телефонного
разговора слышится эхо
или шум.
Плохое качество звука
телефона.
Ошибка голосового вызова.
Во время воспроизведения
с помощью
аудиопроигрывателя
Bluetooth® (для / )
Bluetooth происходит
прерывание звука.
Не удается осуществить
управление подключенным
аудиопроигрывателем
Bluetooth.
•
Выполните поиск с устройства Bluetooth еще раз.
•
Выполните сброс устройства.
•
Удостоверьтесь, что введен одинаковый PIN-код на устройстве и
устройстве Bluetooth.
•
Удалите информацию о сопряжении с устройства и устройства
Bluetooth, а затем выполните сопряжение еще раз.
•
Отрегулируйте положение микрофона.
•
Проверьте настройку
•
Уменьшите расстояние между устройством и устройством
Bluetooth.
•
Переместите автомобиль в место с более сильным уровнем
сигнала сотовой сети.
•
Используйте метод голосового вызова в более бесшумных
условиях.
•
Будьте ближе к микрофону, когда произносите имя.
•
Необходимо произносить команды зарегистрированным голосом.
•
Уменьшите расстояние между устройством и
аудиопроигрывателем Bluetooth.
•
Выключите и включите приемник, затем подключите устройство.
•
Другие устройства Bluetooth могут пытаться подключиться к
устройству.
•
Проверьте, поддерживает ли подключенный аудиопроигрыватель
Bluetooth профиль Audio/Video Remote Control Profile (AVRCP —
профиль удаленного управления звуком и видеоизображением).
(См. инструкции к аудиопроигрывателю.)
•
Отключите и подключите проигрыватель Bluetooth еще раз.
[ECHO CANCEL]. ( 14)
( 3)
( 12)
( 12)
РУССКИЙ
25
Page 62

УСТРАНЕНИЕ ПРОБЛЕМ УСТАНОВКА И ПОДКЛЮЧЕНИЕ
Симптомы Способы устранения
“DEVICE FULL” Число зарегистрированных устройств уже достигло предела.
“N/A VOICE TAG” Необходимо произносить команды зарегистрированным голосом.
“NOT SUPPORT” Подключенный телефон не поддерживает функцию распознавания
“NO ENTRY”/“NO PAIR” Нет зарегистрированных устройств, подключенных/обнаруженных
“ERROR” Попытайтесь выполнить операцию еще раз. Если снова отображается
“NO INFO”/“NO DATA” Устройство Bluetooth не может получить информацию о контактах.
“HF ERROR XX”/
“BT ERROR”
Bluetooth® (для / )
“SWITCHING NG” Подключенные телефоны могут не поддерживать функцию
(Для )
Отключение звука при приеме телефонного вызова
Подключите провод MUTE к телефону с использованием имеющейся в продаже дополнительной
принадлежности для телефона.
При поступлении входящего вызова отображается сообщение “CALL”.
(Аудиосистема устанавливается на паузу.)
•
Чтобы продолжить использование аудиосистемы во время вызова нажмите кнопку .
Сообщение “CALL” исчезает, и работа аудиосистемы возобновляется.
При завершении вызова сообщение “CALL” исчезает.
возобновляется.)
Повторите попытку после удаления неиспользуемого устройства.
( 16, DEVICEDELETE)
голоса или передачу телефонной книги.
через Bluetooth.
сообщение “ERROR”, проверьте, поддерживает ли устройство
запрашиваемую функцию.
Выполните сброс приемника и повторите операцию. Если проблема не
устранена, обратитесь в ближайший центр обслуживания.
переключения телефонов.
( 28)
(Работа аудиосистемы
Предупреждение
•
Устройство можно использовать только с источником питания 12 В постоянного тока с отрицательным
заземлением.
•
Отключите отрицательную клемму аккумулятора перед подключением проводов и монтажом.
•
Не подключайте провод аккумулятора (жёлтый) и провод высокого напряжения (красный) к корпусу
машины или проводу заземления (чёрный), чтобы не допустить короткое замыкание.
•
Во избежание короткого замыкания:
– Изолируйте неподсоединенные провода с помощью виниловой ленты.
– После ус тановки обязательно заземлите данное устройство на корпус автомобиля.
– Закрепите провода с помощью фиксаторов кабеля и оберните провода, контактирующие с
металлическими частями, виниловой лентой, чтобы защитить провода.
Внимание
•
В целях безопасности работа по подключению проводов и монтажу должна выполняться специалистами.
Обратитесь к поставщику автомобильных аудиосистем.
•
Данное устройство подлежит установке в консоль автомобиля. Не прикасайтесь к металлическим деталям
устройства в процессе и на протяжении некоторого времени после завершения эксплуатации устройства.
Температура металлических деталей, таких как радиатор охлаждения и кожух, существенно повышается.
•
Не подключайте провода динамиков [ к корпусу машины, проводу заземления (чёрный) или
параллельно.
•
Установите устройство под углом менее 30º.
•
Если в электропроводке транспортного средства нет клеммы зажигания, подключите провод высокого
напряжения (красный) к клемме на блоке плавких предохранителей, которая обеспечивает питание с
напряжением 12 В постоянного тока и которая включается и выключается ключом зажигания.
•
Держите все кабели вдали от тепловыделяющих металлических частей.
•
После установки устройства, убедитесь в том, что все осветительные и электронные приборы вашего
автомобиля работают в прежнем режиме.
•
Если предохранитель сгорел, первым делом убедитесь в том, что кабели не касаются корпуса автомобиля,
после чего замените предохранитель на аналогичный новый.
26
РУССКИЙ
Page 63

УСТАНОВКА И ПОДКЛЮЧЕНИЕ
Список деталей для установки
(A)
Передняя панель
(C)
Посадочный корпус
(E)
Ключ для демонтажа
(B)
Декоративная панель
(D)
Жгут проводов
Установка устройства (установка в приборную панель)
Подключите необходимые
провода.
Фиксатор вверху
Перед сборкой расположите
декоративную панель, как
показано.
Отогните соответствующие фиксаторы,
предназначенные для прочной
установки посадочного корпуса.
( 28)
Приборная панель
автомобиля
Стандартная процедура
1
Извлеките ключ из замка зажигания, затем отсоедините разъем [
автомобильного аккумулятора.
2
Правильно подключите провода.
См. раздел “Подключение проводов”.
3
Установите устройство в вашем автомобиле.
См. раздел “Установка устройства (установка в приборную панель)”.
4
Подключите клемму [ автомобильного аккумулятора.
5
Нажмите , чтобы включить питание.
6
Отсоедините переднюю панель и выполните сброс устройства в течение 5
секунд.
( 3)
( 28)
Порядок извлечения
устройства
1
Снимите переднюю панель.
2
Снимите декоративную панель.
3
Введите ключи для демонтажа в прорези на
каждой стороне, затем следуйте инструкциям со
стрелками, как показано на рисунке.
РУССКИЙ
27
Page 64

УСТАНОВКА И ПОДКЛЮЧЕНИЕ
Подключение проводов
Если в автомобиле отсутствует разъем ISO:
Рекомендуется устанавливать устройство с использованием имеющегося в продаже
жгута проводов, специально предназначенного для вашего автомобиля, и, в целях
вашей безопасности, поручить эту работу профессионалам. Обратитесь к поставщику
автомобильных аудиосистем.
Подключение разъемов ISO на некоторых автомобилях VW/
Audi или Opel (Vauxhall)
Возможно, потребуется изменить схему соединений для прилагаемого жгута
проводов, как показано на рисунке.
A7 (Красный)
A4 (Жёлтый)
Контакт
A4 Жёлтый
A5 Синий/белый*
A7 Kрасный
A8 Чёрный
B1
Фиолетовый
B2 Фиолетовый/чёрный
[
B3
Cерый
B4
B5
B6
B7
B8
28
]
Серый/чёрный
Белый
]
Белый/чёрный
Зелёный
Зелёный/чёрный
РУССКИЙ
Схема соединений по умолчанию
Цвет и функция (для разъемов ISO)
:
Аккумулятор
1
:
Управление питанием
:
Зажигание (АCC)
:
Заземляющее соединение (земля)
]
:
Задний динамик (правый)
Для 3-полосного кроссовера: Высокочастотный
динамик (правый)
:
Передний динамик (правый)
Для 3-полосного кроссовера: Среднечастотный
[
динамик (правый)
:
Передний динамик (левый)
Для 3-полосного кроссовера: Среднечастотный
[
динамик (левый)
:
]
Задний динамик (левый)
Для 3-полосного кроссовера: Высокочастотный
[
динамик (левый)
Kабель зажигания
(Kрасный)
УстройствоАвтомобиль
Kабель батареи (Жёлтый)
Предохранитель
(10 A)
Жёлтый (Kабель батареи)
(Kабель зажигания)
Kрасный (A7)
Жёлтый (A4)
Разъемы ISO
Kрасный
При подсоединении внешнего усилителя подсоедините
его провод заземления к корпусу автомобиля, чтобы
предотвратить повреждение устройства.
Разъем для антенны
Если соединение не выполняется, не вытаскивайте кабель из наконечника.
Лампа синяя/жёлтая
(Провод дистанционного
управления с руля)
Синий/белый*
(Провод управления
питанием/провод
управления антенной)
Коричневый
(Провод управления
отключением звука)
2
Примечание: Полная выходная мощность для синего/белого провода (*1) + (*2)
составляет 12В
STEERING WHEEL
REMOTE INPUT
REMOTE CONT
ANT CONT
P. CONT
MUTE
350мА
К адаптеру дистанционного управления
с руля
К гнезду управления питанием, если Вы
используете дополнительный усилитель
мощности, или к гнезду управления антенной
в автомобиле
Для подключения навигационной системы
Kenwood ознакомьтесь с прилагаемым к ней
руководством пользователя
(Для
К гнезду, которое заземлено, когда звонит
телефон или во время разговора.
)
( 26)
Page 65

УСТАНОВКА И ПОДКЛЮЧЕНИЕ
Подсоединение внешних компонентов
(для
Входной разъем микрофона
/ )
( 12)
/
Выходные разъемы для задних/передних/
низкочастотного динамиков
Для 3-полосного кроссовера:
Выход на высокочастотные/среднечастотные/
низкочастотные динамики
Выходные разъемы задних динамиков/
низкочастотного динамика
Для 3-полосного кроссовера:
Выход на низкочастотный динамик
РУССКИЙ
29
Page 66

СПРАВОЧНЫЕ МАТЕРИАЛЫ
Обслуживание
Чистка устройс тва
В случае загрязнения протрите переднюю панель сухой силиконовой или мягкой тканью.
Очистка разъема
Отсоедините лицевую панель и аккуратно
протрите разъем ватной палочкой. Соблюдайте
осторожность, чтобы не повредить разъем.
Разъем (на обратной стороне
лицевой панели)
Дополнительная информация
Для: – Пос ледние обновления встроенного программного обеспечения и последний список
поддерживаемых функций
– Оригинальное приложение KENWOOD
– Любая другая последняя информация
Посетите <www.kenwood.com/cs/ce/>.
Воспроизводимые файлы
•
Воспроизводимые аудиофайлы для запоминающего устройства USB большой емкости:
MP3(.mp3), WMA(.wma), AAC(.aac), AAC(.m4a), WAV (.wav), FLAC (.flac)
•
Воспроизводимая файловая система устройств USB: FAT12, FAT16, FAT32
Даже если аудиофайлы соответствуют перечисленным выше стандартам, при некоторых типах
или состояниях носителей воспроизведение может оказаться невозможным.
•
Чтобы ознакомиться с подробными сведениями и примечаниями относительно доступных для
воспроизведения звуковых файлов, посетите <www.kenwood.com/cs/ce/audiofiles>.
Об устройствах USB
•
Запрещается подключать USB-носитель через USB-концентратор.
•
Подключение кабеля, общая длина которого превышает 5 м, может привести к некорректному
воспроизведению.
•
Это устройство не распознает устройства USB с номинальным напряжением, отличным от 5В, и
номинальным током свыше 1,5А.
Об iPod/iPhone
•
Через USB
Made for
– iPod touch (5th и 6th generation)
– iPod nano (7th generation)
– iPhone 4S, 5, 5S, 5C, 6, 6 Plus, 6S, 6S Plus, SE, 7, 7 Plus
•
Через Bluetooth
Made for
– iPod touch (5th и 6th generation)
– iPhone 4S, 5, 5S, 5C, 6, 6 Plus, 6S, 6S Plus, SE, 7, 7 Plus
•
Управление iPod невозможно, если на нем отображается текст “KENWOOD” или “ ”.
•
В зависимости от версии операционной системы iPod/iPhone некоторые функции могут не работать на данном устройстве.
Об устройствах Android
•
Данное устройство поддерживает Android OS 4.1 и выше.
•
Некоторые устройства Android (с OS 4.1 и выше) могут не поддерживать полностью Android Open Accessory (AOA) 2.0.
•
Если устройство Android одновременно поддерживает запоминающие устройства большой емкости и AOA 2.0, данное
устройство всегда воспроизводит через AOA 2.0 в качестве приоритета.
О функции Spotify
•
Приложение Spotify поддерживает:
– iPhone 4S, 5, 5S, 5C, 6, 6 Plus, 6S, 6S Plus, SE, 7, 7 Plus (iOS 8 или выше)
– iPod touch (5th и 6th generation)
– Android OS 4.0.3 или выше
•
Spotify является услугой, предоставляемой третьей стороной, поэтому ее технические и функциональные характеристики
могут изменяться без предварительного уведомления. Соответственно, совместимость может нарушаться, либо
некоторые или все из предоставляемых услуг могут стать недоступными.
•
Некоторые функции Spotify не могут управляться с данного устройства.
•
По всем вопросам работы с приложением, пожалуйста, обращайтесь в Spotify по адресу <www.spotify.com>.
О функции Bluetooth
•
В зависимости от версии Bluetooth некоторые устройства Bluetooth не могут быть подключены к этому устройству.
•
Устройство может не работать с некоторыми устройствами Bluetooth.
•
Окружающая среда оказывает влияние на состояние сигнала.
30
РУССКИЙ
Page 67

СПРАВОЧНЫЕ МАТЕРИАЛЫ
Изменение отображаемой информации
Каждое нажатие кнопки
•
Если информация не доступна или не записана, отображается сообщение “NO TEXT”, “NO INFO” или другая информация (например, название радиостанции, время воспроизведения).
DISP
переключает отображаемую информацию.
Название источника
STANDBY Название источника (Дата/Часы)* Название источника Часы (обратно к началу)
РАДИОПРИЕМНИК Частота (Дата/Часы)* Частота
(Только для FM-радиос танций системы передачи цифровой
информации)
Название радиостанции (Дата/Часы)* Радиотекст (Дата/Часы)* Радиотекст+ (R.TEXT+)
Название песни (Исполнитель) Название песни (Дата/Часы)* Частота (Дата/Часы)*
(обратно к началу)
USB
iPod USB/iPodBT или
ANDROID
SPOTIFY/SPOTIFY BT Контекстное название (Дата/Часы)*
BT AUDIO
AUX Название источника (Дата/Часы)* Название источника
*
: Заряд батареи и сила сигналов устройства Bluetooth будут отображаться, если для параметра
(Для файлов MP3/WMA/AAC/WAV/FLAC)
Название песни (Исполнитель) Название песни (Название альбома) Название
песни (Дата/Часы)*
воспроизведения (Дата/Часы)*
Когда выбрано
Название песни (Исполнитель)
(Дата/Часы)*
(Название альбома)
(обратно к началу)
(Для
Название песни (Исполнитель)
(Дата/Часы)*
Имя файла (Имя папки) Имя файла (Дата/Часы)* Время
[MODE OFF]/[BROWSE MODE] ( 9)
Время воспроизведения (Дата/Часы)* (обратно к началу)
Время воспроизведения (Дата/Часы)* (обратно к началу)
Название песни (Название альбома) Название песни
Название песни (Дата/Часы)* Время воспроизведения (Дата/Часы)*
)
Название песни (Название альбома) Название песни
/
(обратно к началу)
:
Название песни (Исполнитель) Название песни
Информация на дисплее
Часы (обратно к началу)
(Только для FM-радиос танций системы передачи цифровой
информации)
Название радиостанции Радиотекст Радиотекст+ Название/Исполнитель Частота
Часы (обратно к началу)
(Для файлов MP3/WMA/AAC/WAV/FLAC)
Название песни/Исполнитель Название альбома/Исполнитель Имя папки Имя файла
Время воспроизведения Часы (обратно к началу)
Когда выбрано
Название песни/Исполнитель
Контекстное название
воспроизведения
Название песни/Исполнитель
[BATT/SIGNAL]
[MODE OFF]/[BROWSE MODE] ( 9)
Часы (обратно к началу)
Название песни Имя исполнителя Название альбома Время
Часы (обратно к началу)
Часы (обратно к началу)
Часы (обратно к началу)
установлено значение
[AUTO]. ( 14)
Название альбома/Исполнитель Время воспроизведения
Название альбома/Исполнитель Время воспроизведения
:
РУССКИЙ
31
Page 68

ТЕХНИЧЕСКИЕ ХАРАКТЕРИСТИКИ
FM Диапазон час тот 87,5МГц — 108,0МГц (с интервалом 50кГц)
Полезная чувствительность
(отношение сигнал/шум = 30дБ)
Пороговая чувствительность
(ДИН отношение сигнал/шум = 46дБ)
Частотная характеристика (±3 дБ) 30Гц — 15кГц
Отношение сигнал/шум (MONO) 64 дБ
Тюнер
Разделение стереоканалов (1 кГц) 40 дБ
MW
Диапазон частот 531кГц — 1611 кГц (с интервалом 9кГц)
(AM)
Полезная чувствительность
(отношение сигнал/шум = 20дБ)
LW
Диапазон частот 153кГц — 279кГц (с интервалом 9кГц)
(AM)
Полезная чувствительность
(отношение сигнал/шум = 20дБ)
USB-стандарт USB1.1, USB2.0 Полноскоростной
Система файлов FAT12/16/32
Максимальный ток источника питания Постоянный ток 5 В
Частотная характеристика (±1 дБ) 20Гц — 20кГц
Отношение сигнал/шум (1 кГц) 105 дБ
Динамический диапазон 90 дБ
USB
Разделение каналов 85 дБ
MP3-декодирование В соответствии с аудиоуровнем-3 стандарта
WMA-декодирование Совместимо с Windows Media Audio
AAC-декодирование Файлы AAC-LC “.aac”, “.m4a”
WAV-декодирование Линейный PCM
FLAC-декодирование Файл FLAC (До 96кГц/ 24бит)
32
РУССКИЙ
0,71 мкВ/75 Ом
2,0 мкВ/75 Ом
28,2 мкВ
50 мкВ
1,5A
MPEG-1/2
Версия Bluetooth 3.0
Диапазон частот 2,402ГГц — 2,480ГГц
Выходная мощность Класс мощности 2: +4 дБм (МАКС.), 0 дБм (СРЕД.)
)
Максимальный диапазон связи Луч обзора приблизительно 10 м (32,8 фута)
Профиль HFP 1.6 (Hands-Free Profile — профиль громкой связи)
Bluetooth (для /
Mаксимальная выходная
мощность
Полный диапазон частот 22Bт× 4 (менее чем 1% THD)
Полное сопротивление катушки
громкоговорителя
Тоновоспроизведение Диапазон 1: 62,5Гц±9дБ
Звук
Уровень/нагрузка предусилителя
(USB)
Полное сопротивление выхода
предусилителя
A2DP (Advanced Audio Distribution Profile — профиль
расширенного распространения звука)
AVRCP 1.5 (Audio/Video Remote Control Profile — профиль
удаленного управления звуком и видеоизображением)
SPP (Serial Port Profile — профиль последовательного порта)
PBAP (Phonebook Access Profile — профиль доступа к
телефонной книге)
50Вт×4
4Ом—8Ом
Диапазон 2: 100 Гц ±9 дБ
Диапазон 3: 160 Гц±9дБ
Диапазон 4: 250 Гц±9дБ
Диапазон 5: 400Гц±9дБ
Диапазон 6: 630Гц±9дБ
Диапазон 7: 1кГц ±9 дБ
Диапазон 8: 1,6кГц±9дБ
Диапазон 9: 2,5кГц ±9 дБ
Диапазон 10: 4кГц±9дБ
Диапазон 11: 6,3кГц±9дБ
Диапазон 12: 10кГц±9дБ
Диапазон 13: 16кГц±9дБ
/ : 4000 мВ/10 кОм
: 2500 мВ/10 кОм
≤600Ом
Page 69

ТЕХНИЧЕСКИЕ ХАРАКТЕРИСТИКИ
Частотная характеристика (±3 дБ) 20Гц — 20кГц
Максимальное напряжение на входе 1000мВ
Полное сопротивление на входе 30 кОм
Вспом. оборуд.
Рабочее напряжение 14,4В (допустимо от 10,5 В—16В)
Максимальное текущее потребление 10A
Диапазон рабочих температур –10°C — +60°C
Установочные размеры (Ш × B × Г) 182 мм × 53 мм × 100 мм
Вес нетто (включая декоративную панель
Общие характеристики
и посадочный корпус)
Данные могут быть изменены без уведомления.
0,6кг
РУССКИЙ
33
Page 70

Page 71

Page 72

 Loading...