

Page 1

DDX7025
MONITOR WITH DVD RECEIVER
INSTRUCTION MANUAL
© PRINTED IN JAPAN B64-2838-00/00 (E)(AI)
Page 2

Contents
Before Use ..............................................................4
About discs ............................................................6
English
Notes on playing MP3/WMA ................................7
DDX7025 Basic operations ....................................8
Basic Operations of Remote Controller ............10
Switch Screen Mode............................................12
Control during DVD Video or Video CD
Playback ............................................................14
• Displaying the DVD/VCD Playback screen
• Displaying the Easy Control Panel
• Displaying the DVD/VCD Control screen
• DVD Disc Menu
• VCD Zoom Control
• Information Display
• Direct Search
Tuner Control........................................................20
• Displaying the Easy Control Panel
• Displaying the Tuner Control screen
• Displaying the Tuner Menu screen
• Seek Mode
• Auto Memory
• Manual Memory
• Preset Select
• Direct Search
• Traffic Information
• Search for Program Type
• Radio Text
CD/MP3/WMA/Disc Changer Play Control........26
• Displaying the Easy Control Panel
• Displaying the CD/MP3/WMA/Disc Changer
Control screen
• Displaying the CD/MP3/WMA/Disc Changer
Menu screen
• Set Disc Name
• Directory List (during MP3/WMA play)
• ID3/WMA TAG Display (during MP3/WMA play)
• Disc Select (during play by disc changer)
• Direct Search
Mute Telephone ..................................................33
• Mute Telephone
TV Control ............................................................34
• Displaying the TV Picture screen
• Displaying the Easy Control Panel
• Displaying the TV Control screen
• Displaying the TV Menu screen
• Seek Mode
• Auto Memory
• Manual Memory
• Preset Select
• Set Station Name
DAB Tuner control................................................38
• Displaying the Easy Control Panel
• Displaying the DAB Tuner Control screen
• Displaying the DAB Tuner Menu screen
• Seek Mode
• Auto Ensemble Memory
• Service Preset Memory
• Service Select
• Language Filter
• Search for Program Type
• DAB Information
• DAB Announcement
Character Entry ....................................................44
• How To Use the Character Entry screen
Source Select........................................................45
• Displaying the Control screen
• Displaying the Source Select screen
Adjusting the Monitor Display Position and
Quality................................................................46
• Displaying the Screen Control screen
• Displaying the Tilt Adjust screen
Setup Menu
Setup Menu ......................................................47
• Displaying the Control screen
• Displaying the Setup Menu screen
Audio Set Up ....................................................48
• Displaying the Audio Set Up screen
• Crossover Network Setup
Audio Set Up ....................................................50
• Displaying the Car Type Set Up screen
• Displaying the Speaker Set Up screen
• Displaying the Channel Level screen
• Channel Level
• DTA Setup
• High Pass Filter Setup
• Low Pass Filter Setup
DVD Setup ........................................................56
• Displaying the DVD SETUP 1 screen
• Displaying the DVD SETUP 2 screen
• Language Setup
• Parental Level Setup
System Setup ..................................................60
• Displaying the System Set Up 1 screen
• Displaying the System Set Up 2 screen
AV Interface ......................................................62
• Displaying the AV I/F 1 screen
• Displaying the AV I/F 2 screen
User Interface ..................................................64
• Displaying the User I/F 1 screen
• Displaying the User I/F 2 screen
• Touch Panel Adjust
• Clock
• Security Code Setup
2 English
Page 3

TV Setup ..........................................................70
• Displaying the TV1 Area Set Up screen
• Displaying the TV2 Area Set Up screen
RDS Setup ........................................................71
• Displaying the RDS Set Up 1 screen
• Displaying the RDS Set Up 2 screen
DAB Set Up ......................................................72
• Displaying the DAB Set Up screen
• Announcement Selection
AMP Control ....................................................74
• Displaying the AMP Control screen
Sound Effects Menu
Sound Effects Menu ........................................76
• Displaying the Control screen
• Displaying the Sound Effects Menu screen
Audio Control ..................................................77
• Displaying the Audio Control 1 screen
• Displaying the Audio Control 2 screen
Equalizer ..........................................................78
• Displaying the Equalizer screen
• Tone curve setup
• Parametric Equalizer
Zone Control ....................................................82
• Displaying the Zone Control screen
Digital Effect ....................................................83
• Displaying the Digital Effect screen
Position ..............................................................84
• Displaying the Position screen
Hands-Free Unit Control......................................86
GSM control ....................................................86
• Displaying the Control screen
• When called
• When dialing
• Calling by Phone Book
• Addition to Phone Book
• Editing the Phone Book
• Quick Dialing
• Hands Free Setup
• Reading the SMS (Short Message Service)
messages
• Creating an SMS (Short Message Service)
message
Glossary ................................................................94
Troubleshooting Guide........................................95
Specifications ..................................................100
English 3
Page 4
Before Use
2WARNING
English
To prevent injury and/or fire, take the following
precautions:
• Ensure that the unit is securely installed. Otherwise it
may fly out of place during collisions and other jolts.
• When extending the ignition, battery or ground wires,
make sure to use automotive-grade wires or other wires
with an area of 0.75mm
cable deterioration and damage to the cable coating.
• To prevent short circuits, never put or leave any metallic
objects (e.g., coins or metal tools) inside the unit.
• If the unit starts to emit smoke or strange smells, turn
off the power immediately and consult your Kenwood
dealer.
• Do not touch the liquid crystal fluid if the LCD is
damaged or broken due to shock. The liquid crystal fluid
may be dangerous to your health or even fatal.
If the liquid crystal fluid from the LCD contacts your body
or clothing, wash it off with soap immediately.
2CAUTION
2
(AWG18) or more to prevent
To prevent damage to the machine, take the
following precautions:
• Make sure to ground the unit to a negative 12V DC
power supply.
• Do not open the top or bottom covers of the unit.
• Do not install the unit in a spot exposed to direct sunlight
or excessive heat or humidity. Also avoid places with too
much dust or the possibility of water splashing.
• Do not subject the faceplate to excessive shock, as it is
a piece of precision equipment.
• When replacing a fuse, only use a new one with the
prescribed rating. Using a fuse with the wrong rating
may cause your unit to malfunction.
• To prevent short circuits when replacing a fuse, first
disconnect the wiring harness.
• Do not use any screws except for the ones provided.
The use of improper screws might result in damage to
the main unit.
• You cannot view video pictures whilst the vehicle is
moving. To enjoy TV/video pictures, find a safe place to
park and engage the parking brake.
NOTE
• If you experience problems during installation, consult
your Kenwood dealer.
• If the unit does not seem to be working right, try
pressing the reset button first. If that does not solve the
problem, consult your Kenwood dealer.
Audio units you can control from the
DDX7025 Receiver (in November of 2003):
KDC-CPS89, KDC-CPS87, KDC-CPS85, KDC-C719,
KDC-C717, KDC-C715, KDC-C669, KDC-C667, KDC-C665,
KDC-C469, KDC-C467, KDC-C465, KDC-D301, KMD-D401,
KTC-9090DAB, KDV-C820, KDC-C719MP, KCA-HF521,
KPA-CP100, KTC-V500N/P/E (Set the "O-N" switch to "N"
position if provided.)
Navigation units you can control from the
DDX7025 Receiver (in November of 2003):
KNA-DV3200, KNA-DV2200
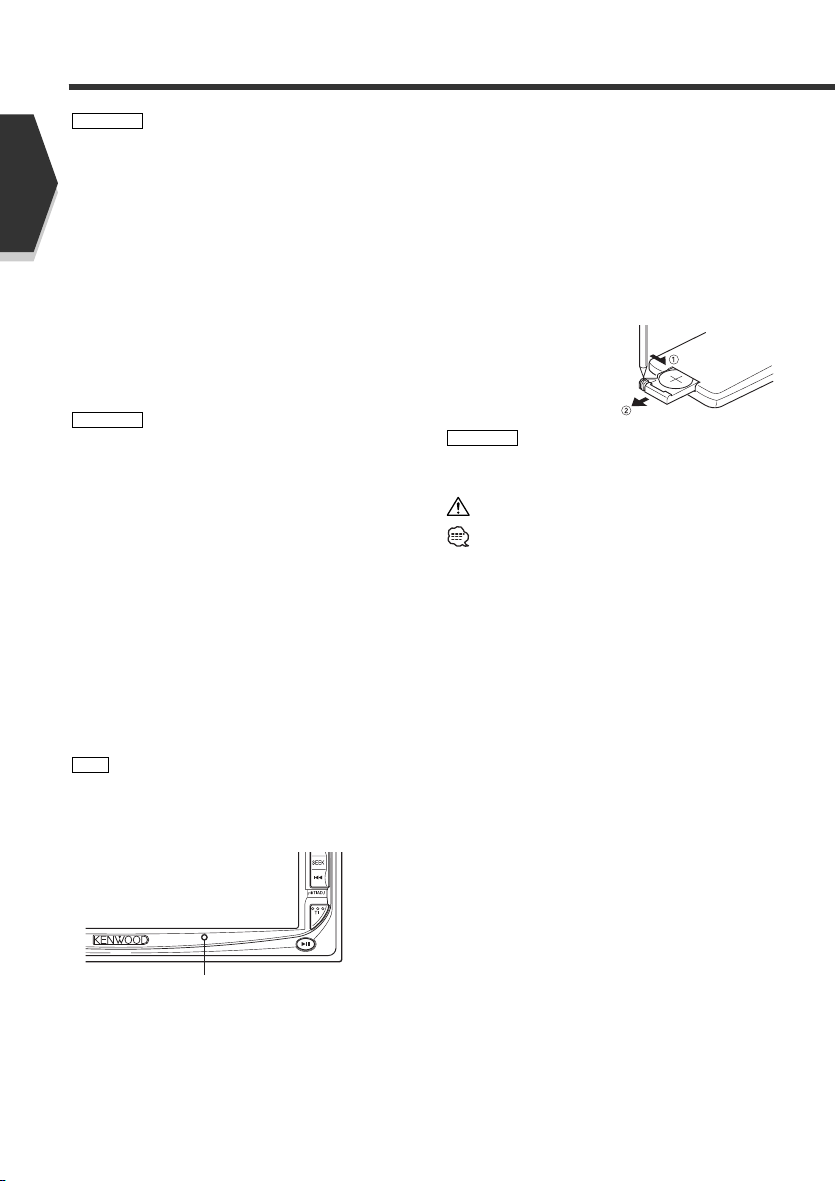
Loading and Replacing the battery
Use one lithium battery
(CR2025).
Insert the batteries with
the + and - poles aligned
properly, following the
illustration inside the case.
2WARNING
Store unused batteries out of the reach of children. Contact
a doctor immediately if the battery is accidentally
swallowed.
Do not set the remote on hot places such as above the
dashboard.
• The provided batteries are intended for use in operation
checking, and their service life may be short.
• When the remote controllable distance becomes short,
replace both of the batteries with new ones.
Keep on slide
Pull out
Cleaning the panel and monitor
When the operator panel and monitor panels are dirty, wipe
and clean them using a soft cloth (such as a commercially
available silicon coated cloth). When contaminated
excessively, clean them using a cloth dipped in a neutral
detergent first, then remove the detergent using a dry cloth.
Do not use a hard cloth and a volatile chemical (such as an
alcohol). If used, the panel surface may be scratched or
printed letters may be erased.
Cleaning the disc slot
As dust can accumulate in the disc slot, clean it
occasionally. Your discs can get scratched if you put them
in a dusty disc slot.
Lens Fogging
Right after you turn on the car heater in cold weather, dew
or condensation may form on the lens in the disc player of
the unit. Called lens fogging, discs may be impossible to
play. In such a situation, remove the disc and wait for the
condensation to evaporate. If the unit still does not operate
normally after a whilst, consult your Kenwood dealer.
Reset button
Screen brightness during low temperatures
When the temperature of the unit falls such as during
winter, the liquid crystal panel's screen will become darker
than usual. Normal brightness will return after using the
monitor for a whilst.
4 English
This Product is not installed by the manufacturer of a
vehicle on the production line, nor by the professional
importer of a vehicle into an EU Member State.
Page 5
Region codes in the world
1
2
4
1
5
4
5
2
1
2
6
3
8
32
9
16:9 LB
The DVD players are given a region code according to the country or area it is marketed, as shown in the following map.
Icons on the DVD discs
Icon Description
Indicates the region code where the disc can be played.
Number of voice languages recorded with the audio function. The number in the icon indicates the number
of voice languages. (Max. 8 languages)
Number of subtitle languages recorded with the subtitle function. The number in the icon indicates the
number of subtitle languages. (Max. 32 languages)
Number of angles provided by the angle function. The number in the icon indicates the number of angles.
(Max. 9 angles)
Aspect ratios that can be selected. "LB" stands for Letter Box and "PS" for Pan/Scan. In the example on the
left, the 16:9 video can be converted into letter box video.
Unplayable discs
This player cannot play back any of the following discs.
• DVD-ROM/DVD-RAM discs • HQ-VCD discs
• CDV discs (Only the audio part can be reproduced) • CD-G/CD-EG/CD-EXTRA discs (Only the audio can be reproduced)
• Photo CD discs • DVD-Audio
Also, you cannot play back the DVD-R/RW and DVD+R/RW discs if not recorded in the DVD-Video format.
Restrictions due to difference between discs
Some DVD and VCD discs can be played only in
certain playback modes according to the intentions
of the software producers. As this player plays
discs according to their intentions, some functions
may not work as intended by you. Please be sure
to read the instructions provided with each disc.
When an inhibition icon is displayed on the
monitor, it indicates that the disc being played is
under the restriction as described above.
The illustrations of the display and the panel appearing in this
manual are examples used to explain more clearly how the
controls are used. Therefore, what appears on the display in the
illustrations may differ from what appears on the display on the
actual equipment, and some of the illustrations on the display
may represent something impossible in actual operation.
Time is displayed on each control screen in the 12 hour clock display type (with AM/PM displayed) or in the 24 hour clock display type
(without AM/PM displayed) depending on the sales area. The display type cannot be changed. In this instruction manual, screens of the
24 hour display type are used as examples.
Inhibition
icon
Explanation of icons used on this manual
Indicates the key operation on the receiver.
Indicates the button you must touch.
Indicates the key or joystick operation on the remote
controller.
The initial value of each setup is shown.
Gives an additional information or an operation advice.
English 5
Page 6
About discs
Handling discs
• Don’t touch the recording surface of the disc.
English
• CD-R/RW, DVD-R/RW, and DVD+R/RW are easier to
damage than a normal music CD. Use a CD-R/RW, DVDR/RW, or DVD+R/RW after reading the caution items on
the package etc.
• Don’t stick tape etc. on the disc.
Also, don’t use a disc with tape stuck on it.
When using a new disc
If the disc center hole or outside rim has burrs, use it after
removing them with a ball pen etc.
Burrs
Burrs
Removing discs
When removing discs from this unit pull them out
horizontally.
Discs that can’t be used
• Discs that aren’t round can’t be used.
• Discs with coloring on the recording surface or that are
dirty can’t be used.
• This unit can only play the CDs with .
It may not correctly play discs which do not have the
mark.
•A CD-R or CD-RW that hasn’t been finalized can’t be
played. (For the finalization process refer to your CDR/CD-RW writing software, and your CD-R/CD-RW
recorder instruction manual.)
Disc storage
• Don’t place them in direct sunlight (On the seat or
dashboard etc.) and where the temperature is high.
• Store discs in their cases.
Disc accessories
Don’t use disc type accessories.
Disc cleaning
Clean from the center of the disc and move outward.
6 English
Page 7

Notes on playing MP3/WMA
This unit can play MP3 (MPEG1 Audio Layer 3)/WMA.
Note, however, that the MP3/WMA recording media
and formats acceptable are limited. When writing
MP3/WMA, pay attention to the following restrictions.
Acceptable media
The MP3/WMA recording media acceptable to this unit are
CD-ROM, CD-R, and CD-RW.
When using CD-RW, do full format not quick format to
prevent malfunction.
Acceptable medium formats
The following formats are available for the media used in
this unit. The maximum number of characters used for file
name including the delimiter (".") and three-character
extension are indicated in parentheses.
• ISO 9660 Level 1 (12 characters)
• ISO 9660 Level 2 (31 characters)
• Joliet (64 characters)
• Romeo (128 characters)
Up to 170 characters can be displayed in the long file name
format. For a list of available characters, see the instruction
manual of the writing software and the section Entering file
and folder names below.
The media reproducible on this unit has the following
limitations:
• Maximum number of directory levels: 8
• Maximum number of files per folder: 255
• Maximum number of characters for folder name: 64
• Maximum number of folders: 100
MP3/WMA written in the formats other than the above
may not be successfully played and their file names or
folder names are not properly displayed.
Settings for your MP3/WMA encoder and CD
writer
Do the following setting when compressing audio data in
MP3/WMA data with the MP3/WMA encoder.
• Transfer bit rate: MP3: 8 —320 kbps
• Sampling frequency: MP3: 32, 44.1, 48 kHz
When you use your CD writer to record MP3 up to the
maximum disc capacity, disable additional writing. For
recording on an empty disc up to the maximum capacity at
once, check Disc at Once.
Play mode may not be possible when portions of the
functions of Windows Media Player 9 or higher are used.
WMA: 48 —192 kbps
WMA: 32, 44.1, 48 kHz
Entering file and folder names
The code list characters are the only file names and folder
names that can be entered and displayed.
If you use any other character for entry, the file and folder
names are not displayed correctly. They may neither be
displayed correctly depending on the CD writer used.
The unit recognizes and plays only those MP3/WMA which
have the MP3/WMA extension (.MP3/.WMA).
A file with a name entered with characters not on the code
list may not play correctly.
Writing files into a medium
When a medium containing MP3/WMA data is loaded, the
unit checks all the data on the medium. If the medium
contains a lot of folders or non-MP3/WMA files, therefore,
it takes a long time until the unit starts playing MP3/WMA.
In addition, it may take time for the unit to move to the
next MP3/WMA file or a File Search or Folder Search may
not be performed smoothly.
Loading such a medium may produce loud noise to damage
the speakers.
• Do no attempt to play a medium containing a nonMP3/WMA file with the MP3/WMA extension.
The unit mistakes non-MP3/WMA files for MP3/WMA data
as long as they have the MP3/WMA extension.
• Do not attempt to play a medium containing non
MP3/WMA.
MP3/WMA playing order
When selected for play, Folder Search, File Search, or for
Folder Select, files and folders are accessed in the order in
which they were written by the CD writer.
Because of this, the order in which they are expected to be
played may not match the order in which they are actually
played. You may be able to set the order in which
MP3/WMA are to be played by writing them onto a
medium such as a CD-R with their file names beginning
with play sequence numbers such as "01" to "99",
depending on your CD writer.
Entering ID3 tag
The Displayable ID3 tag is ID3 version 1.x.
For the character code, refer to the List of Codes.
English 7
Page 8

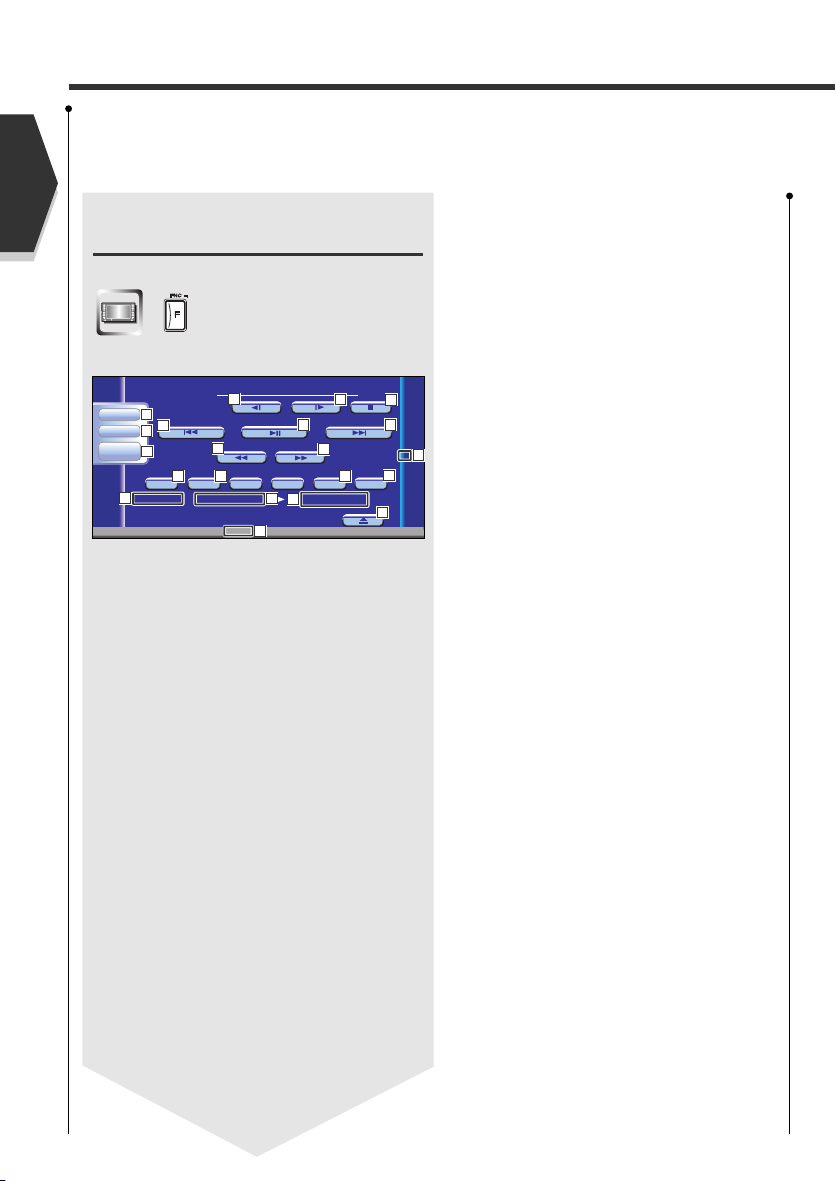
DDX7025 Basic operations
English
8 English
Page 9

Play Disc
1
[Disc insertion slot]
A disc is played when you insert it.
Play/Pause
2
[38] key
Pauses and replays a disc.
Eject Disc
3
[EJECT] key
The disc is ejected.
Switch Video Sources
4
[V.SEL] key
The video sources are switched each time you press
the key.
* Optional accessory
Clears the video image when pressed more than one
second. When pressed again, the original image is
redisplayed.
Switch Audio Source/Power Supply
5
[SRC] key
The audio sources are switched each time you press
the key.
Track/Station Selectors
7
[SEEK] key
Selects a music or chapter, track, or frequency.
Attenuator/Loudness
8
[ATT]/[LOUD] key
Attenuates the volume.
Press it again to cancel muting.
Press it for more than one second to turn the Loudness
function on or off. (see page 77)
If turned on, high and low tones are enhanced during
low volume.
Traffic Information
9
[TI] key
Turns the Traffic Information function On or Off. (see
page 24)
Screen Setup
p
[SCRN] key
Displays the Screen Control or Tilt Control screen. (see
page 46)
Function
q
[FNC] key
The video sources are switched each time you press
the key.
Switches the source that is output at the AV OUTPUT
terminal when it is pressed more than 1 second.
Switch Screen Mode/GSM
w
[MODE]/[GSM] key
The screen mode is switched. (see page 12)
The GSM Control screen appears when you hold down
the key more than 1 second.
* Optional accessory
Hold down more than 1 second to turn the power
supply Off.
Push it again to turn power supply On.
Volume Controls
6
[VOL] key
The display turns on when you put the parking brake,
except for the navigation system.
English 9
Page 10
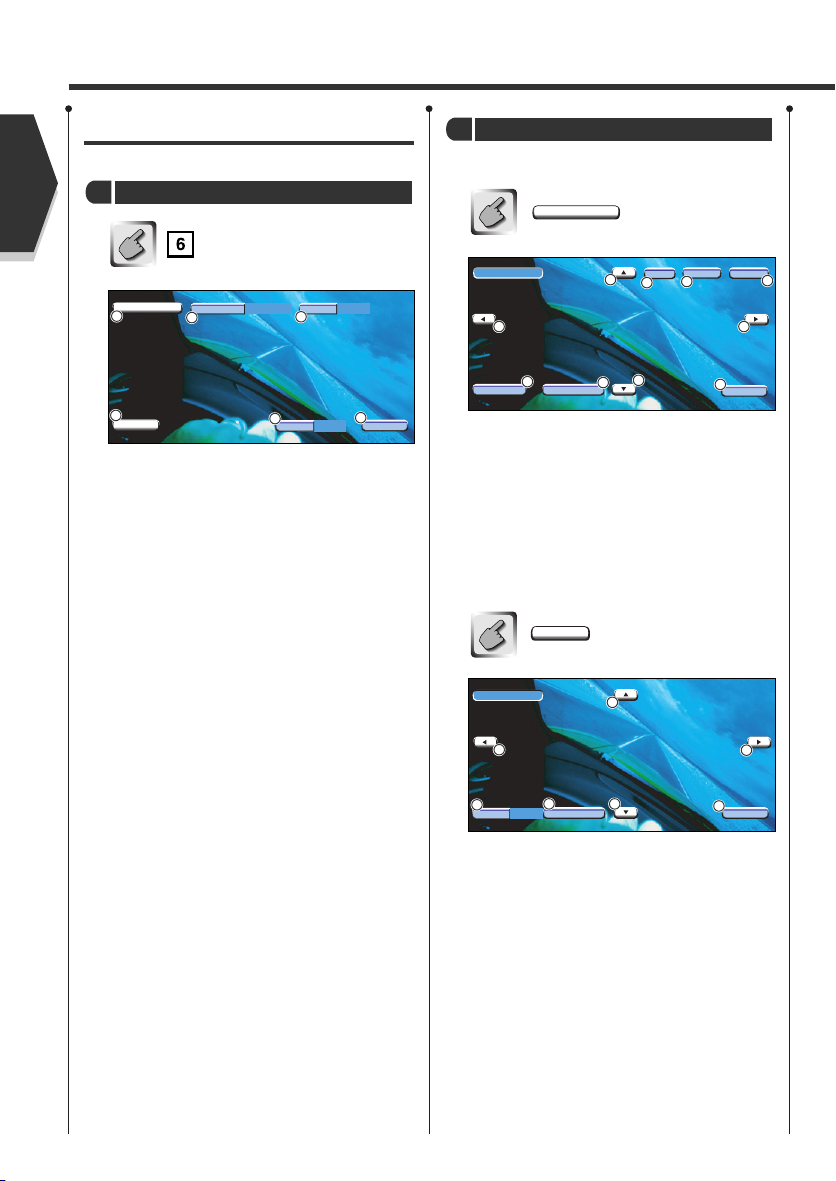
Basic Operations of Remote Controller
English
Remote Control Mode selector
1
Selects one of the following remote control modes.
TV: TV source
DVD: Built-in DVD/VCD/CD/MP3/WMA player source
AUD: Tuner source or attached disc changer/disc
Volume Control
2
Adjusts the volume.
10 English
player source
[DISC]
3
Stops to play the built-in disc player.
Switches over the sound source each time it is
4
pressed.
Selects the Direct Search mode.
5
(see page 19/24/33 for <Direct Search>)
Page 11
Joystick
6
[DVD]
Enters your selection from the DVD Disc Menu.
[DVD] [VCD]
7
Returns to the previous screen when the DVD/VCD
Disc Menu is used.
[DVD]
8
Calls the Top menu of DVD Disc Menu.
Switch Video Sources
9
[V.SEL] key (When 1is set to "TV")
The video sources are switched each time you press
the key.
* Optional accessory
[DVD]
p
Calls the DVD Disc Menu.
[DVD]
q
Each time you press the button, the angle switches.
[DVD] [VCD]
w
Each time you press the button, the zoom ratio
switches.
[DVD]
e
Switches a subtitle language.
[DVD]
r
Switches an audio language.
[DISC]
t
Select a folder or a disc.
[TV]
FM: Switches to TV1, TV2, or VIDEO.
[TUNER]
FM: Switches to the FM1, FM2, or FM3 band.
AM: Switches to the AM band.
[DISC]
y
Selects a chapter, a track or a song.
[TV]
Select a channel.
[TUNER]
Selects a station.
[DVD]
u
1
: Fast Backward (Rewind). The speed changes
each time it is pressed.
¡
: Fast Forward. The speed changes each time it is
pressed.
[TV] [TUNER]
i
—:Call the stations from memory.
[DISC]
o
Plays or pauses.
[TUNER]
Selects the Seek mode. (see page 22/40 for the <Seek
Mode>)
[DVD]
;
: Slow Backward.
: Slow Forward.
Attenuator
a
[ATT] key
Attenuates the volume.
Press it again to cancel muting.
[DVD] : An operation during DVD playback
[VCD] : An operation during VCD playback
[DISC] : An operation during DVD, VCD, CD, MP3/WMA or MD playback
[TV] : An operation during TV source
[TUNER] : An operation during FM/AM broadcasting source
English 11
Page 12
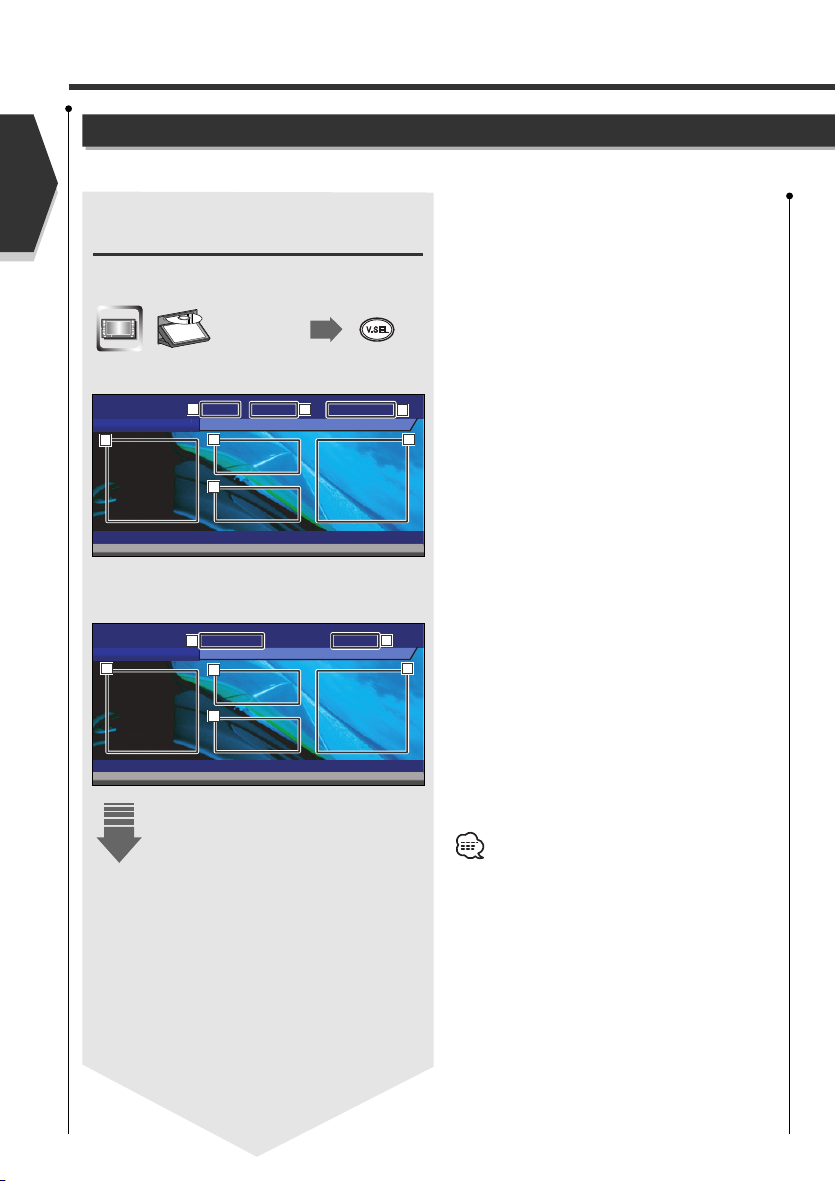
Switch Screen Mode
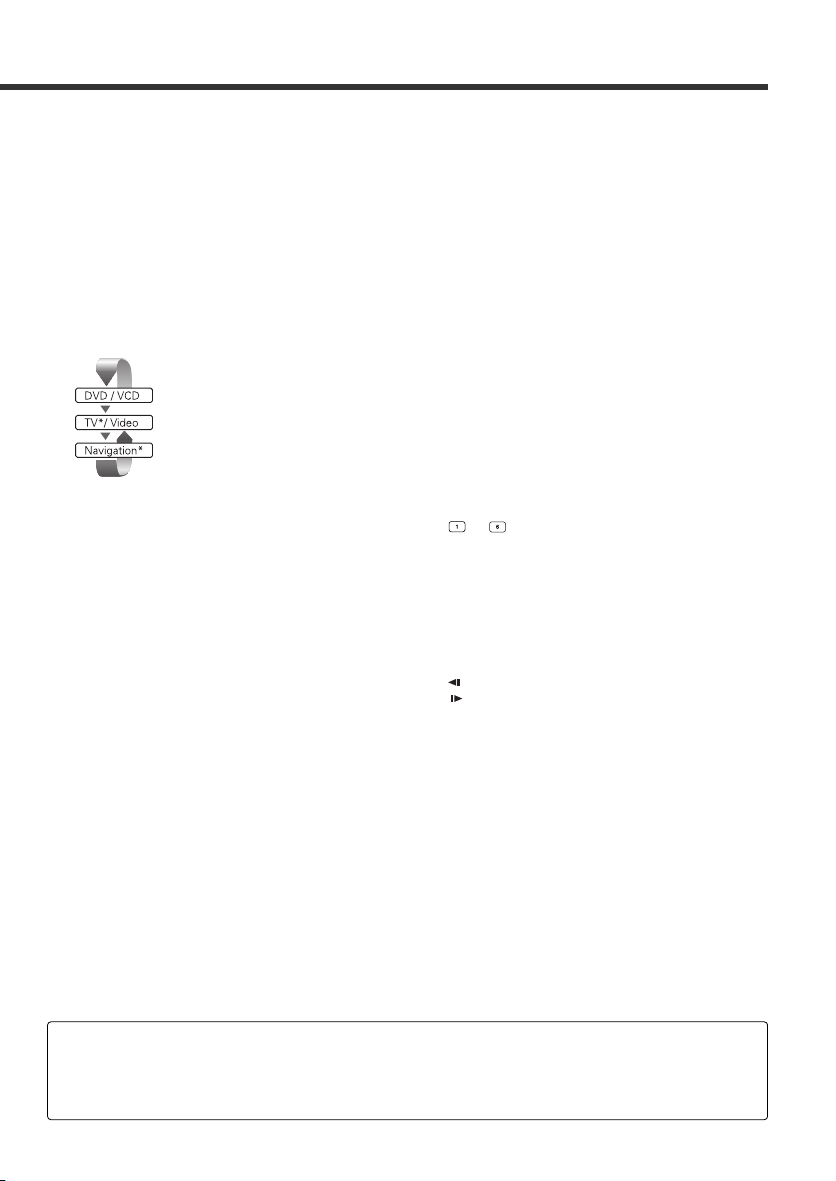
The Screen mode of the monitor changes each time the [MODE] key is pressed.
English
[MODE] key
Full picture mode [FULL]
Justify picture mode [JUST]
• When the Menu, Easy Control screen, or Navigation is selected, it is shown in the full-size display mode automatically.
• The Screen mode can be set for each of DVD/VCD, TV, and video images.
12 English
Cinema picture mode [CINEMA]
Zoom picture mode [ZOOM]
Normal picture mode [NORMAL]
Their Screen mode cannot be changed.
Page 13

English 13
Page 14
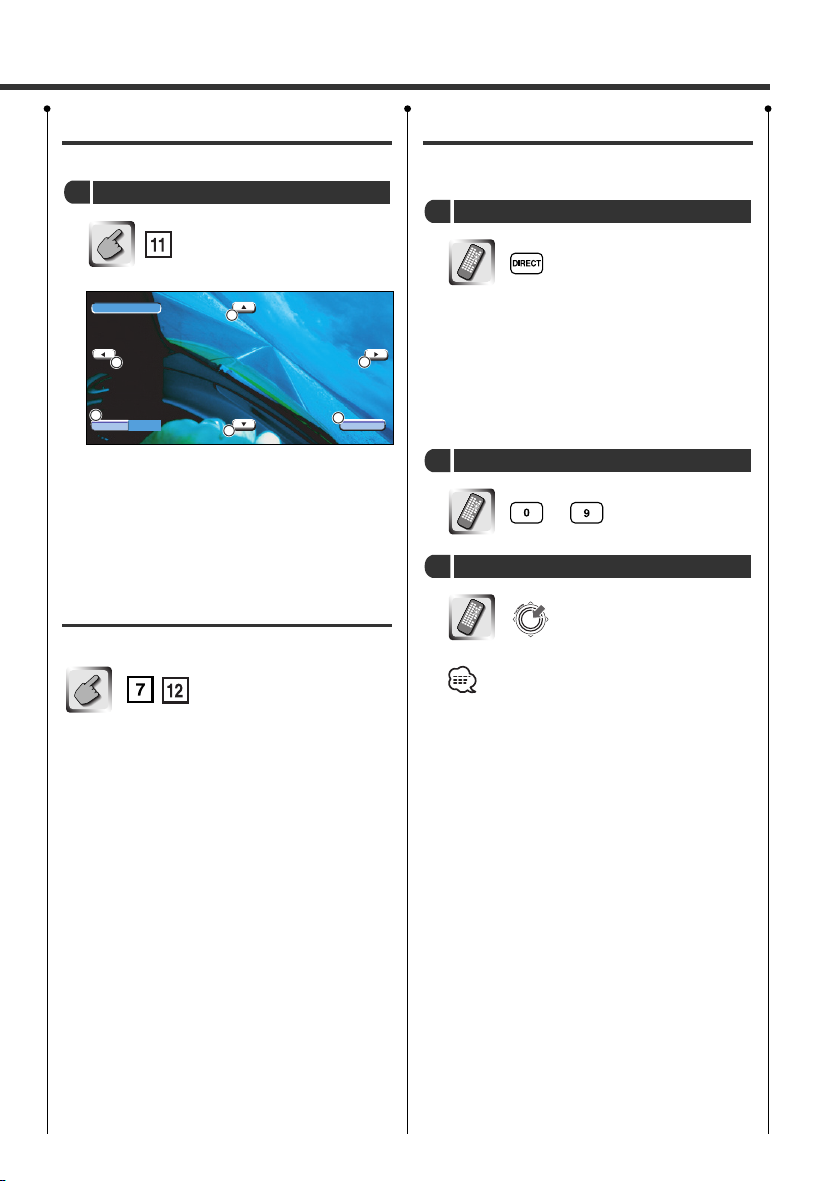
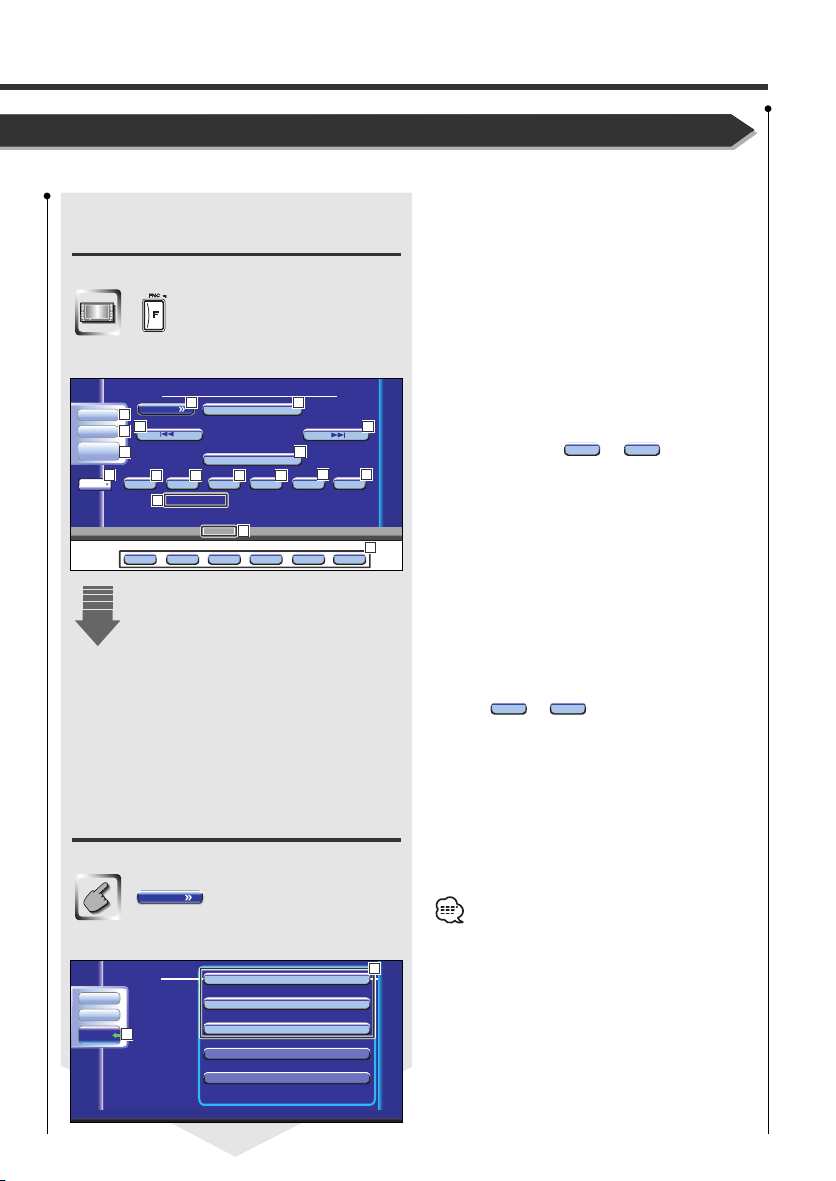
Control during DVD Video or Video CD Playback
English
Control during DVD Video or Video CD Playback
Various control screens appear when you play back a DVD Video (DVD) or a Video
Displaying the DVD/VCD
Playback screen
Title Number Display
You can use the following operations when displaying
DVD/VCD images.
Plays back the
DVD or VCD.
DVD playback screen
DVD VIDEO Title 1 Chap 3 T 0:02:37
5
DVD VIDEO Title 1 Chap 3 T 0:02:37
1
MODE: FU L L
6
7
2
AV - INAV-O UT:
IN
VCD playback screen
DVD VCD Scene 255 P 2:37
PBC VER2
10
DVD VCD Scene 255 P 2:37
8
MODE:FULL
11
12
IN
3
AV - INAV-O UT:
1
Chapter Number Display
2
Play Time Display
3
Forward Chapter Search Area
4
Selects the next chapter.
Backward Chapter Search Area
5
Selects the previous chapter.
3
4
9
DVD Disc Menu Control Buttons Area
6
Displays the Disc Menu Control buttons (see page
18).
Information Display Button Area (see page 19)
7
Scene/Track Number Display
8
Forward Scene/Track Search Area
9
Selects the next scene (when PBC is On) or track
(when PBC is Off).
Backward Scene/Track Search Area
p
Selects the previous scene (when PBC is On) or
track (when PBC is Off).
Zoom Control Button Area
q
Displays the Zoom Control buttons (see page 19).
Information Display Button Area (see page 19)
w
14 English
• For DVD/VCD playback, DVD/VCD picture
selection, or controller key operations, see
<DDX7025 Basic Operations> (see page 8).
• The information display is cleared automatically
after approximately 5 seconds. Also, the
information can be displayed automatically when
it is updated (see page 65).
Page 15
CD (VCD) disc.
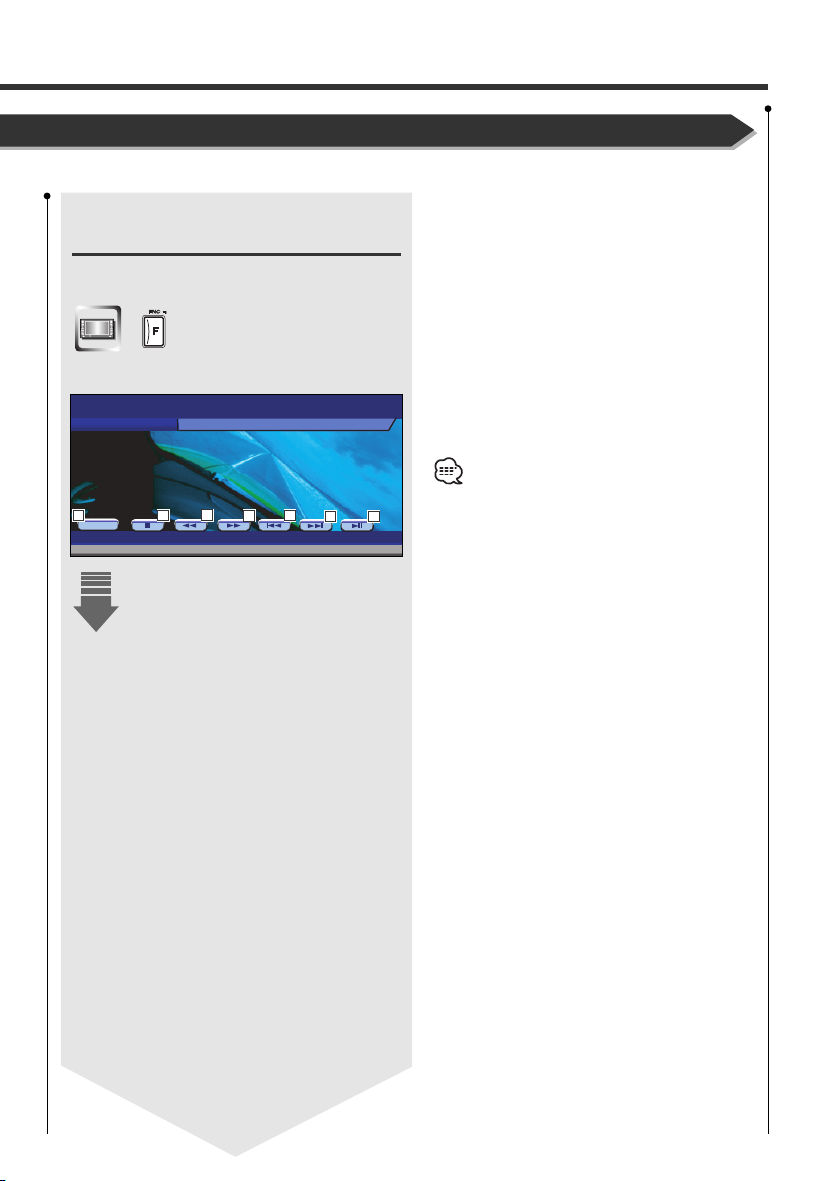
Displaying the Easy Control
Panel
The Control Panel is displayed in a floating position of the
DVD/VCD screen.
Display the Easy Control Panel
DVD VIDEO
Title 1 Chap 3 T 0:05:32
AV -INAV-OUT:MODE: FU L L
Switches the source.
e
Stops to play.
r
Rewinds or fast forwards.
t
Chapter Search (DVD)
y
Searches for a chapter.
Scene/Track Search (VCD)
Selects a scene (when PBC is On) or a track (when
PBC is Off).
Plays or pauses.
u
The Easy Control Panel display is cleared when you
touch the center of image display area.
13
SRC
DVD VIDEO
15
14
Title 1 Chap 3 T 0:05:32
IN
16
15
16
17
English 15
Page 16
Control during DVD Video or Video CD Playback
English
Displaying the DVD/VCD
Control screen
Ejects the disc from the built-in disc player.
Plays a DVD/VCD using various functions.
DVD/VCD Control screen
DVD V I DEO
Audio
19
24
20
Set Up
Direct
21
SRC
31
T itle 1 Chap 3 T0:05:20
KENWOOD
26
25
22
28
27
REPPBC
T-REP
SCRL
32
33
35
13:50
26
23
24
22
30
29
TIME
18
i
Calls the Sound Effects Menu. (see page 76)
o
Calls the Setup Menu. (see page 47)
;
Displays the Source Select screen. (see page 45)
a
Fast Forwards or Rewinds.
s
Stops to play.
d
When pressed twice, the disc is played from its
beginning when you play it in the next time.
Selects a chapter, a scene or a track.
f
IN
When the DVD is paused, touch this button to start
34
single-frame stepping.
Plays or pauses.
g
Slow Forwards or Backwards. (during DVD playback
h
only)
Turns the PBC function of VCD On or Off. (when
j
VCD Ver 2.0 or SVCD is in use only)
Switches the Repeat Play operations in the
k
following sequence.
DVD: Title Repeat, Chapter Repeat, Repeat Off
VCD: Track Repeat, Repeat Off (Available when the
PBC is off)
Scrolls the display text.
l
Switches the play time display in the following
/
sequence.
DVD: Title, chapter, remaining titles
VCD: Track, disc, remaining discs (Effective only
when the PBC function is off)
Title Number Display (DVD)
z
Chapter/Scene/Track Number Display
x
Play Time Display
c
Appears when a disc is inserted.
v
Function Indicator
b
16 English
Page 17

English 17
Page 18
Control during DVD Video or Video CD Playback
Zoom
Angle
1/1
Exit
Menu
Ctrl
10/10SUB
Audio
1/1
Top
Enter
Return
Cancel
Menu
Ctrl
Menu
Exit
Zoom
Ctrl
Exit
Cancel
Zoom
Off
English
DVD Disc Menu
Selects an option from the DVD Disc Menu.
Displays the Disc Menu Control screen
1
DVD Disc Menu Control Buttons
Area (page 14)
1
5
Calls the Menu Control.
1
Switches the picture angle.
2
3
(during program playback only)
Switches the caption language.
3
(during program playback only)
Switches the voice language.
4
(during program playback only)
Displays the Zoom Control screen.
5
Clears the Disc Menu Control.
6
4
2
6
Select Disc Menu options
2
Disc Menu
Menu
Ctrl
3
6
3
4
Calls the Menu.
1
Returns to the Disc Menu Control screen.
2
Selects a menu option.
3
Enters your menu selection.
4
Returns to the previous menu screen.
5
Displays the Top Menu.
6
Clears the Disc Menu Control.
7
3
2
Zoom Control
Zoom
2
1
5
3
7
18 English
2
1
Changes the zoom ratio at 4 levels (2 times, 3
1
23
2
4
times, 4 times, or off) each time you touch.
Scrolls the screen in the direction you touch.
2
Returns to the Disc Menu Control screen.
3
Clears the Disc Menu Control.
4
Page 19
VCD Zoom Control
Zoom
Ctrl
Exit
Zoom
Off
Displays an enlarged VCD screen.
Displays the Zoom Control screen
1
Zoom Control Button Area
(page 14)
Direct Search
You can search for a DVD/VCD chapter, scene
or track by entering its number.
Selects the Direct Search mode
1
2
2
1
Changes the zoom ratio at 4 levels (2 times, 3
1
times, 4 times, or off) each time you touch.
Scrolls the screen in the direction you touch.
2
Clears the Zoom Control button.
3
2
Information Display
Displays the DVD and AV information.
Information Display Button Area
(Page 14)
The information is displayed for 5 seconds.
The following items can be searched directly each
time it is pressed.
2
DVD: Title, Chapter, Time, Direct number
VCD (when PBC is On): Scene, Direct number
VCD (when PBC is Off): Track, Time
3
However, the direct search may not be supported for
some discs.
Enter a number or time
2
—
Search
3
The operation ends automatically if you do not
operate within 10 seconds.
English 19
Page 20
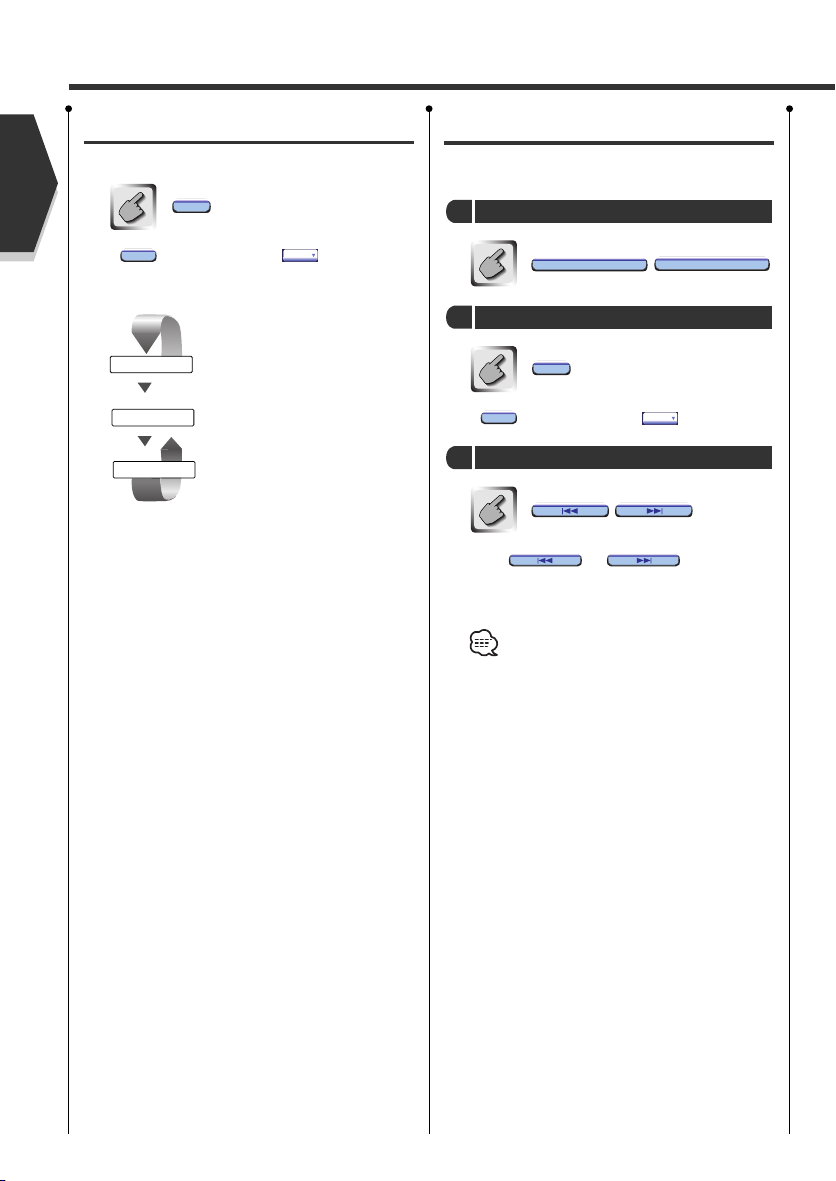
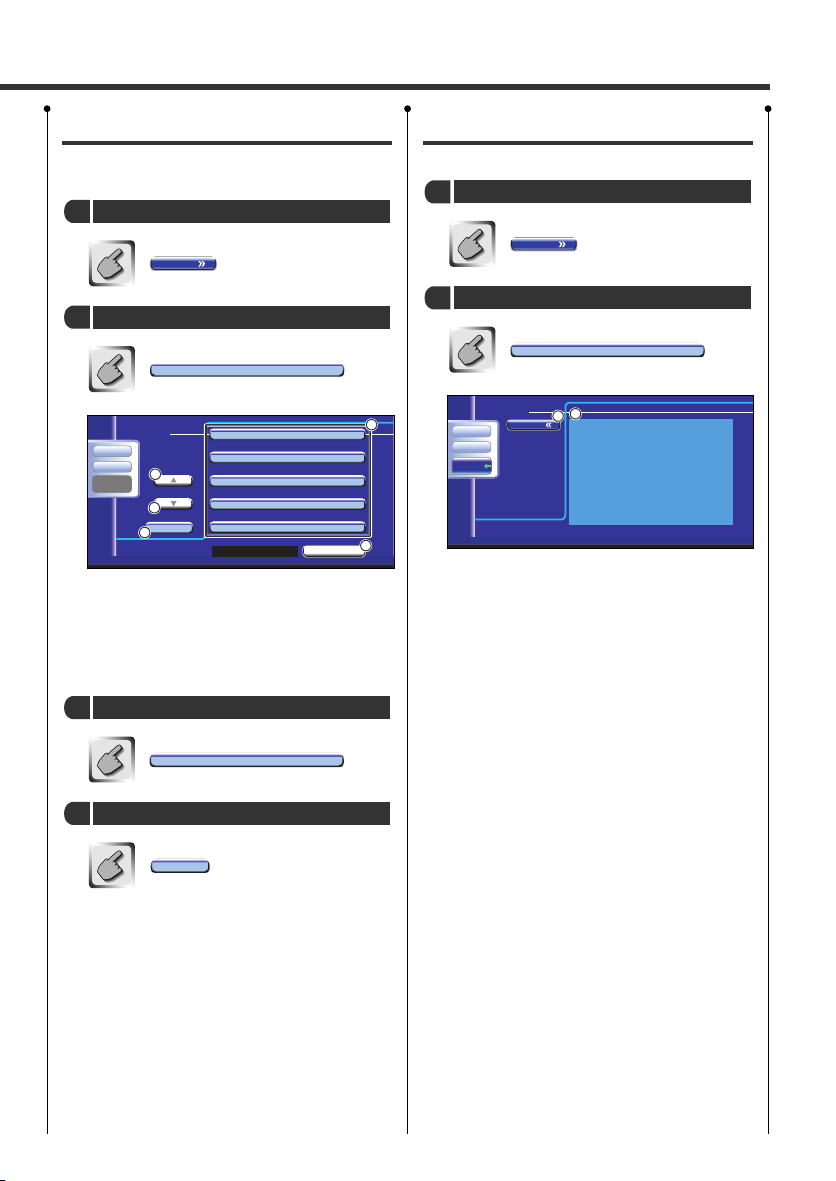
Tuner Control
English
Tuner Control
Various control screens appear in the Tuner Source mode.
Displaying the Easy Control
Panel
Switches the source.
The Tuner Control Panel is displayed in a floating position
of the selected picture.
Displaying the Easy Control Panel
AV - INAV-O UT:
3
4
3
SEEK
SRC
TUNER
1
MODE: FU L L
2
A M F M
FM1 98.1 MHzPreset 1
2
1
Switches the band (to AM or FM1/2/3).
2
Tunes in a station
3
Switches the Seek mode.
4
(see page 22 for the <Seek Mode>)
• For receiver key operations, see <DDX7025 Basic
Operations> (see page 8).
• The Easy Control Panel display is cleared when
you touch the center of image display area.
20 English
Page 21
Displaying the Tuner Control
TUNER
Preset Select
PTY Sear ch
Radio Text
Set Up
Audio
SRC
screen
You can tune in a station using various functions.
Tuner Control screen
5
TUNER
6
Audio
8
Set Up
Direct
7
SRC
12
NextNext
FM1 98.1 MHzPreset 1
5
Menu
11
13
LO.S MONO
AME
21
123456
FM
AM
14
15
SEEK DISP SCRL
AUTO 1
20
16
13:50
9
11
10
18
17
Displaying the Tuner Menu
screen
You can select menu options using various functions.
Menu
Tuner Menu screen
Calls the Tuner Menu.
5
Calls the Sound Effects Menu. (see page 76)
6
Displays the Source Select screen. (see page 45)
7
Calls the Setup Menu. (see page 47)
8
Switches to the FM1/2/3 band.
9
Switches to the AM band.
p
Tunes in a station.
q
Use the <Seek Mode> to change the frequency
switching.
Switches between to buttons and
w
61
Function buttons to use.
Turns the Local seek function On or Off.
e
Selects the Auto Memory mode.
r
(See page 22 for the <Auto Memory>)
19
Switches the Seek mode.
t
(see page 22 for the <Seek Mode>)
Selects the Program Service Name or Radio Text
y
mode for text display. (Only when receiving the FM
broadcast)
Scrolls the display text.
u
Select the Monaural reception mode. (Only when
i
receiving the FM broadcast)
When to buttons appear, you can call
o
61
up the stations from memory.
For memory of broadcasting stations, see <Auto
Memory> (see page 22) or <Manual Memory> (see
page 23).
Seek Mode Indicator
;
Memory Number Display
a
Selects options from various function menus.
s
Returns to the Tuner Control screen.
d
The available functions vary depending on the
model used (the tuner specifications and the
broadcasting system that can be received).
22
23
English 21
Page 22
Tuner Control
English
Seek Mode
Sets a station selection.
SEEK
If is not shown, touch .
SEEK
The mode is switched each time you touch the
button.
AUTO 1
AUTO 2
MANUAL
Tunes in a station with good
reception automatically.
Tune in stations in memory one
after another.
Switches to the next channel
manually.
NextNext
Auto Memory
Stores stations with good reception in memory
automatically.
Select a band you wish to store in memory
1
FM
Select the Auto Memory mode
2
AME
If is not shown, touch .
AME
Start Auto Memory
3
Touch or .
Auto Memory terminates when 6 stations are stored
or when all stations are tuned in.
The operation ends automatically if you do not
operate within 10 seconds.
AM
NextNext
22 English
Page 23
Manual Memory
TUNER
Menu
FM 98.1
FM3 1) 100. 5 MHz
FM3 2) 100. 5 MHz
FM3 3) 100. 5 MHz
FM3 4) 100. 5 MHz
FM3 5) 100. 5 MHz
FM3 6) 100. 5 MHz
Set Up
Audio
SRC
Stores the current receiving station in memory.
Select a station you wish to store in memory
1
FM
Store in memory
2
—
61
If to are not shown, touch .
61
Continue to touch until the memory number appears.
AM
NextNext
Preset Select
Lists and tunes in stations in memory one after
the other.
Call the Tuner Menu
1
Menu
Call the Preset Select Menu
2
Preset Select
4
2
2
3
Tunes in the displayed station.
1
Switches the band of the displayed station list.
2
Band display.
3
Returns to the Tuner Menu.
4
1
English 23
Page 24
Tuner Control
English
Direct Search
Tunes in a station when its frequency is
entered.
Select a band
1
Selects the Direct Search mode
2
Enter a frequency
3
—
When you enter them, signal reception starts.
Example: When you receive FM 92.1 MHz
Example: When you receive AM 810 kHz
The operation ends automatically if you do not
operate within 10 seconds.
Traffic Information
When a traffic bulletin starts, any source is
switched to the traffic information and it is
displayed automatically.
When the traffic bulletin starts...
The Traffic Information screen appears automatically.
Traffic Information screen
TUNER
1
Audio
2
Set Up
Direct
SRC
Traffic Infomation
Calls the Sound Effects Menu. (see page 76)
1
Calls the Setup Menu. (see page 47)
2
During reception of traffic information the
adjusted volume is automatically remembered,
and the next time it switches to traffic
information it's automatically the remembered
volume.
Please note that if DSP unit (optional accessory)
is connected, the volume will be preset by
pressing the button for 2 seconds or more.
13:50
24 English
Page 25
Search for Program Type
Menu
TUNER
Radio text:
Set Up
Audio
SRC
TUNER
FM 98.1
ReturnReturn
SRCH
Set Up
Audio
All Speech
All Music
News
Current Affairs
Information
Not Found
Direct
SRC
A program is tuned when you set its program
type.
Call the Tuner Menu
1
Menu
Call the PTY Search Menu
2
PTY Sear c h
2
2
3
Selects a program type.
1
Scrolls the program type list.
2
Searches for the program type.
3
It is displayed when the Program Type is selected.
Returns to the Tuner Menu.
4
Select a program type
3
Radio Text
You can display the radio text.
Call the Tuner Menu
1
Menu
Display the Radio Text
2
Radio Text
1
1
4
Displays the Radio Text.
1
Returns to the Tuner Menu.
2
2
4
News
Search for the program type
SRCH
etc.
English 25
Page 26
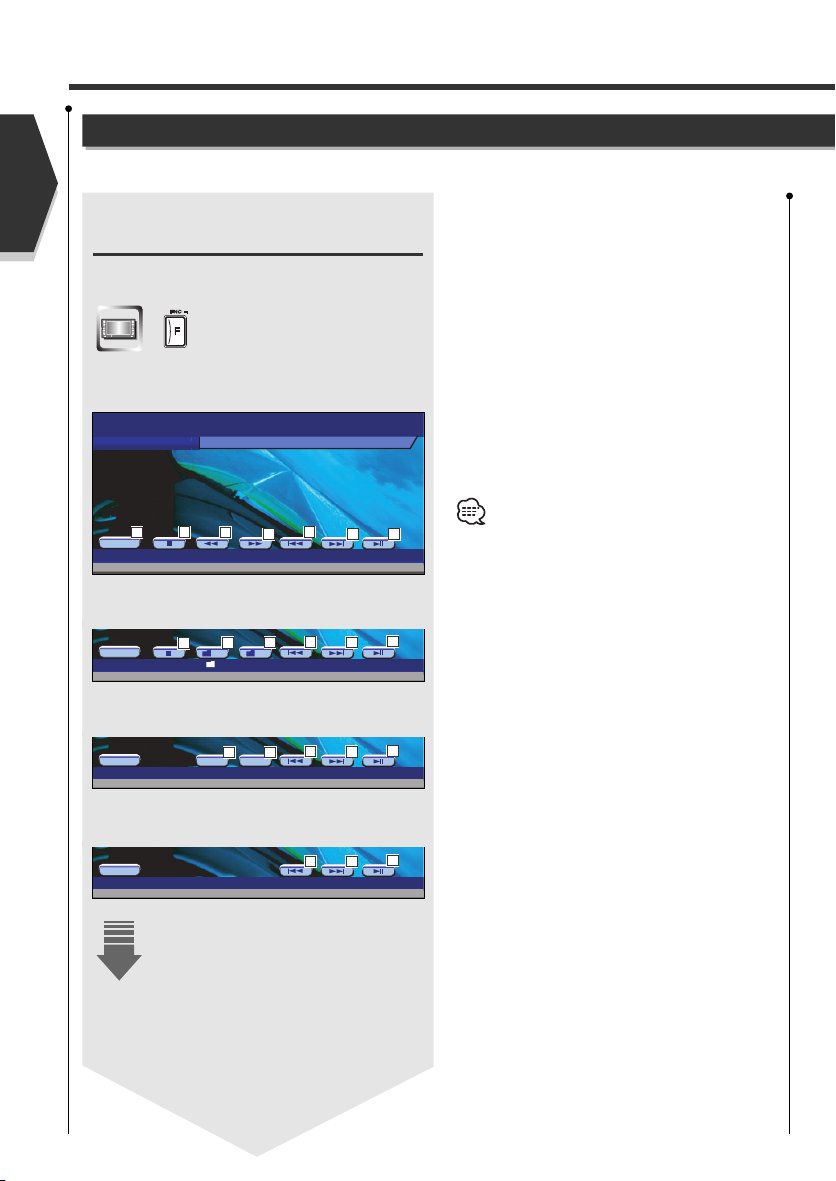
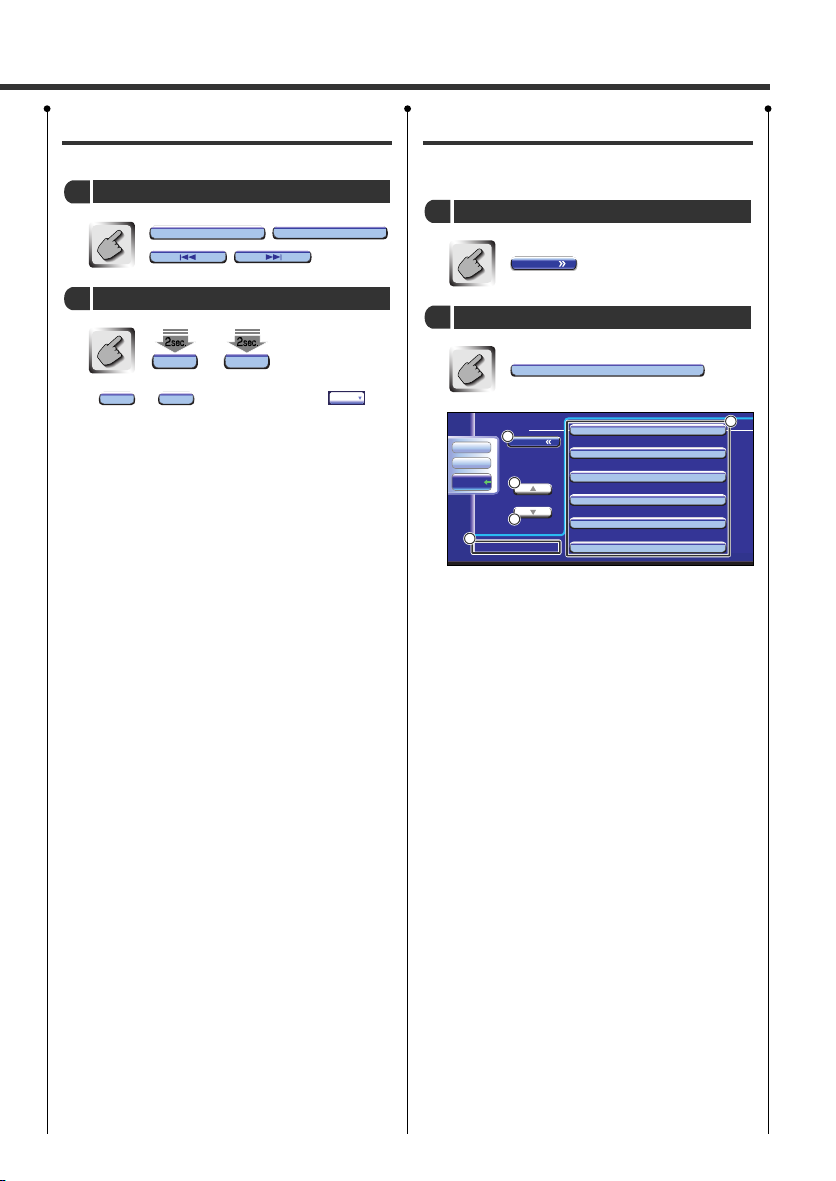
CD/MP3/WMA/Disc Changer Play Control
SRC
Track 3 P 5:32
DVD CD
DVD CD
MODE:FULL
IN
AV - INAV-O UT:
SRC
–
+
P 0:05:32
DVD MP3/WMA
13
¡
IN
English
CD/MP3/WMA/Disc Changer Play Control
You can call various control screens during CD/MP3/WMA/Disc Changer playback.
Displaying the Easy Control
Panel
Switches the source.
The CD/MP3/WMA/Disc Changer Play Control Panel is
displayed in a floating position of the selected picture.
Display the Easy Control Panel
During CD playback
2
1
3
4
3
4 5
During MP3/WMA playback
4
6
6
2
5
4
1
Stops to play the built-in disc player.
2
When a CD is played back on the built-in disc player:
3
Rewinds or fast forwards.
Selects a song.
4
Plays or pauses.
5
When an MP3/WMA is played back on the built-in
6
disc player:
Selects a folder.
When a disc is played back on the disc changer:
7
Selects a disc.
• For CD/MP3/WMA/Disc Changer playback and
receiver key operations, see <DDX7025 Basic
Operations> (see page 8).
• The Easy Control Panel display is cleared when
you touch the center of image display area.
26 English
During playback on disc changer
SRC
CD CH
7
D - D +
T3D1 P 5:32
IN
During playback on CD player
SRC
CD
T3 P 5:32
IN
4
7
4
5
4
5
4
Page 27
Displaying the CD/MP3/WMA/
Menu
IN
13:50
REP
RDM
SCN
SCRL
TIME
DISP
DVD CD
Set Up
Audio
Track 4 P 2:0 9
Direct
SRC
REP
Disc Changer Control screen
You can play the CD/MP3/WMA/disc changer using
various functions.
CD Control screen
9
11
10
8
13
14
16
17
22
15
14
18
19
26
25
13
21
20
23
12
During CD playback
Calls the CD Menu.
8
Calls the Sound Effects Menu. (see page 76)
9
Displays the Source Select screen. (see page 45)
p
Calls the Setup Menu. (see page 47)
q
Ejects the disc from the built-in disc player.
w
Selects a track.
e
Fast Forwards or Rewinds.
r
Plays or pauses.
t
Starts or stops Scan Play (that plays the beginning
y
24
of each song one after the other).
Repeats to play (the present track).
u
Starts or stops Random Play (to play songs in
i
random order).
Selects the Disc Name (see
o
<
31), Disc Text, or Track Text mode for text display.
Scrolls the display text.
;
Switches the play time display between Track, Disc,
a
and Disc Remaining Time.
Track Number Display
s
Play Time Display
d
Appears when a disc is inserted.
f
Stops to play the built-in disc player.
g
When pressed twice, the disc is played from its
beginning when you play it in the next time.
Function Indicator
h
Set Disc Name>,page
English 27
Page 28

CD/MP3/WMA/Disc Changer Play Control
English
MP3/WMA Control screen
Audio
Set Up
Direct
SRC
NextNext
DVD MP3/WMA
Menu
30
38
KENWOOD
32
27
33 35 36
34
RDMSCN
PEP
¡
REP
39
FREP
13:50
29
32
+
-
31
28
SCRL
DISP
40
P 0:00:3813
43
30
37
41
44
During MP3/WMA play
Calls the MP3/WMA Menu.
j
Fast Forwards.
k
Stops to play.
l
IN
42
When pressed twice, the disc is played from its
beginning when you play it in the next time.
Selects a song.
/
Plays or pauses.
z
Selects a folder.
x
Starts or stops Scan Play (that plays the beginning
c
of each song one after the other).
Repeats to play (the present song).
v
Starts or stops Random Play (to play songs of the
b
present folder in random order).
Selects the Folder name, File name, Title (ID3/WMA
n
tag), Artist name (ID3/WMA tag), or Album name
(ID3 tag) for text display.
Scrolls the display text.
m
Switches the button display.
,
Repeats to play the song of the present folder.
.
Folder and File Number Display
P
Play Time Display
Q
Appears when a disc is inserted.
W
Function Indicator
E
Ejects a disc.
R
28 English
Page 29
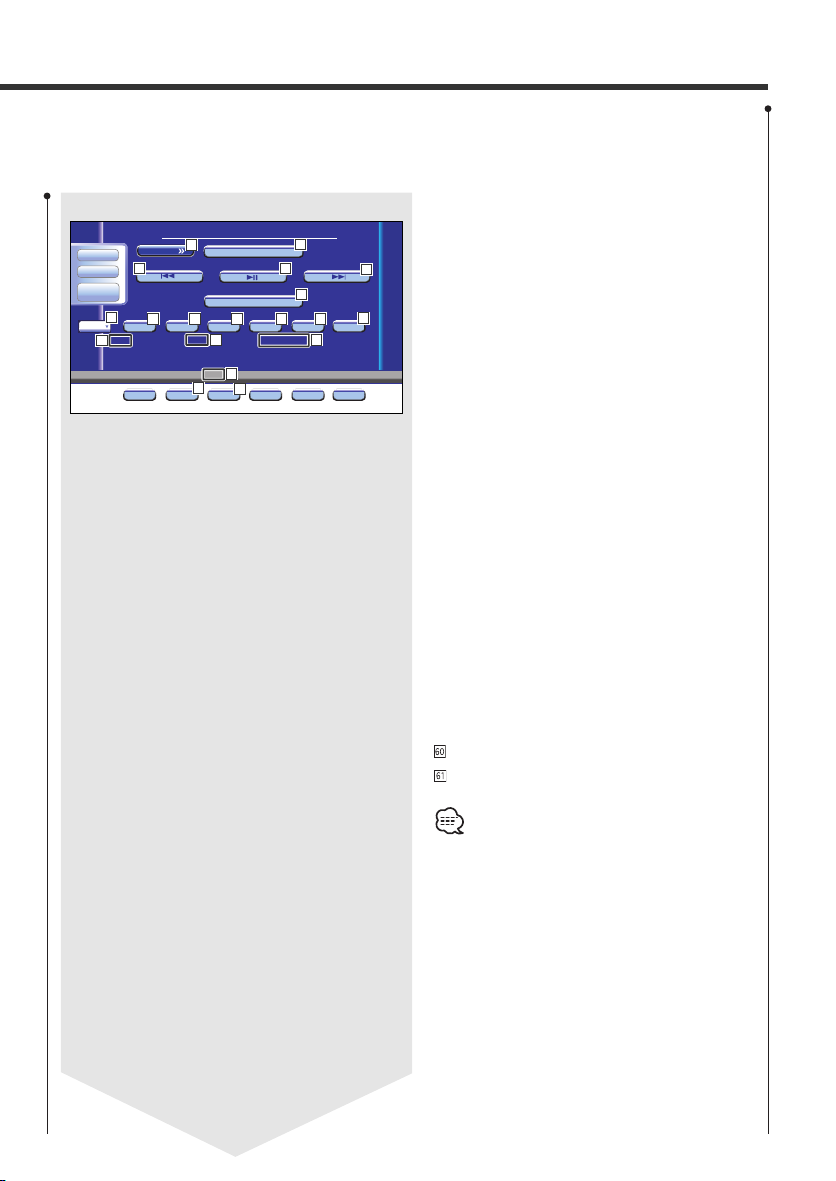
Disc Changer/CD player Control screen
CD- CH
Audio
Set Up
Direct
SRC
54
NextNext
D1 T5 P 1:24
58
45
Menu
46 48
50
49
REP RDM SCN
REP
52
DREP
MRDM
59
Disc
Disc
51
61
53
+
-
DISP SCRL
55
13:50
47
46
47
57
56
TIME
60
During play by the disc changer/CD player
Calls the Disc Changer/CD player Menu.
T
Selects a track.
Y
Starts Fast Forward or Fast Rewind when it is held
down.
Selects a disc. (Function of Disc Changer)
U
Plays or pauses.
I
Starts or stops Scan Play (that plays the beginning
O
of each song one after the other).
Repeats to play (the present track).
:
Starts or stops Random Play (to play songs in
A
random order).
Repeats to play disc (the present disc). (Function of
S
Disc Changer)
Starts or stops Magazine Random Play (to play
D
songs of the disc changer in random order).
(Function of Disc Changer)
Switches the button display.
F
Selects the Disc Name (see <Set Disc Name>,
G
page 31), Disc Text, or Track Text mode for text
display.
Scrolls the display text.
H
Switches the play time display between Track, Disc,
J
and Disc Remaining Time.
Disc Number Display (Function of Disc Changer)
K
Track Number Display
L
Play Time Display
Function Indicator
The functions that can be used and the information
that can be displayed will differ depending on the
models being connected.
English 29
Page 30
CD/MP3/WMA/Disc Changer Play Control
Name Se t
DVD CD
Set Up
Audio
SRC
English
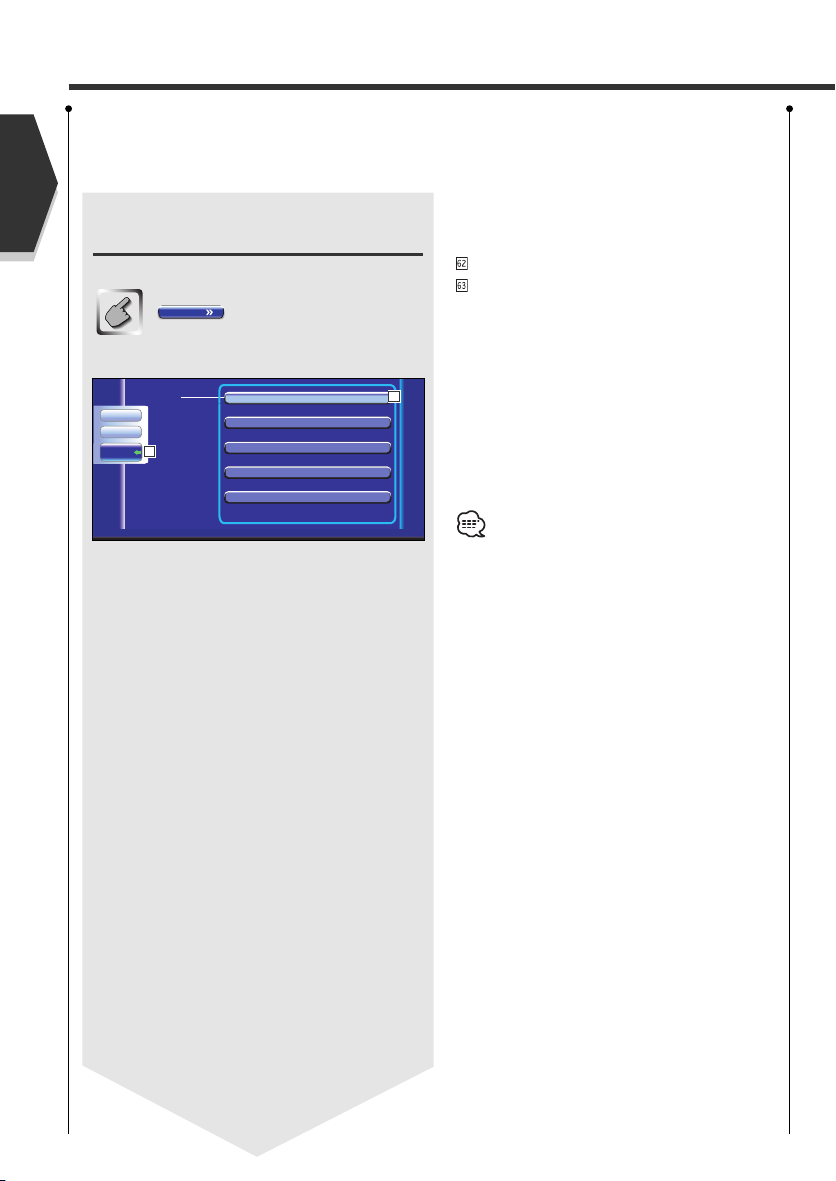
Displaying the CD/MP3/WMA/
Disc Changer Menu screen
You can select menu options using various functions.
Menu
CD Menu screen
62
63
Selects options from various function menus.
Returns to the CD/MP3/WMA/Disc Changer Control
screen.
The available functions vary depending on the
source used.
30 English
Page 31

Set Disc Name
Menu
MP3/WMA
0:35:27
Folder Name
File Name
Fol d e r Name
File Name
Folder Name
File Name
Fol
Open
Root
Set Up
Audio
SRC
Names a CD.
Play a CD you wish to name
1
Call the CD/Disc Changer Menu
2
Directory List (during
MP3/WMA play)
The directory of an MP3/WMA disc are listed
for quick search.
Call the MP3/WMA Menu
1
Menu
Select the Set Name mode
3
Name Se t
Name Se t
The position varies
depending on the disc you are playing.
Enter a name
4
For character entry details, see <Character Entry>
(see page 44).
Exit the Set Name mode
5
Ok
• You cannot name an MD or MP3/WMA disc.
• Number of discs that can be stored in memory
Built-in disc player: 10
External CD changer/ player:
Varies depending on the CD changer/ player.
Refer to the CD changer/ player manual.
Menu
Start the Directory List
2
Directory List
7
7
1
2
6
Returns to the root directory.
1
Displays the next higher level of hierarchy.
2
Displays a directory if the subdirectory has a
3
directory. When you touch the directory, it opens.
Displays a directory if the subdirectory has files
4
without a directory. When you touch the directory,
it opens and songs in the directory are played.
Displays the MP3/WMA files. When you touch a
5
file, its song is played back.
Plays the selected directory.
6
Scrolls the list.
7
Select a song
3
3
4
5
File Name
Display the desired song and touch the file display.
English 31
Page 32

CD/MP3/WMA/Disc Changer Play Control
Menu
TITLE:
ARTIST:
ALBUM:
MP3
Set Up
Audio
SRC
CD- CH
Menu
P 2:35
1. Di sc N ame
2. Disc Name
3. Disc Name
4. Disc Name
5. Disc Name
6. Disc Name
Set Up
Audio
SRC
DISP
English
ID3/WMA TAG Display (during
MP3/WMA play)
The ID3/WMA TAG information of MP3/WMA
file is listed.
Call the MP3/WMA Menu
1
Menu
Display the ID3/WMA TAG
2
Information
1
1
Scrolls the list.
1
Disc Select (during play by
disc changer)
The discs loaded on the disc changer are listed
for quick disc selection.
Calls the Disc Changer Menu
1
Menu
Call the Disc Select Menu
2
Disc Select
1
2
3
3
Plays the displayed disc.
1
Selects the Disc Name or Disc Text mode for text
2
display.
Scrolls the list.
3
(It is not displayed when a disc changer having 6
or less discs is used.)
32 English
Select the desired disc
3
1. Disc Name
Touch the desired disc display.
Page 33

Mute Telephone
13:50
CALL
Set Up
Audio
Direct
SRC
Direct Search
Searches for a disc or a song when its number
is entered.
During play on the built-in disc player
Select the Direct Search mode
1
The following items can be searched directly each
time it is pressed.
CD: Track number, Total play time
MP3/WMA: Folder, File
Enter a disc or track number
2
—
Search
3
When searching for a song:
During play on an external in disc player or disc
changer
Enter a disc or track number
1
Mute Telephone
When the telephone is called, the system is
paused automatically.
When the telephone is called...
The Phone Call ("CALL") screen appears, and system
is paused.
Phone Call ("CALL") screen
If you continue to listen the source audio
during phone call...
The system restarts to play while the phone call is
continued.
When the call ends...
Hang up the phone.
The system restarts to play.
Search
2
When searching for a song:
When searching for a disc:
The operation ends automatically if you do not
operate within 10 seconds.
—
English 33
Page 34

TV Control
English
TV Control
(with the optional accessory TV Tuner connected only)
Various control screens appear in the TV Source mode.
Displaying the TV Picture
screen
TV Band Number Display
Various control screens appear in the TV Source mode.
Selects the
TV Pictures.
TV Picture screen
TV1
1
MODE: FU L L
7
2
Group 1
Preset 3
3
2ch
4
AV - INAV-O UT:
1
TV Area Group Display (see page 70)
2
Memory Number Display
3
Channel Number Display
4
Channel Up Area
5
Increase the channel.
Channel Down Area
6
56
Decrease the channel.
Band/Video Switch Area
7
Switches to TV1, TV2, or VIDEO.
8
TV1
Group 1
Preset 3
2ch
TV
Information Display Button Area
8
• For TV picture selection and receiver key
operations, see <DDX7025 Basic Operations>
(see page 8).
• The information display is cleared automatically
after approximately 5 seconds. Also, the
information can be displayed automatically when
it is updated (see page 65).
Displaying the Easy Control
Panel
Switches the source.
The Control Panel is displayed in a floating position of the
TV picture.
Displaying the Easy Control Panel
TV1
MODE:FULL
AV - INAV-O UT:
9
Switches to Video (VIDEO).
p
Switches the TV band (to TV1 or TV2).
q
Calls up a channel.
w
Switches the Seek mode.
e
(see page 36 for the <Seek Mode>)
The Easy Control Panel display is cleared when you
touch the center of image display area.
SRC
TV
34 English
10
11
9
TV1
VID T V
Group 1
12
Preset 3
13
12
SEEK
2ch
Page 35

Displaying the TV Control
TV
Preset Select
Name Set
Set Up
Audio
SRC
screen
You can tune in a TV station using various functions.
TV Control screen
TV
14
Menu
15
Audio
20
17
Set Up
Direct
16
SRC
21
NextNext
AME
26
TV 1 Group 1 Preset 3 2 ch
123456
VIDEO
TV
22
23
SEEK
AUTO 1
25
13:50
18
19
27
Calls the TV Menu.
r
Calls the Sound Effects Menu. (see page 76)
t
Displays the Source Select screen. (see page 45)
y
Calls the Setup Menu. (see page 47)
u
Switches to VIDEO.
i
Switches to TV1 or TV2.
o
Select a channel.
;
20
Use the <Seek Mode> (see page 36) to change the
channel tuning sequence.
Switches between to buttons and
a
61
Function buttons to use.
Selects the Auto Memory mode.
s
(see page 36 for the <Auto Memory>)
Switches the Seek mode.
24
d
(see page 36 for the <Seek Mode>)
When to buttons appear, you can
f
61
call up the channels from memory.
For memory of broadcasting stations, see <Auto
Memory> (see page 36) or <Manual Memory> (see
page 36).
Seek Mode Indicator
g
TV Area Group Display (see page 70)
h
Memory Number Display
j
Displaying the TV Menu screen
You can select menu options using various functions.
Menu
TV Menu screen
29
Selects options from various function menus.
k
Returns to the TV Control screen.
l
The available functions vary depending on the
model used (the tuner specifications and the
broadcasting system that can be received).
28
English 35English 35
Page 36

TV Control
English
Seek Mode
Sets a TV station selection.
SEEK
If is not shown, touch .
SEEK
The mode is switched each time you touch the
button.
AUTO 1
AUTO 2
MANUAL
Tunes in a station with good
reception automatically.
Tune in stations in memory one
after another.
Switches to the next channel
manually.
NextNext
Auto Memory
Stores stations with good reception in memory
automatically.
Select a band you wish to store in memory
1
TV
Select the Auto Memory mode
2
AME
If is not shown, touch .
AME
Start Auto Memory
3
Touch or .
Auto Memory terminates when 6 stations are stored
or when all stations are tuned in.
The operation ends automatically if you do not
operate within 10 seconds.
NextNext
36 English
Manual Memory
Stores the current receiving channel in
memory.
Select a channel you wish to store in memory
1
TV
Store in memory
2
—
61
If to are not shown, touch .
Continue to touch until the memory number appears.
61
NextNext
Page 37

Preset Select
Menu
TV 3ch
TV
TV1 1) 1ch
TV1 2) 1ch
TV1 3) 1ch
TV1 4) 1ch
TV1 5) 1ch
TV1 6) 1ch
Set Up
Audio
SRC
Lists and tunes in stations in memory one after
the other.
Select a band you wish to call
1
TV
Call the TV Menu
2
Menu
Call the Preset Select Menu
3
Preset Select
2
Tunes in the displayed station.
1
If the station name is displayed if it has been set.
Returns to the TV Menu.
2
(P35 r)
Set Station Name
Names a station.
Select a station you wish to name
1
Call the TV Menu
2
Selects the Set Name mode
3
Enter a name
4
1
For character entry details, see <Character Entry>
(see page 44).
Exit the Set Name mode
5
• You can store up to 20 stations in memory.
• You can set a station name only after you have
applied the parking brake.
TV
Menu
N ame Set
Ok
English 37
Page 38

DAB Tuner control
English
DAB Tuner control
(with the optional accessory DAB tuner connected only)
Various control screens appear in the DAB Tuner source mode.
Displaying the Easy Control
Panel
Switches the source.
The DAB Tuner Control Panel is displayed in a floating
position of the selected picture.
Display the Easy Control Panel
MODE:FULL
2
1
SRC
BAND SEEK
DAB1 220.094MHZ
DAB
3
S - S +
3
AV - INAV-O UT:
4
4
5
1
Switches the band (to DAB1/2/3).
2
Selects a service.
3
Selects the Ensemble.
4
Switches the Seek mode.
5
(see page 40 for the <Seek Mode>)
• For system key operations, see <DDX7025 Basic
Operations> (see page 8).
• The Easy Control Panel display is cleared when
you touch the center of image display area.
38 English
Page 39

Displaying the DAB Tuner
Control screen
You can select the Ensemble and services using various
functions.
DAB Tuner Control screen
DAB
6
Menu
Audio
7
Set Up
9
Direct
8
SRC
13
NextNext
DAB1 Preset2 Service Label
123456
Se rv i c e
12
Band
Se rv i c e
15
SEEK D IS P
AUTO1
16
19
14
AMEP/S
+
17
13:50
11
10
-
12
11
18
Displaying the DAB Tuner
Menu screen
You can select menu options using various functions.
Menu
DAB Tuner Menu screen
DAB
Audio
Set Up
SRC
21
PTY Sear c h
DAB I n fo r ma t i o n
Service Select
Language Filter
20
Calls the DAB Tuner Menu.
6
Calls the Sound Effects Menu. (see page 76)
7
Displays the Source Select screen. (see page 45)
8
Calls the Setup Menu. (see page 47)
9
Switches the band (to DAB1/2/3).
p
Selects a service.
q
Selects the Ensemble.
w
Switches between to buttons and
e
61
Function button to use.
Selects the primary or secondary operation.
r
Selects the Auto memory mode. (see page 40 for
t
the <Auto Ensemble memory>)
Switches the Seek mode.
y
(see page 40 for the <Seek Mode>)
Changes the display between Ensemble label, PTY
u
label, Component label, Region label, and Audio
quality.
When to buttons appear, you can
i
61
call a service from memory.
Seek Mode Indicator
o
Selects options from various function menus.
;
Returns to the DAB Tuner Control screen.
a
For DAB Tuner function details, see the Instruction
Manual of DAB Tuner (optional accessory).
English 39
Page 40

DAB Tuner control
English
Seek Mode
A service selection method can be set.
SEEK
If is not shown, touch .
SEEK
The mode display is switched each time you touch
the button.
AUTO 1
AUTO 2
MANUAL
Tunes in an ensemble with good
reception automatically.
Selects services in memory one
after another.
Switches to the next channel
manually.
NextNext
Auto Ensemble Memory
An ensemble with good reception is stored in
memory automatically.
Select a band you wish to store in memory
1
Service Preset Memory
The current receiving service is stored in
memory.
Select a service you wish to store in memory
1
Band
Se r v ice
Store in memory
2
If to are not shown, touch .
61
+
Se r v ice
—
61
-
NextNext
Select the Auto Memory mode
2
If is not shown, touch .
AME
Start Auto Memory
3
Touch or .
Auto Memory terminates when 6 ensembles are
stored or when all ensembles are tuned in.
40 English
Band
AME
NextNext
Page 41

Service Select
Menu
220.094 MHz
DAB
Ser vi ce Name
Ser vi ce Name
Ser vice Name
Ser vi ce Name
Ser vi ce Name
Ser vi ce Name
Set Up
Audio
SRC
DAB
English
Language
SRCH
Ret ur n
Set Up
Audio
Direct
SRC
The service list of the currently receiving
ensemble is displayed for your selection.
Call the DAB Tuner Menu
1
Menu
Call the Service Select Menu
2
Service Select
Language Filter
The languages are list for your selection.
Call the DAB Tuner Menu
1
Menu
Call the Language Filter Menu
2
Languag e Filter
3
2
2
Selects a service.
1
Scrolls the service list.
2
Returns to the DAB Tuner Menu.
3
Select a service
3
Ser vi ce Name
1
Selects a language.
1
Searches for the selected language.
2
Returns to the DAB Tuner Menu.
3
Select a language you wish to use
3
Search for the language
4
1 1
2
3
SRCH
English 41
Page 42

DAB Tuner control
DAB
SRCH LANG
News
PTY
Return
Set Up
Audio
Direct
SRC
English
Search for Program Type
The services are received when you set its
program type.
Call the DAB Tuner Menu
1
Menu
Call the PTY Search Menu
2
PTY Sea rc h
1
2
Selects a program type.
1
Searches for the program type.
2
Displays the Language select screen.
3
Returns to the DAB Tuner Menu.
4
Select a program type
3
3
Select a Language
Display the Language select screen
LANG
DAB
Audio
Set Up
Direct
SRC
Selects a Language.
1
Searches for the program type.
1
2
Returns to the PTY Search Menu.
3
2
SRCH
PTY
Language
1
News
English
Ret ur n
1
3
Select a Language
4
Search for the program type
4
SRCH
42 English
Page 43

DAB Information
13:50
DAB
Set Up
Audio
Direct
SRC
Traffic News
Service Label:
Ensemble Label:
Component Label:
Menu
Set Up
Audio
SRC
DAB
The DAB information is displayed.
Call the DAB Tuner Menu
1
Menu
DAB Announcement
When the Announcement you have turned on
starts, any source is switched to the
Announcement automatically.
When the announcement starts...
The Announcement screen appears automatically.
Display the DAB Information screen
2
DAB Information
3
2
Displays the DAB information (such as Service
1
1
2
label, Ensemble label, Component label, Audio
quality, Region label, and Dynamic label).
Scrolls the information display.
2
Returns to the DAB Tuner Menu.
3
Announcement screen
1
2
Calls the Sound Effects Menu. (see page 76)
1
Calls the Setup Menu. (see page 47)
2
English 43
Page 44

Character Entry
English
How To Use the Character
Entry screen
When you select the Set Disc Name mode or
others, the following screen appears for
character entry.
Character Entry screen
1
KENWOOD
a
3
bcd e fg
4
4
hi jklmn
opqrstu
vwx yz
2
Shifts the cursor.
1
Enters a space.
2
OkSpace
If you erase a character, locate the cursor on it
and touch this button.
Enters characters.
3
Scrolls up or down the character button display.
4
Exits the Character Entry mode and returns to the
5
previous screen.
You can enter characters only after you have
applied the parking brake.
1
5
44 English
Page 45

Source Select
IN
13:50
DVD V I DEO
REP
SCRL
TIME
Set Up
Audio
Direct
SRC
Title 1 Chap 3 T0:05:20
KENWOOD
T-REP
Source Select
The source you wish to listen to can be selected quickly.
Displaying the Control screen
Press this key several times unit the Control screen
appears.
Control screen
The Source Select screen can be displayed from
the control screen of any source.
Displaying the Source Select
screen
Direct
SRC
Source Select screen
Audio
Set Up
2
SRC
STANDBY
TUNER
DVD
VIDEO
CD CH
MD CH
Select the source.
1
Returns to the Control screen previously displayed.
2
1
English 45
Page 46

Adjusting the Monitor Display Position and Quality
T i l t A d j u s t
T i l t
English
Adjusting the Monitor Display Position and Quality
You can adjust the position and picture quality of the monitor.
Displaying the Screen Control
screen
Brightness Control
You can adjust the picture quality using the following
keys.
Screen Control screen
1
2
3
4
5
1
2
3
4
5
6
Tilt
7
Displaying the Tilt Adjust
screen
You can set the monitor tilt.
Tilt
Tilt Adjust screen
Tilt Adjust
Tilt
8
11 22 33 44 55 66
ScreenScreen
OK
1
Tint Control
2
Displayed for an NTSC system image on TV or
Video.
Color Control
3
Displayed on the TV and Video screen only.
Contrast Control
4
Black Level Adjustment
5
Displays the Adjust Monitor Position screen.
6
(see <Displaying the Tilt Adjust screen>, page 46)
Returns to the previous screen.
7
The Screen Control screen is displayed only when
you have applied the parking brake.
Monitor Tilt Adjustment
8
The monitor fully closes.
9
Returns to the Screen Control screen.
p
Returns to the previous screen.
q
If you turn the power off, the panel will close.
10
However, if you turn the power back on, it will
return to the adjusted tilt.
46 English
Full CloseFull Close
9
11
OK
Page 47

Setup Menu
Setup Menu
You can set up various receiver parameters.
Displaying the Control screen
Press this key several times until the Control screen
appears.
Control screen
DVD V I DEO
Audio
Set Up
Direct
SRC
REP
Title 1 Chap 3 T0:05:20
KENWOOD
T-REP
13:50
IN
SCRL
TIME
You can call the same Setup Menu for the Control
screen of each source.
Displaying the Setup Menu
screen
Set Up
Setup Menu screen
Audio
Set Up
SRC
Set Up
3
1
4
1
Audio Set Up
DVD SETUP
Syst em Set Up
AV I /F Set Up
User I /F Se t Up
Scrolls the Setup Menu.
1
Calls each Setup Menu.
2
Calls the Sound Effects Menu. (see page 76)
3
Returns to the Control screen of the previous
4
source.
2
• Your setup on the <Sound Effects Menu> is
adjusted automatically according to your <Audio
Set Up> (see page 48) on the Setup menu. We
recommend you to complete the <Audio Set Up>
first, then set up the <Sound Effects Menu>.
• The available functions vary depending on the
model used (the tuner specifications and the
broadcasting system that can be received).
English 47
Page 48

Setup Menu
X' Over
Standard
Front L&R
Menu
Spe aker
Set Up
SRC
Audio
English
Audio Set Up
You can setup a speaker network, etc.
Displaying the Audio Set Up
screen
Audio Set Up
Speaker setup screen
3
2
1
5
4
5
Returns to the Control screen of the previous
1
source.
Calls the Sound Effects Menu. (see page 76)
2
Calls the Setup Menu.
3
Displays the X'Over setup screen. (see page 49)
4
Sets up the front speaker type to fine-tune for the
5
optimal equalizer curves.
Standard: Setup for general diameter speakers
Narrow: Setup for small diameter speakers
Middle: Setup for small diameter woofer
Wide: Setup for large diameter woofer
48 English
Page 49

Crossover Network Setup
Return
X' Over
THR
THR
THR
HPF Rear FREQ
LPF SUB FREQ
HPF Front FREQ
Rev er se
You can set a crossover frequency of speakers.
X' Ov er
(P48 4)
X'Over setup screen
1
2
3
4
Sets a Front High Pass Filter frequency.
1
You can select any of the following frequency.
Through, 40, 60, 80, 100, 120, 150, 180, 220 Hz
Sets a Rear High Pass Filter frequency.
2
You can select any of the following frequency.
Through, 40, 60, 80, 100, 120, 150, 180, 220 Hz
Sets a Sub woofer Low Pass Filter frequency.
3
You can select any of the following frequency.
50, 80, 120, Through Hz
Sets the phase of subwoofer output.
4
The phase is reversed 180 degrees when set to
"Reverse".
Returns to the Speaker setup screen.
5
1
2
3
5
English 49
Page 50

Setup Menu
Menu
DTA
Car Typ e
Car Typ e
Sma l l
Set Up
SRC
Audio
English
Audio Set Up
(with the optional accessory DSP unit connected only)
You can set up more detailed settings by connecting the optional accessory DSP
Displaying the Car Type Set Up
screen
Returns to the Control screen of the previous
If your vehicle type is selected, the Digital Time
Alignment is set automatically (for timing adjustment of
sound output for each channel) to have the highest
surround effects.
Audio Set Up
Car Type Set Up screen
2
1
3
4
5
4
6
1
source.
Calls the Sound Effects Menu. (see page 76)
2
Calls the Setup Menu.
3
Sets up the car type you use together with this unit.
4
Displays the DTA (Digital Time Alignment) Setup
5
screen. (see page 52)
You can adjust the digital time alignment that was
set automatically when you selected the car type.
Displays the Speaker Set Up screen.
6
You cannot set up "Car Type" when "Position
Setting" (see page 84) is "All".
50 English
Page 51

unit.
+10dB
Cent er
Menu
Channe l Le ve l
Tes t
Set Up
SRC
Audio
Displaying the Speaker Set Up
screen
When the speaker type and size are set, the speaker
crossover network and equalizer curve are set
automatically.
Speaker Set Up screen
7
Audio
Set Up
SRC
13
Menu
Mu l t i Channel
10
Front L&R
9
11
Sub Woo f er
X' Over HPF
8
X' Over
3/2
Standard
Speaker
LPF
Off
Displaying the Channel Level
screen
You can set the volume at each setup position.
Channel Level screen
14
16
15
17
Displays the X'over (HPF) screen.
7
(See <High Pass Filter Setup>, page 54)
Display the X'over (LPF) screen.
8
(See <Low Pass Filter Setup>, page 54)
Sets up the front speaker type to fine-tune for the
9
optimal equalizer curves.
Standard: Setup for general diameter speakers
Narrow: Setup for small diameter speakers
Middle: Setup for small diameter woofer
Wide: Setup for large diameter woofer
Select the speakers for Multi-channel sounds.
p
10
9
12
"3/2": Center speaker, Front speaker, Rear speaker
"2/2": Front speaker, Rear speaker
"3/0": Center speaker, Front speaker
"2/0": Front speaker
Set the use or no use of Sub Woofer.
q
Displays the Channel Level Setup screen.
w
Displays the Car Type Set Up screen.
e
• "X’Over HPF" and "X’Over LPF" can be set only
when "Sub Woofer" is set to "On".
• To turn the Center speaker on in the "Multi
channel" settings, turn "Dolby Pro Logic" (see
page 83) on.
Selects a speaker to be set.
r
(see <Channel Level>, page 52)
Sets the speaker volume.
t
(see <Channel Level>, page 52)
Starts or stops test signal tone output for setup
y
check.
Displays the Speaker Set Up screen.
u
• Your setup on the <Sound Effects Menu> is
adjusted automatically to get the best sound
effects according to the car type and speaker you
have set on the <Audio Set Up> (see page 48).
15
We recommend you to complete the <Audio Set
Up> first, then set up the <Sound Effects
Menu>.
You can fine-adjust the automatic set value by
<DTA Setup> (see page 52) or <Parametric
Equalizer> (see page 80).
• Stop the test signal tone if you have finished
setting up the Channel Level. If you leave the test
signal tone on, you may not be able to set up
other settings.
English 51
Page 52

Setup Menu
+10dB
Cent er
Menu
Channel Level
Test
Set Up
SRC
Audio
Return
DTA
Preset
1 m
Front
English
Channel Level
Set the volume at each setup position.
Select a speaker you wish to adjust
1
Channel Level setup screen
1
3
Left front speaker
1
Right front speaker
2
Left rear speaker
3
Right rear speaker
4
Center speaker
5
Adjust the volume
2
DTA Setup
Manually set the sound output timing of each
channel.
Display the DTA Setup screen
1
(P50 5)
DTA
5
2
4
DTA Setup screen
3
2
Selects a speaker to be adjusted.
1
Sets the distance between the selected speakers
2
1
2
to adjust delay time.
Stores the adjusted status in memory or calls it
3
from memory.
Returns to the Car Type Set Up screen.
4
Select a speaker you wish to adjust
2
4
52 English
Front speaker
1
Rear speaker
2
Subwoofer
3
Center speaker
4
4
1
2
1
2
3
Page 53

Set a delay time
3
The speakers are virtually moved to the desired
distance.
When the values of center speaker and front
speakers increase, they are virtually moved forward.
When the values of rear speakers and subwoofer
increase, they are virtually moved backward.
Store or call your setup into/from memory
To store your setup in memory
Preset
Continue to touch more than 2 seconds.
To call your setup from memory
Preset
English 53
Page 54

Setup Menu
HPF F r ont
100 Hz 100 Hz 100 Hz
HPF Rear
100 Hz
Reverse
English
High Pass Filter Setup
You can manually set a High Pass Filter of
Crossover Network.
X' Over HPF
1
2
Sets a crossover frequency of Front High Pass
1
341
2
Filter.
Sets a crossover slope of Front High Pass Filter.
2
Sets a crossover frequency of Rear High Pass
3
Filter.
Sets a crossover slope of Rear High Pass Filter.
4
Sets a crossover frequency of Center High Pass
5
Filter.
Sets a crossover slope of Center High Pass Filter.
6
Returns to the Speaker Set Up screen.
7
"HPF Center" can be set only when "Multi
Channel" (see page 51) is set to "3/2" or "3/0".
(P51 7)
5
3
4
6
Low Pass Filter Setup
You can manually set a Low Pass Filter of
Crossover Network.
X' Over LPF
5
6
7
Sets a crossover frequency of Low Pass Filter.
1
Sets a crossover slope of Low Pass Filter.
2
Sets the phase of subwoofer output.
3
1
2
3
The phase is reversed 180 degrees when set to
"Reverse".
Returns to the Speaker Set Up screen.
4
(P51 8)
1
2
4
54 English
Page 55

English 55
Page 56

Setup Menu
Menu
Menu LANG
Subtitle LANG
Audio LANG
Dynami c Range Con t ro l
Midnight
en
en
en
Set
Set
Set
DVD S ETUP 1
Set Up
SRC
Audio
English
DVD Setup
You can set up the DVD play.
Displaying the DVD SETUP 1
screen
DVD SETUP
DVD SETUP 1 screen
2
1
3
7
8
Returns to the Control screen of the previous
1
source.
Calls the Sound Effects Menu. (see page 76)
2
Calls the Setup Menu.
3
Selects a disc menu language.*
4
1
(See <Language Setup>, page 58)
4
5
6
7
(See <Language Setup>, page 58)
Selects an audio language.*
6
(See <Language Setup>, page 58)
Sets the dynamic range.*
7
The dynamic range is reduced by changing from
Selects a subtitle language.*
5
1
1
2
( Wide)
"Wide" to "Normal" and from "Normal" to "Midnight".
You can easy to listen a small sound when the
dynamic range is narrow.
This is effective only when you are using a Dolby
Digital software.
Displays the DVD SETUP 2 screen.
8
DVD SETUP
If is not shown,
touch or to display it.
56 English
Page 57

Displaying the DVD SETUP 2
Menu
OffOn
Ang l e Mar k
Screen Rat io
Pa l en t a l Leve l
Off
4:3 LB
Set
Output
AUTO
DVD S ETUP 2
Set Up
SRC
Audio
screen
DVD SETUP 2 screen
9
10
13
Sets an angle mark display. ( On)
9
Selects the screen display mode.*
p
1
( 16:9)
"16:9": Displays wide pictures.
"4:3 LB": Displays wide pictures in the Letter Box
format (having black stripes at the top and
bottom of screen).
"4:3 PS": Displays wide pictures in the Pan & Scan
format (showing pictures cut at the right
9
q
10
11
w
12
e
and left ends).
Displays the Parental Lock screen.*
1
(See <Parental Level Setup>, page 59)
Keep "AUTO" to use.
Displays the DVD SETUP 1 screen.
*1Disabled when a DVD is being played.
2
*
Disabled when the Zone function is On.
( OFF)
English 57
Page 58

Setup Menu
EnterCancel
bcde fg
hi jklmn
opqrstu
vwx yz
a
Clear
en
Audio LANG
ORIGN
English
Language Setup
Select a language you use for the speech and
menus.
Display the Language Setup screen
1
See <Displaying the DVD SETUP 1 screen> (see
page 56) and select a language you wish to use.
3
Enters a language code.
1
Cancels the language setup and returns to the
2
DVD SETUP 1 screen.
Clears the language code.
3
Sets the original audio language.
4
(It appears during audio language setup.)
Sets the language and returns to the DVD SETUP
5
1 screen.
(It appears after you have entered a language
code.)
Enter a language code
2
See the Language Code Table shown at right to
select the desired language.
Set the language you use
3
58 English
1
Enter
Language Code Table
Abbreviation
aa
ab
af
am
ar
as
ay
az
ba
be
bg
bh
bi
bn
bo
br
4
2
5
ca
co
cs
cy
da
de
dz
el
en
eo
es
et
eu
fa
fi
fj
fo
fr
fy
ga
gd
gl
gn
gu
ha
hi
hr
hu
hy
ia
ie
ik
in
is
it
iw
ja
ji
jw
ka
kk
kl
km
kn
ko
ks
ku
ky
la
ln
lo
lt
Language
Afar
Abkhazian
Afrikaans
Amharic
Arabic
Assamese
Aymara
Azerbaijani
Bashkir
Byelorussian
Bulgarian
Bihari
Bislama
Bengali, Bangla
Tibetan
Breton
Catalan
Corsican
Czech
Welsh
Danish
German
Bhutani
Greek
English
Esperanto
Spanish
Estonian
Basque
Persian
Finnish
Fiji
Faroese
French
Frisian
Irish
Scots Gaelic
Galician
Guarani
Gujarati
Hausa
Hindi
Croatian
Hungarian
Armenian
Interlingua
Interlingue
Inupiak
Indonesian
Icelandic
Italian
Hebrew
Japanese
Yiddish
Javanese
Georgian
Kazakh
Greenlandic
Cambodian
Kannada
Korean
Kashmiri
Kurdish
Kirghiz
Latin
Lingala
Laotian
Lithuanian
Abbreviation
lv
mg
mi
mk
ml
mn
mo
mr
ms
mt
my
na
ne
nl
no
oc
om
or
pa
pl
ps
pt
qu
rm
rn
ro
ru
rw
sa
sd
sg
sh
si
sk
sl
sm
sn
so
sq
sr
ss
st
su
sv
sw
ta
te
tg
th
ti
tk
tl
tn
to
tr
ts
tt
tw
uk
ur
uz
vi
vo
wo
xh
yo
zh
zu
Language
Latvian, Lettish
Malagasy
Maori
Macedonian
Malayalam
Mongolian
Moldavian
Marathi
Malay
Maltese
Burmese
Nauru
Nepali
Dutch
Norwegian
Occitan
(Afan) Oromo
Oriya
Punjabi
Polish
Pashto, Pushto
Portuguese
Quechua
Rhaeto-Romance
Kirundi
Romanian
Russian
Kinyarwanda
Sanskrit
Sindhi
Sangho
Serbo-Croatian
Singhalese
Slovak
Slovenian
Samoan
Shona
Somali
Albanian
Serbian
Siswati
Sesotho
Sundanese
Swedish
Swahili
Tamil
Telugu
Tajik
Thai
Tigrinya
Turkmen
Tagalog
Setswana
Tongan
Turkish
Tsonga
Tatar
Twi
Ukrainian
Urdu
Uzbek
Vietnamese
Volapuk
Wolof
Xhosa
Yoruba
Chinese
Zulu
Page 59

Parental Level Setup
Cancel
Clear
Enter
Parenta l Pass
Lev el5
* * * *
1
2
3
4
5
6
7
8
0
9
Return
Level5
Parenta l Level
Sets a parental level.
Display the Parental Level code number screen
1
(P57 q)
Set
Display the Parental Level Setup screen
3
Enter
1
3
Enters a code number.
1
Cancels the current setup and returns to the DVD
2
2
SETUP 2 screen.
Clears the code number.
3
Displays the present parental lock level.
4
Determines the code number and displays the
5
Parental Level Setup screen.
Enter the code number
2
—
90
• The number you enter first is set as your code
number.
• You can clear the code number by pressing the
Reset button.
1
4
Sets a parental level.
5
1
Returns to the DVD SETUP 2 screen.
2
Set a parental level and a country code
4
Enter the parental level setup
5
1
2
Return
• If a disc has a higher parental lock level, the
audience needs to enter the code number.
• The parental lock level varies depending on a
loaded disc.
• If a disc has no parental lock, any audience can
play it back even when you have set the
parental lock.
English 59
Page 60

Setup Menu
English
System Setup
You can set up the system parameters.
Displaying the System Set Up
1 screen
Sys t em Set Up
System Set Up 1 screen
3
Menu
Audio
Set Up
SRC
2
1
Bee p
Scroll
Remot e Sensor
System Se t Up 1
4 4
Man ua l
6
OffOn
5
6
OffOn
7
Returns to the Control screen of the previous
1
source.
Calls the Sound Effects Menu. (see page 76)
2
Calls the Setup Menu.
3
Turns the key touch tone On or Off. ( On)
4
Allows scrolling of text display on the Source
5
Control screen. ( Manual)
"Auto": Scrolls the screen automatically.
"Manual": Allows you to scroll the screen manually.
Selects a remote control signal. ( On)
6
When turned "Off", the remote control of TV
reception is rejected.
Displays the System Set Up 2 screen.
7
Syst em Set Up
If is not shown,
touch or to display it.
60 English
Page 61

Displaying the System Set Up
2 screen
System Set Up 2 screen
Menu
Audio
Set Up
SRC
10
CD Rea d
Key ILLUMI
System Se t Up 2
1
Green
8
9
Sets a music CD playback. ( 1)
8
"1":Automatically recognizes and plays back an
MP3/WMA disc, a DVD or a music CD.
"2":Forcibly plays back a disc as a music CD.
Select "2" if you wish to play a music CD having
a special format or if you cannot play a disc in
the "1" position.
• You cannot play an MP3/WMA/VCD disc in the "2"
position. Also, you may not play some music
CDs in the "2" position.
• Your setup is disabled when the disc is being
played.
Selects an illumination color of receiver keys.
9
( Red)
"Green":Green
"Red":Red
Displays the System Set Up 1 screen.
p
English 61
Page 62

Setup Menu
Menu
AV I/F 1
Normal
VIDEO
AV - I N
NAV
AV- I N Name
AV- I N
Normal
R-CAM View
Set Up
SRC
Audio
English
AV Interface
You can set audio and visual (AV) interface parameters.
Displaying the AV I/F 1 screen
Returns to the Control screen of the previous
1
AV I /F Set Up
AV I/F 1 screen
3
2
1
4
5
4
5
6
7
8
source.
Calls the Sound Effects Menu. (see page 76)
2
Calls the Setup Menu.
3
Selects a navigation system connection. ( RGB)
4
"RGB":Allows the Kenwood’s Navigation System
to connect via its interface cable.
"AV-IN": Allows a third-party navigation system to
connect via the AV INPUT port.
"OFF":Must be used if no navigation system is
connected. (The navigation display is
cancelled when the AV source is switched.)
Sets a name to be displayed when you select a
5
system that is connected via the AV INPUT port.
( VIDEO)
If you have set the navigation system connection to
"AV-IN", the display is fixed to "NAV".
Sets an image display of the system that is
6
connected via the AV INPUT port. ( Normal)
"Normal":When the image source is switched, an
image entered via the AV INPUT port is
displayed.
"AUTO": When an image signal is entered via the
AV INPUT port, this image is displayed.
Sets how the rear camera image is displayed.
7
"Reverse": Displays with left and right reversed.
"Normal": Displays as it is.
"R-CAM View" can be set only when "AV-IN Name"
is set to "R-CAM".
Displays the AV I/F 2 screen.
8
62 English
AV I /F Set Up
If is not shown,
touch or to display it.
Page 63

Displaying the AV I/F 2 screen
AV I/F 2 screen
Menu
Audio
Set Up
SRC
13
AV -OUT
9
NAV Interruption
NAV Guide Volume Level
11
Line Mute
AV - I N
F-Al l
19
12
AV I/F 2
9
10
11
12
OffOn
Selects an AV source to be output at the AV
9
OUTPUT port. ( AV-IN)
If you select DVD as a source when the optional
accessory DSP unit is connected, no DVD sound is
output to the AV output port.
Selects speakers used for voice guidance of the
p
navigation system. ( F-Left)
"F-Left":Uses the front left side speaker for voice
guidance.
"F-Right": Uses the front right side speaker for voice
guidance.
"F-All": Uses both front speakers for voice
guidance.
Adjusts the volume for voice guidance of the
q
navigation system. ( 19)
Mutes the volume during voice guidance of the
w
navigation system. ( On)
When turned "On", the volume level drops for voice
guidance.
Displays the AV I/F 1 screen.
e
English 63
Page 64

Setup Menu
Menu
User I /F 1
Wall Paper
Wall
Set Up
SRC
Audio
English
User Interface
You can set up user interface (IF) parameters.
Displaying the User I/F 1
screen
1
User I /F S e t Up
User I/F 1 screen
3
2
4
1
4
5
2
3
4
5
Returns to the Control screen of the previous
source.
Calls the Sound Effects Menu. (see page 76)
Calls the Setup Menu.
Switches the wall paper.
Displays the User I/F 2 screen.
User I /F S et Up
If is not shown,
touch or to display it.
64 English
Page 65

Displaying the User I/F 2
Menu
User I /F 2
MANU
On SCRN NAV
On SCRN VIDEO
MANU
On SCRN DVD
MANU
On SCRN TV
MANU
Set Up
SRC
Audio
screen
User I/F 2 screen
6
7
8
9
10
Sets an on-screen display of the navigation screen.
6
( Auto)
If you set to "Auto", an information is displayed for 5
seconds when updated.
Sets an on-screen display of the video playback
7
screen. ( Auto)
If you set to "Auto", an information is displayed for 5
seconds when updated.
Sets an on-screen display of the DVD playback
8
screen. ( MANU)
If you set to "Auto", an information is displayed for 5
seconds when updated.
Sets an on-screen display of the TV screen.
9
( Auto) (with the optional accessory TV tuner
connected only)
If you set to "Auto", an information is displayed for 5
seconds when updated.
Displays the User I/F 1 screen.
p
English 65
Page 66

Setup Menu
Menu
Set
Tou ch Adju st
T ou ch
Set Up
SRC
Audio
Touch Adjust
Cancel Reset
English
Touch Panel Adjust
You can adjust the touch panel operations.
Display the Touch Panel Adjust screen
1
Touch Adj ust
Touch Adj ust
If is not shown, touch
or
2
1
Returns to the Control screen of the previous
1
source.
Calls the Sound Effects Menu. (see page 76)
2
Calls the Setup Menu.
3
Allows you to start touch panel adjustment.
4
Start to adjust the touch panel
2
to display it.
3
Set
Adjustment
3
Touch the center of left lower and right upper
when requested
4
66 English
1
Cancels the adjustment and returns to the Touch
1
Panel Adjust screen.
Resets to the initial status.
2
2
Page 67

Clock
Menu
OffOn
PM 1 1 : 1 8
Reset
C lock
SYNC
Set Up
SRC
Audio
Adjusts the clock time.
Display the Clock Screen
1
Clock Adj ust
Clock Adj ust
If is not shown, touch
or
to display it.
3
2
1
Returns to the Control screen of the previous
1
5
5 6
4
7
8
source.
Calls the Sound Effects Menu. (see page 76)
2
Calls the Setup Menu.
3
Clock time display.
4
Adjusts hours.
5
Adjusts minutes.
6
Sets "00" minute.
7
Setup examples: 3:00~3:29 →3:00
3:30~3:59 →4:00
Sets the clock time in synchronous with the time
8
data sent from the RDS station. ( On)
When turned "On", the synchronous mode starts
and the clock cannot be adjusted manually.
Adjust the clock time
2
6
8
English 67
Page 68

Setup Menu
Menu
Security Code
Security
Set
Set Up
SRC
Audio
SI
OffOn
EnterCancelClear
* * * *1 s t
1
2
3
4
5
6
7
8
0
9
Pas s Wor d
English
Security Code Setup
You can set a security code to protect your
receiver system against theft.
When the Security Code function is activated it can't
be released.
Note, your Security Code is the 4 digit number
entered in your "Car Audio Passport" in this package.
Display the Security Code Setup screen
1
Security Set Up
Security Set Up
If is not shown, touch
or
2
1
Returns to the Control screen of the previous
1
source.
Calls the Sound Effects Menu. (see page 76)
2
Calls the Setup Menu.
3
Allows you to start security code registration.
4
Turns the SI function On or Off.
5
If turned "On", the burglar alarm lamp flashes
when the vehicle ignition is off.
If you have already completed the code
registration, the is not displayed.
to display it.
3
5
Set
Start the security code registration
2
Set
1
2
Enters a security code.
1
Clears your entry.
2
Cancels the registration and returns to the
4
5
3
Security Code Setup screen.
Enters the security code.
4
Enter a security code
3
3
—
90
4
Input a four-digit number.
Register your security code
4
Enter
Reenter the security code
5
Reenter the same security code as that you have
entered in Step 3 for confirmation.
68 English
If you enter a different security code, the screen
returns to Step 3 (for the first code entry).
Register the security code again
6
Enter
Your security code has been registered.
If you press the Reset button or if you disconnect
your Receiver from the battery after the code
registration, you need to enter the registered
security code.
See below for details.
Page 69

If you have pressed the Reset button or if you
have disconnected the Receiver from battery...
Enter the correct security code
1
—
90
You must enter the same security code as that you
have entered in Step 3 above.
Enter the security code
2
Enter
Now, you can use your Receiver.
If you enter an incorrect security code, you
cannot use your Receiver for a while.
Incorrect entry count Receiver inoperable
1—
25 minutes
31 hour
4 or more 24 hours
time
English 69
Page 70

Setup Menu
123456
Menu
Aust r a l i a
Croa t i a
Finland
Nether l and
Denmark
Spain
Sw i tzerland
Yougos l a v i a
Bel g i um
Germany
Portugal
Sweden
Nor way
TV2 Area Set
Set Up
SRC
Audio
English
TV Setup
(with the optional accessory TV Tuner connected only)
The TV signal receiving areas can be set.
Displaying the TV1 Area Set Up
screen
TV Set Up
TV1 Area Set Up screen
3
Audio
Set Up
Menu
2
Aust r a l i a
Switzerland
Yougos l a v i a
SRC
1
Nether l and
Portugal
4
123456
Spai n
Denmark
Croa t i a
Bel g i um
Finland
TV1 Area Set
Germany
Sweden
Nor way
5
Displaying the TV2 Area Set Up
screen
Returns to the Control screen of the previous
1
source.
Calls the Sound Effects Menu. (see page 76)
2
Calls the Setup Menu.
3
Sets the present TV1 receiving area.
4
Displays the TV2 Area Set Up screen.
5
TV Set Up
If is not shown,
touch or to display it.
Sets the present TV2 receiving area.
6
Displays the TV1 Area Set Up screen.
7
TV2 Area Set Up screen
6
7
70 English
Page 71

RDS Setup
The related RDS parameters can be set.
Displaying the RDS Set Up 1
screen
RDS Set Up
RDS Set Up1 screen
3
Menu
Audio
2
Set Up
1
SRC
Displaying the RDS Set Up 2
screen
News
4
AF
Reg io nal
Aut o TP Se ek
RDS Se t Up 1
Of f
4
5
OffOn
6
OffOn
7
OffOn
8
Returns to the Control screen of the previous
1
source.
Calls the Sound Effects Menu. (see page 76)
2
Calls the Setup Menu.
3
Sets a news bulletin interrupt time.
4
Turns the Alternative Frequency function On or Off.
5
( On)
Turns the Region Restriction function On or Off.
6
( On)
Turns the Auto TP Seek function On or Off. ( On)
7
Displays the RDS Set Up 2 screen.
8
RDS Set Up
If is not shown,
touch or to display it.
Selects a display language for the PTY function.
9
Displays the RDS Set Up 1 screen.
p
RDS Set Up2 screen
Menu
Audio
Set Up
SRC
10
Language Se l ec t
9
RDS Set Up 2
German
9
English 71
Page 72

Setup Menu
English
DAB Set Up
(with the optional accessory DAB Tuner connected only)
The DAB reception can be set.
Displaying the DAB Set Up
screen
DAB Set Up
DAB Set Up screen
4
Audio
Set Up
SRC
3
Menu
1
2
PTY Wat ch
7
PTY Watch Off
Announcement Select
DAB P riority
5
DRC
6
Regional Int.
DAB Se t Up
Off
Off
Off
Set
Calls the Sound Effects Menu. (see page 76)
1
Returns to the Control screen of the previous
2
source.
Calls the Setup Menu.
3
Turns the DAB Priority On or Off.
4
Turns the Dynamic Range Control function On or
5
Off.
Turns the Regional Announcement function On or
6
Off.
7
8
Sets a program type to be selected automatically
7
when the receiving ensemble starts.
Displays the Announcement Selection screen.
8
DAB Set Up
If is not shown,
touch or to display it.
72 English
Page 73

Announcement Selection
Various announcement reception parameters
can be set.
Displays the Announcement Selection screen
1
Set
Announcemen t
1
Wea t her
2
2
Turns the Announcement Reception function On
1
Ev ent
Spe ci a l Ev ent
Radio I nfo
or Off.
Scrolls the Announcement items.
2
Returns to the DAB Set Up screen.
3
Set the announcement parameters
2
Off
Off
Off
Off
Return
3
Wea t her
etc.
Traffic News: Traffic information
Transport News: Time table information of public
transportation services
Warning: Lower priority items than alarms
(power failure, cutoff of water
supply and others)
News: News flash
Weather: Weather forecasting
Event: Event information
Special Event: Undetermined event information
Radio Info: Programme information, advance
notice
Sports news: Sports news
Financial news: Financial news
Terminate the setup
3
Return
English 73
Page 74

Setup Menu
English
AMP Control
(with the optional accessory LX Power AMP connected only)
Sets the power amp connected via the LX bus.
Displaying the AMP Control
screen
Calls the Setup Menu.
1
Calls the Sound Effects Menu. (see page 76)
AMP Ctrl
AMP Control screen
1
SRC
Menu
2
3
4
AMP 1 VOLT 14.4V
Audio
Set Up
AMP Control
5
Set
6
7
6
5
2
Returns to the Control screen of the previous
3
source.
Setup option and value display
4
Select a setup option.
5
Selects a set value.
6
Enters the set value.
7
AMP Ctrl
• If is not shown,
touch or to display it.
• For the model name of amp you can control from
the system, see the amp’s catalog.
• For the options and values you can change and
for the amp’s operation when changed, see the
amp’s instruction manual.
74 English
Page 75

English 75
Page 76

Sound Effects Menu
English
Sound Effects Menu
You can set up the receiver sound effects.
Displaying the Control screen
Control screen
DVD V I DEO
Audio
Set Up
Direct
SRC
REP
Title 1 Chap 3 T0:05:20
KENWOOD
T-REP
Displaying the Sound Effects
Menu screen
Audio
Sound Effects Menu screen
1
Audio
Set Up
SRC
Audio
2
3
Audio Control
Equalizer
Zone Con tr ol
SCRL
13:50
IN
TIME
You can display the same Sound Effects Menu on
the Control screen of any source.
Calls the Sound Effects Menu.
1
Calls the Setup Menu. (see page 47)
2
Returns to the Control screen of the previous
3
source.
• Your setup on the <Sound Effects Menu> is
adjusted automatically according to your <Audio
Set Up> (see page 48) on the Setup menu. We
recommend you to complete the <Audio Set Up>
first, then set up the <Sound Effects Menu>.
• Displayed items vary depending on the optional
accessory connected.
76 English
Page 77

Audio Control
You can adjust the front and rear and right and left audio balance.
Displaying the Audio Control
1 screen
Returns to the Control screen of the previous
1
Au dio Control
Audio Control 1 screen
Front
5
FF
Audio
Set Up
SRC
6
3
Menu
2
1
Vol.Offset
-15
4
LL
Rear
Aud i o Control1
FAD F 1 2
BAL R12
4
RR
SUB -1 5
RR
5
7
LOUD
8
6
Off
9
Displaying the Audio Control
2 screen
Audio Control 2 screen
SRC
Menu
BMS AMP Bass
10
BMS AMP FREQ
Flat
Normal
11
Low
10
11
Audio
Set Up
7
source.
Calls the Setup Menu. (see page 47)
2
Calls the Sound Effects Menu.
3
Adjusts the right and left volume balance.
4
Adjusts the front and rear volume balance.
5
Adjusts the volume of the present source based on
6
the difference level of original volume.
If you have increased the volume first, then
reduced it using the "Vol. Offset", the big sound
may suddenly be generated when you switch to
another source.
Adjusts the subwoofer volume.
7
Turns the Loudness control function On or Off.
8
(Does not appear when the optional accessory DSP
unit is connected.)
If turned "On", high and low tones are automatically
enhanced during low volume. ( On)
Displays the Audio Control 2 screen.
9
Adjusts the bass boost of the B.M.S power
p
amplifier (optional accessory).
You may not set some models of power amp boost
to "+18". See the catalog or instruction manual of
power amplifier.
Set the center frequency of bass boost you have set
q
for the "AMP Bass".
If you set it to "Low", the center frequency is
dropped for 20 to 30%.
Displays the Audio Control 1 screen.
w
12
Aud i o Control2
English 77
Page 78

Sound Effects Menu
Tone
English
Equalizer
You can set up the equalizer.
Displaying the Equalizer
screen
Equalizer
Equalizer screen
3
SRC
Menu
2
1
System Q
6
4
Syst em Q -Ex
Equalizer
Natural
Off
Audio
Set Up
Ton e
Returns to the Control screen of the previous
1
source.
Calls the Setup Menu. (see page 47)
2
Calls the Sound Effects Menu.
3
Select the adjustment items for the Tone Curve
4
setup. (Does not appear when the optional
5
6
accessory DSP unit is connected.)
If you set it to "Off", only "Level" can be set up for
Tone Curve.
:
5
Displays the Tone curve setup
screen. (see page 79)
P-EQ
: Displays the Parametric Equalizer
screen. (see <Parametric Equalizer>
page 80) (with the optional accessory
DSP unit connected)
You can adjust the value set for the
Equalizer Curve Type.
Selects an equalizer curve type.
6
You can select any of the following equalizer curves.
System Q
•
"Natural"
•
"Rock"
•
"Pops
•
"Easy"
•
"Top 40"
•
"Jazz"
•
"User" (when the tone curve (page 79) is set up)
KBS
(with the optional accessory DSP unit connected)
•
"Natural"
•
"Top 40"
•
"Rock"
•
"Dance"
•
"Vocal"
•
"Classic"
•
"User" (when Parametric Equalizer (page 80) is
set up)
78 English
Page 79

Tone curve setup
You can set a Tone curve.
Display the Tone setup screen
1
Set a Q factor
5
Q Factor
Tone
Tone setup screen
Tone
1
Bass
2
Middl e
3
T reble
Bass adjustment items are displayed.
1
Middle adjustment items are displayed.
2
Treble adjustment items are displayed.
3
Bass DC Extend settings
4
FREQ
Level
Q Factor
4
Bass DC EXT
80
- 5
1.0
Ret ur n
If turned "On", it extends the bass center
frequency to the low register by approximately
20%.
Returns to the Equalizer screen.
5
Tone curve can be set for each source.
Select a frequency band you wish to adjust
2
Bass
Midd l e
T reble
You can adjust the following frequency bands.
Bass: 60, 70, 80, 100/150 (When "Q Factor" is
"2.00") Hz
Middle: 500, 1k, 1.5k, 2k Hz
Treble: 10k, 12.5k, 15k, 17.5k Hz
Off
You can set it up only when Bass or Middle is
adjusted.
Close the Tone setup screen
6
Return
5
Set a center frequency
3
FREQ
Set a level
4
Level
English 79
Page 80

Sound Effects Menu
English
Parametric Equalizer
You can Manually set the equalizer curve by
adjusting the center frequency, gain and Q
value. (with the optional accessory DSP unit
connected)
Display the Parametric Equalizer screen
1
P-EQ
P aramet r ic Equalizer
2
3
1
Hz
Hz
800
800
+12
3.00
1234
Sets a frequency.
5
Sets a gain level.
6
Sets a Q value.
7
Store the present equalizer curve in memory, or
8
dB
dB
+12
3.00
P1 P2 P3
Select a band to be adjusted.
calls it from memory.
Exits the Parametric Equalizer setup and returns
9
to the Equalizer screen.
Select a frequency band you wish to adjust
2
Band3Band2Band1
KH z
2.25
+12
3.00
4
Band4
dB
KH z
2.25
+12
3.00
dB
8
FREQ
5
Gain
6
7
Return
Q
Set a Q value
5
Q
Store or call the equalizer curve into/from
memory
To store the equalizer curve in memory:
—
P3 P1
Continue to touch to more than
5
6
7
9
2 seconds.
To call the equalizer curve from memory:
P1
Touch to of the equalizer curve
P1
—
P3
you wish to call from memory.
When you call an equalizer curve, its type is shown
as "User".
Close the Parametric Equalizer screen
6
Return
P3
P3 P1
You can adjust the following frequency bands.
60, 80, 100, 120, 160, 200, 250 Hz
1
315, 400, 500, 630, 800, 1k Hz
2
1.25k, 1.6k, 2k, 2.5k, 3.15k, 4k Hz
3
5k, 6.3k, 8k, 10k, 12.5k, 16k Hz
4
Set a center frequency
3
Set a gain
4
80 English
FREQ
Gain
—
Band4Band1
Page 81

English 81
Page 82

Sound Effects Menu
English
Zone Control
You can set the front and rear audio source.
Displaying the Zone Control
screen
Zone Con t r o l
Zone Control screen (when the Zone function is On)
Audio
Set Up
SRC
3
Menu
Dual Zone
2
1
Front
5
FR
DVD
Zone Con tr ol
Reverse
Rear
TUNER
4
Zone
6
Area
5
Returns to the Control screen of the previous
1
source.
Calls the Setup Menu. (see page 47)
2
Calls the Sound Effects Menu.
3
Turns the Zone Function (that sets different source
4
sounds for front and rear speakers) On or Off.
When turned On, and are shown.
Sets the front and rear audio source separately.
5
RF
(This button appears when the Zone function is On.)
When the rear speaker sound is switched, the
audio source that is output at the AV OUTPUT
terminal is also switched to the same source.
However, if you have set the "Area" to "Reverse",
the audio source that is output at the AV OUTPUT
terminal is switched depending on the front sound
source.
Switches the front and rear audio sources.
6
(This button appears when the Zone function is On.)
Use "Reverse" to change over the front and rear
audio sources.
If the zone function is turned on, the /
button appears on each source control screen, with
which you can adjust the volume balance between
the front and rear sources.
DVD V I DEO
Audio
Set Up
Direct
SRC
F R
SCRL
REPPBC
Title 1 Chap 3 T0:05:20
KENWOOD
T-RE P
TIME
RF
13:50
82 English
Page 83

Digital Effect
(with the optional accessory DSP unit connected only)
You can set up the Digital Effect.
Displaying the Digital Effect
screen
Digital Effec t
Digital Effect screen
Audio
Set Up
SRC
3
Menu
2
1
PCM Center
Dolby Pr o Logic
Bi Phantom
Dynam ic Range
Digital Effect
De fe at
4
On O f f
5
On O f f
6
OnOnOff
7 7
Off
Returns to the Control screen of the previous
1
source.
Calls the Setup Menu. (see page 47)
2
Calls the Sound Effects Menu.
3
PCM Center
4
8
4
5
6
If you set to "On", a sound is output from the center
speaker.
Turns the Dolby Pro Logic function on or off.
5
Turns the Bi Phantom function on or off.
6
If you set to "On", the signal of the center channel is
controlled so that it can be exactly positioned.
Sets up the dynamic range when the Dolby Digital
7
sound is used.
If you set to "On", it compresses the dynamic range
to control loud sounds.
The DSP unit settings return to default.
8
• The Dolby Pro Logic and PCM Center functions
are effective when the 2ch PCM signal is used.
• You cannot set up "Bi Phantom" when "Dolby Pro
Logic" is "Off".
• You cannot set up "PCM Center" when "Dolby Pro
Logic" is "On".
English 83
Page 84

Sound Effects Menu
English
Position
(with the optional accessory DSP unit connected only)
You can adjust the sound effects according to your listening position.
Displaying the Position screen
Returns to the Control screen of the previous
1
source.
Calls the Setup Menu. (see page 47)
Position
Position screen
Menu
Audio
Set Up
2
SRC
1
4
3
Position
Position
Front
4
2
Calls the Sound Effects Menu.
3
Sets a listening position.
4
You can select any of "Front R" (Right front), "Front
L" (Left front), "Front" (All front), "Rear" (All rear), and
"ALL" (All) positions.
The final distance is adjusted to the total of Car
Type Set Up value (see page 50) and Position
Setup (both Position and Position Fine Control)
value.
84 English
Page 85

English 85
Page 86

Hands-Free Unit Control
O
English
GSM control
You can call the following control screens if the GSM is connected to the system.
Displaying the Control screen
Displays the Search for Phone Book screen.
1
(See the <Calling by Phone Book>, page 88)
Adds a number to the Phone Book.
2
(See the <Addition to Phone Book>, page 89)
Displays the Create a Mail screen.
3
(See the <Creating an SMS (Short Message
Service) messages>, page 92)
Displays the SMS list.
4
(See the <Reading SMS (Short Message Service)
messages>, page 92)
Displays the Hands-Free Call Setup screen.
5
(See the <Hands Free Setup>, page 91)
Enter three phone numbers for quick dialing.
6
(See the <Quick Dialing>, page 91)
Enters a phone number.
7
(See the <When dialing>, page 87)
Clears the entered phone number.
8
All numbers you have entered are cleared if the
button is pressed more than 1 second.
Starts the hands-free phone call.
9
Displays the previously called phone number.
p
Ends the hands-free phone call.
q
Returns to the previous screen.
w
Displays the radio wave intensity
e
Displays the present Auto Response status
r
When Auto Response is on:
AUT
When Auto Response is off:
Indicates the SMS registration availability
t
Displays the calling and called phone numbers
y
If you have registered a phone number in the Phone
Book, the destination person name is displayed.
GSM Control screen
Hands Free
1
2
+
3
4
5
Set Up
16
6
KENWOOD
0123456789
P1
P2
P3
Or the telephone
is called.
1
23
4
56
7
8
*+
0
13
14
15
AUTO FULL
9
7
10
11
8
Clear
9
#
Return
12
86 English
For details on the hands-free phone calls, see the
Instruction Manual of KCA-HF521 GSM Hands-Free
Unit (optional accessory).
Page 87

When called
When you are called, you can use the handsfree phone.
Respond to a phone call
1
When the telephone is called, the GSM Control
screen appears automatically.
Terminate the phone call
2
The previous screen reappears.
When dialing
Originate a call by entering a phone number.
Enter a phone number
1
—
0
Originate a call
2
You can start talking when the destination responds.
Terminate the phone call
3
The previous screen reappears.
9
English 87
Page 88

Hands-Free Unit Control
English
Calling by Phone Book
You can call a person using his/her phone
number that you have registered in the Phone
Book.
Display the Search for Phone Book screen
1
The Initial Input screen appears.
Initial Input screen
Phone Book List
a
Aa
Type
1
2
2
Switches the character type.
1
Scrolls the character array display.
2
Displays the Phone Book beginning with the
3
bcde fg
hi jklmn
opqrstu
vwx yz
name whose first character you have touched.
Returns to the GSM Control screen.
4
Select the initial character of a person name
2
in memory
etc.
a
The Phone Book List screen appears.
AUTO FULL
3
Return
Phone Book List screen
Phone Book List
0123456789
KENWOOD
Scrolls the list.
1
Enters the destination (called party) name.
2
Displays the destination data edit screen.
3
2
1
1
Name
Name
Name
Name
AUTO FULL
3
Edit
4
Clear
5
6
Return
Ok
(See the <Editing the Phone Book>, page 90)
Clears the destination if this button is touched
4
more than 2 seconds.
Enters the destination data and returns to the
5
GSM Control screen.
Returns to the GSM Control screen.
6
Select a destination you wish to call
3
4
Name
Select a destination you wish to call
4
Ok
The GSM Control screen appears again. The selected
destination data is displayed.
Originate a call
5
88 English
You can start talking when the destination responds.
Terminate the phone call
6
The previous screen reappears.
Page 89

Addition to Phone Book
You can add a phone number to the Phone
Book.
Enter a phone number you wish to register
1
—
0
Start phone number registration
2
Device Select screen
Device Select
Registers a phone number in the SIM card.
1
Registers a phone number in the GSM system
2
1
SIM CARD
2
IN MEMORY
itself.
Returns to the GSM Control screen.
3
9
+
AUTO FULL
3
Return
Select a memory device in which you wish
3
to register phone data
SIM CARD
IN MEMORY
When you select the device, the Name Edit screen
appears.
Name Edit screen
Name Ed i t
1
2
1
Aa
Type
2
3
3
Kenwood
a
bcde fg
hi jklmn
opqrstu
vwx yz
Shifts the cursor.
Switches the character type.
Space
The digits, accent and extended code characters,
and alphabets are switched each time it is
pressed.
Scrolls the keyboard display.
3
Enters a character.
4
Clears the character.
5
All entry characters are cleared if this key is
touched more than 1 second.
Enters the entry characters.
6
Returns to the Device Select screen.
7
Enters a space.
8
AUTO FULL
4
8
Clear
Ok
Return
1
5
6
7
The extended code characters are displayed only
when a cellular phone supporting the GSM
alphabets is connected.
Each of extended code characters (^, {, }, \, [, ], ¯,
|, €) occupies a two-character memory space
when registered.
Enter a name
4
etc.
a
Register the name
5
Ok
The name has been registered.
English 89
Page 90

Hands-Free Unit Control
English
Editing the Phone Book
You can edit data you have registered in the
Phone Book.
Select an item you wish to edit
1
Name
See the <Calling by Phone Book> (see page 88) and
select an item you wish to edit on the Phone Book
List screen.
Phone Book List
0123456789
KENWOOD
Name
Name
Name
Name
Start editing
2
Edit
The Edit Phone Number screen appears.
Edit Phone Number ("TEL Number Edit") screen
Number Edi t
0123456789
123
456
7809
AUTO FULL
AUTO FULL
1
2
4
#*+
3
Edit
Clear
Ok
Return
Clear
Ok
Return
Register the phone number
4
Ok
The phone number is registered, the Edit Name
("Name Edit") screen appears.
Edit Name ("Name Edit") screen
Name Ed i t
1
2
1
Type
2
3
3
Kenwood
a
Aa
bcde fg
hi jklmn
opqrstu
vwx yz
Shifts the cursor.
Switches the character type.
Space
The digits, accent and extended code characters,
and alphabets are switched each time it is
pressed.
Scrolls the keyboard display.
3
Enters a character.
4
Clears the character.
5
All entry characters are cleared if this key is
touched more than 1 second.
Enters the entry characters.
6
Returns to the Edit Phone Number ("TEL Number
7
Edit") screen.
Enters a space.
8
The extended code characters are displayed only
when a cellular phone supporting the GSM
alphabets is connected.
Each of extended code characters (^, {, }, \, [, ], ¯,
|, €) occupies a two-character memory space
when registered.
Enter a name
5
AUTO FULL
4
8
Clear
Ok
Return
1
5
6
7
Enters a phone number.
1
Clears the input phone number.
2
All entry number are cleared if this key is touched
more than 1 second.
Returns to the Phone Book List screen.
3
Enters the phone number.
4
Enter a phone number
3
90 English
etc.
a
Register the phone number
6
Ok
—
0
9
The editing completes and the Phone Book data is
updated.
Page 91

Quick Dialing
You can register up to 3 phone numbers for
quick dialing.
To register a phone number:
Display a phone number you wish to register
1
See the <Calling by Phone Book> (see page 88) and
<When dialing> (see page 87).
Register the phone number
2
—
P3P1
Continue to touch more than 2 seconds.
To call a phone number from memory:
—
P3P1
Only a phone number can be registered for
Quick Dialing. Therefore, the destination
subscriber name and others are not displayed
during dialing.
Hands Free Setup
The hands-free system can be set as follows.
Display the SMS Set Up screen
Set Up
Hands Free Set Up screen
Hands Free Set Up
4
Book SYNC
Sets an automatic response time after call
1
Aut o Response Time
1
2
31 sec
MIC se nce
Phone Vo i ce
31
3
Left
5
SMS SYNC
Right
termination.
Adjusts the microphone sensitivity.
2
Sets a ringing tone output position.
3
"Left": Outputs the tone from the front left-hand
side speaker.
"Right": Outputs the tone from the front right-hand
side speaker.
Synchronizes the GSM with the Phone Book of
4
optional KCA-HF521 unit.
Synchronizes the GSM with the SMS of optional
5
KCA-HF521 unit.
Returns to the GSM Control screen.
6
AUTO FULL
1
2
3
6
Return
The "Phone Voice" of both "Left" and "Right" can
be turned On at the same time. But they cannot
be turned Off at the same time.
English 91
Page 92

Hands-Free Unit Control
English
Reading the SMS (Short
Message Service) messages
You can display messages received by the
SMS.
Display the BOX Message List screen
1
BOX Message List screen
Box List
2
2
Displays messages.
1
Scrolls the message list.
2
Returns to the GSM Control screen.
3
Select a message you wish to display
2
1
01234567890123456
01234567890123456
01234567890123456
01234567890123456
The message is displayed on the Box Message
screen.
BOX Message screen
Box Messag e
1
1
31/01/02 2 0:15
AUTO FULL
3
AUTO FULL
2
3
Return
Clear
Return
Creating an SMS (Short
Message Service) message
You can create a message to be sent by the
SMS.
Enter the destination number where you
1
wish to send an SMS message
—
0
Display the SMS Message Input screen
2
SMS Message Input screen
Message Input
1
Aa
Type
2
4
4
1
2
Kenwood
5
a
bcde fg
hi jklmn
opqrstu
vwx yz
Shifts the cursor.
Switches the character type.
The digits, accent and extended code characters,
and alphabets are switched each time it is
pressed.
Enters a space.
3
Scrolls the keyboard display.
4
Enters a character.
5
Clears the character.
6
All entry characters are cleared if this key is
touched more than 1 second.
Sends the created message.
7
Returns to the GSM Control screen.
8
Create a message
3
9
3
Space
AUTO FULL
Clear
Return
1
7
6
8
Scrolls for a single message.
1
Clears the message if this button is touched more
2
than 2 seconds.
Returns to the BOX Message List screen.
3
92 English
etc.
a
Page 93

Send the message
4
Returns to the GSM Control screen.
The extended code characters are displayed only
when a cellular phone supporting the GSM
alphabets is connected.
Each of extended code characters (^, {, }, \, [, ], ¯,
|, €) occupies a two-character memory space
when registered.
English 93
Page 94

Glossary
DVD: Digital Versatile Disc
English
A type of disc which contains recording of
audio/video packaged media with high video and
audio quality, such as a movie, featuring large
recording capacity and digital signal processing
capability.
VCD: VIDEO CD
A type of CD which contains the recording of
moving images. It compresses image information
by about 1/120 and audio information by about 1/6
and accommodates up to 74 minutes of recording
in a disc with the same diameter as ordinary
music CD of 12 cm.
Some VCDs do not have the P.B.C. compatibility
and are capable of playback only, while some are
P.B.C.-compatible and are capable of various
special playback control operations. This player
can play both of these VCDs.
MPEG: Moving Picture Expert Group (DVD, VCD)
This is an international standard for digital video
and audio compression and decompression in
media.
Dolby Digital
This is a digital audio compression technology
developed by Dolby Laboratories. It is compatible
with 5.1-channel surround audio as well as normal
stereo (2-channel) audio and can accommodate a
large amount of audio data efficiently in a disc.
DTS
Name of a digital surround system developed by
Digital Theater Systems, Inc.
Top menu/menu (DVD)
Some DVDs display more than one title in a
screen. This screen is referred to as the top
menu.
The menu is the item display (menu screen) for
use in setting operations. The menu can be
recalled any time during playback to perform
settings according to the current software,
including the audio switching between Dolby
Digital and PCM, switching of language used in
the subtitles and spoken voice.
Title number (DVD)
The title is the largest unit of video and audio
recorded in a DVD. It usually corresponds to a
single movie of video software or an album
(sometimes a piece of music) of music software.
The numbers assigned to individual titles are
referred to as the title numbers.
Chapter number (DVD)
The chapter is a section of video and audio
recorded in a DVD. A title is composed of several
chapters. The numbers assigned to individual
chapters are referred to as the chapter numbers.
Subtitles (DVD)
Some DVD discs contains the recording of more
than one subtitle language. This player allow you
to select one of the recorded subtitle languages
during playback.
Track number (CD, VCD)
A track is also a section of video and audio
recorded in a disc. The numbers assigned to
individual tracks are referred to as the track
numbers.
With most of music CDs, a track is assigned to a
piece of music. However, with a VCD, the
sections of the contents do not always
correspond to the assigned tracks.
As (special) playback functions such as skipping
and programming of ordinary CDs are based on
track number data, such playback functions are
sometimes impossible with some VCDs.
P.B.C.: Play-Back Control (VCD)
When a VIDEO CD carries "Play Back Control
capable" or similar message on the disc or jacket,
desired scenes and information can be played
back in an interactive manner using a hierarchical
structure while viewing the menu screens
displayed on the TV screen.
94 English
Page 95

Troubleshooting Guide
Some system functions are limited to control depending on your setup.
The rear speakers of DTA cannot be set.
The "Channel Level" of rear speakers cannot be set.
No signals can be set.
The "Equalizer" cannot be set.
The "Position" cannot be set.
The "Car Type Setup" value cannot be set.
The "Speaker Setup" value cannot be set.
No crossover frequency can be set.
The "Channel Level" (test signal output) cannot be set.
The center speaker for DTA cannot be set.
The "Channel Level" of the center speaker cannot be set.
The subwoofer of DTA cannot be set.
The "Channel Level" of the subwoofer cannot be set.
"Multi Channel" has been set to "2/0"
or "3/0" (no rear speaker setting) on
the Speaker Set Up screen (page 51).
The Zone Control has been turned
On (page 82).
"Multi Channel" has been set to "2/0"
or "2/2" (no center speaker setting) on
the Speaker Set Up screen (page 51).
"Sub Woofer" has been set to "Off" on
the Speaker Set Up screen (page 51).
English 95
Page 96

Troubleshooting Guide
What might appear to be a malfunction in your unit may just be the result of slight misoperation or
miswiring. Before calling service, first check the following table for possible problems.
English
General
■
The power does not turn on.
• The fuse has blown.
The desired source is NOT selected although you pressed the SRC button.
• An optional unit required to listen to each source is
not connected yet.
• The RESET button is not pressed yet although the
optional unit has been connected to the system.
• The "O-N" switch of the optional unit is at the "O"
position.
•A disc changer not supported by the system is used.
Nothing happens when the buttons are pressed.
• The computer chip in the unit is not functioning
normally.
No television/video image appears.
• The unit is not connected to the parking brake
detection switch.
• The parking brake is not engaged.
The screen is dark.
• The unit is in a location where temperature is low.
The screen does not darken when the vehicle’s lights are turned on.
• The unit is set to auto dimmer.
• The illumination wire has not been connected. (If
manual dimmer is set)
AM/FM radio reception is poor and/or there is noise.
• The TV antenna and vehicle‘s radio antenna are too
close.
The remote controller does not operate.
• The remote control mode selector is not set
correctly.
• After checking for short circuits in the wires, replace the
fuse with one having the same rating.
•A non-connected source is not selected. See
<INSTALLATION MANUAL> and connect the unit correctly.
• Press the reset button (see page 4).
• Set the "O-N" switch to the "N" position.
• Use a disc changer supported by the system (see page 4).
• Press the reset button on the unit (see page 4).
• Make proper connections according to <INSTALLATION
MANUAL>.
• For safety reasons no television/video images are
displayed while the vehicle is moving. Engaging the
parking brake will cause images to be displayed.
• If the temperature of the monitor unit drops, the screen
may appear darker when power is first turned on due to
the characteristics of a liquid crystal panel. Wait a while
after turning power on for the temperature to rise. Normal
brightness will return.
• When the unit is set to auto dimmer, it is not linked to the
vehicle's light switch.
• Make proper connections according to <INSTALLATION
MANUAL>.
• Separate the two antennas as far as possible.
• Turn off the main unit.
• Switch the remote control mode selector according to the
source you select (see page 10).
96 English
Page 97

No sound can be heard, or the volume is low.
• Attenuator is turned on.
• The fader or balance settings are set all the way to
one side.
• The input/output wires or wiring harness are
connected incorrectly.
The sound quality is poor or distorted.
• One of the speaker wires is being pinched by a
screw in the car.
• The speakers are not wired correctly.
Radio reception is poor.
• The car antenna is not extended.
• The antenna control wire is not connected.
The memory is erased when the ignition is turned off.
• The battery wire has not been connected to the
proper terminal.
• The ignition and battery wire are incorrectly
connected.
The TEL mute function does not work.
• The TEL mute wire is not connected properly.
The TEL mute function turns on even though the TEL mute wire is not connected.
• The TEL mute wire is touching a metal part of the
car.
The sound/picture skips on a DVD/VCD/CD.
• The disc is scratched or dirty.
A track will not play.
• Random play has been selected.
• Turn off Attenuator.
• Reset the fader and/or balance settings.
• Reconnect the input/output wires or the wiring harness
correctly. See the section on <INSTALLATION MANUAL>.
• Check the speaker wiring.
• Reconnect the speaker wires so that each output terminal
is connected to a different speaker.
• Pull the antenna out all the way.
• Connect the wire correctly, referring to the section on
<INSTALLATION MANUAL>.
• Connect the wire correctly, referring to the section on
<INSTALLATION MANUAL>.
• Connect the wire correctly, referring to the section on
<INSTALLATION MANUAL>.
• Connect the wire correctly, referring to the section on
<INSTALLATION MANUAL>.
• Pull the TEL mute wire away from the metal part of the
car.
• Clean the disc, referring to the section on <Disc cleaning>
(see page 6).
• Turn off random play.
A VCD cannot be played using menus.
• The VCD disc being played is not compatible with
P.B.C.
The subtitle is not displayed.
• The DVD disc being played does not contain the
recording of subtitles.
The voice (or subtitle) language cannot be changed.
• The DVD disc being played does not contain the
recording of more than one audio (or subtitle)
language.
• Menu playback is available only with VCD discs recorded
with P.B.C.
• The subtitle cannot be displayed when the DVD disc being
played does not contain the recording of subtitles.
• The voice (or subtitle) language cannot be changed when
the DVD disc being played does not contain the recording
of more than one voice (or subtitle) language.
English 97
Page 98

Troubleshooting Guide
The viewing angle cannot be changed.
English
• The DVD disc being played does not contain the
recording of more than one angle.
• You are attempting to switch the angle in a DVD
section where more than one angle is not recorded.
Playback will not start even after a title is selected.
•A viewing restriction (RATING) has been set for the
disc.
The voice or subtitle language selected in the initial setting is not played.
• The DVD disc being played does not contain the
recording of the selected voice or subtitle language.
Disc source
■
The disc control mode cannot be selected.
• No wire has been connected to the disc changer
input terminal on the unit.
The specified disc does not play, but another one plays instead.
• The specified CD is quite dirty.
• The CD is upside-down.
• The disc is loaded in a different slot from that
specified.
• The disc is severely scratched.
The sound skips.
• Something is touching the disc changer.
• The CD is scratched or dirty.
The display shows that the changer is being played, but no sound can be heard.
• The computer chip in the unit is not functioning
normally.
The specified track will not play.
• Random play or magazine random play has been
selected.
Track repeat, disc repeat, track scan, disc scan, random play, and magazine random play start by themselves.
• The setting is not cancelled.
Can’t remove disc.
• The cause is that more than 10 minutes has elapsed
since the vehicle ACC switch was turned OFF.
• The viewing angle cannot be changed when the DVD disc
being played does not contain the recording of more than
one angle.
• More than one viewing angle may be recorded only in
limited sections in a disc.
• Check the viewing restriction level (RATING) setting.
• Use a DVD disc containing the recording of the selected
voice or subtitle language.
• Connect the wire to the disc changer input terminal on the
unit.
• Clean the CD.
• Load the CD with the labeled side up.
• Eject the disc magazine and check the number for the
specified disc.
• Try another disc instead.
• Remove whatever is touching it.
• If skipping happens at the same place when the car is
stopped, something with the CD is wrong. Clean the CD.
• Press the reset button on the unit (see page 4).
• Turn off random play or magazine random play.
• The settings for these functions remain on until the
setting to off or the disc ejected, even if the power is
turned off or the source changed.
• The disc can only be removed within 10 minutes of the
ACC switch being turned OFF. If more than 10 minutes
has elapsed, turn the ACC switch ON again and press the
Eject button.
98 English
Page 99

MP3/WMA source
■
Cannot play an MP3/WMA.
• The media is scratched or dirty.
The sound skips when an MP3/WMA is being played.
• The media is scratched or dirty.
• The recording condition is bad.
The MP3/WMA track time isn’t displayed correctly.
• ---
Can’t display the ID3 tag information correctly.
• Record is not made in conformity with the ID3 tag
version 1.x.
The following messages are displayed when certain problems are occurring in your system. Take
the recommended actions.
• Clean the media, referring to the CD cleaning of the
section on <About discs> (see page 6).
• Clean the media, referring to the CD cleaning of the
section on <About discs> (see page 6).
• Record the media again or use another media.
• There are times when it isn’t displayed correctly according
to the MP3/WMA recording conditions.
• Record in conformity with the ID3 tag version 1.x.
Also, the display may be incorrect if an MP3 file uses the
ID3 tag v1.x standard and if this standard has been
expanded after production of the machine software.
Hot Error The protective circuit in the unit activates when the temperature inside the unit exceeds 60°C
Hold Error The protective circuit in the unit activates when the temperature inside the automatic disc
Mecha Error The disc player is malfunctioning.
Disc Error The unplayable discs is inserted.
Read Error The disc is upside-down.
Region code Error The DVD software encoded for other region code.
Parental level Error The parental level is set to high levels.
Error 07 — 67 The unit is malfunctioning for some reason.
(140°F), stopping all operation.
]
Cool down the unit by opening the windows or turning on the air conditioner. As the
temperature falls below 60°C (140°F), the disc will start playing again.
changer exceeds 60°C (140°F), stopping all operation.
]
Cool down the unit by opening the windows or turning on the air conditioner. As the
temperature falls below 60°C (140°F), the disc will start playing again.
]
Eject the disc and try inserting it again. Contact the Kenwood dealer if this indicator continues
blinking or the disc cannot be ejected.
]
Load the disc with the labeled side up.
The disc is quite dirty.
]
Clean the disc, referring to the section on <Disc cleaning> (see page 6).
]
Press the reset button on the unit. If the "Error ##" code does not disappear, consult your
nearest service center.
English 99
English 99
Page 100

Specifications
Specifications subject to change without notice.
English
Monitor section
Picture size................................................6.4 inches wide
Display system ........................Transparent TN LCD panel
Drive system ..............................TFT active matrix system
Number of pixels....................336,960 (480H×234V×RGB)
Effective pixels ......................................................99.99%
Pixel arrangement......................RGB striped arrangement
Back lighting ....................Cold Cathode Fluorescent Tube
DVD section
D/A Converter ............................................................24Bit
Decoder ............Linear PCM/Dolby digital/dts/MP3/WMA
Wow & Flutter ............................Below Measurable Limit
Frequency response
(Sampling frequency;96k) ........................20~44,000Hz
(Sampling frequency;48k) ........................20~22,000Hz
(Sampling frequency;44.1k) ......................20~20,000Hz
Total harmonic distortion (1k) ................................0.010%
Signal to Noise ratio................................100dB (DVD 96k)
Dynamic range........................................100dB (DVD 96k)
DISC Format........................DVD-Video/VIDEO-CD/CD-DA
Sampling frequency........................44.1kHz/48kHz, 96kHz
Quantifying bit number ....................................16/20/24bit
FM Tuner section
Frequency range (50kHz)..........................87.5~108.0MHz
Usable sensitivity (S/N=26dB) ..........................0.7µV/75Ω
Quieting sensitivity (S/N=46dB) ........................1.6µV/75Ω
Frequency response (±3.0dB) ......................30Hz~15kHz
S/N (dB) (MONO) ......................................................66dB
Selectivity (±400kHz) ..............................................≥ 80dB
Stereo separation............................................39dB (1kHz)
LW Tuner section
Frequency range (9kHz) ..........................153kHz~281kHz
Usable sensitivity ....................................................28dBµ
MW Tuner section
Frequency range (9kHz) ........................531kHz~1611kHz
Usable sensitivity ....................................................28dBµ
143.6(W)×77.1(H)mm
Video section
Color system of external video input ................NTSC/PAL
External video input level (RCA jacks) ..............1Vp-p/75Ω
External audio max input level (RCA jacks) ..........1V/22kΩ
Analog RGB input ..........................................0.7Vp-p/75Ω
Audio section
Maximum Power (Front&Rear) ..............................50W×4
Output power (Front&Rear)
(DIN 45324, +B=14.4V) ......................................30W×4
Preout level (V) ....................................................2V/10kΩ
Preout impedance ..................................................≤ 600Ω
Tone action
Bass........................................................100 Hz ±10 dB
Middle ......................................................1 kHz ±10 dB
Treble......................................................10 kHz ±10 dB
General
Operating voltage ....................................14.4V (11V~16V)
Current consumption ..................................................15A
Dimensions (W×H×D) ..............182mm×112mm×163mm
Operational temperature range ......................-10°C~60°C
Storage temperature range ............................-20°C~85°C
Weight ......................................................................2.8kg
Although the effective pixels for the liquid crystal panel is given as 99.99% or more, 0.01% of pixels may not light or may
light incorrectly.
100 English
 Loading...