

Keating Of Chicago CMG, 31289 User Manual
SERVICE INSTRUCTIONS
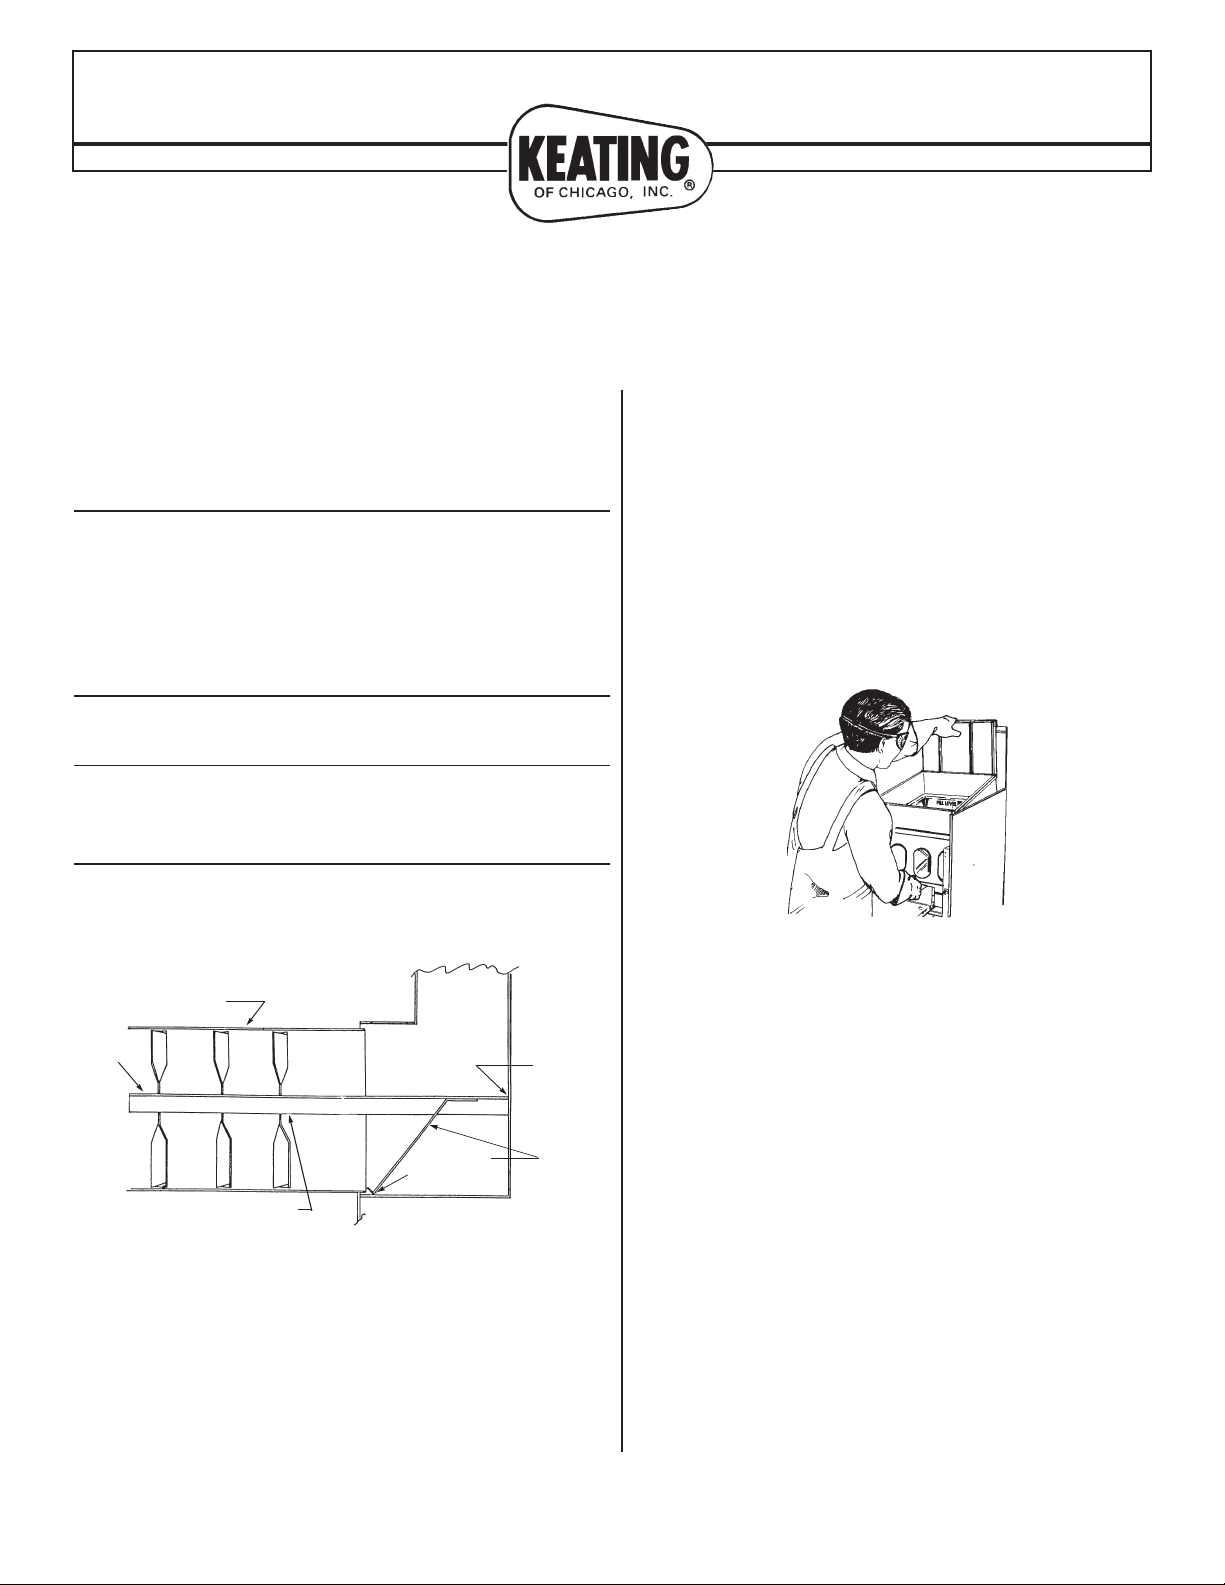
FLUE BACK
B
RETAINING CLIP
RADIANT ASSEMBLY
TUBE
A
C
www.keatingofchicago.com 1-800-KEATING
REMOVAL AND REPLACEMENT
OF FRYER VESSEL
(MODELS WITH UNI-POT)
A fryer vessel should be kept shiny and clean at
all times. A clean fryer vessel will not only provide
well prepared food products, but will also save
energy and oil costs.
NOTE: Before attempting to replace:
l Verify that the vessel needs to be replaced.
l Familiarize yourself with the replacement
process.
l Check the new vessel before disassembling
the fryer.
NOTE: Call 1-800-KEATING to verify the correct
size fryer vessel for the fryer being serviced.
NOTE: If possible, remove the fryer from the
immediate cooking area to a less congested area
of the restaurant for service.
NOTE: Always install new radiants supplied when
installing a new or rebuilt fryer vessel.
1. To install radiant assembly insert the end
with the retaining clip in the tube first.
Make sure that the end of the clip “C” is
bent below the bottom of the radiant fins.
2. Push the assembly back as far as it will go
until the rear end of angle bar is against the
flue back at “B”.
3. As the assembly is inserted make sure
that the fins are not bent out of
perpendicular with the radiant angle bar.
REMOVAL:
1. Disconnect electric power source.
(except for AA and CMG models).
2. Turn off gas.
3. Drain oil into approved container and set
aside.
Fryer vessel being removed.
4. Remove splashback screws, drill out pop
rivets and lift splashback from fryer(s).
5. Drill out pop rivets in vertical canopy trim
pieces, firmly tap downward on canopy
to loosen it and lift canopy from fryer.
6. Removal of components:
a. Remove flame switch bulb.
Remove control panel.
b.
c. Remove control panel back.
d. Remove thermostat bulb from vessel.
e. Remove Hi-Limit control bulb from
vessel.
7. Loosen union in tailpiece assembly.
8. To remove fryer vessel, grasp top of flue
and lift it forward, then lift fryer vessel up
and set on floor.
Part #031289 Rev
. 1
ECO 2110
Date 6/11/98
6/98
UNIPOT
SERVICE INSTRUCTIONS
www.keatingofchicago.com 1-800-KEATING
REMOVAL AND REPLACEMENT OF
FRONT DRAIN FRYER VESSEL
(MODELS WITH UNI-POT)
page 2
9. Remove flue from fryer vessel by
removing six screws out of tabs. Inspect
flue for cracks or damage and replace if
necessary.
10. Remove drain valve from fryer vessel.
REPLACEMENT:
1. Slide flue onto tabs on back of new fryer
vessel until it contacts back of vessel.
Drill holes into vessel tabs through
existing holes in flue and fasten flue to
vessel tabs with six sheet metal screws
and set on floor next to old vessel.
2. Replace drain valve on new fryer vessel
after applying high temperature sealant
on vessel threads.
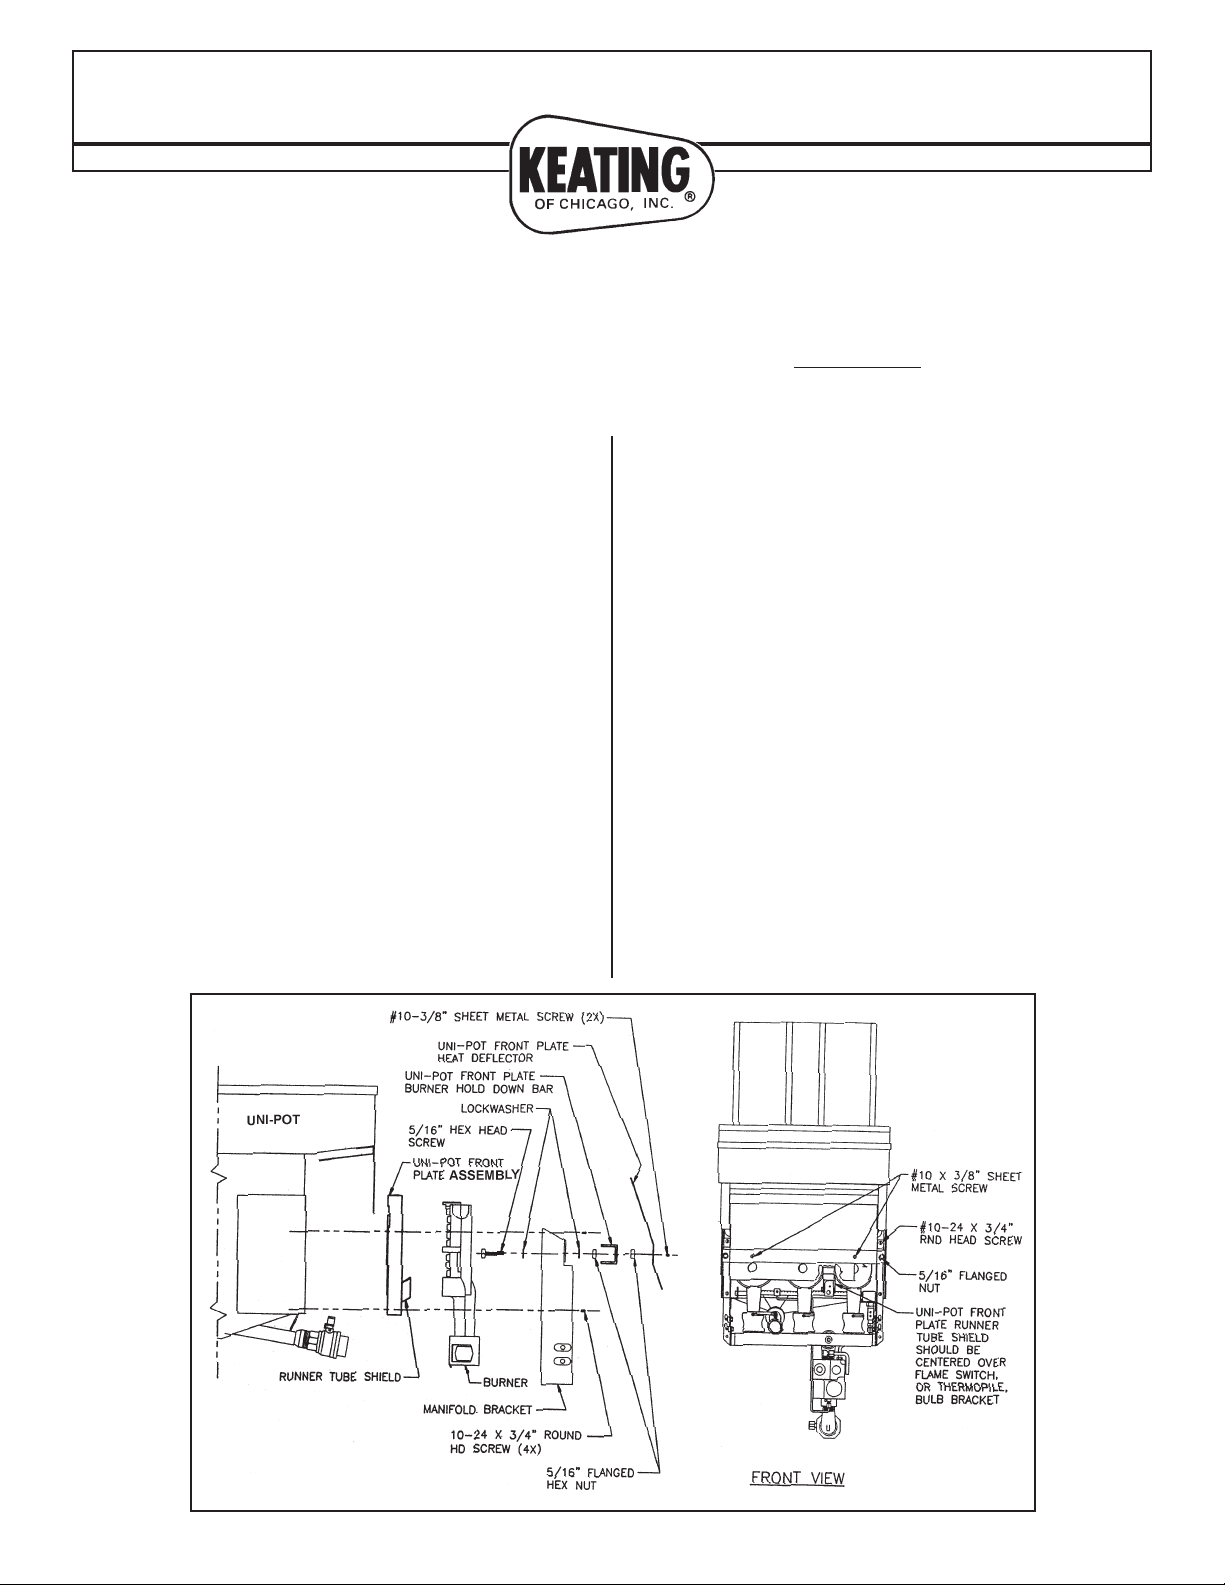
3. Remove gas manifold with support
brackets from vessel by removing four
screws and lockwashers joining brackets
CONTINUED
to sides of vessel. Leave constant and
runner pilot tubing and gas manifold
connected to manifold brackets and
assemble to new vessel.
4. Carefully lower vessel and flue into
cabinet. Check fryer vessel fit in cabinet
before proceeding with assembly.
5. Replace splashback onto vessel with
sheet metal screws and pop rivets.
6. Replace canopy onto cabinet with two
sheet metal screws.
7. Tighten union in tailpiece assembly.
8. Replacement of components:
a. Replace Hi-Limit control bulb into
vessel.
b. Replace thermostat bulb into vessel.
Part #031289 Rev. 1 ECO 2110 Date 6/11/98
 Loading...