

Page 1

KMR 1250 LPG
1.091-106
1.091-116
www.karcher.com
5.959-012 A2004624 (11/02)
Page 2

Deutsch
Betriebsanleitung für Anwender Seite 3
English
F r ançais
Norsk
Svenska
Español
ЕллзнйкЬ
User Instructions Page 25
Notice d’instructions pour l’utilisateur Page 47
Bruksanvisning for bruker Side 69
Bruksanvisning Sida 91
Instrucciones de manejo para usuarios Página 113
ПдзгЯет лейфпхсгЯбт гйб фпхт чсЮуфет УелЯдб 135
Page 3

KMR 1250 LPG User Instructions English
Contents
Safety Regulations................................................................................................ 26
Liquefied gas ................................................................................................................ 2 6
On behalf of the environment ....................................................................................... 2 7
Safety Directives for LPG Motor Vehicles ............................................................. 28
Obligations of the factory management and the employee ......................................... 28
Maintenance by experts ............................................................................................... 28
Initial operation/operation ............................................................................................. 2 8
In storage rooms and in repair workshops ................................................................... 2 9
Intended usage ..................................................................................................... 30
Sweeper functions ................................................................................................ 30
Prior to initial start-up............................................................................................ 31
Unloading procedure .................................................................................................... 3 1
Pushing the sweeper .................................................................................................... 3 1
After pushing the sweeper............................................................................................ 31
Open cover .................................................................................................................... 31
Operating controls................................................................................................. 32
Preparing the sweeper for use............................................................................... 33
Installing/changing the gas cylinder ............................................................................. 3 3
Adjusting the driver’s seat............................................................................................. 33
Starting the sweeper..................................................................................................... 34
Initial driving trials ......................................................................................................... 34
Moving off and sweeping .............................................................................................. 3 4
Braking.......................................................................................................................... 3 4
Stopping the sweeper and switching off ....................................................................... 3 4
Emptying the waste hopper................................................................................... 35
Important information .................................................................................................... 3 5
Cleaning the filter .................................................................................................. 35
Automatic cleaning ....................................................................................................... 3 5
Manual cleaning ........................................................................................................... 3 5
T ypical applications............................................................................................... 36
Sweeping on dry ground .............................................................................................. 3 6
Sweeping on damp or wet ground ............................................................................... 3 6
Picking up larger items (sticks, tins, etc.) ...................................................................... 37
Overcoming obstacles .................................................................................................. 37
Shutting the sweeper down for longer periods .......................................................37
Cleaning and care ................................................................................................. 36
Maintenance ......................................................................................................... 38
First engine oil change ................................................................................................. 3 8
Initial inspection after 8 operating hours ...................................................................... 3 8
Daily maintenance ........................................................................................................ 38
Maintenance intervals .................................................................................................. 38
Maintenance tasks................................................................................................ 39
Checking tyre pressures ............................................................................................... 39
Checking the oil level ................................................................................................... 3 9
Filling up with oil ........................................................................................................... 39
Changing the engine oil ............................................................................................... 40
Cleaning or replacing the air cleaner ........................................................................... 4 0
Check gas installation .................................................................................................. 40
Checking the hydraulic system ..................................................................................... 4 0
Safety information which must be observed when handling batteries. ....................... 41
Checking the level of electrolyte in the battery............................................................. 4 1
Charging the battery ..................................................................................................... 41
Replacing the sealing skirts ......................................................................................... 42
Replacing the side brush .............................................................................................. 42
Replace light unit .......................................................................................................... 4 2
Adjusting the sweeping pattern .................................................................................... 4 3
Replacing the main brush roller ................................................................................... 43
Replacing fuses ............................................................................................................ 4 4
Replacing the dust filters .............................................................................................. 4 4
Troubleshooting..................................................................................................... 45
T echnical specifications ........................................................................................ 46
25
Page 4

English User Instructions KMR 1250 LPG
Safety Regulations
General statutory regulations on safety and accident prevention, e.g. VBG 1
and VBG 12, must be observed in addition to the information contained in
these Operating Instructions. Always read the Operating Instructions first
before using the machine, even if you have worked with similar motor
sweeping machines before. It is essential to familiarize yourself with all
features and operating controls of the machine, as well as with their functions
before starting work.
– Check the gas system for leaks.
– Close the tank valve immediately if there is a leak. Put into operation
again only after the cause of the fault has been removed.
– Motor sweeping machines must be used only by suitable persons who are
trained to operate them, who have demonstrated their ability to operate
the machine to the contractor or his authorized agent and who are expressly instructed by them to operate the machine.
– Use the motor sweeper only on those areas for which the contractor or his
authorized agent have given their approval.
– The operator must leave the machine only if the motor has been switched
off, the gas cylinder has been closed, the machine has been secured
against unwanted movement, the parking brake has been applied and the
key has been removed.
– The key should be removed to prevent unauthorized use of the machine.
– When transporting the machine the motor should be stopped and the gas
cylinder closed.
– The unit should be fastened securely by means of stop points and fixing
straps or ropes when it is being carried on a transport vehicle.
– The operator should use the machine only for its intended purpose. The
operator should taken local conditions into account when driving and give
consideration to third parties, in particular children, when working.
– It is forbidden to remain in an area of danger.
– Check that the machine is in perfect condition and operationally safe
before using it. The machine must not be used if it is not in proper working
condition.
– The warning and information signs on the machine give important informa-
tion for safe operation.
– Never allow other persons to ride or be carried on the machine.
– Riding machines must be set in motion only from the driver’s seat.
– The machine must be used only in areas where dust does not represent
a health risk (category “U” dust).
– Proper maintenance is essential for the prevention of accidents.
– Switch off the motor and remove the key before cleaning and servicing the
machine or replacing parts.
– When working on the electrical system always remove the battery connec-
tor or disconnect the battery (negative terminal).
– Suitable tools should be used for maintenance, repair and installation
work, etc. Maintenance work on the fuel gas system must be carried out
only by trained personnel.
– Do not sweep up burning or glowing objects.
– The motor sweeper should be protected from excessive heat above 70° C
(radiators, sunlight, etc.).
26
Liquefied gas
Only use liquefied gas cylinders with propellant gas filling of Quality A or B,
as specified in DIN 51 622, in accordance with ambient temperature.
Page 5
KMR 1250 LPG User Instructions English
Note:
The use of domestic gas is absolutely forbidden!
For gas engines it is permitted to use liquefied gas mixtures of propane/
butane whose mixing ratio lies between 90/10 and 30/70.
Owing to the better cold start properties, it is preferable to use liquefied gas
with a high propane proportion for external temperatures below 0 °C (32 °F),
for evaporation begins to take place already at low temperatures.
Replacement parts
Please note that the use of other than original replacement parts can lead to
serious malfunctions and also to bad accidents, if such parts have not been
properly manufactured, or do not precisely replace the original part or lead to
unsafe operation of the appliance. Please always use only original replacement parts.
Accessories
Wrong, non-suitable or defective accessories hamper the functioning of the
appliance. Their use is dangerous. Please use only original accessories.
Otherwise the right to claim under guarantee can be extinguished.
Fire hazard while sweeper is operating!
n Keep highly inflammable materials away from the engine and the exhaust
while the sweeper is operating.
Danger of toppling over on steep slopes!
The sweeper could topple over while it is being driven across or turning
round on a sleep slope.
n The maximum gradient up or down which the sweeper can be driven is 18%.
n Do not drive at right angles to a slope with a gradient steeper than 10%.
Danger of toppling over if bends are negotiated at high speed!
The sweeper could topple over if it is driven round a bend at high speed.
Drive slowly round bends.
Caution when carrying out maintenance or repairs!
In order to prevent the engine from being started unintentionally, proceed as
follows:
n Remove the ignition key.
n Disconnect the battery at the negative terminal.
Caution while handling the battery!
Observe the safety information provided by the battery manufacturer.
Always use batteries and chargers recommended by KÄRCHER, otherwise
your warranty could be rendered invalid.
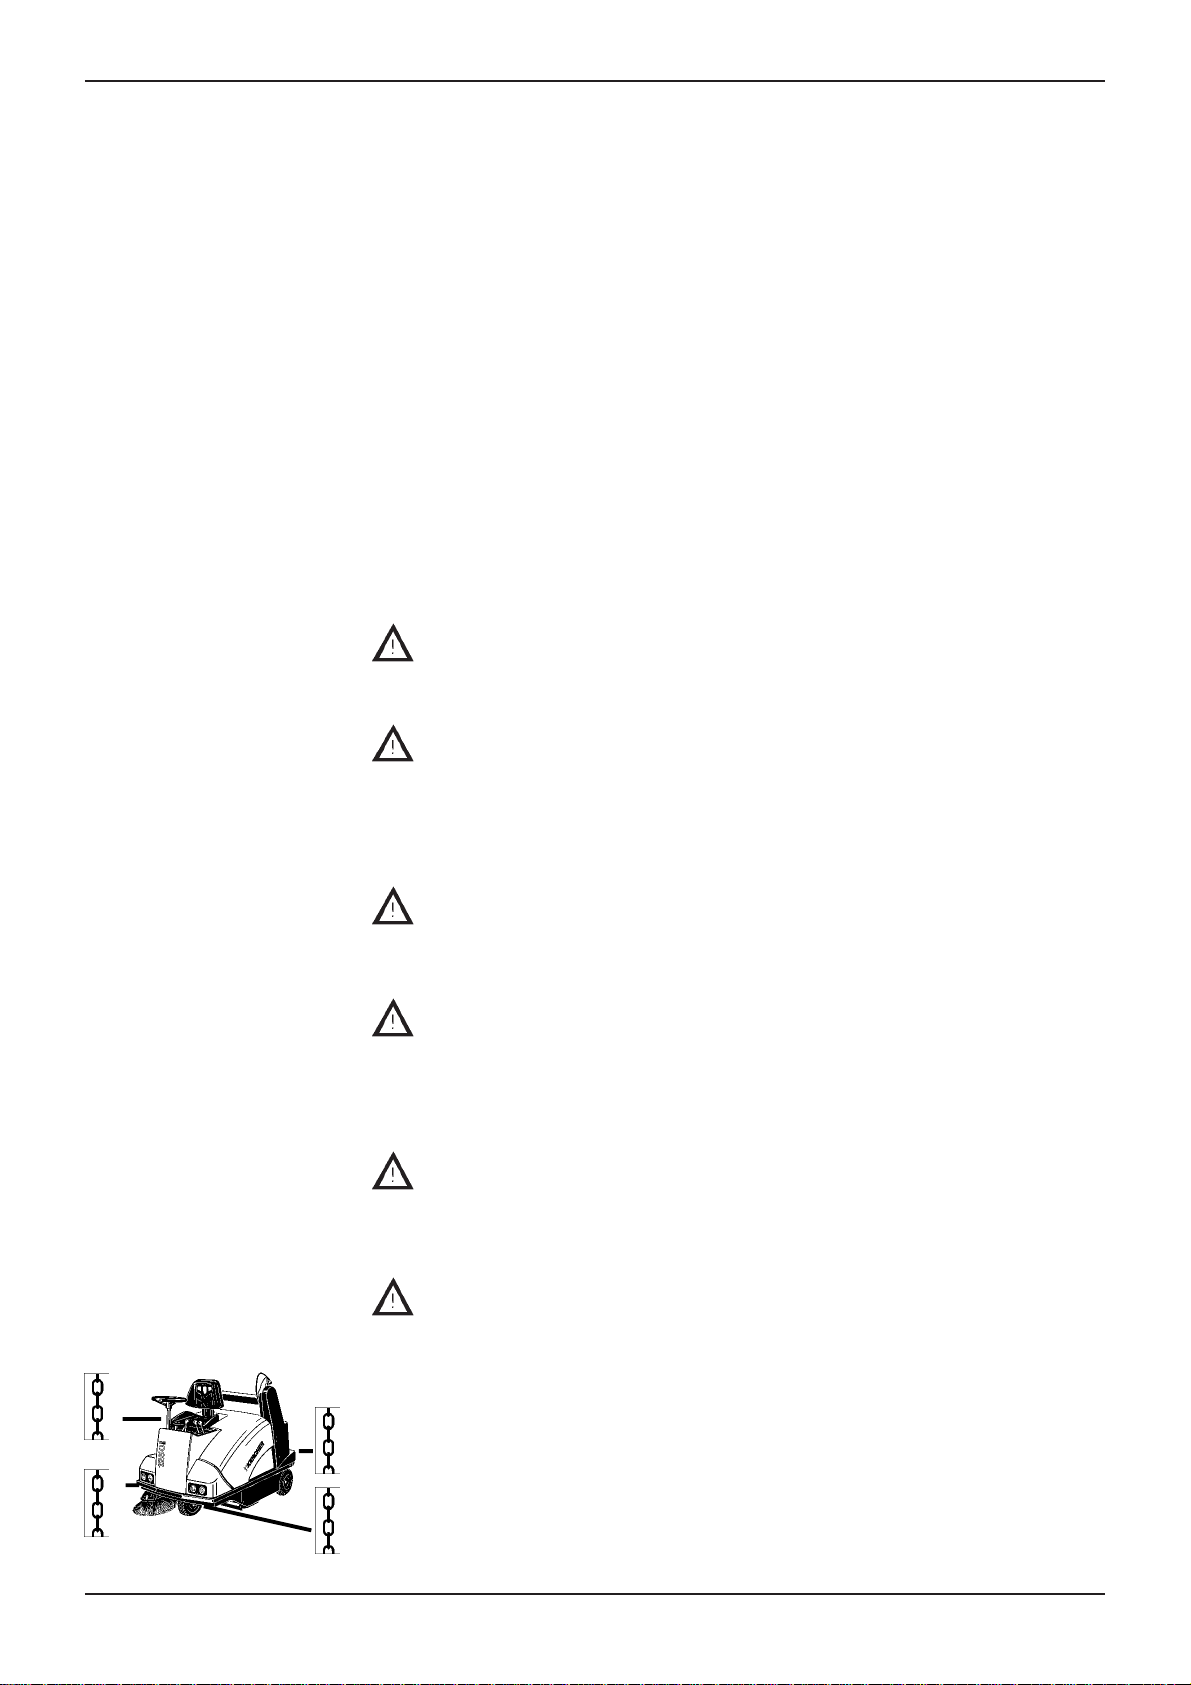
Caution while transporting the sweeper!
Make sure that the sweeper is secured properly if you are going to transport
it to a different location.
Do not use a forklift truck for loading purposes as it could damage the
sweeper.
n Apply the parking brake.
n Secure the sweeper as shown in the illustration, using
– web belts or
– ropes or
– chains.
27
Page 6

English User Instructions KMR 1250 LPG
On behalf of the
environment
Safety Directives
for LPG Motor
Vehicles
Caution, environmental hazard due to exhausted batteries!
Exhausted batteries should not be treated as domestic refuse. Make sure
that are disposed of in an environmentally appropriate manner.
Caution, environmental hazard due to engine oil or hydraulic fluid!
After you have changed the engine oil or hydraulic fluid, take the waste
product to a recognised collection point or to a waste disposal company.
Liquified petroleum gases (fuel gases) are butane and propane or butane/
propane mixtures. They are supplied in special cylinders. The working pressure of these gases is dependent on the outside temperature.
Caution:
Do not treat liquified petroleum gas in the same way as petrol. Petrol vaporizes slowly. Liquified petroleum gas becomes gaseous immediately. The
danger of gas spreading in an enclosed area and igniting is therefore greater
than with petrol.
Therefore:
Be doubly careful; no open flames – ovens, storm lamps, etc. – do not smoke
in storage locations or when carrying out any kind of work on the LPG system.
Obligations of the factory management and the employee
All persons handling liquefied gas have an obligation to acquire the knowledge regarding the characteristics of liquefied gas which is necessary to
execute their work free of danger. This booklet must always accompany the
sweeper.
Maintenance by experts
Fuel gas systems must be regularly checked by an expert, at least once a
year, for their functioning capability and freedom from leaks (as per ZH 1/57).
The inspection must be attested in writing. The bases for the inspection are §
33 and § 37 UVV (Accident Prevention Regulations) “Use of liquefied gas”
(VGB21 (Association of Superpower Station Operators)).
Initial operation/operation
– Gas may only be used from one cylinder. Using gas from several cylin-
ders simultaneously may result in liquified gas flowing from one cylinder
into another; this will create a non-permissible pressure increase when the
cylinder valve on the overfilled cylinder is subsequently closed (comp. B1
of these guidelines).
– When fitting full cylinders, the correct position of the cylinder is denoted by
“top”. Gas cylinders should be replaced carefully. When installing or
removing, the gas outlet connection fitting of the cylinder valve must be
sealed with a hexagon cap nut which is screwed down with a key.
– Never continue using gas cylinders which are leaking. Following all rele-
vant safety precautions, they should be emptied immediately in the open
air by releasing the gas and then marked as leaking.
When delivering or collecting damaged gas cylinders, the distributor or his
agent (filling station attendant or similar) should be informed immediately
in writing of the existing damage.
– When returning damaged gas cylinders, the distributor or his agent (filling
station attendant or similar) should be informed immediately in writing of
the existing damage.
– After connecting the cylinder, check for leaks using a foaming agent.
– The valves should be opened slowly. They must not be opened or closed
with the aid of striking tools.
In the event of liquified petroleum gas catching fire use only carbon dioxi-
de powder-type fire extinguishers or carbon dioxide gas extinguishers.
28
Page 7

KMR 1250 LPG User Instructions English
– The entire LPG system must be monitored continuously to ensure that it is
in a safe operating condition and, in particular, is not leaking. The vehicle
must not be used if the gas system is leaking.
– The cylinder valve must be closed before disconnecting the pipe or hose
connection. The connection nut on the cylinder must be opened slowly
and only slightly at first, otherwise the gas which is still under pressure in
the line will flow out spontaneously.
Caution:
Liquified gas which comes into contact with skin causes frostbite!
– Following disassembly, the lock nut must be screwed firmly onto the
connecting thread.
– Soap water, a soap bubble solution or other foaming agents should be
used when testing for leaks. It is forbidden to inspect the LPG system
using a naked flame.
– The installation directions of the manufacturer should be observed when
replacing individual system parts. The cylinder and main shut-off valves
should be closed when doing this.
– The condition of the electrical system of LPG vehicles should be monito-
red continuously. Sparks may cause explosions if system parts which
convey gas are leaking. If an LPG vehicle has been stored for a prolonged
period the storage room should be thoroughly ventilated before putting the
vehicle or its electrical systems into operation.
– The Industrial and Commercial Association and the responsible Trade
Supervisory Office must be informed immediately of any accidents which
occur in connection with gas cylinders or the liquified gas system. Dama-
ged components must be kept until the investigation has been concluded.
In storage rooms and in repair workshops
– The storage of power gas and liquefied-gas cylinders must be effected in
accordance with the stipulations of TRF 69 (Technical Regulations for
Liquefied Gas).
– LPG motor vehicles must not be stored in the same room with generator
vehicles.
– The cylinder and main shut-off valves should be closed immediately after
putting the motor vehicle into storage.
– The terms of the relevant legislation on garages and the relevant state
building regulations apply to the location and nature of the storage places
for fuel gas motor vehicles.
– The gas cylinders should be stored in special areas which are separate
from the storage rooms. Refer to “Handling and Storage of Filled Tanks” of
the Technical Principles of the “Statutory Regulation on Pressure Gas”.
– The electrical hand lamps which are used in these places must have a
closed, sealed globe and a rigid basket guard.
– When carrying out work in repair workshops the cylinder and main shut-off
valves should be closed and the fuel gas cylinders protected against heat.
Before interrupting or ending work a responsible person should check
whether all valves, in particular cylinder valves, are closed. Work involving
the use of naked flames, in particular welding and cutting work, must not
be carried out in the vicinity of fuel gas cylinders. Fuel gas cylinders must
not be stored in the workshops, even if they are empty.
– The storage rooms and workshops must be well ventilated. It is important
to remember that fuel gases are heavier than air. They concentrate on the
ground, in repair pits and other floor recesses and may form explosive
gas-air mixtures.
29
Page 8

English User Instructions KMR 1250 LPG
Intended usage
Sweeper functions
This sweeper
– is intended for use as a sweeper of dirty surfaces in an outside environ-
ment,
– corresponds to Usage Category “U” for dust that is not injurious to health,
– can only be used on public paths and highways if it has been fitted with
the StVZO Accessory Kit.
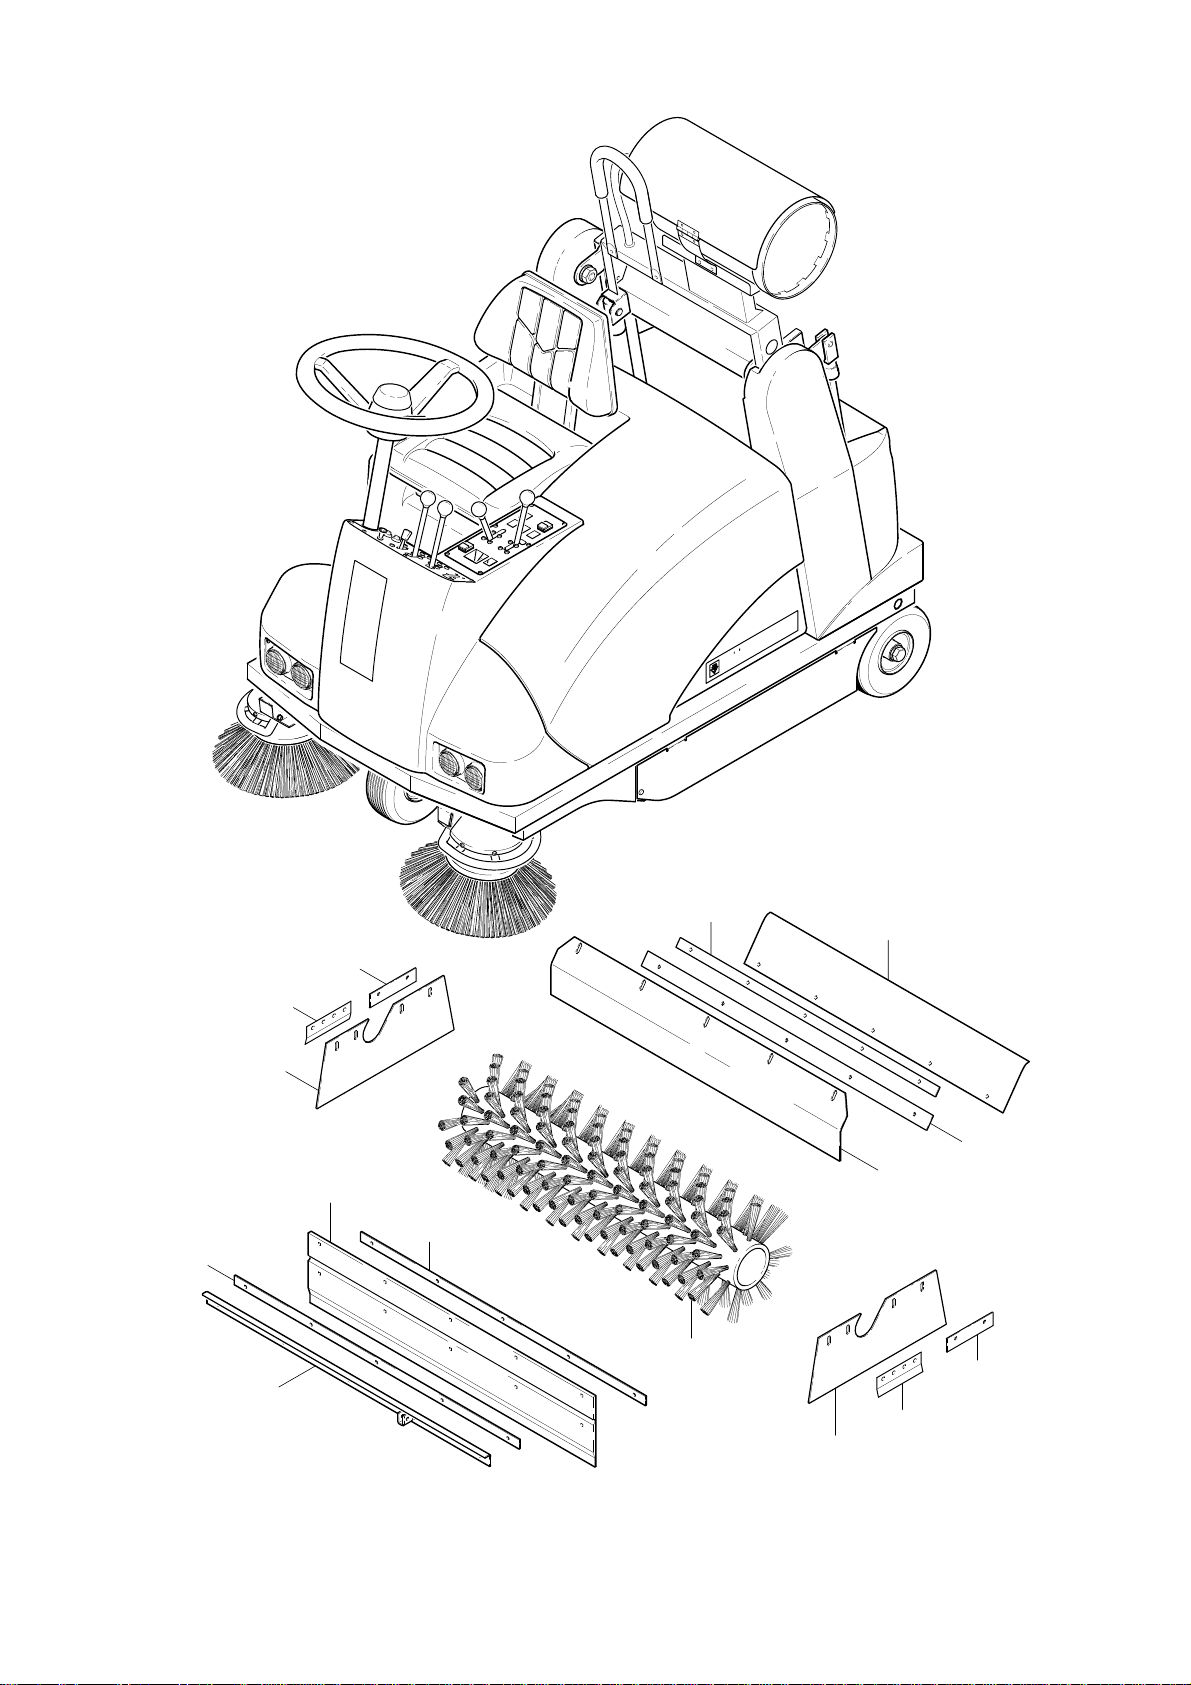
Main components
Drive
– driven by means of 1-cylinder petrol engine which is converted to operate
on liquefied petroleum gas (6.6 kW in compliance with SAE J 6070a)
– stepless hydraulic drive system to the rear wheels
– drive of main brush and side brush by means of belt drive
– hydraulically operated emptying of the waste hopper
– powerful dynamo
Sweeping mechanism
– main brush employing throw-over principle for particularly effective filling
of waste hopper
– floating main brush roller with adjustable height above ground
– quick-change mechanism for main brush
– side brush can be raised and swivels automatically
– bulk waste flap for picking up larger items (e.g. cigarette packs or drink
cans)
Filter system
– integrated dust extraction for main roller by means of radial turbine
– 2 circular filters with 2 x 3 m2 effective surface area
– electric filter cleaner with automatic shaking mechanism
30
Page 9

KMR 1250 LPG User Instructions English
Prior to initial
start-up
Unloading procedure
Do not use a forklift truck for unloading as it could cause damage
!
to the sweeper.
The sweeper has been lashed onto a pallet to ensure that it can be transported safely. The procedure for unpacking the sweeper is as follows:
1. Remove the wooden boards from the pallet and nail them onto the end of
the pallet (in front of the sweeper).
2. Detach the wires holding the sweeper in place at the ends of the pallet.
3. Knock away the blocks used for locking the wheels and use them for the
support of the wooden planks on the left and right.
4. Drive the sweeper off the pallet and down the ramp made from the boards.
5. The side brush has been tied to the chassis for transport. Undo the cord
holding it in place.
Pushing the sweeper
When you want to move the machine without automotive power
n Open engine cover having previously disassembled seat, for which see
Chapter “Open cover”
ç Set free-wheeling lever to position “OFF”
n Release parking brake
n Move sweeper
Note:
Do not move the sweeper over comparatively long stretches or at speeds
over 10 km/h (e.g. when being towed).
After pushing the sweeper
n Put parking brake on.
n Set free-wheeling lever to position “ON”
Open cover
To open the cover the seat has to be removed.
n Pull off spring connector 1 and pull out rod 2.
n Remove driver’s seat
n Open cover to engine by grasping the handle grip under the driver’s seat
and folding the cover up or backwards.
31
Page 10

English User Instructions KMR 1250 LPG
Operating controls
1. Ignition lock
2. Choke
3. Throttle lever
4. Raise / lower RH side brush
5. Raise / lower main brush
6. Raise / lower LH side brush (optional)
7. Switch for two-handed operation
8. Operating hour counter
9. Lights
10. Bulk waste flap
*
Function only operative in conjunction with 7 (two-handed operation).
32
11. Parking brake / Driving brake
12. Tip waste hopper *
13. Raise waste hopper *
14. Lower waste hopper *
15. Filter cleaning
16. Sweeping mode, wet / dry
17. Drive pedal
18. Horn
19. Steering wheel
Page 11

KMR 1250 LPG User Instructions English
Preparing the
sweeper for use
All directions given (left/right, front/rear) are as seen from the driver’s seat.
n Check the oil level in the engine (see Chapter: “Maintenance”).
n Check the amount of fuel in the tank and fill up, if required (see below).
n Check the level of hydraulic fluid and top up, if required (see Chapter:
“Maintenance”).
n Check the air pressure in the tyres (see Chapter: “Maintenance”).
n Inspect the brush roller and remove any string, rope, etc., that may be
caught up in the brushes.
n Check the dust filter. If it is very dirty, operate the shaker to clean it off.
n Empty the waste container.
n Slowly and carefully open shut-off valve of the liquefied-gas cylinder.
Caution: After a long standstill of the sweeper in an enclosed room, or if
a gas smell is apparent, ventilate well.
Adjusting the driver’s seat
The driver’s seat can be adjusted to suit persons of various heights.
n Unhook the rods in the seat tilting device.
ç Undo the 4 screws.
n Move the seat to the desired position.
n Tighten the screws and hook the rods back into the tilting device.
Installing/changing
the gas cylinder
Note:
Observe the safety instructions concerning vehicles driven by liquefied
petroleum gas. Change of cylinder may be undertaken only by persons who
have been instructed on how to do it. Liquefied petroleum gas cylinders may
not be changed in garages or in spaces below ground level.
! Caution
Do not smoke or use a naked flame when changing the cylinder.
– Close the shut-off valve tightly on the liquefied petroleum gas cylinder.
– Hold the connection fitting firmly by the handle and carefully undo the
union nut a little at first.
Note: Union nut has a left-hand thread.
– Unscrew union nut completely and take off hose.
– Undo bent lever closure at the gas cylinder bracket
– Screw covering cap of valve immediately on to the empty cylinder.
– Replace empty cylinder by full one.
– There is a filter in the hose connection. Please check this for impurities
and clean it if necessary.
!Attention:
To ensure low-maintenance operation of the gas installation, the connection
union of the shut-off valve on the liquefied petroleum gas cylinder must stand
up vertically. Only type-tested replacement cylinders of 11kg content are to
be used.
– Close hose connection again as prescribed.
– Carry out an examination for leaks according to the maintenance instruc-
tions (see point 1.).
– Tighten bent lever closure firmly.
Note:
Ice accretion and foamy yellow deposits on the gas cylinder indicate a leakage.
Gas components
System components which are subject to wear or to ageing, pressure regulators, pressure reduction valves, solenoid valve and hoses are to be replaced
after 8 years at the latest (in conformity with ZH 1/455 para. 6.3.).
33
Page 12

English User Instructions KMR 1250 LPG
Starting the
sweeper
Initial driving trials
Carry out initial driving trials in an area where there is plenty of free space
until you are familiar with individual operating controls and their functions.
All indications of direction (right/left, front/rear) are given in relation to the
direction of travel as seen from the driver’s seat.
n Sit down on the driver’s seat.
The engine cannot be started until the driver has sat down (seat contact
switch). As soon as driver gets up from the seat, the engine switches off
(safety cut-out).
n Make sure that
– the LH side brush (if fitted) is in the raised position,
– the RH side brush is in the raised position,
– the main brush is in the raised position.
n Place the speed lever in the middle position (operating speed)
n Turn the ignition key to position “1”
n Press the choke button for 2 - 5 s in order to fill the piping system.
n Put the ignition key in the Start position , the engine starts.
Moving off and sweeping
n Lower the main brush and, if required, the side brush as well
.
n Release the parking brake
– push the lever towards the front.
n Slowly depress the drive pedal
– towards front for travelling forwards
– towards rear for travelling in reverse.
The speed at which the sweeper travels forwards or backwards can be
continuously adjusted by depressing the drive pedal by the appropriate
amount.
Braking
n Take your foot off the throttle pedal and the machine brakes automatically.
Note: Safety!
There is a possibility that the automatic braking action is not sufficient to
bring the machine to a standstill. In this case please use the parking brake or
the reverse pedal as an additional aid!
Stopping the sweeper and switching off
n Release the drive pedal. The sweeper brakes automatically and comes to
a halt.
n Apply the parking brake .
n Set the throttle lever to minimum engine speed (to the rear).
34
n Make sure the main roller and side brush are raised so that
the bristles are not damaged.
n Switching off
– Turn the ignition key counter-clockwise to the 0 position and then
remove it.
After the engine has been switched off, the filter is automatically cleaned for approx. 10 seconds.
n Tightly close the shut-off valve of the gas cylinder immediately after
stopping the engine.
Page 13

KMR 1250 LPG User Instructions English
Cleaning the filter
Emptying the
waste hopper
Automatic cleaning
n Stop the sweeper and switch off the engine.
After the engine has been switched off, the filter is automatically cleaned
for approx. 10 seconds.
Manual cleaning
While the sweeper is operating, the filter should be cleaned approx. every
15–30 minutes (depending on amount of dust).
n Stop the sweeper.
n Set the sweeping mode lever to
n Switch on the electric filter cleaner for approx. 10 seconds .
n Set the sweeping mode lever back to
n Continue with cleaning task as before.
wet
.
dry
.
Important information
Injury hazard!
No person or animal should be allowed to stand in the area traversed by the hopper
while it is being emptied.
Danger of being crushed!
Do not reach into the shafts and linkage of the emptying mechanism.
Do not stand under the hopper.
Risk of sweeper toppling over!
If the sweeper is standing on a slope with a gradient of more than 5%, it could topple
over while the hopper is being emptied. The hopper should therefore only be emptied
when the gradient at the location where the sweeper is standing is less than 5% for
the direction in which it is facing.
n Stop the sweeper.
n Raise the main brush
Note: Following steps can only be performed with the sweeper set to two-handed
operation
n Raise the waste hopper,
When the hopper has reached the required height:
n Tip the hopper outwards, 1 + 3 +
Note:
The hopper must have reached a certain minimum height before it can be tipped out.
The best position for emptying the hopper is when it has been fully extended.
As soon as you release the button for activating the tipping system, the hopper
automatically returns to its original position.
n Lower the hopper,
.
1 + 2 +
1 + 4 +
35
Page 14
English User Instructions KMR 1250 LPG
Typical applications
!
Caution while sweeping!
Do not sweep up packing bands, wires or similar items, otherwise the
sweeping mechanism will be damaged.
Do not sweep any burning/glowing objects.
Sweeping on dry ground
If there is a large amount of rubbish, such as several layers of leaves
n remove the bulk by hand before you start with the sweeper.
For a small amount of normal dirt
on an even surface:
n lower main brush
– set the lever to the middle position (minimum brush wear).
on an uneven surface:
n lower main brush
– set the lever to the lower position (increased brush wear).
n switch on dust extraction
– set the switching mode lever to
n for cleaning right up to the edges – lower the side brush .
At regular intervals:
n clean the filter,
n empty the waste hopper.
Notes: If you are sweeping up fine dust, use the side brush as little as possi-
ble as it will increase the amount of dust stirred up by the sweeper. If the
side brush encounters an obstacle, it automatically swivels back inside the
outer contours of the sweeper. You should nevertheless try to avoid collisions.
While the sweeper is operating, the filter should be cleaned approx. every
15–30 minutes (depending on amount of dust).
dry
Sweeping on damp or wet ground
Follow the same procedure as for sweeping on dry ground. In order to protect
the filter from moisture
n switch off the dust extraction
– set the sweeping mode lever to
wet
.
36
At regular intervals:
n empty the waste hopper.
Page 15

KMR 1250 LPG User Instructions English
Picking up larger items (sticks, tins, etc.)
Caution!
When the bulk waste flap is open, stones or grit could be thrown at the front
by the main brush. Make sure therefore that when you open the flap no
persons, animals or property are endangered.
n Open the bulk waste flap by pulling back the corresponding lever.
n Drive over the items to be picked up, at low speed and with the bulk waste
flap open.
Note:
In order to avoid stirring up dust unnecessarily, close the bulk waste flap
again as soon as possible.
Overcoming obstacles
Obstacles up to 5 cm in height
– can be driven over without any problems. Before you do so, open the bulk
waste flap and raise the main brush.
Shutting the
sweeper down for
longer periods
Obstacles more than 5 cm in height
– can be only be driven over with the aid of a suitable ramp.
If you do not intend to use the sweeper for a longer period of time (e.g.
during the winter), please observe the following.
n It is most important that the main brush and side brush(es) are kept raised
in order to avoid damage to the bristles.
n Clean the interior and exterior of the sweeper.
n Change the engine oil (see Chapter: “Maintenance”).
n Store the sweeper in a protected environment and ensure that it cannot
roll away.
n Remove the ignition key.
n Remove the gas cylinder
n Disconnect the battery.
n Charge the battery with a suitable charger approx. every two months (see
Chapter: “Maintenance”).
37
Page 16

English User Instructions KMR 1250 LPG
Cleaning and care
Maintenance
Before you carry out any cleaning or general maintenance tasks,
n Park the sweeper and switch off the engine.
Cleaning the inside of the sweeper:
You can clean out the inner parts of the sweeper by blowing them through
with compressed air.
Cleaning the outside of the sweeper:
The outside of the sweeper can be wiped off with a damp cloth. Do not use
any aggressive cleaning agents which might cause damage to the plastic
components.
First engine oil change
!
Caution!
When an engine is new, it is subject to increased abrasion. In order that the
engine does not suffer any damage, we recommend that you change the
engine oil and the oil filter after the first 8 operating hours.
Initial inspection after 8 operating hours
!
Caution!
In order to ensure that your sweeper functions safely and reliably, it should
undergo an initial inspection after approx. 8 operating hours. The inspection
should be carried out by an authorised service agent.
n Check all Bowden cables and make adjustments where necessary.
n Change the engine oil.
n Check that there are no leaks in the hydraulic system and all components
function correctly.
n Check that the parking brake functions correctly.
n Check the air pressure in the tyres (correct level: 6 bar).
n Check the gas piping system for leaks.
Daily maintenance
n Check the engine oil level.
n Check the tyre pressure (correct level: 6 bar).
n Inspect the brush roller and remove any string, rope, etc., that may be
caught up in the brushes.
n Check the dust filter. If it is very dirty, operate the shaker to clean it off.
n Empty the waste container.
n Check gas hose for damage and threaded joints in the piping for firm
seating.
38
Maintenance intervals
Keep to the service intervals set out in the maintenance booklet so that your
sweeper functions reliably and you retain the full benefit of the warranty.
The maintenance booklet (Order-no. 5.950-533) can be found in the tool
compartment on the sweeper (under the bonnet).
The necessary maintenance tasks should be carried out by an authorised
service agent.
Page 17

KMR 1250 LPG User Instructions English
!
Safety information applicable to maintenance tasks
Before you begin any maintenance tasks, please read the enclosed leaflet
Safety Information No. 5.956-250.
!
Caution! Make sure engine cannot be started unintentionally.
In order to prevent the engine from being started unintentionally, proceed as
follows after you have parked the sweeper.
n Pull out the ignition key.
n Open the unit cover.
n First of all disconnect the cable from the negative terminal (–), then dis-
connect the positive terminal (+).
Note:
When reconnecting the battery, proceed in reverse order – connect the
positive terminal (+) first of all, then the negative terminal (–).
The necessary maintenance tasks or daily inspections can be carried out with
the bonnet raised.
Maintenance tasks
!
Injury hazard!
Do not open the bonnet until the motor has been switched off.
!
Burns hazard!
Take care not to touch the exhaust when you open the bonnet.
!
Injury hazard!
ç If you need to work under the waste container while it is in the raised
position, you must first of all secure the container to prevent it from drop-
ping down unintentionally:
Checking tyre pressures
n Park the sweeper on a level surface.
n Check the air pressure in each tyre and correct it where necessary.
Air pressure for front and rear tyres = 6 bar.
Checking the oil level
n Park the sweeper on a level surface.
ç Pull out the dipstick.
n Wipe the dipstick clean and re-insert it in the filler hole.
n Pull out the dipstick again and check the result.
The oil level should be between the MIN and MAX marks.
If the oil level is below MIN – top up with oil.
If the oil level is above MAX – drain off the surplus.
n Insert the dipstick back into the filler hole.
Filling up with oil
n Pour engine oil type SAE 15 W 40 into the hole for the dipstick.
39
Page 18

English User Instructions KMR 1250 LPG
Changing the engine oil
Caution! Danger to the environment from engine oil
After carrying out an oil change, ensure that the waste oil is passed to an
appropriate collection point or official disposal company.
Caution,
n Run the engine until it reaches its normal operating temperature.
n Make sure the sweeper is standing on a level surface.
n Open the unit cover.
n Place a drip pan under the engine.
ç Hold the end of the drain tube over the drip pan and let the old oil run out.
n Close off the end of the drain tube again.
n Pour engine oil into the filler hole.
Capacity = 1.1 litres
n Check the oil level with the dipstick –
n Wipe up any oil spillage and dispose of the waste oil appropriately.
see “Checking the oil level”
.
Cleaning or replacing the air cleaner
Do not run the engine without an air cleaner otherwise this will
lead to increased wear on the engine
1
2
The air cleaner must be washed out more frequently if the engine is run in
particularly dusty environment.
Do not wash the air cleaner in petrol or a cleaning solvent with a
low flash point.
n Paper insert 1: Replace the insert if it is very dirty. Otherwise, blow com-
pressed air through the insert from the inside to out or knock it against a
hard surface. Do not brush it off, otherwise the dirt will be compacted
between the fibres.
n Foam insert 2: Wash out the insert in a solution of washing-up liquid and
warm water. Rinse it out and allow it to dry out thoroughly. Immerse the
clean insert in engine oil and squeeze out the excess fluid. If too much oil
is left in the insert, smoke will be given off by the engine when it is next
started.
Check gas installation
n Check the gas hose for damage daily and the threaded joints in the piping
for firm seating.
n Half-yearly or every 100 operating hours check the piping system for
leakage.
n Annually check the gas installation, clean the evaporator/pressure regula-
tor and replace the seals.
n Check that the CO content in the exhaust gas is < 0.5 % when idling and
at full load.
40
Checking the hydraulic system
n Carry out a visual inspection. If there is any loss of fluid from the hydraulic
unit, cylinder or hoses, call KÄRCHER Customer Service.
Page 19
KMR 1250 LPG User Instructions English
Battery
Safety information which must be observed when handling batteries.
Comply with the user instructions and ensure that these are displayed at the
charging station. Before the operator carries out any work on batteries, he/
she must have received proper instruction from a suitably qualified person.
Wear safety goggles and protective clothing when working on batteries.
Observe accident prevention regulations, as well as DIN VDE 0510, VDE
0105 Part 1.
Smoking is forbidden!
Make sure that there are no naked flames, other source of heat or sparks in
the proximity of the battery, otherwise there is a danger of explosion or fire.
If electrolyte comes into contact with skin or eyes, rinse the affected area
with plenty of clean water. The metal parts of battery cells are permanently
live. Therefore do not place any tools or other objects on top of the battery.
Explosion and fire hazard! Avoid short-circuits.
Warning! The metal parts of battery cells are permanently live. Therefore do
not place any tools or other objects on top of the battery.
Electrolyte is highly corrosive. Under normal operating conditions it is not
possible for anything to come into contact with the electrolyte. If the battery
housing is destroyed, the bound electrolyte that leaks out is just as corrosive as liquid electrolyte.
Return to manufacturer!
Exhausted batteries bearing this symbol are a re-usable resource which
should be recycled accordingly. Exhausted batteries that are not intended to
be recycled must be disposed of as hazardous waste in compliance with all
relevant regulations.
Checking the level of electrolyte in the battery
Note: Applies only to batteries that are NOT maintenance-free.
Check the level of electrolyte in batteries filled with acid. Make sure the
battery is fully charged before you carry out the check. If required:
n Top up each cell with distilled water until the lead plates are covered by
approx. 1 cm of liquid.
Charging the battery
Note:
Only use a regulated charger that is suitable for use with starter batteries and
is capable of delivering a charging current of 4 - 6 A.
Only use a battery charger with a certification mark!
Only undertake the charging procedure in dry, weather-protected areas.
n Stop the sweeper and remove the ignition key.
n Tilt the seat forwards.
n Connect the positive terminal (red clamp) to the charger.
n Connect the negative terminal (black clamp) to the charger.
n Connect the charger to the mains and switch it on. The charging time is
specified by the manufacturer of the charger.
41
Page 20

English User Instructions KMR 1250 LPG
Replacing the sealing skirts
The sealing skirts fulfil an important function. They retain the partial vacuum
in the area round the brushes which is essential so that the sweeper can
function properly. They ensure that sweeping can take place without clouds
of dust being formed at the same time. If the sealing skirts are damaged or
worn out, they must be replaced immediately.
n Park the sweeper and switch off the engine.
n Remove the retaining screws and detach the sealing skirts.
n Fit new skirts, and align them as follows:
The side skirts should be adjusted so that they clear the ground by 1–3
mm.
The rear skirt should be adjusted so that they clear the ground by 1–5
Direction of travel
mm.
n The front skirt cannot be adjusted. Replace the skirt as soon as you see
signs of excessive wear.
n Tighten the retaining screws.
Replacing the side brush
n Park the sweeper and switch off the engine.
n Raise the side brush.
n Remove the three hex-socket bolts (5 mm Allen key).
n Detach the side brush.
n Push the new side brush onto the drive pin.
n Refit and tighten the three hex-socket bolts.
Replace light unit
n Stop the machine and turn it off
n Take out the ignition key
n Undo 6 screws S on the panel
n Remove the panel 1
n Unscrew the Phillips screw between the supports of the lamp holder on
the defective headlight
n Turn the lens of the defective headlight anti-clockwise about 1/4 of a turn
2 and take out reflector housing 3
n Replace light unit
n Insert reflector housing with new light unit in panel again from below and
secure with about 1/4 of a turn clockwise. Make certain it engages proper-
ly, the label
HALOGEN on the headlight glass must be able to be read horizontally 4
n Screw in again the screw between the supports, then secure the panel
with the 6 screws.
42
Page 21

KMR 1250 LPG User Instructions English
Adjusting the sweeping pattern
n Open the unit cover and secure it in place.
ç The sweeping pattern can be altered by turning the central adjusting knob.
– To increase size of sweeping pattern: turn adjusting knob counter-
clockwise (towards +).
– To reduce size of sweeping pattern: turn adjusting knob clockwise
(towards –).
After any adjustments have been made, check the sweeping pattern.
n Drive the sweeper onto a dusty surface and apply the parking brake.
n Lower the main brush (lever set to middle position) and allow it to brush
the floor for several seconds.
n Raise the main brush and drive backwards a short distance with the bulk
waste flap open (first release the parking brake).
n The width of the sweeping pattern should be 30–50 mm.
Note:
The shape of the sweeping pattern should not be trapezoidal. If it is, call
customer service.
Brush roller seen from
above
Replacing the main brush roller
n Park the sweeper and switch off the engine
n Lower the brush roller.
n Open the RH side flap 1 (seen in direction of travel).
n Undo the retaining bolt on the lower forked head 2 and swivel the push
rod towards the rear.
n Unscrew the knurled knob 3.
n Remove the oscillating linkage 4.
n Open the flap over the end of the brush roller 5 (turn-lock fastener).
n Pull out the brush roller 6.
n Screw in the knob for adjusting the sweeping pattern as far as it will go
(clockwise, towards –).
n Fit the new brush roller in reverse order to the removal procedure.
Note:
Make sure the bristles point in the right direction – see illustration.
Direction of travel
n Set up the sweeping pattern by turning the adjusting knob –
the sweeping pattern”.
see “Adjusting
43
Page 22

English User Instructions KMR 1250 LPG
Replacing fuses
n Park the sweeper and switch off the engine.
n Open the unit cover.
n Replace blown fuses with ones with the same rating.
Note:
If a fuse blows repeatedly, this indicates a fault somewhere in the electrical
system. Please call Customer Service.
Replacing the dust filters
The dust filters should be inspected for damage every 50 operating hours.
A significant build-up of dust at the air outlet from the fan is a sign of a filter
that is not fitted properly or is defective.
n Raise the hopper half way 1.
n Release the catches on the filter box 2.
n Swivel the filter box forwards and lift it off 3.
n Open out the handle, pull it outwards and turn it through 90º (make sure it
engages) 4.
n Remove the filter cartridge 5.
n Insert a new filter cartridge (pins should fit into the holes) 6.
n Turn the handle back to its original position and make sure it locks in
place.
n Mount the filter box and engage the catches.
44
Page 23

KMR 1250 LPG User Instructions English
Troubleshooting
Problem Possible cause Remedy
Engine does not start
Sweeper does not move
Brushes do not rotate
No dust extraction
Battery is flat Recharge or replace battery
Gas cylinder empty Replace gas cylinder
Gas cylinder closed Open gas cylinder
Engine oil level is too low Top up with oil
Lever (bypass valve) on
converter transmission is open
V-belt has snapped Call Customer Service
V-belt is loose Check belt tension and adjust
Main brush or side brush has
been jammed by packing bands
or similar item
Fan is not working Check V-belt
Filter is blocked Clean or replace filters
Push lever in opposite
direction to travel – see
“Pushing the sweeper by
hand”
as required
Remove blockage
Poor sweeping results
Dust is stirred up during
sweeping
Lifting mechanism for
emptying hopper does not
work
Sweeper travels forwards
or backwards even though
drive pedal is not pressed
Brushes are worn down Replace brushes
Waste hopper is full Empty waste hopper
Incorrect sweeping pattern Adjust sweeping pattern
Worn out seals on sweeper, filter
not fitted properly or defective
Fuse has blown Replace fuse or inform
Defective switch Inform Customer Service
Defective hydraulic unit Inform Customer Service
Neutral position not set up
correctly
Replace defective seals; fit
filter correctly or replace it
Customer Service if fuse
blows repeatedly
Inform Customer Service
45
Page 24

English User Instructions KMR 1250 LPG
Technical specifications
Dimensions and weights
Length 1.650 mm
Width 1.000 mm
Height 1.750 mm
Unladen weight (ready for operation 4 5 0 kg
Max. permissible overall weight 60 0 kg
Driving and sweeping performance
Max. travelling speed 6 km/h
Max. climbing ability/gradient 1 8 %
Effective sweeping width
without side brush 75 0 mm
Effective sweeping width
with 1 side brush 1.000 mm
Effective sweeping width
with 2 side brushes 1.300 mm
Area rating (theoretical)
without side brush 6.000 m²/h
with 1 side brush 8.000 m²/h
with 2 side brushes 10.400 m²/h
Waste container
Theoretical capacity 100 L
Max. usable capacity 80 L
Lifting height 1.430 mm
Filter surface area 6 m²
Sweeping unit
Brush roller with V-shaped rows of bristles
Diameter of brush roller 2 8 5 mm
Diameter of side brush 45 0 mm
Vehicle tyres
Pneumatic, diameter 30 0 mm
4.00-4
Air pressure, front 6 bar
Air pressure, rear 6 bar
Lighting
Light unit DIN 49848
HS3 6V/2,4 W
Engine oil
SAE15W40 1,1 L
Battery 1 2 Volt
44 Ah
Starter electric
Drive system
Maintenance-free, fully enclosed hydrostatically
driven axle with differential
Hydraulic fluid
Class DIN HVLP 51524/2
46 c St /40 °C
Capacity * 1,4 L
* We recommend BARTRAN HV 46 Hydraulic Fluid.
Protection class IP X3
Ambient conditions
Temperature -5 to + 40 ° C
Air humidity, not wet with dew 0 - 90 %
Operating cycle
Under favourable conditions, the sweeper has an
operating cycle of 12 hours with a full fuel tank at
the start. The actual time is dependent upon several
factors:
– surface structure of the ground and how level it is
– how well the sweeper has been maintained
– type of brush roller and its degree of wear.
Noise emission
Sound level (EN 60704-1) 7 9 dB(A)
Guaranteed noise level
(2000/14/EC) 101 dB(A)
Machine vibration
Rated vibration value (ISO 5349)
Upper limb measurements < 2,5 m/s²
Feet/seating area < 2,5 m/s²
Engine
Model Honda GX 270
Type 4-stroke
Cylinders 1
Capacity 270 cm³
Output (9 HP at 3600 r.p.m.) 6,6 kW
Fuel, liquefied gas 1 1 kg
46
Page 25

KMR 1250 LPG
1.091-106.0
1.091-116.0
6.654-116.0
7.654-002.0
6.348-316.0
6.348-337.0
>>MICROMP<< LADETECHNIK
24V 30A Wa
6.618-090.0
KMR
0
6.414-532.0
6.491-566.0
6.435-288.0
5
2
1
KARCHER
6.435-295.0
6.435-331.0
6.435-289.0
6.905-986.0
7.312-003.0
7.313-003.0
7.306-501.0
7.651-002.0
6.651-382.0
6.491-596.0
6.682-378.0
6.435-331.0
6.435-295.0
6.303-058.0
6.303-125.0
5.031-452.0
7.644-017.0
7.644-007.0
6.644-277.0
7.644-018.0
06/99 - S 1/2
Page 26
KMR 1250 LPG
1.091-106.0
1.091-116.0
KMR
0
5
2
1
KARCHER
5.190-083.0
5.365-215.0
5.190-084.0
4.038-524.0
5.190-055.0
5.394-439.0
5.190-082.0
5.190-089.0
5.365-216.0
5.031-378.0
5.190-084.0
6.905-982.0
5.190-082.0
5.190-083.0
5.365-215.0
06/99 - S 2/2
Page 27

DECLARACIÓN DE CONFORMIDAD DE LA UNIÓN EUROPEA
Por la presente declaramos los abajo firmantes que la máquina
designada a continuación cumple, tanto por su concepción y clase de
DÉCLARATION DE CONFORMITÉ EUROPÉENNE
Par la présente, nous déclarons que la machine ci-après répond, de par
sa conception et sa construction ainsi que de par le modèle que nous
construcción como por la ejecución que hemos puesto en circulación,
avons mis sur le marché, aux exigences de sécurité et d’hygiène en
las normas fundamentales de seguridad y protección de la salud
formuladas en las directivas comunitarias correspondientes.
La presente declaración pierde su validez en caso de alteraciones en la
máquina efectuadas sin nuestro consentimiento explícito.
Producto: Barredora de suelos
Modelo: 1.091-xxx
Directivas comunitarias aplicables:
Directiva comunitaria sobre máquinas (98/37/EG)
Directiva sobre compatibilidad electromagnética (89/336/EWG)
vigueur de la directive européenne.
En cas de modification de la machine effectuée sans notre accord, cette
déclaration sera caduque.
Produit: Balayeuse / machine autoporteuse
Type: 1.091-xxx
Directives européennes en vigueur:
Directive européenne sur les machines (98/37/EG)
Directive européenne sur la compatibilité électromagnétique
(89/336/EWG) modifiée par 91/263/EWG, 92/31/EWG, 93/68/EWG
Directive CE relative aux émissions sonores (2000/14/UE)
modificada mediante 91/263/EWG, 92/31/EWG, 93/68/EWG
Normativa UE sobre emisiones de ruidos (2000/14/EU)
Normes harmonisées appliquées:
DIN EN 60335-1, DIN EN 60335-2-72, DIN EN 55 014-2:1997
Normas armonizadas aplicadas:
DIN EN 60335-1, DIN EN 60335-2-72, DIN EN 55 014-2:1997
Normes nationales appliquées:
CISPR 12
Normas nacionales aplicadas:
CISPR 12
Proceso de valoración de conformidad utilizado
Procédure d’analyse de conformité utilisée
Annexe V
Anexo V
Nivel de potencia acústica medido:
99 dB(A)
Niveau de puissance sonore mesuré:
99 dB(A)
Niveau de puissance sonore garanti:
Nivel de potencia acústica garantizado:
101 dB(A)
101 dB(A)
La conformité permanente des appareils de série avec les exigences
consignées dans les directives actuelles de la CE et avec les normes
Mediante una serie de medidas internas, queda asegurado que los
aparatos y equipos de serie cumplan siempre las exigencias formuladas
appliquées est garantie par des mesures internes.
Les soussignés agissent par ordre et avec les pleins pouvoirs de la
en las directivas comunitarias actuales y en las normas
correspondientes a aplicar.
Los firmantes actúan autorizados y con poder otorgado por la dirección
Direction commerciale.
de la empresa
EU DECLARATION OF CONFORMITY
We hereby declare that the equipment described below conforms to the
relevant fundamental safety and health requirements of the appropriate
EU Directives, both in its basic design and construction as well as in the
version marketed by us.
This declaration will cease to be valid if any modifications are made to
the machine without our express approval.
Product: Sweeper / Ride-on unit
Model: 1.091-xxx
Relevant EU Directives:
EU Machinery Directive (98/37/EG)
EG - KONFORMITÄTSERKLÄRUNG
Hiermit erklären wir, daß die nachfolgend bezeichnete Maschine
aufgrund ihrer Konzipierung und Bauart sowie in der von uns in Verkehr
gebrachten Ausführung den einschlägigen grundlegenden Sicherheits-
und Gesundheitsanforderungen den unten aufgeführten EG-Richtlinien
entspricht. Bei einer nicht mit uns abgestimmten Änderung der
Maschine verliert diese Erklärung ihre Gültigkeit.
Produkt:Kehrsaugmaschine, Aufsitzgerät
Typ: 1.091-xxx
Einschlägige EG-Richtlinien
EG-Maschinenrichtlinie (98/37/EG)
EU Directive on Electromagnetic Compatibility (89/336/EWG)
amended by 91/263/EWG, 92/31/EWG, 93/68/EWG
EU guideline on noise emissions (2000/14/EU)
Harmonised standards applied:
DIN EN 60335-1, DIN EN 60335-2-72, DIN EN 55 014-2:1997
Relevant EU Directives:
CISPR 12
EG-Richtlinie Elektromagnetische Verträglichkeit (89/336/EWG)
geändert durch 91/263/EWG, 92/31/EWG, 93/68/EWG
EG-Richtlinie über Geräuschemissionen (2000/14/EU)
Angewandte harmonisierte Normen:
DIN EN 60335-1, DIN EN 60335-2-72, DIN EN 55 014-2:1997
Angewandte nationale Normen:
CISPR 12
Applied conformity valuation method
Appendix V
Measured noise level:
99 dB(A)
Guaranteed noise level:
101 dB(A)
Appropriate internal measures have been taken to ensure that series-
production units conform at all times to the requirements of current EU
Directives and relevant standards.
Angewandtes Konformitäts- Bewertungsverfahren
Anhang V
Gemessener Schallleistungspegel:
99 dB(A)
Garantierter Schallleistungspegel:
101 dB(A)
Prüfgrundsätze des Hauptverbandes der gewerblichen
Berufsgenossenschaft Kehrsaugmaschinen
Es ist durch interne Maßnahmen sichergestellt, daß die Seriengeräte
The signatories are empowered to represent and act on behalf of the
company management.
immer den Anforderungen der aktuellen EG-Richtlinien und den
angewandten Normen entsprechen.
Die Unterzeichnenden handeln im Auftrag und mit Vollmacht der
Geschäftsführung.
Page 28

5.957-501 (01/02)
Alfred Kärcher Kommanditgesellschaft.
Sitz Winnenden. Registergericht: Waiblingen, HRA 169.
Persönlich haftende Gesellschafterin. Kärcher Reinigungstechnik
GmbH. Sitz Winnenden, 2404 Registergericht Waiblingen, HRB
Geschäftsführer:
Dr. Bernhard Graf, Hartmut Jenner, Georg Metz,
Thomas Schöbinger
Alfred Kärcher GmbH & Co.
Cleaning Systems
Alfred-Kärcher-Straße 28-40
P.O.Box 160
D-71349 Winnenden
Tel.:++49 7195 14-0
Fax :++49 7195 14-2212
FÖRSÄKRAN OM ÖVERENSSTÄMMELSE
Härmed försäkrar vi att den enligt nedan angivna maskinen till
konstruktion, byggnadssätt och i av oss levererat utförande motsvarar
tillämpliga baskrav beträffande säkerhet och hälsa enligt EU-direktiven.
Vid ändringar på maskinen som icke avtalats med oss upphör denna
försäkran att gälla.
Produkt: Sopmaskin / Sopåkmaskin
Typ: 1.091-xxx
Tillämpliga EU-direktiv:
EG maskindirektiv (98/37/EG)
EG direktiv för elöverkänslighet (89/336/EWG)
ändrat genom 91/263/EWG, 92/31/EWG, 93/68/EWG
EG-direktiv över ljudemissioner (2000/14/EU)
Tillämpade harmoniserade normer:
DIN EN 60335-1, DIN EN 60335-2-72, DIN EN 55 014-2:1997
Tillämpade nationella normer:
CISPR 12
Använt förfarande för utvärdering av överensstämmelse
Bilaga V
Uppmätt ljudeffektsnivå:
99 dB(A)
Garanterad ljudeffektsnivå:
101 dB(A)
Vi har genom interna åtgärder säkerställt, att serietillverkade maskiner
alltid motsvarar aktuella EU-direktiv och tillämpade normer.
De undertecknade agerar på uppdrag av och med fullmakt av
företagsledningen.
EU-KONFORMITETSERKLÆRING
êê
ê
åå
åê
å
òò
ò
áá
áò
ôô
ôá
çç
çô
ôô
ôç
üü
üô
ôô
ôü
óó
óô
éé
éó
ðð
ðé
ð
çç
ç
óó
óç
ùù
ùó
ëë
ëù
þþ
þë
Ä
ÄÄ
Äþ
Vi erklærer herved at maskinen som er beskrevet nedenfor, i
konstruksjon og utførelse tilsvarer markedsførte modell og er i
overensstemmelse med de gjeldende og grunnleggende sikkerhets- og
helsekrav i EU-direktivet.
Denne erklæring mister sin gyldighet dersom maskinen endres uten
etter avtale med oss.
Produkt: Feiemaskin / Rider
Type: 1.091-xxx
Gjeldende EU-direktiv:
EU-direktiv for maskiner (98/37/EG)
EU-direktiv for elektromagnetisk toleranse (89/336/EWG)
endret ved 91/263/EWG, 92/31/EWG, 93/68/EWG
EU-direktiv om støyemisjoner (2000/14/EU)
Anvendte overensstemmende normer:
DIN EN 60335-1, DIN EN 60335-2-72, DIN EN 55 014-2:1997
Anvendte nasjonale normer:
CISPR 12
Anvendt metode for vurdering av samsvar
Tillegg V
Målt lydeffektnivå:
99 dB(A)
Garantert lydeffektnivå:
101 dB(A)
Gjennom interne tiltak er det sikret at serieproduserte maskiner alltid er i
overensstemmelse med kravene i de aktuelle EU-direktiver og anvendte
normer.
Undertegnede handler etter oppdrag og med fullmakt fra ledelsen.
íí
í
ïï
ïí
ôô
ôï
ô
áá
á
éé
éá
ãã
ãé
ã
xx
x
çç
ç
xx
xx
xx
xx
óó
óç
--
-x
ÝÝ
Ýó
11
1-
èè
èÝ
è
99
91
åå
å
00
09
..
.0
ìì
ìå
11
1.
ì
ýý
ý
ïï
ïý
ìì
ìï
óó
óì
éé
éó
ññ
ñé
áá
áñ
èè
èá
áá
áè
êê
êá
ê
ÞÞ
Þ
íí
íÞ
áá
áí
÷÷
և
çç
ç÷
ÌÌ
Ìç
Ì
//
/
áá
á/
ðð
ðá
ýý
ýð
ïï
ïý
êê
êï
óó
óê
ó
ÞÞ
Þ
êê
êÞ
éé
éê
íí
íé
áá
áí
÷÷
և
çç
ç÷
ÌÌ
Ìç
Ì
::
:
íí
í:
üü
ü
üü
üí
úú
úü
ãã
ãü
ïï
ïú
çç
çã
ññ
ñï
ää
äç
ЕмеЯт, дзлюнпхме ме фзн рбспэуб, ьфй фп мзчЬнзмб рпх
чбсбкфзсЯжефбй рбсбкЬфщ, льгщ фпх учедйбумпэ кбй фпх
фсьрпх кбфбукехЮ т, ьрщт кбй льгщ фзт рбсбллбгЮт рпх
дйбфЯиефбй брь мбт уфзн бгпсЬ, бнфбрпксЯнефбй уфйт учефйкЭт
вбуйкЭт брбйфЮуейт буцблеЯбт кбй хгеЯбт фщн Пдзгйюн ЕК. Уе
ресЯрфщуз бллбгюн уфп мзчЬнзмб чщсЯт рспзгпэменз
ухнненьзуз мбжЯ мбт, рбэей нб йучэей з рбспэуб дЮлщуз.РРР
Ðñ
ï
ïä
ïï
::
:
ÊÊ
Ê:
ÅÅ
ÅÊ
Å
òò
ò
åå
åò
ßß
ßå
ãã
ãß
çç
çã
ää
äç
ÏÏ
Ïä
Ï
òò
ò
::
:1
ýý
ýò
òò
ò:
êê
êý
éé
éê
ïï
ïò
ôô
ôé
ðð
ðï
åå
åô
÷÷
֌
ýý
ýð
Ô
Ó
ÔÔ
Ôý
ÓÓ
Ó÷
ПдзгЯб ЕК учефйкЬ ме фйт мзчбнЭт (98/37/EG)
ПдзгЯб ЕК ресЯ злекфспмбгнзфйкЮт ухмвбфьфзфпт (89/336/EWG)
::
:
ßß
ß:
åå
åß
èè
èå
óó
óè
ïï
ïó
ìì
ìï
ññ
ñì
áá
áñ
öö
öá
åå
åö
å
íí
í
õõ
õí
ïï
ïõ
÷÷
֕
ÝÝ
Ý÷
Ý
õõ
õ
ïï
ïõ
ðð
ðï
ð
áá
á
ðð
ðá
õõ
õð
ôô
ôõ
üü
üô
ññ
ñü
ðð
ðñ
ð
áá
á
íí
íá
ÝÝ
Ýí
ìì
ìÝ
óó
óì
éé
éó
íí
íé
ïï
ïí
ìì
ìï
ññ
ñì
áá
áñ
íí
íá
рпх фспрпрпйЮизке ме фзн ПдзгЯб 91/263/EWG, 92/31/EWG,
93/68/EWG
ПдзгЯб ЕК ресЯ ЕкрпмрЭт ипсэвщн (2000/14/EЕ)ЕЕЕ
Åí
DIN EN 60335-1, DIN EN 60335-2-72, DIN EN 55 014-2:1997ÅÅÅ
::
:
ßß
ß:
åå
åß
èè
èå
óó
óè
ïï
ïó
ìì
ìï
ññ
ñì
áá
áñ
öö
öá
åå
åö
å
íí
í
õõ
õí
ïï
ïõ
÷÷
֕
ÝÝ
Ý÷
Ý
õõ
õ
ïï
ïõ
ðð
ðï
ð
áá
á
ðð
ðá
õõ
õð
ôô
ôõ
üü
üô
ññ
ñü
ðð
ðñ
ð
ÜÜ
Ü
êê
êÜ
éé
éê
íí
íé
èè
èí
Åè
CISPR 12ÅÅÅ
òò
ò
çç
çò
óó
óç
ùù
ùó
öö
öù
ññ
ñö
üü
üñ
ìì
ìü
ìì
ìì
õõ
õì
óó
óõ
ó
òò
ò
çç
çò
óó
óç
çç
çó
ãã
ãç
üü
üã
ëë
ëü
ïï
ïë
éé
éï
îî
îé
áá
áî
á
òò
ò
ïï
ïò
ää
äï
ïï
ïä
èè
èï
ÝÝ
Ýè
ìì
ìÝ
ì
áá
á
óó
óá
ßß
ßó
åå
åß
èè
èå
óó
óè
ïï
ïó
ìì
ìï
ññ
ñì
áá
áñ
öö
öá
Åö
РбсЬсфзмб V
МефсзиеЯуб уфЬимз бкпхуфйкЮт рЯеузт:
99 dB(A)
ДйбуцблйумЭнз уфЬимз бкпхуфйкЮт рЯеузт:
101 dB(A)
Ме лзциЭнфб еущфесйкЬ мЭфсб Эчей еобуцблйуиеЯ, ьфй пй
ухукехЭт уейсЬт кбфбукехЮт бнфбрпксЯнпнфбй рЬнфб уфйт
брбйфЮуейт фщн ерйкбЯсщн пдзгйюн ЕК кбй уфб ецбсмпуиЭнфб
рсьфхрб. Пй хрпгсЬцпнфет енесгпэн ме енфплЮ кбй кбфьрйн
еопхуйпдьфзузт фзт ГенйкЮт Дйеэихнузт.
 Loading...