

Page 1
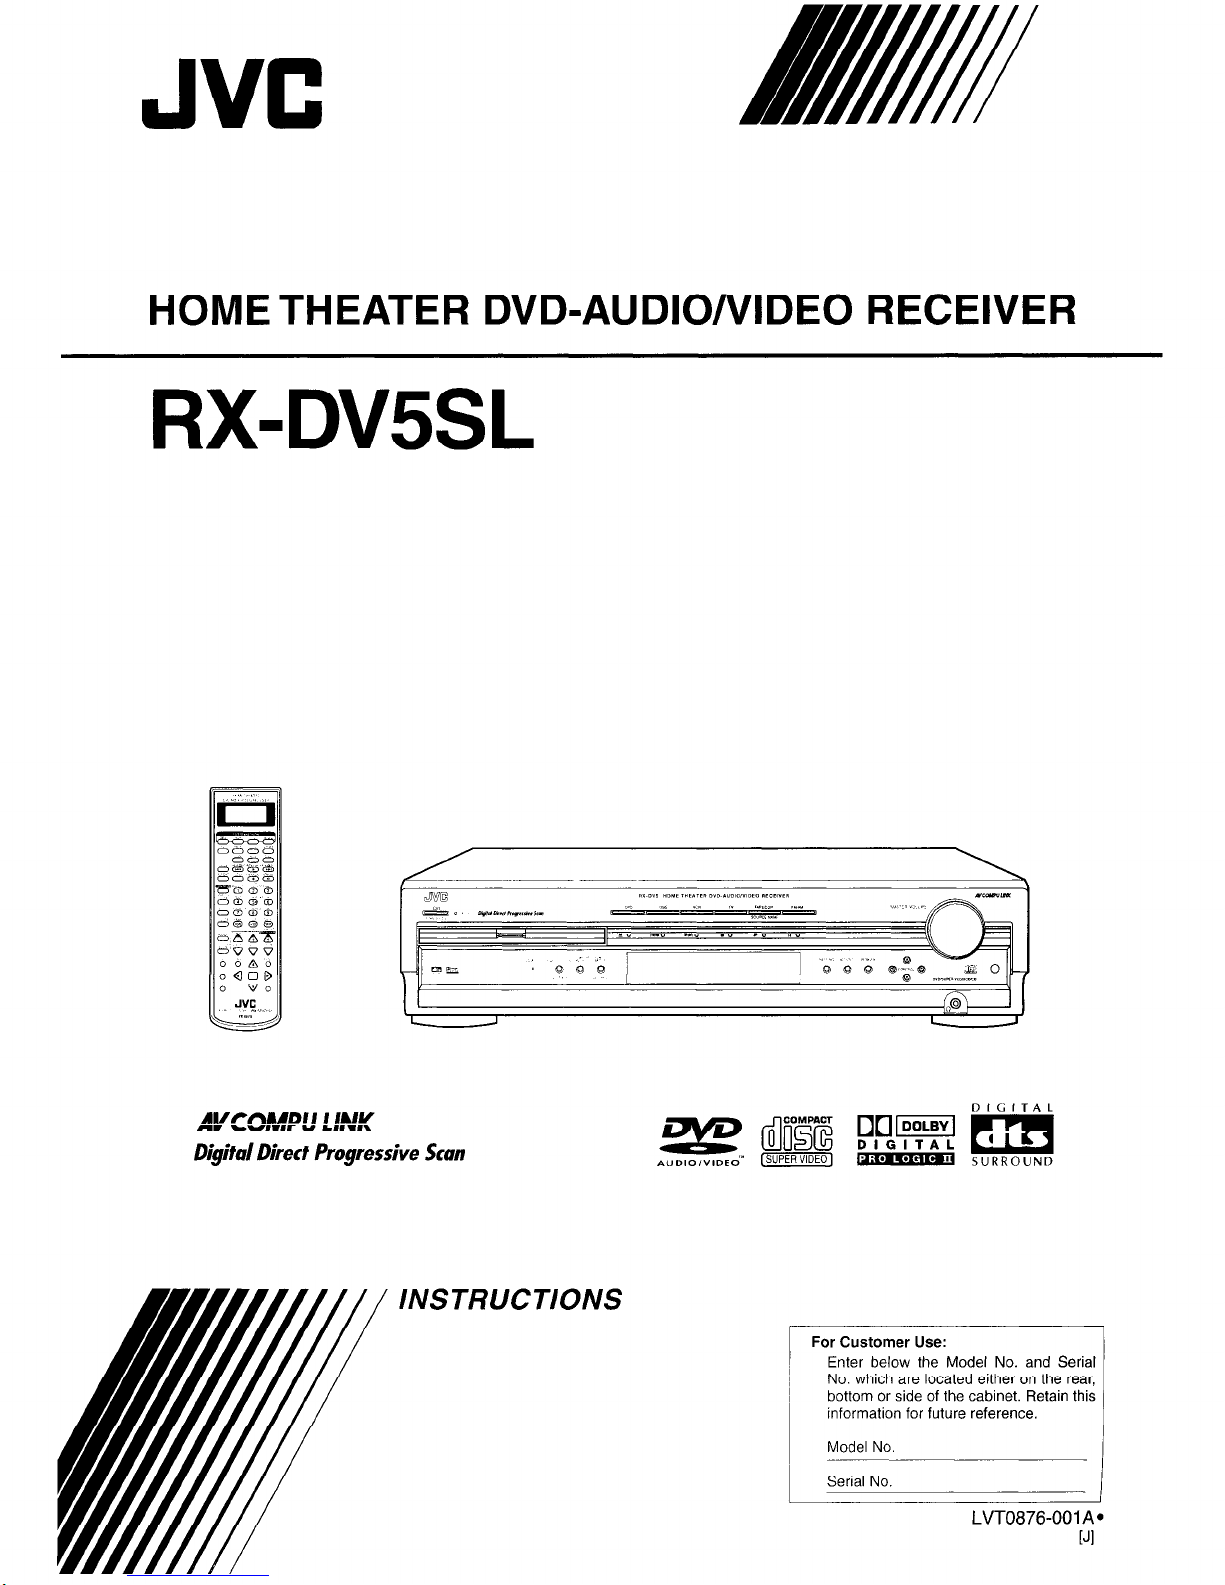
JVC
HOME THEATER DVD-AUDIO/VIDEO RECEIVER
RX-DVSSL
Avfmu611 I Iuw
A. b”,.,T ” L 11.1.
Digital Direct Progressive Scan
INSTRUCTIONS
For Customer Use:
Enter below the Model No. and Serial
No. which are located either on the rear,
bottom or side of the cabinet. Retain this
information for future reference.
LVT0876-001 A’
[Jl
Page 2
Warnings, Cautions and Others
G-l
CAUTION:
REFER SERVICING TO QUALIFIED SERVICE PERSONNEL.
TO REDUCE THE RISK OF ELECTRIC SHOCK,
DO NOT REMOVE COVER (OR BACK).
NO USER SERVICEABLE PARTS INSIDE.
The lightning flash with arrowhead symbol,
within an equilateral triangle is intended to
alert the user to the presence of uninsulated
“dangerous voltage” within the product’s
enclosure that may be of sufficient
magnitude to constitute a risk of electric
shock to persons.
The exclamation point within an equilateral
triangle is intended to alert the user to the
presence of important operating and
maintenance (servicing) instructions in the
literature accompanying the appliance.
WARNING: TO REDUCE THE RISK OF FIRE
OR ELECTRIC SHOCK, DO NOT EXPOSE
THIS APPLIANCE TO RAIN OR MOISTURE.
For U.S.A.
This equipment has been tested and found to comply wrth the lrmits
for a Class B digrtal device, pursuant to part 15 of the FCC Rules.
These limits are designed to provide reasonable protection against
harmful interference in a residential installation.
This equipment generates, uses and can radiate radio frequency
energy and, if not installed and used in accordance with the
instructions,
communications. However, there is no guarantee that interference
will not occur in a particular installation. If this equipment does cause
harmful interference to radio or television reception, which can be
determined by turning the equipment off and on, the user is
encouraged to try to correct the interference by one or
following measures:
Reorient or relocate the recervrng antenna.
Increase the separation between the equipment and receiver.
Connect the equipment into an outlet on a circuit different from that
to
which the receiver is connected.
Consult the dealer or an experienced radio/TV technicran for help.
cause harmful interference to radio
may
more of the
Note to CATV system installer:
This reminder is provided to call the CATV system installer’s
attention to Section 820-40 of the NEC which provides
guidelines for proper grounding and, in particular, specifies that
the cable ground shall be connected to the grounding system
of the building, as close to the point of cable entry as practical.
Page 3
CAUTION
To reduce the risk of electrical shocks, fire, etc.:
1. Do not remove screws, covers or cabinet.
2. Do not expose this appliance to rain or moisture
Caution - WSTANDBY/~N button!
Disconnect the mains plug to shut the power off completely.
The O/I STANDBY/ON button in any position does not disconnect the
mains line.
The STANDBY/ON can be remote controlled.
IMPORTANT FOR LASER PRODUCTS
1. CLASS 1 LASER PRODUCT
2. CAUTION:
Visible and invrsible laser radiation when open and
interlock failed or defeated. Avoid direct exposure to beam.
3. CAUTION:
Do not open the top cover. There are no user serviceable parts inside the Unit; leave all servicing to qualified service
personnel.
G-2
Page 4
I
Table o
Parts Identification
......................................
2
Front Panel .................................................................................
2
Remote Control
.........................................................................
3
Getting Started..
............. . ........
s .,..........., ....
4
Before Installation
......................................................................
4
Checking the Supplied Accessories
...........................................
4
Putting Batteries in the Remote Control
....................................
4
Connecting the FM and AM Antennas
.......................................
5
Connecting the Speakers
...........................................................
6
Connecting Audio/Video Components
.......................................
7
H About connecting cords
......................................................
7
W TV connection
....................................................................
8
n
VCR connection
.................................................................
9
n
DBS tuner connection
.........................................................
9
n
Cassette deck/CD recorder connection
.............................
IO
n
Digital connection..
...........................................................
IO
Basic Operations
.......................................
11
1 Turn On the Power
...............................................................
I I
2 Select the Source to Play
.....................................................
I I
3 Adjust the Volume
................................................................
I I
Turning Off the Sounds Temporarily
.......................................
I2
Turning Off the Power with the Sleep Timer
...........................
I2
Changing the Display Brightness
.............................................
12
Changing the Source Name
......................................................
12
Selecting the Analog or Digital Input Mode
............................
13
Changing the Digital Input Mode Manually
............................
I3
Attenuating the Input Signal
....................................................
14
Changing the Scanning Mode
..................................................
I4
Activating the Recording Mode
...............................................
14
Basic DVD Player Operations
......................
15
1 Open the Disc Tray
..............................................................
IS
2 Load a Disc
..........................................................................
IS
3 Start Playback
......................................................................
IS
4 Adjust the Volume
................................................................
I6
5 Activate Realistic Sound Field..
...........................................
16
6 Select Surround Mode
.........................................................
I6
7 Stop Playback
......................................................................
16
8 Turn Off the Power (into Standby)
......................................
16
Tuner Operations..
.....................................
17
Tuning into Stations Manually
.................................................
17
Using Preset Tuning
.................................................................
I7
Selecting the FM Reception Mode.
..........................................
IX
Basic Settings
.. ..s ......................................
19
Operation Buttons
....................................................................
19
Operating Procedure..
...............................................................
I9
n
Speaker information-“SUBWFR,” “FRNT SP,”
“CNTR SP,” and “REAR SP”
...........................................
20
n
Speaker distance
-“FRNT D,” “CNTR D,” and “REAR D”
......................
20
n
Crossover frequency--“CROSS”
.....................................
2 I
n
Low frequency effect attenuator--“LFE”
........................
2 I
n
Dynamic range compression-“D.COMP”
......................
2 I
n
Digital input (DIGITAL IN) terminals--“DGT”
.............
2 1
w Auto surround-“AUTO SR”
...........................................
22
n
Video output mode-“VOUT”
.........................................
22
Sound Adjustments..
............
. .............. . ......
23
Operation Buttons
....................................................................
23
Operating Procedure..
...............................................................
23
n
Front speaker output balance-“BAL”.
............................
24
n
Tone-“BASS” and “TREBLE”
......................................
24
n
Speaker output levels-“SUBWFR,” “CENTER.”
“REAR L,” and “REAR R”
..............................................
24
Creating Realistic Sound Fields
...................
25
Activating Surround Mode
.................................................
.... 27
Selecting Surl-ound Modes
........................................................
27
Adjusting Surround Mode Cuing Remote Control..
.................
2X
DVD Player Operations
..............................
29
Disc Information
......................................................................
29
Using the On-screen Bar
................
......................................
3 I
Basic Operation through the On-xl-em Bar
............................
32
Changing the Time Indication
..................................................
32
Locating a Desired Scene from the Disc Menu
.......................
3.1
Selecting a View Angle
ANGLE
...........................................
34
Changing the Languages-SUBTITLE and AUDIO
...............
35
Playing from a Specified Position on a Di\c
... ........................
37
n
Locating a desired chapteritrachChapter/Track Search
..............
........................................
37
n
Locating a desired position--Time Search
.......................
37
n
Locating a desired scene-DIGEST
.................................
38
Special Picture Playback
..........................................................
39
n
Frame-by-frame playback
.................................................
39
n
Showing continuotls still pictures-STROBE
..................
39
n
Playing back in \Iov+motio~~
... .... .... ........................
39
n
Zooming in-ZOOM
........................................................
39
n
Changing the VFP setting-
VFI'
......................................
10
Program Playback and Random Playback
.............................
,, 4 I
Repeat Playback
.......................................................................
42
Additional Information for DVD AUDIO
........ .......................
43
Special Playback for DVD AUDIO..
........................................
43
MP3 Disc Playback
....................................
45
Basic Operations
.............................
......... .... ........................
45
Operations through the MP? CONTROL Screen
....................
46
Repeat Playback
................ .....................................................
46
JPEG Disc Playback
...................................
47
Slide-show Playback
................................................................
47
Operations through the JPEG CONTROL. Screen
...................
48
Repeat Playback
.......................................................................
48
Choice Menu
Operations ... ..........................
49
Operation Buttons
....................................
....................... ......
49
Configuration of Choice
Menu ................................................
49
Operating Procedure..
...............................................................
50
n
LANGlJAGE menu
.......................
.... .......................
5 I
n
PICTURE menu
..............................................................
5 I
n
AUDIO menu..
................... ..........................................
52
l
Language code list
........ .............................................
52
n
SPK. SETTING mcn~,
..................
..............................
53
n
OTHERS menu
.......... ..............
............... ...............
.... 54
Restricting Playback by Parental Idock
...................................
5.5
n
Setting Parental Loch
........................................................
5.5
n
Changing the setting of Parental Lock
.............................
56
n
Releasing Parental Lock Lempol-al-ily
................................
56
l
Country/Area codes list for Parental Lock
....................
57
Glossary for DVD Player
.............................
5%
AV COMPU LINK Remote Control System
....
59
Operating JVC’s Audio/Video Components
........
61
Operating Audio Components
... .....
.......... ............................
6 I
Operating Video Components
..................................................
62
Operating Other Manufacturers’ Equipment
.....
63
Changing the Preset Signal Code\
... ..................................
63
Maintenance
.............................................
66
Troubleshooting
.........................................
67
Specifications
............................................
70
Page 5
7 ‘8 9’ 1oj
See pages in the parenthew\ for dct;lil\
I1 011 STANDBY/ON button and STANDBY lamp (I I )
2 ’
Disc
tray and illumination lamp ( 15)
3 ~ DVD player operation buttons
14.
1. (open/close), 144 (reverse skip), ))I (forward skip),
n
(stop), ) (play). II (pause)
Source selecting buttons ( I I, 13)
* DVD, DBS, VCR. TV. TAPJXDR, FM/AM
SOURCE NAME button ( 12)
MASTER VOLUME control ( I I. 16)
DVD AUDIO lamp (43)
INPUT ANALOG/DIGITAL button (I 3)
INPUT ATT. (attenuator) button ( 14)
’ 3 SURROUND ON/OFF button (I 6,27)
‘10’ SURROUND MODE button (I 6, 27)
REC MODE button (I 4)
!I 1 Display
* For details, see “Display” below.
112 SETTING button (I9 - 22)
113
ADJUST button (23, 24)
114
MEMORY button (I 7)
115~
CONTROL A / v / 4 / W buttons (I7 - 24)
116’
0 (phones) jack ( I I)
17: Remote
sensor
Display
ANALOG DIGITAL AUTO MPRO LOGIC JI DSP PROGRAM REPEAT 1 A-B RANDOM PROGRESSIVE
AUTOSURROUND
OODIGITAL irl q m
RESUME SPK. B.S.P BONUS TUNED STEREO AUTD
.............................................
* /SUBWFRILFE
.............................................
.............................................
.............................................
@ s Ei
.............................................
..............................................
.............................................
INPUT All
VOLUh4E
. ..r* . ..-A
: :: :
m :...: :a.:
. . .
MHz:...: :m.t
MUTING SLEEP
. . . . . d....
. ..m. .I...
::::: :::::
. . . . . I . . . .
. . . . . I . . . .
.I... I....
i‘
Input
mode indicator\ ( 13)
* ANALOG, DIGITAI.
A1JTO
2 Surround mode ind~cattrr\ (25. 76)
* MPRO LOGICII , DSP
3:
Play mode mdxators (4 I, 42.4648)
* PROGRAM, REPEAT I A-B. RANDOM
4
PROGRESSIVE Indicator (
14)
5
INPUT ATT Indicator (14)
6 Sound signal indicator-\ (I .?)
* unDlG[TAL (Dolby 111$al). &s (I> I‘S Digital St~rround).
7, Signal and
speaker mdicator\ (27)
* I,, C R, SURWFR (Subwofcr). I,FE (Low Frequenq Ellect).
LS. S, RS
8
Surround
indicators (27)
* AUTO SURROUND, SURROUND
9 RESUME indicator (16)
10 SPK. (speaker) indicator (I I)
1 i DVD AUDIO indicator\ (43)
* B.S.P. BONUS
12 Mam display
13‘
Tuner rnode
indicators (17, 181
* TUNED. STEREO, AUTO MUTING
‘14
SLEEP
indicator (I 2)
15 FI-equenq unit indicators
* Ml31 (for FM station), kH/ tfor AM statmn)
16
VOLIIME indication
2
Page 6
Parts ldentificati
See pages in the parentheses for details.
HOME THEATER
DVD-AUDIONIDEO RECEIVER
Ill me Ill
REMOTE CONTROL RM-SRXDVSJ
rnOR
111
;18
J9i
1201
[21
221
1 Operation mode display
2 oil STANDBY/ON button\ ( I 1. 02 - 65)
’ DBS, VCR. TV, AUDIO
3
1 Source selecting buttons ( I I, 13, 6 I 65)
l
TV, TAPE, CDR, FM/AM, DBS, VCR, DVD
.j, TV/VIDEO button (15, 62, 63)
15 I REPEAT button (42, 46, 48)
‘6 SLEEP button (12)
7
CONTROL button (24, 27. 2X, 43, 4-1)
‘> ANALOG/DIGITAL INPUT button ( 13)
9 1 AUDIO button (35, 36)
‘101 SUBTITLE button (35)
11 DIMMER button (I 2)
121 ANGLE button (34)
PAGE + button (44)
‘13
ZOOM button (39)
PAGE - button (44)
14:
MUTING button ( 12)
151 DIGEST button (3X)
16 CHOICE button (49, SO)
171
ON SCREEN button (3 I. 32. 34 - 38, 41, 42)
118 Multi operation buttons
l
144. k, ))I. w, II, REW. FF
l
TUNING 0 and 0 buttons (17)
l
GROUP () and 0 buttons (43)
l
FM MODE button ( IX)
l
STROBE button (39)
l
TV/DBS CH (channel) +
‘191
Number buttons
l
For selecting preset channels (I 8)
l
For- adjusting sound (24. 28, 61)
l
For operating audioividco components (6 I ~ 65)
l
SURR (surround) ON/OFF button (16,27)
l
SURR (surround) MODE button t 16. 27)
l
VFP button (40)
l
TV RETURN button (62, 6.3)
and
-buttons (62, 63)
0 PROGRESSIVE button (14)
1201 TV VOL (volume) + and - buttons (62, 63)
‘21, VOLUME + and - buttons (1 I, 16)
L2a Menu operation buttons
l
TOP MENU button (33)
l
MENU button (33)
l
RETURN button (33)
l
ENTER button
l
Cursor A/T/)/~ huttons
When you press one of the following buttons, the remote control operation mode appears on the operation
mode display for about two hours.
Ex. : When you press FM/AM
_ ,.~ .__ .”
; This mark appears while
i the remote control is
transmitting the signal to
e the unit.
-_,_
3
Button Operation mode
TV TV
TAPE
CDR
FM/AM TUNER
DBS DBS
VCR VCR
DVD DVD
TAPE
CDR
Button Operation mode
Each time you press the button, the
operation mode changes as follows:
CONTROI,
SOUND - GROUP
L--
Source
indication
-II
Page 7
General Precautions
l
DO NOT incert any metal object Into the unit.
- DO NOT disassemble the unit or rcmovc \cr-ews, covers. ot
cabinet.
- DO NOT expose lhc unit to rain or- moisture.
Locations
l
Install the unit in a location that ii level and protected from
moisture.
l
The temperature around the unit mu\t be between S”C and 35°C
(4
1 “F and 95°F).
* Make sure them is good ventilation around the unit. Pool
ventilation could cause overheating and damage the unit.
Handling the unit
l
DO NtX touch the power cord with wet hands.
l
DO NOT pull on the power cord to unplug it. When unplugging
the cord, always grasp the plug so as not to damage the cord.
l
Keep the power cord away from the connecting cords and the
antenna. The power cord may cause noise or screen interference. It
is recommended to use a coaxial cable for antenna connection,
since it is well-shielded against interference.
l
When a power failure occur\. or when you unplug the power cord,
the preset settings such as preset FM or AM channels and sound
adjustments may be erased in a few days.
Before using the remote control, put two supplied batteries first.
l
When using the remote control,
the remote
7 On
sensor on the unit.
the
back
of the remote control, remove the
aim the remote control directly at
battery cover.
2 Insert batteries. Make sure to match the polarity:
(+) to (+) and (-) to (-).
Check to be sure you have all of the following supplied accessories.
The number in the parentheses indicates the quantity of the pieces
supplied.
l
Remote Control (1)
* Batteries (2)
l
AM Loop Antenna (1)
l
FM Antenna (1)
l
Composite Video Cord (1)
If anything is missing, contact your dealer immediately
3 Replace the cover.
If the range or effectiveness of the remote control
the batteries. Use two R6P(SUM-3)/AA(l5F) type dry-cell batteries.
CAUTION:
Follow these precautions to avoid leaking or cracking cells:
l
Place batteries rn the remote control so they match the polarity:
(+) to (+) and (-) to (-).
l
Use the correct type of batteries. Batteries that look similar may
differ in voltage.
l
Always replace both batteries at the same time.
l
Do not expose batteries to heat or flame.
decreases, replace
Page 8
Getting Start
Snap the tabs on the loop into
the slots of the base to
assemble the AM loop antenna
f AM reception is poor,
:onnect an outdoor
jingle vinyl-covered wire
:not supplied).
If FM reception is poor, connect
I
outdoor FM antenna (not supplied).
I
ANTENNA -
AM
antenna connection
Connect the AM loop antenna supplied to the AM LOOP
terminals.
1
Remove the insulation if the AM loop antenna
wire is covered with vinyl.
2
Press and hold the clamp of the terminal (a),
then insert the wire (a).
3 Release the clamp.
rum the loop until you have the best reception.
p If the reception is poor, connect an outdoor single vinyl-
covered wire (not supplied) to the AM EXT terminal. Keep the
AM loop antenna connected.
Rear panel of the unit
FM
antenna connection
Connect the FM antenna supplied to the FM 75 Q COAXIAL
terminal as temporary measure.
Extend the supplied FM antenna hot-irontally.
l
If the reception is poor. connect an outdoor FM antenna (not
with a coaxial type
connector, disconnect the supplied FM antenna.
Note:
l
Make sure the antenna conductors do not touch any other
termfnals, connecting cords and power cord. This could
cause
poor
reception.
5
Page 9
Connecting the subwoofer speaker
By connecting a subwoofer, you can enhance the bass or reproduce
the original LFE signals recorded in the digital software.
After connecting the front, center and rear speakers. and/or a
subwoofer, set the speaker setting information properly to obtain the
best possible Surround effect. For details. see page 20.
CAUTIONS:
l
Use speakers with the SPEAKER IMPEDANCE indicated by the
speaker terminals (8 - 16 (1).
l
DO NOT connect more than one speaker to one speaker termtnal
Connecting the front, center, and rear speakers
For each speaker, connect the (+) and (-) terminals on the rear panel
to the (+) and (-) terminals marked on the speakers respectively.
7 Cut, twist and remove the insulation at the end of
each speaker cord (not supplied).
2 Press and hold the clamp of the speaker terminal
(@), then insert the speaker cord (@:I>.
3
Release the
clamp.
To left front speaker
u
u
To left rear
speaker
To right rear
speaker
Powered subwoofer
(example)
Connect the input jack of a powered subwoofer to the SUBWOOFER OUT jack on the rear panel, using a cable with RCA pin
plugs (not supplied).
l
Refer also to the manual supplied with your subwoofer.
Note:
l
You can place a subwoofer wherever you like since bass sound is
non-directional. Norma//y place it in front of you.
Speaker Layout Diagram
Center speaker
/.pgq .__,
Subwaofer
,’
,,’ Left front
Right front \‘\<I
/’
speaker
speaker
Right rear
speaker
To obtain the best possible sound from this system, place all the
speakers except the subwoofer at the same distance from the
listening position with each speaker’s front faced toward the
listener.
Then, change the subwoofer and speaker settings to fit your
listening conditions (see page 20).
6
Page 10
Getting Started
W About connecting cords
IFor video connections 1
The S-video cords and the component video cord are not supplied with this unit.
Use the cords supplied with the other components or purchase them at your dealer.
l
Composite video cord (supplied)
-
:
S-video cord (not supplied)
0
Component video cord (not supplied)
q
Yellow
Red
You can use composite video cord (8) and/or S-video cord
( q
) for connecting DES tuner and VCR to this unit.
l
You can use component video cord(u) in addition to fl and
q
for connecting your TV to this unit.
l
By using q or q , you can get a better picture quality-in the
order: q < q c
l
To view the picture from DBS tuner or VCR on your TV connect
your TV to this unit using the same type of cord for connecting
DBS tuner or VCR to this unit.
l
To view the picture from the built-in DVD player, connect the TV
to this unit using q , [il, and/or q , then register the video
output mode correct/y (see “Video output mode” on page 22).
l
To enjoy the progressive video picture, connect the TV
compatible with the progressive video input using HI then
change the scanning mode correctly (see ‘Changing the
Scanning Mode” on page 14).
q
For audio connections
Connect the external components to this unit with the audio cords.
Use the cord supplied with the other components or purchase them at your dealer.
l
Digital coaxial cord (not supplied)
B Optical digital cord (not supplied)
u
m.\
Audio cord (not supplied)
lill
Red
When the unit is shipped from the factory, the DtGtTAL IN
terminals are set for use with the following components:
- DlGlTAL 1 (coaxial): For DBS tuner
~ DlGlTAL 2 (optical): For TV
l
If you connect CDR, change the digital input (DIGITAL IN)
terminal setting (see “Digital input (DIGITAL IN) terminats”on
page 21) and the source name (see “Changing the Source
Name”on page 12) correctly
l
Select the digital input mode correct/y (see “Selecting the
Analog or Digital input Mode” on page 13).
Page 11
W TV connection
Video connections
DO NOT connect a TV through a VCR or a TV with a built-in
VCR; Otherwise, the picture may be distorted.
Illustrations of the input/output terminals below are typical
examples. When you connect other components, refer also to
their manuals since the terminal names actually printed on
their rear vary among the components.
Green
Audio connections
Red Red
Red Red
8
Page 12
Getting Starte
3pe connection.
Illustrations of the input/output terminals below are typical examples.
*”
%.1 *,a 19 ~:
When you connect other components, refer also to their manuals since the
terminal names actually printed on their rear vary among the components.
n VCR
connection
DBS tuner
Red
Red
Page 13
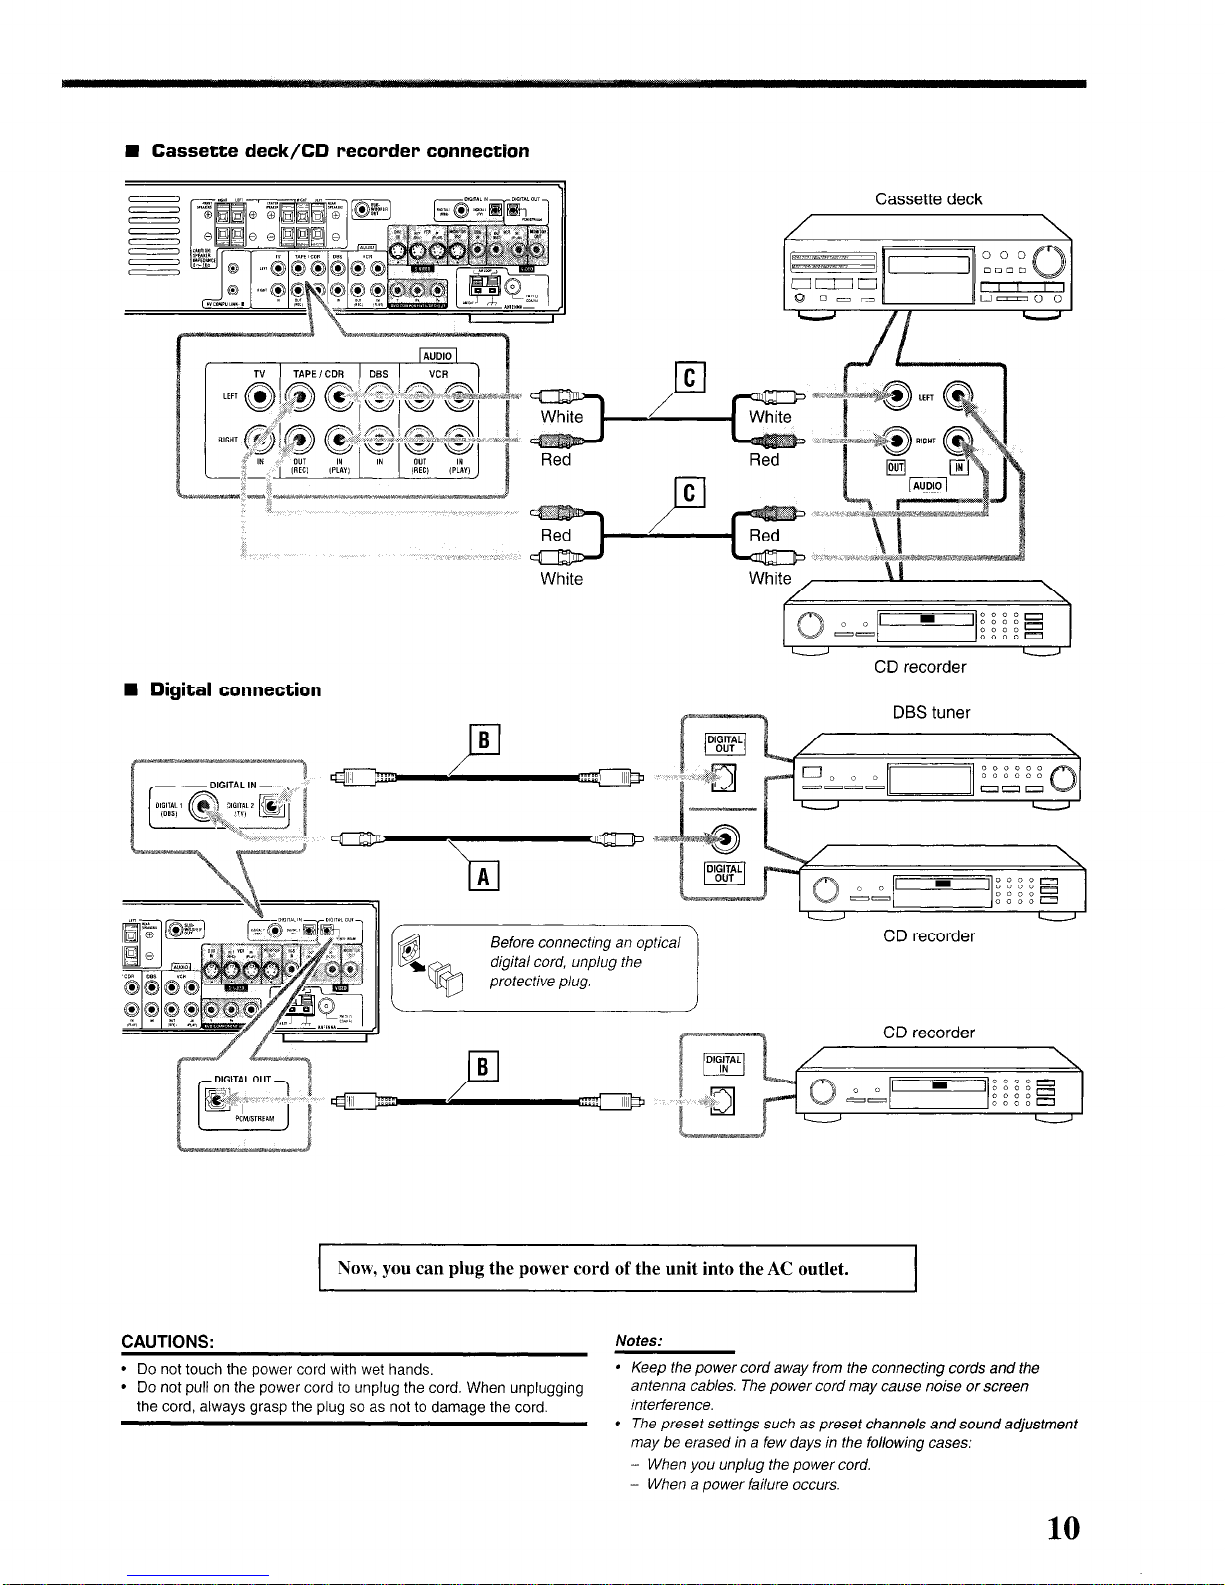
W Cassette deck/CD recorder connection
basserre uem
/
I
1 White
W Digital connection
nea
White
I-E-l
nea
-
U
CD recorder
CD recorder
CD recorder
Now, you can plug the power cord of the unit into the AC outlet.
CAUTIONS:
l
Do not touch the power cord with wet hands.
l
Do not pull on the power cord to unplug the cord. When unplugging
the cord, always grasp the plug so as not to damage the cord.
I
Notes:
l
Keep the power cord away from the connecting cords and the
antenna cables. The power cord may cause noise or screen
Interference.
* The preset settings such as preset channels and sound adjustment
may be erased in a few days in the following cases:
- When you unplug the power cord.
- When a power failure occurs.
10
Page 14
I
Basic Operatio
On the front panel From the remote control
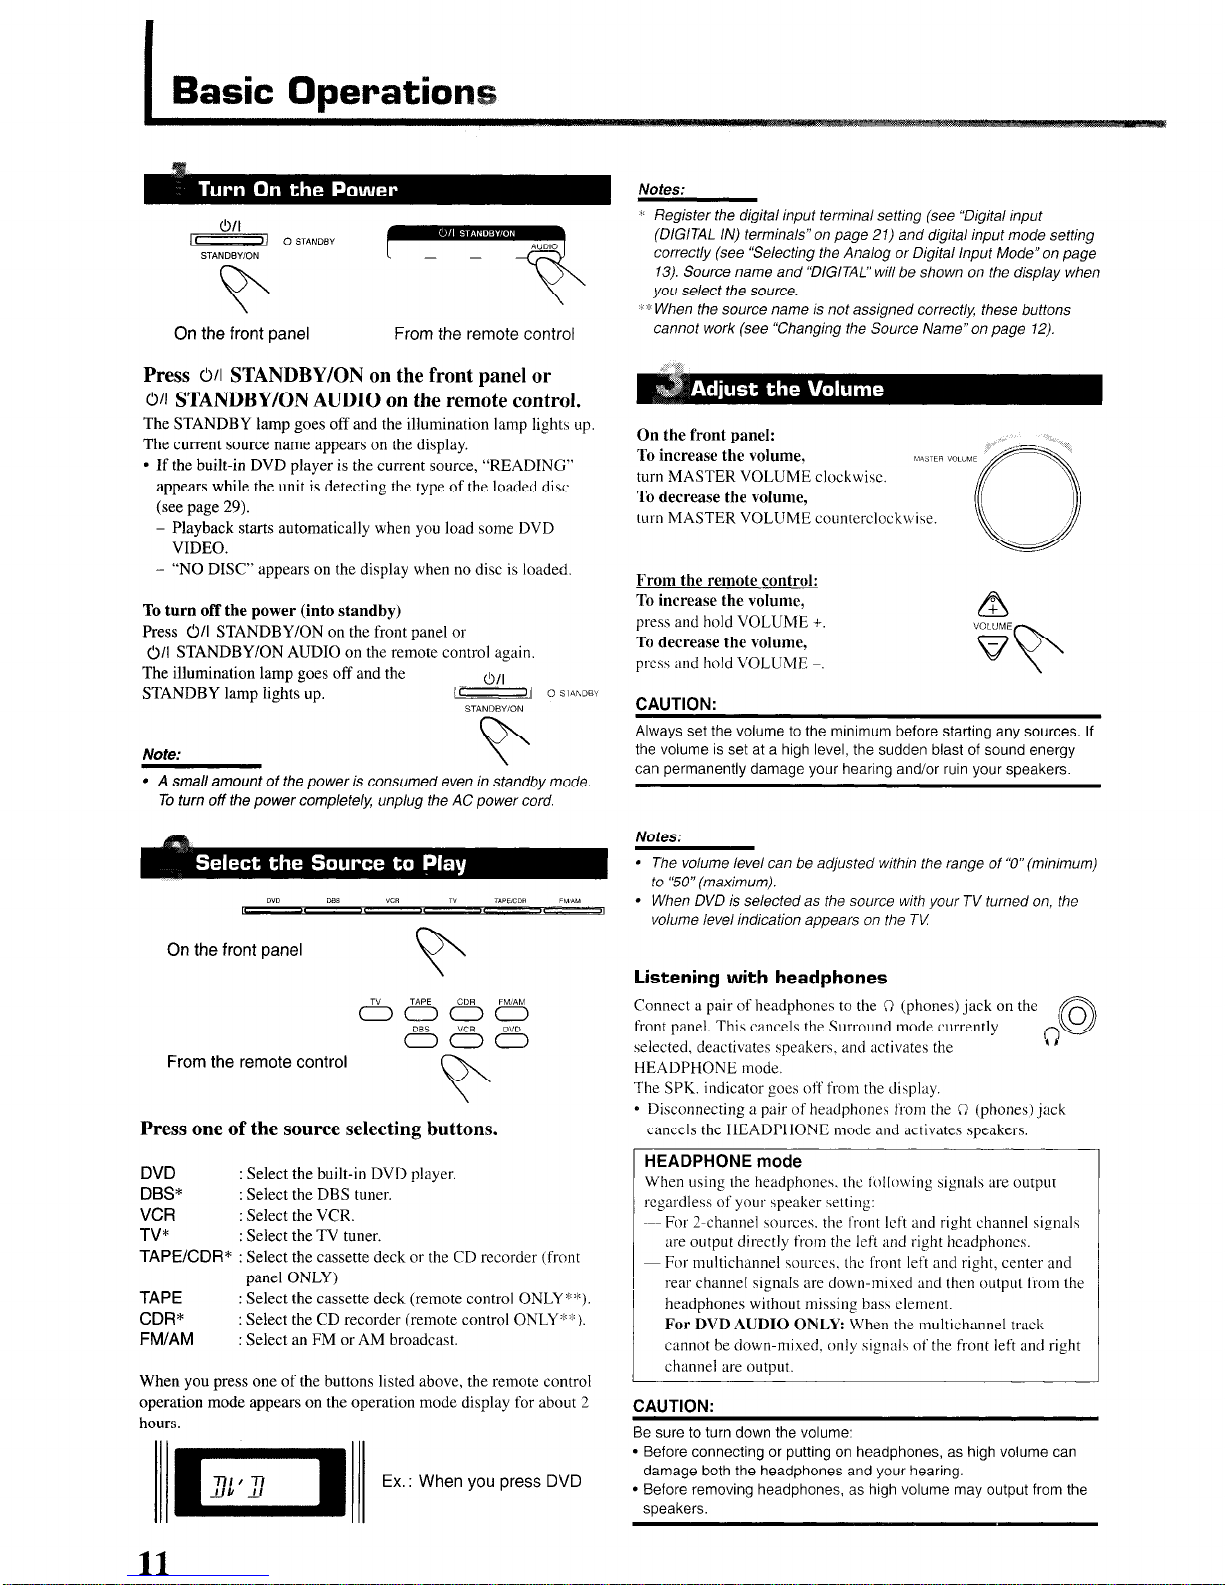
Press O/I STANDBY/ON on the front panel or
W STANDBY/ON AUDIO on the remote control.
The STANDBY lamp goes off and the illumination lamp lights up.
The current source name appears on the display.
l
If the built-in DVD player is the current source, “READING”
appears while the unit is detecting the type of the loaded disc
(see page 29).
- Playback starts automatically when you load some DVD
VIDEO.
- “NO DISC” appears on the display when no disc is loaded.
To turn off the power (into standby)
Press O/I STANDBY/ON on the front panel or
o/I STANDBY/ON AUDIO on the remote control again.
The illumination lamp goes off and the
O/I
STANDBY lamp lights up.
a 0 SlA~DBY
STANDBYION
Note:
v
l
A
small amount of the power is consumed even in standby mode.
To turn off the power complete/H unplug the AC power cord.
On the front panel
&BmPEB
DBS VCR D”D
000
From the remote control
Press one of the source selecting buttons.
DVD
DBS*
VCR
TV*
TAPE/CDR*
TAPE
Select the cassette deck (remote control ONLY *“6).
CDR”
Select the CD recorder (remote control ONLY:+z:).
FM/AM
Select an FM or AM broadcast.
Select the built-in DVD player.
Select the DBS tuner.
Select the VCR.
Select the TV tuner.
Select the cassette deck or the CD recorder
(front
panel ONLY)
When you press one of the buttons listed above, the remote
control
operation mode appears on the operation mode display for about 2
hours.
ci_nq
Ex. : When you press DVD
Notes:
‘. Register the digital input terminal setting (see “Digital Input
(DIGITAL IN) terminals”on page 21) and digital input mode setting
correct/y (see ‘Selecting the Analog or Digital Input Mode” on page
13). Source name and “DIGITAL” will be shown on the display when
you select the source.
~‘? When the source name is not assigned correct/v, these buttons
cannot work (see “Changing the Source Name”on page 12).
On the front oanel:
To increase the volume,
turn MASTER VOLUME clockwise.
To decrease the volume,
turn MASTER VOLUME counterclockwise.
From the remote control:
To increase the volume,
press and hold VOLUME +.
To decrease the volume,
press and hold VOLUME -.
CAUTION:
Always set the volume to the mlnimum before starting any sources. If
the volume is set at a high level, the sudden blast of sound energy
can permanently damage your hearing and/or ruin your speakers.
Notes:
l
The volume level can be adjusted within the range of ‘0” (minimum)
to ‘50” (maximum).
l
When DVD is selected as the source with your TV turned on, the
volume /eve/ indication appears on the TV
Listening with headphones
Connect a pair of headphones to the (3 (phones) jack on the
front panel. This cancels the Surround mode currently
@
selected, deactivates speakers. and activates the
4,
HEADPHONE mode.
The
SPK. indicator
goes off t’rom the display.
* Disconnecting a pair of headphones from the i) (phones)
jack
cancels the HEADPHONE mode and activates speakers
HEADPHONE mode
When using the headphone\. the following signals are output
regardless of your speaker \etting:
~~~ For Z-channel sources. the front left and right
channel signal5
are output directly from the left and right hcadphoncs.
~ For multichannel sources. the front left and right, center and
rear channel
signals are down-mixed and then output f.rom the
headphones without missing bass clement.
-For DVD AUDIO ONLY: When
the multichannel track
cannot be down-mixed. only signal\ of the firont left and right
channel are output.
CAUTION:
Be sure to turn down the volume:
l
Before connecting or putting on headphones, as high volume can
damage both the headphones and your hearing.
l
Before removing headphones, as high volume may output from the
speakers.
11
Page 15

From the remote control ONLY
\
Press MUTING to mute the sound.
“MUTING” appears on the display and the volume turns off (the
VOLUME Indication goes off).
* When DVD is selected as the \ourcc with your TV turned on.
“VOLUME -” appears on the TV.
q ‘3 :,.: Epx: “i” ‘i’ !, . . . . .
:::: :
: :
:
; ; :**,: : ,;. i : . . ..I
. ..: : . . .
To restore the sound
Press MUTING again
l
Pressing VOLUME + or on the remote control (or turn
MASTER VOLUME on the front panel) also restores the sound
From the remote control ONLY
Press SLEEP repeatedly.
The SLEEP indicator lights up on the display.
l
Each time you press the button. the shut-off time changes as
follow\:
SLEEP indicator
I
;[5
10+20-+30-60
I 0(0ff)e150+120+90
Jl
When the shut-off time comes
The unit is turned off automatically.
To check or change the remaining time until the shut-off time
Press SLEEP once.
The remaining time (in minutes) until the shut-off time appears.
* To change the ?hut-off time. press SLEEP repeatedly.
To cancel the Sleep Timer
Press SLEEP repeatedly until “SI.EEP 0” appears on the display
(The SLEEP indicator goes oil‘.)
l
Turning off the unj~ also cancel\ the Sleep Timer,
Note:
l
If Auto Standby (see page 54) and Sleep Timer are used at a time,
one with
the
ear/y shut-off rime will furn off the unit.
From the remote control ONLY
Press DIMMER to dim the display.
l
Each time you press the button, the display and
illumination lamp dim and brighten alternately.
When you connect an CD recorder to the TAPEKDR jacks on the
rear panel, change the source name which will be shown on the
display.
On the front panel ONLY
v
Ex. : When changing the source name from “TAPE ” to “CDR”
1 Press TAPEKDR (SOURCE NAME) to select as
the source.
2 Press and hold SOURCE NAME (TAPEKDR)
until “ASSGN. CDR” appears on the display.
ANALOC
0 q :“.
. . . .
:... j :..,
: . . . . . . . . . : : . . . . :... (...,
MLUME
. . .
. . . . . . . . . .
: . . . :‘.,I
( )-
: : :...i i : ::
i : . IF:’
. . . . :.: . .
j “-!
To change the source name to “TAPE”
Press and hold SOURCE NAME (TAPEKDR) until “ASSGN.
TAPE” appears on the display in step 2.
Note:
l
Without changing the source name, you can still use the connected
components. However, there may be some inconveniences:
- The unexpected source name will appear on the display when
you press TAPE/CDR (SOURCE NAME) on the front pane/.
~ The CDR or TAPE button on the remote control cannot work for
selecting the
source.
- You cannot use the digital input (see page 10) for the CD
recorder.
12
Page 16
Basic Operatio
When you have connected digital source components using both the
analog connection and the digital connection methods (see pages 7 to
lo), you can select the input mode.
l
Before selecting the digital input mode, register the digital input
terminal setting correctly (see “Digital input (DIGITAL IN)
terminals” on page 2 1).
I
2
Press one of the source selecting buttons (DBS,
TV, or CDR) for which you want to change the
input mode.
DE w COR
I
4 I 4 8
I
On the front panel
From the remote control
v
Note:
l
You cannot change the input mode when selecting DVD as the
source. Digital input is a/ways used for the built-in DVD player.
Press INPUT ANALOG/DIGITAL (INPUT ATT.)
on the front panel or ANALOG/DIGITAL INPUT
on the remote control.
lNP”T
ANALOG
*NALcwDIGITAL
iDlGlTAL
v
INPJT
F
On the front panel
From the remote control
The current input mode appears on the display.
l
Each time you press the button. the input mode alternates
between the analog input (“ANALOG”“) and the digital input
(“DGTL AUTO”).
ANALOG/DIGITAL AUTO indicator
-L&J
q
q . . . . i” . . . :
.‘. -.
: :::: :::
:.A : -.: :...; :
: : : : :
: : i ‘7
. . . . . . . . . . ,,.:
* “ANALOG” is the initial setting except for the built-in DVD
player.
DGTL AUTO
: Select this for the digital input mode.
The DIGITAL AUTO indicator lights up.
The unit automatically detects the incoming
signal format, then the sound signal indicator
for the detected signai-~nI)IGTTAL or dt+
lights up; otherwise, no sound signal indicator\
light UD.
If the following symptoms occur while Dolby Digital or DTS
Digital Surround software is played back. you can change the digital
input mode:
l
Sound does not come out at the beginning of playback.
l
Noise comes out while searching foi- or skipping chapters or
tracks.
On the front panel
Press CONTROL F (or 4) to select “DGTL D.D.”
or “DGTL DTS” while “DGTL AUTO” still remains
on the display.
l
Each time you press the button, the digital input mode changes as
follows:
I*,, “, -.~ ,,, .- “-7
DGTLAUTO M/ DGTi rj.D.
;
TDGy< DTS 1
DGTL AUTO
: Normally select this.
The DIGITAL, AUTO indicator lights up.
The unit automatically detects the incoming
signal format, then the sound signal indicator
for the detected signal lights up.
DGTL D.D.
:
Select this for playing back software encoded
with Dolby Digital.
The ~~DlGlTAL indicator lights up*.
DGTL DTS
: Select this for playing back software encoded
with DTS Digital Sut-round.
The dt~ indicator lights up”.
.‘! These indicators flash when no signal or the signal without the
proper format is played back.
When DVD is
selected as
the source, you can also
%btF
change the digital input mode by pressing
ANALOG/DIGITAL INPUT repeatedly on the remote
control.
Notes:
l
When ‘DGTL AUTO”cannot recognize the incoming signals, no
sound signal indicators light up on the display
* When you turn off the unit or select another source, ‘DGTL DTS”
and “DGTL D. D.” are canceled.
The digital input mode is automatically reset to ‘DGTL AUTO.”
ANALOG
: Select this for the analog input mode.
The ANALOG indicator lights up.
13
Page 17
When the input level of the analog source is too high, the sound\
will be distorted. If this happens. you need to attenuate the input
signal level to prevent the sound dislortion.
l
You have to make this ad.ju\tment for each analog source.
On the front panel ONLY
INPUTA”
Press and hold INPUT ATT. (INPUT ANALOG/
DIGITAL) until the INPUT ATT indicator lights up
on the display.
l
Each time you press and hold the button, the Input Attenuator
turns on (“ATT ON”) or off (“ATT NORMAL”“).
INPUT ATT indicator
L
@iJib
“: “ATT NORMAL” is the initial setting.
ATT NORMAL : NOI-mally select this. The analog sound is not
attenuated.
ATT ON : Select thi\ when the analog sound is
distorted.
This unit supports the progressive scanning system (480~“) as well
as the conventional interlaced scanning system (48Oi”).
If your TV has component video
video input. you can enjoy a high quality picture from the built-in
DVD player.
l
Refer also to the instruction manuals supplied with your TV.
l
You can select the progressive mode according to the original
picture type (film ot- video source). See page 5 I.
l
Do not change the scanning mode to “PROGRESSIVE” in the
following cases:
~ When your TV does not support the progressive video input.
- When you do not conncc~ your TV to the unit using component
video cord.
jacks
and supports the progressive
Notes:
l
Some progressive TVs and High-Definition TVs are not fully
compatible with this system. When the unnaturaal picture is played
back, change the scanning mode to “INTERLACE.” To check the
compatibility of your TV; contact your dealer.
All JVC progressive TVs and High-Definition TVs are fully
compatible with this system respective/y
* When you select “PROGRESSIVE”as the scanning mode, the
picture does not come out correcfly through composite video and
S-video jacks.
480~ and 480i indicate the number of scanning lines and scanning
format of an image signal.
~ 480~ indicates 480 scanning lines with progressive format.
- 480i indicates 480 scanning lines with inter/aced format.
When you play back the multichannel sources, Recording mode
enables you to record the sounds without missing surround elements
by down-mixing the center and rear channel signals into the front
channel signals.
l
For DVD AUDIO ONLY: When the multichannel track cannot be
down-mixed, this function does not take effect.
* When the multichannel software is played back with Recording
mode activated, the sounds are down-mixed and come out through
the front speakers only.
On the front panel ONLY
&
REC MODE
Press and hold REC MODE (SURROUND MODE)
until “RECMODE ON” appears on the display.
l
Each time you press and hold the button, Recording mode is
activated (“RECMODE ON”) and deactivated
(“RECMODE OFF”*) alternately.
<’ “RECMODE OFF” is the initial setting.
RECMODE OFF : Normally select this. The down-mixing is
canceled.
RECMODE ON : Select this for recording the down-mixed
sounds.
When recording with VCR:
You can record the picture on your video tape without the volume
level indication when Recording mode is activated.
l
When you do not want to record the on-screen guide icons, see
page 54.
l
The choice menu and on-screen bar are always recorded when
they appear on the TV.
From the remote control ONLY
Press and hold PROGRESSIVE for more than 3
seconds when DVD is selected as the source.
The current scanning mode appears on the display for a while.
l
Each time you press and hold the button, the scanning mode
changes “INTERLACE”::’ and “PROGRESSIVE” alternately.
‘h “INTERLACE” is the initial setting.
INTERLACE : Select this for conventional TV.
PROGRESSIVE : Select this if your TV with component
,jacks supports the progressive video input.
The PROGRESSIVE indicator light\ up.
&
..,
CAUTION:
When the front speakers are small, the output sound may be distorted
by Recording mode. In this case, decrease the volume until the sound
distortion diminishes.
Notes:
* When you turn off the unit or select another source, Recording
mode is canceled (“RECMODE OFF).
l
Sound adjustments (see pages 23 and 24) and Surround modes
(see pages 2.5 to 28) do not affect the recording.
0 The following buttons do not work while Recording mode is
activated (“RECMODE Ow):
- SETTlNG and ADJUST on the front pane/
- SURROUND ON/OFF and SURROUND MODE on the front
pane/
~ Number buttons for adjusting sound on fhe remote control
14
Page 18
For details about DVD player operations, see pages 29 to
44.
l
You can also play back MP3 and JPEG files. See pages 45
to 48.
l
When using remote
control, press DVD to
change the remote control
operation mode to the
DVD player operation.
By pressing the following buttons, you can pause, advance, or reverse
playback, and locate the beginning of the title. chapter, or track.
I44 0
-0
b0
II 0
On the front panel
From the remote control
To stop playback temporarily
Press II.
l
Pressing F starts playback again.
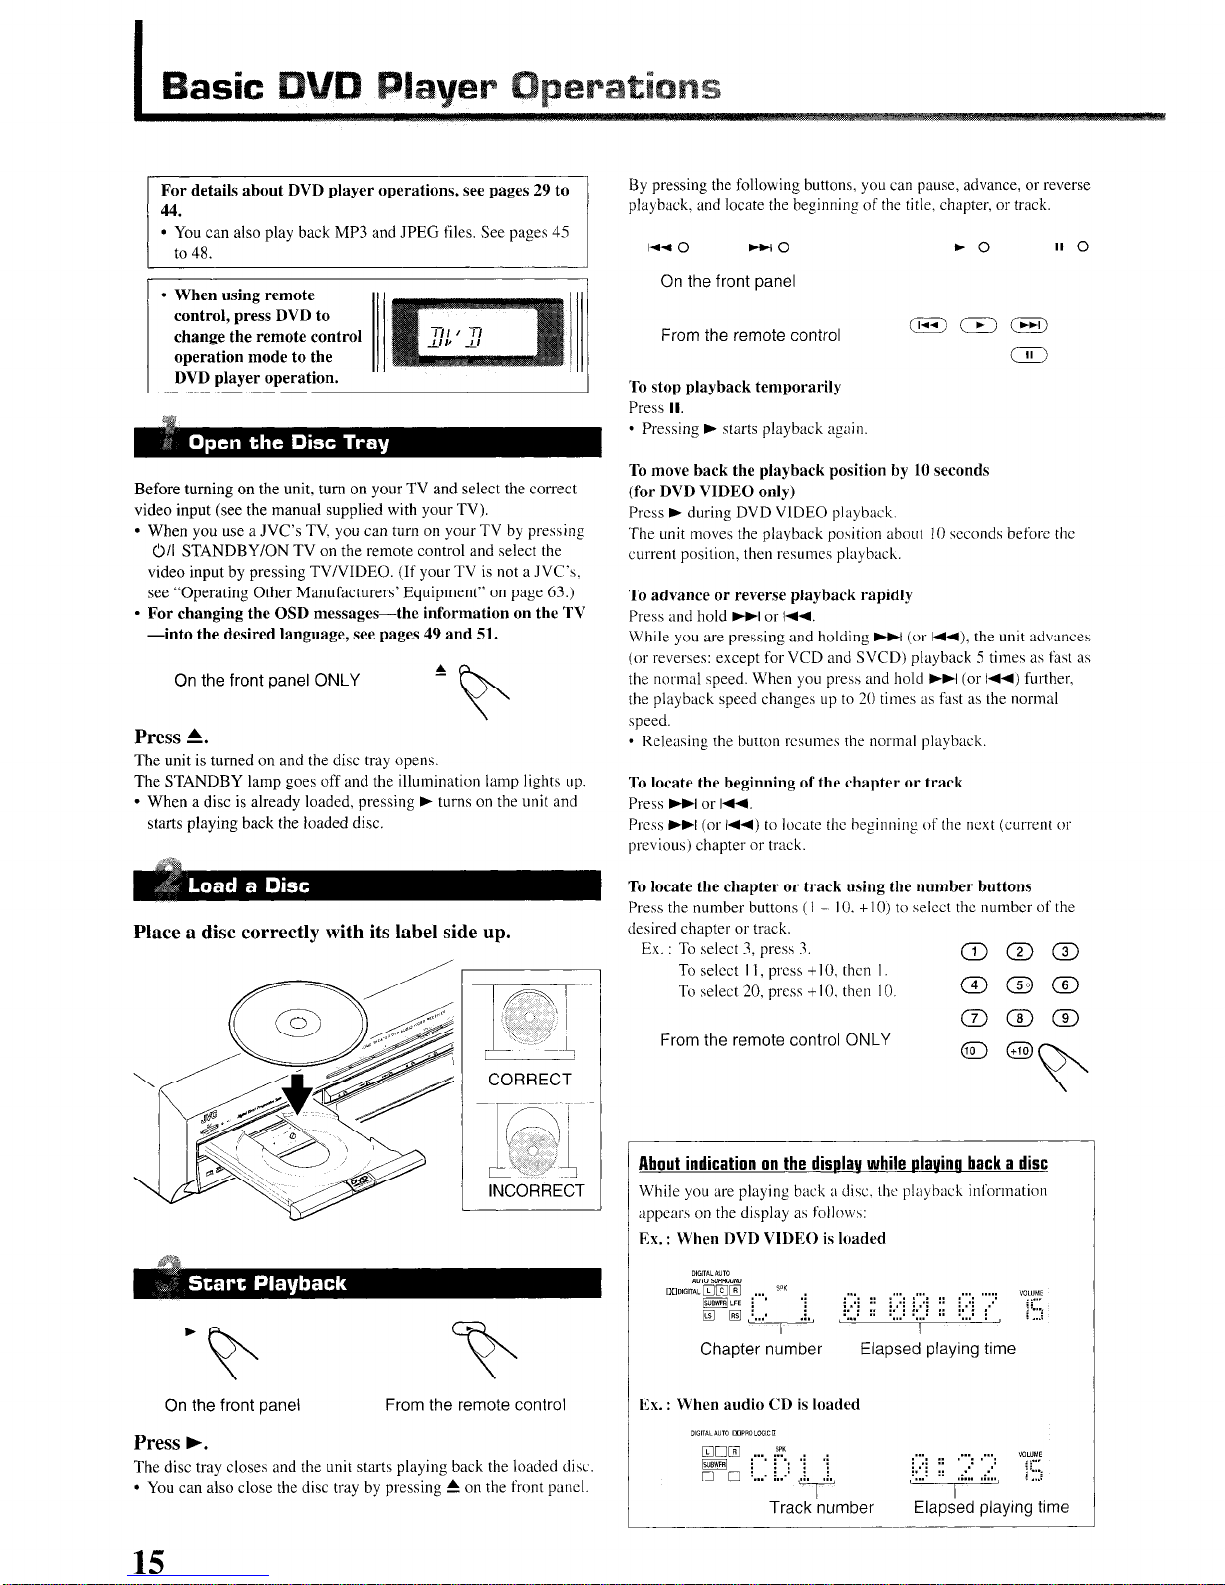
Before turning on the unit, turn on your TV and select the correct
video input (see the manual supplied with your TV).
l
When you use a JVC’s TV. you can turn on your TV by pressing
011 STANDBY/ON TV on the remote control and select the
video input by pressing TV/VIDEO. (If your TV is not a JVC’a.
see “Operating Other Manufacturers’ Equipment” on page 63.)
l
For changing the OSD messages-the information on the TV
-into the desired language, see pages 49 and 51.
On the front panel ONLY
A
b
Press A.
The unit is turned on and the disc tray opens.
The STANDBY lamp goes off and the illumination lamp lights up
l
When a disc is already loaded, pressing F turns on the unit and
starts playing back the loaded disc.
Place a disc correctly with its label side up.
To move back the playback position by 10 seconds
(for DVD VIDEO only)
Press F during DVD VIDEO playback.
The unit moves the playback position about IO seconds befot-e the
current position, then resumes playback.
To advance or reverse playback rapidly
Press and hold WI or 144.
While you are pressing and holding ))I (or Id+), the unit advances
(or reverses: except for VCD and SVCD) playback 5 times as fa\t as
the normal speed. When you press and hold ))I (or 144) further.
the playback speed changes up to 20 times as fast as the normal
speed.
l
Releasing the button resumes the normal playback.
To locate the beginning of the chapter or track
Press WI or
144.
Press ))I (or 144) to locate the heginning of the next (WI-I-ent 01
previous) chapter or track.
To locate the chapter or track using the number buttons
Press the number buttons (I - IO. + 10) to select the number of the
desired chapter or track.
Ex. : To select 3, press 3.
To select I 1, press +lO, then I.
To select 20, press + IO. then IO.
QQO
EDBGD
From the remote control ONLY
On the front panel
From the remote control
Press F.
The disc tray closes and the unit starts playing back the loaded disc.
l
You can also close the disc tray by pressing r on the front panel.
15
CORRECT
INCORRECT
About indication on the display while ulaying back a disc
While you are playing back a disc. the playback information
appears on the display a\ follw\:
Ex. : When DVD VIDEO is loaded
Chapter number
Ex. : When audio CD is loaded
000 -.. :” -: .:
0 0 j
::: .i
i.:’ j-i+ :’ . . . . :: ,:.., .: ,::,, i”-;
. . . .
Track number
Elapsed playing time
i . . ..j . :: . . . . . . . . : . . WLUME i i-
I
Elapied playing time
1
Page 19
On the front panel
From the remote control
For detail\. see “Ba\~c Opcralion\” on page I I.
You can activate Surround mode for creating realistic sound fields.
*
You
can
activate
Surround
nwde automatically when the digital
multichannel \ourcc (Dolby Digital or DTS Digital Surround
software) or 2-channel matrix source (Dolby Surround software) i\
played brick-Auto Surround (see ,x,gc 22).
When you activate or dencri\ate Surround mode manually. do the
li)llowing procedul-e\:
On the front Danel:
Press SURROUND ON/OFF.
From the remote control:
1) Press CONTROL repeatedly so that
“SOUND” appears on the operation
mode display.
F
SURR ohr OFF
2) Press SURR ON/OFF.
v
* Each time you press SURROIJND ON/OFF on the l’t-ant panel 01
SIIRR ON/OFF on the remote control. Surround mode is activated
and deactivated alternately.
When thc00PRO LOGIC II (Ir DSP indicator is lit. you can select
vririou\ Surround modes (\ce page 27).
S”r4i.u ND-
MODE
FUPFDE
On the front panel
From the remote control
Press SURROUND MODE (REC MODE) on the
front panel or SURR MODE on the remote control.
l
When you enjoy digital multichannel source such as Dolby Digital
or DTS Digital Surround \of’tware, you cannot change Surround
mode. When you enjoy Dolhy Digital or DTS Digital Surround 2channel including Z-channel matrix sour-cc such as Dolby Surround
software, you can \elecr Surround mode from between PRO
LOGIC II MOVIE and PRO LOGIC’ II MUSIC (see page 27).
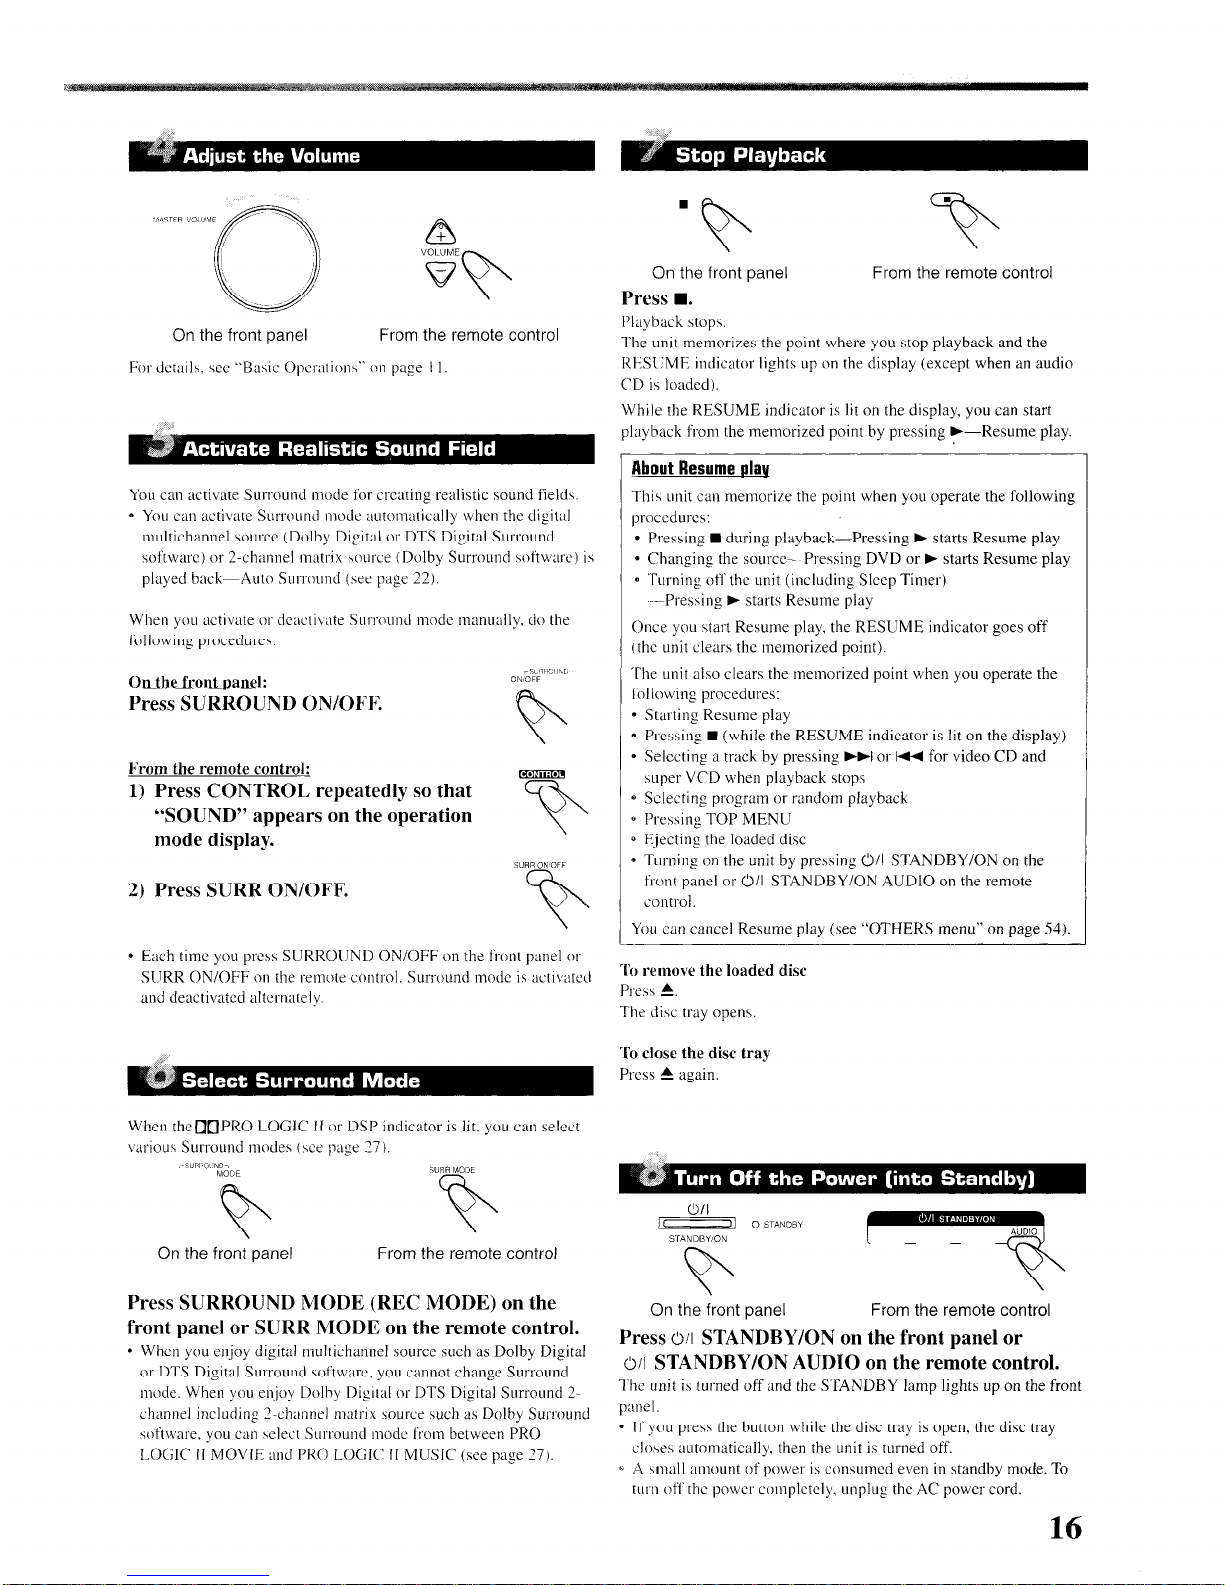
On the front panel
Press W.
Playback stop\.
From the remote control
The unit memorires the point where you stop playback and the
RESI:ME indicator lights up on the display (except when an audio
(‘D i\ loaded).
While the RESUME indicator is lit on the display, you can start
playback from the memorized point by pressing ,--Resume play.
About Resume play
Thii unit can memorize the point when you operate the following
proccdurcs:
l
Pressing n during playback-Pressing ) starts Resume play
* Changing the source- Pressing DVD or ) starts Resume play
0 Turning off the unit (including Sleep Timer)
--Pressing ) starts Resume play
Once you start Resume play. the RESUME indicator goes off
cthc unit clears the memorired point).
The unit also clears the memorized point when you operate the
lollowing procedures:
l
Starting Resume play
0 Prc\sinp n (while the RESUME indicator is lit on the display)
* Selecting a tl-ack by pressing ))I or I* for video CD and
super VCD when playback stop?
0 Selecting program or random playback
* Pressing TOP MENU
0 Ejecting
the
loaded disc
0 Turning on the unit by pressing 0/I STANDBY/ON on the
front panel or O/l STANDBY/ON AUDIO on the remote
control.
You can cancel Resume play (see “OTHERS menu” on page 54).
To remove the loaded disc
Pres\ A.
The disc tray opens.
To close the disc tray
Press 1. again.
On the front panel
From the remote control
Press
O/I
STANDBY/ON on the front panel or
011 STANDBY/ON AUDIO on the remote control.
The unit is turned off and the STANDBY lamp lights up on the front
panel.
* If you press the button while the disc tray is open, the disc tray
closes automatically. then the unit is rurned off.
* A small amount of power is consumed even in standby mode. To
turn off the power complctcly, unplug the AC power cord.
16
Page 20
I
Tuner Opera
On the front panel:
1 Press FM/AM to select the band.
The last received station of the selected hand is
tuned in.
The CONTROL buttons now work for tuner
operations.
l
Each time you press the button, the band alternates between
FM and AM.
Ex. : When selecting the FM band
2 Press CONTROL V (or A)
Go
repeatedly until ‘k TUNING 9’
‘ONTRoL
appears on the display.
@
3 While “c TUNING 9’ still remains
on the display, press repeatedly or
~ CONiROL ~
hold CONTROL ) (or 4) until you
find the frequency you want.
l
Pressing (or holding) CONTROL ) increases the frequencic\.
l
Pressing (or holding) CONTROL 4 decreases the frequencies.
From the remote control:
1 Press FM/AM.
“TUNER’ appears on the
operation mode display.
2 Press repeatedly or hold TUNING 0 or 0 until you lind the
frequency you want.
l
Pressing (or holding) TUNING 0
Increases the frequencies.
l
Pressing (or holding) TUNING 0 decreases the frequencies.
Notes:
When you ho/d and release CONTROL b (or TUNlNG Q on the
remote control) or CONTROL 4 (or TUNING 0 on the remote
control), the frequency keeps changing until a certain station is
tuned in.
When a station of sufficient signal strength is tuned in, the TUNED
indicator lights up on the display
When an FM stereo program is recewed, the STEREO indicator
also lights up.
Once a station is assigned to a channel number, the station can be
quickly tuned. You can preset up to 30 FM and IS AM stations.
W To store the preset stations
Before you start, remember...
There i\ a time limit in doing the I’ollowing steps.
If the \etting is canceled before you finish. start horn step 2 agam.
On the front panel ONLY:
7
2
3
4
Tune into the station you want to preset (see
“Tuning into Stations Manually”).
l
If you want to store the FM reception mode for this station,
select the FM reception mode you want. See “Selecting the
FM Reception Mode” on page IX.
Ex. : When selecting the FM band
Press MEMORY.
MEblORY
The channel number position \tarta flashing on the
display for about 5 seconds.
Press CONTROL ) (or 4) to select
0 Q
. CONTROL .
a channel number while the channel
number position is flashing.
MEMORY
Press MEMORY again while the selected
channel number is flashing
on
the
display.
v
The station is assigned to the selected channel number.
l
The selected channel number stop\ flashing and then the
frequency starts flashing.
5 Press CONTROL k (or 4) to select another
frequency you want to store while the frequency
is flashing on the display.
6
Repeat steps 2 to 5 until you store all the
stations you want.
To erase a stored preset station
Star-ing a new station on a used channel number erases the
prcvioucly stored enc.
Page 21

n
To tune in a preset station
On the front panel:
1 Press FM/AM to select the band.
/ I.3 m
The last received station of the selected band is
tuned in.
F
The CONTROL button\ now work for tuner
operations.
Ex. : When selecting the FM band
2 Press CONTROL v (or A)
repeatedly until “< PRESET >”
appears on the display.
3 While “< PRESET 9’ still remains
on the display, press CONTROL )
@ ‘ONTRoL @
(or 4) to select a preset channel
number you want.
* PI-essing (or holding) (‘ONTROL ) increases the preset
channel number-s.
l
Pressing (or holding) CONTROL 4 decreases the preset
channel numbers.
From the remote control:
1 Press FM/AM.
“TUNER” appears on the
operation mode display.
The last received station of the selected band is tuned in
The number huttona now work for tuner operations.
2
Press the number buttons to select a preset channel number.
l
For channel number 5, press 5.
l
For channel number IS. pt-ess + IO then 5.
l
For channel number 10, press + IO. +lO. then IO.
When an FM itcreo broadcast is hard to receive or noisy, you can
change the FM reception mode while receiving an FM broadcast.
l
You can store the FM reception mode for each preset station.
Before you start, remember...
There is a time limit in doing the following steps.
II’ the setting is canceled before you finish, start from step 1 again.
On the front Danel:
7 While listening to an FM station,
press CONTROL V (or A)
repeatedly until “c FM MODE 9’
appears on the display.
2 While “< FM MODE 9’ still remains
on the display, press CONTROL )
@ ‘ONTRoL @
(or 4) to select “MONO.”
l
Each time you press the button, the FM
reception mode alternates between “AUTO
MUTING”” and “MONO.”
ANALOG
q CiI . ..* :spn ..:.. . . . .
:* ,: ‘“p “!FF? y yy . . . .
: . . : ; : i 1:: i :
:...: : : : :
: :.. : I . . .
“wg
: : . . . . . ..:
:
i :*..i i .im ; *: : :
. . . . MA
2 ‘...;
.
: A
____________
~----- .-
PTO MUTING]o[MONO
:. “AUTO MUTING” is the initial setting. If you have already
changed the setting, “MONO” will be shown.
AUTO MUTING : Normally select this.
When a program is broadcasted in stereo,
you will hear stereo sound; when in
monaural, you will hear monaural sounds.
This mode is also useful to suppress static
noise between stations. The AUTO
MUTING indicator lights up on the display.
MONO
: Select this to improve the reception (but
stereo effect will be lost).
In this mode. you will hear noise while
tuning into the stations. The AUTO
MUTING indicator goes off from the
display. (The STEREO indicator also goes
off.)
To restore the stereo effect
Repeat step 1. then select “AUTO MUTING” in step 2.
From the remote control:
I
Press FM/AM to select an FM station.
Number buttons now work for tuner operations.
2 Press FM MODE.
* Each time you press the button, the FM reception mode
alternates between ‘AUTO MUTING” and “MONO.”
18
Page 22
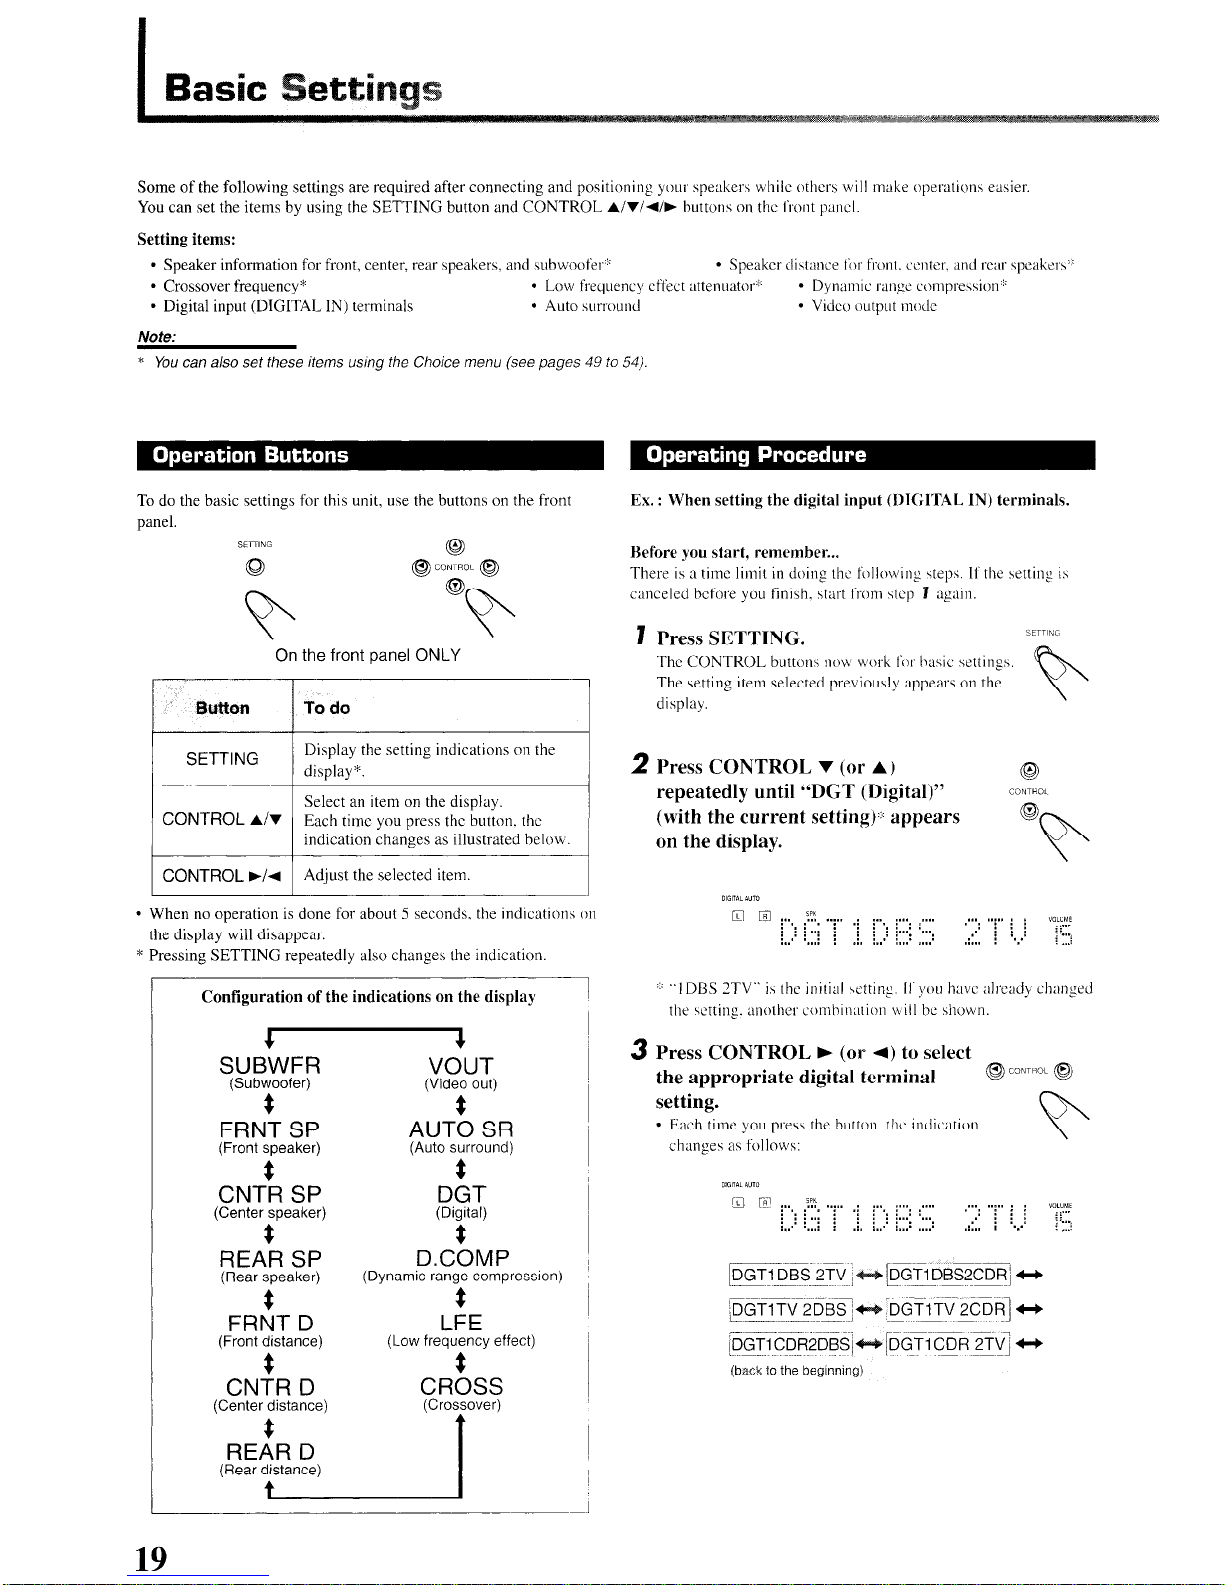
Some of the following settings are required after connecting and positioning your speaker\ while others will make operations easier
You can set the items by using the SETTING button and CONTROL A/r/+/F
buttons on the front pat~cl.
Setting items:
l
Speaker information for front, center, rear speakers, and
subwoofer’~
l
Speaker distance for front. center.
and rcx speakers’:
l
Crossover frequency*
l
Low frequency effect attenuator’.
l
Dynamic range compre\\ion:::
l
Digital input (DIGITAL IN) terminals
l
Auto surround
l
Vi&x output mode
Note:
* You can also set these items ustng the Choice menu (see pages 49 to 54).
To do the basic settings for this unit, use the buttons on the front
panel.
SEiilNG
652
c2
@ @
CONTROL
v
@
On the front
panel
ONLY
I
Button
To do
SETTING
Display the setting indications on the
display*.
I
CONTROL
A/v
CONTROL b/d
l
When no operation is done for about 5 seconds. the indications on
the display will disappear.
* Pressing SETTING repeatedly also changes the indication.
Configuration of the indications on the display
4
4
SUBWFR VOUT
(Subwoofer) (Video out)
:
$
FRNT SP
AUTO SR
(Front speaker)
(Auto
surround)
:
:
CNTR SP
DGT
(Center speaker)
(Digital)
: :
REAR SP
D.COMP
(Rear speaker)
(Dynamic range compression)
:
:
FRNT D
LFE
(Front distance)
(Low frequency effect)
CNTR D
CROSS
(Crossover)
Ex. : When setting the digital input (DIGITAL IN) terminals.
Before you slart, remember...
There is a time limit in doing the following \tep<. If the settins rs
canceled
before you
finish. start l’rom \tcp I again.
7 Press SETTING.
SETTlhC
The CONTROL buttons now work for bn\ic \ettings.
The setting item selected previously) appears on the
display.
2 Press CONTROL v (or A)
@
repeatedly until “DGT (Digital)”
CONTROL
(with the current setting)::: appears
@
on the display.
I
.:. “I DBS 7TV” is the initial \ctting. II you have already changed
the \etting. another combination \I ill be shown.
3 Press CONTROL b (or 4) to select
the appropriate digital terminal
@ ‘ONTHo’ @
setting.
l
Each time you press the button. lhc indication
changes as follows:
m 5’ i,.
2,
.. i . . .
“f.. .: :.., . ...* .a... . . . . . ..:.. : :
“muME
: : : I..: ~...
:,: . ..i ::: i .!* i.:
. .
:...: . . . . .
.: i i j
ii;:;
A.. . .:
! ,._l
ICI): DBS 2TV j
PGTl DBS2CDRi c,
(back to the beginning)
19
Page 23
w Speaker information-“SUBWFR [subwoofer),”
“FRNT SP [front speaker),” “CNTR SP (center
speaker],” and “REAR SP [rear speaker)”
To obtain the best possible effect from the Surround modes (see
pages 25 to 28). register the following information after all
connections are completed.
0 For subwoofer:
0 q
. . . . 7.
:,,, j : : . . . . . : : :....
:...: ;:I i...
:...
:.:.:
:: L j :=“: : “y!
:
:
..: L’ .:: : ..
::
,... . j
‘.] i ;
. . . .
i”..:
.*,.:
Select one of the following settings:
YES :
Select this when a subwoofer is connected
NO
: Select this when no subwoofer is used
Notes:
l “NO” is the initial setting.
l
If you have selected “NO” for the subwoofer, you can on/y select
‘LARGE” for the front speakers.
0 For front saeakers, center speaker. and rear speakers:
m q
j
. . . . spi(. ..;. ; . . . .
a... a...
:‘. j
.a.. :. *: : YOL”M
. .
: .: : i’::
:,,, I,,,: :: :,** : : : : j ;-.
. . ..a . . :
. . . . . .
i :: ****: i : :
. . . . . .
i’-:
. . . . .
Select one of the following settings for each speaker:
LRG (large) : Select thiy when the speaker size is relatively
large.
SML (small) : Select thic when the speaker size is relatively
small.
NO : Select this when you have not connected a
speaker. (Not selectable for the front speakers)
Notes:
l
‘ERG (/arge)“is the initial setting for fbe front speakers, ‘SML
@ma//)” for the center and rear speakers.
l
Keep the following comment in mind as reference when
adjusting the settings.
- If the size of the cone speaker unit built in your speaker is
greater than 4 3/d inches (12 cm), select “‘LRG (large),“and if
it
is
smaller than 4 3/R inches (12 cm), select “SML (small).”
l
If you have selected ‘SML (small)” for the front speakers, you
cannot select ‘LRG (large)” for the center and rear speakers.
n
Speaker distance-“FRNT D (front distance],”
“CNTR D [center distance),” and “REAR D
[rear distance]”
0 El . . . . ;=. ..:.. . . . .
i :‘. i : i...:
i” . . . . . . .
.i ii ‘] : ,.: .i.’
MLUUE i
..i.. IF
: .: : . .
. ! . .
i . .
.i. *.,.:
.
. I..
i:....
. ...* . ..: .. .
i-t
mm . . . . . :?.i. :.... :. . .
i.:.- :...
:...
:,.. ii.:.: : ; ,,
. *.... .
:: ‘i = . ..i..
i,..: .i
y: /
: ‘. i.... : : : -. i... .. .:, *,.,: *
I.. .
j:;-?
The distance from your listening point to the speakers is another
important element to obtain the best possible surround sound of
the Surround modes.
You need to set the distance from your listening point to the
speakers. By referring to the speaker distance setting, this unit
automatically sets the delay time of the sound through each
speaker so that sounds through all the speakers can reach you at
the same time.
Set the distance from the listening point within the range of
1 ft (0.3 m) to 30 ft (9.0 m), in 1 ft (0.3m) interval.
Ex. : In this case,
set “FRNT D” to “1 Ift,”
set “CNTR D” to “1 Oft” and
set “REAR D” to “9ft.”
Notes:
l
“IOft” is the initial setting. If you have a/ready changed the
setting, another setting will be shown.
* If you have selected “NO” for the center
and rear speakers
setting, you cannot set the speaker distance for the center and
rear speakers.
20
Page 24
Basic Setting
Crossover frequency-“CROSS (crossover)”
MG”4TILWlO
mm
. ..* :%, , . . .
i
*,*.* : . . . . . *:. ‘..*. ‘...’ : : .:...
Small speakers cannot reproduce the bass sounds efficiently. If
you use a small speaker in any position, this unit automatically
reallocates the bass sound elements assigned to the small
speaker to the large speakers.
To use this function properly, set the crossover frequency level
according to the size of the small speaker connected.
l
If you have selected “LRG (large)” for all speakers. this
function will not take effect.
Select one of the following settings:
80Hz : Select this frequency when the cone speaker unit
built in the sueaker is about 4 ‘14 inches (I 2 cm).
1OOHz : Select this frequency when the cone speaker unit
built in the speaker is about 3 15/1b inches (10 cm).
120Hz : Select this frequency when the cone speaker unit
built in the speaker is about 3 ‘/lh inches (8 cm).
Notes:
l
“1 OOHz” is the initial setting. If you have already changed the
setting, another frequency will be shown.
l
Crossover frequency is not valid for the HEADPHONE mode.
“” :“” :: .I :-:: :-:: i j ..,,. “?!z
:...’ : i :... . . .
.’ : :
*.,.: . . . . . ::
: :*.: :*.: :.I.: ,.
]! . . . .
: ,,.:
n Dynamic range compression-“D.COMP”
You can compress the dynamic range (difference between
maximum sound and minimum sound) of the reproduced sound
This is useful when enjoying surround sound at night.
l
This function takes effect only when playing back a source
encoded with Dolby Digital.
Select one of the following settings:
OFF : Select this when you want to enjoy surround with its
full dynamic range. (No effect applied.)
MID : Select this when you want to reduce the dynamic range
a little.
MAX : Select this when you want to apply the compression
effect fully. (Useful at night.)
l
“MID”is the initial setting. If you have already changed the
setting, another setting will be shown.
w Digital input [DIGITAL IN) terminals-“DGT”
Low frequency effect attenuatow”LFE”
,.-.-.-.-.
Mo”AL*uTo
macrruD@CC :
lsG%il : i... i...
El 63 i.... i I....
If the bass sound is distorted while playing back software
encoded with Dolby Digital or DTS Digital Surround,
LFE level to eliminate distortion.
l
This function takes effect only when the LFE signals come
Select one of the following settings:
OdB
-1OdB : Select this when the bass sound is distorted
Note:
l
“OdB” is the initial setting. If you have a/ready changed the
setting, “-1OdB” will be shown.
.%. . . . . .
::
:: :=:: :: :
: Normally select this.
: :.... YOLUME
:-.
: :: ,..: :..:
. . . . . . . . . . .
;c
i “-z
set the
in.
q q I”m : y ,.j.. ,j :... ; . . . . :.... “OLUME
: i . . . : : : :,..* . . .
. .
:..* . . ..i :
,i. i,..’ i,,,: ,,,.:
. . . . . ..:.. ; i
: j
,::.. , . . . . i’-;
ir”
When you use the digital input terminals, register what
components are connected to which terminals (DIGITAL IN I/
DIGITAL IN 2). So, the correct source name will appear when
you select the digital source.
Set the appropriate digital terminal setting.
l
Each time you press CONTROL ) or 4, the display changes
as follows:
IDBS2TVe IDBS2CDRe lTV2DBSe
I TV2CDRc lCDR2DBSti ICDR2TVZ
(back to the beginning)
Notes:
l
“IDES ZTV” is the initial setting. If you have a/ready changed
the setting, another combination will be shown.
l
If you want to connect a CD recorder to the digital input
terminal, change the source name to ‘%DR” from “TAPE.”
For details, see ‘Changing the Source Name”on page 12.
21
Page 25

W Auto surround--“AUTO SR”
Surround mode i\ automatically activated when the digital
multichannel source such as Dolby Digital or DTS Digital
Surround software or Z-channel matrix SOUI-ce such as Dolby
Surround is played back.
You can enjoy Surround mode \imply by selecting the source
(with digital input selected for that source)--Auto Surround.
Select one of the following settings:
ON
OFF
The AUTO SURROUND indicator always lights up
on the display.
*If multichannel \ignals come in. an appropriate
Surround mode will be turned on.
*If Dolby Digital ‘-channel or DTS 2-channel
including sun-ound signals come in, “PL II
MOVIE’ will be selected.
*If Dolby Digital ‘-channel or DTS 2-channel
signals without surround aignala come in,
“STEREO” will be selected.
*If the other signals come in, nothing will change.
Select this to deactivate Auto Surround.
Notes:
l
‘ON” is the initial setting. If you have a/ready changed the
setting, ‘OFF” will be shown
l
This function does not take effect in the following cases:
- While playing an analog source.
- While selecbng ‘DG TL D. D.” or “DGTL DTS” as the fixed
digital input mode (see page 13).
l
If you press SURROUND ON/OFF (SURR ON/OFF on the
remote control) with Auto Surround activated, Auto Surround
will be canceled temporarily for the current/y selected source
Auto Surround setting will be restored in the following cases:
- When you turn off and on the unit,
- When you change the source,
- When you change the analog/digital input, and
- When you reset “AUTO SR” to “0N”again.
After connecting your TV to the unit, register the type of the
connected output terminal-VIDEO, S-VIDEO, or
DVD COMPONENT VIDEO OUT.
Without setting this, AV COMPU LINK does not work
appropriately when DVD is selected as the source (see
“AV COMPU LINK Remote Control System” on pages 59 and
60).
Set the output terminal appropriately.
VIDEO
: Select this when you connect your TV to VIDEO
jack by using a composite video cord.
S : Select this when you connect your
TV
to
S-VIDEO
jack by using an S-video cord.
COMPNT : Select this when you connect your TV to DVD
COMPONENT VIDEO OUT jacks by using
component video cord.
Note:
l
“VIDEO” is the initial setting. If you have already changed the
setting, another setfing will be shown.
22
Page 26

I
Sound Adju
The following settings are required after connecting and positioning your speakers.
You can adjust the items by using the ADJUST button and CONTROL A/V/4/) buttons on the front panel
Adjustment items:
l
Front speaker output balance”
. Tone’:’
l
Speaker output level\:::
l
DAP effect level
Notes:
l
The setting contents of adjustment items are memorized for each source.
* You can
a/so set
these items using the Choice menu (see pages 49 to 541
To do the basic settings for this unit, use the buttons on the front
panel.
ADJUST
69
Q
0 @
4 CONTROL
v
@
On the front panel ONLY*
I
ADJUST
Display the ad.justment indications on
the display*“.
CONTROL
A/y
CONTROL b/d
l
When no operation is done for about S seconds. the indications
on the display will disappear.
* You can also make sound adjustment except for front speakers
output balance from the remote control.
** Pressing ADJUST repeatedly also changes the indication.
Configuration of the indications on the display
4
4
BAL
(Balance)
$
BASS
$
TREBLE
f
EFFECT##
4
:
CENTER#
t
t
These indications appear only when the cot-respondmg \peaher\
information for each speaker is set to other than “NO.”
‘# “EFFECT” appears only when one of DAP modes (\ec page\ 25
to 28) is activated.
Ex. : When setting the front speaker output balance.
Before you start, remember...
There is a time limit in doing the following steps. If the setting is
canceled before you finish, start from step I again.
7 Press ADJUST.
ADJUST
The CONTROL buttons now work for sound
adjustments. The setting item aelected previously
appears on the display.
b
2 Press CONTROL V (or A)
43
repeatedly until “BAL (Balance)”
roNTR0L
(with the current setting)::: appears
@
on the display.
0
Lx . . . . . ,?.!, ( WUME
!..: i...j :
i...: : : i....
i
‘.‘. :“” :
:... :.* 1
. .y., :‘... :..m.
if-
. . . . I . . . . :
* a:
: :... i.:.’
. :
i.... : . .
i-3
.F “CENTER” is the initial setting. If you have already changed
the setting, another setting will be shown.
3 Press CONTROL ) (or 4) to adjust ~
the front speaker balance.
4 CONTROL b
8
l
Each time you pres\ the button. the indication
changes as follows:
23
Page 27

n
Front speaker output balance
--“BAL [balance]”
If the sounds you hear from the front right and left speakers are
unequal. you can adjust the speaker output balance.
Adjust the output balance appropriately from the listening
point within the range of R (Right) -21 to CENTER (0) or
CENTER (0) to L (Left) -21.
Note:
l
“CENTER” is the initial setting. If you have a/ready changed
the sefting, another setbng will be shown.
w Tone-“ BASS”
and “TREBLE”
Elm
..:.. !Y.!: . . . . . r., : . . . . .
i :7
i... . . . . . i i...
. :.. !...a in..- * . . . . . i . . . .
You can adjust the has\ and treble sounds as you like.
Adjust the tone within the range of -10 to +I0 in 2 steps
intervals.
Note:
l
‘0”is the initial setting. If you have a/ready changed the setting,
another setting will be shown
Adiustins sound from the remote control
I Press CONTROL
repeatedly so that
“SOUND” appears on the
operation mode display.
Number buttons now work for sound adjustments.
2 Adjust the level as follows:
To adjust subwoofer, press SUBWOOFER + or -.
To adjust center \pcaker. prcs\ CENTER + or -.
To ad,just left rear speaker, press REAR*L + or -.
To adjust right rear speaker, press REAR*R + or -.
To adjust the effect level (for DAP mode), press EFFECT
About auto memory
This unit memorizes the settings for each source:
l
when you turn off the power (see page I I).
l
when you change the sotuce (see page 1 I).
l
when you change the sour-ce name (see page 12). and
l
when you change the analog/digital input mode (see page 13)
When you change the source, the memorized settings for the
newly selected source are automatically recalled.
H Speaker output levels-“SUBWFR
[subwoofer),” “CENTER,” “REAR L (left),”
and “REAR R [right]”
ow
. . . . ““: ; . . . . :
:..*
- -*mm. :-..
. i
i :..: : . i i... j.:..
..*.a -...- i...: :.:.: i : -.
You can adjust the speaker output levels if you have set the
speaker information appropriately.
l
You can adjust the output level for center and/or rear speakers
only when one of proper Surround modes is activated (see
page 27).
Adjust the speaker output level within the range of -10 to
+lO in 1 step interval.
Note:
l
“0” is the initial setting. If you have a/ready changed the setting,
another setting will be shown.
n
DAP effect level--“EFFECT”
iiNll’x DSP
p& :.... $?t. :.... :.... . . . . ..:..
. ...’
Mxuwz I
q
:... :... f.. i... :
ric I . . . . i
i
. . ;yi
. : . . . . . . . . :
. . . . .
g 7
While one of DAP modes is activated (the DSP indicator lights
up on the display), you can adjust the effect level.
For details about DAP modes, see pages 25 to 28.
Adjust the effect level within the range of 1 to 5.
l
“3” is
the
initial setting. If you have already changed the setting,
another setting will be shown.
The following can be stored for each source:
l
Analog/digital input mode (see page 13)
l
Input attenuator mode (see page 14)
l
Front speaker output balance (see above or page 52)
* Speaker output level (see above or page 53)
l
Tone adjustment (see above or page 52)
l
DAP effect level (see above)
l
Surround mode selection (see page 27)
Note:
l
If the source is FM or AM, you can assign a different setting for
each band.
24
Page 28

Creating Realistic
I
You can use the following Surround modes to reproduce a realistic
sound field:
n
Dolby Surround
l
Dolby Pro Logic II
l
Dolby Digital
n
DTS Digital Surround
n
DAP (Digital Acoustic Processor) modes
n
All Channel Stereo
For DVD AUDIO multichannel surround, see page 43.
n Dolby Surround
Dolbv Pro Louic
Dolby Pro Logic II has newly developed multichannel playback
format to decode into 5. l-channel from all 2-channel sourccsstereo source and Dolby Digital encoded source.
Matrix-based encoding/decoding method for Dolby Pro Logic II
makes no limitation for the cutoff frequency of the rear treble and
enables stereo rear sound compared to conventional Dolby Pro
Logic.
l
You cannot select Dolby Pro Logic II when playing
AUDIO.
Dolby Pro Logic II enables to reproduce spacious sound from
original sound without adding any new sounds and tonal colorations.
Dolby Pro Logic II has two modes-Movie mode and Music mode:
Pro Logic II Movie (PL II MOVIE)-suitable for reproduction of
Dolby
Surround encoded sources bearing the mark OOIDOLBV sunno%
and stereo television sources. You can enjoy sound field very close
to the one created with discrete 5. l-channel sounds.
Pro Logic II Music (PL II MUSIC)-suitable for reproduction of
any 2-channel stereo music sources. You can enjoy wide and deep
sound by using this mode.
l
When Dolby Pro Logic II is activated, the 00 PRO LOGIC II
indicator lights up on the display.
II*
back
DVD
Dolby Diaital*
Used to reproduce multichannel sound tracks of the software
encoded with Dolby Digital ( F!F ).
l
To enjoy the software encoded with Dolby Digital, connect the
source component using the digital terminal on the rear of this
unit. (See page 10.)
Dolby Digital 5.1~channel encoding method (so-called discrete
multichannel digital audio format) records and digitally compl-esse\
the left front channel, right front channel, center channel, left rear
channel, right rear channel, and LFE channel signals.
Since each channel is completely independent from the other
channel signals to avoid interference, you can obtain much bettel
sound quality with much stereo and surround effects.
n DTS Digital Surround”*
Used to reproduce multichannel \ound tt-acks of the software
encoded with DTS Digital Surround (m).
l
To en.joy the software encoded with DTS Digital Surround,
connect the source component using the digital terminal on the
rear of this unit. (See page IO.)
DTS Digital Surround is another discrete multichannel digital
audio format available on CD. LD. and DVD software.
Compared to Dolby Digital, audio comprcasion ratio is relatively
low. This fact allows DTS Digital Surround format to add breadth
and depth to the reproduced sounds. As a result, DTS Digital
Surround feature\ natural. solid and clear sound.
action
11 Left rear I
1 speaker 1
A-J
W DAP (Digital Acoustic Processor] modes
DAP mode\ have been designed to create important acoustic
surround element\.
l
You cannot select DAP modes when playing back DVD
AUDIO.
The sound heard in a live club,
of direct sound and indirect sound--early rctlections and reflection\
from behind. Direct sounds reach the listener directly without any
reflection. On the other hand, indirect sounds are delayed by the
distances of the ceiling and walls (see the diagram below).
These indirect sounds are important elements of the acoustic
sun-ound effects. The DAP
field
by
adding these indirect sounds.
DAP modes can be used when the front and rear speakers are
connected to this unit (without respect to the center speaker
connection: no sound comes out of the center speaker even if it is
connected).
dance
mode cx
club. hall or pavilion consists
reproduce a I-ealistic sound
1
Note:
l
Do/by Digital or DTS software can be rough/y grouped info two
categories-multichannel (up to 5. i-channel) and P-channel
software. To enjoy surround sounds while playing Dolby Digital Zchannel or DTS software, you can use Do/by Pro Logic II.
* Manufactured under license from Do/by Laboratories. “Dolbx” “Pro
Logic,“and the double-D symbol are trademarks of Dolby
Laboratories.
25
‘. ‘i Manufactured underlicense from Digital Theater Systems, Inc. US
PAT. No. 5,451,942 and other world-wide patents Issued and
pending. ‘DTS” and “DTS Digital Surround” are trademarks of
Digital Theater Systems, Inc. Copyright 1996 Digital Theater
Systems, Inc. All rights reserved.
Page 29

The following DAP modes are provided for this unit:
H All Channel Stereo
LIVE CLUB : Gives the feeling of a live music club with a low
ceiling.
DANCE CLUB : Gives a throbbing bass beat.
HALL : Gives clear vocal and the feeling of a concert
hall.
PAVILION
: Gives the spacious feeling of a pavilion with a
high ceiling.
These DAP modes can be used to add the acoustic surround effects
while reproducing 2-channel ster-eo software, either analog or Linear
PCM digital signal. and can
give you a real “being there” feeling.
l
When one of the DAP modes is selected. the DSP indicator lights
up on the display.
Crea
Id
Reflections from behind
Direct sounds
This mode can reproduce a larger stereo sound field using all the
connected (and activated) speakers.
* You cannot select All Channel Stereo when playing hack DVD
AUDIO.
All Channel Stereo can be used when the front and rear
speakers are connected to this receiver without respect to the
center speaker connection.
If the center speaker is connected and activated, the same phases of
the front left and right signals arc mixed and output through the
center speaker.
All Channel Stereo can be used while reproducing 2-channel stereo
software, either analog or Linear PCM digital signal.
l
When All Channel Stereo is selected, the DSP indicator lights up
on the display.
All Channel Stereo reprodwtiam~ : t_- ._
Sound reproduced from normal stereo
Sound reproduced from All Channel Stereo
0: Possible x: Impossible
Available Surround modes for each inaut sianal
DOLBY
DTS
PL II
DIGITAL SURROUND MOVIE
PL II
MUSIC
LIVE
CLUB
DANCE
CLUB
HALL
ALL
CH
PAVILION
ST.
Dolby
Digital
(Multichannel) ’
Dolby Digital
(2-channel)
0
Dolby Surround
(matrix 2-ch)
0
DTS Digital
Surround
0
(Multichannel)
DTS Digital
Surround
0
(2-channel)
0
X X
x
X
X X X X
X
X
3
,c\
i
X
X X
X X
X X
0
C)
X
X X X X
X
0
X X X
X X
X X
X X
0 0
X
X X X X
Linear PCM
o-
X X
0
3
0
0 0
0
0
Analog c , x , x I 0
0
O I O I c
0
0
26
Page 30

Creating Realis
When Auto Surround is set to “OFF” or 2-channel source other than
Dolby Surround software is played back, activate Surround mode
manually.
Make sure that you have set the speakers information correctly
(see page 20 or 53).
l
If only front speakers are connected, you cannot activate any
Surround mode.
On the front uanel:
Press SURROUND ON/OFF.
The SURROUND indicator lights up on the display
(when Auto Surround is set to “OFF”).
l
Each time you press the button, Surround mode is
activated and deactivated altcrnatcly.
From the remote control:
rirlmm
’ .* 1 Press CONTROL repeatedly so that
“SOUND” appears on the operation
mode display.
Number buttons now work for sound adjustments.
2 Press SURR ON/OFF.
The SURROUND indicator lights up on the
display (when Auto Surround is set to “OFF”).
l
Each time you press the button, Surround mode
is activated or deactivated alternately.
a
Y
When 2-channel source is played back with Surround mode
activated. you can select another Surround mode.
Available Surround modes will vary depending on the number of the
connected speakers and the playback sound.
Make sure that you have set the speaker information correctly
(see page 20 or 53).
* You cannot change Surround mode when playing back DVD
AUDIO multichannel track.
4 If rear speakers are not connected, you cannot use DAP modes
and All Channel Stereo.
On the front panel:
Press SURROUND MODE.
l
Each time you press the button, Surround mode
is changed as illustrated below:
v
From the remote control:
1 Press CONTROL repeatedly so that w
“SOUND” appears on the operation
mode display. v
Number buttons now work for sound adjustments.
2 Press SURR MODE.
* Each time you press the button Surround mode IS
changed as illustrated below:
When 5 or 4 (except center speaker) speakers are connected:
SURRMODE
v
About SURROUND indicators
l
When Auto Surround is set to
“ON,” the AUTO SURROUND
indicator always lights up on the
display.
l
When you activate Surround
mode manually with Auto
Surround set to “OFF,” the
SURROUND indicator lights up
on the display.
Sianal and speaker indicators on the disnlay
The following signal indicators light up -:
L R
C, LS, RS : Light up when the signals corresponding to each
S
LFE
: *When digital input is selected: Light up when
the signals corresponding to each channel come
in.
l
When analog input is selected: Always light
up.
channel come in.
: Lights up when the monaural rear channel signal
or Dolby Surround encoded signal comes in.
: Lights up when the LFE channel signal comes
in.
When 3 (except rear speakers) speakers are connected or
Dolby Digital including matrix source is played back:
DlGIRLA”TO mPROLoGlCr
S”RIKI”NO
g!g 7.: .:.:. :, .: : :
n n I”” j ,.,, .j!i,
/pL II MOVIE?
L c R
LFE
LS s RS
Signal indicators Speaker Indicators
The speaker indicators light up as follows:
l
The subwoofer speaker indicator- ( JsuBwFR1) lights up when
“SUBWFR” is set to “YES” (see page 20) or “USE” (see
page 53).
* The other speaker indicator\ light up only w#hen the
corresponding speaker i\ activated. and also when required
for the current playback.
. . . .
.i’ **...
: : i...
; :I :...: ....: .i. i ,...
IL!? ll MUSIC,
q uu
piiiFq
017
“OLUME
ii..,
j :I::
27
Page 31

Notes:
When playing back the ~ourcc with Surround mode. you can ad,juat
the speaker output levels for Surround modes.
Once you have adjtlsted
the
Sur-round modes, the adjustment is
memorized for each source’.
l
You can also adjust Surround modes casing the Choice menu (see
pages 49 to 54) or hutton~ on the front panel (SK page 24).
l
When using test tone, you can ad,just the {peaker output levels
without playback sounds.
1 Select and play back software you like.
2 Activate and select Surround mode.
* When 2-channel source is played back, you can select
Surround modes.
3 Adjust the sound.
1) Press CONTROL repeatedly so that
“SOUND” appears on the operation mode
display.
Number buttons now work for the sound adjustment
2) Adjust the speaker output levels as follows:
To adjust center speaker. press CENTER +/-.”
To adjust left rear speaker, press REAR-L +/-.
To adjust right rear speaker-. press REAR-R +/-.
To adjust subwoofer, press SURWOOFER +/-.
To adjust the effect level, press EFFECT.*”
The name for the
ikm
currently adjusted appears on the
display. For detail\. 5ee the illustrations of “Speaker output
levels” on page 24.
l
You can adjust the speaker output /eve/s for the
activated speakers ONLY (the speaker indicators are
lit on the display).
* You cannot adjust the output /eve/s of center speaker
when one of DAP modes is activated.
:-‘* You can adjust the effect /eve/ on/y when one of DAP
modes is activated.
l
Before operating the DVD player using remote
control, press DVD to change the remote control
operation mode to DVD.
For usina test tone
I) Press CONTROL
!) Press TEST.
The playback sound stops during playback.
“TEST L” starts flashing
on
the display and a test tone come
out of the speakers in the following order:
~~~~~~~~~~
(Right rear speaker)
I) Adjust the speaker output level as follows:
To adjust center speaker, press CENTER +/-.
To adjust left rear speaker, press REAR*L +/-.
To adjust right rear speaker. press REAR-R +/-
* You cannot adjust the speaker output /eve/s if you have set
speaker information to “NO.”
l
No test tone comes out of the speaker when its speaker
fnformation is set to “NO.”
l
When you press EFFECT or SUBWOOFER +/-, the test to
stops.
I) Press TEST to stop the test tone.
The test tone stops.
0 When no operation is done, the test tone stops automatical
in about I minute.
Relation between Surround modes and ad&table items
0: Possible x : Impossible
I
DAP
I
c
I x I c IO IO IO 1
All Channel Stcrco
1 c [ 0 C‘ 0 0
X
Note:
l
You cannot adjust the speakers which are not used by the selected Surround mode
28
Page 32

DVD Pla
I
n
Playable Disc Types
This unit has been designed to play back the following discs:
DVD VIDEO, DVD AUDIO, Video CD (VCD), Super Video CD (SVCD), audio CD, CD-R, and CD-RW.
l
This unit can also play back MP3 and JPEG files recorded on CD-R and CD-RW. For details about MP3. see “MP3 Disc Playback” on
pages 45 and 46 and about JPEG, see “JPEG Disc Playback” on page\ 47 and 4X.
l
This instruction refers to Video CD as VCD, Super Video CD as SVCD. and audio CD as CD
Discs you can play:
l
The following discs cannot be played back:
DVD-ROM, DVD-RAM, DVD-RW, CD-ROM, CD-l (CD-I Ready). Photo CD. etc
Playing back these discs will generate noise and damage the speakers.
l
On some DVD VIDEO, DVD AUDIO. VCD, or SVCD, their actual operations may be different from what is explained in this manual. This
is due to the disc programming and disc structure, but not a malfunction of this unit.
l
You can play back DVD-R recorded with the DVD VIDEO format. but some may not be played back because of the disc characteristics or
recording conditions
Note on Region Code
DVD players and DVD VIDEO have their own Region Code
numbers. This unit can play back only DVD VIDEO recorded
with the color system of NTSC whose Region Code numbers
include “I.”
Ex.: @ Q @ 0
If a DVD VIDEO with the wrong Region Code numbers is
loaded, “REGION CODE ERROR!” appears on the TV and
playback cannot start.
IMPORTANT
following...
l
Check the connection with the TV.
l
Turn on the TV and select the correct input mode on the TV to
view the pictures or on-screen indications on the TV scl-een.
l
For disc playback, you can change the initial setting to you,
preference. (See pages 49 to 57.)
: Before playing a disc, make sure of the
If “ 8 ” appears on the TV screen when you press a button,
the disc cannot accept an operation you have tried to do, or
data required for that operation is not recorded on the disc.
NOTICE
will not be accepted.
: In some cases, without showing “
“, operation\
Notes on CD-R and CD-RW
l
U\cr-edited CD-R (Recordable) and CD-RW (ReWritable) can
be played back only if they are already
* The unit can play back CD-R or CD-RW recorded on a
personal computer if they have been recorded in the
“finalized.”
audio CD
format.
The unit can also play back CD-R or CD-RW if MP3 tiles 01
JPEG files are recorded on them.
However. they may not be played back because of their disc
characteristics, recording conditions, 01. damage or stain on
them. Especially, the com‘iguration and characteristics of an
MP? disc or a JPEG disc is determined by the writing
(encoding) software and hardware used for recording.
Therefore, due to the software and hardware used, the
following symptoms may occur:
~ Some discs may not be played back.
Some tracks on an MP3 disc XC skipped and may not be
played back normally.
-
Some tiles on a JPEG disc may be played back distortedly.
l
Before playing back CD-R or CD-RW. read their instructions
or cautions carefully.
l
CD-RW may require a longer readout time. It is caused by the
fact that the reflectance of CD-RW LS lower than for regular
audio CD.
29
Page 33

H Disc structure
DVD VIDEO
consists of
“titles.”
and each title may be divided into
some
“chapters”
(see Example I ).
For example, if DVD VIDEO contains some movies, each movie
may
have its own
title
number and it may be further- divided into
some
chapters.
In DVD VIDEO Karaoke, each song may have it5
own title
number, but it may not be further divided into
chapters.
DVD AUDIO
consists of
“groups,.’
and each group may bc divided
into some
“tracks” (see
Example 2).
Some DVD AUDIO also contain a “bonus group” that can be played
back by entering the “key number” (a kind of password). Usually
the contents of “bonu\ group” are not opened to the public.
Note that most DVD AUDIO include other information in addition
to audio, such as still picturca. movies, and text.
VCD. SVCD.
and
CD
consist
of “tracks”
(see Example 3).
In general, each track has its own
track
number. (On some discs,
each track may also be divided by Indexes. This unit is not
compatible with Index function.)
W Playback Control function (PSC)
The Playback Control function allows you to enjoy menu-driven
operation.
Menu-driven playback
A selection menu is displayed when you start playing VCD and
SVCD with the Playback Control feature. The selection menu shows
a list of numbers for selection. Some discs may show moving
pictures or a divided screen.
You can interact with the screen using a menu display to select and
play an entry.
See the example illustration on the right about basic feature of
menu-driven playback (for details about the operation through the
menu, see also page 33).
Note:
I
l
While operating VCD or SVCD using the menu, some of the
functions such as repeat piay may not work.
Example 1: DVD VIDEO
Title 1
Title 2
*
Example 2: DVD AUDIO
Menu
screen
-
LJ
------------_ _------------_-
Submenu 4 Submenu
1
RETURN.
30
Page 34

DVD Player
This section explains advanced operations of the built-in DVD player Losing the remote control. For MP3 playback. \ce pages 45 and 46, and
for JPEG playback, see pages 47 and 48.
Before using the remote control, press DVD so that “DVD” appears on the operation mode display.
l
See also “Basic DVD Player Operations” on pages I5 and 16.
q
show which types of disc are available for the op~ation.
l
Turn on your TV and select the correct input mode on the TV.
If “Q ” appears on the TV when you press a button, the disc cannot accept an operation you have tried to do, or data required for
1
that operation is not recorded on the disc.
You can check the information of a disc while the disc is loaded and
use some functions through the on-screen bar.
OQOD
ON SCREEN
VO
0 Whenever a disc is loaded
Press ON SCREEN.
l
Each time you press the button, the on-screen bar changes as
shown to the right:
When a DVD VIDEO IS played
w
(with the pull-down menu)
Q
The on-screen bar goes off.
*Q
(back to the beginning)
Contents of the on-screen bar with the pull-down menu
rJ
41
Ex.: When a DVD VIDEO is played
q
Disc type
q
Playback information
cimm
shows the current title.
famB
shows the current
chapter.
ra Playback conditions for all types of disc
Indications
Meanings
4 Operation icons (on the pull-down menu)
ndication
/CHAP1
ill
PAGE
l/l!
JPROG./
/RND./
m
‘ ,’
time indic3Con.
‘
See page 32.
Select this to repeat
playback. See page 12.
Select this for time search.
See page 37.
Select this for chapter
search. See page 37.
Select this for track
search. See page 37.
Select this to change the
audio language or channel
See pages 35 and 36.
Select thi,j to change
subtitle language.
See page 35.
Select this to change the
view angle. See page 3-i.
Sclcct this to change the
page. See page 44.
Select this for the program
play. See page 1 I.
Select thih for the random
play. See page -I I.
Available discs /
All discs
I
31
Page 35

You can change the time information in the on-screen bar and the
display window on the center unit
Ex. : When selecting the repeat mode for DVD VIDEO
0 0
0
o@$j~~
OPi?~“LEN
Kg20
0 During playback or while
@
stopped
7 Press ON SCREEN twice.
The on-screen bar with pullMown menu appears on the TV.
TIMEC3C, OFF 0-P CHA
2 Press cursor b (or 4) repeatedly to move E to
-1 on the pull-down menu.
3 Press ENTER.
The pol~~up window appears under the pull-down menu
j > _1 “\,* *1’ 1
P;IFF
.- w
4 Press cursor V (or A) to select the desired option
in the pop-up window.
l
Each time you press the button. the options change.
5 Press ENTER.
The setting changes and the pop-up window goes off.
To turn off the on-screen bar
Press ON SCREEN.
Note:
l
See the pages for the de&// of each function
0 During playback or while
stopped
7 Press ON SCREEN twice.
The on-screen bar appears on the TV
2
Press cursor b (or 4) to move c3 to TIME .
3 Press ENTER.
l
Each time you press the button, the time indication changes as
lollows:
TOTAL * T.
(total)
REM 4 TIME d REM d
(back to the beginning)
TOTAL : Elapsed time of the disc
T. REM : Remaining time of the disc
TIME
: Elapsed playing time of the current chapter/track
REM
: Remaining time of the current chapter/track
To turn off the on-screen bar
Preu ON SCREEN.
Nofes:
l
The time indication in the on-screen bar changes as follows:
EX. :
The indication on the display also changes.
0 Wh//e playing VCD, SVCD, or CD, the indication of the hour digit
does not appear.
32
Page 36

DVD Player Dp
Using the disc menu, you can start playing a title, chapter, or track
you specify.
VCD or SVCD recorded with PBC has its own menus such as a list
of the tracks. (After loading such a disc. “PBC” appears on the
display.) You can locate the specific track by using the menu (see
also page 30).
If the on-screen bar is shown on the TV, press ON SCREEN
l
Before using the remote control, press DVD to change the
repeatedly to go off the on-screen bar.
remote control operation mode.
n
From the DVD menu
DVD VIDEO and DVD AUDIO generally have their own menus
which show the disc contents. These menus contain various items
such as titles of movies, names of songs, or artist information, and
display them on the TV screen. You can locate a desired scene by
using these menus.
0
0
Ill
0
0
q
When DVD VIDEO/
DVD AUDIO is loaded
1 Press TOP MENU or MENU.
The DVD menu appears on the TV. (The menu usually appears
on the TV automatically after loading the disc.)
Ex. :
DVD VIDEO/DVD AUDIO normally has a “top” menu when it
contains more than one title/group. In this case, press
TOP MENU to show the title menu.
Some DVD VIDEO/DVD AUDIO may also have a diffcrcnt
menu which is shown by pressing the MENU button.
See the instructions of each DVD VIDEO/DVD AUDIO for its
particular menu.
2u
se cursor A/V/F/~ to select a desired item,
then press ENTER.
The unit starts playback of the selected item.
l
With some discs, you can also select items by entering the
corresponding number using number buttons.
W From the VCD/SVCD menu with PBC
0 When the menu appears on
the TV during playback
with PBC
Press number buttons (l-10, +lO) to select the
number of the desired item.
The unit starts playback from the selcctcd item.
Ex. : To select 3, press 3.
To select I 1, press + IO, then I.
Ex. :
To return to the menu
Press RETlrRN.
When “NEXT” or “PREVIOUS” is shown on the TV screen:
To go to the next page, press ))I.
To return to the previous page, press 144.
To play back PBC-compatible VCDlSVCD without PBC
Starr playback by pressing the number buttons while playback is
stopped.
The elapsed playinp time appeal-\ on the display instead of “PBC.”
To restore PBC
Press TOP MENU or MENU
“PBC” appears again on the display
About indication on the display while olauing back a VCD/SUCD
While you are playing back a VCDKVCD recorded with PBC. playback information appear on the display a\ follow\:
Ex. : When VCD is played back using PBC
Ex. : When VCD is played back without using PBC
01G”AL #“TO
cm
D,aTAL AUTO 09
0 q
: : .:::, :. . , “Y ,.... YOLUME
:::
:: . .
.;
:: !:I:’
n
q
. . . . :
..,.
f.,.’ ..,,: ,i. :: :
..,..
:*.*’ .,..: : . . . . .
i---i
i ..f
I
Track number
I I
Track number Elapsed playing time
33
Page 37

While playing hack DVD VlDEOiDVD AlJDlO containing multiview angles, you can enjoy the same scene at different angles.
The & icon appears at the heginning of playback when the current
scene has multi-view angles.
W Selecting a view angle
=,L-c7
q
During playback
7 Press ANGLE.
The following pop-u,, window appears on the TV.
Ex. : The tir\t view angle is selected out of 3 view angles
recorded.
2 Press ANGLE repeatedly to select the desired
view angle.
l
Each time you press the button, the angle of the scene
changes.
Ex.: l/3 a 2/3 ti 3/3 4 (back to the beginning)
The pop-up window goes off ii no operation is done for about
5 seconds.
Usine the on-screen bar:
7 Press ON SCREEN repeatedly until the on-screen
bar with pull-down menu appears on the TV.
2 Press cursor F (or 4) repeatedly to move 6 to
ed
in the pull-down menu, then press
ENTER.
The following pop-up window appears under the pull-down
menu.
Ex. : The first view angle ih selected out of 3 view angles
3 Press cursor v (or A) repeatedly to select the
desired view angle.
* Each time you press the button, the angle of the scene
changes.
4 Press ENTER.
The pop-up window goes off.
To turn off the on-screen bar
Press ON SCREEN.
W Showing all view angles on the TV
=,l7l7
0 During playback
7 Press and hold ANGLE for a few seconds.
Up to 9 pictures of the different camera angles recorded on a
disc appear on the TV screen.
bx. When 3 view angles are recorded.
Angle list
L Selected picture
2 Press cursor A/V/W+ repeatedly to move 6 to
the desired view.
3 Press ENTER.
The angle list goes off, and playback ctarts at the selected view
angle.
Notes:
l While the angle list is shown on the TV you cannot listen to the
sound.
l
If “ u appears on the JV fhe current scene does not contain
multi-view angles.
34
Page 38

While playing back DVD VIDEO/DVD AUDIOBVCD containing
subtitles in different languages, you can select the subtitle language
to be displayed on the TV.
The a icon appears at the beginning of playback when the current
scene has plural subtitles.
When DVD VIDEOlDVD AUDIO contains audio language<
(soundtrack), you can select the language (soundtrack) to listen to.
The a icon appears at the beginning of playback when the current
scene has plural audio languages.
l
You can also select the audio channel(s) of VCD or SVCD.
n
7
Selecting the subtitle language
111 o A A A 111 q Duringplayback
Press SUBTITLE.
The following pop-up window appears on the TV.
Ex. : “ENGLISH” is selected among 3 subtitle languages
recorded.
2 Press SUBTITLE repeatedly to select the desired
subtitle language.
l
Each time you press the button, the subtitle language change\.
The pop-up window goes off if no operation is done for about
5 seconds.
Using the on-screen bar:
I
2
3
Press ON SCREEN repeatedly until the on-screen
bar with pull-down menu appears on the TV.
Press cursor F (or 4) repeatedly to move E to
fzJ
in the pull-down menu, then press
ENTER.
The following pop-up window appears under the pull-down
menu.
Ex. : “ENGLISH” is selected among 3 subtitle languages
recorded.
Press cursor V (or A) repeatedly to select the
desired subtitle language.
l
Each time you press the button. the subtitle language change\.
4 Press ENTER.
The pop-up window goes off.
To turn off the on-screen bar
Press ON SCREEN.
for DVD V/DEO/DVD AUDIO: Some subtitle languages are
abbreviated in the pop-up wIndow. See “‘Language code /Won
page 52.
For SVCD: SVCD can contain up to four subtitles. Pressing
SUBTlTLE changes the subtitles regardless of whether the
subtitles are recorded or not. (Subtitles will not change if no subtitle
is recorded.)
If “8 )1 appears on the TY the current scene does not contain
plural subtitles.
n
Selecting the audio language
gzza ,am
0000
0 During playback
1 Press AUDIO.
The following pop-up window appears on the TV.
hx. : “ENGLISH” is selected among 3 audio languages
recorded.
),lw?>. .,
2 Press AUDIO repeatedly to select the desired
audio language.
l
Each time you pre\a the button. the audio language changes.
The pop-up window goes off II‘ no operation is done for about
5 second\.
Usinv the on-screen bar:
7 Press ON SCREEN repeatedly until the on-screen
bar with pull-down menu appears on the TV.
2 Press cursor F (or 4) repeatedly to move g to
CD in the pull-down menu, then press
ENTER.
The following pop-up window appears under the pull-down
menu.
Ex. : “ENGLISH” i\ selected
among 3 audio
languages
recorded
35
Page 39

3 Press cursor v (or A) repeatedly to select the
desired audio language.
l
Each time you press the button, the audio language changes.
4 Press ENTER.
The pop-up window Foe\ oil’.
To turn off the on-screen bar
Press ON SCREEN.
Notes:
l
Some audio languages are abbreviated in the pop-up window. See
“Language code list” on page 52.
l
If ” “appears on the TV, the current scene does not contain
plural audio languages.
n
Selecting the audio channel
When playing back some Karaokc VCDs or SVCDs. you can el?lo)
Karaoke by <electing the audio channel to play.
I!I
c3000
III
0 During playback
1 Press AUDIO.
The following pop-up window appears on the TV.
Ex. : “ST” (stereo) i\ selected
2 Press AUDIO repeatedly to select the desired
audio channel.
* Each time you press the button, the audio channel changes
For VCD:
Ex. :
ST d L
d R d (back to the beginning)
ST : To listen to normal stereo playback.
L : To listen to the L (left) audio channel.
R : To listen to the R (right) audio channel.
For SVCD:
Ex. :
STlc3ST2c3Llc3Filc3L2dR2c3
(back to the beginning)
ST l/ST 2 : To listen to normal stereo playback of ST 1 or
ST 2 channel.
Ll/L2
: To listen to the L (left) I or 2 audio channel.
R l/R2
: To listen to the R (right) I or 2 audio channel.
The pop-up window goes off if no operation is done for about
S xconds.
lGng the on-screen bar:
7 Press ON SCREEN repeatedly until the on-screen
bar with pull-down menu appears on the TV.
2 Press cursor F (or 4) repeatedly to move & to
al
in the pull-down menu, then press
ENTER.
The following pop-up window appears under the pull-down
menu.
Ex. : “ST” (stcrco) is selected.
TIME ‘Ct2 OFF ‘@+ :PROG. RND.
3 Press cursor v (or A) repeatedly to select the
desired audio channel(s).
0 Each time you press the button, the audio channels change
4 Press ENTER.
The pop-up window goes off.
To turn off the on-screen bar
Preu ON SCREEN.
36
Page 40

You can start playing a title, chapter, or track you specify.
You can also play a disc from the specified time.
n
Locating a desired chapter/track
-Chapter/Track Search
When playing back DVD VIDEO/DVD AUDIO, you can search fog
the chapter/track number to be played.
l
Before using the remote control, press DVD to change the
remote control operation mode.
O@@J@
o~-J(-J
q
During playback
7 Press ON SCREEN repeatedly until the on-screen
bar with pull-down menu appears on the TV.
2 Press cursor F (or 4) repeatedly to move E to
CHAP.+
or
TRACK
+ in the pull-down menu, then
press ENTER.
The following pop-up window appears under the pull-down
menu.
Ex. : When DVD VIDEO is loaded.
Ex. : When DVD AUDIO is loaded.
3 Press the number buttons (O-9) to enter the
desired chapter/track number.
Ex. : To select chapter/track number 8. press 8.
To select chapter/track number IO, press 1 theu 0.
To select chapter/track number 37, press 3 then 7.
l
To correct a misentry
Repeat step 3 until the desired number appears in the pop-up
window.
4 Press ENTER.
The unit starts playback from the selected chapter/track.
To turn off the on-screen bar
Press ON SCREEN.
H Locating a desired position-Time Search
You can start playing at your desired position by specifying the
elapsed playing time from the beginnin,
(T of the current title up to
.‘9:59:59” (for DVD VIDEO/DVD AUDIO). or from the beginning
01‘ the disc up to “99:5Y” (for VC’DISVCDIC’D).
l
Before using the remote control, press DVD to change the
remote control operation mode.
o For DVD VIDEO:
During playback
For VCDISVCD:
While stopped or during
playback without PBC
For DVD AUDIO/CD:
While stopped or during
playback
7 Press ON SCREEN repeatedly until the on-screen
bar with pull-down menu appears on the TV.
2P
ress cursor ) (or 4) repeatedly to move
c3 to
0 + in the pull-down menu, then press ENTER.
The following pop-up window appear\ under the pull-down
menu
3 Use the number buttons (O-9) to enter the time.
Ex. : To play back from a point of I (hours): 02 (minutes): 39
(seconds) from the beginning
Press 1
Press 0
Press 2
Press 4
Press 9
* To correct a misentry
4 Press ENTER.
The unit starts playbacl, l‘ron~ the apccil‘iecl time
Notes:
l
The IO/O button works as the 0 button in this function.
l
The + 10 button is not used in this function.
l
You can select up to the 99th chapter/track.
37
Page 41

To turn off the on-screen bar
Press ON SCREEN.
Notes:
l The IO/O button works as the 0 button in this function
l
The +I0 button is not used in this function.
l
You can specify the time In hours/minutes/seconds for DVD VIDEO/
DVD AUDIO, and in mwteskeconds for VCD/SVCD/CD.
n
Locating a desired scene--DIGEST
The unit can display the opening scenes of each title or chapter on
DVD VIDEO or each wick of il VCDISVCD.
You can select 3 desired title, chapter. or track from the opening
scenes shown on the TV screen.
;
0
0 For DVD VIDEO:
While stopped or during
playback
For VCDISVCD:
While stopped or during
playback without PBC
7 Press DIGEST.
Up to 9 opening w2nc\ ;we di\playetl.
Selected scene
* While DVD VIDEO is stopped :
The opening scenes of each title appear on the TV screen.
- During DVD VIDEO playhack :
The opening sccncs of each chapter in the current title appeal
on the TV \cl-een.
. When VCD or SVCD is loaded :
The opening wznc~ ol’e~h trnck nppcar on the TV screen.
2 Press cursor ~/V/b/4 to move R to the desired
scene.
* If there are more than 9 scenes, the digest screen will have
more than one p”ge.
To show other pages of the digest screen
To display the previous page, select the left top scene,
then press cursor 4.
To display the next page. select the right bottom scene.
then press cursor F.
OR
Press WI to display the next page.
Press 144 to display the previous page.
3 Press ENTER.
The unit starts playback from the selected scene.
Note:
* For some discs, It may take some time before a// the scenes appear
on the TV screen.
38
Page 42

This unit provides special picture playback functions including
frame-by-frame, strobe, slow-motion, and zoom.
n
Frame-by-frame playback
l
Before using the remote control, press DVD to change the
remote control operation mode.
000
III
0 During playback
Press II (STROBE) repeatedly.
l
Each time you press the button. the still picture advances to the
next frame.
To return to normal playback
Press F.
Note:
l
You can also perform the above operafion using Ii on the front pane/.
n
Showing continuous still pictures-STROBE
l
Before using the remote control, press DVD to change the
remote control operation mode.
0000
0 During playback
7 Press STROBE (II) at the point you want to view
as continuous pictures.
Playback pauses.
2 Press and hold STROBE (II) for a few seconds.
The same 9 frames (still pictures) appear on the TV screen.
You can advance the frames one by one in the following \tep.
3 Press STROBE
(II)
once.
The picture in the middle on the top row show\ an advanced
frame from the one on the left.
- Advanced frame
l
Pressing the button repeatedly advances the frames one by enc.
l
Pressing F instead of STROBE (II) advances each frame at
normal playback speed with a time delay over the all 9 frame\.
(The sound is muted.)
To return to the normal screen
Press and hold STROBE (II) for a few seconds
Notes:
l
If you press and hold STROBE (II) for a few seconds during
playback, 9 still pictures also appear but they advance in normal
playback speed with a time delay (The sound is muted)
l
You can a/so perform the above operation using II on the front panel.
n
Playing back in slow-motion
l
Before using the remote control, press DVD to change the
remote control operation mode.
ooocE2
0 During playback
7 Press
II
(STROBE) at the point where you want
to start playback in slow-motion.
Playback patries.
2 Press and hold ))I or 144.
To play back in forward slow-motion. press and hold FM.
To play back in rev’erse slowmotion (for DVD VIDEO only).
prc\s and hold 144.
0 Each time you press and hold the button. the playback speed
changes as follows.
Forward:
c3
Reverse (for DVD VIDEO only):
To pause slow-motion playback
Pm\\
II
(STROBE).
Tn return to normal playback
Press ).
Note:
* You cannot iisten to the sound during slow-motion playback.
1 Zooming in-ZOOM
00&230
0 4j &iii3 ,!i$J
0 During playback or while
paused
Press ZOOM.
* Each time you press the button. ~hc magnification changes as
10ll0ws:
39
Page 43

To move the zoomed-in position
pre\s cur\or rlrl,lr.
To return to normal playback
Press ENTER.
Note:
l
While being zoomed in. the picture may look coarse
II Changing the VFP setting-VFP
The VFP (Video Fine Procca\or)
adjust the picture ba\ed on the piclurc tone, or personal preference.
l
There is a time limit in doing the following steps. If the setting is
canceled before you finl\h. start from \tep 1 again.
l
Before using the remote control, press DVD to change the
remote control operation mode.
f~~nction enables you
to
-
cx3AA
q
c=xrivJ
OOAO
0
0
7 Press VFP.
The currenl VFP xtrln; screen appear\ on the TV.
pj$
0
During playback
To adiust the aeoearance of the picture
When selecting “USERI” or “1JSER2,” you can adjust the
appearance of picture.
7 Press VFP, then press cursor b (or 4) repeatedly
to select “USERl” or “USER%.”
IV
2 Press cursor v (or A) repeatedly to select a
parameter you want to adjust.
Ad,just gradually to show preferable appearance by confirming
the picture.
GAMMA
BRIGHTNESS : Controls the brightness of the screen
CONTRAST
SATURATION : Controls the color depth of the screen
TINT
SHARPNESS
Y DELAY :
: Controls the brightness of neutral tints
while maintaining the brightness of dark
and bright portions (-4 to +4).
(-I6 to +l6).
: Controls the contrast of the screen
(-I6 to +l6).
(-16 to +16).
: Controls the tint of the screen
(-16 to +16).
: Controls the sharpness of the screen
(+(I 10 +3).
Controls the color gap of the screen
(-2 to +2).
3 Press ENTER.
The VFP setting screen disappears and the following pop-up
window appears on the TV.
Ex. : When “NORMAL” is selected
2 Press cursor b (or I) repeatedly to select the
VFP mode.
l
Each time you pre\\ the button. the VFP mode changes as
followr.
NORMAL : Normally \elcct this.
CINEMA
USER1 and USER2 : You can adjust parameters that affect
To turn off the VFP setting screen
Press VFP.
: Suitable for a movie source.
the appearance of picture and store the
\cttlnys (\ee the right).
Ex. : When “GAMMA” is selected
4 Press cursor v (or A) repeatedly to change the
setting, then press ENTER.
The current VFP setting xreen appears again.
5 Repeat steps 2 to 4 to adjust other parameters.
To turn off the VFP setting screen
Press VFP.
To activate your setting
Press VFP, then press cursor ) (or 4) repeatedly to select
“USER I ” or “USER2.”
9 The VFP setting screen disappears if no operations are done for
more than about IO seconds.
40
Page 44

DVD Pla
5 Press F.
Playback starts in the programmed OI-tier.
You can play tracks on DVD AC’DIOIVCDISVCDICD in the desired
order or in the random order.
l
You cannot use Resume play for the program or random playback.
W Playing back in the desired order
You can play up to 99 tracks in the desired order.
l
You may program the same tracks more than once.
l
Before using the remote control, press DVD to change the
remote control operation mode.
0 While stopped
1 Press ON SCREEN repeatedly until the on-screen
bar with pull-down menu appears on the TV.
2 Press cursor k (or 4) repeatedly to move 6 to
PROG.
in the on-screen bar, then press ENTER.
The program screen appears on the TV and the PROGRAM
indicator lights up on the display.
l
IO steps appear at a time on the program screen.
For DVD AUDIO:
For VCDISVCDICD:
3 Press th
e number buttons (l-10, +lO) to enter a
track/group you want to program.
Ex. : To select the track/group number 3, press 3.
To select the track/group number 14, press + IO then 4.
To select the track/group number 40, press + 10. + 10. + IO
then 10.
l
For DVD AUDIO ONLY: Enter a group number and a track
number in order.
l
When you enter a track/group number that does not exist on
the loaded disc, your entry is ignored.
l
The total program time is shown at the top of the program
screen on the display.
For DVD AUDIO:
For VCDISVCDICD:
4 Repeat step 3 to program the next steps.
l
Each time you enter a track number in the step at the bottom
of the program screen, the next steps appear.
To erase a step
Press cursor A ior v) to move Rto the desired step, then press n .
l
To program the next steps again. press cursor y repeatedly IO
move Q to the blank step. then repcat \tcp 3.
To stop the program playback
Pre\s w.
l
When VCD or SVCD i\ played hack. the progt-am bcreen appears
again.
* To edit your program. repeat step\ 3 and 4.
To cancel the program playback mode
Clear the program you made as follow\:
1 Press n to stop playback.
2 Press ON SCREEN to turn on the on-\creen bar.
3 Press a.
* You can also clear the program by ejecting the disc or turning off
the unit.
To turn off the on-screen bal
Press ON SCREEN.
Note:
l
When all the programmed tracks have been played, the program
playback stops.
n
Playing back tracks in random order
ON SCREEN
0
FL70
q
While stopped
7 Press ON SCREEN repeatedly until the on-screen
bar with pull-down menu appears on the TV.
2 Press cursor ) (or 4) repeatedly to move 6 to
RND. in the on-screen bar, then press ENTER.
The KANDOM indicator lights up on the display and playback
starts in random ot-det-.
To stop the random playback
Prca\ H.
The random playback i\ canceled.
* When all tracks have been played once. the random playback is
alw canceled.
Notes:
l
The same track will not be played more than once during fhe
random playback.
l
During the random playback, you can skip back to the beginning of
the current track by pressing 144, but cannot skip back to the tracks
that have been played.
* During the random playback, pressing ENTER with
RND.
selected
In the on-screen bar cancels the random playback and continues
playback in the normal order.
Page 45

Notes:
You can repeat playback of the current title or chapter (for DVD
VIDEO). group or track ifor DVD AUDIO). or track (for VCDi
SVCDKD).
You can also I-epeat playback of a desired portion
n
Repeating a current title, group, chapter, or
all tracks
0 For DVD VIDEO:
During playback
For VCDISVCD:
During playback or while
stopped without PBC
For DVD AUDIO/CD:
During playback or while
stopped
7 Press ON SCREEN repeatedly until the on-screen
bar with pull-down menu appears on the TV.
2 Press cursor ) (or 4) repeatedly to move g to
c3
in the on-screen bar, then press ENTER.
The following pop-up window appears under the on-screen bar.
3 Press cursor v (or A) repeatedly to select the
repeat mode, then press ENTER.
l
Each time you prc\\ curmr v (or A). the repeat mode changes
as followc:
For DVD VIDEO:
For DVD AUDIO/WCD/SVCD/CD:
(back to the begmnmg)
CHAPTER : Repcat\ the currcn, chapter- (the REPEAT I
indicator light\ up on the display)
TRACK
: Repeat\ the current track (the REPEAT I
indicator light\ up on the display)
TITLX
: Repeat\ the curt-cnt titte (the REPEAT
indicator- light\ up on the display)
ALL/GROUP
* Repent\ all the track\ on the disc. In the
’ group. OI- of the pt-ogram (the REPEAT
mdicator light\ up on the display)
A-B
: Repeats a desired portion (XC the right
coillnln)
OFF
: Select thi\ to ~.anccI the repeat mode
0 You can directly change the repeat mode (except HEP~AI
A-B) for the curt-cnt chapter. title. track. or disc by
pressing REPEAI‘ on the remote control.
l
If you select “ALL” during random playback, the a// tracks of the
disc are played repeatedly in random order.
* “A-B”cannot be selected during the program and random
playback or while a disc is not played back.
To turn off the on-screen bar
Press ON SCREEN.
To cancel the repeat playback
Sclcct “OFF” in step 3, then press ENTER.
n
Repeating a desired part
You can repeat playback of a desired portion by specifying the
beginning (point A) and the ending (point B).
III
op ‘:“N
0
0
I/l
0 During playback
7 Press ON SCREEN repeatedly until the on-screen
bar with pull-down menu appears on the TV.
2 Press cursor F (or 4) repeatedly to
move g to
c5
in the on-screen bar, then press ENTER.
The following pop-up window appears under the on-screen bar.
3 Press cursor Y (or A) repeatedly to select “A-B.”
4 Press ENTER at the beginning of the portion you
want to repeat (point A).
The following display appears in the on-screen bar.
The REPEAT A indicator also lights up on the display.
5 Press ENTER at the end of the portion you want
to repeat (point B).
A-B repeat playback starts,. The selected part of the disc
(between point A and B) is played repeatedly.
During repeat A-B playback, the REPEAT A-B indicator lights
up on the display.
To turn off the on-screen bar
Press ON SCREEN.
To cancel the A-B repeat playback
Select “OFF” in step 3, then press ENTER.
Note:
Q While playing back DVD VIDEO, A-B repeat playback is possible
on/y within the same tit/e.
42
Page 46

W About indication on the front panel
The unit has various indications for DVD AUDIO.
l
When DVD AUDIO is loaded
The DVD AUDIO lamp lights up on the front panel
l
When playing back DVD AUDIO
The following indications appear on the display
13 B.&P (Browsable Still Picture) indicator
: Lights when you play back still pictures.
See “Selecting a still picture” on page 44.
@ BONUS indicator : Lights when the loaded DVD AUDIO has
a bonus group. See “Playing back a bonus
group” on page 44.
3 Group indication : Shows the current group number. See
“Selecting the group” on this page.
@ Track indication : Shows the current track number.
61 Elapsed playing time
Notes:
l
When playing back DVD AUDIO, you cannot select the following
Surround modes:
- Pro Logic II,
- DAP modes, and
- A// Channel Stereo.
l
For the multichannel track which can be mixed down:
When “NONE” is selected as the speaker setting for the center or
rear speakers, the current multichannel track is mixed down to fhe
front speaker channels.
l
For the multichannel track which cannot be mixed down:
- When you try to deactivate Surround mode during playback,
‘MULTI CH”appears on the display and Surround mode still
remains.
- When you start playback with Surround mode deactivated, ‘LR
ONLY” appears on the dispiay In this case, you cannot
the sounds other than left and right front channels.
Men to
W Selecting the group
. . .
=LjYjIzJ
l/I
O@
I’,-
@
u Whenever a disc is loaded
Press CONTROL repeatedly so that “GROUP”
appears on the operation mode display, then press
GROUP 0 or 0 to select the desired group.
l
You can also select the group by pressing number buttons (1-Y).
n
Activating Surround mode
When playing back the high-resolution multichannel sound, you can
activate Surround mode manually.
l
When Auto surround is set to “ON,” Surround mode is activated
automatically for the multichannel sound.
0000
OSU
Press CONTROL repeatedly so that “SOUND”
appears on the operation mode display, then press
SURR ON/OFF.
l
Each time you press SURR ON/OFF. Surround mode is activated
or deactivated alternately.
l
You can also use the SURROUND ON/OFF button on the front
panel to activate or deactivate Surround mode.
,,o 0
0 During playback
Note:
l
When you select the bonus group, the key number entry indication
appears (see page 44).
43
Page 47

n
Selecting a still picture
Most DVD ALJDIO include \rill pictures. which usually appear in
turn automatically during playback according to the playback
\equence.
You can change the picture (turn the page) manually when the
current still picture has selectable pages.
0 While the B.&P indicator
lights up on the display
Press CONTROL repeatedly so that “GROUP”
appears on the operation mode display, then press
PAGE + or - to select the desired page.
Using the on-screen bar:
H Playing back a bonus group
Some DVD AUDIO have a special group called “honus group”
whose contents are not opened to the public. The bonus group is
always assigned to the last group of a disc (for example, if a disc
contains 4 groups including a bonus group, “group 4” is the bonus
group).
To play back a bonus group, you have to enter the specific “key
number” (a kind of password) for the bonus group. A way of getting
the key number depends on discs
1 ci
After getting the key number, yol
the following procedure.
In play hack the bonus group
b:
0 TO
0 While the BONUS
indicator lights up
7 Press CONTROL repeatedly so that “GROUP”
appears on the operation mode display, then
press the number buttons to select a bonus group.
The key number entry indication appears as follows:
Y
OOAO
0
OhC-.-iEN
0
7 Press ON SCREEN repeatedly until the on-screen
bar with pull-down menu appears on the TV.
2 Press cursor ) (or 4) repeatedly to move E to
PAGE
The following pop-up window appears under the on-screen bar.
3 Press cursor v (or A) repeatedly to select the
desired page.
To turn off the on-screen bau
Press ON SCREEN.
&i&&J p)
0
U While the B.S.P indicator
lights up on the display
in the on-screen bar, then press ENTER.
On the TV
On the display
OIGITU mx
ALIT0 SURCWNO
BEal IPK w: . . . . . : .
Ba
LFE
i.:’ i... -.:.:
: . . I .,.. , ,.... . . . . . . . . . . . . . . .
YCWHE
( $1
1:.
2 Press DVD on the remote control to change the
remote control operation mode to “DVD.”
3 Enter the key number using the number buttons
(O-9), then press ENTER.
When you enter the correct key number, the unit starts playing
back the bonus group and the BONUS indicator goes off.
l
If you enter the wrong number, enter the number again.
To turn off the key number entry
Perform one of the following:
* Press n ,
l
Open the disc tray, or
* Turn off the unit.
Opening the disc tray or turning off the unit also erases the memory
of the key number, while pressing H does not erase the memory.
1
Notes:
l
If you specify a track in the bonus group for the program playback,
the key number entry indication in step 1 appears for entering the
key number.
0 In the random playback mode, tracks in the bonus group are not
played back.
44
Page 48

This unit can play back MP3 tiles on a CD-R or CD-RW. We call \uch ;I disc “Ml’3 disc” in thi\ in\tl~uctlon
l
Before using the remote control, press DVD tn change the remote control operation mode for the Ml’3 disc operations
l
Turn on your TV and select the correct input mode on the TV.
accept an operation you hale tried to do. 1
What is MP3?
MP3 is an abbreviation of Motion Picture Experts Group I (01
MPEG-1) Audio Layer 3. MP3 is simply a file format with a data
:ompression. By using MP3 format. one CD-R or CD-RW can
:ontain about IO times as many songs as a regular CD can.
Disc structure
3n an MP3 disc, each song (material) is recorded as a file. Files
Ire usually grouped into a folder. Folders can also include other
‘alders, creating hierarchical folder layers.
rhis unit simplifiej the hierarchical construction of a disc rind
nanages files and folders by “tracks” and “groups.”
_ Up to 99 groups
‘I- Group1 -1
Group 2
I
IdTrack iql*Track 2.1 1 Group 3_ i <Group 4=] =Group 5i
,
Up to 1.50 tracks
rhis unit can recognize up to I SO tracks per group and up to 99
groups per disc (up to 14,850 tracks in total). Since the unit
gnores the tracks whose numbers are exceeding I50 and the
groups whose numbers are exceeding 99, they cannot be played
Jack.
If there are any type of tiles other than MP3 files in a folder.
those files are also counted in the total file number.
Votes:
* MP3 discs (either CD-R or CD-RW) require a longer readout time
than normal discs. (lt depends on the complexity of the folder/file
configuration.)
) When making an MP3 disc, select IS0 9660 Level I or Level 2
as the disc format.
b This unit supports “multi-session” discs (up to 5 sessions).
1 This unit cannot play ‘packet write”discs.
1 This unit can play MP3 files on/y with the following file
extensions: “. MP3,” “. Mp3,” “.mP3,” and “.mp3.”
p 103” tags cannot be shown on the display
* An MP3 file can contain file information called ‘703 Tag” where
its a/bum name, performer, track title. etc. are recorded. There
are two versions--ID3vl (ID3 Tag version 1) and ID3vZ (ID3
Tag version 2).
t It is recommended that you make each MP3 file at sampling rate
of 44.1 k/-/z and at bit rate of 128 kbps. The unit cannot
play
back
the files made at
bit
rate of under 64 kbps.
) If both MP3 files and JPEG files are recorded on a disc, set the
MP3/JPEG setting in the PlCTURE menu to “MP3.”
(See page 52.)
Some MP3 discs may not be played back because of their disc
characteristics or recording conditions.
Notes:
l
The following functions are not available
to
MP3 disc playback.
Program playback, random playback. fast-forward/reverse playback,
on-screen bar, and choice menus
l
Some tracks on an MP3 disc are skipped and may not be played
back normally
You can also Lose the buttons on the front panel if they have the
similar names aa those on the remote control.
l
Before using the remote control, press INI) to change the
remote control operation mode.
n
Starting playback
I,oad an
MP3 disc, then press W,
l’he
unit
start\ playback. 7‘11~ Ml’.3 CONTROL \creen appeal-\ on
the TV (\re pace 16).
Current track number
Current group r(umber
Elapsed pla);ing time
(minutes:seconds) of the current
track during playback
When all tracks in ;i group h;~\c hwn played. the unit plays tracks In
rhc next quip
n
Stopping playback temporarily
Press II.
To start playback again
Prc5s w.
W Selecting groups or tracks
To skip groups forward
f’ress cursor ).
To skip groups backward
Press cursor 4.
To skip to the beginning of the currenl track
Press I44 once.
n
Stopping playback completely
Press n .
45
Page 49

n
MP3 CONTROL screen
Current group number/Total group number
I, Current
Elapsed playing time
: group
! of the current track
I
I
; Current track
Current track number/
Total track number in the current group
(Total track number on the loaded disc)
Notes:
l
Some group and track names may not be d/splayed correctly
because of their recording conditions
0 The order of groups and tracks on an MP3 disc may be displayed
different/y from the order d/splayed on your personal computer.
l
Up to I2 groups and tracks are displayed on the TV at a time.
Pressing cursor ~hh/r repeatedly shows the hldden groups and
tracks one by one.
W Operations
l
Before using the remote control, press DVD to change the
remote control operation mode.
To select or skip groups during playback
To select the next groups (or skip groups forward)
Pres\ curwr F repeatedI!
To select the previous groups (or skip groups backward)
PI-es\ cursor 4 rcpc3tCdl~.
To start playback by specifying a track number
Press the number buttons (1 - 10, +lO) to enter the track number.
Ex. : To select the track number 3, press 3.
To select the track number 14, press +lO then 4.
To select the track number 24. press +lO, +lO, then 4.
To select the track number I IO, press +I0 ten times, then 10.
The entered number appears in the track number indication, then
playback starts from the specified track.
You can repeat playback of the current track, group, or all the tracks
on the loaded disc.
Ill
<‘,cIcII)o
;p--c.?;mma
Ill
q
During playback or while
stopped
From the remote control ONLY:
Press REPEAT.
The repeat indication appears on the MP3 CONTROL screen and
the REPEAT indicator lights up on the display.
* Each time you press the button, the repeat mode changes as
follows:
REPEAT TRACK
Y? REPEAT GROUP 2 REPEAT ALL
Z the indication goes off Z (back to the beginning)
REPEAT TRACK : Repeats the current track
REPEAT GROUP : Repeats the current group
REPEAT ALL
: Repeats all the tracks on the disc
To cancel repeat mode
Press REPEAT repeatedly until the repeat indication goes off from
the MP3 CONTROL screen (the REPEAT indicator also goes off
from the display).
To select or skip tracks during playback
To select the next tracks (or skip tracks forward)
Press curwr V repeatedly.
To select the previous tracks (or skip tracks backward)
Press c~xsor A repeatedI!.
Page 50

This unit can play back JPEG files on a CD-R or CD-RW. We call such a disc “JPEG disc” in this Inslruction.
l
Before using the remote control, press DVD to change the remote control operation mode for the JPEG dlac operations.
l
Turn on your TV and select the correct input mode on the TV.
If “ ” appears on the TV when you press a button, the disc cannot accept an operation you have tried to do. )
What is JPEG?
A still-picture data compression system proposed by the Joint
Photographic Expert Group, which features little distortion in
image quality in spite of its high compression ratio.
Disc structure
On a JPEG disc, each still picture (material) is recorded as a file.
Files are usually grouped into a folder. Folders can also include
other folders, creating hierarchical folder layers.
This unit simplifies the hierarchical construction of a disc and
manages folders by “groups.”
Up to 99 groups
__^_^_ .__..._...
‘b Group 1 -1 1 Group2 +I
;I- File1 $File2 fil ldGroup3=]~Group4;];Group5~
k_____rX___ .“. __-
*- ‘. Up to 150 files
This unit can recognize up to 150 files per group and up to 99
Froups per disc (up to 14,850 tiles in total). Since the unit ignores
the files whose numbers are exceeding I50 and the groups whose
numbers are exceeding 99, they cannot bc played back.
p If there are any type files other than JPEG files in a folder, those
files are also counted in the total file number.
Notes:
* JPEG discs (either CD-R or CD-RW) require a longer readout
time than normal discs. (It depends on the complexity of the
fo/der/fi/e configuration.)
* When making a JPEG disc, select /SO 9660 Level 1 or Levei 2
as the disc format.
0 This unit supports “multi-session” discs (up to 5 sessions).
9 This unit cannot play ‘packet
write”
discs.
) The unit can play JPEG files on/y with the following file
extensions: “.jpg,” Yjpeg,” ‘: JPG,” “. JPEG” and any uppercase and
lowercase combinations (such as ‘:Jpg’).
0 It is recommended you to record a file at 640 x 480 resolution. (/f
a file has been recorded at a resolution of more than 640 x 480,
it will take a longer time to be shown.)
D If both JPEG files and MP3 files are recorded on a disc, set the
MP3/JPEG setting in the PlCTURE menu to “JPEG.”
(See page 52.)
* This system can play on/y baseline JPEG files::. Progressive
JPEG files* or lossless JPEG files
cannot be played.
* - Baseline JPEG format., Used for digital cameras, web, etc.
- Progressive JPEG format: Used for web.
- Lossless JPEG format: An o/d type and rarely used now
m Some JPEG discs may not be played back because of their disc
characteristics or record/rig conditions.
You can play back the still pictures one after another automatically
~ ali&show playback.
You can also u\e the buttons on the front panel if they have the
similar names as those on the remote control.
l
Before using the remote control, press DVD to change the
remote control operation mode.
n
Starting slide-show playback
Load a JPEG disc, then press b.
The slide-show playback start\. Each tile (still picture) is shown on
the TV for abou[ 3 second\. then chanpc[l LO the next fllc one aftcl
another.
When all tiles in a group have been played back. the unit plays back
files in the next group.
W Stopping slide-show playback temporarily
Press II.
You can /oom in on the still p1clure J\cc l+!c JX).
To start slide-show playback again
Prey\ ),
H To start the slide-show playback by
specifying a file number
Press the number buttons ( I ~ IO. + IO) to enter the file number.
Ex. : To {elect the tile number- 3. prc\\ 3.
To select the file number I J. press + IO then 4.
To select the file number 24. prcs\ + IO. + IO. then 4.
To select the file number I IO. pi-es\ + IO ten times. then IO.
The selected file number appear\ in the lile number indication. then
the \liclc-show playbnch ~lat-l\ 11ron1 the jilt )ou have specified.
H Selecting files or groups
To skip pictures (files) forward
Pres\ ))I or cursor v as many Iiliie\ 21, required.
To skip pictures (files) backward
l’re\s 144 or cursor A ;I\ man) Iltnc\ it\ required.
n
Stopping slide-show playback completely
Press n .
‘The JPEG CONTROL screen appears on the TV.
0 I:or how to operate through the JPE(; (‘ONTROL screen. see
“Operahon through the JPEG <‘C)NTROI,
Screen” on p:ige 48.
47
Page 51

Notes:
0 The following functions are not available to the slide-show playback:
program playback, random playback, repeat playback, fast-forward/
reverse playback, on-screen bar, and choice menus.
* If a black screen continuous/y appears in the slide-show playback:
the file current/y played may be non-baseline JPE G file. In this
case, select a playable f//e (a base/me JPEG file) again (e.g.,
pressing H or MENU to open the JPEG CONTROL screen. etc.).
Note fhat it may take a long t/me lo select another file.
0 Some files on a JPEG d/se
You can search for and show the desired groups and files through the
JPEG CONTROI. screen
may
be d/stored during playback.
W JPEG CONTROL screen
W To
select
Pre\< cursor ) (or 4) repeatedly.
W To
select a file
Pres\ cursor v (or A) repeatedly.
n
To show the selected file
Pres\ ENTER.
* When the still picture has been shown on the TV thoroughly, you
can 7oom in or out the still picture (see pages 39 and 40).
* If you press F, the slide-show playback starts from the selected
file.
n
Zooming in on the still picture
Press
ZOOM.
To move the zoomed-in position
Pre\i cursor AlrlFi4.
a group
Current group number/Total group number
Current j
group i
-I
Current file number/
Total file number in the current group
(Total file number on the loaded disc)
Notes:
l
You can check the group number and the file number on the display
window.
l
Some group and file names may not be displayed correctly
because of the recording condition.
l
The order of groups and b/es on a JPEG disc may be displayed
different/y from the order displayed on your personal computer.
l
Up to 12 groups and files are displayed on the TV at a time.
Pressing cursor ~hh/r repeatedly shows the hidden groups and
files one by one.
l
Before using the remote control. press WI) to change the
remote control operation mode.
To return to normal playback
I’resT ENTER.
SK also pages 39 and 40.
H To return to the JPEG CONTROL screen
Press MENU or E.
You can repeat playback of the current group or all the files on the
loaded dix.
c3c3c3c2
cIr3aam
From the remote control ONLY:
0 During playback or while
stopped
Press REPEAT.
The repeat indication appears on the JPEG CONTROL screen and
the REPEAT indicator lights up on the display.
0 Each time you press the button. the repeat mode changes as
follow~s:
REPEAT GROUP = REPEAT ALL =
the indication goes off ZZ (back to the beginning)
REPEAT GROUP : Repeats the current group
REPEAT ALL : Repeats all the tiles on the disc
To cancel repeat mode
I’rcss REPEAT repeatedly until the repcat indication goes off from
the JPEG CONTROL screen (the REPEAT indicator also goes off
from the dtsplay).
48
Page 52

You can adjust the initial settings through the choice menu on the TV.
Before operating the choice menu, select the source you want to adjust by pressing source selecting button.
l
When selecting FM or AM as the source, you cannot use the choice menu.
l
When selecting the source other than DVD, FM, and AM, you can use the AUDIO and SPK. SETTING menu\. The audio adjustments are
memorized for each source.
Notes:
l
You need to turn on your TV and
select
the correct input mode on the TV
l
You can on/y use the remote control for the choice menu operations.
l
You can change the language used in the choice menu. See page 51.
l
You cannot show the choice menu when an MP3 disc or a JPEG disc is loaded
To do the operations in this choice menu. use the buttons on the
remote control.
CHDlCE
A
0
From the remote control ONLY
CHOICE
Display the choice menu on the TV.
Each time you press the button. the
choice menu is turned on and off
alternately.
I
A/V
Select an item
Adjust the selected item on the choice
Move to the submenu of the selected
The choice menu has the follow,ing menu\:
LANGUAGE menu
(see page 51)
You can select the initial
language for the disc menu.
audio. and subtitle. You can
select the language used on
TV screen while operating I
unit.
also
the
thi5
PICTURE menu (see page 51)
You can select the desired
options concerning a picture 01
monitor screen.
AUDIO menu (see page 52)
1
: *.
You can adjust the sound
d
settings of this unit through this I
menu.
SPK. SETTING menu
(see page 53)
You can adjust the speaker
setting\. You can also adjust
output level of the speaker\.
the
OTHERS menu (see page 54)
You can change the settings i’ot
some of the functions.
To set Parental Lock. LI\C this
menu.
49
Page 53

Ex. : When setting the progressire mode.
Before operating the choice menu, press DVD to change the
source to DVD.
7 Press CHOICE.
The LANGUAGE menu appear\ on the TV.
2
3
4
Press cursor b (or 4) repeatedly
to display PICTURE menu.
4 I3
Press cursor v (or A) repeatedly
to move a to “PROGRESSIVE
MODE.”
Press ENTER.
The pop-up window appears. listing the
selectable option\.
5 Press cursor v (or A) repeatedly
to select the desired option.
A
Ex. : When “FILM” is selected.
6 Press ENTER to finish the setting.
To set other items on the same choice menu
Repeat steps 3 to
6.
To move to another choice menu
Press cursor F (or 4) repeatedly to select a choice menu you want
to iet up.
To return to the normal screen
Press CHOICE.
Nntn.
- Some items in the choice menu consist of submenus for setting up
various options. Pressing ENTER makes the submenus for the
selected item appear on the TV.
You can set the items using cursor AM and ENTER (as explained
in steps 5 and 6 above).
50
Page 54

Choice
n
0
0
0
0
LANGUAGE
menu
Select one of the following settings:
You can select “MENU LANGUAGE,” “AUDIO LANGUAGE.”
and “SUBTITLE” only before playback.
16:9 AUTO (Wide television conversion) :
Select this when the aspect ratio of your TV is 16:9
(wide TV).
MENU LANGUAGE
Some discs have multiple languages.
Select one of the languages or language codes from AA to ZU
(see “Language code list” on page 52) as the menu language.
4:3 LB (Letter Box conversion) :
Select this when the aspect ratio of your TV is 4:?
(conventional TV). While viewing a wide screen
picture, the black bars appear on the top and the
bottom of the screen.
AUDIO LANGUAGE
Some discs have multiple audio languages.
4:3 PS (Pan Scan conversion) :
Select this when the aspect ratio of your TV is 4:3
(conventional TV). While viewing a wide screen
picture, the black bars do not appear: however, the
left and right edges of the pictures will not be shown
on the screen.
Select one of the languages or language codes from AA to ZU
(see “Language code list” on page 52).
SUBTITLE
Some discs have multiple subtitle languages.
Ex. : 16:9
Select one of the languages or language codes from AA to ZU
(see “Language code list” on page 52) or “OFF (no subtitle).”
l
Even if “4:3 PS” is selected, the screen size may become
“4:3 LB” with some DVD VIDEO. This depends on how they
are recorded.
Note:
l
When the language you have selected for MENU LANGUAGE,
Al/D/O LANGUAGE, or SUBTITLE is not recorded on a disc,
the original language is used as the initial language
automatically
l
When you select “I 6:9 NORMAL” for a picture whose aspect
ratio is 4:3, the picture slightly changes due to the process for
converting the picture width.
l
PROGRESSIVE MODE
ON SCREEN LANGUAGE
Select one of the languages shown on the TV.
You can select the progressive mode according to the picture
type (film or video source). This take\ effect only when
“PROGRESSIVE” is selected as the scanning mode (set page
14).
H PICTURE
menu
Select one of the following settings:
l
MONITOR TYPE
You can select the monitor type to match your TV when you
play DVD VIDEO recorded in the picture’s width/height ratio of
16:9.
16:9 NORMAL (Wide television conversion) :
Select this when the aspect ratio of your TV is fixed
to 16:9 (wide TV). The unit automatically adjusta the
screen width of the output signal correctly when
playing back a picture whose aspect ratio is 4:3.
Ex.: 4:3 LB
Ex. : 4:3 PS
Normally, set to “AUTO.“
VIDEO : Suitable for playing back a video source disc
FILM : Suitable for playing back a film or progressive
source disc.
AUTO
: Used to play a dix containing both video and film
source materials. Thi\ unit recognizes the picture
type (film or video source) of the current disc
according to the disc information.
l
If the playback picture is unclear or noisy, or the
oblique lines of the picture are rough, try to change
to other modes.
l
SCREEN SAVER
You can activate or deactivate the screen saver function
Select one of the following settings:
ON
: The pictut-e on the TV becomes dark when no
operation i\ done for 5 minute\.
OFF
: The screen ja\er function dots not work
51
Page 55

l
MP3/JPEG
If both VIP3 files
select which files to play.
and
JPEG lile\ are recorded on a disc. you can
0
TREBLE
.4djust the treble tone level from the front speakers within
the range of -10 to +lO in 2 step intervals.
Select one of the following settings:
MP3
: Select this fol- nlavine MP3 files.
JPEG : Select thi\ f’or playing JPEG tiles.
n
AUDIO menu
You can all adJust the l‘ollouin
g item\ using the front panel OI-
remote control (\cc pages Ii) 10 24).
l
l/R BALANCE
Ad,just the output balance hetwecn the left front speaker and
right front speaker within the range of “R-21” to “CENTER”
or “CENTER” to “L-21.”
l
BASS
Adjust the hass tone level from the front speakers within the
range of -10 to +lO in 2 step intervals.
0
LFE ATT.
The I,ow Frequency Effect attenuater diminishes the distortion
of the bass sound from the subwoofer while playing back a disc
with Dolby Digital or DTS Digital Surround.
Select one of the following settings:
-10 dB
: Select this to diminish the distortion of the bass
sound from the subwoofer.
OdB
0
0. RANGE COMPRESSION
: Select this to cancel this function.
You can enjoy a powerful sound at night even at a low volume
level when listening to the
sound
with Dolby Digital.
Select one of the following settings:
MAX : Select this when you want to apply the compression
effect fully (useful at midnight).
MID : Select this when you want to reduce the dynamic
range a little.
OFF : Select this when you want to enjoy surround with its
full dynamic range (no effect applied).
AA 1 Afat
AM ] Ameharlc
AR ’
Arabrc
AS Assamese
AY Aymara
AZ Arerbailanl
BA Bashklr
BE
Bvelorusslan
BG 1 Buloanan
BG Bulgarian
BH BIharI
BI Blslama
BN Bengali. Bangla
BO TIbetan
BR
Breton
CA Catalan
FA
-pi
FJ
FO
FY
GA
GD
GL
GN
GU
HA
HI
HR
HU
HY
IA
IE
IK
IN
IS
IW
Jl
JW
KA
KK
KL
Persian
Finnish
Fill
Faroese
Frlslan
Irish
Scats Gaelic
Gallclan
Guaranl
Hausa
Hindi
CroatIan
Hungarian
Armenian
Interlingua
Intevlingue
lnuplak
lndoneslan
Icelandic
Hebrew
Ylddlsh
Javanese
Georgian
Kazakh
Greeqlandic
Language code list
KM 1 Cambodian OM 1 (Afan) Oromo 1 SU 1 Sundanese
Pashto, Pushto TE Telugu
Tajik
TG
TH Thai
TI Tlgrlnya
TK Turkmen
TL
Tagalog
TN Setswana
TO Tonga
TR Turkish
TS Tsonga
TT
Tatar
TW TWI
UK Ukratnian
Page 56

Choice
n
SPK. SETTING menu
l
SIZE
Select this to enter the SIZE submenu.
FRONT SPEAKER. CENTER SPEAKER.
and
REAR SPEAKER
Select one of the following settings for each speaker:
LARGE (LRG) : Select this when the speaker \iLe is relativeI)
SMALL (SML) : Select this when the speaker sire is rclativcl)
small.
NONE (NO)
: Select this when you have not connected 2,
speaker. (Not selectable for the front
speakers)
SUBWOOFER
Select one of the following settings:
USE (YES)
: Select this when il subwoofer is connected.
NONE (NO) : Select this when no \ubwoofcr is used.
RETURN
Select this to return to SPK. SETTING menu.
Notes:
l
Keep the following comment in mind as reference when
FRONT SPEAKER. CENTER SPEAKER,
and
adjusting speaker settings.
REAR SPEAKEK
-
If the size of the cone speaker unif built in your speaker is
greater than 4 3/4 inches (12 cm), select “LARGE,“and If it IS
smaller than 4 % inches (12 cm),
select
“SMALL.”
l
If you have selected “‘SMALL” for the front speakers, you cannot
select “LARGE” for the center and rear speakers.
l
If you have selected “NONE” for subwoofer, you cannot select
“SMALL” for the front speakers.
l
You can take advantage of the speaker diagrams on the left
part of the SPK. SE TTlNG menu to set the speaker.
For each speaker, set the distance from the listening point
within the range of I ft (0.3 m) to 30 ft (9.0 m), in 1 ft (0.3 m)
interval.
TEST TONE
Select this to start or stop test tone.
-
The speaker diagram for the selected speaker is highlighted
- The size of the speaker diagram is changed according to
your setting.
RETURN
Select this to return to SPK. SETTlNG menu.
Speaker diagrams
----------- Front speakers
_-..-.--.-...
Subwoofer .-
Center speaker
.__”
_..,
Rear speakers
l
LEVEL
Select this to enter the LEVEL submenu.
CENTER SPEAKER. LEFT REAK SPEAKER, RIGHT
REAR SPEAKER, and SUB WOOFER
Adjust the speaker output level within the range of -10 dB to
+lO dB for each speaker in 1 step interval.
TEST TONE
Select this to start or stop test tone.
RETURN
Select this to return to SPK. SETTING menu.
Notes:
l
When “NONE” is selected for the center speaker, rear speakers
and/or subwoofer on fhe SlZf menu, “-“appears instead of the
current setting. In this case, you cannot adjust the output level
of those speakers.
* You can adjust the output /eve/ for center speaker and/or rear
speakers on/y when one of proper Surround modes are
activated (see page 27).
l
When ‘NONE” is selected for the center and/or rear speakers,
the test tone does not come out of those speakers.
l
DISTANCE
Select this to enter the DISTANCE submenu.
Notes:
l
When “NONE” is selected for Ihe center speaker and rear
speakers on the SIZE menu, “-”
appears instead of the current
setting. In this case, you cannot adjust the speaker distance of
those speakers.
l
When ‘NONE” is selected for the center speaker and/or rear
speakers on the SlZE menu, the test tone does not come out of
those soeakers.
Page 57

l
CROSS OVER
l
DN SCREEN GUIDE
When you use a small speaker in any position, this unit
automatically reallocates the bass sound elements assrgned to
the small speaker to the large speakers.
To use this function properly. set this crossover frequency level
according to the sire of the smallest speaker connected.
l
If you have selected “LRG (la]-ge)” or “LARGE” for all
You can activate or deactivate the following on-screen guide
icons:
For multi-view angles
:&
For plural subtitles
:m
For nlural audio languages : 0X
I I
For playback status
:@gfJ,~,Q##.
speakers. this function will not take effect.
Select one of the following settings:
The onscreen guide icons appear on the TV at the beginning of
the plavhack with this function turned on.
120Hz : Select this frequency when the cone speaker unit
built in the sneaker is about 3 ‘/re inches (8 cm).
1OOHz : Select this frequency when the cone speaker unit
built in the speaker- IS about 3 “/rh inches (IO cm)
80Hz
: Select this frequency when the cone speaker unit
built in the speaker is about 4 ‘/-I inches (I2 cm).
l
RETURN TO INITIAL
Select this to reset all speaker settings to the initial settings.
n
OTHERS menu
l
RESUME
You can activate or deacti\ ate the resume play function of the
built-in DVD player.
Select one of the following settings:
ON
: Select this to activate this function.
When recording the picture with VCR, select “OFF” to avoid
recording the indications above on your video tape.
l
The choice menu and on-screen bar can be recorded even
though this function is set to “OFF.”
Select one of the following settings:
ON
: Select this to activate this function
OFF : Select this to deactivate it
l
Subtitles (see page 35) and the information for zooming in
(see pages 39 and 40) appear on the display even though this
setting is “OFF.”
l
AUTO STANDBY
When the playback of the disc on the built-in DVD player ends
and no operation is done for more than the selected time, the
unit is turned off automatically.
l
This function takes effect only when DVD is selected as the
source.
Select one of the following settings:
60
: Select this to turn off the unit if no operation is done
within 60 minutes.
30 : Select this to turn off the unit if no operation is done
within 30 minutes.
OFF
: Select this to deactivate it
OFF
: Select this to deactivate it
l
If Sleep Timer (see page 12) and Auto Standby are used at a
time. one with the early shut-off time will turn off the unit.
e PARENTAL LOCK
You can restrict playback of DVD VIDEO containing violent
scenes and those not suitable for your family members.
l
You can select “PARENTAL LOCK” only before playback.
Select this to enter the PARENTAL LOCK submenu.
(See pages 55 and 56.)
54
Page 58

You can restrict playback of DVD VIDEO containing violent scenes
and those not suitable for your family members. Nobody can play
such a disc unless this function is canceled.
l
This setting takes effect only for the DVD VIDEO containing the
Parental Lock level information-Lcvcl I (most restrictive) to
Level 8 (least restrictive).
l
You can set the Parental Lock only while playback is stopped.
Press ENTER.
5
The pop-up window for setting level appear,
n Setting Parental Lock
1 Press CHOICE, then press cursor b (or 4)
to
display the OTHERS menu.
2 Press cursor V (or A) repeatedly to move 6 to
“PARENTAL LOCK,” then press ENTER.
The PARENTAL LOCK submenu appears on the TV.
3 Press cursor V (or A) repeatedly to move 6 to
“COUNTRY CODE,” then press ENTER.
The submenu for setting the country code appears.
Press cursor V (or A) repeatedly to select the
6
level of restriction, then press ENTER.
6 moves to “PASSWORD.”
l
The smaller the value of lc\el is. the more restrictive the
Parental Lock level is.
* Select “NONE” to cancel this l’uncrlon.
7
Press the number
buttons (O-9) to enter
digit number as your password, then press
ENTER.
[;3 moves to “EXIT.”
Press ENTER.
8
OTHERS menu re\nmc\
To return to the normal screen
Press CHOICE.
a four
4 Press cursor v (or A) repeatedly to select the
country code, then press ENTER.
See “Country/Area codes list for Parental Lock” on page 57.
6 moves to “SET LEVEL.”
55
Note:
* Remember your password or make a note of if.
You need to enter your password to change the setting or release
the lock. To change the setllng, see page 56.
Page 59

l
If you forget your password, enter “8888.”
n Changing the setting of Parental Lock
7 Press CHOICE, then press cursor F (or 4) to
display the OTHERS menu.
2 Press cursor V (or A) repeatedly to move 6 to
“PARENTAL LOCK,” then press ENTER.
The PARENTAL LOCK cubmenu appears on the TV.
l
You can only move 13 to “PASSWORD” or to “EXIT” before
you enter your password.
3
4
5
Press the number buttons (O-9) to enter your
password, then press ENTER.
l
If you enter a wrong password. “WRONG! RETRY*** PRESS
0-9KEY” appears on the PARENTAL LOCK submenu.
You cannot go to next steps bclore you enter the correct
password.
Press cursor v (or A) repeatedly to move K to
the item you want to change, then press ENTER.
Press cursor y (or A) repeatedly to change the
setting, then press ENTER.
6
Press the number buttons (O-9) to enter your
password, then press ENTER.
The new setting is stol.4.
n Releasing Parental Lock temporarily
When you set a strict parental level. some discs may not be played
back at all. When you load such a disc and try to play it, the
following display appears on the TV. You can release Parental Lock
temporarily.
7 Press cursor V (or A) repeatedly to move 6 to
“TEMPORARY RELEASE”, then press ENTER.
E moves to “PASSWORD.”
l
If you do not want to release Parental Lock temporarily, select
“NOT RELEASE” by pressing cursor v (or A), then press
ENTER. To eject the disc. press A.
2P
ress number buttons (O-9) to enter your
password, then press ENTER.
Playback starts.
l
If you enter a wrong password.
“WRONG! RETRY*** PRESS
0-9KEY” appears on the PARENTAL LOCK submenu.
You cannot play the disc before you enter the correct
password.
Note:
l
When you enter wrong passwords more than three times, E
moves to “NOT RELEASE”automatically and cursor v (or A) does
not work. Press C to remove the disc.
l
You cannot set the Parental Lock before you set your password.
l
If you go out of the PARENTAL LOCK submenu before setting your
password in step 6, the new country code and parental /eve/ w/l/ not
become effective, and the o/d country code and parental /eve/
remain effective.
l
When you enter wrong passwords more than three times, E
moves to ‘EXIT” automatically and cursor v (or A) does not work.
Press ENTER to exit from the PARENTAL LOCK submenu, then
start from step 1 again.
56
Page 60

Choice Menu
Country/Area codes list for Parental Lock
AD Andorra
ER
Eritrea LA
Lao People’s
RW
Rwanda
AE Unted Arab Emtrates ES Spain
Democratic Republtc
SA
Saud1 Arabia
AF Afghantstan
1 ET Ethlopra
LB Lebanon
ss-
-Solomon Islands
AG Antigua and Barbuda
Fi
Finland LC
Saint Lucra SC Seychelles
Al Angullla FJ
Fij
Ll
Ltechtensteln
SD Sudan
AL Albana
FK Falkland Islands (Malvrnas) LK
Sri Lanka SE Sweden
AM
Armenia
FM
Micronesia LR
Llberla
SG
Singapore
AN Netherlands Antilles (Fedelated States of) t?S Lesotho SH Saint Helena
A0 Angola
FO Faroe Islands LT
Lithuania Sl Slovenia
AQ
Antarctica
FR France
LU Luxembourg SJ Svalbard and Jan Mayen
AR Argentina
FX France, Metropolitan iv
Latvia SK Slovakia
AS American Samoa
GA Gabon LY
Lrbyan Arab Jamahrrlya
SL
Sierra Leone
Syrian Arab Republic
Turks and Caicos Islands
French Southern Territories
New Caledonia
Trrnidad and Tobago
TV Tuvalu
Vatican City State
Saint Vincent and the
Grenadines
Page 61

Aspect ratio
The ratio of vertical and horizontal si/cs of a displayed image The
horizontal vs. vertical ratio of conventional TVs is 1:3 and that of
wide-screen TVs is 16:Y.
Multichannel
DVD VlDEO has been designed to have each soundtrack constitute
one sound field. Multichannel refers to a structure of sound tracks
having three or more channels.
Chapter
The smallest division on DVD VIDEO. It i\ a division of a title and
similar to a track for CD or V(T).
Composite video signal
A video signal comprised of three kinds of signals combined: an
image signal made up of luminance
the frequency multiplication technique. burst signal providing the
basis for color reproduction. and synchronization signal.
and
chrominance signals using
Component video signal
A video signal system where parts of information necessary for
reproducing image signal comprised of the three primary colors of
light are transmitted via separate signal lines. ‘Types of signal, such
as RIG/B. Y/PR/PK. etc., are available.
Disc menu
A screen display prepared for allow,ing selection of images. sounds.
subtitles, multi-angle, etc. recorded
on
DVD VIDEO.
Interlaced scanning
In the conventional video system, a picture is shown on the display
monitor in two halves. The Interlaced scanning system places lines
of the second half of the picture ill-between lines of the first half of
the picture.
JPEG
A still-picture data compression syatcm proposed by the Joint
Photographic Expert Group. which features little distortion in image
quality in spite of its high compression ratio.
Linear PCM (PCM: Pulse Code Modulation)
A system for converting analog sound signal to digital signal fat
later processing with no data compre\\ion used in conversion.
Letter box
A method of displaying wide images like movies in on a 4:3 TV
screen with no part of the image deleted by placing black bands on
the top and bottom of the screen. This name has derived from the
screen form looking literally like a letter box.
Multilanguage
When a title is created to cope with multiple languages, it is
generally called a multilanguage title.
Parental Lock
A feature of this system to automatically determine whether or not
to reproduce particular DVD VIDEO software by comparing its
parental level (a measure of undesirability of scenes, etc. from
educational viewpoint) set for the software beforehand with that set
on this system by the user; if the software’s level is less restrictive
than the user-set level. it will be reproduced.
Playback control (PBC)
Rcfcrs to the signal recorded on VCD/SVCD for controlling
reproduction. By using menu screens recorded on VCD/SVCD that
supports PBC. you can enjoy interactive-type software as well as
software having a search function.
Progressive scanning
By progressive scanning, all the horizontal lines of a picture are
displayed at one time as a single frame. This system can convert the
interlaced video from DVD VIDEO into progressive format for
connection to a progressive TV. It dramatically increases the vertical
resolution.
Region code
A system for allowing discs to be played back only in the regions
designated beforehand. All the countries in the world are divided
into six regions and each region is identified by a specified region
code (or region number). If the region code of a disc matches that of
a player, the player can play back the disc.
Surround
A system for creating three-dimensional sound fields full of realism
by arranging multiple speakers around the listener.
Sampling frequency
Frequency of sampling data when analog data is converted to digital
data. Sampling frequency numerically represents how many times
the original analog signal is sampled per second.
MP3
A file format with a sound data compression system. “MP3” is the
abbreviation of Motion Picture Experts Group I (or MPEG- I) Audio
Layer 3. By usmg MP3 format. one CD-R or CD-RW can contain
about IO times as much data volume as a iregular CD can.
Multi-angle
By recording multiple sccncs progrcs\ing at the same time in a
single title, the user can sclcct view! angles. This feature is called the
multi-angle function.
Transfer rate
The rate of transferring digital data. Usually the measure is in bit per
second (bps). The DVD system applies a variable transfer rate
system for high efficiency.
58
Page 62

The AV COMPU LINK remote control system allows you to operate JVC’s video components (TV and VCK) through the unit.
This unit is equipped with the AV COMPU LINK-III, which has added a function to operate JVC’s video components through the video
components terminals. To use this remote control system, you need to connect the video component\ you want to operate, following the
diagrams below and the procedures on page 60.
l
Refer also to the manuals supplied with your video components.
CONNECTIONS 1: AV COMPU LINK Connection
-La==--
TV
CAUTION:
When connecting the TV with the
AV COMPU LINK remote
control
system, connect the unit to the
AV COMPU LINK III or
AV COMPU LINK EX
terminal.
DO NOT connect the unit to the
AV COMPU LINK RECEIVER/
AMP
terminal.
Notes:
l
When connecting the unit and a TV with the AV COMPU LlNK EX termma/ by using a component video cab/e, you cannot use Automatic
Selection of TV’s Input Mode (see page 60).
l
When connecting the VCR only to this unit, connect it direct/y to the umt using cab/es wfth the monaural mini-piugs.
CONNECTIONS 2: Video Cable Connection
This unit is equipped with three types of the video terminals-composltc video. S-video, and component video. and the signals coming into
this unit through one type of video terminals can output only through the terminal of the same type, So you nct’d to connect the VCK and TV
to this unit using one of the following two ways-CASE I or 2:
l
When using the AV COMPU LINK remote control system, set the component video input correctly (see “Video output mode” on
page 22); otherwise, the correct input for this unit will not be selected on the TV.
---~
CASE 1
When connecting the source equipment to the unit through the S-video terminals, connect this unit to the
TV’s Video Input 1 terminal using S-video cables.
CASE 2
CASE 3
Source
Equipment
S-video cable
RX-DV5SL
S-wdeo cable i]
To Video Input 1
When connecting the source equipment to the unit through the composite video terminals, connect this
unit to the TV’s Video Input 2 terminal (composite video input) using composite video cables.
Source
Equipment
Composite
wdeo cable
RX-DV5SL
Composite
video cable
To Video Input 2
When setting the video output mode of the built-in DVD player to “component,” connect this unit to the
TV’s Video Input 2 terminals (component video input) using component video cables.
RX-DV5SL
Component
TV
video cable
1 ~-
To Video Input 2
59
Page 63

1. If you have already plugged your VCR, TV, and
this unit into the AC outlets, unplug their AC
power cords first.
2. Connect your VCR, TV, and this unit following
“CONNECTIONS I 99 on the previous page, using
the cables with the monaural mini-plugs (not
supplied).
3. Connect the audio input/output jacks on VCR,
TV, and this unit using the audio cords.
0 See page\ 7 to 9.
One-Touch DVD Play
Sunply by starting playback on the built-in DVD player, you can
enjoy the playback without setting other switches manually.
The TV automatically turns on and changes the input mode to the
appropriate position so that you can view the playback picture.
Automatic Selection of TV’s Input Mode
0 When you select TV as the source to play on the unit, the TV
automatically changes the input mode to the TV tuner so that you
can watch TV.
0 When you select DVD, VCR, or DBS as the source to play on the
unit. the TV automatically changes the input mode to the
appropriate position so that you can view the playback picture.
4. Connect the video input/output jacks on VCR,
TV and this unit following “CONNECTIONS 2”
on the previous page, using the composite video
cord, with S-video plug or with component video
plugs.
5. Plug the AC power cords of the components into
the AC outlets.
6. When turning on the TV for the first time after
the AV COMPU LINK connection, turn the TV
volume to the minimum
using the
TV
volume
control on the TV.
7’. Turn on other connected components first, then
turn on this unit.
0 When tLmng on tilt VCR. USC the remote Colltl-01 SuppIled
with thic unit--pre\\ Oil STANDBY/ON VCR.
‘l-he AV (‘OMPU LINK re~notc control \ystem allows you to use the
tivc bait functions listed lbclo\‘v.
Remote Control of the TV and VCR Using This
Remote Control
r:or
details.
see page 62.
* Aim the remote control tiil-ectly at the remote sensor on each
target component.
Notes:
When connecting a TV with the AV COMPU LINK EX terminal to
ttx unit, you cannot use a component video cable (as CASE 3 on
the previous page).
When you select TV as the source on the unit, you cannot see the
menu on the TV screen since the AV COMPU LlNK remote control
system automatically changes the TV’s input mode to the TV tuner.
If you do not mind stopping listening to the TV sounds, you can
then show the on-screen menu after changing the TV’s input mode
to the appropriate position the unit is connected to.
Automatic Power On/Off
The TV and VCR turn on and off along with the unit.
When you turn on the unit;
* It’the previously selected source is VCR, the TV and VCR will
turn on automatically.
- If the previously sclcctcd source is TV or DVD, only the TV will
turn on automatically.
When you turn off the unit, the TV and VCR will turn off.
Note:
a If you turn off the unit while recording on the VCR, the VCR will not
turn off but continue recording.
Qne-Touch Video Play
Simply bv inxrting a \,idco C;I\\C~IC \h~thout its sat’ety tab into the
VCR. you can enjoy the v~dco playback without setting other
switches manually. The unit ;~utom;lticully turn\ on and changes the
source to VCR.
The TV automatically turn\ on and change\ the input mode to the
appqriate position so that you can L icw the playback picture.
When you insert a \~ideo ca\sc~tc \h ith its safety tab, press the play
(F) button on the VCR or on the rcmotc control. You can get the
same result.
60
Page 64

You can operate JVC’s audio and video components with this unit’s remote control, since control signals for JVC.\ components are preset in the
remote control.
To operate JVC’s audio components using this remote control
l
Aim the remote control directly at the remote sensor on the unit.
l
To operate a source with the remote control, the source must be
selected using the source selecting buttons on the remote control
l
Refer also to the manuals supplied with your components.
n
Sound control section (Amplifier)
After pressing CONTROL repeatedly to show “SOUND” on the
operation mode display. you can perform the following operation\:
SURR ON/OFF
SURR MODE
TEST
CENTER + or -
REAR*L + or -
REAR-R + or -
:
Turns on or off the Surround modesDolby Digital. DTS Digital Surround. and
Dolby Pro Logic 11.
: Selects the Surround modes.
: Turns on or off the test tone output.
: Adjusts the center speaker channel output
level.
: Adjusts the left rear speaker channel
output level.
: Adjusts the right rear speaker channel
output level.
SUBWOOFER + or - : Adjust< \ubwoofer channel output level.
EFFECT
: Selects the effect level.
Note:
l
After
adjusting
sounds, press the source selecting button to operate
your target source by using number buttons; otherwise, number
buttons cannot be used for operating your
target source.
n
CD recorder
After pressing CDR, you can perform the following operationson a CD
player and a CD recorder:
ci
c
cim
c-“3
Gc
a2
GQ
0
b
: Starts playing.
I44 : Returns to the heginnIng 01 the current
(or
previous)
track.
))I : Skips to the beginning or the next track.
H : Stops playing.
II : Pauses playing. To relea\c it. press W.
1 - 10, +lO : Selects a track number directly.
For track number 5. press 5.
For track number 15. press +lO, then 5.
For track number 20. pres\ +lO, then IO.
For track number 30. prc>\ +10. +lO. then IO.
Note:
* When you start recording on the CD recorder, use the buttons on
the CD recorder itself or on the remote control supplied with it.
n
Tuner
You can always perfot-m the following opcrationa:
FM/AM
: Tune\ into the la\t ~lectetl FM or AM station.
0 Each time you press the button. the hand changes between FM and
AM alternately.
After pressing FM/AM. you can perform the following operations on
a tuner:
I - 10, +I0
: Select\ a pre~r channel numhct- directly.
For channel number 5. pre\b 5.
t-or channel nunlher IX. press +lO, then 5.
For channel number 20. pres\ +lO. then IO.
TUNING 0 or 0 :
Tune5 into \taliotl\.
FM MODE
: Chanfc\ the FM reception mode
61
Page 65

To operate JVC’s video components using this remote control
l
You need to connect JVC’s \idco components through the
AV COMPU LINK-III jacha (\ec page SC)) in addition to the
audio/video connections (vx papc\ 7 to IO).
0 Some JVC’s VCRs can accept two types of the control signals-
remote codes “A” and “R.” Before using this remote control, make
sure that the remote control code of the connected VCR is set to
code “A.”
l
To operate the video component(\) using the remote control, aim
the remote control directly at the remote sensor on each
component. not on this unit.
q
w
You can always perform the follo\h ing operations:
n
VCR
You can always perform the following operations:
Ii .
Oil STANDBY/ON VCR : Turns on or off the VCR
After pressing VCR, you can perform the following operations on a
VCR:
1 -- 9, 0
b
REW
FF
n
II
: Selects the TV channels on a VCR.
For channel number 5, press 5.
For channel number 10, press 1, then 0.
For channel number 23, press 2, then 3
: Starts playing.
: Rewinds a tape.
: Fast-winds a tape.
: Stops operations.
: Pauses playing. To release it, press ).
O/I STANDBY/ON TV
TV VOI, + or - : Adjusts the volume.
TV/VIDEO : Se& the input mode (either TV 01
After pressing TV, you can perform the following operations on a TV:
TV/DBS CH + or 1 - 9,0, lOO+
TV RETURN
: Turns on or off the TV.
VIDEO).
: Change\ the channels.
: Selects the channels.
For channel number 5. press 5.
For channel number IO, press I, then 0.
FOI- channel number 23. press 2, then 3.
For channel number 135, press lOO+, 3.
then S.
: Alternate\ between the previously
{elected channel and the current
channel.
62
Page 66

I
Opera
This remote control supplied with the unit can transmit control signals for other manufacturers’ TVs, DBS tuners, and VCRs.
By changing the transmittable signals from preset ones to other manufacturers’. you can operate other manufacturers’ components using this
remote control.
To operate other manufacturers’ equipment using this remote
control
l
Aim the remote control directly at the remote sensor on each
equipment.
l
To operate a source with the remote control, the source must he
selected using source selecting buttons on the remote control.
l
Refer also to the manuals supplied with your equipment.
n
1.
2.
3.
To change the transmittable signals for
operating other manufacturers’ lV
Press
and
hold
O/I STANDBY/ON TV.
Press TV.
Enter the manufacturer’s code
using the number buttons
OOQ
(l-9,0).
Co~cQ
See the right to find the code.
0cDcD
4.
Release WI STANDBY/ON TV.
You can perform the following operations on the TV:
WI STANDBY/ON TV : Turns on or off the TV.
TVVOL+or- : Adjusts the volume.
TV/VIDEO
: Sets the input mode (either TV 01
VIDEO).
After pressing TV, you can perform the following operation\ on
a TV:
TV/DBS CH + or 1 - 9,0,100+
: Changes the channels.
: Selects the channels.
For channel number 5, press 5.
Forchannel number IO. press I. then 0.
Forchannel numher23. press2. then 3.
For channel number 135. pres\ I OO+.
3. then 5.
TV RETCRN will function as the
ENTER button if your equipment
requires pressing ENTER after
selecting a channel number.
5.
Notes:
Refer also to the manual supplied for your TV
A// the functions listed on the left may not be assigned to the
buttons for some TVs.
If you cannot change fhe channels of some TVs by pressing
the number buttons, press
JV/DBS
CH + or - for changing the
channels.
Try to operate your TV by pressing
O/I STANDBY/ON TV.
When your TV turns on or off. you l-,~\e entered the correct
code.
If there arc more than one code listed for your brand of TV,
try each one until the corrccI one is entered.
Manufactures’ codes for TV
Manufacturer Codes
JVC I 00”. 02. 13. 14. 47. 74
Akai
Blaupunkt
Fisher
.,.,, -.
I 01.05
IOl,b2
1 il? OA
I
)ii”l;“”
Loewe 06, 15, 16
Magnavox 08, 17, 49
Mets 50 - 53
)Kano
I ranasonic
) 15
124-27.76
Philips
Quelle
RCAiPFiOSC
SABA
15, 17, 28, 75
52 - 67
08,24, 29 - 31, 48
32, 33, 68 - 70
06, 08, 16, 34, 35, 49
01,05
02, 15, 36
1 Sham 37. 38. 77
I
[ Note:
l
Manufacturers’codes are subject to change without notice. If
63
Page 67

n
To change the transmittable signals for
operating other manufacturers’ DBS tuner
1. Press and hold
O/r STANDBY/ON DBS.
2. Press DBS.
3. Enter the manufacturer’s code
using the number buttons
(l-9,0).
See to the right to lind the code.
4. Release O/I STANDBY/ON DBS.
O/l STANDBY/ON DBS
: Turns on o!- off the DBS tuner.
After pressing DBS. you can perform the following operations
on a DBS tuner:
TV/DBS CH
+ or - : Changes the channels.
1 - 9,0,100+
: Selects the channels.
For channel number 5. press 5.
lwr ~hanncl number IO, press I. then 0.
For channel number 23, press 2. then 3.
For channel number 135. press lOO+. 3.
hen 5.
Note:
TV RETIJRN will function as the
EUTER button it’ your equipment
require< pressing ENTER after selecting a
ch~~nncl nulnber.
* Refer a/so fo the manuai suppiled for your DBS tuner.
5. Try to operate your DBS tuner by pressing
WI STANDBY/ON DBS.
When your DBS tunel. turn\ on or oil‘. you have rntercd the
correct code.
If there are more than one code listed for your brand of DlSS
tuner, try each one
until the col-l.cct one i\ entered.
Manufactures’ c :odes for DBS tuner
‘“57”
i\ the initial JVC code.
Note:
* Manufacturers’codes are subject to change without notice. If
they are changed, this remote control cannot operate the
equipment.
64
Page 68

Operating Ot
W To change the transmittable signals for
operating other manufacturers’ VCR
1. Press and hold
WI STANDBY/ON VCR.
2. Press VCR.
“CR
v
3. Enter the manufacturer’s code
using the number buttons (l-9,0).
OOQ
See the right to find the code.
cl@El
4. Release O/I STANDBY/ON VCR.
O/I STANDBY/ON VCR
: Turns on or off the VCR.
After pressing VCR, you can perform the following operations
on a VCR:
1 - 9,0 : Selects the TV channels on a VCR.
For channel number 5, press 5.
For channel number IO, press I, then 0.
For channel number 23, press 2, then 3.
TV RETURN will function as the ENTER button it
your equipment requires pressing ENTER after
selecting a channel number.
b : Starts playing.
REW : Rewinds a tape.
FF
: Fast-winds a tape.
n
: Stops operations.
II
: Pauses playing. To release it, press k.
Note:
l
Refer also to the manual supplIed for your VCR.
Manufactures’ codes for VCR
Manufacturer
JVC
Aiwa
Bell & Howell
Blaupunkt
CGM
Emerson
Fisher
Funai
GE
Goldstar
Codes
OO:‘:, 26 - 29, 58
01, 02
03
04,05
06,07
08,10-12,64,65
03,14- 17
01
18-71)
67 -Goodmans
Grundig
Hitachi
Loewe
Magnavox
Mitsubishi
NEC
13,21
06,22
,8,X-%
C‘Z
r
07, L I
04, 19, 24
w-l - 26
Orion
Panasonic
ii, 24, 39, 40
Philips
_~~~04,19,2!,24,41,42
Phonola
21
Sony
Telefunken
Toshiba
Zenith
55,60
43,44
56 .57
~‘“00” is the initial JVC code
Note:
l
Manufacturers’codes are subject
to
change without notice. If
1 equipment. ’
they are changed this remote control cannot operate the
5. Try to operate your VCR by pressing
O/I
STANDBY/ON VCR.
When your VCR turns on or off, you have entered the col.rect
code.
If there are more than one code listed for your brand of
VCR, try each one until the correct one is entered.
65
Page 69

To get the best performance of the system. keep your discs and mechanism clean
General Notes
In general. you will have the bc\t performance by keeping your discs
and mechanism clean.
l
Store dives in their cases. and keep them in cabinets or on shelves.
Handling Discs
l
Remove the disc from its case by holding It at the edge wshile
pressing the center hole lightly.
l
Do not touch the shiny surface of the disc, or bend the dix.
l
Put the disc back in its case after use to prevent warping.
l
Be careful not to scratch the surface of the disc when placing It
back in its case.
l
Avoid exposure to direct sunlight. tcmpcrnturc extreme\. and
moisture.
Cleaning Discs
Wipe the disc with a soft cloth in a straight line from center to edge.
DO NOT use any solvent-such as conventional record
cleaner, spray, thinner, or benzine-to clean the disc.
Cleaning the Unit
l
Stain\ on the unit
Should be wiped off with a soft cloth. If the unit is heavily stained,
tripe it with a cloth soaked in water-diluted neutral detergent and
~runp well. then wipe clean with a dry cloth.
l
Since the unit may deteriorate in quality, become damaged or get
its paint peeled off. be careful about the following.
-- DO NOT wipe it with a hard cloth.
~ DO NOT wipe it strong.
~~ DO NOT wipe it with thinner or benzine.
~ DO NOT apply any volatile substances such as insecticides to it.
~- DO NOT allow any rubber or plastic to remain in contact with
it for a long time.
66
Page 70

I
Troubles
Use this chart to help you solve daily operational problems. If there is any problem you cannot \olvc. contact qour dealer.
W Genaral
PROBLEM
The power does not come on.
No sound from speakers.
POSSIBLE CAUSE
The power cord is not plugged in.
Speaker signal cables are not
connected.
The audio cable i< not connected
properly.
An incorrect source is selected.
Sound from one speaker only.
Muting is activated.
An incorrect input mode (analog 01
digital) is selected.
Connections are incorrect.
The balance IS \et to one extreme
“OVERLOAD” starts flashing on the
display.
Speakers are overloaded because ot
high volume.
The STANDBY lamp lights up after
turning on the power, hut soon the unit
turns off (into standby mode).
Speakers are overloaded because of
short circuit of speaker terminals.
The unit is overloaded hecause of a
high voltage.
Remote control does not operate as you
intend.
Remote control does not work.
The remote control is not ready for
your intended operation.
It is too far from the unit. or is not
facing the unit.
There is an obstruction hiding the
remote sensor on the unit.
The remote control I\ not aimed at the
remote sensor- on the unit 01
components.
The batteries have been inserted into
the wrong way round (+/-).
Batteries are weak.
The remote control signals are not set
correctly.
SOLUTION
Plug the power cord into an AC outlet.
Cheek spcakcr wiring and reconnect if
necessary.
Connect the cord pl-operly (see pages 7 to
IO).
Select the concct source.
Press MUTING to cancel the muting.
Select rhc correct input mode (analog 01.
digital).
Check connection\.
Ad,iust the balance properly (\ee pages 24 01
52).
I. Pres\ O/I STANDBY/ON on the front
panel to turn 00’ the unit.
2. Stop the playback source.
3. Turn on the unit again. and ad-just the
Press Oil STANDBY/ON on the front panel
to turn off the unit. then check the ypeaket
wil-ing.
If “OVERLOAD” does not disappear.
unplug the AC power cord. then plug it bath
again.
If 5pcaLcr uiring i\ not short-circuited.
COIl1;LC1
you,- deale1-.
Press Oil STANDBY/ON on the front panel
to turn off the unit. After unplugging the
power cord. consult your dealer.
PI-es? CONTROL, (\ee page 24) or a source
selecting button first. then press the buttons
you want to use.
Come clo\er to the unit. Operate the remote
control within 73 ft (7 m) II-om the unit.
Remove the oh\tt-uction.
Aim the rcmolc control at the remote scnsot
on e;lc,h componrrr1 you want to operate.
Replocc hatterie\.
Enter the corl-ccl nl;uiufilctllrcra’ code (set
pages 63 to 6.5).
67
Page 71

n
For DVD Player
PROBLEM
No picture is displayed on the TV. Connect the cord correctly (see pages 8 and
No picture is displayed on the TV
scnxn, the picture is blurred. or the
picture is divided into two parts.
No sound is heard and “NO AIJDIO”
appears on the display.
A disc cannot be played. The unit‘s and disc‘s Region Code
appears on the display.
Video and audio are distorted
“MULTI CH” or “L/R ONLY” appears
on the display.
The picture does not fit the TV screen
properly.
One-touch DVD playback does not
work though you have conncctcd A\/
COMPU LINK cord cot-i-ectly.
No subtitle appears on the TV screen
though you have selected as your initial
subtitle language
~_I
The video cord is not connected
correctly.
TV input selection is incotrect.
The disc is not playable.
The scanning mode is set to
“PROGRESSIVE” though the unit is
connected to the TV which does not
support the progressive video input,
such as a conventional TV.
The loaded disc may be illegally
copied.
numbers are incompatible
Parental Lock is in use.
The disc is loaded with its label and
data sides inverted.
The unplayable disc is loaded.
The disc is scratched ot- dirty.
and the TV.
With some discs. a picture may he
blurred when setting “PROGRESSIVE
MODE” to “FILM“ or “AUTO.”
The current track prohibits you from
playing hack with stereo sound.
“MONITOR TYPE” is not set correctly.
The TV is not set correctly
The video output mode setting is
incorrect
---~~~.
Audio language is different from the
one you have selected as
audio language.
YOLK
initial
POSSIBLE CAUSE
9).
Select the correct input on the TV
Replace the disc (see page 29).
Change the scanning mode to
“INTERLACE” (see page 14).
Consult with the disc vendor.
Replace the disc (see page 29).
Enter your password to change the parental
level (see pages 55 and 56).
Insert the disc correctly (set page 15). A disc cannot he played and “0:OO”
Replace the disc (see page 29).
Replace or clean the disc (see page 66)
Connect the unit and TV directly A VCR is connected between the unit
Set “PROGRESSIVE MODE” to “VIDEO”
(see page 5 I )
Activate Surround mode (see page 43) or
listen to another track.
Set the monitor type correctly (see page 51).
Set the TV correctly.
Set the video output mode correctly
according to the video connection between
your TV and the unit (see page 22).
Some discs are programmed to always
display no ruhtitle initially. If this happens,
press SUBTITLE on the remote control
after starting play (see page 35).
Some discs are programmed to always use
the original language initially. If this
happens, press AUDIO on the remote
control after starting play (see page 35)
SOLUTION
68
Page 72

Troubled
n
For Tuner
PROBLEM
Hard to listen to broadcast because of
noise.
Continuous hiss or buzzing during FM
reception.
POSSIBLE CAUSE
The AM loop antenna is too close to the
unit.
The supplied FM antenna ii not
properly extended and positioned.
Incoming signal is too weak.
The station is too far away.
An incorrect antenna is used.
Antennas are not connected properly.
Ignition noise from automobiles
Occasional cracking noise during FM
reception.
H For MP3
PROBLEM
A disc cannot be played
No MP3 files except JPEG files are
played.
W For JPEG
PROBLEM
SOLUTION
Change the position and direction of the AM
loop antenna.
Extend the FM antenna at the best position.
Connect an outdoor FM antenna or contact
your dealer.
Select a new station.
Cheek with your dealer to be sure you have a
correct antenna.
Check connections.
Move the antenna farther from automobile
traffic
POSSIBLE CAUSE
No MP3 files are recorded on the disc.
The disc is unplayable (such as CD
ROM).
SOLUTION
Replace the disc
MP3 files do not have the correct tile
extension-.mp3. .Mp3. .mP3, or .MP3
in their file names.
Add the file extension-.mp3, .Mp3, .mP3,
01. .MP3-to their lilt names (see page 45).
MP3 files are made at bit rate under
64 kbps.
MP3 files are not recorded in the format
compliant with IS0 9660 Level I or 2.
The MP3/JPEG setting i\ set to
“JPEG.”
POSSIBLE CAUSE
This unit cannot pl;ly back such tiles.
Replace the di\c.
Replace the disc. (Record MP3 files tlsing a compliant application.)
When both MP3 files and JPEG files are
recorded on a disc, to play MP3 files, set the
MPYJPEG setting to “MP?” (see page 52).
SOLUTION
A disc cannot be played.
No JPEG files al-c rccordcd on the disc.
Replace the di\c.
The disc 1s unplayable (such as CDROM).
JPEG files do not have the correct file
extension in their tile names.
JPEG file\ are not made with barcline
JPEG format.
Add the file extension-.jpg. .jpcg, .JPG.
.JPEG or any uppercase and towerca\e
combination (\uch as “.Jpg”)-to their litc
names (\ce page 47).
Thi\ unit cannot play back such file\.
Replace the di\c.
JPEG files are not recorded in the
format compliant with IS0 9660 Level
t or2.
The MPYJPEG setting is set to “MP3.”
No JPEG files except MP3 files are
played.
Reptacc the di\c [Record JPEG files using a
compliant application.)
When both MP3 tile\ and JPEG files are
~CCOI-dcd on a disc. to play JPEG file\, set
the MP?/JPEG \ettlng to “JPEG” (see page
52).
69
Page 73

Amplifier
Output
Audio
Audio Input Sensitivity/impedance (I kHz):
Audio input (DIGITAL IN)* :
Signal-to-Noise Ratio (‘66 IHFi’78 IHF):
Frequency Kesponse (8 Q):
Tone Control:
Video
Video Input Sen\itivity/lmpedance (I kHr):
Composite video:
Power
S-video:
Designs & specifications are subject to change without notice.
At Stereo operation:
Front channels: 100 W per channel, min. RMS, driven into 8 Q
40 Hz to 20 kHz with no more than 0.8% total
harmonic distortion.
At Surround operation:
Front channels:
Center channel: 100 W, min. RMS, driven into 8 0
Rear channels:
TV, TAPEKDR, DBS, VCR: 240 mVl47 kR
Coaxial: DIGITAL I (DBS): 0.5 V(p-p)/75 s1
Optical: DlGITAL 2 (TV): -21 dBm to -15 dBm (660 nm *30 nm)
*Corresponding to Linear PCM, Dolby Digital, and DTS Digital Surround
(with sampling frequency-32 kHz, 44.1 kHz, 48 kHz).
TV. TAPEKDR, DBS, VCR: 87 dBl67 dB
TV. TAPEICDR, DBS, VCR: 20 Hz to 20 kHz (?I dB)
Bass (100 HL): +lOdB,2dB
Treble (10 kHz):
DBS IN, VCR IN:
DBS IN, VCR IN:
100 W per channel, min. RMS, driven into 8 Q
at I kHz, with no more than 0.8% total harmonic
distortion.
at I kHz, with no more than 0.8% total harmonic
distortion.
100 W per channel, min. RMS, driven into 8 Q
at I kHz, with no more than 0.8% total harmonic
distortion.
+iOdB?2dB
1 V(p-p)/75 R
(Yluminance):
(C:chrominance): 0.286 V(p-p)/75 R
1 V(p-p)/75 R
Video Output Level/Impedance (I kHz):
Composite video:
Component video:
Horizontal Resolution: 500 lines
Signal-to-Noise Ratio (S/N): 63 dB
FM tuner WIFI
AM tuner
General
Power Requirements:
Power Consumption:
Dimensions (W x H x D):
VCR OUT, MONlTOR OUT:
S-video:
Color System: NTSC
Synchronize: Negative
Tuning Range:
Tuning Range:
Mass:
VCR OUT, MONITOR OUT:
DVD COMPONENT VIDEO OUT:
87.5 MH7 to 108.0 MHz
530 kHL to I 710 kHz
AC l2OV%, 60 Hr
200 W/255 VA (in operation)
2 W (in standby mode)
435 mm x 100 mm x 403.5 mm
(I7 ‘/lh in. X 3 Ii/if> in. X I5 lJ/lh in.)
7.9 kg (17.4 Ibs)
1 V(p-p)/75 R
(Yluminance):
(C:chrominance): 0.286 V(p-p)/75 Q
(Component-Y): 1 .o V(p-p)/75 s2
(Component-Pa/PR): 0.7 V(p-p)/75 R
1 V(p-p)/75 R
70
Page 74

1 JVC
z JVC COMPANY OF AMERICA warrants this product and all parts thereof, except as set forth below ONLY TO THE =
$ ORIGINAL PURCHASER AT RETAIL to be FREE FROM DEFECTIVE MATERIALS AND WORKMANSHIP from the date z
* of original retail purchase for the period as shown below. (“The Warranty Period”)
*
:
*
c
= THIS LIMITED WARRANTY IS VALID ONLY IN THE FIFTY (50) UNITED STATES, THE DISTRICT OF COLUMBIA AND
z IN COMMONWEALTH OF PUERTO RICO.
= WHAT WE WILL DO:
z If this product is found to be defective, JVC wrll repair or replace defective parts at no charge to the original owner. : *
z Such repair and replacement services shall be rendered by JVC during normal business hours at JVC authorized service
* centers. Parts used for replacement are warranted only for the remainder of the Warranty Period. All products and parts z *
* thereof may be brought to a JVC authorized service center on a carryin basis except for Television sets having a screen
z size 25 inches and above which are covered on an inhome bass.
= WHAT YOU MUST DO FOR WARRANTY SERVICE:
2 Return your product to a JVC authorized service center with a copy of your bill of sale. For your nearest JVC authorized 2
2 servicecenter, please call toll free: (800) 537-5722.
2 If service is not available locally, box the product carefully, preferably in the original carton, and ship, insured, with
* a copy of your bill of sale plus a letter of explanation of the problem to the nearest JVC Factory Service Center, the z *
$ name and location of which will be given to you by the toll-free number.
2 If you have any questions concerning your JVC Product, please contact our Customer Relations Department.
= WHAT IS NOT COVERED:
z This limited warranty provided by JVC does not cover:
= 1.
Products which have been subiect to abuse, accrdent, alteration, modification, tampering, neglrgence, misuse, faulty
installation, lack of reasonable care, or if repaired or serviced by anyone other than a service facility authorized by
:
JVC to render such service, or if affixed to any attachment not provided with the products, or if the model number
or serial number has been altered, tampered with, defaced or removed;
2
Initial installation and installation and removal for repair;
*
2.
Operational adjustments covered in the Owner’s Manual, normal maintenance, video and audio head cleaning;
3 3.
Damage that occurs in shipment, due to act of God, and cosmetic damage;
* 4.
Signal reception problems and failures due to line power surge;
* 5.
= 6.
Video Pick-up Tube&CD Image Sensor, Cartridge, Stylus (Needle) are covered for 90 days from the date of purchase; z
Accessories;
* 7.
= 8.
Batteries (except that Rechargeable Batteries are covered for 90 days from the date of purchase);
*
2 There are no express warranties except as listed above.
*
* THE DURATION OF ANY IMPLIED WARRANTIES, INCLUDING THE IMPLIED WARRANTY OF MERCHANTABILITY, IS
2 LIMITED TO THE DURATION OF THE EXPRESS WARRANTY HEREIN.
= JVC SHALL NOT BE LIABLE FOR THE LOSS OF USE OF THE PRODUCT INCONVENIENCE LOSS OR ANY OTHER =
: DAMAGES. WHETHER DIRECT, INCIDENTAL OR CONSEQUENTIAL (INCiUDING, WITHOUT LIMITATION, DAMAGE :
i TO TAPES, RECORDS OR DISCS) RESULTING FROM THE USE OF THIS PRODUCT, OR ARISING OUT OF ANY BREACH
“* OF THIS WARRANTY. ALL EXPRESS AND IMPLIED WARRANTIES, INCLUDING THE WARRANTIES OF MERCHANT* ABILITY AND FITNESS FOR PARTICULAR PURPOSE, ARE LIMITED TO THE WARRANTY PERIOD SET FORTH ABOVE. :
z
* Some states do not allow the exclusion of incidental or consequential damages or lrmitations on how long an *
* implied warranty lasts, so these limitations or exclusions may not apply to you. This warranty gives you specific ;
2 legal rights and you may also have other rights which vary from state to state.
2
JVC COMPANY OF AMERICA
DIVISION OF JVC AMERICAS CORP.
LIMITED WARRANTY
PARTS LABOR
1 YR 90 DAYS /
---
1700
Wayne, NJ
CONSUMER VIDEO l-90 ;
I
Valley Road
07470
*
*
:
*
*
;
:
z
*
*
*
2
*
*
:
*
*
?
;
;
:
2
:
:
*
i
*
i
:
*
REFURBISHED PRODUCTS CARRY A SEPARATE WARRANTY, THIS WARRANTY DOES NOT APPLY. FOR DETAILS OF
REFURBISHED PRODUCT WARRANTY, PLEASE REFER TO THE REFURBISHED PRODUCT WARRANTY INFORMATION
PACKAGED WITH EACH REFURBISHED PRODUCT.
Model No. :
Purchase data :
ET-51005.5(0301)
Serial No. :
Name of dealer :
Page 75

Authorized Service Centers
QUALITY
J VC @imc~
HOW TO LOCATE YOUR JVC SERVICE CENTER
TOLL FREE: 1 (800) 537-5722
http://www.jvc.com
Dear Customer,
In order to receive the most satisfaction from your purchase,please read the instruction booklet before
operating the unit.ln the event that repairs are necessary, please call 1 (800)537-5722 for your nearest
authorized servicer or visit our website at www.JVC.com
Remember to retain your Bill of Sale for Warranty Service.
-~- ._-_l_i
Do not service the television yourself
Caution
To prevent electrical shock,do not open the cabinet.There are no user serviceable
parts inside.
Please refer to qualified service personnel for repairs.
Accessories
To purchase accessories for your JVC product,please call toll free:1 (8001882-2345 or
on the web at www.JVC.com
ET-51005-5
(0301)
Page 76

Thank you for purchasing
JVC
Please do not
send products or other
correspondence to this address.
307 c
JVC
PRODUCT REGISTRATION DEPARTMENT
PO BOX 13274
DENVER CO 80201-3274
I l,,l, II
I,, ,,I,1 II,,, III
II,,ll,,,l,ll,,,l,l,,ll,,,l,l,,l,,l,ll
) US CUSTOMERS ONLY )
Registering your product will allow us to contact you in the unlikely
event a product safety notification is required.
This is not a warranty card. Retain your bill of sale for proof of
warranty coverage.
THANK YOU FOR PURCHASING THIS JVC PRODUCT
I*
.
l 0
A
8
I
Page 77

.
IMPORTANT! Please fill-out and return within 10 days!
1
First Name:
307c JVC
initial:
Last Name:
A
Address: (Number and Street)
City:
state:
Apt #:
Zip Code:
2
Phoneff:
3 E-mail Address:
If you voluntarily provide us with your emall address, you give us perm~sslon to share and use your email address to send you emall offers that may mterest you.
4 Date of purchase:
Month
Day
5 Model Number:
6
Serial Number:
7
Name of store where purchased:
8
Purchase Price: $
.oo
9 Did you:
1 o Purchase this product yourself?
2 o Receive this product as a gift?
10
IS this product:
1 o The first product of this t
r yi
pc ou have ever owned?
2 o A replacement for a ilrnl ar J
C product7
3 o A replacement for a slmliar product rmade by
another company?
4 o An addltlon to a slmllar product you are ctlll using?
11
What factors most influenced your decision to purchase
this product?
1 o JVC brand reputation
2 o Previous experience with JVC products
3 0 Price
4. 0 Specific product features
5 0 Style/appearance
6 o Salesperson’s recommendatlan
/ o Frlend’sirelattve’s recommendation
8 0 Warranty coverage
9 o Other____..
12 A. If you have purchased a mobile audio product, please
tell us about the car or truck in which it was installed,
otherwise, please tell us about the newest car or truck
in your household.
Make
(rq Ford)
Model
(F y Tams SHOI
6. Please check which applies:
: 0 Own
2 0 Lease
18
lncludino vourself, what is the t&f number of people
living in your household?
(Examples'01.02.03.04 )
19 Date ot birth (month/year) of the other adults and
children in your household:
Male Female
Male Femaie
1.0 2 0
Month “EX
‘.O 2 o Month Year
10 20
Umlih Yeal
I ‘O 2 O mltll Year
20 Fy yFb$mary residence, do you:
2. o Rent
21 Wfric; b~s,‘,~;;~~bgegsOyour
$15,000-$i4,999
familq inoco~;o\ ooo~~,24 999
2. 0 8. 0 $125:000-u49:999
3. 0 $25,000-$34,999 9 0 $150,000-$174.999
4 0 $35,000.$49,999 10. 0 $175,000-$199.999
5 0 $50,000-$74,999 11 0 $200,000-$249.999
6 0 $75,000-$99.999 12 o $250,000 or Over
22 Education:
(Please check which category applies to you)
1 o Some high school
2 o Completed high school
3 o College degree
4 o Graduate degree
In the last six (6) months has anyone in your household
purchased any of the following items through the mail
and/or over the internet?
A. Mali
B. Internet
1 Booksimagarlnes
0
0
2. Children’s products
0
0
3 Clothes
0
0
25
13 Would you like information on JVC accessories or other
JVC products related to the item you purchased?
1 0 Yes
2 o No
14 Would you be interested in purchasing an extended warranty for
your JVCproduct? : o Yes
2 o No
15
Your gender:
1 o
Male 2 0 Female
16
Your marital status: 1 o Married 2 0 Sinqle
17 Date of E birth:
MOltI
b
war
4. lnsuranceiflnanclal products o
0
5 Musiclv~deolDVD
0 0
6 Travel
0 0
/ Other
0 0
24
I use these credit cards:
1 o American Express 4 0 Visa
2 o Gas/Retail 5. o Other
3 o Master Card
6 o Do not have credit cards
Someone in my home participates in Someone in my home participates in
Cy;k Cy;k ~&g4&l$ork ~&g4&l$ork 19. 19.
2. o 2. o Blbleidevotlonal Blbleidevotlonal
3 0 3 0 Boatlngisailmg Boatlngisailmg
s:. s:.
4. o 4. o Campmglhtking Campmglhtking 22 22
5. o 5. o Casmo gambling Casmo gambling 23. 23.
6 o 6 o Contribute to charitable causes Contribute to charitable causes 24 24
7. 0 7. 0 Crafts Crafts 25 25
8 0 8 0 Cultural art/events Cultural art/events 26 26
9 0 9 0 Cyclmg Cyclmg
10 o Do-lt~yourself 10 o Do-lt~yourself
;;. ;;.
11 o 11 o Enter sweepstakes/contests Enter sweepstakes/contests 29 29
12 o 12 o Flshlng Flshlng 30. 30.
13 0 13 0 FltnessiexerclseiJogglng FltnessiexerclseiJogglng 31. 31.
; ;, ; L$enlng ; ;, ; L$enlng
32. 32.
33 33
16 o 16 o Gourmet cooklngifoodiwmes Gourmet cooklngifoodiwmes 34. 34.
17 o 17 o Grandchildren Grandchildren 35. 35.
18. o 18. o Home decoratlng Home decoratlng 36. 36.
the
following activities:
0
0
0
0
0
0
0
0
0
0
0
0
0
0
0
0
0
0
Huntmgishootlng
lknesm (mtil funds, I+%)
Investments (stacks & bonds)
Own a dog
Personal computing / Internet
Photo raphy
%
Read ooks
Snow skimg
Self improvement
Soccer
Tennis
Travel-Foreign
Travel-L.S
TV shopping
Vltammsinatural foods
Watch sports on TV
Thank you for completing tliis questionnaire
Your answers will help us and other companies reach you with offers that may Interest you
87-5:028-Z
If you prefer not to receive these offers, please check here [ I
(0302)
PLEAS1 FOLD AND SEAL WITH TAPE BEFORE MAILING
DO NOT STAPLE
Printed in Malaysia A
Page 78

Important Products
Safety Instruction
Electrical energy can perform many useful functions.
But improper use can result in potential electrical
shock or fire hazards. This product has been engineered and manufactured to assure your personal
safety. In order not to defeat the built-in safeguards,
observe the following basic rules for its installation,
use and servicing,
ATTENTION:
Follow and obey all warnings and instructions marked
on your product and its operating instructions. For
your safety, please read all the safety and operating
instructions before you operate this product and keep
this brochure and the operating instructions packaged
with your product for future reference.
Page 79

INSTALLATION
1. Grounding or Polarization
(A) Your product may be equipped with a polarized
alternating-current line plug (a plug having one blade
wider than the other). This plug will fit into the power
outlet only one way. This is a safety feature.
If you are unable to insert the plug fully into the outlet,
try reversing the plug. If the plug should still fail to fit,
contact your electrician to replace your obsolete outlet. Do not defeat the safety purpose of the polarized
plug.
(6) Your product may be equipped with a 3-wire
grounding-type plug, a plug having a thirdtgrounding)
pin. This plug will only fit into a grounding-type power
outlet. This is a safety feature.
If you are unable to insert the plug into the outlet,
contact your electrician to replace your obsolete out-
let. Do not defeat the safety purpose of the grounding-type plug.
2. Power Sources
Operate your product only from the type of power
source indicated on the marking label. If you are not
sure of the type of power supply to your home, con-
sult your product dealer or local power company. If
your product is intended to operate from battery
power, or other sources, refer to the operating in-
structions.
3. Overloading
Do not overload wall outlets, extension cords, or in-
tegral convenience receptacles as this can result in a
risk of fire or electric shock.
4. Power Cord Protection
Power supply cords should be routed so that they are
not likely to be walked on or pinched by items placed
upon or against them, paying particular attention to
cords at plugs, convenience receptacles, and the
point where they exit from the product.
5. Ventilation
Slots and openings in the cabinet are provided for
ventilation. To ensure reliable operation of the
product and to protect it from overheating, these
openings must not be blocked or covered.
Do not block the openings by placing the product
on a bed, sofa, rug or other similar surface.
Do not place the product in a built-in installation
such as a bookcase or rack unless proper ventila-
tion is provided or the manufacturer’s instructions
have been adhered to.
6. Wall or Ceiling Mounting
The product should be mounted to a wall or ceiling
only as recommended by the manufacturer.
ANTENNA INSTALLATION
INSTRUCTIONS
1. Outdoor Antenna Grounding
If an outside antenna or cable system is connected to
the product, be sure the antenna or cable system is
grounded so as to provide some protection against
voltage surges and built-up static charges. Article
810 of the National Electrical Code, ANSliNFPA 70,
provides information with regard to proper grounding
of the mast and supporting structure, grounding of
the lead-in wire to an antenna discharge unit, size of
grounding conductors, location of antenna discharge
unit, connection to grounding electrodes, and re-
quirements for the grounding electrode.
2. Lightning
For added protection for this product during a lightn-
ing storm, or when rt IS left unattended and unused for
long periods of time, unplug it from the wall outlet and
disconnect the antenna or cable system. This will
prevent damage to the product due to lightning and
power-line surges.
Page 80

5. Ventilation
Slots and openings in the cabinet are provided for
ventilation. To ensure reliable operation of the
product and to protect it from overheating, these
openings must not be blocked or covered.
.
Do not block the openings by placing the product
on a bed, sofa, rug or other similar surface.
.
Do not place the product in a built-in installation
such as a bookcase or rack unless proper ventilation is provided or the manufacturer’s instructions
have been adhered to.
6. Wall or Ceiling Mounting
The product should be mounted to a wall or ceiling
only as recommended by the manufacturer.
3. Power Lines
An outside antenna system should not be located in
the vicinity of overhead power lines or other electric
light or power circuits, or where it can fall into such
power lines or circuits. When installing an outside
antenna system, extreme care should be taken to
keep from touching such power lines or circuits as
contact with them might be fatal.
ANTENNA INSTALLATION
INSTRUCTIONS
1. Outdoor Antenna Grounding
If an outside antenna or cable system is connected to
the product, be sure the antenna or cable system is
grounded so as to provide some protection against
voltage surges and built-up static charges. Article
810 of the National Electrical Code, ANSliNFPA 70,
provides information with regard to proper grounding
of the mast and supporting structure, grounding of
the lead-in wire to an antenna discharge unit, size of
grounding conductors, location of antenna discharge
unit, connection to grounding electrodes, and re-
quirements for the grounding electrode.
2. Lightning
For added protection for this product during a lightn-
ing storm, or when It IS left unattended and unused for
long periods of time, unplug it from the wall outlet and
disconnect the antenna or cable system. This will
prevent damage to the product due to lightning and
power-line surges.
NEC NATIONAL ELECTRiCAL CODE
USE
1. Accessories
To avoid personal injury:
e Do not place this product on an unstable cart,
stand, tripod, bracket, or table. It may fall, causing
serious injury to a child or adult, and serious
damage to the product.
* Use only with a cart, stand, tripod, bracket, or ta-
ble recommended by the manufacturer or sold with
the product.
l Use a mounting accessory recommended by the
manufacturer and follow the manufacturer’s in-
structions for any mounting of the product.
l Do not try to roll a cart with small casters across
thresholds or deep-pile carpets.
Page 81

3. Power Lines
An outside antenna system should not be located in
the vicinity of overhead power lines or other electric
light or power circuits, or where it can fall into such
power lines or circuits. When installing an outside
antenna system, extreme care should be taken to
keep from touching such power lines or circuits as
contact with them might be fatal.
EXAMPLE OF ANTENNA GROUNDING AS PER
NATIONAL ELECTRICAL CODE, ANWNFPA 70
USE
1. Accessories
To avoid personal Injury:
* Do not place this product on an unstable cart,
stand, tripod, bracket, or table. It may fall, causing
serious injury to a child or adult, and serious
damage to the product.
0 Use only with a cart, stand, tripod, bracket, or ta-
ble recommended by the manufacturer or sold with
the product.
l Use a mounting accessory recommended by the
manufacturer and follow the manufacturer’s Instructions for any mounting of the product.
l Do not try to roll a cart with small casters across
thresholds or deep-pile carpets.
Page 82

SERVICING
PORTABLE CART WARNING
ISymbol provided by RETACl
2. Product and Cart Combination
A product and cart combination
should be moved with care.
Quick stops, excessive force,
and uneven surfaces may cause
the product and cart combination to overturn.
3. Water and Moisture
Do not use this product near water-for example,
near a bath tub, wash bowl, kitchen sink or laundry
tub, in a wet basement, or near a swimming pool and
the like.
4. Object and Liquid Entry
Never push objects of any kind into thus product
through openings as they may touch dangerous vol-
tage points or short-out parts that could result in a fire
or electric shock. Never spill liquid of any kind on the
product.
5. Attachments
Do not use attachments not recommended by the
manufacturer of this product as they may cause hazards.
6. Cleaning
Unplug this product from the wall outlet before
cleaning. Do not use liquid cleaners or aerosol clean
ers. Use a damp cloth for cleaning.
7. Heat
The product should be situated away from hea;
sources such as radiators, heat registers, stoves, or
other products (including amplifiers) that produce
heat.
I. Servicing
If your product is not operating correctly or exhibits a
marked change in performance and you are unable to
restore normal operation by following the detailed
procedure in its operating instructions, do not attempt
to service it yourself as opening or removing covers
may expose you to dangerous voltage or other haz-
ards. Refer all servicing to qualified service personnel.
2. Damage Requiring Service
Unplug this product from the wall outlet and refer
servicing to qualified service personnel under the fol-
lowing conditions:
a. When the power supply cord or plug is damaged.
b. If liquid has been spilled, or objects have fallen into
the product.
c. If the product has been exposed to rain or water.
d. If the product does not operate normally by folL
lowing the operating instructions. Adjust only
those controls that are covered by the operating
Instructions as an improper adjustment of other
controls may result In damage and will often rem
quire extensive work by a qualified technician to
restore the product to its normal operation.
e. If the product has been dropped or damaged in any
way.
f. When the product exhibits a distinct change in
performance-this indicates a need for service.
3. Replacement Parts
When replacement parts are required, be sure the
service technician has used replacement parts speci-
fied by the manufacturer or have the same charac-
teristics as the orrglnal part. Unauthorized substitu-
tions may result in fire, electric shock or other haz-
ards.
4. Safety Check
Upon completion of any service or repairs to this
product, ask the service technician to perform safety
checks to determine that the product is in safe oper-
ating conditions.
Page 83

SERVICING
I. Servicing
If your product is not operating correctly or exhibits a
marked change in performance and you are unable to
restore normal operation by following the detailed
procedure in its operating instructions, do not attempt
to service it yourself as opening or removing covers
may expose you to dangerous voltage or other hazards. Refer all servicing to qualified service personnel.
2. Damage Requiring Service
Unplug this product from the wall outlet and refer
servicing to qualified service personnel under the following conditions:
a. When the power supply cord or plug is damaged.
b. If liquid has been spilled, or objects have fallen into
the product.
c. If the product has been exposed to rain or water.
d. If the product does not operate normally by fol-
lowing the operating instructions. Adjust only
those controls that are covered by the operating
instructions as an improper adjustment of other
controls may result in damage and will often re-
quire extensive work by a qualified technician to
restore the product to its normal operation.
e. If the product has been dropped or damaged in any
way.
f. When the product exhibits a distinct change in
performance-this indicates a need for service.
Important Products
Safety Instruction
Electrical energy can perform many useful functions.
But improper use can result in potential electrical
shock or fire hazards. This product has been en-
gineered and manufactured to assure your personal
safety. In order not to defeat the built-in safeguards,
observe the following basic rules for its installation,
use and servicing.
ATTENTION:
Follow and obey all warnings and instructions marked
on your product and its operating instructions. For
your safety, please read all the safety and operating
instructions before you operate this product and keep
this brochure and the operating instructions packaged
with your product for future reference.
3. Replacement Parts
When replacement parts are required, be sure the
service technician has used replacement parts specsfied by the manufacturer or have the same characteristics as the original part. Unauthorized substitutions may result in fire, electric shock or other haz-
ards.
4. Safety Check
Upon completion of any service or repairs to this
product, ask the service technician to perform safety
checks to determine that the product is in safe operating conditions.
Printed in Malaysia
YU20333
 Loading...