

Page 1
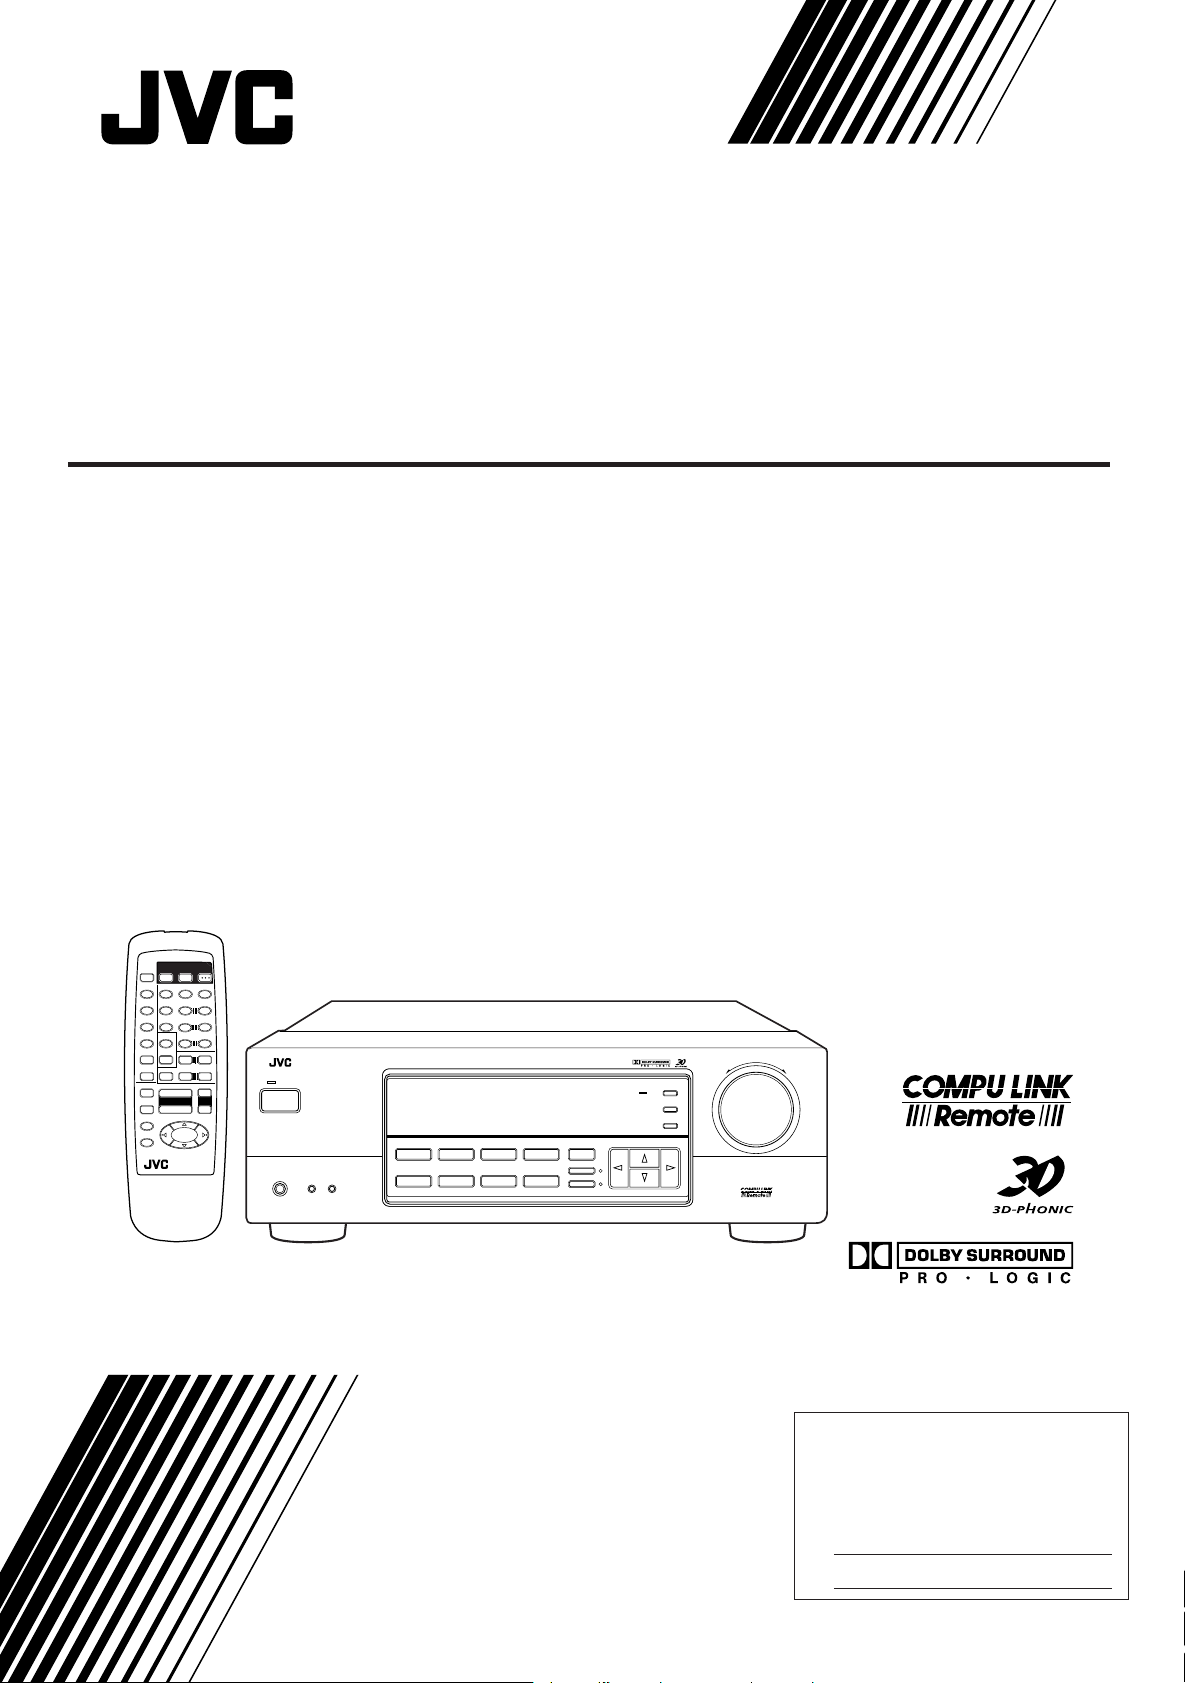
AUDIO/VIDEO CONTROL RECEIVER
RECEPTEUR DE CONTROL AUDIO/VIDEO
RX-5000VBK
POWER
TV
CD
VCR
EFFECT
FM/AM
5
VCR
7/P
SOUND
DVD
CONTROL
CD-DISC
PHONO
TV/VIDEO
+
VOLUME
–
SLEEP
8
4
1
RM-SR558U REMOTE CONTROL
AUDIO
SURROUND
TESTDELAY
5
321
– CENTER +
54
6
5
– REAR•L +
5
98
MENU
– REAR•R +
+10
10
ENT
TV VOL.
+
–
TV CH
+
–
+
VCR CH
–
£
4
1
7
RX-5000V AUDIO/VIDEO CONTROL RECEIVER
STANDBY
POWER
SPEAKERS
PHONES
12
— OFF_ ON
DVD MULTICDDVD
ADJUSTBASS BOOST
SETTING
MEMORY
VCR
FM
SURROUND MULTI CURSOR
PHONO
TAPE/MD
SOURCE NAME
ONE TOUCH OPERATION
AM
INPUT ATT.
MASTER VOLUME
–+
TAPE/MD
DVD MULTI
ONE TOUCH
OPERATION
MUTING
INSTRUCTIONS
MANUAL D’INSTRUCTIONS
For Customer Use:
Enter below the Model No. and Serial
No. which are located either on the rear,
bottom or side of the cabinet. Retain this
information for future reference.
Model No.
Serial No.
LVT0384-002A
[C]
Page 2
Warnings, Cautions and Others/
Mises en garde, précautions et indications diverses
CAUTION
To reduce the risk of electrical shocks, fire, etc.:
1. Do not remove screws, covers or cabinet.
2. Do not expose this appliance to rain or moisture.
ATTENTION
Afin d’éviter tout risque d’électrocution, d’incendie, etc.:
1. Ne pas enlever les vis ni les panneaux et ne pas ouvrir le coffret de
l’appareil.
2. Ne pas exposer l’appareil à la pluie ni à l’humidité.
For Canada/pour le Canada
CAUTION: TO PREVENT ELECTRIC SHOCK, MATCH WIDE
BLADE OF PLUG TO WIDE SLOT, FULLY INSERT
ATTENTION: POUR EVITER LES CHOCS ELECTRIQUES,
INTRODUIRE LA LAME LA PLUS LARGE DE LA FICHE DANS LA
BORNE CORRESPONDANTE DE LA PRISE ET POUSSER
JUSQUAU FOND
Caution –– POWER switch!
Disconnect the mains plug to shut the power off completely. The
POWER switch in any position does not disconnect the mains line.
The power can be remote controlled.
Attention –– Commutateur POWER!
Déconnecter la fiche de secteur pour couper complètement le
courant. Le commutateur POWER ne coupe jamais complètement
la ligne de secteur, quelle que soit sa position. Le courant peut être
télécommandé.
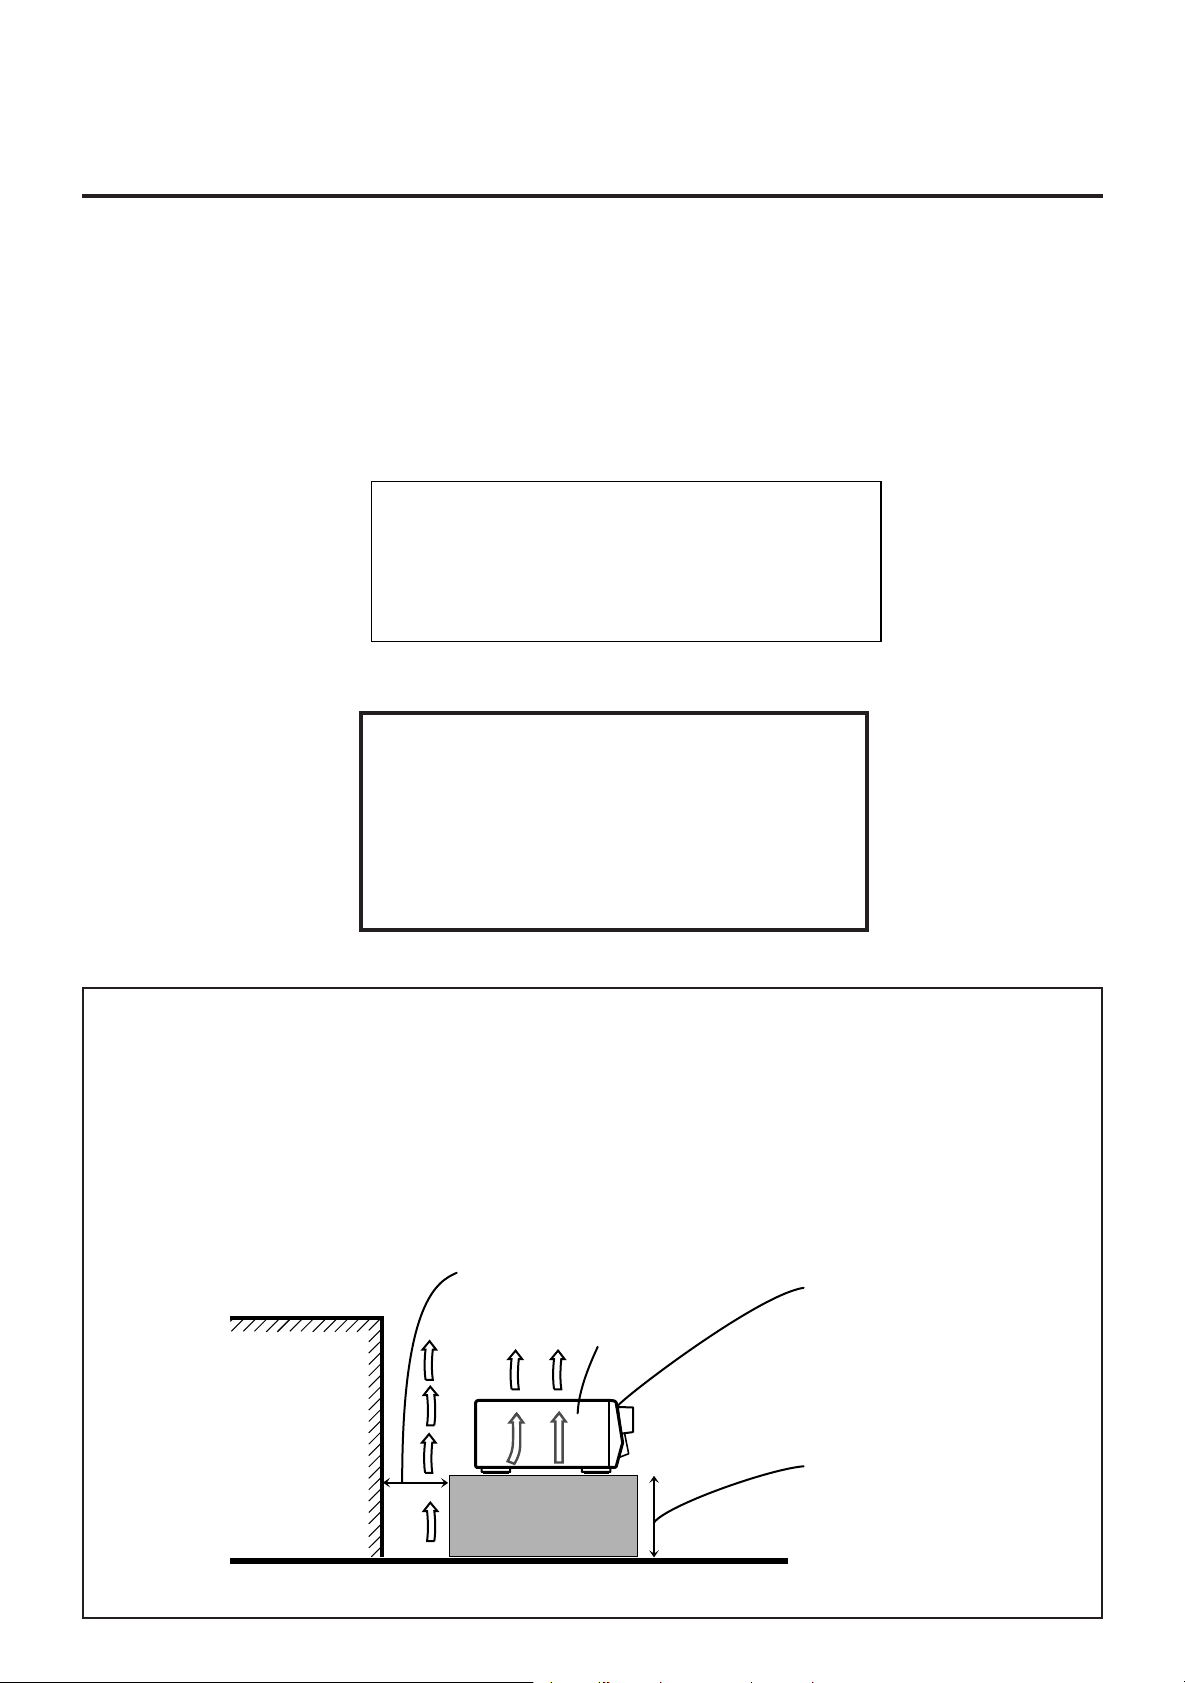
Caution: Proper Ventilation
To avoid risk of electric shock and fire and to protect from damage.
Locate the apparatus as follows:
Front: No obstructions open spacing.
Sides: No obstructions in 10 cm from the sides.
Top: No obstructions in 10 cm from the top.
Back: No obstructions in 15 cm from the back
Bottom: No obstructions, place on the level surface.
In addition, maintain the best possible air circulation as illustrated.
Spacing 15 cm or more
Dégagement de 15 cm ou plus
Attention: Ventilation Correcte
Pour éviter les chocs électriques, l’incendie et tout autre dégât.
Disposer l’appareil en tenant compte des impératifs suivants
Avant: Rien ne doit gêner le dégagement
Flancs: Laisser 10 cm de dégagement latéral
Dessus: Laisser 10 cm de dégagement supérieur
Arrière: Laisser 15 cm de dégagement arrière
Dessous: Rien ne doit obstruer par dessous; poser l’appareil
sur une surface plate.
Veiller également à ce que l’air circule le mieux possible comme
illustré.
Front
Avant
Wall or obstructions
Mur, ou obstruction
RX-5000VBK
Stand height 15 cm or more
Hauteur du socle: 15 cm ou plus
Floor
Plancher
Page 3

Table of Contents
Parts Identification...................................... 2
Getting Started........................................... 3
Before Installation ...................................................................... 3
Checking the Supplied Accessories ........................................... 3
Connecting the FM and AM Antennas....................................... 3
Connecting the Speakers ............................................................ 4
Connecting Audio/Video Components....................................... 5
Connecting the Power Cord ....................................................... 7
Putting Batteries in the Remote Control .................................... 7
Basic Operations ......................................... 8
Turning the Power On and Off (Standby) .................................. 8
Selecting the Source to Play.......................................................8
Adjusting the Volume ................................................................. 9
Selecting the Front Speakers ...................................................... 9
Muting the Sound ....................................................................... 9
Recording a Source .................................................................... 9
Attenuating the Input Signal .................................................... 10
Adjusting the Front Speaker Output Balance........................... 10
Reinforcing the Bass ................................................................ 10
Adjusting the Tone ................................................................... 10
English
Basic Settings........................................... 11
Changing the Source Name...................................................... 11
Setting Center and Rear Speakers for the DSP Modes ............ 11
Storing the Basic Settings and Adjustments — One Touch
Operation ........................................................................... 12
Using the Sleep Timer.............................................................. 12
Receiving Radio Broadcasts ........................ 13
Tuning in Stations Manually .................................................... 13
Using Preset Tuning ................................................................. 13
Selecting the FM Reception Mode........................................... 14
Using the DSP Modes ................................ 15
Available DSP Modes According to the Speaker Arrangement .. 16
Adjusting the 3D-PHONIC Modes .......................................... 17
Adjusting the DAP Modes ....................................................... 17
Adjusting the Surround Modes — Dolby Surround and JVC
Theater Surround ............................................................... 18
Activating the DSP Modes ....................................................... 19
Using the DVD MULTI Playback Mode.......... 20
Activating the DVD MULTI Playback Mode .......................... 20
COMPU LINK Remote Control System ......... 21
Operating JVC’s Audio/Video Components ... 22
Troubleshooting......................................... 24
Specifications............................................ 25
1
Page 4
Parts Identification
Become familiar with the buttons and controls on the receiver before use.
Refer to the pages in parentheses for details.
English
127354869p
RX-5000V AUDIO/VIDEO CONTROL RECEIVER
STANDBY
POWER
PHONES
SPEAKERS
1
DVD MULTI
2
— OFF_ ON
CD
DVD
PHONO
rty
VCR
TAPE/MD
SOURCE NAME
FM
AM
e
SURROUND MULTI CURSOR
ONE TOUCH OPERATION
INPUT ATT.
w
Front Panel
1
TAPE/MD
FM/AM
2
DVD MULTI
PHONO
ONE TOUCH
3
4
5
6
OPERATION
MUTING
SLEEP
7
POWER
TV
CD
VCR
DVD
8
RM-SR558U REMOTE CONTROL
CONTROL
CD-DISC
4
1
EFFECT
7/P
SOUND
TV/VIDEO
5
VOLUME
+
–
VCR
5
– CENTER +
54
– REAR•L +
5
– REAR•R +
10
TV VOL.
–
–
£
7
TV CH
SURROUNDTESTDELAY
AUDIO
6
+10
VCR CH
321
5
98
MENU
ENT
+
+
+
+
–
4
1
1 POWER button and STANDBY lamp (8)
2 Display (8)
3 SURROUND button (16)
4 ONE TOUCH OPERATION button and
lamp (12)
8
5 Remote sensor (7)
6 BASS BOOST lamp (10)
9
7 SETTING button (11)*
8 ADJUST button (10)*
p
q
9 MEMORY button (13)
p MASTER VOLUME control (9)
w
e
q Cursor control buttons
r
w INPUT ATT. button and lamp (10)
e SOURCE NAME button (11)
r Source selecting buttons (8)
DVD MULTI, DVD, VCR, FM*,AM*,
TAPE/MD, PHONO, CD
t SPEAKERS 1/2 buttons (9)
y PHONES jack (9)
ADJUST
BASS BOOST
SETTING
MEMORY
q
Remote Control
1 POWER buttons (8, 23)
TV, VCR, AUDIO
2 Source selecting buttons (8)
CD, TAPE/MD, FM/AM, VCR, DVD,
DVD MULTI, PHONO
3 ONE TOUCH OPERATION button (12)
4 VOLUME +/– buttons (9)
5 MUTING button (9)
6 SLEEP button (12)
7 Operating buttons for audio/video
components (22)
8 • 10 keys for selecting preset channel (14,
22)
• 10 keys for adjusting sound (12, 17, 22)
• 10 keys for operating other components
(22)
9 SOUND CONTROL button (12, 17, 22)
p TV VOL. –/+ buttons (23)
q CD-DISC button (22)
MASTER VOLUME
–+
w TV CH –/+ buttons (23)
e TV/VIDEO button (23)
r VCR CH +/– buttons (23)
IMPORTANT:
To use the Cursor control buttons (q) on the front panel:
What these buttons actually do depends on which function you are trying to adjust. Before using these buttons, select the function by
pressing one of the buttons marked with *.
2
Page 5

Getting Started
This section explains how to connect audio/video components and speakers to the receiver, and how to connect the
power supply.
Before Installation
Connecting the FM and AM Antennas
English
General
• Be sure your hands are dry.
• Turn the power off to all components.
• Read the manuals supplied with the components you are going to
connect.
Locations
• Install the receiver in a location that is level and protected from
moisture.
• The temperature around the receiver must be between –5˚ and
35˚C (23˚F and 95˚F).
• Make sure there is good ventilation around the receiver. Poor
ventilation could cause overheating and damage the receiver.
Handling the receiver
• Do not insert any metal object into the receiver.
• Do not disassemble the receiver or remove screws, covers, or
cabinet.
• Do not expose the receiver to rain or moisture.
Checking the Supplied Accessories
Check to be sure you have all of the following items, which are
supplied with the receiver.
The number in the parentheses indicates quantity of the pieces
supplied.
• Remote Control (1)
• Batteries (2)
• AM Loop Antenna (1)
• FM Antenna (1)
If anything is missing, contact your dealer immediately.
FM Antenna Connections
A
AM
LOOP
ANTENNA
FM 75
COAXIAL
AM
EXT
FM Antenna
ANTENNA
AM
LOOP
FM 75
COAXIAL
Extend the supplied FM antenna horizontally.
Outside FM Antenna Cable
AM
EXT
A. Using the Supplied FM Antenna
The FM antenna provided can be connected to the FM 75Ω
COAXIAL terminal as temporary measure.
B. Using the Standard Type Connector (Not Supplied)
A standard type connector should be connected to the FM 75Ω
COAXIAL terminal.
Note:
If reception is poor, connect the outside antenna.
Before attaching a 75
going to an outside antenna), disconnect the supplied FM antenna.
Ω
coaxial cable (the kind with a round wire
B
AM
LOOP
ANTENNA
FM 75
COAXIAL
AM
EXT
3
Page 6
AM Antenna Connections
RIGHT LEFT
FRONT SPEAKERS
1
2
1
2
English
ANTENNA
FM 75
COAXIAL
AM
LOOP
1
Outdoor single vinyl-covered wire (not supplied)
AM
EXT
Snap the tabs on the loop into the
slots of the base to assemble the
AM loop.
AM Loop Antenna
2
3
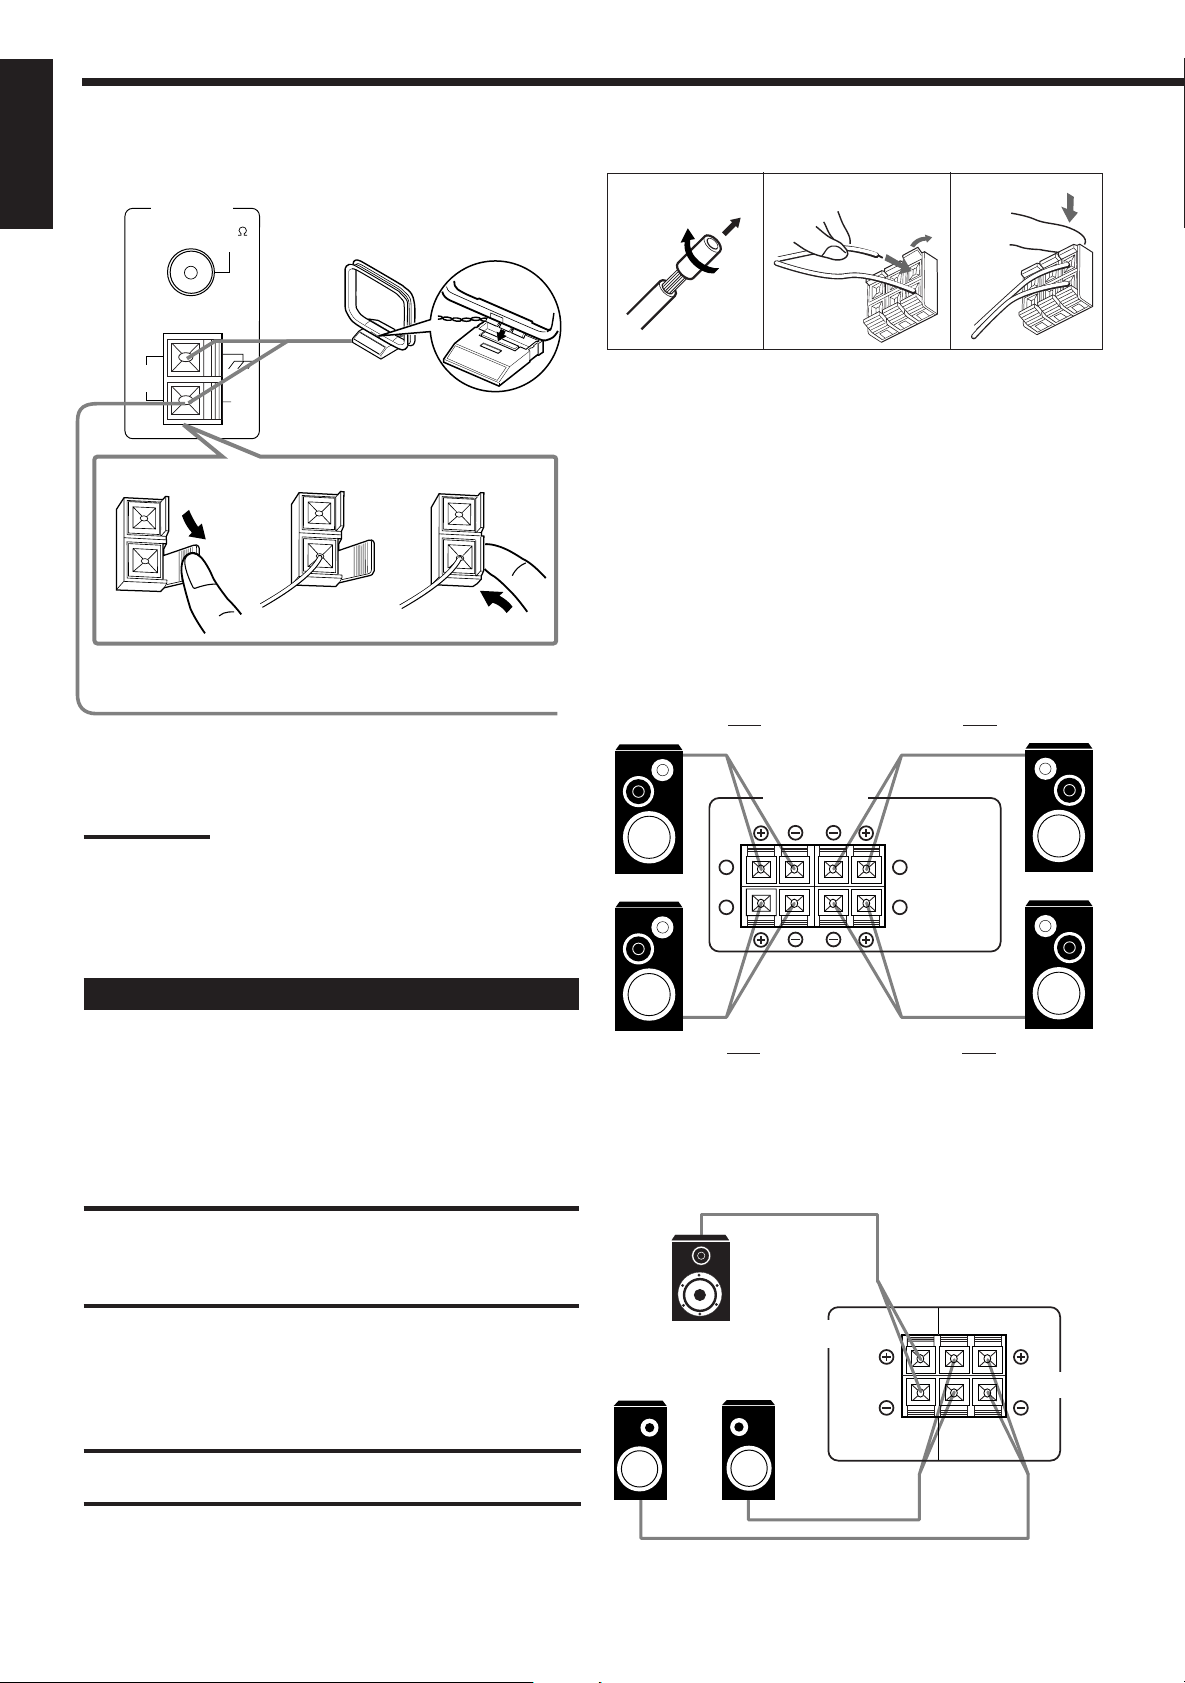
Basic connecting procedure
1
2
3
1 Cut, twist and remove the insulation at the end of
each speaker signal cable.
2 Open the terminal and then insert the speaker
signal cable.
3 Close the terminal.
Connecting the front speakers
You can connect two pairs of front speakers (one pair to the FRONT
SPEAKERS 1 terminals, and another pair to the FRONT
SPEAKERS 2 terminals).
Right speaker
FRONT SPEAKERS 1
Left speaker
Turn the loop until you have the best reception.
Notes:
• Make sure the antenna conductors do not touch any other
terminals, connecting cords and power cord. This could cause poor
reception.
• If reception is poor, connect an outdoor single vinyl-covered wire to
the AM EXT terminal. (Keep the AM loop antenna connected.)
Connecting the Speakers
You can connect the following speakers:
• Two pairs of front speakers to produce normal stereo sound.
• One pair of rear speakers to enjoy the surround effect.
• One center speaker to produce more effective surround effect (to
emphasize human voices).
• One subwoofer to enhance the bass.
IMPORTANT:
After connecting the speakers listed above, set the
speaker setting information properly to obtain the best
possible DSP (Digital Signal Processor ) effect. For
details, see page 11.
For each speaker (except for a subwoofer), connect the (–) and (+)
terminals on the rear panel to the (–) and (+) terminals marked on
the speakers. For connecting a subwoofer, see page 5.
Right speaker
FRONT SPEAKERS 2
Left speaker
Connecting the rear and center speakers
Connect rear speakers to the REAR SPEAKERS terminals and a
center speaker to the CENTER SPEAKER terminals.
Center speaker
Left rear
speaker
Right rear
speaker
CENTER
SPEAKER
RIGHT LEFT
SPEAKERS
REAR
CAUTION:
Use speakers with the SPEAKER IMPEDANCE indicated by the
speaker terminals.
4
Page 7
Connecting the subwoofer speaker
AUDIO
PHONO
TAPE/MDCD
OUT
(REC)IN(PLAY)
L
R
You can enhance the bass by connecting a subwoofer.
Connect the input jack of a powered subwoofer to the
SUBWOOFER OUT jack on the rear panel, using a cable with RCA
pin plugs.
SUBWOOFER
OUT
Powered subwoofer
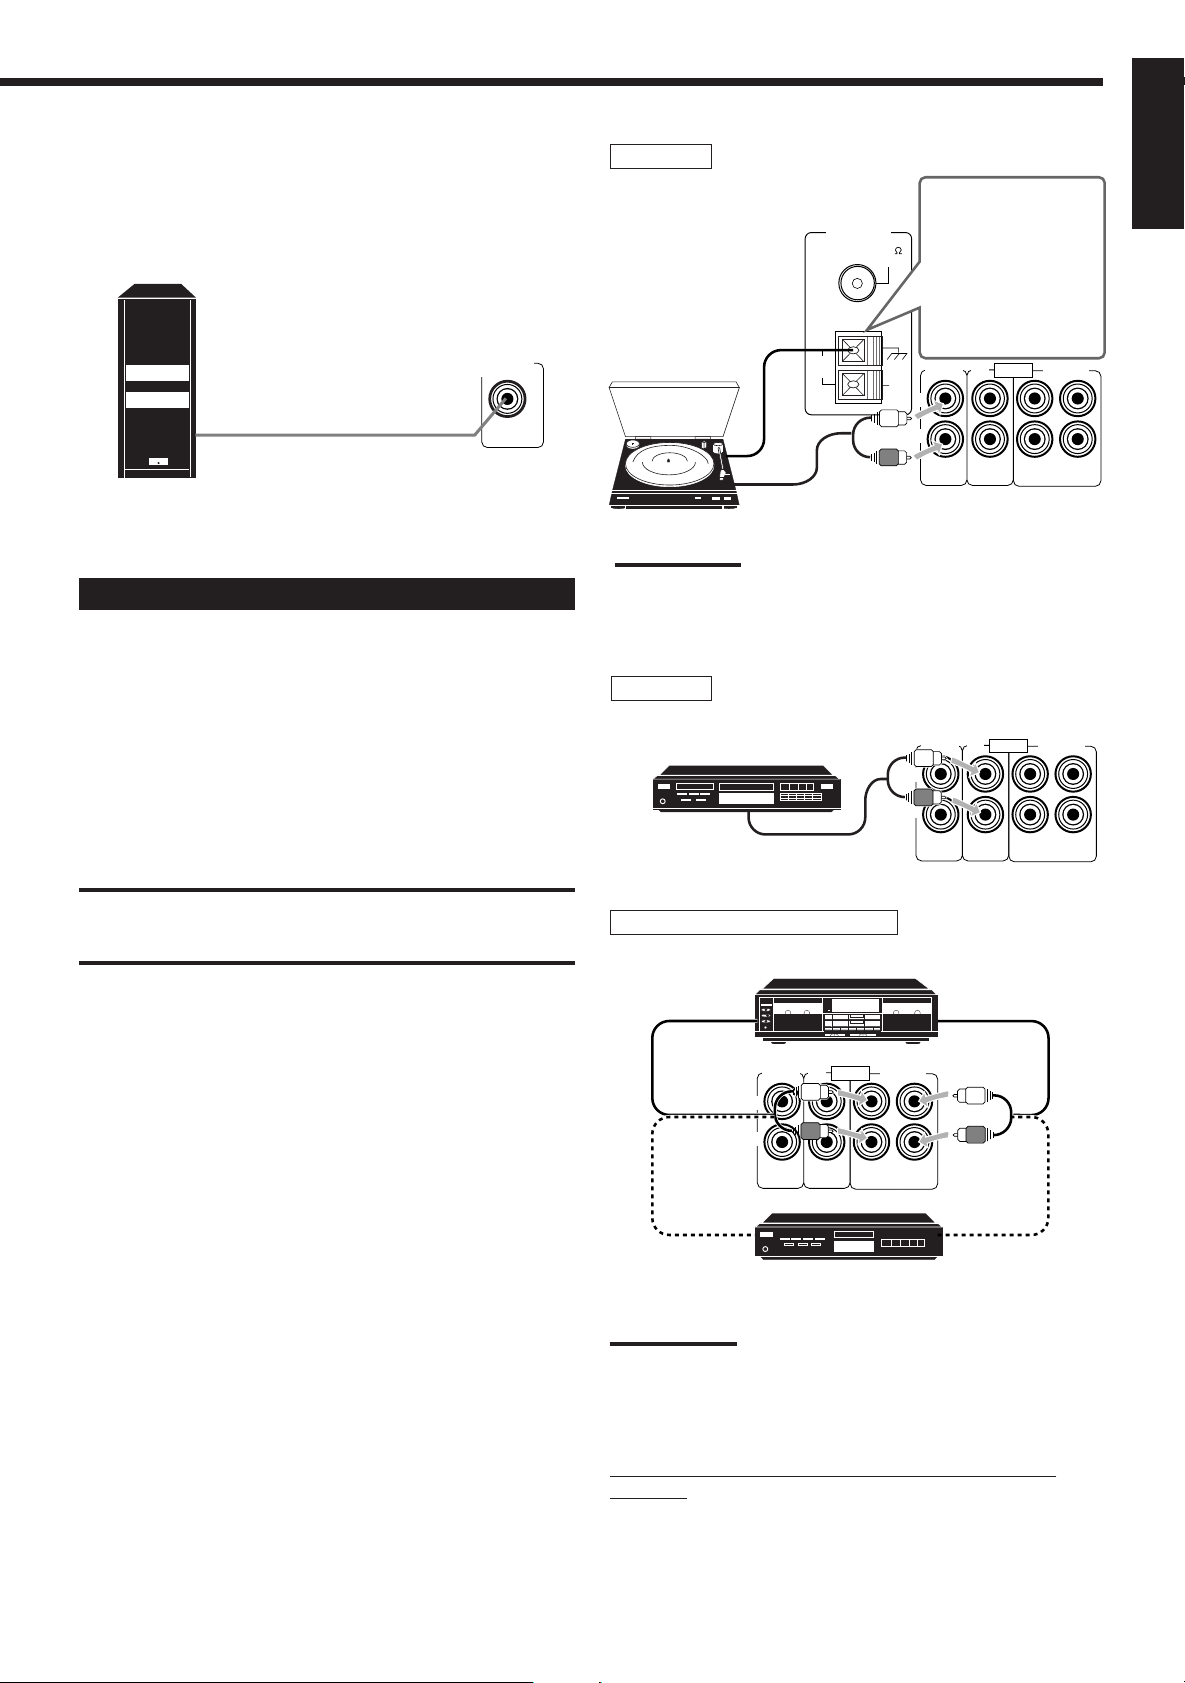
Connecting Audio/Video Components
You can connect the following audio/video components to this
receiver using cables with RCA pin plugs (not supplied). Refer also
to the manuals supplied with your components.
Turntable
If an earth cable is
ANTENNA
FM 75
COAXIAL
provided for your
turntable, connect the
cable to the ground
terminal (H) of the
ANTENNA terminals
on the rear panel.
Turntable
AM
LOOP
AM
EXT
PHONO
L
R
AUDIO
OUT
(REC)IN(PLAY)
TAPE/MDCD
To audio output
Note:
Any turntables incorporating a small-output cartridge such as an MC
(moving-coil type) must be connected to this receiver through a
commercial head amplifier or step-up transformer. Direct connection
may result in insufficient volume.
CD player
English
Use the cables with RCA pin plugs (not supplied).
Connect the white plug to the audio left jack, and the red plug to the
audio right jack.
Audio component connections
CAUTION:
If you connect a sound-enhancing device such as a graphic equalizer
between the source components and this receiver, the sound output
through this receiver may be distorted.
CD player
To audio output
Cassette deck or MD recorder
Cassette deck
To audio input
PHONO
L
R
To audio input
MD recorder
AUDIO
OUT
(REC)IN(PLAY)
To audio output
TAPE/MDCD
To audio output
Note:
You can connect either a cassette deck or an MD recorder to the
TAPE/MD jacks. When connecting an MD recorder to the TAPE/MD
jacks, change the source name, which will be shown on the display
when selected as the source, to “MD.” See page 11 for details.
If your audio components have a COMPU LINK-3
terminal
See also page 21 for detailed information about the connection and
the COMPU LINK-3 remote control system.
5
Page 8
Video component connections
English
Use the cables with RCA pin plugs (not supplied).
Connect the white plug to the audio left jack, the red plug to the
audio right jack and the yellow plug to the video jack.
DVD player
• When you connect the DVD player with stereo output jacks:
DVD player
TV (as the monitor)
DVD
VIDEO
OUT
(REC)IN(PLAY)
VCR
OUT
(REC)IN(PLAY)
AUDIO
VCR
LEFT
RIGHT
DVD
MONITOR
OUT
OUT
(REC)IN(PLAY)
OUT
(REC)IN(PLAY)
VIDEO
VCR
TV (or Monitor)
To video input
MONITOR
OUT
LEFT
DVD
Å ı
DVD
FRONT CENTER REAR
L
R
SUBWOOFER
DVD
LEFT
RIGHT
Å To front left/right channel audio output (or to audio mixed
output if necessary)
ı To video output
• When you connect the DVD player with its analog discrete output
(5.1 CH reproduction) jacks:
VIDEO
OUT
(REC)IN(PLAY)
VCR
OUT
(REC)IN(PLAY)
AUDIO
LEFT
RIGHT
MONITOR
OUT
To audio/video
input
DVD player
RIGHT
AUDIO
V HS
To audio/video
VCR
output
Å
FRONT CENTER REAR
L
R
ı ljÎ
DVD
RIGHT
SUBWOOFER
LEFT
DVD
DVD
VIDEO
OUT
(REC)IN(PLAY)
VCR
OUT
(REC)IN(PLAY)
AUDIO
LEFT
RIGHT
MONITOR
OUT
Å To front left/right channel audio output
ı To center channel audio output
Ç To subwoofer audio output
Î To video output
‰ To rear left/right channel audio output
6
Page 9
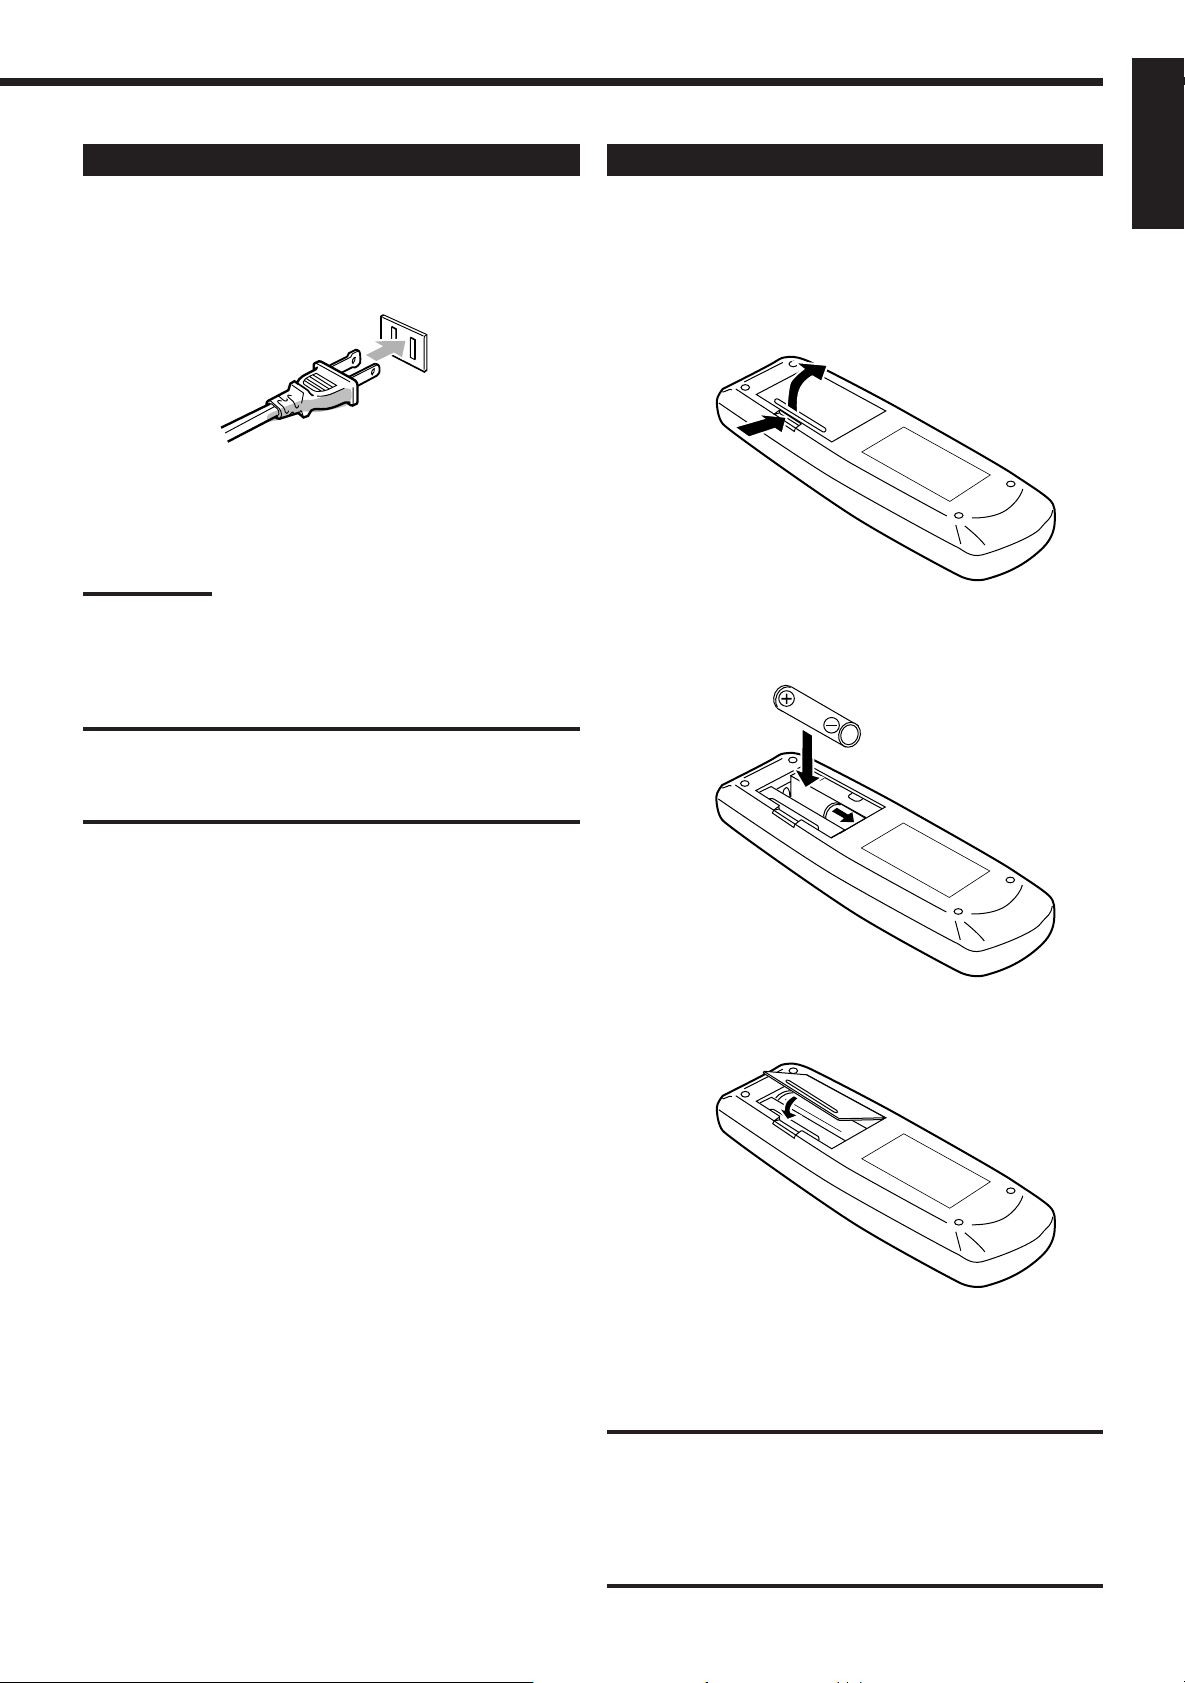
Connecting the Power Cord
Before plugging the receiver into an AC outlet, make sure that all
connections have been made.
Plug the power cord into an AC outlet.
Keep the power cord away from the connecting cables and the
antenna. The power cord may cause noise or screen interference.
We recommend that you use a coaxial cable to connect the
antenna, since it is well-shielded against interference.
Note:
The preset settings such as preset channels and sound adjustment
may be erased in a few days in the following cases:
– When you unplug the power cord.
– When a power failure occurs.
Putting Batteries in the Remote Control
English
Before using the remote control, put two supplied batteries first.
When using the remote control, aim the remote control directly at
the remote sensor on the receiver.
1. On the back of the remote control, remove the
battery cover as illustrated.
2. Insert batteries. Make sure to observe the proper
polarity: (+) to (+) and (–) to (–).
CAUTIONS:
• Do not touch the power cord with wet hands.
• Do not pull on the power cord to unplug the cord. When
unplugging the cord, always grasp the plug so as not to damage
the cord.
R6P (SUM-3)/AA (15F)
3. Replace the cover.
If the range or effectiveness of the remote control decreases, replace
the batteries. Use two R6P (SUM-3)/AA (15F) type dry-cell
batteries.
CAUTION:
Follow these precautions to avoid leaking or cracking cells:
• Place batteries in the remote control so they match the polarity
indicated: (+) to (+) and (–) to (–).
• Use the correct type of batteries. Batteries that look similar may
differ in voltage.
• Always replace both batteries at the same time.
• Do not expose batteries to heat or flame.
7
Page 10
Basic Operations
The following operations are commonly used when you play any sound source.
English
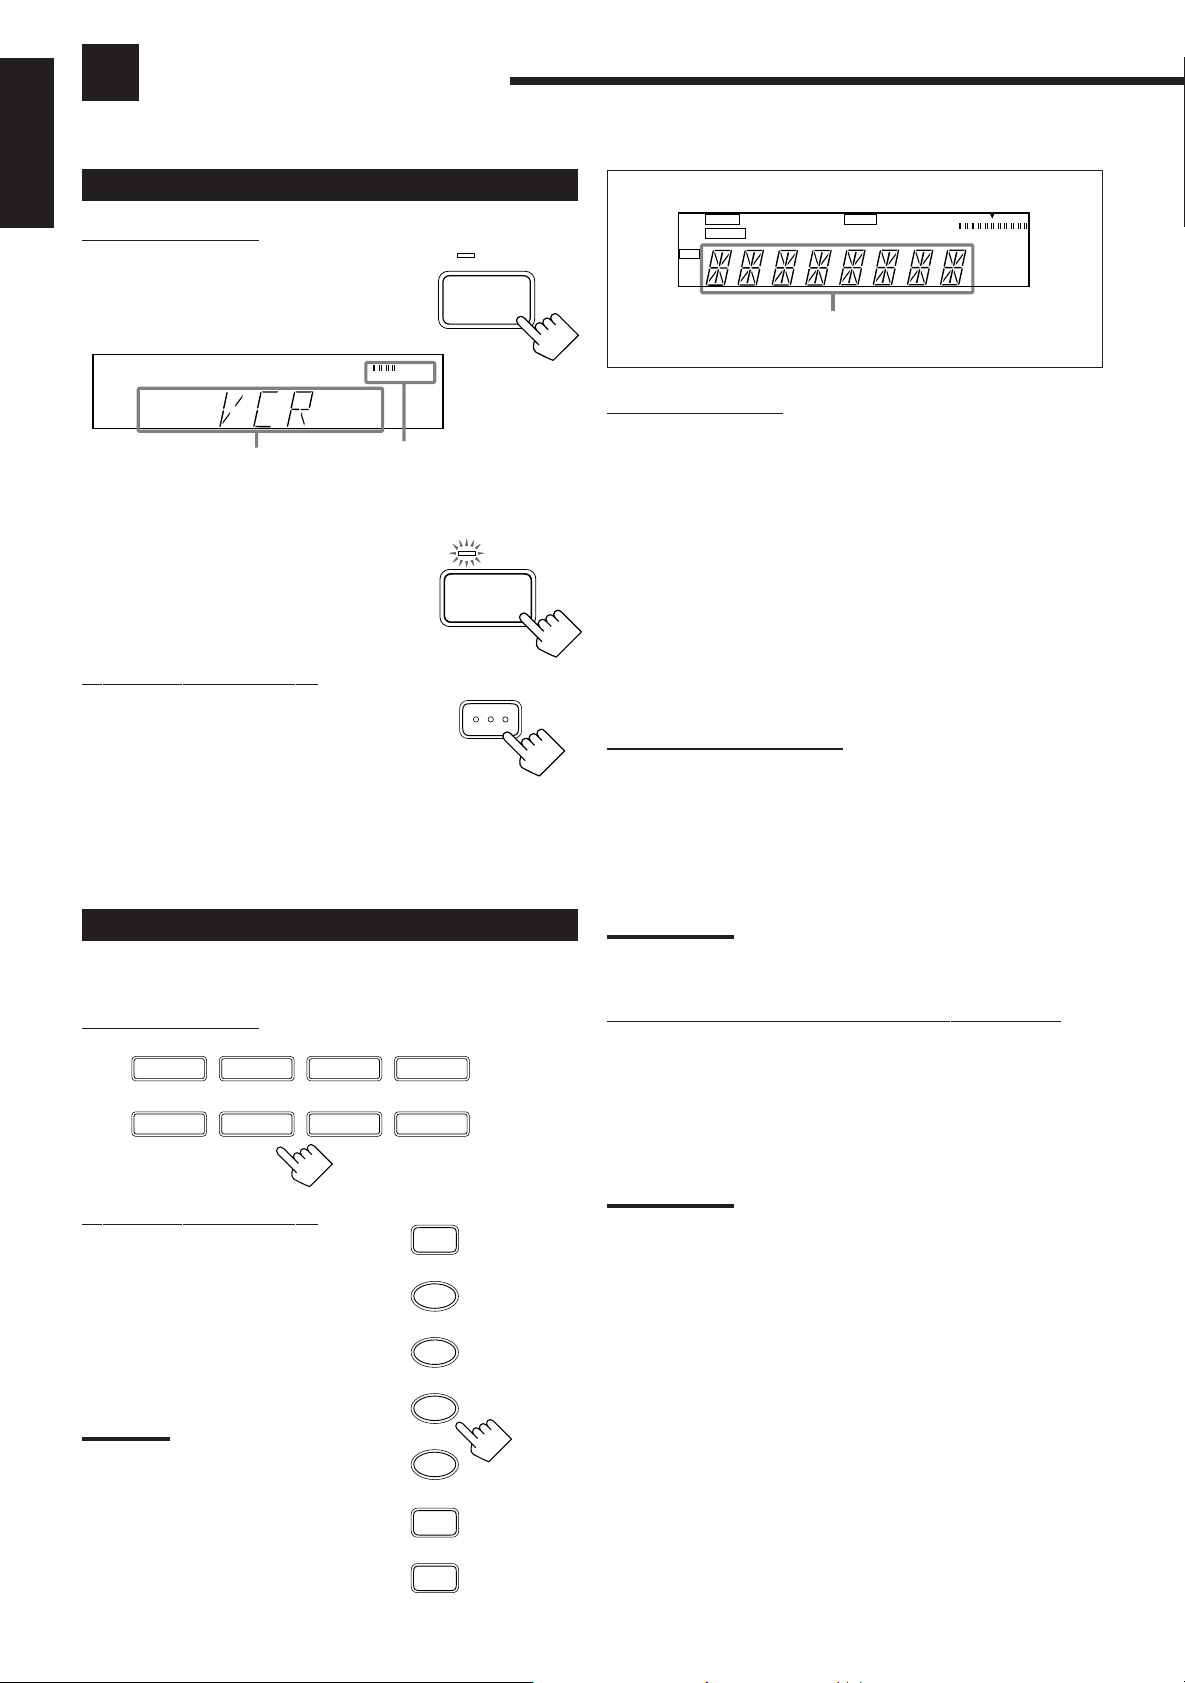
Turning the Power On and Off (Standby)
On the front panel:
To turn on the power, press POWER.
The STANDBY lamp goes off. The name of the
current source (or station frequency) appears on
the display.
Current source
name appears
To turn off the power (into standby mode),
press POWER again.
The STANDBY lamp lights up. A small amount
of power is consumed in standby mode.
To turn the power off completely, unplug the AC
power cord.
From the remote control:
To turn on the power, press AUDIO POWER.
The STANDBY lamp goes off. The name of the
current source (or station frequency) appears on
the display.
To turn off the power (into standby mode),
press AUDIO POWER again.
The STANDBY lamp lights up.
STANDBY
POWER
VOLUME
Current volume level
is shown here
STANDBY
POWER
AUDIO
MUTE TUNED SLEEP 3D-PHONIC
AUTO STEREO PRO LOGIC HALL
DAP
CH-
L
VOLUME
MHz
kHz
R
Selected source name appears
On the front panel:
DVD MULTI Select the DVD player for viewing the digital video
disc using the analog discrete output mode (5.1CH
reproduction) on the DVD player.
To enjoy the DVD MULTI playback, see page 20.
DVD Select the DVD player for viewing the stereo digital
video disc.
VCR Select the video component connected to the VCR
jacks.
FM Select an FM broadcast.
AM Select an AM broadcast.
TAPE/MD Select the cassette deck (or the MD recorder).
PHONO Select the turntable.
CD Select the CD player.
From the remote control:
FM/AM Select an FM/AM broadcast.
Each time you press the button, the band changes
alternately.
• Other buttons function in the same way as the buttons on the front
panel.
Selecting the Source to Play
Press one of the source selecting buttons.
On the front panel:
DVD MULTI
CD
From the remote control:
Note:
When you press one of the source
selecting buttons, marked above
with an asterisk (*), on the remote
control, the receiver automatically
turns on.
DVD
PHONO
VCR
TAPE/MD
SOURCE NAME
TAPE/MD
DVD MULTI
FM
AM
CD
FM/AM
VCR
DVD
PHONO
Note:
When connecting an MD recorder (to the TAPE/MD jacks), change
the source name that appears on the display. See page 11 for details.
Selecting different sources for picture and sound
You can watch picture from a video component while listening to
sound from another component.
Press one of the audio source selecting buttons (CD, TAPE/MD,
PHONO, FM, AM), while viewing the pictrue from a video
component such as the VCR or DVD player, etc.
Note:
*
Once you have selected a video source, pictures of the selected
source are sent to the TV until you select another video source.
*
*
*
8
Page 11
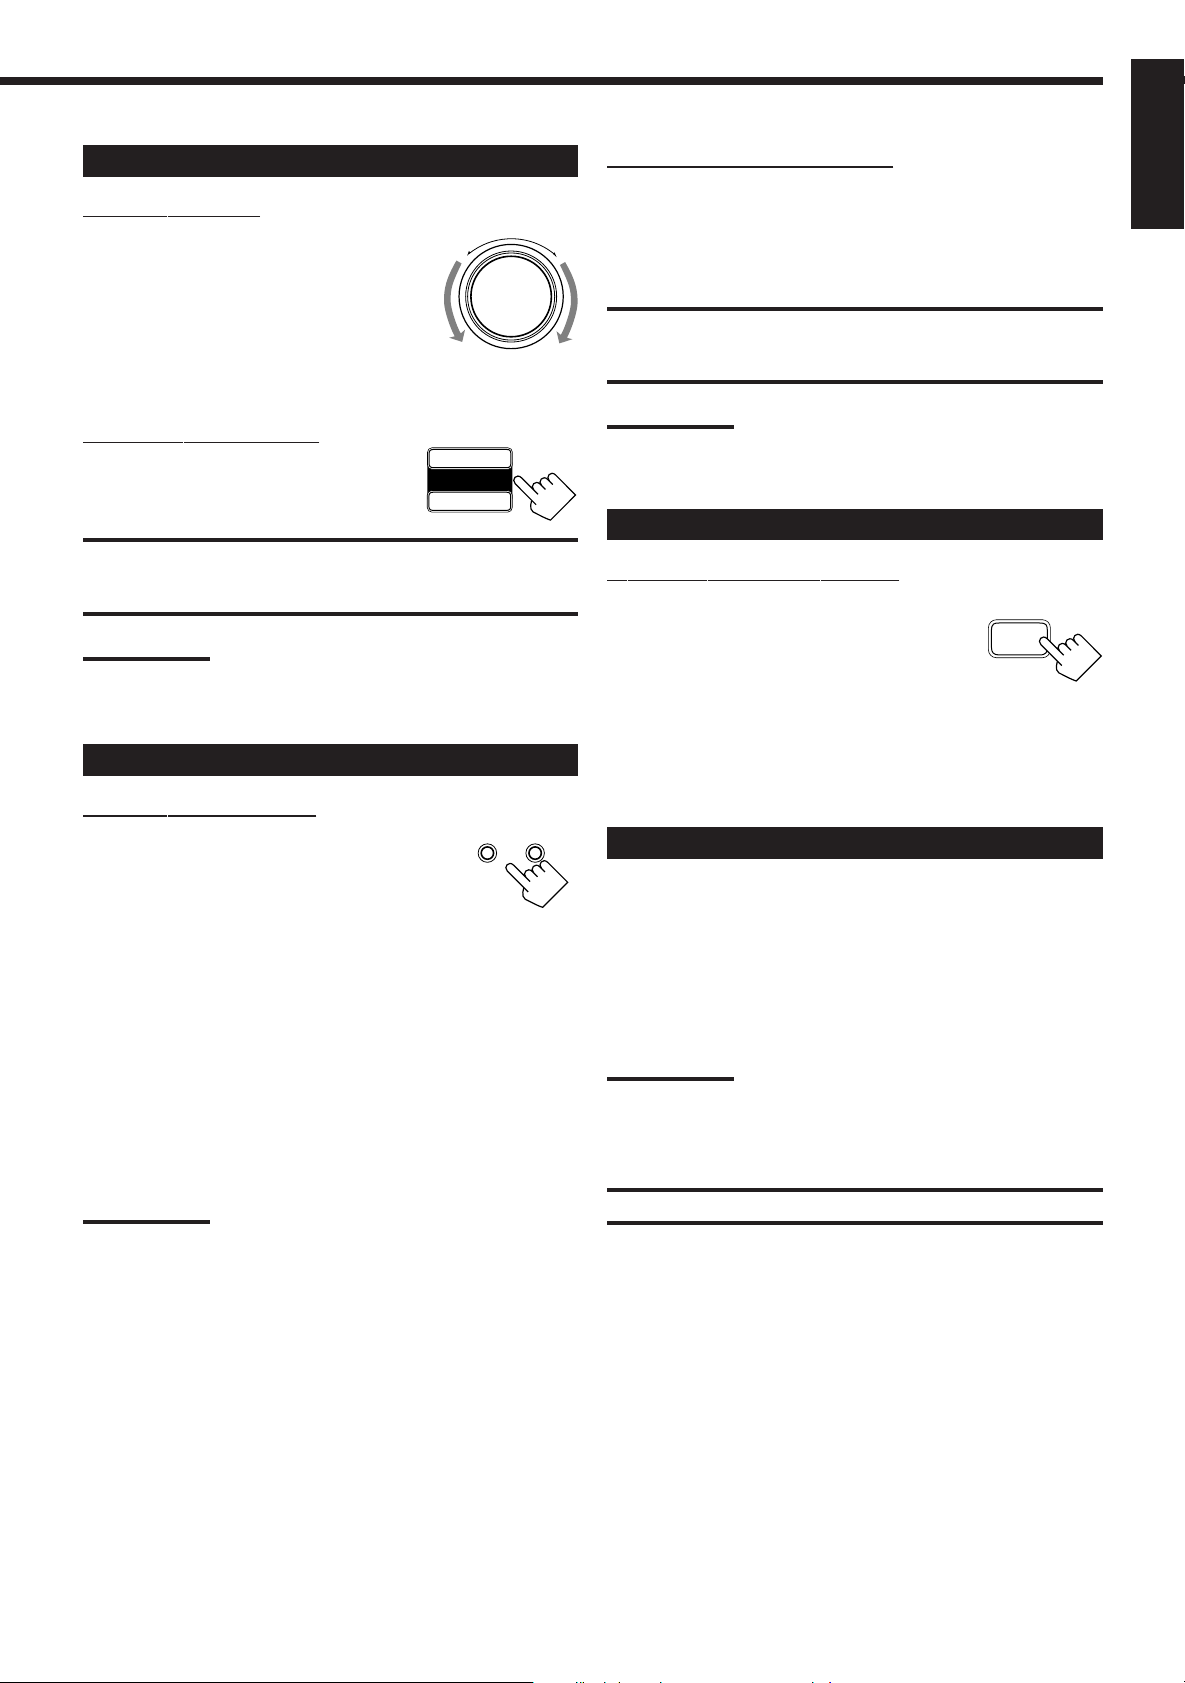
Adjusting the Volume
On the front panel:
To increase the volume, turn MASTER
VOLUME clockwise (+).
–
MASTER VOLUME
+
To decrease the volume, turn it
counterclockwise (–).
• When you turn MASTER VOLUME rapidly,
the volume level also changes rapidly.
• When you turn MASTER VOLUME slowly,
the volume level also changes slowly.
From the remote control:
To increase the volume, press VOLUME +.
To decrease the volume, press VOLUME –.
+
VOLUME
–
CAUTION:
Always set the volume to the minimum before starting any source. If
the volume is set at its high level, the sudden blast of sound energy
can permanently damage your hearing and/or ruin your speakers.
Note:
The volume level can be adjusted within the range of “0” (minimum)
to “80” (maximum).
Selecting the Front Speakers
On the front panel ONLY:
When you have connected two pairs of the front
speakers, you can select which to use. Pressing
SPEAKERS 1 or SPEAKERS 2 activates the
respective set of speakers.
• To use the speakers connected to the FRONT SPEAKERS 1
terminals, press SPEAKERS 1 to set it in the _ ON position, and
press SPEAKERS 2 to set it in the — OFF position.
• To use the speakers connected to the FRONT SPEAKERS 2
terminals, press SPEAKERS 2 to set it in the _ ON position, and
press SPEAKERS 1 to set it in the — OFF position.
• To use both sets of the speakers, press SPEAKERS 1 to set it in
the _ ON position, and press SPEAKERS 2 to set it in the _ ON
position.
• To use neither set of the speakers, press SPEAKERS 1 and
SPEAKERS 2 to set them in the — OFF position.
Note:
When only one set of the speakers is connected to either the FRONT
SPEAKERS 1 or 2 terminals, do not activate both pairs of the
speakers. If you do, no sound comes out of the front speakers.
SPEAKERS
12
_ ON — OFF
Listening only with headphones
1. Connect a pair of headphones to the PHONES jack on the front
panel.
2. Press SPEAKERS 1 and SPEAKERS 2 to set them in the —
OFF position.
CAUTION:
Be sure to turn down the volume before connecting or putting on
headphones, as high volume can damage both the headphones and
your hearing.
Note:
You cannot shut off the sound through the other speakers using the
SPEAKERS 1 and 2 buttons.
Muting the Sound
From the remote control ONLY:
Press MUTING to mute the sound through all
speakers and headphones connected.
MUTING
“MUTING” appears on the display and the
volume turns off (the volume level indicator goes
off).
To restore the sound, press MUTING again.
• Turning MASTER VOLUME or pressing VOLUME +/– also
restores the sound.
Recording a Source
You can r ecord any source playing through the receiver to a cassette
deck (or an MD recorder) connected to the TAPE/MD jacks and the
VCR connected to the VCR jacks at the same time.
While recording, you can listen to the selected sound source at
whatever sound level you like, without affecting the sound levels of
the recording.
Note:
The output volume level, tone adjustment (see page 10), Bass Boost
(see page 10) and DSP modes (see page 15) cannot affect the
recording.
IMPORTANT:
Before recording, turn off the DVD MULTI playback mode.
English
9
Page 12
English
Attenuating the Input Signal
When the input level of the playing source is too high, the sounds
will be distorted. If this happens, you need to attenuate the input
signal level to prevent the sound distortion.
On the front panel ONLY:
Press INPUT ATT. so that the lamp next to
the button lights up.
• Each time you press the button, the Input
Attenuator mode turns on or off.
Note:
When using “DVDMULTI” playback mode, this effect only applies to
front left and right channel signals.
Adjusting the Front Speaker Output
Balance
If the sounds you hear from the front right and left speakers are
unequal, you can adjust the speaker output balance.
Before y ou start, remember...
• There is a time limit in doing the following steps. If the setting is
canceled before you finish, start from step 1 again.
On the front panel ONLY:
1. Press ADJUST so that MULTI
CURSOR % / fi buttons work for
adjusting the sound.
2. Press MULTI CURSOR % / fi
repeatedly until “BALANCE”
appears on the display.
3. Press MULTI CURSOR @ / # to
adjust the balance.
• Pressing @ decreases the right channel
output.
• Pressing # decreases the left channel
output.
INPUT ATT .
ADJUST
MULTI CURSOR
MULTI CURSOR
Reinforcing the Bass
With this Bass Boost function, you can boost the bass level.
Before y ou start, remember...
• There is a time limit in doing the following steps. If the setting is
canceled before you finish, start from step 1 again.
On the front panel ONLY:
1. Press ADJUST so that MULTI
ADJUST
CURSOR % / fi buttons work for
adjusting the sound.
MULTI CURSOR
2. Press MULTI CURSOR % / fi
until “B–BOOST” appears on the
display.
3. Press MULTI CURSOR @ / # to
MULTI CURSOR
switch this function “ON” or
“OFF.”
• When this function is switched “ON,” the
BASS BOOST lamp on the front panel
lights up.
Note:
The Bass Boost function affects the front speaker sounds only.
Adjusting the Tone
You can adjust the treble and bass sounds as you like.
Before y ou start, remember...
• There is a time limit in doing the following steps. If the setting is
canceled before you finish, start from step 1 again.
On the front panel ONLY:
1. Press ADJUST so that MULTI
ADJUST
CURSOR % / fi buttons work for
adjusting the sound.
2. Press MULTI CURSOR % / fi
MULTI CURSOR
repeatedly until “– BASS +” or
“–TREBLE+” appears on the
display.
• Select “– BASS +” to adjust the bass sound
level.
• Select “–TREBLE+” to adjust the treble
sound level.
3. Press MULTI CURSOR @ / # to
MULTI CURSOR
adjust the bass or treble sound
level within the range of –10 to
+10.
• Each time you press the button, the sound
level changes by ±2.
10
Page 13

Basic Settings
Some of the following settings are required after connecting and positioning your speakers in your listening room, while
others will make operations easier.
MULTI CURSOR
Changing the Source Name
When you have connected an MD recorder to the TAPE/MD jacks
on the rear panel: Change the source name shown on the display
when you select the MD recorder as the source.
3. Press MULTI CURSOR @ / # to
select your center speaker size.
LARGE SMALL NO
English
On the front panel ONLY:
When changing the source name from “TAPE” to “MD”:
TAPE/MD
1. Press T APE/MD .
• Make sure “TAPE” appears on the display.
2. Press and hold SOURCE NAME
(the same button as TAPE/MD)
SOURCE NAME
TAPE/MD
SOURCE NAME
until “MD” appears on the display.
To change the source name from “MD” to “TAPE,” repeat
the same procedure above (in step 1, make sure “MD” appears
on the display).
Note:
Without changing the source name, you can still use the connected
components. However, there may be some inconvenience.
– “TAPE” will appear on the display when you select the MD
recorder.
– You cannot use the COMPU LINK remote control system (see page
21) to operate the MD recorder.
Setting Center and Rear Speakers for
the DSP Modes
To obtain the best possible surround sound of the DSP (Digital
Signal Processor) modes (see page 15), you have to register the
information about the speaker arrangement after all connections are
completed.
LARGE: Select this mode when the size of the center speaker
is the same as that of the front speakers.
SMALL: Select this mode when the size of the center speaker
is smaller than that of the front speakers.
NO: Select this mode when you do not use a center
speaker.
Rear Speaker Setting
Register whether you have connected the rear speakers or not.
Before y ou start, remember...
• There is a time limit in doing the following steps. If the setting is
canceled before you finish, start from step 1 again.
On the front panel ONLY:
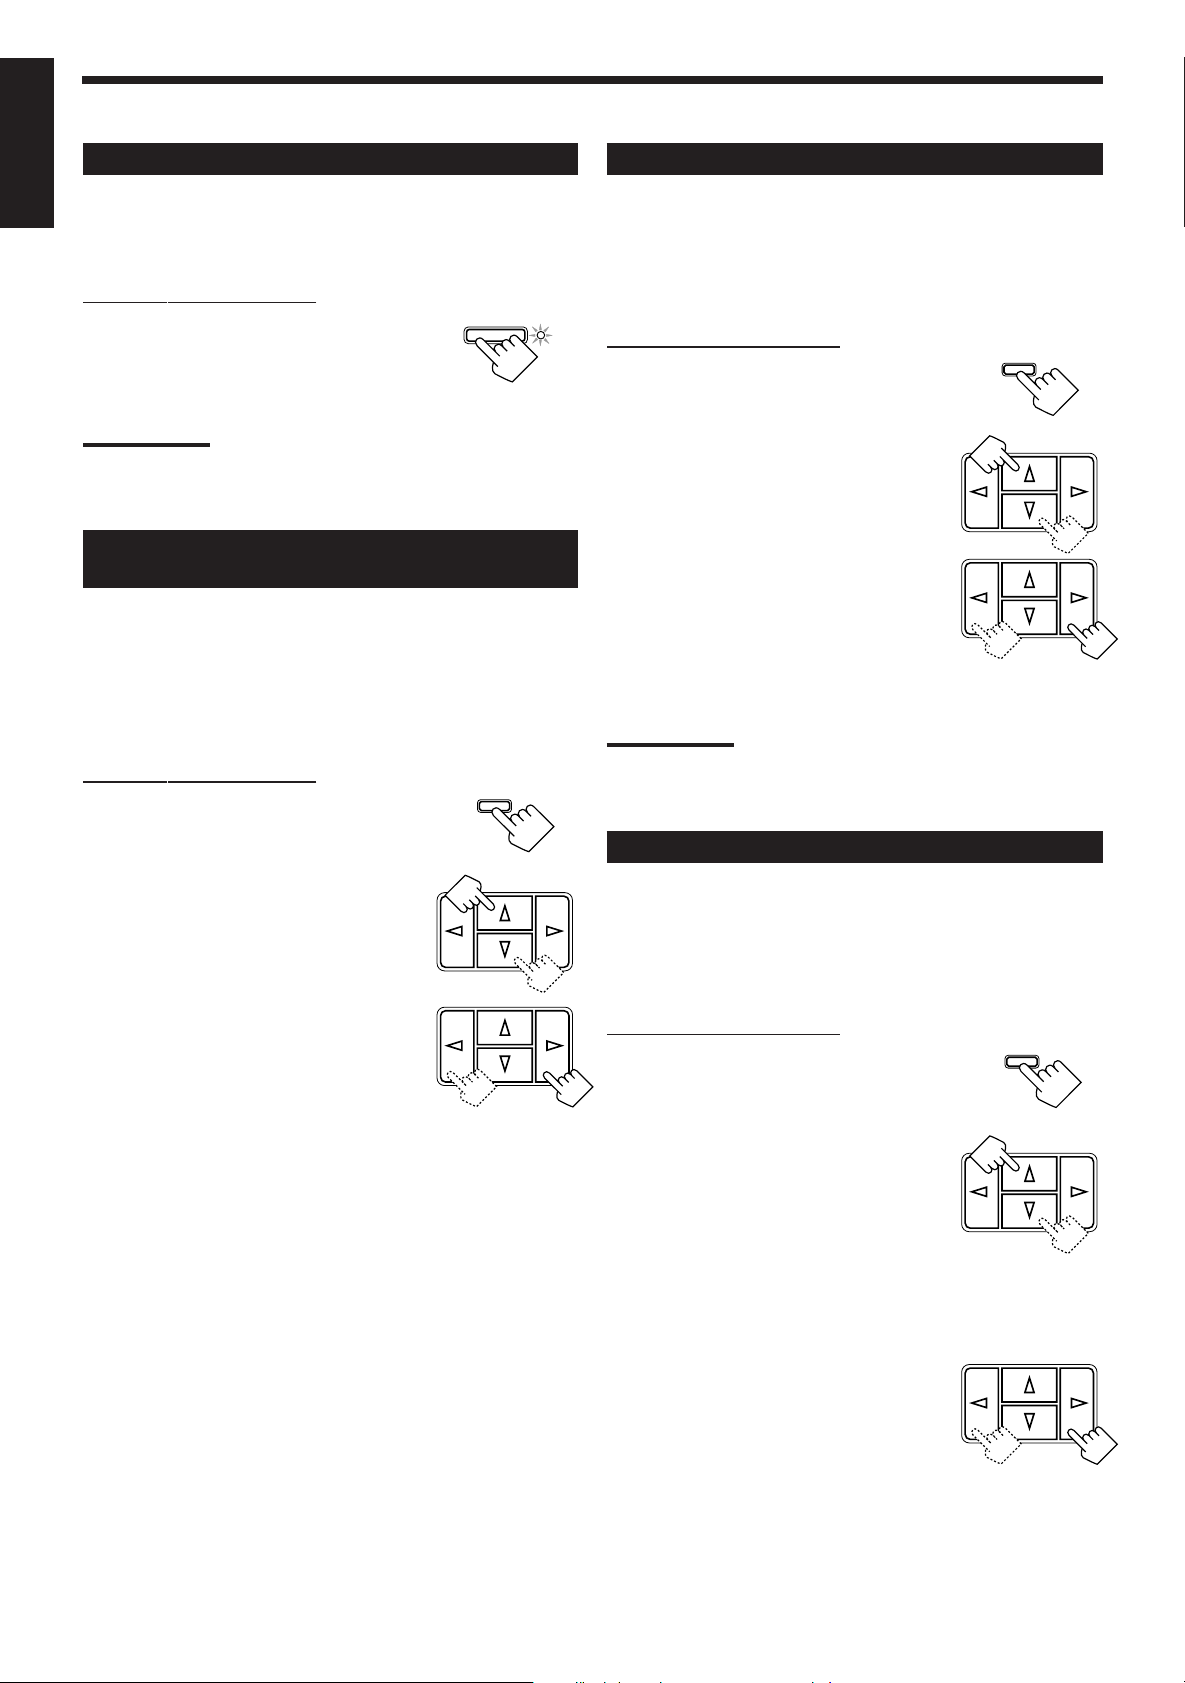
1. Press SETTING so that MULTI
SETTING
CURSOR % / fi buttons work for
setting the rear speaker
information.
2. Press MULTI CURSOR % / fi
MULTI CURSOR
repeatedly until “REAR SPK”
(Rear Speaker) appears on the
display.
3. Press MULTI CURSOR @ / # to
MULTI CURSOR
register whether you have
connected the rear speakers.
Center Speaker Setting
Register the center speaker size.
Before y ou start, remember...
• There is a time limit in doing the following steps. If the setting is
canceled before you finish, start from step 1 again.
On the front panel ONLY:
1. Press SETTING so that MULTI
SETTING
CURSOR % / fi buttons work for
setting the center speaker size.
2. Press MULTI CURSOR % / fi
MULTI CURSOR
repeatedly until “CNTR SPK”
(Center Speaker) appears on the
display.
YES: Select this mode when you use rear speakers.
NO: Select this mode when you do not use rear speakers.
Note:
When you change your speakers, you need to register the information
about the speakers again.
Delay Time Setting
Register the delay time of the sound from the rear speakers,
comparing the sound from the front speakers.
Before y ou start, remember...
• There is a time limit in doing the following steps. If the setting is
canceled before you finish, start from step 1 again.
• You can adjust the delay time only when you have connected the
rear speakers and have set “REAR SPK” to “YES’’ (See above).
• Delay time setting is only valid for ‘‘PRO LOGIC” (See page 15).
11
Page 14
On the front panel:
ONE TOUCH OPERATION
2010 30 40 50 60 70 80
(Canceled)
0
English
1. Press SETTING so that MULTI
CURSOR % / fi buttons work for
setting the delay time.
2. Press MULTI CURSOR % / fi
repeatedly until “–DELAY +”
appears on the display.
3. Press MULTI CURSOR @ / # to
select an appropriate delay time.
DELAY 1
DELAY 3
DELAY 2
SETTING
MULTI CURSOR
MULTI CURSOR
To store the sound settings
1. Press ONE TOUCH OPERATION.
The ONE TOUCH OPERATION lamp lights up, then the
previously memorized settings are recalled.
ONE TOUCH
OPERATION
On the remoteOn the front panel
2. Adjust the sound using the functions listed to the
left.
The newly adjusted settings are memorized.
To recall the sound settings
With the ONE TOUCH OPERATION lamp lit, the settings for the
currently selected source are recalled, when the source is selected.
DELA Y 1: Select this mode when the distance from you to
your rear speakers is greater than that to the front
speakers.
DELA Y 2: Select this mode when the distance from you to
your rear speakers is almost equal to that to the
front speakers.
DELA Y 3: Select this mode when the distance from you to
your rear speakers is less than that to the front
speakers.
From the remote control:
1. Press SOUND CONTROL.
2. Press SURROUND repeatedly until “PRO LOGIC” appears on
the display.
3. Press DELAY repeatedly until an appropriate delay time appears
on the display.
Storing the Basic Settings and
Adjustments — One Touch Operation
JVC’s One Touch Operation function is used to assign and store
different sound settings for each different playing source. By using
this function, you do not have to change the settings every time you
change the source. The stored settings for the newly selected source
are automatically recalled.
The following can be stored for each source:
• Volume level (see page 9)
• Input Attenuator (see page 10)
• Balance (see page 10)
• Bass Boost (see page 10)
• Tone adjustment (see page 10)
• DSP modes
– 3D-PHONIC mode settings (see page 17)
– DAP mode settings (see page 17)
– Surround mode settings (see page 18)
• DVD MULTI playback mode settings (see page 20)
To cancel the One Touch Operation function
Press ONE TOUCH OPERATION so that the lamp goes off.
(Even though the One Touch Operation function is canceled, the
recalled sound effects remain active.)
Notes:
• If the source is FM or AM, you can assign a different setting for
each band.
• The DSP modes and DVD MULTI playback mode cannot be used
at the same time.
Using the Sleep Timer
Using the Sleep Timer, you can fall asleep to music and know the
receiver will turn off by itself rather than play all night.
From the remote control ONLY:
Press SLEEP repeatedly.
The SLEEP indicator lights up on the display,
and the shut-off time changes as follows (in
minutes):
When the shut-off time comes
The receiver turns off automatically.
To check or change the time remaining until the
shut-off time
Press SLEEP once.
The remaining time until the shut-off time appears in minutes.
• To change the shut-off time, press SLEEP repeatedly.
To cancel the Sleep Timer
Press SLEEP repeatedly until “0.” appears on the display. (The
SLEEP indicator goes off.)
Turning off the power also cancels the Sleep Timer.
SLEEP
12
Page 15
Receiving Radio Broadcasts
You can browse through all the stations or use the preset function to go immediately to a particular station.
Tuning in Stations Manually
On the front panel ONLY:
1. Press FM or AM.
The last station of the selected band is tuned
in.
• MULTI CURSOR % / fi / @ / # buttons
can be now used for operating the tuner.
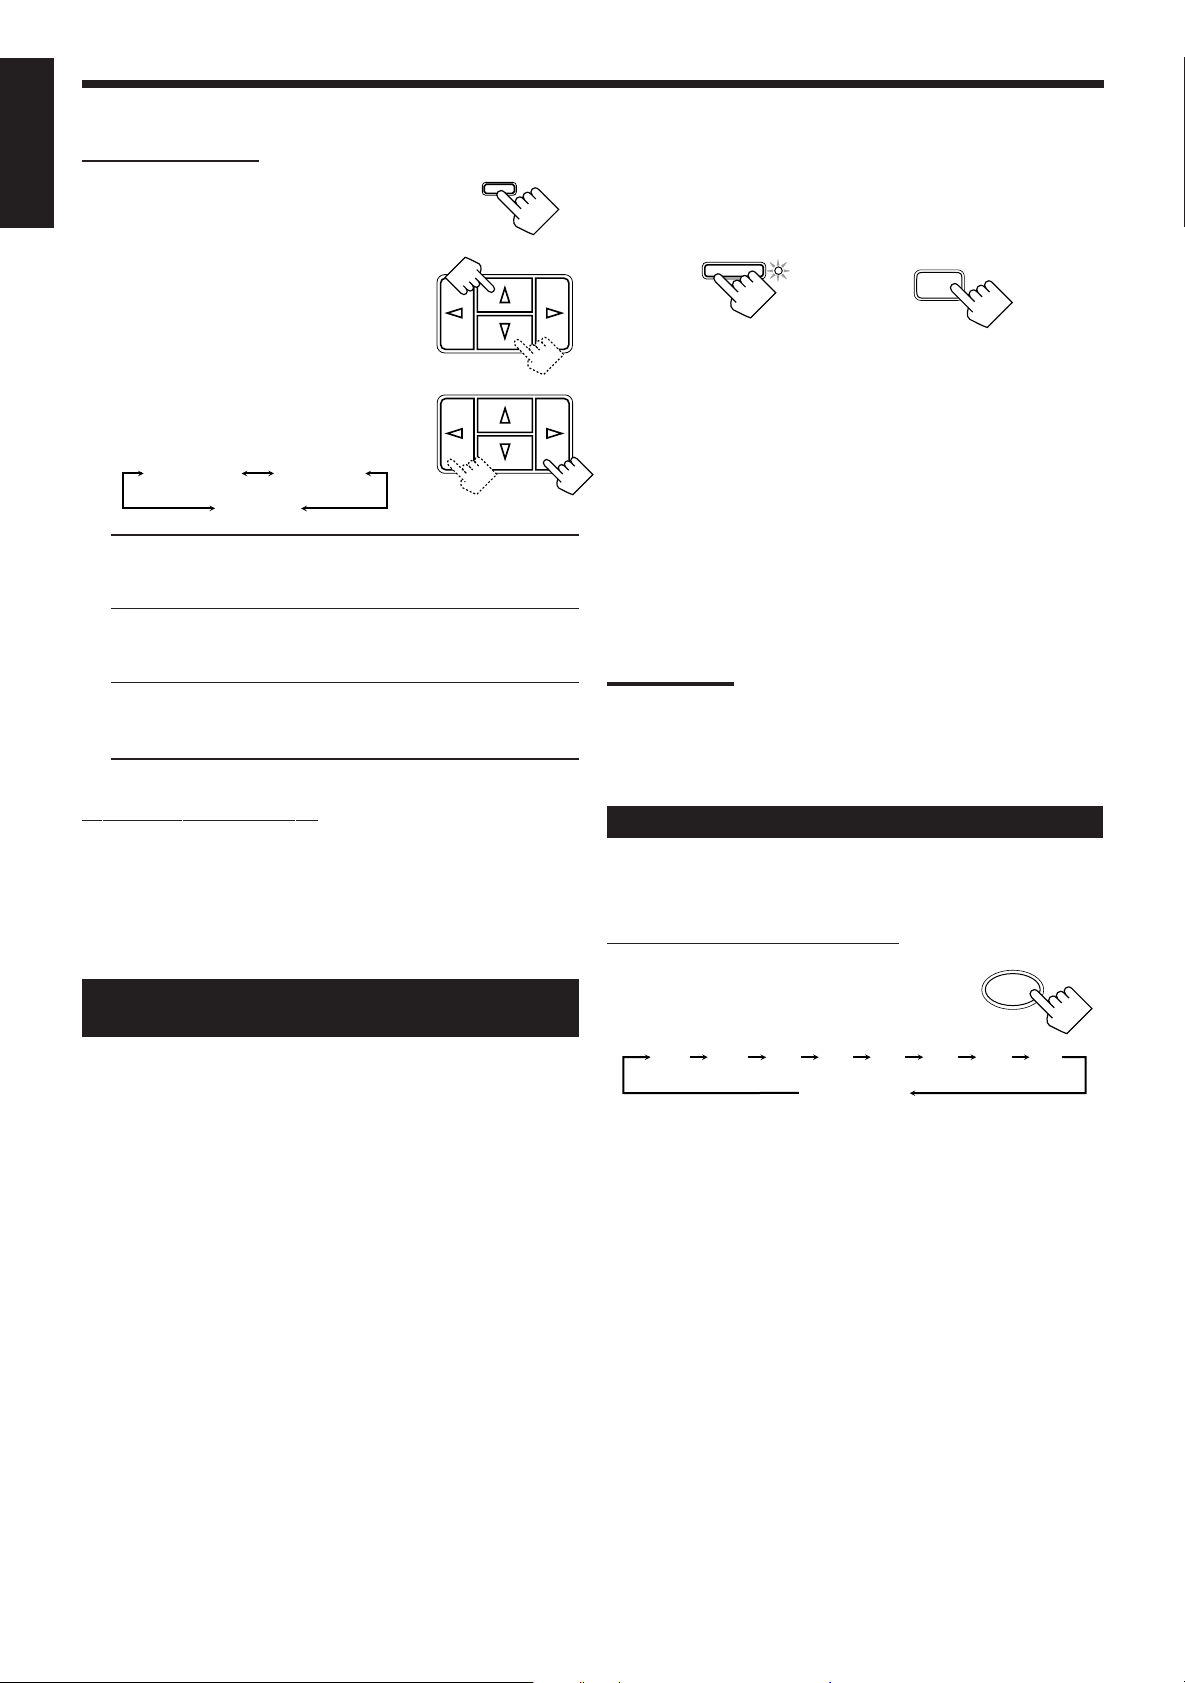
2. Press MULTI CURSOR % / fi
FM
AM
MULTI CURSOR
repeatedly until “–TUNING+”
appears on the display.
3. Press MULTI CURSOR @ / #
MULTI CURSOR
until you find the frequency you
want.
• Pressing @ decreases the frequency.
• Pressing # increases the frequency.
Notes:
• When you hold MULTI CURSOR @ / # in step 3, the frequency
keeps changing until a station is tuned in.
• When a station of sufficient signal strength is tuned in, the TUNED
indicator lights up on the display.
When an FM stereo program is received, the STEREO indicator
also lights up.
Using Preset Tuning
Once a station is assigned to a channel number, the station can be
quickly tuned. You can preset up to 30 FM stations and 15 AM
stations.
To store the preset stations
Before y ou start, remember...
• There is a time limit in doing the following steps. If the setting is
canceled before you finish, start from step 1 again.
On the front panel ONLY:
1. Tune in the station you want to preset (see
“Tuning in Stations Manually”).
If you want to store the FM reception mode for this station,
select the FM reception mode you want. See “Selecting the FM
Reception Mode” on page 14.
2. Press MEMORY.
“CH-” appears and the channel number
position starts flashing on the display for
about 5 seconds.
CH-
_ _
MEMORY
MULTI CURSOR
3. Press MULTI CURSOR @ / # to
select a channel number while the
channel number position is
flashing.
English
Note:
You can use the 10 keys on the remote control to select the
preset number. When using the 10 keys, be sure that they are
activated for the tuner, not for the CD and others. (See page 22.)
4. Press MEMORY again while the
MEMORY
selected channel number is
flashing on the display.
The selected channel number stops flashing.
The station is assigned to the selected channel number.
5. Repeat steps 1 to 4 until you store all the stations
you want.
To erase a stored preset station
Storing a new station on a used number erases the previously stored
one.
13
Page 16
To tune in a preset station
English
On the front panel:
1. Press FM or AM.
The last station of the selected band is tuned
in.
• MULTI CURSOR % / fi / @ / # buttons
can be now used for operating the tuner.
2. Press MULTI CURSOR % / fi
repeatedly until “–PRESET+”
appears on the display.
3. Press MULTI CURSOR @ / # to
select a preset channel station.
• Pressing @ decreases the preset channel
number.
• Pressing # increases the preset channel
number.
From the remote control:
1. Press FM/AM.
The last station is tuned in.
• Each time you press the button, the band
alternates between FM and AM.
2. Press the 10 keys to select a preset
channel number.
• For channel number 5, press 5.
• For channel number 15, press +10 then 5.
• For channel number 20, press +10 then 10.
• For channel number 30, press +10, +10,
then 10.
EFFECT
7/P
FM
AM
MULTI CURSOR
MULTI CURSOR
FM/AM
TESTDELAY
5
5
– CENTER +
54
– REAR•L +
5
– REAR•R +
10
SURROUND
321
6
5
98
MENU
+10
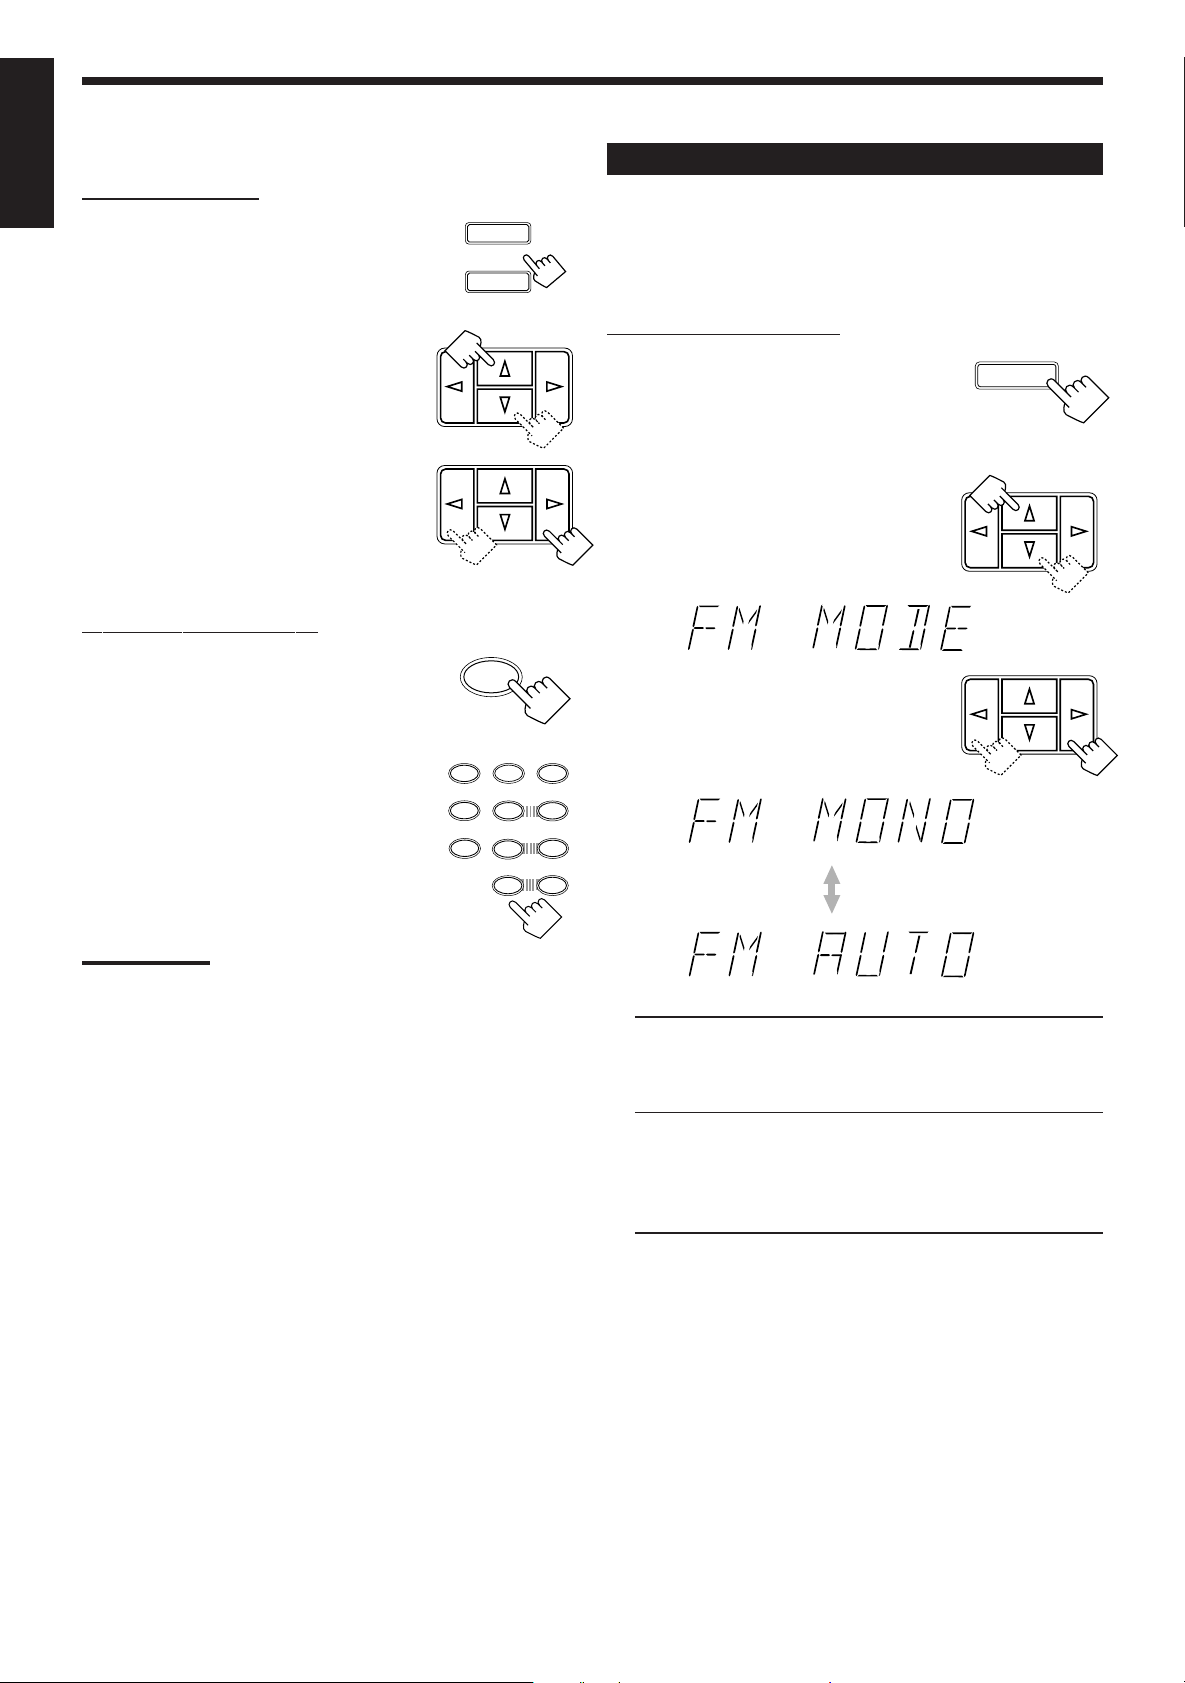
Selecting the FM Reception Mode
When an FM stereo broadcast is hard to
receive or noisy
You can change the FM reception mode while receiving an FM
broadcast.
On the front panel ONLY:
1. Press FM.
The last station of the selected band is tuned
in.
• MULTI CURSOR % / fi / @ / # buttons can
be now used for operating the tuner.
2. Press MULTI CURSOR % / fi
repeatedly until “FM MODE”
appears on the display.
3. Press MULTI CURSOR @ / # to
switch the FM reception “FM
MONO” or “FM AUTO.”
ENT
FM
MULTI CURSOR
MULTI CURSOR
Note:
When you use the 10 keys on the remote control, be sure that they
are activated for the tuner, not for the CD and others. (See page 22.)
FM MONO: Reception will be improved although you will
lose the stereo effect. In this mode, you will hear noise
while tuning into the stations. The MUTE AUTO
indicator goes off on the display.
FM AUTO: When a program is broadcasted in stereo, you
will hear stereo sound; when in monaural, you will hear
monaural sounds. This mode is also useful to suppress
static noise between stations. The MUTE AUTO
indicator lights up on the display.
14
Page 17
Using the DSP Modes
DOLBY SURROUND
DOLBY SURROUND
The built-in Surround Processor provides three types of the DSP (Digital Signal Processor) mode — 3D-PHONIC mode,
DAP (Digital Acoustic Processor) mode and Surround mode (Dolby Pro Logic and JVC Theater Surround).
3D-PHONIC modes
The 3D-PHONIC mode gives you such a nearly surround effect as it
is reproduced through the Dolby Surround decoder, which is widely
used to reproduce sounds with a feeling of movement like those
experienced in movie theaters. The 3D-PHONIC mode is the result
of research on sound localization technology carried out at JVC for
many years. This mode can be used when two front speakers are
connected to this receiver (without respect to the rear/center
speaker connection).
You can select either 3D ACTION or 3D THEATER to your
preference.
3D ACTION: Best for action and war movies — where the
action is fast and explosive.
3D THEATER: Reproduces the sound field of a large theater.
Surround Modes
With this receiver, you can use two types of the Surround modes.
• Dolby Surround
Dolby Surround has been developed to reproduce the important
elements of the acoustic surround at home.
To watch the soundtracks of video software bearing the mark
* which includes the same encoded surround
information as found in Dolby Stereo films, the receiver can provide
you with Dolby Surround decoder.
There are two types of Dolby Surround – “Pro Logic” and “3
Stereo.”
“Pro Logic” can be used when the front speakers and rear
speakers are connected to this receiver (regardless of the center
speaker connection). On the other hand, “3 Stereo” can be used
when the rear speakers are not connected (center speaker must
be connected).
• JVC Theater Surround
In order to reproduce a more realistic sound field in your listening
room while playing soundtracks of video software bearing the mark
, JVC Theater Surround has been designed to give
you clearer vocals and to create a real “being there” feeling.
This mode can be used when the front speakers and rear
speakers are connected to this receiver (without respect to the
center speaker connection).
English
DAP modes
The sound heard in a concert hall or club consists of direct sound
and indirect sound — early reflections and reflections from behind.
Direct sounds reach the listener directly without any reflection. On
the other hand, indirect sounds are delayed by the distances of the
ceiling and walls. These direct sounds and indirect sounds are the
most important elements of the acoustic surround effects. The DAP
mode can create these important elements, and gives you a real
“being there” feeling. This mode can be used when the front
speakers are connected to this receiver (without respect to the
rear/center speaker connection).
You can select one of the following to your preference.
DANCE CLUB:Gives a throbbing bass beat.
LIVE CLUB: Gives the feeling of a live music club with a low
ceiling.
HALL: Gives clear vocal and the feeling of a concert hall.
PAVILION: Gives the spacious feeling of a pavilion with a
high ceiling.
Reflections from
Early reflections
behind
Notes:
• The DSP modes have no effect on monaural sources.
• The DSP modes cannot be used for recording.
• When you select “DVDMULTI” as the source to play, you cannot
select or adjust the DSP modes.
IMPORTANT:
Before recording, turn off the DVD MULTI playback mode.
As for the DVD MULTI playback mode, see
page 20.
Direct sounds
* Manufactured under license from Dolby Laboratories Licensing
Corporation. Additionally licensed under Canadian patent number
1,037,877. “Dolby,” the double-D symbol, and “Pro Logic” are
trademarks of Dolby Laboratories Licensing Corporation.
15
Page 18

English
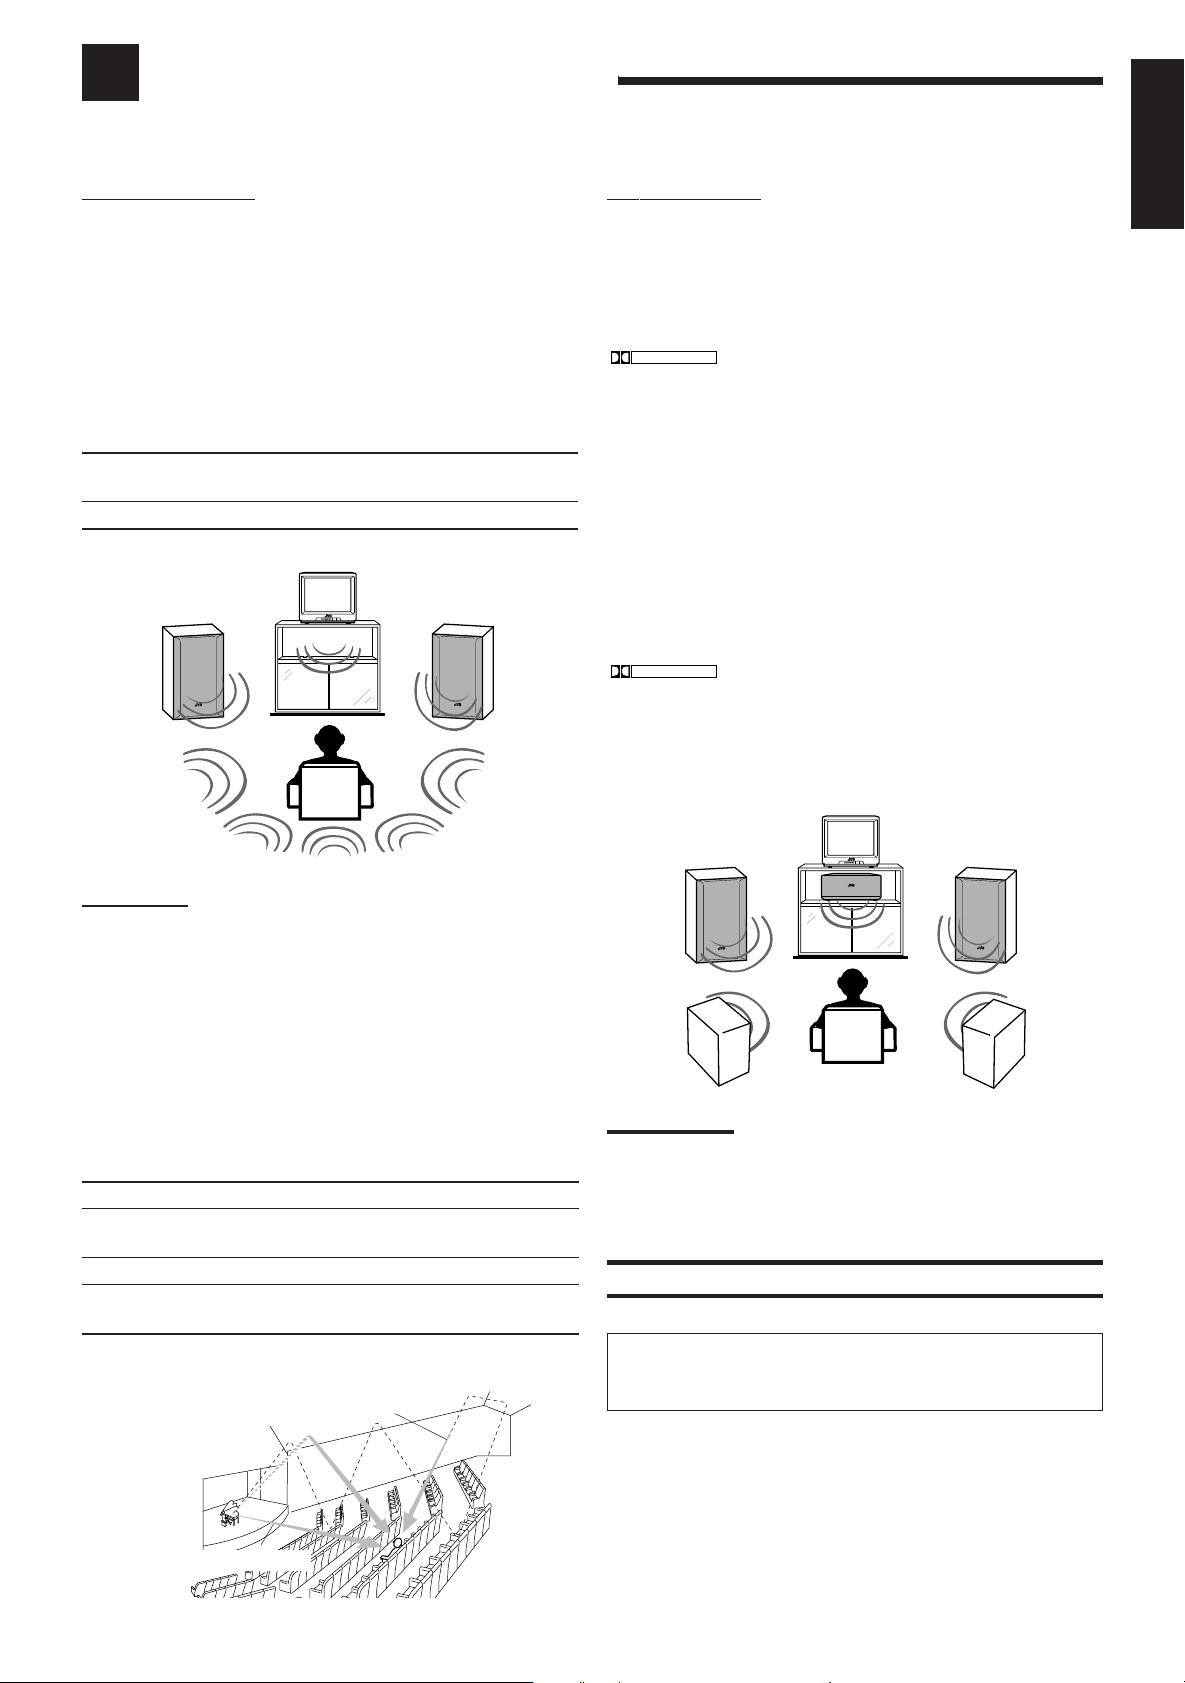
Available DSP Modes According to the Speaker Arrangement
Available DSP modes will vary depending on how many speakers are used with this receiver.
Make sure that you have set the speaker information correctly (see page 11).
Front
speaker
Front
speaker
Speaker arrangements
TV
TV
Center speaker
Front
speaker
Front
speaker
Available DSP modes
Each time you press SURROUND, the DSP modes change as
follows:
• 3D THEATER
• DANCE C (DANCE CLUB)
• LIVE C (LIVE CLUB)
• HALL
• PAVILION
• 3D ACTION
• OFF (DSP mode is canceled)
Each time you press SURROUND, the DSP modes
change as follows:
• 3 STEREO
• 3D THEATER
• DANCE C (DANCE CLUB)
• LIVE C (LIVE CLUB)
• HALL
• PAVILION
• 3D ACTION
• OFF (DSP mode is canceled)
Front
speaker
Rear
speaker
Front
speaker
Rear
speaker
TV
TV
Center speaker
Front
speaker
Rear
speaker
Front
speaker
Rear
speaker
Each time you press SURROUND, the DSP modes change as
follows:
• PRO LOGIC
• THEATER
• DANCE C (DANCE CLUB)
• LIVE C (LIVE CLUB)
• HALL
• PAVILION
• 3D ACTION
• OFF (DSP mode is canceled)
Each time you press SURROUND, the DSP modes change as
follows:
• PRO LOGIC
• THEATER
• DANCE C (DANCE CLUB)
• LIVE C (LIVE CLUB)
• HALL
• PAVILION
• 3D ACTION
• OFF (DSP mode is canceled)
16
Page 19

Adjusting the 3D-PHONIC Modes
Before y ou start, remember...
• Make sure that you have set the speaker information correctly
(see page 11).
• There is a time limit in doing the following steps. If the setting is
canceled before you finish, start from step 1 again.
On the front panel:
1. Press SURROUND repeatedly
SURROUND
until “3DACTION” or “3D
THEATR” appears on the display.
The 3D-PHONIC, PRO LOGIC indicators also light up on the
display.
2. Press ADJUST so that the MULTI
ADJUST
CURSOR % / fi / @ / # buttons
work for adjusting the surround
setting.
3. Press MULTI CURSOR % / fi
MULTI CURSOR
repeatedly until “–EFFECT+”
appears on the display.
MULTI CURSOR
4. Press MULTI CURSOR @ / # to
select an effect level you want.
• Each time you press the button, the effect
level changes as follows:
EFFECT 1 EFFECT 2
EFFECT 5
As the number increases, the selected 3D-PHONIC mode
becomes stronger.
From the remote control:
1. Press SOUND CONTROL.
The 10 keys are activated for sound adjustments.
2. Press SURROUND repeatedly
until “3DACTION” or “3D
EFFECT 3
EFFECT 4
SOUND
CONTROL
SURROUND
3
THEATR” appears on the display.
The 3D-PHONIC, PRO LOGIC indicators also light up on the
display.
3. Press EFFECT to select an effect
level you want.
• Each time you press the button, the effect
level changes as follows:
EFFECT 1 EFFECT 2
EFFECT 5
As the number increases, the selected 3D-PHONIC mode
becomes stronger.
EFFECT 3
EFFECT 4
EFFECT
4
5
Adjusting the DAP Modes
Before y ou start, remember...
• Make sure that you have set the speaker information correctly
(see page 11).
• There is a time limit in doing the following steps. If the setting is
canceled before you finish, start from step 1 again.
• You can only adjust the rear speaker output level when you have
connected the rear speakers and have set “REAR SPK” to “YES.”
See page 11.
On the front panel:
1. Press SURROUND repeatedly
SURROUND
until the DAP mode — DANCE
CLUB, LIVE CLUB, HALL, or
PAVILION — appears on the
display.
The DAP indicator also lights up on the display.
2. Press ADJUST so that the MULTI
ADJUST
CURSOR % / fi / @ / # buttons
work for adjusting the DSP
setting.
MULTI CURSOR
3. Press MULTI CURSOR % / fi
repeatedly until “– REAR +”
appears on the display.
MULTI CURSOR
4. Press MULTI CURSOR @ / # to
adjust the rear speaker output
level (from –10 to +10).
Note:
You cannot adjust the left and right rear speaker output levels
separately.
MULTI CURSOR
5. Press MULTI CURSOR % / fi
repeatedly until “–EFFECT+”
appears on the display.
MULTI CURSOR
6. Press MULTI CURSOR @ / # to
select an effect level you want.
• Each time you press the button, the effect
level changes as follows:
EFFECT 1 EFFECT 2
EFFECT 5
As the number increases, the selected DAP mode becomes
stronger.
EFFECT 3
EFFECT 4
English
17
Page 20

From the remote control:
English
1. Press SOUND CONTROL.
The 10 keys are activated for sound adjustments.
2. Press SURROUND repeatedly
until the DAP mode — DANCE
CLUB, LIVE CLUB, HALL, or
PAVILION — appears on the
display.
The DAP indicator also lights up on the display.
3. Press REAR•L – / + to adjust the
rear speaker output level.
• Pressing REAR•L – decreases the output
level up to –10 dB.
• Pressing REAR•L + increases the output
level up to +10 dB.
SOUND
CONTROL
SURROUND
3
– REAR•L +
5
3. Press TEST to check the speaker
output balance.
“TEST ” starts flashing on the display, and a
test tone comes out of the speakers in the
following order:
Left front speaker
Rear speaker
Note:
You can adjust the speaker output levels without outputting the
test tone.
Center speaker
Right front speaker
TEST
2
5
98
4. Press CENTER – / + repeatedly to
adjust the center speaker output
– CENTER +
5
6
5
level (from –10 to +10).
Note:
You cannot adjust the left and right rear speaker output levels
separately.
4. Press EFFECT to select an effect
level you want.
• Each time you press the button, the effect
level changes as follows:
EFFECT 1 EFFECT 2
EFFECT 5
As the number increases, the selected DAP mode becomes
stronger.
EFFECT 3
EFFECT 4
EFFECT
4
5
Adjusting the Surround Modes — Dolby
Surround and JVC Theater Surround
Before y ou start, remember...
• Make sure that you have set the speaker information correctly
(see page 11).
• There is a time limit in doing the following steps. If the setting is
canceled before you finish, start from step 1 again.
• You can only adjust the effect level when selecting JVC Theater
Surround.
• You can only adjust the rear and/or center speaker output levels
when you have connected rear speakers and/or a center speaker
and have set “REAR SPK” and/or “CNTR SPK” correctly. See
page 11.
5. Press REAR•L – / + to adjust the
– REAR•L +
5
rear speaker output level (from
–10 to +10).
Notes:
• You cannot adjust the left and right rear speaker output levels
separately.
• You cannot use the REAR•R – / + buttons to adjust the rear
speaker level.
6. Press TEST again to stop the test
tone.
7. ONLY FOR JVC Theater
Surround:
Press EFFECT to select an effect
level you want.
• Each time you press the button, the effect
level changes as follows:
EFFECT 1 EFFECT 2
EFFECT 5
As the number increases, JVC Theater Surround becomes
stronger.
EFFECT 3
EFFECT 4
TEST
5
2
EFFECT
4
98
5
From the remote control:
1. Press SOUND CONTROL.
The 10 keys are activated for sound adjustments.
2. Press SURROUND repeatedly
SOUND
CONTROL
SURROUND
until the mode — “PROLOGIC,”
“3 STEREO,” or “THEATER” —
appears on the display.
• For “PROLOGIC” and “3 STEREO,” the PRO LOGIC
indicator lights up on the display.
• For “THEATER,” the PRO LOGIC and DAP indicators light
up on the display.
18
3
Page 21

On the front panel:
You can also use the buttons on the front panel to adjust the
Surround modes. However, no test tone is available when using the
buttons on the front panel. So, make adjustments while listening to
the sound of the source played back.
1. Press SURROUND repeatedly
SURROUND
until the mode — “PROLOGIC,”
“3 STEREO,” or “THEATER”—appears
on the display.
The PRO LOGIC indicator lights up on the display.
8. ONLY FOR JVC Theater
Surround:
Press MULTI CURSOR @ / # to
select an effect level you want.
• Each time you press the button, the effect
level changes as follows:
EFFECT 1 EFFECT 2
EFFECT 5
English
MULTI CURSOR
EFFECT 3
EFFECT 4
2. Press ADJUST so that MULTI
CURSOR % / fi / @ / # buttons
work for adjusting the DSP
setting.
3. Press MULTI CURSOR % / fi
repeatedly until “–CENTER+”
appears on the display.
4. Press MULTI CURSOR @ / # to
adjust the center speaker output
level (from –10 to +10).
5. Press MULTI CURSOR % / fi
repeatedly until “– REAR +”
appears on the display.
6. Press MULTI CURSOR @ / # to
adjust the rear speaker output
level (from –10 to +10).
ADJUST
MULTI CURSOR
MULTI CURSOR
MULTI CURSOR
MULTI CURSOR
As the number increases, JVC Theater Surround becomes
stronger.
Activating the DSP Modes
Once you have finished adjustments for the DSP modes, you can use
the same adjustments every time you want to use these modes.
On the front panel:
SURROUND
1. Press SURROUND repeatedly
until the DSP mode you want
appears on the display.
• Each time you press the button, the DSP modes change. (See
page 16 for more details)
2. Select and play a sound source.
• To enjoy the 3D-PHONIC, Dolby Surround, and JVC Theater
Surround, play back a software which was processed with
Dolby Surround and is labeled with
DOLBY SURROUND
To cancel the DSP mode
Press SURROUND repeatedly until “OFF” appears on the display.
From the remote control:
1. Press SOUND CONTROL.
The 10 keys are activated for sound adjustments.
mark.
SOUND
CONTROL
Note:
You cannot adjust the left and right rear speaker output levels
separately.
7. ONLY FOR JVC Theater
Surround:
Press MULTI CURSOR % / fi
repeatedly until “–EFFECT+”
appears on the display.
MULTI CURSOR
2. Press SURROUND repeatedly
until the DSP mode you want
appears on the display.
• Each time you press the button, the DSP
modes change. (See page 16 for more
details)
SURROUND
3
3. Select and play a sound source.
• To enjoy the 3D-PHONIC, Dolby Surround, and JVC Theater
Surround, play back a software which was processed with
Dolby Surround and is labeled with
DOLBY SURROUND
mark.
To cancel the DSP mode
Press SURROUND repeatedly until “OFF” appears on the display in
step 2 above.
19
Page 22

Using the DVD MULTI Playback Mode
This receiver provides the DVD MULTI playback mode for reproducing the analog discrete output mode of the DVD
player. Before playing back a DVD, refer also to the manual supplied with the DVD player.
English
Activating the DVD MULTI Playback Mode
You can adjust the DVD MULTI playback mode while playing back
a DVD using the analog discrete output mode on the DVD player.
Once you made adjustments, the receiver memorizes the
adjustments until you change them.
Before y ou start, remember...
• Make sure that you have set the speaker information correctly
(see page 11).
• There is a time limit in doing the following steps. If the setting is
canceled before you finish, start from step 1 again.
• You can only adjust the rear and/or center speaker output levels
when you have connected rear speakers and/or a center speaker
and have set “REAR SPK” and/or “CNTR SPK” correctly. See
page 11.
7. Press MULTI CURSOR @ / # to
adjust the left rear speaker output
level (from –10 to +10).
8. Press MULTI CURSOR % / fi
repeatedly until “–REAR R+”
appears on the display.
9. Press MULTI CURSOR @ / # to
adjust the right rear speaker
output level (from –10 to +10).
MULTI CURSOR
MULTI CURSOR
MULTI CURSOR
On the front panel:
DVD MULTI
1. Press DVD MULTI .
Note:
When you select “DVDMULTI” as the source to play, the DSP
mode is canceled temporarily, and the SURROUND button does
not work.
2. Select the analog discrete output mode on the
DVD player, and start playing a DVD.
• Refer to the manual supplied with the DVD player.
If you need to make any adjustment, go to the following
steps.
3. Press ADJUST so that MULTI
ADJUST
CURSOR % / fi / @ / # buttons
work for adjusting the DVD
MULTI playback setting.
4. Press MULTI CURSOR % / fi
MULTI CURSOR
repeatedly until “–CENTER+”
appears on the display.
From the remote control:
1. Press DVD MULTI.
Note:
When you select “DVDMULTI” as the source to play, the DSP
mode is canceled temporarily, and the SURROUND button does
not work.
DVD MULTI
2. Select the analog discrete output mode on the
DVD player, and start playing a DVD.
• Refer to the manual supplied with the DVD player.
If you need to make any adjustment, go to the following
steps.
SOUND
3. Press SOUND CONTROL.
The 10 keys are activated for adjusting the sound.
4. Press CENTER – / + to adjust the
center speaker output level.
• Pressing CENTER – decreases the output
level up to –10 dB.
• Pressing CENTER + increases the output
level up to +10 dB.
CONTROL
– CENTER +
5
6
5
5. Press MULTI CURSOR @ / # to
adjust the center speaker output
level (from –10 to +10).
6. Press MULTI CURSOR % / fi
repeatedly until “–REAR L+”
appears on the display.
20
MULTI CURSOR
MULTI CURSOR
5. Press REAR•L – / + to adjust the
left rear speaker output level.
• Pressing REAR•L – decreases the output
level up to –10 dB.
• Pressing REAR•L + increases the output
level up to +10 dB.
6. Press REAR•R – / + to adjust the
right rear speaker output level.
• Pressing REAR•R – decreases the output
level up to –10 dB.
• Pressing REAR•R + increases the output
level up to +10 dB.
– REAR•L +
5
– REAR•R +
10
98
+10
Page 23

COMPU LINK Remote Control System
The COMPU LINK remote control system allows you to operate JVC audio components through the remote sensor on
the receiver.
To use this remote control system, you need to connect JVC audio
components through the COMPU LINK-3 (SYNCHRO) jacks (see
below) in addition to the connections using cables with RCA pin
plugs (see page 5).
• Make sure that the AC power cords of these components are
unplugged before connection. Plug the AC power cords only after
all connections are complete.
CD player
Cassette deck
or
MD recorder
COMPU LINK – 3
(SYNCHRO)
Turntable
To connect the components, use the cables with monaural
mini plug.
Notes:
• If your audio component has two COMPU LINK-3 (SYNCHRO)
jacks, you can use either one. If it has only one COMPU LINK-3
(SYNCHRO) jack, connect it so that it is the last item in the series
of components. (For example, the turntable or CD player in the
diagram above.)
• To operate the cassette deck or MD recorder using the COMPU
LINK remote control system, set the source name correctly. (See
page 11.)
• Refer also to the manuals supplied with your audio components.
This remote control system allows you to use four functions listed
below.
Remote Control through the Remote Sensor on the
Receiver
You can control the connected audio components through the remote
sensor on the receiver using this remote control. Aim the remote
control directly at the remote sensor on the receiver. For details, see
pages 22 and 23.
Automatic Power On/Off (Standby): only possible
with the COMPU LINK-3 connection
Both the CD player and cassette deck (or MD recorder) turn on and
off (standby) along with the receiver.
When you turn on the receiver, the CD player or cassette deck (or
MD recorder) will turn on automatically, depending on which
component has been previously selected.
When you turn off the receiver, both the CD player and cassette
deck (or MD recorder) will turn off (standby).
Synchronized Recording
Synchronized recording means the cassette deck (or MD recorder)
starts recording as soon as a CD or a record begins playing.
To use synchronized recording, follow these steps:
1. Put a tape in the cassette deck (or an MD in the
MD recorder), and a disc in the CD player (or a
record on the turntable).
2. Press the record (¶) button and the pause (8)
button on the cassette deck (or MD recorder) at
the same time.
This puts the cassette deck (or MD recorder) into recording
pause.
If you do not press the record (¶) button and pause (8) button at
the same time, the synchronized recording feature will not
operate.
3. Press the play (3) button on the CD player or on
the turntable.
The source changes on the receiver, and as soon as play starts,
the cassette deck (or MD recorder) starts recording. When the
play ends, the cassette deck (or MD recorder) enters recording
pause, and stops about 4 seconds later.
Notes:
• During synchronized recording, the selected source cannot be
changed.
• If the power of any component is shut off during synchronized
recording, the COMPU LINK remote control system may not
operate properly. In this case, you must start again from the
beginning.
English
Automatic Source Selection
When you press the play (
on its own remote control, the receiver automatically turns on and
changes the source to the component. On the other hand, if you
select a new source on the receiver or the remote control, the
selected component begins playing immediately.
In both cases, the previously selected source continues playing
without sound for a few seconds.
33
3) button on a connected component or
33
21
Page 24

Operating JVC’s Audio/Video Components
You can operate JVC’s audio and video components with this receiver’s remote control, since control signals for JVC
components are preset in the remote control.
English
IMPORTANT:
To operate JVC’s audio components using this remote control:
• You need to connect JVC audio components through the COMPU
LINK-3 (SYNCHRO) jacks (see page 21) in addition to the
connections using cables with RCA pin plugs (see page 5).
• Aim the remote control directly at the remote sensor on the
receiver.
• If you use the buttons on the front panel to choose a source, the
remote control will not operate that source. To operate a source
with the remote control, the source must be selected using buttons
on the remote control.
• Refer also to the manuals supplied with your components.
Sound control section (Amplifier)
After pressing SOUND CONTROL, you can perform the following
operations:
SURROUND: Selects the DSP modes.
CENTER – / +: Adjusts the center speaker output level for the
Surround/DVD MULTI playback modes.
REAR•L – / +: Adjusts the left/right rear speaker output level for
the DSP modes.
Adjusts the left rear speaker output level for the
DVD MULTI playback mode.
REAR•R – / +: Adjusts the right rear speaker output level for the
DVD MULTI playback mode.
DELAY : Selects the delay time of the rear speaker sound.
(Only works when “PROLOGIC” is selected.)
EFFECT: Selects the effect level for the DSP modes.
TEST: Turns on or off the test tone output for the
Surround mode.
CD
TAPE/MD
FM/AM
VCR
DVD
DVD MULTI
PHONO
ONE TOUCH
OPERATION
MUTING
SLEEP
8
RM-SR558U REMOTE CONTROL
EFFECT
SOUND
CONTROL
CD-DISC
TV/VIDEO
4
1
7/P
5
+
VOLUME
–
VCR
TESTDELAY
5
– CENTER +
54
– REAR•L +
5
– REAR•R +
10
TV VOL.
–
TV CH
–
£
7
AUDIO
SURROUND
321
6
5
98
MENU
+10
+
+
+
VCR CH
–
ENT
4
1
POWER
TV
Tuner
After pressing FM/AM, you can perform the following operations:
FM/AM: Alternates between FM and AM.
1 – 10, +10: Selects a preset channel number directly.
For channel number 5, press 5.
For channel number 15, press +10, then 5.
For channel number 20, press +10, then 10.
Note:
After adjusting sounds, press the corresponding source selecting
button or CD-DISC to operate your target source by using the 10
keys; otherwise, the 10 keys cannot be used for operating your target
source.
Cassette deck
After pressing TAPE/MD, you can perform the following operations
on a cassette deck:
3: Starts playing.
11
1: Fast winds the tape from right to left.
11
¡¡
¡: Fast winds the tape from left to right.
¡¡
7: Stops operations.
8: Pauses playing. To release it, press 3.
Note:
To operate the cassette deck or MD recorder usint the COMPU LINK
remote control system, set the source name correctly. (See page 11.)
CD player
After pressing CD, you can perform the following operations on the
CD player:
3: Starts playing.
44
4: Returns to the beginning of the current (or
44
previous) track.
¢¢
¢: Skips to the beginning of the next track.
¢¢
7: Stops playing.
8: Pauses playing. To r elease it, press 3.
1 – 10, +10: Selects a track number directly.
For track number 5, press 5.
For track number 15, press +10, then 5.
For track number 20, press +10, then 10.
For track number 30, press +10, +10, then 10.
22
Page 25

CD player-changer
After pressing CD-DISC, you can perform the following operations
on a CD player-changer:
3: Starts playing.
44
4: Returns to the beginning of the current (or
44
previous) track.
¢¢
¢: Skips to the beginning of the next track.
¢¢
7: Stops playing.
8: Pauses playing. To release it, press 3.
1 – 6, 7/P: Selects the number of a disc installed in a CD
player-changer.
If your CD changer is of 200-disc loading capability (except for
XL-MC100 and XL-MC301),
you can do the following operations using the number buttons after
pressing CD.
• 10 button can function as 0.
1. Select a disc number.
2. Then select a track number (always enter two digits).
3. Start playback.
EXAMPLES:
• Selecting disc number 3, track number 2, and start playback.
Press 3, then, 10, 2, then 3.
• Selecting disc number 10, track number 5, and start playback.
Press 1, 10, then, 10, 5, then 3.
VCR
You can always perform the following operations :
VCR POWER:Turns on or off the VCR.
VCR CH +/–: Changes the channels on the VCR.
After pressing VCR, you can perform the following operations on
the VCR:
3: Starts playing.
1: Rewinds a tape.
¡: Fast winds a tape.
7: Stops operations.
8: Pauses playing. To release it, press 3.
DVD player
After pressing DVD or DVD MULTI, you can perform the following
operations on a DVD player:
3: Starts playing.
4: Returns to the beginning of the current (or previous)
track.
¢: Skips to the beginning of the next track.
7: Stops playing.
8: Stops playing temporarily. To release it, press 3.
After pressing DVD or DVD MULTI, these buttons can be used
for the DVD menu operations.
TEST
5
2
English
• Selecting disc number 105, track number 12, and start playback.
Press 1, 10, 5, then 1, 2, then 3.
MD recorder
After pressing TAPE/MD, you can perform the following operations
on the MD recorder:
3: Starts playing.
4: Returns to the beginning of the current (or previous)
track.
¢: Skips to the beginning of the next track.
7: Stops playing.
8: Pauses playing. To release it, press 3.
Note:
To operate the cassette deck or MD recorder using the COMPU LINK
remote control system, set the source name correctly. (See page 11.)
IMPORTANT:
To operate JVC’s video components using this remote control:
• Aim the remote control directly at the remote sensor on the VCR,
DVD player or TV, not on the receiver.
• Some JVC VCRs can accept two types of the control signals —
remote code “A” and “B.” Before using this remote control, make
sure that the remote control code of the VCR connected to the
VCR jacks is set to code “A.”
EFFECT
5
7/P
Note:
For detailed menu operations, refer to the instructions supplied
with the discs or the DVD player.
– CENTER +
54
– REAR•L +
5
– REAR•R +
10
6
98
MENU
+10
5
ENT
(ENTER)
TV
You can always perform the following operations:
TV POWER: Turns on or off the TV.
TV VOL. –/+: Adjusts the volume.
TV/VIDEO: Sets the input mode (either TV or VIDEO).
TV CH –/+: Changes the channels.
23
Page 26

Troubleshooting
Use this chart to help you solve daily operational problems. If there is any problem you cannot solve, contact your JVC
service center.
English
PROBLEM
POSSIBLE CAUSE
SOLUTION
The display does not light up.
No sound from speakers.
Sound from one speaker only.
Continuous hiss or buzzing during FM
reception.
Occasional cracking noise during FM
reception.
The power cord is not plugged in.
Speaker signal cables are not connected.
The SPEAKERS 1 and 2 buttons are not
set correctly.
An incorrect source is selected.
Muting is activated.
Speaker signal cables are not connected
properly.
The balance is set to one extreme.
Incoming signal is too weak.
The station is too far away.
An incorrect antenna is used.
Antennas are not connected properly.
Ignition noise from automobiles.
Plug the power cord into an AC outlet.
Check speaker wiring and reconnect if
necessary.
Press SPEAKERS 1 and 2 correctly.
Select the correct source.
Press MUTING to cancel the mute.
Check speaker wiring and reconnect if
necessary.
Adjust the balance properly (see page 9).
Connect an outside FM antenna or contact
your dealer.
Select a new station.
Check with your dealer to be sure you have
the correct antenna.
Check connections.
Move the antenna farther from automobile
traffic.
Howling during record playing.
“OVERLOAD” starts flashing on the
display.
Remote control does not work.
Your turntable is too close to speakers.
Speakers are overloaded because of high
volume.
Speakers are overloaded because of short
circuit of speaker terminals.
There is an obstruction in front of the
remote sensor on the receiver.
Batteries are weak.
Move speakers away from the turntable.
Rotate the MASTER VOLUME control
counterclockwise three or four times, then
press POWER on the front panel.
If “OVERLOAD” does not disappear, unplug
the AC power cord, then plug it back again.
Press POWER on the front panel, then check
the speaker wiring.
If “OVERLOAD” does not disappear, unplug
the AC power cord, then plug it back again.
If speaker wiring is not short-circuited, contact
your dealer.
Remove the obstruction.
Replace batteries.
24
Page 27

Specifications
Amplifier
Output Power
At Stereo operation: 100 W per channel, min. RMS, driven
At Surround operation:
Front Channel: 100 W per channel, min. RMS, driven into
Center channel: 100 W, min. RMS, driven into 8 Ω at 1 kHz,
Rear channel: 100 W per channel, min. RMS, driven into
T otal Harmonic Distortion (8 Ω, 1 kHz):
Audio
Audio Input Sensitivity/Impedance (1 kHz):
PHONO (MM): 2.7 mV/47 k Ω
CD, TAPE/MD, VCR, D VD:
Audio Output Level: TAPE/MD, VCR 220 mV
Signal-to-Noise Ratio (’66 IHF/’78 IHF):
PHONO: 70 dB/77 dB (at REC OUT)
CD, TAPE/MD, VCR, D VD:
Frequency Response (8 Ω):
PHONO: 20 Hz to 20 kHz (±1 dB)
CD, TAPE/MD, VCR, D VD:
RIAA Phono Equalization:
Video
Video Input Sensitivity/Impedance:
VCR, DVD: 1V(p-p)/75 Ω
Video Output Level:
VCR, MONITOR OUT: 1V(p-p)/75 Ω
Synchronization: Negative
Signal-to-Noise Ratio: 45dB
English
into 8 Ω, at 40 Hz to 20 kHz with no more
than 0.8 % total harmonic distortion.
8 Ω at 1 kHz with no more than 0.8 % total
harmonic distortion.
with no more than 0.8 % total harmonic
distortion.
8 Ω at 1 kHz, with no more than 0.8 % total
harmonic distortion.
0.8 %* at 100 W output
(* Measured by JVC Audio Analysis
System)
220 mV/47 k Ω
87 dB/67 dB
20 Hz to 20 kHz (±1 dB)
±1.0 dB (20 Hz to 20 kHz)
25
Page 28

English
FM tuner (IHF)
Tuning Range: 87.5 MHz to 108.0 MHz
Usable Sensitivity: Monaural: 12.8 dBf (1.20 µV/75 Ω)
50 dB Quieting Sensitivity:
Monaural: 21.3 dBf (3.2 µV/75 Ω)
Stereo: 41.3 dBf (31.5 µV/75 Ω)
Signal-to-Noise Ratio (IHF-A weighted):
Monaural: 78 dB at 85 dBf
Stereo: 73 dB at 85 dBf
Total Harmonic Distortion:
Monaural: 0.4 % at 1 kHz
Stereo: 0.6 % at 1 kHz
Stereo Separation at REC OUT: 35 dB at 1 kHz
Alternate Channel Selectivity:
45 dB: (±400 kHz)
Frequency Response:30 Hz to 15 kHz: (+0.5 dB, –3 dB)
AM tuner
Tuning Range: 530 kHz to 1,710 kHz
Usable Sensitivity: Loop antenna 400 µV/m
Signal-to-Noise Ratio: 50 dB (100 mV/m)
General
Power Requirements: AC 120V , 60 Hz
Power Consumption: 290 W/390 VA (at operation)
2 W (in standby mode)
Dimensions (W x H x D): 435 mm x 146 mm x 403.5 mm
Mass: 10.2 kg (22.5 lbs)
Designs & specifications are subject to change without notice.
3
/16 in. x 5 3/4 in. x 15 15/16 in.)
(17
26
Page 29

Table des matières
Indentification des parties ............................ 2
Pour commencer ......................................... 3
Avant l’installation ..................................................................... 3
Vérification des accessoires fournis ........................................... 3
Connexion des antennes FM et AM........................................... 3
Connexion des enceintes ............................................................ 4
Connexion des appareils audio/vidéo......................................... 5
Connexion du cordon d’alimentation secteur............................. 7
Mise en place des piles dans la télécommande .......................... 7
Opérations de base ...................................... 8
Mise de l’appareil sous et hors tension (attente) ........................ 8
Sélection de la source à reproduire ............................................ 8
Ajustement du volume ............................................................... 9
Sélection des enceintes avant ..................................................... 9
Mise en sourdine du son............................................................. 9
Enregistrement d’une source...................................................... 9
Atténuation du signal d’entrée ................................................. 10
Ajustement de la balance de sortie des enceintes avant ........... 10
Renforcement des graves ......................................................... 10
Ajustement de la tonalité.......................................................... 10
Français
Réglages de base....................................... 11
Modification du nom de la source............................................ 11
Réglage de l’enceinte centrale et des enceintes
arrières pour les modes DSP .............................................. 11
Mémorisation des ajustements et des réglages de base —
fonctionnement monotouche.............................................. 12
Utilisation de la minuterie d’arrêt ............................................ 12
Réception d’émissions de radio.................... 13
Accord manuel d’une station ................................................... 13
Utilisation de l’accord par préréglage ...................................... 13
Sélection du mode de réception FM......................................... 14
Utilisation des modes DSP.......................... 15
Modes DSP disponibles en fonction de la
disposition des enceintes.................................................... 16
Ajustement des modes 3D-PHONIC ....................................... 17
Ajustement des modes DAP..................................................... 17
Ajustement des modes surround — Dolby Surround et JVC
Theater Surround ............................................................... 18
Mise en service des modes DSP............................................... 19
Utilisation du mode de lecture DVD MULTI ... 20
Mise en service du mode de lecture DVD MULTI .................. 20
Système de commande à distance
COMPU LINK ............................................ 21
Commande d’appareils audio/vidéo JVC ....... 22
Guide de dépannage ................................... 24
Spécifications............................................ 25
1
Page 30

Identification des parties
Se familiariser avec les touches et les commandes avant d'utiliser l'ampli-tuner.
Pour plus d’informations, se référer aux pages indiquées entre parenthèse.
127354869p
Français
1
2
3
4
5
6
7
STANDBY
POWER
PHONES
RX-5000V AUDIO/VIDEO CONTROL RECEIVER
SPEAKERS
1
2
— OFF_ ON
POWER
TV
CD
TAPE/MD
FM/AM
VCR
DVD
DVD MULTI
PHONO
ONE TOUCH
OPERATION
MUTING
SLEEP
8
RM-SR558U REMOTE CONTROL
4
1
EFFECT
7/P
SOUND
CONTROL
CD-DISC
TV/VIDEO
5
VOLUME
+
–
VCR
TESTDELAY
5
– CENTER +
54
– REAR•L +
5
– REAR•R +
10
–
–
£
7
TV VOL.
TV CH
AUDIO
SURROUND
321
6
98
+10
+
+
+
+
VCR CH
–
5
MENU
ENT
4
1
DVD MULTI
CD
DVD
PHONO
rty
VCR
TAPE/MD
SOURCE NAME
FM
AM
e
Panneau avant
1 Touche POWER et témoin STANDBY
(8)
2 Affichage (8)
3 Touche SURROUND (16)
4 Touche et témoin ONE TOUCH
8
9
p
q
w
e
r
OPERATION (12)
5 Capteur de télécommande (7)
6 Témoin BASS BOOST (10)
7 Touche SETTING (11) *
8 Touche ADJUST (10) *
9 Touche MEMORY (13)
p Commande MASTER VOLUME (9)
q Touches de commande du curseur
w Touche et témoin INPUT ATT. (10)
e Touche SOURCE NAME (11)
r Touches de sélection de source (8)
DVD MULTI, DVD, VCR, FM*, AM*,
TAPE/MD, PHONO, CD
t Touches SPEAKERS 1/2 (9)
y Prise PHONES (9)
BASS BOOST
SURROUND MULTI CURSOR
ONE TOUCH OPERATION
INPUT ATT.
w
MASTER VOLUME
–+
ADJUST
SETTING
MEMORY
q
Télécommande
1 Touches POWER (8, 23)
TV, VCR, AUDIO
2 Touches de sélection de source (8)
CD, TAPE/MD, FM/AM, VCR, DVD,
DVD MULTI, PHONO
3 T ouche ONE TOUCH OPERATION (12)
4 Touches VOLUME +/– (9)
5 Touche MUTING (9)
6 Touche SLEEP (12)
7 Touches de commande des appareils
audio/vidéo (22)
8 • Touches numériques pour choisir les
canaux préréglés (14, 22)
• Touches numériques pour ajuster le son
(12, 17, 22)
• Touches numériques pour commander
les appareils audio/vidéo (22)
9 T ouche SOUND CONTROL (12, 17, 22)
p Touches TV VOL. –/+ (23)
q Touche CD-DISC (22)
w Touches TV CH –/+ (23)
e T ouche TV/VIDEO (23)
r Touches VCR CH +/– (23)
IMPORTANT:
Pour utiliser les touches de commande du curseur (q) sur le panneau avant:
Le fonctionnement de ces touches dépend de la fonction en cours d’ajustement. Avant d’utiliser ces touches, choisir la fonction en
appuyant sur l’une des touches marquées par *.
2
Page 31

Pour commencer
Cette section explique comment connecter les appareils audio/vidéo et les enceintes à l'ampli-tuner, et comment
connecter l'appareil au secteur.
Avant l'installation
Général
• S'assurer d'avoir les mains sèches.
• Mettre tous les appareils hors tension.
• Lire les modes d'emploi fournis avec les appareils qui doivent être
connectés.
Emplacement
• Installer l'ampli-tuner dans un endroit plat et protégé de l'humidité.
• La température autour de l'ampli-tuner doit être comprise entre –5˚
et 35˚C (23˚ et 95˚ F).
• S'assurer qu'il y a une bonne ventilation autour de l'appareil. Une
mauvaise ventilation peut entraîner une surchauffe et endommager
l'ampli-tuner.
Manipulation de l'ampli-tuner
• N'insérer aucun objet métallique à l'intérieur de l'ampli-tuner.
• Ne pas démonter l'ampli-tuner ni ne retirer les vis, les couvercles
ou le compartiment.
• Ne pas exposer l'appareil à la pluie ou à l'humidité.
Vérification des accessoires fournis
Vérifier que tous les articles suivants sont bien fournis avec l'amplituner.
Le nombre entre parenthèses indique la quantité d'articles fournis.
• Télécommande (1)
• Piles (2)
• Antenne cadre AM (1)
• Antenne FM (1)
Si quelque chose manquait, contacter le revendeur immédiatement.
Connexion des antennes FM et AM
Connexion de l'antenne FM
AM
LOOP
ANTENNA
FM 75
COAXIAL
AM
EXT
A
Antenne FM
ANTENNA
AM
LOOP
FM 75
COAXIAL
Etendre l'antenne FM fournie horizontalement.
AM
EXT
Câble d'antenne FM extérieure
A. Utilisation de l'antenne FM fournie
L'antenne FM fournie peut être connectée à la prise FM 75Ω
COAXIAL de façon temporaire.
B. Utilisation d'un connecteur de type standard (Non fourni)
Un connecteur de type standard devrait être connecté à la prise
FM 75Ω COAXIAL.
Remarque:
Si la réception est mauvaise, connecter une antenne extérieure.
Avant de connecter un câble coaxial 75Ω (câble rond provenant de
l'antenne extérieure), déconnecter l'antenne-fil FM fournie.
B
AM
LOOP
ANTENNA
FM 75
COAXIAL
AM
EXT
Français
3
Page 32

Connexion de l'antenne AM
RIGHT LEFT
FRONT SPEAKERS
1
2
1
2
Procédure de connexion de base
Français
1
ANTENNA
AM
LOOP
Insérer les languettes du cadre dans
FM 75
COAXIAL
AM
EXT
les fentes de la base pour assembler
l'antenne cadre AM.
Antenne cadre AM
2
3
Fil extérieur recouvert de vinyle (non fournies)
1
2
3
1 Couper, tordre et retirer l’isolant à l’extrémité de
chaque câble de signal d’enceinte.
2 Ouvrir la prise puis insérer le câble de signal
d’enceinte.
3 Refermer la prise.
Connexion des enceintes avant
Il est possible de connecter deux paires d'enceintes avant (une paire
aux prises FRONT SPEAKERS 1, et l'autre paire aux prises
FRONT SPEAKERS 2).
Enceinte
droite
FRONT SPEAKERS 1
Enceinte
gauche
Tourner le cadre jusqu'à l'obtention de la meilleure réception.
Remarques:
• S'assurer que les conducteurs de l'antenne ne touchent aucune
autre prise, cordon de connexion et cordon d'alimentation. Cela
pourrait nuire à la réception.
• Si la réception est mauvaise, connecter un fil extérieur recouvert de
vinyle à la prise AM EXT. (Laisser l'antenne cadre AM connectée.)
Connexion des enceintes
Il est possible de connecter les enceintes suivantes:
• Deux paires d'enceintes avant pour produire un son stéréo normal.
• Une paire d'enceintes arrière pour profiter des effets surround.
• Une enceinte centrale pour produire des effets surround plus
efficaces (pour accentuer les voix humaines).
• Un caisson de grave pour améliorer les graves.
IMPORTANT:
Après la connexion des enceintes de la liste ci-dessus, régler leurs
informations correctement pour obtenir les meilleurs effets DSP
(Digital Signal Processor) possibles. Pour les détails, voir page 11.
Pour chaque enceinte (a l'exception du caisson de grave), connecter
les prises (–) et (+) du panneau arrière aux prises marquées (–) et (+)
sur les enceintes. Pour la connexion du caisson de grave, voir page 5.
ATTENTION:
Utiliser des enceintes avec l'impédance d'enceinte (SPEAKER
IMPEDANCE) indiquée sur les prises d'enceintes.
Enceinte
droite
FRONT SPEAKERS 2
Enceinte
gauche
Connexion des enceintes arrière et de l'enceinte
centrale
Puis connecter les enceintes arrière aux prises REAR SPEAKERS et
l'enceinte centrale aux prises CENTER SPEAKER en utilisant ces
câbles.
Enceinte centrale
Enceinte
arrière gauche
Enceinte
arrière droite
CENTER
SPEAKER
RIGHT LEFT
REAR
SPEAKERS
4
Page 33

Connexion du caisson de grave
Il est possible d'améliorer les graves en connectant un caisson de
grave.
Connecter la prise d'entrée d'un caisson de grave actif à la prise
SUBWOOFER OUT sur le panneau arrière, en utilisant un câble
muni de fiches cinch.
SUBWOOFER
OUT
Caisson de grave actif
Connexion des appareils audio/vidéo
Il est possible de connecter les appareils audio/vidéo suivants à cet
ampli-tuner en utilisant des câbles munis de fiches cinch (non
fournies). Se référer aussi aux modes d'emploi fournis avec ces
appareils.
Tourne-disque
Si le tourne-disque
ANTENNA
FM 75
COAXIAL
est muni d’un câble
de mise à la terre,
connecter ce câble à
la prise de terre (H)
des prises ANTENNA
sur le panneau
arrière.
Tourne-disque
AM
LOOP
AM
EXT
PHONO
L
R
AUDIO
OUT
(REC)IN(PLAY)
TAPE/MDCD
A la sortie audio
Remarque:
Les tourne-disques incorporant une cellule à faible signal de sortie
telle qu'une MC (type à bobine mobile) doivent être connectés à
l'ampli-tuner à travers un amplificateur de tête ou un amplificateur
élévateur disponible dans le commerce. Une connexion directe
résulterait en un volume insuffisant.
Lecteur CD
Français
Utiliser des câbles munis de fiches cinch (non fournis).
Connecter la fiche blanche à la prise audio gauche et la fiche rouge à
la prise audio droite.
Connexion des appareils audio
ATTENTION:
Si un appareil de traitement du son tel qu'un égaliseur graphique est
connecté entre les appareils source et cet ampli-tuner, la sortie
sonore à travers cet ampli-tuner peut être déformée.
Lecteur CD
PHONO
L
R
A la sortie audio
Platine cassette ou enregistreur de MD
Platine cassette
A l'entrée audio
PHONO
L
R
AUDIO
OUT
(REC)IN(PLAY)
TAPE/MDCD
A l'entrée audio
Enregistreur de MD
TAPE/MDCD
AUDIO
OUT
(REC)IN(PLAY)
A la sortie audio
A la sortie audio
Remarque:
Il est possible de connecter une platine cassette ou un enregistreur
de MD aux prises TAPE/MD. Lors de la connexion d'un enregistreur
de MD aux prises TAPE/MD, changer le nom de la source, qui
apparaît sur l'affichage lors de la sélection de source, sur “MD”. Voir
page 11, pour les détails.
Si les appareils audio possèdent un prise COMPU
LINK-3
Voir aussi la page 21 pour des informations détaillées sur les
connexions et le système de commande à distance COMPU LINK-3.
5
Page 34

Connexion des appareils vidéo
Utiliser des câbles munis de fiches cinch (non fournis).
Connecter la fiche blanche à la prise audio gauche, la prise rouge à
la fiche audio droite et la fiche jaune à prise vidéo.
Lecteur de DVD
• Lors de la connexion du lecteur de DVD avec les prises de sortie
stéréo:
Lecteur de DVD
Téléviseur (ou d'un moniteur)
DVD
Français
Magnétoscope
VIDEO
OUT
(REC)IN(PLAY)
VCR
OUT
(REC)IN(PLAY)
AUDIO
LEFT
RIGHT
DVD
MONITOR
OUT
VIDEO
OUT
(REC)IN(PLAY)
VCR
OUT
(REC)IN(PLAY)
Téléviseur
(ou moniteur)
A l'entrée vidéo
MONITOR
OUT
LEFT
DVD
Å ı
DVD
FRONT CENTER REAR
L
R
SUBWOOFER
DVD
LEFT
RIGHT
Å A la sortie audio des canaux avant gauche/droit (ou à la
sortie audio mixée, si nécessaire)
ı A la sortie vidéo
• Lors de la connexion du lecteur de DVD par les prises de sortie
analogiques discrètes (reproduction 5,1 canaux):
VIDEO
OUT
(REC)IN(PLAY)
VCR
OUT
(REC)IN(PLAY)
AUDIO
LEFT
RIGHT
MONITOR
OUT
A l’entrée
audio/vidéo
RIGHT
AUDIO
V HS
Magnétoscope
A la sortie
audio/vidéo
Lecteur de DVD
DVD
Å
FRONT CENTER REAR
L
R
ı ljÎ
DVD
SUBWOOFER
DVD
LEFT
RIGHT
VIDEO
OUT
(REC)IN(PLAY)
VCR
OUT
(REC)IN(PLAY)
AUDIO
RIGHT
Å A la sortie audio des canaux avant gauche/droit
ı A la sortie audio du canal central
Ç A la sortie audio du caisson de grave
Î A la sortie vidéo
‰ A la sortie audio des canaux arrière gauche/droit
LEFT
MONITOR
OUT
6
Page 35

Connexion du cordon d'alimentation
secteur
Mise en place des piles dans la
télécommande
Avant de brancher l'ampli-tuner sur une prise d'alimentation secteur,
s'assurer que toutes les connexions ont été faites.
Brancher le cordon d'alimentation sur une prise secteur murale.
Tenir le cordon d'alimentation à l'écart des câbles de connexion
et d'antenne. Le cordon d'alimentation risquerait de causer des
bruits ou des interférences sur l'écran. Il est recommandé
d'utiliser un câble coaxial pour connecter l'antenne car il est
correctement blindé contre les interférences.
Remarque:
Les réglages préréglés tels que les canaux préréglés et les
ajustements sonores peuvent être effacés au bout de quelques jours
dans les cas suivants:
– Quand le cordon d’alimentation est débranché.
– Quand une coupure de courant se produit.
Avant d'utiliser la télécommande, mettre d'abord en place les deux
piles fournies. Lors de l'utilisation de la télécommande, la diriger
directement sur le capteur de télécommande de l'ampli-tuner.
1. Au dos de la télécommande, retirer le couvercle
du compartiment à pile comme montré sur
l'illustration.
2. Insérer les piles. S'assurer de respecter les
polarités: (+) à (+) et (–) à (–).
R6P (SUM-3)/AA (15F)
Français
ATTENTION:
• Ne pas toucher le cordon d'alimentation avec les mains mouillées.
• Ne pas tirer sur le cordon d'alimentation pour débrancher la fiche.
Toujours saisir directement la fiche de façon à ne pas
endommager le cordon.
3. Remettre en place le couvercle du compartiment
à piles.
Si la plage de fonctionnement de la télécommande ou son efficacité
diminue, remplacer les piles. Utiliser deux piles sèches de type R6P
(SUM-3)/AA (15F).
ATTENTION:
Suivre ces précautions pour éviter toute fuite ou fissuration des piles:
• Placer les piles dans la télécommande de façon que les polarités
indiquées soient respectées: (+) à (+) et (–) à (–).
• Utiliser le type de pile correct. Des piles qui paraissent similaires
peuvent différer en tension.
• Toujours remplacer les deux piles en même temps.
• Ne pas exposer les piles à la chaleur ou à une flamme.
7
Page 36

Opérations de base
Les opérations suivantes sont utilisées ordinairement lors de la reproduction de n'importe quelle source.
Mise de l'appareil sous et hors tension
(attente)
Sur le panneau avant:
Pour mettre l'appareil sous tension, appuyez sur POWER.
Le témoin STANDBY s'éteint. Le nom de la source
actuelle (ou la fréquence de la station) apparaît sur
l'affichage.
Français
Le nom de la source
actuelle apparaît
VOLUME
Le niveau de volume
actuel est montré ici
Pour mettre l'appareil hors tension (en
mode d'attente), appuyer de nouveau
sur POWER.
Le témoin STANDBY s'allume. Une petite quantité
de courant est consommée ne mode d’attente.
Pour mettre l’appareil complètement hors tension,
débrancher le cordon d’alimentation secteur.
A partir de la télécommande:
Pour mettre l'appareil sous tension,
appuyer sur AUDIO POWER.
Le témoin STANDBY s'éteint. Le nom de la source actuelle
(ou la fréquence de la station) apparaît sur l'affichage.
Pour mettre l'appareil hors tension (en mode d'attente),
appuyer de nouveau sur AUDIO POWER.
Le témoin STANDBY s'allume.
Sélection de la source à reproduire
STANDBY
POWER
STANDBY
POWER
AUDIO
Sur le panneau avant:
DVD MULTI Choisit le lecteur DVD pour voir un DVD en
DVD Choisit le lecteur de DVD pour voir un DVD en
VCR Choisit l'appareil vidéo connecté aux prises VCR.
FM Choisit la réception FM.
AM Choisit la réception AM.
TAPE/MD Choisit la platine cassette (ou l'enregistreur de MD).
PHONO Choisit le tourne-disque.
CD Choisit le lecteur CD.
A partir de la télécommande:
FM/AM Choisit la réception FM ou AM.
• Les autres touches fonctionnent de la même façon que les touches
du panneau avant.
Remarque:
Lors de la connexion d’un enregistreur de MD (aux prises TAPE/MD)
changer le nom de la source qui apparaît sur l’affichage. Voir page 11
pour les détails.
MUTE TUNED SLEEP SEA 3D-PHONIC
AUTO STEREO PRO LOGIC 3CH LOGIC HALL LOUDNESS
DAP
CH-
Le nom de la source choisie apparaît
utilisant le mode de sortie analogique discrète
(reproduction 5,1 canaux) sur le lecteur de DVD.
Pour la lecture DVD MULTI, voir page 20.
mode stéréo.
Chaque fois que la touche est pressée, la bande alterne
entre FM et AM.
L
VOLUME
MHz
kHz
R
Appuyer directement sur l'une des touches de sélection de
source.
Sur le panneau avant:
DVD MULTI
CD
DVD
PHONO
VCR
TAPE/MD
SOURCE NAME
CD
FM
AM
*
A partir de la télécommande:
TAPE/MD
FM/AM
*
*
VCR
Remarque:
Quand une des touches de
sélection de source, marquée par
un astérisque (*), est pressée sur la
télécommande, l’ampli-tuner se met
automatiquement sous tension.
DVD
DVD MULTI
PHONO
*
Sélection de sources différentes pour l'image et le son
Il est possible de regarder l'image d'un appareil vidéo tout en
écoutant le son d'un autre appareil.
Appuyer sur l'une des touches de sélection de source audio (CD,
TAPE/MD, PHONO, FM, AM), tout en regardant l'image d'un
appareil vidéo tel que le magnétoscope, le lecteur de DVD, etc.
Remarque:
Une fois que la source vidéo a été choisie, les images de la source
choisie sont envoyées au téléviseur jusqu'à ce qu'une autre source
soit choisie.
8
Page 37

Ajustement du volume
Sur le panneau avant:
Pour augmenter le volume, tourner
MASTER VOLUME dans le sens
des aiguilles d'une montre.
Pour diminuer le volume, tourner
dans le sens contraire.
• Quand MASTER VOLUME est tourné
rapidement, le niveau de volume change aussi
rapidement.
• Quand MASTER VOLUME est tourné
lentement, le niveau de volume change aussi
lentement.
–
MASTER VOLUME
Écoute privée avec le casque d’écoute
1. Connecter un casque d’écoute à la prise PHONES sur le
panneau avant.
2. Mettre SPEAKERS 1 et SPEAKERS 2 en position — OFF.
+
ATTENTION:
S'assurer de diminuer le volume avant de connecter un casque
d'écoute ou de se le mettre sur les oreilles car un niveau de volume
élevé peut endommager à la fois le casque et l'ouïe de l'auditeur.
Remarque:
Il n’est pas possible de couper le son des autres enceintes en utilisant
les touches SPEAKERS 1 et 2.
Français
A partir de la télécommande:
Pour augmenter le volume, appuyer sur
VOLUME +.
Pour diminuer le volume, appuyer sur
+
VOLUME
–
VOLUME –.
ATTENTION:
Toujours régler le volume au minimum avant de démarrer une source.
Si le volume est réglé sur un niveau élevé, la soudaine déflagration
d'énergie sonore peut endommager de façon irréversible l'ouïe de
l'auditeur et/ou détruire les enceintes.
Remarque:
Le niveau de volume peut être ajusté à l'intérieur d'une plage de “0”
(minimum) à “80” (maximum).
Sélection des enceintes avant
Sur le panneau avant UNIQUEMENT:
Si deux paires d’enceintes avant ont été
connectées, il est possible de choisir laquelle
utilisée. Appuyer sur SPEAKERS 1 ou
SPEAKERS 2 met en service le jeu respectif
d’enceintes.
• Pour utiliser les enceintes connectées aux prises FRONT
SPEAKERS 1, mettre SPEAKERS 1 en position _ ON et
SPEAKERS 2 en position — OFF.
• Pour utiliser les enceintes connectées aux prises FRONT
SPEAKERS 2, mettre SPEAKERS 2 en position _ ON et
SPEAKERS 1 en position — OFF.
• Pour utiliser les deux paires d’enceintes connectées, mettre
SPEAKERS 1 en position _ ON et SPEAKERS 2 en position _
ON.
• Pour n’utiliser aucune paire d’enceintes, mettre SPEAKERS 1
en position — OFF et SPEAKERS 2 en position — OFF.
SPEAKERS
12
_ ON — OFF
Mise en sourdine du son
A partir de la télécommande UNIQUEMENT:
Appuyer sur MUTING pour couper le son
MUTING
de toutes les enceintes et du casque
d'écoute connecté.
“MUTING” apparaît sur l'affichage et le son
est coupé (l'indicateur du niveau de volume
s'éteint).
Pour rétablir le son, appuyer de nouveau sur MUTING.
• Tourner MASTER VOLUME ou appuyer sur VOLUME +/–
restaure aussi le son.
Enregistrement d'une source
Il est possible d'enregistrer n'importe quelle source reproduite à
travers l'ampli-tuner sur une platine cassette (ou un enregistreur de
MD) connecté au prises TAPE/MD et en même temps sur un
magnétoscope connecté aux prises VCR.
Pendant l'enregistrement, il est possible d'écouter la source sonore
choisie au niveau sonore souhaité sans affecter les niveaux sonores
de l'enregistrement.
Remarque:
Le niveau du volume de sortie, l’ajustement de la tonalité (voir page
10), l’accentuation des graves (voir page 10) et les modes DSP (voir
page 15) ne peuvent pas affecter l’enregistrement.
IMPORTANT:
Avant de commencer l'enregistrement, mettre hors service le mode
de lecture DVD MULTI.
Remarque:
Quand un seul jeu d’enceintes est connecté aux prises FRONT
SPEAKER 1 ou 2, ne pas mettre en service les deux paires
d’enceintes. Aucun son ne sortirait des enceintes avant.
9
Page 38

Atténuation du signal d’entrée
Renforcement des graves
Quand le niveau d’entrée de la source sonore est trop élevé, les sons
sont déformés. Si cela se produit, il faut atténuer le niveau du signal
d’entrée pour éviter la distorsion du son.
Sur le panneau avant UNIQUEMENT:
Appuyer sur INPUT ATT. de façon que le
témoin à côté de la touche s’allume.
• Chaque fois que la touche est pressée, le mode
Français
d’atténuation du signal d’entrée se met en
service et hors service.
Remarque:
Lorsque “DVDMULTI” est choisi comme source, cet effet est
uniquement appliqué aux signaux des canaux avant gauche et droit.
Ajustement de la balance de sortie des
enceintes avant
Si le son entendu par les enceintes avant droite et gauche est
déséquilibré, il est possible d'ajuster la balance de sortie des
enceintes.
Avant de commencer, se rappeler...
• Il y a un temps limite pour réaliser les étapes suivantes. Si le
réglage est annulé avant la fin, recommencer à partir de l’étape 1.
Sur le panneau avant UNIQUEMENT:
1. Appuyer sur ADJUST de façon
que MULTI CURSOR % / fi
fonctionnement pour ajuster le
son.
INPUT ATT .
ADJUST
Avec cette fonction de renforcement des graves, il est possible
d’accentuer le niveau des graves.
Avant de commencer, se rappeler...
• Il y a un temps limite pour réaliser les étapes suivantes. Si le
réglage est annulé avant la fin, recommencer à partir de l’étape 1.
Sur le panneau avant UNIQUEMENT:
1. Appuyer sur ADJUST de façon
ADJUST
que MULTI CURSOR % / fi
fonctionnement pour ajuster le
son.
2. Appuyer répétitivement sur
MULTI CURSOR
MULTI CURSOR % / fi jusqu’à
ce que “B–BOOST” apparaisse
sur l’affichage.
3. Appuyer sur MULTI CURSOR
MULTI CURSOR
@ / # pour mettre cette fonction
sur la position “ON” (en service)
ou “OFF” (hors service).
• Quand cette fonction est en service “ON”,
le témoin BASS BOOST s’allume sur le
panneau avant.
Remarque:
La fonction de renforcement des graves affecte uniquement le son
des enceintes avant.
Ajustement de la tonalité
2. Appuyer répétitivement sur
MULTI CURSOR % / fi jusqu’à
ce que “BALANCE” apparaisse
sur l’affichage.
3. Appuyer sur MULTI CURSOR
@ / # pour ajuster la balance.
• Appuyer sur @ diminue la sortie du canal
droit.
• Appuyer sur # diminue la sortie du canal
gauche.
MULTI CURSOR
MULTI CURSOR
Il est possible d’ajuster les aigus et les graves comme on le souhaite.
Avant de commencer, se rappeler...
• Il y a un temps limite pour réaliser les étapes suivantes. Si le
réglage est annulé avant la fin, recommencer à partir de l’étape 1.
Sur le panneau avant UNIQUEMENT:
1. Appuyer sur ADJUST de façon
ADJUST
que MULTI CURSOR % / fi
fonctionnement pour ajuster le
son.
2. Appuyer répétitivement sur
MULTI CURSOR
MULTI CURSOR % / fi jusqu’à
ce que “– BASS +” ou
“–TREBLE+” apparaisse sur
l’affichage.
• Choisir “– BASS +” pour ajuster le niveau des graves.
• Choisir “–TREBLE+” pour ajuster le niveau des aigus.
MULTI CURSOR
3. Appuyer sur MULTI CURSOR
@ / # pour ajuster le niveau des
graves ou des aigus à l’intérieur
d’une plage allant de –10 à +10.
• Chaque fois que la touche est pressée, le
niveau du son change de ±2 niveaux.
10
Page 39

Réglages de base
Certains des réglages suivants sont requis après la connexion et le positionnement de vos enceintes dans votre salle
d'écoute, tandis que les autres faciliteront l'utilisation de l'ampli-tuner.
MULTI CURSOR
Modification du nom de la source
Si un enregistreur de MD a été connecté aux prises TAPE/MD sur le
panneau arrière, changer le nom de la source qui apparaît sur
l’affichage quand l’enregistreur de MD est choisi comme source.
Sur le panneau avant UNIQUEMENT:
Pour changer le nom de la source de “TAPE” sur “MD”:
1. Appuyer sur TAPE/MD.
• S’assurer que “TAPE” apparaît sur l’affichage.
2. Maintenir pressé SOURCE NAME
(la même touche que TAPE/MD)
jusqu’à ce que “MD” apparaisse
TAPE/MD
SOURCE NAME
TAPE/MD
SOURCE NAME
sur l’affichage.
3. Appuyer sur MULTI CURSOR
@ / # pour choisir la taille de
l’enceinte centrale.
LARGE SMALL NO
LARGE: Choisir ce mode quand la taille de l'enceinte centrale
est la même que celle des enceintes avant.
SMALL: Choisir ce mode quand la taille de l'enceinte centrale
est inférieure à celle des enceintes avant.
NO: Choisir ce mode si l'on n'utilise pas d'enceinte
centrale.
Réglage des enceintes arrière
Enregistrer si des enceintes arrière sont connectées ou pas.
Français
Pour changer le nom de la source de “MD” sur “TAPE”, répéter
la même procédure (à l’étape 1, s’assurer que “MD” apparaisse sur
l’affichage).
Remarque:
Sans changer le nom de source, il est quand même possible d'utiliser
les appareils connectés. Cependant, il peut y avoir quelques
inconvénients.
– “TAPE” apparaît sur l'affichage quand l'enregistreur de MD est
choisi.
– Il n'est pas possible d'utiliser le système de commande à distance
COMPU LINK (voir page 21) pour commander l'enregistreur de
MD.
Réglage de l'enceinte centrale et des enceintes
arrières pour les modes DSP
Pour obtenir le meilleur son surround possible pour les modes DSP
(Digital Signal Processor) (voir page 15), il faut enregistrer
l’information concernant la disposition des enceintes après que
toutes les connexions soient terminées.
Réglage de l'enceinte centrale
Enregistrer la taille de l'enceinte centrale.
Avant de commencer, se rappeler...
• Il y a un temps limite pour réaliser les étapes suivantes. Si le
réglage est annulé avant la fin, recommencer à partir de l’étape 1.
Sur le panneau avant UNIQUEMENT:
1. Appuyer sur SETTING de façon
SETTING
que MULTI CURSOR % / fi
fonctionnement pour régler la
taille de l’enceinte centrale.
2. Appuyer répétitivement sur
MULTI CURSOR
MULTI CURSOR % / fi jusqu’à
ce que “CNTR SPK” (enceinte
centrale) apparaisse sur
l’affichage.
Avant de commencer, se rappeler...
• Il y a un temps limite pour réaliser les étapes suivantes. Si le
réglage est annulé avant la fin, recommencer à partir de l’étape 1.
Sur le panneau avant UNIQUEMENT:
1. Appuyer sur SETTING de façon
SETTING
que MULTI CURSOR % / fi
fonctionnement pour régler les
informations des enceintes
arrières.
2. Appuyer répétitivement sur
MULTI CURSOR
MULTI CURSOR % / fi jusqu’à
ce que “REAR SPK” (enceintes
arrière) apparaisse sur l’affichage.
3. Appuyer sur MULTI CURSOR
MULTI CURSOR
@ / # pour enregistrer si des
enceintes arrière sont connectées
ou non.
YES: Choisir ce mode si l'on utilise des enceintes arrière.
NO: Choisir ce mode si l'on n'utilise pas d'enceintes arrière.
Remarque:
Si l'on change les enceintes, il faut enregistrer de nouveau les
informations concernant les enceintes.
Réglage du temps de retard
Enregistrer temps de retard du son provenant des enceintes arrière par
rapport au son provenant des enceintes av ant.
Avant de commencer, se rappeler...
• Il y a un temps limite pour réaliser les étapes suivantes. Si le
réglage est annulé avant la fin, recommencer à partir de l’étape 1.
• Il est possible d’ajuster le temps de délai uniquement après avoir
connecté des enceintes arrière et réglé “REAR SPK” sur “YES”.
(Voir ci-dessus.)
• Le réglage du temps de retard n’est valide que pour
“PROLOGIC”. (Voir page 15.)
11
Page 40

Sur le panneau avant:
ONE TOUCH OPERATION
2010 30 40 50 60 70 80
(Canceled)
0
1. Appuyer sur SETTING de façon
que MULTI CURSOR % / fi
fonctionnement pour régler le
temps de délai.
2. Appuyer répétitivement sur
MULTI CURSOR % / fi jusqu’à
ce que “–DELAY +” apparaisse sur
Français
l’affichage.
3. Appuyer sur MULTI CURSOR
@ / # pour choisir le temps de
retard approprié.
DELAY 1
DELAY 3
DELAY 2
SETTING
MULTI CURSOR
MULTI CURSOR
Pour mémoriser les réglages sonores
1. Appuyer sur ONE TOUCH OPERATION.
Le témoin ONE TOUCH OPERATION s'allume, puis les
réglages précédemment mémorisés sont rappelés.
ONE TOUCH
OPERATION
Sur la télécommandeSur le panneau avant
2. Ajustez le son en utilisant les fonctions décrites cià gauche.
Les nouveaux réglages sont mémorisés.
Pour rappeler les réglages sonores
Quand le témoin ONE TOUCH OPERATION est allumé, les
réglages de la source choisie actuellement sont rappelés quand la
source est choisie.
DELAY 1: Choisissez ce mode quand la distance à vos
enceintes arrière est plus grande que celle à vos
enceintes avant.
DELAY 2: Choisissez ce mode quand la distance à vos
enceintes arrière est à peu près la même que celle à
vos enceintes avant.
DELAY 3: Choisissez ce mode quand la distance à vos
enceintes arrière est plus petite que celle à vos
enceintes avant.
A partir de la télécommande:
1. Appuyer sur SOUND CONTROL.
2. Appuyer répétitivement sur SURROUND jusqu’à ce que
“PROLOGIC” apparaisse sur l’affichage.
3. Appuyer répétitivement sur DELAY jusqu’à ce que le temps de
retard approprié apparaisse sur l’affichage.
Mémorisation des ajustements et des
réglages de base — fonctionnement
monotouche
Le fonctionnement monotouche de JVC est utilisé pour attribuer et
mémoriser différents réglages sonores pour chaque source différente.
En utilisant cette fonction, il n'est pas nécessaire de changer les
réglages chaque fois que la source est changée. Les réglages
mémorisés pour la source choisie sont automatiquement rappelés.
Les choses suivantes peuvent être mémorisées pour chaque source:
• Niveau de volume (voir page 9)
• Atténuateur d’entrée (voir page 10)
• Balance (voir page 10)
• Accentuation des graves (voir page 10)
• Ajustement de la tonalité (voir page 10)
• Modes DSP
– Réglages des modes 3D-PHONIC (voir page 17)
– Réglages des modes DAP (voir page 17)
– Réglages des modes Surround (voir page 18)
• Réglages du mode de lecture DVD MULTI (voir page 20)
Pour annuler le fonctionnement monotouche
Appuyer sur ONE TOUCH OPERATION de façon que le témoin
s'éteigne.
(Même si le fonctionnement monotouche est annulé, les effets
sonores rappelés restent actifs.)
Remarques:
• Si la source est FM ou AM, il est possible d'attribuer un réglage
différent pour chaque bande.
• Les modes DSP et le mode de lecture DVD MULTI ne peuvent pas
être utilisés en même temps.
Utilisation de la minuterie d'arrêt
En utilisant la minuterie d'arrêt, il est possible de s'endormir en musique
tout en sachant que l'ampli-tuner se mettra automatiquement hors
tension plutôt que fonctionner toute la nuit.
A partir de la télécommande UNIQUEMENT:
Appuyer répétitivement sur SLEEP.
L’indicateur SLEEP s’allume sur l’affichage et
l’heure de mise hors tension change comme suit
(en minutes):
(Annulé)
Quand l'heure d'arrêt arrive
L'ampli-tuner se met automatiquement hors tension.
Pour vérifier ou changer la durée restante avant
la mise hors tension
Appuyer une fois sur SLEEP.
La durée restante jusqu'à la mise hors tension apparaît en minutes.
• Pour changer la durée restante, appuyer répétitivement sur SLEEP.
Pour annuler la minuterie d'arrêt
Appuyer répétitivement sur SLEEP jusqu'à ce que “0.” apparaisse
sur l'affichage. (L'indicateur SLEEP s'éteint.)
Mettre l'appareil hors tension annule aussi la minuterie d'arrêt.
SLEEP
12
Page 41

Réception d'émissions de radio
CH-
_ _
Vous pouvez parcourir toutes les stations ou utiliser la fonction de préréglage pour aller directement à une station
particulière.
Accord manuel d’une station
Utilisation de l'accord par préréglage
Sur le panneau avant UNIQUEMENT:
1. Appuyer sur FM ou AM.
La dernière station de la bande choisie est
accordée.
• MULTI CURSOR % / fi / @ / # peuvent
être maintenant utilisées pour commander
le tuner.
2. Appuyer répétitivement sur
FM
AM
MULTI CURSOR
MULTI CURSOR % / fi jusqu’à
ce que “–TUNING+” apparaisse
sur l’affichage.
3. Appuyer sur MULTI CURSOR
MULTI CURSOR
@ / # jusqu’à ce que la fréquence
souhaitée soit trouvée.
• Appuyer sur @ diminue la fréquence.
• Appuyer sur # augmente la fréquence.
Remarques:
• Si MULTI CURSOR @ / # sont maintenues pressées à l’étape 3, la
fréquence continue de changer jusqu’à qu’une station soit
accordée.
• Quand une station de signal suffisamment fort est accordée,
l'indicateur TUNED s'allume sur l'affichage.
Quand un programme stéréo est reçu, l'indicateur STEREO
s'allume aussi.
Une fois qu'une station est affectée à un numéro de canal, la station
peut être accordée rapidement. Il est possible de prérégler un
maximum de 30 stations FM et 15 stations AM.
Pour mémoriser les stations préréglées
Avant de commencer, se rappeler...
• Il y a un temps limite pour réaliser les étapes suivantes. Si le
réglage est annulé avant la fin, recommencer à partir de l’étape 1.
Sur le panneau avant UNIQUEMENT:
1. Accorder la station que l'on souhaite prérégler
(voir “Accord manuel d'une station”).
Si l'on souhaite mémoriser le mode de réception FM pour cette
station, choisir le mode de réception FM souhaité. Voir
“Sélection du mode de réception FM” à la page 14.
2. Appuyer sur MEMORY.
“CH-” apparaît et la position de numéro de
canal clignote sur l'affichage pendant
environ 5 secondes.
3. Appuyer sur MULTI CURSOR
MEMORY
MULTI CURSOR
@ / # pour choisir un numéro de
canal pendant que la position du
numéro de canal clignote.
Remarque:
Il est possible d'utiliser les touches numériques de la
télécommande pour choisir le numéro de préréglage. Lors de
l'utilisation des touches numériques, s'assurer qu'elles sont
actives pour le tuner et non pas pour le lecteur CD ou une autre
source. (Voir page 22.)
Français
4. Appuyer de nouveau sur MEMORY
pendant que le numéro du canal
MEMORY
choisi clignote sur l'affichage.
Le numéro du canal choisi s'arrête de clignoter.
La station est attribuée au numéro de canal choisi.
5. Répétez les étapes 1 à 4 jusqu’à ce que toutes les
stations souhaitées soient mémorisées.
Pour effacer une station préréglée
Enregistrer une nouvelle station sur un numéro utilisé, efface la
station précédente.
13
Page 42

Pour accorder une station préréglée
Sur le panneau avant:
1. Appuyer sur FM ou AM.
La dernière station de la bande choisie est
accordée.
• MULTI CURSOR % / fi / @ / # peuvent
être maintenant utilisées pour commander
le tuner.
2. Appuyer répétitivement sur
Français
MULTI CURSOR % / fi jusqu’à
ce que “–PRESET+” apparaisse
sur l’affichage.
3. Appuyer sur MULTI CURSOR
@ / # pour choisir un canal
préréglé.
• Appuyer sur @ diminue le numéro du
canal préréglé.
• Appuyer sur # augmente le numéro du
canal préréglé.
A partir de la télécommande:
1. Appuyer sur FM/AM.
La dernière station est accordée.
• Chaque fois que la touche est pressée, la
bande alterne entre FM et AM.
2. Appuyer sur les touches
numériques pour choisir un
numéro de canal préréglé.
• Pour le canal numéro 5, appuyer sur 5.
• Pour le canal numéro 15, appuyer sur
+10 puis sur 5.
• Pour le canal numéro 20, appuyer sur
+10 puis sur 10.
• Pour le canal numéro 30, appuyer sur
+10, sur +10, puis sur 10.
EFFECT
7/P
MULTI CURSOR
MULTI CURSOR
FM/AM
5
FM
AM
TESTDELAY
5
– CENTER +
54
– REAR•L +
5
– REAR•R +
10
SURROUND
321
6
98
+10
5
MENU
Sélection du mode de réception FM
Quand une émission FM stéréo est difficile à
recevoir ou parasitée
Il est possible de changer le mode de réception FM pendant la
réception d’une station FM.
Sur le panneau avant UNIQUEMENT:
1. Appuyer sur FM.
La dernière station de la bande choisie est
accordée.
• MULTI CURSOR % / fi / @ / # peuvent
être maintenant utilisées pour commander
le tuner.
2. Appuyer répétitivement sur
MULTI CURSOR % / fi jusqu’à
ce que “FM MODE” apparaisse
sur l’affichage.
3. Appuyer sur MULTI CURSOR
@ / # pour commuter la réception
FM sur “FM MONO” ou “FM
AUTO”.
ENT
FM
MULTI CURSOR
MULTI CURSOR
Remarque:
Lors de l'utilisation des touches numériques de la télécommande,
s'assurer qu'elles sont actives pour le tuner et non pas pour le lecteur
CD ou une autre source. (Voir page 22.)
14
FM MONO: La réception est améliorée même si l'effet stéréo
est perdu. Dans ce mode du bruit est entendu lors de
l'accord entre les stations.
L'indicateur MUTE AUTO s'éteint sur l'affichage.
FM AUTO: Quand un programme est diffusé en stéréo, il est
entendu en stéréo; quand il est diffusé en monaural, il
est entendu en monaural. Ce mode permet aussi de
supprimer le bruit statique entre les stations.
L'indicateur MUTE AUTO s'allume sur l'affichage.
Page 43

Utilisation des modes DSP
DOLBY SURROUND
DOLBY SURROUND
Le processeur surround intégré offre trois types de mode DSP (Digital Signal Processor) — le mode 3D-PHONIC, le
mode DAP (Digital Acoustic Processor) et le mode surround (Dolby Pro Logic et JVC Theater Surround).
Modes 3D-PHONIC
Le mode 3D-PHONIC donne un effet proche de l’effet surround
quand il est reproduit à travers un décodeur Dolby Surround, qui est
largement utilisé pour reproduire les sons avec une impression de
mouvement comme ceux que l’on entend dans une salle de cinéma.
Le mode 3D-PHONIC est le résultat de la technologie de
localisation sonore développé par JVC pendant de nombreuses
années. Ce mode peut être choisi quand deux enceintes avant
sont connectées à cet ampli-tuner (avec ou sans enceintes
centrale/arrière).
Il est possible de choisir 3D ACTION ou 3D THEATER.
3D ACTION: Convient pour les films d’action et de guerre — où
l’action est rapide et explosive.
3D THEA TER: Reproduit le champ sonore d’un grand cinéma.
Modes surround
Il est possible d’utiliser deux types de mode surround avec cet
ampli-tuner.
• Dolby Surround
Le Dolby Surround a été mis au point pour reproduire chez soi les
éléments importants de l’acoustique surround.
Pour reproduire la bande son de supports vidéo portant la marque
* qui contiennent les informations codées que l’on
trouve dans les films Dolby Stéréo, l’ampli-tuner possède le Dolby
Surround.
Il y a deux types de Dolby Surround — “Pro Logic” et “3 Stereo”.
“Pro Logic” peut être utilisé quand des enceintes avant et des
enceintes arrière sont connectées à cet amplificateur (avec ou
sans enceinte centrale). Tandis que “3 Stereo” peut être utilisé
quand les enceintes arrière ne sont pas connectées (l’enceinte
centrale doit être connectée).
• Theater Surround de JVC
Afin de reproduire un champ sonore plus réaliste dans la pièce
d’écoute lors de la reproduction de supports vidéo portant la marque
, le Theater Surround de JVC a été conçu pour
rendre les voix plus claires et pour créer une réelle impression “d’y
être”.
Ce mode peut être utilisé quand des enceintes avant et des
enceintes arrière sont connectées (avec ou sans enceinte
centrale).
Français
Modes DAP
Le son entendu dans une salle de concert ou dans un club est
constitué de sons directs et de sons indirects — réflexions premières
et réflexions arrières. Les sons directs atteignent directement
l’auditeur sans aucune réflexion. Tandis que les sons indirects sont
retardés par la distance du plafond et des murs. Ces sons directs et
indirects sont les éléments les plus importants des effets acoustiques.
Le mode DAP peut recréer ces éléments importants et donner une
réelle impression “d’y être”. Ce mode peut être utilisé quand des
enceintes avant sont connectées à cet ampli-tuner (avec ou sans
enceintes centrale/arrière).
Il est possible de choisir l’un des modes suivants.
DANCE CLUB:Rend les battements graves palpitants.
LIVE CLUB: Donne l’impression d’un club de musique à
plafond bas.
HALL: Rend les voix claires et donne l’impression d’une
salle de concert.
PAVILION: Donne l’impression spacieuse d’un pavillon à
plafond haut.
Réflexions
Réflexions
premières
arrière
Remarques:
• Les modes DSP n'ont aucun effet sur les sources monaurales.
• Les modes DSP ne peuvent pas être utilisés pour l'enregistrement.
• Quand “DVDMULTI” est choisi comme source de lecture, il n'est
pas possible de choisir ou d'ajuster les modes DSP.
IMPORTANT:
Avant l'enregistrement, mettre le mode de lecture DVD MULTI hors
service.
Pour le mode de lecture DVD MULTI, voir
pages 20.
Sons directs
*
Fabriqué sous licence de Dolby Laboratories Licensing
Corporation. DOLBY, le symbole double-D et PRO LOGIC sont des
marques de Dolby Laboratories Licensing Corporation.
15
Page 44

Modes DSP disponibles en fonction de la disposition des enceintes
Les modes DSP disponibles varient en fonction du nombre d’enceintes utilisées avec cet ampli-tuner.
S’assurer que les informations des enceintes ont été réglées correctement (voir page 11).
Français
Enceinte
avant
Enceinte
avant
Disposition des enceintes
Téléviseur
Téléviseur
Enceinte centrale
Enceinte
avant
Enceinte
avant
Modes DSP disponibles
Chaque fois que la touche SURROUND est pressée, les modes
DSP changent comme suit:
• 3D THEATER
• DANCE C (DANCE CLUB)
• LIVE C (LIVE CLUB)
• HALL
• PAVILION
• 3D ACTION
• OFF (Le mode DSP est annulé.)
Chaque fois que la touche SURROUND est pressée, les modes
DSP changent comme suit:
• 3 STEREO
• 3D THEATER
• DANCE C (DANCE CLUB)
• LIVE C (LIVE CLUB)
• HALL
• PAVILION
• 3D ACTION
• OFF (Le mode DSP est annulé.)
Enceinte
avant
Enceinte
arrière
Enceinte
avant
Enceinte
arrière
Téléviseur
Téléviseur
Enceinte centrale
Enceinte
avant
Enceinte
arrière
Enceinte
avant
Enceinte
arrière
Chaque fois que la touche SURROUND est pressée, les modes
DSP changent comme suit:
• PRO LOGIC
• THEATER
• DANCE C (DANCE CLUB)
• LIVE C (LIVE CLUB)
• HALL
• PAVILION
• 3D ACTION
• OFF (Le mode DSP est annulé.)
Chaque fois que la touche SURROUND est pressée, les modes
DSP changent comme suit:
• PRO LOGIC
• THEATER
• DANCE C (DANCE CLUB)
• LIVE C (LIVE CLUB)
• HALL
• PAVILION
• 3D ACTION
• OFF (Le mode DSP est annulé.)
16
Page 45

Ajustement des modes 3D-PHONIC
Ajustement des modes DAP
Avant de commencer, se rappeler...
• S’assurer que les informations sur les enceintes ont été réglées
correctement (voir page 11).
• Il y a un temps limite pour réaliser les étapes suivantes. Si le
réglage est annulé avant la fin, recommencer à partir de l’étape 1.
Sur le panneau avant:
1. Appuyer répétitivement sur
SURROUND
SURROUND jusqu’à ce que
“3DACTION” ou “3DTHEATR”
apparaisse sur l’affichage.
Les indicateurs 3D-PHONIC et PRO LOGIC s’allument aussi
sur l’affichage.
2. Appuyer sur ADJUST de façon que
ADJUST
MULTI CURSOR % / fi / @ / #
fonctionnent pour le réglage du
surround.
3. Appuyer répétitivement sur les
MULTI CURSOR
touches de commande du curseur
% / fi jusqu’à ce que “–EFFECT+”
apparaisse sur l’affichage.
4. Appuyer sur MULTI CURSOR
MULTI CURSOR
@ / # pour choisir le niveau
d’effet souhaité.
• Chaque fois que la touche est pressée, le
niveau d’effet change comme suit:
EFFECT 1 EFFECT 2
EFFECT 5
Plus le numéro est élevé, plus l’effet du mode 3D-PHONIC
devient fort.
A partir de la télécommande:
1. Appuyer sur SOUND CONTROL.
Les touches numériques sont actives pour
l’ajustement du son.
2. Appuyer répétitivement sur
SURROUND jusqu’à ce que
EFFECT 3
EFFECT 4
SOUND
CONTROL
SURROUND
3
“3DACTION” ou “3DTHEATR”
apparaisse sur l’affichage.
Les indicateurs 3D-PHONIC et PRO LOGIC s’allument aussi
sur l’affichage.
3. Appuyer sur EFFECT pour
choisir le niveau d’effet souhaité.
• Chaque fois que la touche est pressée, le
niveau d’effet change comme suit:
EFFECT 1 EFFECT 2
EFFECT 5
Plus le numéro est élevé, plus l’effet du mode 3D-PHONIC
devient fort.
EFFECT 3
EFFECT 4
EFFECT
4
5
Avant de commencer, se rappeler...
• S’assurer que les informations sur les enceintes ont été réglées
correctement (voir page 11).
• Il y a un temps limite pour réaliser les étapes suivantes. Si le
réglage est annulé avant la fin, recommencer à partir de l’étape 1.
• Il est uniquement possible d’ajuster le niveau de sortie des
enceintes arrière quand des enceintes arrière sont connectées et
que “REAR SPK” est réglé sur “YES”. Voir page 11.
Sur le panneau avant:
1. Appuyer répétitivement sur
SURROUND
SURROUND jusqu’à ce que le
mode DAP — DANCE CLUB,
LIVE CLUB, HALL ou
PAVILION — apparaisse sur
l’affichage.
L’indicateur DAP s’allume aussi sur l’affichage.
2. Appuyer sur ADJUST de façon que
ADJUST
MULTI CURSOR % / fi / @ / #
fonctionnent pour le réglage du
DSP.
3. Appuyer répétitivement sur
MULTI CURSOR
MULTI CURSOR % / fi jusqu’à
ce que “– REAR + ” apparaisse
sur l’affichage.
4. Appuyer sur MULTI CURSOR
MULTI CURSOR
@ / # pour ajuster le niveau de
sortie des enceintes arrière (de –10
à +10).
Remarque:
Il n’est pas possible d’ajuster le niveau de sortie de l’enceinte
droite et gauche séparément.
5. Appuyer répétitivement sur
MULTI CURSOR
MULTI CURSOR % / fi jusqu’à
ce que “–EFFECT+” apparaisse
sur l’affichage.
6. Appuyer sur MULTI CURSOR
MULTI CURSOR
@ / # pour choisir le niveau
d’effet souhaité.
• Chaque fois que la touche est pressée, le
niveau d’effet change comme suit:
EFFECT 1 EFFECT 2
EFFECT 5
Plus le numéro est élevé, plus l’effet du mode DAP choisi
devient fort.
EFFECT 3
EFFECT 4
Français
17
Page 46

A partir de la télécommande:
1. Appuyer sur SOUND CONTROL.
Les touches numériques sont actives pour
l’ajustement du son.
2. Appuyer répétitivement sur
SURROUND jusqu’à ce que le
mode DAP — DANCE CLUB,
LIVE CLUB, HALL ou
Français
PAVILION — apparaisse sur
l’affichage.
L’indicateur DAP s’allume aussi sur l’affichage.
SOUND
CONTROL
SURROUND
3
3. Appuyer sur TEST pour vérifier la
TEST
balance de sortie des enceintes.
“TEST” commence à clignoter sur
l’affichage et une tonalité de test sort des
enceintes dans l’ordre suivant:
TEST TONE L
Enceinte avant
(Left front speaker)
gauche
TEST TONE S
(Rear speaker)
Remarque:
Il est possible d’ajuster les niveaux de sortie des enceintes sans
sortir la tonalité de test.
TEST TONE C
Enceinte centrale
(Center speaker)
TEST TONE R
Enceinte avant droiteEnceintes arrière
(Right front speaker)
5
2
3. Appuyer sur REAR•L – / + pour
ajuster le niveau de sortie des
– REAR•L +
5
98
enceintes arrière.
• Appuyer sur REAR•L – diminue le niveau
de sortie jusqu’à –10 dB maximum.
• Appuyer sur REAR•L + augmente le
niveau de sortie jusqu’à +10 dB maximum.
Remarque:
Il n’est pas possible d’ajuster le niveau de sortie de l’enceinte
droite et gauche séparément.
4. Appuyer sur EFFECT pour
choisir le niveau d’effet souhaité.
• Chaque fois que la touche est pressée, le
niveau d’effet change comme suit:
EFFECT 1 EFFECT 2
EFFECT 5
Plus le numéro est élevé, plus l’effet du mode DAP choisi
devient fort.
EFFECT 4
EFFECT
4
EFFECT 3
5
Ajustement des modes surround — Dolby
Surround et JVC Theater Surround
Avant de commencer, se rappeler ...
• S’assurer que les informations sur les enceintes ont été réglées
correctement (voir page 11).
• Il y a un temps limite pour réaliser les étapes suivantes. Si le
réglage est annulé avant la fin, recommencer à partir de l’étape 1.
• Le niveau d’effet peut être ajusté uniquement quand JVC Theater
Surround est choisi.
• Le niveau de sortie des enceintes arrière et de l’enceinte centrale
peut être ajusté uniquement quand des enceintes arrière et/ou une
enceinte centrale sont connectées et si “REAR SPK” et/ou “CNTR
SPK” ont été correctement réglés. Voir page 11.
4. Appuyer répétitivement sur
CENTER – / + pour ajuster le
– CENTER +
5
niveau de sortie de l’enceinte
centrale (de –10 à +10).
5. Appuyer sur REAR•L – / + pour
ajuster le niveau de sortie des
– REAR•L +
5
enceintes arrière (de –10 à +10).
Remarques:
• Il n’est pas possible d’ajuster le niveau de sortie de l’enceinte
droite et gauche séparément.
• Il n’est pas possible d’utiliser les touches REAR•R – / + pour
ajuster le niveau de sortie des enceintes.
6. Appuyer de nouveau sur TEST
TEST
pour arrêter la tonalité de test.
7. UNIQUEMENT POUR
“THEATER”:
Appuyer sur EFFET pour choisir
EFFECT
le niveau d’effet souhaité.
• Chaque fois que la touche est pressée, le
niveau d’effet change comme suit:
EFFECT 1 EFFECT 2
EFFECT 5
Plus le numéro est élevé, plus l’effet du mode JVC Theater
Surround devient fort.
EFFECT 3
EFFECT 4
6
5
98
5
2
5
4
A partir de la télécommande:
1. Appuyer sur SOUND CONTROL.
Les touches numériques sont actives pour
l’ajustement du son.
2. Appuyer répétitivement sur
SURROUND jusqu’à ce que le
SOUND
CONTROL
SURROUND
3
mode — “PROLOGIC”, “3
STEREO” ou “THEATER” —
apparaît sur l’affichage.
• Pour “PROLOGIC” et “3 STEREO”, l’indicateur PRO LOGIC
s’allume sur l’affichage.
• Pour “THEATER”, les indicateurs PRO LOGIC et DAP
s’allument sur l’affichage.
18
Page 47

Sur le panneau avant:
Il est aussi possible d’utiliser les touches sur le panneau avant pour
ajuster les modes surround. Cependant, aucune tonalité de test n’est
disponible lors de l’utilisation des touches sur le panneau avant.
Réaliser alors l’ajustement tout en écoutant le son d’une source
sonore.
1. Appuyer répétitivement sur
SURROUND
SURROUND jusqu’à ce que le
mode — “PROLOGIC”, “3
STEREO” ou “THEATER” —
apparaît sur l’affichage.
L’indicateur PRO LOGIC s’allume aussi sur l’affichage.
8. UNIQUEMENT POUR
“THEATER”:
Appuyer sur MULTI CURSOR
@ / # pour choisir le niveau
d’effet souhaité.
• Chaque fois que la touche est pressée, le
niveau d’effet change comme suit:
EFFECT 1 EFFECT 2
EFFECT 5
Plus le numéro est élevé, plus l’effet du mode JVC Theater
Surround devient fort.
EFFECT 3
EFFECT 4
MULTI CURSOR
Français
2. Appuyer sur ADJUST de façon que
MULTI CURSOR % / fi / @ / #
fonctionnent pour le réglage du
DSP.
3. Appuyer répétitivement sur
MULTI CURSOR % / fi jusqu’à
ce que “–CENTER+” apparaisse
sur l’affichage.
4. Appuyer sur MULTI CURSOR
@ / # pour ajuster le niveau de
sortie de l’enceinte centrale (de
–10 à +10).
5. Appuyer répétitivement sur
MULTI CURSOR % / fi jusqu’à
ce que “– REAR +” apparaisse sur
l’affichage.
6. Appuyer sur MULTI CURSOR
@ / # pour ajuster le niveau de
sortie des enceintes arrière (de –10
à +10).
Remarque:
Il n’est pas possible d’ajuster le niveau de sortie de l’enceinte
droite et gauche séparément.
7. UNIQUEMENT POUR
“THEATER”:
Appuyer répétitivement sur
MULTI CURSOR % / fi jusqu’à
ce que “–EFFECT+” apparaisse
sur l’affichage.
ADJUST
MULTI CURSOR
MULTI CURSOR
MULTI CURSOR
MULTI CURSOR
MULTI CURSOR
Mise en service des modes DSP
Une fois que les ajustements des modes DSP sont terminés, il est
possible d’utiliser les mêmes ajustement chaque fois que l’on
souhaite utiliser ces modes.
Sur le panneau avant:
1. Appuyer répétitivement sur
SURROUND
SURROUND jusqu’à ce que le
mode DSP souhaité apparaisse sur
l’affichage.
• Chaque fois que la touche est pressée, le mode DSP change.
(Voir page 16 pour plus de détails.)
2. Choisir et reproduire une source sonore.
• Pour profiter du 3D-PHONIC, du Dolby Surround et du JVC
Theater Surround, reproduire une source qui a été traitée avec
le Dolby Surround et qui porte la marque
DOLBY SURROUND
Pour annuler le mode DSP
Appuyer répétitivement sur SURROUND jusqu’à ce que “OFF”
apparaisse sur l’affichage.
A partir de la télécommande:
1. Appuyer sur SOUND CONTROL.
Les touches numériques sont actives pour
l’ajustement du son.
2. Appuyer répétitivement sur
SURROUND jusqu’à ce que le
SOUND
CONTROL
SURROUND
3
mode DSP souhaité apparaisse sur
l’affichage.
• Chaque fois que la touche est pressée, le
mode DSP change. (Voir la page 16 pour
plus de détails.)
3. Choisir et reproduire une source sonore.
• Pour profiter du 3D-PHONIC, du Dolby Surround et du JVC
Theater Surround, reproduire une source qui a été traitée avec
le Dolby Surround et qui porte la marque
DOLBY SURROUND
.
.
Pour annuler le mode DSP
Appuyer répétitivement sur SURROUND jusqu’à ce que “OFF”
apparaisse sur l’affichage, à l’étape 2 ci-dessus.
19
Page 48

Utilisation du mode de lecture DVD MULTI
Cet ampli-tuner possède un mode de lecture DVD MULTI pour reproduire le mode de sortie analogique discrète des
lecteurs DVD. Avant de reproduire un DVD, se référer aussi au monde d’emploi fourni avec le lecteur DVD.
Mise en service du mode de lecture DVD
MULTI
Il est possible d’ajuster le mode de lecture DVD MULTI lors de la
lecture d’un DVD en utilisant le mode de sortie analogique discrète
sur le lecteur DVD.
Une fois que les ajustements sont terminés, l’ampli-tuner les
mémorise jusqu’à la prochaine modification.
Français
Avant de commencer, se rappeler...
• S’assurer que les informations sur les enceintes ont été réglées
correctement (voir page 11).
• Il y a un temps limite pour réaliser les étapes suivantes. Si le
réglage est annulé avant la fin, recommencer à partir de l’étape 1.
• Le niveau de sortie des enceintes arrière et de l’enceinte centrale
peut être ajusté uniquement quand des enceintes arrière et/ou une
enceinte centrale sont connectées et si “REAR SPK” et/ou “CNTR
SPK” ont été correctement réglés. Voir page 11.
Sur le panneau avant:
1. Appuyer sur DVD MULTI .
Remarque:
Quand “DVDMULTI” est choisi comme source de reproduction, le
mode DSP est annulé temporairement et la touche SURROUND
ne fonctionne pas.
2. Choisir le mode de sortie analogique discrète sur
le lecteur DVD et commencer la lecture d’un
DVD.
• Se référer au mode d’emploi fourni avec le lecteur DVD.
S’il est nécessaire de réaliser des ajustements
supplémentaires, passer aux étapes suivantes.
3. Appuyer sur ADJUST de façon que
MULTI CURSOR % / fi / @ / #
fonctionnent pour le réglage de la
lecture DVD MULTI.
4. Appuyer répétitivement sur
MULTI CURSOR % / fi jusqu’à
ce que “–CENTER+” apparaisse
sur l’affichage.
5. Appuyer sur MULTI CURSOR
@ / # pour ajuster le niveau de
sortie de l’enceinte centrale (de –
10 à +10).
6. Appuyer répétitivement sur
MULTI CURSOR % / fi jusqu’à
ce que “–REAR L+” apparaisse
sur l’affichage.
DVD MULTI
ADJUST
MULTI CURSOR
MULTI CURSOR
MULTI CURSOR
7. Appuyer sur MULTI CURSOR
MULTI CURSOR
@ / # pour ajuster le niveau de
sortie de l’enceinte arrière gauche
(de –10 à +10).
8. Appuyer répétitivement sur
MULTI CURSOR
MULTI CURSOR % / fi jusqu’à
ce que “–REAR R+” apparaisse
sur l’affichage.
9. Appuyer sur MULTI CURSOR
MULTI CURSOR
@ / # pour ajuster le niveau de
sortie de l’enceinte arrière droite
(de –10 à +10).
A partir de la télécommande:
1. Appuyer sur DVD MULTI.
Remarque:
Quand “DVDMULTI” est choisi comme source de reproduction, le
mode DSP est annulé temporairement et la touche SURROUND
ne fonctionne pas.
DVD MULTI
2. Choisir le mode de sortie analogique discrète sur
le lecteur DVD et commencer la lecture d’un
DVD.
• Se référer au mode d’emploi fourni avec le lecteur DVD.
S’il est nécessaire de réaliser des ajustements
supplémentaires, passer aux étapes suivantes.
3. Appuyer sur SOUND CONTROL.
Les touches numériques sont actives pour
l’ajustement du son.
4. Appuyer sur CENTER – / + pour
ajuster le niveau de sortie de
SOUND
CONTROL
– CENTER +
5
6
l’enceinte centrale.
• Appuyer sur CENTER – diminue le niveau
de sortie jusqu’à –10 dB maximum.
• Appuyer sur CENTER + augmente le
niveau de sortie jusqu’à + 10 dB maximum.
5. Appuyer sur REAR•L – / + pour
ajuster le niveau de sortie de
– REAR•L +
5
98
l’enceinte arrière gauche.
• Appuyer sur REAR•L – diminue le niveau
de sortie jusqu’à –10 dB maximum.
• Appuyer sur REAR•L + augmente le
niveau de sortie jusqu’à +10 dB maximum.
6. Appuyer sur REAR•R – / + pour
ajuster le niveau de sortie de
– REAR•R +
10
+10
l’enceinte arrière droite.
• Appuyer sur REAR•R – diminue le niveau
de sortie jusqu’à –10 dB maximum.
• Appuyer sur REAR•R + augmente le
niveau de sortie jusqu’à +10 dB maximum.
5
20
Page 49

Système de commande à distance COMPU LINK
Le système de commande à distance COMPU LINK vous permet de commander les appareils audio JVC à travers le
capteur de télécommande de l'ampli-tuner.
Pour utiliser ce système de commande à distance, il faut connecter
les appareils audio JVC par les prises COMPU LINK-3
(SYNCHRO) (voir ci-dessous) en plus des connexions utilisant les
câbles munis de fiches cinch (voir page 5).
• S'assurer que les cordons d'alimentation de ces appareils sont
débranchés avant de les connecter. Brancher les cordons
d'alimentation uniquement après que toutes les connexions sont
terminées.
Lecteur CD
Platine cassette
ou
Enregistreur de MD
COMPU LINK – 3
(SYNCHRO)
Tourne-disque
Pour connecter les appareils, utilisez des câbles avec mini-fiche
monaurale.
Remarques:
• Si un appareil audio a deux prises COMPU LINK-3 (SYNCHRO),
on peut utiliser n'importe laquelle. S'il n'a qu'une prise COMPU
LINK-3 (SYNCHRO), la connecter de façon qu'elle soit le dernier
élément de la chaîne d'appareils. (Par exemple, le tourne-disque ou
le lecteur CD sur l’illustration ci-dessus.)
• Pour commander la platine cassette ou l'enregistreur de MD en
utilisant le système de commande à distance COMPU LINK, régler
le nom de source correctement. (Voir page 11.)
• Se référer aussi aux modes d'emploi fournis avec les appareils
audio.
Ce système de commande à distance permet d'utiliser les quatre fonctions
décrites ci-dessous.
Télécommande à travers le capteur de télécommande
de l'ampli-tuner
Il est possible de commander les appareils audio connectés à travers
le capteur de télécommande de l'ampli-tuner en utilisant cette
télécommande. Diriger la télécommande directement sur le capteur
de télécommande de l'ampli-tuner. Pour les détails, voir pages 22 et
23.
Mise sous et hors tension (Attente) automatique:
possible uniquement avec la connexion COMPU LINK-3
Le lecteur CD et la platine cassette (ou l'enregistreur de MD) se
mettent sous et hors tension (attente) en même temps que l'amplituner.
Quand l'ampli-tuner est mis sous tension, le dernier appareil choisi,
le lecteur CD ou la platine cassette (ou enregistreur MD), se met
automatiquement sous tension.
Quand l'ampli-tuner est mis hors tension, le lecteur CD et la platine
cassette (ou l'enregistreur de MD) se mettent hors tension (attente).
Enregistrement synchronisé
L'enregistrement synchronisé signifie que la platine cassette (ou
l'enregistreur de MD) commence l'enregistrement dès qu'un CD ou
un disque commence à être reproduit.
Pour utiliser l'enregistrement synchronisé, utiliser les étapes
suivantes:
1. Mettre une cassette dans la platine cassette (ou un
MD dans l'enregistreur de MD) et un CD dans le
lecteur CD (ou un disque sur le tourne-disque).
2. Appuyer en même temps sur la touche
d'enregistrement (
¶¶
¶) et sur la touche de pause (
¶¶
88
8)
88
sur la platine cassette (ou l'enregistreur de MD).
La platine cassette (ou l'enregistreur de MD) entre en mode de
pause à l'enregistrement.
Si la touche d'enregistrement (¶) et de pause (8) ne sont pas
pressées en même temps, l'enregistrement synchronisé ne
fonctionnera pas.
3. Appuyer sur la touche de lecture (
33
3) sur le
33
lecteur CD ou sur le tourne-disque.
La source change sur l'ampli-tuner et dès que la lecture
commence, la platine cassette (ou l'enregistreur de MD)
commence l'enregistrement. Quand la lecture est terminée, la
platine cassette (ou l'enregistreur de MD) retourne en mode
pause à l'enregistrement, puis s'arrête 4 secondes plus tard.
Remarques:
• Pendant l'enregistrement synchronisé, la source choisie ne peut
être changée.
• Si l'alimentation d'un des appareils est coupée pendant
l'enregistrement synchronisé, le système de commande à distance
COMPU LINK risque de ne pas fonctionner normalement. Dans ce
cas, il faut recommencer du début.
Français
Sélection automatique de source
Quand la touche de reproduction (
sa télécommande est pressée, l'ampli-tuner se met automatiquement
sous tension et change la source sur cet appareil. Inversement, si une
nouvelle source est choisie sur l'ampli-tuner ou sur la
télécommande, l'appareil choisi commence la reproduction
immédiatement.
Dans les deux cas, la source précédemment choisie continue sa
reproduction pendant quelques secondes.
33
3) d'un appareil connecté ou de
33
21
Page 50

Commande d'appareils audio/vidéo JVC
Vous pouvez commander des appareils audio et vidéo JVC avec la télécommande de cet ampli-tuner car les signaux de
commande des appareils JVC sont préréglés dans la télécommande.
IMPORTANT:
Pour commander les appareils audio JVC en utilisant cette
télécommande:
• Il faut connecter les appareils audio JVC par les prises COMPU
LINK-3 (SYNCHRO) (voir page 21) en plus de connexions avec
les câbles munis de fiches cinch (voir page 5).
• Diriger la télécommande directement sur le capteur de
télécommande de l'ampli-tuner.
• Si l'on utilise les touches du panneau avant pour choisir une
Français
source, la télécommande ne peut pas commander cette source.
Pour commander une source avec la télécommande, la source doit
être choisie avec les touches de la télécommande.
• Se référer aussi aux modes d'emploi fournis avec les appareils.
POWER
TV
CD
TAPE/MD
FM/AM
VCR
DVD
DVD MULTI
PHONO
ONE TOUCH
OPERATION
MUTING
SLEEP
8
RM-SR558U REMOTE CONTROL
EFFECT
SOUND
CONTROL
CD-DISC
TV/VIDEO
4
1
7/P
5
+
VOLUME
–
VCR
TESTDELAY
5
– CENTER +
54
– REAR•L +
5
– REAR•R +
10
TV VOL.
–
TV CH
–
£
7
AUDIO
SURROUND
321
6
98
MENU
+10
+
+
+
VCR CH
–
5
ENT
4
1
Section de commande sonore (Amplificateur)
Après appuyer sur SOUND CONTROL, il est possible de réaliser
les opérations suivantes:
SURROUND: Changer les modes DSP.
CENTER – / +: Ajuster le niveau de sortie de l'enceinte centrale
pour les modes Surround/lecture DVD MULTI.
REAR•L – / +: Ajuster le niveau de sortie des enceintes arrière
gauche/droite pour les modes DSP.
Ajuster le niveau de sortie de l'enceinte arrière
gauche pour le mode de lecture DVD MULTI.
REAR•R – / +: Ajuster le niveau de sortie de l'enceinte arrière
droite pour le mode de lecture DVD MULTI.
DELAY: Choisir le temps de retard du son des enceintes arrière.
(Fonctionne uniquement quand “PROLOGIC” est
choisi.)
EFFECT: Choisir le niveau d'effet pour les modes DSP.
TEST: Mettre en/hors service la sortie de la tonalité de
test pour le mode surround.
Remarque:
Après avoir ajusté le son, appuyer sur la touche de sélection de source
correspondante ou sur CD-DISC pour commander la source souhaitée
en utilisant les touches numériques. Sinon, les touches numérique ne
peuvent pas utilisées pour commander la source souhaitée.
Platine cassette
Après appuyer sur TAPE/MD, il est possible de réaliser les choses
suivantes sur une platine cassette:
3: Démarrer la lecture.
11
1: Avancer rapidement la bande de la droite vers la
11
gauche.
¡¡
¡: Avancer rapidement la bande de la gauche vers la
¡¡
droite.
7: Arrêter les opérations.
8: Arrêter momentanément la lecture. Pour la
reprendre, appuyer sur 3.
Remarque:
Pour commander une platine cassette ou un enregistreur de MD en
utilisant le système de commande à distance COMPU LINK, régler le
nom de source correctement. (Voir page 11.)
Tuner
Après appuyer sur FM/AM, il est possible de réaliser les opérations
suivantes:
FM/AM: Alterner entre FM est AM.
1 – 10, +10: Choisir un numéro de canal directement.
Pour le canal numéro 5, appuyer sur 5.
Pour le canal numéro 15, appuyer sur +10, puis sur 5.
Pour le canal numéro 20, appuyer sur +10, puis sur
10.
22
Lecteur CD
Après appuyer sur CD, il est possible de réaliser les opérations
suivantes sur un lecteur CD:
3: Démarrer la lecture.
44
4: Retourner au début de la plage actuelle (ou précédente).
44
¢¢
¢: Sauter au début de la plage suivante.
¢¢
7: Arrêter la lecture.
8: Arrêter momentanément la lecture. Pour la reprendre,
appuyer sur 3.
1 – 10, +10: Choisir un numéro de plage directement.
Pour la plage numéro 5, appuyer sur 5.
Pour la plage numéro 15, appuyer sur +10, puis sur 5.
Pour la plage numéro 20, appuyer sur +10, puis sur 10.
Page 51

Lecteur-changeur de CD
Après appuyer sur CD-DISC, il est possible de réaliser les
opérations suivantes sur un lecteur-changeur de CD:
3: Démarrer la lecture.
44
4: Retourner au début de la plage actuelle (ou
44
précédente).
¢¢
¢: Sauter au début de la plage suivante.
¢¢
7: Arrêter la lecture.
8: Arrêter momentanément la lecture. Pour la
reprendre, appuyer sur 3.
1 – 6, 7/P: Choisir le numéro d'un disque inséré dans le lecteur-
changeur de CD.
Après appuyer sur CD, il est possible de réaliser les opérations
suivantes sur un lecteur-changeur de CD:
1 – 10, +10: Choisir un numéro de plage directement.
Pour la plage numéro 5, appuyer sur 5.
Pour la plage numéro 15, appuyer sur +10, puis sur 5.
Pour la plage numéro 20, appuyer sur +10, puis sur 10.
Si le changeur de CD à une capacité de 200 disques (sauf pour le
XL-MC100 et XL-MC301),
il est possible de réaliser les opérations suivantes à l'aide des touches
numériques après avoir appuyé sur CD.
• La touche 10 peut être utilisée comme touche 0.
1. Choisir un unméro de disque.
2. Choisir ensuite un numéro de plage (entrer toujours 2
chiffres).
3. Démarrer la lecture.
EXEMPLES:
• Sélection du disque numéro 3, plage numéro 2 et démarrage de
la lecture.
Appuyez sur 3, sur 10 et 2, puis sur 3.
• Sélection du disque numéro 10, plage numéro 5 et démarrage de
la lecture.
Appuyez sur 1 et 10, sur 10 et 5, puis sur 3.
• Sélection du numéro de disque 105, plage numéro 12, et
démarrage de la lecture.
Appuyez sur 1, 10 et 5, sur 1 et 2 puis sur 3.
IIMPORTANT:
Pour commander des appareils vidéo JVC en utilisant cette
télécommande:
• Diriger la télécommande directement sur le capteur de
télécommande du magnétoscope, lecteur de DVD ou téléviseur et
non pas sur l'ampli-tuner.
• Certains magnétoscopes JVC peuvent accepter deux types de
signal de télécommande — le signal “A” et “B”. Avant d'utiliser
cette télécommande, s'assurer que le code de télécommande du
magnétoscope connecté aux prises VCR est réglé sur le code “A”.
Magnétoscope
Il est toujours possible de réaliser les opérations suivantes:
VCR POWER: Mettre sous et hors tension le magnétoscope.
VCR CH +/–: Changer les canaux sur le magnétoscope.
Après appuyer sur VCR, il est possible de réaliser les opérations
suivantes sur le magnétoscope:
3: Démarrer la lecture.
1: Rebobiner une bande.
¡: Avancer rapidement une bande.
7: Arrêter les opérations.
8: Arrêter momentanément la lecture. Pour la
reprendre, appuyer sur 3.
Lecteur de DVD
Après appuyer sur DVD ou DVD MULTI, il est possible de réaliser
les opérations suivantes sur un lecteur de DVD:
3: Démarrer la lecture.
11
1: Retourner au début de la plage actuelle (ou
11
précédente).
¢: Sauter au début de la plage suivante.
7: Arrêter la lecture.
8: Arrêter momentanément la lecture. Pour la reprendre,
appuyer sur 3.
Après appuyer sur DVD ou DVD MULTI, ces touches peuvent
être utilisées pour commander le menu DVD.
TEST
5
2
Français
Enregistreur de MD
Après appuyer sur TAPE/MD, il est possible de réaliser les choses
suivantes sur un enregistreur de MD:
3: Démarrer la lecture.
4: Retourner au début de la plage actuelle (ou
précédente).
¢: Sauter au début de la plage suivante.
7: Arrêter la lecture.
8: Arrêter momentanément la lecture. Pour la reprendre,
appuyer sur 3.
Remarque:
Pour commander une platine cassette ou un enregistreur de MD en
utilisant le système de commande à distance COMPU LINK, régler le
nom de source correctement. (Voir page 11.)
EFFECT
5
7/P
Remarque:
Pour les opérations détaillées concernant le menu DVD, se référer
aux instructions fournies avec les disques ou le lecteur de DVD.
– CENTER +
54
– REAR•L +
5
– REAR•R +
10
6
98
MENU
+10
5
ENT
Téléviseur
Il est toujours possible de réaliser les opérations suivantes:
TV POWER: Mettre sous ou hors tension le téléviseur.
TV VOL. –/+: Ajuster le volume.
TV/VIDEO: Régler le mode d'entrée (sur TV ou VIDEO).
TV CH –/+: Changer les canaux.
23
Page 52

Guide de dépannage
Utilisez ce tableau pour vous aider à résoudre les problèmes de fonctionnement quotidiens. Si certains problèmes ne
peuvent pas être résolus, contacter un centre de réparation JVC.
PROBLEME
L'affichage ne s'allume pas.
Aucun son ne sort des enceintes.
Français
Le son sort seulement d'une enceinte.
Souffle ou ronflement continu pendant la
réception FM.
CAUSE POSSIBLE
Le cordon d’alimentation n’est pas
branché.
Les câbles de signal d'enceinte ne sont pas
connectés.
Les touches SPEAKERS 1 et 2 ne sont
pas positionnées correctement.
Une source incorrecte est choisie.
La mise en sourdine est en service.
Les câbles de signal d'enceinte ne sont pas
connectés correctement.
La balance est réglée sur un extrême.
Le signal est trop faible.
La station est trop éloignée.
Une antenne incorrecte est utilisée.
SOLUTION
Brancher le cordon d’alimentation sur une
prise secteur.
Vérifier le câblage des enceintes et
reconnecter si nécessaire.
Positionner les touches SPEAKERS 1 et 2
correctement.
Choisir la source correcte.
Appuyer sur MUTING pour annuler la mie en
sourdine.
Vérifier le câblage des enceintes et
reconnecter si nécessaire.
Ajuster la balance correctement (voir page 9).
Connecter une antenne FM extérieure ou
contacter le revendeur local.
Choisir une nouvelle station.
Vérifier avec le revendeur local pour s'assurer
que l'antenne est correcte.
Bruit de craquement occasionnel pendant
la réception FM.
Hurlement pendant la reproduction d'un
disque analogique.
“OVERLOAD” clignote sur l'affichage.
La télécommande ne fonctionne pas.
Les antennes ne sont pas connectées
correctement.
Bruit d'ignition provenant d'automobiles.
Le tourne-disque est trop près des
enceintes.
Les enceintes sont surchargées à cause
d'un volume élevé.
Les enceintes sont surchargées à cause
d'un court-circuit des prises d'enceinte.
Il y a un obstacle entre la télécommande
et le capteur de télécommande de l'amplituner.
Les piles sont faibles.
Vérifier les connexions.
Eloigner l'antenne du trafic automobile.
Eloigner les enceintes du tourne-disque.
Tourner MASTER VOLUME dans le sens
contraire des aiguilles d'une montre, trois ou
quatre fois, puis appuyer sur POWER sur le
panneau avant.
Si “OVERLOAD” ne disparaît pas,
débrancher le cordon d'alimentation, puis le
rebrancher de nouveau.
Appuyer sur POWER sur le panneau avant, puis
vérifier le câblage des enceintes.
Si “OVERLOAD” ne disparaît pas, débrancher
le cordon d'alimentation, puis le rebrancher.
Si le câblage d'enceinte n'est pas court-circuité,
contacter le revendeur local.
Retirer l'obstacle.
Remplacer les piles.
24
Page 53

Spécifications
Amplificateur
Puissance de sortie
En stéréo: 100 W par canal, min. RMS, entraîné sur
Pendant l'utilisation du surround:
Canaux avant: 100 W par canal, min. RMS, entraîné sur
Canal central: 100 W, min. RMS, entraîné sur 8 Ω à 1 kHz
Canaux arrière: 100 W par canal, min. RMS, entraîné sur
Distorsion harmonique totale (8 Ω, 1 kHz):
8 Ω, 40 Hz à 20 kHz avec moins de 0,8%
de distorsion harmonique totale.
8 Ω à 1 kHz avec moins de 0,8% de
distorsion harmonique totale.
avec moins de 0,8% de distorsion
harmonique totale.
8 Ω à 1 kHz avec moins de 0,8% de
distorsion harmonique totale
0,8%* avec une sortie de 100 W
(* Mesuré par le système d'analyse audio de
JVC)
Français
Audio
Sensibilité d'entrée audio/Impédance (1 kHz):
PHONO (MM): 2,7 mV/47 k Ω
CD, TAPE/MD, VCR, D VD:
220 mV/47 k Ω
Niveau de sortie audio:TAPE/MD, VCR: 220 mV
Rapport signal sur bruit (’66 IHF/’78 IHF):
PHONO: 70 dB/77 dB (à REC OUT)
CD, TAPE/MD, VCR, D VD:
87 dB/67 dB
Réponse en fréquence (8 Ω):
PHONO: 20 Hz à 20 kHz (±1 dB)
CD, TAPE/MD, VCR, D VD:
20 Hz à 20 kHz (±1 dB)
Egalisation phono RIAA:
±1,0 dB (20 Hz à 20 kHz)
Vidéo
Sensibilité d'entrée vidéo/Impédance:
VCR, DVD: 1V(c-c)/75 Ω
Niveau de sortie vidéo:
VCR, MONITOR OUT: 1V(c-c)/75 Ω
Synchronization: Négative
Rapport signal sur bruit: 45dB
25
Page 54

Français
Tuner FM (IHF)
Plage d'accord: 87,5 MHz à 108,0 MHz
Sensibilité utile: Monaural: 12,8 dBf (1,20 µV/75 Ω)
Sensibilité utile à 50 dB:
Monaural: 21,3 dBf (3,2 µV/75 Ω)
Stéréo: 41,3 dBf (31,5 µV/75 Ω)
Rapport signal sur bruit (IHF-A pondéré):
Monaural: 78 dB à 85 dBf
Stéréo: 73 dB à 85 dBf
Distorsion harmonique totale:
Monaural: 0,4% à 1 kHz
Stéréo: 0,6% à 1 kHz
Séparation stéréo à REC OUT: 35 dB à 1 kHz
Sélectivité de canal alterné:
45 dB: (±400 kHz)
Réponse en fréquence:
30 Hz à 15 kHz: (+0,5 dB, –3 dB)
Tuner AM
Plage d'accord: 530 kHz à 1710 kHz
Sensibilité utile: Antenne cadre 400 µV/m
Rapport signal sur bruit: 50 dB (100 mV/m)
Général
Alimentation: Secteur 120V , 60 Hz
Consommation: 290 W/390 VA (pendant le
fonctionnement)
2 W (en mode d'attente)
Dimensions (L x H x P): 435 mm x 146 mm x 403,5 mm
Masse: 10,2 kg (22,5 livres)
La conception et les spécifications sont sujettes à changement
sans notification.
3
/16 x 5 3/4 x 15 15/16 pouces)
(17
26
Page 55

VICTOR COMPANY OF JAPAN, LIMITED
EN, FR
0200HIMMDWJEIN
JVC
 Loading...