

Page 1
SERVICE MANUAL
CD RECEIVER
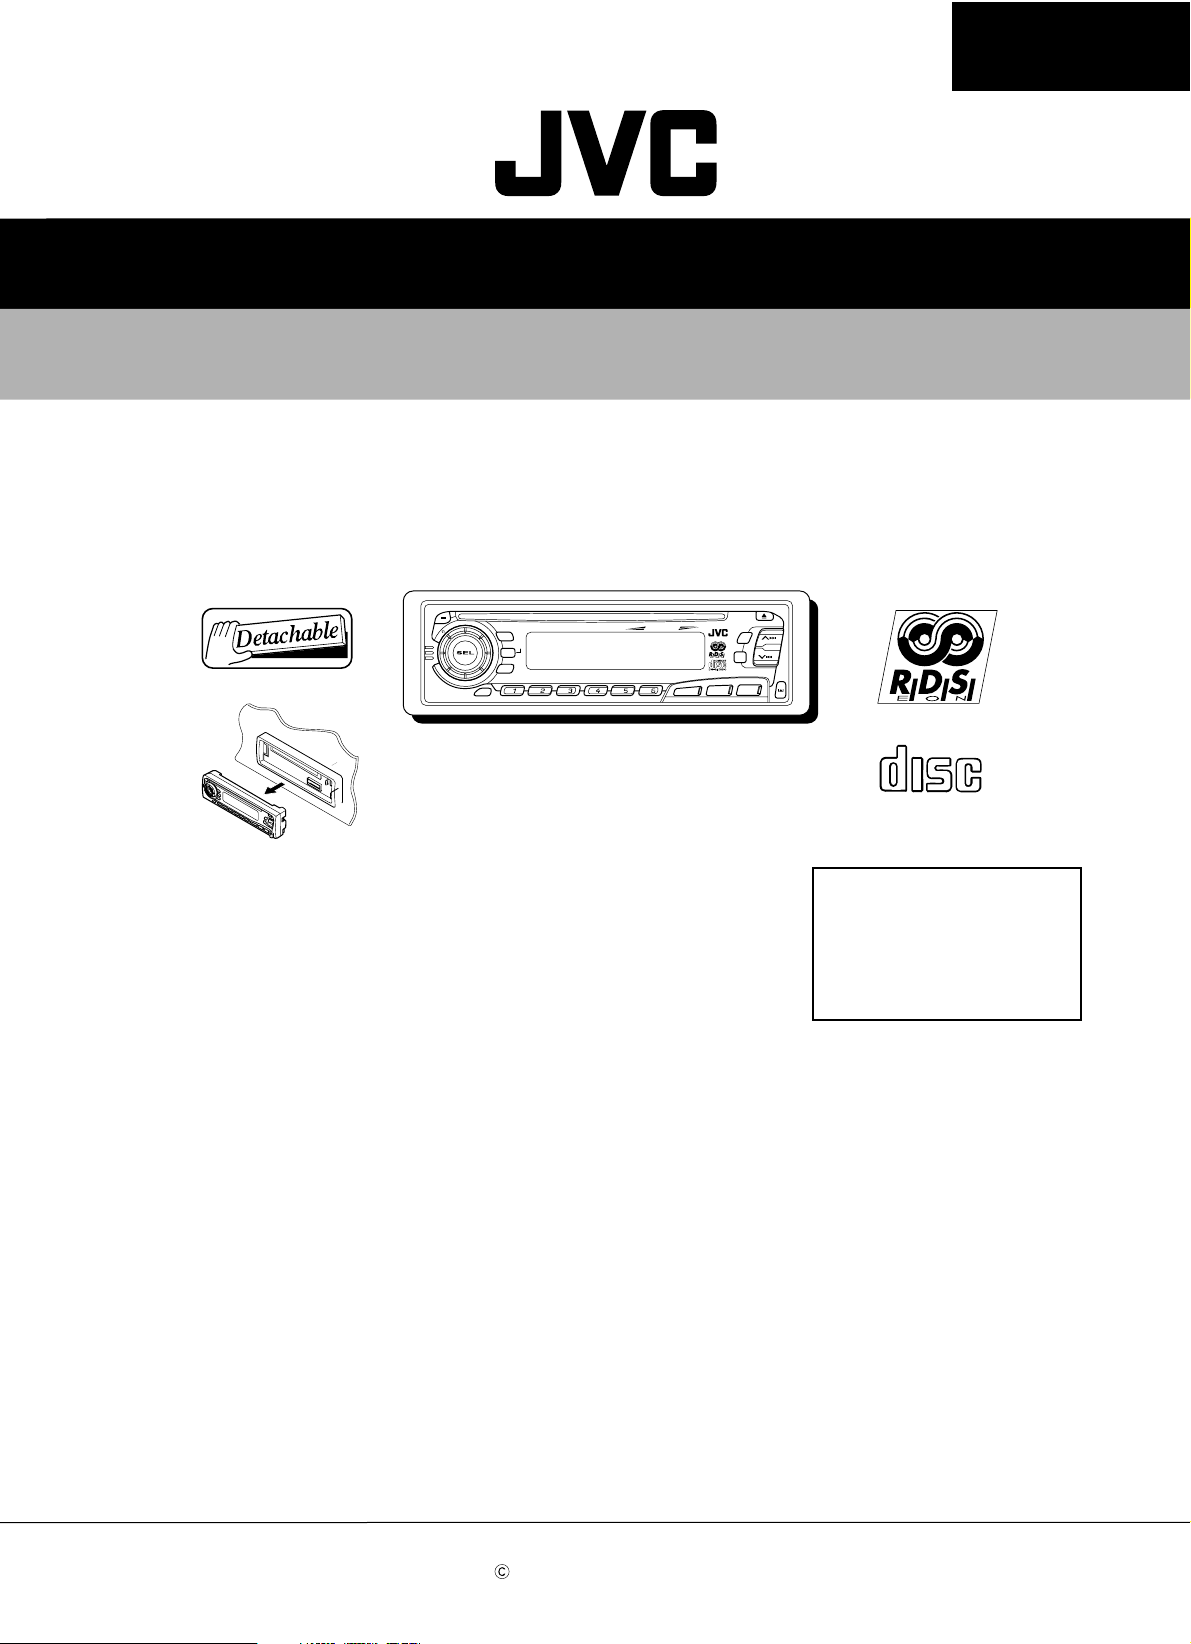
KD-S8R
KD-S8R
KD-S8R
COMPACT
DIGITAL AUDIO
Area Suffix
E ------ Continental Europe
EX ---- Central Europe
KD-S8R is a change model of KD-S777.
Additionally, please refer to KD-S777 (service manual issue No.49542)
because the service manual is a comparison table with KD-S777.
This service manual is printed on 100% recycled paper.
COPYRIGHT 2000 VICTOR COMPANY OF JAPAN, LTD.
No.49572
Sep. 2000
Page 2

KD-S8R
VICTOR COMPANY OF JAPAN, LIMITED
MOBILE ELECTRONICS DIVISION
PERSONAL & MOBILE NETWORK B.U. 10-1,1Chome,Ohwatari-machi,Maebashi-city,Japan
(No.49572)
Printed in Japan
200009(V)
Page 3
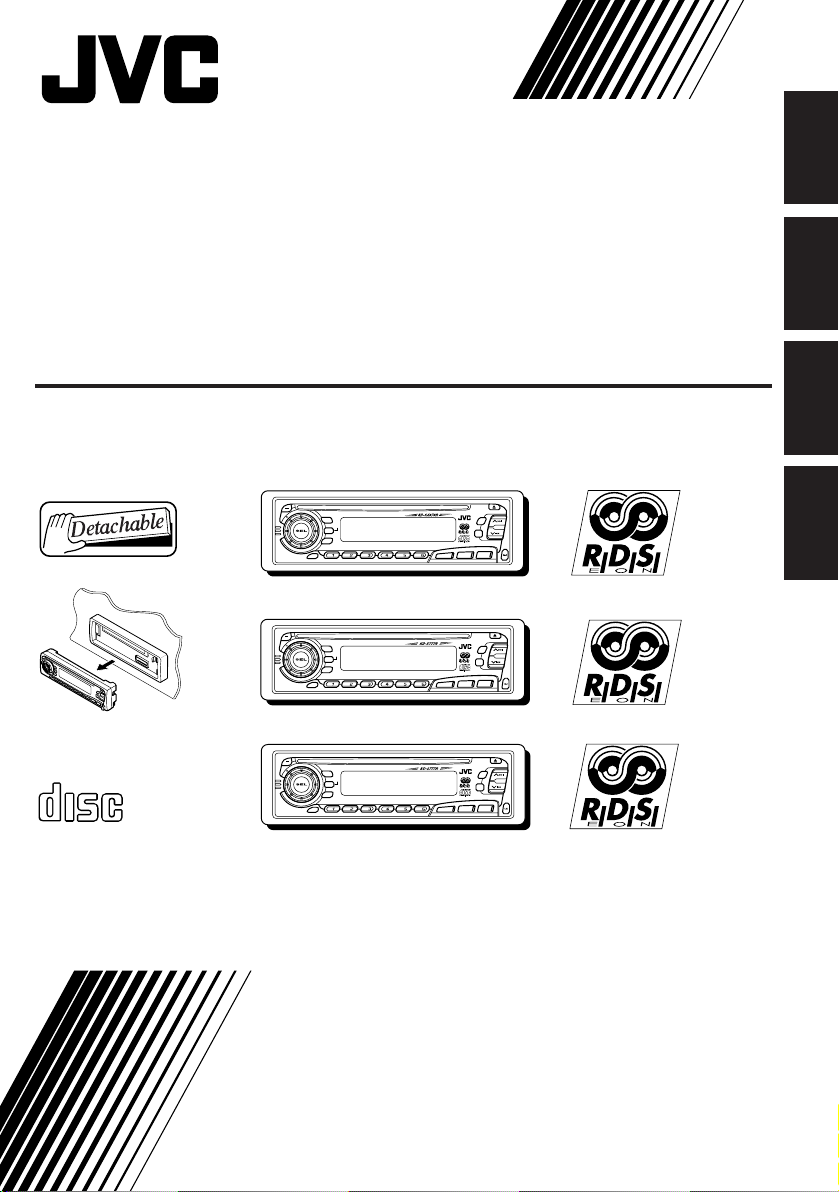
CD RECEIVER
CD-RECEIVER
RECEPTEUR CD
CD-RECEIVER
ENGLISH
DEUTSCH
KD-SX878R/KD-S777R/KD-S8R
KD-SX878R
T
AT
/
40Wx4
/I
DISP
RDS
TP
PTY
7 8 9 10 11 12
SCM
KD-S777R
T
T
A
/
40Wx4
/I
DISP
RDS
TP
PTY
7 8 9 10 11 12
SCM
KD-S8R
ATT
/
40Wx4
/I
DISP
RDS
COMPACT
TP
PTY
7 8 9 10 11 12
SCM
DIGITAL AUDIO
For installation and connections, refer to the separate manual.
Für den Einbau und die Anschlüsse siehe das eigenständige Handbuch.
Pour l’installation et les raccordements, se référer au manuel séparé.
Bijzonderheden over de installatie en aansluiting van het apparaat vindt u in de desbetreffende
handleiding.
INSTRUCTIONS
BEDIENUNGSANLEITUNG
MANUEL D’INSTRUCTIONS
GEBRUIKSAANWIJZING
MO
RND
5
SSM
∞
RPT
DAB
CD
CD
FM/AM
CD
-CH
MO
RND
SSM
RPT
CD
FM
AM
MO
RND
SSM
RPT
CD
FM
AM
FRANÇAIS
NEDERLANDS
FSUN3117-312
[E]
Page 4
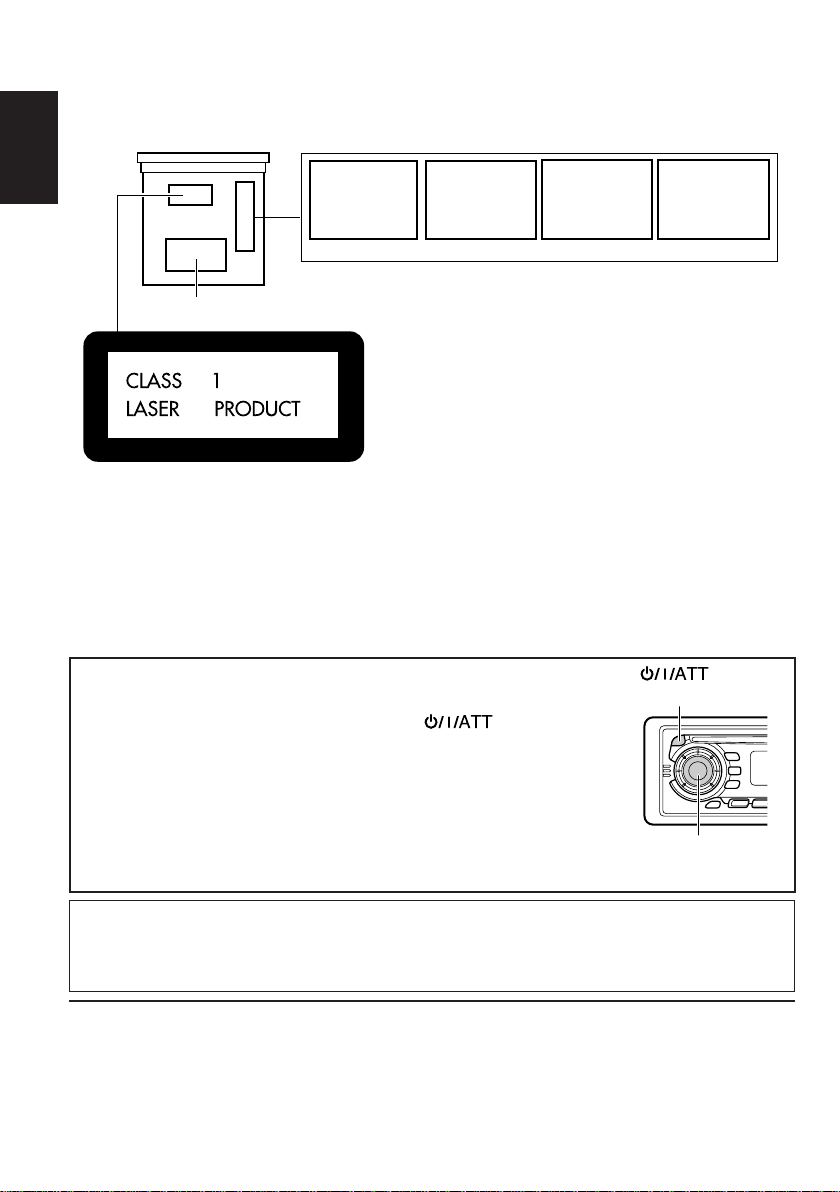
Position And Reproduction Of Labels
Bottom panel of the main unit
ENGLISH
DANGER: Invisible laser
radiation when open and
interlock failed or defeated.
AVOID DIRECT EXPOSURE
TOBEAM. (e)
ADVARSEL: Usynlig laserstråling ved åbning, når
sikkerhedsafbrydere er ude
af funkti on. Undgåudsættelse for stråling. (d)
VARNING: Osynlig laser-
strålning när denna del
är öppnad och spärren
urkopplad. Betrakta
strålen. (s)
VARO : Avattaessa ja suojalukitus ohitettaessa olet
är
alttiina näkymättömälle
ej
lasersäteilylle. Älä katso
säteeseen. (f)
Name/Rating plate
Caution:
This product contains a laser component
of higher laser class than Class 1.
PRODUCTS
Precautions:
1. CLASS 1 LASER PRODUCT
2. DANGER: Invisible laser radiation when open
and interlock failed or defeated. Avoid direct
exposure to beam.
3. CAUTION: Do not open the top cover. There are
no user-serviceable parts inside. Leave all
servicing to qualified service personnel.
4. CAUTION: This CD player uses invisible laser
radiation and is equipped with safety switches
to prevent radiation emission when unloading
CDs. It is dangerous to defeat the safety
switches.
5. CAUTION: Use of controls, adjustments or
performance of procedures other than those
specified herein may result in hazardous
radiation exposure.
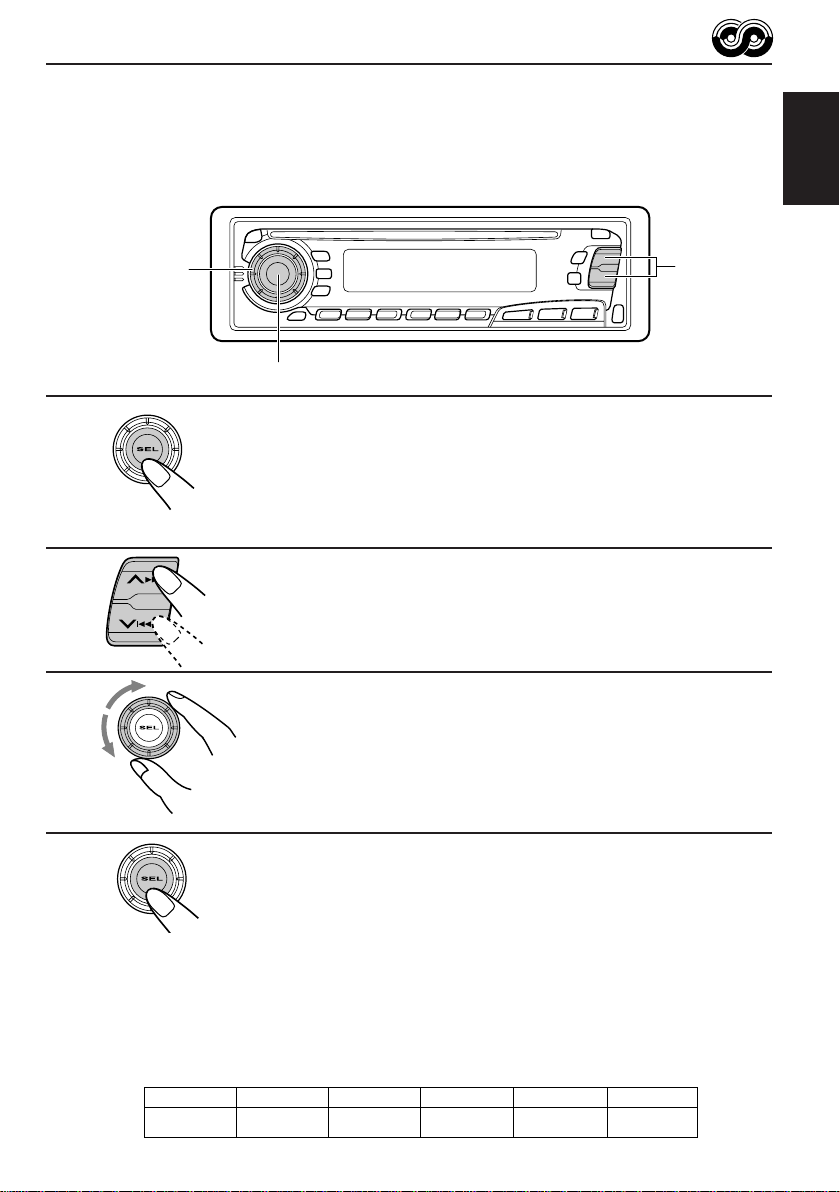
How to reset your unit
Press and hold both the SEL (Select) and (Standby/On/
ATT) buttons at the same time for several seconds.
This will reset the built-in microcomputer.
Notes:
• Your preset adjustments — such as preset channels or sound
adjustments — will also be erased.
• If a CD is in the unit, it will eject when you reset the unit. Pay
attention not to drop the CD.
IMPORTANT FOR LASER
(Standby/On/ATT)
SEL (Select)
Note:
For security reasons, a numbered ID card is provided with this unit, and the same ID number is
imprinted on the unit’s chassis. Keep the card in a safe place, as it will help the authorities to
identify your unit if stolen.
BEFORE USE
* For safety....
• Do not raise the volume level too much, as this
will block outside sounds, making driving
dangerous.
* Temperature inside the car....
If you have parked the car for a long time in hot
or cold weather, wait until the temperature in the
car becomes normal before operating the unit.
• Stop the car before performing any complicated
operations.
2
Page 5
Thank you for purchasing a JVC product. Please read all instructions carefully before operation, to
ensure your complete understanding and to obtain the best possible performance from the unit.
CONTENTS
How to reset your unit....................................................................2
BASIC OPERATIONS.................................................... 5
RADIO BASIC OPERATIONS .........................................6
Listening to the radio .....................................................................6
Storing stations in memory............................................................7
FM station automatic preset: SSM ...............................................7
Manual preset .............................................................................. 8
Tuning into a preset station ...........................................................9
Selecting FM reception sound .......................................................9
RDS OPERATIONS..................................................... 10
What you can do with RDS EON ................................................ 10
Tracing the same programme automatically
(Network-Tracking Reception) ....................................................10
Using Standby Reception .......................................................... 12
Selecting Your Favorite Programme for PTY Standby Reception.. 13
Searching Your Favorite Programme .......................................... 13
Other convenient RDS functions and adjustments....................16
Automatic selection of the station when using the number
buttons ....................................................................................... 16
Changing the display mode while listening to an FM station ..... 17
Setting the TA volume level ........................................................ 17
Automatic clock adjustment........................................................17
CD OPERATIONS....................................................... 18
Playing a CD ................................................................................. 18
Locating a track or a particular portion on a CD .....................19
Selecting CD playback modes......................................................20
Prohibiting CD ejection ............................................................... 21
ENGLISH
SOUND ADJUSTMENTS .............................................22
Adjusting the sound...................................................................... 22
Using the Sound Control Memory ..............................................23
Selecting and storing the sound modes ..................................... 23
Recalling the sound modes ........................................................24
Storing your own sound adjustments .........................................25
CONTINUED TO THE NEXT PAGE
3
Page 6
OTHER MAIN FUNCTIONS ......................................... 26
Setting the clock............................................................................26
Changing the general settings......................................................27
Basic Procedure ........................................................................ 27
Canceling Advanced SCM ......................................................... 28
ENGLISH
Selecting 24-hour or 12-hour clock ............................................ 29
Selecting the level display ......................................................... 29
Selecting the display mode while using the CD changer
(ONLY FOR KD-SX878R) ......................................................... 29
Selecting the telephone muting .................................................. 30
Selecting the external component to use
(ONLY FOR KD-SX878R) ......................................................... 30
Detaching the control panel .........................................................31
REMOTE OPERATIONS ............................................... 32
(With an optionally purchased remote controller)
(ONLY FOR KD-SX878R/KD-S777R)
Installing the battery ....................................................................32
Using the remote controller .........................................................33
CD CHANGER OPERATIONS ...................................... 34
(ONLY FOR KD-SX878R)
Playing CDs ...................................................................................34
Selecting CD playback modes......................................................36
EXTERNAL COMPONENT OPERATIONS ..................... 37
(ONLY FOR KD-SX878R)
DAB TUNER OPERATIONS ......................................... 38
(ONLY FOR KD-SX878R)
Tuning into an ensemble and one of the services ....................... 38
Storing DAB services in memory ................................................40
Tuning into a preset DAB service ................................................42
MAINTENANCE......................................................... 43
Handling CDs................................................................................43
TROUBLESHOOTING .................................................44
SPECIFICATIONS ....................................................... 45
4
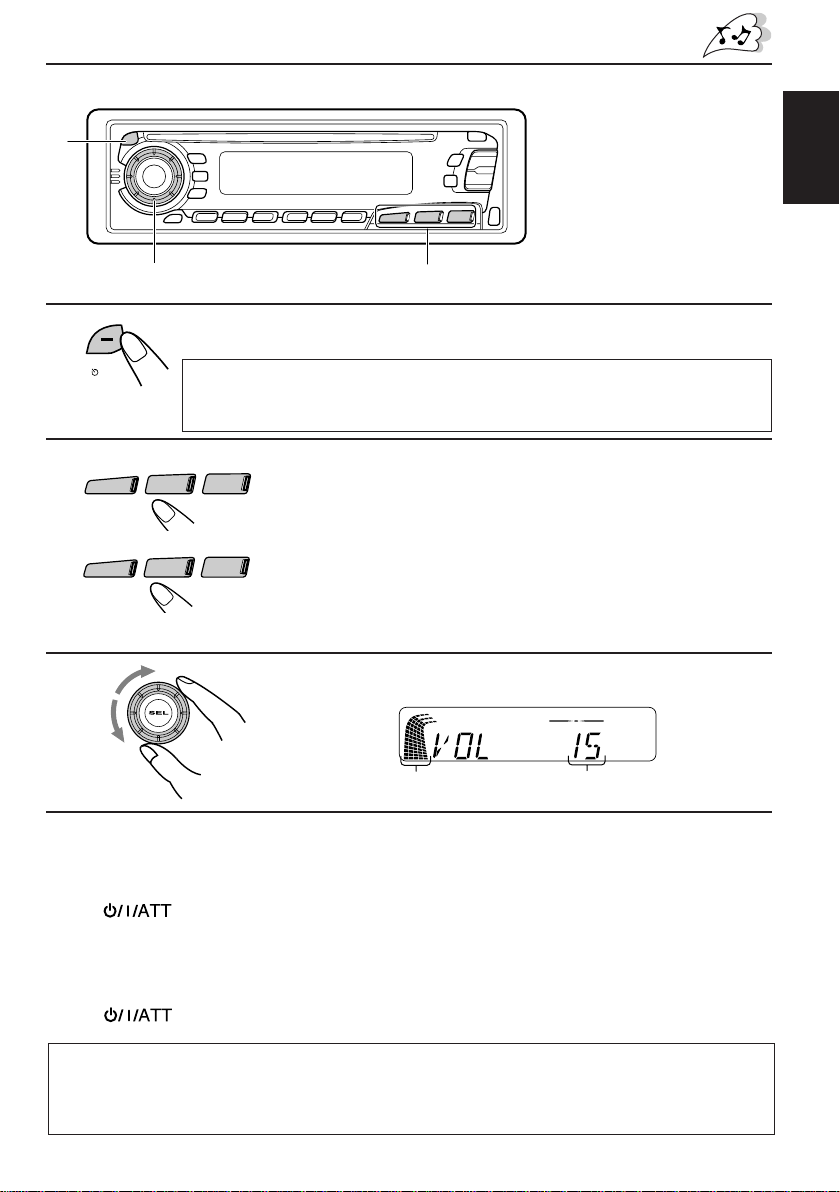
Page 7
1
BASIC OPERATIONS
1
ATT
/
/I
KD-SX878R
2
CD
-CH
KD-S777R/KD-S8R
AM
3
Note:
When you use this unit for the
first time, set the built-in clock
correctly. (See page 26.)
3
2
Turn on the power.
Note on One-Touch Operation:
When you select a source in step 2 below, the power automatically comes on.
You do not have to press this button to turn on the power.
FM/AM
FM
CD
CD
Select the source.
To operate the tuner, see pages 6 – 17.
To operate the CD player, see pages 18 – 21.
ONLY FOR KD-SX878R
To operate the CD changer, see pages 34 – 36.
To operate the external component, see page 37.
To operate the DAB tuner, see pages 38 – 42.
Adjust the volume.
ENGLISH
Volume level appears.Volume level indicator
4
Adjust the sound as you want (see pages 22 – 25).
To drop the volume in a moment
Press briefly while listening to any source. “AT T ” starts flashing on the display, and
the volume level will drop in a moment.
To resume the previous volume level, press the button briefly again.
To turn off the power
Press for more than 1 second.
CAUTION on Volume Setting
CDs produce very little noise compared with other sources. If the volume level is adjusted for the
tuner , for example, the speakers may be damaged by the sudden increase in the output level. Ther efor e,
lower the volume before playing a disc and adjust it as r equired during playback.
5
Page 8
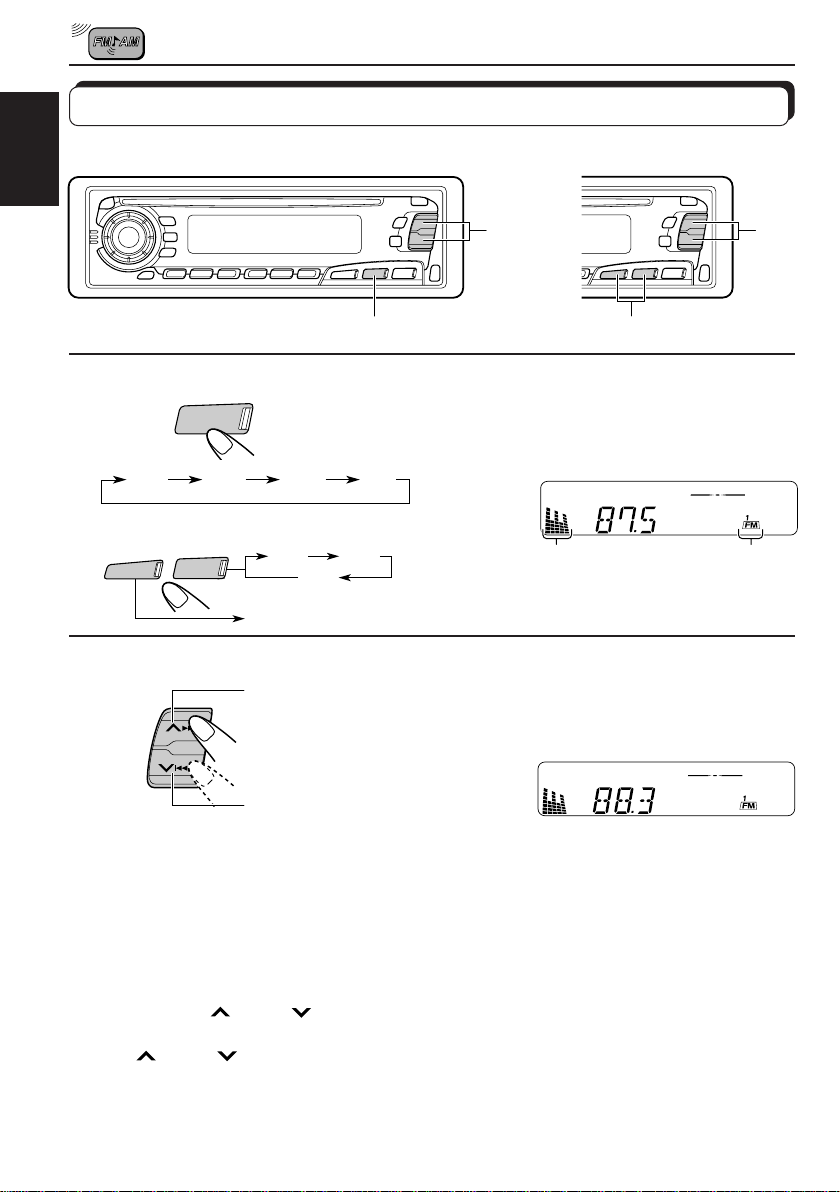
RADIO BASIC OPERATIONS
Listening to the radio
KD-SX878R
ENGLISH
KD-SX878R
1
KD-S777R/KD-S8R
2
1
FM/AM
FM1 FM2 FM3 AM
AM
FM
AM
To search stations
of higher
frequencies.
Select the band (FM1, FM2, FM3 or AM).
You can select any one of FM1, FM2, and FM3 to listen to an
FM station.
FM1
FM2
FM3
KD-S777R/KD-S8R
2
2
1
Audio (see page 29) or
volume level indicator
Selected band
appears.
Start searching a station.
When a station is received, searching stops.
To search stations
of lower
frequencies.
To stop searching before a station is received, press the same button you have pressed
for searching.
To tune in a particular frequency without searching
1 Select the band (FM or AM).
For KD-SX878R: Press FM/AM repeatedly.
For KD-S777R/KD-S8R: Press FM or AM.
2 Press and hold
Now you can manually change the frequency while “M” is flashing.
3 Press
• If you hold down the button, the frequency keeps changing (in 50 kHz intervals for FM and
9kHz intervals for AM–MW/LW) until you release the button.
6
¢ or 4 repeatedly until the frequency you want is reached.
¢ or 4 until “M” (for Manual) starts flashing on the display.
Page 9
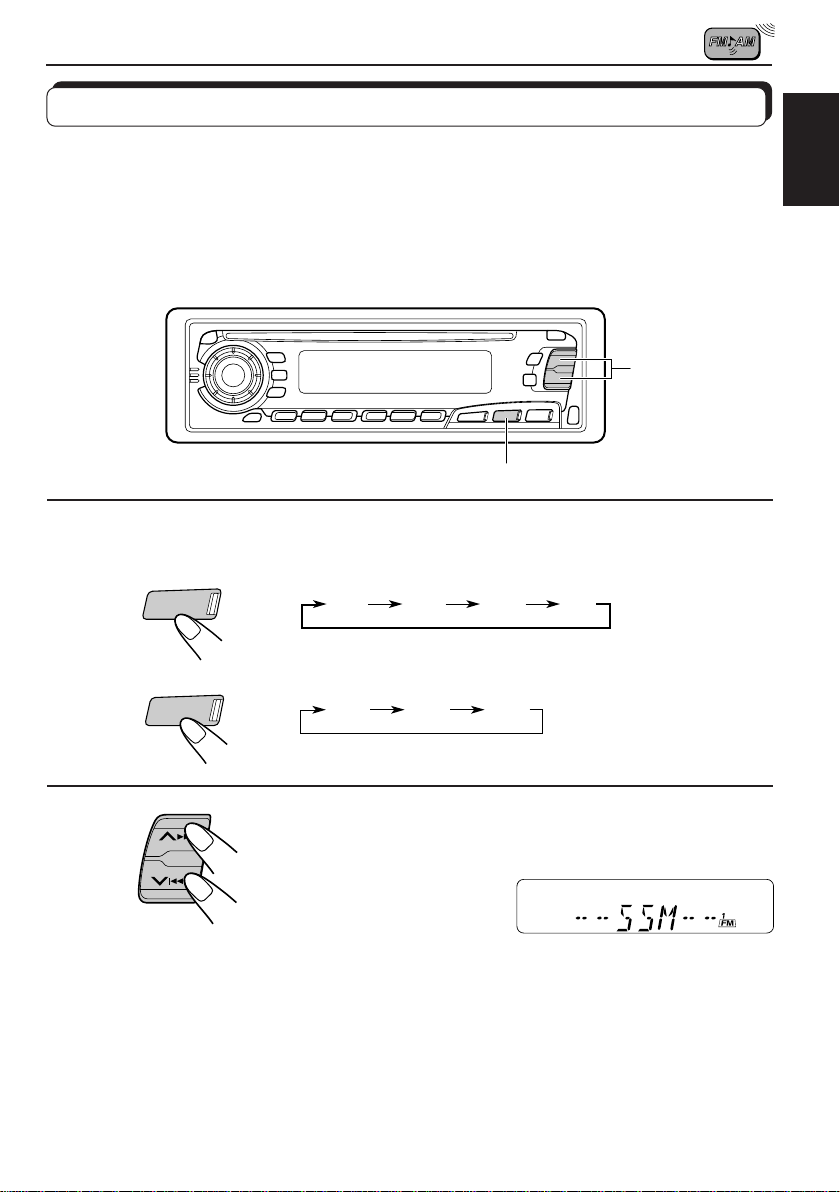
Storing stations in memory
You can use one of the following two methods to store broadcasting stations in memory.
• Automatic preset of FM stations: SSM (Strong-station Sequential Memory)
• Manual preset of both FM and AM stations
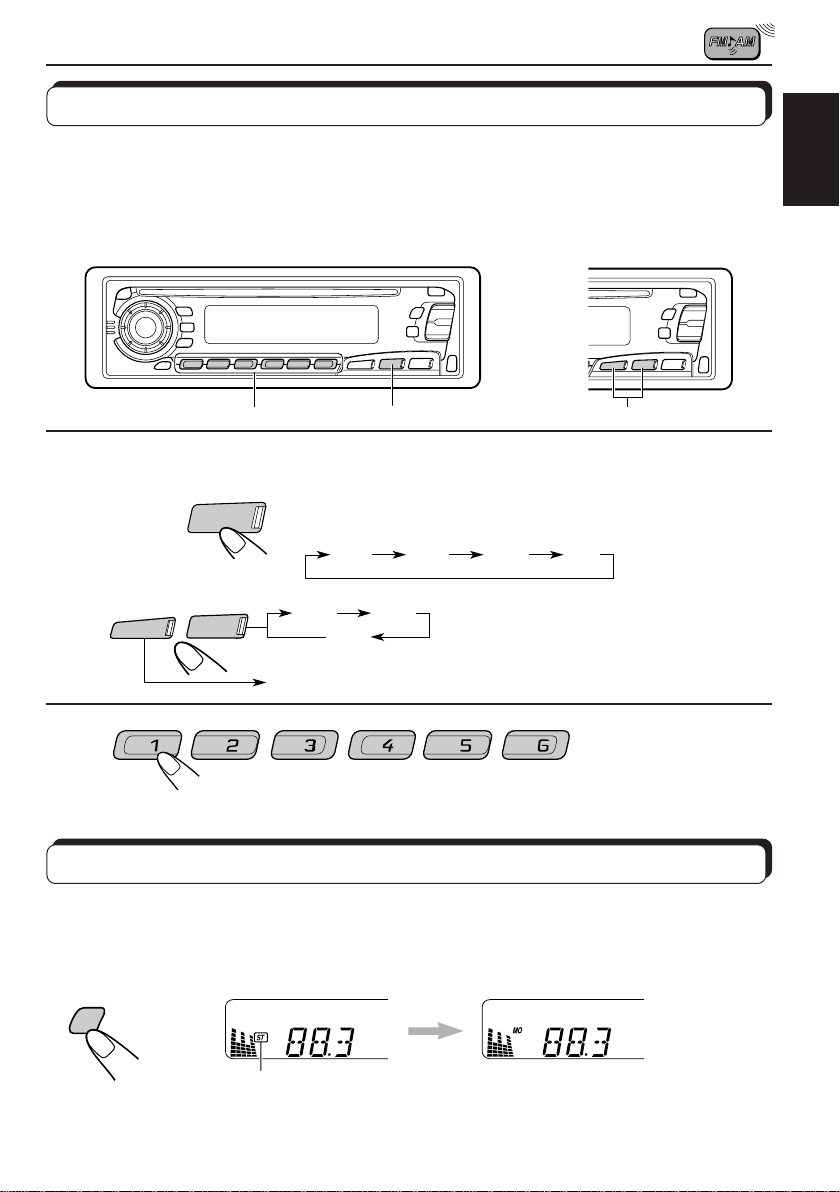
FM station automatic preset: SSM
You can preset 6 local FM stations in each FM band (FM1, FM2 and FM3).
2
1
ENGLISH
1
KD-SX878R
FM/AM
KD-S777R/KD-S8R
FM
Select the FM band number (FM1, FM2 or
FM3) you want to store FM stations into.
FM1 FM2 FM3 AM
FM1 FM2 FM3
2
SSM
Local FM stations with the strongest signals are searched and stored automatically in the
band number you have selected (FM1, FM2 or FM3). These stations are preset in the number
buttons—No. 1 (lowest frequency) to No. 6 (highest frequency).
When automatic preset is over, the station stored in number button 1 will be automatically
tuned in.
Press and hold both buttons for more than
2 seconds.
“SSM” appears, then disappears when
automatic preset is over.
7
Page 10
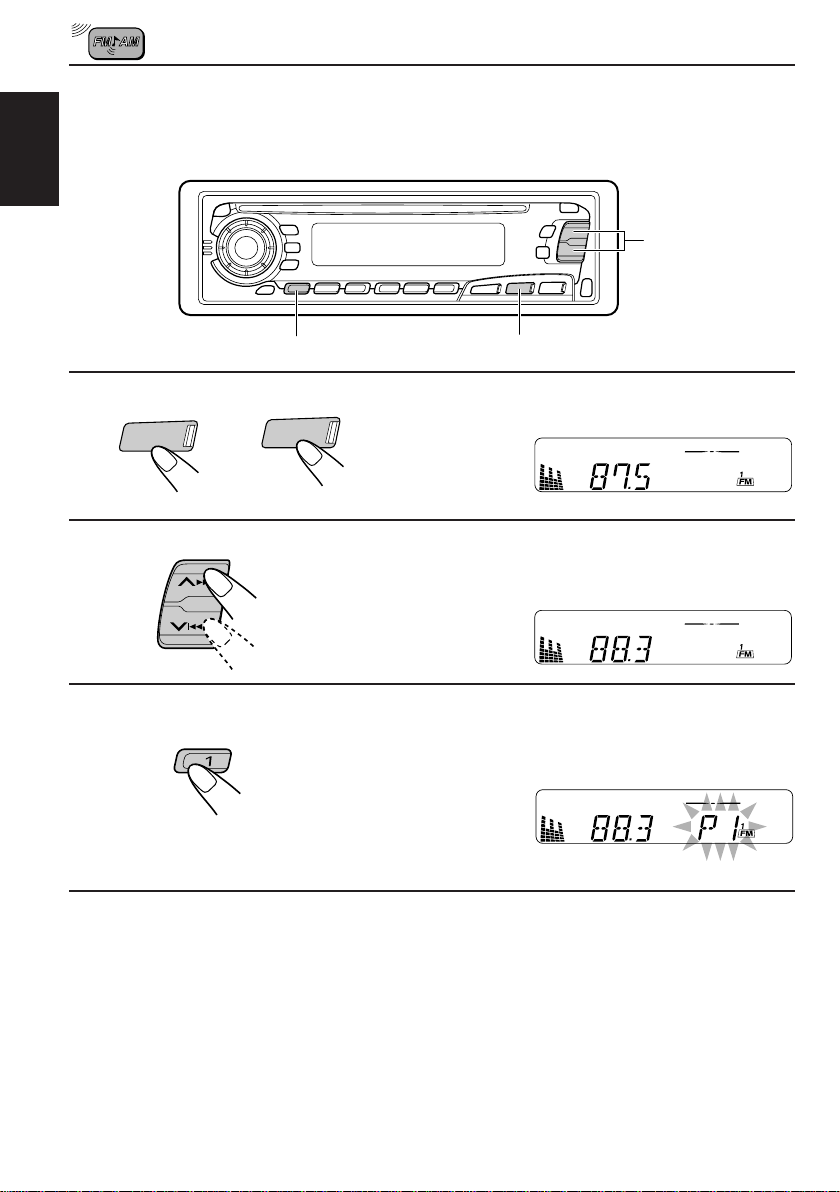
Manual preset
You can preset up to 6 stations in each band (FM1, FM2, FM3 and AM) manually.
EXAMPLE: Storing an FM station of 88.3 MHz into the preset channel number 1 of the FM1 band
ENGLISH
2
3
KD-SX878R KD-S777R/KD-S8R
1
FM/AM
FM
Select the FM1 band.
1
2
Tune into a station of 88.3 MHz.
See page 6 to tune into a station.
3
Press and hold the number button (in this
example, 1) for more than 2 seconds.
“P1” flashes for a few seconds.
4
Repeat the above procedure to store other stations into other
preset channel numbers.
Notes:
• A previously preset station is erased when a new station is stored in the same pr eset channel number.
• Preset stations are erased when the power supply to the memory circuit is interrupted (for example,
during battery replacement). If this occurs, preset the stations again.
8
Page 11
Tuning into a preset station
You can easily tune into a preset station.
Remember that you must store stations first. If you have not stored them yet, see pages 7
and 8.
ENGLISH
KD-SX878R
1
KD-SX878R
KD-S777R/KD-S8R
2
Select the number (1 – 6) for the preset station you want.
AM
FM/AM
FM
KD-S777R/KD-S8R
2
1
Select the band (FM1, FM2, FM3 or AM)
you want.
FM1 FM2 FM3 AM
FM1
AM
FM2
FM3
1
Selecting FM reception sound
When an FM stereo broadcast is hard to receive:
Press MO RND (Monaural/Random) while listening to an FM stereo broadcast. The MO
indicator lights up on the display. The sound you hear becomes monaural but reception will be
improved.
MO
RND
Lights up when receiving an FM broadcast in stereo.
To restore the stereo effect, press the same button again.
9
Page 12

RDS OPERATIONS
What you can do with RDS EON
RDS (Radio Data System) allows FM stations to send an additional signal along with their
regular programme signals. For example, the stations send their station names, as well as
ENGLISH
information about what type of programme they broadcast, such as sports or music, etc.
Another advantage of RDS function is called “EON (Enhanced Other Networks).” The EON
indicator lights up while receiving an FM station with the EON data. By using the EON data
sent from a station, you can tune into a different station of a different network broadcasting
your favorite programme or traffic announcement while listening to another programme or to
another source such as CD.
By receiving the RDS data, this unit can do the following:
• Tracing the same programme automatically (Network-Tracking Reception)
• Standby Reception of TA (Traffic Announcement) or your favorite programme
• PTY (Programme Type) search
• TP (Traffic Programme) search
• And some other functions
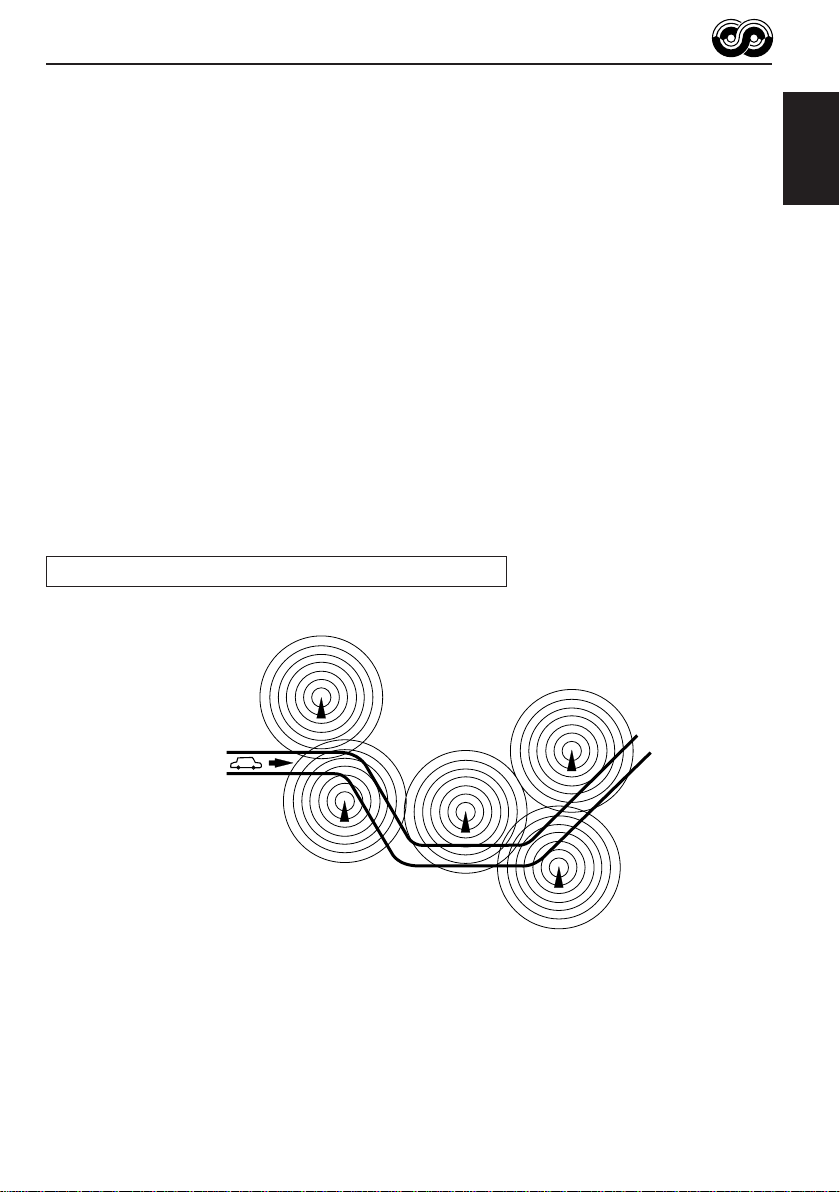
Tracing the same programme automatically (NetworkTracking Reception)
When driving in an area where FM reception is not good, the tuner built in this unit automatically
tune in another RDS station, broadcasting the same programme with stronger signals. So,
you can continue to listen to the same programme in its finest reception, no matter where you
drive. (See the illustration on the next page.)
Two types of the RDS data are used to make Network-Tracking Reception work correctly —
PI (Programme Identification) and AF (Alternative Frequency).
Without receiving these data correctly from the RDS station you are listening to, NetworkTracking Reception will not operate.
10
RDS
TP
To use Network-Tracking Reception, press and hold TP RDS
(Traffic Programme/Radio Data System) for more than 1 second.
Each time you press and hold the button, Network-Tracking
Reception modes change as follows:
Mode 1 Mode 2 Mode 3
AF indicator
REG indicator
Page 13
Mode 1
The AF indicator lights up but the REG indicator does not.
Network-Tracking is activated with Regionalization set to “off.”
Switches to another station within the same network when the receiving
signals from the current station become weak.
Note:
In this mode, the programme may differ fr om the one currently received.
Mode 2
Both the AF indicator and the REG indicator light up.
Network-Tracking is activated with Regionalization set to “on.”
Switches to another station, within the same network, broadcasting the same
programme when the receiving signals from the current station become weak.
Mode 3
Neither the AF indicator nor the REG indicator lights up.
Network-Tracking is deactivated.
The same programme can be received on different frequencies.
Programme 1 broadcasting on frequency E
Programme 1 broadcasting
on frequency A
ENGLISH
Programme 1 broadcasting on
frequency B
Programme 1 broadcasting on frequency C
Programme 1 broadcasting on frequency D
11
Page 14
Using Standby Reception
Standby Reception allows the unit to switch temporarily to your favorite programme (PTY:
Programme Type) and Traffic Announcement (TA) from the current source — another FM
station and CD.
ENGLISH
Note:
Standby Reception will not work if you are listening to an AM station.
TA Standby Reception
• When you press TP RDS while listening to an FM station, the TP indicator
RDS
TP
is lit during reception of a TP (Traffic Programme) station and the TA standby
mode is engaged.
Note:
When the station being received is not a TP station, the TP indicator flashes. Press
¢ or 4 to engage the TA standby mode. “SEARCH” appears on the
display, and TP station sear ch starts. When a TP station is tuned in, the TP indicator
is lit.
• If you are listening to a CD, and wish to listen to a TP station, press TP
RDS to enter the TA standby mode. (The TP indicator lights up.)
If a traffic programme starts broadcasting while the TA standby mode is active,
“TRAFFIC” appears and the playback source changes to the FM band. The
volume increases to the preset TA volume level and the traffic programme
can be heard (see page 17).
To deactivate the TA standby mode, press TP RDS again.
PTY Standby Reception
• When you press PTY while listening to an FM station, the PTY indicator is
PTY
12
lit during reception of a PTY station and the PTY standby mode is engaged.
The selected PTY name stored on page 14 flashes for 5 seconds.
Note:
When the station being received is not a PTY station, the PTY indicator flashes.
Press
the display, and PTY station search starts. When a PTY station is tuned in, the PTY
indicator is lit.
• If you are listening to a CD, and wish to listen to a selected PTY broadcast,
press PTY to enter the PTY standby mode. (The PTY indicator lights up.)
If the selected PTY programme starts broadcasting while the PTY standby
mode is active, the selected PTY name appears and the playback source
changes to the FM band. The selected PTY programme can then be heard.
To deactivate the PTY standby mode, press PTY again.
¢ or 4 to engage the PTY standby mode. “SEARCH” appears on
Page 15
Selecting Your Favorite Programme for PTY Standby
Reception
You can select your favorite programme for PTY Standby Reception to store in memory.
When shipped from the factory, “NEWS” is stored as the programme type for PTY Standby
Reception.
ENGLISH
1
2
3
3
2
1,4
Press and hold SEL (select) for more than 2
seconds to enter the general setting mode
(see page 27).
Select “PTY STBY (standby)” if not shown on
the display.
Select one of twenty-nine PTY codes. (See
page 16.)
Selected code name appears on the display and is stored
into memory.
4
Finish the setting.
Searching Your Favorite Programme
You can search one of your 6 favorite programme types stored in memory.
When shipped from the factory, the following 6 programme types have been stored in the
number buttons (1 to 6).
To change the factory preset settings, see page 14.
To search your favorite programme, see page 15.
1
POP M
2
ROCK M
3
EASY M
4
CLASSICS
5
AFFAIRS
6
VARIED
13
Page 16
To store your favorite programme types
ENGLISH
1
2
3
3
2
1,5
Press and hold SEL (select) for more than 2
seconds to enter the general setting mode
(see page 27).
Select “PTY SRCH (search)” if not shown on
the display.
Select one of twenty-nine PTY codes.
(See page 16.)
Selected code name appears on the display.
• If the code already stored in memory is selected, it will flash
on the display.
4
14
4
Press and hold the number button for more than 2 seconds to
store the PTY code selected into the preset number you want.
The selected code name will flash on the display.
5
Finish the setting.
Page 17
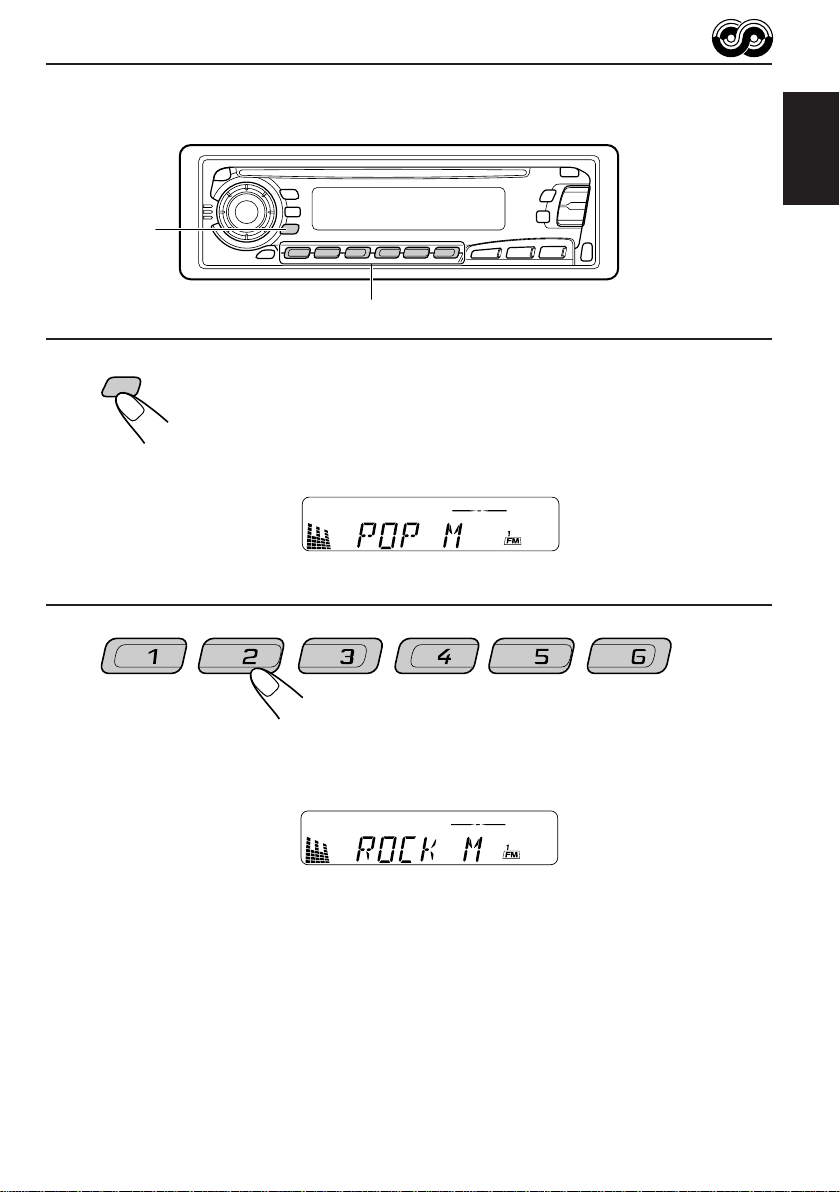
To search your favorite programme type
1
2
ENGLISH
1
2
PTY
Press and hold PTY (programme type) for
more than 1 second while listening to an FM
station.
The last selected PTY code appears.
Select one of PTY codes stored in preset
number buttons (1 to 6).
Ex. When “ROCK M” is stored in preset number button 2.
PTY search for your favorite programme starts after 5
seconds.
• If there is a station broadcasting a programme of the same PTY code you selected, that
station is tuned in.
• If there is no station broadcasting a programme of the same PTY code you selected, the
station will not change.
Note:
In some areas, the PTY search will not work correctly.
15
Page 18

Other convenient RDS functions and adjustments
Automatic selection of the station when using the number
ENGLISH
buttons
Usually when you press the number button, the preset station is tuned in.
However, when the preset station is an RDS station, something different will happen. If the
signals from that preset station are not sufficient for good reception, this unit, using the AF
data, tunes in another frequency broadcasting the same programme as the original preset
station is broadcasting. In case no other station is tuned in, you can also search all receivable
frequencies for the same programme. (Programme search) To activate programme search,
follow the procedure below.
• Programme search takes a while.
• See also “Changing the general settings” on page 27.
1. Press and hold SEL (select) for more than 2 seconds to call up the general setting mode.
2. Press
3. Select “ON” by turning the control dial clockwise.
Now programme search is activated.
To cancel programme search, repeat the same procedure and select “OFF” in step 3 by
turning the control dial counterclockwise.
PTY codes
NEWS: News
AFFAIRS: Topical programmes expanding
INFO: Programmes which impart
SPORT: Sport events
EDUCATE: Educational programmes
DRAMA: Radio plays
CULTURE: Programmes on national or
SCIENCE: Programmes on natural science
VARIED: Other programmes like comedies
POP M: Pop music
ROCK M: Rock music
EASY M: Easy-listening music
LIGHT M: Light music
CLASSICS: Classical music
OTHER M: Other music
WEATHER: Weather information
FINANCE: Reports on commerce, trading,
CHILDREN: Entertainment programmes for
16
¢ or 4 to select “P(programme)-SEARCH.”
SOCIAL: Programmes on social activities
on current news or affairs
advice on a wide variety of
topics
regional culture
and technology
or ceremonies
the Stock Market, etc.
children
RELIGION: Programmes dealing with any
aspect of belief or faith, or the
nature of existence or ethics
PHONE IN: Programmes where people can
express their views either by
phone or in a public forum
TRAVEL: Programmes about travel
destinations, package tours, and
travel ideas and opportunities
LEISURE: Programmes concerned with
recreational activities such as
gardening, cooking, fishing, etc.
JAZZ: Jazz music
COUNTRY: Country music
NATION M: Current popular music from
another nation or region, in that
country’s language
OLDIES: Classic pop music
FOLK M: Folk music
DOCUMENT: Programmes dealing with
factual matters, presented in an
investigative style
Page 19
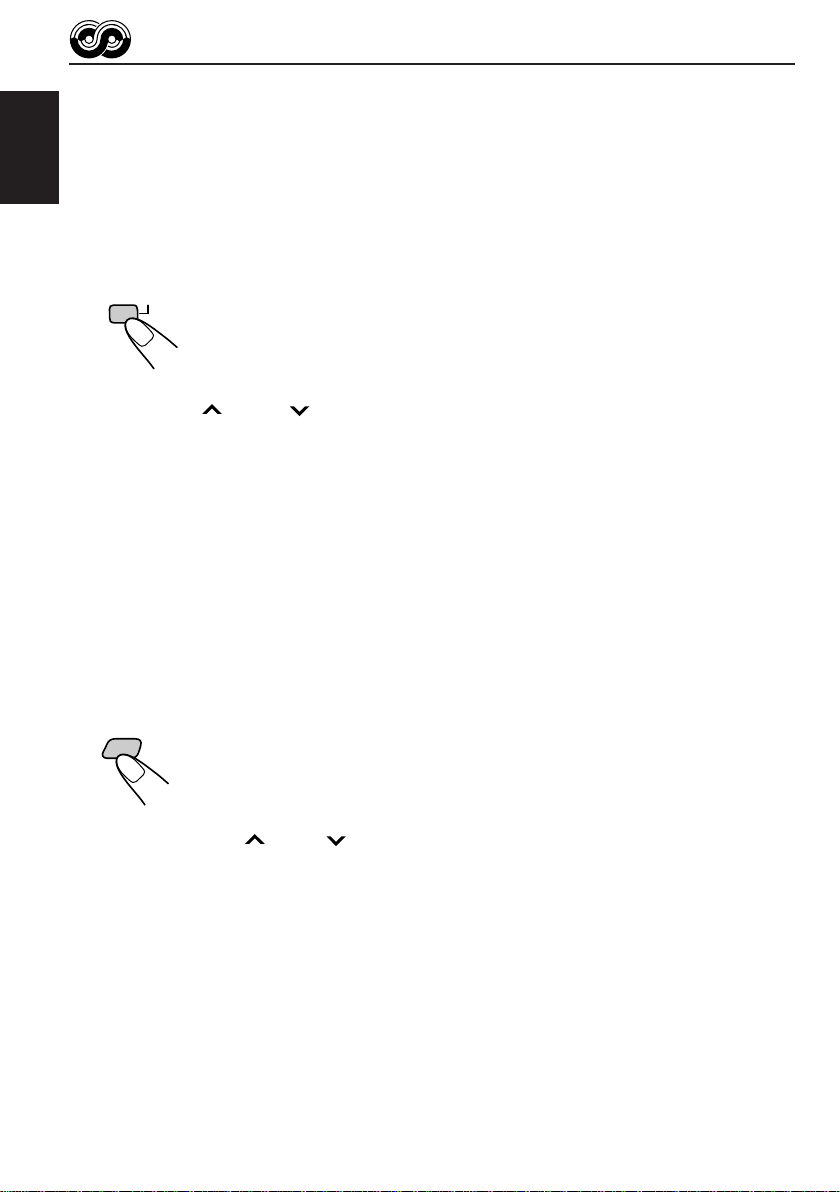
Changing the display mode while listening to an FM
station
You can change the initial indication on the display to station name (PS NAME), station
frequency (FREQ), or clock time (CLOCK) while listening to an FM RDS station.
• See also “Changing the general settings” on page 27.
1. Press and hold SEL (select) for more than 2 seconds to call up the general setting mode.
2. Press
3. Set to the desired indication (station name, station frequency or clock time) with the control
dial.
Note:
By pressing DISP, you can also change the display while listening to an FM RDS station.
Each time you press the button, the following information appears on the display:
¢ or 4 to select “DISPMODE (display mode).”
ENGLISH
PS NAME (Station name)
CLOCK (Clock time)
* Then, the display goes back to the original indication in several seconds.
FREQ (Station frequency)
PTY (Programme type)
Setting the TA volume level
You can preset the volume level for TA Standby Reception. When a traffic programme is
received, the volume level automatically changes to the preset level.
• See also “Changing the general settings” on page 27.
1. Press and hold SEL (select) for more than 2 seconds to call up the general setting mode.
2. Press
3. Set to the desired volume level with the control dial.
¢ or 4 to select “TA VOL (volume).”
Automatic clock adjustment
When shipped from the factory, the clock built in this unit is set to be readjusted automatically
using the CT (Clock Time) data in the RDS signal.
If you do not want to use automatic clock adjustment, follow the procedure below.
• See also “Changing the general settings” on page 27.
1. Press and hold SEL (select) for more than 2 seconds to call up the general setting mode.
2. Press
3. Select “OFF” by turning the control dial counterclockwise.
Now automatic clock adjustment is canceled.
To reactivate clock adjustment, repeat the same procedure and select “ON” in step 3 by
turning the control dial clockwise.
¢ or 4 to select “AUTO ADJ (adjust).”
Note:
It takes about 2 minutes to adjust the time using the CT data. So, you must tune to the station for more
than 2 minutes continuously; otherwise, the clock time will not be adjusted.
17
Page 20
CD OPERATIONS
Playing a CD
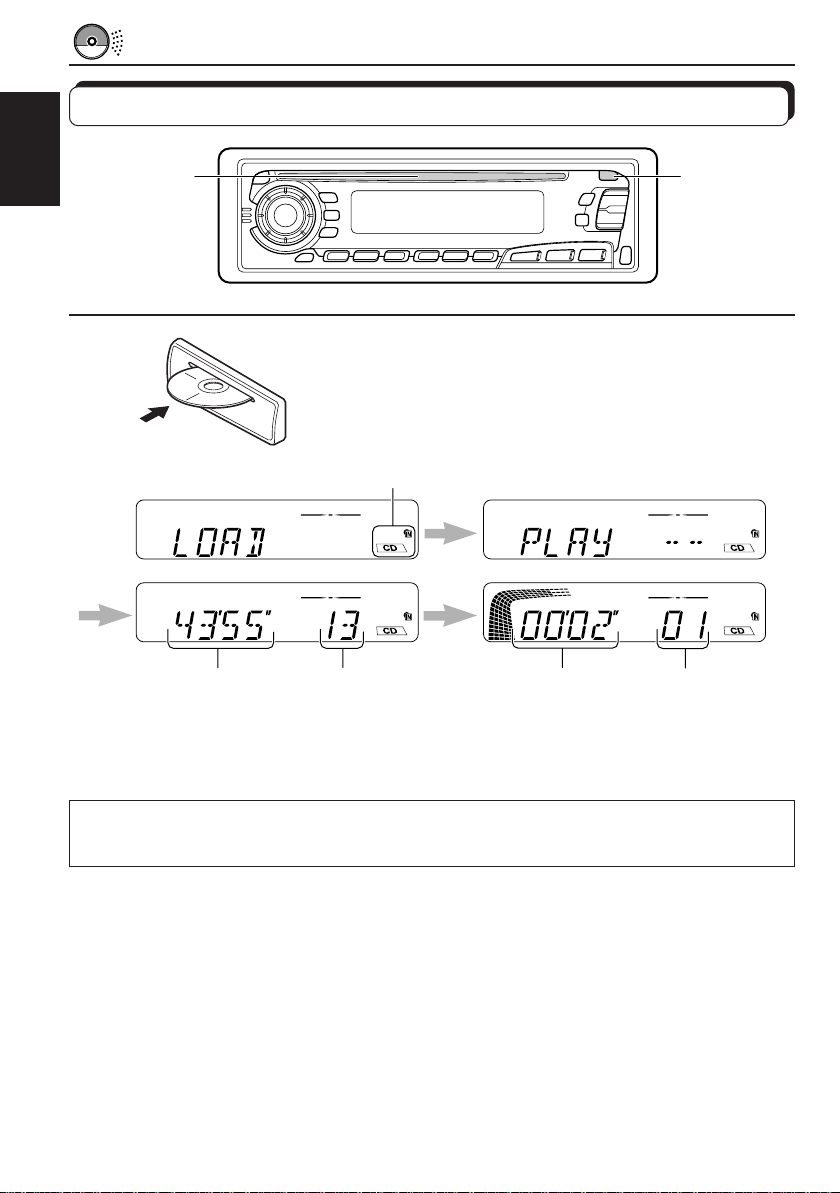
Loading slot
ENGLISH
Total playing time of
the inserted disc
Insert a disc into the loading slot.
The unit turns on, draws a CD and starts playback
automatically.
Lights up
Total track number of
the inserted disc
Elapsed
playing time
Current track
0
Note:
When a CD is inserted upside down, the CD ejects automatically.
Note on One-Touch Operation:
When a CD is already in the loading slot, pressing CD turns on the unit and starts playback
automatically.
To stop play and eject the CD
Press 0.
CD play stops and the CD automatically ejects from the loading slot.
If you change the source to FM or AM (or CD changer: ONLY FOR KD-SX878R), the CD play
also stops (without ejecting the CD this time).
Notes:
• If the ejected disc is not removed for about 15 seconds, the disc is automatically inserted again into
the loading slot to protect it from dust. (CD play will not start this time.)
• You can eject the CD even when the unit is turned off.
18
Page 21

Locating a track or a particular portion on a CD
Number buttons
To fast-forward or reverse the track
Press and hold ¢, while playing a CD, to fast-forward the track.
ENGLISH
¢
4
Press and hold
4, while playing a CD, to reverse the track.
To go to the next tracks or the previous tracks
Press ¢ briefly, while playing a CD, to go ahead to the beginning of
the next tracks. Each time you press the button consecutively, the
beginning of the next tracks is located and played back.
Press
the current track. Each time you press the button consecutively, the
beginning of the previous tracks is located and played back.
4 briefly, while playing a CD, to go back to the beginning of
To go to a particular track directly
7 8 9 10 11 12
Press the number button corresponding to the track number to start playback.
• To select a track number from 1 – 6:
Press 1 (7) – 6 (12) briefly.
• To select a track number from 7 – 12:
Press and hold 1 (7) – 6 (12) for more than 1 second.
19
Page 22

Selecting CD playback modes
ENGLISH
To play back tracks at random (Random Play)
You can play back all tracks on the CD at random.
RND
MO
Each time you press MO RND (Monaural/Random) while playing a CD, CD
random play mode turns on and off alternately.
When the random mode is turned on, the RND indicator lights up on the
display and a track randomly selected starts playing.
MO RND
RPT
• To select the next track at random, press
To play back tracks repeatedly (Repeat Play)
You can play back the current track repeatedly.
RPT
20
Each time you press RPT (Repeat) while playing a CD, CD repeat play
mode turns on and off alternately.
When the repeat mode is turned on, the RPT indicator lights up on the
display.
¢ briefly.
Page 23

Prohibiting CD ejection
0
CD
You can prohibit CD ejection and can “lock” a CD in the loading slot.
While pressing CD, press 0 for more than 2 seconds. “EJECT” flashes on the display for
about 5 seconds, and the CD is “locked” and cannot be ejected.
To cancel the prohibition and “unlock” the CD, press and hold 0 again for more than 2
seconds, while pressing CD. “EJECT” appears on the display, and the CD ejects from the
loading slot.
ENGLISH
21
Page 24

SOUND ADJUSTMENTS
Adjusting the sound
You can adjust the sound characteristics to your preference.
ENGLISH
2
1
Equalization pattern indicator
1
Select the item you want to adjust.
BAS TRE FAD
VOL
Indication To do: Range
BAS Adjust the bass –06 (min.) — +06 (max.)
(Bass)
TRE Adjust the treble –06 (min.) — +06 (max.)
(Treble)
FAD Adjust the front and rear speaker R06 (rear only) — F06 (front only)
(Fader)* balance
BAL Adjust the left and right speaker L06 (left only) — R06 (right only)
(Balance) balance
LOUD Boost low and high frequencies to LOUD ON — LOUD OFF
(Loudness) produce a well-balanced sound at low
volume level.
VOL Adjust the volume 00 (min.) — 50 (max.)
(Volume)
Note:
* If you are using a two-speaker system, set the fader level to “00.”
LOUD
BAL
22
2
Adjust the level.
Equalization pattern changes as
you adjust the bass or treble.
Note:
Normally the control dial works for volume adjustment. So you do
not have to select “VOL” to adjust the volume level.
Page 25

Using the Sound Control Memory
You can select and store a preset sound adjustment suitable to each playback source.
(Advanced SCM)
Selecting and storing the sound modes
Once you select a sound mode, it is stored in memory, and will be recalled every time you
select the same source. A sound mode can be stored for each of the following sources —
FM1, FM2, FM3, AM and CD (and external components: ONLY FOR KD-SX878R).
• If you do not want to store the sound mode separately for each playback source, but want to
use the same sound mode for all the sources, see “Canceling Advanced SCM” on page 28.
“Link” indicator
SCM
ENGLISH
SCM
Indication For: Preset values
SCM OFF (Flat sound) 00 00 On
BEAT Rock or disco music +02 00 On
SOFT Quiet background music +01 –03 Off
POP Light music +04 +01 Off
Select the sound mode you want.
Each time you press the button, the sound mode changes as follows:
SCM OFF BEAT SOFT
• If the “Link” indicator is lit on the display (with “SCM LINK” set to “LINK
ON”—see page 28), the selected sound mode can be stored in memory
for the current source, and the effect applies to the current source.
• If the “Link” indicator is NOT lit on the display (with “SCM LINK” set to
“LINK OFF”), the selected sound mode effect applies to any source.
Bass Treble Loudness
POP
23
Page 26

Recalling the sound modes
ENGLISH
KD-SX878R
CD-CH
FM/AM
CD
Select the source while the “Link” indicator is
lit on the display.
The “Link” indicator starts flashing, and the sound mode stored
in memory for the selected source is recalled.
Source buttons
KD-S777R/KD-S8R
FM
AM
CD
Equalization pattern of the
selected sound mode appears.
LOUD (loudness) indicator
Sound mode
indicator
Notes:
• You can adjust each sound mode to your preference, and store it in memory.
If you want to adjust and store your original sound mode, see “Storing your own sound adjustments”
on page 25.
• T o adjust the bass and treble r einfor cement levels or to turn on/off the loudness function temporarily ,
see page 22. (Your adjustments will be canceled if another source is selected.)
24
Page 27

Storing your own sound adjustments
You can adjust the sound modes (BEAT, SOFT, POP: see page 23) to your preference and
store your own adjustments in memory.
3
1,4
2
ENGLISH
1
2
3
4
SCM
Within
5 seconds
SCM
Call up the sound mode you want to adjust.
See page 23 for details.
Select “BAS (Bass),” “TRE (Treble)” or “LOUD
(Loudness).”
Adjust the bass or treble level or turn the
loudness function ON/OFF.
See page 22 for details.
Press and hold SCM (Sound Control Memory)
until the sound mode you have selected in step
1 flashes on the display.
Your setting is stored in memory.
5
Repeat the same procedure to store other settings.
To reset to the factory settings
Repeat the same procedure and reassign the preset values listed in the table on page 23.
25
Page 28

OTHER MAIN FUNCTIONS
Setting the clock
ENGLISH
1
2
1
1
3
4
2,3
2,3
DISP
1,4
Press and hold the button for more than
2 seconds to call up the general settings mode.
2
Set the hour.
1 Select “CLOCK H (Hour)” if not
shown on the display.
2 Adjust the hour.
2
Set the minute.
1 Select “CLOCK M (Minute).”
2 Adjust the minute.
Finish the setting.
To check the current clock time (changing the display mode)
Press DISP repeatedly. Each time you press the button, the display mode changes as follows:
During tuner operation:
Clock
Note:
For the indication change during RDS operation,
see page 17.
During CD changer operation (ONLY FOR KD-SX878R):
Note:
For the indication change during DAB operation, see page 39.
• If the unit is not in use when you press DISP, the power turns on, the clock time is shown for
5 seconds, then the power turns off.
26
Frequency
Clock Disc number Elapsed playing time
During CD operation:
Clock
During external component operation
(ONLY FOR KD-SX878R):
LINE IN
Elapsed playing time
Clock
Page 29

Changing the general settings
You can change the items listed on the next page.
Basic Procedure
3
1,4
1
2
ENGLISH
2
Press and hold the button for more than
2 seconds to call up the general settings
mode.
Select the item you want to adjust. (See page
28.)
3
4
Select or adjust the item selected above.
Finish the setting.
27
Page 30

1
CLOCK H Hour adjustment
ENGLISH
CLOCK M Minute adjustment
SCM LINK Sound control
24H/12H 24/12-hour time
AUTO ADJ Automatic setting of
DISPMODE Display mode
CH DISP Changer display
PTY STBY PTY standby
PTY SRCH PTY search
TA VOL Traffic announcement
P-SEARCH Programme search
LEVEL Level display
TEL Audio mute for cellular
LINE IN* External component
2
Select.
memory linkage
display
the clock
(ONLY FOR KD-SX878R)
volume
phone system
(ONLY FOR KD-SX878R)
3
Set.
Back
Back
12H
OFF
PS NAME
TIME DISC DISC 29
29 programme types
(See page 16.)
VOL (00 – 50)
OFF
AUDIO 1 AUDIO 2
OFF MUTING 1
MUTING 2
CHANGER
Advance
Advance
LINK ONLINK OFF
24H
ON
FREQ
CLOCK
ON
OFF
LINE IN
* Displayed only when one of the following sources is selected — FM, AM and CD.
• Press SEL (select) when the setting is complete.
Factory-preset
settings
0:00
24H
ON
PS NAME 17
NEWS 13
(See page 13.) 13
VOL 20
OFF 16
AUDIO 2
OFF
CHANGER 30
See
page
26
belowLINK ON
29
17
17
29
30
Canceling Advanced SCM
You can cancel the Advanced SCM (Sound Control Memory), and unlink the sound modes
and the playback sources.
When shipped from the factory, a different sound mode can be stored in memory for each
source so that you can change the sound modes simply by changing the sources.
• LINK ON: Advanced SCM (different sound modes for different sources)
• LINK OFF: Conventional SCM (one sound mode for all sources)
1. Press and hold SEL (Select) for more than 2 seconds to call up the general settings mode.
2. Select “SCM LINK” with
3. Select the desired mode with the control dial.
The SCM LINK mode changes as follows:
28
¢ or 4.
LINK ON LINK OFF
Page 31

Selecting 24-hour or 12-hour clock
You can change the clock built in this unit either to 24-hour system or 12-hour system.
1. Press and hold SEL (Select) for more than 2 seconds to call up the general settings mode.
2. Select “24H/12H” with
3. Select “24H” or “12H” with the control dial.
The clock alternates between 24-hour system and 12-hour system.
¢ or 4.
24H 12H
Selecting the level display
You can select the level display according to your preference.
When shipped from the factory, “AUDIO 2” is selected.
• AUDIO 1: Shows the audio level indicator and the equalization pattern indicator.
• AUDIO 2: Alternates “AUDIO 1” setting and illumination display.
• OFF: Erases the audio level indicator and the equalization pattern indicator.
1. Press and hold SEL (Select) for more than 2 seconds to call up the general settings mode.
2. Select “LEVEL” with
3. Select the desired mode with the control dial.
The level display setting changes as follows:
¢ or 4.
ENGLISH
AUDIO 1 AUDIO 2
OFF
Selecting the display mode while using the CD changer
(ONLY FOR KD-SX878R)
You can change the initial indication on the display either to disc number or to elapsed playing
time, while using the CD changer.
1. Press and hold SEL (Select) for more than 2 seconds to call up the general settings mode.
2. Select “CH DISP” with
3. Select “DISC” or “TIME” with the control dial.
¢ or 4.
DISC
TIME
29
Page 32

Selecting the telephone muting
This mode is used when a cellular phone system is connected. Depending on the phone
system used, select either “MUTING 1” or “MUTING 2”, whichever mutes the sounds from
this unit.
When shipped from the factory, this mode is deactivated.
ENGLISH
• MUTING 1: Select this if this setting can mute the sounds.
• MUTING 2: Select this if this setting can mute the sounds.
• OFF: Cancels the telephone muting.
1. Press and hold SEL (Select) for more than 2 seconds to call up the general settings mode.
2. Select “TEL” with
3. Select “MUTING 1,” “MUTING 2” or “OFF” with the control dial.
The telephone muting mode changes as follows:
¢ or 4.
MUTING 1 MUTING 2
OFF
Selecting the external component to use
(ONLY FOR KD-SX878R)
You can connect the external component to the CD changer jack on the rear using the Line
Input Adaptor KS-U57 (not supplied).
To use the external component as the playback source through this unit, you need to select
which component — CD changer or external component — to use. When shipped from the
factory, CD changer is selected as the external component.
• LINE IN: To use the external component other than CD changer
• CHANGER: To use the CD changer
1. To change the source to FM, AM or CD, press FM/AM or CD.
2. Press and hold SEL (Select) for more than 2 seconds to call up the general settings mode.
3. Select “LINE IN” with
4. Select the desired mode with the control dial.
The external component selecting mode changes as follows:
LINE IN CHANGER
Note:
For connecting the Line Input Adaptor KS-U57 and the external component, refer to the Installation/
Connection Manual (separate volume).
¢ or 4.
30
Page 33

Detaching the control panel
You can detach the control panel when leaving the car.
When detaching or attaching the control panel, be careful not to damage the connectors on
the back of the control panel and on the panel holder.
ENGLISH
How to detach the control
panel
Before detaching the control panel, be sure
to turn off the power.
1
Unlock the control panel.
2
Lift and pull the control panel
out of the unit.
How to attach the control
panel
1
Insert the left side of the
control panel into the groove
on the panel holder.
2
Press the right side of the
control panel to fix it to the
panel holder.
3
Put the detached control
panel into the provided case.
Note on cleaning the connectors:
If you frequently detach the contr ol panel, the
connectors will deteriorate.
T o minimize this possibility , periodically wipe
the connectors with a cotton swab or cloth
moistened with alcohol, being careful not to
damage the connectors.
Connectors
31
Page 34

REMOTE OPERATIONS
(With an optionally purchased remote controller)
(ONLY FOR KD-SX878R/KD-S777R)
We recommend that you use remote controller RM-RK31 with your unit.
The followings are the instructions for using RM-RK31.
ENGLISH
Before using the remote controller:
• Aim the remote controller directly at the remote sensor
on the main unit. Make sure there is no obstacle in
between.
• Do not expose the remote sensor to strong light (direct
sunlight or artificial lighting).
Installing the battery
When the controllable range or effectiveness of the remote controller decreases, replace
the battery.
1. Remove the battery holder.
(back side)
1)
2)
1) Push out in the direction indicated by the arrow
using a ball point pen or a similar tool.
2) Remove the battery holder.
Remote sensor
Lithium coin battery
(product number:
CR2025)
(back side)
WARNING:
• Store the batteries in a place which childr en cannot reach.
If a child accidentally swallows the battery, immediately consult a doctor.
• Do not recharge, short, disassemble or heat the batteries or dispose of in a fire.
Doing any of these things may cause the batteries to give off heat, crack or start a fire.
• Do not leave the batteries with other metallic materials.
Doing this may cause the batteries to give off heat, crack or start a fire.
• When throwing away or saving the batteries, wrap in tape and insulate; otherwise, , it may cause
the batteries to give off heat, crack or start a fire.
• Do not poke the batteries with tweezers or similar tools.
Doing this may cause the batteries to give off heat, crack or start a fire.
32
2. Place the battery.
Slide the battery into the holder with the + side facing
upwards so that the battery is fixed in the holder.
3. Return the battery holder.
Insert again the battery holder pushing it until you
hear a clicking sound.
Page 35

Using the remote controller
1 Functions the same as the button on the main unit.
2 • Functions as the BAND button while listening to the radio
1
2
3
4
5
6
7
(or the DAB tuner).
Each time you press the button, the band changes.
• Functions as the DISC + button while listening to the CD
changer.
Each time you press the button, the disc number increases,
and the selected disc starts playing.
• Does not function as the PROG button.
3 • Functions as the PRESET button while listening to the radio
(or the DAB tuner).
Each time you press the button, the preset station number
increases, and the selected station is tuned in.
• Functions as the DISC – button while listening to the CD
changer.
Each time you press the button, the disc number
decreases, and the selected disc starts playing.
4 Functions the same as the control dial on the main unit.
Note: This button does not function for the general settings mode
5 Selects the sound mode.
Each time you press SCM (Sound Control Memory), the mode
changes.
6 Selects the source.
Each time you press FUNC (function), the source changes.
7 • Searches stations while listening to the radio.
• Selects services while listening to the DAB tuner if pressed
briefly.
• Searches ensembles while listening to the DAB tuner if
pressed for more than 1 second.
• Fast forwards or reverses the track if pressed and held
while listening to a CD.
• Skips to the beginning of the next tracks or goes back to
the beginning of the current (or previous tracks) if pressed
briefly while listening to a CD.
ENGLISH
adjustment.
33
Page 36

CD CHANGER OPERATIONS
This section is ONLY FOR KD-SX878R, when used with a JVC CD automatic changer
(separately purchased).
We recommend that you use one of the CH-X series with your unit.
If you have another CD automatic changer, consult your JVC IN-CAR ENTERTAINMENT
dealer for connections.
ENGLISH
• For example, if your CD automatic changer is one of the KD-MK series, you need a cord (KS-U15K)
for connecting it to this unit.
Before operating your CD automatic changer:
• Refer also to the Instructions supplied with your CD changer.
• If no discs are in the magazine of the CD changer or the discs are inserted upside
down, “NO DISC” will appear on the display. If this happens, remove the magazine and
set the discs correctly.
• If “RESET 1 - RESET 8” appears on the display, something is wrong with the connection
between this unit and the CD changer. If this happens, check the connection, connect
the connecting cord(s) firmly if necessary, then press the reset button of the CD changer.
Playing CDs
¢
4
Number buttons
CD
-CH
Note on One-Touch Operation:
When you press CD-CH, the power automatically comes on. You do not have to press
to turn on the power.
Select the CD automatic changer.
Playback starts from the first track of the first disc.
All tracks of all discs are played back.
To fast-forward or reverse the track
Press and hold ¢, while playing a CD, to fast-forward the track.
34
Press and hold
4, while playing a CD, to reverse the track.
CD-CH
Page 37

To go to the next tracks or the previous tracks
Press ¢ briefly, while playing a CD, to go ahead to the beginning of
the next track.
Each time you press the button consecutively, the beginning of the next
tracks is located and played back.
ENGLISH
Press
the current track.
Each time you press the button consecutively, the beginning of the previous
tracks is located and played back.
4 briefly, while playing a CD, to go back to the beginning of
To go to a particular disc directly
7 8 9 10 11 12
Press the number button corresponding to the disc number to start its
playback (while the CD changer is playing).
• To select a disc number from 1 – 6:
Press 1 (7) – 6 (12) briefly.
• To select a disc number from 7 – 12:
Press and hold 1 (7) – 6 (12) for more than 1 second.
Ex. When disc number 3 is selected
Disc number
Track number
35
Page 38

Selecting CD playback modes
ENGLISH
MO RND
RPT
To play back tracks at random (Random Play)
MO
RND
Mode RND Indicator Plays at random
RND1 Lights All tracks of the current disc, then the tracks of the
RND2 Flashes All tracks of all discs inserted in the magazine.
Each time you press MO RND (Monaural/Random) while playing a CD, CD
random play mode changes as follows:
RND1
(Random1)
RND2
(Random2)
Canceled
next disc, and so on.
To play back tracks repeatedly (Repeat Play)
RPT
Each time you press RPT (Repeat) while playing a CD, CD repeat play
mode changes as follows:
36
RPT1
(Repeat1)
RPT2
(Repeat2)
Canceled
Mode RPT Indicator Plays repeatedly
RPT1 Lights The current track (or specified track).
RPT2 Flashes All tracks of the current disc (or specified disc).
Page 39

EXTERNAL COMPONENT OPERATIONS
This section is ONLY FOR KD-SX878R.
You can connect the external component to the CD changer jack on the rear using the Line
Input Adaptor KS-U57 (not supplied).
31
Preparations:
• For connecting the Line Input Adaptor KS-U57 and the external component, refer to the Installation/
Connection Manual (separate volume).
• Before operating the external component using the following procedure, select the external input
correctly. (See “Selecting the external component to use” on page 30.)
ENGLISH
1
CD
-CH
Note on One-Touch Operation:
When you press CD-CH, the power automatically comes on. You do not have to press
to turn on the power.
Select the external component.
• If “LINE IN”* does not appear on the display, see page 30
and select the external input (“LINE IN”).
* Displayed only when one of the following sources is selected
— FM, AM and CD.
2
Turn on the connected component and start playing the source.
3
Adjust the volume.
37
Page 40

DAB TUNER OPERATIONS
This section is ONLY FOR KD-SX878R, when used with a JVC DAB (Digital Audio
Broadcasting) tuner (separately purchased). We recommend that you use DAB tuner
KT-DB1500 with your unit.
If you have another DAB tuner, consult your JVC IN-CAR ENTERTAINMENT dealer.
• Refer also to the Instructions supplied with your DAB tuner.
ENGLISH
What is DAB system?
DAB is one of the digital radio broadcasting systems available today. It can deliver CD
quality sound without any annoying interference and signal distortion. Furthermore, it can
carry text, pictures and data.
In contrast to FM broadcast, where each programme is transmitted on its own frequency,
DAB combines several programmes (called “services”) to form one “ensemble.”
With the DAB tuner connected with this unit, you can enjoy these DAB services.
Tuning into an ensemble and one of the services
A typical ensemble has 6 or more programmes (services) broadcast at the same time. After
tuning into an ensemble, you can select a service you want to listen to.
4
3
CD
Before you start....
Press FM/AM/DAB briefly if you are selecting CD, CD changer or LINE IN as the source.
1
DAB
1,2
Select the DAB tuner.
Each time you press and hold the button for more than 1
second, the DAB tuner and the FM/AM tuner are alternately
selected.
DAB
FM/AM
2
FM/AM
DAB
Select the DAB band (DAB1, DAB2, or DAB3).
FM/AM
38
You can select any one of DAB1, DAB2, and DAB3 to tune
into an ensemble.
DAB 1 DAB 2
DAB 3
Page 41

3
To search
ensembles of higher
frequencies
To search
ensembles of lower
frequencies
Start searching an ensemble.
When an ensemble is received, searching stops.
ENGLISH
4
To stop searching before an ensemble is received, press the same button you have pressed
for searching.
MO
RND
5
∞
RPT
Select an service you want to listen to.
To change the display information while tuning into an
ensemble
Normally service name is shown on the display.
By pressing DISP, you can also change the display while tuning into an ensemble.
Each time you press the button, the following information appears for a while on the display.
Service name Band/Preset number
Frequency
Ensemble name
Channel no.Clock time
To restore the FM/AM tuner
Press and hold FM/AM/DAB for more than 1 second again.
To tune in a particular ensemble without searching:
1 Press and hold FM/AM/DAB for more than 1 second.
2 Press FM/AM/DAB repeatedly to select the DAB band (DAB1, DAB2, or DAB3).
3 Press and hold
4 Press
• If you hold down the button, the frequency keeps changing until you release the button.
¢ or 4 repeatedly until the ensemble you want is reached.
¢ or 4 for more than 1 second.
39
Page 42

Storing DAB services in memory
You can preset up to 6 DAB services in each DAB band (DAB1, DAB2 and DAB3) manually.
ENGLISH
1
2
FM/AM
FM/AM
DAB
DAB
4
3
5
1,2
Select the DAB tuner.
Each time you press and hold the button, the DAB tuner and
the FM/AM tuner are alternately selected.
DAB
FM/AM
Select the DAB band (DAB1, DAB2, or DAB3)
you want.
Each time you press the button, the DAB band changes as
follows:
DAB 1 DAB 2
DAB 3
40
3
Tune into an ensemble you want.
Page 43

4
MO
RND
5
∞
RPT
Select a service of the ensemble you want.
5
Press and hold the number button (in this example, 1) for more
than 2 seconds.
Band/preset number and service
name flash alternately for a while.
6
Repeat the above procedure to store other DAB services into
other preset numbers.
Notes:
• A previously preset DAB service is erased when a new DAB service is stored in the same preset
number.
• Preset DAB services are erased when the power supply to the memory circuit is interrupted (for
example, during battery replacement). If this occurs, pr eset the DAB services again.
ENGLISH
41
Page 44

Tuning into a preset DAB service
You can easily tune into a preset DAB service.
Remember that you must store services first. If you have not stored them yet, see pages 40
ENGLISH
and 41.
1
2
3
FM/AM
FM/AM
DAB
DAB
3
1,2
Select the DAB tuner.
Each time you press and hold the button, the DAB tuner and
the FM/AM tuner are alternately selected.
DAB
FM/AM
Select the DAB band (DAB1, DAB2, or DAB3)
you want.
Each time you press the button, the DAB band changes as
follows:
DAB 1 DAB 2
DAB 3
Select the number (1 – 6) for the preset DAB
service you want.
42
Page 45

MAINTENANCE
Handling CDs
This unit has been designed only to reproduce the CDs bearing the
Other discs cannot be played back.
How to handle CDs
When removing a CD from its case, press down the center holder of the case
and lift the CD out, holding it by the edges.
• Always hold the CD by the edges. Do not touch its recording surface.
When storing a CD into its case, gently insert the CD around the center
holder (with the printed surface facing up).
• Make sure to store CDs into the cases after use.
To keep CDs clean
A dirty CD may not play correctly. If a CD does become dirty, wipe it with a soft
cloth in a straight line from center to edge.
To play new CDs
New CDs may have some rough spots around the inner and outer edges. If such
a CD is used, this unit may reject the CD.
To remove these rough spots, rub the edges with a pencil or ball-point pen, etc.
Moisture condensation
Moisture may condense on the lens inside the CD player in the following cases:
• After starting the heater in the car.
• If it becomes very humid inside the car.
Should this occur, the CD player may malfunction. In this case, eject the CD and leave the unit turned on
for a few hours until the moisture evaporates.
COMPACT
DIGITAL AUDIO
mark.
Center holder
ENGLISH
CAUTIONS:
• Do not insert 8 cm CDs (single CDs) into the loading slot. (Such CDs cannot be ejected.)
• Do not insert any CD of unusual shape — like a heart or flower; otherwise, it will cause a malfunction.
• Do not expose CDs to direct sunlight or any heat source or place them in a place subject to high temperature
and humidity. Do not leave them in a car.
• Do not use any solvent (for example, conventional record cleaner, spray, thinner, benzine, etc.) to clean
CDs.
When playing a CD-R (Recordable)
You can play back your original CD-Rs on this receiver.
• Before playing back CD-Rs, read their instructions or cautions carefully.
• Some CD-Rs recorded on CD recorders may not be played back on this receiver because of their disc
characteristics, and of the following reasons:
– Discs are dirty or scratched.
– Moisture condensation occurs on the lens inside the unit.
– The pickup lens inside the CD player is dirty.
• Use only “finalized” CD-Rs.
• CD-RWs (Rewritable) cannot be played back on this receiver.
• Do not use CD-Rs with stickers or sticking labels on the surface. They may cause malfunctions.
About mistracking:
Mistracking may result from driving on extremely rough roads. This does not damage the unit and the
CD, but will be annoying.
We recommend that you stop CD play while driving on such rough roads.
43
Page 46

TROUBLESHOOTING
What appears to be trouble is not always serious. Check the following points before calling a
service center.
Symptoms
Causes
Remedies
• CD cannot be played back.
ENGLISH
• CD sound is sometimes
interrupted.
• Sound is sometimes
interrupted.
• Sound cannot be heard from
the speakers.
• SSM (Strong-station
Sequential Memory)
automatic preset does not
work.
• Static noise while listening
to the radio.
•“NO DISC” appears on the
display.
•“RESET 8” appears on the
display.
•“RESET 1-RESET 7”
appears on the display.
• CD can be neither played
back nor ejected.
• This unit does not work at
all.
• The CD changer does not
work at all.
CD is inserted upside down.
You are driving on rough roads.
The disc is scratched.
Connections are incorrect.
Connections are incorrect.
The volume is turned to the
minimum level.
Connections are incorrect.
Signals are too weak.
The antenna is not connected
firmly.
No CD is in the magazine.
CDs are inserted incorrectly.
This unit is not connected to a
CD changer correctly.
The unit may function
incorrectly.
The built-in microcomputer
may function incorrectly due to
noise, etc.
Insert the CD correctly.
Stop playing CD while driving on
rough roads.
Change the disc.
Check the cords and
connections.
Check the cords and
connections.
Adjust it to the optimum level.
Check the cords and
connections.
Store stations manually.
Connect the antenna firmly.
Insert CDs into the magazine.
Insert them correctly.
Connect this unit and the CD
changer correctly and press
the reset button of the CD
changer.
Press the reset button of the
CD changer.
Press and 0 at the
same time for several seconds.
Be careful not to drop CD when
it is ejected.
Press and hold both SEL and
several seconds to reset the
unit. (The clock setting and
preset stations stored in
memory are erased.)
page 2.)
at the same time for
(See
44
Page 47

SPECIFICATIONS
AUDIO AMPLIFIER SECTION
Maximum Power Output:
Front: 40 W per channel
Rear: 40 W per channel
Continuous Power Output (RMS):
Front: 16 W per channel into 4 Ω, 40 Hz
to 20,000 Hz at no more than 0.8%
total harmonic distortion.
Rear: 16 W per channel into 4 Ω, 40 Hz
to 20,000 Hz at no more than 0.8%
total harmonic distortion.
Load Impedance: 4 Ω (4 Ω to 8 Ω allowance)
Tone Control Range
Bass: ±10 dB at 100 Hz
Treble: ±10 dB at 10 kHz
Frequency Response: 40 Hz to 20,000 Hz
Signal-to-Noise Ratio: 70 dB
Line-Out Level/Impedance: 2.0 V/20 kΩ load
(full scale)
Output impedance: 1 kΩ
TUNER SECTION
Frequency Range
FM: 87.5 MHz to 108.0 MHz
AM: (MW) 522 kHz to 1,620 kHz
(LW) 144 kHz to 279 kHz
CD PLAYER SECTION
Type: Compact disc player
Signal Detection System: Non-contact optical
pickup (semiconductor laser)
Number of channels: 2 channels (stereo)
Frequency Response: 5 Hz to 20,000 Hz
Dynamic Range: 96 dB
Signal-to-Noise Ratio: 98 dB
Wow and Flutter: Less than measurable limit
GENERAL
Power Requirement
Operating Voltage: DC 14.4 V (11 V to 16 V
allowance)
Allowable Operational Temperature:
0˚C to +40˚C
Grounding System: Negative ground
Dimensions (W × H × D)
Installation Size:
182 mm × 52 mm × 150 mm
Panel Size: 188 mm × 58 mm × 14 mm
Mass: 1.3 kg (excluding accessories)
Design and specifications subject to change
without notice.
ENGLISH
[FM Tuner]
Usable Sensitivity: 11.3 dBf (1.0 µV/75 Ω)
50 dB Quieting Sensitivity:
16.3 dBf (1.8 µV/75 Ω)
Alternate Channel Selectivity (400 kHz):
65 dB
Frequency Response: 40 Hz to 15,000 Hz
Stereo Separation: 30 dB
Capture Ratio: 1.5 dB
[MW Tuner]
Sensitivity: 20 µV
Selectivity: 35 dB
[LW Tuner]
Sensitivity: 50 µV
45
Page 48

Having TROUBLE with operation?
Please reset your unit
Refer to page of How to reset your unit
Haben Sie PROBLEME mit dem Betrieb?
Bitte setzen Sie Ihr Gerät zurück
Siehe Seite Zurücksetzen des Geräts
Vous avez des PROBLÈMES de fonctionnement?
Réinitialisez votre appareil
Référez-vous à la page intitulée Comment réinitialiser votre appareil
Hebt u PROBLEMEN met de bediening?
Stel het apparaat terug
Zie de pagina met de paragraaf Het apparaat terugstellen
EN, GE, FR, NL
VICTOR COMPANY OF JAPAN, LIMITED
JVC
0600HISFLEJES
Page 49

1
CD Mechanism
ABC
CD PICKUP UNIT MECHA. SWITCH
SW1~4
TRACKING
FOCUS
CN501
RF AMP
IC521
TA2109F-X
SPINDLE/FEED
MOTOR
SPINDLE
FEED
LOADING MOTOR
LOADING
BTL DRIVER
IC501
LA6557
SW1~4
LM 0/1
2
3
4
5
Block diagram
SYSTEM
CONTROLLER
IC701
CD LPF
IC581
NJM4565M
BUFFER
IC801
HD74HC126FP
CD L/R
CH L/R
VOL CL
VOL DA
VOL CE
E.VOL
IC161
TEA6320T
IC71
SAA6579T-X
TUL/R
FM/AM
TUNER
TU1
FRONT L/R
REAR L/R
MUX
CLK
DATA
AM/FM
CP601
J1
ENC 1,2
CP691
VOLUME JOG
JS690
REMOCON
REMOTO CONTROL
RECEIVER
IC680
RPM6938-SV4
KEY0~2
KEY MATRIX
S601~S620
LCDDI
LCDCLK
LCDCE
LCD DRIVER
IC691
LC75823E
S1~S52 COM1~3
LCD1
QLD0105-001
RF
TE
FE
FMO
DMO
TRO
FOO
DSP & DAC
IC541
TC9462F
Main board
BUS0~3
BUCK,CCE,RST
CD L/R
CJ322
LINE OUT
CJ301
2-1
POWER
AMP.
IC301
LA13158A
FRONT L
FRONT R
REAR L
REAR R
CN901
Front board
Page 50

Standard schematic diagrams
Receiver & power amplifier circuit
TU1
5
C31
2.2/50
C32
0.001
Q31
2SD601A
C41
4
9V
CD.L
CD.R
REST
SW1
SW2
SW3
SW4
LM0
LM1
CD8V
RST
BUS0
BUS1
BUS2
BUS3
BUCK
3
CCE
VMC0334-001
0.033
2SD601A
GND
CP601
DETACH
10V
ACC5V
REMOCON
ENC1
ENC2
LCDCL
LCDDA
LCDCE
KEY0
KEY1
KEY2
2
CH.L
GND
SI
CONT+B
CH.R
MEM-IN
J801
QNZ0095-001
QAU0156-001
J1
QNZ0009-001
L1
4.7u
C1
1SS133
5P
C4
220P
1k
R2
1k
R3
C44
0.01
R31
R32
10K
1K
Q32
2SD601A
R33
1.5K
R43
1K
R41
R42
3.3K
C42
0.0082
Q41
1K
C43
100/16
Q42
2SC3661
10K
10K
R686
R685
D706
D705
D704
R801
100k
R802
100k
R810
100
C801
100K
0.01
R803
KD-S8RKD-S8R
C77
COMP.OUT
C189
1/50
C169
1/50
Q1
D1
D2
1SS133
C2
10P
C5
C6
0.047
0.47/50
Q43
UN2211
MONO
IFC
C10
0.001
SD/ST
OSC
AMEO
FMEO
UN2211
R44
33
FM/AM
D41
MA3110
C720
C719
0.1
0.1
R804
IC801
HD74HC126FP
Q5
2SB815
R7
Q7
4.7K
R8
47k
SQ
R52
15K
R51
470
10K
Q52
2SD601A
C51
0.1
0.47/50
R53
10K
C52
D703
D702
10k
R805
100
C802
UN2211
0
R1
C7
100P
R54
Q51
C53
2SD601A
R55
2.2K
4700P
D701
I/O
R808
SCK
22k
R806R807
100K
100k
0.047
R809
C172
0.018
C8
0.01
R4
22k
Q4
2SB709A
D3
MA152WK
R9
3.3K
Q751
UN2211
R56
47K
C54
0.01
C55
330P
47K
R57
SI
SO
100K
R751
FM/AM
AFCK
R6
10K
MONO
SEEK/STP
47K
SEEK/STP
C9
0
B51
R10
R58
47K
Q53
UN2211
SM
C192
220/10
8.2( 1/8W)
9V
Q2
C3
2SD601A
0.1/50
0.018
SK/STP
AFCK
Q161
2SD601A
R5
4.7k
R169
4.7k
Q3
UN2111
47/10
C73
0.01
C72
47P
X71
QAX0263-001
C71
82P
LEVEL
SK/STP
R706
10K
VDD
VSS
0.022
10K
10K
R167
22k
R168
B174
D161
MA152WK
C74
2.2k
R71
2.2k
R72
C721
PS2
0.1
R730
100K
R725
100K
R726
R727
R728
R729
R170
47k
47K
47k
47k
2SD601A
0
Q181
4.7k
IC71
SAA6579T-X
9V
C718
DETACH
10K
R738
UN2111
0.01
Q174
R731
ACC5V
100K
4.7k
R711
SISOSCK
C191R187
1/50
C171
1/50
22k
R188
C173
0.1
Q162
UN2111
C75
560P
C76
2.2/50
2.2k
R73
D241
82K
0.22/50
R241
C241
RST
BUS2
BUS0
BUS1
BUS3
4.7k
4.7k
R710
R709
SDA
1SS133
C242
0.047
1SS133
1k
D242
R242
LM1
CCE
BUCK
R745
UPD178078GF-525
SCL
CH.L
CD.L
CD.R
CH.R
R181
220k
D953
MA152WK
9V
R244
12k
R245
180k
R243
100
C244
1/50
2SD601A
22k
Q241
C243
22/16
LM0
R744
2.2K
2.2K
LM1
IC701
R703
R704
2.2k
2.2k
I/O
LCDDA
LCDCL
47k
R247
R246
R164 R184
3.3K 3.3K
R746
LM0
10K
R705
2.2k
4.7k
R712
R736
SW2
SW3
SW4
REST
ENC1
LCDCE
R163
R161
220k
C911
47/10
R732
47K
SDA
47K
10K
R718
10k
R734
KEY0
ENC2
2.2k
R162
22k
C161
C162
1/50
C164
0.22/50
C181
1/50
C182
C912
100/10
R733
47K
SCL
TEL_MUTE
R747
47K
R717
R716
10k
10k
10k
R715
KEY1
KEY2
LEVEL
C166
C163
0.0056
0.15
C165
0.033
0.0082
C184
0.22/50
C185
0.033
C183
0.15
0.0082
C186
0.0056
R911
R183
22k
R182
C913
2.2k
100/16
PS2
R743R742
R723
SW1
100K
REMOCON
R724
4.7K
R701
1K
R702
1.2K
R750
RESET
10k
10k
R714
R713
4.7k
R721
4.7k
R720
4.7k
R719
SM
SQ
10
47K47K
47K
C706
100/6.3
R722
390
QAX0406-001
C704
0.1
R708
47K
R707
47K
C168
2.2/50
C167
2.2/50
47K47K
47K
R166
UN2111
Q781
MA152WK
R165R185
47K
R186
R352
D341
MA152WA
R781
27K
1K
R782
D782
1SS133
Q782
UN2211
C783
0.082
D781
C781
47/6.3
1K
47K
R891
R892
D891
MA152WA-X
Q891
UN2211
C891
0.047
Q977
2SB709A
Q976
UN2211
C902
C901
220/10
0.01
Q901
2SB709A
R901
2.2K
BA4905-V3
IC961
C903
22/16
R902
47k
Q902
UN2213
Q783
UN2111
MTZJ11C
D784
C782
R978
22/16
12K
R977
27K
R903
0
D909
MA152WA
10/16
C915
10/16
C905
C904
220/10
C907
2.2/50
10/16
C906
R905 R906
4.7K 10k
IC161
TEA6320T
C188
2.2/50
C187
2.2/50
C712
C713
68p
0.01
R976
47K
L701
4.7u
CD8V
10V
C708
CONT+B
100/6.3
ACC5V
C707
0.01
VPP
R737
47K
R740
TEL_MUTE
47K
FMEO
AMEO
OSC
IFC
R739
X1
47K
SD/ST
C701
27P
C702
27P
X701
C703
0.1
MEM-IN
C709
0.01
IC301
HA13158A
R351
27K
R331
27K
R341
27K
R321
27K
R342
1K
1K
R353
2.2k
R343
2.2k
Q341
2SD1048
47( 1/4W)
C914
4.7/25
390P
390P
C332
C352
390P
390P
C310
10/16
C342
C322
R310
4.7K
Q351
2SD1048
100
100
R354
R344
L961
R907
D910
CRS03-W
C312
0.047
J301
QNN0170-001
QQR0703-001
D912
C909
CRS03-W
0.1
CP961
QNZ0112-001
QMF021-100-J1
1N5401-TU
C908
2200/16
0.1
0.1
C313
C314
D911
0.1
C315
C309
10/16
1
CD / MAIN SIGNAL
TUNER SIGNAL
KD-S8R FSDH3159-005TW 1/3
Note:/S/c/JES/3159.001
2-2
HABC DE FG
Page 51

KD-S8R
CD Servo control circuit
5
R508
LM0
LM1
LD
VCC
SW4
VF
SW3
R504
VB
LOADING-
LOADING+
SPINDLE+
FOCUS-
SPINDLE-
FOCUS+
TRACKING+
TRACKING-
SW1
VA
SW2
VE
VC
MD
REST
VREF
FEED+
FEED-
4
CN501
QGB2027M1-26S
3
VREF
C521
0.01
VCC
C522
0.01
VC
VA
VB
VE
VF
MD
2
LD
LA6567
20K
IC501
LOADING+
LOADING-
TRACKING-
TRACKING+
FOCUS-
FOCUS+
C533
R521
47K
R522
47K
R523
47K
R524
47K
R525
100K
R526
100K
R533
56P
6.8K
R532 R531
R534
15K 2.2K
47K
IC521
TA2109F
C523
0.01
C524
100/6.3
FO
SP
220/10
0.01
C502
SPINDLE+
SPINDLE-
FEED+
FEED-
FD
RF
RFGC
RFRP
TP1
RF
0.1
C531
C532
C525
0.01
Q521
2SB1322
0.1
SEL
C526
100/6.3
R528
R527
Q501
C503
2SB1322
22/16
R502
5.6K
R503
2.4K
FE
SBAD
TP2
VREF
C529
C530
0.01
100/6.3
R530
33K
27K
100P
C527
100/6.3
C528
R529
TEB
TE
22
22
R501
5.6K
C501
20K
R507
8.2K
D501
DSK10C
R506
D502
DSK10C
0R0
C569
C567
C568
C570
L541
4.7uH
100
R558
C571
100/6.3
C572
C573
L542
4.7uH
4.7K
4.7K
4.7K
4.7K
R545
R541
R542
R543
R544
10K
C541
100/6.3
0.01
C542
100P
100/6.3
GND
100/6.3
R-CH
0.01
L-CH
BUS0
BUCK
BUS1
CCE
BUS2
BUS3
RST
C543
IC541
1/50
TC9462F
C565
10P
10P
0.01
0.01
X541 C566
QAX0413-001
R581
R-CH
L-CH
C582
24K
R591
24K
C564
C563
C545
0.01
C544
100/6.3
4.7/25
C581
820P
C591
820P
0.01
100/6.3
22K22K
22K22K
R582R583
R592R593
C583
C593
47/6.3
47/6.3
C592
4.7/25
C562
C561
SEL
TEB
C560
6.8K
3.3K
1.5K
R555
R556
R557
R549
R548
R546 R547
C546
10K 47K
100/6.3
R584
R585
R595
12K
R594
33K
0.047
0.047
0.047
C559
0.047
R554
3.3K
15K
R553
1.5K
R552
C555
R551
C552
0.01
2700P
C551
0.01
C550
R550
33K
0.015
470K
68K
47P
C547
R586
33K
1.5K
12K
C584
120P
IC581
NJM4565M
C595
100/10
C594
120P
R596
1.5K
RFGC
C558
C557
560P
100/6.3
C556
3300P
0.033
10K
C548
TE
SBAD
FE
RFRP
C554
0.01
C553
RF
100/6.3
C549
100/6.3
9V
CD.R
GND
CD.L
REST
SW1
SW2
SW3
SW4
LM0
LM1
BUS0
BUS1
BUS2
BUS3
BUCK
CCE
RST
GND
1
CD / MAIN SIGNAL
KD-S8R FSDH3159-005CW 2/3
Note:/s/C/jes/3159.002
ABCD E F G
2-3
Page 52

KD-S8RKD-S8R
LCD Driver circuit
5
4
IC680
RPM6938-SV4
C671
0.01
D671
MA3051
LCD1
QLD0106-001
SEG49
SEG50
SEG51
MA152WK
MA152WA
SEG52
COM1
COM2
R690
COM3
0R0
C691
0.022
C698
680P
R698
51K
3
R602
KEY0
KEY1
KEY2
2
R603
820
S601
S602 S603
S608S607 S609 S610 S611 S612 S613
R616
820
S615 S616 S617 S618 S619
R605R604
S604
R618R617
R619
1.2K820
1.8K
R606
2.7K1.8K1.2K820
S605 S606
R612R608 R609 R610 R611
R620
2.7K
SEG2
SEG1
R613
3.9K2.7K820 820 1.2K 1.8K
S620
SEG9
SEG8
SEG7
SEG6
SEG5
SEG4
SEG3
SEG10
SEG11
SEG12
SEG13
SEG14
SEG15
SEG16
SEG17
SEG18
SEG19
SEG20
SEG21
SEG27
SEG22
SEG23
SEG24
SEG25
SEG26
D654D655D656
D657
D670
R614
10K
S614
MA3051
510
510
R643
R644
510
680
680
R642
R646
R645
SEG34
SEG33
SEG32
SEG31
SEG30
SEG29
SEG28
D648D649
D651
D652D653
D650
510
510
R639
R640
510
390
R641
R638
SEG41
SEG40
SEG39
SEG38
SEG37
SEG36
SEG35
D644D645D646
D641
D638 D637 D636
D642
D639
D643 D640
D647
270
270
R636
R632
R635
270
270
390
R633
R634
R637
SEG48
SEG47
SEG46
SEG45
SEG44
SEG43
SEG42
D631
D633
R652
D635 D634 D632
R651
560
390
390
R631
COM3
COM2
COM1
SEG52
SEG51
SEG50
SEG49
R691
2.2k
R692
2.2k
D693
10K
R693
10K
LCDCE
R694
10K
LCDCL
1K
D660
680
680
680
R650
R648
R649
R695
10K
LCDDA
R696
D659
D692
MA152WK
680
R647
C697
2.2/20
D695
R697
680K
MA152WK
MA152WA
D691
MA3047/M/-X
D694
D696
R672R671
47010K
C672
4.7/6.3
SEG48
SEG47
SEG46
SEG45
SEG44
SEG43
LC75823E
SEG6
SEG5
SEG4
SEG7
SEG3
SEG2
SEG1
C682
R684
0.022
SEG42
SEG41
SEG40
SEG39
SEG38
SEG37
SEG36
SEG35
SEG34
SEG33
IC691
SEG10
SEG11
SEG12
SEG13
SEG14
SEG15
SEG9
SEG8
SEG16
JS690
QSW0793-001
R681
100
DET
C681
220
220
R683
0.022
SEG32
SEG31
SEG30
SEG29
SEG28
SEG27
SEG26
SEG25
SEG24
SEG23
SEG22
SEG21
SEG20
SEG19
SEG18
SEG17
10V
ACC5V
REMOCON
ENC1
ENC2ENC2
LCDCL
LCDDA
LCDCE
KEY0
KEY1
KEY2
CP691
VMC0335-001
1
KD-S8R FSDH3159-005SW 3/3
Note:/s/C/jes/3159.003
2-4
HABC DE FG
Page 53

PARTS LIST
[ KD-S8R ]
* All printed circuit boards and its assemblies are not available as service parts.
Area suffix
KD-S8R
E ----------- Continental Europe
EX ---------- Central Europe
- Contents -
Exploded view of general assembly and parts list
CD mechanism assembly and parts list
Electrical parts list
Packing materials and accessories parts list
3-2
3-5
3-9
3-14
3-1
Page 54

KD-S8R
Exploded view of general assembly and parts list
7
46
43
7
7
43
4
A
Block No.
M
M
1
M
62
41
42
39
31
Main board
2
40
B
6
6
6
63
28
8
11
12
8
14
13
15
26
10
26
26
Front board
38
3
34
35
37
36
LCD1
32
3-2
25
A
1
30
5
58
22
57
5
65
56
5
64
61
18
53
66
19
16
55
54
20
52
59
60
24 33
23
21
B
17
Page 55

KD-S8R
M1MM
)
)
( General assembly )
Parts list
Item Parts number Parts name Area
A
1 FSJC1029-404 TOP CHASSIS 1
2 FSMH3001-202 SIDE PANEL 1
3 FSKM3011-002 BOTTOM COVER 1
4 FSMA3004-003 INSULATOR 1
5 QYSDST2604Z SCREW 3 CHASSIS+MECHA B
6 FSKZ4005-001 SCREW 3 CHASSIS+SIDE PA
7 QYSDST2604Z SCREW 3 CHASSIS+REAR BK
8 QYSDST2606Z SCREW 2 CHASSIS+MAIN PW
10 FSJC2013-002 FRONT CHASSIS 1
11 FSKS3010-001 LOCK LEVER 1
12 FSKW4005-003 TORSION SPRING 1 FOR LOCK LEVEL
13 FSXP3026-002 RLS KNOB 1
14 FSKW3002-015 COMP.SPRING 1
15 FSPK3009-001 BLIND 1
16 FSJC1048-001 FRONT PANEL 1
17 FSJD3019-00G FINDER ASSY 1
18 FSXP2045-002 PRESET BUTTON 1 1-6
19 FSXP3053-002 POWER BUTTON 1
20 FSXP3064-001 EJECT BUTTON 1
21 FSXP2038-003 D.FUNC CAP 1
22 FSXK3003-005 VOL.KNOB 1 JOG DIAL
23 FSXP3063-001 DETACH BUTTON 1
24 FSKW3002-012 COMP. SPRING 1 FOR DETACH BUTT
25 FSJC1049-001 REAR COVER 1
26 VKZ4777-001 MINI SCREW 5 FRONT+REAR
28 FSYN3159-D005 NAME PLATE 1
30 ------------ CD MECHA 1 TN-CCD1001Z
31 QMFZ021-100-J1 FUSE
A
32 QNZ0442-001 RUBBER CONNE 1
33 FSYH3020-001 LCD CASE 1
34 FSKS3019-001 LENS CASE 1
35 FSJK3025-001 LCD LENS 1
36 FSYH4074-001 LIGHT SHEET 1
37 FSYH4079-001 LIGHT SHEET 1
38 FSKS3016-002 LED HOLDER 1
39 FSKM3012-012 REAR BRACKET 1 WITH FUSE LABEL
40 FSKL4018-00B IC BRACKET 1
41 FSKL4014-002 HEAT SINK 1 0.2MM THICKER
42 FSKL4015-002 REG BRACKET 1
43 QYSDST2606Z SCREW 2 FOR REAR BKT
46 QYSDSF3006Z SCREW 1 FOR LINE OUT
52 FSXP4006-001 SCM BUTTON 1 SCM
53 FSXP2041-003 PUSH BUTTON(L
54 FSXP3062-001 PUSH BUTTON(R
55 FSXP2043-001 UP DOWN BUTTON 1 UP/DOWN
56 FSXP3061-001 SEL BUTTON 1
57 FSYH4036-032 SHEET 1 SEL BTN
58 FSJK3027-001 RIM LENS 1
Block No.
Q'ty Description
1
1
1
3-3
Page 56

KD-S8R
Parts list
Item Parts number Parts name Area
A
59 FSJK3026-001 CD LENS 1
60 FSYH4036-053 SHEET 1 D.FUNC BUTTON
61 FSYH4036-058 SHEET 1 SCM BUTTON
62 E406709-001 CAUTION LABEL 1
63 VMA4652-001SS EARTH PLATE 1
64 FSYH4036-061 SHEET 1
65 FSYH4036-062 SHEET 1
66 GE40112-001A LIGHT COVER 1
LCD 1 QLD0106-001 LCD MODULE 1
( General assembly )
Q'ty Description
Block No. M1MM
3-4
Page 57

CD mechanism assembly and parts list
Grease
G-31SA
G-31SA(Bottom side)
RX-405
102
23
102
Block No.
49
M
KD-S8R
2
M
M
12
90
91
b
113
14
70
3
80
16
71
101
86
1
23
101
101
101
15
17
5
100
7
20
10
9
11
105
65
66
62
13
2
4
100
7
6
19
18
8
48
43
64
b
a
62
68
d
110
67
c
61
72
41
47
113
134
103
46
50
42
30
88
93
102
22
79
62
87
114
82
54
c
81
78
117
133
22
89
115
116
92
49
85
83
84
107
36
55
131
56
130
107
d
107
31
112
d
34
54
46
135
49
32
38
52
39
109
47
132
a
104
51
63
40
107
57
37
35
33
101
108
106
29
106
108
3-5
Page 58

KD-S8R
)
)
)
)
)
)
)
)
)
)
)
)
)
)
)
)
)
)
)
)
)
)
)
Parts list
Item Parts number Parts name Area
A
1 30310101T FRAME 1
2 30310103T DANPER PIN 2
3 30310107T UPPER PLATE 1
4 30310108T SEL STOP PLATE 1
5 30310142T SEL ARM (L)L 1
6 30310143T SEL ARM (R)L 1
7 30310145T S ARM SPRING(L
8 30310112T TRIG LEVER 1
9 30310155T TRIG PL(Z
10 30310115T TRIG PL SPRING 1
11 30310116T TRIG ARM 1
12 30310134T FIX ARM (L)B 1
13 30310159T FIX ARM (R)Z 1
14 30310150T FIX PL (L)Z 1
15 30310156T FIX PL (R) Z 1
16 30310138T LDG GR (6)B 1
17 30310122T LDG GEAR (6)SP 1
18 30310148T S.L ARM(N
19 30310125T S.L ARM SPRING 1
20 30310149T REAR DAM BKT(Z
22 30310151T HUNG UP SP (FZ
23 30310129T HUNG UP SP (R
29 30300510T PU GEAR(B
30 --------------- T.T.BASE(Z
31 --------------- TURN TABLE(Z
32 30310544T F.M.BASE(Z
33 30310547T FD GR BLK(Z
34 --------------- FD GR AZ 1
35 --------------- FD GR CZ 1
36 30310546T PU GUIDE(Z
37 --------------- FD SCREW(Z
38 30310533T THRUST SPR(M
39 30310548T PU M NUT(Z
40 30310512T NUT PUSH SPR PL 1
41 30310558T CLP ARM(Z
42 30310514T CLP ARM SPRING 1
43 30310552T CLAMPER(Z
46 --------------- LOCK PIN(FZ
47 --------------- LOCK PIN(RZ
48 30310557T CLAMPER PLATE(Z 1
49 30310524T DAMPER (J
50 30310525T CLP ARM SPR (L
51 30310545T F SCREW GUIDE(Z 1
52 30310556T PU G.SP PLT(Z
54 --------------- FEED MOTOR 2 FF030PK-09210
55 --------------- SPINDLE MOTOR 1 RF300CA-11440D
56 64180405T DET SW 1 ESE11SF4
57 OPTIMA-720L1 C.D PICK (CAR
( CD mechanism )
Q'ty Description
2
1
1
1
2
2
1
1
1
1
1
1
1
1
1
1
1
2
2
3
1
1
1
Block No. M2MM
3-6
Page 59

KD-S8R
M2MM
)
)
)
)
)
)
)
)
)
)
)
)
)
)
( CD mechanism )
Parts list
Item Parts number Parts name Area
A
61 30311035T FPC HOLDER(Z
62 19501403T WIRE CLAMPER 3
63 30311037T PICK UP FPC(Z
64 30311036T CONNECT.PCB(Z-J 1
65 30311038T WIRE (5P-Z
66 30311039T WIRE (LD-Z
67 30311040T WIRE (FD-Z
68 30311041T WIRE (RS-Z
70 64180402T DET SWITCH 2 ESE22MH1
71 64180403T DET SWITCH 2 ESE22MH3
72 68150232T CONNECTOR 1 TKC-W26X-C1
78 --------------- LDG PULLEY 1
79 30311105T SOPPORT PLATE 1
80 30311138T GR MT BLK(N
81 30311109T LDG GEAR (2
82 30311110T LDG GEAR (3
83 --------------- LDG GEAR (4
84 30311112T LDG GEAR (5
85 --------------- LDG GR ARM 1
86 30311136T LDG ROLLER 2
87 --------------- LDG RLR SHAFT 1
88 30311118T L.P SPRING (L
89 30311119T L.P SPRING (R
90 30311123T SW PCB 1
91 30311124T SW ACTUATOR 1
92 30311129T LDG BELT 1
93 30311140T FRONT BRKT (J
100 9C0620503T C B TAP SCREW 2 M2X5
101 9C2020401T C SCREW TS.G 5 M2X4
102 9C4320403T C B TAP SCREW 4 M2X4
103 9C0117223T SCREW 2 M1.7X2.2
104 9C4217703T C TAP SCREW S3 1 M1.7X7
105 9C0320201T C TAP SCREW S3 1 M2X2
106 9C4920013T C TAP SCREW S3 2 M2X10
107 9C4920603T C TAP SCREW B3 4 M2X6
108 9P0220031T TAMS SCREW 2 M2X3
109 9C0314203T C TAP SCREW 1 M1.4X2
110 9C0420253 C TAP SCREW 1 M2X2.5
112 --------------- POLY WASHER 1 2.1X3.5X0.3
113 9W0330276 NW BLUE 2 2.9X5X0.3
114 --------------- WAVE WASHER 1
115 --------------- LUMILAR WASHER 1 2.5X6X0.1
116 9W0725030T LUMILAR WASHER 1 2.3X9.8X0.25
117 9W0640030T WASHER 1 1.4X3.2X0.4
130 303105310T FEED MO ASSY 1 NO.34 54
131 303105311T SPINDLE MO ASSY 1 NO.31 55 112
132 303105312T FEED SCREW ASSY 1 NO.35 37
133 303111301T LDG MOTOR ASSY 1 NO.54 78
Q'ty Description
1
1
1
1
1
1
1
1
1
1
1
1
1
1
Block No.
3-7
Page 60

KD-S8R
Parts list
Item Parts number Parts name Area
A
134 303111302T ROLLER SHAFT 1 NO.114 115
135 303105502T T.T.BASE ASSY 1 NO.30 46 47
( CD mechanism )
Q'ty Description
303111302T ROLLER SHAFT 1 NO.83 85 87
Block No. M2MM
3-8
Page 61

KD-S8R
Electrical parts list
Item
A
C 1 NDC21HJ-5R0X C CAPACITOR
C 2 NDC21HJ-100X C CAPACITOR
C 3 QERF1HM-104Z E CAPACITOR .10MF 20% 50V
C 4 NCS21HJ-221X C CAPACITOR
C 5 QERF1HM-474Z E CAPACITOR .47MF 20% 50V
C 6 NCB21EK-473X C CAPACITOR
C 7 NCS21HJ-101X C CAPACITOR
C 9 QER41AM-227 E CAPACITOR 220MF 20% 10V
C 10 NCB21HK-102X C CAPACITOR
C 31 QERF1HM-225Z E CAPACITOR 2.2MF 20% 50V
C 32 NCB21HK-102X C CAPACITOR
C 41 NCB21HK-333X C CAPACITOR
C 42 NCB21HK-822X C CAPACITOR
C 43 QERF1CM-107Z E CAPACITOR 100MF 20% 16V
C 44 NCB21HK-103X C CAPACITOR
C 51 QERF1HM-474Z E CAPACITOR .47MF 20% 50V
C 52 NCB21HK-472X C CAPACITOR
C 53 NCB21EK-104X C CAPACITOR
C 54 NCB21HK-103X C CAPACITOR
C 55 NCB21HK-331X C CAPACITOR
C 71 NDC21HJ-820X C CAPACITOR
C 72 NDC21HJ-470X C CAPACITOR
C 73 NCB21HK-103X C CAPACITOR
C 74 QERF1AM-476Z E CAPACITOR 47MF 20% 10V
C 75 NCS21HJ-561X C CAPACITOR
C 76 QEKJ1HM-225Z E CAPACITOR 2.2MF 20% 50V
C 77 NCB21EK-223X C CAPACITOR
C 161 QEKJ1HM-105Z E CAPACITOR 1.0MF 20% 50V
C 162 NCB21HK-822X C CAPACITOR
C 163 NCB21CK-154X C CAPACITOR
C 164 QEKJ1HM-224Z E CAPACITOR .22MF 20% 50V
C 165 NCB21HK-333X C CAPACITOR
C 166 NCB21HK-562X C CAPACITOR
C 167 QEKJ1HM-225Z E CAPACITOR 2.2MF 20% 50V
C 168 QEKJ1HM-225Z E CAPACITOR 2.2MF 20% 50V
C 169 QERF1HM-105ZM E CAPACITOR 1.0MF 20% 50V
C 171 QERF1HM-105ZM E CAPACITOR 1.0MF 20% 50V
C 172 NCB21HK-183X C CAPACITOR
C 173 NCB21EK-104X C CAPACITOR
C 181 QEKJ1HM-105Z E CAPACITOR 1.0MF 20% 50V
C 182 NCB21HK-822X C CAPACITOR
C 183 NCB21CK-154X C CAPACITOR
C 184 QEKJ1HM-224Z E CAPACITOR .22MF 20% 50V
C 185 NCB21HK-333X C CAPACITOR
C 186 NCB21HK-562X C CAPACITOR
C 187 QERF1HM-225Z E CAPACITOR 2.2MF 20% 50V
C 188 QERF1HM-225Z E CAPACITOR 2.2MF 20% 50V
C 189 QEKJ1HM-105Z E CAPACITOR 1.0MF 20% 50V
C 191 QERF1HM-105ZM E CAPACITOR 1.0MF 20% 50V
C 192 NCB21HK-183X C CAPACITOR
C 241 QEKJ1HM-224Z E CAPACITOR .22MF 20% 50V
C 242 NCB21EK-473X C CAPACITOR
C 243 QEKJ1CM-226Z E CAPACITOR 22MF 20% 16V
C 244 QEKJ1HM-105Z E CAPACITOR 1.0MF 20% 50V
C 309 QERF1CM-106ZM E CAPACITOR 10MF 20% 16V
C 310 QERF1CM-106ZM E CAPACITOR 10MF 20% 16V
C 312 NCB21EK-473X C CAPACITOR
C 313 NCB21EK-104X C CAPACITOR
C 314 NCB21EK-104X C CAPACITOR
C 315 NCB21EK-104X C CAPACITOR
C 322 NCS21HJ-391X C CAPACITOR
C 332 NCS21HJ-391X C CAPACITOR
C 342 NCS21HJ-391X C CAPACITOR
Parts number Parts name Area
( Main board )
Block No. 01
Remarks
Item
A
C 352 NCS21HJ-391X C CAPACITOR
C 501 QERF1AM-227ZM E CAPACITOR 220MF 20% 10V
C 502 NCB21HK-103X C CAPACITOR
C 503 QEKJ1CM-226Z E CAPACITOR 22MF 20% 16V
C 521 NCB21HK-103X C CAPACITOR
C 522 NCB21HK-103X C CAPACITOR
C 523 NCB21EK-103X C CAPACITOR
C 524 QEKJ1AM-107Z E CAPACITOR 100MF 20% 10V
C 525 NCB21HK-103X C CAPACITOR
C 526 QEKJ0JM-107Z E CAPACITOR 100MF 20% 6.3V
C 527 QEKJ0JM-107Z E CAPACITOR 100MF 20% 6.3V
C 528 NCS21HJ-101X C CAPACITOR
C 529 NCB21HK-103X C CAPACITOR
C 530 QEKJ0JM-107Z E CAPACITOR 100MF 20% 6.3V
C 531 NCB21EK-104X C CAPACITOR
C 532 NCB21EK-104X C CAPACITOR
C 533 NCS21HJ-560X C CAPACITOR
C 541 QEKJ0JM-107Z E CAPACITOR 100MF 20% 6.3V
C 542 NCB21HK-103X C CAPACITOR
C 543 QEKJ1HM-105Z E CAPACITOR 1.0MF 20% 50V
C 544 QEKJ0JM-107Z E CAPACITOR 100MF 20% 6.3V
C 545 NCB21HK-103X C CAPACITOR
C 546 QEKJ0JM-107Z E CAPACITOR 100MF 20% 6.3V
C 547 NDC21HJ-470X C CAPACITOR
C 548 NCB21HK-153X C CAPACITOR
C 549 QEKJ0JM-107Z E CAPACITOR 100MF 20% 6.3V
C 550 NCB21HK-103X C CAPACITOR
C 551 NCB21HK-272X C CAPACITOR
C 552 NCB21HK-103X C CAPACITOR
C 553 QEKJ0JM-107Z E CAPACITOR 100MF 20% 6.3V
C 554 NCB21HK-103X C CAPACITOR
C 555 NCB21EK-333X C CAPACITOR
C 556 NCB21HK-332X C CAPACITOR
C 557 NCS21HJ-561X C CAPACITOR
C 558 QEKJ0JM-107Z E CAPACITOR 100MF 20% 6.3V
C 559 NCB21HK-473X C CAPACITOR
C 560 NCB21HK-473X C CAPACITOR
C 561 NCB21HK-473X C CAPACITOR
C 562 NCB21HK-473X C CAPACITOR
C 563 QEKJ0JM-107Z E CAPACITOR 100MF 20% 6.3V
C 564 NCB21HK-103X C CAPACITOR
C 565 NCB21HK-103X C CAPACITOR
C 566 NDC21HJ-100X C CAPACITOR
C 567 NDC21HJ-100X C CAPACITOR
C 568 NCB21HK-103X C CAPACITOR
C 569 QEKJ0JM-107Z E CAPACITOR 100MF 20% 6.3V
C 570 NCS21HJ-101X C CAPACITOR
C 571 QEKJ0JM-107Z E CAPACITOR 100MF 20% 6.3V
C 572 QEKJ0JM-107Z E CAPACITOR 100MF 20% 6.3V
C 573 NCB21HK-103X C CAPACITOR
C 581 NCS21HJ-821X C CAPACITOR
C 582 QEKF1EM-475ZM E CAPACITOR 4.7MF 20% 25V
C 583 QEKJ0JM-476Z E CAPACITOR 47MF 20% 6.3V
C 584 NCS21HJ-121X C CAPACITOR
C 591 NCS21HJ-821X C CAPACITOR
C 592 QEKF1EM-475ZM E CAPACITOR 4.7MF 20% 25V
C 593 QEKJ0JM-476Z E CAPACITOR 47MF 20% 6.3V
C 594 NCS21HJ-121X C CAPACITOR
C 595 QEKJ1AM-107Z E CAPACITOR 100MF 20% 10V
C 701 NDC21HJ-220X C CAPACITOR
C 702 NDC21HJ-220X C CAPACITOR
C 703 NCB21EK-104X C CAPACITOR
C 704 NCB21EK-104X C CAPACITOR
Parts number Parts name Area
Remarks
3-9
Page 62

KD-S8R
Q
Q
Q
Q
Q
Q
Q
Q
Q
Q
Q
Q
Q
Q
Q
Q
Q
Q
Q
Q
Q
Q
Q
Q
Q
Q
Q
Q
Q
Q
Q
Electrical parts list
Item
A
C 706 QEKJ0JM-107Z E CAPACITOR 100MF 20% 6.3V
C 707 NCB21HK-103X C CAPACITOR
C 708 QERF0JM-107Z E CAPACITOR 100MF 20% 6.3V
C 709 NCB21HK-103X C CAPACITOR
C 712 NCS21HJ-680X C CAPACITOR
C 713 NCB21HK-103X C CAPACITOR
C 718 NCB21HK-103X C CAPACITOR
C 719 NCB21EK-104X C CAPACITOR
C 720 NCB21EK-104X C CAPACITOR
C 721 NCB21EK-104X C CAPACITOR
C 781 QERF0JM-107Z E CAPACITOR 100MF 20% 6.3V
C 782 QERF1CM-226Z E CAPACITOR 22MF 20% 16V
C 783 NCB21EK-823X C CAPACITOR
C 891 NCB21EK-473X C CAPACITOR
C 901 QERF1AM-227ZM E CAPACITOR 220MF 20% 10V
C 902 NCB21HK-103X C CAPACITOR
C 903 QEKJ1CM-226Z E CAPACITOR 22MF 20% 16V
C 904 QERF1AM-227ZM E CAPACITOR 220MF 20% 10V
C 905 QERF1CM-106ZM E CAPACITOR 10MF 20% 16V
C 906 QERF1CM-106ZM E CAPACITOR 10MF 20% 16V
C 907 QERF1HM-225Z E CAPACITOR 2.2MF 20% 50V
C 908 QEZ0338-228 E CAPACITOR 2200MF
C 909 NCB21EK-104X C CAPACITOR
C 911 QERF1AM-476Z E CAPACITOR 47MF 20% 10V
C 912 QEKJ1AM-107Z E CAPACITOR 100MF 20% 10V
C 913 QEKJ1CM-107Z E CAPACITOR 100MF 20% 16V
C 914 QERF1EM-475Z E CAPACITOR 4.7MF 20% 25V
C 915 QERF1CM-106ZM E CAPACITOR 10MF 20% 16V
CN501 QGB2027M1-26S CONNECTOR
CP601 VMC0334-001 CONNECTOR F.PANEL CONN.
CP961 QNZ0112-001 CAR CONNECTOR
D 1 1SS133-T1 SI DIODE
D 2 1SS133-T1 SI DIODE
D 3 MA152WK-X SI DIODE
D 161 MA152WK-X SI DIODE
D 241 1SS133-T1 SI DIODE
D 242 1SS133-T1 SI DIODE
D 341 MA152WA-X DIODE
D 501 DSK10C-T1 DIODE
D 701 MA3056/M/-X ZENER DIODE
D 702 MA3056/M/-X ZENER DIODE
D 703 MA3056/M/-X ZENER DIODE
D 704 MA3056/M/-X ZENER DIODE
D 705 MA3056/M/-X ZENER DIODE
D 706 MA3056/M/-X ZENER DIODE
D 781 MA152WK-X SI DIODE
D 782 1SS133-T1 SI DIODE
D 784 MA3110/M/-X ZENER DIODE
D 891 MA152WA-X DIODE
D 909 MA152WA-X DIODE
D 910 CRS03-W SB DIODE
D 911 1N5401-TU-15 DIODE
D 912 CRS03-W SB DIODE
D 953 MA152WK-X SI DIODE
IC 71 SAA6579T-X IC
IC161 TEA6320T-X IC
IC301 HA13158A IC
IC501 LA6567H-X IC
IC521 TA2109F-X IC
IC541 TC9462F IC
IC581 NJM4565M-WE IC
IC701 UPD178078GF-525 IC
IC961 BA4905-V3 IC
Parts number Parts name Area
( Main board )
Block No. 01
Remarks
Item
A
J 1 QNZ0009-001 CAR ANT JACK
J 301 QNN0170-001 PIN JACK (REEL)
L 1 QQL244J-4R7Z INDUCTOR
L 541 QQL244J-4R7Z INDUCTOR
L 542 QQL244J-4R7Z INDUCTOR
L 701 QQL244J-4R7Z INDUCTOR
L 961 QQR0703-001 CHOKE COIL
R 1 NRSA02J-0R0X MG RESISTOR
R 2 NRSA02J-102X MG RESISTOR
R 3 NRSA02J-102X MG RESISTOR
R 4 NRSA02J-223X MG RESISTOR
R 5 NRSA02J-472X MG RESISTOR
R 6 NRSA02J-473X MG RESISTOR
R 7 NRSA02J-472X MG RESISTOR
R 8 NRSA02J-473X MG RESISTOR
R 9 NRSA02J-332X MG RESISTOR
R 10 NRS181J-8R2X MG RESISTOR
R 31 NRSA02J-102X MG RESISTOR
R 32 NRSA02J-103X MG RESISTOR
R 33 NRSA02J-152X MG RESISTOR
R 41 NRSA02J-332X MG RESISTOR
R 42 NRSA02J-102X MG RESISTOR
R 43 NRSA02J-102X MG RESISTOR
R 44 NRS181J-330X MG RESISTOR
R 51 NRSA02J-471X MG RESISTOR
R 52 NRSA02J-153X MG RESISTOR
R 53 NRSA02J-103X MG RESISTOR
R 54 NRSA02J-103X MG RESISTOR
R 55 NRSA02J-222X MG RESISTOR
R 56 NRSA02J-473X MG RESISTOR
R 57 NRSA02J-473X MG RESISTOR
R 58 NRSA02J-473X MG RESISTOR
Parts number Parts name Area
1 UN2211-X TRANSISTOR
2 2SD601A/R/-X TRANSISTOR
3 UN2111-X TRANSISTOR
4 2SB709A/R/-X TRANSISTOR
5 2SB815/7/-X TRANSISTOR
7 UN2211-X TRANSISTOR
31 2SD601A/R/-X TRANSISTOR
32 2SD601A/R/-X TRANSISTOR
41 2SD601A/R/-X TRANSISTOR
42 2SC3661-X TRANSISTOR
43 UN2211-X TRANSISTOR
51 2SD601A/R/-X TRANSISTOR
52 2SD601A/R/-X TRANSISTOR
53 UN2211-X TRANSISTOR
161 2SD601A/R/-X TRANSISTOR
162 UN2111-X TRANSISTOR
174 UN2111-X TRANSISTOR
181 2SD601A/R/-X TRANSISTOR
241 2SD601A/R/-X TRANSISTOR
341 2SD1048/6-7/-X TRANSISTOR
351 2SD1048/6-7/-X TRANSISTOR
501 2SB1322/RS/-T TRANSISTOR
521 2SB1322/RS/-T TRANSISTOR
781 UN2111-X TRANSISTOR
782 UN2211-X TRANSISTOR
783 UN2111-X TRANSISTOR
891 UN2211-X TRANSISTOR
901 2SB709A/R/-X TRANSISTOR
902 UN2213-X TRANSISTOR
976 UN2211-X TRANSISTOR
977 2SB709A/R/-X TRANSISTOR
Remarks
3-10
Page 63

KD-S8R
Electrical parts list
Item
A
R 71 NRSA02J-222X MG RESISTOR
R 72 NRSA02J-222X MG RESISTOR
R 73 NRSA02J-222X MG RESISTOR
R 161 NRSA02J-224X MG RESISTOR
R 162 NRSA02J-223X MG RESISTOR
R 163 NRSA02J-222X MG RESISTOR
R 164 NRSA02J-332X MG RESISTOR
R 165 NRSA02J-473X MG RESISTOR
R 166 NRSA02J-473X MG RESISTOR
R 167 NRSA02J-103X MG RESISTOR
R 168 NRSA02J-223X MG RESISTOR
R 169 NRSA02J-472X MG RESISTOR
R 170 NRSA02J-472X MG RESISTOR
R 181 NRSA02J-224X MG RESISTOR
R 182 NRSA02J-223X MG RESISTOR
R 183 NRSA02J-222X MG RESISTOR
R 184 NRSA02J-332X MG RESISTOR
R 185 NRSA02J-473X MG RESISTOR
R 186 NRSA02J-473X MG RESISTOR
R 187 NRSA02J-103X MG RESISTOR
R 188 NRSA02J-223X MG RESISTOR
R 241 NRSA02J-823X MG RESISTOR
R 242 NRSA02J-102X MG RESISTOR
R 243 NRSA02J-101X MG RESISTOR
R 244 NRSA02J-123X MG RESISTOR
R 245 NRSA02J-184X MG RESISTOR
R 246 NRSA02J-223X MG RESISTOR
R 247 NRSA02J-473X MG RESISTOR
R 310 NRSA02J-472X MG RESISTOR
R 321 NRSA02J-273X MG RESISTOR
R 331 NRSA02J-273X MG RESISTOR
R 341 NRSA02J-273X MG RESISTOR
R 342 NRSA02J-102X MG RESISTOR
R 343 NRSA02J-222X MG RESISTOR
R 344 NRSA02J-101X MG RESISTOR
R 351 NRSA02J-273X MG RESISTOR
R 352 NRSA02J-102X MG RESISTOR
R 353 NRSA02J-222X MG RESISTOR
R 354 NRSA02J-101X MG RESISTOR
R 501 NRSA02J-562X MG RESISTOR
R 502 NRSA02J-562X MG RESISTOR
R 503 NRSA02J-242X MG RESISTOR
R 504 NRSA02J-203X MG RESISTOR
R 506 NRS181J-0R0X MG RESISTOR
R 507 NRS181J-822X MG RESISTOR
R 508 NRS181J-203X MG REGISTOR
R 521 NRSA02J-473X MG RESISTOR
R 522 NRSA02J-473X MG RESISTOR
R 523 NRSA02J-473X MG RESISTOR
R 524 NRSA02J-473X MG RESISTOR
R 525 NRSA02J-104X MG RESISTOR
R 526 NRSA02J-104X MG RESISTOR
R 527 NRSA02J-220X MG RESISTOR
R 528 NRSA02J-220X MG RESISTOR
R 529 NRSA02J-273X MG RESISTOR
R 530 NRSA02J-333X MG RESISTOR
R 531 NRSA02J-222X MG RESISTOR
R 532 NRSA02J-153X MG RESISTOR
R 533 NRSA02J-682X MG RESISTOR
R 534 NRSA02J-473X MG RESISTOR
R 541 NRSA02J-472X MG RESISTOR
R 542 NRSA02J-472X MG RESISTOR
R 543 NRSA02J-472X MG RESISTOR
Parts number Parts name Area
( Main board )
Block No. 01
Remarks
Item
A
R 544 NRSA02J-472X MG RESISTOR
R 545 NRSA02J-103X MG RESISTOR
R 546 NRSA02J-103X MG RESISTOR
R 547 NRSA02J-473X MG RESISTOR
R 548 NRSA02J-683X MG RESISTOR
R 549 NRSA02J-474X MG RESISTOR
R 550 NRSA02J-333X MG RESISTOR
R 551 NRSA02J-103X MG RESISTOR
R 552 NRSA02J-152X MG RESISTOR
R 553 NRSA02J-153X MG RESISTOR
R 554 NRSA02J-332X MG RESISTOR
R 555 NRSA02J-332X MG RESISTOR
R 556 NRSA02J-682X MG RESISTOR
R 557 NRSA02J-152X MG RESISTOR
R 558 NRS181J-101X MG RESISTOR
R 581 NRSA02J-243X MG RESISTOR
R 582 NRSA02J-223X MG RESISTOR
R 583 NRSA02J-223X MG RESISTOR
R 584 NRSA02J-333X MG RESISTOR
R 585 NRSA02J-123X MG RESISTOR
R 586 NRSA02J-152X MG RESISTOR
R 591 NRSA02J-243X MG RESISTOR
R 592 NRSA02J-223X MG RESISTOR
R 593 NRSA02J-223X MG RESISTOR
R 594 NRSA02J-333X MG RESISTOR
R 595 NRSA02J-123X MG RESISTOR
R 596 NRSA02J-152X MG RESISTOR
R 685 NRSA02J-103X MG RESISTOR
R 686 NRSA02J-103X MG RESISTOR
R 701 NRSA02J-102X MG RESISTOR
R 702 NRSA02J-122X MG RESISTOR
R 703 NRSA02J-222X MG RESISTOR
R 704 NRSA02J-222X MG RESISTOR
R 705 NRSA02J-222X MG RESISTOR
R 706 NRSA02J-103X MG RESISTOR
R 707 NRSA02J-473X MG RESISTOR
R 708 NRSA02J-473X MG RESISTOR
R 709 NRSA02J-472X MG RESISTOR
R 710 NRSA02J-472X MG RESISTOR
R 711 NRSA02J-472X MG RESISTOR
R 712 NRSA02J-472X MG RESISTOR
R 713 NRSA02J-103X MG RESISTOR
R 714 NRSA02J-103X MG RESISTOR
R 715 NRSA02J-103X MG RESISTOR
R 716 NRSA02J-103X MG RESISTOR
R 717 NRSA02J-103X MG RESISTOR
R 718 NRSA02J-103X MG RESISTOR
R 719 NRSA02J-472X MG RESISTOR
R 720 NRSA02J-472X MG RESISTOR
R 721 NRSA02J-472X MG RESISTOR
R 722 NRSA02J-0R0X MG RESISTOR
R 723 NRSA02J-104X MG RESISTOR
R 724 NRSA02J-472X MG RESISTOR
R 725 NRSA02J-104X MG RESISTOR
R 726 NRSA02J-473X MG RESISTOR
R 727 NRSA02J-473X MG RESISTOR
R 728 NRSA02J-473X MG RESISTOR
R 729 NRSA02J-473X MG RESISTOR
R 730 NRSA02J-104X MG RESISTOR
R 731 NRSA02J-104X MG RESISTOR
R 732 NRSA02J-473X MG RESISTOR
R 733 NRSA02J-473X MG RESISTOR
R 734 NRSA02J-103X MG RESISTOR
Parts number Parts name Area
Remarks
3-11
Page 64

KD-S8R
Electrical parts list
Item
A
R 736 NRSA02J-103X MG RESISTOR
R 737 NRSA02J-473X MG RESISTOR
R 738 NRSA02J-103X MG RESISTOR
R 739 NRSA02J-473X MG RESISTOR
R 740 NRSA02J-103X MG RESISTOR
R 742 NRSA02J-473X MG RESISTOR
R 744 NRSA02J-222X MG RESISTOR
R 745 NRSA02J-222X MG RESISTOR
R 747 NRSA02J-473X MG RESISTOR
R 750 NRSA02J-473X MG RESISTOR
R 781 NRS181J-273X MG RESISTOR
R 782 NRS181J-102X MG RESISTOR
R 801 NRSA02J-104X MG RESISTOR
R 802 NRSA02J-104X MG RESISTOR
R 803 NRSA02J-104X MG RESISTOR
R 807 NRSA02J-104X MG RESISTOR
R 809 NRSA02J-104X MG RESISTOR
R 891 NRSA02J-473X MG RESISTOR
R 892 NRSA02J-102X MG RESISTOR
R 901 NRSA02J-222X MG RESISTOR
R 902 NRSA02J-473X MG RESISTOR
R 903 NRSA02J-0R0X MG RESISTOR
R 905 NRSA02J-472X MG RESISTOR
R 906 NRSA02J-103X MG RESISTOR
R 907 QRZ0125-470X C RESISTOR 47 1/1W
R 911 NRSA02J-100X MG RESISTOR
R 976 NRSA02J-473X MG RESISTOR
R 977 NRSA02J-273X MG RESISTOR
R 978 NRSA02J-123X MG RESISTOR
TU 1 QAU0156-002 TUNER
X 71 QAX0263-001Z CRYSTAL
X 541 QAX0413-001Z CRYSTAL
X 701 QAX0406-001Z CRYSTAL
Parts number Parts name Area
( Main board )
Block No. 01
Remarks
3-12
Page 65

KD-S8R
Electrical parts list
Item
A
C 681 NCB21HK-223X C CAPACITOR
C 682 NCB21HK-223X C CAPACITOR
C 691 NCB21HK-223X C CAPACITOR
C 697 NBE41DM-225X TS E CAPACITOR
C 698 NCS21HJ-681X C CAPACITOR
CP691 VMC0335-001 CONNECTOR
D 631 SML-310LT/MN/-X LED POWER LED
D 632 SML-310VT/JK/-X LED R.ENC LED1
D 633 SML-310VT/JK/-X LED R.ENC LED2
D 634 SML-310VT/JK/-X LED R.ENC LED3
D 635 SML-310VT/JK/-X LED R.ENC LED4
D 636 SML-310VT/JK/-X LED R.ENC LED5
D 637 SML-310VT/JK/-X LED SEL LED1
D 638 SML-310VT/JK/-X LED SEL LED2
D 639 SML-310VT/JK/-X LED SEL LED3
D 640 SML-310VT/JK/-X LED EJECT LED
D 641 SML-310VT/JK/-X LED F.SKIP/UP LED
D 642 SML-310VT/JK/-X LED B.SKIP/DOWN LED
D 643 SML-310VT/JK/-X LED MO/RND LED
D 644 SML-310VT/JK/-X LED RPT LED
D 645 SML-310VT/JK/-X LED CD LED
D 646 SML-310VT/JK/-X LED FM/AM LED
D 647 SML-310VT/JK/-X LED EXT/CD-CH LED
D 648 SML-310VT/JK/-X LED 1 LED
D 649 SML-310VT/JK/-X LED 2 LED
D 650 SML-310VT/JK/-X LED 3 LED
D 651 SML-310VT/JK/-X LED 4 LED
D 652 SML-310VT/JK/-X LED 5 LED
D 653 SML-310VT/JK/-X LED 6 LED
D 654 SML-310VT/JK/-X LED SOUND
D 655 SML-310VT/JK/-X LED DISPLAY
D 656 SML-310VT/JK/-X LED SCAN
D 657 LNJ308G81/1-3/X LED BBE LED
D 659 NSPW310BS/BRS/ LED LCD ILLUM.LED1
D 660 NSPW310BS/BRS/ LED LCD ILLUM.LED2
D 670 MA3051/M/-X ZENER DIODE
D 691 MA3047/M/-X ZENER DIODE
D 692 MA152WK-X SI DIODE
IC691 LC75823W IC
JS690 QSW0863-001 JOG SHUTTLE SW
R 602 NRSA02J-821X MG RESISTOR
R 603 NRSA02J-821X MG RESISTOR
R 604 NRSA02J-122X MG RESISTOR
R 605 NRSA02J-182X MG RESISTOR
R 606 NRSA02J-272X MG RESISTOR
R 608 NRSA02J-821X MG RESISTOR
R 609 NRSA02J-821X MG RESISTOR
R 610 NRSA02J-122X MG RESISTOR
R 611 NRSA02J-182X MG RESISTOR
R 612 NRSA02J-272X MG RESISTOR
R 613 NRSA02J-392X MG RESISTOR
R 614 NRSA02J-103X MG RESISTOR
R 616 NRSA02J-821X MG RESISTOR
R 617 NRSA02J-821X MG RESISTOR
R 618 NRSA02J-122X MG RESISTOR
R 619 NRSA02J-182X MG RESISTOR
R 620 NRSA02J-272X MG RESISTOR
R 631 NRSA02J-271X MG RESISTOR
R 632 NRSA02J-271X MG RESISTOR
R 633 NRSA02J-271X MG RESISTOR
R 634 NRSA02J-271X MG RESISTOR
R 635 NRSA02J-271X MG RESISTOR
R 636 NRSA02J-271X MG RESISTOR
Parts number Parts name Area
( Front board )
Block No. 02
Remarks
Item
A
R 637 NRSA02J-391X MG RESISTOR
R 638 NRSA02J-391X MG RESISTOR
R 639 NRSA02J-511X MG RESISTOR
R 640 NRSA02J-511X MG RESISTOR
R 641 NRSA02J-511X MG RESISTOR
R 642 NRSA02J-511X MG RESISTOR
R 643 NRSA02J-511X MG RESISTOR
R 644 NRSA02J-511X MG RESISTOR
R 645 NRSA02J-681X MG RESISTOR
R 646 NRSA02J-681X MG RESISTOR
R 647 NRSA02J-911X MG RESISTOR
R 648 NRSA02J-911X MG RESISTOR
R 649 NRSA02J-911X MG RESISTOR
R 650 NRSA02J-911X MG RESISTOR
R 651 NRSA02J-561X MG RESISTOR
R 652 NRSA02J-152X MG RESISTOR
R 681 NRSA02J-101X MG RESISTOR
R 690 NRSA02J-0R0X MG RESISTOR
R 691 NRSA02J-222X MG RESISTOR
R 692 NRSA02J-222X MG RESISTOR
R 693 NRSA02J-103X MG RESISTOR
R 694 NRSA02J-103X MG RESISTOR
R 695 NRSA02J-103X MG RESISTOR
R 696 NRSA02J-103X MG RESISTOR
R 697 NRSA02J-684X MG RESISTOR
R 698 NRSA02J-513X MG RESISTOR
S 601 NSW0124-001X TACT SWITCH POWER
S 602 NSW0124-001X TACT SWITCH SOUND
S 603 NSW0124-001X TACT SWITCH DISPLAY
S 604 NSW0124-001X TACT SWITCH SCAN
S 605 NSW0124-001X TACT SWITCH BBE
S 606 NSW0124-001X TACT SWITCH 1 /VCR FUNC.
S 607 NSW0124-001X TACT SWITCH SELECT
S 608 NSW0124-001X TACT SWITCH 2
S 609 NSW0124-001X TACT SWITCH 3 /VCR PLAY
S 610 NSW0124-001X TACT SWITCH 4 /VCR STOP
S 611 NSW0124-001X TACT SWITCH 5 /VCR REW
S 612 NSW0124-001X TACT SWITCH 6 /VCR FWD
S 613 NSW0124-001X TACT SWITCH F.SKIP/UP
S 614 NSW0124-001X TACT SWITCH EJECT
S 615 NSW0124-001X TACT SWITCH EXT./CD-CH
S 616 NSW0124-001X TACT SWITCH FM/AM
S 617 NSW0124-001X TACT SWITCH CD
S 618 NSW0124-001X TACT SWITCH RPT
S 619 NSW0124-001X TACT SWITCH MO/RND
S 620 NSW0124-001X TACT SWITCH B.SKIP/DOWN
Parts number Parts name Area
Remarks
3-13
Page 66

KD-S8R
Packing materials and accessories parts list
P4
A1
P2
Block No.
Block No.
3
M
M
M
M
4
M
M
P2
A16
A4
A13
P4
P3
A14
P5
KIT1:A5~A9
A12
3-14
A2~3,A17
Page 67

KD-S8R
M3MM
( Packing )
M4MM
( Accessories )
ENG,GER,FRE,DUT
ENG,GER,FRE,
SPA,ITA,SWE,FIN
DUT,SPA,ITA
SWE,FIN
Parts list
Item Parts number Parts name Area
A
P 1 FSPE3004-092 CARTON 1
P 2 FSPH1018-002 PAPER CUSHION 2
P 3 VPE3005-064 POLY BAG 1 FOR SET
P 4 QPA01703505P POLY BAG 2 FOR INST.BOOK
P 5 QPA00801205 POLY BAG 1 FOR SCREW KIT
Q'ty Description
Parts list
Item Parts number Parts name Area
A
A 1 FSUN3117-312 INST.BOOK 1
A 2 FSUN3117-322 INST.BOOK 1
A 3 FSUN3117-T482 INSTALL MAUNAL 1
FSUN3117-T452 INSTALL MAUNAL 1
FSUN3117-T212 INSTALL MAUNAL 1
A 4 LV40978-001A CAUTION SHEET 1
A 5 VKZ4027-202 PLUG NUT 1
A 6 VKH4871-001SS MOUNT BOLT 1
A 7 VKZ4328-001 LOCK NUT 1
A 8 WNS5000Z WASHER 1
A 9 FSKL4010-002 HOOK 2
A 12 FSJB3001-30C HARD CASE 1
A 13 FSKM2004-202 MOUNTING SLEEVE 1
A 14 QAM0175-001 POWER CORD 1 WITH TEL MUTE
A 16 FSJD2034-001 TRIM PLATE 1
A 17 BT-54013-1 WARRANTY CARD 1
KIT 1 KDGS717K-SCREW1 SCREW PARTS KIT 1 A5-A9
Q'ty Description
Block No.
Block No.
3-15
 Loading...