

Page 1

JLIP CAPTURE PACK
JLIP CAPTURE-PACK
ENSEMBLE JLIP CAPTURE
JLIP CAPTURE PAKKET
PAQUETE JLIP CAPTURE
PACCHETTO JLIP CAPTURE
JLIP CAPTURE PACK
JLIP-SIEPPAUSPAKKAUS
JLIP CAPTURE PACK
JLIP BILDEOVERFØRINGSPAKKE
HS-V4KITE
BEFORE OPERATION
VOR DER INBETRIEBNAHME
AVANT DE COMMENCER
VOOR GEBRUIK
ANTES LA OPERACION
PRIMA DI INIZIARE
FØR BRUGEN
ENNEN KÄYTTÖÄ
INNAN DU SÄTTER IGÅNG
FØR BRUK
ENGLISHDEUTSCHFRANÇAIS
NEDERLANDSCASTELLANO
ITALIANODANSKSUOMISVENSKANORSK
INSTRUCTIONS
BEDIENUNGSANLEITUNG / MODE D’EMPLOI
GEBRUIKSAANWIJZING / MANUAL DE INSTRUCCIONES
MANUALE DI ISTRUZIONI / INSTRUKTIONSBOG
KÄYTTÖOHJEET / ANVISNINGAR
BRUKSANVISNING /
LYT0432-001A
Page 2
CAUTIONS
IMPORTANT (For owners in U.K.)
Connection to the mains supply in the United Kingdom.
DO NOT cut off the mains plug from this equipment. If the plug fitted is not suitable for
the power points in your home or the cable is too short to reach a power point, then obtain
an appropriate safety approved extension lead or consult your dealer.
BE SURE to replace the fuse only with an identical approved type, as originally fitted, and
to replace the fuse cover.
If nontheless the mains plug is cut off ensure to remove the fuse and dispose of the plug
immediately, to avoid a possible shock hazard by inadvertent connection to the mains
supply.
If this product is not supplied fitted with a mains plug then follow the instructions given
below:
DO NOT make any connection to the Larger Terminal coded E or Green.
The wires in the mains lead are coloured in accordance with the following code:
Blue to N (Neutral) or Black
Brown to L (Live) or Red
If these colours do not correspond with the terminal identifications of your plug, connect
as follows:
Blue wire to terminal coded N (Neutral) or coloured black.
Brown wire to terminal coded L (Live) or coloured Red.
If in doubt — consult a competent electrician.
i
Page 3

Some Do’s And Don’ts On The Safe
Use Of Equipment
This equipment has been designed and manufactured to meet international safety standards
but, like any electrical equipment, care must be taken if you are to obtain the best results and
safety is to be assured.
DO read the operating instructions before you attempt to use the equipment.
DO ensure that all electrical connections (including the mains plug, extension leads and
interconnections between pieces of equipment) are properly made and in accordance with
the manufacturer's instructions. Switch off and withdraw the mains plug when making or
changing connections.
DO consult your dealer if you are ever in doubt about the installation, operation or safety of
your equipment.
DO be careful with glass panels or doors on equipment.
DON'T continue to operate the equipment if you are in any doubt about it working normally,
or if it is damaged in any way — switch off, withdraw the mains plug and consult your
dealer.
DON'T remove any fixed cover as this may expose dangerous voltages.
DON'T leave equipment switched on when it is unattended unless it is specifically stated that it
is designed for unattended operation or has a standby mode. Switch off using the
switch on the equipment and make sure that your family knows how to do this. Special
arrangements may need to be made for infirm or handicapped people.
DON'T use equipment such as personal stereos or radios so that you are distracted from the
requirements of road safety. It is illegal to watch television whilst driving.
DON'T listen to headphones at high volume, as such use can permanently damage your
hearing.
DON'T obstruct the ventilation of the equipment, for example with curtains or soft furnishings.
Overheating will cause damage and shorten the life of the equipment.
DON'T use makeshift stands and NEVER fix legs with wood screws — to ensure complete
safety always fit the manufacturer's approved stand or legs with the fixings provided
according to the instructions.
DON'T allow electrical equipment to be exposed to rain or moisture.
ABOVE ALL...
— NEVER let anyone especially children push anything into holes, slots or any other
opening in the case — this could result in a fatal electrical shock;
— NEVER guess or take chances with electrical equipment of any kind — it is better to be
safe than sorry!
ii
Page 4

2 EN
JVC SOFTWARE LICENCE AGREEMENT
IMPORTANT
TO CUSTOMERS:
MAKE SURE TO READ THIS CAREFULLY BEFORE OPENING THE SEALED SOFTWARE
PACKETS
Thank you for purchasing our product. In order to start using the software programme
enclosed, you are required to accept the terms and conditions of the agreement as provided below.
Software Licence Agreement
This is a legal agreement between you (either an individual or an entity) and Victor Company
of Japan, Limited (JVC). By opening the sealed software packages and/or by using the Programme, you are agreeing to be bound by the terms of this Agreement. Should you not agree
to the terms hereof, return the unopened software packets and the accompanying items to the
place where you obtained them.
1. GRANT OF LICENCE
This Licence Agreement (Agreement) permits you to use the software programme (Programme)
enclosed in this package and/or the accompanying written material (e. g. printed manuals).
Although you are also granted licence to load the Programme into temporary memory (i. e.
RAM) or install the Programme once into permanent memory (e. g. hard disk, CD-R, or other
storage device) of one (1) computer system, you are strictly prohibited to install the Programme on a network server for the sole purpose of internal distribution.
2. COPYRIGHT
Notwithstanding the provision of Article 1 hereof, any copyright in the Programme is owned
exclusively by JVC and is protected by the Japanese copyright law, copyright laws of other
countries, as applicable, and relevant provisions under international treaties including the
Berne Convention for the Protection of Literary and Artistic Works, as amended, and the
Universal Copyright Convention, as amended. Therefore, you must treat the Programme like
any other copyrighted material except that you may either (a) make one (1) copy of the Programme solely for your personal backup or archival purposes, or (b) transfer the Programme
to a single hard disk, provided that you keep the original solely for your personal backup or
archival purposes.
3. RESTRICTION ON THE PROGRAMME
You may not reverse engineer, decompile, disassemble, revise or modify the Programme,
except to the extent that such restriction is expressly prohibited by applicable law. JVC and its
distributors and dealers shall not be liable for any claims or defects etc. arising out of or in
connection with such prohibited activities as indicated in this Agreement.
4. OTHER RESTRICTIONS
Y ou may not rent, lease or transfer the Programme to any third party nor let such a party use
the Programme.
Page 5

EN 3
5. LIMITED WARRANTY
JVC warrants that any media in which the Programme is embodied (e.g. floppy discs, CDROM, etc.) are free from any defects in materials and workmanship for a period of thirty (30)
days from the date of your purchase and that any hardware accompanying the Programme is
also free from defects to the extent provided in the attached Warranty Form. JVC’s entire
liability and your exclusive remedy in connection with the Programme shall be, at JVC’s option, either (a) return of the price paid, or (b) replacement of defective Programme media.
6. DISCLAIMER OF WARRANTIES
EXCEPT FOR THE EXPRESS W ARRANTIES STATED HEREIN AND TO THE EXTENT PERMITTED BY APPLICABLE LAW, JVC AND ITS SUPPLIERS DISCLAIM ANY OTHER WARRANTIES, EITHER EXPRESS OR IMPLIED, INCLUDING BUT NOT LIMITED TO IMPLIED
WARRANTIES OF MERCHANTABILITY AND FITNESS FOR A PARTICULAR PURPOSE IN
REGARD TO THE PROGRAMME AND THE ACCOMPANYING PRINTED MATERIALS.
7. LIMITED LIABILITY
TO THE EXTENT PERMITTED BY APPLICABLE LAW, IN NO EVENT SHALL JVC AND ITS
SUPPLIERS BE LIABLE FOR ANY INDIRECT, SPECIAL, INCIDENTAL OR CONSEQUENTIAL DAMAGES WHATSOEVER, REGARDLESS OF THE FORM OF ACTION WHETHER
IN CONTRACT, TORT, STRICT PRODUCT LIABILITY OR OTHERWISE (INCLUDING BUT
NOT LIMITED TO DAMAGES FOR LOSS OF PROFITS, BUSINESS INTERRUPTION, LOSS
OF BUSINESS INFORMATION OR ANY OTHER PECUNIAR Y LOSS) ARISING OUT OF OR
IN CONNECTION WITH THE USE OF OR INABILITY TO USE THE PROGRAMME, EVEN IF
JVC HAS BEEN ADVISED OF THE POSSIBILITY OF SUCH DAMAGES.
Victor Company of Japan, Limited
Page 6

4 EN
CONTENTS
MAJOR FEATURES 5 – 6
GETTING STARTED 7
Provided Accessories .............................................................
Connectable Devices ..............................................................
Operating Environment ...........................................................
INSTALLATION 8 – 9
JLIP Video Capture................................................................
JLIP Video Producer ..............................................................
Adobe® Acrobat® Reader 3.0 ...................................................
Mr. Photo Gold ....................................................................
CONNECTIONS 10 – 11
Presto! Mr. Photo Gold 13 – 19
TECHNICAL SUPPORT FOR REGISTERED USERS 20 – 21
NOTICE FOR USERS 21
NOTE:
The JLIP Video Capture/Producer instruction manual is also included on the CD-ROM in
PDF format. To open, double-click the file in the desired language. Note that Adobe
Acrobat® Reader must be installed to read PDF files.
CAUTION:
● Operate this equipment according to the operating procedures described in this manual.
● Use only the provided CD-ROM. Never use any other CD-ROM to run this software.
● Do not attempt to modify this software.
● Changes or modifications not approved by JVC could void user’s authority to operate the
equipment.
®
7
7
7
8
8
8
9
How to handle a CD-ROM
● Take care not to soil or scratch the mirror surface (opposite to the printed surface). Do
not write anything or put a sticker on either the front or back surface. If the CD-ROM gets
dirty, gently wipe it with a soft cloth outward from the centre hole using a circular
motion.
● Do not use conventional disc cleaners or cleaning spray.
● Do not bend the CD-ROM or touch its mirror surface.
● Do not store your CD-ROM in a dusty, hot or humid environment. Keep it away from
direct sunlight.
● The Readme.TXT file provides additional information for setup and information that is not
included in the instruction manual. Please read the file before installing the provided
software programme.
● You can find the latest information (in English) on the provided software programme at our
world wide web server at http://www.jvc-victor.co.jp.
Page 7
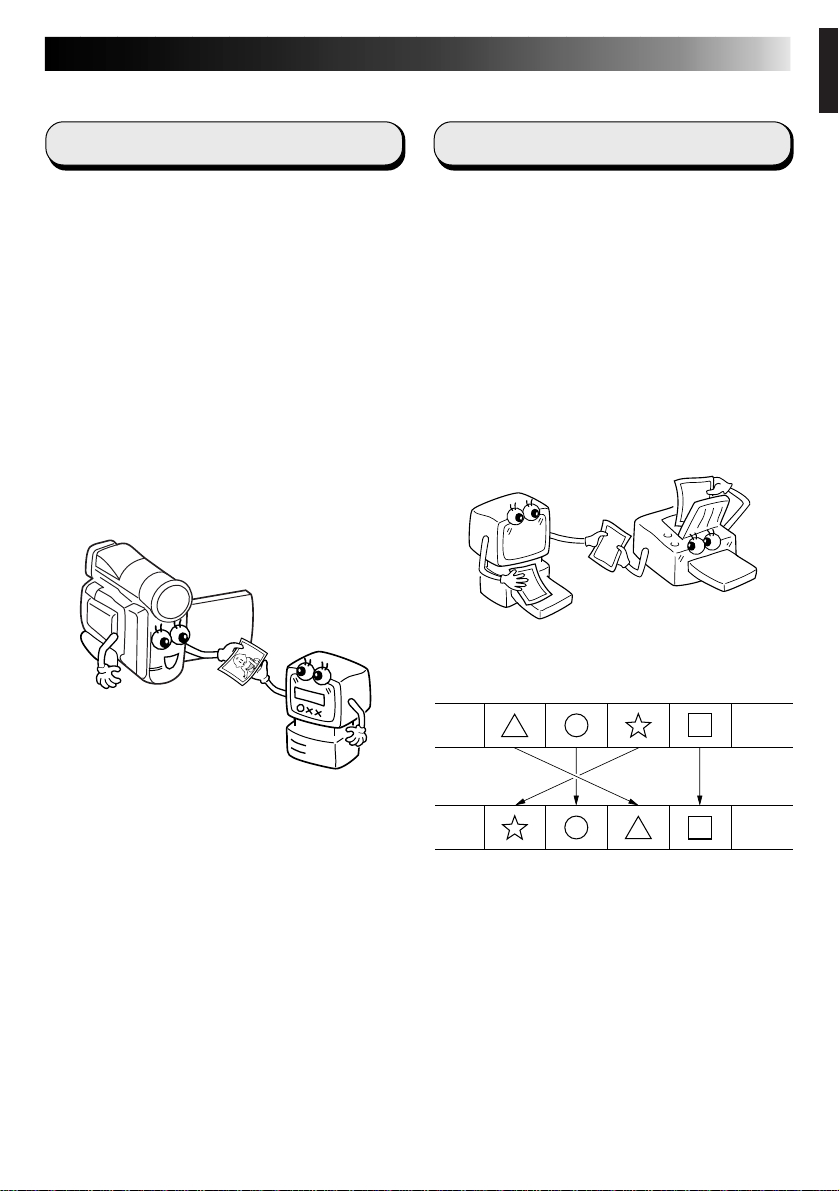
MAJOR FEATURES
Two software programmes are provided.
EN 5
JLIP Video Capture
Video Capture Facility
Video images from a video camera can be
captured as still images with 16.77 million
colours through the serial port (RS-232C) of a
WindowsT-operated computer.
JLIP Control Facility
With a JLIP compatible video camera,
• all basic video operations can be
executed via the computer display;
• up to 99 images can be captured
automatically with Programme Video
Capture (playing tape — scanning —
transferring to PC).
JLIP Video Producer
JLIP Control Facility
With a JLIP-compatible video camera,
• all basic video operations can be
executed on the computer display;
• programmed video playback (up to 99
programmes) or assemble editing can be
performed.
Assemble Editing
Selected scenes on a pre-recorded tape can
be edited in a specified sequence.
Pre-recorded tape
(on video camera)
Recording tape
(on VCR)
Page 8
6 EN
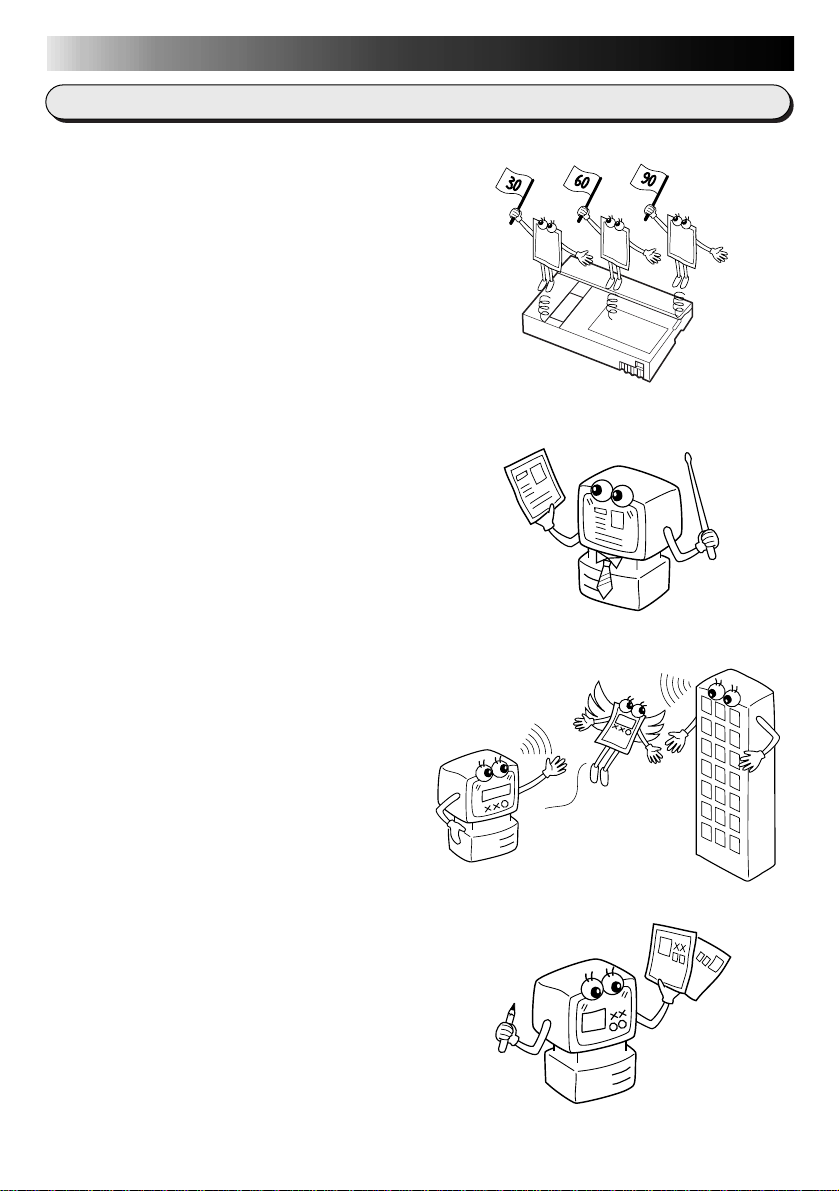
Advanced Applications
Create title indexes for your video
collection
Title index images can be captured from your
favorite recordings using the Interval Capture
mode. Print the captured index images on
your PC printer using the computer’s Print
Screen facility, then attach them to your
cassettes.
Business presentations
Images captured from video can be incorporated into business documents to spice up
your presentations.
MAJOR FEATURES (cont.)
Internet homepage
Images captured from video can be incorporated in your Internet homepage using image
editing software.
Video journal and postcards
Create your own original postcards, party
invitation cards and the like or keep a video
journal.
Page 9

GETTING STARTED
Provided Accessories
CD-ROM including:
•JLIP Video Capture
•JLIP Video Producer
•Presto! Mr. Photo Gold
•
Mr. Photo
•
PhotoAlbum
•
ImageFolio
Connectable Devices
q JVC digital video cameras: GR-DVL20, GR-DVL30, GR-DVL40
Operating Environment
q Personal Computer with Microsoft® Windows® 95/Windows® 98
q CPU: Intel® Pentium® or better processor
q Minimum RAM requirement: 32 MB
q Available Hard Disk space of at least 10 MB for JVC Software
Recommended 140 MB for Presto! Mr. Photo Gold
(You can select which applications from Mr. Photo Gold you wish to install.)
q Colour display capable of at least 640 x 480 pixels, 256 colours
Recommended 1024 x 768 pixels, 16.77 million colours
q 1 free serial transmission port, compatible with 9600 bps or higher transmission
rate, connectable to RS-232C with 9 pin serial connector
(Recommended compatible with UART 16550A)
q Mouse (Windows® compatible)
q CD-ROM drive
PC Connection Cable
Edit Cable (4 pole – 2 pole)
EN 7
NOTE:
An optional 9 pin serial conversion adapter is required for computers using a serial
communication port other than a standard 9 pin.
* The system requirements information above is not a guarantee that the provided
software will work on all personal computers meeting those requirements.
* Microsoft® and Windows® are either registered trademarks or trademarks of
Microsoft Corporation in the United States and/or other countries.
* is a registered trademark of JVC.
JLIP stands for Joint Level Interface Protocol, a new communication protocol which
allows AV units equipped with a JLIP terminal to be controlled by a personal
computer.
* Other product and company names included in this instruction manual are
trademarks and/or registered trademarks of their respective holders.
Page 10

8 EN
INSTALLATION
INSTALLATION
Refer to the Windows® 95/98 manual or your computer’s manual for details on basic
Windows® 95/98 operating procedures.
Installing JLIP Video Capture
1. Start up Windows®.
• Close any other applications that are running.
Make sure that there are no icons of other applications on the task bar.
2. Insert the CD-ROM into the CD-ROM drive.
Click Start on the task bar — Run.
3. Click Browse — CD-ROM icon in the Look in: column.
4. Double-click the JVC folder.
5. Double-click the Jcpt folder.
6. Double-click the Setup.exe icon.
7. Click OK.
The set-up programme will load. Follow the instructions that appear on the screen.
Installing JLIP Video Producer
1. Start up Windows®.
• Close any other applications that are running.
Make sure that there are no icons of other applications on the task bar.
2. Insert the CD-ROM into the CD-ROM drive.
Click Start on the task bar — Run.
3. Click Browse — CD-ROM icon in the Look in: column.
4. Double-click the JVC folder.
5. Double-click the Vdpro folder.
6. Double-click the Setup.exe icon.
7. Click OK.
The set-up programme will load. Follow the instructions that appear on the screen.
Installing Adobe® Acrobat® Reader 3.0
1. Start up Windows®.
• Close any other applications that are running.
Make sure that there are no icons of other applications on the task bar.
2. Insert the CD-ROM into the CD-ROM drive.
Click Start on the task bar — Run.
3. Click Browse — CD-ROM icon in the Look in: column.
4. Double-click the Reader folder.
5. Double-click the Setup.exe icon.
6. Click OK.
The set-up programme will load. Follow the instructions that appear on the screen.
NOTES:
• Close any other programmes running on the PC.
• Disable programmes that operate in the background, such as screen savers, e-mail
and communication software, virus checkers, schedulers, etc.
• Turn off file and printer sharing.
Page 11

EN 9
INSTALLATION
Refer to the Windows® 95/98 manual or your computer’s manual for details on basic
Windows® 95/98 operating procedures.
Installing NewSoft Presto! Mr. Photo/PhotoAlbum/ImageFolio
1. Start up Windows®.
• Close any other applications that are running.
Make sure that there are no icons of other applications on the task bar.
2. Insert the CD-ROM into the CD-ROM drive.
Click Start on the task bar — Settings — Control Panel.
3. Double-click Add/Remove Programs.
Click Install — Next — Browse — CD-ROM icon in the Look in: column.
4. Double-click the NewSoft folder.
5. Double-click Setup.exe.
6. Click Finish.
• Once the installation programme loads, follow the instructions displayed on your
screen.
7. Click Install in the Language Selection window.
• The installation programme will automatically detect the language being used in
the version of Windows® you are running.
8. Click Next> in the Select Components window.
• Click the check box to deselect any software you do not wish to install.
The set-up programme will load. Follow the instructions that appear on the screen.
STARTING UP JLIP Video Capture/Producer AND
Presto! Mr. Photo/PhotoAlbum/ImageFolio
1. Start up Windows®.
2. Click the Start button on the task bar.
• The Program menu appears on the screen.
3. Move the mouse pointer over the programme entry you want to run and click to
start the programme.
• The software you selected in step 3 starts up.
HOW TO CLOSE THE PROGRAMME
Click the Close button or select File — Exit.
Page 12

10 EN
CONNECTIONS
n To assure safety, make sure all units are turned off before making any connections.
n We recommend that you use the AC Power Adapter/Charger.
n When connecting a cable with a core filter attached, be sure to plug the connector equipped
with the core filter into the video camera.
n Do not make any connections to the video camera’s DV OUT connector.
WHEN CONNECTED TO A VCR EQUIPPED WITH A JLIP JACK
When JLIP Video Capture is used:
PC connection cable (provided)
Attach the core filter provided
with your video camera, referring
to its instruction manual.
To PC jack
To JLIP jack
When JLIP Video Producer is used:
Video Camera
S-VIDEO cable
To S OUT jack
White to
AUDIO
L
Red to
AUDIO
R
Yellow to
VIDEO
Connect this if the video
source unit has an S-Video
input jack.
Core filter
White to
AUDIO L
To COM port
(RS-232C)
To S-VIDEO
input jack
PC
JLIP cable
To JLIP jack
VCR
(Recording deck)
AUDIO/VIDEO cable
NOTE:
The JLIP cable can only be
used with JVC VCRs equipped
with a JLIP jack.
Red to
AUDIO R
Yellow to
VIDEO
If your VCR has a SCART
connector, use the cable
adapter.
NOTE:
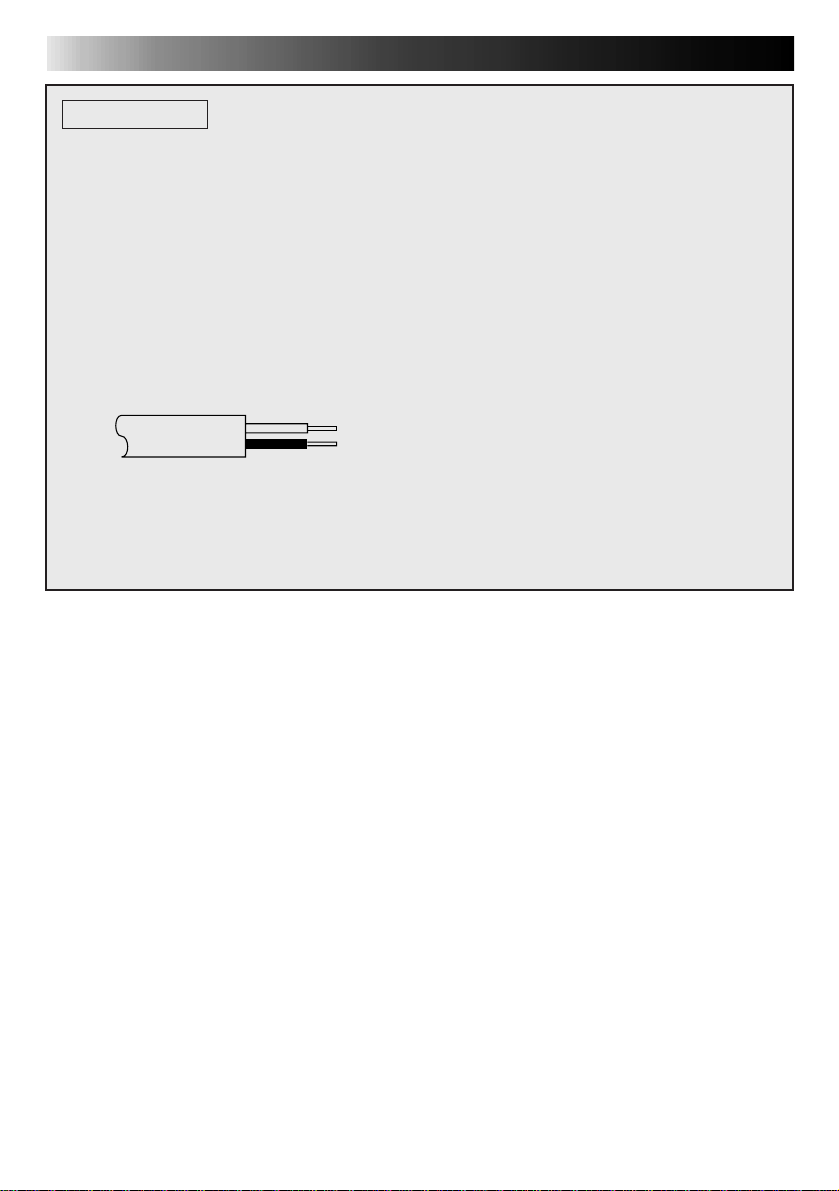
The JLIP cable is optional. Be sure to use the following:
•JLIP cable: PEAC0453
Consult your nearest JVC Technical Support Centre for details about availability (see page 20).
Page 13

EN 11
WHEN CONNECTED TO A VCR NOT EQUIPPED WITH A
JLIP JACK
When using a VCR not equipped with a JLIP jack, set your VCR brand using the remote control
unit, then perform editing using the remote control.
When JLIP Video Capture is used:
PC connection cable (provided)
Use the plug which has three
yellow rings around the pin.
To PC jack
To JLIP jack
When JLIP Video Producer is used:
White to
AUDIO
L
Video Camera
Red to
AUDIO
R
AUDIO/VIDEO cable
To S OUT jack
Yellow to
VIDEO
If your VCR has a SCART
connector, use the cable
adapter.
S-VIDEO cable
Connect this if the video
source unit has an S-Video
input jack.
Core filter
White to
AUDIO L
Red to
AUDIO R
Yellow to
VIDEO
To COM port
(RS-232C)
To S-VIDEO
input jack
Use the plug
which has one
black ring
around the pin.
TW
PC
Edit cable
(4 pole – 2 pole)
(provided)
To remote
pause jack
VCR
(Recording deck)
Connect here if the
recording deck doesn’t
have a remote pause jack.
Remote control unit
Page 14

12 EN
MEMO
Page 15

Mr. Photo Gold:
Presto! Mr. Photo
Presto! PhotoAlbum
EN 13
Presto! ImageFolio
For Windows
* Please consult your nearest NewSoft service centre for technical support. (see
next page)
Copyright © 1997-1998, NewSoft Technology Corp. All Rights Reserved.
Page 16

14 EN
NewSoft international service centre:
U.S.A: 4113 Clipper Court, Fremont, CA 94538, USA
Taiwan: 9F, No. 68, Sec. 3, Nan-king E. Rd., Taipei, Taiwan, R.O.C.
Japan: 6-21-3 Shinbashi Minato-Ku, Tokyo 105-0004 Japan
U.K.: The Software Centre, East Way,
Technical Support
Tel: (1) 510-445-8600 Fax: (1) 510-445-8601
Technical Support Hot Line: (1) 510-445-8616
E-mail: tech@newsoftinc.com
http://www.newsoftinc.com
Tel: (886) 2-2517-0750 Fax: (886) 2-2517-0760
Technical Support Hot Line: (886) 2-2517-0952
E-mail: support@newsoft.com.tw
http://www.newsoft.com.tw
Tel: (81) 3-5472-7008 Fax: (81) 3-5472-7009
E-mail: support@newsoft.co.jp
http://www.newsoft.co.jp
East Mill Industrial Estate, Ivybridge
Devon, PL21 9PE, United Kingdom
Tel: (44) 01752-201148 Fax: (44) 01752-894833
France: Info Trade Centre
d’activités de I’Ourcq 45,
rue Delizy 93692 Pantin France
Tel: (33) 1-4810-7563 Fax: (33) 1-4810-7555
E-mail: infotrad@club-internet.fr
* ( ): Country code
Page 17

Presto! Mr. Photo
Mr. Photo stores and catalogues all of your valuable photos. You can sort photos and
film “rolls” by date and title, or search by keyword, date, and other image properties.
Then drag-and-drop photos to the Application Bar to create photo masterpieces using
ready-made templates or design electronic photo albums. Click the Slide Show icon
to view selected photos in a “roll” of film, or drag-and-drop a photo to the E-mail
icon to send it to family and friends.
Features
EN 15
● Acquire photos from digital cameras, scanners, floppy disks, PhotoCDs, and the
Internet.
● Catalogue photos in “rolls” of film that you can customize and rearrange.
● Enhance photos instantly (remove red-eye, adjust brightness/contract, blur/
sharpen).
● Drag-and-drop photos to print, e-mail, create HTML slide shows, or post on the
Internet.
● Drag-and-drop photos to other applications for further editing or creative projects.
● Save photos as a screen saver or as wallpaper.
● Print stickers, labels, and photo catalogues.
System Requirements
● Digital Camera plus digital camera software.
● Scanner, if you intend to scan photos.
● A PC with at least a 486 microprocessor (a Pentium processor is recommended)
and 16 MB RAM.
● Recommend at least 30 MB of hard disk space available after installation. Mr.
Photo will need this space to work in.
● A CD-ROM drive to load Mr. Photo.
● Super VGA display card.
NOTE:
The Mr. Photo Gold software can only be used with JVC digital video cameras in
conjunction with the JLIP Video Capture software.
Page 18

16 EN
Presto! PhotoAlbum helps you create electronic photo albums that keep your memories alive forever. Just drag-and-drop photos, frames, clip art, textures, and special
effects. You can also personalize your albums with voice-overs and sound effects,
then produce album slide shows to post to the Internet or send completed albums by
e-mail.
Features
Presto! PhotoAlbum
● Scan or import your photos from digital cameras and scanners.
● Auto colour correction for input photos.
● Drag-and-drop easy-editing operation.
● Photo Browser with thumbnail views of photos.
● Share albums with an Internet Browser.
● Library of over 500 pieces of clip art for decoration.
● Sound attachment with albums, pages and photos.
● Independent album playback support.
● Supports popular file formats: TIF, PCX, BMP, TGA, JPG, PCD, WMF, FPX, PNG,
etc.
System Requirements
● An IBM PC 486, Pentium or compatible computer.
● A CD-ROM drive.
● A hard disk drive with at least 50 MB space available to hold and run the pro-
gramme effectively.
● At least 16 MB of RAM (preferably 32 MB).
● MS Windows 95 or Windows NT 4.0.
Recommended System Requirements
● A sound card with a microphone.
● A colour printer.
● A network browser such as Internet Explorer 3.0 or Netscape Navigator 3.0, or
later.
Page 19

Presto! ImageFolio
ImageFolio is a comprehensive multimedia image processing programme running
under MS Windows 95 or Windows NT. It enables you to process in detail on your
computer screen scanned images such as photographs, graphics and drawings, as
well as images captured from video devices such as a VCR, a laser disc, a digital
camera, a video capture box, etc.
You can create new images by using the powerful tools included in the software. Its
sophisticated set of image editing tools enables you to quickly sketch an image
canvas in order to create a new image, or to enhance pre-existing ones. With this
software, your imagination is your only limit!
EN 17
Features
Image Input
● Captures images from flatbed/hand scanner, digital camera, capture box, etc.
● Auto & Semi-auto image stitching for inputting large-sized images.
● Loading/saving images with various popular file formats such as TIF, PCX, BMP,
TGA, JPG, PCD, WMF, PNG, etc.
● New Flash Pix format support.
Image Output
● Print colour-adjustment variations for examining the printing effect before actual
printing.
● OLE 2.0 support for stand-alone editing mode.
● Easy artwork design for home page production and HTML applications.
Image Editing and Processing
● Multiple-layer single document for complicated object organization.
● Drag-and-drop floating images among documents (moving a selected area to new
or other canvases).
● Precise colour selection by setting colour channels or choosing from a palette.
● Complete drawing and painting set of tools to work on images such as line, paint-
brush, airbrush, colour gradation, eraser, zoom, text, eyedropper, free-hand rotate,
hue/saturation brush, brightness/darkness brush, blur/sharpen brush, image hose,
etc.
● Definable image hose tool for quick insertion of image set on canvas.
● Anti-alias feature with all graphic tools to enhance the drawing effect.
● Full selection tools for easy masking of irregularities in objects.
● Creating magic 3D effects with definable light source for selected objects with one
touch.
Page 20

18 EN
● Generating object shadows in selectable light directions with one touch.
● Elegant templates provided for easy applications of daily-life photo usage.
● Image fine-tuning functions to adjust brightness, contrast, hue, saturation, tone
distribution (equalization) and so on.
● Multiple filters to produce special effects such as smooth, sharpen, edge detection,
emboss and mosaic.
● Effect browser providing previews in actual size of image, processed with all the
fine-tuning functions and filters.
● 16- and 32- bit Adobe™ plug-in filter interface support.
System Requirements
The following hardware devices and software are required to run the software:
● An IBM PC 486, Pentium or compatible computer.
● One CD-ROM drive.
● One hard disk drive with at least 60 MB space available to hold and run the
programme effectively.
● At least 8 MB of RAM (preferably 16 MB).
● MS Windows 95 or Windows NT.
Presto! ImageFolio (cont.)
To make fully efficient use of the programme, the following additional hardware and
software elements are highly recommended:
● 50 MB or more of virtual memory.
● A colour printer supported by MS Windows 95.
Page 21

Installing Mr. Photo, PhotoAlbum and ImageFolio
Follow the steps below to install Mr. Photo, PhotoAlbum and ImageFolio.
1. Insert the programme CD into your CD-ROM drive.
2. Press the Start button and choose Run.
3. Type [drive]:\NewSoft\setup.exe and choose OK. The installation programme will
automatically detect the language being used in the version of Windows you are
running.
4. Follow the instructions on your screen as they appear.
EN 19
Page 22

20 EN
JVC Support for:
TECHNICAL SUPPORT FOR REGISTERED USERS
U.K. & IRELAND
JVC (U.K.) Limited
14 Priestley Way, London
NW2 7BA, United Kingdom
Tel : (0181) 450-3282
Fax : (0181) 452-2534
JVC IRELAND
(Branch of JVC(U.K.)Limited)
JVC HOUSE Carriglea Industrial Estate
Naas Road, Dublin 12, Republic of Ireland
Tel : (01)-460-2288 Fax : (01) -456-7522
DEUTSCHLAND
JVC DEUTSCHLAND GMBH
Postfach 10 05 62, Grüner Weg 12, 61169
Friedberg/Hessen. Deutschland
Tel : (06031) 9390 Fax : (06031) 183 83
BELGIE/LUXEMBURG
Klein Eilandstraat 3 - 1070 BRUSSEL, België
Tel : (02) 529 42 11 Fax : (02) 520 83 12
JVC BELGIUM N.V.
ESPAÑA
Ctra. Gracia Manresa Km. 14' 750 Edificio Can
Castanyer, 08190 Sant Cugat del Vallés, España
Tfno : (93) 565 32 16 Fax : (93) 565 32 18
JVC ESPAÑA S.A.
ÖSTERREICH
JVC AUSTRIA GMBH
Slamastrasse 43 A-1230, Wien, Austria
Tel : (0222) 610370 Fax : (0222) 6103777
FRANCE
JVC FRANCE S.A. DIVISION VIDEO
102, boulevard Heloise,
95104 Argenteuil CEDEX, France
Tel : 01.39.96.33.33 Fax : 01.39.47.73.78
NEDERLAND
JVC NEDERLAND B.V.
JVC Plein DE Heyderweg 2,
2314 XZ Leiden, Nederland
Tel : (071) 5453333 Fax : (071) 5894674
BELGIQUE/LUXEMBOURG
JVC BELGIUM S.A.
Rue de la Petite lle 3 -1070 BRUXELLES, Belgique
Tel : (02) 529 42 11 Fax : (02) 520 83 12
ITALIA
JVC ITALIA S.p.A.
Via Cassanese 224 Palazzo Tiepolo, 20090
Segrate Milano Oltre, Italia
Tel : (02) 26.99.161 Fax : (02) 26.92.1820
DANMARK
JVC DANMARK A/S
Helgeshøj Alle 30 DK-2630 Taastrup, Danmark
Tel : 43 50 90 00 Fax : 43 50 90 81
SVERIGE
JVC SVENSKA AB
Veddestavãgen 15, 175 62 Jãrfälla-Stockholm, sweden
Tel : (08) 7950400 Fax : (08) 7950450
SCHWEIZ/SUISSE/SVIZZERA
SPITZER ELECTRONIC AG
Mühlemattsstrasse 13 4104 Oberwil, Suisse
Tel : 061 405 1111 Fax : 061 402 0434
PORTUGAL
ORIELA, SA
Campo de Santa Clara, 160-A, 1100, Lisboa, Portugal
Tel : 01 888 4731 Fax : 01 886 7871
P.O.BOX 2012, Postterminalen 3103 Tonsberg, Norge
Tel : 33 36 52 00 Fax : 33 36 52 99
Mänkimiehentie 2 02780 Espoo, Finland
Tel : 9-68281 Fax : 9-810933
≥ªEπ·‹…£∑…Ω≥Á°√∑π≥ Eªª°fl °.E.
◊ƒ∂¤†∂Í› 62, 183 46 Ω∆fiÁ†‡∆, A¥≤v†, ´ªª°©°
Tel : 01-4832855 Fax : 01-4832557
NORGE
JVC NORGE A/S
SUOMI
OY HEDENGREN AB
GREECE
For other countries, refer to the JVC Worldwide Service Network at http://
www.jvc-victor.co.jp/english/worldmap/index-e.html.
Page 23

EN 21
NewSoft Support for:
North America (U.S.A)
Technical Support Hotline:
Please e-mail: tech@newsoftinc.com or
call (510) 445-8616
www.newsoftinc.com
Europe
UK
The Software Centre, East Way, East Mill
Industrial Estate, Ivybridge, Devon, PL21
9PE, UK
Tel: (44) 1752-201148
Fax: (44) 1752-894833
France
Info Trade Centre d’activités de l’Ourcq
45, rue Delizy 93692 Pantin, France
Tel: (33) 1-4810-7563
Fax: (33) 1-4810-7555
Asia/Pacific (Taiwan, R.O.C.)
9F, NO68, Sec. 3, Nankig E. Rd., Taipei,
Taiwan, R.O.C.
Tel: (886) 2-2517-0750
Fax: (886) 2-2517-0760
support@newsoft.com.tw
www.newsoft.com.tw
NOTICE FOR USERS
Use of this software is authorized according to the terms of the software licence.
When contacting the nearest JVC office or agency in your country about this software
(refer to the JVC Worldwide Service Network at http://www.jvc-victor.co.jp/english/
worldmap/index-e.html), please fill out the following and have the appropriate
information ready.
Product Name
Model
Problem
Error Message
Manufacturer
Model Desktop Laptop
PC
CPU
OS
Memory MB
Available Hard Disk Space MB
Please note that it may take some time to respond to your questions, depending on
their subject matter.
JVC cannot answer questions regarding specifications or performance of provided
NewSoft products, or basic operation of your PC.
Page 24

HS-V4KITE
COPYRIGHT© 1999 VICTOR COMPANY OF JAPAN, LTD.
VICTOR COMPANY OF JAPAN, LIMITED
E
Printed in Japan
0699MNV*UN*SW
 Loading...