

Page 1
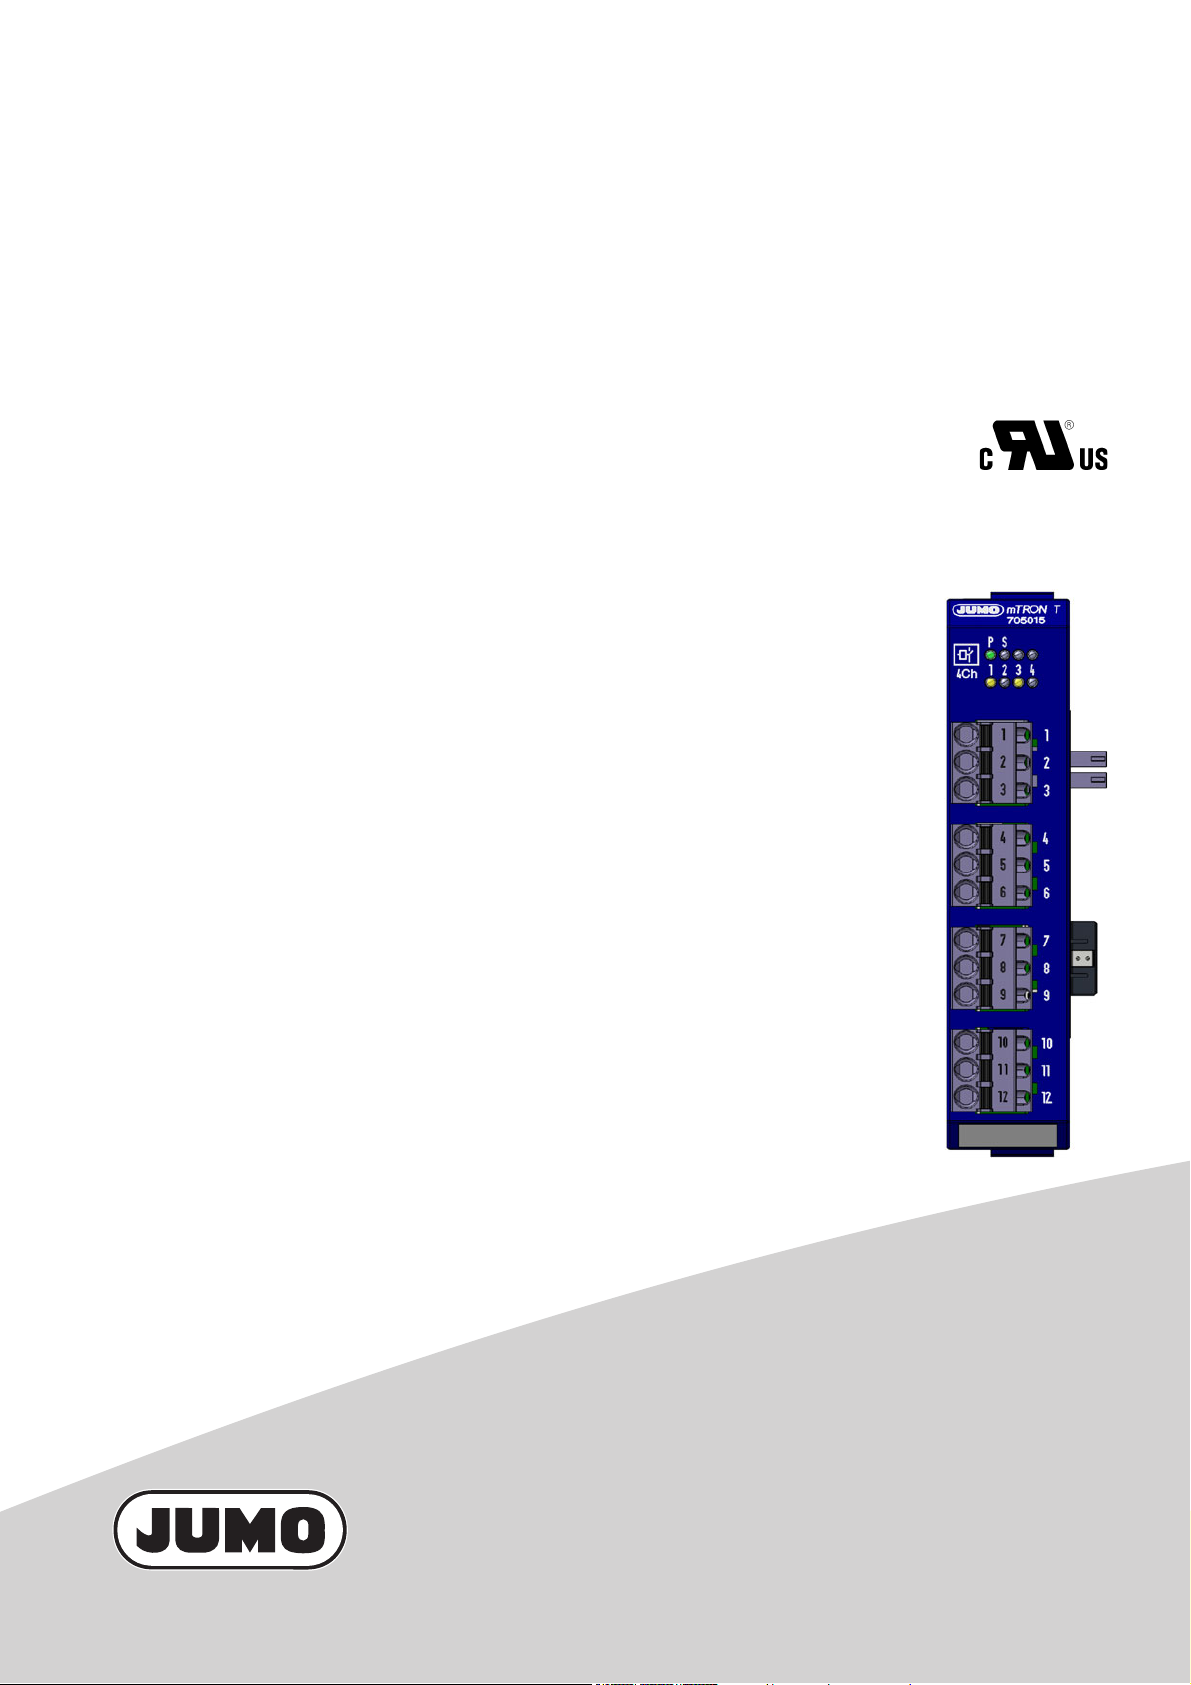
JUMO mTRON T
Measuring, Control, and Automation System
Relay Module 4-Channel
B 705015.0
Operating Manual
2013-06-18/00575604
Page 2

Page 3

Contents
1 Introduction . . . . . . . . . . . . . . . . . . . . . . . . . . . . . . . . . . . . . . . . . . . . . . . . . . . . . .5
1.1 Available technical documentation . . . . . . . . . . . . . . . . . . . . . . . . . . . . . . . . . . . . . . . . . . . . . . . . 5
1.1.1 General information . . . . . . . . . . . . . . . . . . . . . . . . . . . . . . . . . . . . . . . . . . . . . . . . . . . . . . . . . . . . 5
1.1.2 Base units . . . . . . . . . . . . . . . . . . . . . . . . . . . . . . . . . . . . . . . . . . . . . . . . . . . . . . . . . . . . . . . . . . . 5
1.1.3 Input/output modules . . . . . . . . . . . . . . . . . . . . . . . . . . . . . . . . . . . . . . . . . . . . . . . . . . . . . . . . . . . 5
1.1.4 Special modules . . . . . . . . . . . . . . . . . . . . . . . . . . . . . . . . . . . . . . . . . . . . . . . . . . . . . . . . . . . . . . 6
1.1.5 Operating, visualization, recording . . . . . . . . . . . . . . . . . . . . . . . . . . . . . . . . . . . . . . . . . . . . . . . . 6
1.1.6 Power supply units . . . . . . . . . . . . . . . . . . . . . . . . . . . . . . . . . . . . . . . . . . . . . . . . . . . . . . . . . . . . 6
1.2 Safety information . . . . . . . . . . . . . . . . . . . . . . . . . . . . . . . . . . . . . . . . . . . . . . . . . . . . . . . . . . . . . 7
1.2.1 Warning symbols . . . . . . . . . . . . . . . . . . . . . . . . . . . . . . . . . . . . . . . . . . . . . . . . . . . . . . . . . . . . . . 7
1.2.2 Note signs . . . . . . . . . . . . . . . . . . . . . . . . . . . . . . . . . . . . . . . . . . . . . . . . . . . . . . . . . . . . . . . . . . . 7
1.2.3 Intended use . . . . . . . . . . . . . . . . . . . . . . . . . . . . . . . . . . . . . . . . . . . . . . . . . . . . . . . . . . . . . . . . . 8
1.2.4 Qualification of personnel . . . . . . . . . . . . . . . . . . . . . . . . . . . . . . . . . . . . . . . . . . . . . . . . . . . . . . . 8
1.3 Acceptance of goods, storage, and transport . . . . . . . . . . . . . . . . . . . . . . . . . . . . . . . . . . . . . . . . 9
1.3.1 Checking the delivery . . . . . . . . . . . . . . . . . . . . . . . . . . . . . . . . . . . . . . . . . . . . . . . . . . . . . . . . . . 9
1.3.2 Notes on storage and transport . . . . . . . . . . . . . . . . . . . . . . . . . . . . . . . . . . . . . . . . . . . . . . . . . . . 9
1.3.3 Returning goods . . . . . . . . . . . . . . . . . . . . . . . . . . . . . . . . . . . . . . . . . . . . . . . . . . . . . . . . . . . . . . 9
1.3.4 Disposal . . . . . . . . . . . . . . . . . . . . . . . . . . . . . . . . . . . . . . . . . . . . . . . . . . . . . . . . . . . . . . . . . . . . 10
1.4 Identifying the Device Version . . . . . . . . . . . . . . . . . . . . . . . . . . . . . . . . . . . . . . . . . . . . . . . . . . . 11
1.4.1 Nameplates . . . . . . . . . . . . . . . . . . . . . . . . . . . . . . . . . . . . . . . . . . . . . . . . . . . . . . . . . . . . . . . . . 11
1.4.2 Order details . . . . . . . . . . . . . . . . . . . . . . . . . . . . . . . . . . . . . . . . . . . . . . . . . . . . . . . . . . . . . . . . 12
1.4.3 Scope of delivery . . . . . . . . . . . . . . . . . . . . . . . . . . . . . . . . . . . . . . . . . . . . . . . . . . . . . . . . . . . . . 12
1.4.4 General accessories . . . . . . . . . . . . . . . . . . . . . . . . . . . . . . . . . . . . . . . . . . . . . . . . . . . . . . . . . . 12
2 Description . . . . . . . . . . . . . . . . . . . . . . . . . . . . . . . . . . . . . . . . . . . . . . . . . . . . . .13
2.1 Brief description . . . . . . . . . . . . . . . . . . . . . . . . . . . . . . . . . . . . . . . . . . . . . . . . . . . . . . . . . . . . . . 13
2.2 Block diagram . . . . . . . . . . . . . . . . . . . . . . . . . . . . . . . . . . . . . . . . . . . . . . . . . . . . . . . . . . . . . . . 13
3 Installation . . . . . . . . . . . . . . . . . . . . . . . . . . . . . . . . . . . . . . . . . . . . . . . . . . . . . .15
3.1 General information on installation/dismounting . . . . . . . . . . . . . . . . . . . . . . . . . . . . . . . . . . . . . 15
3.2 Installation/dismounting on DIN rail . . . . . . . . . . . . . . . . . . . . . . . . . . . . . . . . . . . . . . . . . . . . . . . 16
3.2.1 Input/output modules . . . . . . . . . . . . . . . . . . . . . . . . . . . . . . . . . . . . . . . . . . . . . . . . . . . . . . . . . . 16
3.3 Replacing module inserts . . . . . . . . . . . . . . . . . . . . . . . . . . . . . . . . . . . . . . . . . . . . . . . . . . . . . . 20
3.3.1 Input/output modules . . . . . . . . . . . . . . . . . . . . . . . . . . . . . . . . . . . . . . . . . . . . . . . . . . . . . . . . . . 20
3.4 Dimensions . . . . . . . . . . . . . . . . . . . . . . . . . . . . . . . . . . . . . . . . . . . . . . . . . . . . . . . . . . . . . . . . . 22
4 Electrical connection . . . . . . . . . . . . . . . . . . . . . . . . . . . . . . . . . . . . . . . . . . . . .23
4.1 Installation notes . . . . . . . . . . . . . . . . . . . . . . . . . . . . . . . . . . . . . . . . . . . . . . . . . . . . . . . . . . . . . 23
4.2 Electrical isolation . . . . . . . . . . . . . . . . . . . . . . . . . . . . . . . . . . . . . . . . . . . . . . . . . . . . . . . . . . . . 24
4.3 Connection diagram . . . . . . . . . . . . . . . . . . . . . . . . . . . . . . . . . . . . . . . . . . . . . . . . . . . . . . . . . . 25
4.3.1 Display and connection elements . . . . . . . . . . . . . . . . . . . . . . . . . . . . . . . . . . . . . . . . . . . . . . . . 25
4.3.2 Relay outputs . . . . . . . . . . . . . . . . . . . . . . . . . . . . . . . . . . . . . . . . . . . . . . . . . . . . . . . . . . . . . . . 26
4.4 Functional test . . . . . . . . . . . . . . . . . . . . . . . . . . . . . . . . . . . . . . . . . . . . . . . . . . . . . . . . . . . . . . . 26
3
Page 4

Contents
5 Operation . . . . . . . . . . . . . . . . . . . . . . . . . . . . . . . . . . . . . . . . . . . . . . . . . . . . . . .27
5.1 Display and connection elements . . . . . . . . . . . . . . . . . . . . . . . . . . . . . . . . . . . . . . . . . . . . . . . . 27
5.2 LED displays . . . . . . . . . . . . . . . . . . . . . . . . . . . . . . . . . . . . . . . . . . . . . . . . . . . . . . . . . . . . . . . . 28
5.2.1 Display modes . . . . . . . . . . . . . . . . . . . . . . . . . . . . . . . . . . . . . . . . . . . . . . . . . . . . . . . . . . . . . . . 28
5.2.2 System states and errors . . . . . . . . . . . . . . . . . . . . . . . . . . . . . . . . . . . . . . . . . . . . . . . . . . . . . . 29
6 Configuration . . . . . . . . . . . . . . . . . . . . . . . . . . . . . . . . . . . . . . . . . . . . . . . . . . . .31
6.1 Digital outputs . . . . . . . . . . . . . . . . . . . . . . . . . . . . . . . . . . . . . . . . . . . . . . . . . . . . . . . . . . . . . . . 31
6.2 NV connecting list . . . . . . . . . . . . . . . . . . . . . . . . . . . . . . . . . . . . . . . . . . . . . . . . . . . . . . . . . . . . 32
6.2.1 Digital signals . . . . . . . . . . . . . . . . . . . . . . . . . . . . . . . . . . . . . . . . . . . . . . . . . . . . . . . . . . . . . . . 33
7 Online parameters . . . . . . . . . . . . . . . . . . . . . . . . . . . . . . . . . . . . . . . . . . . . . . . .39
7.1 Calibrate / test . . . . . . . . . . . . . . . . . . . . . . . . . . . . . . . . . . . . . . . . . . . . . . . . . . . . . . . . . . . . . . . 39
7.1.1 Digital output . . . . . . . . . . . . . . . . . . . . . . . . . . . . . . . . . . . . . . . . . . . . . . . . . . . . . . . . . . . . . . . . 39
7.1.2 Versions . . . . . . . . . . . . . . . . . . . . . . . . . . . . . . . . . . . . . . . . . . . . . . . . . . . . . . . . . . . . . . . . . . . 40
8 Appendix . . . . . . . . . . . . . . . . . . . . . . . . . . . . . . . . . . . . . . . . . . . . . . . . . . . . . . .41
8.1 Technical data . . . . . . . . . . . . . . . . . . . . . . . . . . . . . . . . . . . . . . . . . . . . . . . . . . . . . . . . . . . . . . . 41
8.1.1 Outputs . . . . . . . . . . . . . . . . . . . . . . . . . . . . . . . . . . . . . . . . . . . . . . . . . . . . . . . . . . . . . . . . . . . . 41
8.1.2 Electrical data . . . . . . . . . . . . . . . . . . . . . . . . . . . . . . . . . . . . . . . . . . . . . . . . . . . . . . . . . . . . . . . 41
8.1.3 Case and ambient conditions . . . . . . . . . . . . . . . . . . . . . . . . . . . . . . . . . . . . . . . . . . . . . . . . . . . 41
8.1.4 Approval/approval marks . . . . . . . . . . . . . . . . . . . . . . . . . . . . . . . . . . . . . . . . . . . . . . . . . . . . . . . 42
4
Page 5
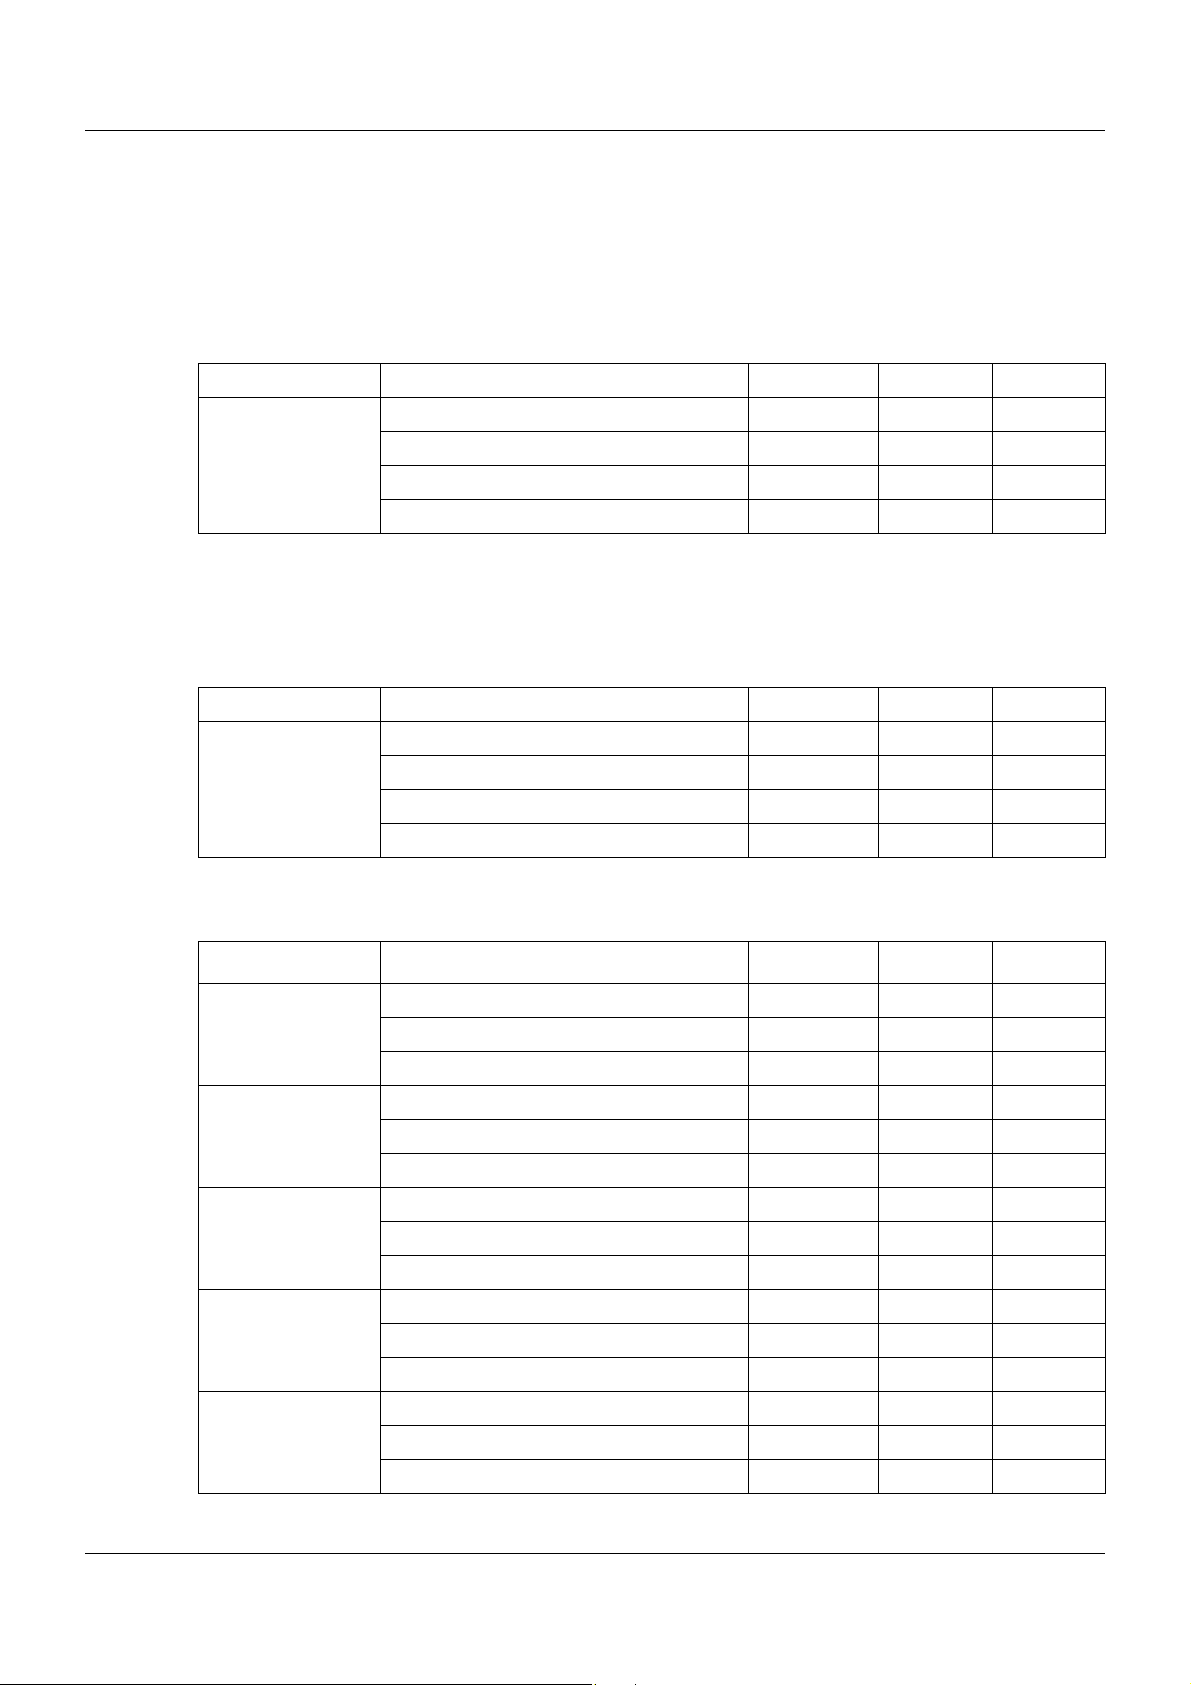
1.1 Available technical documentation
The documents specified below are available for the measuring, control, and automation system.
1.1.1 General information
Product Type of documentation No. Printed PDF file
Measuring,
control, and
automation system
1
Accessory subject to charge
2
Includes an overview of the purpose and content of all documents
1.1.2 Base units
Data sheet T 705000 - X
System manual
Setup program manual B 705000.6 - X
System description
1
2
1 Introduction
B 705000.0 X -
B 705000.8 - X
Product Type of documentation No. Printed PDF file
Central
processing unit
Data sheet T 705001 - X
Operating manual B 705001.0 - X
Modbus interface description B 705001.2.0 - X
Installation instructions B 705001.4 X X
1.1.3 Input/output modules
Product Type of documentation No. Printed PDF file
Multichannel
controller module
Relay module
4-channel
Analog
input module
4-channel
Data sheet T 705010 - X
Operating manual B 705010.0 - X
Installation instructions X X
Data sheet T 705015 - X
Operating manual B 705015.0 - X
Installation instructions B 705015.4 X X
Data sheet T 705020 - X
Operating manual B 705020.0 - X
Installation instructions B 705020.4 X X
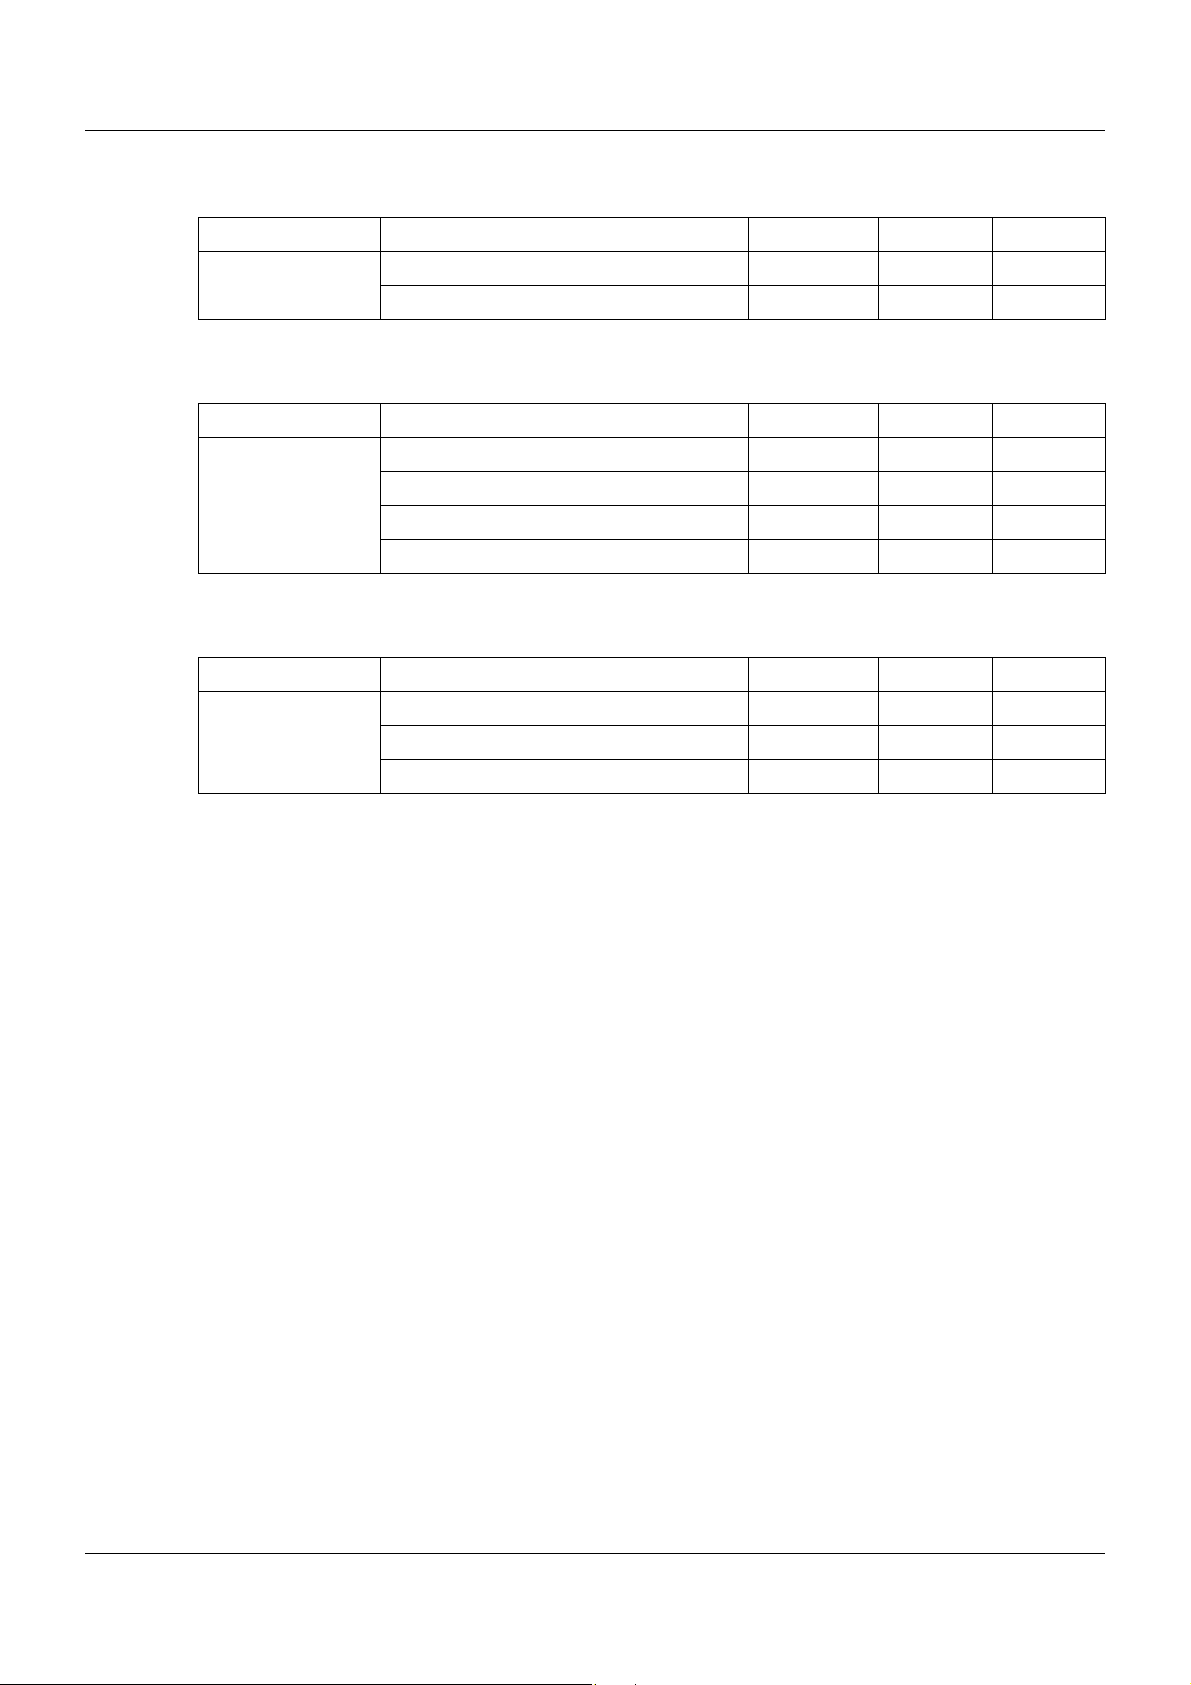
Analog
input module
8-channel
Digital input/
output module
12-channel
Data sheet T 705021 - X
Operating manual B 705021.0 - X
Installation instructions B 705021.4 X X
Data sheet T 705030 - X
Operating manual B 705030.0 - X
Installation instructions B 705030.4 X X
5
Page 6
1 Introduction
1.1.4 Special modules
Product Type of documentation No. Printed PDF file
Router module Data sheet T 705040 - X
Installation instructions B 705040.4 X X
1.1.5 Operating, visualization, recording
Product Type of documentation No. Printed PDF file
Multifunction
panel 840
Data sheet T 705060 - X
Operating manual B 705060.0 - X
Modbus interface description B 705060.2.0 - X
Installation instructions B 705060.4 X X
1.1.6 Power supply units
Product Type of documentation No. Printed PDF file
24 V power supply
units
Data sheet T 705090 - X
Operating instructions QS5.241 X -
Operating instructions QS10.241 X -
6
Page 7
1.2 Safety information
&
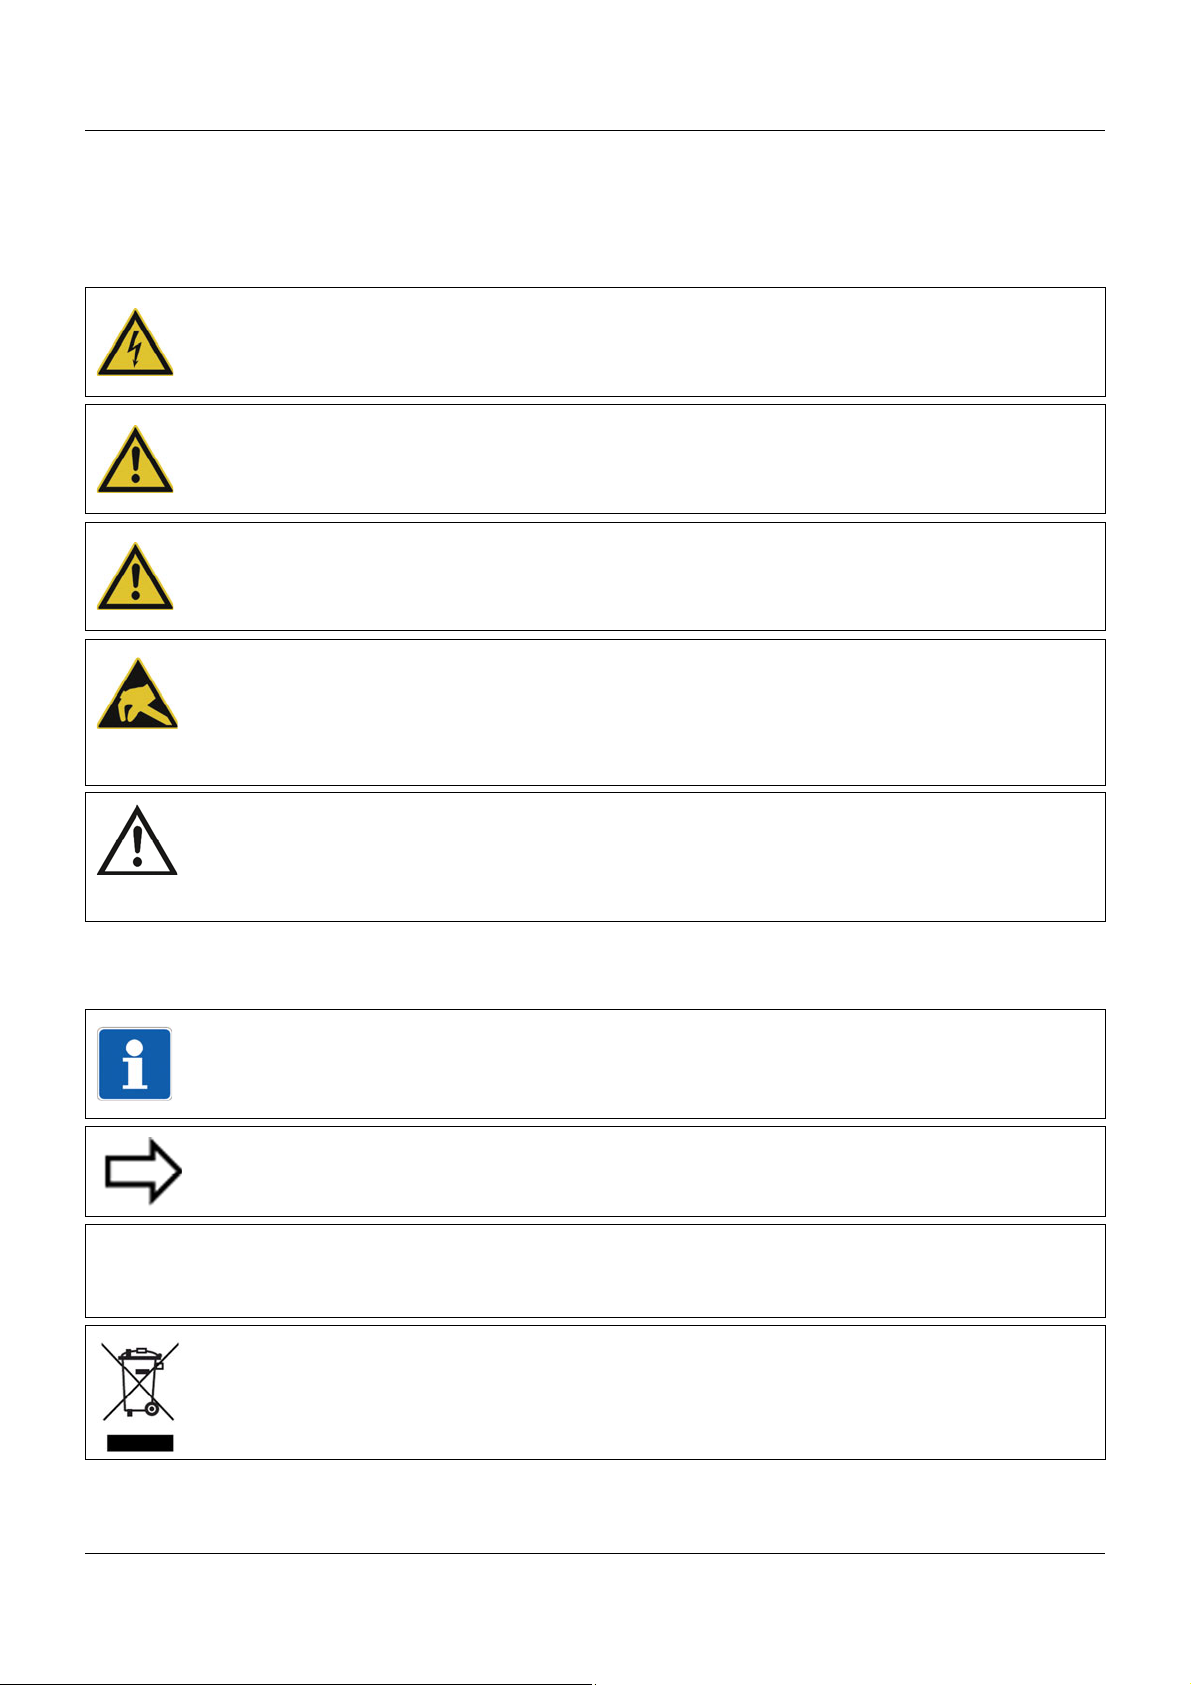
1.2.1 Warning symbols
DANGER!
This symbol indicates that injury to persons caused by electrical shock may occur, if the
respective protective measures are not carried out.
WARNING!
This symbol in connection with the signal word indicates that injury of persons may occur,
if the respective protective measures are not carried out.
CAUTION!
This symbol in combination with the signal word indicates that damage to assets or data
loss will occur if suitable precautions are not taken.
CAUTION!
This sign indicates that components could be destroyed by electrostatic discharge
(ESD = Electro Static Discharge), if the respective cautionary measures are not taken.
Only use the ESD packages intended for this purpose to return device inserts, assembly
groups or assembly components.
1 Introduction
READ DOCUMENTATION!
This symbol – placed on the device – indicates that the associated device documentation
has to be observed. This is necessary to recognize the kind of the potential hazards as
well as to take the measures to avoid them.
1.2.2 Note signs
TIP!
This symbol refers to important information about the product or its handling or additional
use.
REFERENCE!
This symbol refers to further information in other sections, chapters, or manuals.
FURTHER INFORMATION!
This sign is used in the tables and refers to further information in connection with the table.
DISPOSAL!
This device and, if installed, the batteries must not be disposed of in the garbage can after
use! Please ensure that they are disposed of properly and in an environmentally friendly
manner.
7
Page 8

1 Introduction
1.2.3 Intended use
The modules described are intended for measuring, control, and automation tasks in an industrial environment, as described in the technical data. Other uses or uses beyond those defined
are not viewed as intended uses.
The modules are built according to the relevant standards and directives as well as the applicable safety regulations. Nevertheless, incorrect use may lead to bodily injury or property damage.
To avoid danger, the modules may only be used:
• For the intended use
• When in good order and condition
• When taking into account the technical documentation provided
Even if a module is used correctly and according to the intended use, it may still cause application-related dangers (e.g. due to missing safety devices or incorrect settings).
1.2.4 Qualification of personnel
This document contains the necessary information for the intended use of the modules to which
it relates.
It is intended for technically qualified personnel who have received special training and have
the appropriate knowledge in the field of automation technology (measuring, process, and control technology).
The appropriate level of knowledge and the technically fault-free implementation of the safety
information and warnings contained in the technical documentation provided are prerequisites
for risk-free mounting, installation, and startup as well as for ensuring safety when operating
the described modules. Only qualified personnel have the required specialist knowledge to correctly interpret and implement the safety information and warnings contained in this document
in specific situations.
8
Page 9

1.3 Acceptance of goods, storage, and transport
1.3.1 Checking the delivery
• Ensure that the packaging and contents are not damaged
• Check that the delivery is complete using the delivery papers and the order details
• Inform the supplier immediately if there is any damage
• Store damaged parts until clarification is received from the supplier
1.3.2 Notes on storage and transport
• Store the module in a dry and clean environment. Observe the admissible ambient conditions (see "Technical data")
• The transport of the module is to be shockproof
• The original packaging provides optimum protection for storage and transport
1.3.3 Returning goods
In the event of repair, please return the module in a clean and complete state.
Use the original packaging to return goods.
1 Introduction
Accompanying letter for repair
Please include the completed accompanying letter for repair when returning goods.
Do not forget to state the following:
• Description of the application and
• Description of the error that has occurred
The accompanying letter for repair can be downloaded online from the manufacturer's website
(use the search function if necessary).
Protection against electrostatic discharge (ESD)
(ESD = electrostatic discharge)
To prevent damage from ESD, electronic modules or components must be handled, packaged,
and stored in an ESD-protected environment. Measures against electrostatic discharge and
electrical fields are described in DIN EN 61340-5-1 and DIN EN 61340-5-2 "Protection of electronic devices from electrostatic phenomena".
When returning electronic modules or components, please note the following:
• Sensitive components must only be packaged in an ESD-protected environment. Workspaces such as this divert electrostatic charges to ground in a controlled manner and prevent static charges due to friction capacities.
• Only use packaging for ESD-sensitive modules/components. These must consist of conductive plastics.
No liability can be assumed for damage caused by ESD.
9
Page 10
1 Introduction
CAUTION!
Electrostatic charges occur in non-ESD protected environments.
Electrostatic discharges can damage modules or components.
For transport purposes, use only the ESD packaging provided.
1.3.4 Disposal
Disposing of the device
DISPOSAL!
Devices and/or replaced parts should not be placed in the refuse bin at the end of their service life as they consist of materials that can be recycled by specialist recycling plants.
Dispose of the device and the packaging material in a proper and environmentally friendly
manner.
For this purpose, observe the country-specific laws and regulations for waste treatment and
disposal.
Disposing of the packaging material
The entire packaging material (cardboard packaging, inserts, plastic film, and plastic bags) is
fully recyclable.
10
Page 11
1.4 Identifying the Device Version
(B)
(A)
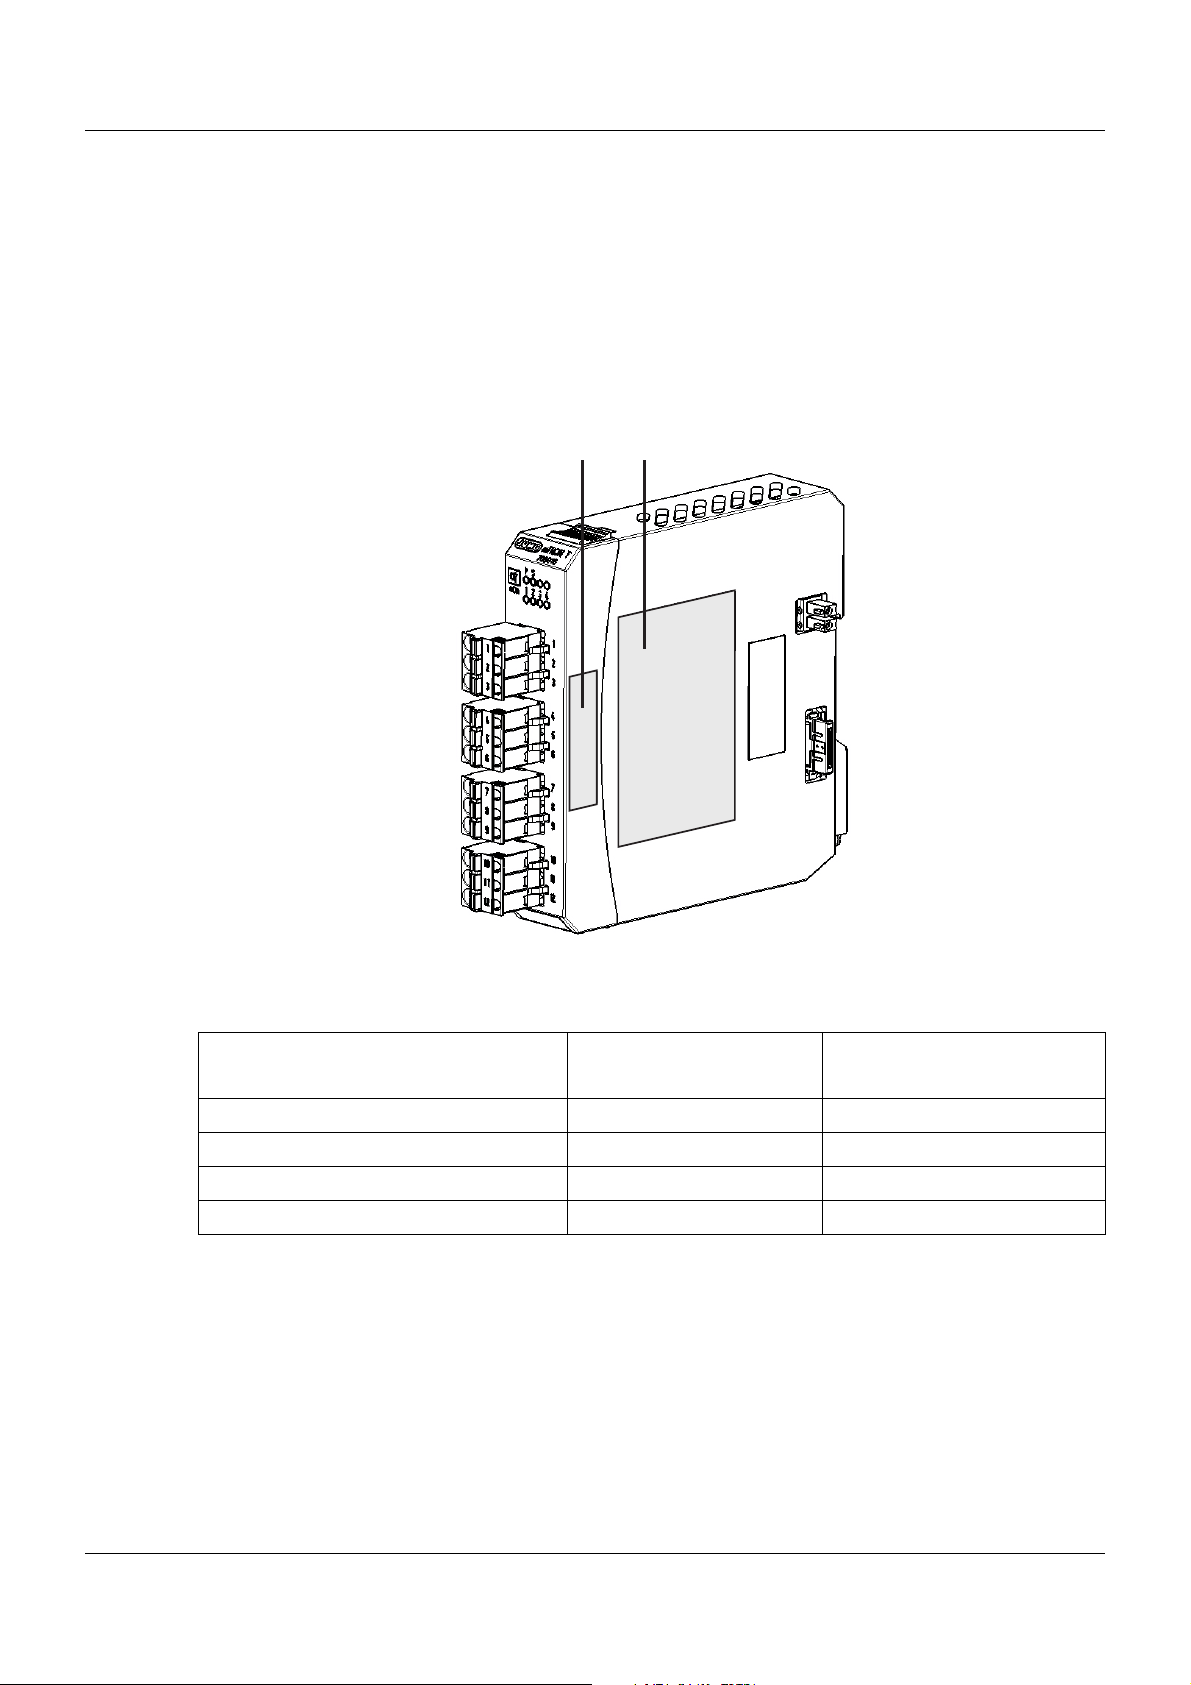
1.4.1 Nameplates
Position
The nameplate (B) is affixed to the module case.
An additional nameplate with reduced information is located on the module insert (A). This du-
plicate identification is important when replacing a module insert or retrofitting optional modules.
1 Introduction
Contents
It contains important information. This includes:
Device type
Compare the specifications on the nameplate with the order.
Identify the supplied device version using the order details of the respective module.
Part no. (TN)
The part no. clearly identifies an article in the catalog. It is important for communication between the customer and the sales department.
Description Designation on the name-
plate
Device type (A + B) Typ 705015/36
Part no. (B) TN 00XXXXXX
Fabrication number (A + B) F-Nr 0070033801211010006
Voltage supply (B) - DC 24 V +25/-20 %
Example
11
Page 12
1 Introduction
Fabrication no. (F-Nr)
Among other things, the fabrication number contains the date of production (year/week).
Example: F-Nr = 0070033801211010006
The figures concerned are in positions 12, 13, 14, and 15 (from the left).
The device was therefore produced in the 1st calendar week of 2011.
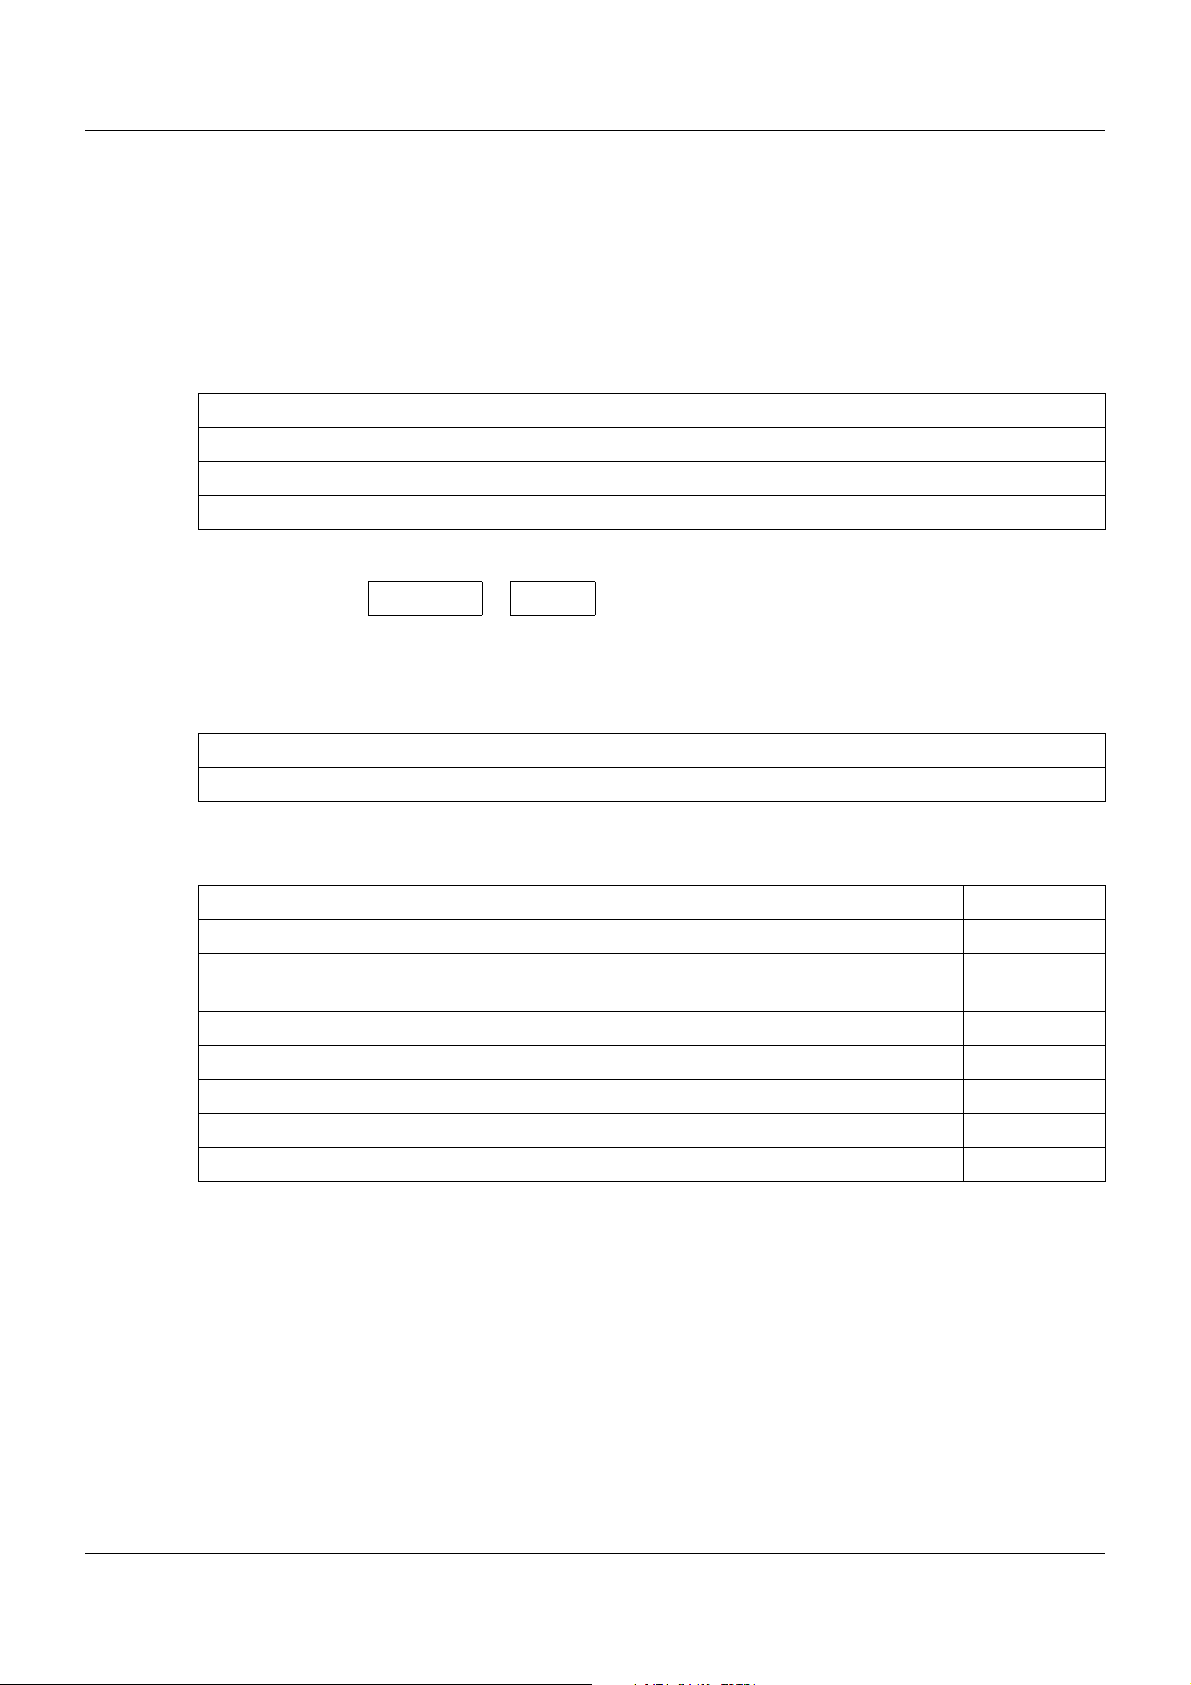
1.4.2 Order details
(1) Basic type
705015 Relay module 4-channel
(2) Voltage supply
36 DC 24 V +25/-20 %
(1) (2)
Order code /
Order example 705015 / 36
1.4.3 Scope of delivery
1 relay module
1 Installation Instructions B 705015.4
1.4.4 General accessories
Article Part no.
JUMO mTRON T system manual, English 00575577
MiniDVD with setup program (full version), programming software CODESYS V3, and
detailed documentation; incl. USB cable
PC Evaluation Software PCA3000 00431882
Release automatic print for PC Evaluation Software PCA3000 00505548
PCA Communication Software PCC 00431879
Plant Visualization Software JUMO SVS3000: See data sheet 700755 -
USB cable A-plug mini-B-plug 3 m 00506265
00569494
12
Page 13
2.1 Brief description
4 Relaisausgänge (Wechsler)
705015
Spannungsversorgung
Systembus
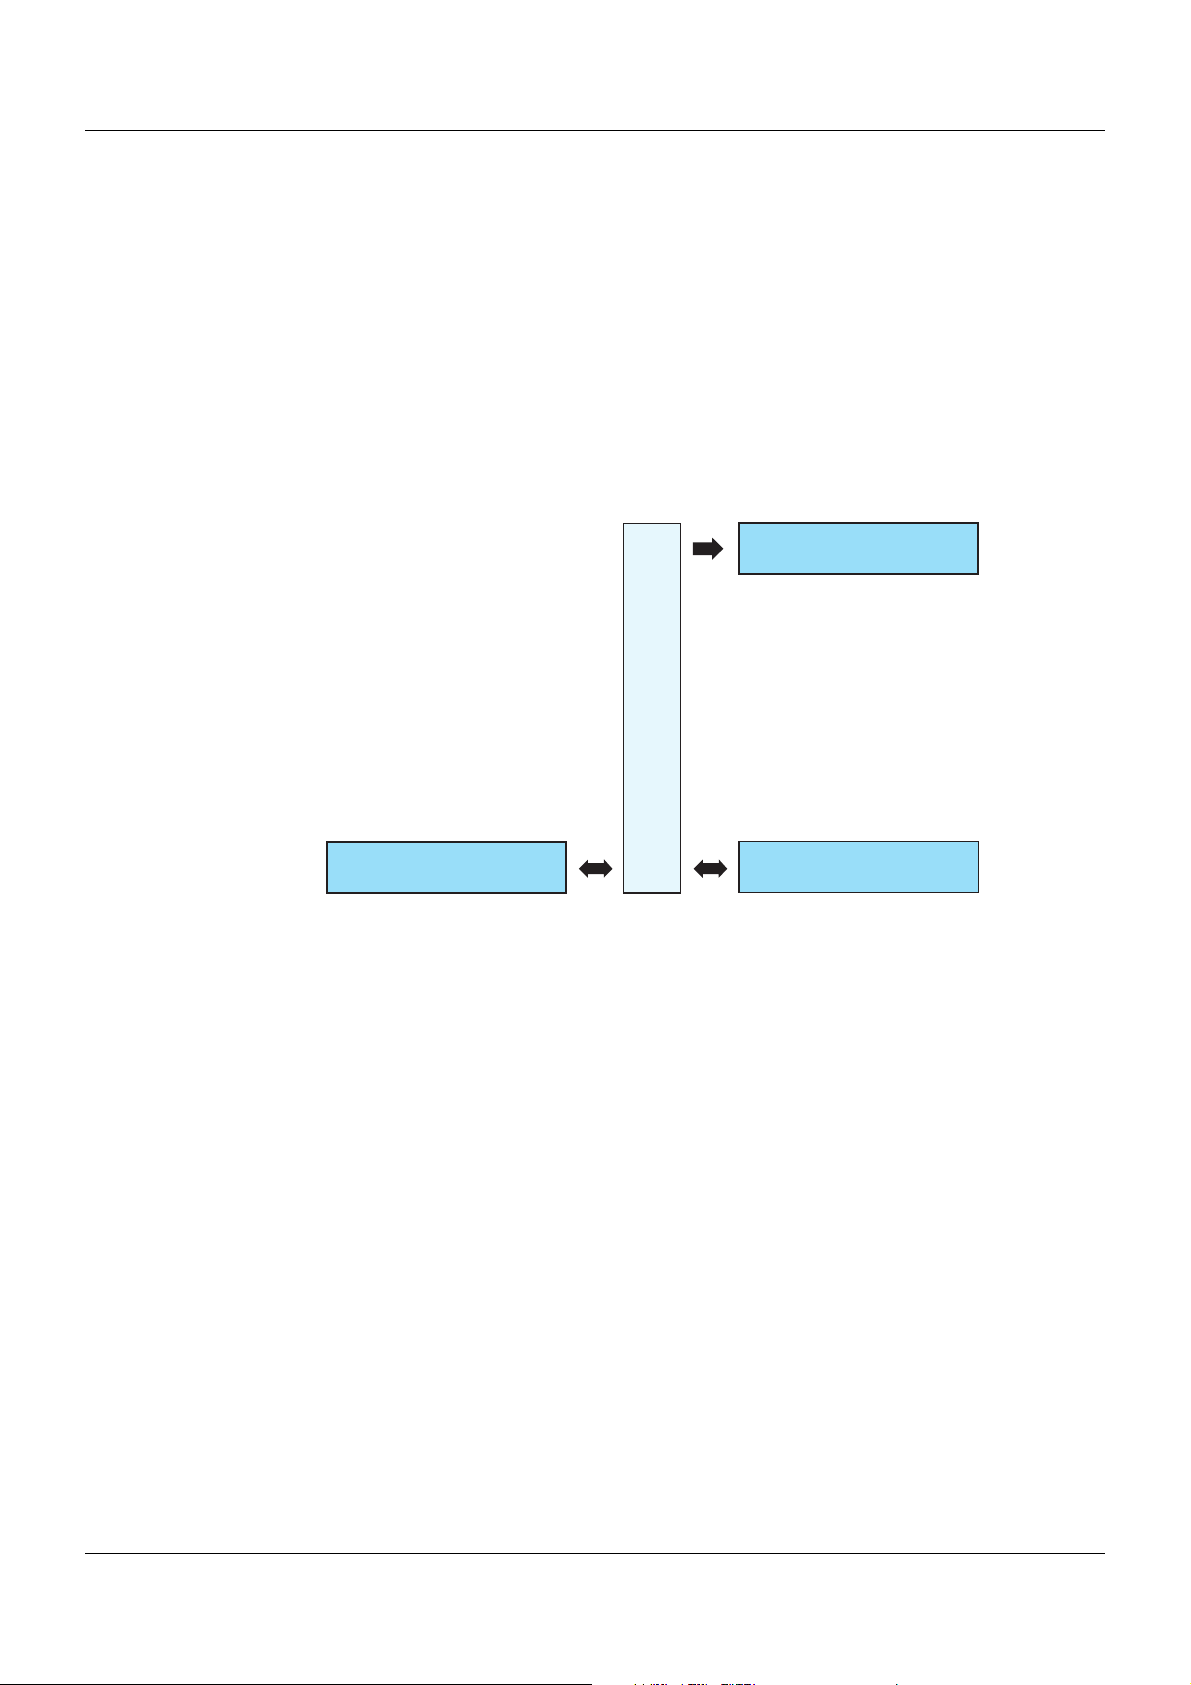
The relay module provides four relay outputs controlled through the system bus by digital signals (assigment in the connection list or directly by the PLC). Each relay output is equipped with
an AC 230V/3A changeover contact.
LEDs are used to indicate applied voltage supply, the module operating status, as well as the
status of the relay outputs.
For service work, the module insert can be easily pulled out of the case at the front. The case
including the bus PCB remains mounted on the DIN rail.
2.2 Block diagram
2 Description
13
Page 14

2 Description
14
Page 15

3 Installation
3.1 General information on installation/dismounting
DANGER!
With multichannel controller module 705010 and relay module 705015, the load circuits from
relay or solid state relay outputs can be operated with a dangerous electrical voltage (e.g.
230 V).
There is a risk of electric shock.
Prior to the installation/dismounting of these modules or the removal of the module insert, the
load circuits are to be disconnected from the voltage and the terminal strips are to be removed from the module. This work must only be performed by qualified personnel.
WARNING!
The modules must never be installed in areas with an explosion hazard.
There is the risk of an explosion.
The entire system must only be used outside of areas with an explosion hazard.
Mounting site
All modules have protection type IP20 and are only intended for use in fireproof control cabinets
or switch boxes. The mounting site should be virtually vibration-free. Electromagnetic fields
caused by equipment such as motors or transformers should be avoided.
Multifunction panel 840 has protection type IP67 at the front and is intended for installation in
a panel cut-out. The rear has protection type IP20.
Climatic conditions
The ambient temperature and the relative humidity at the mounting site must correspond to the
technical data. Aggressive gases and vapors have a negative effect on the operating life of the
modules. The mounting site must be free from dust, powder, and other suspended matter so
that the cooling slots do not become blocked.
DIN rail
All modules are mounted on a DIN rail according to DIN EN 60715 (35 mm × 7.5 mm × 1 mm).
For reasons of stability, the spacing of the fastening screws for the DIN rail should not exceed
200 mm. The minimum distances for the modules that are specified in the module-specific installation or operating instructions must be observed.
Installation position
The DIN rail should be mounted horizontally so that all modules are arranged vertically. Otherwise the admissible ambient temperature range will be restricted.
Space requirement
The modules require the minimum distances shown in the following figure for the purpose of
installation/dismounting and for future maintenance or replacement. In the event of shorter distances the minimum bending radius of the cables, the performance of the electrical installation,
and the clear arrangement of the plant are no longer guaranteed.
15
Page 16

3 Installation
130
203.6
51.8
30
70
51.8
Minimum distances
3.2 Installation/dismounting on DIN rail
All modules in the system are intended for installation on a DIN rail according to DIN EN 60715
(35 mm × 7.5 mm × 1 mm).
The following must always be installed on the left, at the start of the DIN rail:
• A central processing unit or
• A router module
These modules connect the input/output modules to the voltage supply and the system bus.
TIP!
To determine the required minimum width of the DIN rail, the widths of the individual modules
are to be added (see technical data of the modules in the respective data sheet or the module-specific installation instructions).
The widths of the cover (17.5 mm) and both end brackets (each 9.5 mm) should also be taken into consideration: 17.5 mm + 2 × 9.5 mm = 36.5 mm.
3.2.1 Input/output modules
In a sequence at the user's discretion, input/output modules can be arranged to the right next
to a base unit or a router module.
16
Page 17

Installation, using the example of a multichannel controller module 705010
(A) (A1)
(A2)
(D)
(C5) (D6)
(D7)
(C)(A)
(B4)(A3)
(B)
3 Installation
Example installation
Procedure:
Step Activity
1 Mount the multichannel controller module (A) in the DIN rail from above (A1).
2 Pivot the multichannel controller module (A) downward until it snaps into place (A2).
3 Move the multichannel controller module (A) to the left against the previous module (A3)
until the plug connections for the voltage supply and the system bus are connected.
4 Position additional modules (B) and move to the left against the previous module (B4).
5 After the final module, position the cover (C) on the DIN rail and move to the left against the
module (C5).
6 After attaching the cover, position the end bracket (D) on the DIN rail and move to the left
against the cover (D6).
7 Fasten the end bracket (D) using a screwdriver (D7). For this purpose, ensure that the end
bracket and the cover are positioned flush against the final module.
17
Page 18

3 Installation
(C2)
(D1)
(A4) (B3)
(C) (D)
(A) (B)
(A)
(F)
(E)
(E5)
(F7)
(A6)
(A8)
Dismounting, using the example of a multichannel controller module 705010
Removing the multichannel controller module from the DIN rail
18
Procedure:
Step Activity
1 Fully release the end bracket (D) using a screwdriver (D1), press upward from below, pivot
2 Move the cover (C) to the right (C2) until the side contacts of the neighboring module are
toward the front, and remove from the DIN rail.
Note: The end bracket does not need to be removed from the DIN rail if there is sufficient
space to the side to move it at least 20 mm to the right.
exposed. Then release the cover at the bottom using a screwdriver, press upward, and
remove from the DIN rail.
Note: The cover does not need to be removed from the DIN rail if there is sufficient space
to the side to move it at least 20 mm to the right.
Page 19

3 Installation
Step Activity
3 Move the modules (B) on the right next to the multichannel controller module that is to be
replaced (A) a minimum of 20 mm to the right (B3).
➥ These modules are isolated from the voltage supply and the system bus.
4 Move the multichannel controller module (A) to the right (A4) until the side contacts of the
neighboring module (here: central processing unit) – on the left, next to the multichannel
controller module that is to be replaced – are exposed.
➥ The multichannel controller module is isolated from the voltage supply and the system
bus. This is a prerequisite for the dismounting of the multichannel controller module.
5 If required, pull off the wired terminals (E) of the multichannel controller module (A) toward
the front (E5).
6 Insert a suitable screwdriver (F) into the unlocking slot of the multichannel controller mod-
ule (A6) and press upward (F7).
7 Pivot the multichannel controller module (A) upward off the DIN rail (A8) and remove it.
19
Page 20

3 Installation
(A)
(E)
(B) (D)
(G)
(C)
(F)
(F)
(F)
3.3 Replacing module inserts
3.3.1 Input/output modules
DANGER!
With multichannel controller module 705010 and relay module 705015, the load circuits from
relay or solid state relay outputs can be operated with a dangerous electrical voltage (e.g.
230 V).
There is a risk of electric shock.
The load circuits are to be disconnected from the voltage supply prior to removing the wired
terminal strips. This work must only be performed by qualified personnel.
Replacement of a module insert, using the example of a multichannel controller module 705010
20
For service purposes (or when retrofitting options for the multichannel controller module), the
case (D) can remain in the system; only the module insert (B) is replaced. For this purpose, the
system does not need to be isolated from the voltage supply (hot swapping).
The system will detect a module insert of the same type that has been replaced and will automatically reconfigure it. Retrofitted functions for the multichannel controller module (expansion
slots) must be configured using the setup program or the multifunction panel.
The new module insert also has a new nameplate (G), which will differ from the old one at least
with regard to the fabrication number, and is no longer identical to nameplates (E) and (C) on
the case (D).
Therefore, in the event of replacement, the module insert will be supplied along with a new
nameplate that will be affixed to the case (D) in place of the old nameplate (C). This means that
the specifications of nameplates (G) and (C) once again correspond to one another.
Page 21

CAUTION!
Only module inserts of the same type may be used for the replacement.
Otherwise, the function of the system may be affected.
The module inserts can be clearly identified using the nameplate.
CAUTION!
With the multichannel controller module 705010, a new module insert may contain retrofitted
inputs or outputs that have not yet been configured.
This can lead to unintended behavior, particularly at the outputs and the actuators connected
to them.
Prior to using the retrofitted inputs or outputs, ensure that these have been configured correctly.
Removing the module insert
Step Activity
1 Disconnect load circuits from the relay or solid state relay outputs.
2 Pull off the wired terminal strips (A) toward the front.
3 Installation
3 Press the old module insert (B) together on the grooved surfaces at the top and bottom and
remove from the case (D).
4 For the multichannel controller module, also remove the modules (F) of the expansion slots
from the case (D) toward the front, if required.
Mounting the module insert
Step Activity
1 Affix the new nameplate in place of the old nameplate (C) in the case.
2 For the multichannel controller module, also insert the modules (F) of the expansion slots
into the case (D), if required.
3 Hold the new module insert (B) at the grooved surfaces on the top and bottom and insert
them into the case (D). For this purpose, ensure that the board of the module insert slides
into the guide rails of the case. For the multichannel controller module, also ensure that the
modules (F) of the expansion slots slide in the guide rails of the module insert.
4 Reattach the wired terminal strips (A).
TIP!
When mounting the module insert, ensure that the snap holders (under the grooved surfaces)
audibly snap into place.
TIP!
The availability of the system can be increased through the storage of module inserts and
modules for expansion slots.
21
Page 22

3 Installation
3.4 Dimensions
22
Page 23

4.1 Installation notes
TIP!
These installation notes apply for the entire measuring, control, and automation system and,
on some occasions, are only applicable for a specific module.
The respective connection diagram shows the context.
Qualification of personnel
• Work on the modules must only be carried out to the extent described and, like the electrical
connection, only by qualified personnel.
Cables, shielding, and grounding
• When selecting the cable material, when installing, and when performing the electrical connection of the module, the regulations of DIN VDE 0100 "Erection of power installations with
rated voltages up to 1000 V" and the respective national regulations (e.g. on the basis of
IEC 60364) are to be observed.
• Certain cables must be heat resistant up to at least 80 °C at maximum load. The relevant
instructions in the connection diagram of the affected modules must be observed.
• Route input, output, and supply cables separately and not parallel to one another.
• Only use shielded and twisted probe and interface cables. Do not route the lines close to
current-carrying components or cables.
• For temperature probes, ground the shielding on one side in the control cabinet.
• Do not perform loopthroughs on the grounding cables, but route the cables individually to a
shared grounding point in the control cabinet; in doing so, ensure that the cables are as
short as possible.
Ensure that the equipotential bonding is correct.
4 Electrical connection
Electrical safety
• Isolate power supply units from the voltage supply on the primary side if there is a risk of
touching parts with dangerous electrical voltage (e.g. 230 V) in the course of work.
• The fuse rating of the power supply units on the primary side should not exceed a value of
10 A (inert).
• With modules with relay or solid state relay outputs, the load circuits can be operated with
a dangerous electrical voltage (e.g. 230 V). Disconnect load circuits from the voltage supply
during installation/dismounting and electrical connection.
• In order to prevent the destruction of the relay or solid state relay outputs in the event of an
external short circuit in the load circuit, the load circuit should be fused to the maximum admissible output current.
• The modules are not suitable for installation in areas with an explosion hazard.
• In addition to a faulty installation, incorrectly set values on the module could also impair the
correct function of the following process. Therefore, ensure that safety devices independent
of the module (e.g. overpressure valves or temperature limiters/monitors) are available and
that it is only possible for qualified personnel to define settings. Please observe the corresponding safety regulations in this context.
23
Page 24

4 Electrical connection
System bus
Voltage supply
DC 24 V
Relay output 1
AC 3800 V
»
Relay output 4
AC 3800 V
»
.
.
.
Voltage supply Out
Side system bus In Side system bus Out
Voltage supply In
References to other information
• The electromagnetic compatibility meets the standards and regulations cited in the technical data.
• The USB device interface and voltage supply in the central processing unit 705001 are not
electrically isolated. In general, please observe the specifications regarding electrical isolation.
4.2 Electrical isolation
24
Page 25

4.3 Connection diagram
CAUTION!
At maximum load, the temperature may exceed 60 °C at the terminals.
As a result the insulation of the cable may be damaged.
The cable must be heat resistant up to at least 80 °C.
4.3.1 Display and connection elements
4 Electrical connection
(1) Status displays (LED):
P = Voltage supply
S = Status
1 to 4 = Relay outputs
(LED is lit: Active)
(2) Voltage supply Out, DC 24 V
(3) Side system bus Out
(4) Relay output 4
(5) Relay output 3
(6) Side system bus In
(7) Relay output 2
(8) Voltage supply In, DC 24 V
(9) Relay output 1
25
Page 26

4 Electrical connection
4.3.2 Relay outputs
Connection Output Terminals Symbol and terminal designation
Relay output (changeover
contact)
1
2
3
4
4.4 Functional test
The voltage supply must be tested on completion of the electrical connection:
Signal Meaning
LED "P" (Power, green) is lit The module is being supplied with voltage
LED "P" (Power, green) is not lit The module is not supplied with voltage or there
1 to 3
4 to 6
7 to 9
10 to 12
1, 4, 7, 10
2, 5, 8, 11
3, 6, 9, 12
through the side contacts.
is a problem with the electrical function of the
LED.
Remedy:
• Check the voltage supply to the side contacts
of the preceding module (top contact +24 V,
bottom contact GND).
• Check voltage supply at the "+24 V" and
"GND" terminals of the base unit or router
module.
• Check power supply unit and connection between the power supply unit and the base unit
or router module.
If the "Power" LED does not light up despite a
voltage supply being present, the module insert
or – if the bus board inside the case is faulty – the
entire module must be replaced.
Startup
26
The check described above completes the process of installation and electrical connection. For
startup, use the additional documentation (operating manual or system manual).
The "Introduction" section of this document contains an overview of all documentation for the
measuring, control, and automation system.
Page 27

5.1 Display and connection elements
5 Operation
(1) Status displays (LED):
P = Voltage supply
S = Status
1 to 4 = Relay outputs
(LED is lit: Active)
(2) Voltage supply Out, DC 24 V
(3) Side system bus Out
(4) Relay output 4
(5) Relay output 3
(6) Side system bus In
(7) Relay output 2
(8) Voltage supply In, DC 24 V
(9) Relay output 1
27
Page 28

5 Operation
5.2 LED displays
"P" LED (Power)
The LED is permanently lit in green if the module is being supplied with voltage.
"S" LED (Status)
This LED indicates the status of the module. Diagnostics requires the setup program or a Web
browser as appropriate.
LEDs "1" to "4"
The LEDs indicate the status of the relevant relay output (changeover contact).
• LED is not lit = relay output is inactive (idle position)
• LED is lit (yellow) = relay output is active (operating position)
5.2.1 Display modes
The following table lists all possible states of the "S" LED (Status).
Display mode Description Green sym-
bol
--- LED state not relevant --- ---
Off LED off
On LED on (permanently lit)
Flickering LED flickers (50 ms on, 50 ms off)
Single flickering LED flashes briefly (50 ms on, 200 ms off)
Blinking LED flashes (200 ms on, 200 ms off)
Single flash LED flashes once (200 ms on, 1000 ms off)
Double flash LED flashes twice (on/off/on for 200 ms each
time, 1000 ms off)
Triple flash LED flashes three times (on/off/on/off/on for
200 ms each time, 1000 ms off)
Quadruple flash LED flashes four times (on/off/on/off/on/off/on for
200 ms each time, 1000 ms off)
Blinking red/green LED flashes red and green (200 ms red, 200 ms
green)
On green/
Single flickering red
LED lights up green, flashes red (50 ms red)
Red symbol
28
Page 29

5.2.2 System states and errors
The following table lists all the system states and errors that are indicated by the "S" LED (Status). In most cases, further diagnostics must be performed with the setup program.
5 Operation
Category "S" LED
(Status)
Bus status No connection to central processing
Bus status System in "Stop" (INIT) state – no
Bus status System in "Stop" (PREOP) state – no
Operation
(Priority 3)
Operation
(Priority 3)
Meaning Diagnos-
unit
error, only in start phase
error, only in start phase
System in "Stop" (SAFEOP) state –
no error
System in "Run" (OP) state – no
error
Recommended action
tics with
LED Check whether the central pro-
cessing unit is running; check
cabling and topology
LED
LED
LED
LED
29
Page 30

5 Operation
30
Page 31

TIP!
The parameters described in this section can be configured either with the setup program or
on the multifunction panel.
6.1 Digital outputs
Four digital outputs (relay 1 to 4) are available.
The digital outputs are exclusively driven by external inputs (NV_Relay01 to NV_Relay04).
Chapter 6.2 "NV connecting list", page 32
Setup dialog
6 Configuration
Parameter
Parameter Selection/settings Description
Relay 1 to
Relay 4
Status after change of configuration
Modified parameters are incorporated immediately.
Behavior after power on
During the initialization phase of the relay module, the digital outputs are inactive (relays in idle
position).
Assign a TAG number Identification marking (documentation in
PLC)
31
Page 32

6 Configuration
6.2 NV connecting list
The NV connecting list is used to link external inputs (NV_...) of the relay module to signals from
other modules via the system bus.
A comprehensive list with the module signals is included in the following chapter:
Chapter 6.2.1 "Digital signals", page 33
Further information about the signals can be found in the operating manual for the relevant
module.
TIP!
There is no NV connecting list in the input/output module configuration menu on the multifunction panel. Instead, a central NV connecting list is available in the configuration menu of
the base unit (CPU).
Setup dialog
Parameter
32
Parameter Selection/settings Description
Digital signal /
Valu e
...\NV_Relay01
(Example)
Select input to be connected. List of external inputs of the module
If a connection has already been configured, the module and its signal are displayed in the "Value" column.
This is the previously selected external input.
Select the module and – in the selector
next to it on the right – the signal to connect to the external input.
List of modules in the system and the
relevant signals
TIP!
All digital outputs of the relay module are inactive if these signals are not available (connection to base unit interrupted or system in "Stop" state).
Page 33

Status after change of configuration
The connections are available immediately.
Behavior after power on
The connections are available immediately after system initialization.
6.2.1 Digital signals
The following table contains all signals that are available in the NV connecting list for connection to the external inputs (NV_...) of the relay module.
Category Signal Description
Inactive No signal selected
Central processing unit
Digital variables Digital variable 1 to 64 Digital variable 1 to 64 (via interface)
6 Configuration
Program
generator 1 to
Program
generator 9
Operating contact 1 to 16 Operating contact 1 to 16 of program channels
(in the three program channels, operating contacts with the same name are linked with OR)
Mode: Basic status Status: Program is not running (basic status)
Mode: Automatic Status: Program is running (automatic mode,
no delay time or program end time)
Mode: Automatic 1 Status: Program is running (automatic mode,
incl. delay time and program end time)
Mode: Standstill Status: Program stopped during automatic
mode (time base stopped)
Mode: Delay Status: Program start delayed (delay time
runs)
Mode: Program end Status: Program ends (program end time runs,
corresponds to length of end signal)
Mode: Manual Status: Manual mode
Tolerance band channel 1 to 3 Tolerance band signal of program channel 1 to
3
PLC Binary output 27 to 32 Signal of PLC digital output 27 to 32
Limit monitoring Limit monitoring 1 to 64 Output signal of limit value monitoring 1 to 64
33
Page 34

6 Configuration
Category Signal Description
Binary linking Binary linking 1 to 8 Result of binary linking 1 to 8
PLC Binary output 9 to 32 Signal of PLC digital output 9 to 32
Binary PLC output block 13 to
block 18
Alarm analog
variables
Alarm integer
variables
PLC Binary output 1 to 32 Signal of PLC digital output 1 to 32
Alarm1 ExAI1 to Alarm1 ExAI64 Alarm signal 1 of analog variable 1 to 64
Alarm2 ExAI1 to Alarm2ExAI64 Alarm signal 2 of analog variable 1 to 64
Alarm1 ExInt1 to Alarm1 ExInt64 Alarm signal 1 of integer variable 1 to 64
Alarm2 ExInt1 to Alarm2ExInt64 Alarm signal 2 of integer variable 1 to 64
34
Page 35

Category Signal Description
6 Configuration
Alarms/
Faults
CAlarm/Fault System collective alarm or system fault (cen-
tral processing unit and modules)
CAlarm/Fault ackn. System collective alarm or system fault with
acknowledgement
Signal remains active until acknowledgement.
CAlarm device System collective alarm (central processing
unit and modules)
CAlarm ackn. System collective alarm with acknowledge-
ment
Signal remains active until acknowledgement.
Fault System fault (central processing unit and mod-
ules)
Fault ackn. System fault with acknowledgement
Signal remains active until acknowledgement.
CAlarm Basis Central processing unit collective alarm
System Run System state (Run = 1, Stop = 0)
Reserve 1 (Reserved for future use.)
Fieldbus error Error at fieldbus interface
System error mandatory Error in a mandatory module
System error optional Error in an optional module
No PLC No PLC program available
Battery empty Battery alarm (central processing unit buffer
battery is dead and must be replaced)
Notify service department!
Attention: RAM memory content is deleted!
Battery low Battery pre-warning (central processing unit
buffer battery can be replaced within 4 weeks
without data loss)
Notify service department!
35
Page 36

6 Configuration
Category Signal Description
Multichannel controller module
Controller C01ManualMode to
C04ManualMode
C01TuneActive to C04TuneActive Self-optimization active for controller module
C01Output1 to C04Output1 Switch position of first controller output of con-
C01Output2 to C04Output2 Switch position of second controller output of
C01CollAlarm to C04CollAlarm Collective alarm of controller channel 1 to 4
Setpoint SP01RampTolBand to
SP04RampTolBand
SP01Changeover1 to
SP04Changeover1
SP01Changeover2 to
SP04Changeover2
Manual mode active for controller channel
1 to 4
1 to 4
troller channel 1 to 4
controller channel 1 to 4
(can be configured with signals from the digital
selector)
Alarm signal of tolerance band monitoring of
ramp function 1 to 4
Bit 0 of setpoint changeover of setpoint value
function 1 to 4
Bit 1 of setpoint changeover of setpoint value
function 1 to 4
Analog inputs AI01Alarm1 to AI04Alarm1 Alarm signal 1 of analog input 1 to 4
AI01Alarm2 to AI04Alarm2 Alarm signal 2 of analog input 1 to 4
Digital inputs DI01, DI02, DI05 to DI10 Signal of digital input 1, 2, 5 to 10
If the HW counter is activated, the signal of
digital input 1 is inactive.
Limit monitoring LI01 to LI04 Output signal of limit value monitoring 1 to 4
Mathematics Logic01 to Logic04 Result of logic function 1 to 4
Miscellaneous CollectiveAlarm Controller module collective alarm
HWCounterSignal Signal of hardware counter in "fill" operating
mode (as shut-down signal when threshold
value reached)
36
Page 37

6 Configuration
Category Signal Description
Analog input module 4-channel
Analog inputs AI01Alarm1 to AI04Alarm1 Alarm signal 1 of analog input 1 to 4
AI01Alarm2 to AI04Alarm2 Alarm signal 2 of analog input 1 to 4
Digital inputs DI01 Signal of digital input
Alarm CollectiveAlarm Module collective alarm
Analog input module 8-channel
Analog inputs AI01Alarm1 to AI08Alarm1 Alarm signal 1 of analog input 1 to 8
AI01Alarm2 to AI08Alarm2 Alarm signal 2 of analog input 1 to 8
Digital inputs DI01 Signal of digital input
Alarm CollectiveAlarm Module collective alarm
Digital input/output module 12-channel
Digital inputs DI01 to DI12 Signal of digital input 1 to 12
Alarm CollectiveAlarm Module collective alarm
Multifunction panel 840
System bus
digital inputs
Alarm batch 1 to
Alarm batch 9
CollectiveAlarm Collective alarm of multifunction panel (pro-
Fault Fault in multifunction panel (independent of
Batch 1 active to Batch 9 active Signal for active batch 1 to 9
Push button 1 to
Push button 18
Collective alarm of batch 1 to 9 (process values)
cess values)
process values)
Status of push button 1 to 18 in process screen
37
Page 38

6 Configuration
38
Page 39

TIP!
An active connection between the setup program and the central processing unit is required
to configure the parameters described in this section.
7.1 Calibrate / test
CAUTION!
Incorrect settings may result in inadmissible changes to values.
This can have negative effects on the system function.
This function must be used only by (or under the instruction of) a service technician of the
device manufacturer.
7.1.1 Digital output
Setup dialog
7 Online parameters
Parameter
Parameter Selection/settings Description
Relay 1
to
Relay 4
Set all Click the "Set all" button. All relays switch to operating position.
Delete all Click the "Delete all" button. All relays switch to idle position.
Select relay (activate checkbox).
Several relays can be selected.
The selected relay switches to operating
position.
39
Page 40

7 Online parameters
7.1.2 Versions
Setup dialog
This dialog displays the module versions.
40
Page 41

8 Appendix
8.1 Technical data
8.1.1 Outputs
4 relay outputs (changeover contact)
Switching capacity 3 A at AC 230 V resistive load
3 A at DC 30 V resistive load
Contact life 350,000 operations at rated load / 750,000 operations at 1 A
8.1.2 Electrical data
Voltage supply
Connection Lateral (feed via base unit or router module)
Voltage DC 24 V +25/-20 %
Residual ripple 5 %
Current consumption 120 mA (at DC 19.2 V)
Power consumption 3 W
Relay outputs
Connection At the front (removable terminal strips with Push-In technology)
Conductor cross section
Wire or strand without ferrule Min. 0.5 mm
Strand with ferrule Min. 0.5 mm2, max. 2.5 mm
2 x strand with twin ferrule
with plastic collar
Stripping length 10 mm
Electrical safety Acc. to EN 61010-1
Electromagnetic compatibility Acc. to EN 61326-1
Interference emission Class A – only for industrial use –
Interference immunity To industrial requirements
Min. 0.5 mm2, max. 1.5 mm2 (both strands with the same cross section)
Overvoltage category III, pollution degree 2
2
, max. 2.5 mm
2
2
8.1.3 Case and ambient conditions
Case type Plastic case for DIN rail mounting in the control cabinet (indoor use);
DIN rail acc. to DIN EN 60715, 35 mm x 7.5 mm x 1 mm
Dimensions (W x H x D) 22.5 mm x 103.6 mm x 101.5 mm (without connection elements)
Weight Approx. 160 g
Protection type IP20, acc. to DIN EN 60529
Ambient temperature range -20 to +55 °C
Storage temperature range -40 to +70 °C
Resistance to climatic conditions Relative humidity ≤ 90 % annual average without condensation (cli-
matic class 3K3 acc. to DIN EN 60721-3-3 with extended tempera-
ture and humidity range)
Site altitude Up to 2000 m above sea level
Mechanical ambient conditions
1
Test conditions are listed in the System Descripton B 705000.8.
1
Classification acc. to DIN EN 60721-3-3, table 6, class 3M2
41
Page 42

8 Appendix
8.1.4 Approval/approval marks
Approval mark Testing agency Certificate/certifica-
tion number
c UL us Underwriters Laborato-
ries
E201387 UL 61010-1 (3. Ed.),
Inspection basis Valid for
all types
CAN/CSA-22.2
No. 61010-1 (3. Ed.)
42
Page 43

Page 44

JUMO GmbH & Co. KG
Street address:
Moritz-Juchheim-Straße 1
36039 Fulda, Germany
Delivery address:
Mackenrodtstraße 14
36039 Fulda, Germany
Postal address:
36035 Fulda, Germany
Phone: +49 661 6003-0
Fax: +49 661 6003-607
E-mail: mail@jumo.net
Internet: www.jumo.net
JUMO Instrument Co. Ltd.
JUMO House
Temple Bank, Riverway
Harlow - Essex CM20 2DY, UK
Phone: +44 1279 63 55 33
Fax: +44 1279 63 52 62
E-mail: sales@jumo.co.uk
Internet: www.jumo.co.uk
JUMO Process Control, Inc.
6733 Myers Road
East Syracuse, NY 13057, USA
Phone: 315-437-5866
1-800-554-5866
Fax: 315-437-5860
E-mail: info.us@jumo.net
Internet: www.jumousa.com
 Loading...