

Page 1

Cultivator attachment
Accessoire de cultivateur
Accesorio de cultivador
Operator’s manual
Manuel d’utilisation
Manual de instrucciones
GB
FR
ES
Page 2
2 –
English
KEY TO SYMBOLS
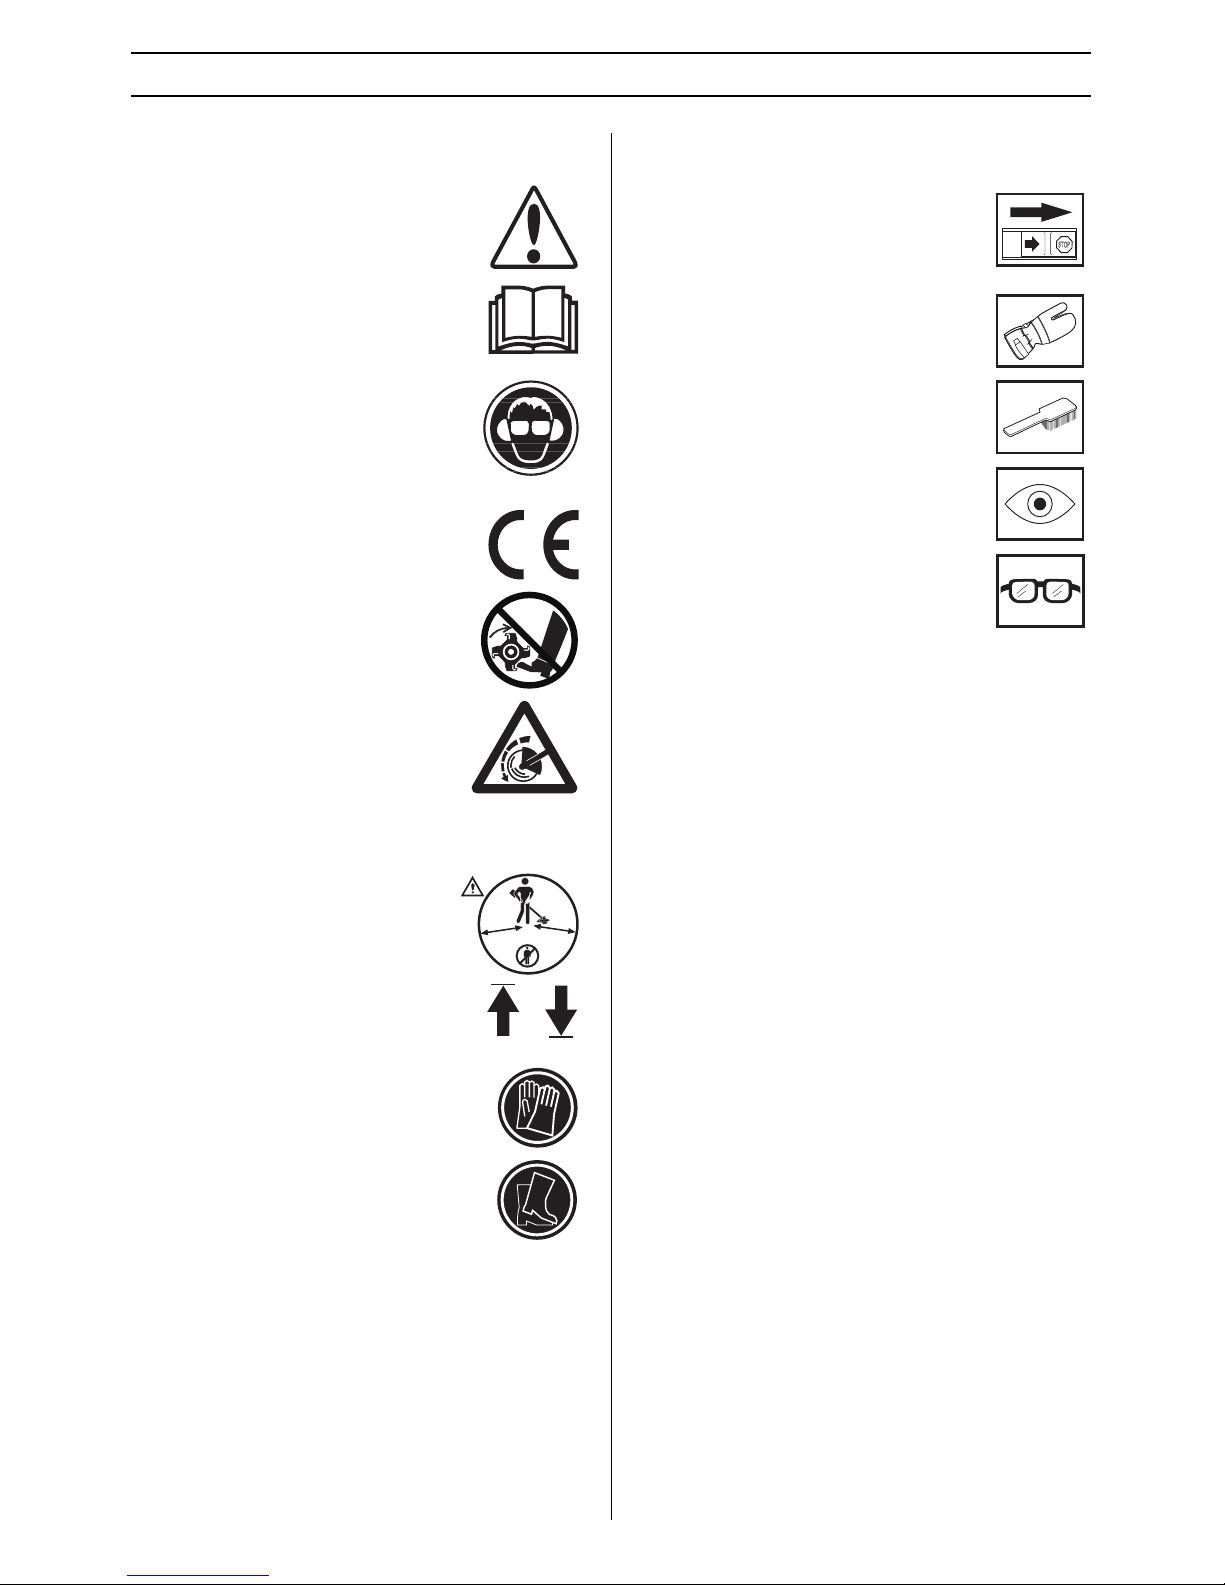
Symbols
WARNING! The machine can be a dangerous
tool if used incorrectly or carelessly, which can
cause serious or fatal injury to the operator or
others.
Please read the operator’s manual carefully
and make sure you understand the
instructions before using the machine.
Always wear:
• Approved hearing protection
• Protective goggles or a visor
This product is in accordance with applicable
EC directives.
Warning: rotating cutter. Keep hands and feet
clear.
Warning: the cutter continues to rotate even
after the engine has stopped.
When the engine has stopped, stop the
cutter from rotating by lowering the cutter
onto the ground. The arrow indicates the
direction of rotation.
The operator of the machine must ensure,
while working, that no persons or animals
come closer than 15 metres.
Arrows which show limits for the position of
the guard.
Always wear approved protective gloves.
Wear sturdy, non-slip boots.
Other symbols/decals on the machine refer to special
certification requirements for certain markets.
Switch off the engine by moving the stop
switch to the STOP position before carrying
out any checks or maintenance.
Always wear approved protective gloves.
Regular cleaning is required.
Visual check.
Protective goggles or a visor must be worn.
50FT
15 m
50FT
15 m
Page 3

English
– 3
CONTENTS
Contents Note the following before starting:
Jonsered has a policy of continuous product development
and therefore reserves the right to modify the design and
appearance of products without prior notice.
Long-term exposure to noise can result in permanent hearing
impairment. So always use approved hearing protection.
Please read the operator’s manual carefully and make sure
you understand the instructions before using the machine.
These instructions supplement the instructions that were
included with the machine. For other procedures, please refer
to the operating instructions for the machine.
The machine is only designed for cultivating.
KEY TO SYMBOLS
Symbols ....................................................................... 2
CONTENTS
Contents ...................................................................... 3
Note the following before starting: ................................ 3
SAFETY INSTRUCTIONS
Personal protective equipment ..................................... 4
Machine ′ s safety equipment ........................................ 4
General safety precautions .......................................... 5
General working instructions ....................................... 6
WHAT IS WHAT?
What is what on the cultivator attachment? ................. 7
ASSEMBLY
Fitting the bevel gear ................................................... 8
Assembling the guard. ................................................. 8
STARTING AND STOPPING
Check before starting ................................................... 9
MAINTENANCE
Bevel gear .................................................................... 10
Replacing the tine ........................................................ 10
Maintenance schedule ................................................. 10
TECHNICAL DATA
Technical data .............................................................. 11
!
WARNING! Under no circumstances may the
design of the machine be modified without
the permission of the manufacturer. Always
use genuine accessories. Non-authorized
modifications and/or accessories can result
in serious personal injury or the death of the
operator or others.
!
WARNING! This accessory may only be used
together with the intended clearing saw/
trimmer, see under heading ”Approved
accessories” in chapter Technical data in the
machine’s Operator’s Manual.
Page 4
4 –
English
SAFETY INSTRUCTIONS
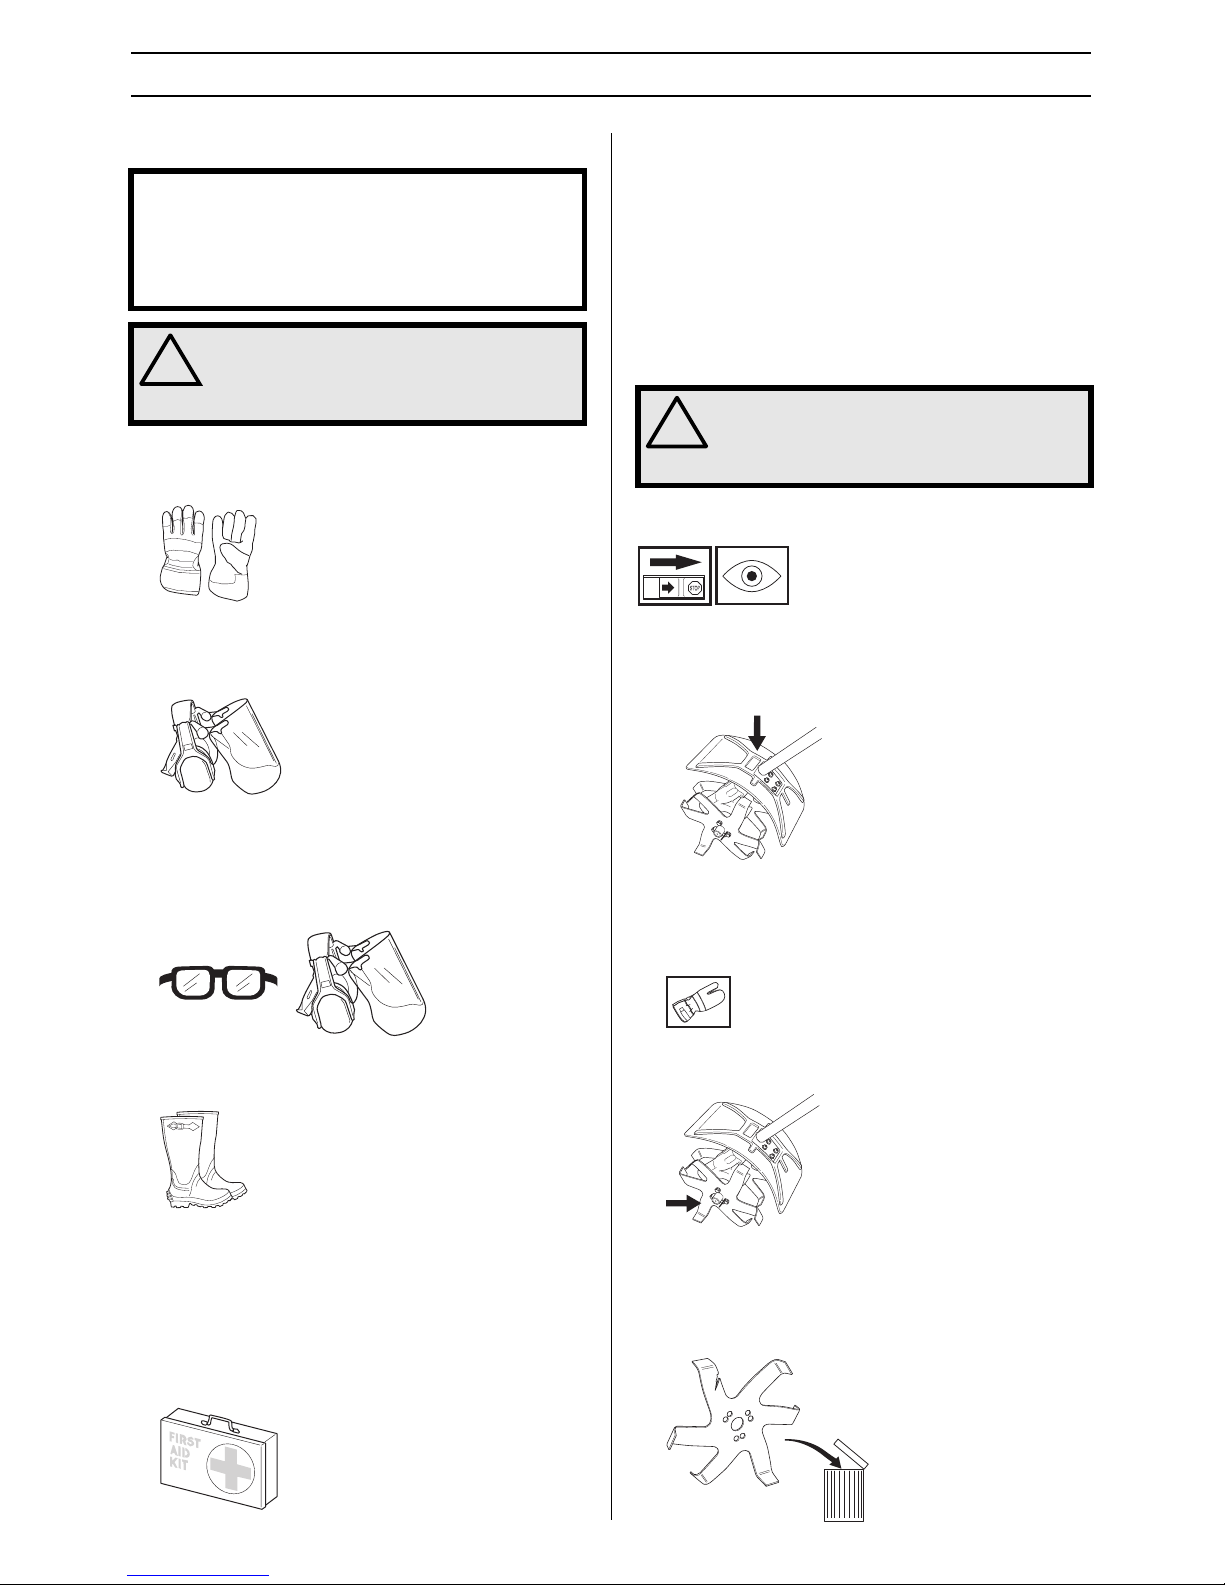
Personal protective equipment
GLOVES
Gloves should be worn when necessary, e.g., when fitting
cutting attachments.
HEARING PROTECTION
Wear hearing protection that provides adequate noise
reduction.
EYE PROTECTION
Always wear approved eye protection. If you use a visor then
you must also wear approved protective goggles. Approved
protective goggles must comply with standard ANSI Z87.1 in
the USA or EN 166 in EU countries.
BOOTS
Wear sturdy, non-slip boots.
CLOTHING
Wear clothes made of a strong fabric and avoid loose clothing
that can catch on twigs and branches. Always wear heavy,
long pants. Do not wear jewellery, shorts sandals or go
barefoot. Secure hair so it is above shoulder level.
FIRST AID KIT
Always have a first aid kit nearby.
Machine
′′
′′
s safety equipment
This section describes the machine ′ s safety equipment, its
purpose, and how checks and maintenance should be carried
out to ensure that it operates correctly. See the ”What is
what?” section to locate where this equipment is positioned
on your machine.
The life span of the machine can be reduced and the risk of
accidents can increase if machine maintenance is not carried
out correctly and if service and/or repairs are not carried out
professionally. If you need further information please contact
your nearest service workshop.
Cutting attachment guard
This guard is intended to prevent loose objects from being
thrown towards the operator. The guard also protects the
operator from accidental contact with the cutting attachment.
• Ensure that the guard is undamaged and is not cracked.
• Replace the guard if it has been exposed to impact or is
cracked.
Cutting equipment
The tines are designed and machined to withstand the loads
resulting from cultivating.
The two basic rules:
1 Only use cutting attachments with the guards we
recommend! See the chapter on Technical data.
2 Check the cutting attachment for damage or cracks. A
damaged cutting attachment should always be replaced.
IMPORTANT! You must use approved personal protective
equipment whenever you use the machine. Personal
protective equipment cannot eliminate the risk of injury but
it will reduce the degree of injury if an accident does
happen. Ask your dealer for help in choosing the right
equipment.
!
WARNING! Listen out for warning signals or
shouts when you are wearing hearing
protection. Always remove your hearing
protection as soon as the engine stops.
!
WARNING! Never use a machine that has
faulty safety equipment! Carry out the
inspection, maintenance and service
routines listed in this section.
Page 5
English
– 5
SAFETY INSTRUCTIONS
General safety precautions
• Never allow children to use the machine.
• Ensure that no-one comes closer than 15 m while you are
working.
• Never allow anyone else to use the machine without first
ensuring that they have understood the contents of the
operator’s manual.
Safety instructions before starting work
• Inspect the working area. Remove all loose objects, such
as stones, broken glass, nails, steel wire, string, etc. that
could be thrown out or become wrapped around the cutter
or cutter guard.
• Keep unauthorised persons at a distance. Children,
animals, onlookers and helpers should be kept outside the
safety zone of 15 m. Stop the machine immediately if
anyone approaches.
• Check the entire machine before starting. Replace
damaged parts. Check that there are no fuel leaks and
that all guards and covers are complete and fastened
securely. Check all nuts and screws.
• Check that the tines are undamaged and show no signs of
cracking or other damage. Replace the tines if necessary.
• Make sure the cutter guard is fitted and not damaged.
• Check that the tines and tine guard are secured correctly.
• When adjusting the carburettor, make sure that the tines
are held against the ground and that no one else is in the
vicinity.
• Check that the blades do not move when the engine is
idling.
• Make sure the handle and safety features are in order.
Never use a machine that has any parts missing or has
been modified in relation to the specification.
• Only use the machine for the purpose it was intended for.
!
WARNING! Always stop the engine before
doing any work on the cutting attachment.
This continues to rotate even after the
throttle has been released. Ensure that the
cutting attachment has stopped completely
and disconnect the HT lead from the spark
plug before you start to work on it.
!
WARNING! Never use a machine with faulty
safety equipment. The machine’s safety
equipment must be checked and maintained
as described in this section. If your machine
fails any of these checks contact your
service agent to get it repaired.
IMPORTANT!
Never use the machine if you are tired, if you have drunk
alcohol, or if you are taking medication that could affect your
vision, your judgement or your co-ordination.
Wear personal protective equipment. See instructions
under the heading Personal protective equipment.
Never use a machine that has been modified in any way
from its original specification.
Never use the machine in extreme weather conditions such
as severe cold, very hot and/or humid climates.
Never use a machine that is faulty. Carry out the checks,
maintenance and service instructions described in this
manual. Some maintenance and service measures must be
carried out by trained and qualified specialists. See
instructions under the heading Maintenance.
All covers and guards must be fitted before starting. Ensure
that the spark plug cap and ignition lead are undamaged to
avoid the risk of electric shock.
!
WARNING! Faulty blades can increase the
risk of accidents.
Page 6

6 –
English
SAFETY INSTRUCTIONS
General working instructions
Basic safety rules
1 Look around you:
- To ensure that people, animals or other things cannot
affect your control of the machine.
- To ensure that people, animals, etc., do not come into
contact with the cutting attachment or loose objects
that are thrown out by the cutting attachment.
2 Do not use the machine in bad weather, such as dense
fog, heavy rain, strong wind, intense cold, etc. Working in
bad weather is tiring and can lead to dangerous
conditions, e.g. slippery surfaces.
3 Make sure you can move and stand safely. Check the area
around you for possible obstacles (roots, rocks, branches,
ditches, etc.) in case you have to move suddenly. Take
great care when working on sloping ground.
4 The engine must be switched off before moving.
5 Never put the machine down with the engine running
unless you have it in clear sight.
CAUTION! Do not use the machine unless you are able to call
for help in the event of an accident.
Basic working techniques
• Always ensure you have a safe and stable working
position.
• Always hold the machine with both hands. Hold the
machine on the right of your body.
• When the engine is switched off, keep your hands and feet
away from the blades until they have stopped.
• Make sure your hands and feet do not come near the
cutter when the engine is running.
• Always keep the tines close to the ground.
• Always slow the engine to idle speed after each working
operation. Long periods at full throttle without any load on
the engine (i.e. without the resistance that the cutting
attachment exerts on the engine when you are using the
machine) can lead to serious engine damage.
• Pay extra attention when pulling the cultivator towards you
while working.
• If heavy vibration occurs, stop the machine. Disconnect
the HT lead from the spark plug. Check that the machine
is not damaged. Repair any damage.
Safety instructions after completing work
• Make sure the cutting attachment has stopped before
cleaning, carrying out repairs or an inspection.
Disconnect the HT lead from the spark plug.
• Wear heavy-duty gloves when repairing the cultivator.
• Store the machine out of reach of children.
• Use only original spare parts for repairs.
IMPORTANT!
This section takes up the basic safety precautions for
working with a cultivator.
If you encounter a situation where you are uncertain how to
proceed you should ask an expert. Contact your dealer or
your service workshop.
Avoid all usage which you consider to be beyond your
capability.
!
WARNING! At times grass and stones can
become caught in the tines. Always stop the
engine when cleaning.
!
WARNING! Watch out for thrown objects.
Always wear eye protection. Never lean over
the cutting attachment guard. Stones,
rubbish, etc. can be thrown up into the eyes
causing blindness or serious injury.
Keep unauthorised persons at a distance.
Children, animals, onlookers and helpers
should be kept outside the safety zone of 15
m. Stop the machine immediately if anyone
approaches.
The bevel gear can get hot during use and
may remain so for a while afterwards. You
could get burnt if you touch it.
Page 7

English
– 7
WHAT IS WHAT?
What is what on the cultivator attachment?
1
2
3
4
5
6
7
8
1 Blade guard
2 Shaft
3 Blades
4 Split pin
5 Cotter pin
6 Grease filler cap, bevel gear
7 Bevel gear
8 Operator ′ s manual
Page 8

8 –
English
ASSEMBLY
Fitting the bevel gear
• Assembling the angle gear on the shaft. Turn the shaft so
that the splines on the drive axle mate in the angle gear.
• First tighten the screw H and then the screw M.
Assembling the guard.
• Remove the four screws C and the two screws F from the
bracket A.
• Place the rubber sleeve D on the shaft E. The rubber
sleeve should sit between the arrow markings on the
shaft.
• Place the bracket A around the rubber sleeve and fit the
screws F loosely.
• Guide the guard B onto the shaft so that the hole in the
guard aligns with the hole in the bracket. Tighten the
screws C.
• Align the bracket with guard so that it sits straight in
relation to the tines.
• Tighten the screws F.
M
H
F
A
C
D
E
F
A
A
4 x C
B
Page 9

English
– 9
STARTING AND STOPPING
Check before starting
For safety reasons follow these recommendations!
• Inspect the working area. Remove any objects that could
be thrown out.
• Check that the machine is in perfect working order. Check
that all nuts and screws are tight.
• Check the tines and tine guard to ensure they are
undamaged and show no signs of cracking. Replace the
tine and tine guard if they have been exposed to impact or
are cracked.
Page 10

10 –
English
MAINTENANCE
Bevel gear
The bevel gear is filled with the right quantity of grease at the
factory. However, before using the machine you should check
that the bevel gear is filled three-quarters (40g) full with
grease. Use JONSERED special grease.
CAUTION! The gear housing must not be filled completely
with grease. The grease expands as the machine heats up
during operation. If the gear housing was completely filled
with grease it could damage the seals and lead to leakage of
grease.
The grease in the bevel gear does not normally need to be
changed except if repairs are carried out.
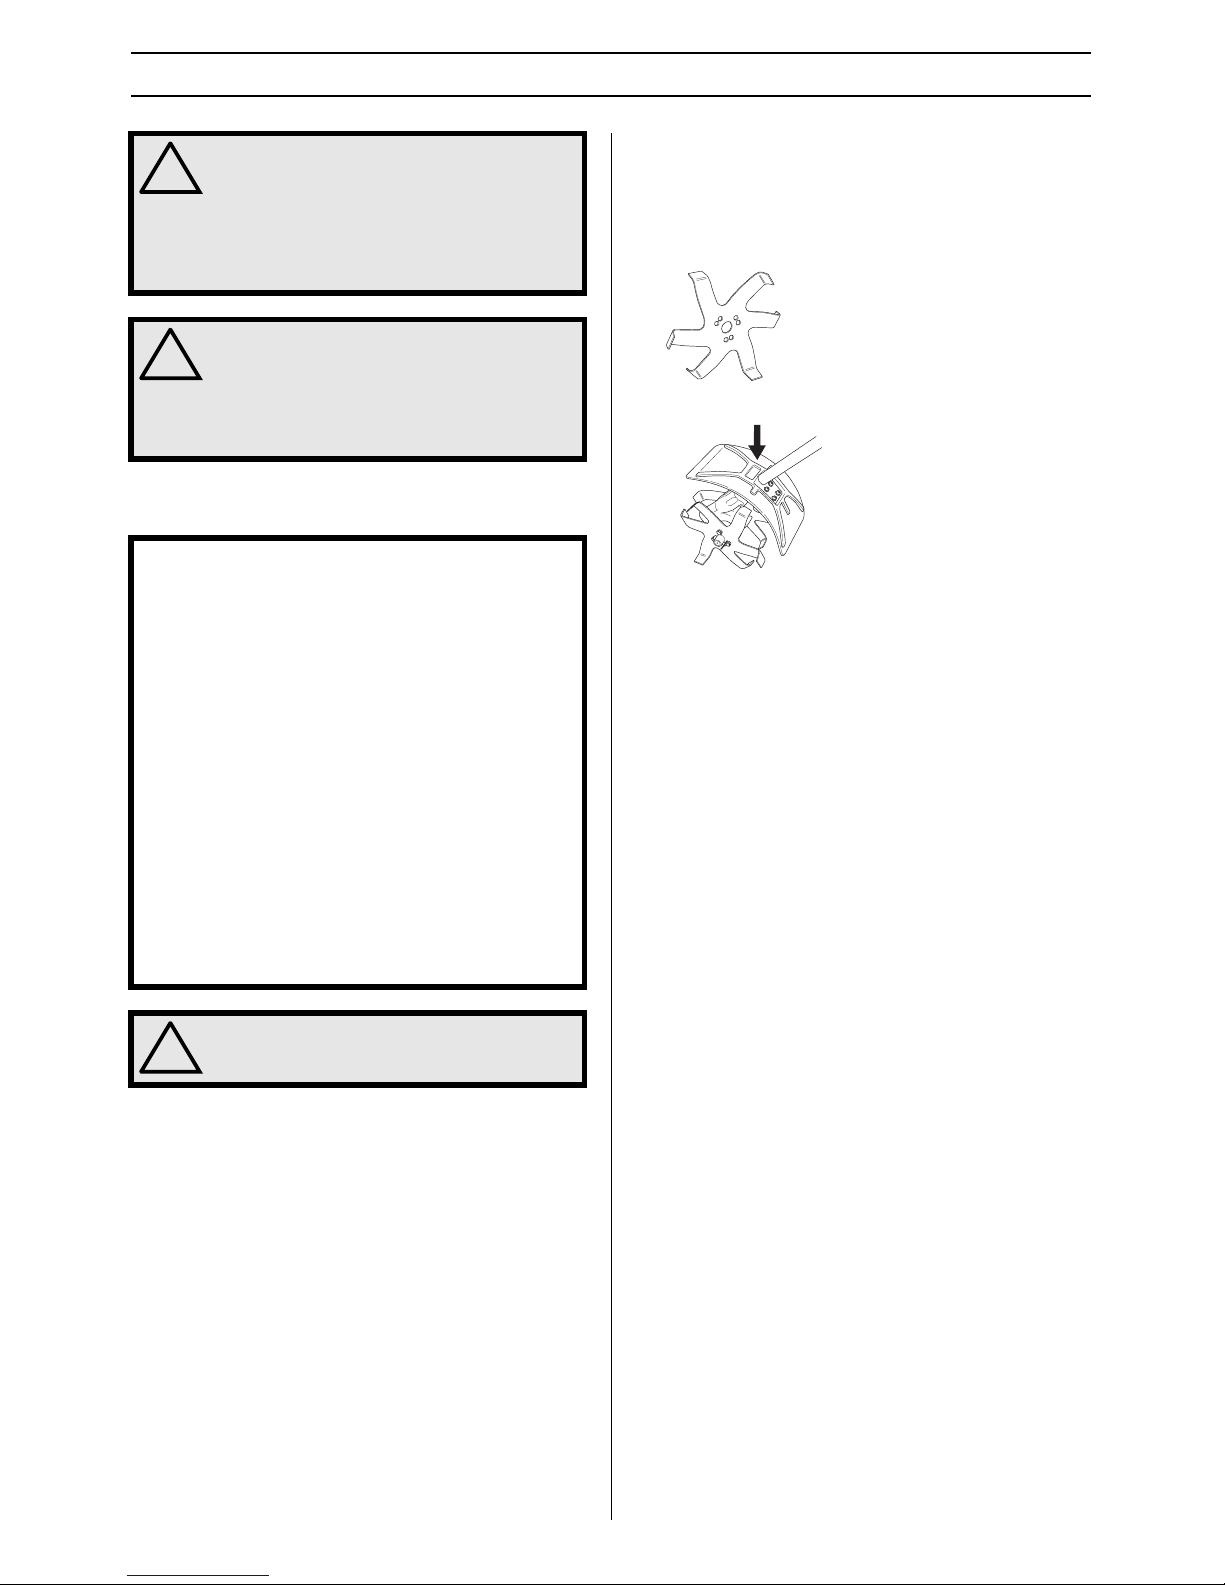
Replacing the tine
Loosen the split pin and cotter pin.
Remove the tine unit from the angle gear’s output axle.
Loosen the 3 screws holding the tine.
Replace the tine with a new and assemble in the reverse
order.
Maintenance schedule
Below you will find some general maintenance instructions. If
you need further information please contact your service
workshop.
Daily maintenance
1 Check that the guard is undamaged and not cracked.
Replace the guard if it has been exposed to impact or is
cracked.
2 Check that the blades do not move when the engine is
idling or when the choke is in the start throttle position.
3 Check that the tines are undamaged and show no signs of
cracking or other damage. Replace the tines if necessary.
Weekly maintenance
1 Check that the bevel gear is filled three-quarters (40g) full
with lubricant. Fill if necessary using special grease.
1
Page 11

English
– 11
TECHNICAL DATA
Technical data
Technical data CA 150
Weight
Weight, kg 2,9
Blades
Diameter tines, mm 220
Working width, mm 150
Tine speed at engine speed 10,500 r/min 215
Page 12

´®z+R'r¶02¨
´®z+R'r¶02¨
Page 13

Page 14

2005-03-31
1150078-20
´®z+R'r¶02¨
´®z+R'r¶02¨
 Loading...