

Page 1
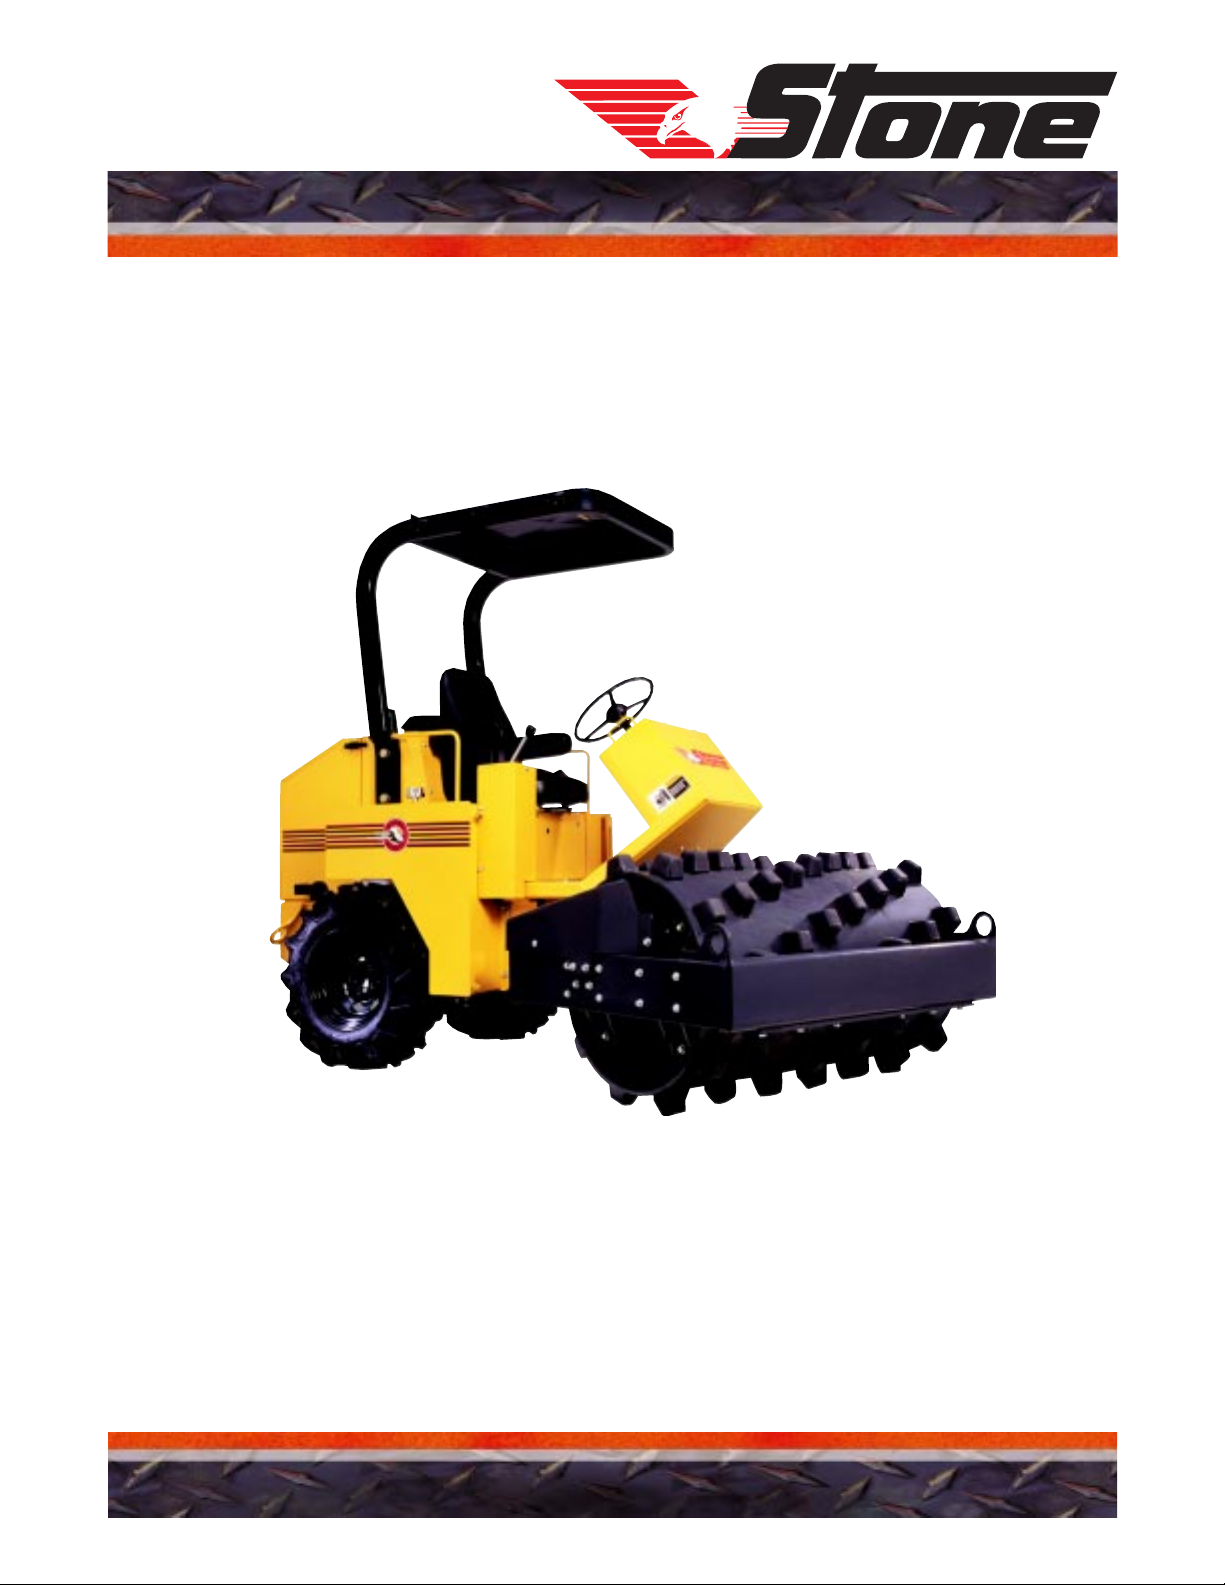
OPERATOR/SERVICE MANUAL
MODELS: SD-43, SD-54, PD-43
PD-54, PDB-43, PDB-54
RHINO MODEL SHOWN: PD54
JOHN DEERE DIESEL
A 100% employee-owned American manufacturer
REVISION: B 6/01 P/N 56322
Page 2

Page 3

TABLE OF CONTENTS
OPERATOR/SERVICE MANUAL
RHINO 43/54
FOREWORD ................................................................................................... 6
LIMITED WARRANTY ....................................................................................... 7
SECTION 1 - TECHNICAL DATA ...................................................................... 9 - 11
1.1 Specifications .......................................................................................... 10
1.2 Engine RPM ............................................................................................ 10
1.3 Machine Data .......................................................................................... 11
1.4 Machine Sound Level Test ...................................................................... 11
SECTION 2 - HEALTH & SAFETY ................................................................... 13 - 19
SECTION 3 - OPERATION ................................................................................. 21 - 29
3.1 Introduction and Operating Principle ...................................................... 22
3.2 Diesel Fuel .............................................................................................. 23
3.3 Engine Break-in ...................................................................................... 23
3.4 Engine Oil and Filter ............................................................................... 23
3.5 Warning Light ......................................................................................... 23
3.6 Hydraulic Oil, Filter, and Breather ......................................................... 23 - 24
3.7 Engine Coolant........................................................................................ 24
3.8 Visual Inspection ..................................................................................... 24
3.9 Air Cleaner .............................................................................................. 24 - 25
3.10 Before Starting ........................................................................................ 25
3.11 To Start ................................................................................................... 25
3.12 To Stop ................................................................................................... 25
3.13 Idling Engine ........................................................................................... 25
3.14 Warming Engine...................................................................................... 25 - 26
3.15 Parking Brake .......................................................................................... 26
3.16 Brake Light ............................................................................................. 26
3.17 To Operate ............................................................................................... 26
3.18 Forward/Reverse/Neutral ........................................................................ 26
3.19 Throttle ................................................................................................... 26
3.20 Gauges ................................................................................................... 26
3.21 Panel Fuse ............................................................................................... 27
3.22 Cold Weather Starting / Intake Heater Button ........................................ 27
3.23 Blade Lever ............................................................................................. 27
3.24 Horn/Back-up Alarm ............................................................................... 27
3.25 ROPS/FOPS/Seat Belt ............................................................................ 27
3.26 Tires/Lugnuts .......................................................................................... 27
3.27 Drum/Scrapers ........................................................................................ 28
3.28 Cleaning .................................................................................................. 28
3.29 Eccentrics ................................................................................................ 28
3.30 Compaction Tips ..................................................................................... 28
3.31 Tie Downs ............................................................................................... 28
3.32 Towing (Bypass) ..................................................................................... 28 - 29
3.33 Storage ................................................................................................... 29
Page 4

SECTION 4 - MAINTENANCE........................................................................... 31 - 55
4.1 Important ................................................................................................. 32
4.2 Maintenance Schedule ............................................................................ 32
4.3 Important Maintenance Information ....................................................... 34
4.4 Engine Oil and Filter ............................................................................... 34
4.5 Additional Service Information .............................................................. 34
4.6 Hydraulic Oil and Filter .......................................................................... 34 - 35
4.7 Hydraulic Breather .................................................................................. 35
4.8 Engine Cooling System........................................................................... 35 - 36
4.8.1 Replacing Engine Coolant......................................................... 36
4.8.2 Adding Engine Coolant ............................................................. 36 - 37
4.8.3 Disposing of Coolant................................................................. 37
4.9 Air Cleaner .............................................................................................. 37
4.9.1 Air Cleaner Service ................................................................... 37
4.9.2 Air Cleaner Replacement .......................................................... 37 - 38
4.9.3 Element Storage ........................................................................ 38
4.10 Fuel Filter ................................................................................................ 38
4.10.1 Water Separator ......................................................................... 38
4.10.2 Fuel Filter Replacement ............................................................ 38 - 39
4.10.3 Bleeding Fuel System ............................................................... 39
4.10.4 Bleeding at Fuel Injection Pump ............................................... 39
4.10.5 Bleeding at Fuel Injection Nozzles ........................................... 39 - 40
4.11 Fan/Alternator Belt ................................................................................. 40
4.12 Grease Fittings ........................................................................................ 40
4.13 Frame Hinge............................................................................................ 40
4.14 Blade Pins ............................................................................................... 40
4.15 Battery ................................................................................................... 40
4.15.1 Servicing Battery....................................................................... 40 - 41
4.15.2 Battery Installation .................................................................... 41
4.15.3 Charging/Jumping Battery ........................................................ 41 - 42
4.16 Engine Crankcase Vent Tube .................................................................. 42
4.17 Engine Valve Clearance .......................................................................... 42
4.18 Emission Regulation/Engine RPM ......................................................... 42
4.19 Fuel Injectors .......................................................................................... 42 - 43
4.19.1 Test Fuel Injection Nozzles ....................................................... 43
4.20 Fuel Tank................................................................................................. 43
4.21 Fuel Lines................................................................................................ 43
4.22 Hydraulic Hoses/Connections ................................................................. 43 - 44
4.23 Forward/Reverse/Neutral Adjustment .................................................... 44
4.24 Neutral Interlock ..................................................................................... 44
4.25 Control Cables: Forward/Reverse, Throttle, Blade................................. 44
4.26 Eccentrics ................................................................................................ 45
4.26.1 Eccentric Housing Oil ............................................................... 45
4.27 Charge System......................................................................................... 45
4.28 Panel Fuse: 20 AMP................................................................................ 45
4.29 Engine Installation Guidelines ................................................................ 45 - 46
4.30 Engine Mounting..................................................................................... 46
4.31 Hardware ................................................................................................. 46
4.31.1 Loctite ....................................................................................... 46
4.32 Roll Over Protective Structures (ROPS)................................................. 46
4.32.1 Maintenance of ROPS/Seat Belts (Inspection & Repair) ......... 46
Page 5

4.33 Horn/Back-up Alarm ............................................................................... 47
4.33.1 Back-up Alarm Switch .............................................................. 47
4.34 Scrapers ................................................................................................... 47
4.35 Troubleshooting ...................................................................................... 48 - 53
4.36 Electrical Troubleshooting ...................................................................... 54
4.37 Service Record ........................................................................................ 55
SECTION 5 - EXPLODED DIAGRAMS & PARTS LIST................................ 57 - 97
5.1 Hardware Key ......................................................................................... 59
5.2 Torque Charts and Guidelines ................................................................. 60 - 61
5.3 Drum Assembly ....................................................................................... 62 - 65
5.4 Main Frame ............................................................................................. 66 - 69
5.5 Radiator/Engine Mount ........................................................................... 70 - 71
5.6 Engine ................................................................................................... 72 - 75
5.7 Air Cleaner .............................................................................................. 76 - 77
5.8 Controls ................................................................................................... 78 - 81
5.9 Drive System Hydraulics ........................................................................ 82 - 85
5.10 Steering/Eccentric System Hydraulics .................................................... 86 - 87
5.11 Blade ................................................................................................... 88 - 89
5.12 Hydraulic Schematic ............................................................................... 90 - 91
5.13 Wiring ................................................................................................... 92 - 93
5.14 Decal Identification ................................................................................. 94 - 97
CALIFORNIA PROPOSITION 65 WARNING .............................................................. 99
Page 6

FOREWORD
These instructions include:
Safety regulations
Operating instructions
Maintenance instructions
These instructions have been prepared for
operation on the construction site and for the
maintenance engineer.
These instructions are intended to simplify
operation of the machine and to avoid
malfunctions through improper operation.
Observing the maintenance instructions will
increase the reliability and service life of the
machine when used on the construction site and
reduce repair costs and downtimes.
Always keep these instructions at the place of
use of the machine.
Only operate the machine as instructed and
follow these instructions.
Warranty Information
Please enter the following data. This will help expedite
any service or warranty work.
1. Machine Type: _______________________
Machine S/N: ________________________
2. Engine Type: _________________________
Engine S/N: __________________________
3. VIN: _______________________________
4. Purchase Date: _______________________
5. Dealer/Distributor Information:
Name: ______________________________
Address: ____________________________
____________________________________
Observe the safety regulations as well as the
guidelines of the civil engineering trade
association. Observe safety rules for the
operation of equipment and the pertinent
regulations for the prevention of accidents.
Stone Construction Equipment, Inc. is not liable
for the function of the machine when used in an
improper manner and for other than the intended
purpose.
Operating errors, improper maintenance and the
use of incorrect operating materials are not
covered by the warranty.
The above information does not extend the
warranty and liability conditions of business of
Stone Construction Equipment, Inc.
Stone Construction Equipment, Inc.
P.O. Box 150, Honeoye, New York 14471
Phone: (800) 888-9926
Fax: (716) 229-2363
Phone #: ____________________________
Fax #: ______________________________
Location of above information:
1. Information on S/N tag.
2. Information on engine tag.
3. Information on S/N tag - if applicable.
4. Date you purchased machine.
5. Dealer machine was purchased from.
- 6 -
Page 7

L i m i t e d W a r r a n t y
The Manufacturer warrants that products manufactured shall be free from defects in material and
workmanship that develop under normal use for a period of 90 days for concrete vibrators and electric
pumps, one year for Rhino®, Bulldog®, Wolfpac Rollers, trowels, Stompers®, saws, forward plates,
engine powered pumps, and 6 months for all other products from the date of shipment. The foregoing
shall be the exclusive remedy of the buyer and the exclusive liability of the Manufacturer. Our warranty
excludes normal replaceable wear items, i.e. gaskets, wear plates, seals, O-rings, V-belts, drive chains,
clutches, etc. Any equipment, part or product which is furnished by the Manufacturer but manufactured by
another, bears only the warranty given by such other manufacturer . (The Manufacturer extends the warranty
period to “Lifetime” for the drum bearings and seals for the mortar mixers, and agrees to furnish, free of
charge, the bearings and seals only upon receipt of the defective parts. The warranty is two years for
eccentric bearings on the forward plate compactors, mortar and plaster mixer drums, trowel gearboxes
and five years on the Bulldog trench roller eccentric bearings.) A Warranty Evaluation Form must accompany
all defective parts. Warranty is voided by product abuse, alterations, and use of equipment in applications
for which it was not intended, use of non-manufacturer parts, or failure to follow documented service
instructions. The foregoing warranty is exclusive of all other warranties whether written or oral, expressed
or implied. No warranty of merchantability or fitness for a particular purpose shall apply. The agents,
dealer and employees of Manufacturer are not authorized to make modification to this warranty , or additional
warranties binding on Manufacturer. Therefore, additional statements, whether oral or written, do not
constitute warranty and should not be relied upon.
The Manufacturer’s sole responsibility for any breach of the foregoing provision of this contract, with respect
to any product or part not conforming to the Warranty or the description herein contained, is at its option (a)
to repair, replace or refund such product or parts upon the prepaid return thereof to location designated
specifically by the Manufacturer. Product returns not shipped prepaid or on an economical transportation
basis will be refused (b) as an alternative to the foregoing modes of settlement - the Manufacturer’s dealer
to repair defective units with reimbursement for expenses, except labor, and be reviewed with the
Manufacturer prior to repair. A Warranty Evaluation Form must accompany all warranty claims.
Except as set forth hereinabove and without limitation of the above, there are no warranties or other
affirmations which extends beyond the description of the products and the fact hereof, or as to operational
efficiency, product reliability or maintainability or compatibility with products furnished by others. In no
event whether as a result of breach of contract or warranty or alleged negligence, shall the Manufacturer
be liable for special or consequential damages including but not limited to: Loss of profits or revenues, loss
of use of the product or any associated product, cost of capital, cost of substitute products, facilities or
services or claims of customers.
No claim will be allowed for products lost or damaged in transit. Such claims should be filed with the carrier
within fifteen days.
Effective April 1, 1998.
Bred Tough, Technology Born T o Work.
The Way It Ought T o Be.
Stone Construction Equipment, Inc.
32 East Main Street, P . O. Box 150
Honeoye, NY 14471-0150
- 7 -
Phone: 1-800-888-9926 • 1-716-229-5141
Fax: 1-716-229-2363
www.stone-equip.com • e-mail: sceny@mcimail.com
4/98 P/N 51018
Page 8

Page 9

1. TECHNICAL DATA
- 9 -
Page 10

1. TECHNICAL DATA
MODEL
Drum Type
Dimensions
Operating Wt. (Kg)
Drum Width (cm)
H x L x W (cm)
Tires (cm)
Operating System
Engine (kW)
RPM (Hertz)
Fuel Capacity (liters)
Steering
Frame
Drive System
Eccentric Drive
Cooling
Parking Brake
Security Braking Sys.
Performance
Centrifugal Force (Kn)
Frequency (Hertz)
Total Applied Force
(Kn)
Speed
Low Gear
High Gear
(kilometers/hour)
Amplitude (mm)
Articulating Angle
Oscillating Angle
Gradeability
Inside Turning Radius
(meter)
Wall Clearance (cm)
Curb Clearance (cm)
Area Cap.
(Sq.Ft./Hr.) (M2)
STONE
SD 43
Smooth
6100# (2767)
43" (109,2)
97" x 124" x 51"
(246,4 x 315 x 124,5)
9.5 x 16 (24,1 x 40,6)
Diamond Tread
58 hp John Deere
(43.25)
2500 (41,7)
20 gal. (757)
Power
Articulating,
Oscillating
Positraction
Hydrostatic
Water
Mechanical
Hydrostatic
12,000# (53,38)
2100 (35)
14,900# (66,28)
0-2 mph (0-3,22)
0-4 mph (0-6,44)
.071" (1,80)
o
35
o
9
90%
94.25" (2,39)
2 1/2" (6,35)
14" (35,56)
37,840 sq.ft/hr.
(3515,5)
STONE
SD 54
Smooth
6540# (2966,5)
54" (137,2)
97" x 124" x 59"
(246,4 x 315 x 149,9)
9.5 x 16 (24,1 x 40,6)
Diamond Tread
58 hp John Deere
(43.25)
2500 (41,7)
20 gal. (757)
Power
Articulating,
Oscillating
Positraction
Hydrostatic
Water
Mechanical
Hydrostatic
12,000# (53,38)
2100 (35)
15,100# (67,17)
0-2 mph (0-3,22)
0-4 mph (0-6,44)
.062" (1,57)
o
35
o
9
90%
88.75" (2,25)
2 1/2" (6,35)
14" (35,56)
47,520 sq.ft/hr.
(4414,8)
1.1 Specifications Stone Rhino
STONE
PD 43
Padfoot
6409# (2907,1)
43" (109,2)
97" x 124" x 51"
(246,4 x 315 x 124,5)
9.5 x 16 (24,1 x 40,6)
Cleated Tractor
58 hp John Deere
(43.25)
2500 (41,7)
20 gal. (757)
Power
Articulating,
Oscillating
Positraction
Hydrostatic
Water
Mechanical
Hydrostatic
12,000# (53,38)
2100 (35)
15,209# (67,65)
0-2 mph (0-3,22)
0-4 mph (0-6,44)
.059" (1,50)
o
35
o
9
70%
94.25" (2,39)
2 1/2" (6,35)
14" (35,56)
37,840 sq.ft/hr.
(3515,5)
STONE
PD 54
Padfoot
6880# (3120,7)
54" (137,2)
97" x 124" x 59"
(246,4 x 315 x 149,9)
9.5 x 16 (24,1 x 40,6)
Cleated Tractor
58 hp John Deere
(43.25)
2500 (41,7)
20 gal. (757)
Power
Articulating,
Oscillating
Positraction
Hydrostatic
Water
Mechanical
Hydrostatic
12,000# (53,38)
2100 (35)
15,419# (68,59)
0-2 mph (0-3,22)
0-4 mph (0-6,44)
.053" (1,35)
o
35
o
9
70%
88.75" (2,25)
2 1/2" (6,35)
14" (35,56)
47,520 sq.ft/hr.
(4414,8)
STONE
PD 54
Padfoot
6880# (3120.7)
54" (137.2)
97' x 124' x 59'
(246.4 x 315 x 149.9)
9.5 x 16 (24.1 x 40.6)
Cleated Tractor
58 hp John Deere
(43.25)
2500 (41.7)
20 gal (757)
Power
Articulating
Oscillating
Positraction
Hydrostatic
Water
Mechanical
Hydrostatic
12,000# (53,38)
2100 (35)
15,808# (70,32)
0-2 mph (0-3,22)
0-4 mph (0-6,44)
.059" (1,50)
o
35
o
9
70%
94.25" (2,39)
7" (17,78)
14" (35,56)
37,840 sq.ft/hr.
(3515,5)
®
STONE
PDB 54
Padfoot w/blade
7275# (3300)
54" (137,2)
97" x 136" x 68"
(246,4 x 315 x 172,7)
9.5 x 16 (24,1 x 40,6)
Cleated Tractor
58 hp John Deere
(43.25)
2500 (41,7)
20 gal. (757)
Power
Articulating,
Oscillating
Positraction
Hydrostatic
Water
Mechanical
Hydrostatic
12,000# (53,38)
2100 (35)
16,075# (71,51)
0-2 mph (0-3,22)
0-4 mph (0-6,44)
.053" (1,35)
o
35
o
9
70%
88.75" (2,25)
7" (17,78)
14" (35,56)
47,520 sq.ft/hr.
(4414,8)
Standard Features: 2 drum scrappers; ROPS/FOPS; gauges – oil pressure, volt meter, coolant temp, hour meter, fuel sight, hydraulic oil sight; warning lights - oil pressure and
temperature; horn; back-up alarm; neutral safety start; padded seat w/flip-up arm rests; seat belt; secondary parking brake
1.2 ENGINE RPM
IDLE RPM 1,200 + 100 18Hz
FULL RPM 2,500 + 100 41Hz
ECCENTRIC FULL SPEED RPM 2,100 + 100 34Hz
- 10 -
Page 11

1. TECHNICAL DATA
1.3 MACHINE DATA
Brakes
Service
Parking
Recommended Fuel Diesel fuel blend meeting ASTM D975 or EN 590
Premium diesel fuel conditioner is also recommended
Electric 12 Volt system battery BCI group 24
Hydraulic Oil Mobilfluid 424
Engine Oil 1st 100 hours John Deere br eak-in oil (T Y22041) then
SAE 15W/40 API CG-4 or API CF-4 6.5 quarts (6.0 liters)
Engine Coolant 50/50 Mixture antifreeze / distilled water meeting ASTM 4985,
coolant additive is also recommended
Eccentric Oil SAE 20W/50 API SJ or API SH
Hydrostatic
Automatic spring applied
800 CCA 78 amp charge system
Capacity 20 gallons (76 liters)
SD / PD 43: 1 quart (.95 liter)
SD / PD 54: 15 quarts (1.4 liters)
Engine / HP John Deere 3029DF 58 HP (43 kW) int. @ 2,500 RPM
Torque 153 ft. lbs. (208 Nm) int. @ 1,200 RPM
Fuel Economy .377 lb./hp - hr. (230 g/kWh) @ 1,600 RPM
1.4 MACHINE SOUND LEVEL TEST
Machine Type: PDB54 Rhino
Sound Level Meter Calibration Date: August 6, 1997
Meter Type: Simpson Model 886-2 Type 2
Test Date: August 6, 1997
Test Conditions:
Temperature 70° Fahrenheit / 20° Celsius
Ambient Sound 60 dba Slow Mode
Soil Condition Silts and Clays
Moisture Limit N/A
Engine Speed: 2,500 RPM / 41 Hz
Frequency: 2,100 VPM / 34 Hz
Test Site: Honeoye, New York, USA
Sound Level at Operator Position: 93 dba Without Vibe
93 dba With Vibe
- 11 -
Page 12

Page 13

2. HEALTH & SAFETY
- 13 -
Page 14

2. HEALTH & SAFETY
SAFETY USE
These machines are designed to carry out the function
of compacting material of the non-cohesive, bituminous
and granular varieties.
Safety Precautions
If used correctly they will provide an effective and safe
means of compaction and meet the appropriate
performance standards.
It is essential that the operator of the machine is
adequately trained in its safe operation, be authorized
to operate it, and have sufficient knowledge of the
machine to ensure that it is in full working order before
being put to use.
- 14 -
Page 15
2. HEALTH & SAFETY
Safety Precautions
Before using this equipment, study this entire manual
to become familiar with its operation. Do not allow
untrained or unauthorized personnel, especially
children, to operate this equipment. Use only factory
authorized parts for service.
FOLLOW SAFETY INSTRUCTIONS
Carefully read all safety messages and decals in this manual
and on your machine safety signs. Keep decals in good
condition. Replace missing or damaged decals. Be sure
new equipment components and repair parts include the
current safety signs. Replacement safety signs and decals
are available through your dealer.
Learn how to operate the machine and how to use controls
properly. Do not let anyone operate without instruction.
Keep your machine in proper working condition.
Unauthorized modifications to the machine may impair the
function and/or safety and affect machine life.
When warning decals are destroyed or missing, contact
the Manufacturer immediately at 1-800-888-9926 for
replacement. For the safety of yourself and others, it is
imperative that the following rules are observed.
Failure to do so may result in serious injury or death.
If you do not understand any part of this manual and need
assistance, contact your dealer.
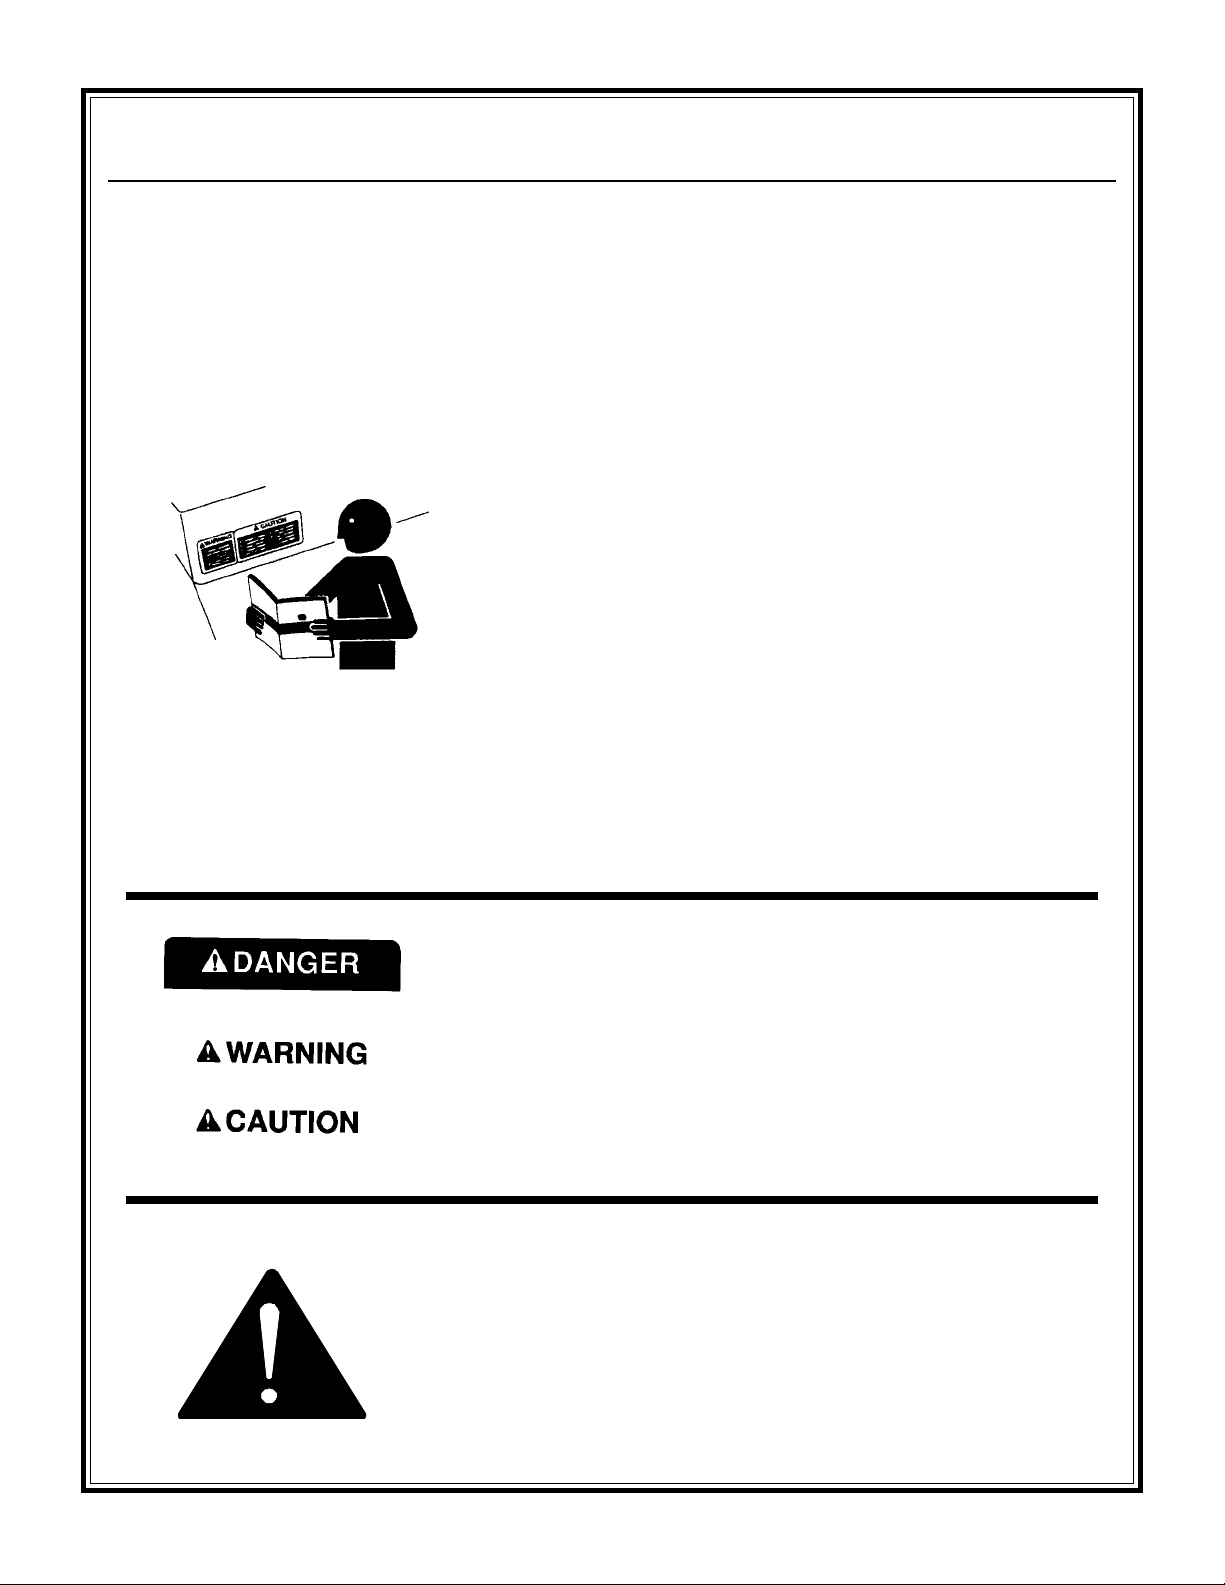
UNDERSTAND SIGNAL WORDS
A signal word DANGER, WARNING, or CAUTION is
used with the safety-alert symbol. DANGER identifies the
most serious hazards.
DANGER or WARNING safety signs are located near
specific hazards. General precautions are listed on
CAUTION safety signs. CAUTION also calls attention to
safety messages in this manual.
This notation appears before warnings in the text. It means that
the step which follows must be carried out to avoid the possibility
of personal injury or death. These warnings are intended to help
the technician avoid any potential hazards encountered in the
normal service procedures. We strongly recommend that the
reader takes advantage of the information provided to prevent
personal injury or injury to others.
- 15 -
Page 16
2. HEALTH & SAFETY
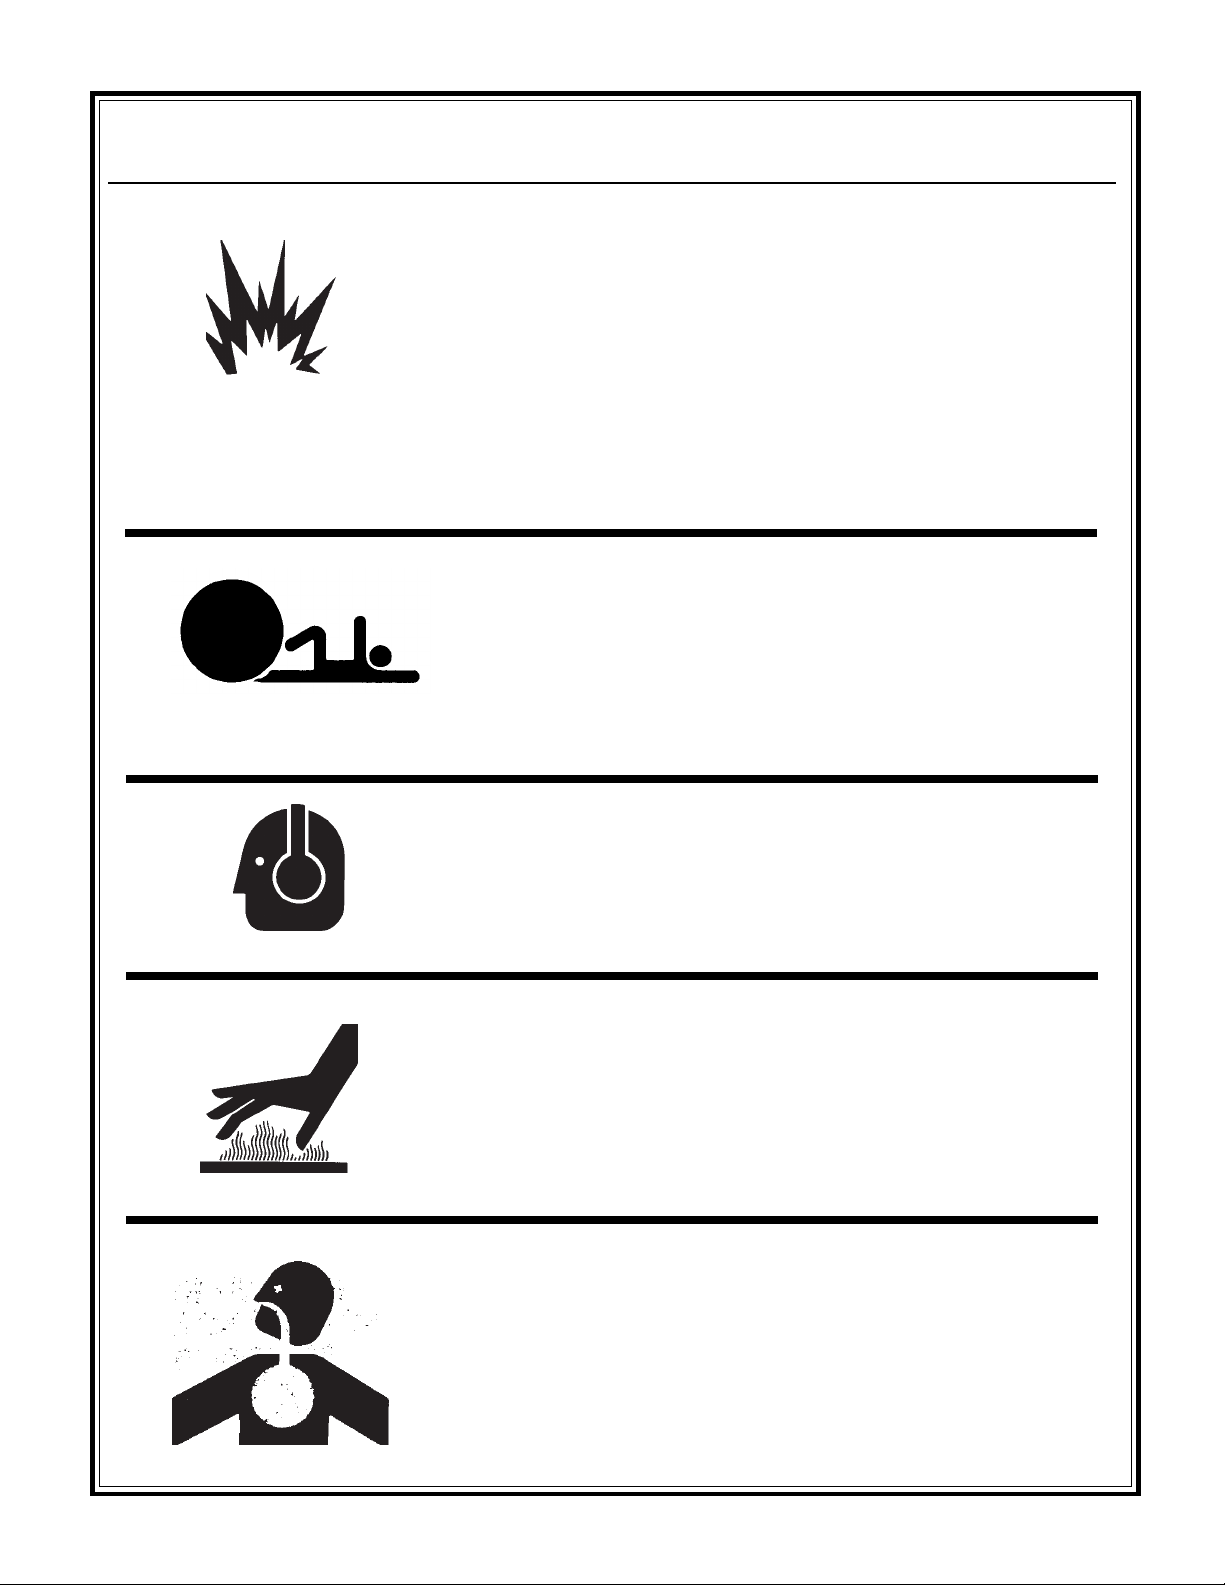
USE COMMON SENSE WHEN HANDLING FUELS
Transport and handle fuel only when contained in approved safety
container.
Do not smoke when refueling or during any other fuel handling
operation.
Do not refuel while the engine is running or while it is still hot.
If fuel is spilled during refueling, wipe it off from the engine
immediately and discard the rag in a safe place.
Do not operate the equipment if fuel or oil leaks exist - repair
immediately.
Never operate this equipment in an explosive atmosphere.
Operator must always be seated with seat belt on when
roller is running.
Never allow more than one person on roller.
Always turn engine off before dismounting from roller.
Always apply parking brake when not in use.
Never park roller on a hill.
Never operate roller on slope greater than 15 degrees.
Do not operate the roller in standing water.
Safety Precautions
Ear protection required when operating this equipment.
Exposure to loud noise can cause impairment or loss of
hearing.
HOT SURFACES
Muffler, engine, and engine shroud may be hot.
Allow all components in the engine compartment to cool before
performing any service work.
Never operate unit in a poorly ventilated or enclosed area.
Avoid prolonged breathing of exhaust gases.
Engine exhaust fumes can cause sickness or death.
- 16 -
Page 17

2. HEALTH & SAFETY
Qualified personnel only. No untrained operators. Serious injury may
occur.
Users must be trained to operate this roller. Read the Operator's
Manual and Engine Owner's Manual. Learn to operate this roller
safely.
Do not articulate on grades larger than 15o, roller may tip over.
Do not operate across the sides of hills, roller may tip over.
Do not operate at the edge of mats or roads, roller may tip over.
Do not stand. Be seated, with seat belt on, when roller is running.
Do not park the roller on hills.
Always turn off engine and apply brake before dismounting.
Caution: Escaping hydraulic fluid under pressure can have sufficient
force to penetrate the skin, causing serious personal injury.
Hydraulic system produces high pressures--incorrect hose replacement
can cause serious personal injury. When performing service, refer to
Operator's Manual for hose identification and connections.
Hydraulic fluid escaping under pressure from a very small hole can be
almost invisible. Use a piece of cardboard or wood to search for
possible leaks.
Never use your hands to detect pressure leaks.
Hydraulic tank temperature can reach 180
Safety Precautions
o
F maximum.
SERVICE COOLING AND HYDRAULIC SYSTEMS SAFELY
Pressurized release of fluids from hydraulic or coolant systems can
cause serious burns.
Shut off engine. Only remove filler cap when cool enough to touch
with bare hands. Slowly loosen cap to first stop to relieve pressure
before removing completely.
Never perform any work on the roller while it is running. Before
working on the roller, stop the engine and disconnect the spark plug
wire(s) to prevent accidental starting, block drums to prevent rolling.
Keep engine cover closed during the operation.
Keep hands, clothing and jewelry away from all moving parts.
Keep all guards in place.
- 17 -
Page 18
2. HEALTH & SAFETY
Keep feet clear of all drums.
Keep work area free of bystanders.
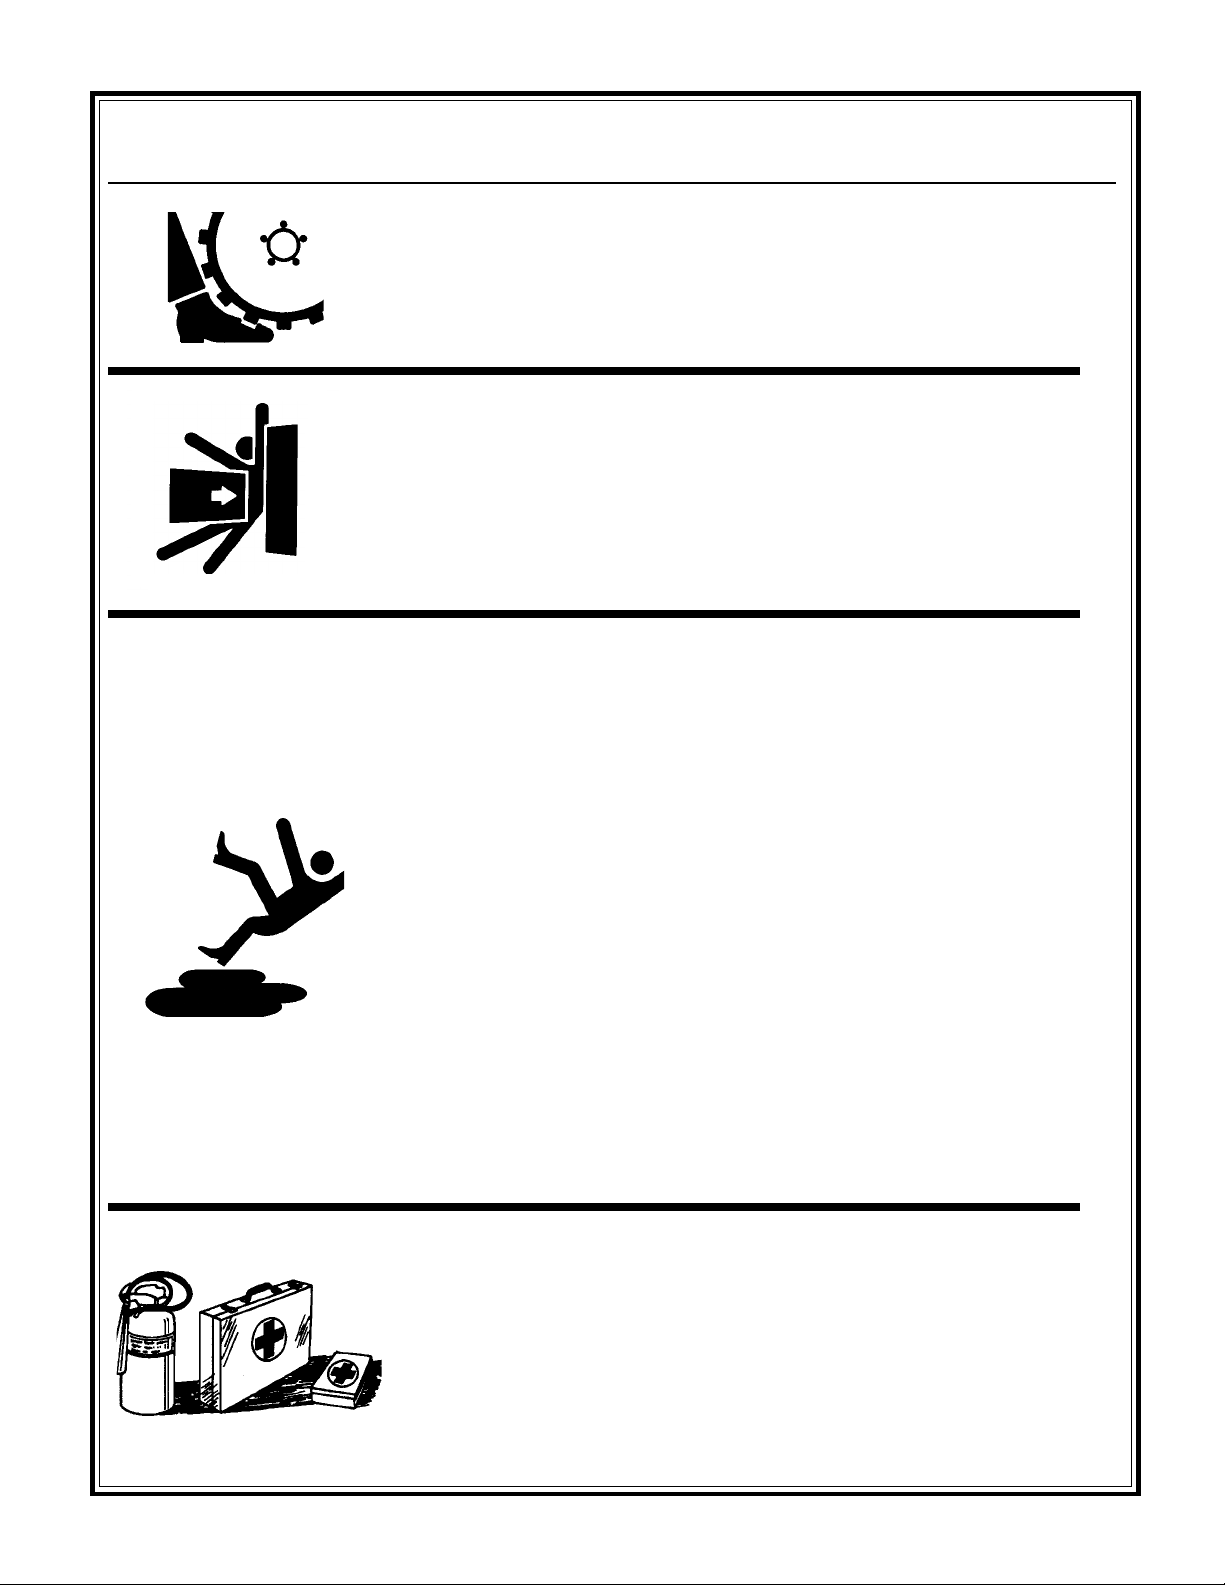
For foot protection wear steel toe shoes or toe pads.
Caution: Keep away from the machines articulation area
when the engine is running.
Only start engine from operators seat.
Before starting machine, make sure that there are no persons
or obstacles near or under machine.
PRACTICE SAFE MAINTENANCE
Understand service procedure before doing work. Keep area clean
and dry.
Safety Precautions
Never lubricate, service, or adjust machine while it is moving. Keep
hands, feet, and clothing from power-driven parts. Disengage all
power and operate controls to relieve pressure. Lower equipment
to the ground. Stop the engine. Remove the key. Allow machine
to cool.
Securely support any machine elements that must be raised for
service work.
Keep all parts in good condition and properly installed. Fix damage
immediately. Replace worn or broken parts. Remove any buildup
of grease, oil, or debris.
Disconnect battery ground cable (-) before making adjustments on
electrical systems or welding on machine.
PREPARE FOR EMERGENCIES
Be prepared if a fire starts.
Keep a first aid kit and fire extinguisher handy.
Keep emergency numbers for doctors, ambulance service, hospital,
and fire department near your telephone.
- 18 -
Page 19
2. HEALTH & SAFETY
Starting fluid (ether) is highly flammable. Do not use or an explosion
or fire may result.
WEAR PROTECTIVE CLOTHING
Wear close fitting clothing and safety equipment appropriate to
the job.
Prolonged exposure to loud noise can cause impairment or loss of
hearing.
Wear a suitable hearing protective device such as earmuffs or
earplugs to protect against objectionable or uncomfortable loud
noises.
Operating equipment safely requires the full attention of the
operator. Do not wear radio or music headphones while
operating machine.
Safety Precautions
PREVENT BYPASS STARTING
Avoid possible injury or death from engine runaway.
Do not start engine by shorting across starter terminal. Engine will
start with drive system engaged if normal circuitry is bypassed.
Start engine only from operators seat with seat belt on and
forward/reverse in neutral.
DISPOSE OF WASTE PROPERLY
Improperly disposing of waste can threaten the environment and
ecology. Potentially harmful waste used with John Deere equipment
includes such items as oil, fuel, coolant, brake fluid, filters, and
batteries.
Use leakproof containers when draining fluids. Do not use food or
beverage containers that may mislead someone into drinking from
them.
Do not pour waste onto the ground, down a drain, or into any water
source.
Air conditioning refrigerants escaping into the air can damage the
Earths atmosphere. Government regulations may require a certified
air conditioning service center to recover and recycle used air
conditioning refrigerants.
Inquire on the proper way to recycle or dispose of waste from your
local environmental or recycling center.
- 19 -
Page 20

Page 21

3. OP ERATION
- 21 -
Page 22

3. OPERATION
3.1 INTRODUCTION AND OPERATING PRINCIPLE
This roller is ergonomically engineered to optimize operator interface with the total machine its really user
friendly. Besides good visibility to the roll-edge, as well as the work surface, youll find that the controls are
exactly in the right places for maximum comfort. And it is very convenient to monitor all the consumables fuel,
hydraulic oil, etc.
Our common sense approach to servicing is a valuable benefit. Thanks to our modular design, everything that
needs servicing is located behind one of the easy-access service panels or is under the rear cowl.
For maneuverability and productivity, nothing beats the proven performance of center-point articulation. Because
the drum and tires track each other exactly, tight turns are achieved smoothly. The roller is equipped with full
positive traction, front to rear and side to side, which keeps the roller moving through various conditions.
Theres power steering a feature no operator wants to be without. A variable hydrostatic drive system provides
infinitely variable speed control from 0 to 4 mph. The eccentric delivers a centrifugal force sufficient to
compact all types of soil. Superior vibration isolation to the operator is achieved by mounting heavy-duty shock
mounts between the eccentric and support frames.
The following instructions were compiled to provide you information on how to obtain long and trouble-free use
of the roller. Periodic maintenance of the roller is essential. Read this manual in its entirety and follow the
instructions carefully. Failure to do so may cause injury to you or a bystander.
- 22 -
Page 23

3. OPERATION
3.2 DIESEL FUEL
Do not mix oil with fuel. The engine has a separate oil
reservoir in the crankcase. Diesel fuel blend meeting
ASTM D915 or EN590 and a premium diesel fuel
conditioner is recommended.
WARNING
FUEL IS BOTH TOXIC AND FLAMMABLE. DO
NOT SMOKE WHILE WORKING WITH FUEL.
DO NOT USE NEAR OPEN FLAME. ALWAYS
STOP ENGINE BEFORE REFUELING. CLEAN UP
SPILLED FUEL BEFORE STARTING. AVOID
FIRES BY KEEPING ENGINE CLEAN OF
ACCUMULATED GREASE AND DEBRIS.
START, STORE, AND REFUEL ON LEVEL
GROUND TO PREVENT PERSONAL INJURY. DO
NOT RUN UNIT IN AN ENCLOSED, NONVENTILATED AREA. AVOID PROLONGED
BREATHING OF VAPORS AND SKIN CONTACT.
SERIOUS ILLNESS OR LOSS OF LIFE COULD
RESULT.
KEEP THE VENT HOLE IN FUEL TANK CAP
OPEN. IF VENT HOLE IS PLUGGED, PRESSURE
MAY BUILD UP IN TANK, CAUSING
DANGEROUS SPRAYING OF FUEL WHEN TANK
CAP IS REMOVED. A VACUUM MAY ALSO BE
CREATED DURING OPERATION, WHICH
COULD STOP FUEL FLOW. DIESEL FUEL IS
MANDATORY FOR USE IN THIS ENGINE.
ALWAYS USE CLEAN FUEL. LOW QUALITY OR
CONTAMINATED FUEL WILL DAMAGE FUEL
INJECTION COMPONENTS.
DIESEL FUEL STORED IN GALVANIZED
CONTAINERS REACTS CHEMICALLY WITH
THE ZINC COATING ON THE CONTAINER. THE
CHEMICAL REACTION CREATES POWDERY
FLAKES OF ZINC SULFIDE. IF WATER IS
PRESENT IN THE FUEL, A ZINC HYDROXIDE
GEL WILL FORM.
3.3 ENGINE BREAK-IN
IMPORTANT Read Engine Manual for break-in
requirements. 1st 100 hours John Deere break-in oil
only (TY 22041). Do not add oil until level is in the
add area on the dipstick. Do not fill above the
crosshatched area on the dipstick. 1st 100 hours run
engine at full throttle. Operate engine at heavy
loads, do not idle longer than 5 minutes. Check oil
frequently, do not exceed 100 hours with break-in
oil.
3.4 ENGINE OIL AND FILTER
Change oil and filter at 100 hours, then every 250
hours. Use SAE 15W-40 API CG-4 or API CF-4. Refer
to Engine Manual for additional oil types and
recommendations. Do not mix different brands or
types of oil. Mixing oils can degrade lubrication
performance.
3.5 WARNING LIGHT
Unit is equipped with a warning light for low pressure
and/or hot engine temperature.
Specifications:
Oil pressure at full speed: 40 50 psi
(2.75 3.45 bar)
Coolant temperature range: 180° - 202°F
(82° - 94°C)
3.6 HYDRAULIC OIL, FILTER, BREATHER
WARNING
PRESSURIZED RELEASE OF FLUIDS FROM
HYDRAULIC SYSTEM CAN CAUSE SERIOUS
BURNS. SHUT OFF ENGINE. ONLY REMOVE
BREATHER CAP WHEN COOL ENOUGH TO
TOUCH WITH BARE HANDS. SLOWLY LOOSEN
CAP TO FIRST STOP TO RELIEVE PRESSURE
BEFORE REMOVING COMPLETELY.
Check the hydraulic oil level. Use the sight gauge
located on the hydraulic tank. A 1/4 1/2 air bubble
will be seen at the top of the gauge showing the fluid
level.
- 23 -
Page 24

3. OPERATION
For satisfactory operation, the following oil
conditions apply:
1. Accurate level readings can be checked
only when the fluid is cold.
2. If the natural color of the fluid has become black
or milky, it is possible that an overheating or
water contaminant problem exists.
3. Do not mix hydraulic fluids. Mobil 424 is
recommended for the hydraulic system.
CAUTION: After a new unit has run 5 hours, the
oil filter should be changed. This is to rid the
system of any trapped contamination from the wearin of the parts. Refer to Maintenance for hydraulic
filter change.
3.7 ENGINE COOLANT
WARNING
CHECK COOLING SYSTEM CAREFULLY.
EXPLOSIVE RELEASE OF FLUIDS FROM
PRESSURIZED COOLING SYSTEM CAN
CAUSE SERIOUS BURNS.
To check coolant level:
1. Shut off engine, allow to cool.
2. Only remove filler cap when cool enough to
touch with bare hands. Slowly loosen cap to
first stop to relieve pressure before removing
completely.
3. Remove cap, coolant level should just touch the
bottom of radiator filler neck. If coolant is
required, see Adding Coolant in the
Maintenance section of this manual.
IMPORTANT: Do not overfill radiator. Refer to
Coolant Maintenance if additional coolant is
required. Never pour cold liquid into a hot
engine, as it may crack cylinder head or block.
DO NOT operate engine without coolant for even
a few minutes. If coolant leaks or abnormal
temperature is detected, contact a service
technician immediately.
replace the water pump seal. Contact your engine
distributor or servicing dealer for repairs.
3.8 VISUAL INSPECTION
Make a thorough inspection of the engine compartment
daily. Look for oil or coolant leaks, worn fan belt,
loose connections and trash build-up. Remove trash
build-up and have repairs made as needed if leaks are
found.
NOTE:Wipe all fittings, caps, and plugs before
performing any maintenance to reduce the chance of
system contamination.
Air intake system hoses and connections for
cracks and loose clamps.
Fan belt for cracks, breaks, or other damage.
Water pump for coolant leaks.
3.9 AIR CLEANER
IMPORTANT: The air intake system must not leak.
Any leak, no matter how small, may result in engine
failure due to abrasive dirt and dust entering the
intake system.
1. Inspect all intake hoses (piping) for cracks.
2. Check clamps on piping which connect the air
cleaner and engine.
3. Squeeze dust unloader valve (A) on air cleaner
assembly to remove dust deposits. If clogged,
remove and clean the dust unloader valve. Replace
if damaged.
IMPORTANT: Do not operate engine without the
dust unloader valve.
NOTE:It is normal for a small amount of leakage to
occur as the engine cools down and parts contract.
Excessive coolant leakage may indicate the need to
- 24 -
Page 25

3. OPERATION
WARNING
BEFORE STARTING ENGINE IN A CONFINED
BUILDING, INSTALL PROPER OUTLET
EXHAUST VENTILATION EQUIPMENT.
ALWAYS USE SAFETY APPROVED FUEL
STORAGE AND PIPING. NEVER RUN THE
ROLLER WITHOUT THE PANELS IN PLACE OR
SEVERE PERSONAL INJURY MAY OCCUR.
3.10 BEFORE STARTING
1. Check for proper fluid levels, engine oil,
coolant, fuel, and hydraulic oil.
2. Check the air cleaner.
3. Check throttle, levers, and controls for smooth
operation.
4. Check seat belt, horn, and back-up alarm
operation.
3.12 TO STOP
WARNING
ALWAYS OBEY THE FOLLOWING
PROCEDURES BEFORE DISMOUNTING FROM
THE ROLLER.
1. Place the forward/reverse lever in the NEUTRAL
position.
2. Throttle engine down to its slowest speed.
3. Turn key switch to OFF position to stop the
engine. Remove ignition key.
NOTE:Before stopping an engine that has been
operating at working load, idle engine at
least 2 minutes.
3.13 IDLING ENGINE
3.11 TO START
1. Operator must always be seated and seat belt
must be worn.
2. Forward/reverse must be in NEUTRAL position
and eccentric switch should be in OFF position.
3. Throttle should be set at idle.
4. Turn key clockwise until the engine cranks over.
Release the key when the engine starts.
DO NOT crank engine for more than 20
seconds at a time.
5. Check all gauges for normal engine operation.
If operation is not normal, stop the engine and
determine the cause.
NOTE:If temperature is below 0° C (32° F), it may be
necessary to use cold weather starting aid. See Cold
Weather Starting later in this section.
WARNING
DO NOT USE STARTING FLUID (ETHER).
ENGINE IS EQUIPPED WITH INTAKE HEATER.
AN EXPLOSION OR FIRE MAY RESULT. REFER
TO COLD WEATHER STARTING
INSTRUCTIONS.
IMPORTANT: Avoid excessive engine idling.
Prolonged idling may cause the engine coolant
temperature to fall below its normal range. This, in
turn, causes crankcase oil dilution, due to
incomplete fuel combustion, and permits formation
of gummy deposits on valve, pistons, and piston
rings. It also promotes rapid accumulation of
engine sludge and unburned fuel in the exhaust
system.
3.14 WARMING ENGINE
IMPORTANT: To assure proper lubrication,
operate engine at idle with no load for 5 minutes.
Extend this period when operating at temperatures
below freezing.
1. Check oil pressure gauge as soon as engine
starts. If gauge needle does not rise above
minimum oil pressure specification of
(1.05 bar) (15.0 psi) within 5 seconds, stop the
engine and determine the cause. Normal
engine oil pressure is (3.45 bar + 1.03 bar)
(50 + 15 psi) at rated full load speed
(1800 2500 rpm) with oil at normal operating
temperature of 105° C (221° F).
2. Watch coolant temperature gauge. Do not
place engine under full load until it is properly
- 25 -
Page 26

3. OPERATION
warmed up. The normal engine coolant
temperature range is 82° - 94° C (180° - 202° F).
NOTE:It is good practice to operate the engine under
a lighter load and at lower speeds than normal for the
first few minutes after start-up.
WARNING
NEVER OPERATE ON SLOPES GREATER THAN
15 DEGREES OR TIPPING MAY OCCUR.
3.18 FORWARD/REVERSE/NEUTRAL
3.15 PARKING BRAKE
WARNING
BLOCK THE DRUMS TO PREVENT ROLLING
OF THE MACHINE OR SEVERE PERSONAL
INJURY MAY OCCUR. NEVER PARK ROLLER
ON A HILL.
When engine is not running, the brake is applied.
When the engine is running and the forward/reverse
lever is in NEUTRAL, the brake will apply within 2
seconds.
3.16 BRAKE LIGHT
When the key is turned to ON, the brake light should
come on within 2 seconds. Shifting into forward or
reverse, the light should go out.
3.17 TO OPERATE
The forward/reverse lever should be aligned with
NEUTRAL on the console when the roller is moving
neither forward nor backward with the engine running.
The neutral interlock switch should not allow the
engine to start unless the forward reverse lever is in
neutral.
3.19 THROTTLE
Pull throttle out to increase engine speed. Push throttle
to reduce engine speed. For best performance, run
engine at full throttle.
3.20 GAUGES
IMPORTANT: Any time an electric gauge or meter
does not register correctly, replace it with a new
one. Do not attempt to repair it.
Oil Pressure Gauge Indicates engine oil pressure.
IMPORTANT: Follow Manufacturers "Before
Starting" and "Break-in" procedures on engine.
Always allow engine to warm up five minutes
before applying load.
Start and apply full throttle. Move forward/reverse
lever slowly forward to gain speed desired. The same
procedure is for reverse. To slow down, move
forward/reverse lever toward NEUTRAL.
To gain power or speed by moving forward/reverse
lever slightly off of NEUTRAL will produce the
greatest amount of torque. Moving the lever all the
way forward or reverse will give the greatest amount
of speed.
Coolant Temperature Gauge Indicates the
engine coolant temperature.
Volt Meter Indicates charging current within
electrical system.
Hour Meter Indicates the operating hours of the
engine while key switch is in the ON position. The
hour meter should be used as a guide for scheduling
maintenance.
WARNING
AVOID LEAVING THE KEY ON WHEN
MACHINE IS NOT RUNNING. THIS WILL
HAVE AN EFFECT ON THE HOUR METER
READINGS.
- 26 -
Page 27

3. OPERATION
3.21 PANEL FUSE 20 AMP
Protects electrical system.
WARNING
NEVER USE FUSE WITH A DIFFERENT RATING
FROM THAT SPECIFIED. SERIOUS DAMAGE
TO THE ELECTRICAL SYSTEM OR A FIRE MAY
RESULT.
3.22 COLD WEATHER STARTING / INTAKE
HEATER BUTTON
WARNING
DO NOT USE STARTING FLUID (ETHER).
ENGINE IS EQUIPPED WITH AIR INTAKE
HEATER. AN EXPLOSION OF FIRE MAY
RESULT. FOR COLD WEATHER STARTING, SEE
INSTRUCTIONS BELOW.
1. Turn the key to the ON position (do not crank
engine).
2. Press INTAKE HEATER BUTTON for
approximately 30 seconds. Start engine using
starter switch. As soon as the engine starts, release
button.
3. Never operate the starter for more than 20
seconds at a time. If engine does not start,
release the starter switch and wait at least one
minute before trying again.
4. Do not adjust the throttle setting. Allow the
engine to idle for 5 minutes to warm up. At
temperatures below freezing, extend warm up
time.
3.23 BLADE LEVER (OPTIONAL)
3.24 HORN AND BACK-UP ALARM
Check operation daily. It is the drivers responsibility
to operate equipment safely.
3.25 ROPS / FOPS / SEAT BELT
Inspect daily. Certified factory installed for operator
protection. Do not remove or modify.
WARNING
DANGER: AVOID CRUSHING. DO NOT JUMP
IF MACHINE TIPS. ALWAYS WEAR SEAT
BELT.
DO NOT OPERATE THIS MACHINE IF THE
ROLLOVER PROTECTIVE STRUCTURE
(ROPS) IS STRUCTURALLY DAMAGED,
SHOWS CRACKS, IS NOT PROPERLY
SECURED AS ORIGINALLY INSTALLED, OR
HAS BEEN ROLLED. DO NOT REPAIR,
MODIFY, OR ADD ATTACHMENTS TO ROPS
UNLESS AUTHORIZED IN WRITING BY THE
MANUFACTURER.
DO NOT ADD ATTACHMENTS TO THE
MACHINE THAT INTRUDE INTO OPERATORS
PROTECTIVE AREA, REDUCE VISIBILITY,
RESTRICT EMERGENCY EXITS, OR ADD
WEIGHT EXCEEDING CERTIFICATION
WEIGHT OF ROPS. DO NOT OPERATE
MACHINE UNLESS SEAT BELT CONFORMING
TO SAE AND/OR ASAE STANDARDS IS
FASTENED. SEE OPERATORS MANUAL OR
CONTACT YOUR DEALER FOR COMPLETE
INSPECTION REQUIREMENTS AND
MAINTENANCE INSTRUCTIONS.
Controls the leveling blade height for pre-leveling
loose soil.
IMPORTANT: Do not use the blade to dig or
bulldoze or machine damage may occur.
3.26 TIRES/LUG NUTS
WARNING
DO NOT EXCEED RATED PRESSURE 35 PSI.
Clean and check daily:
1. Tires are properly inflated.
2. Lug nuts are in place and tight
190 ft. lbs. (140 Nm).
- 27 -
Page 28

3. OPERATION
3.27 DRUM/SCRAPPERS
Clean and inspect daily to prevent excess mud and
debris from building up. Replace if missing or worn.
Pad drum scrappers are adjustable, see Maintenance
section.
3.28 CLEANING
WARNING
DIRT AND MUD BUILT UP WILL REDUCE
MACHINE PERFORMANCE AND/OR CAUSE
FAILURES.
Use pressurized water to remove dirt and mud. Clean
and inspect entire machine daily. Use extra care when
cleaning radiator and oil cooler.
When cleaning machine, caution should be used
around regulator area. Direct spraying of the
regulator is not good. (Regulator should be covered
or protected if direct spraying will happen).
Excessive water pressure may also loosen wire
connections or start terminals corroding. After
cleaning, all terminals should be dried if wet and
connections checked for proper seating.
3.29 ECCENTRICS
When vibratory compaction is necessary, engage
eccentrics by pushing the vibration switch to the ON
position. For best performance run engine at full
rpm. The eccentrics should be turned off whenever
the roller is stopped or stopped to change direction.
Do not run the eccentric on any non-yielding surface
such as concrete or aged asphalt.
3.30 COMPACTION TIPS
Avoid sharp turns, steer gradually. If articulation is a
new concept, we suggest the operator take 20 minutes
or so to get used to the feel of the unit.
Recommended compaction speed should be at
3 m.p.h. or less to achieve a uniform compaction.
WARNING
DO NOT ARTICULATE ON GRADES LARGER
THAN 15, ROLLER MAY TIP OVER.
DO NOT OPERATE ACROSS THE SIDES OF
HILLS, ROLLER MAY TIP OVER.
DO NOT OPERATE AT THE EDGE OF MATS OR
ROADS, ROLLER MAY TIP OVER.
DO NOT STAND, ALWAYS WEAR SEAT BELT.
3.31 TIE DOWNS
WARNING
TIE DOWNS ARE NOT INTENDED FOR LIFTING
PURPOSES.
Equipment is equipped with front and rear tie down
rings for shipping purposes. Use only these tie downs
to secure unit.
3.32 TOWING (BYPASS)
WARNING
NEVER PUSH OR PULL THE ROLLER WITH THE
ENGINE OFF. WHEN ENGINE IS NOT RUNNING,
THE BRAKE IS APPLIED. WHEN THE ENGINE
IS RUNNING AND THE FORWARD/REVERSE
LEVER IS IN NEUTRAL, THE BRAKE WILL
APPLY WITHIN 2 SECONDS.
In an emergency or during a breakdown, it may be
necessary or desirable to tow the roller. This may be
accomplished by mechanically releasing the brake and
bypassing the transmission pump. If these procedures
are followed carefully, the roller may be moved short
distances at LOW speed without running the engine.
The brake is located in the front wheel motor, which
drives the drum of the roller. There is an access hole in
the front frame to assist in releasing the brake. Refer to
the Drum Assembly #39 22770 Kit Bypass to identify
these parts. The threaded hole in the center of the
wheel motor requires a M12 bolt long enough to extend
beyond the frame when fully engaged. A bolt, washer,
and nut is included in a separate package for this
- 28 -
Page 29

3. OPERATION
purpose. Fully install the nut and washer on the bolt.
Insert this assembly through the hole in the frame such
that the washer is over the hole with the nut against the
outside of this washer. Thread the bolt, finger tight
into the wheel motor to the bottom of the hole. Now
tighten the nut against the washer until the brake is
compressed and released. This should require about 44
ft. lbs. torque. Do not torque the bolt. Be careful not
to over-torque beyond releasing the brake.
The bypass valve is located on the transmission pump.
The seat and battery plate should be removed for
access to the transmission pump. The bypass valve is
controlled by a shaft with cross-drilled holes and
maybe a slot in the end. This shaft may be turned
manually to open the valve and allow the motor to turn.
The valve is fully open with two revolutions of the
shaft. DO NOT OPEN VALVE PAST TWO TURNS.
The valve must be fully closed for normal operation.
The torque required to close the valve is only 7 to 10 ft.
lbs.
DAMAGE MAY RESULT FROM OVERTORQUING.
3.33 STORAGE
IMPORTANT: The front wheel motor has a rubber
plug in the M12 hole to prevent contamination.
Reinstall the rubber plug after towing
1. Store the roller on level ground with drums
blocked and parking brake on.
2. Remove the key. Operations of roller by
untrained persons could result in personal injury.
3. During extended storage, drums can be coated with
any type of oil or grease to prevent rusting.
4. Storage instructions for the engine are stated in the
Engine Manual and should be carried out.
- 29 -
Page 30

Page 31

4. MAINTENANCE
- 31 -
Page 32

4.1 IMPORTANT
F
The person attempting any of the
following maintenance tasks must be
authorized to do so and have read
and understood all sections within
this manual.
- 32 -
Page 33

4. MAINTENANCE
4.2 MAINTENANCE SCHEDULE CHART
- 33 -
Page 34

4. MAINTENANCE
4.3 IMPORTANT MAINTENANCE
INFORMATION
WARNING
REMOVE THE KEY AND / OR DISCONNECT
BATTERY TO AVOID ACCIDENTAL
IGNITION OF ENGINE. SEVERE PERSONAL
INJURY MAY OCCUR. ROLLER MUST BE
PARKED ON LEVEL GROUND WITH
PARKING BRAKE APPLIED, ENGINE OFF,
AND DRUM BLOCKED. NEVER WORK ON
THE ROLLER WITH ENGINE RUNNING.
SEVERE PERSONAL INJURY MAY OCCUR.
ALLOW ALL COMPONENTS IN THE
ENGINE COMPARTMENT TO COOL
BEFORE PERFORMING ANY SERVICE
WORK.
IMPORTANT: Read John Deere Emission
Warranty Statement and Engine Manual before
service or maintenance.
4.4 ENGINE OIL AND FILTER
IMPORTANT: Read Engine Manual and Engine
Break-in covered in Operating section of this
manual.
packing contacts filter housing. DO NOT
overtighten filter element.
7. Install oil pan drain plug.
8. Fill engine crankcase with correct engine oil
through timing gear cover opening of rocker arm
cover opening.
IMPORTANT: Immediately after completing any
oil change, crank engine for 30 seconds without
permitting engine to start. This will help insure
adequate lubrication to engine components
before engine starts.
9. Start engine and run to check for possible leaks.
10. Stop engine and check oil level after 10
minutes. Oil level reading should be between
arrows or within crosshatch of dipstick.
4.5 ADDITIONAL SERVICE INFORMATION
This is not a detailed service manual. If you want more
detailed service information see John Deere Manuals:
55319 Manual Engine
55320 Manual Parts
55321 Manual Technical
4.6 HYDRAULIC OIL/FILTER
Change oil and filter at 100 hours, then every 250
hours. Use SAE 15W-40 API CG-4 or API CF-4.
1. Run engine approximately 5 minutes to warm up
oil. Shut engine off.
2. Remove oil pan drain plug, drain into suitable
container.
3. Drain crankcase oil from engine while warm.
4. Remove and discard oil filter using a filter
wrench.
5. Clean filter mounting pad.
IMPORTANT: Filtration of oils is critical to
proper lubrication. Always change filter
regularly. Use filter meeting John Deere
performance specifications.
6. Oil new filter seal and install new filter element,
tighten approximately 3/4 1 - 1/4 turn after
WARNING
PRESSURIZED RELEASE OF FLUIDS FROM
HYDRAULIC SYSTEM CAN CAUSE SERIOUS
BURNS.
SHUT OFF ENGINE. ONLY REMOVE BREATHER
CAP WHEN COOL ENOUGH TO TOUCH WITH
BARE HANDS. SLOWLY LOOSEN CAP TO FIRST
STOP TO RELIEVE PRESSURE BEFORE
REMOVING COMPLETELY.
ESCAPING HYDRAULIC FLUID UNDER
PRESSURE CAN HAVE SUFFICIENT FORCE TO
PENETRATE THE SKIN, CAUSING SERIOUS
PERSONAL INJURY. HYDRAULIC FLUID
ESCAPING UNDER PRESSURE FROM A VERY
SMALL HOLE CAN BE ALMOST INVISIBLE. USE
A PIECE OF CARDBOARD OR WOOD TO
SEARCH FOR POSSIBLE LEAKS. NEVER USE
YOUR HANDS TO DETECT PRESSURE LEAKS.
- 34 -
Page 35

4. MAINTENANCE
HYDRAULIC TANK TEMPERATURE CAN
REACH 180 DEGREES F MAXIMUM.
Refer to Operating section of this manual for hydraulic
oil conditions and recommendations.
Before disconnecting any hydraulic components, be
sure engine is shut off and relieve all pressure. Before
applying pressure to system, be sure all connections are
tight and lines, fittings, and hoses are not damaged.
IMPORTANT: When hoses, oil filter, and/or
hydraulic components are changed, start the engine
and purge the air from the system prior to checking
the oil level. To do this, idle the engine for three
minutes with control lever in NEUTRAL position.
Slowly engage forward to reverse. This allows fluid
to replace air introduced with filter change. If this
procedure is not followed, partial or complete
failure of the pump may result.
Change hydraulic oil filter at 5 hours then every 100
hours.
1. Remove and discard hydraulic oil filter using a
filter wrench.
2. Oil new filter seal and install new filter element,
tighten approximately 3/4 1 - 1/4 turn after
packing contacts filter housing. DO NOT
overtighten filter element.
IMPORTANT: Immediately after completing filter
change, crank engine for 30 seconds without
permitting engine to start. This will help insure
adequate lubrication to components before engine
starts.
3. Start engine and run to check for possible leaks.
4. Stop engine and replenish hydraulic oil.
WARNING
NEVER OVERFILL THE HYDRAULIC TANK.
USE THE SIGHT GAUGE LOCATED ON THE
HYDRAULIC TANK. A 1/4 1/2 AIR BUBBLE
WILL BE SEEN AT THE TOP OF THE GAUGE
SHOWING THE FLUID LEVEL.
Change hydraulic oil every 800 hours. Use Mobil 424.
1. Run engine approximately 5 minutes to warm up
oil. Shut engine off.
2. Remove breather cap and oil drain plug, drain
into suitable container.
3. Apply thread sealant to breather cap and drain
plug, install drain plug.
4. Fill hydraulic tank with correct hydraulic oil
(approximately 20 gallons). Use the sight gauge to
watch for proper oil level, install breather cap.
IMPORTANT: Immediately after completing oil
change, crank engine for 30 seconds without
permitting engine to start. This will help insure
adequate lubrication to components before engine
starts.
5. Start engine and run to check for possible leaks.
6. Stop engine and replenish hydraulic oil.
4.7 HYDRAULIC BREATHER
Replace every 800 hours or yearly. P/N 35483.
WARNING
PRESSURIZED RELEASE OF FLUIDS FROM
HYDRAULIC SYSTEM CAN CAUSE SERIOUS
BURNS. SHUT OFF ENGINE. ONLY REMOVE
BREATHER CAP WHEN COOL ENOUGH TO
TOUCH WITH BARE HANDS. SLOWLY LOOSEN
CAP TO FIRST STOP TO RELIEVE PRESSURE
BEFORE REMOVING COMPLETELY.
4.8 ENGINE COOLING SYSTEM
WARNING
EXPLOSIVE RELEASE OF FLUIDS FROM
PRESSURIZED COOLING SYSTEM CAN
CAUSE SERIOUS BURNS. SHUT OFF ENGINE.
ONLY REMOVE FILLER CAP WHEN COOL
ENOUGH TO TOUCH WITH BARE HANDS.
SLOWLY LOOSEN CAP TO FIRST STOP TO
RELIEVE PRESSURE BEFORE REMOVING
COMPLETELY.
- 35 -
Page 36

4. MAINTENANCE
WARNING
To check coolant level, refer to Operating section of
this manual and Engine Manual.
Inspect cooling system every 600 hours or 12 months.
1. Check entire cooling system hoses. Replace
hoses when hard, flimsy, or cracked.
2. Thoroughly inspect all cooling system hoses.
Replace hoses when hard, flimsy, or cracked.
IMPORTANT: Air must be expelled from cooling
system when system is refilled. Loosen
temperature-sending unit fitting at rear of cylinder
head to allow air to escape when filling system.
Retighten fitting when all the air has been expelled.
3. Test the coolant solution at 600 hours or 12 month
intervals and whenever excessive coolant is lost
through leaks or overheating to ensure the
necessary protection. Coolant test strips are
available from your John Deere dealer. These test
strips provide a simple, effective method to check
the freeze point and additive levels of your engine
coolant.
4. After 600 hours or 12 months of engine operating
time, recharge your engine coolant with the
recommended amount (see label on container) of
TY16004 or TY16005 Liquid Coolant Conditioner.
ALWAYS maintain coolant at correct level and
concentration. DO NOT operate engine without
coolant for even a few minutes.
If frequent coolant makeup is required, the glycol
concentration should be checked with JT05460
Refractometer to assure that the desired freeze point is
maintained. Follow manufacturers instructions
provided with Refractometer.
Water may be used as coolant in emergency situations
only.
Foaming, hot surface aluminum and iron corrosion,
scaling, and cavitation will occur when water is used as
the coolant, even when coolant conditioners are added.
Drain cooling system and refill with recommended
glycol base engine coolant as soon as possible.
4.8.1 Replacing Engine Coolant
Every 1200 hours or 24 months, the coolant should be
replaced. The coolant system should also be flushed
and pressure tested. Refer to Engine Manual.
4.8.2 Adding Coolant
NOTE: TY16004 or TY16005 Liquid Coolant
Conditioner is a non-chromate inhibitor and should be
used only with low silicate, ethylene-glycol base
antifreeze. It does not protect the cooling system from
freezing. See "Adding Coolant."
Usually recharging your engine coolant with the
recommended amount of TY16004 or TY16005 Liquid
Coolant Conditioner at 600 hours or 12 months of
operation is adequate. However, with a CoolScan
analysis report you will be given a more thorough
evaluation of your engine coolant condition along with
detailed service recommendations. Refer to Engine
Manual.
IMPORTANT: Do not add supplemental coolant
additives when the cooling system is drained and
refilled with John Deere ANTIFREEZE/SUMMER
COOLANT or John Deere COOL GARD.
CAUTION: Explosive release of fluids from
pressurized cooling system can cause serious burns.
Shut off engine. Only remove filler cap when cool
enough to touch with bare hands. Slowly loosen cap to
first stop to relieve pressure before removing
completely.
IMPORTANT: Never pour cold liquid into a hot
engine, as it may crack cylinder head or block. DO
NOT operate engine without coolant for even a few
minutes.
Air must be expelled from cooling system when
coolant is added.
1. Loosen temperature sending unit fitting at rear
of cylinder head to allow air to escape when
filling system.
- 36 -
Page 37

4. MAINTENANCE
IMPORTANT: When adding coolant to the system,
use the appropriate coolant solution. Coolant 50/50
mixture of antifreeze/distilled water meeting ASTM
4985, ASTM D5345 (pre-diluted coolant) or John
Deere COOL-GARD. 50/50 mixture provides
protection to -34° F (-37° C). Do not overfill cooling
system. A pressurized system needs space for heat
expansion without overflowing at top of radiator.
2. Fill until coolant level touches bottom of
radiator filler neck.
3. Tighten fitting when air has been expelled from
system.
4.8.3 Disposing of Coolant
Improperly disposing of engine coolant can threaten
the environment and ecology.
Use leakproof containers when draining fluids. Do not
use food or beverage containers that may mislead
someone into drinking from them.
1. Remove air cleaner cover.
2. Remove primary (outer) element only.
3. Thoroughly clean all dirt from inside filter housing.
4. Air cleaner has rubber dust unloader valve on the
air cleaner. Squeeze valve tip to release any
trapped dirt particles.
5. Inspect filter to determine if it is practical to clean
or for damage after cleaning filter.
a. Hold a bright light inside element and
check carefully for holes. Discard
any element that shows the smallest hole
or rupture.
b. Be sure outer screen is not dented.
Vibration would quickly wear a hole in
filter.
c. Be sure filter gasket is in good condition.
If gasket is damaged or missing, replace
element.
6. Gently pat sides of element with palm of hand to
loosen dirt. DO NOT tap element against a
hard surface.
Do not pour waste onto the ground, down a drain, or
into any water source.
Inquire on the proper way to recycle or dispose of
waste from your local environmental or recycling
center or from your dealer.
4.9 AIR CLEANER
4.9.1 Air Cleaner Service
IMPORTANT: Do not operate engine without the
dust unloader valve.
For daily inspection refer to the Operating section of
this manual.
Clean the primary (outer) filter element every 100
hours.
IMPORTANT: Always replace secondary safety
(inner) filter elements. DO NOT attempt to clean
them. Do not blow air from outside portion of filter
with air nozzle. Wear safety glasses and remove
bystanders.
WARNING
ONLY A SPECIAL AIR CLEANING GUN SHOULD
BE USED. CONCENTRATED AIR PRESSURE
FROM AN ORDINARY AIR NOZZLE MAY
SEVERELY DAMAGE FILTER ELEMENT. DO
NOT EXCEED 30 psi (2.1 bar) WHEN CLEANING
FILTER ELEMENT.
7. Insert the cleaning gun into element, hold air
nozzle about 1" (25.4) mm from perforated metal
retainer. Force air through filter from inside to
outside and move air gun up and down pleats to
remove as much dirt as possible.
8. Repeat steps 6 and 7 to remove additional dirt.
9. Inspect element for damage after cleaning.
Replace element if any damage is found.
Service air cleaner more frequently in dusty conditions.
4.9.2 Air Cleaner Replacement
Replace primary (outer) element every 600 hours.
1. Remove air cleaner cover.
- 37 -
Page 38

4. MAINTENANCE
2. Remove primary (outer) element only.
3. Thoroughly clean all dirt from inside filter housing.
4. Air cleaner has a rubber dust unloader valve on the
air cleaner. Squeeze valve tip to release any
trapped dirt particle.
IMPORTANT: Remove secondary safety (inner)
element ONLY for replacement. DO NOT attempt
to clean, wash, or reuse secondary element.
Replacement of secondary element is usually
necessary ONLY when primary element has a hole
in it.
5. To replace secondary element, remove retaining
nut and secondary element. Immediately replace
secondary element with new element to prevent
dust from entering air intake system.
6. Install new primary element and tighten wing nut
securely. Install cover assembly and tighten
retaining wing nut securely.
4.9.3 Element Storage
Seal element in a plastic bag and store in shipping
container to protect against dust and damage.
NOTE: Air cleaner element MUST BE DRY before
storing in plastic bag.
4.10 FUEL FILTER
4.10.1 Water Separator
Fuel filter is equipped with a water drain plug, check/
drain every 50 hours or 2 weeks.
NOTE: Drain water into a suitable container and
dispose of properly.
1. Loosen drain plug at bottom of fuel filter two or
three turns.
2. Loosen air bleed plug two full turns on fuel filter
base and drain water from bottom until fuel starts
to drain out.
3. When fuel starts to drain out, tighten drain plug
securely by hand or using a coin.
After draining water from the fuel filter, the filter must
be primed by bleeding all air from the fuel system.
4. Operate primer lever of the fuel supply pump until
fuel flow is free from air bubbles.
5. Tighten bleed plug securely by hand or using a
coin, continue operating hand primer until pumping
action is not felt. Push hand primer inward (toward
engine) as far as it will go.
If the fuel system needs further bleeding of air, see
Bleeding Fuel System in Maintenance section of this
manual.
4.10.2 Fuel Filter Replacement
WARNING
ESCAPING FLUID UNDER PRESSURE CAN
PENETRATE THE SKIN CAUSING SERIOUS
INJURY. RELIEVE PRESSURE BEFORE
DISCONNECTING FUEL OR OTHER LINES.
TIGHTEN ALL CONNECTIONS BEFORE
APPLYING PRESSURE. KEEP HANDS AND BODY
AWAY FROM PINHOLES AND NOZZLES THAT
EJECT FLUIDS UNDER HIGH PRESSURE. USE
A PIECE OF CARDBOARD OR PAPER TO
SEARCH FOR LEAKS. DO NOT USE YOUR
HAND.
IF ANY FLUID IS INJECTED INTO THE SKIN, A
DOCTOR FAMILIAR WITH THIS TYPE INJURY
MUST SURGICALLY REMOVE IT WITHIN A
FEW HOURS OR GANGRENE MAY RESULT.
DOCTORS UNFAMILIAR WITH THIS TYPE OF
INJURY MAY CALL THE DEERE & COMPANY
MEDICAL DEPARTMENT IN MOLINE, ILLINOIS,
OR OTHER KNOWLEDGEABLE MEDICAL
SOURCE.
Replace fuel filter every 600 hours or 12 months.
1. Thoroughly clean fuel filter assembly and
surrounding area.
2. Loosen drain plug and drain fuel into a suitable
container.
- 38 -
Page 39

4. MAINTENANCE
NOTE: Lifting up on retaining ring as it is rotated
helps to get it past raised locators.
3. Firmly grasp the retaining ring and rotate it
counterclockwise 1/4 turn. Remove ring with
filter element.
4. Inspect filter mounting base for cleanliness. Clean
as required.
NOTE: Raised locators on fuel filter canister must be
indexed properly with slots in mounting base for
correct installation.
5. Install new filter element onto mounting. Be sure
element is properly indexed and firmly seated on
base. It may be necessary to rotate filter for correct
alignment.
6. Remove filter element from water separator bowl.
Drain and clean separator bowl. Dry with
compressed air. Install water separator bowl onto
new element. Tighten securely.
7. Align keys on filter element with slots in filter
base.
8. Install retaining ring onto mounting base making
certain dust seal is in place on filter base. Hand
tighten ring (about 1/3 turn) until it snaps into
the detent. DO NOT overtighten retaining ring.
A PIECE OF CARDBOARD OR PAPER TO
SEARCH FOR LEAKS. DO NOT USE YOUR
HAND.
IF ANY FLUID IS INJECTED INTO THE SKIN, A
DOCTOR FAMILIAR WITH THIS TYPE INJURY
MUST SURGICALLY REMOVE IT WITHIN A
FEW HOURS OR GANGRENE MAY RESULT.
DOCTORS UNFAMILIAR WITH THIS TYPE OF
INJURY MAY CALL THE DEERE & COMPANY
MEDICAL DEPARTMENT IN MOLINE, ILLINOIS,
OR OTHER KNOWLEDGEABLE MEDICAL
SOURCE.
Whenever the fuel system has been opened up for
service (lines disconnected or filters removed), it will
be necessary to bleed air from the system.
1. Loosen the air bleed vent screw on fuel filter head
two full turns by hand on fuel filter base.
2. Operate supply pump primer lever until fuel flow
is free from air bubbles.
3. Tighten bleed plug securely by hand or using a
coin, continue operating hand primer until pumping
action is not felt. Push hand primer inward (toward
engine) as far as it will go.
4. Start engine and check for leaks.
NOTE: The proper installation is indicated when a
click is heard and a release of the retaining ring is
felt. A plug is provided with the new element for
plugging the used element.
9. Bleed the fuel system. See Bleeding Fuel System
in Maintenance section of this manual.
4.10.3 Bleeding Fuel System
WARNING
ESCAPING FLUID UNDER PRESSURE CAN
PENETRATE THE SKIN CAUSING SERIOUS
INJURY. RELIEVE PRESSURE BEFORE
DISCONNECTING FUEL OR OTHER LINES.
TIGHTEN ALL CONNECTIONS BEFORE
APPLYING PRESSURE. KEEP HANDS AND BODY
AWAY FROM PINHOLES AND NOZZLES THAT
EJECT FLUIDS UNDER HIGH PRESSURE. USE
If engine will not start, it may be necessary to bleed air
from fuel system at fuel injection pump or injection
nozzles as explained next.
4.10.4 Bleeding at Fuel Injection Pump
1. Slightly loosen fuel supply line connector at
injection pump.
2. Operate fuel supply pump primer lever until fuel,
without air bubbles, flows from fuel return line
connection.
3. Tighten return line connector to 16 Nm (12 lb-ft.).
4. Leave hand primer in the inward position toward
cylinder block.
4.10.5 Bleeding at Fuel Injection Nozzles
1. Energize the electronic fuel shut-off solenoid
(turn ignition key to ON position).
- 39 -
Page 40

4. MAINTENANCE
2. Using two open-end wrenches, loosen fuel line
connection at injection nozzle.
3. Crank engine over with starting motor, (but do
not start engine), until fuel free from air bubbles
flows out of loosened connection. Retighten
connection to 27 Nm (20 lb-ft.).
4. Repeat procedure for remaining injection nozzles
(if necessary) until all air has been removed from
fuel system.
If engine still will not start, see your authorized
servicing dealer or engine distributor.
4.11 FAN/ALTERNATOR BELT
Low belt tension causes slippage resulting in excessive
cover wear, burn spots, overheating, or slip and grab
causing belt breakage.
High belt tension causes belt heating and excessive
stretch, as well as damage to drive components such as
pulleys and shafts. V-belts should ride on the sides of
standard pulleys not on the bottom of the groove.
Standard V-belt tension can be checked with JDG529
Tension Gauge (arrow) or equivalent gauge.
STANDARD V-BELTS
Tension New Belt Tension Used* Belt
Single Belt 578-623 N 378-423 N
(130-140 lb. force) (85-95 lb. force)
4.12 GREASE FITTINGS
Use a grease gun to grease below fittings, use lithium
grease. Remove the blue protection cap off fitting
before greasing.
4.13 FRAME HINGE
Grease daily six fittings with lithium base grease using
a grease gun. There is one fitting on each of the top
and bottom bearings for the vertical pin. There are two
fittings on the horizontal pin.
4.14 BLADE PINS
Grease the two fittings daily; one on each of the blade
pivot pins.
4.15 BATTERY
4.15.1 Servicing Battery
1. Inspect belts for cracks, fraying, or stretched out
areas. Replace if necessary.
2. Using either JDG529 Tension Gauge or belt
tension tester and straightedge, check tension of
warm belts.
For standard V-belt, an 89 N (20 lb. force)
applied halfway between pulleys should
deflect belt by 19 mm (3/4 in.).
3. If adjustment is necessary, loosen alternator bracket
cap screw and nut on mounting bolt. Pull
alternator frame outward until belts are correctly
tensioned.
IMPORTANT: Do not pry against the alternator rear
frame. Do not tighten or loosen belts while they are
hot.
4. Tighten alternator bracket cap screw and nut
firmly.
5. After a new or used belt has run for 10 minutes
recheck belt tension.
WARNING
BATTERY GAS CAN EXPLODE. KEEP SPARKS
AND FLAMES AWAY FROM BATTERIES. USE A
FLASHLIGHT TO CHECK BATTERY
ELECTROLYTE LEVEL.
NEVER CHECK BATTERY CHARGE BY
PLACING A METAL OBJECT ACROSS THE
POSTS. USE A VOLTMETER OR HYDROMETER.
ALWAYS REMOVE GROUNDED NEGATIVE (-)
BATTERY CLAMP FIRST AND REPLACE IT
LAST.
1. On regular batteries, check electrolyte level. Fill
each cell to bottom of filler neck with distilled
water.
2. Keep batteries clean by wiping them with a damp
cloth. Keep all connections clean and tight.
Remove any corrosion, and wash terminals with a
- 40 -
Page 41

4. MAINTENANCE
solution of 1 part baking soda and 4 parts water.
Tighten all connections securely.
NOTE: Coat battery terminals and connectors with a
mixture of petroleum jelly and baking soda to retard
corrosion.
3. Keep battery fully charged, especially during cold
weather. If a battery charger is used, turn charger
off before connecting charger to battery(ies).
Attach POSITIVE (+) battery charger lead to
POSITIVE (+) battery post. Then attach
NEGATIVE (-) battery charger lead to a good
ground.
Once a month, check the battery for proper charge of
12.5 volts. Check for proper fluid level. Use distilled
water when adding and run 30 minutes to mix. Clean
battery, posts, and terminals. Disconnect battery cables
before charging to avoid damage to the electrical
system.
WARNING
SULFURIC ACID IN BATTERY ELECTROLYTE
IS POISONOUS. IT IS STRONG ENOUGH TO
BURN SKIN, EAT HOLES IN CLOTHING, AND
CAUSE BLINDNESS IF SPLASHED INTO EYES.
If acid is swallowed:
1. Drink large amounts of water or milk.
2. Then drink milk of magnesia, beaten eggs, or
vegetable oil.
3. Get medical attention immediately.
In freezing weather, run engine at lease 30 minutes to
assure thorough mixing after adding water to battery.
If necessary to replace battery(ies), replacements must
meet or exceed the following recommended
capabilities at -18° C (0° F):
12 Volt Heavy Duty Battery
BCI Group 24 800 CCA
4.15.2 Battery Installation
WARNING
ALWAYS CONNECT GROUNDED CABLE LAST.
CLEAN AND SECURELY CONNECT EACH
CABLE END TO BATTERY TERMINAL OF SAME
POLARITY. BATTERY SHOULD BE SECURELY
FASTENED WITH PROPERLY INSTALLED
HOLD-DOWNS.
4.15.3 Charging / Jumping Battery
Avoid the hazard by:
1. Filling batteries in a well-ventilated area.
2. Wearing eye protection and rubber gloves.
3. Avoiding breathing fumes when electrolyte is
added.
4. Avoiding spilling or dripping electrolyte.
5. Use proper jump start procedure.
If you spill acid on yourself:
1. Flush your skin with water.
2. Apply baking soda or lime to help neutralize
the acid.
3. Flush your eyes with water for 10 15 minutes.
Get medical attention immediately.
A 12-volt booster battery can be connected in parallel
with battery(ies) on the unit to aid in cold weather
starting. ALWAYS use heavy-duty jumper cables.
WARNING
GAS GIVEN OFF BY BATTERY IS EXPLOSIVE.
KEEP SPARKS AND FLAMES AWAY FROM
BATTERY. BEFORE CONNECTING OR
DISCONNECTING A BATTERY CHARGER TURN
CHARGER OFF. MAKE LAST CONNECTION
AND FIRST DISCONNECTION AT A POINT AWAY
FROM BATTERY. ALWAYS CONNECT
NEGATIVE (-) CABLE LAST AND DISCONNECT
THIS CABLE FIRST.
IMPORTANT: Be sure polarity is correct before
making connections. Reversed polarity will damage
electrical system. Always connect positive to
- 41 -
Page 42

4. MAINTENANCE
positive and negative to ground. Always use 12-volt
booster battery for 12-volt electrical systems.
1. Connect booster battery or batteries to
produce the required system voltage for your
engine application.
NOTE: To avoid sparks, DO NOT allow the free ends
of jumper cables to touch the engine.
2. Connect one end of jumper cable to the POSITIVE
(+) post of the booster battery.
3. Connect one end of jumper cable to the POSITIVE
(+) post of the battery connected to starter.
4. Connect one end of the other jumper cable to the
NEGATIVE (-) post of the booster battery.
5. ALWAYS complete the hook-up by making the last
connection of the NEGATIVE (-) cable to a good
ground on the engine frame and away from the
battery(ies).
6. Start the engine. Disconnect jumper cables
immediately after engine starts. Disconnect
NEGATIVE (-) cable first.
4.16 ENGINE CRANKCASE VENT TUBE
Remove and clean every 600 hours or 12 months. If
you operate the engine in dusty conditions, clean the
tube at shorter intervals.
1. Remove and clean crankcase vent tube.
2. Install the vent tube. Be sure the O-ring fits
correctly in the rocker arm cover for elbow adapter.
Tighten hose clamp securely.
Do not alter injection pumps.
TAMPERING with the following engine factory
settings is ILLEGAL except to reset to published
specifications and reseal by authorized engine
dealer:
- Engine Timing
- Fuel Delivery
- Aneroid Settings
- Rated Speed
Deere will reissue emissions dataplates only to replace
damaged plates. Requests must be in writing and
include name, address, engine model, and serial
number with reason for need.
Power rating changes WILL NOT be allowed on new
engines.
4.19 FUEL INJECTORS
WARNING
ESCAPING FLUID UNDER PRESSURE CAN
PENETRATE THE SKIN CAUSING SERIOUS
INJURY. RELIEVE PRESSURE BEFORE
DISCONNECTING FUEL OR OTHER LINES.
TIGHTEN ALL CONNECTIONS BEFORE
APPLYING PRESSURE. KEEP HANDS AND BODY
AWAY FROM PINHOLES AND NOZZLES THAT
EJECT FLUIDS UNDER HIGH PRESSURE. USE
A PIECE OF CARDBOARD OR PAPER TO
SEARCH FOR LEAKS. DO NOT USE YOUR
HAND.
4.17 ENGINE VALVE CLEARANCE
Check/adjust at 900 hours then every 1200 hours or 24
months. See authorized engine service dealer or refer
to Engine Manual for procedures.
4.18 EMISSION REGULATION/ENGINE RPM
Do not adjust operating speed. Full speed is factory set
at 2500 rpm.
Do not adjust idle speed above 1400 rpm. Proper idle
rpm is 1200 + 100.
IF ANY FLUID IS INJECTED INTO THE SKIN, A
DOCTOR FAMILIAR WITH THIS TYPE INJURY
MUST SURGICALLY REMOVE IT WITHIN A
FEW HOURS OR GANGRENE MAY RESULT.
DOCTORS UNFAMILIAR WITH THIS TYPE OF
INJURY MAY CALL THE DEERE & COMPANY
MEDICAL DEPARTMENT IN MOLINE, ILLINOIS,
OR OTHER KNOWLEDGEABLE MEDICAL
SOURCE.
IMPORTANT: Always use John Deere replacement
parts meeting John Deere performance
- 42 -
Page 43

4. MAINTENANCE
specifications. Only qualified technicians should
attempt fuel injector diagnose.
Fuel injection nozzles are usually removed and tested
or replaced when there is a noticeable loss of power or
excessive smoking after break-in period.
For detailed testing and diagnostic information on fuel
system refer to John Deere Technical Manual (P/N
55321).
4.19.1 Test Fuel Injection Nozzles (engine running)
1. Operate engine at intermediate speed and no load.
2. Slowly loosen the fuel pressure line at one of the
nozzles until fuel escapes at the connection (fuel
not opening nozzle valve).
NOTE: The injection nozzle before and/or after
nozzle being checked could be the faulty
nozzle.
If engine speed changes, the injection
nozzle is probably working satisfactory.
If engine speed does not change, a nozzle
is faulty and must be checked and repaired
(or replaced).
3. Repeat test for each remaining nozzle assembly.
4. Remove faulty injection nozzles and see authorized
engine dealer or replace with new.
Fill fuel tank at the end of each days operation to
prevent condensation in tank as moist air cools and
freezing during cold weather.
Avoid storing fuel over long periods of time. If fuel is
stored for more than a month prior to use or there is a
slow turnover in fuel tank or supply tank, add a fuel
conditioner such as John Deere PREMIUM DIESEL
FUEL CONDITIONER or equivalent to stabilize the
fuel and prevent water condensation. John Deere
PREMIUM DIESEL FUEL CONDITIONER is
available in winter and summer formulas. Fuel
conditioner also reduces fuel gelling and controls wax
separation during cold weather.
Proper fuel storage is critically important. Use clean
storage and transfer tanks. Periodically drain water and
sediment from bottom of tank. Store fuel in a
convenient place away from buildings.
IMPORTANT: DO NOT store diesel fuel in
galvanized containers. Diesel fuel stored in
galvanized containers reacts with zinc coating on
container to form zinc flakes. If fuel contains water,
a zinc gel will also form. The gel and flakes will
quickly plug fuel filters and damage injection
nozzles and injection pump.
DO NOT use brass-coated containers for fuel
storage. Brass is an alloy of copper and zinc.
4.20 FUEL TANK
Drain and flush the fuel tank every year.
WARNING
HANDLE FUEL CAREFULLY. DO NOT FILL THE
FUEL TANK WHEN ENGINE IS RUNNING.
DO NOT SMOKE WHILE FILLING FUEL TANK
OR SERVICING FUEL SYSTEM.
THE FUEL TANK IS VENTED THROUGH THE
FILLER CAP. IF A NEW FILLER CAP IS
REQUIRED, ALWAYS REPLACE IT WITH AN
ORIGINAL VENTED CAP.
4.21 FUEL LINES
Inspect fuel line condition and clamps. Replace fuel
lines every 2 years.
4.22 HYDRAULIC HOSES/CONNECTIONS
WARNING
ESCAPING HYDRAULIC FLUID UNDER
PRESSURE CAN HAVE SUFFICIENT FORCE TO
PENETRATE THE SKIN, CAUSING SERIOUS
PERSONAL INJURY.
HYDRAULIC FLUID ESCAPING UNDER
PRESSURE FROM A VERY SMALL HOLE CAN
BE ALMOST INVISIBLE. USE A PIECE OF
- 43 -
Page 44

4. MAINTENANCE
WARNING
CARDBOARD OR WOOD TO SEARCH FOR
POSSIBLE LEAKS. NEVER USE YOUR HANDS
TO DETECT PRESSURE LEAKS.
IF YOU ARE INJURED BY ESCAPING
HYDRAULIC FLUIDS, SEE A DOCTOR AT ONCE.
SERIOUS INFECTION OR REACTIONS CAN
DEVELOP IF PROPER MEDICAL TREATMENT IS
NOT ADMINISTERED IMMEDIATELY.
Before disconnecting any hydraulic lines, be sure
engine is shut off and relieve all pressure. Before
applying pressure to system, be sure all connections are
tight and lines, fittings and hoses are not damaged.
Inspect for leaks daily. Check connections for tightness
every 100 hours.
Hydraulic system produces high pressures incorrect
hose replacement can cause serious personal injury.
When performing service, refer to hydraulic diagrams
for hose identification and connections.
4.24 NEUTRAL INTERLOCK
The purpose of the neutral interlock switch is to
prevent engine starting when the forward/reverse lever
is not in the neutral position. To check:
1. Disconnect battery cables from battery.
2. a. Disconnect (2) wires from neutral interlock
switch and connect it to leads from an
ohmmeter.
b. When switch is actuated, ohmmeter should
read zero resistance.
3. Adjustments must be made at transmission.
4. Disconnect ohmmeter and reconnect interlock
wires and battery cables.
4.25 CONTROL CABLES: FORWARD/
REVERSE, THROTTLE, BLADE
Lubricate all cable ends with penetrating oil every 200
hours.
4.23 FORWARD/REVERSE/NEUTRAL
ADJUSTMENT
The forward/reverse lever should be aligned with
NEUTRAL on the console when the roller is moving
neither forward nor backward with the engine running.
If the lever is not aligned, adjust it as described below.
1. Shut off the engine with the forward/reverse lever
left in operating neutral position, the position when
the roller moves neither forward nor reverse.
Apply the parking brake.
2. Open the engine hood of the machine.
3. Disconnect the linkage from the hydrostatic
transmission from the clevis. Do this by removing
the lock nut from the clevis pin and removing the
pin.
4. Now screw clevis in or out to adjust.
5. Secure the clevis to the transmission lever with
the clevis pin, secure with the lock nut and tighten
clevis nut.
Linkage play must be minimal at both connections.
Replace clevis and/or link if required.
DO NOT ADJUST THE CONTROL CABLE WITH
THE POWER ON OR THE ENGINE RUNNING.
SERIOUS INJURY OR DEATH COULD RESULT.
A GRADUAL OR SUDDEN INCREASE IN THE NOLOAD FRICTION (CABLE DISCONNECT AT
BOTH ENDS) OF A CONTROL CABLE IS AN
INDICATION OF A PENDING OR PRESENT
PERFORMANCE PROBLEM. THE CONTROL
CABLE SHOULD BE REPLACED, OTHERWISE
SERIOUS INJURY OR DEATH COULD RESULT.
A GRADUAL OR SUDDEN DECREASE IN THE
USABLE STROKE IS AN INDICATION OF A
PENDING OR PRESENT PERFORMANCE
PROBLEM. THE CONTROL CABLE SHOULD BE
REPLACED, OTHERWISE SERIOUS INJURY OR
DEATH COULD RESULT. CONTROL CABLES
WHICH HAVE MOISTURE INSIDE OF THEM
AND/OR HAVE FROZEN SHOULD BE
REPLACED. DO NOT APPLY HEAT TO THAW
OR DRY CONTROL CABLES.
- 44 -
Page 45

4. MAINTENANCE
4.26 ECCENTRICS
Test vibration with front drum on soft ground. Run
engine at full rpm to obtain vib spec 2100 + 100 rpm
check per below.
To check vibration with a vibrotach, place the
vibrotach on the vibrating member surface, record
reading when the wire reaches maximum movement.
(Vibrotach P/N 37891).
When checking vibration with strobe light, place
horizontal line on vibrating member surface. Check
with strobe light and record reading when the line
reaches minimum movement.
4.26.1 Eccentric Housing Oil
WARNING
ROLLER MUST BE PARKED ON LEVEL
GROUND WITH PARKING BRAKE APPLIED AND
ENGINE OFF.
REMOVE THE KEY AND / OR DISCONNECT
BATTERY TO AVOID ACCIDENTAL IGNITION
OF ENGINE. SEVERE PERSONAL INJURY MAY
OCCUR.
NEVER WORK ON THE ROLLER WITH ENGINE
RUNNING. SEVERE PERSONAL INJURY MAY
OCCUR.
4.27 CHARGE SYSTEM
If gauge fails to function, check charge system. With
the engine running at full speed, voltage should be 1314 volts across the battery (check volt meter). If unit is
charging, replace gauge. If not, see authorized engine
dealer to check alternator.
4.28 PANEL FUSE 20 AMP
This fuse provides protection for the electrical system.
If the engine fails to turnover when starting, check the
fuse.
WARNING
NEVER USE FUSE WITH A DIFFERENT RATING
FROM THAT SPECIFIED. SERIOUS DAMAGE
TO THE ELECTRICAL SYSTEM OR A FIRE MAY
RESULT.
TURN THE ENGINE SWITCH OFF AND REMOVE
THE KEY BEFORE CHECKING OR REPLACING
FUSES TO PREVENT ACCIDENTAL SHORTCIRCUITING.
When frequent fuse failure occurs, it usually indicates
a short circuit or an overload in the electrical system.
See your authorized engine dealer for repair.
4.29 ENGINE INSTALLATION GUIDELINES
Eccentric housing oil should be checked monthly and
changed every 800 hours or yearly. Refer to
Maintenance Chart.
To check, locate oil plug inside the right hand drum
end and position drum so that oil plug is visible at 7:00.
Loosen oil plug slowly until oil starts to drip out past
the oil plug. Oil must be present at the 7:00 position.
Add oil if required and reinstall oil plug, use thread
sealant.
Eccentric housing oil:
SAE 20W/50 API SJ or API SH
SD/PD 43 1 qt. (.95 L.)
SP/PD 54 1.5 qt. (1.4 L.)
When installing new or reworking used diesel engines,
this list of guidelines should be strictly adhered to.
Following these guidelines should prevent damage to
the electrical system of diesel engines.
A. Always disconnect the positive cable from the
battery before performing any work on the
machine that involves welding or working on
the electrical system.
B. Avoid jump starting a diesel engine. Either change
the battery or remove the positive cable and charge
the battery.
C. Do not alter or change the wiring harness.
- 45 -
Page 46

4. MAINTENANCE
D. Cold weather add-ons should not be needed.
When cleaning machine, caution should be used around
regulator area. Direct spraying of the regulator is not
good. (Regulator should be covered or protected if
direct spraying will happen). Excessive water pressure
may also loosen wire connections or cause terminal
corrosion. After cleaning, all terminals should be dried
if wet and connections checked for proper seating.
4.30 ENGINE MOUNTING
Check periodically, tighten all mounting hardware for
proper torque. Refer to Torque Charts in Exploded
Views with Parts Section.
4.31 HARDWARE
Inspect all hardware for tightness. Refer to parts
illustrations for proper torque and Torque Charts in
Exploded Views with Parts Section.
4.31.1 Loctite
Loctite 262 threadlocker is required to prevent hardware from loosening.
Refer to Exploded Diagram and Parts List for * where
loctite is required.
4.32 ROLL OVER PROTECTIVE
STRUCTURES (ROPS)
Proper inspection and maintenance procedures can
ensure that ROPS will perform the lifesaving function
they are designed for and expected to do. Make
regular, periodic inspections to ensure ROPS are
damage-free and thus capable of functioning in an
upset.
Generally ROPS/FOPS structures are not intended as
external load carrying members and must not be used
to mount attachments such as pull hooks, winches, side
brooms, etc. without the manufacturers approval.
4.32.1 Maintenance of ROPS/Seat Belts
Inspection
Scheduled, frequent visual checks of mounting
hardware by operator or service personnel are
recommended. Inspection with regular service
intervals is suggested. The inspection should check
for:
Worn, damaged or missing resilient mounts.
Excessive motion or rattling during operation
are indications of a problem.
Loose, missing or damaged mounting
hardware (bolts, nuts, washers, etc.). Bolts
should be checked for proper torque.
Cracks in ROPS/FOPS structure and mounting
system. The machine should be cleaned, as
necessary, to allow inspection for cracks in
the structure and mounting system. Rust lines
should be taken as indications of cracks and
verified by inspection. Some cracks will badly
affect the ROPS/FOPS function. If in doubt,
consult the manufacturer.
Water drainage paths. Clear water drainage
paths so that entrapped water will not freeze
and crack or deform the structure.
Corrosion. Extensive paint peeling and rust
should be noted and corrective action taken.
Seat belt. The presence and operability of a
seat belt should be noted. The belt should be
clean, free of dirt and grease and the latch
should function smoothly.
The structure should be inspected following a
rollover, collision or fire.
Repair
Replace missing or damaged hardware with the
manufacturers specified hardware. Re-torque all loose
threaded fasteners to the manufacturers specifications.
The manufacturer must be consulted to determine the
repairability of cracks in ROPS/FOPS structures.
Modifications to basic design should be avoided, as
recertification is required.
- 46 -
Page 47

4. MAINTENANCE
4.33 HORN/BACK-UP
WARNING
THIS VEHICLE IS EQUIPPED WITH A BACK-UP
ALARM. ALARM MUST SOUND WHEN
BACKING UP. IT IS THE DRIVERS
RESPONSIBILITY TO OPERATE THIS VEHICLE
SAFELY. BE SURE BACK-UP ALARM AND HORN
ARE WORKING.
Inspect the sound decibel level of the horn and back-up
alarm daily and test weekly for proper dBA level (112
dBA). Test results should be recorded in the vehicles
maintenance file. If mud, dirt or other debris is forced
into alarm, clean and test to ensure proper operation.
4.33.1 Back-Up Alarm Switch
1. Remove control panel wrap.
2. To check for proper switch operation, connect
ohmmeter leads to the wire connections. The
back-up switch should be normally open in the
neutral position and normally closed when
shifted into reverse position. With the ignition
key in the on position, shifting into reverse
should actuate the back-up alarm.
3. Check the assembly for proper switch actuation,
smooth lever operation and all hardware for
tightness, then assemble the panel wrap and
hardware.
4.34 SCRAPERS
Prevent mud and debris from building up. If urethane
scrapers are worn or torn, replace.
Steel scrapers are adjustable. The scrapers should just
clear the drum and pads. If adjusting, be sure to check
that scrapers clear drum and pads all the way around
the drum. To adjust, loosen mounting bolts and slide
scraper in or out, check clearance and retighten.
- 47 -
Page 48

4. MAINTENANCE
4.35 TROUBLESHOOTING
PROBLEM
Engine Won't Start.
Engine won't start but cranks over.
CAUSE REMEDY
Forward/Reverse lever not in neutral
position.
Panel fuse blown.
Loose battery or starter cables.
Faulty engine starting circuit.
Faulty or improperly adjusted neutral
interlock switch.
Dirty fuel injectors. (Diesel Only)
Petcock plugged.
Low on fuel.
Fuel valve closed.
Fuel filter plugged.
Place lever in neutral position.
Replace, 20A fuse required.
Check and tighten.
Check appropriate section in Engine
Manual
Make sure neutral switch is adjusted
properly and wires are all secured. Test
with ohmmeter. Readjust neutral switch.
Replace if defective.
Clean or replace.
Clean or replace.
Add fuel.
Open.
Check fuel filter, replace if necessary.
Engine hard to start or will not start (or)
Engine starts but does not keep running.
Exhaust restricted.
Injection pump not getting fuel or air in
fuel
system.
Faulty injection pump or nozzles
Fuel lines plugged.
Air in fuel line.
Cold weather.
Crankcase oil too heavy.
Improver type of fuel.
Water, dirt, or air in fuel system.
Clogged fuel filter.
Injection pump shut-off not reset.
Check and correct exhaust restriction.
Check fuel flow at supply pump or bleed
fuel system.
Consult authorized diesel repair station
for repair or replacement.
Clean or replace.
Bleed fuel line.
Use cold weather starting aid.
Use oil of proper viscosity.
Consult fuel supplier; use proper type
fuel for operating conditions.
Drain, flush, fill, and bleed system.
Replace filter element.
Turn key switch to "OFF" then to "ON".
- 48 -
Page 49

4. MAINTENANCE
4.35 TROUBLESHOOTING-cont'd.
PROBLEM
Engine starts but does not keep running.
Roller won't move forward or reverse.
CAUSE REMEDY
Water/dirt in fuel.
Choke remains on. (Gas Only)
Carburetor improperly adjusted. (Gas
Only)
Dirty fuel injectors. (Diesel Only)
Injection pump drawing in air. (Diesel
Only)
Objects in front of drums.
Unit in bypass.
Loose or broken forward/reverse linkage.
Loose or broken chain.
Loose or broken transmission belts.
Drain fuel system.
Adjust choke cable.
Clean choke linkage.
Adjust as per Engine Manual.
Service or replace.
Check fuel lines or replace.
Remove.
Check bypass valve.
Readjust linkage or replace worn arm
linkage.
Make sure chain is on sprocket. Adjust
tension or replace if chain shows
excessive war.
Replace and/or tighten.
Unit lacks power moving forward --but
okay in reverse or vice versa.
Unit lacks power.
Low hydraulic oil.
Improperly adjusted forward/reverse
linkage.
Engine not properly warmed up.
Low hydraulic oil level.
Plugged hydraulic filter.
Insufficient belt tension.
Engine RPM too low.
Check oil level gauge. Add if required.
Adjust linkage so that lever travel is the
same in either direction from neutral.
Idle before operating to achieve operating
temperature.
Add.
Replace.
Check and adjust belts.
Check throttle linkage for proper
actuation (3100 RPM Gas/2600 Diesel).
See Maintenance.
- 49 -
Page 50

4. MAINTENANCE
4.35 TROUBLESHOOTING-cont'd
PROBLEM
High fuel consumption.
High oil consumption.
CAUSE REMEDY
Improper type of fuel.
Clogged or dirty air cleaner.
Engine overloaded.
Improper valve clearance.
Injection nozzles dirty.
Engine out of time.
Low engine temperature.
Crankcase oil too light.
Oil leaks.
Use proper type of fuel.
Service air cleaner.
Excessive mud/debris build-up -- Clean/
pressure wash.
See your authorized servicing dealer or
engine distributor.
See your authorized servicing dealer or
engine distributor.
See your authorized servicing dealer or
engine distributor.
Check thermostat.
Use proper viscosity oil.
Check for leaks in lines, gaskets, and
drain plug.
Low oil pressure.
Engine emits smoke.
Restricted crankcase vent tube.
Defective turbocharger.
Too much oil in crankcase.
Loose oil filter or sending unit.
Loose bolts.
Engine in break-in period.
Low oil level.
Improper type of oil.
Too much oil in crankcase.
Engine in break-in period.
Clean vent tube.
See your authorized servicing dealer or
engine distributor.
Drain.
Tighten.
Tighten.
See Engine Owner's Manual.
Add oil.
Drain, fill crankcase with oil of proper
viscosity and quality.
Drain, fill to proper level.
See Engine Owner's Manual.
- 50 -
Page 51

4. MAINTENANCE
4.35 TROUBLESHOOTING-cont'd
PROBLEM
Engine emits white smoke.
Engine emits black or gray exhaust
smoke.
CAUSE REMEDY
Improper type of fuel.
Low engine temperature.
Defective thermostat.
Defective injection nozzles.
Engine out of time.
Improper type of fuel.
Clogged or dirty air cleaner.
Injection nozzles dirty.
Engine out of time
Use proper fuel.
Warm up engine to normal operating
temperature.
Remove and check thermostat.
See your authorized servicing dealer or
engine distributor.
See your authorized servicing dealer or
engine distributor.
Use proper fuel.
Service air cleaner.
See your authorized servicing dealer or
engine distributor.
See your authorized servicing dealer or
engine distributor.
Engine overheats.
Engine overloaded.
Low coolant level.
Faulty radiator cap.
Loose or defective fan belts.
Low engine oil level.
Cooling system needs flushing.
Defective thermostat.
Defective temperature gauge or sender.
Incorrect grade of fuel.
Reduce load, check for mud build-up,
clean if required.
Fill radiator to proper level, check
radiator and hoses for loose connections
or leaks.
Have serviceman check.
Adjust belt tension. Replace as required.
Check oil level. Add oil as required.
Flush cooling system.
Remove and check thermostat.
Check water temperature with
thermometer and replace if necessary.
Use correct grade of fuel.
- 51 -
Page 52

4. MAINTENANCE
4.35 TROUBLESHOOTING-cont'd
PROBLEM
Roller won't move forward or reverse.
Unit lacks power moving forward, but
okay in reverse or vice versa.
Unit lacks power.
CAUSE REMEDY
Objects in front of drums.
Unit in bypass loose or broken forward/
reverse linkage.
Low hydraulic oil.
Improperly adjusted forward/reverse
linkage.
Engine not properly warmed up.
Restricted fuel hose.
low hydraulic oil level.
Plugged hydraulic filter.
Leaking exhaust manifold gasket.
Remove.
Check bypass valve. Readjust linkage or
replace worn arm linkage, make sure
lever at pump is moving.
Check oil level gauge. Add if required.
Adjust linkage so that lever travel is the
same in either direction from neutral.
Idle before operating to achieve operating
temperature.
Clean or replace fuel hose
Add hydraulic oil.
Replace.
See your authorized servicing dealer or
engine distributor.
Engine RPM too low.
Defective Aneroid control line.
Dirty fuel filter.
Dirty fuel injectors.
Injection pump drawing in air.
Too much oil in crankcase.
Air filter dirty.
Injection pump out of time.
Faulty hydraulic pump or drive motor.
Check throttle linkage for proper
actuation. Check full speed.
See your authorized servicing dealer or
engine distributor.
Replace.
Service or replace.
Check fuel lines or replace.
Drain and check. Service or replace.
Clean and/or replace.
See your authorized servicing dealer or
engine distributor.
Test hydraulic pressure for 500psi at full
load on drive motor with engine at full
RPM.
Check charge pressure 220-260 psi with
engine at full RPM.
- 52 -
Page 53

4. MAINTENANCE
4.35 TROUBLESHOOTING-cont'd
PROBLEM
Unit lacks power - cont'd.
Unit won't steer.
CAUSE REMEDY
Faulty hydraulic pump or drive motor cont'd.
Improper type of fuel.
Excessive mud or debris build-up.
Below normal engine temperature.
Improper valve clearance.
Cylinder leaking.
Piston rod bent.
Missing hydraulic cylinder pin.
Kinked or broken hoses.
Replace pump if pressure is not in specified
range in hydraulic motor drive circuit.
Check drive motors case, drain flow
.5GPM max. drum, tires blocked, engine
running.
Use proper fuel.
Clean/pressure wash.
Remove and check thermostat.
See your authorized servicing dealer or
engine distributor.
Replace hydraulic cylinder.
Replace hydraulic cylinder.
Replace.
Replace.
Brakes don't hold properly.
Brake stays on.
Low hydraulic fluid.
Faulty hydraulic pump.
Brake valve faulty.
Loose wires.
No release pressure.
Faulty relay.
Add fluid.
Check hydraulic steering circuit for
maximum pressure of 2,300 psi at full
RPM. Replace or repair by authorized
Service Center.
Check brake light operation.
Check for 12 volt A brake valve, see
Wiring.
Check wiring for loose or broken wiring.
Check pump for proper charge pressure
220-260psi.
Check, replace if required.
- 53 -
Page 54

4. MAINTENANCE
4.36 ELECTRICAL TROUBLESHOOTING
PROBLEM
Undercharged system.
Battery used too much water.
Batteries will not charge.
CAUSE REMEDY
Excessive electrical load from added
accessories.
Excessive engine idling.
Poor electrical connections on battery,
ground strap, starter, or alternator.
Defective battery.
Defective alternator.
Cracked battery case.
Defective battery.
Battery charging rate too high.
Loose or corroded connections.
Sulfated or worn-out batteries.
Remove accessories.
Increase engine RPM when heavy
electrical load is used.
Inspect and clean as necessary.
Test battery.
Test charging system.
Check for moisture and replace as
necessary.
Test battery.
Test charging system.
Clean and tighten connections.
See your authorized servicing dealer or
engine distributor.
Starter will not crank.
Starter cranks slowly.
Entire electrical system does not
function.
Loose or defective alternator belt.
Loose or corroded connections.
Low battery output voltage.
Faulty start circuit relay.
Low battery output.
Crankcase oil too heavy.
Loose or corroded connections.
Faulty battery connection.
Sulfated or worn-out batteries.
Blown fuse.
Adjust belt tension or replace belts.
Clean and tighten loose connections.
See your authorized servicing dealer or
engine distributor.
See your authorized servicing dealer or
engine distributor.
See your authorized servicing dealer or
engine distributor.
Use proper viscosity oil.
Clean and tighten loose connections.
Clean and tighten connections.
See your authorized servicing dealer or
engine distributor.
Replace fuse.
- 54 -
Page 55

4. MAINTENANCE
.oNledoM:N/SrelloR:N/SenignE
dnaliOenignE
retliF
dna,retliF,liOciluardyH
rehtaerB
tnalooCenignE
renaelCriA
rotarapeSretaW
retliFleuF
tleBrotanretlA/naF
sgnittiFesaerG
yrettaB
DROCERECIVRES73.4
woleBecnanetniaMfosetaDdnasruoHdroceR
ebuTtneVesacknarC
ecnaraelCevlaV
SMPRenignE
srotcejnIleuF
knaTleuF
seniLleuF
ciluardyH
liOgnisuoH
esuFlenaP
snoitcennoC/sesoH
esreveR/drawroF
kcolretnIlartueN
selbaClortnoC
cirtneccE/scirtneccE
metsySegrahC
erawdraH
stleBtaeS/SPOR
sreparcS
- 55 -
Page 56

Page 57

5. EXPL ODED VIEWS
WITH PARTS
- 57 -
Page 58

Page 59

5. PARTS LIST
5.1 Hardware Key ......................................................................................... 59
5.2 Torque Charts and Guidelines ................................................................. 60 - 61
5.3 Drum Assembly ....................................................................................... 62 - 65
5.4 Main Frame ............................................................................................. 66 - 69
5.5 Radiator/Engine Mount ........................................................................... 70 - 71
5.6 Engine ................................................................................................... 72 - 75
5.7 Air Cleaner .............................................................................................. 76 - 77
5.8 Controls ................................................................................................... 78 - 81
5.9 Drive System Hydraulics ........................................................................ 82 - 85
5.10 Steering/Eccentric System Hydraulics .................................................... 86 - 87
5.11 Blade ................................................................................................... 88 - 89
5.12 Hydraulic Schematic ............................................................................... 90 - 91
5.13 Wiring ................................................................................................... 92 - 93
Exploded Views with Parts
5.14 Decal Identification ................................................................................. 94 - 97
5.1 HARDWARE KEY
- 59 -
ZN = ZINC PLATED
BLK = BLACK OXIDE FINISH
Page 60

5.2 Torque Charts and Guidelines
Do not use these values if a different torque value or tightening procedure is given for a specific application. Torque values listed are for general use. Check
tightness of fasteners periodically.
Shear bolts are designed to fail under predertermined loads. Always replace shear bolts with identical grade.
Fasteners should be replaced with the same or higher grade. If higher grade fasteners are used, these should only be tightened to the strength of the original.
Make sure fasteners' threads are clean and that you properly start thread engagement. This will prevent them from failing when tightening.
SAE GRADE 5
Coarse Thread, Zinc-Plated
SIZE TORQUE SIZE TORQUE
ft. lbs. Nm ft. lbs. Nm
1/4 - 20 (.250) 681/4 - 20 (.250) 912
5/16 - 18 (.3125) 13 18 5/16 - 18 (.3125) 18 24
3/8 - 16 (.375) 23 31 3/8 - 16 (.375) 33 45
7/16 - 14 (.4375) 37 50 7/16 - 14 (.4375) 52 70
1/2 - 13 (.500) 57 77 1/2 - 13 (.500) 80 108
9/16 - 12 (.5625) 82 111 9/16 - 12 (.5625 ) 115 156
5/8 - 11 (.625) 112 152 5/8 - 11 (.625) 159 215
3/4 - 10 (.750) 200 271 3/4 - 10 (.750) 282 382
7/8 - 9 (.875) 322 436.5 7/8 - 9 (.875) 454 615
1 - 8 (1.000) 483 655 1 - 8 (1.000) 682 925
SAE GRADE 5
Fine Thread, Zinc-Plated
SIZE TORQUE SIZE TORQUE
ft. lbs. Nm ft. lbs. Nm
1/4 - 28 (.250) 7101/4 - 28 (.250) 10 14
5/16 - 24 (.3125) 14 19 5/16 - 24 (.3125) 20 27
3/8 - 24 (.375) 26 35 3/8 - 24 (.375) 37 50
7/16 - 20 (.4375) 41 56 7/16 - 20 (.4375) 58 79
1/2 - 20 (.500) 64 87 1/2 - 20 (.500) 90 122
9/16 - 18 (.5625) 91 123 9/16 - 18 (.5625) 129 175
5/8 - 18 (.625) 128 173 5/8 - 18 (.625) 180 244
3/4 - 16 (.750) 223 302 3/4 - 16 (.750) 315 427
7/8 - 14 (.875) 355 481 7/8 - 9 (.875) 501 679
1 - 12 (1.000) 529 717 1 - 12 (1.000) 746 1011
1 -14 (1.000) 541 733 1 -14 (1.000) 764 1036
SAE GRADE 8
Coarse Thread, Zinc-Plated
SAE GRADE 8
Fine Thread, Zinc-Plated
- 60 -
Page 61

5.2 Torque Charts and Guidelines
Property Class 8.8
ZINC-PLATED
SIZE Nm ft. lbs. Nm ft. lbs.
M6 9.9 7 10 7
M8 24 18 25 18
M10 48 35 49 36
M12 83 61 88 65
M14 132 97 140 103
M16 200 148 210 155
M20 390 288 425 313
M24 675 498 720 531
Property Class 10.9
ZINC-PLATED
SIZE Nm ft. lbs. Nm ft. lbs.
M6 14 10 14 10
M8 34 25 35 26
M10 67 49 68 50
M12 117 86 125 92
M14 185 136 192 142
M16 285 210 295 218
M20 550 406 600 443
M24 950 701 1000 738
Coarse Thread Fine Thread
Coarse Thread Fine Thread
REMARK:
Property Class 12.9
ZINC-PLATED
SIZE Nm ft. lbs. Nm ft. lbs.
M6 16.5 12 16.5 12
M8 40 30 42 31
M10 81 60 82 60
M12 140 103 150 111
M14 220 162 235 173
M16 340 251 350 258
M20 660 487 720 531
M24 1140 841 1200 885
Conversion Factor: 1 ft. lb. = 1.3558 Nm
Coarse Thread Fine Thread
- 61 -
Page 62

5.3 Drum Assembly
h:\engr\manuals\rhino\rhdrumas.eps
- 62 -
Page 63

5.3 Drum Assembly
Item Part No. Description Qty.
1 42374-2 Drum Weld SD 43 1
42375-2 Drum Weld SD 54 1
42376-2 Drum Weld PD 43 1
42377-2 Drum Weld PD 54 1
2 22748-2 Frame Weld 43 1
22749-2 Frame Weld 54 1
3 22820 Kit Cap & Bearing LH 1
4 22821 Kit Cap & Bearing RH 1
5 29514 Weight Eccentric 1
6 29513 Shaft Eccentric 43 1
29563 Shaft Eccentric 54 1
7 32234 Bearing Eccentric 2
8 29601 Spline Extension 1
9 29980-2 Cover Web Drum 1
10 38507 Seal Shaft 1
11 23015 Kit Wheelmotor & Cap 1
# 32308 Seal Kit for Wheelmotor in 23015 1
12 42232-2 Bracket Weld S-MOUNT RH 2
13 42233-2 Plate MOUNT Wheelmotor 1
14 42234-2 Bracket Weld S-Mount LH 2
15 42236-2 Plate Weld HOUSING 1
16 47281 Shock Mounts (Per Side)
SD43, PD43 (front 2, back 3) 10
SD54, PD54, PDB43 (front 3, back 3) 12
PDB54 (front 3, back 4) 14
17 38531 Motor Gear Eccentric 1
Item Part No. Description Qty.
18 32243 Bearing Ball 2
19 42210 Washer 1/8 - 3ID X 3 - 1/2 OD 1
20 46403 FTG Hyd 3/4 NPT X 5/8 H - BARB 2
21 29524 Block Yoke SET 1
22 42490-2 Hose Guard Weld LH 1
42496-2 Hose Guard Weld LH BLADE 1
23 42491-2 Hose Guard Weld RH 1
42497-2 Hose Guard Weld RH BLADE 1
24 29505-2 Hinge Weld ART / OSC 2
25 46521 Plug Pipe 3/4 NPT SKT Hydraulic 2
26 42489-2 Bar Mount Hose Guard 2
27 46131 Hose Hydraulic Low Press 5/8 ID 1
28 46032 Elbow Pipe 3/4 NPT 45 Street 1
29 47305 O-Ring 10 ID X 1/8 CS 2
30 32236 Bearing Flange 4
31 24017 WSHR 2 - 15/16 X 2 - 1/4 ID 2
32 38760 Nilos Ring 1
33 42243-2 Strip Scraper SD 43 2
42242-2 Strip Scraper SD 54 2
29547-2 Scraper PD 43 2
29546-2 Scraper PD 54 2
34^ 42494-2 Spacer House Guard 2
35 46042 FTG 164 IB 2
36 47001 Caplug Blue 6
- 63 -
REMARK:
Part Numbers 22820, 22821, 23015 include Item 7.
^ Not required on blade unit
# Not Shown
Page 64

5.3 Drum Assembly Cont'd.
h:\engr\manuals\rhino\rhdrumas.eps
- 64 -
Page 65

5.3 Drum Assembly Cont'd.
Item Part No. Description Qty. FT. LBS. (Nm)
TorqueTorque
Item Part No. Description Qty. FT. LBS. (Nm)
37 47301 O-Ring 3 - 1/4 ID X 1/16 CS 1
38 32251 Seal V-RING 6" DIA. 1
39 22770 Kit Brake Release 1
40 42345 Scraper POLY SD43 2
42346 Scraper POLY SD54 2
41 42493-2 Bar Mount PIVOT 4
A#* 80561 HHCS 1/2 - 13 X 1-3/4 GR5 ZN 24 57 (77)
##* 80561 HHCS 1/2 - 13 X 1-3/4 GR5 ZN 76 57 (77)
B#* 80085 HWHST 5/16 - 18 X 1 ZN 4 13 (18)
##* 80085 HWHST 5/16 - 18 X 1 ZN 13 13 (18)
C# 80117 WSHRL 1/2 MED SPLIT ZN 43 - ## 80117 WSHRL 1/2 MED SPLIT ZN 44 - ### 80117 WSHRL 1/2 MED SPLIT ZN 47 - D* 80680 SHCS 1/2 - 13 X 2 - 1/2 ZN 5 57 (77)
E 80086 WSHRL 5/16 MED SPLIT ZN 3 - F* 80049 SHCS 5/16 - 18 X 1 - 1/4 BLK 3 13 (18)
G#* 80537 NUTFL 1/2 - 20 ZN 10 64 (87)
## 80537 NUTFL 1/2 - 20 ZN 12 64 (87)
### 80537 NUTFL 1/2 - 20 ZN 14 64 (87)
H 80125 WSHR 17/32 ID X 1 - 1/16 ZN 16 - I#* 80658 HHCS 1/2 - 20 X 1 GR5 ZN 5 64 (87)
##* 80658 HHCS 1/2 - 20 X 1 GR5 ZN 6 64 (87)
###* 80658 HHCS 1/2 - 20 X 1 GR5 ZN 7 64 (87)
J#* 80678 HHCS 1/2 - 20 X 3 GR5 ZN 5 64 (87)
##* 80678 HHCS 1/2 - 20 X 3 GR5 ZN 6 64 (87)
###* 80678 HHCS 1/2 - 20 X 3 GR5 ZN 7 64 (87)
K*80474 HHCS 3/8 - 16 X 1 - 1/4 GR 5 ZN 2 23 (31)
M 80043 WSHR 3/8 WROTZN 14 - N 80056 NUTNY 3/8 - 16 ZN 7 23 (31)
O 80058 WSHRL 3/8 MRD SPLIT ZN 2 -
P* 80643 HHCS 3/8 - 16 X 7 GR5 ZN 1 23 (31)
Q* 80405 HHCS 1/2 - 13 X 2 - 3/4 GR5 ZN 12 57 (77)
R* 80681 SHCS 5/8 - 11 X 1 - 1/2 BLK 8 190 (257)
S 80337 WSHRL 5/8 MED SPLIT ZN 18 - -
T* 80695 HHCS 5/8 - 11 X 2 GR5 ZN 18 112 (152)
V 80355 WSHR 5/8 SAE ZN 40 - -
W 80082 NUTNY 5/8 - 11 ZN 14 112 (152)
X 80051 NUTNY 1/2 - 13 ZN 16 57 (77)
Y* 80699 HHCS 5/8 - 11 X 3 - 1/4 GR5 ZN 8 112 (152)
Z* 80113 HHCS 1/2 - 13 X 3/4 ZN 6 57 (77)
AA# 80343 WSHR 1/2 SAE ZN 64 - ## 80343 WSHR 1/2 SAE ZN 68 - ### 80343 WSHR 1/2 SAE ZN 72 - BB* 80694 HHCS 3/8 - 13 X 4 - 1/2 GR5 ZN 4 - CC* 80578 HHCS 1/2 - 13 X 3 GR5 ZN 4 57 (77)
DD 80641 HHTB M12 X 100MM GR8.8 ZN 1 - EE 80700 NUTFX M12 ZN 1 - -
FF 26326 WSHR 9/16 X 1 - 3/4 X 1/4 1 - -
- 65 -
REMARK:
# SD43, PD43 ## SD54, PD54, PDB43 ### PDB54
*Loctite Required
Page 66
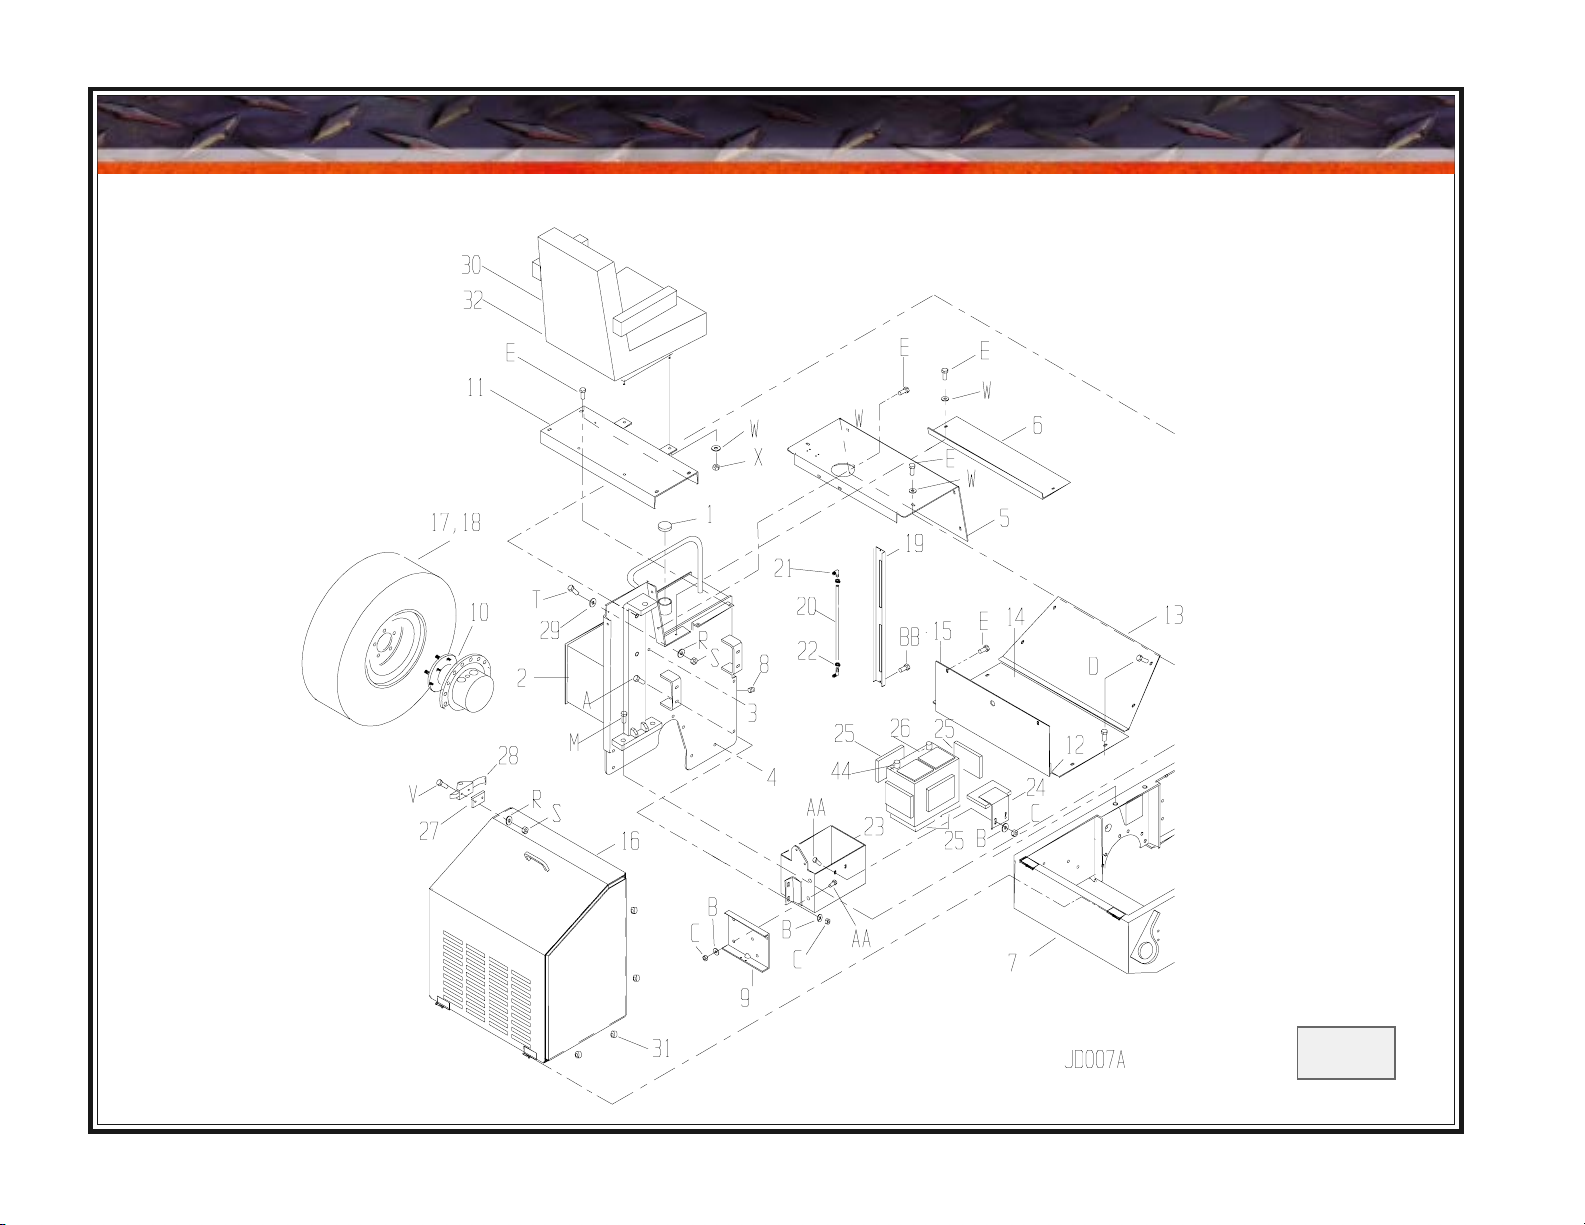
5.4 Main Frame
- 66 -
Page 67

5.4 Main Frame
Item Part No. Description Qty.
1 46059 Cap Fuel 1
2 43250-2 Tank Fuel 1
3 46127 Fitting Return Fuel 1/4H 1
4 46815 Fitting Supply Fuel 5/16H 1
5 43738-2 Panel Cover Tanks 1
6 43736-2 Panel Cover Filter 1
7 43240-2 Frame Main 1
8 46107 Plug 1/2 NPT Sq Hd 1
9 43845-2 Mount Manifold 1
10 38528 Wheelmotor 2
11 29539-2 Panel Seat 1
12 29132 Pin Hinge 1
13 42062-2 Pan Nose 1
14 42063-2 Pan Floor 1
15 42065-2 Plate Battery 1
16 43740-2 Cowl 1
43808 Set Sound Proof 1
17 39289 Tire Assembly RH Turf 1
39290 Tire Assembly LH Turf 1
38720 Tire Turf (R-3) 1
18 39195 Tire Assembly RH Lug 1
39196 Tire Assembly LH Lug 1
38722 Tire Lug (R-1) 1
19 42015-2 Cover Level 1
20 47295-2 Hose 2
38712 Float Fuel 1
Item Part No. Description Qty.
21 34486 Fitting Elbow 2
22 34089 Clamp 2
23 43785-2 Battery Box 1
24 29560-2 Hold Down Battery 1
25 29314 Liner Battery Box 7
26 38519 Battery 800 CCA 1
27 42321-2 Spacer 2
28 38610 Latch 2
29 38622 Keeper 2
30 47268 Seat 1
31 47292 Bumpers 8
- 67 -
REMARK:
Page 68

5.4 Main Frame Cont'd.
- 68 -
Page 69

5.4 Main Frame Cont'd.
Item Part No. Description Qty. FT. LBS. (Nm)
TorqueTorque
Item Part No. Description Qty. FT. LBS. (Nm)
32 38600 Seat Belt 1
33 43251-2 Tank Hydraulic 1
34 29700-2 ROPS 1
35 29702-2 ROPS Support 1
36 42215-2 Bracket Hose 2
37 42216-2 Bracket Hose 1
38 42075-2 Panel Front 1
39 42222-2 Panel Rear 1
40 46450 Steering Wheel 1
41 46452 Column 1
42 46449 Horn Kit 1
43 47217 Nut Steering 1
44 47247 Grommet Rubber 2" ID 1
A 80041 CRBLT 3/8 - 16 X 1 - 1/4 ZN 4 - B 80043 WSHR 3/8 WROT ZN 6 - C 80056 NUTNY 3/8 - 16 ZN 6 23 (31)
D 80610 HWHTB 3/8 - 16 X 1 - 1/4 ZN 8 23 (31)
E 80085 HWHTB 5/16 - 18 X 1 ZN 22 13 (18)
F 80082 NUTNY 5/8 - 11 ZN 12 112 (152)
G 80355 WSHR 5/8 SAE ZN 24 - H* 80695 HHCS 5/8 - 11 X 2 GR5 ZN 12 112 (152)
I* 80561 HHCS 1/2 - 13 X 1 - 3/4 GR5 ZN 12 57 (77)
J* 80476 HHCS 3/8 - 16 X 1 - 1/2 ZN 4 23 (31)
K 80058 WSHRL 3/8 SPLIT ZN 4 - L* 80668 HHCS 3/4 - 10 X 2 GR8 BLK 2 282 (382)
M* 80669 HHCS 3/4 - 10 X 2 - 1/2 GR8 ZN 4 282 (382)
N* 80684 HHCS 1 - 8 X 3 GR8 BLK 4 682 (925)
O 80685 WSHRL 1 SPLIT ZN 4 - P 80670 NUTFX 3/4 - 10 BLK 4 - Q 80671 WSHRL 3/4 SPLIT ZN 6 - R 80346 WSHR #10 SAE ZN 6 - S 80693 NUTNY 10 - 24 ZN 4 - T 80696 FHSMS 10 - 24 X 1 ZN 2 - V 80527 PPHMS 10 - 24 X 5/8 ZN 4 - W 80348 WSHR 5/16 WROT ZN 8 - X 80114 NUTNY 5/16 - 18 ZN 10 13 (18)
Y 80051 NUTNY 1/2 - 13 ZN 12 - Z 80343 WSHR 1/2 SAE ZN 24 - AA 80587 CRBLT 3/8 - 16 X 1 ZN 2 - BB* 80257 RHSMS 10 - 24 X 3/8 BLK 2 - CC* 41038 LUG NUT M14 x 60 ° 10 184 (250)
REMARK:
- 69 -
* Loctite Required
Page 70

5.5 Radiator and Engine Mount
- 70 -
Page 71

5.5 Radiator and Engine Mount
Item Part No. Description Qty.
Torque
Item Part No. Description Qty. FT. LBS. (Nm)
1 43255-2 Bracket Outer Bell Housing 1
2 47281 Shock Mounts 6
3 43715-2 Mount Weld LH Engine 1
4 43714-2 Mount Weld RH Engine 1
5 42129-2 Bracket S-MTG Engine 2
6 39576 Guard Fan 1
7 39574 Radiator 1
39606 Cap Radiator 1
39602 Hose Radiator Upper 1
39603 Hose Radiator Lower 1
39600 Clamp Hose 2" 2
39601 Clamp Hose 2-1/4" 2
39604 Petcock Radiator 1
8 43245-2 Mount Weld Radiator RH 1
9 43246-2 Mount Weld Radiator LH 1
10 39575 Shroud Radiator 1
11 43249-2 Plate Mount Cooler 2
12 43805-2 Radiator Support 1
13 38627 Rubber Mount Cooler 4
14 42460-2 Bracket Cowl Stop 1
15 38815 Stop Cable 1
A* 80161 HHCS 5/16 - 18 X 1 GR 5 ZN 4 13 (18)
B* 80658 HHCS 1/2 - 20 X 1 GR5 ZN 6 57 (77)
C 80058 WSHRL 3/8 Split ZN 6 - D 80041 CRBLT 3/8 - 16 X 1 - 1/4 ZN 3 - E 80043 WSHR 3/8 WROT ZN 15 - F 80564 WSHR 3/8 ID X 1/4 OD ZN 4 - G 80056 NUTNY 3/8 - 16 ZN 11 23 (31)
H 80114 NUTNY 5/16 - 18 ZN 4 13 (18)
I 80537 NUTFL 1/2 - 20 ZN 6 64 (87)
J 80343 WSHR 1/2 SAE ZN PL 20 - K 80117 WSHRL 1/2 MED SPLIT ZN 6 - L 80682 CRBLT 5/16 - 18 X 2 - 1/2 ZN 4 - M 80086 WSHRL 5/16 MED SPLIT ZN 4 - N 80355 WSHR 5/8 SAE ZN 4 - O 80082 NUTNY 5/8 - 11 ZN 2 112 (152)
P* 80695 HHCS 5/8 - 11 X 2 GR5 ZN 2 112 (152)
Q 80347 WSHR ¼ WROT ZN 4 - R 80116 WSHRL ¼ SPLIT ZN 4 - S* 80174 HHCS 3/8 - 16 X 1 GR5 ZN 6 23 (31)
T*80561 HHCS 1/2 - 13 X 1 - 3/4 GR5 ZN 4 57 (77)
U 80051 NUTNY 1/2 - 13 ZN 4 57 (77)
V 80348 WSHR 5/16 WROT ZN 2 - W* 80434 HHCS 1/4-20 x 3/4 GR5 ZN 4 6 (8)
X * 80474 HHCS 3/8-16 x 1-1/4 GR5 ZN 4 - -
REMARK:
- 71 -
* Loctite Required
Page 72

5.6 Engine
- 72 -
Page 73

Item Part No. Description Qty.
5.6 Engine
Torque
Item Part No. Description Qty. FT. LBS. (Nm)
1 30558 Engine Deere 3029 1
2 39577 Fan Nylon 1
3 39578 Spacer Fan 1
4 43799 Mount Relay 1
5 48401 Relay 70A 1
6 43782 Muffler 1
7 39621 Gasket 1
8 39620 Half Clamp 2
9 43715-2 Mount Weld LH Engine 1
10 43714-2 Mount Weld RH Engine 1
11 43254-2 Bracket Inner Bell Housing 1
12 39636 Drive Plate and Cover 1
13 39595 Plate Thr ottle 1
14 39596 Bracket Throttle 1
15 39597 Spacer Throttle 2
16 43749-2 Support Exhaust 1
17 43746-2 Exhaust Pipe 1
18 39585 Clamp Muffler 2-1/4 2
Fuel Lines (not shown)
- 46813 Hose Return ¼ ID 25”
- 39593 Fitting Return Engine 1
- 46127 Fitting Return Tank 1
- 46814 Hose Supply 5/16 ID 36”
- 46815 Fitting Supply Tank 1
- 34089 Clamp Hose 5/8 4
A* 80170 HHCS 5/16-18 X 2-1/2 GR5 ZN 4 13 (18)
B 80086 WSHRL 5/16 SPLIT ZN 6 - C 80527 PPHMS 10-24 X 5/8 ZN 1 - D 80346 WSHR #10 SAE ZN 1 - E 80693 NUTNY 10-24 ZN 1 - F* 80113 HHCS ½-13 X ¾ GR5 ZN 1 57 (77)
G 80117 WSHRL ½ SPLIT ZN 9 - H* 80178 HHCS 3/8-16 X 2 GR5 ZN 1 23 31)
I 80342 WSHR 3/8 SAE ZN 2 - J 80325 NUTFL 3/8-16 REG ZN 1 - K* 80163 HHCS 5/16-18 X 1-1/2 GR5 ZN 2 - L* 80703 HHCS ½-13 X 1-1/2 GR5 ZN 8 - M 80343 WSHR ½ SAE ZN 8 - N* 80204 HHCS 5/8-11 X 1-1/2 GR5 ZN 4 112 (152)
O 80355 WSHR 5/8 SAE ZN 4 - P 80337 WSHRL 5/8 SPLIT ZN 4 - Q 80058 WSHRL 3/8 SPLIT ZN 8 - R* 80686 HHCS 3/8-16 X ¾ GR8 ZN 20 23 (31)
S* 80716 HHCS 3/8-16 X 1-1/4 GR8 ZN 12 23 (31)
T* 80942 HHCS 3/8-16 X 5 GR5 ZN 2 23 (31)
U 80567 HWHTB ¼-20 X 3/8 ZN 2 6 (8)
V 80676 NUTNY ¼-20 ZN 2 - -
- 73 -
REMARK:
* Loctite Required
Page 74

5.6 Engine Cont'd.
- 74 -
Page 75

5.6 Deere Engine Service Parts
Item Part No. Description Qty.
- 39624 Filter Fuel 1
- 39625 Filter Oil 1
- 39626 Belt 1
- 39627 Alternator 1
- 39628 Starter 1
- 39629 Injector Fuel 3
- 39630 Pump Water 1
- 39631 Pump Injection 1
- 39632 Pump Fuel Transfer 1
- 39633 Solenoid Fuel 1
- 39634 Thermostat 1
- 39635 Gasket Thermostat 1
- 39592 Intake Heater 1
- 39598 Sendor Pressure 1
- 39599 Sendor Temperature 1
Item Part No. Description Qty.
REMARK:
- 75 -
Page 76

5.7 Air Cleaner
- 76 -
Page 77

Item Part No. Description Qty.
1 39580 Air Cleaner Assembly 1
39622 Element Primary (Outer) 1
39623 Element Safety (Inner) 1
2 39581 Band 1
3 39617 Cap 1
4 43804 Extension 1
5 43739-2 Mount Air Cleaner 1
6 43747-2 Pipe Intake 1
7 39583 Elbow 90° 1
8 39618 Clamp 3-1/4” 3
9 39616 Hose 180° 1
10 43738-2 Cover Tanks 1
11 39615 Clamp 4” 1
12 39619 Clamp 3-3/4 2
13 39650 Clamp 4-1/4 1
14 38147 Plug 1/8 NPT 1
5.7 Air Cleaner
Torque
Item Part No. Description Qty. FT. LBS. (Nm)
A* 80587 CRBLT 3/8-16 x 1 ZN 2 - B 80342 WSHR 3/8 SAE ZN 2 - C 80056 NUTNY 3/8-16 ZN 2 23 (31)
D* 80161 HHCS 5/16-18x1 GR5 ZN 2 13 (18)
E 80348 WSHR 5/16 2 - F 80114 NUTNY 5/16-18 ZN 2 - -
REMARK:
- 77 -
* Loctite Required
Page 78

5.8 Controls
- 78 -
Page 79

Item Part No. Description Qty.
1 36268 Hour Meter 1
2 39609 Volt Meter 1
3 39610 Gauge Oil Pressure 1
39598 Sendor Oil Pressure 1
4 39611 Gauge Coolant Temperature 1
39599 Sendor Coolant Temperature 1
5 39612 Push Button 1
6 39607 Key Switch 1
39637 Key Ignition 1
7 38711 Fuse Holder 1
8 36311 Fuse 20A 1
9 39653 Switch Rocker On/Off 1
10 39584 Cable Throttle 1
11 47314 Cover Dust 2
12 47315 Gasket Cover Dust 2
13 39608 Relay Starter 1
14 38662 Clamp Cable ½ 2
15 38800 Clamp Conduit ½ 2
16 38602 Cable Forward/Reverse 1
38602 Cable Forward/Reverse (Blade Unit) 2
17 38559 Backup Alarm 112 dBA 1
18 38667 Horn 12V 125 dBA 1
19 41007 Clamp Cable 1
20 42076 Lever Cable 1
5.8 Controls
Item Part No. Description Qty. FT. LBS. (Nm)
A* 80434 HHCS 1/4 - 20 X 3/4 GR ZN 2 6 (8)
B 80518 NUTFL 1/4 - 20 ZN 3 - -
C 80347 WSHR 1/4 WROT ZN 16 - D* 80788 WSHR SPRING 1/4 ID (Blade Unit) 6 - E* 80791 PPHMS 1/4 - 20 X 3/4 BLK 4 - F 80448 PINCT 1/16 X 1/2 1 - G 80442 SHCS #10 - 32 X 1/2 BLK 1 - H* 80481 HHCS 5/16 - 18 X 1 GR5 ZN 2 13 (18)
I 80086 WSHRL 5/16 SPLIT ZN 4 - J 80348 WSHR 5/16 WROT ZN 8 - K 80686 HHCS 3/8 - 16 X 3/4 GR8 ZN 2 23 (31)
M 80346 WSHR #10 SAE ZN 20 - N 80693 NUTNY 10 - 24 ZN 11 - O 80085 HWHTB 5/16 - 18 X 1 ZN 4 13 (18)
P 80114 NUTNY 5/16 - 18 ZN 2 - Q 80056 NUTNY 3/8 - 16 ZN 2 - R 80527 PPHMS 10 - 24 X 5/8 ZN 6 - S* 80161 HHCS 5/16 - 18 X 1 ZN 1 13 (18)
T* 80157 HHCS 1/4 - 20 X 1 - 1/2 ZN - 6 (8)
V* 80354 HHCS 1/4 - 20 X 1 2 6 (8)
80709 HHCS 1/4 - 20 X 2 GR8 ZN (Blade Unit) 2 6 (8)
X 80153 HWHST 1/4 - 20 X 3/4 ZN 12 6 (8)
Y 80449 SHCS 10 - 24 X 5/8 BLK 2 - -
Torque
HHCS 1/4 - 20 X 3/4 GR ZN (Blade Unit) 4 6 (8)
NUTFL 1/4 - 20 ZN (Blade Unit) 6 - -
- 79 -
REMARK:
* Loctite Required
Page 80

5.8 Controls Cont'd.
- 80 -
Page 81

Item Part No. Description Qty.
21 43759-2 Mount Cable Forward/Reverse 1
22 38561 Clevis 1
23 48406 Wire Harness 1
24 38618 Pivot Throttle 1
41006 Stop Throttle 1
25 38816 Clamp Assembly (Blade Unit) 1
26 39097 Lever Forward/Reverse 1
27 43261 Lever Blade (Blade Unit) 1
28 43264-Yel Box W eld Forward/Reverse 1
43265-Y el Box Weld Forward/Reverse (Blade Unit) 1
29 39321 Switch Neutral / Backup 1
30 39320 Knob Forward/Reverse 1
31 42263-2 Panel Wrap 1
32 43263-Yel Bracket Weld Pivot (Blade Unit) 1
33 43262-Yel Pivot (Blade Unit) 1
34 55343 Decal Control (Blade Unit) 1
35 48329 Cable Tie Holder 2
36 38817 Swivel (Blade Unit) 1
37 39319 Plate Forward/Reverse Black 1
38 48399 Relay/Timer (2 sec) 1
39 48393 Light Red 2
5.8 Controls Cont'd.
Item Part No. Description Qty. FT. LBS. (Nm)
A* 80434 HHCS 1/4 - 20 X 3/4 GR ZN 2 6 (8)
HHCS 1/4 - 20 X 3/4 GR ZN (Blade Unit) 4 6 (8)
B 80518 NUTFL 1/4 - 20 ZN 3 - -
NUTFL 1/4 - 20 ZN (Blade Unit) 6 - C 80347 WSHR 1/4 WROT ZN 16 - D* 80788 WSHR SPRING 1/4 ID (Blade Unit) 6 - E* 80791 PPHMS 1/4 - 20 X 3/4 BLK 4 - F 80448 PINCT 1/16 X 1/2 1 - G 80442 SHCS #10 - 32 X 1/2 BLK 1 - H* 80481 HHCS 5/16 - 18 X 1 GR5 ZN 2 13 (18)
I 80086 WSHRL 5/16 SPLIT ZN 4 - J 80348 WSHR 5/16 WROT ZN 8 - K 80686 HHCS 3/8 - 16 X 3/4 GR8 ZN 2 23 31)
M 80346 WSHR #10 SAE ZN 20 - N 80693 NUTNY 10 - 24 ZN 11 - O 80085 HWHTB 5/16 - 18 X 1 ZN 4 13 (18)
P 80114 NUTNY 5/16 - 18 ZN 2 - Q 80056 NUTNY 3/8 - 16 ZN 2 - R 80527 PPHMS 10 - 24 X 5/8 ZN 6 - S* 80161 HHCS 5/16 - 18 X 1 ZN 1 13 (18)
T* 80157 HHCS 1/4 - 20 X 1 - 1/2 ZN - 6 (8)
V* 80354 HHCS 1/4 - 20 X 1 2 6 (8)
80709 HHCS 1/4 - 20 X 2 GR8 ZN (Blade Unit) 2 6 (8)
X 80153 HWHST 1/4 - 20 X 3/4 ZN 12 6 (8)
Y 80449 SHCS 10 - 24 X 5/8 BLK 2 - -
Torque
- 81 -
REMARK:
* Loctite Required
Page 82

5.9 Drive System Hydraulics
- 82 -
Page 83

5.9 Drive System Hydraulics
Item Part No. Description Qty.
1 38522 PUMP VARIABLE MDT 46 1
2 38534 SIGHT GLASS 1
3 38523 DIVIDER FLOW 33/67 1
4 38520 FILTER SUCTION 1
38638 ELEMENT HYDRAULIC 50AT-10C 1
5 38521 BREA THER / FILTER 1
6 38528 MOTOR WHEEL MS05 2
7 38527 MOTOR WHEEL MS05 W/BRAKE 1
8 35482 STRAINER SL 25GPM 1
9 46534 FTG HYD EL 1-5/16 JSW 3
10 46417 FTG STR 1-5/16 J X 1 - 1/4 NPT 2
11 38663 DIVIDER FLOW 50 / 50 1
47326 O-Ring Viton 29.5 1
12 38689 VALVE SOL 3WAY 2POS 1
13 46490 FTG STR 9/16 J X 3/4 OR 3
14 46390 FTG EL90 1 - 5/16 OR X 1 - 1/16 J 5
15 46844 HOSE 1-1/16 FJ 1-1/16 FJ 24 1
16 46843 HOSE 1-1/16 RJ9 1-1/16 RJ4 22-1/4 180° 1
17 46842 HOSE 1-1/16 FJ 1-1/16 RJ4 29-1/2 1
18 46394 FTG Outlet TEE 1-1/16 J 2
19 46846 HOSE 1-1/16 FJ 1-1/16 FJ 91 2
SD, PD43
46847 HOSE 1-1/16 FJ 1-1/16 FJ 96 2
SD, PD54
Item Part No. Description Qty.
20 46396 FTG EL90 1 - 1/16 JSW 2
21 46115 FTG STR 9/16 J 9/16 OR 1
22 46757 HOSE 1-1/16 FJ 1-1/16 FJ52 1
23 46841 HOSE 1 - 1/16 FJ 1 - 1/16 FJ 52 1
24 46400 FTG STR 9/16 J 1/4 BSPP 1
25 46401 FTG STR 9/16 J 3/8 BSPP 3
26 46402 FTG STR 1 - 1/16 3/4 BSPP 6
27 46527 HOSE HYD 9/16 FJ 9/16 FJ 12 1
28 46509 FTG STR 1 - 5/16 J 1 - 5/16 OR 1
29 46544 FTG EL 45 9/16 2
30 46387 HOSE 9/16 FJ X 9/16 FJ 23 - 1/2 1
31 46389 FTG TEE Run 9/16 J 1
32 46345 FTG STR 7/8 JIC X 3/4 NPT 1
33 46385 FTG STR 1 - 1/16 J 1 - 5/16 OR 3
34 46404 FTG HYD EL 7/8 J 1 - 1/16 OR 1
35 46535 HOSE HYD 1 - 5/16 FJ 1 - 5/16 FJ 17 1
36 46447 FTG EL90 1 - 1/4 STREET 1
37 46840 HOSE 1-1/16 FJ 1-1/16 RJ9 44.5 1
38 46845 HOSE 1 - 1/16 FJ 1 - 1/16 FJ 19" 1
39 46325 FTG HYD EL 3/4 OR 9/16 J 3
40 46531 HOSE HYD 7/8 FJ 7/8 FJ 17 1
41 46404 FTG HYD EL 7/8 J 1 - 1/16 OR 1
42 46808 HOSE HYD 9/16 FJ 9/16 RJ4 55" 1
- 83 -
REMARK:
Page 84

5.9 Drive System Hydraulics Cont'd.
- 84 -
Page 85

5.9 Drive System Hydraulics Cont'd.
Item Part No. Description Qty.
43 46529 HOSE HYD 9/16 FJ 9/16 FJ 108 1
SD, PD54
46549 HOSE HYD 9/16 FJ X 9/16 FJ 103 1
SD, PD43
44 46530 HOSE HYD 9/16 FJ 9/16 FJ 30 1
45 46812 HOSE HYD 1 - 5/16 FJ 1-5/16 FJ 22.25" 1
46 46411 FTG ST 7/8J 1-1/16 OR 2
47 46455 FTG HYD EL 45 1 - 1/16 3
# 38206 HOSE WRAP 2.5 ID POLY 7
Torque
Item Part No. Description Qty. FT. LBS. (Nm)
A* 80709 HHCS 1/4 - 20 X 2 GR8 ZN 2 6 (8)
B 80116 WSHR 1/4 SPLIT ZN 2 - C* 80181 HHCS 3/8 - 16 X 2 - 1/2 GR5 ZN 4 23 (31)
D 80058 WSHRL 3/8 SPLIT ZN 4 - E 80347 WSHR 1/4 ZN 2 - -
REMARK:
- 85 -
# Not Shown
* Loctite Required
Page 86

5.10 Steering / Eccentric System Hydraulics
- 86 -
Page 87

5.10 Steering / Eccentric System Hydraulics
Item Part No. Description Qty.
Torque
Item Part No. Description Qty. FT. LBS. (Nm)
1 38524 CONTROL STEERING 1
2 46362 CYLINDER TIE ROD 2.5 X 10 1
44203 PIN CLEVIS 1" 2
44204 RUE RING 1" 2
3 38529 PRIORITY VALVE 1
4 38727 MANIFOLD MODULAR 1
5 46533 HOSE HYD 7/8 FJ X 7/8 FJ 73 1
6 38446 COOLER HYD OIL 1
7 46404 FTG EL 7/8J 1-1/16OR 1
8 46496 FTG STR 9/16 J 1/4 NPT 1
9 46416 HOSE 1-1/6 FJ X 1-1/16 FJ 96 (54’s) 2
46846 HOSE 1-1/16 FJ 1-1/16 FJ 91 (43’s) 2
10 46536 HOSE HYD 7/8 FJ 7/8 FJ 15 1
11 46494 FTG HYD 1-1/16 J 7/8 OR 4
12 46455 FTG HYD EL 45 1-1/16 JSW 3
13 46405 HOSE 1 - 1/16 FJ X 1 - 1/16 FJ 53 1
14 46511 FTG EL 1-1/16 J 7/8 OR 2
15 46119 FTG EL 9/16 JSW 9/16 J 2
16 46121 FTG EL 9/16 J 9/16 OR 1
17 46415 HOSE 1-1/16 FJ 1-1/16 FJ 60 1
19 46396 FTG EL 1-1/16 JSW 1
20 46414 FTG STR 3/4 J 9/16 OR 2
21 38531 MOTOR GEAR 1.48 CIR 1
22 46410 HOSE 9/16 FJ 3/4 RJ 88" 2
23 46133 FTG HYD 7/8 J X 7/8 OR 2
24 46181 FTG STR 9/16 J 3/8 NPT 2
25 46378 FTG HYD 1-1/16J 1-1/16 OR 2
26 46490 FTG HYD 9/16 J 3/4 OR 1
27 46389 FTG HYD TEE 9/16 J RUN 1
28 46345 FTG HYD 7/8 J 3/4 NPT 4
29 46526 HOSE HYD 9/16 FJ 9/16 FJ 60 1
30 46529 HOSE HYD 9/16 FJ 9/16 FJ 108 (54’s) 1
46549 HOSE 9/16 FJ X 9/16 FJ 103 (43’s) 1
31 46532 HOSE 7/8 FJ X 7/8 FJ 54 1
32 38518 PUMP GEAR 1.54 CIR 1
33 38776 O-RING 3 - 1/4 ID X 3/32 CS 1
34 46411 FTG HYF 7/8J 1-1/16OR 2
35 46558 FTG EL45 7/8JSW 1
** 38206 HOSE WRAP 2.5 ID POLY (54’s) 72”
HOSE WRAP 2.5 ID POL Y (43’s) 60"
A* 80561 HHCS 1/2 - 13 X 1 - 3/4 GR5 2 57 (77)
B 80117 WSHRL 1/2 SPLIT ZN 2 - C* 80174 HHSC 3/8 - 16 X 1 GR8 ZN 3 23 (31)
D 80058 WSHRL 3/8 SPLIT ZN 5 - E* 80716 HHCS 3/8 - 16 X 1 - 1/4 GR8 ZN 2 23 (31)
- 87 -
REMARK:
* Loctite Required
Page 88
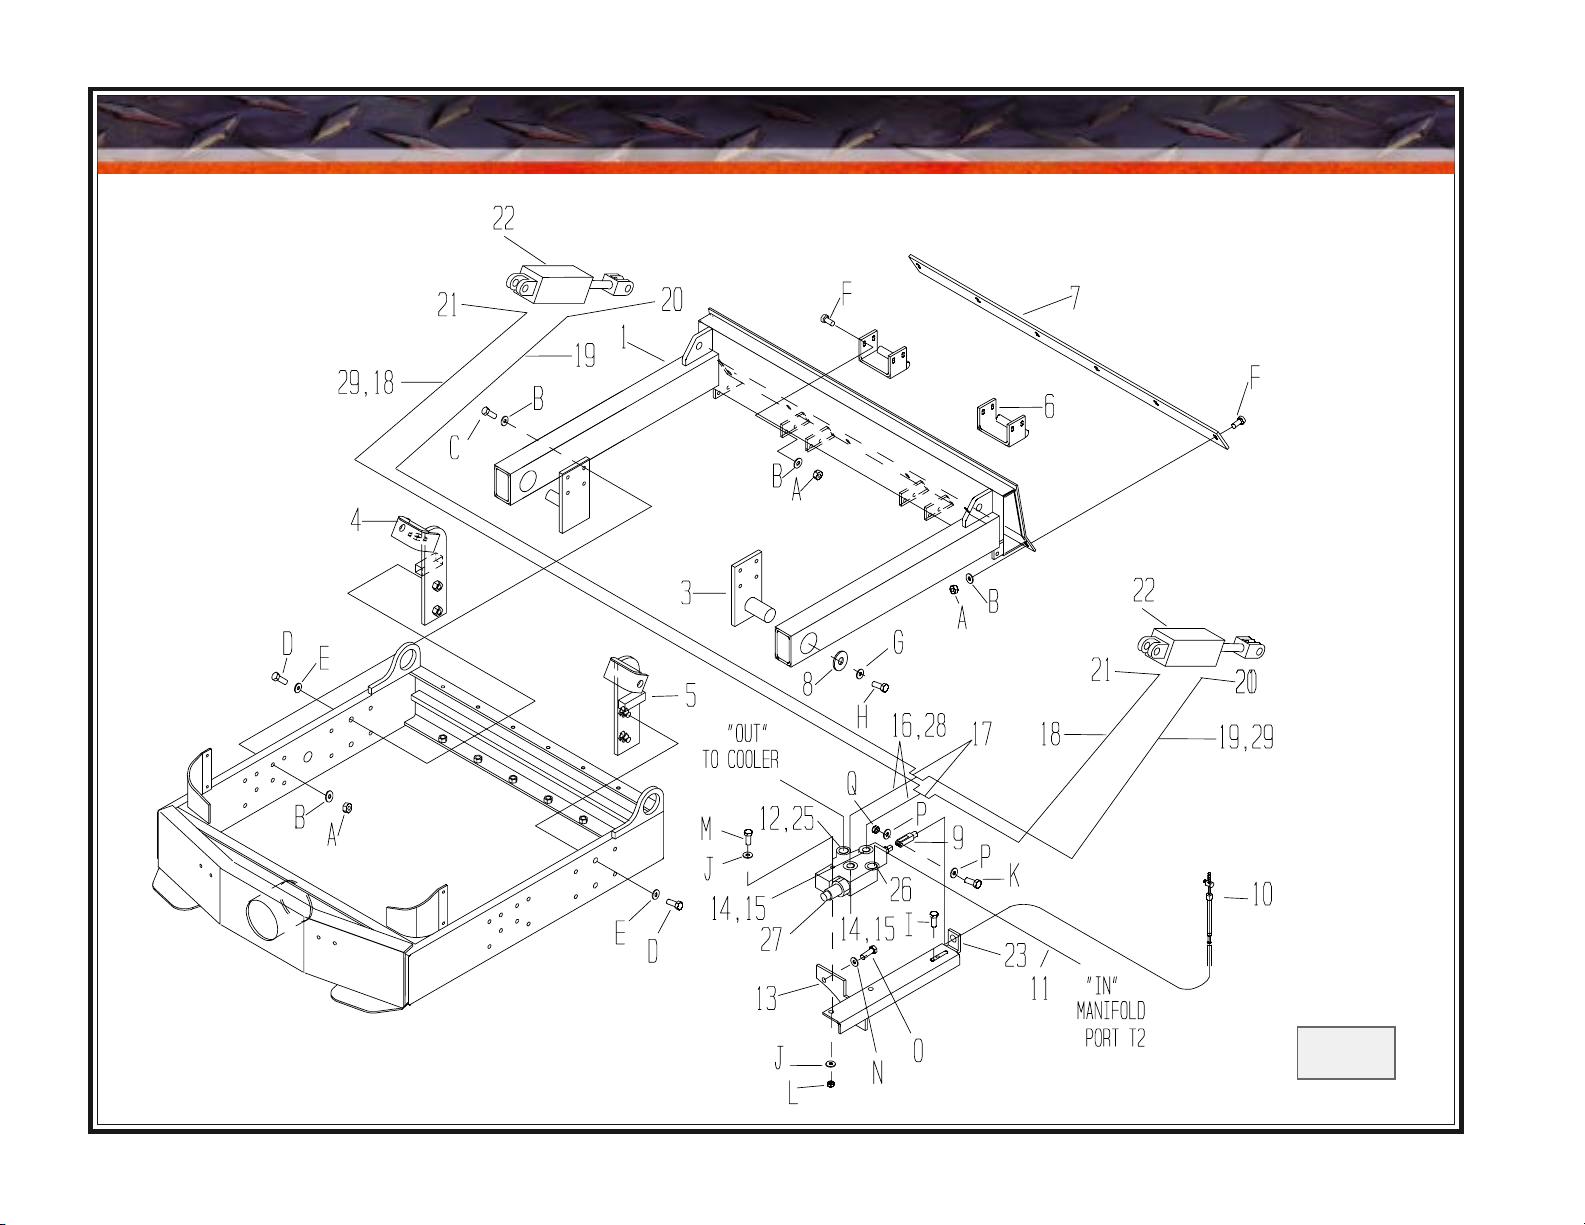
5.11 Blade
- 88 -
Page 89

Item Part No. Description Qty.
5.11 Blade
Torque
Item Part No. Description Qty. FT. LBS. (Nm)
1 29830-2 Blade Weld 43 1
29820-2 Blade Weld 54 1
3 29819-2 Pivot Weld Blade 2
4 29856-2 Clevis Weld Blade LH 1
5 29857-2 Clevis Weld Blade RH 1
6 29846-2 Skid Weld Blade 1
7 29831-2 Lip Wear Blade 43 1
29817-2 Lip Wear Blade 54 1
8 29741-2 WSHR 2 - 3/4 ID X 17/32 X 1/4 TH 2
9 38561 Clevis 1/4 DIR X 1/4 - 28 1
10 38602 Cable F/R 1
11 46489 Hose 7/8 J X 7/8 J 14 1
12 46133 FTG EL 90 7/8 J X 7/8 OR 1
13 42115-2 Mount Weld Blade Valve 1
14 46544 FTG EL 45 9/16 J 1
15 46490 FTG STR 9/16 J X 3/4 OR 1
16 46528 Hose JSW X 9/16 JSW 48" 2
17 46388 FTG TEE TUBE 9/16J 2
18 46547 Hose 9/16 FJ X 9/16 FJ 60" 2
46551 Hose 9/16 JFJ X 9/16 FJ 56" -
19 46546 Hose 9/16 FJ X 9/16 FJ 70" 2
46552 Hose 9/16 FJ X 9/16 FJ 66" -
20 46120 FTG EL90 9/16 J X 3/8 NPT 2
21 46369 FTG EL 45 X 3/8 NPT X 9/16 J 2
22 46444 Cylinder Tie Rod 2 X 8 2
44203 Pin Clevis 1" 4
44204 RUE RING 1" 4
23 42160-2 ADJ Blade Valve 2
25 46462 FTG EL90 7/8 JSW 1
26 46124 FTG STR 7/8 J X 7/8 OR 1
27 38526 V alve CONTROL 1
28 38828 Hose Wrap 1.5 ID POLY 44"
29 38828 Hose Wrap 1.5 ID POLY 44"
A 80051 NUTNY 1/2 - 13 ZN 22 57 (77)
B 80343 WSHR 1/2 SAE ZN 30 - -
C 80405 HHSC 1/2 - 13 X 2 - 3/4 GR5 ZN 8 57 (77)
D 80672 HHCS 3/4 - 10 X 3 GR8 ZN 4 282 (382)
E 80671 WSHRL 3/4 SPLIT ZN 4 - F 80677 CRBLT 1/2 - 13 X 1 - 1/2 ZN 14 - -
G 80117 WSHRL 1/2 SPLIT ZN 2 - -
H 80378 HHCS 1/2 - 13 X 1 GR5 ZN 2 57 (77)
I 80085 HWHTB 5/16 - 18 X 1 ZN 2 18 (18)
J 80348 WSHR 5/16 WROT ZN 4 - K 80070 PPHMS 10 - 24 X 1 ZN 1 - -
L 80114 NUTNY 5/16 - 18 ZN 2 - -
M* 80170 HHCS 5/16 - 18 X 2 - 1/2 GR5 ZN 2 13 (18)
N 80058 WSHR 3/8 SPLIT ZN 2 - -
O* 80088 HHCS 3/8 - 16 X 1 - 1/4 GR8 ZN 2 23 (31)
P 80346 WSHR #10 SAE ZN 2 - -
Q 80693 NUTNY #10 - 24 ZN 1 - -
- 89 -
REMARK:
* Loctite Required
Page 90

5.12 Hydraulic Schematic
- 90 -
Page 91

5.12 Hydraulic Schematic
Item Part No. Description Qty.
1 38522 Transmission Pump 1
2 38518 Pump Steering Eccentric 1
3 38523 Flow Divider Combiner 33/67 1
4 38520 Filter Hydraulic 1
38638 Element Filer 1
5 38524 Control Steering 1
6 38521 Breather Filler 1
7 46362 Cylinder Steering 2.5 x 10 1
8 38528 Wheelmotor Rear 1
9 38527 Wheelmotor Front with Brake 2
10 38529 Valve Priority Steering 1
11 38531 Motor Eccentric 1
12 35482 Strainer 25GPM 1
13 38727 Manifold Eccentrics 1
14 38526 Valve Blade 1
15 46444 Cylinder Blade 2 x 8 2
16 38663 Flow Divider Combiner 50/50 1
17 38689 Valve Brake 1
18 38446 Cooler Oil 1
Item Part No. Description Qty.
REMARK:
- 91 -
Page 92

5.13 Wiring
- 92 -
Page 93

5.13 Wiring
Item Part No. Description Qty.
Item Part No. Description Qty.
1 39609 Volt Meter 1
2 39611 Gage Temp 1
3 39610 Gage Oil PSI 1
4 39607 Key Switch 1
5 48406 Harness Wire 1
6 39599 Sendor Temp 1
7 39598 Sendor Oil PSI 1
8 39608 Relay Starter 1
9 38711 Holder Fuse 1
10 36313 Fuse 20A 1
11 39612 Push Button 1
12 39592 Intake Heater 1
13 48401 Relay 70 Amp 2
14 39653 Switch Eccentric 1
15 48393 Light 12V Red 2
16 48399 Relay Timer 2 Sec 1
17 39097 Control Fwd/Revs 1
18 39638 Coil Eccentric Valve 1
19 39639 Coil Brake Valve 1
20 38559 Alarm back-up 1
21 38519 Battery 24F 800CCA 1
22 36268 Hourmeter 1
23 48404 Cable Battery Red 21” 1
24 48405 Cable Battery Blk 23.4”
- 93 -
REMARK:
Page 94

5.14 Decal Identification
2
1
5
4
3
- 94 -
Page 95

5.14 Decal Identification
Item Part No. Description Qty.
1 55148 DECAL WARNING DIESEL 1
2 55149 DECAL EAR PROTECTION 1
3 55204 DECAL TANK LOGOS 2
4 55212 DECAL TIE DOWN ONLY 4
5 55215 DECAL WARNING PINCH POINT 2
# 55165 INSTRUCTIONS HYD FILTER 1
# 55201 DECAL STONE EAGLE 21-1/2 2
# 55381 DECAL MAINT CHART RHINO 1
# 55213 DECAL RHINO DASH 1
# 55211 DECAL BACK-UP ALARM 1
# 55374 DECAL COWL STRIPES 1
# 55395 DECAL GREASE WEEKLY 1
# 55206 DECAL CONTROL F/R 1
# 55207 DECAL THROTTLE 1
# 55422 DECAL HYDRAULIC FLUID 1
# 55367 DECAL INSTRUMENT 1
Item Part No. Description Qty.
REMARK:
- 95 -
# Not Shown
Page 96

5.14 Decal Identification Cont'd.
1
1
1
1
1
3
2
- 96 -
Page 97

5.14 Decal Identification Cont'd.
Item Part No. Description Qty.
1 55366 DECAL SET WARNINGS 1
(Includes 5 decals listed below)
55369 Decal Cold Starting Instructions
55370 Decal Intake Heater Button
55371 Decal Warning Hot Surfaces
55372 Decal Warning No Ether
55373 Decal Warning Tipover
2 55416 Decal Hydraulic Breather Removal 1
3 55217 Decal Rhino Towing 1
# 55209 Decal Maintenance Chart 1
Item Part No. Description Qty.
REMARK:
- 97 -
# Not Shown
 Loading...