

Page 1

JOHN DEERE
WORLDWIDE COMMERCIAL & CONSUMER
EQUIPMENT D IV IS IO N
GX20927
K1
2-Bag Bagger
For 42-Inch an d 48- Inch Mower Decks
OMGX20927 K1
OPERATOR’S MANUAL
North American Version
Litho in U.S.A.
Page 2

INTRODUCTION
Introduc tion
Thank You for Purchasing a John Deere Product
We appreciate having you as a customer and wish you
many years of safe and satisfied use of your machine.
c CAUTION: Avoid injury! This symbol and text
highlig ht potential haz ards or death to the
operator or bystanders that may occur if the
hazards or procedures are ignored.
Using Your Operator’s Manual
This manual is an important part of your machine and
should remain with the machine when you sell it.
Reading your operator’s manual will help you and others
avoid personal injury or damage to the machine.
Information given in this manual will provide the operator
with the safest and most effective use of the machine.
Knowing how to operate this machine safely and correctly
will allow you to train others who may operate this machine.
If you have an attachment, use the safety and operating
information in the attachment operator’s manual along with
the machine operator’s manual to operate the attachment
safely and correctly.
This manual and safety signs on your machine may also be
availabl e in other languages (see your John Deere dealer
to order).
Sections in your operator’s manual are placed in a specific
order to help you understand all the safety messages and
learn the controls so you can operate this machine safely.
You can also use this manual to answer any specific
operating or servicing questions. A convenient index
located at the end of this book will help you to find needed
information quickly.
IMPORTANT: Av oid damage! This text is used to tell
the operator of actions or conditions that might
result in damage to the machine.
NOTE: General information is given throughout the
manual that may help the operator in the operation or
service of the machine.
The machine shown in this manual may differ slightly from
your machine, but will be similar enough to help you
understand our instructions.
RIGHT-HAND and LEFT-HAND sides are determined by
facing in the direction the machine will travel when going
forward. When you see a broken line arrow (------>), the
item referred to is hidden from view.
Before delivering this machine, your dealer performed a
predelivery inspection to ensure best performance.
Special Messages
Your manual contains special messages to bring attention
to potential safety concerns, machine damage as well as
helpful operating and servicing information. Please read all
the information carefully to avoid injury and machine
damage.
Introduction
Page 3

PRODUCT IDENTIFICATION
Product Iden ti fic a tio n
Record Purchase Information
If you need to contact an Authorized Serv ice Center for
information on servicing, always provide the product model
and serial number.
You will need to locate the model and serial number for the
bagger and record the information in the spaces provided
below.
DATE OF PURCHASE:
______________________________________ ___
DEAL ER N AME:
______________________________________ ___
DEAL ER PHON E:
______________________________________ ___
Product Identification
Page 4

TABLE OF CONTENTS
Table of Co nt ents
Safety .....................................................................................................................................................................................1
Installing ................................................................................................................................................................................4
Removing .............................................................................................................................................................................. 8
Operating ............................................................................................................................................................................. 10
Replacement Parts...............................................................................................................................................................12
Service ................................................................................................................................................................................13
Troubleshooting ....................................................................................................................................................................15
Storage ................................................................................................................................................................................. 16
Assembly..............................................................................................................................................................................17
Specifications .......................................................................................................................................................................19
Index.....................................................................................................................................................................................20
All information, illustrations and
specifications in this manual are based
on the latest information at the time of
publication. The right is reserved to
make changes at any time without
notice.
COPYRI GHT© 2001
Deere & Co.
John Deere Worldwide Commercial and
Consum er Equipmen t Di vi si on
All righ ts reserved
Previous Ed itions
COPYRIGHT©
Table of Contents
OMGX20927 K1 - English
Page 5
SAFETY
Safety
Understanding The Machine Safety Labels
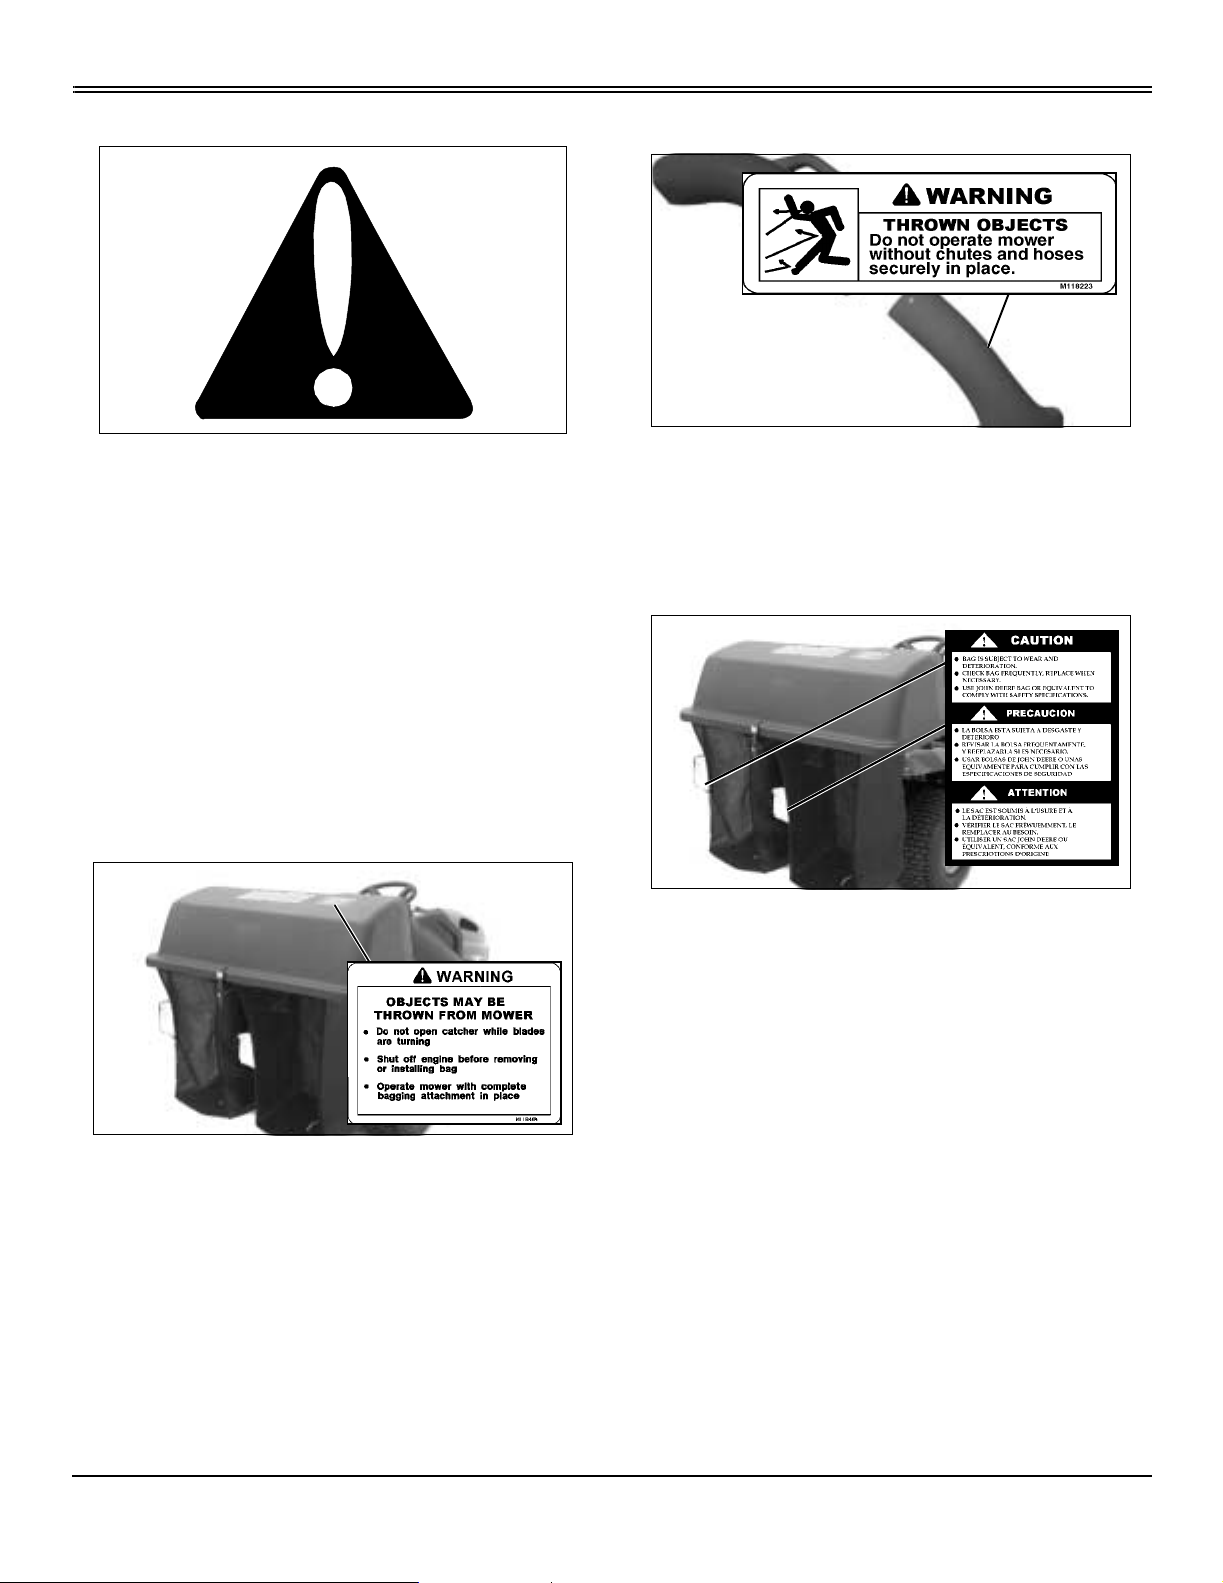
Safety-Alert Symbol
The machine safety labels shown in this section are placed
in important areas on your machine to draw attention to
potential safety hazards.
On your machine safety labels, the words DANGER,
WARNING, and CAUTION are used with the safety-aler t
symbol. DANGER identifies the most serious hazards.
The operator’s manual also explains any potential safety
hazards whenever necessary in special safety messages
that are identified with the word, CAUTION, and the safetyalert symbol.
WARNING: Thrown Objects
MX10382 M118223
• Do not operate mower without chutes and hoses
securely in place.
CAUTION
WARNING: Objects May Be Thrown from Mower
MX10309 M118464
• Do not open catcher while blades are turning.
• Shut off engine before removing or installing bag.
• Operate mower with complete bagging attachment in
place.
MX10309 G C00215
• Bag is subject to wear and deterioration.
• Check bag frequently, replace when necessary.
• Use a John Deere bag or equivalent to comply with
safety specifications.
Bagging Safely
Read, understand and follow all instructions in this
attachment manual, the vehicle operator’s manual and
safety signs on equipment before starting.
Use proper front ballast. Remove ballast when the material
collection system is removed.
Hopper extends beyond vehicle. Be aware of surrounding
objects when making short tur ns.
Do not operate material collection system unless entire
grass catcher is fastened in place with hopper cover
securely latched.
Do not let anyone ride on the mower or material collection
Safety - 1
Page 6

SAFETY
system. Riders are subject to injury such as being struck by
foreign objects or being thrown off. Riders may obstruct the
operator’s view and cause a collision.
Before you remove or inst al l bags or unplug chute:
• Stop mower.
• Disengage mower PTO.
• Stop engine.
Before you back up:
M61008
• Stop machine.
• Look behind hopper for children.
• Lock the park brake.
• Stop the engine.
• Lower tiller to the ground.
• Remove the key.
• Before you leave the operator’ s seat, wait f or engine and
all moving parts to stop.
Wear Appropriate Clothing
MIF
• Wear close fitting clothing and safety equipment
appropriate for the job.
Operate safely on slopes:
• Empty bags when they are half full.
• Do not operate on steep slopes.
• Before you turn, slow down.
• Avoid sudden starts and stops.
• Avoid holes, rocks, and roots.
• Mow up and down — not across slopes.
• Do not park mower with material collection system on
slopes.
Bag Maintenance:
• Bag is subject to wear and deterioration.
• Check bag frequently, replace when necessary.
• Use John Deere bag or equivalent to comply with safety
specifications.
• Do not leave clippings in bags overnight.
Pa rki ng Saf e l y
• Stop machine on a level surface, not on a slope.
• Disengage PTO.
• Always wear safety goggles or safety glasses with side
shields when operating the machine.
• Wear a suitable protective device such as earplugs.
Loud noise can cause impairment or loss of hearing.
• Do not wear radio or music headphones. Safe service
and operation requires your full attention.
Practice Safe Maintenance
MIF
• Understand service procedure before doing work. Keep
area clean and dry .
• Never service or adjust the bagger while the vehicle is
Safety - 2
Page 7

SAFETY
moving. Keep safety devices in place and in working
condition. Keep hardware tight.
• Keep all parts in good condition and properly installed.
Fix damage immediately. Replace worn or broken parts.
Remove any buildup of debris.
• Unauthorized modifications to the bagger may impair its
function and safety. Do not tamper with its original design.
Safety - 3
Page 8
Installing
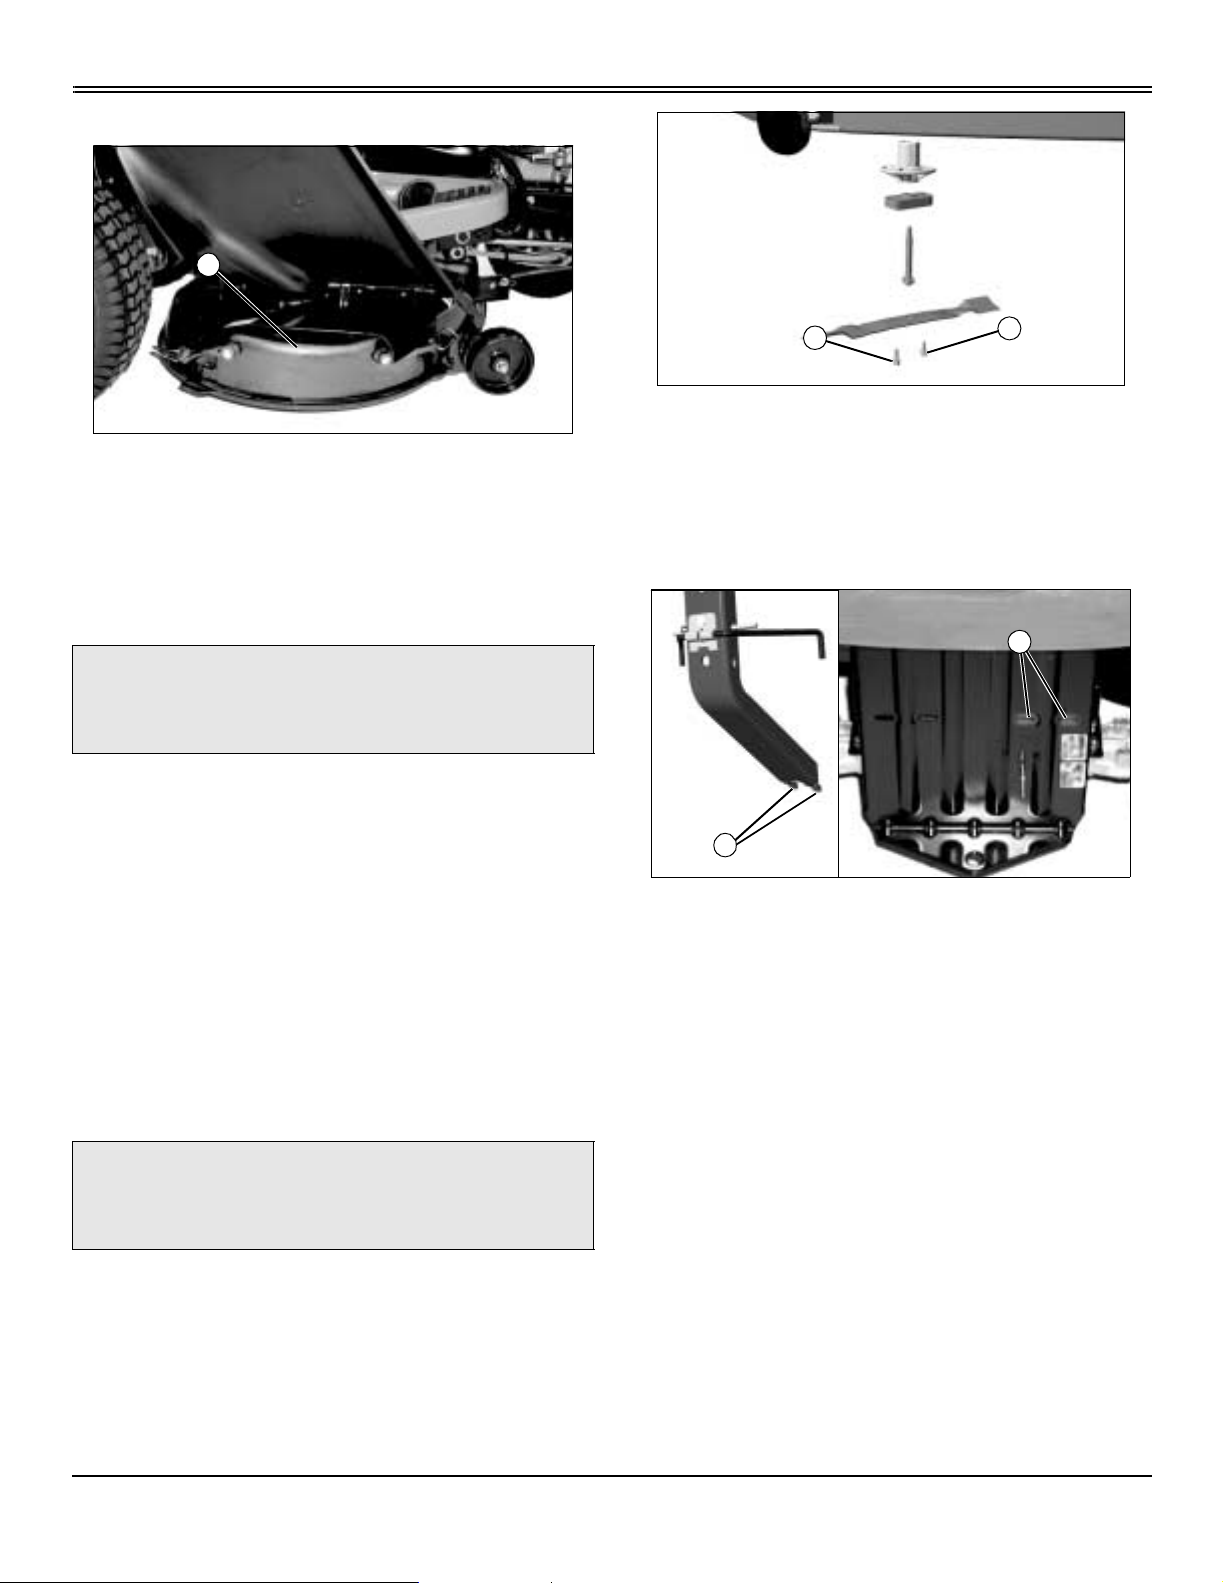
Remove Mulch Cover
A
INSTALLING
MX8868
The mulch cover (A) or mulch plug kit is not compatible with
the installation of the 2-bag bagger. Remove mulch cover
or mulch plug kit before installing bagger attachment.
Install Proper Ballast
c CAUTION: Avoid injury! To maintain steering
control and stability always use the
recommended ballast.
Install the proper front ballast to help counter-balance the
total weight of the bagger . Remove ballast when the bagger
is removed. This will ensure proper operation of the
machine when not bagging. See your authorized service
center for recommended weights on your machine.
Install High Lift Mower Blades
A
6. Tighten blade hardware (A) to 62 N•m (46 lb-ft).
A
MX8865a
Installing 2-Bag Bagger
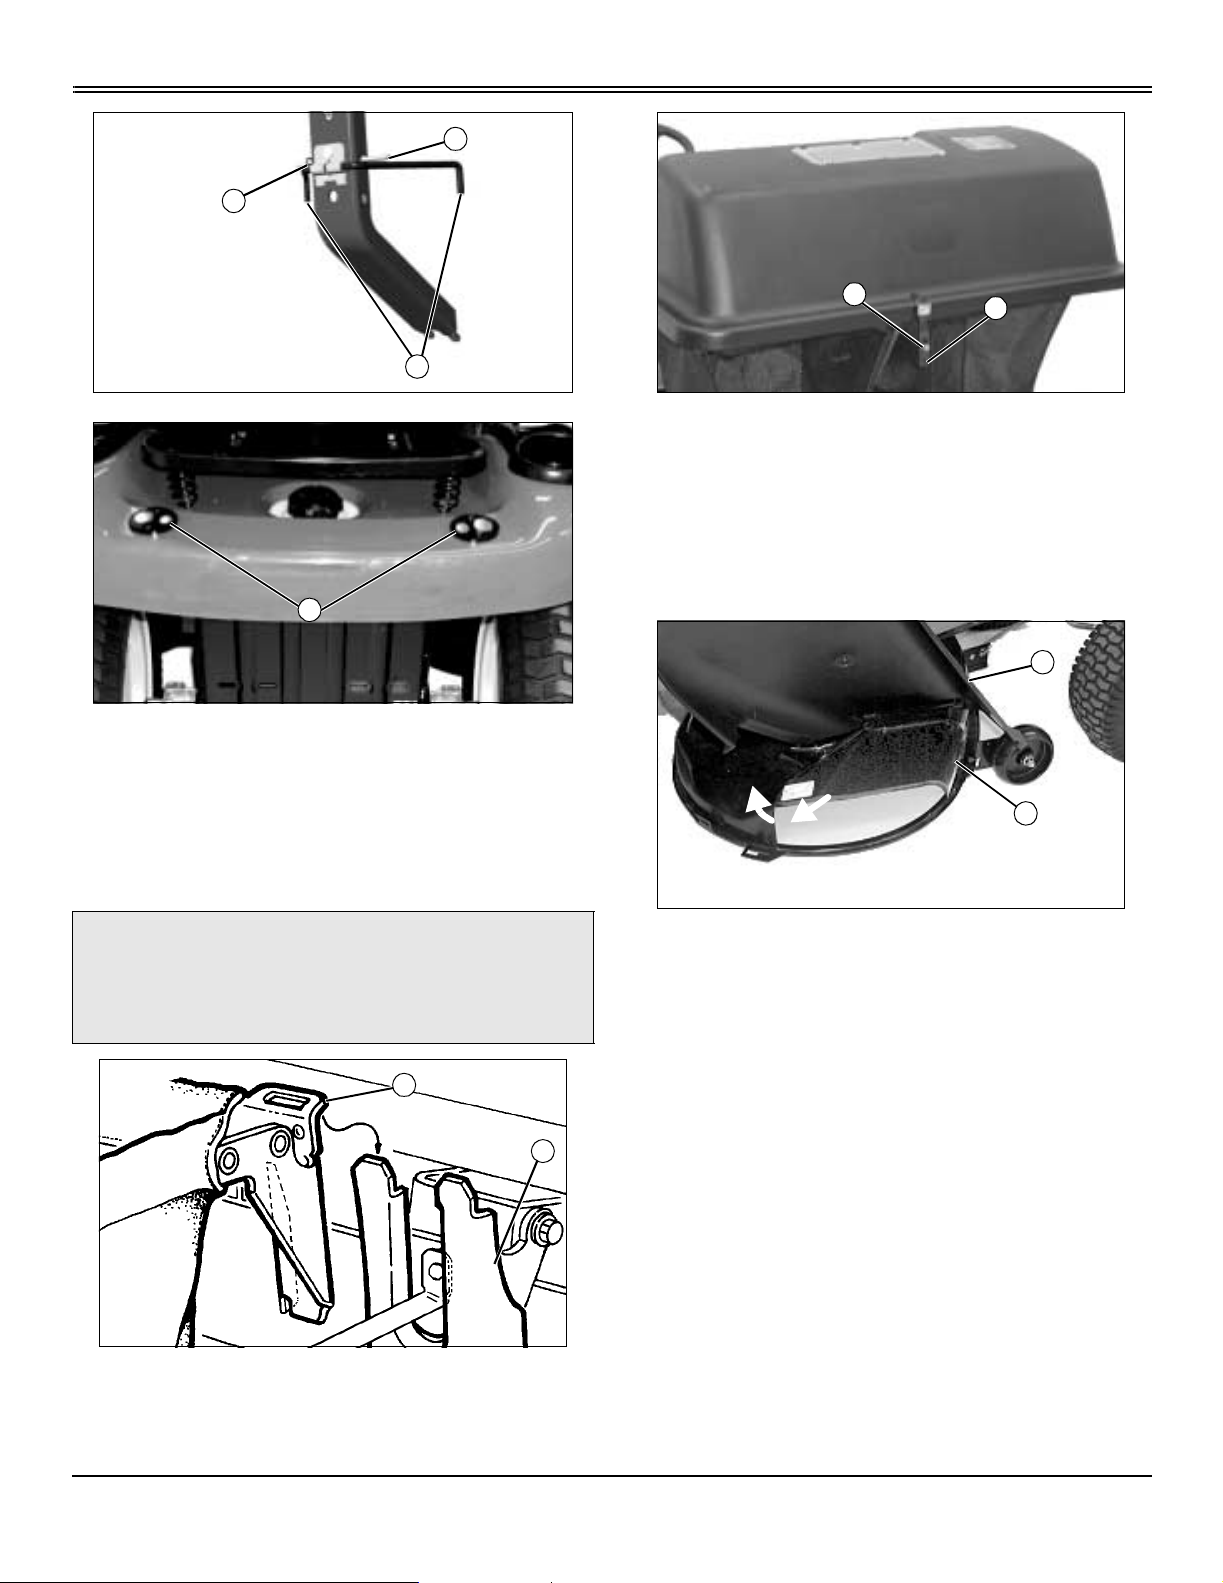
Install Mounting Post and Bagger Support Rod
B
A
M10280 MX8870
1. Fit tabs (A) on mounting post into slots (B) on rear hitch
plate.
1. Park vehicle safely. (See Parking Safely in the Safety
section.)
2. Disconnect the spark plug wire.
3. Thoroughly clean the top and underside of the mower
deck.
c CA UTION: Av oid i njury! Be careful, sharp edges
on mower blades. Always wear gloves when
handling mower blades.
4. Remove mower blades. See your machine operator’s
manual.
5. Install high lift blades.
Installing - 4
Page 9
INSTALLING
D
C
E
MX10280
F
MX8870
2. Insert bagger support rod (E) into the smaller holes in
rear cargo mounts (F).
3. Install drilled cargo pin (D) into mounting post.
4. Install spring locking pin (C) into hole in drilled cargo pin.
I
J
MX10308
2. Close hopper top and fasten hood hold-down (I) over
latch rod (J).
Install Rear Bagger Chute
42-Inch Mower Decks
A
B
Installing Bags
c CAUTION: Avoid injury! To prevent injury from
thrown objects, do not operate mower without
complete bagging attachment securely in
place.
G
H
M93583
1. Install left and right bags (G) on mounting post (H).
MX8872
1. Hold plastic discharge chute (A) open.
2. To unlock metal deflector (B), grasp corner, pull outward
and swing upward to open.
Installing - 5
Page 10

INSTALLING
c CAUTION : Avoid injury! P r event p ossibl e
thrown objects. The discharge chute assembly
must fit tight against the chute hinge bracket
and completely cover the mower deck
discharge opening.
NOTE: Make sure discharge chute assembly does not
get cau ght insi de mower deck dischar ge openin g.
C
D
L
M
K
P
O
N
MX10382
7. Slide top (K) of upper discharge chute assembly into
hopper top.
8. Slide bottom (O) of upper chute over top (M) of lower
chute, aligning notch (P) with bolt (N).
9. Hook rubber strap latch (L) onto bolt (N) in lower chute.
F
C
MX1036 3 MX10315
E
D
3. Position lower discharge chute assembly (F) in front of
mower deck discharge opening (E).
4. Fit tab (C) on lower discharge chute behind hinge (D) of
the chute deflector .
G
H
I
48-Inch Mower Decks
A
B
MX8871
1. Hold plastic discharge chute (A) open.
2. To unlock metal deflector (B), grasp corner, pull outward
and swing upward to open.
3. Position lower discharge chute assembly in front of
mower deck discharge opening.
J
MX10316
5. Insert rod (H) into keyhole (G) on deck, then slide
discharge chute forward, locking rod into place.
6. Hook rubber strap latch (I) over the top of the gage
wheel bracket and insert through hole (J).
Installing - 6
Page 11

INSTALLING
D
C
E
C
MX1037 8 MX10379
4. Hook rear wireform (C) behind gage wheel bracket (E).
c CAUTION : Avoid injury! P r event p ossibl e
thrown objects. The discharge chute assembly
must fit tight against the chute hinge bracket
and completely cover the mower deck
discharge opening.
NOTE: Make sure discharge chute assembly does not
get cau ght insi de mower deck dischar ge openin g.
D
H
G
I
MX10381
6. Make sure discharge chute is seated completely inside
lip (I) of deck .
7. Hook front rubber strap latch (G) through hole (H) in
gage wheel bracket.
K
L
J
O
N
M
MX10382
8. Slide top (J) of upper chute into hopper top.
9. Slide bottom (K) of upper chute over top (L) of lower
chute, aligning notch (N) with bolt (M).
10.Hook rubber strap latch (O) onto bolt (M) in lower chute.
F
MX10380
5. Slide discharge chute forward to fit front wireform (D) on
lower discharge chute behind the hardware on the hinge
bracket (F) of the chute deflector.
Installing - 7
Page 12

REMOVING
Removing
Removing Chute
42-Inch Mower Decks
B
A
MX10382
1. Unhook rubber strap latch (A) connecting upper chute to
lower chute. Remove upper chute (B).
C
MX10381
2. Unhook rubber strap latch (C) holding lower chute
assembly to mower deck.
C
D
E
MX10316
2. Release rubber strap latch (E).
3. Slide lower chute back to release rod (D) from keyhole
(C).
4. Lift discharge chute deflector and remove lower chute
from mo wer.
48-Inch Mower Decks
B
A
D
MX10374
3. Slide discharge chute back to release wireform (D).
4. Lift discharge chute deflector and remove lower chute
from mower.
Removing Bagger
1. Open hopper top and remove both bags.
2. Empty all debris from bags.
c CAUTION: Avoid injury! To prevent injury from
thrown objects, inspect bags frequently for
wear and deterioration. Check bags frequently
and replace when necessary.
3. Inspect bags for wear and deterioration, replace when
necessary.
4. Remove spring locking pin and drilled cargo pin.
MX10382
1. Unhook rubber strap latch (A) connecting upper chute to
lower chute. Remove upper chute (B).
Removing - 8
5. Remove bagger support rod by lifting ends out of holes
in rear cargo mounts.
6. Remove mounting post from rear hitch plate.
7. Install drilled cargo pin and spring locking pin to
mounting post for storage.
Page 13

c CAUTION: Avoid injury! To ensure safe
operation of the machine when not bagging,
remove ballast when the attachment is
removed.
8. Remove ballast.
9. Remove high lift mower blades and install regular
blades.
REMOVING
Removing - 9
Page 14

OPERATING
Opera ting
Airflow For Bagger
Bagger needs strong airflow from mower to bags for best
performance. Follow these suggestions to help airflow:
• Keep bagger chute, hopper top, screen, bags and
underside of mower clean.
• Keep throttle lever at fast position but travel at slow
speed.
• Level mower front-to-rear so rear of mower is no more
than 13 mm (1/2 in.) higher than front of mower.
• Operate mower in higher cutting positions.
• Replace worn or damaged mower blades.
Check for Plugging Whi le Bagging
Check the flow indicator on the Rear Bagger or Power Flow
chute periodically for any indication of loss of air flow.
If there is a trail of clippings behind mower or the clippings
blow to the side, check for plugged chute, full bags, or
problems with the blower assembly (if equipped).
If grass builds up in front of mower deck discharge chute,
check for plugged rear bagger or power flow chute, or
problems with the blower assembly (if equipped).
Inspect and Unplug Material Collection System
c CAUTION: Avoid injury! To help prevent injury
from mower blades, do not try to unplug
discharge chute while engine is running.
M41421
Remove debris from the following inspection points:
1. Open hopper cover. Check chute outlet.
2. Remove chute from mower deck or blower assembly (if
equipped). Check chute inlet.
3. Check under mower deck for debris.
Dismounting to Inspect or Unplug Material Collection System
c CAUTION: Avoid injury! Rotating blades are
dangerous:
• Park the machine safely and lock the park
brake before getting off the seat.
• Turn the mower of f.
• Stop the engine .
Before getting off the seat:
1. Stop machine.
2. Disengage mower blades.
3. Move throttle lever to slow position.
4. Lower mower to the ground.
5. Lock the park brake.
6. Stop the engine.
7. Remove the key.
8. Wait for all moving parts to stop.
Filling Bags
c CAUTION: Avoid injury! To prevent injury from
thrown objects, do not open catcher while
blades are turning. Shut off engine before
removing or installing bag.
Check level of clippings often.
A
MX10307
When clippings are up to hopper top window (A), empty
bags to avoid plugging bagger chute. Left bag normally fills
first.
Operating - 10
Page 15

OPERATING
Right bag may not fill completely when you are cutting thin
stand of grass. Bag will fill if you slow engine to reduce
airflow.
Fill bags 1/2 full when operating on slopes to avoid tipping.
Bagging Tips
IMPORTANT: Avoid damage! Bagger may extend
beyond machine or mower. Be careful not to hit a
tree or building with hopper when you make short
turns.
Run engine at full speed. If engine slows down, reduce
travel speed.
Bag grass only when grass is dry: Wet grass will plug chute
and bagger.
Keep hopper top closed.
Pick up all rocks, stones, twigs and other debris before
mowing and bagging. Cut grass higher than desired the
first time so mower will clear unseen obstructions that could
cause damage to the mower or bagging attachment.
IMPORTANT: Avoid damage! Do not leave clippings
in bags:
• Moisture may damage bags.
• Damp clippings are a fire hazard.
Never leave grass or leaves in bags overnight or for long
periods of time. Dampness from leaves or grass will cause
deterioration of the bags. Also, damp leaves or grass when
contained in the bags are combustible and can create a
fire. For this reason, never store garbage bags of leaves or
grass bagging attachment with full or partially filled bags in
a garage or other enclosure. Grass clippings make
excellent compost. Clippings can be used also as mulch
between garden rows or around flowers, shrubs and trees.
Operating - 11
Page 16

REPLACEMENT PARTS
Replacement Parts
Service Literature
If you would like a copy of the Parts Catalog or T echnical
Manual for this machine call:
• U.S. & Canada: 1-800-522-7448.
• All Other Regions: Your John Deere dealer.
Parts
We recommend John Deere quality parts and lubricant s,
available at your John Deere dealer.
Part numbers may change, use part numbers listed below
when you order. If a number changes, your dealer will have
the latest number.
When you order parts, your John Deere dealer needs your
product serial number. This is the number that you
recorded in the Product Identification section of this
manual.
Part Numbers
Item Part Number
Grass Bags M124053
High Lift Blades
• 42 in. Mower Deck
• 48 in. Mower Deck
(Part numbers are subject to change without notice. Part
numbers may be different outside the U.S.A.)
GX20433
GX20434
Replacement Parts - 12
Page 17

SERVICE
Servic e
Adjusting Bagger Level
c CAUTION: Avoid injury! To prevent injury from
thrown objects, do not open catcher while
blades are turning.
IMPORTANT: Avoid damage! Bag fr am es must be
level horizontally or hopper top will not seal
properly.
A
B
NOTE: Prior to adjusting bags for level, check machine
for level: proper tire inflation and parked on a level
surface.
A
C
B
M96100
1. Install left and right bags on mounting post (A).
2. Adjust left and right bags for level:
• Adjust for front-to-rear level, by bending tab (B).
• Adjust for side-to-side level, by bending tab (C).
MX10308
1. Close hopper top and fasten hood hold-down (B) over
latch rod (A).
2. Hood hold-down should stretch down 19-25 mm (3/4-1
in.) to be fastened. If it does not stretch, adjust latch rod.
C
D
G
F
3. Adjust latch rod:
• Remove lock nut (D), flat washer (E) and cap screw
(G).
E
M96098a
Adjusting Hood Hold-Down
c CAUTION: Avoid injury! To prevent injury from
thrown objects, do not open catcher while
blades are turning.
NOTE: Prior to adjusting hood hold-down, make sure
bags are level.
Service - 13
• Add additional flat washer (C) between latch rod (F)
and bag mounting bracket.
• Install and tighten cap screw (G), flat washer (E) and
lock nut (D).
Adjusting Hopper Top Hinge Tightness
c CAUTION: Avoid injury! To prevent injury from
thrown objects, do not open catcher while
blades are turning.
NOTE: Prior to adjusting hopper top hinge tightness,
make sure bags are level.
1. With bags installed, fully raise and lower hopper top
several times.
Page 18

SERVICE
A
M96098b
2. Tighten or loosen hardware (A) to adjust hopper top
hinge tightness.
Service - 14
Page 19

TROUBLESHOOTING
Troubleshooting
Using Troubl esho ot ing Chart
If you still have a problem after you have checked all
possible causes, see your John Deere dealer.
If you have a problem with your thatcher that is not listed in
the chart, see your John Deere dealer.
If Check
Grass not being picked up completely. • Mow grass only when dry.
• Reduce mower ground speed.
• Empty bags.
• Clean screen in hopper top.
• Unplug chute.
• Check cutting edge of mower blades.
• Increase engine speed to full throttle.
• Check for worn or slipping belt.
Collection chute plugged. • Mow grass only when dry.
• Empty bags.
• Clean screen in hopper top.
• Reduce mower ground speed.
• Stop mower when bags are full, monitor bags/hopper more
frequently.
Grass blows out between hopper tops and bags. • Adjust bagger level for better sealing.
• Adjust hood hold-down for better sealing.
Hopper top is too tight or too loose. • Adjust hopper top hinge.
Troubleshooting - 15
Page 20

STORAGE
Storage
Storage
1. Remove the bagger from the machine.
2. Empty and clean the hopper, chute and bags.
3. Remove any ballast used during bagging. This will
ensure proper operation of the mower when the bagger is
not used.
4. If you are using a special mower blade for bagging,
remove it and use the correct mower blade.
5. Replace missing or damaged par ts. Make sure all
hardware is secure.
6. Paint scuffed metal surfaces to prevent rust.
7. If possible, store the bagger in a cool, dark place. If it
must be stored outside, put a weather-proof cover over it.
Removing From Storage
1. Remove bagger from storage and clean if necessary.
2. Install bagger.
3. Install the proper ballast.
4. If you are using a special mower blade for bagging,
make sure it is installed.
Storage - 16
Page 21

ASSEMBLY
Assemb ly
Identify Parts
Qty. Description
1 Bagger Support Rod
2 High Lift Blade
1 Hopper Screen
1 Hopper Top
1Latch Rod
1 Mounting Post
1 Left Grass Bag
1 Right Grass Bag
1 Lower Discharge Chute Assembly
1 Upper Discharge Chute Assembly
Bag of Parts
Qty. Description
3 Tie Band
1 Drilled Cargo Pin
1 Spring Locking Pin
1 Round Head Bolt
2 Flat Washer
4 M8 x 1.25 Lock Nut
4 Spring Washer
3Hex Bolt
1 Cargo Mount Bracket
Install Bagger Support Rod
2. Insert bagger support rod (A) between cargo mount
bracket and mounting post.
3. Insert round head bolt (F) through cargo mount bracket
and into hole (I) in mounting post.
4. Secure bolt with M8 lock nut (B) and flat washer (C).
Install Hopper Top and Bags
Assemble Hopper Top
NOTE: Spring washers (C) must be installed with cup
of washers facing each other. Do not over-tighten.
1. Install mounting post on machine.
A
G
F
2. Insert lower part of latch rod (E) through hole in post.
3. Fasten upper part of latch rod (F) with hex bolt (G)
through latch rod, post hole, flat washer (D), and secure
with a M8 lock nut (A).
4. Fasten hopper top to mounting post with two hex bolts
(B), four spring washers (C) and two M8 lock nuts (A).
B
B
C
C
E
A
D
MX8875
D
E
A
C
B
I
G
H
F
MX10310
1. Fit tabs (G) on cargo mount bracket (E) into slots (H) on
mounting post (D).
Assembly - 17
5. Raise and lower hopper top several times. Tighten or
loosen hardware to adjust hopper top hinge tightness.
Page 22

ASSEMBLY
Install Hopper Screen
A
B
M96099
1. Fasten hopper screen (B) to inside of hopper top with
three tie bands (A). Put tie bands through holes in hopper
top tabs and slots in screen.
2. Pull tie bands tight and cut off excess.
Install and Adjust Grass Bags
NOTE: Bag frames must be level horizontally or hopper
top will not seal properly.
Adjust Hopper Top Latch
A
MX10308
1. Close hopper top and fasten hood hold-down (A) over
latch rod.
IMPORT ANT: Avoid damage! To prevent injury from
thrown objects, hopper top must be securely sealed.
2. Hood hold-down should stretch down 19-25 mm (3/4-1
in.) to be fastened. If it does not stretch, adjust latch rod.
A
C
B
M96100
1. Install left and right grass bags on mounting post (A).
NOTE: Prior to adjusting bags for level, check machine
for level: proper tire inflation and parked on a level
surface.
2. Adjust left and right grass bags for level:
• Adjust for front-to-rear level, by bending tab (B).
• Adjust for side-to-side level, by bending tab (C).
B
A
C
D
M96098a
3. To adjust latch rod:
• Remove lock n ut ( C), flat washer (D) and hex bolt (A).
• Add additional flat washer (B) between latch rod and
bag mounting bracket.
• Install and tighten hex bolt (A), flat washers (B & D)
and hex flanged lock nut (C).
Assembly - 18
Page 23

SPECIFICATIONS
Specifications
2-Bag Bagger Specifications
42 Inch Bagger Fits . . . . . . . . . . . . . . . . . . . . . . . . . . . . . . . . . . . . . . . . . . . . . . . . . . . . . . . . . . . . . 42-Inch Mower Decks
48 Inch Bagger Fits . . . . . . . . . . . . . . . . . . . . . . . . . . . . . . . . . . . . . . . . . . . . . . . . . . . . . . . . . . . . . 48-Inch Mower Decks
Approximate volume of each bag . . . . . . . . . . . . . . . . . . . . . . . . . . . . . . . . . . . . . . . . . . . . . . . . .0. 11 m
(Specifications are subject to change without notice.)
3
(3.25 Bushel)
Specifications - 19
Page 24

INDEX
Index
A
Assembly ........................................................................ 17
B
Bagger, Adjusting Level ................................................. 13
Bagger, Airflow
Bagger, Filling
Bagger, Installing
Bagger, Removing
Bagger, Tips
Ballast
............................................................................... 4
C
Chute, Removing .............................................................. 8
Customer Service
H
Hood Hold-Down, Adjusting ........................................... 13
Hopper Top Hinge Tightness, Adjusting
Hopper Top, Install
...............................................................10
................................................................ 10
.............................................................. 4
............................................................ 8
................................................................... 11
........................................................... 21
.........................13
......................................................... 17
L
Labels, Safety ...................................................................1
Literature, Service
.......................................................... 12
M
Mounting Bracket, Install ............................................ 4, 17
Mower Blades, Install
Mulch Cover, Remove
.......................................................4
......................................................4
O
Operate Safely ................................................................. 1
P
Parking Safely .................................................................. 2
Parts Catalog
Parts, Replacement
Plugging, Chute
Plugging, Material Collection System
..................................................................12
........................................................12
.............................................................. 10
.............................10
S
Safet y, Ope r a ting ............................................................. 1
Safety-Alert Symbol
Service Literature
Specifications
Storage
...........................................................................16
..........................................................1
........................................................... 12
................................................................. 19
T
Technical Manual ...........................................................12
Troubleshooting
.............................................................. 15
Index - 20
Page 25

NOTES
Notes
Notes
Page 26

NOTES
Notes
Notes
Page 27

NOTES
Notes
Notes
Page 28

JOHN DEER E QUALITY ST AT EMENT
John Dee r e Quality Statement
John Deere Quality
John Deere equipment is more than just a purchase, it’s an investment in quality. That quality goes beyond our equipment
to your John Deere dealer’s parts and service suppor t. This suppor t is needed to keep you a satisfied customer.
That’s wh y J ohn Deere has initiated a process to handle your questions or problems, should they arise. The following three
steps will help guide you through the process.
Step 1
Refer to your operator’s manual
A. It has many illustrations and detailed information on the
safe and proper operation of your equipment.
B. It gives troubleshooting procedures, and specification
information.
C. It gives ordering information for parts catalogs, service
and technical manuals.
D. If your questions are not answered in the operator’s
manual, then go to Step 2.
Step 2
Contact your dealer (Call 1-800-537-8233 to locate your nearest John Deere dealer)
A. Your John Deere dealer has the responsibility, authority,
and ability to answer questions, resolve problems, and fulfill
your parts and serv ice needs.
B. First, discuss your questions or problems with your
dealer’s trained parts and service staff.
Step 3
Call the John Deere Customer Communications Center
A. Your John Deere dealer is the most efficient source in addressing any concern, but if you are not able to resolve your
problem after checking your operator’s manual and contacting your dealer, call the Customer Communications Center.
B. For prompt, effective service, please have the following ready before you call:
The name of the dealer with whom you’ve been working.
Your equipm ent model number.
Number of hours on machine (if applicable).
C. Then call 1-800-537-8233 and our advisor will work with your dealer to investigate your concern.
C. If the parts and service people are unable to resolve your
problem, see the dealership manager or owner.
D . If your questions or problems are not resolved by the
dealer, then go to Step 3.
Your 13-digit serial number which you recorded on the
inside front cover of this manual.
If the problem is with an attachment, your attachment
identification number.
John Deere Quality Statement - 24
 Loading...