

Page 1
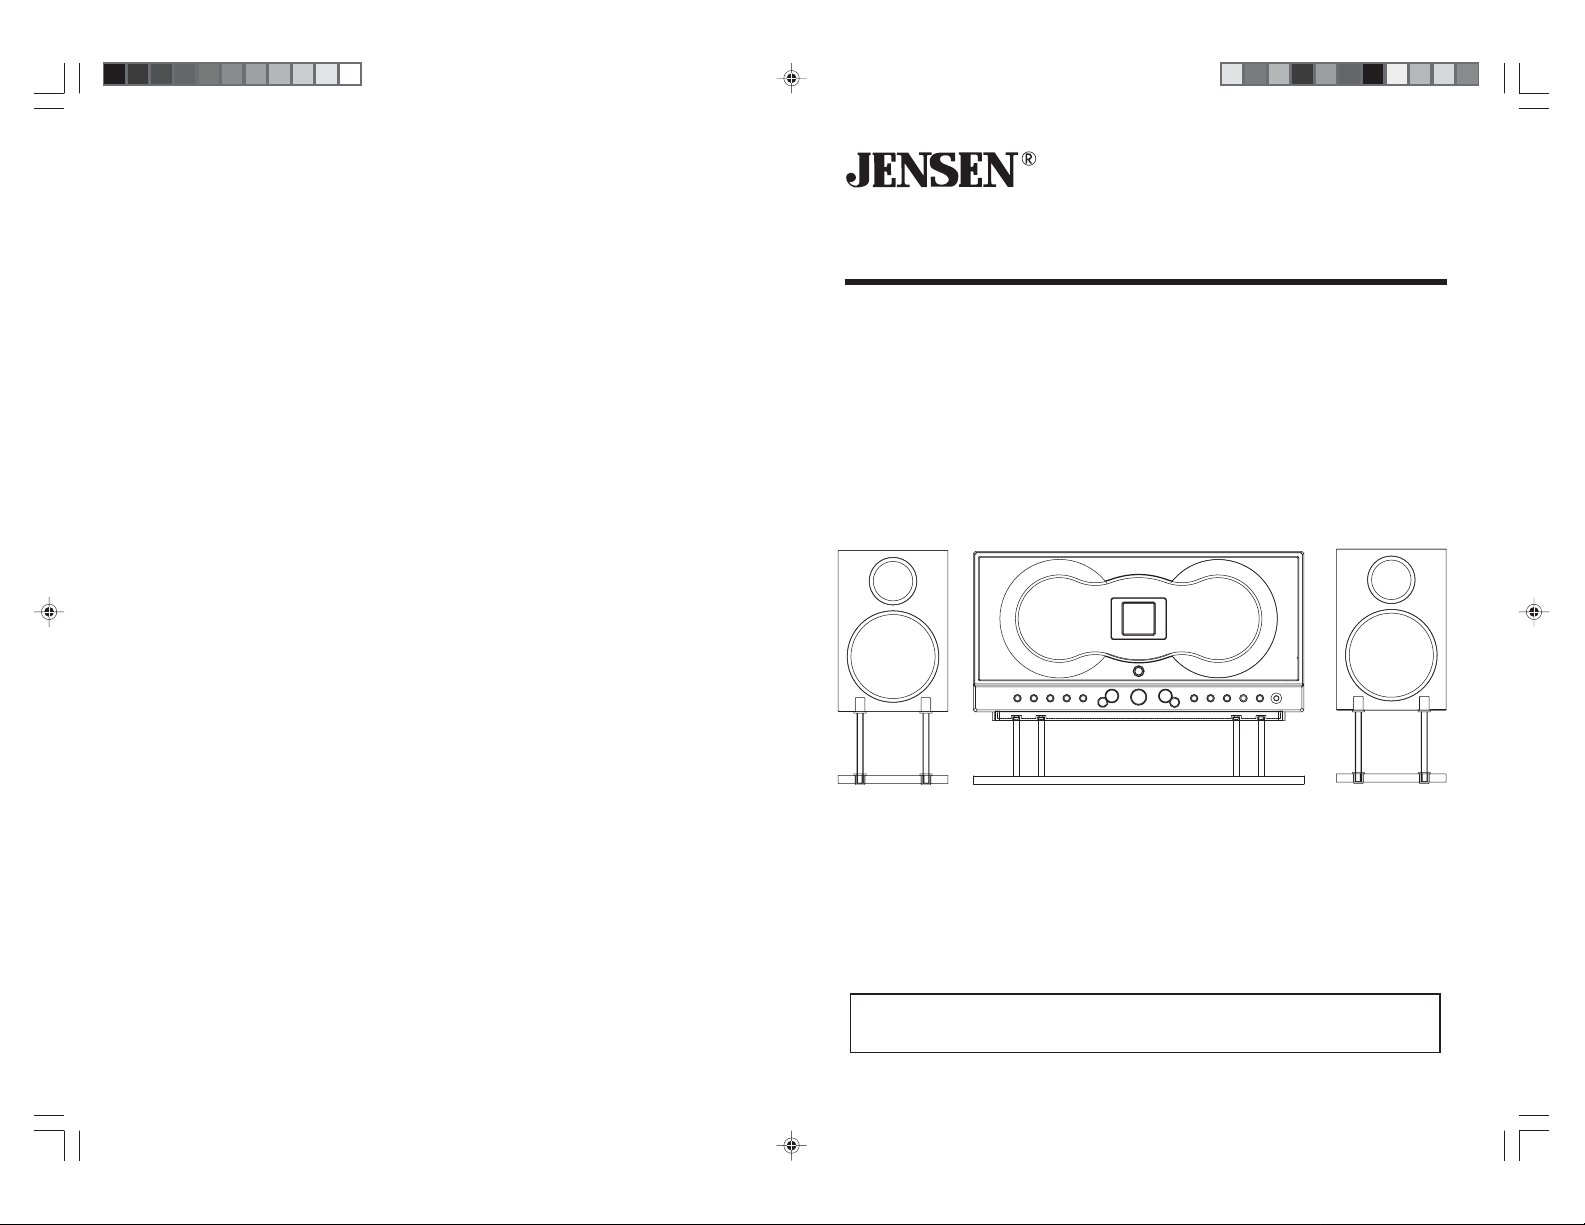
JMC-670
WALL MOUNTABLE FRONT
LOADING DUAL MP3 CD SYSTEM
WITH
DIGITALTUNERAND
REMOTE CONTROL
HX-1056M3 IB JENS 001 REV0.P65 7/20/2005, 2:50 PM1
INSTRUCTIONMANUAL
Pleasereadandfollowthisinstruction manual carefullybeforeusing
theunitandretainitforfuturereference
Page 2
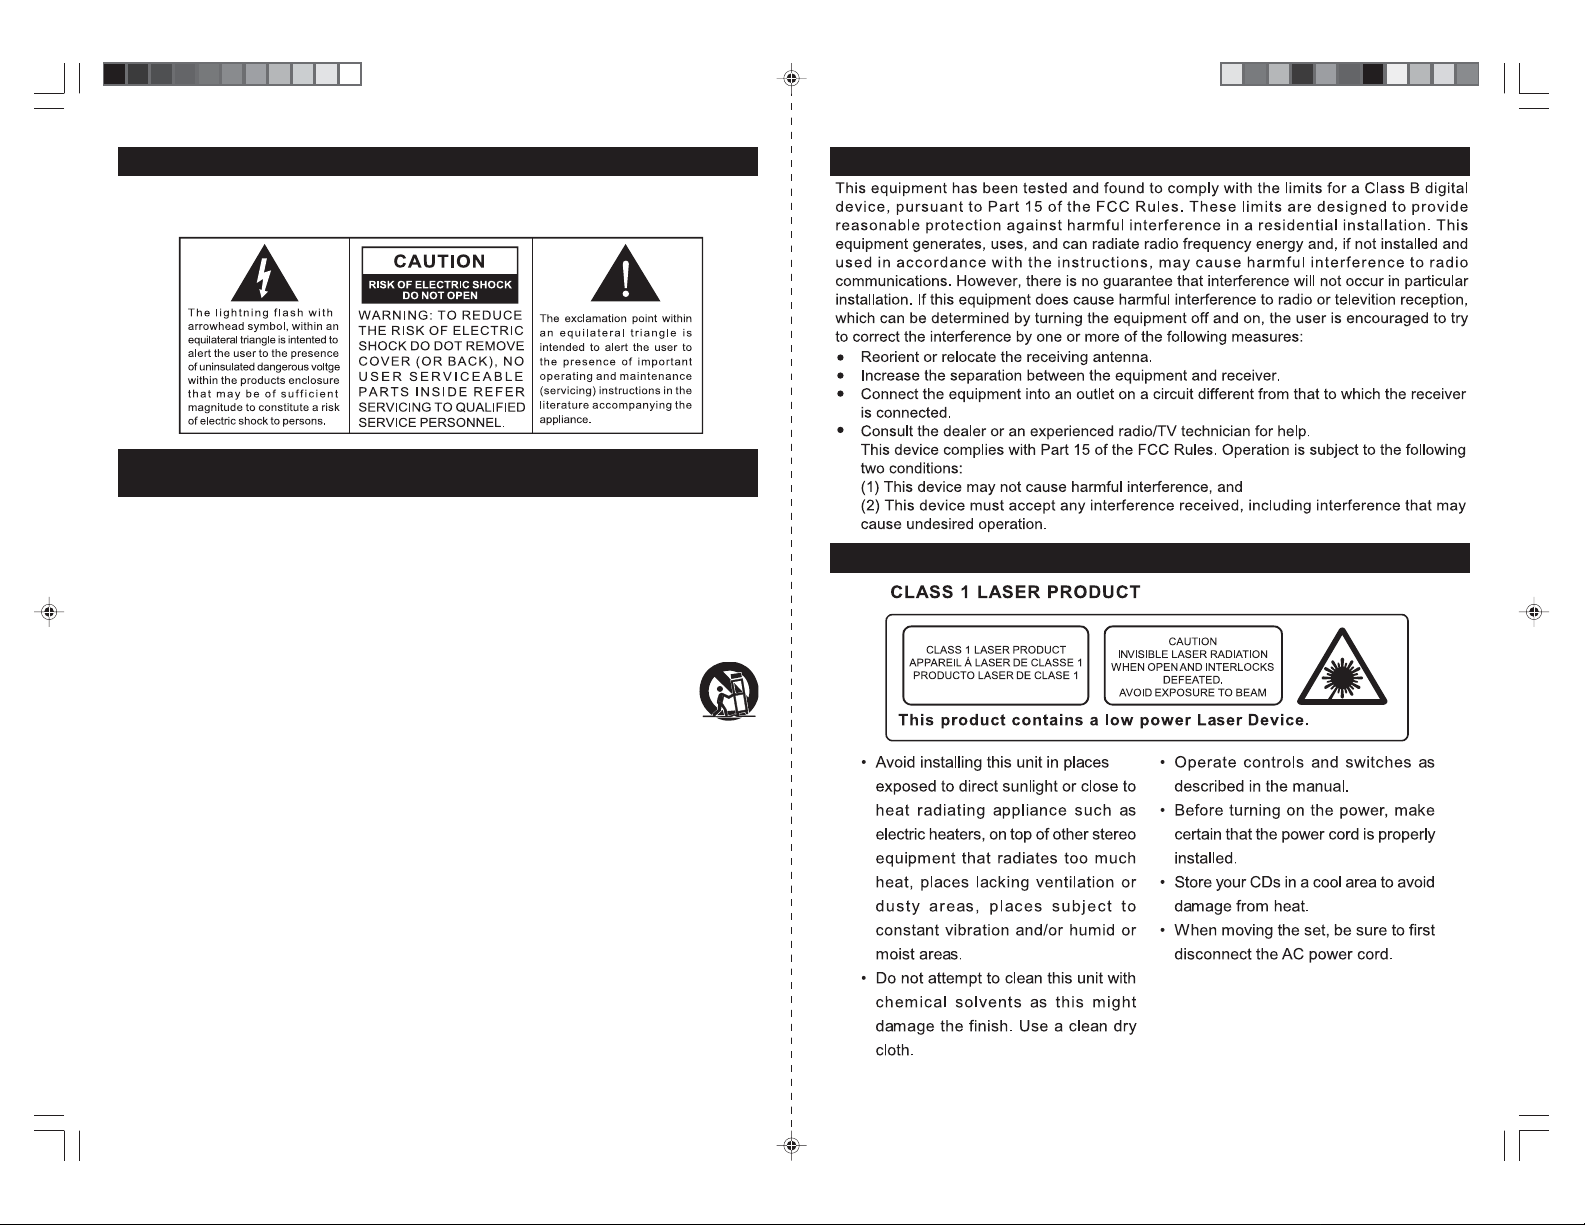
WARNING
TOPREVENTFIREORSHOCKHAZARD, DONOTUSETHIS PLUGWITHANEXTENSIONCORD,RECEPT ACLE
OROTHEROUTLETUNLESSTHEBLADESCANBE FULLYINSERTEDTOPREVENTBLADEEXPOSURE.TO
PREVENTFIREORSHOCKHAZARD, DO NOTEXPOSETHISAPPLIANCETO RAIN OR MOISTURE.
IMPORT ANTSAFETYINSTRUCTIONS
1. Read these instructions.
2. Keep these instructions
3. Heed all warnings.
4. Follow all instructions
5. Do not use this apparatus near water
6. Cleaning-Unplugthis product from thewalloutlet before cleaning, Donot use liquid cleanersoraerosol
cleaners. Use a dry cloth for cleaning
7. Do not block any ventilation openings. Install in accordance with the manufacturer’s instructions.
8. Do not place this product on an unstable cart,stand, tripod, bracket, or table .The product
may fall, causing serious injury to a child or adult, andserious damage to the product.
Use only with a cart, stand,tripod, bracket, or table recommended bythe manufacturer,
or sold with the product.Any mounting of the product should followthe manufacturer’s
instructions, and should use a mountingaccessory recommended by the manufacturer.
AProductand Cart Combination Should Be Moved with Care-Quick stops,excessive
force and uneven surfaces may cause the product and cart combination to overturn.
9. Do not install near any heat sources such as radiators, heat registers, stoves, or other apparatus
(Including amplifiers) that produce heat.
10.Do not defeat the safety purpose of the polarizedor grounding-type plug.Apolarizedor grounding type plug. Apolarized plug hastwo blades withone wider than the other.Agrounding type plughas
two blades anda third groundingprong. The wide blade or the thirdprong is providedfor your safety.
Ifthe provided plug doesnot fit into youroutlet, consult anelectrician for replacement of the obsolete
outlet.
11.Protectthepowercord from being walkedon or pinched particularlyatplugs convenience receptacles,
and the point where they exit from the apparatus.
12. Only use attachments/accessories specified by the manufacturer.
13. Unplug this apparatus during lightening storms or when unused for long periods of time.
14.Refer all servicingto qualified service personnel. Servicing is requiredwhen the apparatushas been
damaged in any way,such as power-supplycord or plug is damaged,liquid has been spilled or
objectshave fallen intothe apparatus, theapparatus has been exposed to rain or moisture, does not
operate normally,or has been dropped.
15.This appliance shall notbe exposed to drippingor splashing water and that no objectfilled with liquids
such as vases shall be placed on the apparatus.
16. Do not overload wall outlet.Use only power source asindicated.
17. Use replacement part as specified by the manufacturer.
18.The product may be mounted to awall only ifrecommended by themanufacturer.
19.Upon completion of anyservice or repairsto this product, askthe service technician toperform safety
checks.
E-1
FCCINFORMATION
IMPORTANTNOTES
E-2
HX-1056M3 IB JENS 001 REV0.P65 7/20/2005, 2:50 PM2
Page 3
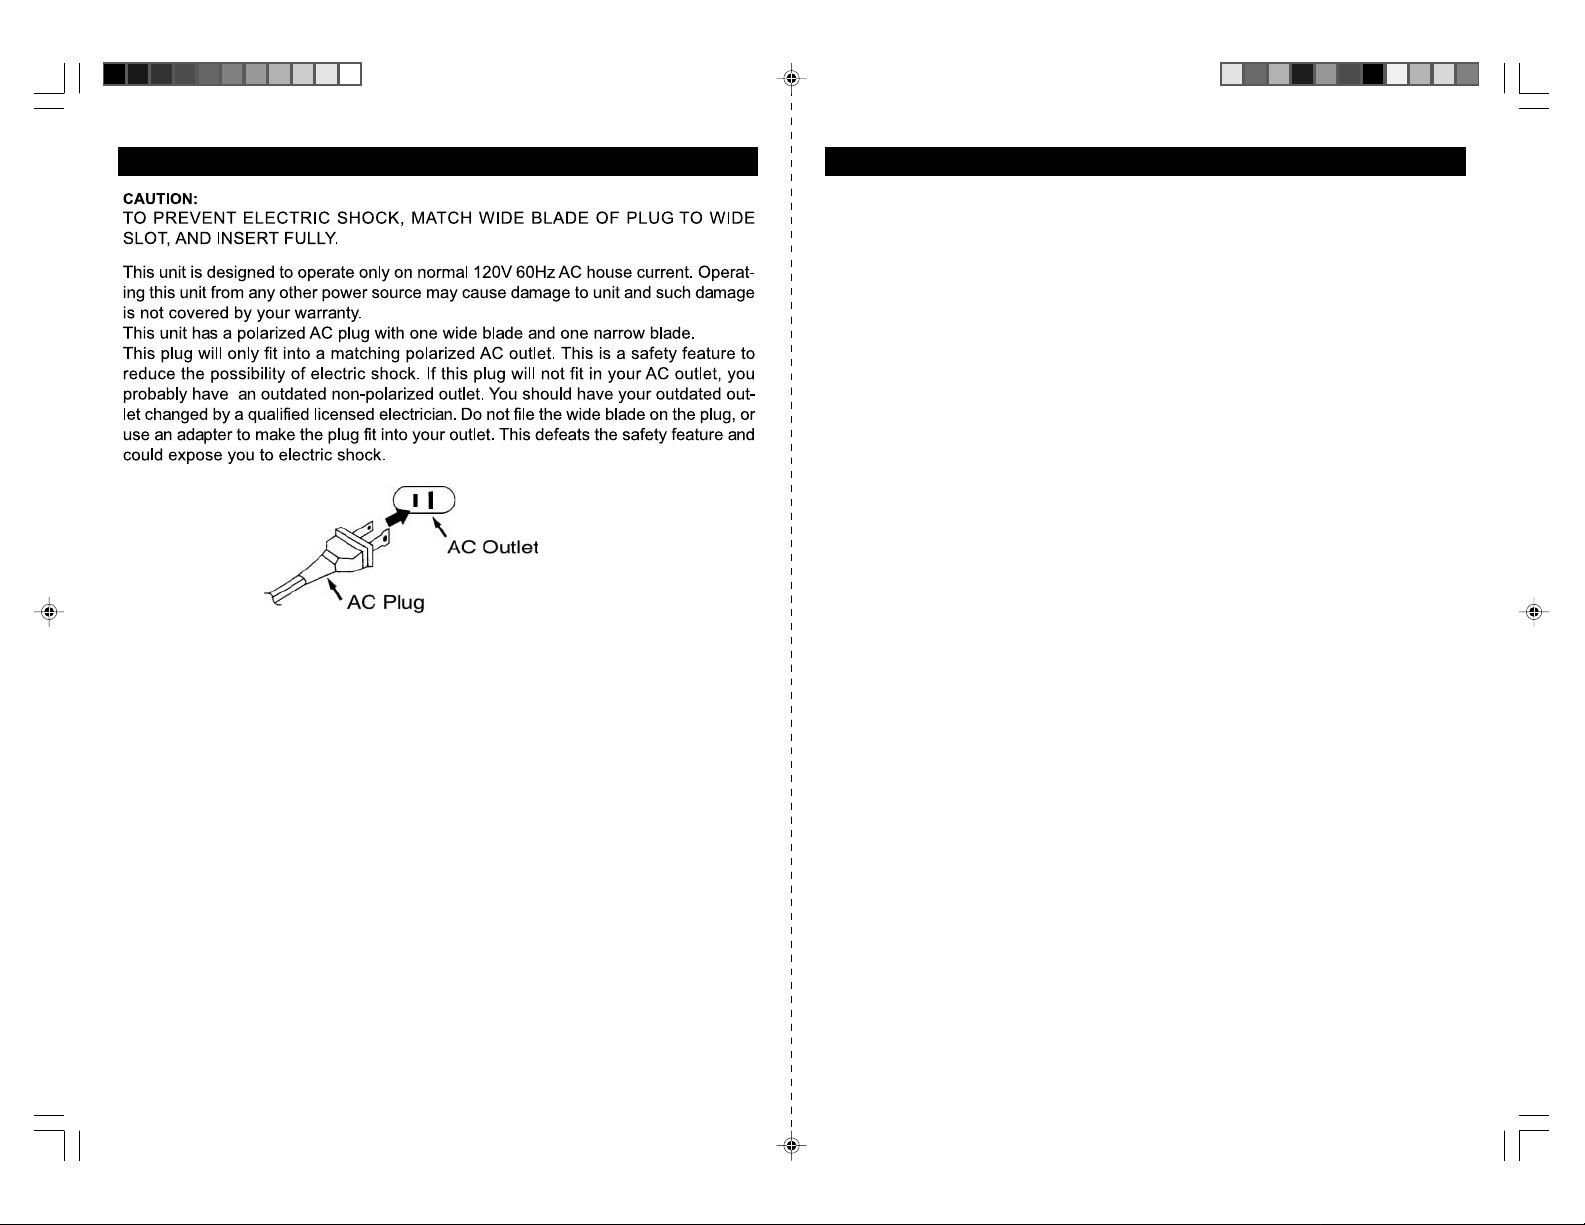
POWERSOURCE T ABLEOFCONTENT
WELCOME................................................................................................................................................5
INDEXTO PARTSANDCONTROLS.....................................................................................................5
MAINUNIT .....................................................................................................................................5
REMOTECONTROL ......................................................................................................................6
DISPLA YSECTION..................................................................................................... ...................6
INSTALLATION.................................................................................................................. . .......................7
FORTABLETOPUSE................................................................................................. ..................7
FORWALLMOUNTING................................................................................................. ..............7
GETTINGSTARTED..................................................................................................................................8
SPEAKERCONNECTION..............................................................................................................8
LINEIN (AUX IN) CONNECTION (OPTIONAL)........................................................................... 8
SUBWOOFERCONNECTION ................................................................................................ .......8
ANTENNACONNECTION ..............................................................................................................8
POWERSUPPL Y...........................................................................................................................8
ACPOWER CONNECTION ......................................................................................................... 8
LINEIN (AUX IN) CONNECTION(OPTIONAL)............................................................................8
SUBWOOFERCONNECTION(OPTIONAL).....................................................................................8
ANTENNACONNECTION.................................................................................................. ..............8
POWERSUPPL Y......................................................................................................... ...................8
ACPOWER CONNECTION.............................................................................................................8
REPLACINGBA TTERYINTHEREMOTECONTROL......................................................................8
CLOCKSETTING ..........................................................................................................................................9
TOSET THE CURRENT TIME........................................................................................................9
COMP ACTDISCOPERATIONS........................................................................................................ .. .........9
BASICDISC(s) PLAY ........................................................................................................ . ...............9
PROGRAMMINGCD TRACKS...........................................................................................................10
PROGRAMMINGMP3 TRACKS...........................................................................................................11
ID3DISPLAY(FOR MP3-CDONLY)..................................................................................... ...............11
RADIOOPERATION....................................................................................................................................12
RADIOTUNING ................................................................................................................. .................12
TOPRESET CHANNELS............................................................................................................. .........13
TORECEIVEPRESETSTA TIONS................................................................................................... 13
AUXOPERATION.................................................................................................................. ......................13
PRESETEQ (EQUALIZATIONSYSTEM)................................................................................................... .13
USINGHEADPHONES(NOT INCLUDED)....................................................................................................13
SLEEPOPERATIONS..................................................................................................................................14
TIMEROPERATION....................................................................................................................................14
CAREAND MAINTENANCE.......................................................................................................................15
TROUBLESHOOTINGGUIDE........................................................................................................... ..........15
RESETINGTHE UNIT............................................................................................................. ......................16
SPECIFICATION..........................................................................................................................................16
HX-1056M3 IB JENS 001 REV0.P65 7/20/2005, 2:51 PM3
E-3
E-4
Page 4

JMC-670 INSTRUCTION MANUAL
WELCOME
Thankyoufor purchasing the JENSEN Wall MountableFrontLoadingDual MP3 CD system.
Beforeoperating the unit,please read this manual thoroughlyand retain itfor future reference.
INDEX TO PARTSAND CONTROLS
MAINUNIT
1). CDDOOR
2). CDDOOROPEN/CLOSEBUTTON
3). FUNCTIONBUTTON
4). CD1/2FUNCTIONBUTTON
5). ID3BUTTON
6). FOLDER+/MEMOUPBUTTON
7). PROGRAM/ MEMORYBUTTON
8).STOP/BAND BUTTON( )
9).PLAY/P AUSEBUTTON( )
10).ON/ST ANDBYBUTTON
11).TUNING / SKIP ( / ) BUTTON
12).REPEA TBUTTON
13).TIMER/SLEEPBUTTON
14).EQBUTTON
15).VOLUMEUP/DOWNBUTTON
16).HEADPHONEJACK
17).MAINUNITST AND
18).MULTI- FUNCTION DISPLAY
19).REMOTESENSOR
20).RESETSWITCH
21).AUXINJACK
22).FMANTENNA
23). AC LINE CORD
24).SUBWOOFERJACK
25).SPEAKERTERMINAL
26).SPEAKERBOX
27).SPEAKERWIRE
28).SPEAKERBOXST AND
JMC-670 INSTRUCTION MANUAL
REMOTECONTROL
H1. ON/ST ANDBYBUTTON
H2. ID3BUTTON
H3. FUNCTIONBUTTON
H4. DISC1/2BUTTON
H5. PLAY/P AUSE(
)-MONO -ST.B UTT ON
H6. MEMO./PROGRAMBUTTON
H7. TUNING BUTTON
&
H8. FOLDER - BUTTON
H9. VOL+&VOL- BUTTON
H10. CDDOOROPEN/CLOSEBUTTON
H11.STO P/ BANDBUTTON(
)
H12.FOLDER+/MEMOUP BUTTON
H13.EQBUTTON
H14.TIMER/SLEEPBUTTON
H15.REPEA TBUTTON
H16.MUTEBUTTON
DISPLA YSECTION
D1. MP3INDICA TOR
D2. ID3INDICAT OR
D3. SLEEPINDICA TOR
D4. MUTEINDICA TOR
D5. AUXINDICA TOR
D6. FREQUENCY / PLAYTIME/ CLOCKDISPLAY
D7. BAND INDICAT OR
D8. PLAYBACKINDICA TOR
D9. CDINDICA TOR
D10.FOLDERINDICATOR
D11.MEMORYINDICA TOR
D12.REPEA TINDICATOR
D13.TIMERINDICATOR
D14.RANDOMINDICA TOR
D15.STEREOINDICATOR
HX-1056M3 IB JENS 001 REV0.P65 7/20/2005, 2:51 PM4
E-5 E-6
Page 5

JMC-670 INSTRUCTION MANUAL JMC-670 INSTRUCTION MANUAL
INST ALLATION
GETTING STARTED
FOR TABLE TOP USE
Following the diagrams below, insert the stands into the base and attach the main unit and
speakers as shown.
NOTE: A screwdriver is needed for attacking the stands to the main unit and stands.
FOR WALL MOUNTING
1.Use the wall-mountingtemplate supplied with theunittomakemarks onthe wall for the anchors. Ma ke s ure
themarksarelevel.
2. Drill 1/4" holes on the ma rks. P leas e re fer to the appe ndix s hee t attac hed with this instruction ma nual
for details .
3. I nse rtthe pla stic a nchor s upplied with unit until it is flus h with the wa ll.
4 . In s e rt th e s c re w a nd tigh te n th e s c r ew 4 mm a w ay f rom th e wa ll. (A pp rox im ate ly th e wid th o f 2 pen nie s )
H an g th e ma in u nit a n d s pe a k er s to the s cr ew a s i ndi ca te d b elo w:
SPE AK ER CONNE CTION
1. Insertthespeakercables by pushing down theterminallever ofthe LeftS peakerTerminal andthe Right
Speaker Terminal (25).
2. C onne ct the s peak er to S pea ker Te rminals ( 25) , with red wire to red termina ls and black wire to bla ck
te rmi na ls .
LINE IN (AUX IN) CONNE CTION (OPT IONAL)
1. C onnect the left and right channe lR CA plug (not included) into the AUX IN Jack ( 21) a nd the other end
to your external player. Ma ke sure the polarity of the rightand the left channe lis corre ct, Red to Right, White to Left.
2. Press the
3.Press Function Button (3/H3).“AUX” Indicator (#D5) appearsin the display (18).
4.Play the auxiliary inputsource.
ON/STANDBYButton(10/H1)toswitchon the unit.
SUBWOOFERCONNECTION (OPTIONAL)
1.Connect one end of a RCA plug(not included) into the Subwoofer Jack (24)and the other endto the
subwoofer (not included).
2.Turnonthe unit andthen your subwoofer.
ANTENNACONNECTION
FM:Unwrap andfullyextendthe FMAntennawire (22) for bestreception. If stereo broadcastingis received,
StereoIndicator(#D15) will light.
AM:The unit is built-in with a directionalferrite antenna, reposition the unitfor best reception.
POWERSUPPLY
ThisFront Loading Dual CD Systemoperates fromAC120V~60Hz line power supply.
Theremotecontrol unit operates on one 3V“CR2025”lithium battery.Topoweruptheremote control, remove the
plasticinsulation tab sticking outof the battery compartment.
ACPOWERCONNECTION
Connectthe power cordto an AC120V~60Hz power source.
HX-1056M3 IB JENS 001 REV0.P65 7/20/2005, 2:51 PM5
REPLACINGBATTER YINTHEREMOTECONTROL
1.Turnoverthe remote control, andremove the battery door.
2.Install 1 “CR2025” lithium batteryaccording to the polarity diagram
onthe battery compartment.
3.Replace the battery door.
E-7 E-8
Page 6

JMC-670 INSTRUCTION MANUAL
CLOCKSETTING
Note: The clock hasto be set the first time youuse the unit.
TOSETTHE CURRENT TIME
Forexample to set theclock at 7:30 AM
1.In STANDBYMode,pressMEMORYButton(7/H6)once.Hour digit flashes to promptfor input.
2.Press the
Note: Make sure thehour is set so thatAM or PM is
correctly displayed.
3.PressMEMORYButton (7/H6) to confirm theselection
andminute position flashesto prompt for input.
/ Button(11/H7)to adjust the hour.
JMC-670 INSTRUCTION MANUAL
Note:Ifno CD is inserted inthe chosen CD location, “NODISC” appears.
7.The CD indicator (#D9)appears with either “
8.Press
Stop play
time are shown
Pause play
elapsed play time are shown
Scan forward and backward And hold / (11/H7) Play time changed rapidly
Control the volume ± Volume Control (15/H9) Volume Level is shown
Stop output from speakers MUTE Button (H16) once “MUTE” (#D4) lights
Resume speaker output MUTE Button (H16) again “MUTE” (#D4) off
Button(9/H5) to start playing.
”or“ ”,indicating the current CDlocation.
M:SSERP:OT ulti-Function Display:
rotacidnIkcabyalPecno)5H/9( (D8) blinks
yalplatotdnaskcartforebmunlatoT)11H/8(
dnarebmunkcartgniyalptnerruCniaga)5H/9(esuapretfayalpemuseR
degnahcrebmunkcartgniyalP)7H/11(/skcartpikS
OtherCD/MP3-CDfunction
1)Repeat (12/H15) - Usethiskey can select differentPlay Mode between repeatone,repeat folder (MP3-
CDonly), repeat current CDand random play.
a)Repeat current track -Press Repeat button once,the REPEATindicatorappearsandcurrent track
repeatedcontinuously.
:
b)RepeatFolder(MP3-CDonly)-PressRepeatbutton until REPEATFOLDERindicatorshownondisplay ,the
selectedfolder will repeatedcontinuously.
4.Pressthe
/ Button(11/H7)toadjusttheminute.
5.PressMEMORYButton (7/H6) again to complete setting.
COMPACTDISCOPERATIONS
NOTE:Thisplayerplays not only commercial CDs butalsoself-complied CD-R/RW/MP3-CD discs.
BASICDISC(s) PLAY
1.Pressthe Button(10/H1) to turn onthe unit.
2.PresstheOPEN/CLOSEButton (2/H10) to open both theCDdoor.
3.Placethe CD(s), with labelsidefacing outward, inside theCD compart
ment.PressOPEN/CLOSEButton (2/H10) again to close the CDdoors.
IMPORTANT: The CD doors aremotorizeddoors.DO NOT PUSH WITH
HAND OR USE ANY OTHERMEANS TO OPEN OR CLOSE IT . THIS
COULD DAMAGE THE DOOR MECHANISM.
4.Pressthe Function Button (3/H3) tooperatethe unit in CDmode.
5.PressCD1/CD2 (4/H4) button to selecttheCD location.
6.Theunitwillscan the CD in selected CD compartments,thetotalnumber
oftracksand total play time oftheCD in the chosen CDlocationappear
inthe display (18). (Only Folder number andtrack number will shown
for MP3-CD)
E-9 E-10
HX-1056M3 IB JENS 001 REV0.P65 7/20/2005, 2:53 PM6
H1
H5
H4
:
c)Repeat current disc - PressRepeatbutton unitil REPEATALLindicator shownon display,thecurrentCD
will repeat continuously.
:
d)Randomplay - Press RepeatbuttonuntilRANDOM indicator appears ondisplayand the current disc will
playrandomly.
:
DISC ERROR
Note:Ifthe disc is dirty,damagedor unreadable, the ‘NO DISC’ willappearin the display.Ifthis occurs, clean
the disc, insertthe disc correctly,or try anotherdisc.
H3
H10
PROGRAMMINGCDTRACKS
Withthis function you canprogram up to 20titles of selected discin the order youdesire.This function can
onlybe done in stopmode.
1.PresstheMEMORYButtontostartprogrammingtracks,“MEMORY”indicator, ‘ ‘appearinthedisplay
and
blinks.
Page 7

JMC-670 INSTRUCTION MANUAL
2.Select the desired trackbypressing the
/ Button(11/H7)toselect the track you wantto program.
JMC-670 INSTRUCTION MANUAL
3.Pressthe MEMORY Button (7/H6) againtoenter the selected track inprogrammemory #1. The program
number
advances to.
4.Repeatsteps 2 & 3to program addiitonal tracks,20 tracks can bememorized.
5.PressPLAY/PAUSE
6.Toclearthe programmed tracks, press STOP
Buttonto start playing the tracksin your programmed order.
Buttonuntil the MEMORYindicator disappear.
Note:Randomfunctions are disabled inprogramplay.
PROGRAMMING MP3 TRACKS
With this function you can program up to 10 titles in theorder you desire.Thisfunction can onlybe done
in stop mode.
1.Press the MEMORY Button
(7/H6),“ FOLDER” indicator and ‘ ’blink,and‘ ’/ MEMORY
indicator appears in the display.
2. Select the desired folder by pressing FOLDER UP or DOWN button (6/H12,&H8).The selected folder
blinks.
3.Press the MEMORY Button
(7/H6)again to enter the selected folder.Thenpress / Buttons
(11/H7)to select your desired track.The selected track blinks.
4.Press the MEMORYButton
‘
’.
(7/H6)again to enterthe selected track.The programnumber advances to
Notes on CD-R/RW Discs
Because of non-standardized format definition/production of CD-R/RW/MP3-CD, playback quality and
performance are not guaranteed.
Manufacturer is not responsible for the playability of CD-R/RW/MP3-CD due to recording conditions
such as PC performance, writing software, media ability, etc.
Do not attach a label or seal to either side of the CD-R/RW/MP3-CD disc. It may cause a malfunction.
RADIOOPERATIONS
RADIOTUNING
1.Press the Button(10/H1)toturn on the unit.
2.Press the Function Button (3/H3)to operate the unitin
radiomode.
5. Repeat 2 to 4 to program additional tracks,10 tracks can be memorized.
6.PressPLAY/PAUSE
7.Toclear the programmed tracks, press STOP
Button to startplayingthe tracks in your programmed order.
Button until the MEMORYindicatordisappear.
ID3DISPLA Y(FOR MP3-CD ONL Y)
Thisunit can support ID3display when play theMP3-CD(if the MP3-CD havethis information in thedisc).
PressbuttonID3(5/H2) once, the ID3 iconwillappear on the LCD display ,andthetitleofthesong,artist and
thealbumwill show on LCD displaybyrolling, press this button againtoresume to show the folder andtrack
number,theID3iconwilldisappear.
E-11 E-12
HX-1056M3 IB JENS 001 REV0.P65 7/20/2005, 2:55 PM7
STOP
11 7
11 7
11 7
15 9
6
6
811
7
4
4
Page 8

JMC-670 INSTRUCTION MANUAL
Note:
Whenlistening to an FMstation, fully extendthe antenna to insuremaximum reception.
Automatictuningrelies on the signal strengthof the broadcastingstation. Weaker stations are often
skippedwhenusing automatic tuning. Manualtuning is suggestedfor locating and programming
weaker stations and also for fine tuning stationsfound during automatic scan.
ForFM stereo reception, the unitprovides FM MONO/STEREO selection. Instereomode, the unit will
automatically switch to stereo when a FM stereo broadcast is received andthe Stereo indicator
(#D15) will light.
T oreceivea weak (noisy) FMstation, press theST/MO Button (H5) to switch to MONOmode. The
receptionmay be improved, but the sound ismonaural (MONO).
TOPRESETCHANNELS
Thisunitis equipped with 20 presetmemoriesfor bothAMandFM (AM-10/
FM-10).
1.Pressthe
2.Pressthe Function Button (3/H3)tooperate the unit inradio mode and
desired band.
3.Tuneto a desired station.
4.PresstheMEMORYButton(7/H6), “MEMORY”(#D11)&numberofpre
set station appears.
5.Pressthe MEMO + Button (6/H12)to select the desiredpresetchannel.
6.PressMEMORYButton(7/H6) again to complete.
7.Tuneto another stationand repeat steps 4to 6 to store the station in
anotherpreset channel.
Button(10/H1) to turn onthe unit.
TORECEIVEPRESETSTATIONS
1.Press the Button(10/H1) to turn on the unit.
2.Press the Function Button(3/H3)to operate the unitin radio mode.
3.Pressthe MEMO + Button(6/H12) to select the presetchannels.
AUXOPERATION
Youcan connect left andright audio outputs from aTV,VCR, DVD, MP3 playeror other portable deviceto
theAUXINJacks(21) on the rear ofthe system. TousethisFrontLoading Dual CD System toamplify your
inputaudio signal:
1.Press the FunctionButton (3/H3) to operate theunit inAUXmode.“AUX” Indicator (#D5) appearsinthe
display.
2.Turnonand start playing the devicethat is plugged intothe AUX Jack.
3.AdjusttheVolumeControlto obtain the desired soundlevel.
PRESETEQ (EQUALIZATIONSYSTEM)
JMC-670 INSTRUCTION MANUAL
SLEEPOPERATIONS
1.Whentheunit in ON, press the TIMER/SLEEPButton(13)to program the sleep time, SLEEPindicatorwill
appears and 90 wil blinks on display.
2.Press
button(13)again to storeyour desired sleep time.
3.Thedisplay shows the chosensleeping time momentarily and thenreturns to the currentfunction mode.
4.Theunit will automatically turn off after theset time has elapsed.
5.T ocanceltheSleep operation, press the SLEEPButton(13) again until SLEEP indicator disappear or
simply switch the unit to standby.
& button (9/H11)toselectthe sleep time between 90-60-30-15 minntes,thenpressSLEEP
TIMEROPERATIONS
Y ourunitcanbesettoturnonatpredetermined time in Radio/CD function mode for running 60 minutes unless
turnoffthe unit manually.Thissettingcan only be done instandbymode.T osettheTIMERasfollows:
1.PresstheTIMER/SLEEPButton(13/H14)once the‘TIMER’icon appear and the hourdigitwillblinktosetthe
timeron time during standbymodein the display.
2.Pressthe
3.PresstheTIMER/SLEEP Button to (13/H14) confirmhoursetting,minute position flashes.
4.Press the / Button (11/H7)to adjust the minute.
5.PresstheTIMER SLEEPButton(13/H14) to complete setting. The‘TU’blinksandvolumelevel will show.
/ Button(11/H7)toadjustthe hour.
Thesound equalization can beadjusted for optimum soundreproductiondepending on style ofmusic you
areplaying. By pressing theEQ Button (14/H13), youcan switch between FLAT ,CLASSROCK,POP.
USINGHEADPHONES (NOT INCLUDED)
Inserting the plugof your headphones into the Headphone Jack (16) will enable you to listen in private.
Whenusing headphones, the speakerswill be disconnected.
NOTE: READ THIS IMPORTANT INFORMATION BEFORE USING YOUR HEADPHONES
1. Avoid extended playat very high volumeas it may impairyour hearing.
2.If you experienceringing in yourears, reduce thevolume or shut off your unit.
3.Keep the volume ata reasonable level evenif your headset isan open-air type designed toallow you to
hearoutside sounds. Please note that excessively highvolume may still blockoutside sounds.
E-13 E-14
HX-1056M3 IB JENS 001 REV0.P65 7/20/2005, 2:55 PM8
6.Pressthe
H14)buttonagain to store thetimer on function andthe volume level willblink.
7.Pressthe
tocomplete timer setting, the‘TIMER’iconand current time willappear on display,the unit will turnon
running60minutes once reachthe time you set.
/ button (11/H7)toselectthe turn on function on volume level, pressTIMER/SLEEP (13/
/ button(11/H7)toselectthevolumelevel, press TIMER/SLEEP button(13/H14)again
Page 9

JMC-670 INSTRUCTION MANUAL JMC-670 INSTRUCTION MANUAL
CAREAND MAINTENANCE
1.Cleanyour unit witha damp (never wet) cloth. Solvent ordetergent should neverbe used.
2.Avoidleaving your unit in direct sunlight orin hot, humid ordusty places.
3.Keepyour unit away fromheating appliances and sourcesof electrical noise such as fluorescent lamps
or motors.
4.Ifdrop-outsor interruptions occur inthe music during play, or if the discfails to play
atall, its bottomsurface may require cleaning. Before playing, wipethe disc from
the center outwards with a good soft cleaning cloth.
RESETINGTHE UNIT
Incase the unit display beginsfunctioning erratic or random
characters are displayed, use a sharp tip to press the RESETSwitch (20) toreset the unit.
Note:Allthepreset memories willbe erased and the clock
hasto be setagain.
TROUBLESHOOTINGGUIDE
Should you experience difficulties in the use of this player please refer to the following chart or call
1-800-777-5331 for Customer Service.
SPECIFICATION
Power source AC120V ~ 60 Hz
DC 3V
Power consumption 28 Watts
Di m e n s i o n Unit: 400 (W) x 116(D) x 219 (H) mm
Speaker:132 (W) x 116 (D) x 219 (H) mm
Tuningrange/sensitivity AM 520 ~ 1710kHz
FM 88 ~ 108MHz
Playbacksystems Ball clip CD mechanisms
Frequencyresponse 100 – 18,000 Hz
Poweroutput 5 Watts RMS per channel
Speakerimpedance 4 Ohms
Headphoneimpedance 8 – 32 Ohms
AUXinput sensitivity 300 mV
,1 pc of “CR2025” lithium battery for remote handset
SERVICE
Please refer to the instructions on the enclosed warranty card for returning your unit for service.
When returning the unit, please remove batteries to prevent damage to the unit in transit and/or from
possible battery leakage. We are not responsible for batteries returned with the product or for the
cost of replacement.
Distributed by:
Spectra Merchandising International, Inc.
Chicago Industry Tech Park
4230 North Normandy Avenue
Chicago, IL60634, U.S.A.
Please have model number ready, for Customer Service,
call 1-800-777-5331
HX-1056M3 IB JENS 001 REV0.P65 7/20/2005, 2:56 PM9
E-15
Printed in China
E-16
 Loading...