


JENNAIR® BUILT-IN ELECTRIC SINGLE OVEN FOUR ÉLECTRIQUE SIMPLE ENCASTRÉ JENNAIR®
Use & Care Guide
For questions about features, operation/performance, parts, accessories, or service in the U.S.A., call:
1-800-JENNAIR (1-800-536-6247) or visit our website at www.jennair.com.
In Canada, call: 1-800-JENNAIR (1-800-536-6247) or visit our website at www.jennair.ca.
Guide d’utilisation et d’entretien
Pour des questions à propos des caractéristiques, du fonctionnement/rendement, des pièces, accessoires ou dépannage, composer le 1 800 JENNAIR (1 800 536-6247) ou visiter notre site Web au www.jennair.com.
Au Canada, composer le 1 800 JENNAIR (1 800 536-6247) ou visiter notre site Web au www.jennair.ca.
W11260125A

TABLE OF CONTENTS |
|
OVEN SAFETY ................................................................................ |
3 |
OVEN USE....................................................................................... |
4 |
Feature Guide............................................................................... |
4 |
Touch Panel.................................................................................. |
4 |
Display.......................................................................................... |
4 |
Display Navigation........................................................................ |
4 |
Setup and Demo Mode................................................................ |
4 |
Cooking Modes............................................................................ |
5 |
Favorites....................................................................................... |
5 |
Assisted Cooking.......................................................................... |
5 |
Settings......................................................................................... |
6 |
More Modes.................................................................................. |
7 |
Aluminum Foil............................................................................... |
7 |
Positioning Racks and Bakeware................................................. |
7 |
Accessories................................................................................... |
8 |
Oven Vent(s).................................................................................. |
9 |
Preheating and Oven Temperature............................................... |
9 |
Baking and Roasting.................................................................... |
9 |
Broiling.......................................................................................... |
9 |
OVEN CARE................................................................................... |
10 |
Self Cleaning Cycle..................................................................... |
10 |
General Cleaning........................................................................ |
11 |
Oven Lights................................................................................. |
11 |
TROUBLESHOOTING................................................................... |
12 |
ASSISTANCE OR SERVICE.......................................................... |
13 |
In the U.S.A................................................................................. |
13 |
In Canada.................................................................................... |
13 |
Accessories................................................................................. |
13 |
TABLE DES MATIÈRES |
|
SÉCURITÉ DU FOUR ................................................................... |
14 |
UTILISATION DU FOUR............................................................... |
15 |
Guide des caractéristiques......................................................... |
15 |
Tableau tactile............................................................................. |
15 |
Affichage..................................................................................... |
15 |
Affichage du menu...................................................................... |
15 |
Réglage et mode démonstration................................................ |
15 |
Modes de cuisson...................................................................... |
16 |
Favorites (recettes favorites)....................................................... |
16 |
Cuisson assistée......................................................................... |
16 |
Settings (réglages)...................................................................... |
17 |
Plus de modes............................................................................ |
18 |
Papier d’aluminium..................................................................... |
18 |
Positionnement des grilles et des ustensiles |
|
de cuisson au four...................................................................... |
18 |
Accessoires................................................................................. |
19 |
Évents du four............................................................................. |
20 |
Préchauffage et température du four......................................... |
20 |
Cuisson et rôtissage au four....................................................... |
20 |
Cuisson au gril............................................................................ |
20 |
ENTRETIEN DU FOUR................................................................. |
21 |
Programme d’autonettoyage...................................................... |
21 |
Nettoyage général...................................................................... |
22 |
Lampes du four........................................................................... |
22 |
DÉPANNAGE................................................................................. |
23 |
ASSISTANCE OU DÉPANNAGE................................................... |
24 |
Aux É.-U...................................................................................... |
24 |
Au Canada.................................................................................. |
24 |
Accessoires................................................................................. |
24 |
2
OVEN SAFETY
Your safety and the safety of others are very important.
many important safety messages in this manual and on your appliance. Always read and obey all safety
safety alert symbol.
alerts you to potential hazards that can kill or hurt you and others.
messages will follow the safety alert symbol and either the word “DANGER” or “WARNING.”
mean:
 DANGER
  WARNING
You can be killed or seriously injured if you don't immediately follow instructions.
You can be killed or seriously injured if you don't follow instructions.
All safety messages will tell you what the potential hazard is, tell you how to reduce the chance of injury, and tell you what can happen if the instructions are not followed.
IMPORTANT SAFETY INSTRUCTIONS
WARNING: To reduce the risk of fire, electrical shock, injury to persons, or damage when using the oven, follow basic precautions, including the following:
■Proper Installation – Be sure the oven is properly installed and grounded by a qualified technician.
■Never Use the Oven for Warming or Heating the Room.
■Do Not Leave Children Alone – Children should not be left alone or unattended in area where oven is in use. They should never be allowed to sit or stand on any part of the oven.
■Wear Proper Apparel – Loose-fitting or hanging garments should never be worn while using the oven.
■User Servicing – Do not repair or replace any part of the oven unless specifically recommended in the manual. All other servicing should be referred to a qualified technician.
■Storage in Oven – Flammable materials should not be stored in an oven.
■Do Not Use Water on Grease Fires – Smother fire or flame or use dry chemical or foam-type extinguisher.
■Use Only Dry Potholders – Moist or damp potholders on hot surfaces may result in burns from steam. Do not let potholder touch hot heating elements. Do not use a towel or other bulky cloth.
■Use Care When Opening Door – Let hot air or steam escape before removing or replacing food.
■Do Not Heat Unopened Food Containers – Build-up of pressure may cause container to burst and result in injury.
■Keep Oven Vent Ducts Unobstructed.
■Placement of Oven Racks – Always place oven racks in desired location while oven is cool. If rack must be moved while oven is hot, do not let potholder contact hot heating element in oven.
■DO NOT TOUCH HEATING ELEMENTS OR INTERIOR SURFACES OF OVEN – Heating elements may be hot even though they are dark in color. Interior surfaces of an oven become hot enough to cause burns. During and after use, do not touch, or let clothing or other flammable materials contact heating elements or interior surfaces of oven until they have had sufficient time to cool. Other surfaces of the oven may become hot enough to cause burns – among these surfaces are oven vent openings and surfaces near these openings, oven doors, and windows of oven doors.
For self-cleaning ovens:
■Do Not Clean Gasket – The gasket is essential for a good seal. Care should be taken not to rub, damage, or move the gasket.
■Do Not Use Oven Cleaners – No commercial oven cleaner or oven liner protective coating of any kind should be used in or around any part of the oven.
■Clean Only Parts Listed in Manual.
■Before Self-Cleaning the Oven – Remove broiler pan and other utensils.
For smart enabled ovens:
■Remote Operation – This appliance is configurable to allow remote operation at any time. Do not store any flammable materials or temperature sensitive items inside of the appliance.
SAVE THESE INSTRUCTIONS
3

OVEN USE
Feature Guide
These instructions cover several different models. The range you have purchased may have some or all of the items listed. The locations and appearances of the features shown here may not match those of your model. Refer to this manual or the Frequently Asked Questions (FAQs) section of our website at www.jennair.com for more detailed instructions. In Canada, refer to the Customer Service Section at www.jennair.ca.
|
Home |
|
Remote |
|
|
|
|
||
|
|
Enable |
|
|
|
|
|
CANCEL |
|
|
Favorites |
|
Settings |
|
|
|
|
|
|
|
|
|
|
|
|
|
|
|
|
KEYPAD |
FEATURE |
INSTRUCTIONS |
|
|
|
Settings |
Oven Use |
Enables you to personalize the audible tones and oven operation to suit your needs. |
|
Functions |
See the “Settings” and “More Modes” sections. |
Home |
Home Screen |
If pressed once, it enables the user to return to the “Cooking Methods” and “Assisted |
|
|
Cooking” screen. If pressed twice, the time of day is displayed. |
Favorites |
Favorites |
Allows you to save the cycles that you use on a frequent basis. |
|
|
|
Remote Enable |
Enable remote app |
Press Remote Enable to enable the ability to use the JennAir® app. If Wi-Fi is not |
|
control |
already enabled, the oven will attempt to connect to a local network. |
Oven Power |
Oven Function |
The Oven Power keypad begins oven function and wakes it from sleep mode. |
|
Power |
|
Cancel |
Oven Function |
The Cancel keypad stops any oven function except the Clock, Timer, and Control |
|
Cancel |
Lock. |
Touch Panel
The touch panel houses the control menu and function controls. The touch keypads are very sensitive and require only a light touch to activate. Scroll up, down, left, or right to explore the different options and features.
For more information about the individual controls, see their respective sections in this manual.
Display
The display is for both the menu and oven function controls. The touch panel allows you to scroll through the oven menus. The display is very sensitive and requires only a light touch to activate and control.
When an oven is in use, the display will show the clock, mode, oven temperature, kitchen timer, and oven timer, if set. If the oven timer is not set, you can set it from this screen.
After approximately 2 minutes of inactivity, the display will go into sleep mode and the display will dim. When the oven is in operation, the display will remain bright.
During use, the display will show menus and the appropriate selections for the options being chosen.
Display Navigation
If the oven is off, touch the Oven Power to activate the menu. From this screen, all automatic cooking programs can be activated, all manual cooking programs can be set, options can be adjusted, and instructions, preparation, and tips can be accessed.
Setup and Demo Mode
1.Select STORE DEMO MODE to enter Demo Mode.
2.Follow the prompts on the display screen to select a language, set up Wi-Fi/connect to network, accept the terms of service and set the time.
NOTE: The display screen will show the time and date (default screen/standby mode).
3.If you selected Store Demo Mode, select TRY THE PRODUCT to explore various features and options of the product.
4.Select the Settings keypad.
5.Select the Info keypad.
6.Select the Store Demo Mode keypad.
To exit Demo Mode, see the “Settings” section.
4

Cooking Modes
 WARNING
Food Poisoning Hazard
Do not let food sit in oven more than one hour before or after cooking.
Doing so can result in food poisoning or sickness.
To set a Manual Cooking Function, follow these steps.
1.Press the Oven Power keypad.
2.Select the Cooking Modes option.
3.Select the desired cooking function from the list. See the following table for descriptions.
4.Follow the on-screen prompts to set the temperature, optional cook time, and optional delay start, if available. Some cooking functions allow you to turn on/off the Preheat function. Some cooking functions have preset options for specific food types. Select the food type that most closely matches your recipe.
5.Press START to begin. If preheating is on, a tone will sound when preheating is complete.
6.Press the Oven Cancel keypad when finished cooking.
COOKING FUNCTION |
SUGGESTED USAGE |
|
|
Rapid Preheat |
A Bake function that will preheat the oven quickly. |
|
|
Bake |
Used for cooking any kind of food on one rack. |
|
|
Broil |
Used for broiling thin foods on one rack. |
|
|
Convect Broil |
Used for roasting large cuts of meat. |
|
|
True Convect |
Used for cooking different foods on multiple racks at the same temperature. |
|
|
4-Rack Cooking |
Used for cooking thin foods (cookies, pies, pizzas) on 4 racks at the same time. |
|
|
Convect Bake |
Used for cooking any kind of food on one rack, especially meats or cakes with fillings. |
|
|
Specialty Functions: |
Used to speed up the defrosting of food. Place food in the middle shelf. Leave food in packaging to |
Defrost |
keep it from drying out. |
Specialty Functions: |
Used to keep already-cooked food warm until it is served. |
Keep Warm |
|
Specialty Functions: |
Used to proof breads. |
Proofing |
|
Specialty Functions: |
Used to cook ready-made food stored at room or refrigerated temperatures, such as biscuits, or to |
Convenience Foods |
reheat already-cooked food. Follow the instructions on the packaging. |
Specialty Functions: |
Used for cooking large cuts of meat. Turn the meat during cooking for even browning, and baste the |
Convect Roast |
meat periodically to keep it moist. |
Specialty Functions: |
Used for cooking stuffed cuts of meat on a single rack with a low power consumption. |
Eco True Convect |
|
Frozen Bake |
Used to cook premade frozen food, such as lasagna, pizza, pastries, french fries, and bread. No |
|
preheat is necessary. Follow the instructions on the packaging. |
Self Clean |
Used to clean the oven at extremely high temperatures. See the “Self Cleaning” section for more |
|
information. |
Favorites
The Favorites feature stores the oven mode and temperature for your favorite recipe. As you continue to utilize your Favorites tool, your product will refine and tailor suggestions towards your cooking cravings/needs.
NOTE: A select set of Favorites and suggestions may be automatically shown on the Home screen based on your meal times.
To save a recipe, select the Favorites keypad and follow the prompts on the screen to customize your favorites.
Add an image or name to the favorite to customize it to your preferences.
Assisted Cooking
Assisted cooking helps you select the right mode for your everyday cooking needs.
Some modes allow you to skip preheat. Follow the prompts on screen for guidance throughout the cooking process.
Assisted cooking recipes include: ■■ Casseroles & Baked Pasta
■■ Meat
■■ Fish & Seafood ■■ Vegetables
■■ Cake & Pastries ■■ Quiche
■■ Bread
■■ Pizza
5

Settings
The Settings keypad allows you access to functions and customization options for your oven. These settings allow you to set the clock, change the oven temperature between Fahrenheit and Celsius, turn the audible signals and prompts on and off, adjust the oven calibration, change the language, and more.
Select the Settings keypad to view the Settings features: ■■ Remote Enable
■■ Kitchen Timer ■■ Light
■■ Self Clean ■■ Mute
■■ Control Lock
See the “More Modes” section for more information.
TOOL |
NOTES |
|
|
|
|
Remote Enable |
Select REMOTE ENABLE to enable the |
|
|
ability to utilize the JennAir® app. |
|
|
NOTE: Remote Enable turns off when the |
|
|
door is opened. It needs to be re-enabled |
|
|
each time it is going to be used. |
|
Kitchen Timer |
Set a kitchen timer by manually entering the |
|
|
desired time into the keypad. |
|
|
1. |
Select KITCHEN TIMER. |
|
2. |
Manually input the time to the desired |
|
|
timer length. |
|
3. |
Select START. |
|
4. |
Select the Cancel keypad to end the |
|
|
Kitchen Timer. |
Light |
Select the Light keypad to turn the light on |
|
|
and off. When the oven door is opened, the |
|
|
oven light will automatically turn on. |
|
Self Clean |
See the “Self Cleaning” section. |
|
|
|
|
Mute |
Select MUTE to mute or unmute the oven |
|
|
sounds. |
|
Control Lock |
The Control Lock shuts down the control |
|
|
panel keypads to avoid unintended use of |
|
|
the oven(s). The Control Lock will remain set |
|
|
after a power failure, if set before the power |
|
|
failure occurs. When the control is locked, |
|
|
only the Oven Power and Settings keypads |
|
|
will function. |
|
|
The Control Lock is preset unlocked, but |
|
|
can be locked. |
|
|
To Lock or Unlock Control: |
|
|
1. |
Check that the oven is off. |
|
2. |
Select CONTROL LOCK. |
|
3. |
“Control Lock” will display. |
|
4. |
Scroll up to unlock. No keypads will |
|
|
function. |
Preferences
Times and Dates
Set time and date preferences.
NOTE: If user is connected to Wi-Fi, time and date will be set automatically.
■■ Your Meal Times: Adjust when breakfast/lunch/dinner is shown
■■ Time
■■ Date
■■ Time Format (AM/PM vs 24 hour [Military Time])
Sound Volume
Set sound volume preferences. ■■ Timers and Alerts
■■ Buttons and Effects
Display Settings
Set the screen brightness. ■■ Display Brightness
Regional
Set regional preferences.
■■ Language: English or French
■■ Temperature Units: Fahrenheit and Celsius.
Wi-Fi
■■ Connect to Network: Download the JennAir® app from the app store on your mobile phone. See the Connectivity Setup sheet for more detailed instructions.
■■ SAID Code: The SAID code is used to sync a smart device with your appliance.
■■ MAC Address: MAC Address is displayed for the Wi-Fi module.
■■ Wi-Fi Radio: Turn Wi-Fi on or off.
Info
■■ Service and Support: Displays model number, Customer Support contact info, and Diagnostics.
■■ Store Demo Mode: Select Store Demo Mode to toggle Demo Mode off and on.
Start Demo Mode
1.Select the Settings keypad.
2.Scroll and select INFO.
3.Select STORE DEMO MODE and select ON.
NOTE: The display screen will show the time (default screen/ standby mode).
4.Select the Settings keypad.
5.Select TRY THE PRODUCT.
If the unit is in Demo Mode after power up, follow these steps to exit Demo Mode:
To Exit Demo Mode:
1.Select TRY THE PRODUCT.
2.Select the Settings keypad.
3.Scroll and select INFO.
4.Select STORE DEMO MODE and select OFF.
5.Select YES on the confirmation screen.
■■ Restore Factory: This will restore your product to the original factory default settings.
■■ Wi-Fi Terms and Conditions: www.jennair.com/connect. In Canada, www.jennair.ca/connected.
6

More Modes
Sabbath Mode
For guidance on usage and a complete list of models with Sabbath Mode, visit www.star-k.org.
The Sabbath Mode sets the oven to remain on in a bake setting until disabled.
When the Sabbath Mode is activated, only the Bake cycle will operate. All other cooking and cleaning cycles are disabled. No tones will sound, and the displays will not indicate temperature changes. When the oven door is opened or closed, the oven light will not turn on or off, and the heating elements will not turn on or off immediately.
If a cook timer is set, the countdown will appear. The timer will countdown once the timer is set.
NOTE: If a power failure happens while Sabbath Mode is running, the oven will show Sabbath Mode is on, but the Bake cycle will not be on. If the oven door is opened during this time, the oven light will not turn on.
To enable and activate Sabbath Mode:
1.Press the Settings keypad.
2.Select MORE MODES.
3.Select SABBATH MODE.
4.Press SABBATH MODE again to enable Sabbath Mode (Sabbath Mode is preset to off).
5.(Optional) For timed cooking in Sabbath Mode, press ADD A COOK TIME, enter the desired cook time and then press NEXT.
6.Select START.
To Disable and Exit Sabbath Mode:
1.Press the Oven Power or Cancel Keypad.
2.Press and hold the display screen for three seconds.
To Adjust Temperature:
1.Press the +/- 25 on the display screen to select the new temperature.
NOTE: The temperature adjustment will not appear on the display, and no tones will sound.
Aluminum Foil
IMPORTANT: To avoid permanent damage to the oven bottom finish, do not line the oven bottom with any type of foil or liner.
For best cooking results, do not cover entire oven rack with foil because air must be able to move freely.
To catch spills, place foil on rack below dish. Make sure foil is at least 1/2" (1.3 cm) larger than the dish and that it is turned up at the edges.
Positioning Racks and Bakeware
IMPORTANT: To avoid permanent damage to the porcelain finish, do not place food or bakeware directly on the oven door or bottom.
Racks
■■ Position racks before turning on the oven.
■■ Do not position racks with bakeware on them. ■■ Make sure racks are level.
■■ Place food so it will not rise into the broil element. Allow at least 1/2" (1.3 cm) between pans and the broil element.
To move a rack, pull it out to the stop position, raise the front edge, and then lift it out. Use the following illustration and charts as a guide for positioning racks.
Rack Positions
5 |
4 |
3 |
|
2 |
|
1 |
Broiling |
|
FOOD |
RACK POSITION |
Most broiling |
5 |
For hamburger patties to have a well-seared exterior and a rare interior, use a flat rack in position 5. Cook over a drip tray filled with 2 cups (500 ml) of water. Broil for 15-30 minutes and turn two thirds of the way through cooking.
Traditional Cooking
FOOD |
RACK POSITION |
|
|
Large roasts, turkeys, angel |
1 or 2 |
food, bundt cakes, quick |
|
breads, pies |
|
Yeast breads, casseroles, |
2 or 3 |
meat and poultry |
|
Cookies, biscuits, muffins, |
3 or 4 when single rack |
cakes |
baking; 1 and 4 when double- |
|
rack baking; 1, 3, and 5 when |
|
triple-rack baking; and 1, 3, 4, |
|
and 5 when quadruple-rack |
|
baking. |
Baking Layer Cakes on Two Racks
For best results when baking cakes on two racks, use rack positions 1 and 4 with the Bake function. Place the cakes on the racks as shown.
Baking Cookies on Two Racks
For best results when baking cookies on two racks, use rack positions 1 and 4.
Bakeware
To cook food evenly, hot air must be able to circulate. Allow 2" (5.0 cm) of space around bakeware and oven walls.
Use the following chart as a guide.
NUMBER OF PAN(S) |
POSITION ON RACK |
|
|
1 |
Center of rack. |
|
|
2 |
Side by side or slightly staggered. |
|
|
3 or 4 |
Refer to the previous illustration. |
NOTE: Bakeware materials and color may affect results. Dark, dull, non-stick, or glass pans may require shorter baking times, in contrast insulated or stainless steel pans may require longer
baking times. Follow bakeware manufacturer’s recommendations.
7
Accessories
The number and the type of accessories may vary depending on which model is purchased. Other accessories can be purchased separately from the After-sales Service.
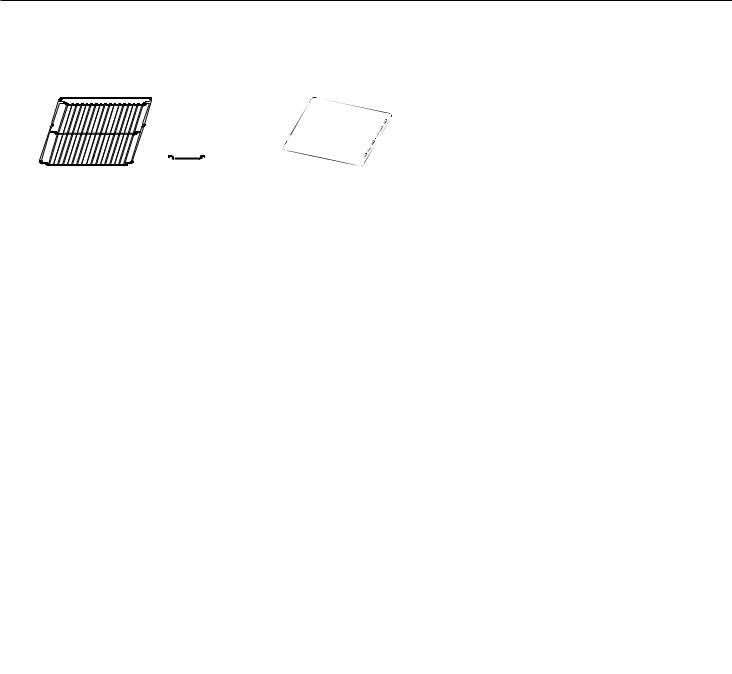
Wire Shelf
Use to cook food or as a support for pans, cake tins and other ovenproof items of cookware.
Sliding Runners (on some models)
To facilitate inserting or removing accessories.
Drip Tray
Use as an oven tray for cooking meat, fish, vegetables, focaccia, etc. or position underneath the wire shelf to collect cooking juices.
Food Probe
To accurately measure the core temperature of food during cooking. Thanks to its four sensing points and rigid support, it can be used for meat and fish, and also for bread, cakes and baked pastries.
Baking Tray
Use for cooking all bread and pastry products, but also for roasts, fish en papillotte, etc.
Inserting the Wire Shelf and other Accessories
Insert the wire shelf horizontally by sliding it across the shelf guides, making sure that the side with the raised edge is facing upwards.
Other accessories, such as the drip tray and the baking tray, are inserted horizontally in the same way as the wire shelf.
Removing and Refitting the Shelf Guides
■■ To remove the shelf guides, lift the guides up and then gently pull the lower part out of its seating. The shelf guides can now be removed.
■■ To refit the shelf guides, first fit them back into their upper seating. Keeping them held up, slide them into the cooking compartment, then lower them into position in the lower seating.
Fitting the Sliding Runners (if present)
Remove the shelf guides from the oven and remove the plastic from the sliding runners.
Fasten the upper clip of the runner to the shelf guide and slide it along as far as it will go. Lower the other clip into position. To
secure the guide, press the lower portion of the clip firmly against the shelf guide.
Make sure that the runners can move freely. Repeat these steps on the other shelf guide on the same level.
NOTE: The sliding runners can be fitted on any level.
8
 Loading...