

Page 1
Bling it ON!
Maddie Bushman Educational Coordinator
1. Open Artistic Suite V6 and connect the cutter to
the computer using the USB cable provided with
the cutter.
2. Set the blade at 6-8 depending on test results.
Note –refer to the manual and always test rst.
3. When this screen appears, select “next”.
4. When the screen appears for selecting the fabric,
choose “cotton” and then select “next”. Note – no
fabric will be used this is just the background for
the crystal design.
5. When the screen appears asking where the
artwork will be found, select “new graphic” and
then select “nish”.
6. Select “tools” from the top toolbar, select “clipart
library” and then select “Insert clipart”.
Page 2
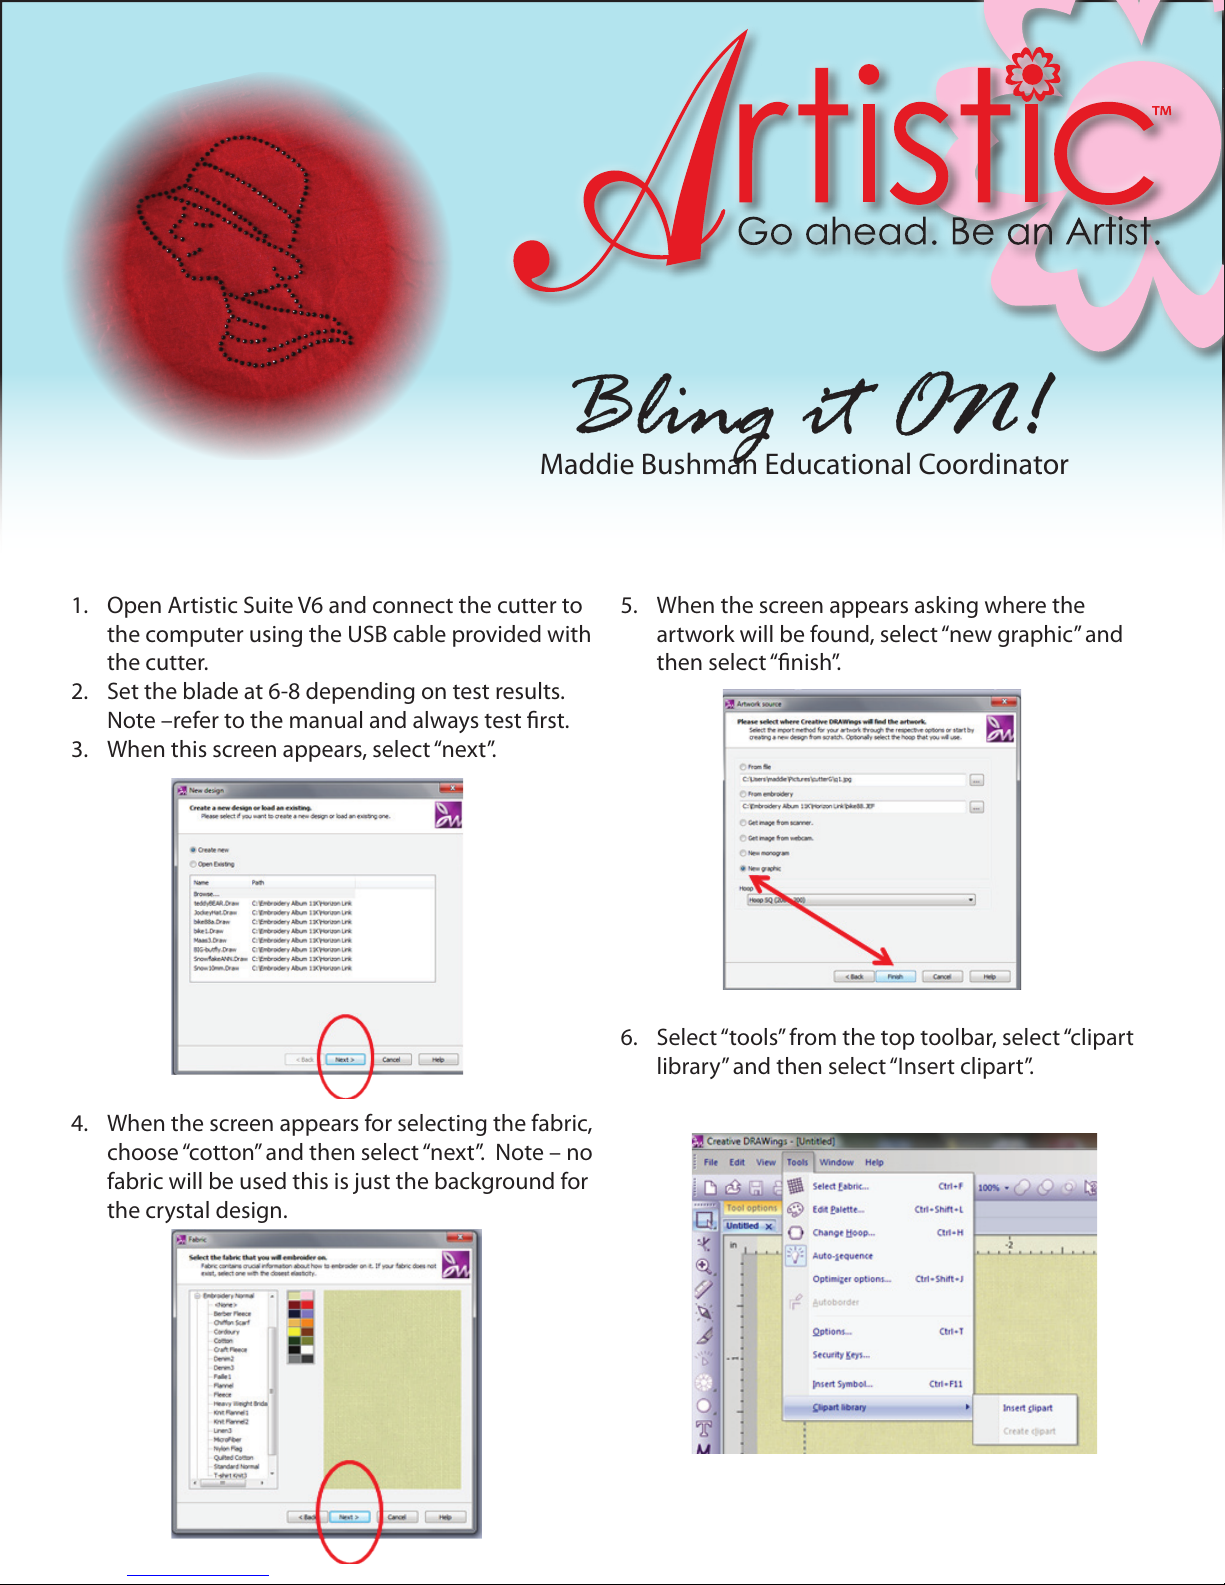
7. Type “girl” in the tag bar and then select
“people22” and then select “insert”.
8. Click and drag the cross hair to create the design
in the hoop. Note use the corner turn arrow to
reposition the girl.
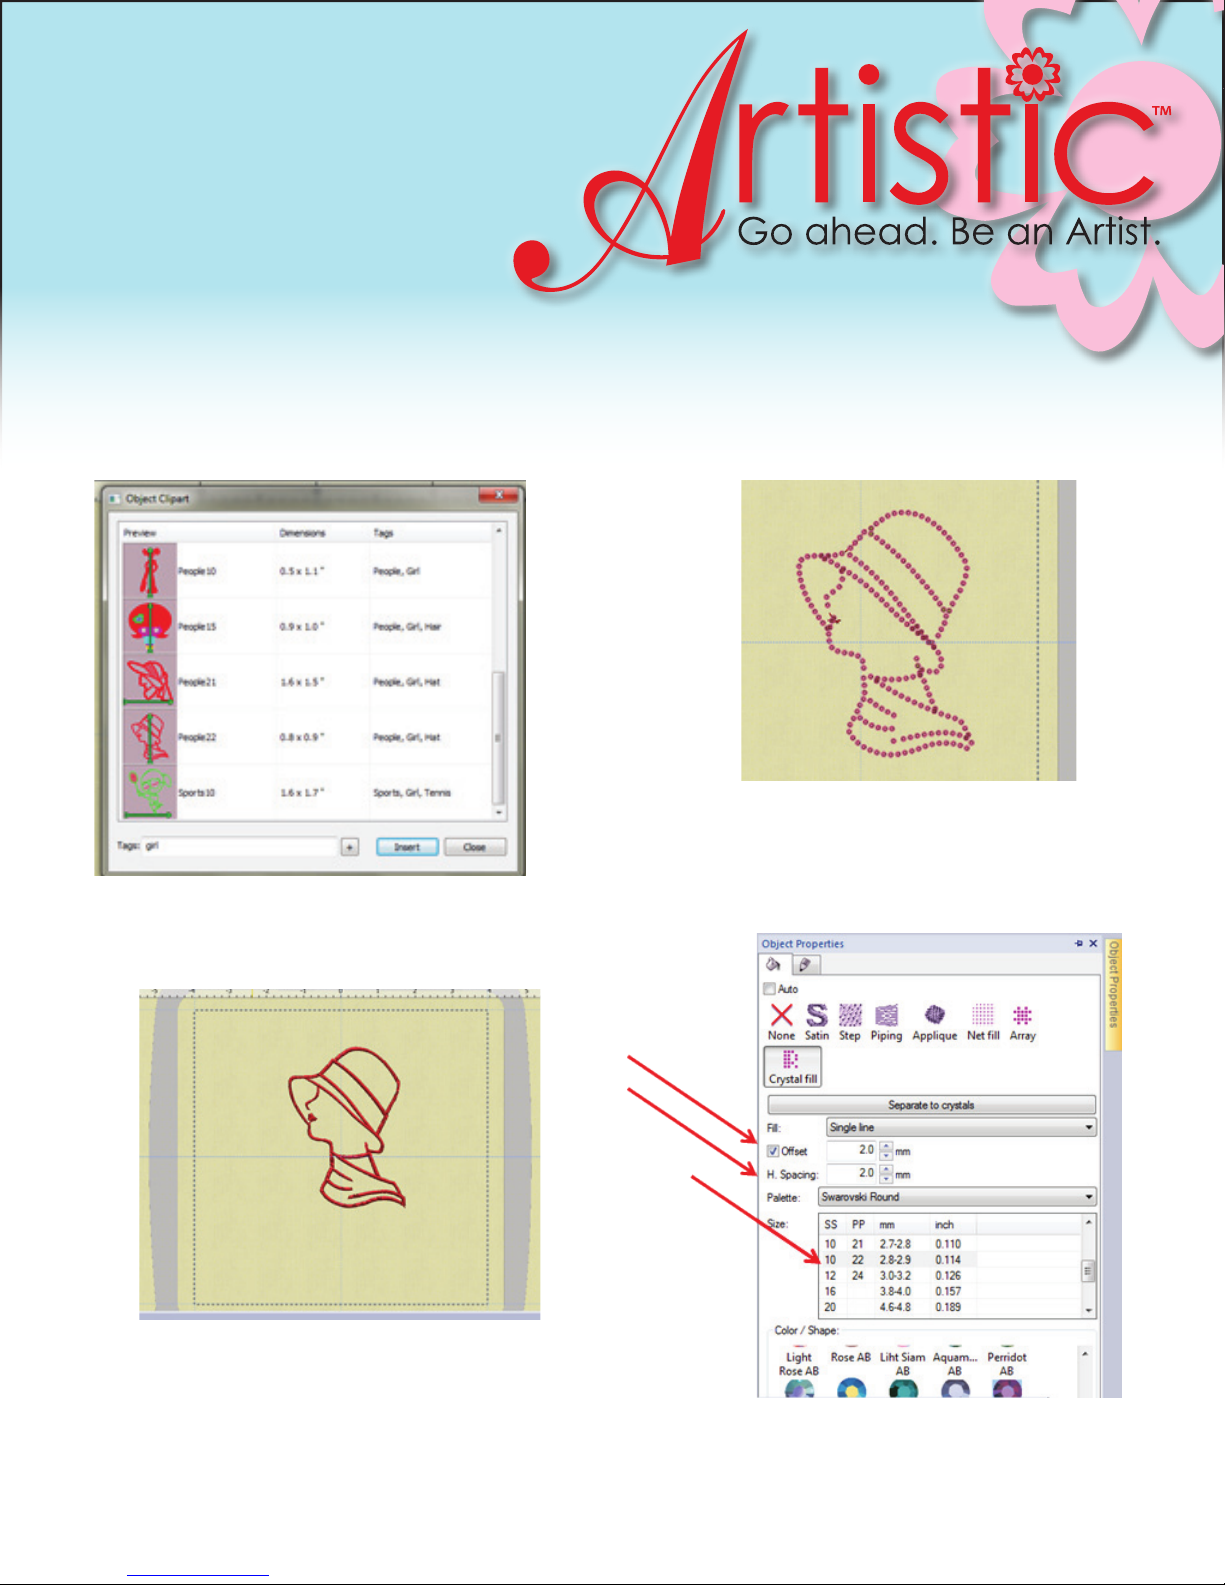
9. While the design is still selected, select object
properties, and then select “crystal ll”.
10. Adjust the “oset” to 2 and the “spacing” to 2,
select desired crystal size (SS10), select “single
line” for ll and the desired color crystal.
Special note – hold the control key and select “a” on
the keyboard to select the entire design, then click and
drag the box to achieve 4.0 width and 5.50 height.
Page 3

11. Using the roller wheel in the center of the
mouse, zoom in to see if there is a red or yellow
“x” in the center of any crystals. Note – this is an
indication that the crystals are either too close or
overlapping and must be moved or removed.
12. Select “Object Properties” and then select
“Separate To Crystal” to make the necessary
changes.
14. Select the crystal with the yellow “x” and move it
or delete it as necessary. Note –please zoom in
for improved accuracy.
15. If the crystals overlap it is suggested that one
of them be deleted. Note – keep zooming in to
see if all the necessary modications have been
made so that the crystals are properly aligned.
Special Note –if desired, for better viewing of crystals
you can change the fabric color to black.
13. Select the crystal with the red “x” and hit the
delete key on the keyboard or reposition it.
Page 4

16. To preview the crystal alignment, select “le”,
select “export” to “Crystal Cutters”.
17. On this screen you can select the cutter to be
used (Silhouette Cameo), the number of passes
(2 – 3). For additional modications refer to the
manual. In addition the dimensions of the crystal
template are indicated.
18. Place the template material with the paper
removed (sticky side to sticky side) on the carrier
mat.
19. Place the carrier mat at the front of the cutter
and press “enter” on the cutter to “load cutting
mat”. Note – most designs will default to upper
left hand corner of the mat.
20. Once the mat is loaded, select “send” to start the
cutter cutting the holes for the crystals.
21. The cutter will start cutting from the bottom of
the design and advance to the top.
22. Once the cutter has completed cutting it will
prompt for “unload”, select enter on the cutter
and take the mat to a work station.
23. Starting at the cut of the frame, gingerly pull it
way from the mat. Note the dots should remain
on the mat for removal later.
24. Allow a few seconds for the template material
to relax and then place on backer board. (White
cardboard)
25. Place the template in the empty starter kit
box and sprinkle crystals in the center of the
template.
26. Take the brush and using a rm side to side
rocking motion brush the crystals into the
template.
27. If a few of the crystals are upside down, use the
pick to ip them right side up.
28. If not all the crystals fell into place, use the “pick
me up” tool to place them in the appropriate
spots.
29. Once all crystals are right side up and in the
template, take a piece of the transfer tape and
place the sticky side on top of the crystals.
30. Firmly press the tape to the crystals using your
ngers.
31. Gingerly remove the tape from the template.
Note – all the crystals should come up with the
tape. If not, lay the tape down again and press
the crystal to make it adhere to the tape.
Page 5

32. Place the tape with the crystals on the desired
surface (garment, umbrella, totebag, purse etc.)
33. Place a large enough pressing cloth on top of the
tape and adhere crystals using a press or a dry
iron set on cotton.
34. The press will signal when desired temperature is
reached but may need to be done twice.
35. For the iron hold for about 20-30 seconds. Note
– Press with the iron, do not slide the iron over
the area it will move the crystals.
Special Note – if using an iron reposition during the
pressing time so as not to get the “hole” marks of
the iron on the garment surface.
36. If possible turn over garment and press on the
wrong side for approximately 10-30 seconds.
Note – if possible remove transfer tape at this
time.
37. Be sure to let the garment cool for at least 5-10
minutes.
38. To remove the dots from the carrier mat place a
scrap of the template material, sticky side up on
the underside of the mat and using the scraper,
scrape the dots onto the sticky scrap.
 Loading...