

Page 1
®
iRobot
Create
OWNER’S GUIDE
SAVE 15%
on accessories.
See back for details.
www.irobot.com
Page 2

Important Safety Instructions
GENERAL SAFETY INSTRUCTIONS
• Read all safety and operating instructions before operating iRobot Create.
• Retain the safety and operating instructions for future reference.
• Heed all warnings on iRobot Create, battery, charger and in owner’s manual.
• Follow all operating and use instructions.
• Refer all non-routine ser vicing to iRobot.
Create USE RESTRICTIONS
• Roomba is for indoor use only.
• Do not sit or stand on this device. Small children and pets should be super vised
when iRobot Create is on.
• Do not pour or spray water onto iRobot Create.
• Do not use iRobot Create to pick up anything that is burning or smoking.
• Always remove the batter y before long-term storage or transpor tation.
• iRobot Create has built-in safety sensors to keep it from falling down stairs and bumping
hard into walls. iRobot is not responsible for any product issues that may arise if you
disable those sensors.
iRobot BATTERY AND CHARGING
• Charge using a standard U.S. (120V AC) outlet only. Product may not be used with any
type of power converter. Use of other power conver ters will immediately void the warranty.
• Use only the charger supplied by the manufacturer to charge this device.
• Do not use a charger with a damaged cord or plug.
• Charge indoors only.
• iRobot Create’s power supply may be protected with a sur ge protector in the event of
severe electrical storms.
• Never handle chargers with wet hands.
2
iRobot Create Owner’s Guide
Page 3

Table of Contents
About iRobot Create .................................................... 4
Anatomy ..................................................................... 5
Demos ....................................................................... 7
Powering iRobot Create ................................................ 8
Cargo Bay Connector ................................................... 10
Open Interface Commands .......................................... 11
Sending OI Commands from a PC ............................ 11
Sending OI Commands from a Microprocessor .........
Creating a Script for iRobot Create ............................... 13
Accessories Available for iRobot Create ........................ 14
Virtual Wall® .......................................................... 14
Self Charging Home Base™ .................................... 15
Roomba Standard Remote ...................................... 15
iRobot Command Module ........................................ 16
iRobot Rechargeable Batter y ................................... 16
Troubleshooting .......................................................... 17
INDEX ......................................................................... 18
12
www.irobot.com 3
Page 4

About iRobot® Create
iRobot® Create is a complete robot development kit that
allows you to program new robot behaviors without having
to worry about mechanical assembly and low-level code.
iRobot Create’s Open Interface (OI) provides you with a set
of commands, such as “drive” commands, demo commands,
song commands and sensor commands, that encourage your
own inventiveness. With iRobot Create, you can develop new
behaviors and add third party electronics, all without having to
worry about mechanical robustness or low-level control.
When you first begin working with iRobot Create you may find its
ten built in demos useful as inspirations for your own ideas.
As you become more comfortable with its abilities and interface
you will want to write your own Open Interface-based programs
to control iRobot Create using a serial connection from a PC or
microprocessor such as the iRobot Command Module.
You can attach and control other hardware and electronic
devices to iRobot Create; such as a robotic arm, light
display, or a ranging sensor. It can also become a musical
instrument! By using the Song command you can write and
save up to 16 songs in iRobot Create. For more information on
iRobot Create’s OI commands, including demos and songs,
refer to the iRobot® Create Open Inter face (OI) Specification
found at www.irobot.com/create.
Thank you for purchasing iRobot Create. We hope you enjoy working
with it and we look forward to hearing about your experiences.
Sincerely,
The iRobot Create Team
4
iRobot Create Owner’s Guide
Page 5
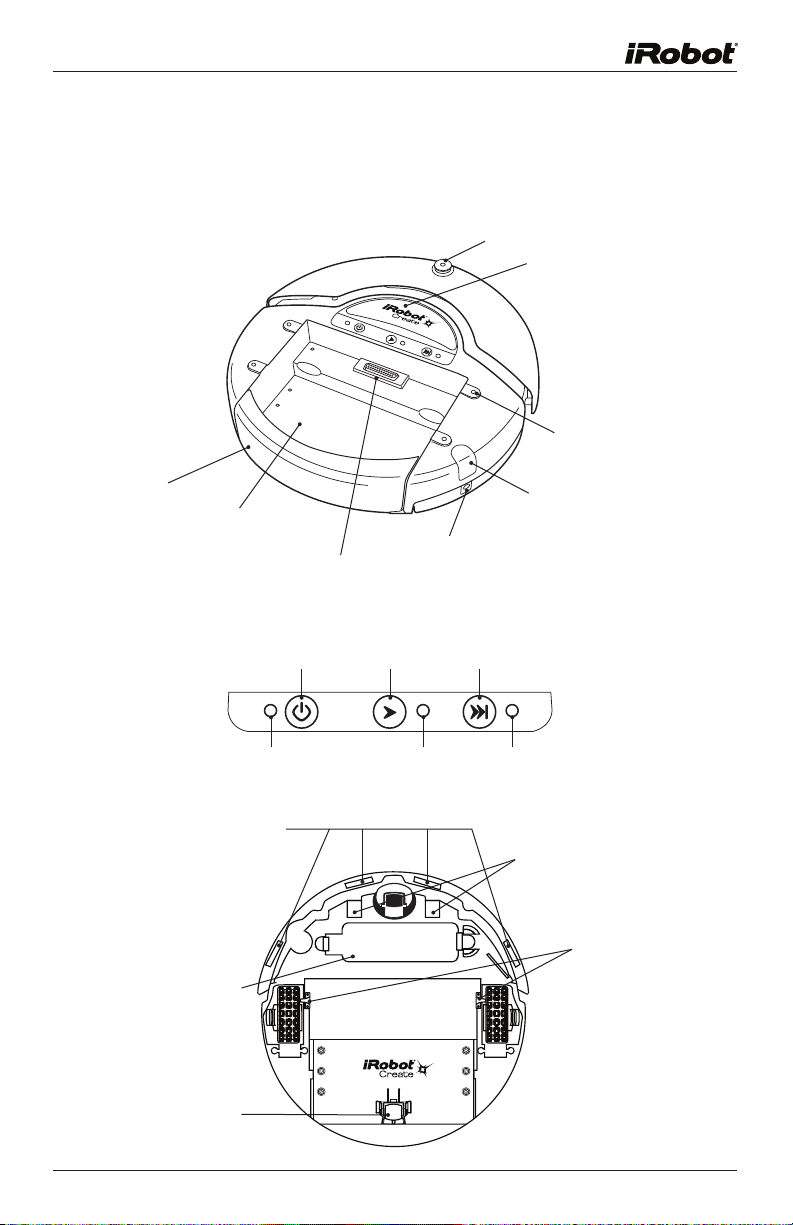
Anatomy
Top View
Tailgate
Cargo Bay
Buttons and Lights
Cargo Bay
Connector
Power Button
Charging Socket
Play
Button
Advance Button
Omnidirectional
IR Receiver
Handle
6-32 Mounting
Cavities
Serial Port
Bottom View
Fourth Wheel
Power LED
Cliff Sensor
Openings
Battery
Play LED Advance LED
Contact
Points for
Home Base
Wheel Clips
www.irobot.com 5
Page 6

Wheel Clips
iRobot Create comes equipped with wheel clips that hold its main wheels in
the Retracted position. You can remove the wheel clips, which automatically
places the wheels into the Released position. Save them in case you later
want to use iRobot Create with the wheels in the Retracted position. There
are advantages to both the Retracted and Released wheel positions.
• The Retracted wheel position (clips in place) provides iRobot Create
with greater stability. This is useful if you are running iRobot Create
with a payload.
• The Released wheel position (clips removed) provides iRobot Create
with greater mobility. This is useful if you want iRobot Create to travel
over uneven surfaces.
Adding the Fourth Wheel
iRobot Create comes with an additional unattached fourth wheel that allows
for greater stability and prevents the back of the robot from dragging when
you add payloads. The fourth wheel is not necessary unless iRobot Create
is running with a payload.
To attach the four th wheel, remove all payloads
from iRobot Create and turn it over so you can
see the underside. Slide the fourth wheel into
the grooves at the back of the robot, with the
wheel angled toward the back (see figure 1).
Push it in until it clicks into place. To remove it,
depress the tab in front of the grooves and slide
the wheel out.
Adding Weight to the Tailgate
iRobot Create comes with a tailgate that enables
you to change the center of gravity of the robot by
adding weight to the back portion of the robot. This is
useful when running iRobot Create with a payload.
To add weight:
• Remove the 2 screws that are securing the
tailgate to the robot.
• Remove the 5 screws holding down the
cover of the tailgate.
• Insert pennies (or other weights) into the
inside tailgate slots.
• Screw the cover back on the tailgate and
screw the tailgate back on the robot.
Tailgate
Figure 1.
iRobot Create’s
fourth wheel
6
iRobot Create Owner’s Guide
Page 7
Demos
iRobot Create comes with ten built-in demos to provide inspiration for your
own robot programming adventures.
• Press the power button and wait for the power LED to stop flashing.
• To select a demo, press the Advance button . iRobot Create beeps
the number of the selected demo. One long, low beep is equal to five
short, high beeps. For example, when you select demo number 8, iRobot
Create plays long-shor t-short-short (
• iRobot Create’s Advance LED blinks in the same pattern while a demo
is running or paused.
• Press the Play button
to star t the currently selected demo.
• To stop the demo, press the Play button or the Advance button.
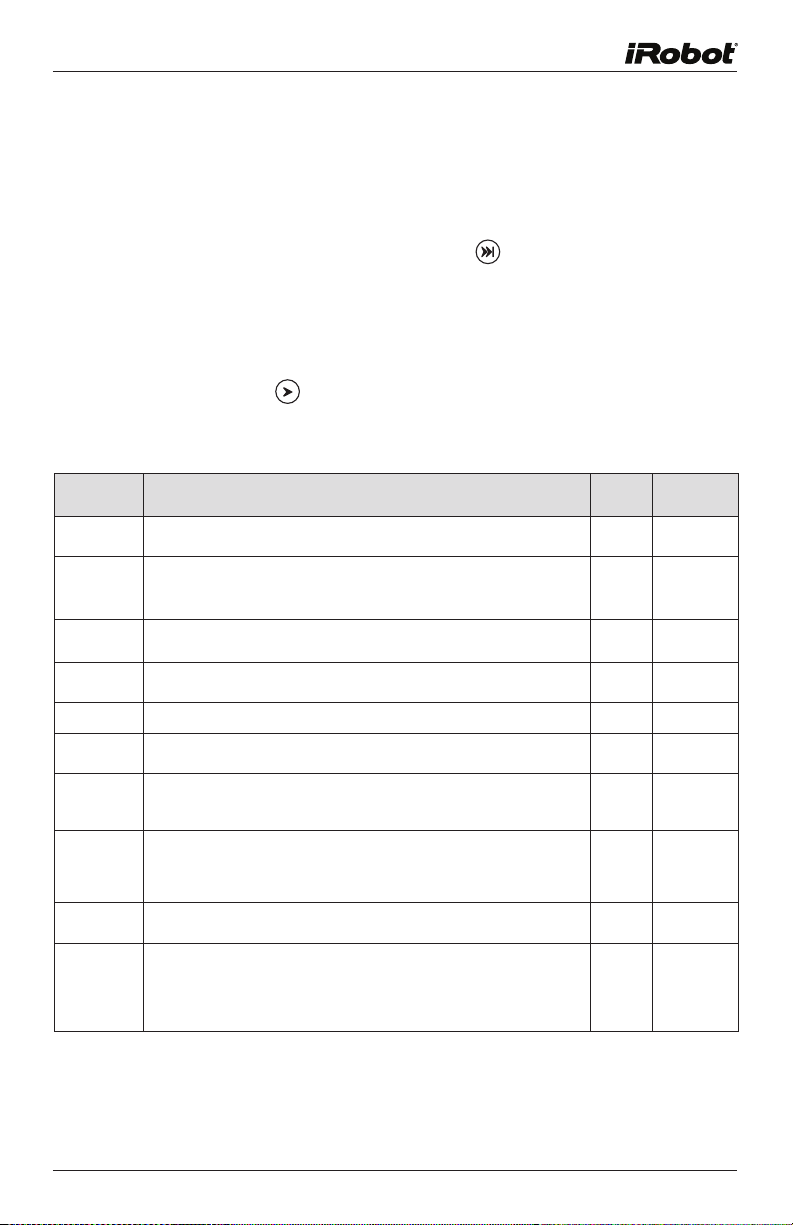
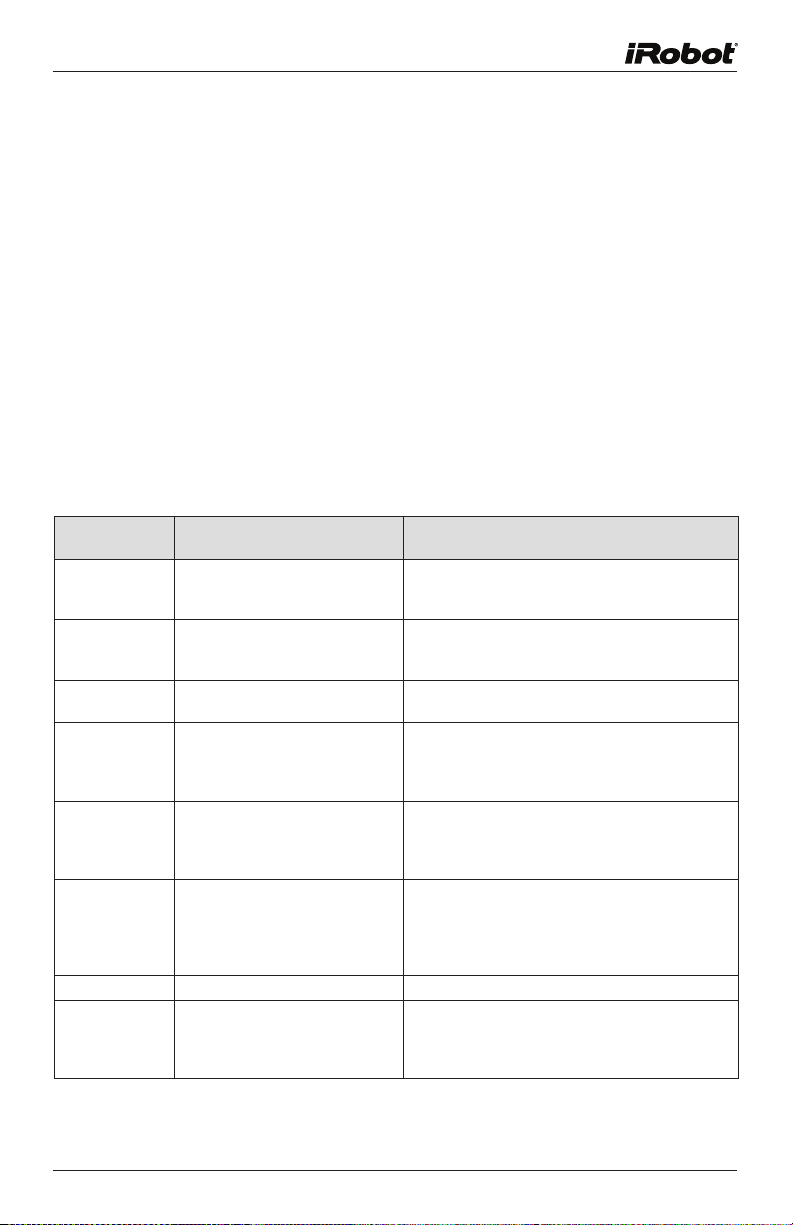
Demo Descriptions
Demo Description Demo # Demo Beep
Cover iRobot Create covers an entire room using a combination of behaviors,
Cover and
Dock
Spot Cover iRobot Create spirals outward, then inward, to cover an area around
Mouse iRobot Create tries to follow around the edges of a room using its
Figure Eight iRobot Create continuously drives in a figure 8 pattern. 5
Wimp iRobot Create drives for ward when pushed from behind. If iRobot
Home iRobot Create drives toward a Vir tual Wall* when the back and sides
Tag Identical to the Home demo, except iRobot Create goes back and
Pachelbel iRobot Create plays the notes of Pachelbel’s Canon in sequence
Banjo iRobot Create’s four clif f sensors play the notes of a chord,
*To find out more about the Home Base and Virtual Wall, see the Accessories section starting on page 14.
such as bouncing off of walls, following walls, and spiraling.
Identical to the Cover demo, with one exception; if iRobot Create
sees the Home Base’s* infrared signals, it uses these to move
towards the Home Base and dock with it.
its starting position.
wall sensor and bumper.
Create hits an obstacle while driving, it drives away from the obstacle.
of its Omnidirectional IR Receiver are covered with black electrical
tape. When it touches the Vir tual Wall or another obstacle, it stops.
forth between multiple Virtual Walls by bumping into one, turning
around, driving to the next Virtual Wall, bumping into it and turning
around to bump into the next Virtual Wall.
when its cliff sensors are activated.
depending on how the bumper is pressed:
•No bumper: G major
•Right or left bumper: D major7
•Both bumpers (center): C major
_...
).
Pattern
1
2
3
4
.
..
...
....
_
6
7
8
9
10
_.
_..
_...
_....
_ _
Demo Commands
You can also start a demo with iRobot Create’s Open Interface serial protocol.
For details, see the iRobot® Create Open Interface (OI) Specification found
at www.irobot.com/create.
www.irobot.com 7
Page 8

Powering iRobot Create
iRobot Create can be powered with the included alkaline batter y pack, which
takes “AA” alkaline batteries, or with any of the iRobot rechargeable batteries
available for purchase at www.irobot.com.
iRobot Create’s power light indicates the charge state of the batteries. It is
green when the batteries are fully charged or new, and gradually turns red as
the batteries discharge.
WARNING: Do not use rechargeable AA batteries in iRobot Create. Use Alkaline
batteries or iRobot Rechargeable Batteries only.
Color of Power Light
Slow Pulsing Orange Charging (iRobot rechargeable battery only)
Fast Pulsing Orange Reconditioning Charge (iRobot rechargeable battery only)
Green
Amber Partially Discharged
Red Almost Fully Discharged
Flashing Red
Battery Status
Fully Charged
Fully Discharged
8
iRobot Create Owner’s Guide
Page 9
Alkaline Battery Pack
The included alkaline battery pack requires 12 non-rechargeable “AA”
batteries to power iRobot Create. iRobot Create’s low-voltage shutoff is
designed for alkaline batteries only; rechargeable batteries can be deeply
discharged and damaged if they are used in the alkaline batter y pack. iRobot
Create does not attempt to charge batteries in the alkaline batter y pack.
Alkaline batteries will power the robot (on a hard floor with no payloads or
attachments) for up to 1.5 hours if the robot is constantly moving. If you
plan to have your robot moving continuously, iRobot recommends that you
purchase a rechargeable battery pack at www.irobot.com.
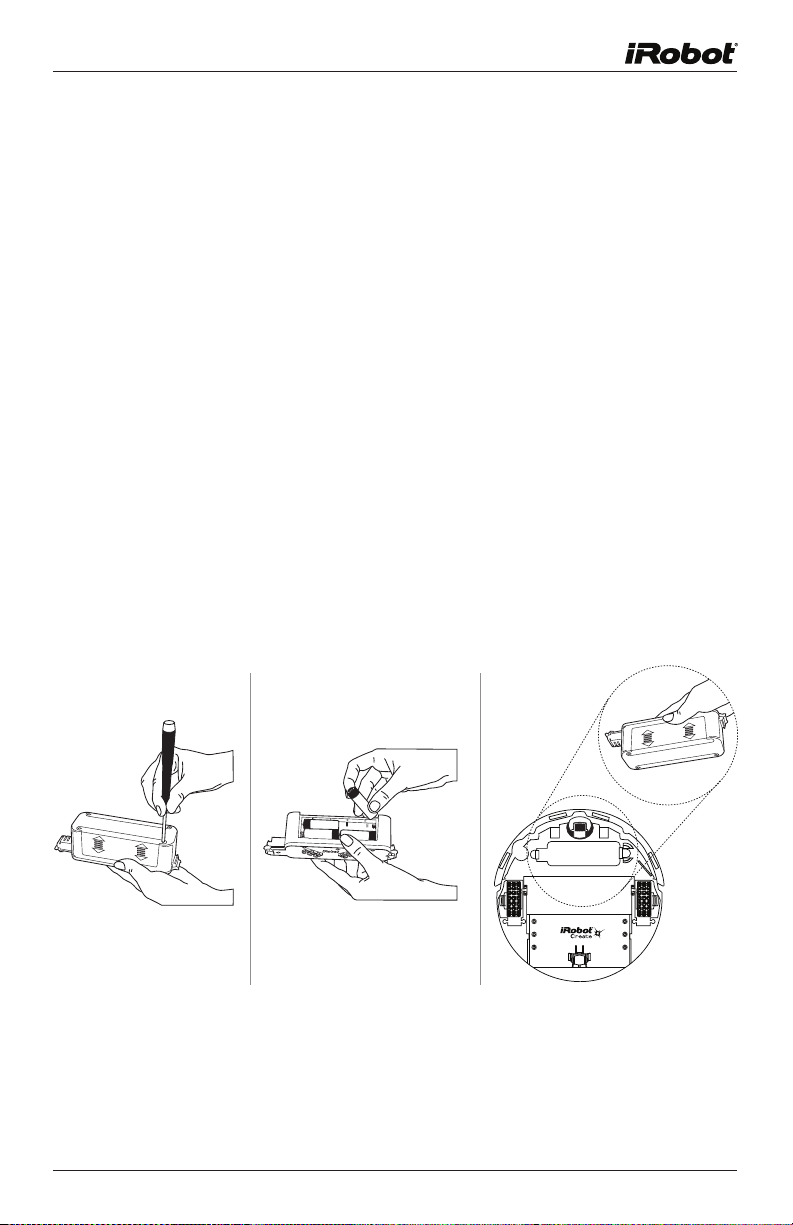
Using the Alkaline Battery Pack
Use a Phillips head screwdriver to loosen the four screws on the underside
of the green Alkaline Battery Pack. The screws will not come all the way out
of the doors. Slide the doors up and out of the battery case. Inser t six
non-rechargeable alkaline “AA” batteries into each side of the batter y case
and then slide the doors back on. Tighten the screws.
Insert the battery case into iRobot Create’s Battery Well, pushing until it
clicks into place.
Note:
The Alkaline Battery Pack is not recommended for use in iRobot Roomba®.
www.irobot.com 9
Page 10

Cargo Bay Connector
The cargo bay connector, located in the front middle of the cargo bay contains
25 labeled pins that you can use to attach electronics and other peripheral
devices such as additional sensors, lights, or motors to iRobot Create. The
cargo bay connector provides four digital inputs, an analog input, three digital
outputs, three low-side driver outputs (useful for driving motors), a charging
indicator, a power toggle, serial Tx and Rx, a 5V reference, battery ground
and battery voltage.
Cargo Bay Connector Pin Descriptions
Pin Name Description
1 RXD
2 TXD 0 – 5V Serial output from iRobot Create
3 Power control toggle Turns iRobot Create on or off on a low-to-high transition
4
5
6 Digital input 3 0 - 5V digital input to iRobot Create
7 Digital output 1 0 - 5V, 20 mA digital output from iRobot Create
8 Switched 5V Provides a regulated 5V 100 mA supply and analog
9 Vpwr iRobot Create battery voltage (unregulated), 0.5A
10 Switched Vpwr Provides battery power @ 1.5 A when iRobot Create is
11 Switched Vpwr Provides battery power @ 1.5 A when iRobot Create is
12 Switched Vpwr Provides battery power @ 1.5 A when iRobot Create is
13 Robot charging When iRobot Create is charging, this pin is high (5V)
14 GND iRobot Create battery ground
15 BRC 0-5V digital input to iRobot Create which can also be used
16 GND iRobot Create battery ground
17 Digital input 0 0 - 5V digital input to iRobot Create
18 Digital input 2 0 - 5V digital input to iRobot Create
19 Digital output 0 0 - 5V, 20 mA digital output from iRobot Create
20 Digital output 2 0 - 5V, 20 mA digital output from iRobot Create
21 GND iRobot Create battery ground
22 Low side driver 0
23 Low side driver 1 0.5A low side driver from Create
24 Low side driver 2 1.5A low side driver from Create
25 GND
Analog input 0 - 5V analog input to iRobot Create
Digital input 1 0 - 5V digital input to iRobot Create
0 – 5V Serial input to iRobot Create
reference voltage when iRobot Create is switched on
powered on.
powered on.
powered on.
to change the baud rate to 19200 (see below)
0.5A low side driver from Create
iRobot Create battery ground
10
iRobot Create Owner’s Guide
Page 11

Open Interface Commands
iRobot Create comes with a serial protocol called the Open Interface (OI) which
consists of a set of commands that you can use to control the robot and read its
sensors. The types of commands available include:
• Demo commands
• Driving commands
• Song commands
• Sensor commands
• Cargo Bay Connector commands
• Scripting commands
A description of all the OI commands can be found in the iRobot® Create
Open Interface (OI) Specification found at www.irobot.com/create.
You send these commands to iRobot Create using the included serial cable or
any other serial connection to a PC.
The serial cable plugs into iRobot Create’s Mini-Din connector, which is located
in the rear right side of iRobot Create, beneath a snap-away plastic guard.
Sending OI Commands from a PC
Connect the serial cable between iRobot Create and your PC’s serial
port and start a serial terminal program that is capable of sending data.
iRobot recommends the freeware RealTerm Serial Capture Program, available
at http://realterm.sourceforge.net/.
Configure the serial settings to 57600 baud, 8 data bits, 1 stop bit, and no
flow control. Select the “Send” tab on RealTerm. Enter commands and watch
the robot perform!
Examples:
• To turn on iRobot Create’s Play LED only:
128 132 139 2 0 0
• To read the state of iRobot Create’s left cliff sensor:
128 142 9
See how the robot’s response changes when you lift it up.
www.irobot.com 11
Page 12

• To make iRobot Create sing:
Send these command sets separately:
128 132
140 0 4 62 12 66 12 69 12 74 36
141 0 (Plays the song)
• To make iRobot Create drive forward:
CAUTION - place iRobot Create on the ground and be ready to grab it when
it reaches the end of its serial cable tether! Send these two command
sets separately:
128 131
137 0 100 128 0
You can also write scripts of commands, freeing your robot from the serial
cable tether. A script is a sequence of commands including commands that
wait for events. With a script you can make the robot per form a “song-anddance” routine that you create.
For more information on scripts, see the section Creating a Script for iRobot
Create found on page 13.
To make the robot perform more complex behaviors, you can write software that
runs on the PC and sends commands to the robot while reading its sensor data.
Your software can communicate with iRobot Create over the included serial
cable or a wireless serial accessory (not included).
(Puts the robot in Full mode)
(Defines the song)
For more information on the Open Inter face commands, see the iRobot®
Create Open Interface (OI) Specification at www.irobot.com/create.
Sending OI Commands from a Microprocessor
With a microprocessor like iRobot’s Command Module attached to your robot,
you can make it perform complex behaviors without a serial tether or wireless
connection to a PC. See page 16 for details on the iRobot Command Module.
With the iRobot Command Module, which plugs into iRobot Create’s Cargo
Bay Connector, you can write your own programs in C or C++, that send OI
commands to iRobot Create and read its sensor data.
You can also expand on the sensors and actuators that iRobot Create offers
by adding your own custom hardware to the iRobot Command Module’s four
DB-9 expansion ports.
12
iRobot Create Owner’s Guide
Page 13

Creating a Script for iRobot Create
iRobot Create’s Open Interface (OI) supports a simple scripting language.
A script consists of a sequence of commands, including drive commands
and commands that wait for an event such as a button press, elapsed time,
or sensor trigger. These commands are documented in detail in the iRobot®
Create Open Interface (OI) Specification. Scripts are stored in iRobot Create’s
RAM, which is cleared when the robot loses power.
Using the Script Command
To load a script onto iRobot Create, use the Script command (152), followed by
the number of bytes in the script, followed by the series of commands and
their arguments. Scripts can be up to 100 bytes long.
Example:
Drive in a square:
152 17 137 1 44 128 0 156 1 144 137 1 44 0 1 157 0 90 153
The meaning of the above string of numbers is:
Commands and Arguments Values
Script 152
Number of bytes
Drive
137
300 mm/s 1 44
Straight 128 0
Wait for Distance 156
400 mm 1 144
Drive 137
300 mm/s 1 44
Spinning counterclockwise 0 1
Wait for Angle 157
90 degrees 0 90
Restart Script 153
17
Using the Play Script Command
When you are ready for iRobot Create to perform the script, send the Play
Script command (153). This loads the script into the serial queue. iRobot
Create then immediately begins executing the script’s commands as if they
had been sent directly to the serial port.
To download a copy of the iRobot Create Open Inter face Specification, go to
www.irobot.com/create.
www.irobot.com 13
Page 14

Accessories Available for iRobot Create
The Following accessories are compatible with iRobot Create:
• Virtual Walls
• Self Charging Home Base
• Roomba Standard Remote
• iRobot Command Module
• iRobot Rechargeable B
Virtual Wall
A Virtual Wall creates an invisible barrier that iRobot Create will not cross by
emitting infrared signals that iRobot Create sees with its Omnidirectional IR
receiver. The invisible barrier can range from three to eight feet long. You
can set the range of the invisible barrier by adjusting a slider bar on the
Vir tual Wall. To create an invisible barrier greater than eight feet wide, you may
need additional Virtual Walls. To purchase a Vir tual Wall, visit our website at
www.irobot.com.
You can also use Vir tual Walls in two of iRobot
Create’s built-in demos: Home and Tag. See page 6
for information on how to select and star t iRobot
Create’s built-in demos.
• The Home demo requires one Vir tual
Wall. To enable the Home demo, cover the
back and sides of the Omnidirectional IR
receiver sensor on iRobot Create with black
electrical tape. When you start the demo,
iRobot Create spins until it sees the Vir tual
Wall Signal, then drives toward it. iRobot
Create stops once it bumps into the Virtual
Wall or other obstacle.
®
™
attery Options
®
Shape of
Beam
• The Tag demo requires at least two Vir tual Walls, placed at least
6 feet apart. To enable the Tag demo, cover the back and side of
the Omnidirectional IR receiver sensor on iRobot Create with black
electrical tape. When you start the demo, iRobot Create spins until it
locates one virtual wall, then drives towards it. When it contacts the
Wall, it spins around until it locates the next Virtual Wall, homes on that
one, and so on.
The Vir tual Wall requires 2 “D” batteries and
D Alkaline
Batteries
(not included)
automatically shuts off after 110 minutes. If the
power light blinks green, the batteries will soon
need replacement.
14
iRobot Create Owner’s Guide
Battery
Door
Page 15
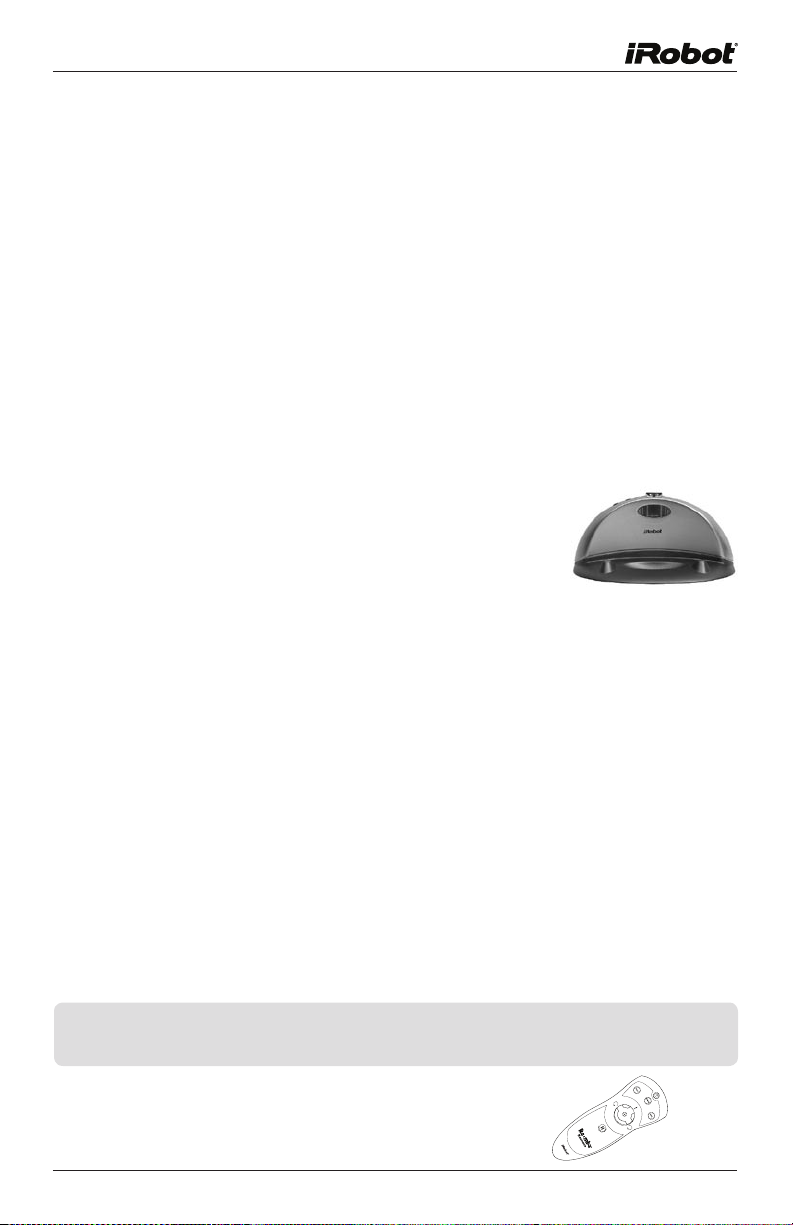
Self Charging Home Base
™
The Self Charging Home Base has three infrared transmitters that you can
use in your own applications. See the iRobot® Create Open Interface (OI)
Specification for details on how to read the signals from these transmitters.
The Self Charging Home Base also enables iRobot Create to automatically
charge its iRobot rechargeable battery. During two demos, iRobot Create
will automatically return to the home base. During the Cover demo, if the
battery is running low and the Omnidirectional IR Receiver on iRobot Create
sees the Home Base IR transmitter, iRobot Create will dock itself on the
Home Base for recharging. During the Cover and Dock demo, as soon as the
Omnidirectional IR Receiver on Create see the Home Base IR transmitter,
iRobot Create will dock itself on the Home Base for recharging. See the Demo
section on page 6 for information on how to select and star t a demo.
While recharging, iRobot Create’s Power LED and the Home Base Dock
lights will be green.
Be sure to keep your Home Base on a hard level sur face
and in an area where iRobot Create has a clear path to
approach the Base. If iRobot Create is unable to dock on
its first attempt, it will continue to try until it is successful.
You can purchase the Self Charging Home Base accessory at www.irobot.com.
Roomba Standard Remote
The Roomba Standard Remote lets you control iRobot Create from a distance.
With the Remote, you can select and start a built-in demo, as well as directly
drive the robot with the Remote’s Directional Button. And with the Open
Interface, you can read all 7 of the signals transmitted by the remote over
iRobot Create’s serial port as well as add remote control functionality to your
own applications.
To star t a demo, press the Remote’s Spot button. This button works the
same as iRobot Create’s Play button.
To select a demo, press the Remote’s Max button. This button works the
same as iRobot Create’s Advance button.
To drive forward press and hold the Up button. To turn left or right press
and hold the Left and Right turn button. To stop, release the button.
NOTE: The Roomba Standard Remote Control will not work if iRobot Create is
near a Virtual Wall or Home Base.
This remote requires 2 AA batteries (sold separately).
You can purchase the Roomba Standard Remote
accessory at www.irobot.com.
www.irobot.com 15
Page 16
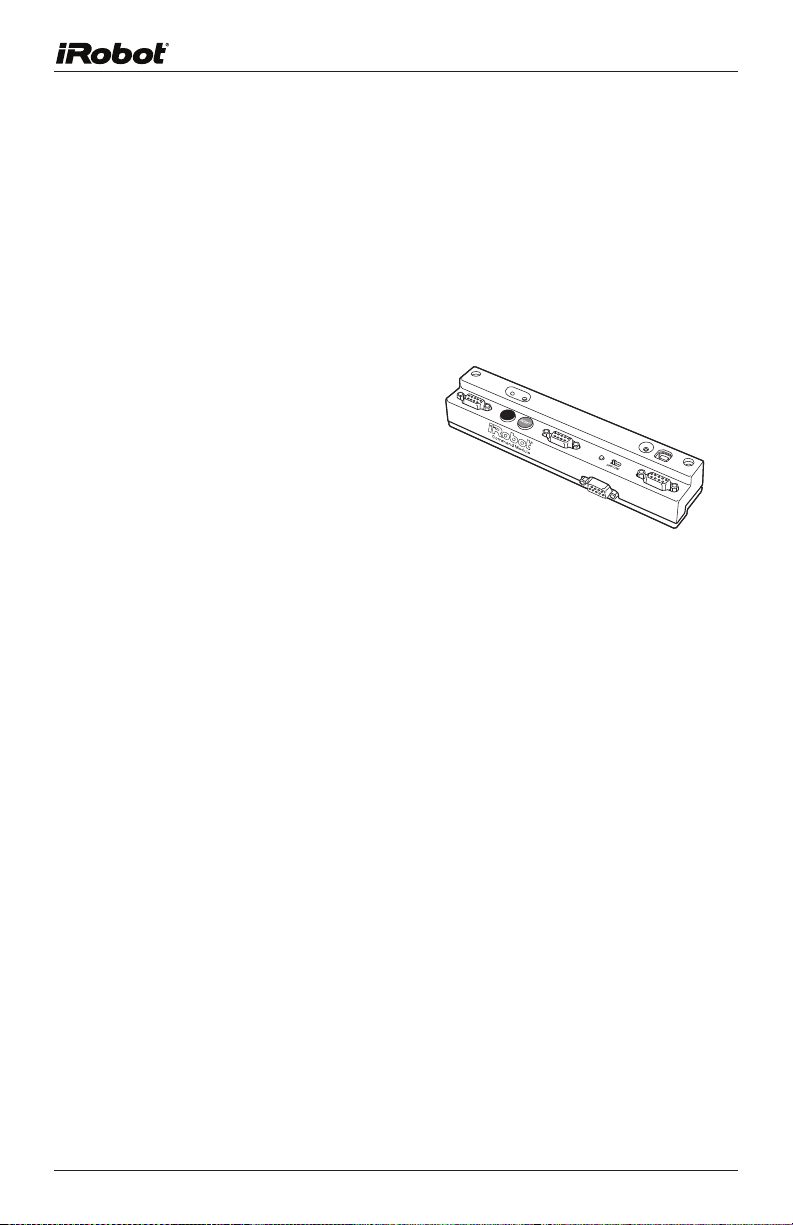
iRobot Command Module
With the iRobot Command Module, you can control iRobot Create with
programs you write in C or C++. And when you add custom hardware to the
iRobot Command Module, you can invent almost any kind of robot you want.
The iRobot Command Module plugs into iRobot Create’s Cargo Bay
connector and screws down for a secure connection. Its four DB-9
expansion ports (ePor ts) make adding your own sensors, lights, and
motors both inexpensive and easy. For more detail, download the iRobot
Command Module Owner’s Manual at www.irobot.com/create.
You can purchase the
iRobot Command Module
at www.irobot.com.
iRobot Rechargeable Battery Options
iRobot Create is compatible with all iRobot Roomba® rechargeable batteries.
If you own a Roomba you can use its battery and charger to power
your iRobot Create.
If you do not have a Roomba battery you can purchase one of these optional
rechargeable batter y packs:
• iRobot Create Rechargeable Battery kit.
This kit comes with a standard rechargeable battery and a standard
charger that will recharge the battery in 7 hours.
• iRobot Roomba APS battery and fast charger.
This battery lasts longer than the standard battery and the fast charger
recharges the batter y in 3 hours.
Tips on using the iRobot rechargeable batteries with iRobot Create:
• Charge this battery overnight before using it for the first time.
• With the rechargeable battery inside the robot, plug the charger directly
into iRobot Create or place iRobot Create on the Home Base while the
Home Base is plugged in.
• The power light pulses orange while the robot is charging and turns
solid green to indicate a full charge.
• For best battery performance, keep iRobot Create powered of f, plugged
in, or charging on the Home Base when not in use.
16
iRobot Create Owner’s Guide
Page 17
• The iRobot Create robot (without a payload or other attachments) will run for
up to 3.5 hours with a fully charged APS battery.
• When you charge an iRobot rechargeable battery for the first time, or
if iRobot Create has been left on and not charging, the robot initiates a
special 16-hour reconditioning charge cycle. During this type of charge
cycle, the power light pulses quickly.
Troubleshooting
During the built-in demos, iRobot Create will tell you when something
is wrong by blinking its Play and Advance lights rapidly and playing a
two-tone “uh-oh” sound followed by beeping. Refer to the char t below to
resolve iRobot Create’s problem. If the problem is not resolved,
visit www.irobot.com/support.
Number of beeps
after “uh-oh”
No beeps A wheel is stuck or is not
1
2 In the figure eight demo, iRobot
3 A wheel motor cannot run Your iRobot Create may be stuck or something may
4 The cliff sensors have
5 Wheel obstruction or robot
6 Wheel drop sensor error Please contact iRobot Customer Care.
7 iRobot Create is stuck Pick up iRobot Create and start it again
Likely Cause What to do
touching the ground
In the figure eight demo, iRobot
Create has contacted an obstacle
Create has encountered a cliff
failed or are blocked
attempting to drive over an
obstacle
Pick up the robot, place it down securely on the
floor and touch the play button to restart the
demo.
Pick up the robot, place it down securely on the
floor and touch the play button to restart the
demo.
Pick up the robot, place it down securely on the
floor and touch the play button to restart the cycle.
be wrapped around a wheel. Look for something
wrapped around the wheels. Push them in and out
and make sure they turn easily.
Turn over iRobot Create and clear any debris that
might be caught underneath the front bumper in
the cliff sensors. You can also use compressed air
to clean them out.
Turn over iRobot Create and remove any
obstructions that prevent the wheels from seating
all the way up into iRobot Create’s body. Also,
remove any obstacles that iRobot Create could
drive over.
somewhere else. Use a virtual wall or other
barrier to keep iRobot Create away from the place
it got stuck.
www.irobot.com 17
Page 18

Index
Accessories, 14
Advance button, 5
Advanced Power System (APS) battery, 16
16 hour refresh charge, 17
Battery Options, 16
iRobot Command Module, 16
Working with Demos
Play a demo, 7
Select a demo,
Stop the demo,
Demo Commands, 7
Demos, 7
Banjo-cheating,
Banjo-hard,
Beep pattern numbers,
Cover,
Cover and Dock,
Demo descriptions,
Drive-Figure-Eight,
Home,
Mouse,
Spot-Cover,
Tag, 7
Wimp,
Docking iRobot Create
Cover and Dock demo, 15
7
7
7
7
7
7
7
7
7
7
7
7
7
Fourth Wheel, 5, 6
iRobot Command Module, 16
Open Interface Commands, 11
Sending from a Microprocessor, 12
Sending from a PC, 12
Play button, 5
Play LED, 5
Power button, 5
Power LED, 5
Rechargeable batter y, 16
Roomba Standard Remote Control, 15
Control buttons, 15
Script, 13
Script
Play Script command, 13
Using the Script command, 13
Wait command, 13
Self Charging Home Base™, 15
Serial capture program, 11
Tailgate, 5, 6
Virtual Walls
Batter y installation, 14
Virtual Walls®, 14
Wheel Clips 5, 6
18
iRobot Create Owner’s Guide
Page 19

iRobot Customer Care
If you have questions or comments about iRobot Create, please contact
iRobot before contacting a retailer.
Please visit our web site at www.irobot.com for support tips, frequently
asked questions, or information about accessories and other iRobot products.
We would like to hear from you.
Should you need assistance, visit the iRobot support web site at
www.irobot.com/support.
www.irobot.com 19
Page 20
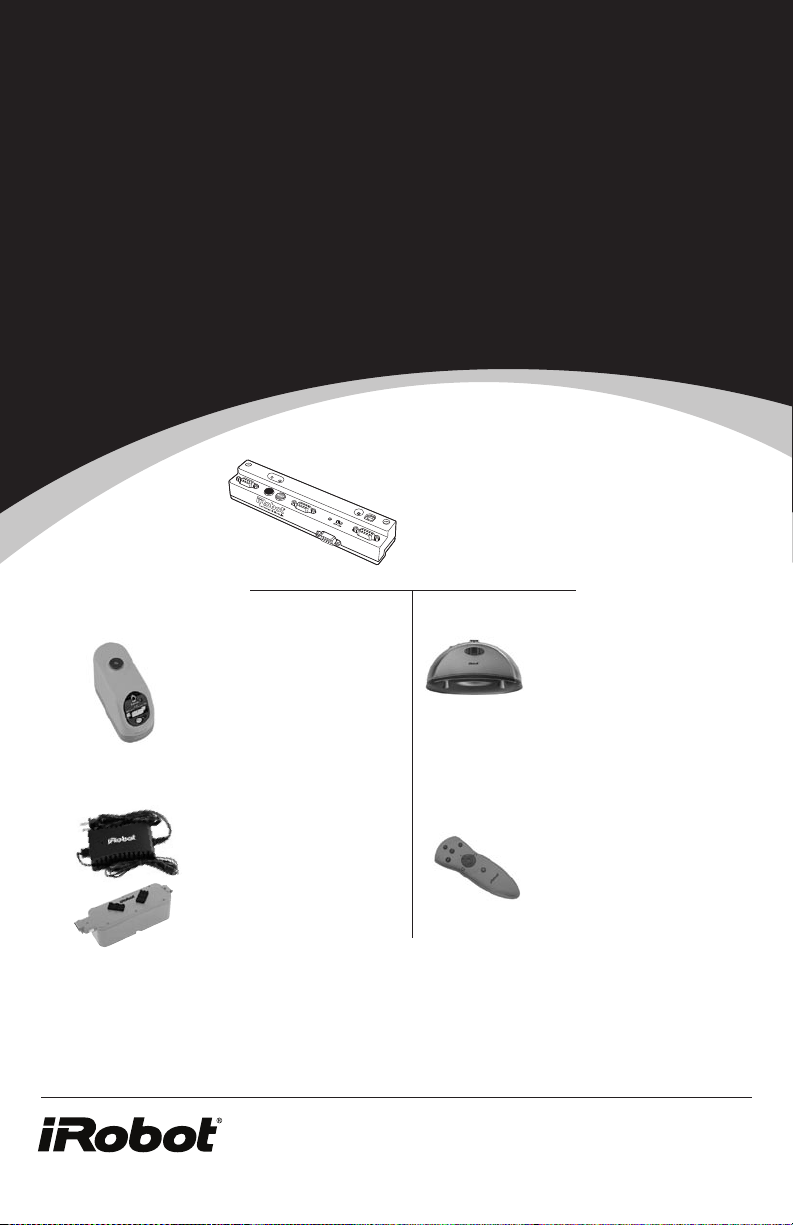
TM
iRobot® Create
Accessories
Register your iRobot® Command Module
today and SAVE 15% on all accessories.
iRobot Command Module
Plugs into Create
and controls the
robot with your own
programs.
*
Virtual Wall
IR transmitter
conveniently placed at
robot eye-level. Can be
used as an invisible
wall or beacon
iRobot
Rechargeable Battery
Rechargeable
battery and charger
for the iRobot Create
®
Home Base
Recharges the iRobot
rechargeable batter y
while in iRobot Create.
Also contains 3
IR transmitters
Standard Remote
Allows you to control
iRobot Create from
a distance
TM
For more accessories and ordering information
go to www.irobot.com or call 800.727.9077.
*See registration card for details. Availability subject to change.
Shipping and handling not included.
©2006 iRobot Corporation. All rights reserved.
iRobot, Roomba and Virtual Wall are registered trademarks of iRobot Corporation.
Home Base and Create are trademarks of iRobot Corporation.
U.S. Pat. Nos. 6,594,844 6,690,134, and 6,809,490. Other patents pending.
430.06
 Loading...