

Insignia NS-DV4G, NS DV4G - TM 4GB Video MP3, NS-DV2GC, NS-DV4GC User Manual

Insignia
NS-DV2G/NS-DV4G Video MP3 Player
Page 1 of 30
Français
Contents
Welcome
Safety information
Features
Package contents
System requirements
Controls and connections
Display information
Setting up your music player
Installing the battery
Charging the battery
Connecting headphones
Installing the software
Using your player
Turning your player on and off
Navigating the on
Recording
Changing the volume
Locking the buttons
Getting more music
Transferring music files to your player
Converting and transferring videos to your player
Playing music files
Viewing photos
Listening to FM radio
Deleting files
Disconnecting the player
Watching videos
Changing settings
Increasing capacity with a MicroSD flash card
Maintaining your player
Care and cleaning
Updating the firmware
Ordering replacement batteries and other parts
Troubleshooting and FAQ
Getting help
-screen menus
User Guide
Español
10/10/2006file://C:\Documents and Settings\Administrator\Desktop\NS-DVxG UG US R0\NS-DV2...

Specifications
Legal notices
Page 2 of 30
Welcome
Congratulations on your purchase of a high-quality Insignia product. Your NS-DV2G or NS-DV4G
represents the state of the art in digital media players and is designed for reliable and trouble-free
performance. You can use your video MP3 player to play digital video and music files, play
audiobooks from Audible.com, and listen to FM radio, and you can carry it with you anywhere.
Safety information
Warnings
Read, keep, and follow all instructions. Heed all warnings.
•
Only use attachments and accessories approved by Insignia.
•
Turn down the volume before turning on your video MP3 player and avoid using it at a
•
high volume. Permanent hearing loss may occur if earphones or headphones are used
at high volume. Reduced volume also extends battery life.
Do not use headphones or earphones while driving, cycling, or operating any motorized
•
vehicle. This may create a traffic hazard and may be illegal in your area.
To reduce the chance of electrical shock, do not use or operate this device near moist
•
environments.
Protect the power cord from being walked on or pinched.
•
Unplug the player during lightning storms or when unused for long periods of time.
•
Risk of explosion, damage, or battery leakage if the battery is incorrectly replaced
•
incorrectly or replaced by an incorrect type. Dispose of used batteries according to
local regulations.
Clean only with a dry cloth.
•
Do not defeat the safety purpose of the polarized-type plug. A polarized plug has two
•
blades with one wider than the other. The wide blade is provided for your safety. When
the provided plug does not fit into your power outlet, consult an electrician for
replacement of the obsolete outlet.
Do not disassemble the player to access internal components (except for the battery)
•
under any circumstances.
Features
Plays MP3, Vorbis, WMA, secure WMA, and Audible audio file formats.
•
Plays WMV and MPEG-4 video file formats.
•
Displays JPEG photos.
•
Backlit LCD supports several languages and displays album art and song information.
•
Digital FM radio tuner allows you to access local radio stations. The radio also
•
10/10/2006file://C:\Documents and Settings\Administrator\Desktop\NS-DVxG UG US R0\NS-DV2...

Page 3 of 30
memorizes up to 20 of your favorite radio stations.
Five preset equalizer settings to optimize playback for normal, rock, jazz, classical, and
•
pop music. You can also set a custom equalizer setting for a total of six to choose
from.
Sophisticated music library sorting lets you browse the music in your player by artist,
•
album, song title, genre, and playlist.
A-B Repeat lets you select any start and end points during playback, so you can
•
repeatedly play that segment. This feature is especially helpful while learning
languages and words to songs.
High-speed mini USB 2.0 port for fast and easy file transfers.
•
Supports Microsoft WMDRM 10 technology.
•
Fully compatible with the Best Buy Digital Music Store, and other Microsoft PlaysforSure
•
music services like Rhapsody, Napster, and Yahoo.
Easy-to-use menus.
•
Mechanical wheel controls with middle select, and Menu and Power buttons.
•
Two audio jacks for Dual headphones.
•
Support for external memory (MicroSD Card).
•
Upgradeable firmware to keep your music player up to date.
•
Easily replaceable and rechargeable lithium ion battery for up to 20 hours of music
•
playback time and a 2.5 hour recharge time.
Package contents
•
Rechargeable lithium ion battery
•
•
•
•
•
•
•
System requirements
Insignia video MP3 player
Earbuds
Mini USB 2.0 cable
Quick Start Guide
CD (contains Best Buy Rhapsody software and this online user guide)
Audible and music offer cards
Carrying case
To transfer music from your computer to your music player, your computer must have the
following minimum system requirements:
Windows XP or Macintosh OS 8.6 and higher
•
Windows Media Player 10 (available on the enclosed CD)
•
One available USB 2.0 port
•
Pentium-class CPU or equivalent
•
64 MB memory
•
Sound card and speakers
•
Microsoft Internet Explorer version 5.01 or higher
•
Active Internet connection (128+ Kbps broadband recommended)
•
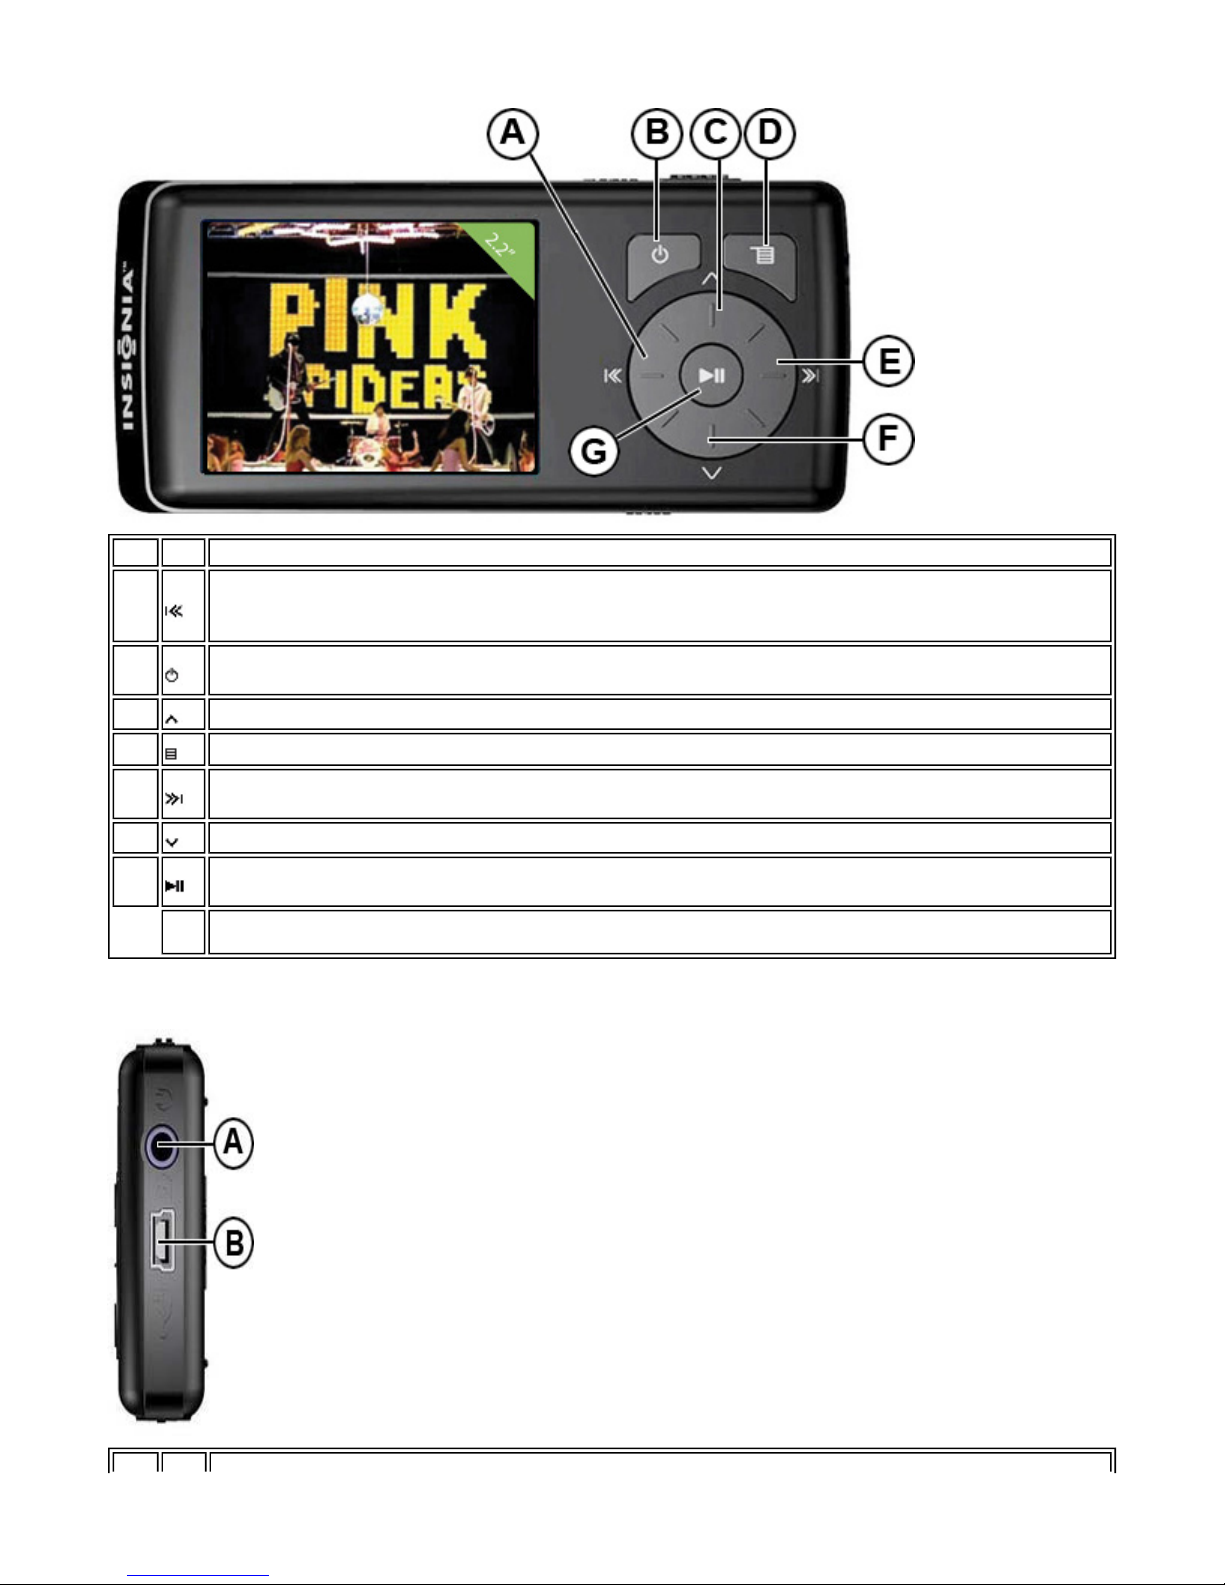
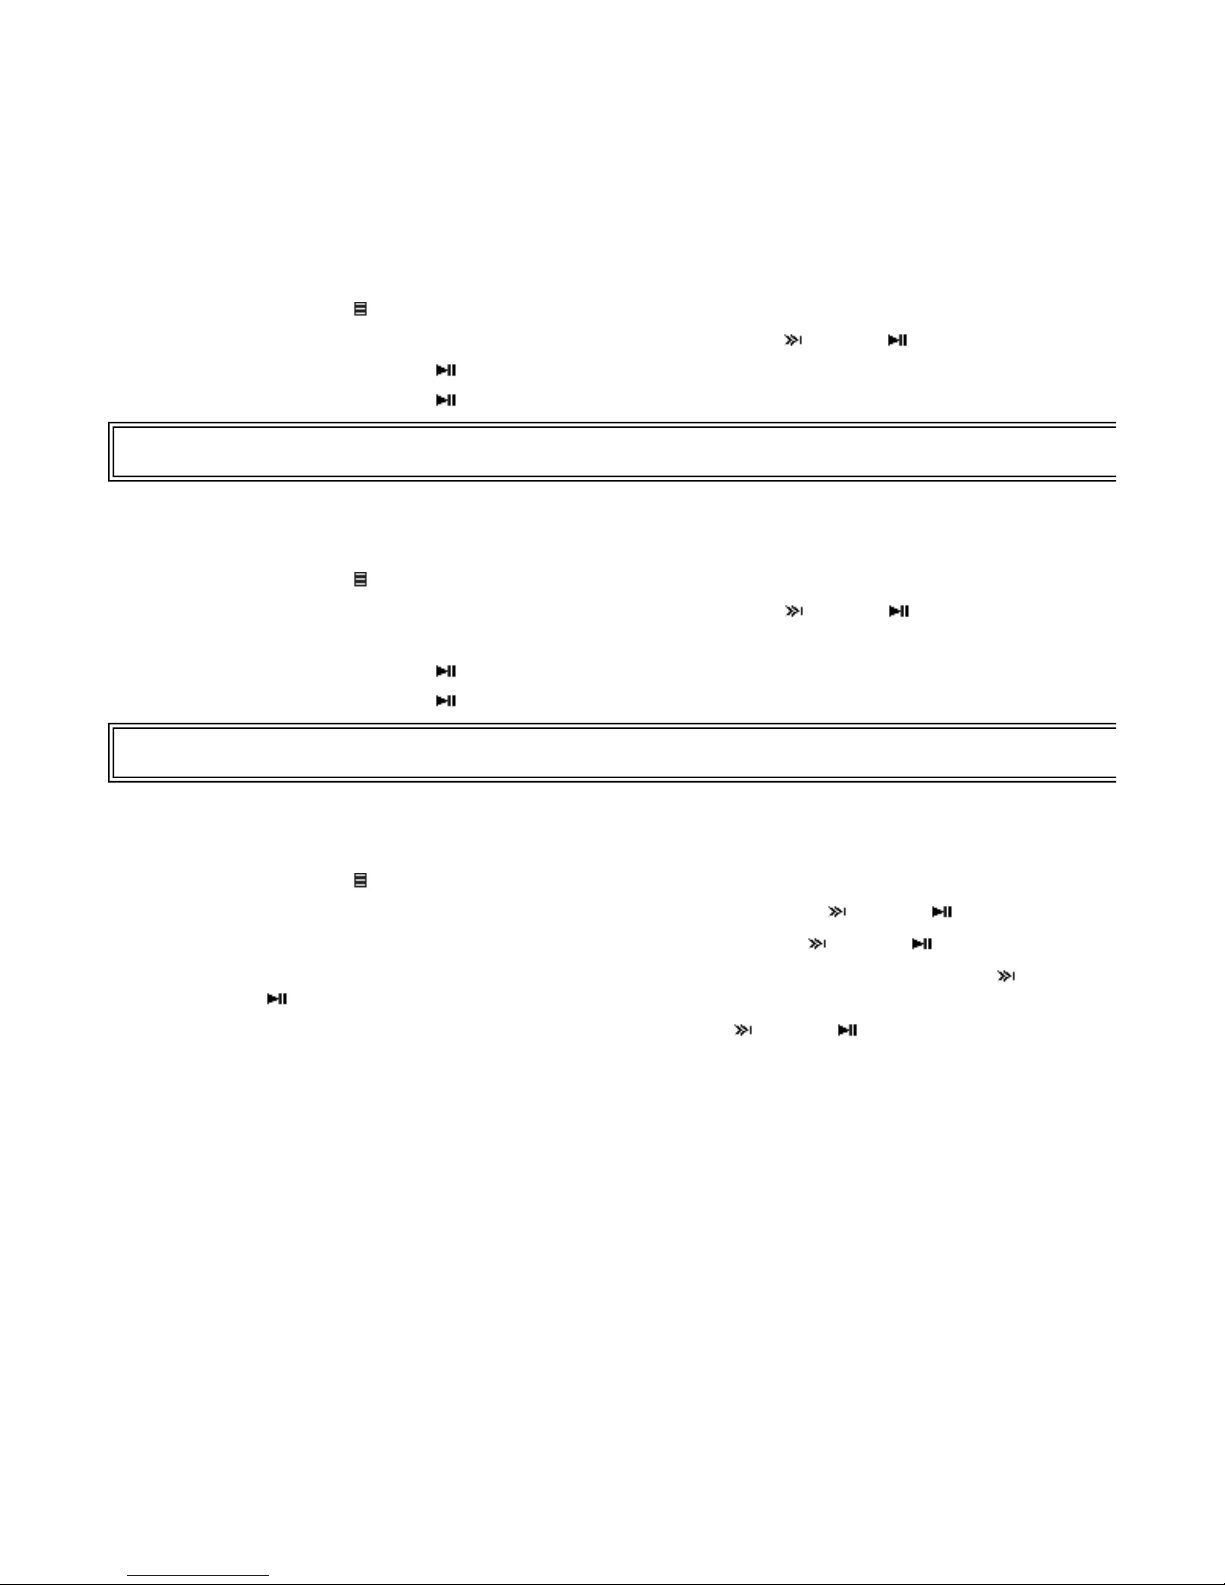
Controls and connections
Front
10/10/2006file://C:\Documents and Settings\Administrator\Desktop\NS-DVxG UG US R0\NS-DV2...
Page 4 of 30
Item Icon Function
Rewind/Skip Back/Previous--Press to restart the current track, and press repeatedly to skip to previous tracks.
A
B
C
D
E
F
G
Right side
Press and hold to rewind. In FM radio mode, press to change frequencies. In Menu mode, press to go to the
previous menu.
Power--Press and hold to turn on the player. Press and hold again to turn off. Press briefly to return the screen
to full brightness.
Up--Press to scroll up through lists or change radio frequency presets.
Menu--Opens the on-screen menu for selecting songs and changing settings.
Fast Forward/Skip/Next--Press to skip to the next track. Press and hold to fast forward. In menus, press to open
the next submenu or setting. In FM radio mode, press to change frequencies.
Down--Press to scroll down through lists or change radio frequency presets.
Play/Pause/Select--Press to play or pause playback. In menus, press to select. In FM radio mode, press to
memorize presets or to record.
Scroll wheel -- Volume in Now Playing mode and Up/Down in Menu mode.
10/10/2006file://C:\Documents and Settings\Administrator\Desktop\NS-DVxG UG US R0\NS-DV2...

Page 5 of 30
Item Icon Function
A
B
Top
Earphone jack--Connect earphones or headphones to this jack.
Mini USB 2.0 port--Connect the USB cable to this port and your computer to charge the player manage content
with your computer.
Item Function
A
B
Bottom
MicroSD Card slot--Insert a MicroSD card into this slot to increase the memory capacity of your player.
HOLD switch--Slide to disable all buttons. See Manually changing the USB mode.
Item Function
Earphone/Line in jack--Connect earphones or headphones to this jack to listen to sound from the player or connect a
A
device to this jack to record from the device.
RESET button--Insert a pointed object to restart the player.
B
Back
Item Function
A
Display information
Battery cover--Remove the battery cover to insert or change the battery.
10/10/2006file://C:\Documents and Settings\Administrator\Desktop\NS-DVxG UG US R0\NS-DV2...

Page 6 of 30
Item Function
Mode Icon --Displays whether a track is playing or paused.
A
Current time--Displays the current time.
B
Repeat/Shuffle icon--Indicates the current Repeat setting.
C
Battery icon--Indicates the battery's power level.
D
Track number/Total Number--Lists the track number currently playing and the number of tracks in the queue.
E
Artist name--Displays the artist name of the current track.
F
Album name--Displays the album name of the current track.
G
Album Art --Shows the album art for the track, if available.
H
Track name--Displays the track title of the current track.
I
Progress bar--Displays the progress of the song.
J
Play time--Displays the elapsed time of the current track.
K
Total time--Displays the length of the current track.
L
Next track--Displays the next track.
M
Setting up your music player
Installing the battery
Slide off the battery cover on the back of the music player.
1.
10/10/2006file://C:\Documents and Settings\Administrator\Desktop\NS-DVxG UG US R0\NS-DV2...
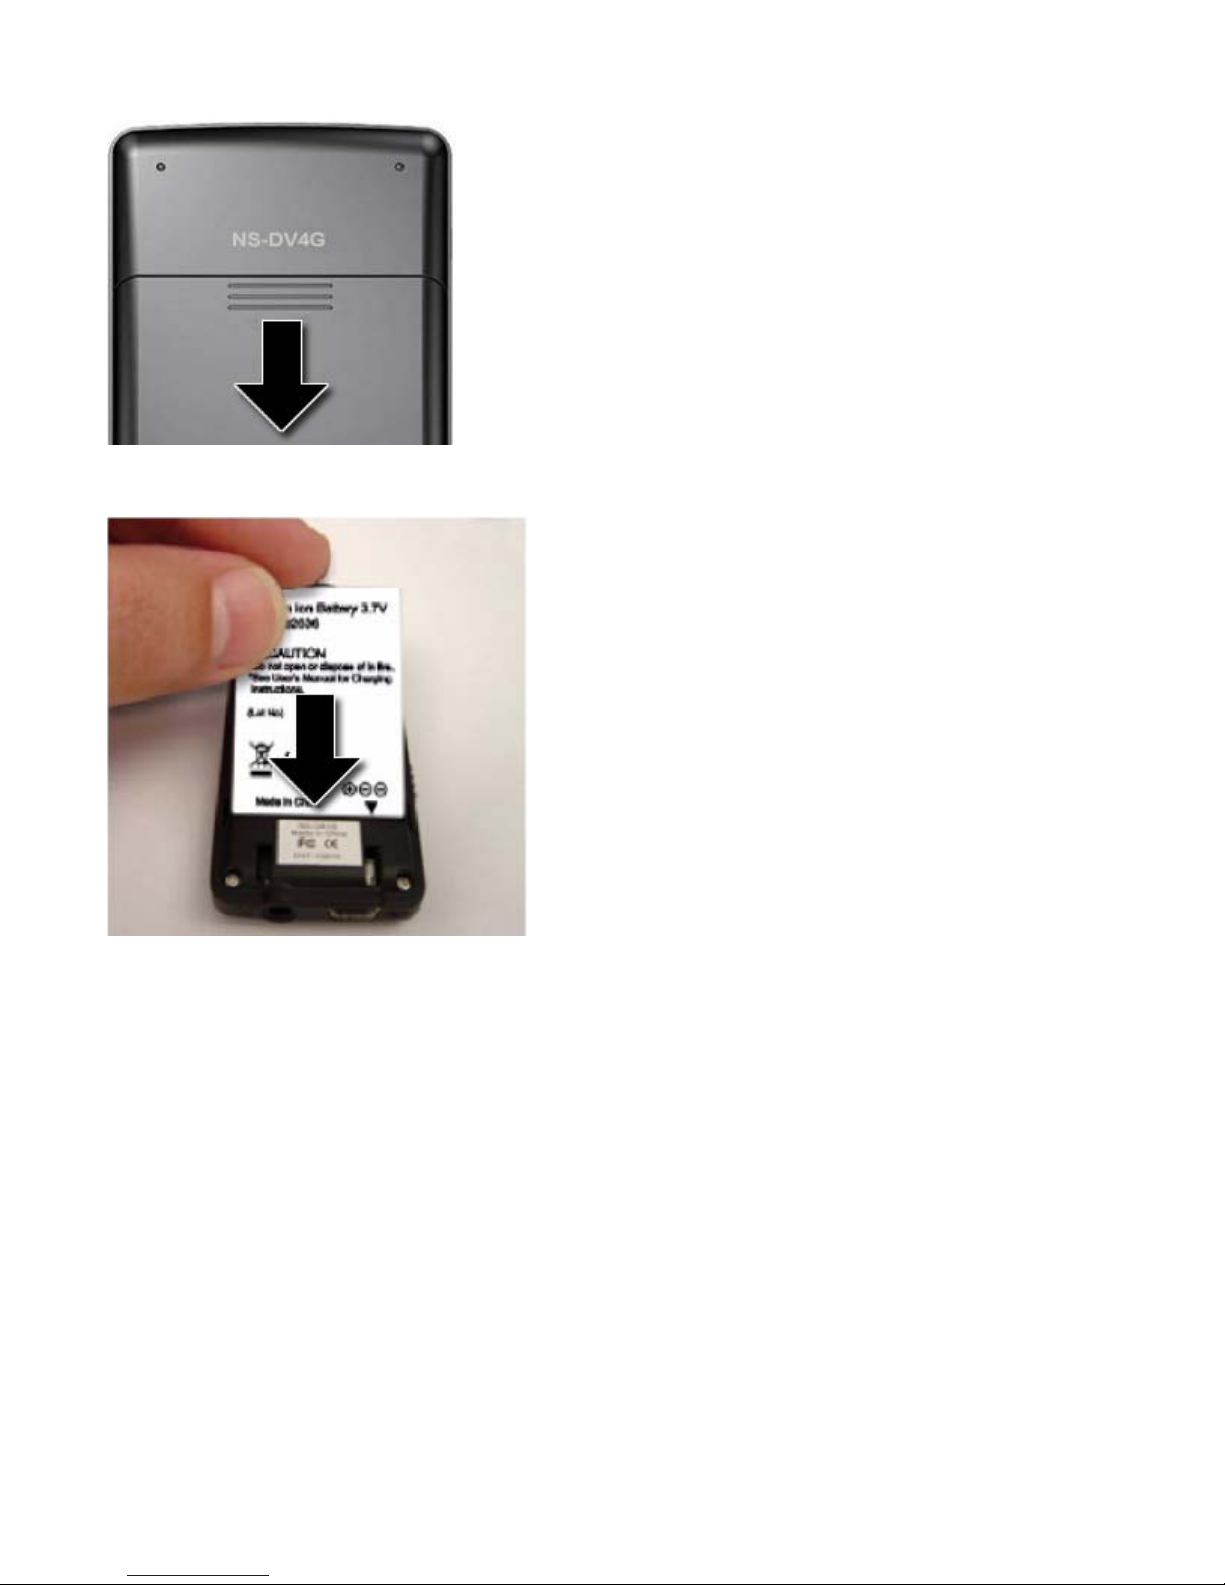
Press the battery into the battery compartment, then slide it into place. The battery should fit
2.
snugly.
Page 7 of 30
Slide the battery cover on until it snaps into place.
3.
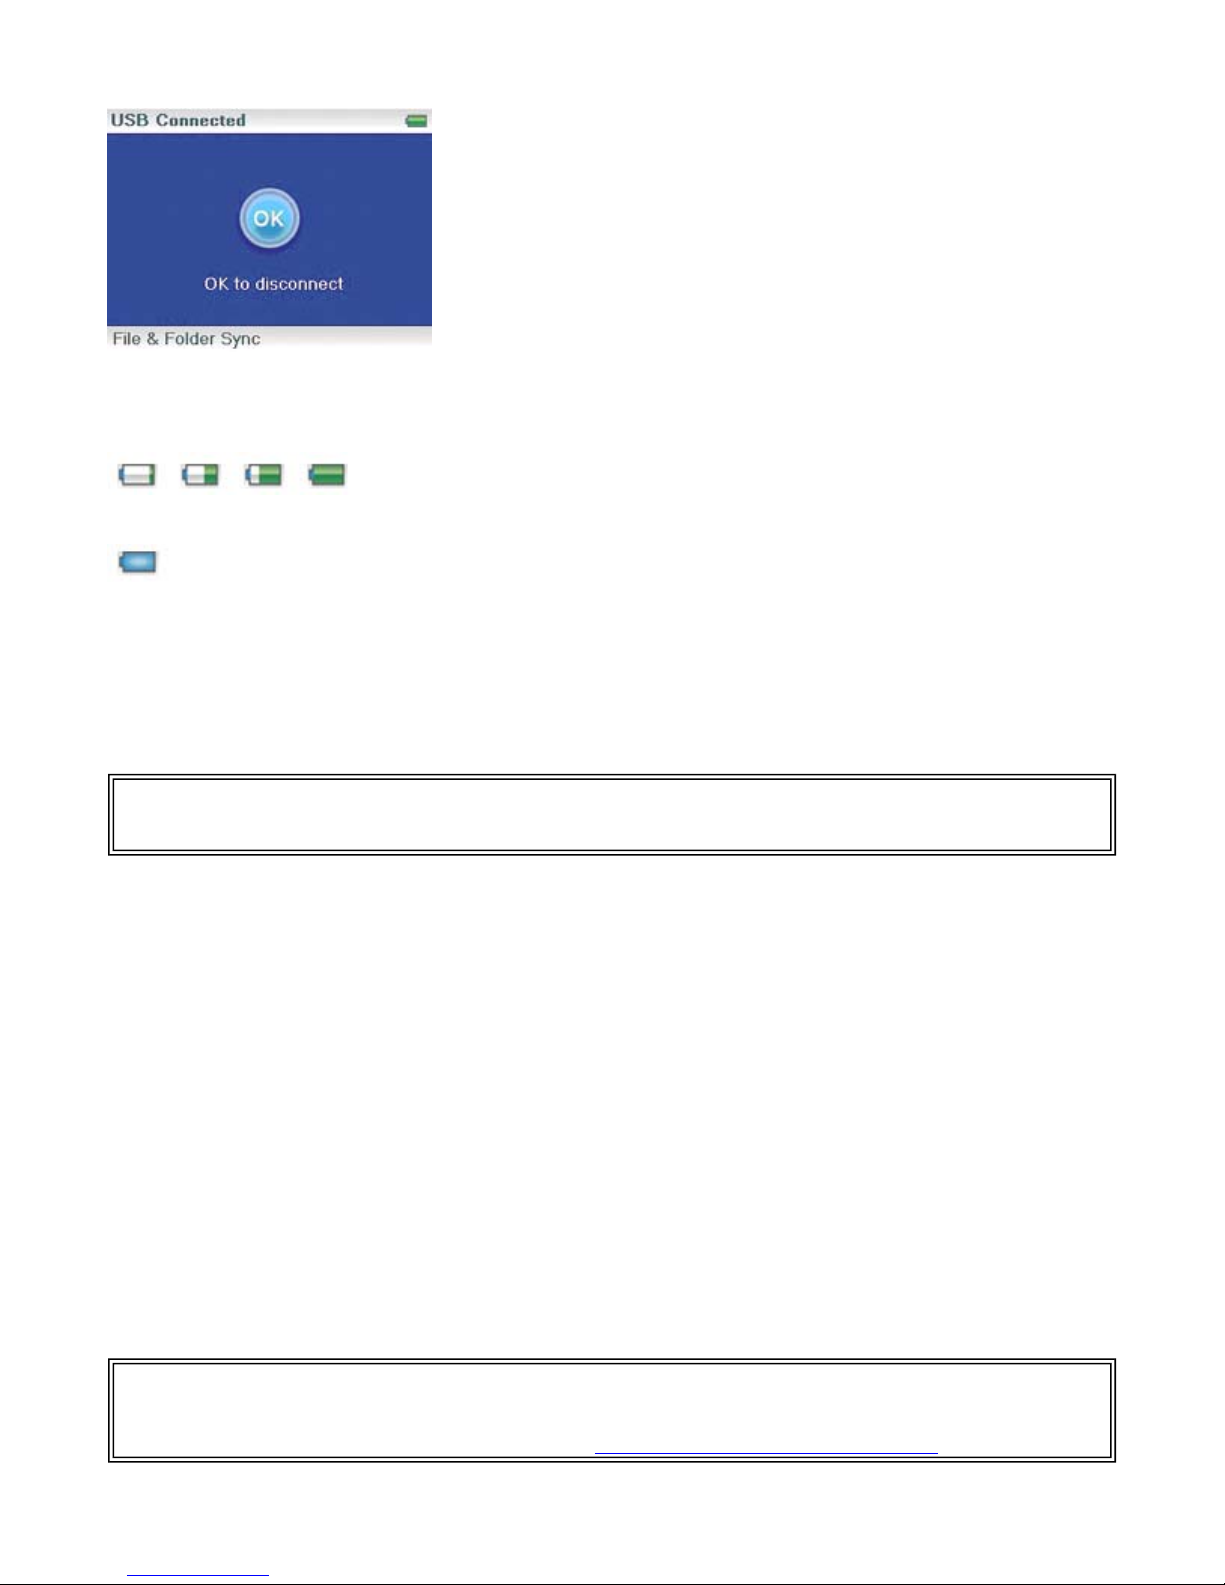
Charging the battery
Charge the battery whenever you aren't using the player to make sure it's always fully charged.
The battery charges in about 2.5 hours. A fully charged battery provides up to 20 hours of
continuous music playback, depending on the brightness and display time of the backlight, and
the volume levels.
To charge the battery:
1.
2.
Turn on your computer.
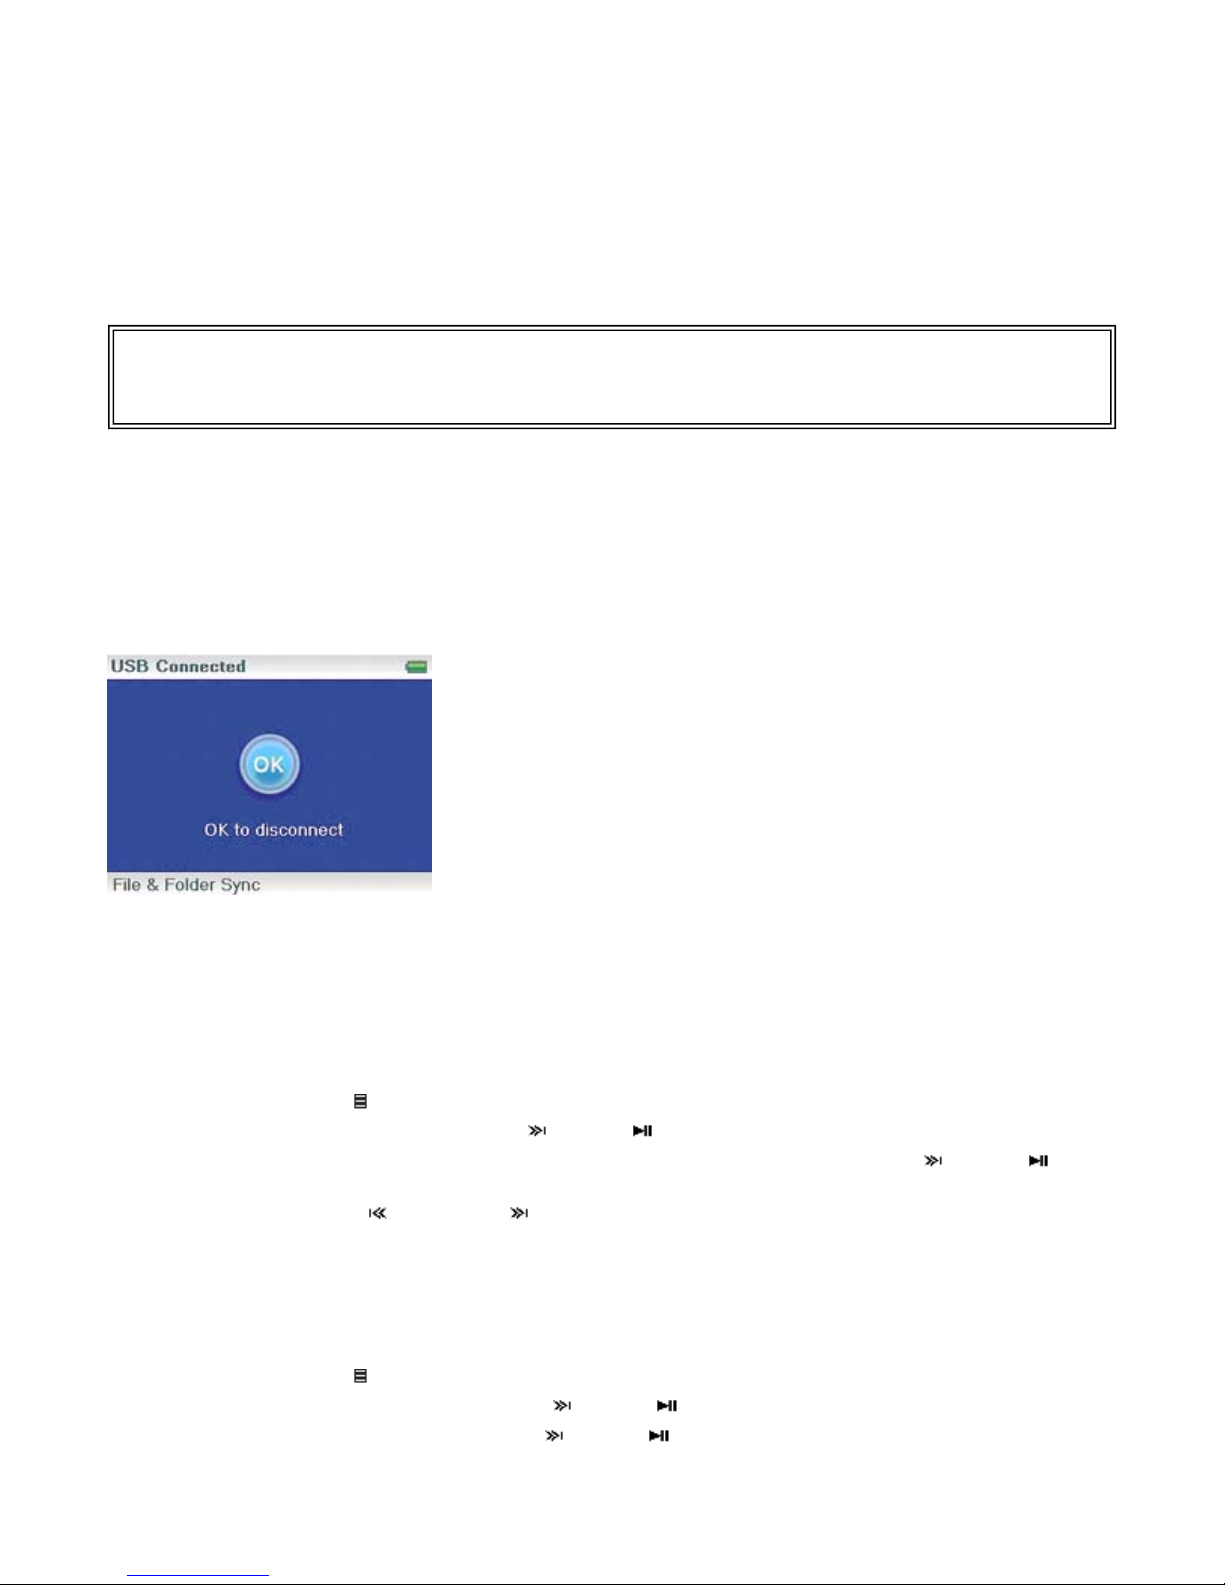
Connect the supplied mini USB 2.0 cable to the mini USB jack on the player and a
standard USB jack on your computer. When the cable is connected correctly, the
player begins recharging its battery using the USB connection, and the message "OK
to disconnect" appears on the player.
10/10/2006file://C:\Documents and Settings\Administrator\Desktop\NS-DVxG UG US R0\NS-DV2...
Page 8 of 30
As the battery charges, the blue battery icon shows an animation of being filled from right to
left, to illustrate that the battery is charging.
After the player is fully charged, the battery icon turns green, indicating a full charge.
Connecting headphones
You can use any headphones with a standard 3.5mm stereo audio plug.
To connect headphones:
Plug headphones or the provided earphones into the earphone/headphone jacks on the
•
Note
To use the FM radio, you must have the earphones connected, because they act as the FM antenna. You
can use any headphones with unshielded wires.
player.
Installing the included software
The instructions in this guide require installation of both the Best Buy Digital Music Store Media
Manager Software and the ArcSoft Media Converter.
To install the software:
Insert the Insignia software CD into your computer's CD drive. The software installation program
1.
starts.
-OR-
If the installation program doesn't start automatically, double-click
desktop, double-click the CD drive that contains the Insignia CD, then double-click the file
Setup.exe
Follow the on-screen instructions to finish the installation.
2.
. The software installation program starts.
My Computer
on your
Attention Apple Users (OS 8.6 and higher)
1. Don’t install software.
2. Connect the player to the computer.
Tip
For iTunes Drag and Drop support, File & Folder (MSC) USB mode is automatically enabled when you
connect the player. Your Insignia MP3 player will only play iTunes MP3 files that you drag and drop from
iTunes. For information on changing USB modes, "See Manually changing the USB mode
".
10/10/2006file://C:\Documents and Settings\Administrator\Desktop\NS-DVxG UG US R0\NS-DV2...
Page 9 of 30
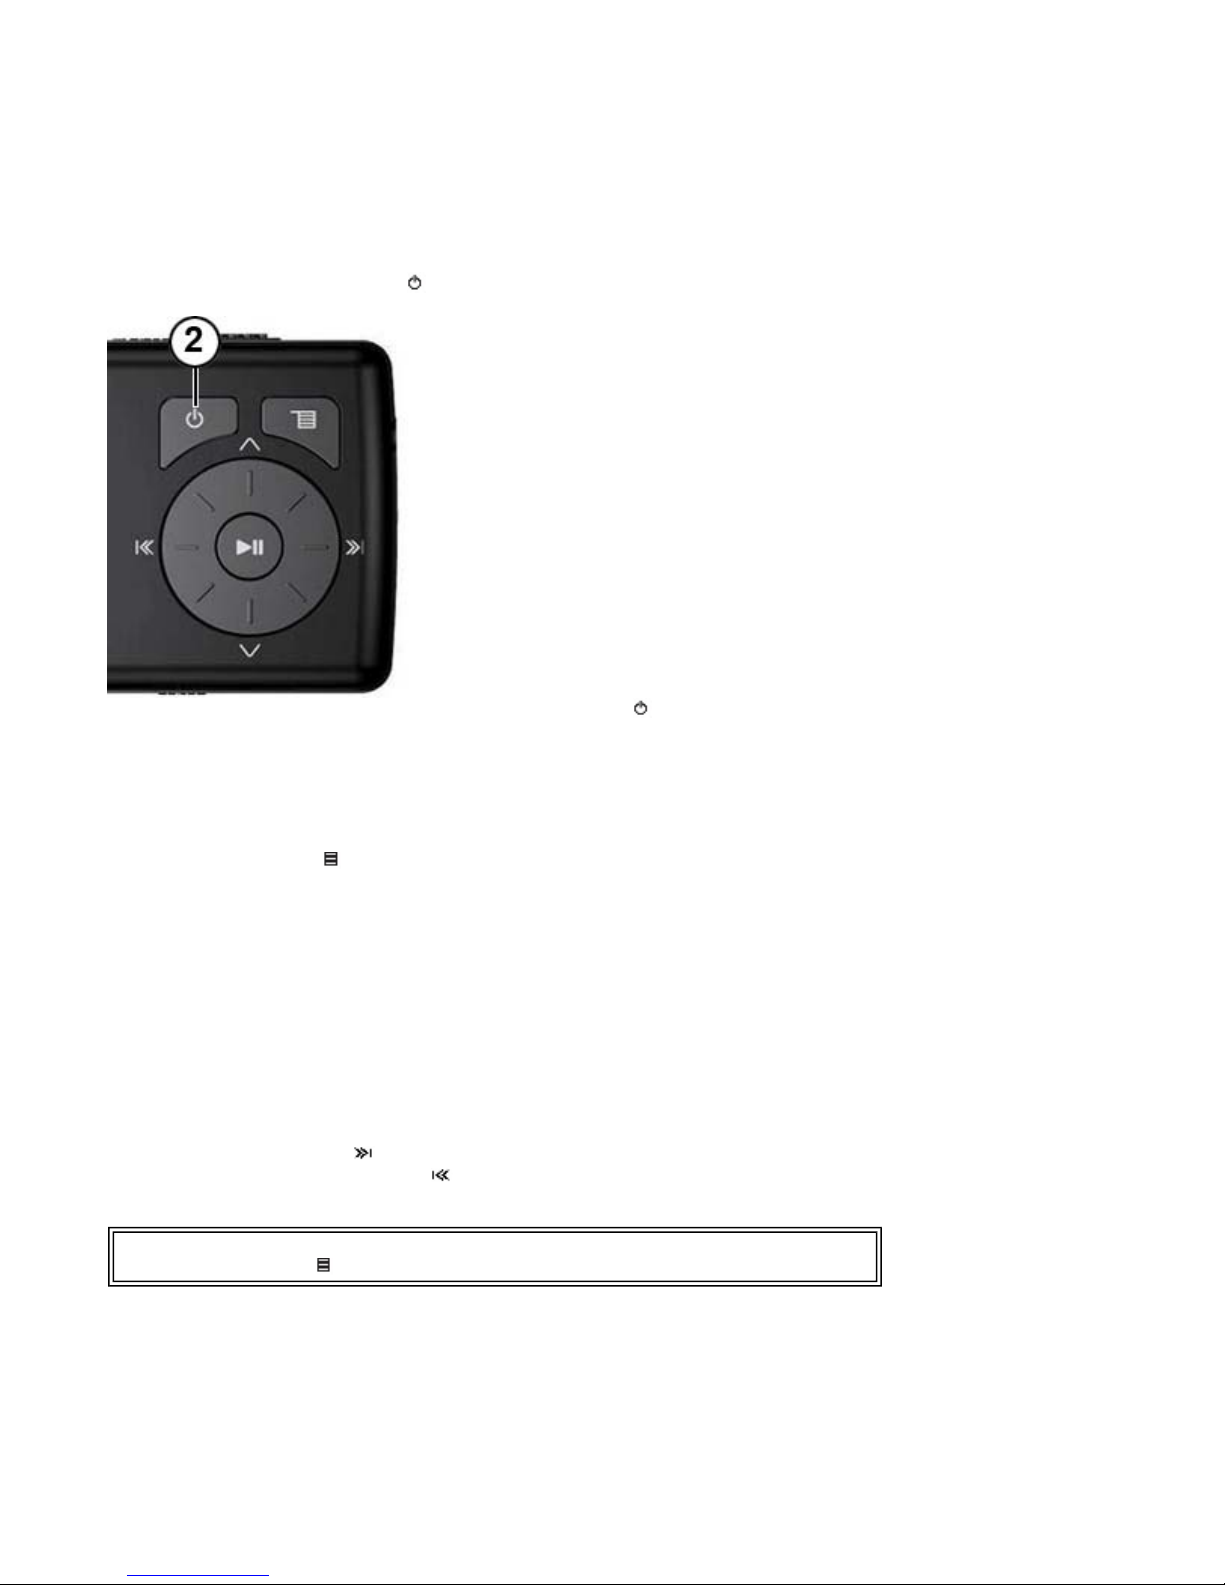
Using your player
Turning your player on and off
To turn your player on and off:
Press and hold (Power)
1.
2.
To turn off your player, press and hold (Power) again.
.
Navigating the on-screen menus
Use the on-screen menu to play music and change settings.
To navigate the on-screen menu:
1.
2.
3. Press (Next). The submenu of the item you selected opens. To navigate backwards from
Tip
Press and hold the (Menu) button to return to the menu you were last navigating.
Recording
You can record sound on your Video MP3 player either from an attached device such as a CD or MP3
player, or from the built-in FM radio.
Press (Menu). The main menu opens.
Use the scroll wheel to highlight one of the following menu items:
•
Now Playing
•
Media Library
•
Audible
•
•
•
•
•
a submenu, press (Previous).
--access your stored video files.
Video
--access your stored photo files.
Photo
FM Radio
Recording
Settings
--displays the track currently playing.
--access your stored tracks.
--access your stored Audible files.
--access the built-in FM radio.
--record a file using the Line- in jac k.
--access your video MP3 player settings.
Recording from a device
10/10/2006file://C:\Documents and Settings\Administrator\Desktop\NS-DVxG UG US R0\NS-DV2...
To record from an attached device:
1. Connect your Video MP3 player to the device using a standard 3.5 mm stereo cable. One
end of the cable plugs into the line out jack on your device and the other end plugs into the line
in jack on the Video MP3 player.
2. (Optional) If you would like to change the recording quality or size then select
the Main menu,
highest quality), then select the quality level of the recording.
3. Press (Menu). The main menu opens.
4. Use the scroll wheel to select Recording, then press (Next) or (Play/Pause).
5. Press and hold (Play/Pause) to start recording, then release the button.
6. Press and hold (Play/Pause) to stop recording, then release the button.
Tip
To record from a microphone, use an amplified microphone for best results.
Record
, then select
Encoder
. Choose either WMA or PCM (PCM provides the
Page 10 of 30
Settings
from
Recording a radio broadcast
To record an FM radio broadcast:
1. Press (Menu). The main menu opens.
2 . Use the scroll wheel to select FM Radio, then press (Next) or (Play/Pause).
3. Tune to the broadcast you want to record.
4. Press and hold (Play/Pause) to start recording, then release the button.
5. Press and hold (Play/Pause) to stop recording, then release the button.
Note
All radio recordings use WMA 128kb/s for recording.
Listening to a recording
To listen to a recording:
1. Press (Menu). The main menu opens.
2 . Use the scroll wheel to select
3 . Use the scroll wheel to select
4. Use the scroll wheel to select the select the recording to listen to, then press (Next) or
(Play/Pause). The play pop-up opens.
5. Use the scroll wheel to select
plays.
Music Library
Recordings
, then press (Next) or (Play/Pause).
, then press (Next) or (Play/Pause).
, then press (Next) or (Play/Pause). The recording
Play
Changing the volume
To change the volume:
Turn the wheel to the right or left to change the volume.
•
10/10/2006file://C:\Documents and Settings\Administrator\Desktop\NS-DVxG UG US R0\NS-DV2...
Page 11 of 30
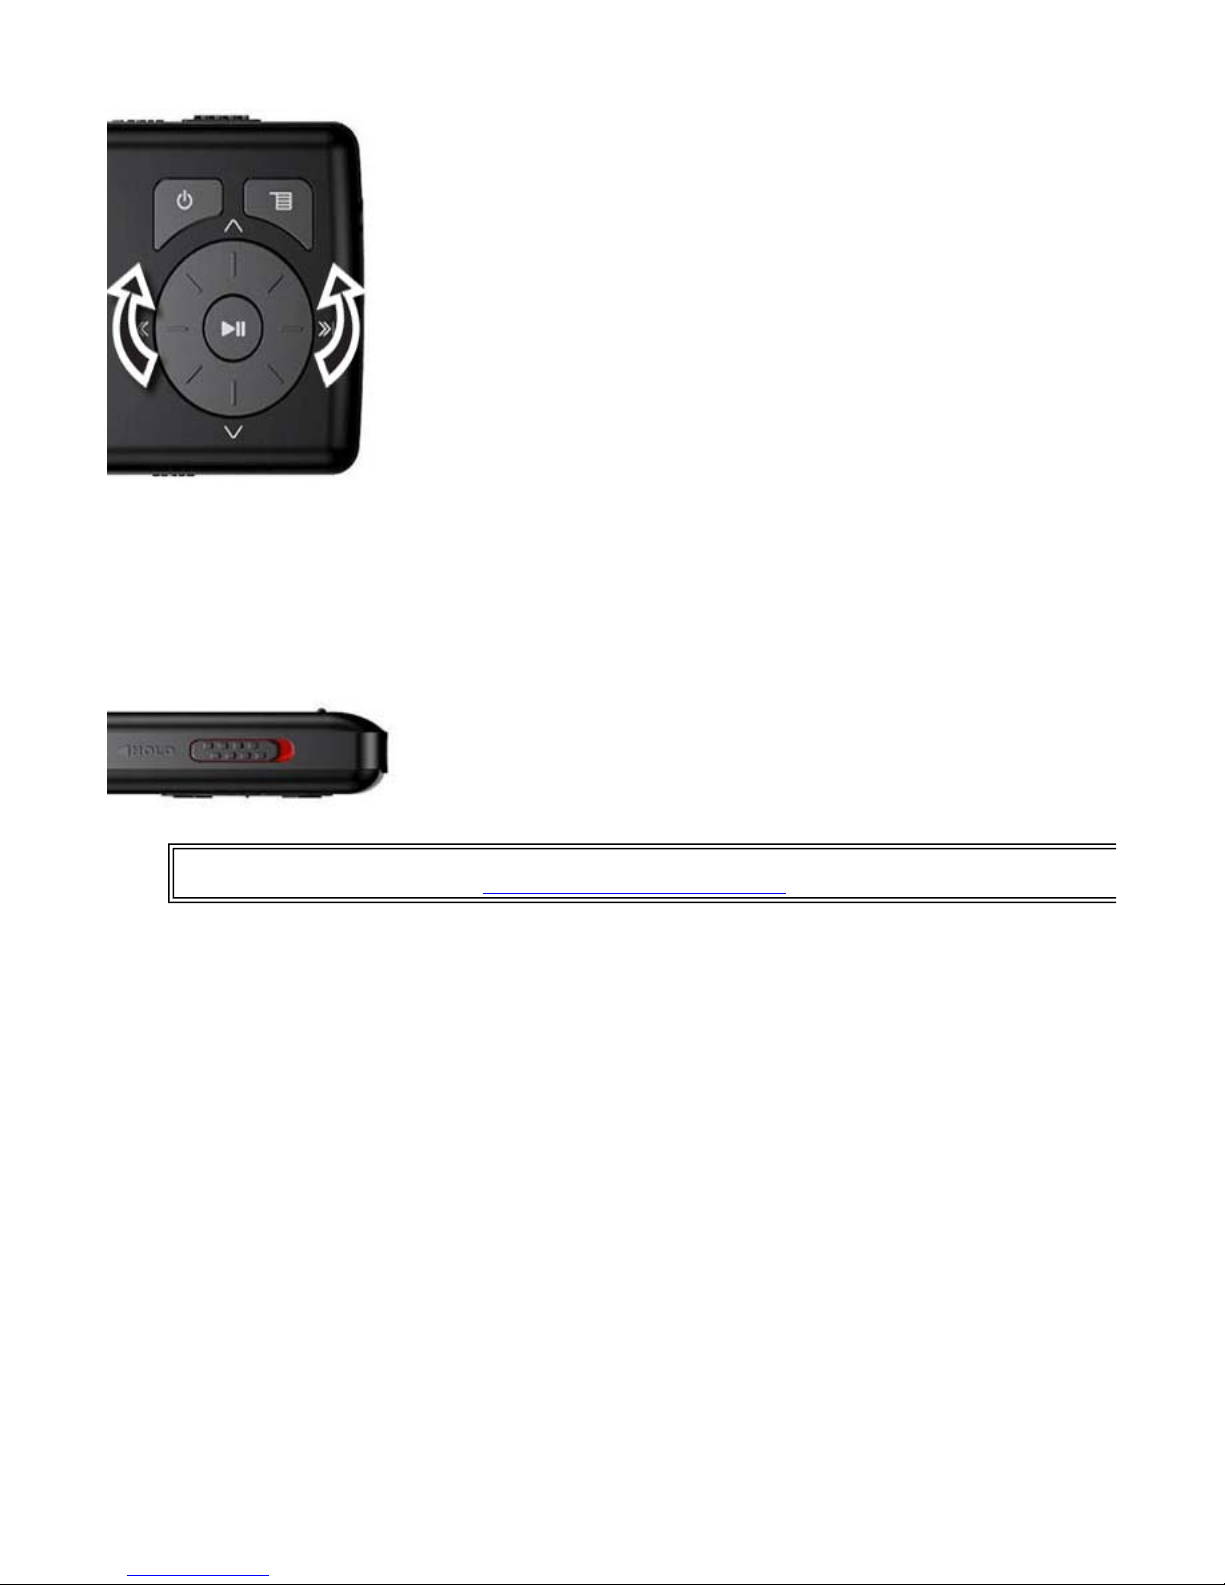
Locking the buttons
You can prevent accidental button operation by locking the buttons.
To lock the buttons:
Slide the
1.
HOLD
position appears on the screen.
switch in the direction of the arrow. An image of the hold button in the HOLD
To unlock the buttons, slide the
2.
Note
To use MSC mode (UMS), see Manually changing the USB mode.
Getting more music
Your music player already contains some music files, but you can get more music from your own
music CDs and from the Internet.
Getting music from CDs and the Internet to your music player involves two steps:
1. Rip a CD (create files of the music on the CD) or download music files from the
Internet.
2. Select the files to copy and copy them to your player.
HOLD
switch away from the arrow.
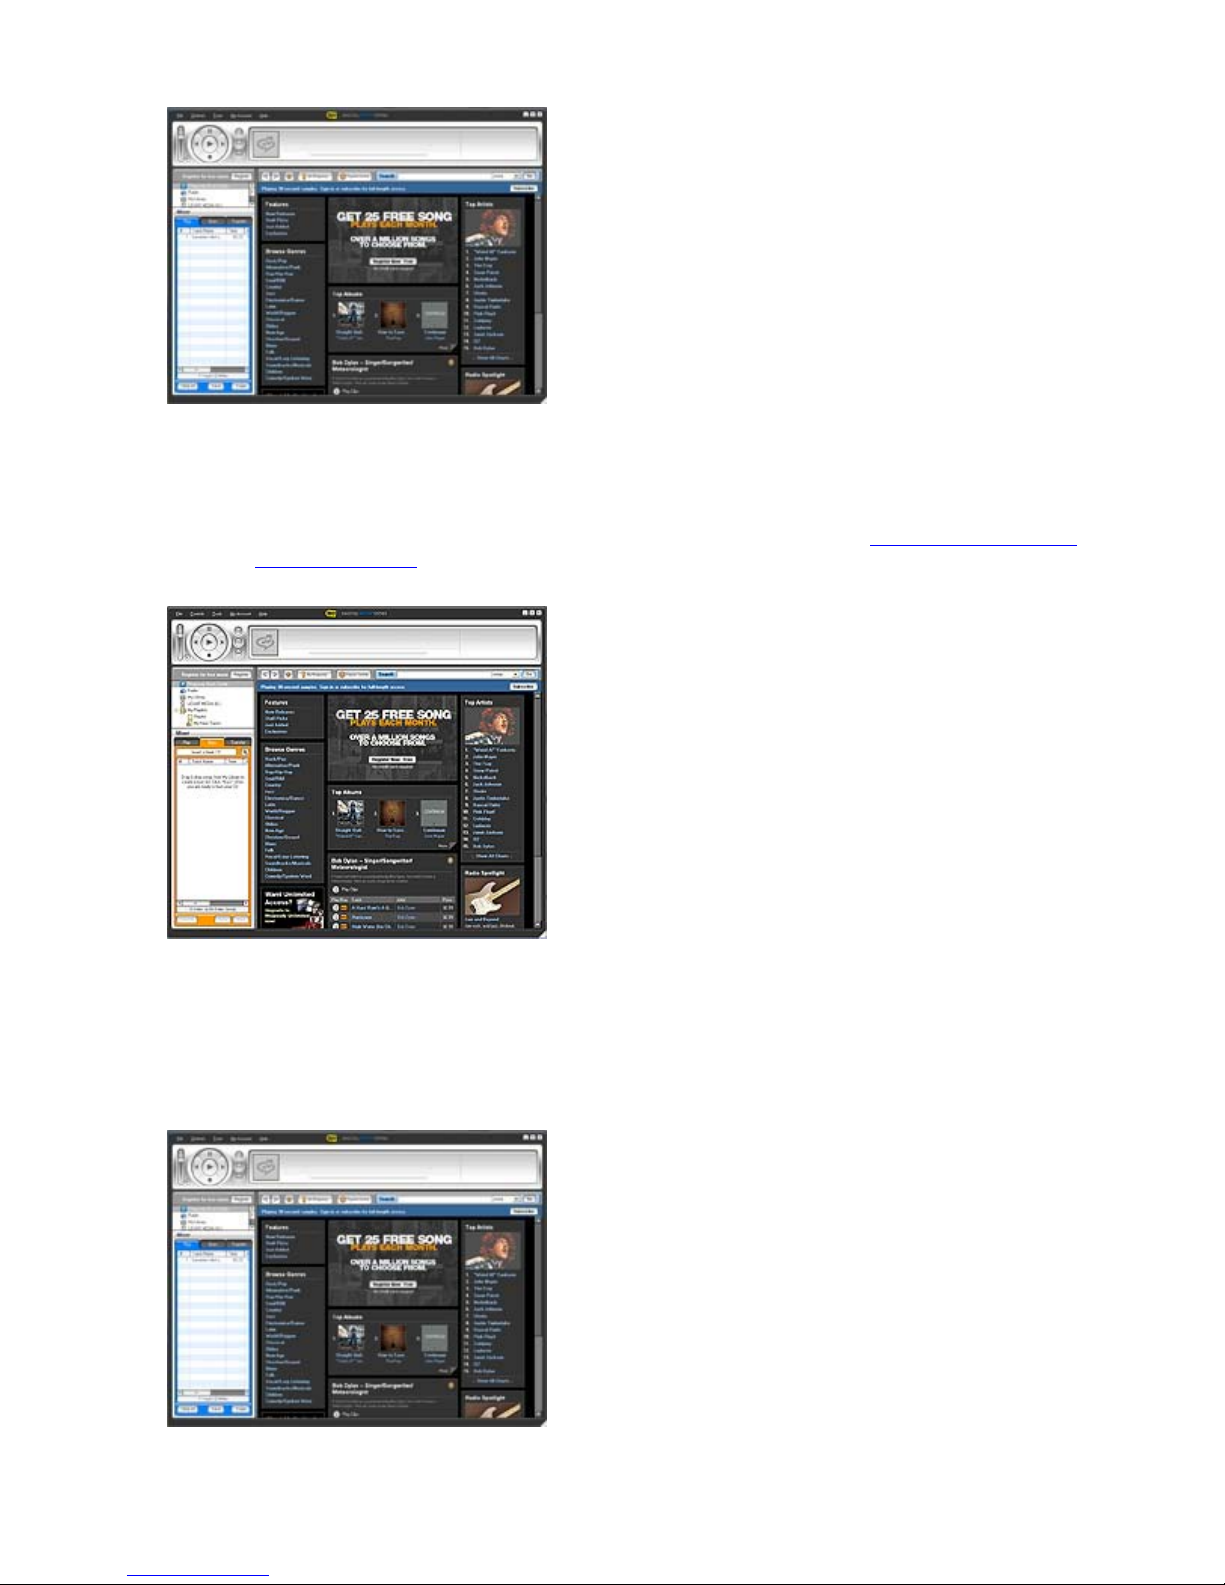
Getting more music on your computer
Getting music from CDs
To rip a CD:
Click
1.
opens.
Start
,
All Programs
,
Best Buy Rhapsody
,
Best Buy Rhapsody
. Best Buy Rhapsody
10/10/2006file://C:\Documents and Settings\Administrator\Desktop\NS-DVxG UG US R0\NS-DV2...
Page 12 of 30
Put a music CD in the CD drive. Rhapsody lists the tracks on the right side of the screen. If you are
2.
connected to the Internet, the list shows the track names.
3.
Click
Import CD
under the
For information on transferring your music files to your music player, "See Transferring music
files to your player".
.
Rhapsody creates MP3 files from the music tracks on the CD and lists them
My Library
folder.
Getting music from the Internet
To buy and download music files from the Internet:
1.
Click
opens.
Start
,
All Programs
,
Best Buy Rhapsody
2.
In the
Search
box, type the name of the artist or album you want to download music for, then click
,
Best Buy Rhapsody
. Best Buy Rhapsody
10/10/2006file://C:\Documents and Settings\Administrator\Desktop\NS-DVxG UG US R0\NS-DV2...
Page 13 of 30
. Any matches that Rhapsody finds are displayed on the screen.
Go
3. Decide which tracks or albums you want to buy, then click
4. Follow the on-screen directions to finish the purchase. The music files are added to your
Rhapsody music library.
Tip
You can also use other digital music management programs to get music files from CDs and the
Internet. See the program's online help for more information.
Tip
For iTunes Drag and Drop support, File & Folder (MSC) USB mode is automatically enabled when
you connect the player. Your Insignia MP3 player will only play iTunes MP3 files that you drag and
drop from iTunes. For information on changing USB modes, "See Manually changing the USB mode
BUY
next to the music you want.
."
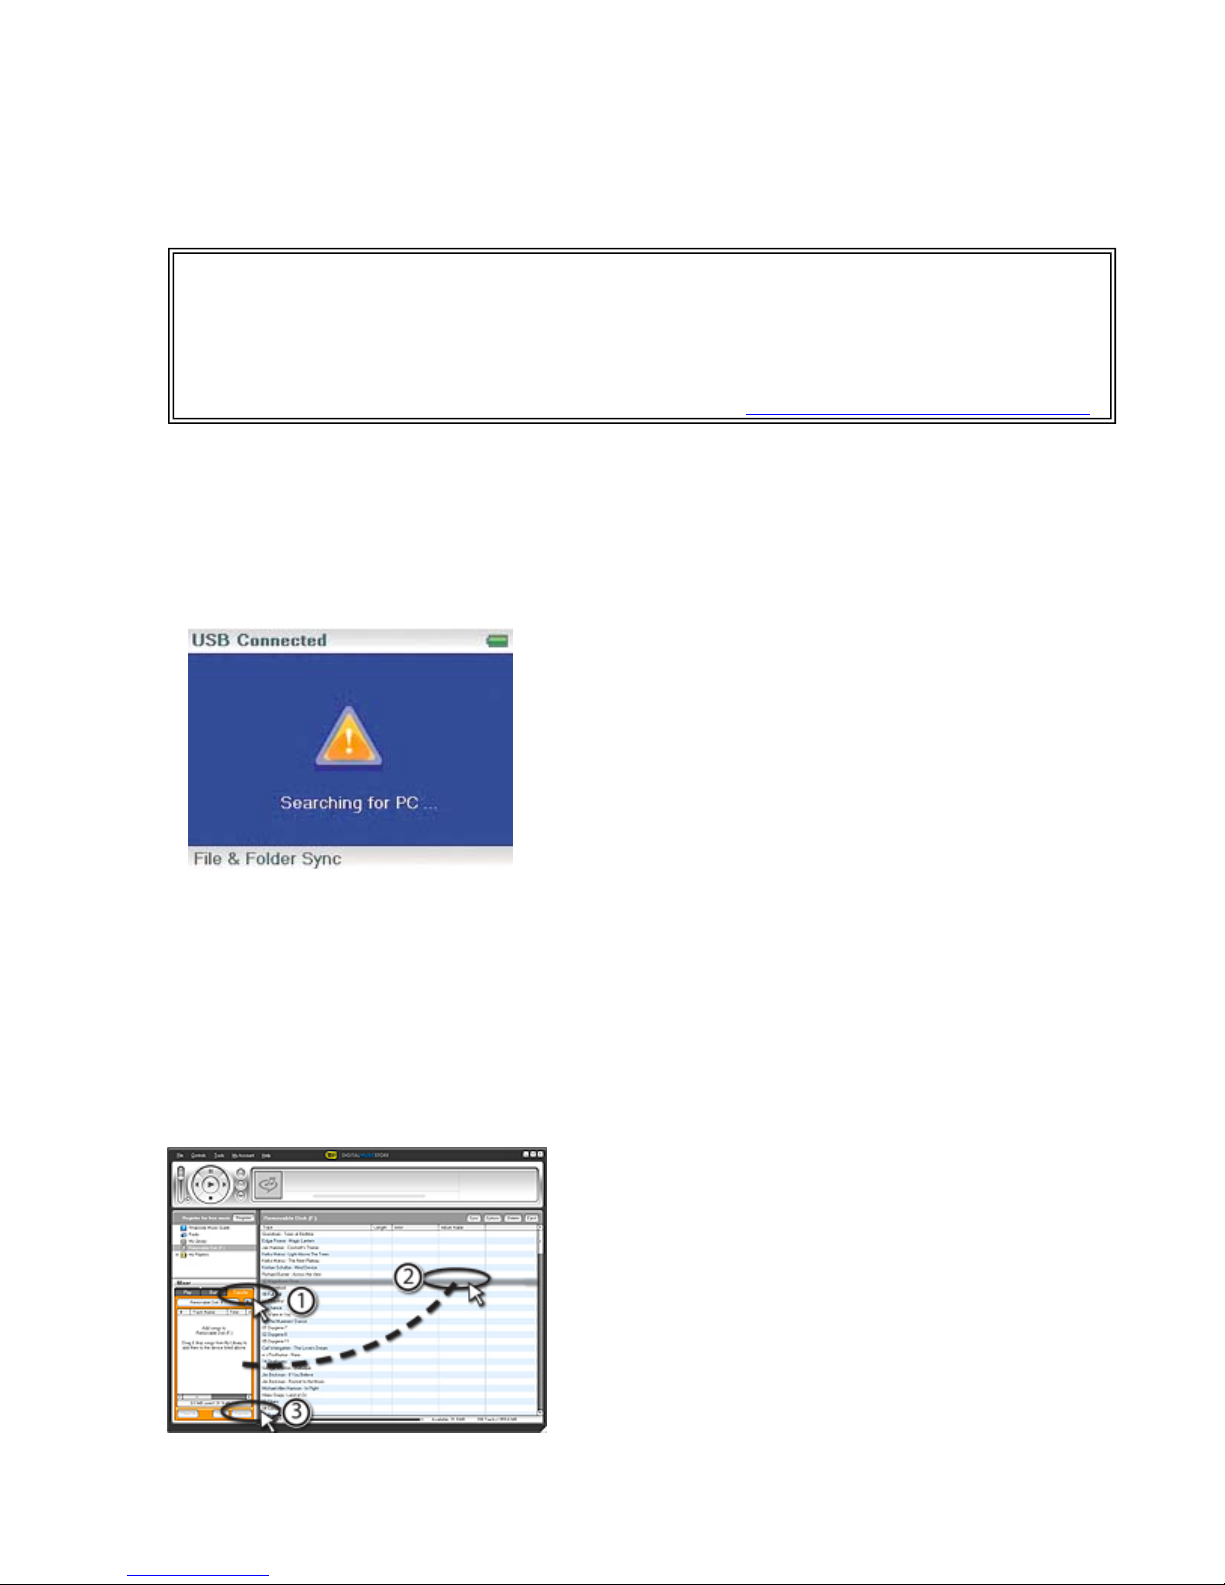
Transferring music files to your player
Transferring files using Rhapsody
To copy files from your computer to the music player using Rhapsody:
1. Connect the USB cable to a USB port on your computer and the mini USB port on your
player. The message "Searching for PC" appears on the player.
Your computer detects the player, and adds the player as a new device ("Insignia Music Player")
in the My Computer list of drives in Windows.
2. Click
Rhapsody opens.
3. Close any popup windows that open.
4. Click
the right side of the screen.
5. Click the
graphic).
,
Start
My Library
All Programs
Transfer
in the list of content types. Your entire library of digital music appears in
tab in the lower left area of the Rhapsody window (#1 in the following
,
Best Buy Rhapsody
,
Best Buy Rhapsody
. Best Buy
6. Click and drag files from the library to the
Transfer
list. (#2 in the above graphic).
10/10/2006file://C:\Documents and Settings\Administrator\Desktop\NS-DVxG UG US R0\NS-DV2...
Page 14 of 30
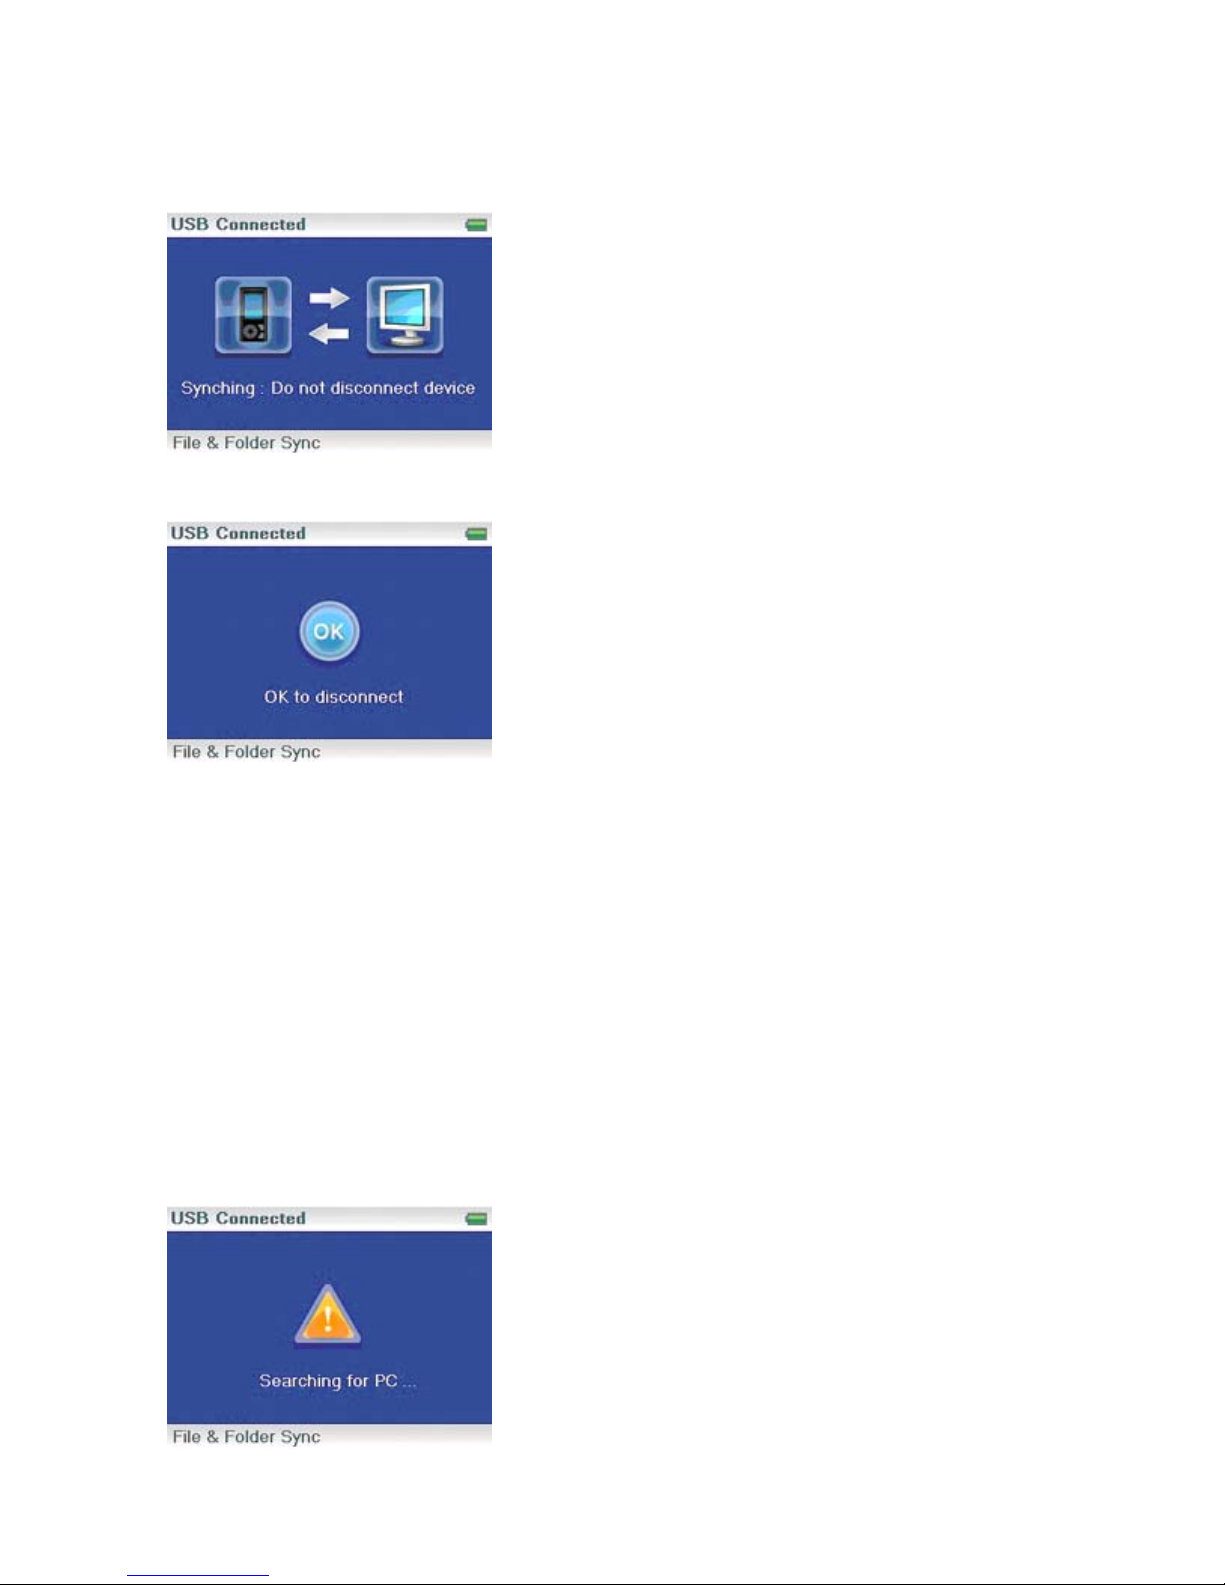
7. When you have dragged all files that you want to copy to the transfer list, click the
Transfer
"Synching: Do not Disconnect" appears on the player.
button (#3 in the graphic). The files are copied to your player. The message
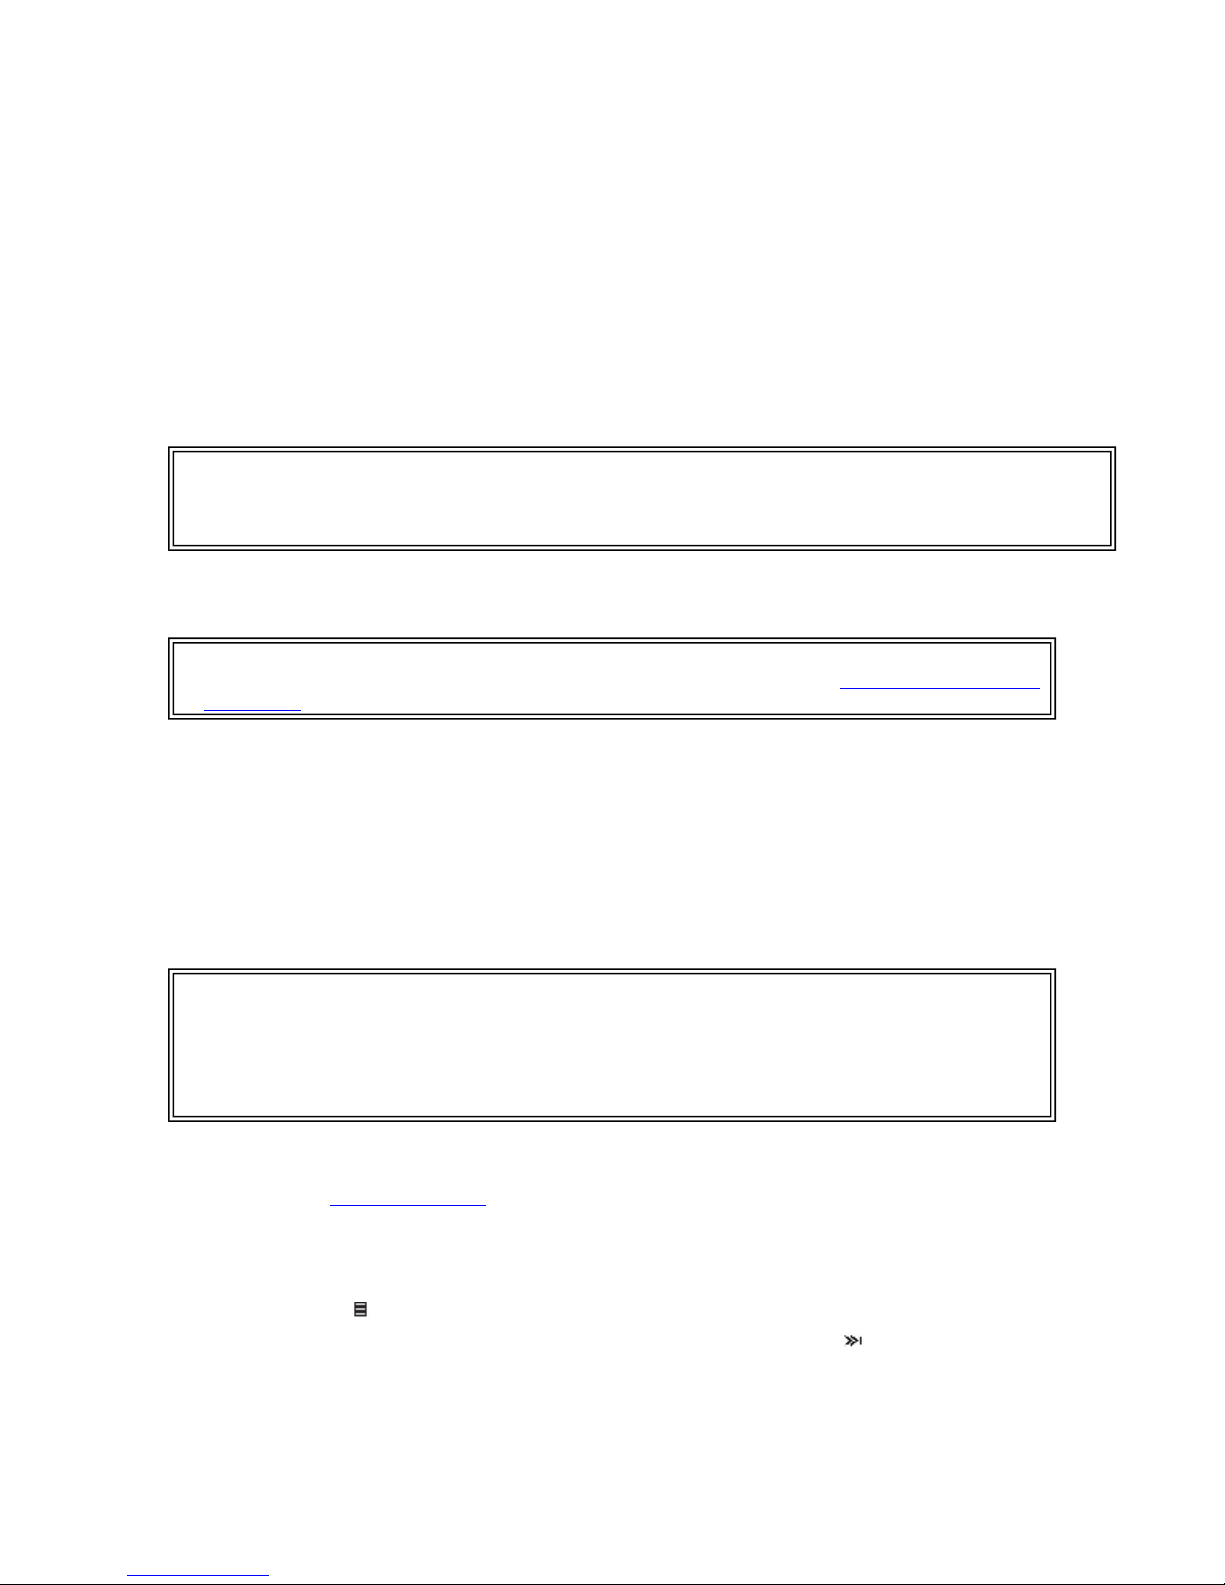
When the transferring is complete, the message "OK to disconnect" appears on the player.
8. Unplug the USB cable from your computer and your player.
Transferring files using Windows Explorer
To copy music files from your computer to your player using Windows Explorer:
· For Windows XP and Windows 2000 users, the player automatically connects in
Manager
formats to the
Depending on which media manager software (such as Rhapsody, Windows Media
Player, and many others) you use, the name of the subfolders may be different than
"Media" and "Data."
· For all other operating system users, the player automatically connects in
Folder
The player will still only play MP3, Vorbis, and WMA files.
1. Connect your player to the computer using the provided USB cable. The message "Searching for
PC" appears on the player.
(MTP) mode to copy WMA and MP3 files to the
folder (you cannot see the Data folder using the player's display).
Data
(MSC) mode to copy folders and any format of files to the player's root folder.
folder, and any other file
Media
Media
File &
10/10/2006file://C:\Documents and Settings\Administrator\Desktop\NS-DVxG UG US R0\NS-DV2...
Page 15 of 30
2. On your computer, click
your music files are.
3. Open
Player
device called "Insignia Music Player" in th e My Computer list of drives in Windows.)
4. Double-click the device and th e int er n al stor ag e icon until yo u se e a list of files an d
folders.
5. Click and drag the music files from your computer to the player:
If your player is in Media Manager (MTP) mode, copy them to the
player.
If your player is in File & Folder (MSC) mode, copy them to the root folder on the
player.
Tip
To select multiple files, press and hold
To select an entire range of files, click the file at the top of the range, press and hold
keyboard, then click the file at the bottom of the range.
When the transferring is complete, the message "OK to disconnect" appears on the player.
6. Unplug the USB cable from your computer and your player.
Tip
Vorbis files will only be recognized in File and Folder (MSC) mode. See Manually changing the
USB mode.
My Computer
drive. (When your computer detected the player, it added the player as a new
again to open another window, then open the
Ctrl
Start
,
My Computer
, then double-click the folder where
Insignia Music
Media
on your keyboard while clicking the files with your mouse.
Shift
folder on the
on your
Converting and transferring videos to your player
To copy videos from your computer to your player using ArcSoft Media Converter:
1. Connect your player to your computer using the provided USB cable. The message
"Searching for PC" appears on the player.
2. Open the ArcSoft Media Converter on your computer.
3. Click
4. Click the file you want to convert, then click
5. Select the file, then click
Tip
You can also create the file in any folder you choose by using the
Enter the location you want to place the file, then click
directly on the player by dragging and dropping the file or by using Windows Media Pla yer.
Windows Media Player can also be used to convert most files. It will automatically transcode
them when you move them to the player.
Deleting videos
To delete videos, "See Deleting files".
Playing music files
To play music:
1. Press (Menu).
2. Use the scroll wheel to highlight
opens.
Add Media
.
.
Open
Convert
. The file is automatically transferred to your player.
Convert
Convert to Folder
. You can then place this file
option.
Music Library
, then press (Next). The music library
10/10/2006file://C:\Documents and Settings\Administrator\Desktop\NS-DVxG UG US R0\NS-DV2...
Page 16 of 30
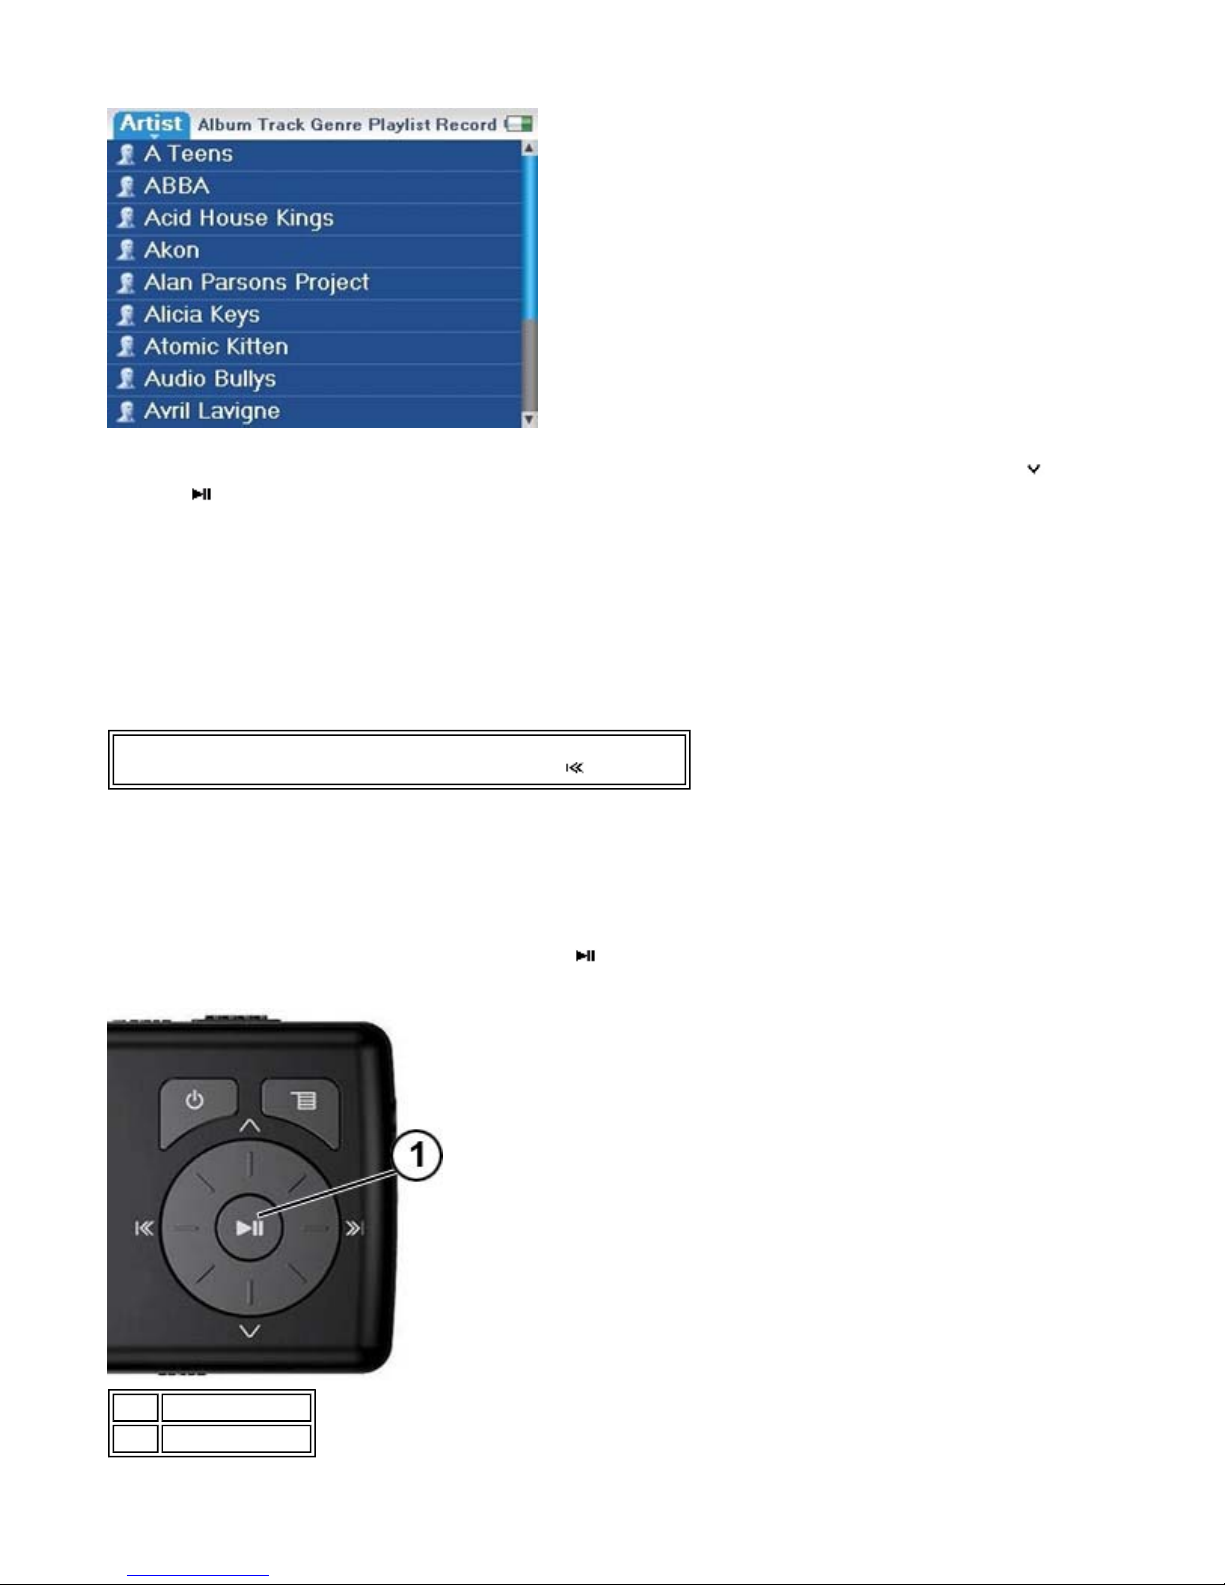
Highlight one of the following tabs across the top of the screen using the scroll wheel, then press (Down)
3.
or (Play/Pause) to open that category:
·
Artists
·
Albums
an album to your player, that album name will appear in this list.
·
Tracks
·
Genres
·
Playlists
·
Recordings
--Lists all artists tranferred to the player.
--Lists all albums transferred to the player. Even if you copied only one track from
--Lists all tracks arranged alphabetically by track title.
--Lists all music genres transferred to the player.
--Lists all playlists transferred to the player.
--Lists all the recorded files on the player.
Tip
To navigate backwards from a submenu, press (Previous).
Select the content to play by pressing
4.
the music. Play and Play All start playing the music immediately. Add to Now Playing queues the music
behind the tracks that are currently playing. Select
Now Playing view, which displays information on the track currently playing.
The album art appears on the left of the display. Press
to see the list of songs selected for playback. Pressing
If your selection does not begin to play, press (Play/Pause).
5.
Play/Pause
. A pop-up menu shows the options you have for playing
Play All
to play all the tracks. The player switches to the
to view full scrren album art. Press
Next
toggles through the various screens.
Next
Next
again
Item Button
Play/Pause button
1
10/10/2006file://C:\Documents and Settings\Administrator\Desktop\NS-DVxG UG US R0\NS-DV2...
Page 17 of 30
The track begins playing, and the play status icon ( ) appears in the upper left corner of the display.
· To pause playback, press (Play/Pause). The pause status icon ( ) appears in the upper
left corner of the screen.
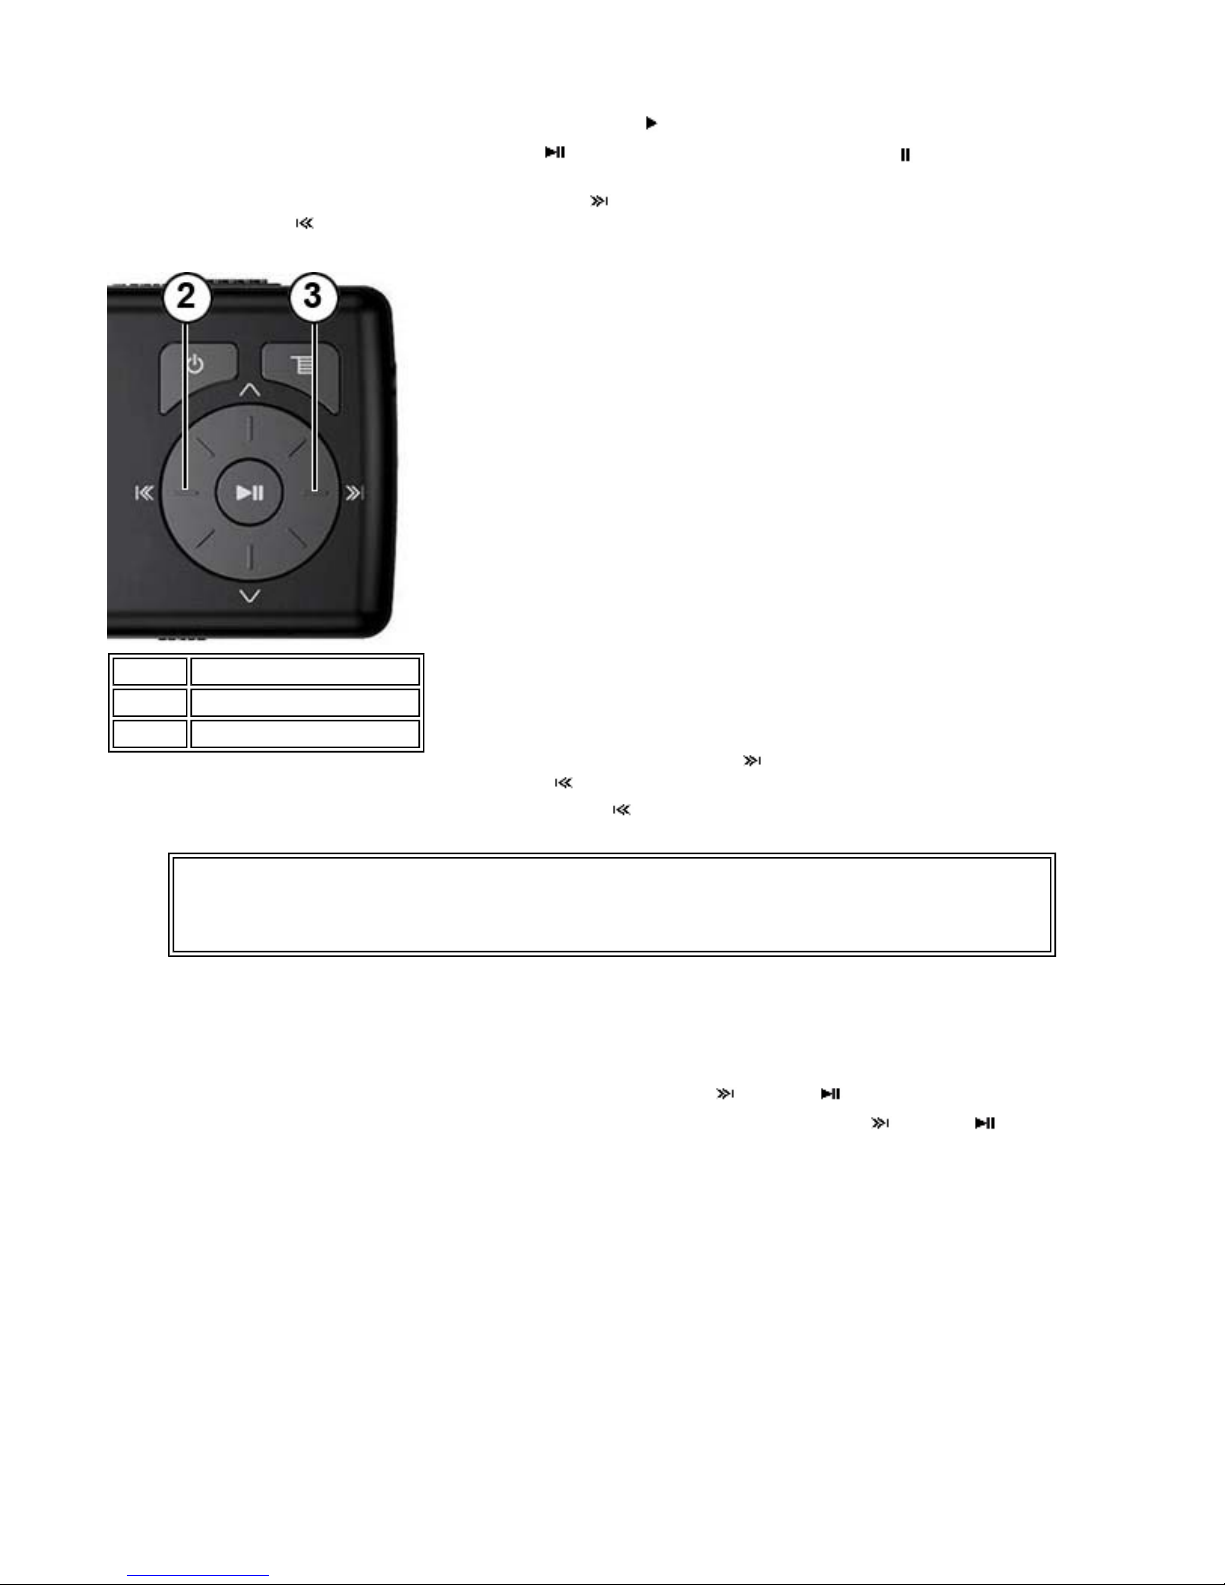
· To skip to the next track, press (Skip/Fast Forward ). To skip to a pr ev io us tra ck, p re ss
(Skip Back/Rewind) repeatedly.
Item Button
2
3
Repeating and shuffling playback
Skip Back/Rewind
Skip/Fast Forward
· To fast forward the current track, press and hold (Skip/Fast Forward). To rewind the
current track, press and hold Skip Back/Rewind).
· To restart the current track, press (Skip Back/Rewind) once.
Tip
If you are using a subscription music service, your player will play a short tone between tracks
when your content is about to expire and a message appears in the Next window on the bottom
of the screen.
You can set the player to repeat or shuffle tracks using the Repeat/Shuffle menu.
To shuffle the playback order:
1. In the Settings menu, select
2. In the Audio menu, select
(Play/Pause).
3. Use the scroll wheel to select from the following modes, then select
appears.
You can select from the following modes:
Repeat/Shuffle Playback
, then press (Next) or (Play/Pause).
Audio
, then press (Next) or
. The shuffle icon
Next
z Repeat single track
z Shuffle tracks/No repeat
z Repeat all tracks
z Repeat all tracks with shuffle
Repeating segments of a track
10/10/2006file://C:\Documents and Settings\Administrator\Desktop\NS-DVxG UG US R0\NS-DV2...
Page 18 of 30
You can use A-B repeat to repeatedly play a segment of a track. You must first enable A-B repeat.
To enable A-B repeat:
1. Press (Menu). The main menu opens.
2. Use the scroll wheel to highlight
3. Use the scroll wheel to highlight
4. Use the scroll wheel to highlight
5. Use the scroll wheel to highlight On or
"Use the down button (V) to activate A-B" appears, then the Audio Setting menu opens again.
6. Press (Menu) to return to the Now Playing screen.
To repeat an audio segment:
During playback, press (Down) to mark the start of the playback loop. The Repeat icon on the display
1.
shows an "A."
Settings
Audio
A-B repeat
, then press (Next) or (Play/Pause).
, then press (Next) or (Play/Pause).
, then press (Next) or (Play/Pause).
, then press (Next) to select. The message
Off
Press (Down) again to mark the end of the playback loop. The Repeat icon on the display shows an "AB"
2.
and the player repeats that audio segment indefinitely.
Press (Down) again to cancel the repeating loop.
3.
Using the equalizer
Six equalizer settings are available, and five are preprogrammed: Normal, Rock, Jazz, Classic, and Pops.
The User setting lets you customize the equalizer to your preference.
To select a pre-programmed equalizer setting:
1. In the Settings menu, select
2. In the Audio menu, select
3. Use the scroll wheel to select the equalizer setting you want.
4. Press (Next) or (Pla y/ Pa us e) to save your new settings.
To change the equalizer's custom setting:
1. In the Settings menu, select
2. In the Audio menu, select
3. Use the scroll wheel to select the
4. Press (Play/Pause) to move the cursor to the first equalizer setting dial.
5. Press (Up) or (Down) to adjust the setting. Repeat this step to adjust each remaining
dial.
Equalizer
Equalizer
, then press (Next) or (Play/Pause).
Audio
, then press (Next) or (Play/Pause).
, then press (Next) or (Play/Pause).
Audio
, then press (Next) or (Play/Pause).
Custom
setting.
10/10/2006file://C:\Documents and Settings\Administrator\Desktop\NS-DVxG UG US R0\NS-DV2...

6. Press (Play/Pause) to save your new settings.
Page 19 of 30
Playing Audible files
You can listen to Audible audio books on your player.
To play Audible files:
1. Press (Menu).
2. Use the scroll wheel to highlight
3. Use the scroll wheel to select the Audible file, then press (Next) or (Play/Pause).
4. Press (Previous) or (Next) to play the previous or next Audible file.
Moving between chapter in an Audible audio book
To move between chapters in Audible files:
1. Press (Up) while playing an Audible file to turn on the chapter feature.
Audible
, then press (Next) or (Play/Pause).
2. Press (Previous) or (Next) to move to the previous or next Audible chapter.
Tip
3. Press (Up) to turn off the chapter feature.
For more information about Audible, visit the Audible website at http://www.audible.com.
Viewing photos
Your player can display JPG and JPEG photos. No other photo formats are supported. To display nonJPG/JPEG photos, you must first convert them to JPG or JPEG using the MediaCoverter software found on
the enclosed CD. Using the included Media Converter significantly reduces the file size and allows you to
store may more photos on the player.
To view photos:
1. Press (Menu). The main menu opens.
2. Select
3. Use the scroll wheel to select the select the photo to display, then press (Next) or
(Play/Pause). The photo displays full screen.
· Press (Previous) or (Next) to skip forward and backward.
· Press (Play/Pause) to enter zoom mode, then press the direction buttons to pan the
image.
· Press (Up) to rotate the photo 90°.
Transferring photos to your player
The method you use to copy photos from your computer to your player depends on the USB mode your
Photo
, then press (Next) or (Play/Pause). A list of available photos appears.
10/10/2006file://C:\Documents and Settings\Administrator\Desktop\NS-DVxG UG US R0\NS-DV2...
Page 20 of 30
player is set to. When you connect your player to your computer, the player automaically selects the mode
that is best suited to your operating system. The player shows the mode in the bottom left corner of the
display.
Tip
You can also use the ArcSoft Media Converter software to convert and transfer all images to your player.
To copy photos from your computer to your player using File & Folder (MSC) USB mode:
Tip
To select multiple files, press and hold
select an entire range of files, click the file at the top of the range, press and hold
then click the file at the bottom of the range.
1. Connect your player to the computer using the provided USB cable. The message
"Searching for PC" appears on the player.
2. On your computer, click
photo files are.
3. Open
drive.
4. Click and drag the photo files from your computer to the player's root folder.
My Computer
again to open another window, then open the
Ctrl
,
Start
My Computer
on your keyboard while clicking the files with your mouse. To
, then double-click the folder where your
Insignia Music Player
on your keyboard,
Shift
When the transferring is complete, the message "OK to disconnect" appears on the player.
5. Unplug the USB cable from your computer and your player.
To copy photos from your computer to your player using Media Manager (MTP) USB mode:
1. Connect your player to the computer using the provided USB cable. The message
"Searching for PC" appears on the player.
2. On your computer, click
photo files are.
3. Open
drive.
4. Click and drag the photo files from their current location to the
on your
Tip
To select multiple files, press and hold
select an entire range of files, click the file at the top of the range, press and hold
then click the file at the bottom of the range.
When the transferring is complete, the message "OK to disconnect" appears on the player.
5. Unplug the USB cable from your computer and your player.
Tip
You can also use the ArcSoft Media Converter software to convert and transfer all images to your player.
My Computer
Insignia Music Player
again to open another window, then open the
Ctrl
,
Start
My Computer
drive.
on your keyboard while clicking the files with your mouse. To
, then double-click the folder where your
Insignia Music Player
folder or the root folder
Media
on your keyboard,
Shift
Deleting photos
To delete photos, "See Deleting files"
Listening to FM radio
You can listen to FM radio broadcasts on your player.
Note
To use the FM radio, you must have the provided earphones connected, because they act as the FM
antenna. To substitute for the earphones, you can use any headphones with unshielded wires.
10/10/2006file://C:\Documents and Settings\Administrator\Desktop\NS-DVxG UG US R0\NS-DV2...
Page 21 of 30
Tuning the radio
To tune to an FM radio station:
1. Plug your earphones into the earphone jack.
2. Press (Menu). The main menu opens.
3. Select
4. Press (Previous) or (Next) to scan to the next station.
Tip
Mono mode can help reduce static when listening to stations that have a weak signal. You can change to Mon
menu.
Setting station presets
Station presets let you quickly access your favorite frequencies.
To set station presets manually:
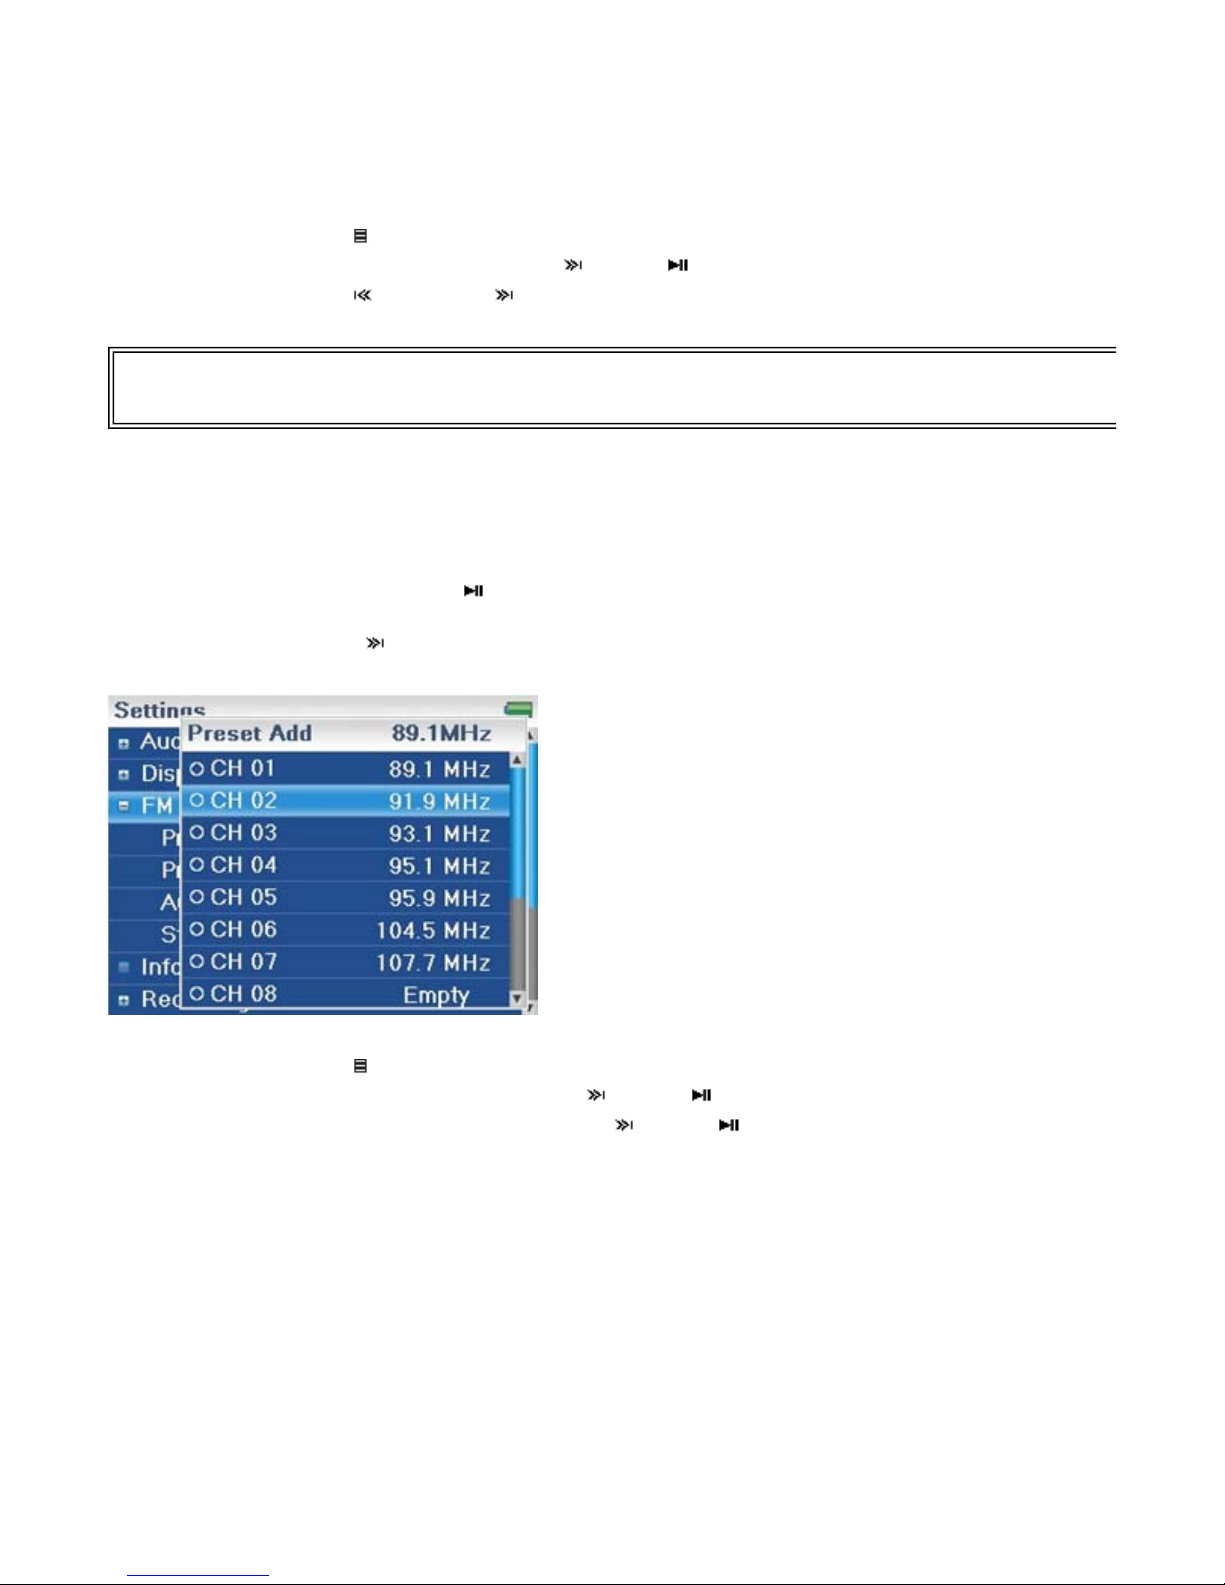
1. Tune to an FM radio station frequency.
2. Press and release (Play/Pause). The Preset Add Menu opens.
3. Scroll down the list until you find the preset you want to save with the currently tuned station,
FM Radio
then press (Next).
,
then press (Next) or (Play/Pause).
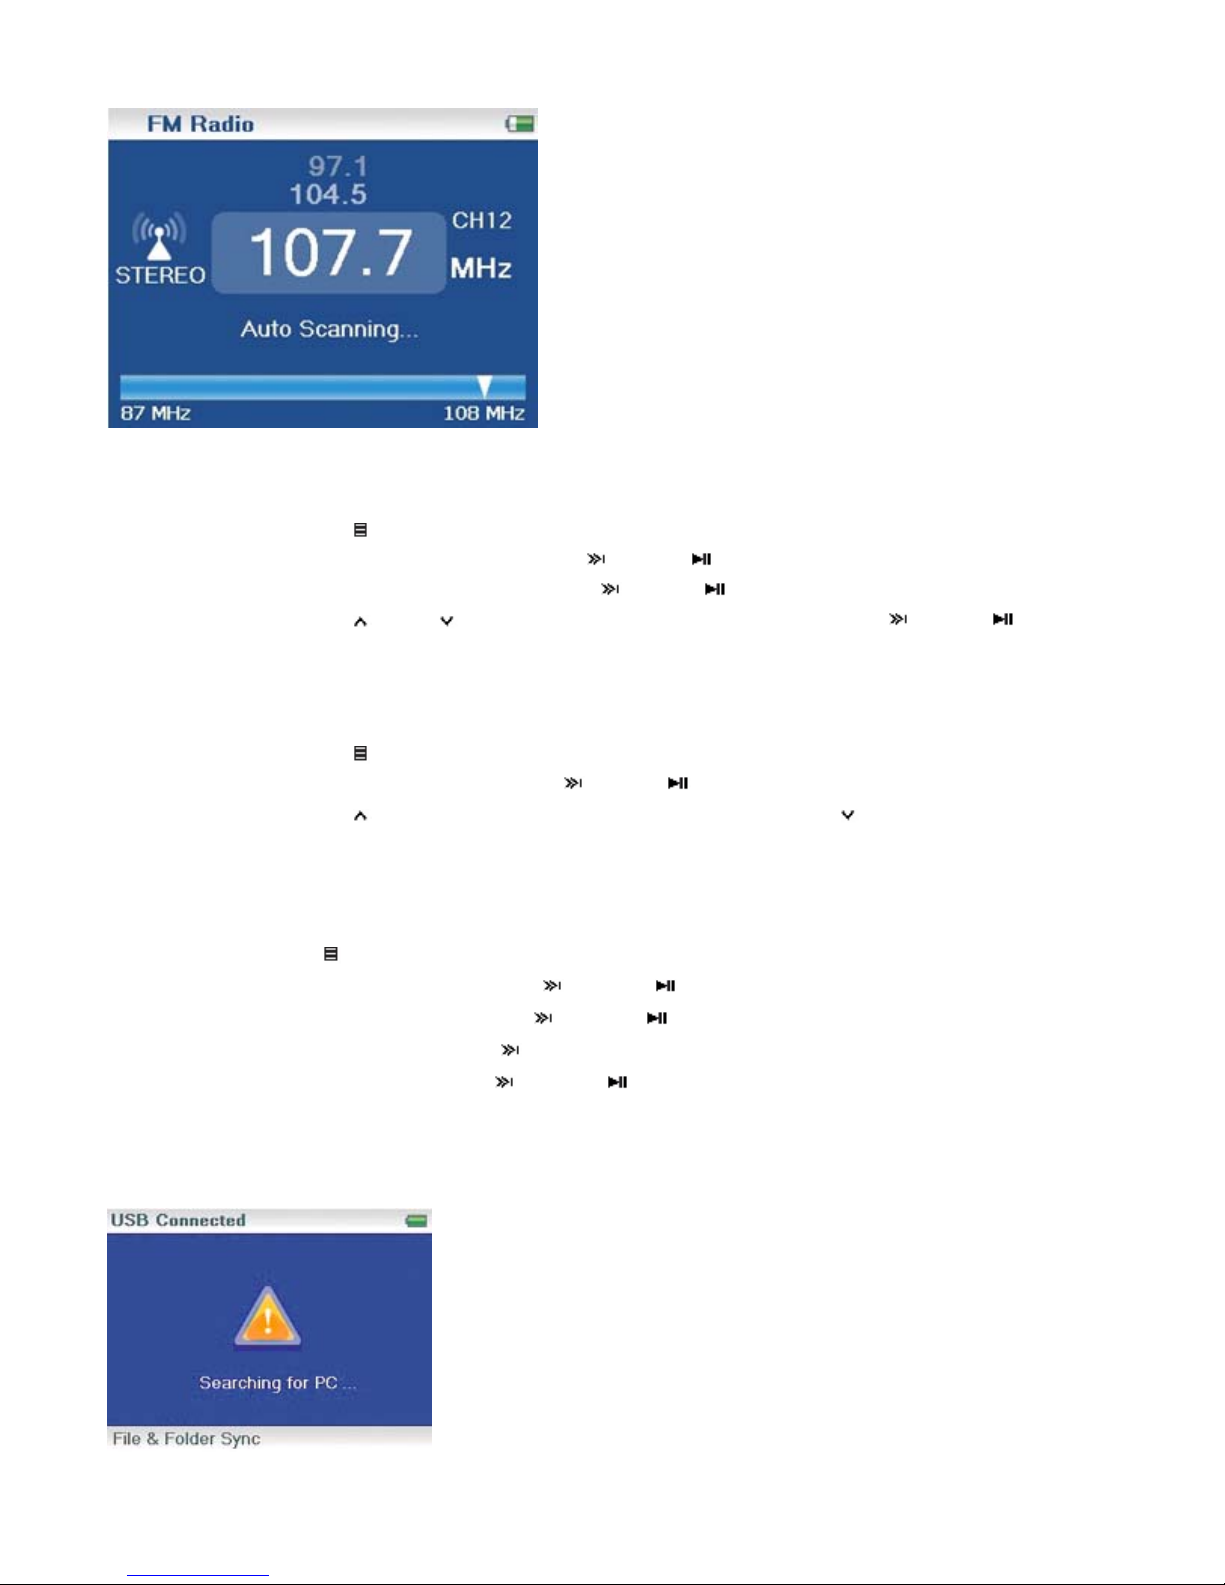
To set station presets automatically:
1. Press (Menu). The main menu opens.
2. Select
3. Select
range and flashes the message "Auto Scanning."
FM Settings
Auto Scanning
,
then press (Next) or (Play/Pause).
,
then press (Next) or (Play/Pause). The player scans the radio
10/10/2006file://C:\Documents and Settings\Administrator\Desktop\NS-DVxG UG US R0\NS-DV2...
A
Page 22 of 30
While scanning, the player automatically adds a preset for any local strong stations until all 20 preset
channels have been set.
To delete station presets:
1. Press (Menu). The main menu opens.
2. Select
3. Select
4. Press (Up) or (Down) to select the preset to delete, then press (Next) or
(Play/Pause). The preset is deleted.
FM Settings
Preset Delete
,
then press (Next) or (Play/Pause).
,
then press (Next) or (Play/Pause).
ccessing station presets
To access station presets:
1. Press (Menu). The main menu opens.
2. Select
3. Press (Up) to access the previous preset channel, or press (Down) to access the next
preset channel.
Deleting files
To delete all files from your player using the on-screen menu:
1.
2.
3.
4.
5.
To delete files from your player using your computer:
1.
Press (Menu). The main menu opens.
Select
Select
Select
Select
Connect the USB cable to a USB port on your computer and the mini USB port on your
FM Radio
, then press (Next) or (Play/Pause).
Settings
System
Erase All
Yes
, then press (Next) or (Play/Pause).
, then press (Next) or (Play/Pause).
, press (Next).
, then press (Next) or (Play/Pause). All media files are deleted.
player. The message "Searching for PC" appears on the player.
10/10/2006file://C:\Documents and Settings\Administrator\Desktop\NS-DVxG UG US R0\NS-DV2...
Your computer detects the player, and adds the player as a new device ("Insignia Video
y
Player") in the My Computer list of drives in Windows.
1.
2.
3.
Click
Double-click the
Find the files you want to delete, click to select them, then press
keyboard. The files are deleted.
Tip
To select multiple files, press and hold
select an entire range of files, click the file at the top of the range, press and hold
then click the file at the bottom of the range.
Start
, then click
My Computer
Insignia Video Player
Ctrl
.
device, then open the
on your keyboard while clicking the files with your mouse. To
Media
Shift
folder.
Delete
on your
on your keyboard,
Page 23 of 30
Disconnecting the player
After you have connected the player to a computer for recharging or music tr ansfer, you need to safely
disconnect the player.
To safely disconnect the player from your computer:
· When the player displays the message "OK to disconnect," unplug the USB cable from the player
and the computer.
Watching videos
Your player can show WMV and MPEG-4 videos. No other video formats are supported. To watch videos in
other format, you must first convert them to either WMV or MPEG-4 using ArcSoft Media Converter that is
included on the enclosed CD.
To watch videos:
1. Press (Menu). The main menu opens.
2. Select
3. Use the scroll wheel to select the select the video to watch, then press (Next) or
(Play/Pause). The video plays.
· Press (Previous) or (Next) to select a different video to watch.
Changing settings
Changing brightness, rotation, and backlight settings
To change the brightness, rotation, and backlight settings:
1. Press (Menu). The main menu opens.
2. Select
3. Select
, then press (Next) or (Play/Pause). A list of available videos appears.
Video
Settings
Displa
, then press (Next) or (Play/Pause).
, then press (Next) or (Play/Pause). The Display menu opens.
10/10/2006file://C:\Documents and Settings\Administrator\Desktop\NS-DVxG UG US R0\NS-DV2...

4. Change any of the following settings:
Brightness
Rotation
easier. Default is
Backlight
backlight may noticeably decrease battery life if it is left on for long periods of time.
--Changes the brightness of the backlit screen.
--Rotates the screen and flips the button functions to make left-handed use of the player
.
Right Handed
--Changes the length of time that the backlight stays on after you press a button. The
Page 24 of 30
Changing power off and sleep settings
To change the power off and sleep settings:
1. Press (Menu). The main menu opens.
2. Select
3. Select
4. Change any of the following settings:
Power Off
automatically turning off. You can select
Sleep
button presses or other activity. You can select 30-minute time increments up to 120 minutes.
Erasing all files and restoring factory defaults
To erase all files and change all settings to factory defaults:
1. Press (Menu). The main menu opens.
2. Select
3. Select
4. Change any of the following settings:
Erase All
System Init
Manually changing the USB mode
The music player can use two USB modes, Media Manager (MTP, the default) mode and File & Folder
(MSC) mode. The player automatically detects which mode is best suited for your computer. During normal
operation, you are not required to change modes manually. If you want to override the automatic setting
and make the player start in File and Folder (MSC) mode, complete the following procedure.
--Adjusts the length of time without any button presses that the player waits before
--Changes the length of time the player waits before automatically turning off, regardless of
--Erases music files from Internal and External storage.
Settings
, then press (Next) or (Play/Pause). The Time menu opens.
Time
Settings
System
--Resets all player settings to the factory defaults.
, then press (Next) or (Play/Pause).
or a time up to ten minutes.
Off
, then press (Next) or (Play/Pause).
, then press (Next) or (Play/Pause). The System menu opens.
To manually change the USB mode:
1. Turn off the player.
2. Move the
3. Connect the USB cable to the player. The player powers-up in File and Folder (MSC) mode.
After you disconnect the player, slide the
Media Manager
File & Folder
using iTunes Drag and Drop Support.
Viewing system information
Your player can tell you its total memory, used memory, available memory, and other system information.
To view system information:
1. Press (Menu). The main menu opens.
2. Select
3. Select
(MTP)--Optimum setting for using the player as a music player on Windows XP and
Windows 2000.
(MSC)--Optimum setting for using the player as a file storage device, and required for
displaying memory use, firmware version, and date. Use the scroll wheel to access the second
Hold
Settings
Information
switch to the Hold position.
button to the off position for normal operation.
Hold
, then press (Next) or (Play/Pause).
, then press (Next) or (Play/Pause). The Information screen opens,
10/10/2006file://C:\Documents and Settings\Administrator\Desktop\NS-DVxG UG US R0\NS-DV2...

Page 25 of 30
information screen.
Increasing capacity with a MicroSD flash card
If you are using a MicroSD card you will see a second device appear in either MTP mode or MSC mode.
You can use this second device in the same way as your primary device. You can copy, delete, and
synchronize files. In addition, if you insert a card with preloaded files, the files will be added to your device's
database (labeled as External storage) if the content is clear from any DRM restrictions.
Maintaining your player
Care and cleaning
· Periodically clean your player by using a damp washcloth dampened with only water, or lenscleaning papers dampened with water or isopropyl (rubbing) alcohol.
· Make sure that you don't get the player wet.
· Keep your player away from hot environments, such as on top of a vehicle dashboard, a window
sill, or a heat register.
· Avoid carrying your player in a pocket that contains metallic items, which can scratch and
damage the player.
· Avoid carrying your player in a pocket or compartment that is dirty. Dirt, dust, and lint can
damage the player.
· As much as possible, keep your player in its protective carrying case.
· Update the firmware occasionally to make sure that you have the latest version and product
features.
Updating the firmware
10/10/2006file://C:\Documents and Settings\Administrator\Desktop\NS-DVxG UG US R0\NS-DV2...

To update the firmware:
f
g
1. On the Internet, connect your Web browser to www.insignia-products.com, then search for
the music player firmware update.
2. Follow the online instructions to download the updated firmware files. Make sure that you
take note of where the file is saved to.
3. Make sure that your music player is in File & Folder (MSC) USB mode. For instructions on
changing the USB mode, "See Manually changing the USB mode
4. Double click the file you saved in step 2, then follow the on-screen instructions.
".
Page 26 of 30
Warning
Buying a new battery
Troubleshooting and FAQ
Installing new firmware will automatically delete all content from the device.
To order batteries or other accessories, visit the PartSearch website: http://bestbuy.partsearch.com.
How do I copy files to the player?
In File & Folder (MSC) mode, you can copy files to the player the same way you copy files to a hard drive
or flash memory drive. In Media Manager (MTP) mode, you can use Rhapsody, Windows Media Player, or
other digital music managers to transfer files to your player. For more information, "See Transferring music
files to your player" and "See Manually changing the USB mode."
How do I use my player with a Mac OS?
Set the player in File and Folder mode and then connect it to your Macintosh. For systems using OS 8.6,
see the Apple support site for instructions on downloading the necessary software to add USB support to
your system.
How do I use my player with iTunes?
Once the player is in File and Folder mode, all music ripped in MP3 format can be dragged and dropped
from iTunes directly onto the player.
Where can I buy a new battery?
Go to http://bestbuy.partsearch.com and follow the instructions to find the correct part for your player.
What is MSC?
The USB mass storage device class is a set of computing communications protocols defined by the USB
Implementers Forum that run on the Universal Serial Bus. The standard provides an interface to a variety o
storage devices. MSC stands for Mass Storage Compliant.
Do I have to fully charge my battery before using it?
No, you can partially charge it, but it is recommended you carge it fully within the first week of purchase.
Which file formats does the player support?
This player supports MP3, WMA, Vorbis, Audible, and secure WMA audio formats, and JPG and JPEG
photo formats. Any other formats must be converted to a supported format before being copied to your
player.
What is MTP?
Media Transfer Protocol (MTP, or Media Manager mode) is a protocol for connecting portable devices to a
Windows XP computer and synchronizing digital media content between those devices.
When I copy files to the player using Windows Explorer, what folder should I copy them to?
In Media Manager (MTP) mode, copy them to the
Folder (MSC) mode, you can copy them to the root directory. On some operating systems, you may see
separate folders for Video and Photos. Copy your files into the appropriate folder.
Some of my music files are on my player, but cannot be played. When I select them, a different
begins to play. What is wrong?
son
folder or root directory on the player. In File &
Media
10/10/2006file://C:\Documents and Settings\Administrator\Desktop\NS-DVxG UG US R0\NS-DV2...

Page 27 of 30
You may not have purchased the rights to play the song on an additional device. To test this, try to play a
song that you have copied from an older CD and converted to MP3 format. If you can play that song but not
the song that doesn't play, then you need to purchase the rights to play the song.
Why should I update the firmware?
You should always update the player to the latest firmware to make sure that it works correctly and has the
latest features. For more information, "See Updating the firmware
How do I copy a CD to my player?
First you must rip the CD using a digital music manager like Best Buy Rhapsody or Windows Media Player.
After the songs are on your computer, copy the songs to the player using Windows Explorer or a digital
music manager. For more information, "See Transferring music files to your player
Why does my player display a message that says "Unknown artist/album"?
This message usually appears when the music file doesn't contain artist or album information (incomplete
ID3 tags). See the documentation or online help of your digital music manager for instructions on adding
that information to your music files.
".
."
Getting help
Contacting technical support
Learn more
Before you contact technical support, review the Troubleshooting and FAQ section to see if your question is
already answered there.
If you have questions about the use or features of your player, call Technical Support at 1-800-699-9218 or
(877) 467-4289, or fill out an online support request at:
www.bestbuy.com/support.asp
Get additional online help at:
www.insignia-products.com
www.bestbuy.com/mp3help
www.geeksquad.com
On the Internet, you can use a Web search site to find information on the following topics*:
· "Ripping CDs"
· "Downloading music"
· "Downloading MP3s"
· "MP3 music"
· "MP3 copyright law"
*Best Buy Enterprise Services, Inc. does not maintain and is not responsible for the content of Web pages
you find using these search terms.
Specifications
Ports and
connections
Display
Battery
Supported formats
Mini USB 2.0
2 Earphones/Headphones shared with 1 Line-in
Micro SD slot
LCD
262,000 colors
320x240 QVGA
Replaceable, rechargeable lithium ion
Audio: MP3, WMA, Secure WMA, Audible, Vorbis (tracks will only be recognized
in File and Folder (MSC) mode)
Photo: JPG/JPEG
10/10/2006file://C:\Documents and Settings\Administrator\Desktop\NS-DVxG UG US R0\NS-DV2...
Page 28 of 30
Video: MPEG-4, WMV
WMA (all sampling rates are 44.1KHz)
Highest 128kbps
High 96kbps
Medium 80kbps
Line in recording
formats
Dimensions
Weight
Legal notices
Compliance statements
This device complies with Part 15 of the FCC Rules. Operation of this product is subject to the following two
conditions: (1) this device may not cause harmful interference, and (2) this device must accept any interference
received, including interference that may cause undesired operation.
This equipment has been tested and found to comply with the limits for a Class B digital device, pursuant to Part
15 of the FCC Rules. These limits are designed to provide reasonable protection against harmful interference in a
residential installation. This equipment generates, uses, and can radiate radio frequency energy and, if not
installed and used in accordance with the instructions, may cause harmful interference to radio communications.
However, there is no guarantee that interference will not occur in a particular installation. If this equipment does
cause harmful interference to radio or television reception, which can be determined by turning the equipment off
and on, the user is encouraged to try to correct the interference by one or more of the following measures:
•
•
•
•
Low 64kbps
PCM
Highest 1536kbps (48KHz)
High 1411kbps (44.1KHz)
Medium 1024kbps (32KHz)
Low 705kbps (22KHz
0.54 x 1.34 x 3.09 inches (13.7 x 34 x 78.5 mm)
2.5 ounces (70g)
Reorient or relocate the receiving antenna.
Increase the separation between the equipment and receiver.
Connect the equipment into an outlet on a circuit different from that to which the receiver
is connected.
Ask the dealer or an experienced radio/TV technician for help.
Copyright
© 2006 Insignia. Insignia and the Insignia logo are trademarks of Best Buy Enterprise Services, Inc. Other brands
and product names are trademarks or registered trademarks of their respective holders. Specifications and
features are subject to change without notice or obligation.
Warranty
1-year limited warranty
Insignia Products (“Insignia”) warrants to you, the original purchaser of this new NS-DV2G or NS-DV4G
(“Product”), that the Product shall be free of defects in the original manufacture of the material or
workmanship for a period of one (1) year from the date of your purchase of the Product (“Warranty
Period”). This Product must be purchased from an authorized dealer of Insignia brand products and
packaged with this warranty statement. This warranty does not cover refurbished Product. If you notify
Insignia during the Warranty Period of a defect covered by this warranty that requires service, terms of
this warranty apply.
10/10/2006file://C:\Documents and Settings\Administrator\Desktop\NS-DVxG UG US R0\NS-DV2...

Page 29 of 30
How long does the coverage last?
The Warranty Period lasts for 1 year (365 days) from the date you purchased the Product. The
purchase date is printed on the receipt you received with the Product.
What does this warranty cover?
During the Warranty Period, if the original manufacture of the material or workmanship of the Product is
determined to be defective by an authorized Insignia repair center or store personnel, Insignia will (at its
sole option): (1) repair the Product with new or rebuilt parts; or (2) replace the Product at no charge with
new or rebuilt comparable products or parts. Products and parts replaced under this warranty become
the property of Insignia and are not returned to you. If service of Products or parts are required after the
Warranty Period expires, you must pay all labor and parts charges. This warranty lasts as long as you
own your Insignia Product during the Warranty Period. Warranty coverage terminates if you sell or
otherwise transfer the Product.
How to obtain warranty service?
If you purchased the Product at a retail store location, take your original receipt and the Product to the
store you purchased it from. Make sure that you place the Product in its original packaging or
packaging that provides the same amount of protection as the original packaging. If you purchased the
Product from an online web site, mail your original receipt and the Product to the address listed on the
web site. Make sure that you put the Product in its original packaging or packaging that provides the
same amount of protection as the original packaging.
Where is the warranty valid?
This warranty is valid only to the original purchaser of the product in the United States and Canada.
What does the warranty not cover?
This warranty does not cover:
Customer instruction
z
z Installation
z Set up adjustments
z Cosmetic damage
z Damage due to acts of God, such as lightning strikes
z Accident
z Misuse
z Abuse
z Negligence
Commercial use
z
z Modification of any part of the Product, including the antenna
This warranty also does not cover:
Damage due to incorrect operation or maintenance
z
z Connection to an incorrect voltage supply
z Attempted repair by anyone other than a facility authorized by Insignia to service the Product
z Products sold as is or with all faults
z Consumables, such as fuses or batteries
10/10/2006file://C:\Documents and Settings\Administrator\Desktop\NS-DVxG UG US R0\NS-DV2...
 Loading...