

Insignia NS-DV2G/DV4G, NS-DV2G, NS-DV4G Quick Start Manual
Up Play/StopPowerPower
Up Play/Stop
NextDown
1. Plug the earphones into the earphone jack.
(The earphones act as the FM antenna.)
2. Press the
Menu button.
3. Use the scroll wheel to select FM radio.
4. Press
(Next).
Press
(Next) to tune
to a higher frequency.
Press
(Previous)
to tune to a lower frequency.
Prev ious
1. Disconnect USB cable.
2. Connect headphones to
the player.
3. Press and hold the
Power button.
4. Press the
Menu button.
5. Use the scroll wheel to
select Music Library.
6. Press
to choose (Next).
7. Use the scroll wheel to
select Artist, Album, Track,
etc. Then press the
(down) arrow key to scroll
through the list.
8. Press
(Play/Pause) to
play the selected item.
9. A pop-up window allows
you to add just this item
or all items in the list. In
addition, you can add them
to the queue of already
playing music by adding
to “Play now”. Select the
option you want and
press Play.
During playback:
• Press
(Play/Pause) to
pause playback. Press again
to resume playback.
• Press
(Fast Forward) to
skip to the next track. Press
and hold to fast forward.
• Press
(Rewind) to
restart the current track,
and press repeatedly to
skip to previous tracks.
Press and hold to rewind.
• Turn wheel clockwise
and counterclockwise to
change volume.
Note: To conserve battery
power, the display dims after
several seconds of button
inactivity. Press the power
button to restore the display.
6
7 8
Digital Video/ Music Player
NS-DV2G/DV4G
Quick Start Guide
©2006 Insignia. Insignia and the Insignia logo are trademarks of Best Buy Enterprise Services, Inc.
Support Solutions
User’s Guide on CD
1-800-699-9218 www.Insignia-Products.com
www.geeksquad.com | www.bestbuy.com/mp3
3734114
Listening to the radio
Listening to music
Converting and transferring photos
and videos
2
3
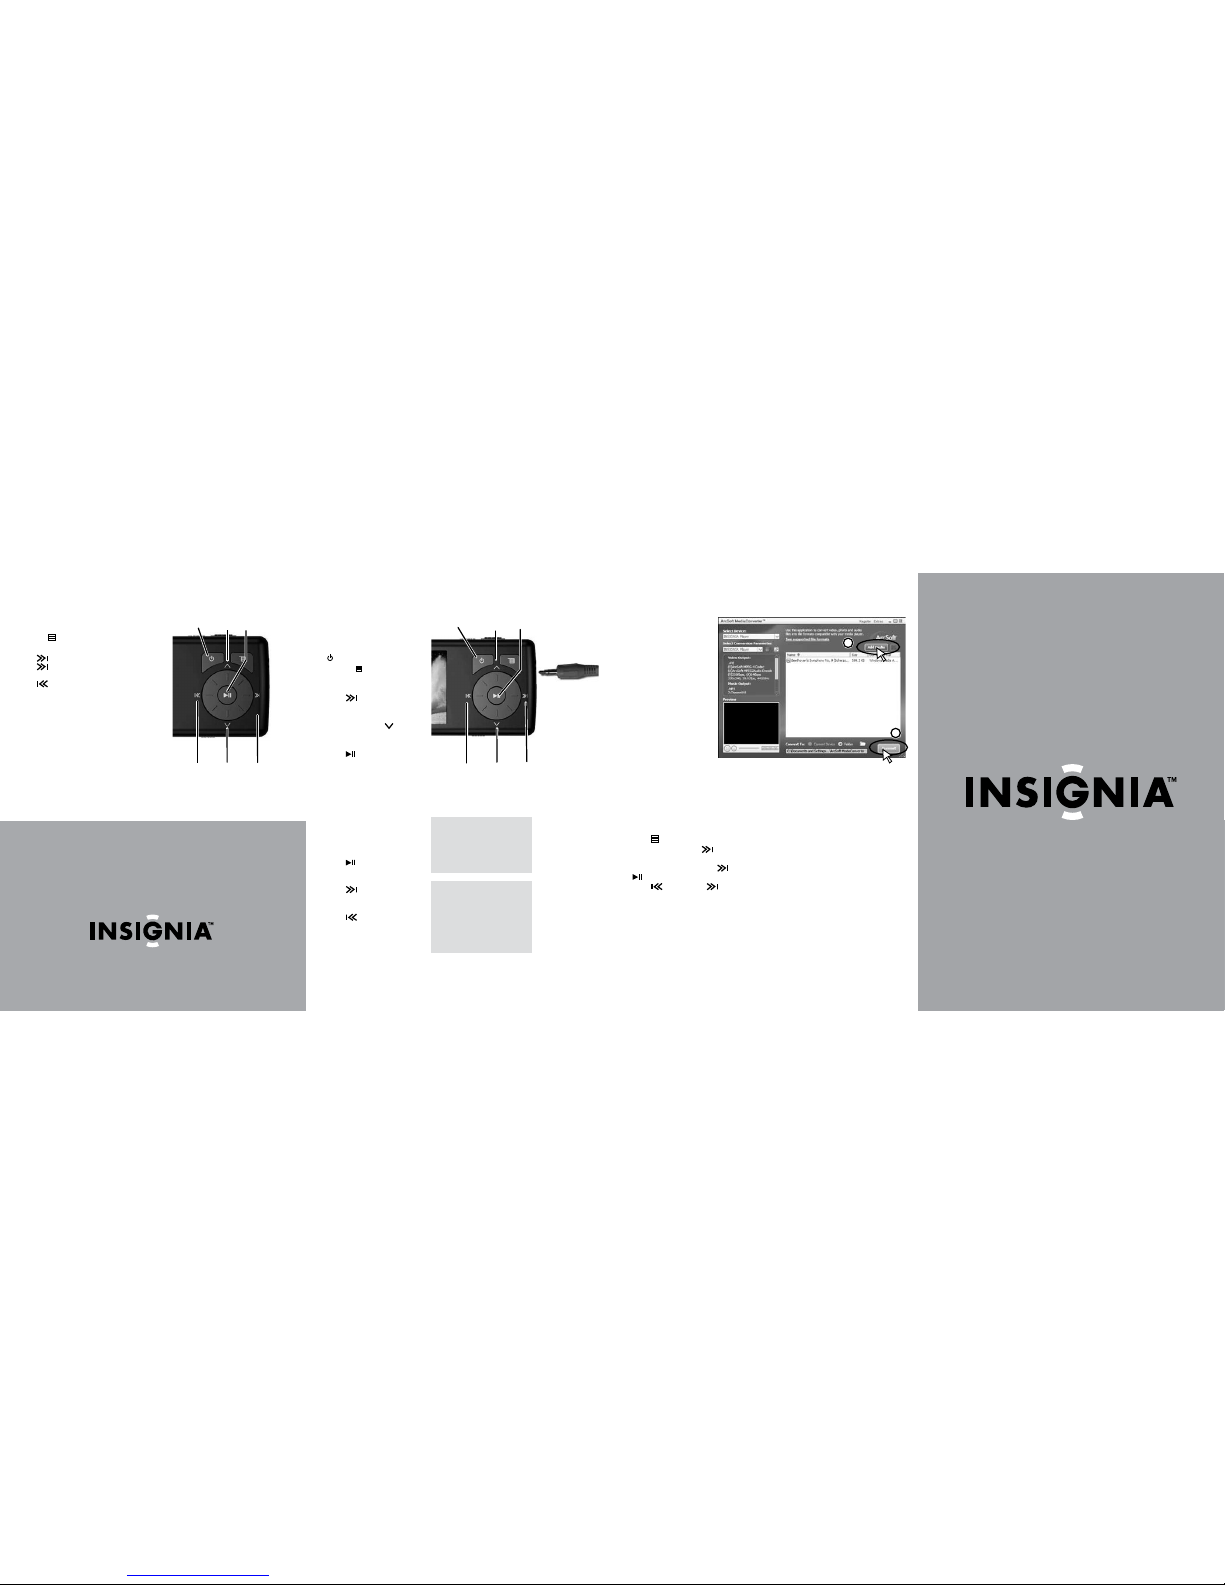
Using ArcSoft
Media Converter
1. Open the ArcSoft Media
Converter software.
2. Click Add Media button,
then find the file you
want to convert and click
Open button.
3. Select the file and click
the Convert button.
The file is converted and
automatically transferred
to your player.
Viewing video
Playing videos on your player
1. Press
Menu, then use the scroll wheel to
select Video and press (Next).
2. Use the scroll wheel buttons to select the
video you want, then press (Next) or
(Play/Pause).
3. Press
(Previous) or (Next) buttons
to play the next or previous videos.
Fast ForwardDownRewind
Note: If you hear a short
beep between tracks this
is the license expiration
warning tone, indicating you
will need to re-synchronize
your subscription content as
it will expire soon.
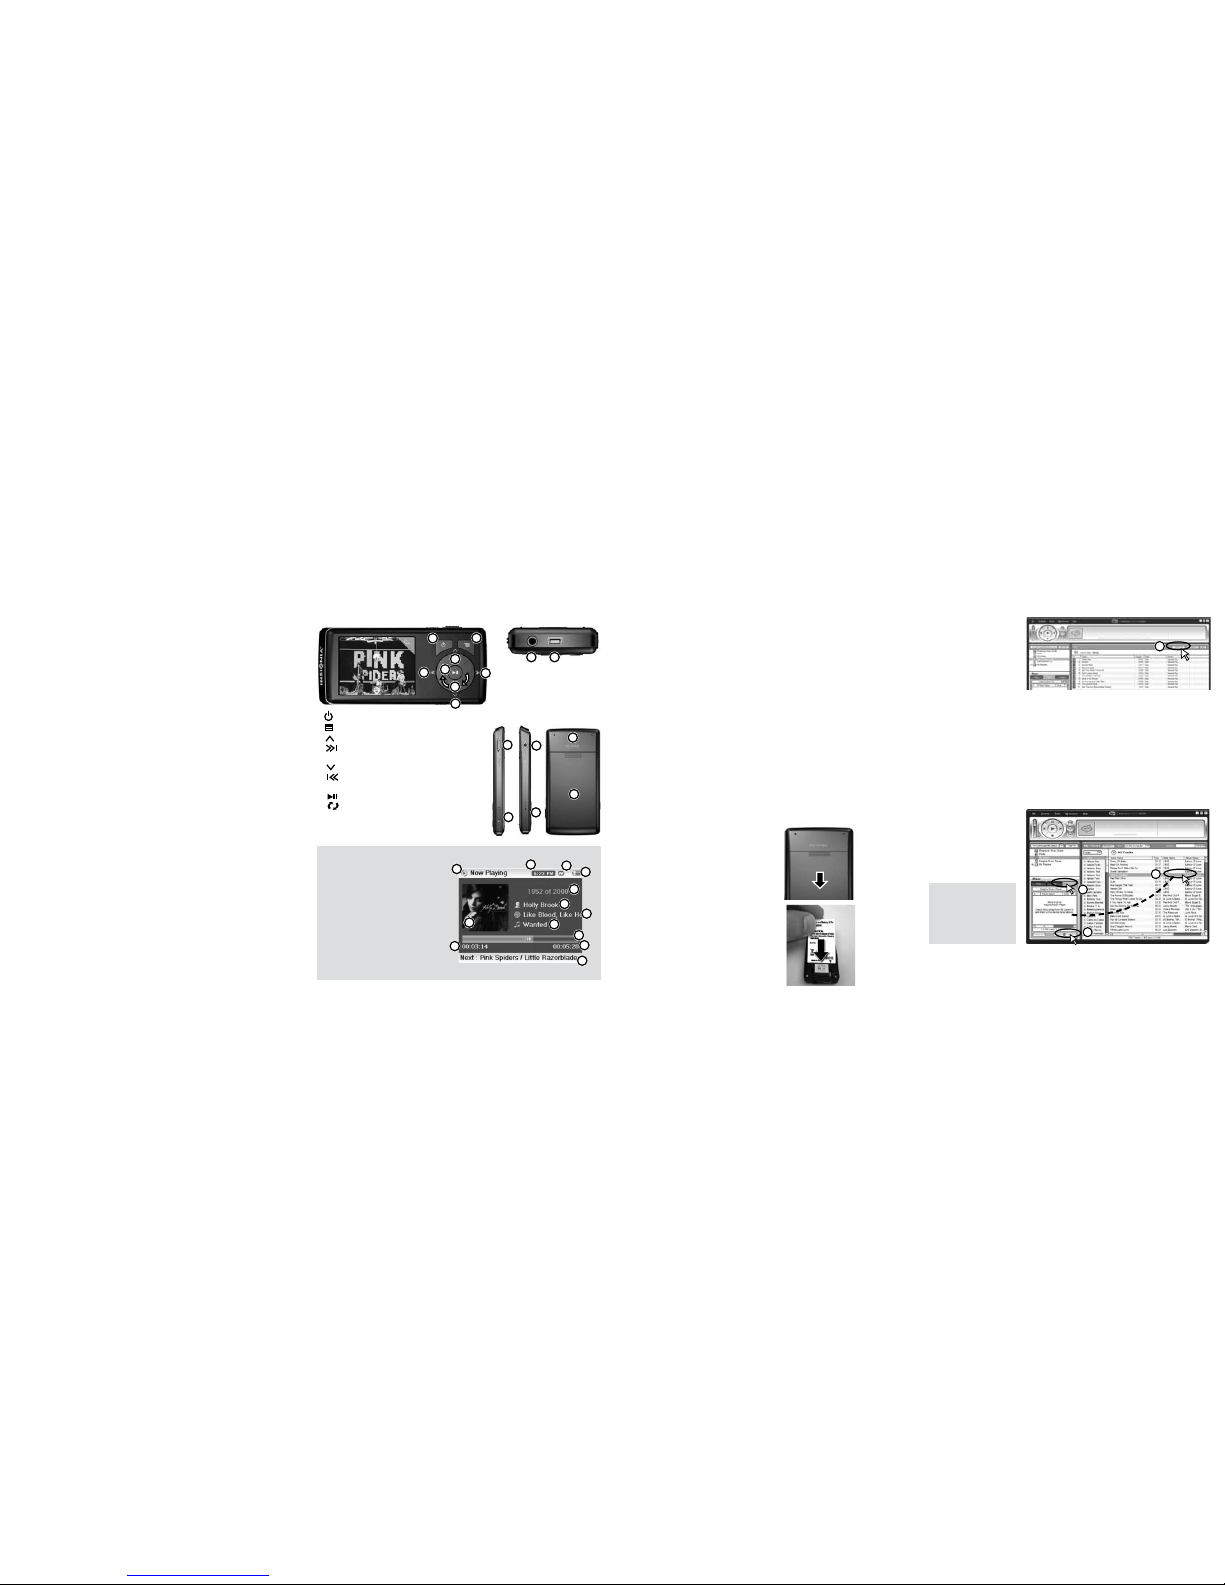
A. Mode Icon
B. Clock
C. Repeat
D. Battery Indicator
E. File Number/Total Number
F. Artist Name
G. Album Name
H. Album Art
I. Track Name
J. Progress Bar
K. Play Time
L. Total Time
M. Next Track Information
Player controls and connections
A. Power
B. Menu
C. Up
D. Fast Forward / Skip
Next / Next Submenu
E. Down
F. Rewind / Skip Back /
Previous menu
G. Play / Pause / Select
H. Volume in Now
Playing mode /
Up/Down in Menu mode
Display Screen
B
D
F
A
C
H
E
G
B
D
F
A
C
H
E
G
I
J
K
L
M
M N
Back
Right
R
Q
Left
P
O
T
S
M. Earphone Jack
N.
Mini USB 2.0
Port Connection
O. MicroSD
Card Slot
P. HOLD
Q. Earphone Jack /
Line in Jack
R. Reset
S. Model number
T. Battery cover
Front
Installing the software
1. Open the CD drive on your computer.
2. Insert the Insignia software CD that came
with your player. The software installation
programs starts.
-ORIf the installation program doesn’t start
automatically, double-click My Computer
on your desktop, double-click the CD drive
that contains the Insignia CD, then doubleclick the file Setup. exe
3. Follow the on-screen instructions to finish
the installation.
The instructions in this guide require
installation of both the Best Buy Digital
Music Store Media Manager and the
ArcSoft Media Converter.
Attention Apple Users
(OS 8.6 and higher)
1. Don’t install software.
2. Connect the device to the
computer.
3. Player will appear on the
Desktop, INSIGNIAMP3. Drag
and Drop MP3 files from media
manager (e.g., iTunes) to player.
Getting s
tarted
Install the battery and connect the
USB cable
1. Remove the battery cover, then install the
rectangular battery into the battery bay.
2. Slide the battery cover back onto the player.
3. Connect the USB cable to the player and to
the PC.
• The battery charges with the USB cable.
• The battery charges in about 2.5 hours.
• Minimum charge time is 30 minutes.
• A fully charged battery provides up to
20 hours of continuous playback.
• You will use the same USB connection
later for transferring music files.
Transferring music to your player
4
Getting music from your
CDs to your music player
involves two steps:
A. Get music to your PC.
B. Transfer music from your
PC to your player.
A. Get music from a
CD to your PC
1. Open Best Buy Digital
Music Store.
2. Put a music CD in the
CD drive. Best Buy
Digital Music Store
lists the tracks in the
music library.
2
1
3
Safety
Turn down the volume on your
player before wearing earphones or
headphones. Avoid using your player
at a high volume.
Permanent hearing loss may occur if
earphones or headphones are used
at high volume.
Do not use headphones or
earphones while driving, cycling, or
operating any motorized vehicle.
This may create a traffic hazard and
may be illegal in your area.
Package Contents
• Digital music player
• Rechargeable battery
• Earphones
• USB 2.0 cable
• Quick Start Guide
• CD with software and user guide
• Carrying case
• Warranty card
• Music offer
• One free download from Audible.com
3 4 52
B. Transferring music
from your PC to
your player
1. Click
Transfer tab.
2. Click and drag
music files.
3. Click Transfer button.
3. Close any pop up windows.
4. Click
Import CD. Best Buy Digital Music Store creates
MP3 files from the music tracks on the CD. You can
also use the Best Buy Digital Music Store (and other
digital music management programs) to get new
music files on the Internet. See the program’s online
help for more information.
Keep your player away from
sources of moisture, including
sinks, bathtubs, shower, rain, and
beverages. Moisture may cause
electric shock.
Bottom
Note: If your player is
not recognized by the
PC, re-connect it to your
PC using a rear USB
port on the back of your
computer.
 Loading...