

Insignia NS-DPF08WW-16, NS-DPF10WW-16 User Manual
8” and 10” Digital Photo
Frame - Espresso
NS-DPF08WW-16/NS-DPF10WW-16
USER GUIDE
Before using your new product, please read these instructions to prevent any damage.

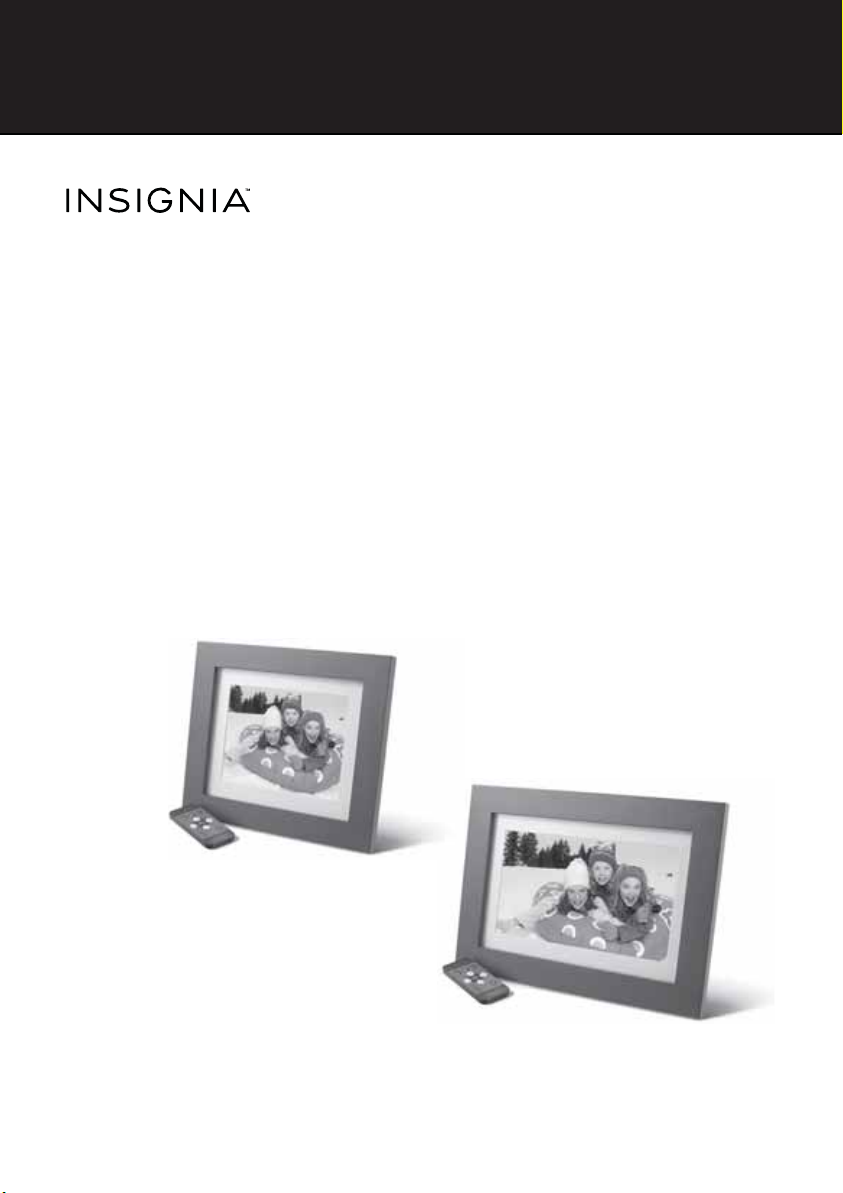
Insignia 8” and 10” Digital Photo Frame - Espresso
Insignia 8” and 10” Digital Photo Frame -
Espresso
Contents
Introduction . . . . . . . . . . . . . . . . . . . . . . . . . . . . . . . . . . . . . . . . . . . . . . . . . . . . . . . . . . .2
IMPORTANT SAFETY INSTRUCTIONS . . . . . . . . . . . . . . . . . . . . . . . . . . . . . . . . . . . .2
Package contents. . . . . . . . . . . . . . . . . . . . . . . . . . . . . . . . . . . . . . . . . . . . . . . . . . . .4
Features . . . . . . . . . . . . . . . . . . . . . . . . . . . . . . . . . . . . . . . . . . . . . . . . . . . . . . . . . . . . . . .4
Back view . . . . . . . . . . . . . . . . . . . . . . . . . . . . . . . . . . . . . . . . . . . . . . . . . . . . . . . . . . .5
Side view. . . . . . . . . . . . . . . . . . . . . . . . . . . . . . . . . . . . . . . . . . . . . . . . . . . . . . . . . . . .6
Remote control . . . . . . . . . . . . . . . . . . . . . . . . . . . . . . . . . . . . . . . . . . . . . . . . . . . . . .7
Setting up your digital photo frame . . . . . . . . . . . . . . . . . . . . . . . . . . . . . . . . . . . .8
Setting up the remote control. . . . . . . . . . . . . . . . . . . . . . . . . . . . . . . . . . . . . . . .8
Setting up the photo frame . . . . . . . . . . . . . . . . . . . . . . . . . . . . . . . . . . . . . . . . . .8
Using the OSD menus to change settings. . . . . . . . . . . . . . . . . . . . . . . . . . . .10
Playing a slideshow . . . . . . . . . . . . . . . . . . . . . . . . . . . . . . . . . . . . . . . . . . . . . . . . . . .18
Playing an instant slideshow from a memory card or USB device . . . . .18
Manually playing a slideshow . . . . . . . . . . . . . . . . . . . . . . . . . . . . . . . . . . . . . . .18
Using the Clock/Calendar view screen . . . . . . . . . . . . . . . . . . . . . . . . . . . . . . . . .19
Maintaining your digital photo frame. . . . . . . . . . . . . . . . . . . . . . . . . . . . . . . . . .20
Cleaning your digital photo frame. . . . . . . . . . . . . . . . . . . . . . . . . . . . . . . . . . .20
Replacing the remote control battery . . . . . . . . . . . . . . . . . . . . . . . . . . . . . . .20
Troubleshooting . . . . . . . . . . . . . . . . . . . . . . . . . . . . . . . . . . . . . . . . . . . . . . . . . . . . . .21
Specifications . . . . . . . . . . . . . . . . . . . . . . . . . . . . . . . . . . . . . . . . . . . . . . . . . . . . . . . . .22
ONE-YEAR LIMITED WARRANTY - INSIGNIA . . . . . . . . . . . . . . . . . . . . . . . . . . . . .25
Introduction
Congratulations on your purchase of a high-quality Insignia product. Your
new digital photo frame is designed for reliable and trouble-free
performance.
IMPORTANT SAFETY INSTRUCTIONS
CAUTION
RISK OF ELECTRIC SHOCK
DO NOT OPEN
This symbol indicates that dangerous voltage
constituting a risk of electric shock is present
within your digital photo frame.
2
www.insigniaproducts.com

Insignia 8” and 10” Digital Photo Frame - Espresso
This symbol indicates that there are important
operating and maintenance instructions in the
literature accompanying your digital photo
frame.
When using electrical appliances, basic precautions should always be
followed to reduce the risk of fire, electric shock, and injury to persons,
including the following:
1 Read all instructions before using this device.
2 Heed all warnings.
3 Follow all instructions.
4 Do not use this device near water.
5 Clean only with soft cloth.
6 Do not block any ventilation openings. Install in accordance with the
manufacturer's instructions.
7 Do not defeat the safety purpose of a polarized or grounding-type
plug. A polarized plug has two blades with one wider than the other. A
grounding type plug has two blades and a third grounding prong. The
wide blade or the third prong are provided for your safety. If the
provided plug does not fit into your outlet, consult an electrician for
replacement of the obsolete outlet.
8 Protect the power cord from being walked on or pinched particularly
at plugs, convenience receptacles, and the point where they exit from
the appliance.
9 Do not attempt to modify or extend the power cord of this device.
10 Unplug this device during lightning storms or when it will not be used
for long periods of time.
11 Make sure that the available AC power matches the voltage
requirements of this device.
12 Do not handle the plug with wet hands. This could result in an electric
shock.
13 Do not turn the device on or off by plugging or unplugging the power
cord.
14 Turn off the device before unplugging it.
15 Refer all servicing to qualified service personnel. Servicing is required
when the device has been damaged in any way, such as the
power-supply cord or plug is damaged, liquid has been spilled or
objects have fallen into the appliance, the appliance has been exposed
to rain or moisture, does not operate normally, or has been dropped.
16 To reduce the risk of fire or electric shock, do not expose this device to
rain, moisture, dripping, or splashing, and no objects filled with liquids
should be placed on top of it.
www.insigniaproducts.com
3

Insignia 8” and 10” Digital Photo Frame - Espresso
Features
• 10.1" or 8” LED backlit TFT LCD display
• 16:9 wide-screen aspect ratio (10” model)
4:3 standard aspect ratio (8” model)
• 1024 x 600 resolution (10” model)
800 x 600 resolution (8” model)
• Supports JPEG image format
• Slideshow mode
• Scheduled on/off
• Built-in media reader, with support for SD/MMC/MS memory cards
•USB flash drive port
• Calendar and clock functions
• Espresso finish wood design
Package contents
• Digital Photo Frame
•Power adapter
• Remote control
•Stand
•User Guide
4
www.insigniaproducts.com
Insignia 8” and 10” Digital Photo Frame - Espresso
MADE IN CHINA
S/N:
10" Digital Picture Frame
Model No.: NS-DPF10WW -16
Rating: 5V 1A
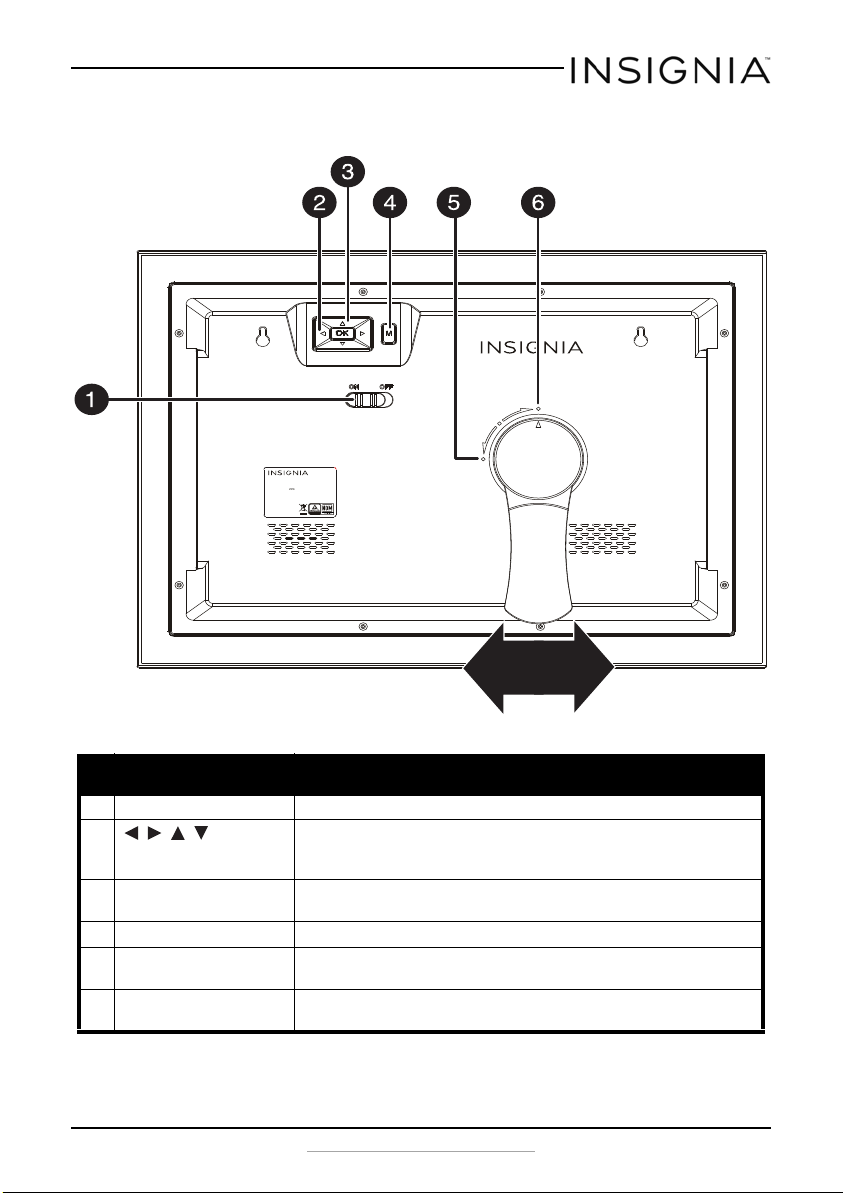
Back view
# Item Description
1 ON/OFF switch Slide to turn your digital photo frame on or off.
2 , , ,
(navigation) buttons
3 OK Press to select the highlighted option or to pause and resume the
Press to navigate the on-screen menus.
When viewing a picture, press right or left to view the next or
previous picture
slideshow.
4 M(enu) Press to go to the main menu.
5 Portrait mode With the arrow on the stand lined up with this dot, the photo frame is
in portrait mode.
6 Landscape mode With the arrow on the stand lined up with this dot, the photo frame is
in landscape mode.
www.insigniaproducts.com
5
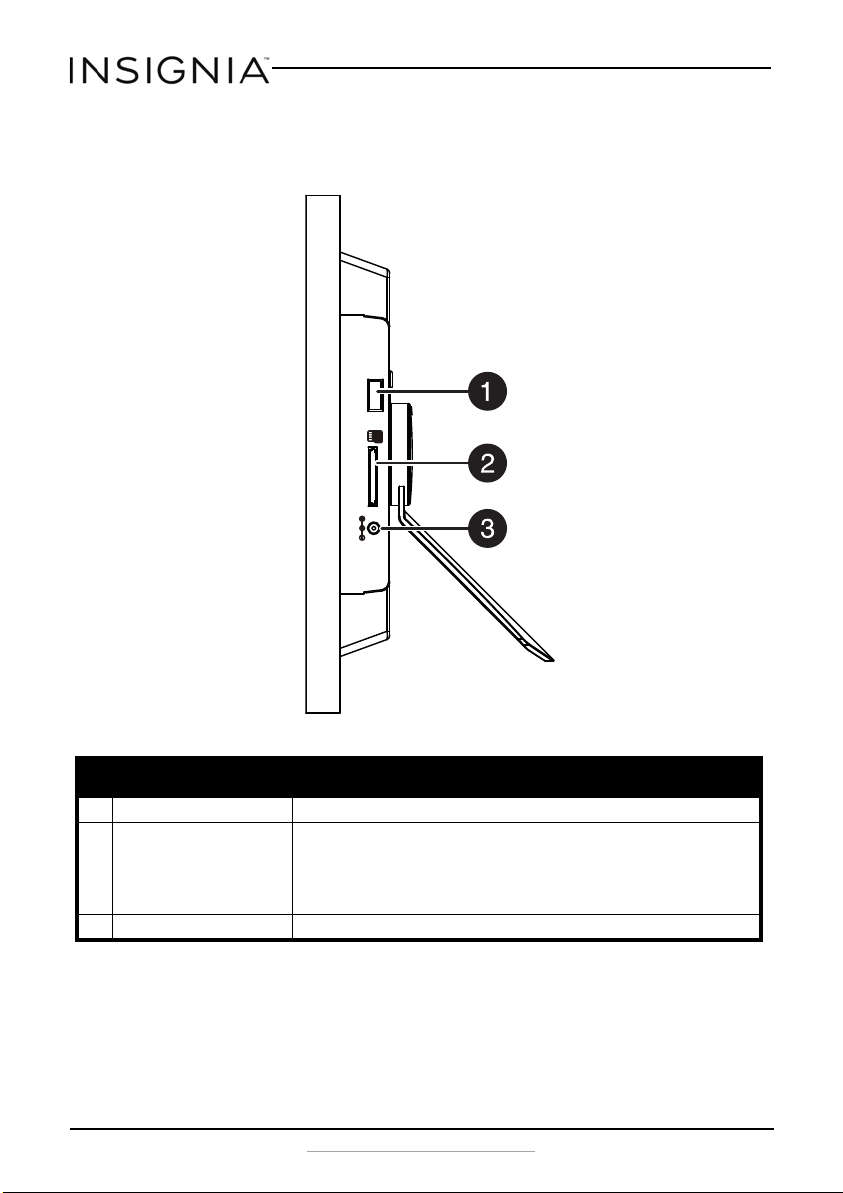
Side view
USB
DC IN 5V
SD/MMC/MS
Insignia 8” and 10” Digital Photo Frame - Espresso
# Item Description
1 USB port Plug a USB flash drive into this slot.
2 SD memory card slot Plug a memory card into this slot. Your digital photo frame accepts:
3 DC in jack Plug the power adapter into this connector.
6
• SD™/SDHC™
• MultiMediaCard™ (MMC)
•Memory Stick™ (MS)
• Memory Stick PRO™ (MS PRO).
www.insigniaproducts.com
Insignia 8” and 10” Digital Photo Frame - Espresso
7
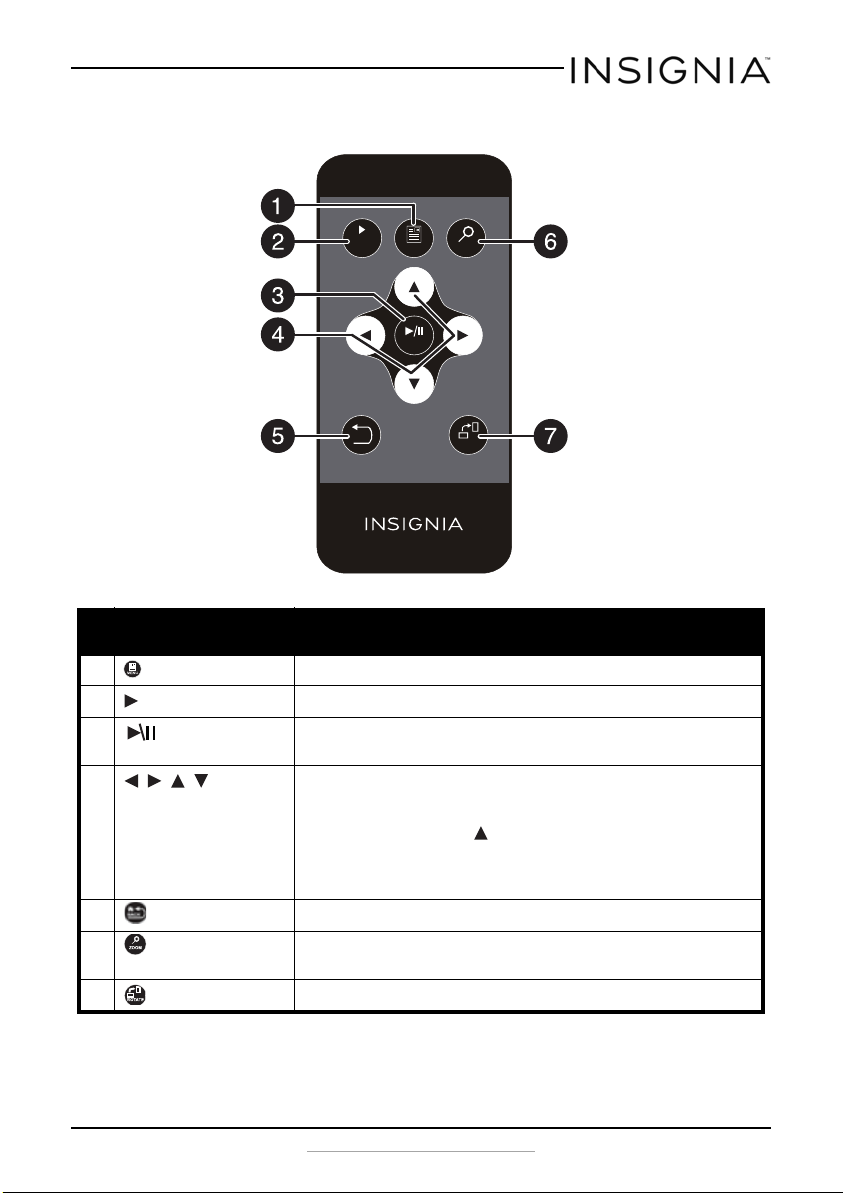
Remote control
SLIDE
SHOW
BACK
MENU
ENTER
RM-NSDPF8/10WW-16
ZOOM
ROTATE
# Item Description
1 MENU Press to display the Main menu.
2 SLIDE SHOW Press to start a slideshow.
3 ENTER Press to select the highlighted option or to pause and resume the
4 , , ,
(navigation/selection
buttons)
5 BACK Press to go back a screen.
6 ZOOM Press to zoom the image. Options include 125%, 150%, 175%, 200%,
7 ROTATE Press to rotate the image. Options include 90°, 180°, 270°, or 0°.
slideshow.
Press to navigate the on-screen menus.
When viewing a picture, press right or left to view the next or
previous picture.
In Slideshow mode, press to open a pop-up menu to rotate, zoom,
or delete an image.
Caution: If you select the delete option, the image is permanently
deleted from the memory card or USB flash drive.
225%, or 250%.
www.insigniaproducts.com
7
Insignia 8” and 10” Digital Photo Frame - Espresso
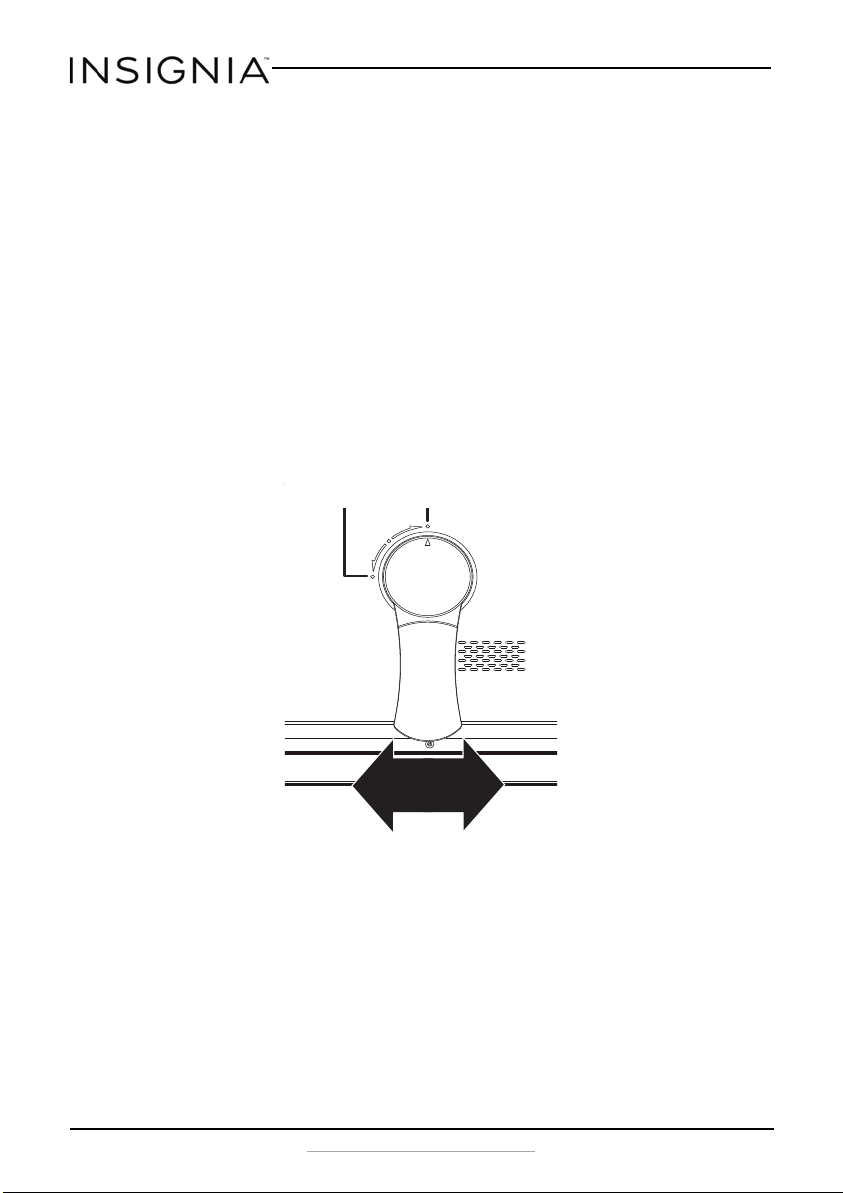
Port rait dot
Landscape dot
Setting up your digital photo frame
Setting up the remote control
• Remove the plastic tab that extends past the bottom edge of the remote
control. This tab protects the battery. The remote control will not work
until it is removed.
Setting up the photo frame
1 Lay the picture frame face-down.
2 Line up the arrow on the stand with the center dot on the back of the
stand.
3 Insert the stand into the grooves and rotate it to the preferred viewing
mode:
• Landscape: Right dot
• Portrait: Left dot
8
www.insigniaproducts.com

Insignia 8” and 10” Digital Photo Frame - Espresso
USB
DC IN 5V
SD/M MC/M S
4 Plug the power adapter into the frame’s DC IN jack and into an power
outlet.
5 Slide the ON/OFF switch to the ON position.
The photo frame comes preloaded with pictures. You can turn on the
photo frame and play back the preloaded demo pictures with no
memory device inserted.
www.insigniaproducts.com
9
 Loading...