

Insignia IS-PA040720 User Manual
EN-1 EN-2
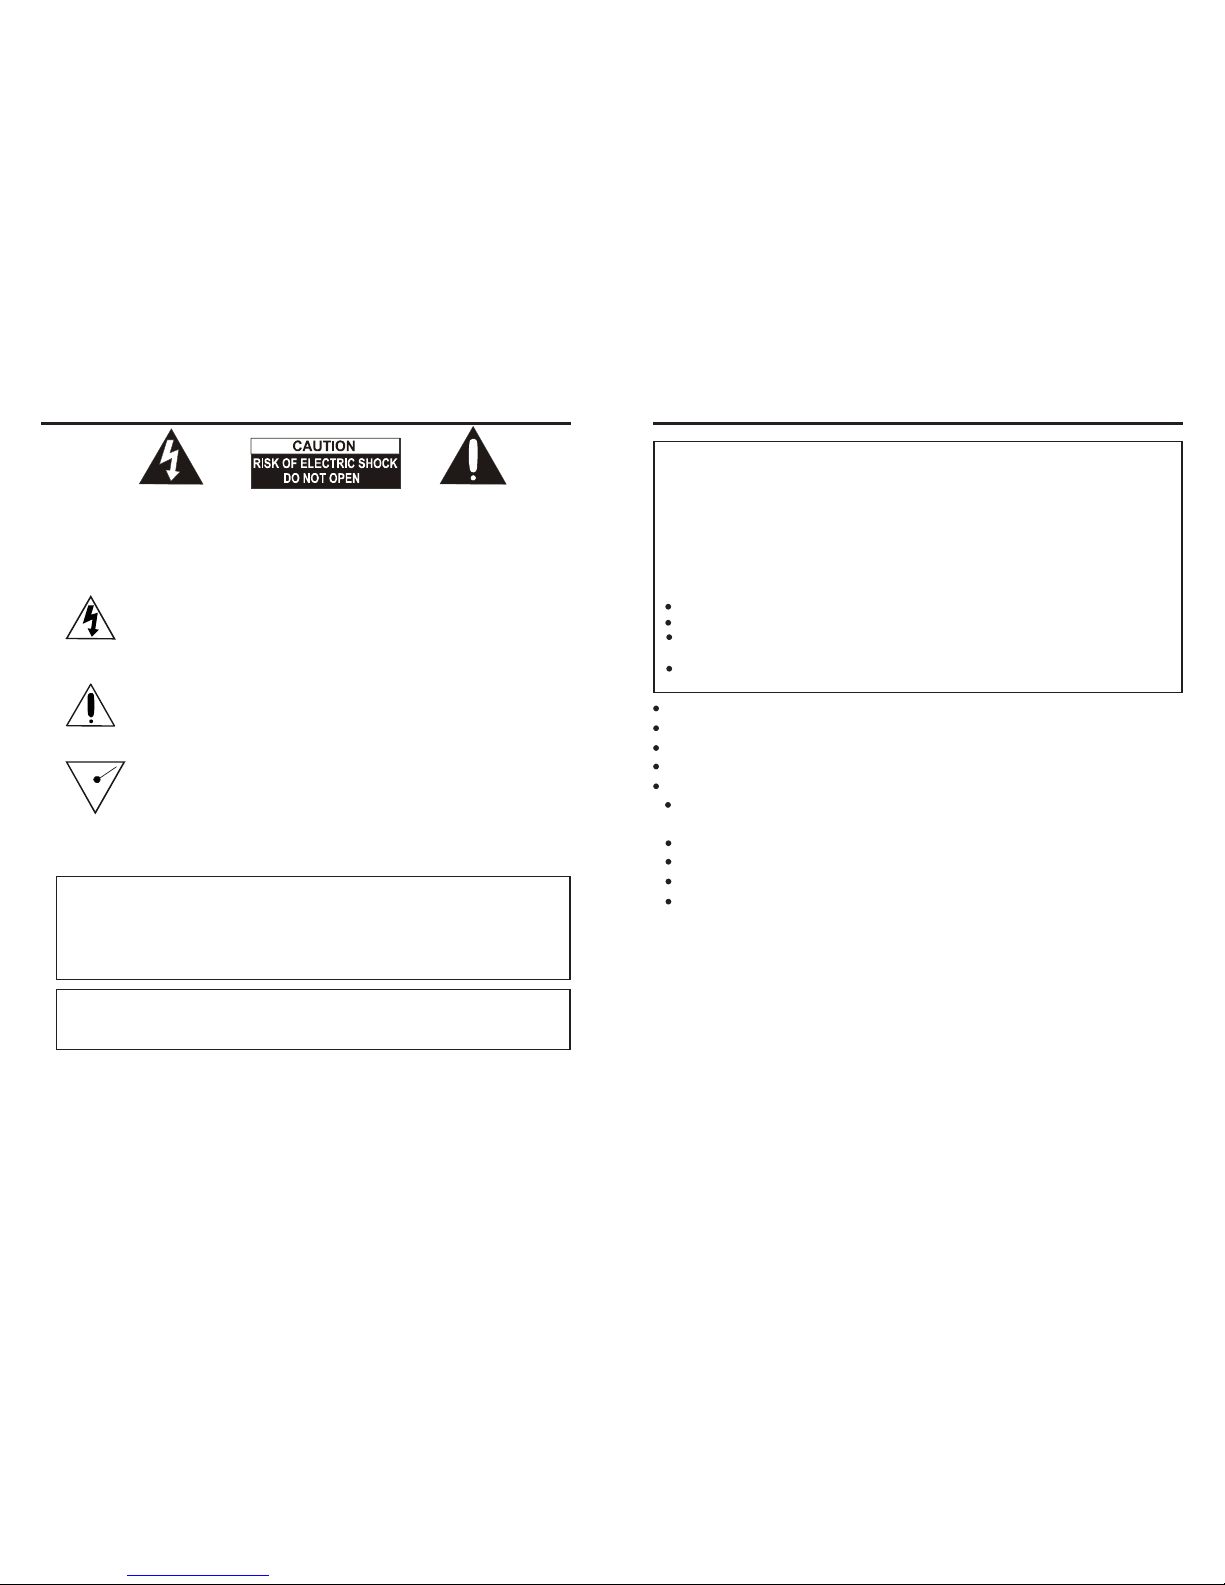
SAFETY PRECAUTIONS
The lightning flash with arrowhead symbol, within an equilateral triangle is
intended to alert the user to the presence of uninsulated dangerous voltage
within the product’s enclosure that may be of sufficient magnitude to
constitute a risk of electric shock to persons.
CAUTION: TO REDUCE THE RISK OF ELECTRIC SHOCK, DO NOT RE-
MOVE COVER (OR BACK). N O USER-SERVICEABLE PARTS INSIDE.
REFERSERVICINGTO QUALIFIED SERVICEPERSONNEL.
ATTENTION
The exclamation point within an equilateral triangle is intended to al ert
the user to the presence of important operati ng and main tenance
(servicing) instructions in t he literature ac companying the applia nce.
DANGER:
This product utilizes a Class 1 laser to read Compact Discs. T his las er
Compact Disc Player is equipped with safety switches to avoid exposure
when the CD door is open and the safety interlocks are defeated. Invisible
and hazardous laser radiation when open and interlock f ailed or defeated.
Avoid direct exposure to beam. Please do not attempt to defeat or bypass
the safety switches.
WARNING:
This device complies with Part 15 of the FCC Rules. Operation is subjectt o the following
two conditions: (1) this device may not cause harmful interference, and (2) this device
must accept any interference received, including interference that may cause undesired operation.
SURGE PROTECTORS:
DANGEROUSVOLTAGE
It is recommended to use a surge protector for AC connection. Lightning and power
surges ARE NOT covered under warranty for this product.
INFORMATION:
This equipment has been tested and found to comply with the limits for a Class B digital
device, pursuant to Part 15 of the FCC Rules. These limits are designed to provide
reasonable protection against ha rmful interference in a residential installation. This
equipment generates,uses and can radiate radio frequency energy and,ifnot installed and
used in accordance with the instructions, may cause harmful interference to radio
communications. However, there is no guarantee that interference will not occur in a
particular installation. If this equipment does cause harmful interference to radio or
television reception, which can be determined byturning theequipment off and on, the user
is encouraged to try to correct the interference by on or more of the following measures:
Reorient or relocate the receiving antenna.
Increase the separation between the equipment and receiver.
Connect the equipment into an outlet on a circuit different from that to which the receiver
is connected.
Consult the dealer or an experienced radio/TV technician for help.
SAFETY PRECAUTIONS (CONTINUED)
Do not open the CD compartment while the CD is rotating.
Always keep the CD compartment closed when not in use.
Keep all foreign objects out of the CD compartment.
Place the unit on a stable surface.
Avoid installing the unit in locations described below:
Places exposed to direct sunlight or close to heat radiating appliances such as electric
heaters.
On top of other stereo equipment that radiates too much heat.
Places lacking ventilation or dusty places.
Places subject to constant vibration.
Humid or moist places.
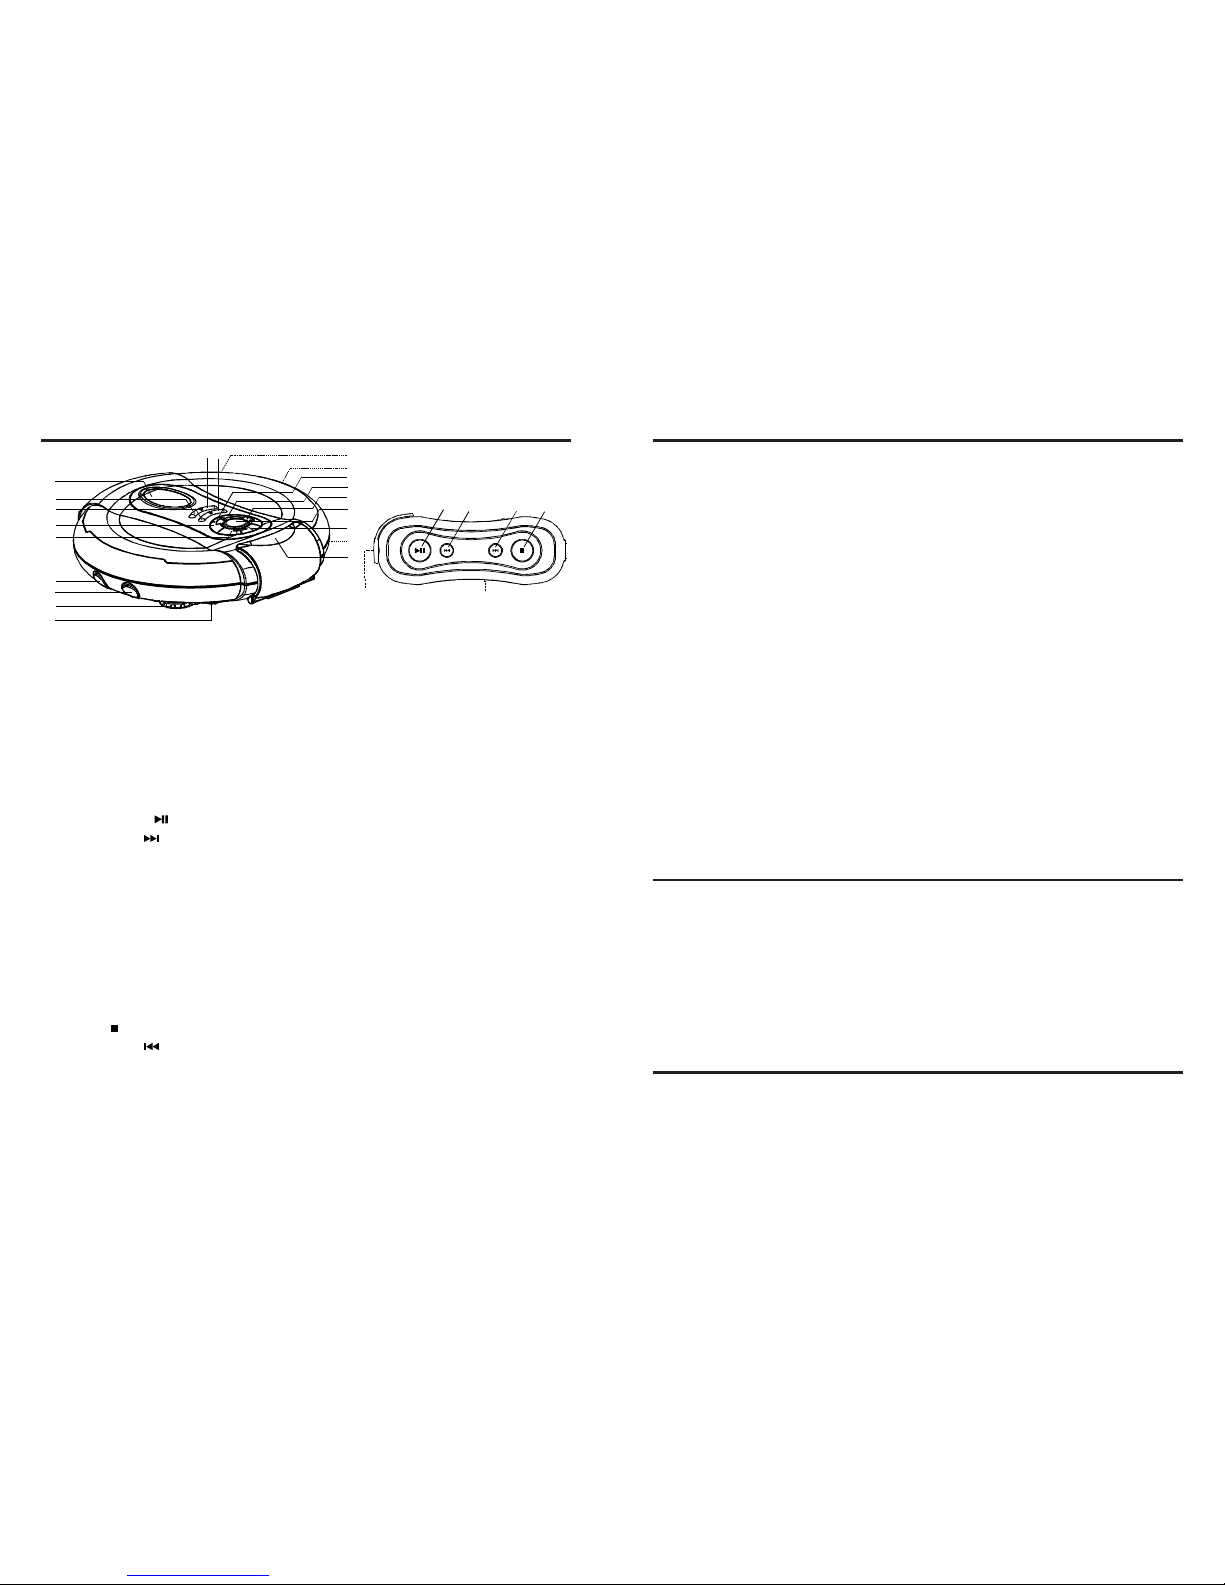
FUNCTIONSAND CONTROLS
1. DC INPUT JACK Jack for 4.5V external power supply
2. MODE/RIGHT(44444) CD AUDIO/MP3: select the different playing possibilities; REPEAT 1/
ALL/DIR., INTRO, RANDOM, and MP3 file SEARCH- RIGHT.
RADIO: Select th e FM Stereo mode ON/OFF.
3. RESUME/LEFT(33333) CD AUDIO/MP3: Stores andco ntinues playback from the last track played,
and MP3 file SEARCH-LEFT.
4. MENU/ESP CD AUDIO: Anti-shock protection ON/OFF.
MP3: Select the MP3 file search function by MENU.
5. Display Window LCD function d isplay
6. FUNCTION SWITCH Set the switch to CD or RADIO
7. PLAY/PAUSE Turns the set on, starts and interrupts CD play
8. TUNING UP CD AUDIO/MP3: Skip or fast search tracks forward.
RADIO: Press the TUNING UP button to select the next frequency.
9. PRESET UP/UP(55555) MP3: Select the MP3 file SEARCH-UP.
RADIO: Select the next preset station number.
10. ENTER/CLEAR Confirm the MENU selected/Cancel the program play
11. HOLD Lock the co ntrols on your CD player to prevent accid ental
butto n presses. Slide HOLD to “ ON” even if the HOL D
function i s working.
12. PRESET DN/DN(66666) M P3: Select the MP3 file SEARCH-DOWN.
RADIO: Select the previous preset number.
13. PROG Select the program mode and enter the program.
14. STOP S tops CD play, and switches the set off
15. TUNING DN CD AUDIO/MP3: Skip or fast search tracks backward.
RADIO: Press the TUNING DOWN button to select the previous frequency.
16. LINE OUT JACK Connect to an external amplifier
17. PHONE JACK 3.5mm headphone jack
18. VOLUME Adjusts the volume
19. OPEN SWITCH O pens the CD lid
20. DBBS SWITCH DYNAMIC BASS BOOST: Switches the bass enhancement on/off
POWER SUPPLY
Use with regular batteries
1. Open the battery compartment door, located on the bottom of the unit, by sliding the door
and lift it up. (Do not remove the battery door).
2. Insert 2x 1.5V /UM-3/AA size alkaline batteries, following the correct polarity, as indicated
in the battery compartment.
3. Close the ba ttery compartment door.
Note: If the symbol “ LOWBATTERY “appears in the display,bat teriesare weak and should
be replaced.
Use withAC/DC adaptor(noti ncluded)
1. Insert the DC plug, att heend of the AC/DC adaptor cord, into the DC 4.5 V INPUT socket
located on the back of the unit.
2. Connect the AC/DC adaptor into a 120V ~ 60Hz AC power outlet.
Notes:
• If the AC adaptor is connected when regular batteries are installed, the power supply
automatically switches to the AC power source.
• Make sure that the AC/DC adaptor matches with your household voltage before connecting it into the wall outlet.
• When not using AC power, disconnect the AC/DC adaptor from the wall outlet.
• Do not touch the AC/DC adaptor with wet hands.
CONNECTIONS
External Audio System
Connect the stereo connection cable (not included) into the LINE OUT jack of t he unit and
the CD/AUX of your audio system. (Do not connect it to the amplifier phono jack.)
Note: Always switch off the power before making any connections between the CD player
and other audio system.
• If the CD player interferes with the TV or radio reception, move the CD player away from
TV set or radio receiver.
HEADPHONE CONTROL
Connect the stereo headphones (included) to the Phones jack .
EN-4
EN-3
16
1
2
3
4
5
8
19
10
9
13
17
18
20
12
11
15
14
7
6
14
8715
18
17

CD/MP3 PLAYBACK
1. Connect t he headphones (included) or opt ional earphones into the Phones jack.
2. Press the Door Open button to open the CD c ompartment door.
3. Insert a disc w ith the label side facing up.
4. Close the CD compartment door until a c lick is heard.
5. Set the VOLUME control to minimum.
6. Press the PLAY/PAUSE button, the unit power will turn on automatically and show “Now
Reading” and start playback.
INCASEOFCDD ISC
The total number of tracks and total playing time appear on the display: Playback starts.
During playback, the actual track and the elapsed time appear.
INCASE OF MP3 DISC
The total number of albums and tracks, and MP3 appear on the display: Playback starts.
During playback, the actual album number, track and the elapsed time appear.
CD + MP3
7. Adjust the VOLUME c ontrol to your desired listening level.
8. To stop playbackt emporarily, presst hePLAY/ PAUSE button once. The elapsed time and
track number will flash on the display. Press the PLAY/PAUSE button again to resume
playback.
9. To stop playback, press the STOP button once.
10. To turn the unit off, press the STOP button twice.
Notes:
• When the CD door is accidentally opened during playback, " Door Open "will appear on
the display.
• Wait until the disc is fully stopped before pressing the OPEN button.
• This unit can play 3" (8cm) single C Ds without an adapt or.
EN-5
Playback information
• If a CD Rewritable (CD Recordable) is not recorded properly, "Disc Error" is displayed.
For CD Audio, use FINALIZE on your CD recorder to complete the recording.
• Playback will stop if you open the CD lid.
• While the CD is reading, "ESP" f lashes.
• If there is no activity for 10 seconds, the set will clear the display, and if there is no activity
after another 50 seconds, the set will switch off automatically to save energy. Any settings
like program and playing modes will then be lost.
LOCATING APARTICULAR TRACK OR POINT OF THE TRACK
INCD
1. Press the BACKWARD (9 ) but ton onc et o go back to the beginning of the current track.
2. Press the BACKWARD (9 ) button repeatedly to go back to previous tracks.
3. Press the FORWARD (:) button repeatedly to go to next tracks.
4. Pressand hold either the FORWARD(: )or BACKWARD(9 ) button to searchbac kwards
or forwards, at high speed, a particular point of track.
Note: Low level audio will be heard during the search process to assist in locating the correct
point in the track.
IN MP3
1. Press the BACKWARD (9 ) button once to go back to the beginning of the current track.
2. Press the BACKWARD (9 ) button repeatedly to go back to previous tracks.
3. Press the FOWARD (:) button repeatedly to go to the next tracks.
4. Press the MENU/ESP but ton once to search in Alphabetic order. Press 3,4 to
select the letters. Press 5,6 to jump a whole line at a time.
Then press ENTER to confirm.
5. Press MENU/ESP button twice to search the album. Press 5,6 to select
the album. Press 3,4 to read the whole title.
Then press ENTER to confirm.
6. Press the PLAY/PAUSE ( ) button again to resume playback of that Album from track 1.
EN-6
 Loading...