

Indesit K3C51.A/U, KN3C65A/U, KN3C62A/U, KN3C62A/EU, K3C51.A /U S Operating Instructions Manual
GB
COOKER AND OVEN
K3C51.A /U
KN3C62A/U
KN3C65A/U
Contents
Installation, 2-3
Positioning and levelling
Electrical connections
Technical data
Description of the appliance, 4
Overall view
Control panel
Start-up and use, 5-8
Using the oven
Cooking modes
Cooking advice table for the oven
Using the glass ceramic hob, 9
Switching the cooking zones on and off
Cooking zones
Precautions and tips, 10
General safety
Disposal
Respecting and conserving the environment
Care and maintenance, 11
Switching the appliance off
Cleaning the appliance
Replacing the oven light bulb
Cleaning the glass ceramic hob
Assistance
Operating Instructions
English, 1
GB
Polski, 12
PL
Magyar, 23
HU
Русскии, 34
RS
Česky, 56
CZ
Slovensko, 45
SL
2
GB
! Before operating your new appliance please read
this instruction booklet carefully. It contains
important information concerning the safe installation
and operation of the appliance.
! Please keep these operating instructions for future
reference. Make sure that the instructions are kept
with the appliance if it is sold, given away or moved.
! The appliance must be installed by a qualified
professional according to the instructions provided.
! Any necessary adjustment or maintenance must be
performed after the cooker has been disconnected
from the electricity supply.
Positioning and levelling
! It is possible to install the appliance alongside
cupboards whose height does not exceed that of the
hob surface.
! Make sure that the wall in contact with the beck of
the appliance is made from a non-flammable, heatresistant material (T 90°C).
To install the appliance correctly:
• Place it in the kitchen, dining room or the bed-sit
(not in the bathroom).
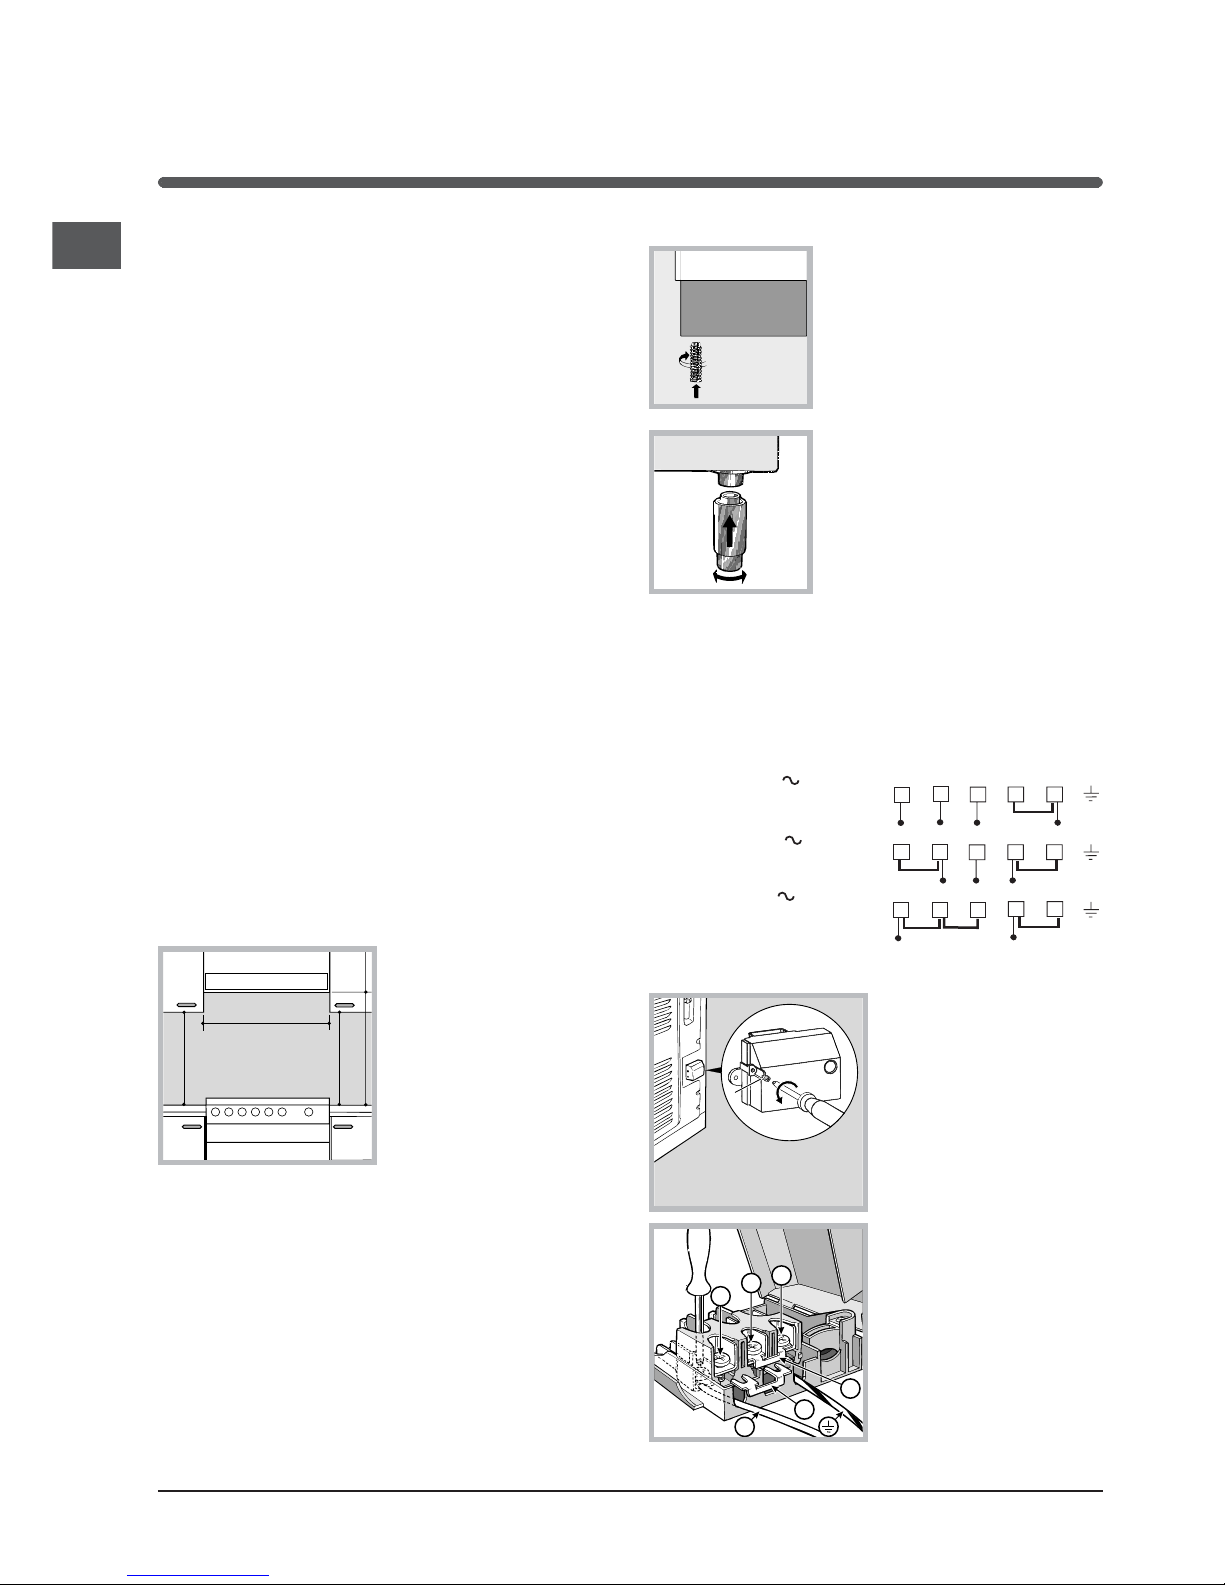
• If the top of the hob is higher than the cupboards,
the appliance must be installed at least 200 mm
away from them.
• If the cooker is
installed underneath a
wall cabinet, there must
be a minimum distance
of 420 mm between this
cabinet and the top of
the hob.
This distance should be
increased to 700 mm if
the wall cabinets are
flammable (
see figure
).
• Do not position blinds behind the cooker or less
than 200 mm away from its sides.
• Any hoods must be installed according to the
instructions listed in the relevant operating manual.
Levelling
If it is necessary to level the
appliance, screw the
adjustable feet into the places
provided on each corner of the
base of the cooker (
see
figure
).
The legs* fit into the slots on
the underside of the base of
the cooker.
Electrical connection
Fitting the power supply cable
The cable should be suited to the type of electrical
connection used, according to the following
connection diagram:
To install the power supply cable correctly:
1. Loosen the screw V
in the terminal board
and pull the cover to
open it (
see figure
).
2. Position the
connection supports A
(
see figure
) according
to the connection
diagram shown above.
The terminal board is
designed for singlephase 230 V
connection: terminals 1,
2 and 3 are connected
to each other; jumper 45 is located in the lower
area of the terminal
board.
3. Position the wires N
and
66
66
6
as shown in the
Installation
HOOD
420
Min.
min.
650
mm. with hood
min.
700
mm. without hood
mm.
600
Min. mm.
420
Min. mm.
V
1
2
3
N
A
B
*
Only available in certain models.
1 2
3
4
5
12345
1
2
3
4
5
R
S
T
N
R
S
N
R
N
400 3N
H05RR-F 5x2.5 CEI-UNEL 35363
400V 2N
H05RR-F 4x4 CEI-UNEL 35363
230V
H05RR-F 3x4 CEI-UNEL 35363
H05VV-F 3x4 CEI-UNEL 35746
H05VV-F 4x4 CEI-UNEL 35746
H05VV-F 5x2.5 CEI-UNEL 35746

GB
3
diagram (
see figure
) and proceed with the
connection process, tightening the terminal screws
as far as possible.
4. Position the remaining wires on terminals 1-2-3
and tighten the screws.
5. Fix the power supply cable in place by fastening
the cable clamp screw.
6. Close the terminal board cover by tightening the
screws V.
Connecting the supply cable to the mains
Install a standardised plug corresponding to the
load indicated on the appliance data plate (
see
Technical data table
).
The appliance must be directly connected to the mains
using an omnipolar circuit-breaker with a minimum
contact opening of 3 mm installed between the
appliance and the mains. The circuit-breaker must be
suitable for the charge indicated and must comply with
NFC 15-100 regulations (the earthing wire must not be
interrupted by the circuit-breaker). The supply cable
must be positioned so that it does not come into
contact with temperatures higher than 50°C at any point.
Before connecting the appliance to the power
supply, make sure that:
• The appliance is earthed and the plug is compliant
with the law.
• The socket can withstand the maximum power of
the appliance, which is indicated by the data
plate.
• The voltage is in the range between the values
indicated on the data plate.
• The socket is compatible with the plug of the
appliance. If the socket is incompatible with the
plug, ask an authorised technician to replace it.
Do not use extension cords or multiple sockets.
! Once the appliance has been installed, the power
supply cable and the electrical socket must be
easily accessible.
! The cable must not be bent or compressed.
! The cable must be checked regularly and replaced
by authorised technicians only.
! The manufacturer declines any liability should
these safety measures not be observed.
*
Only available in certain models.
TABLE OF CHARACTERISTSICS
Dimensions
width 44 cm
height 34 cm
depth 38 cm
Volume
54 l
Useful
measurements
relating to the oven
compartment
width 42 cm
height 23 cm
depth 44 cm
Voltage and
frequency
see data plate
Ceramic hob
Front Left
Back Left
Back Right
Front Right
Max. ceramic hob
consumption
1200 W
1700 W
1200 W
1700 W
5800 W
ENERGY LABEL
Directive 2002/40/EC on the label of
electric ovens.
Standard EN 50304
Energy consumption for Natural
convection – heating mode:
Convection mode;
Declared energy consumption for
Forced convection Class – heating
mode: Baking mode.
This appliance conforms to the following
European Economic Community
directives: 2006 /95/EC dated 12/12/06
(Low Voltage) and subsequent
amendments - 04/108/EEC dated
15/12/04 (Electromagnetic
Compatibility) and subsequent
amendments - 93/68/EEC dated
22/07/93 and subsequent amendments.
2002/96/EEC

4
GB
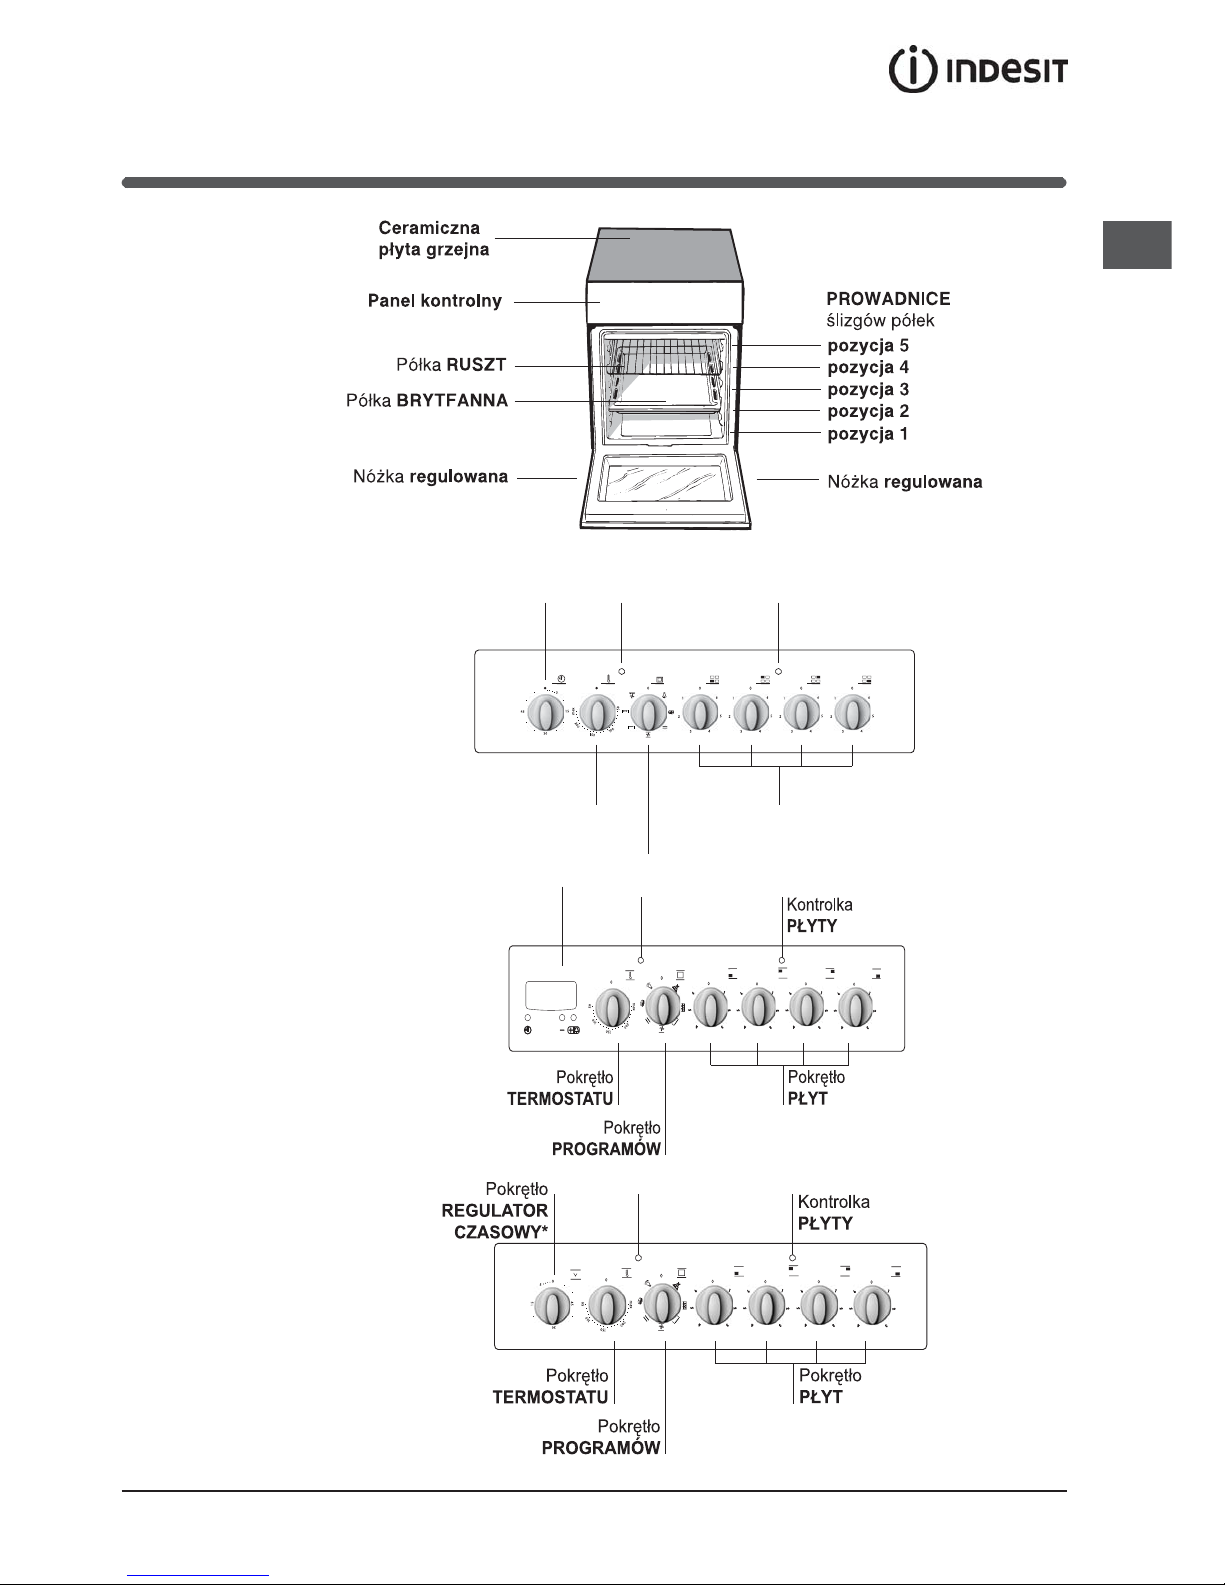
Description
of the appliance
Overall view
Control panel
HOTPLATES
knobs
SELECTOR
knob
THERMOSTAT
knob
THERMOSTAT
indicator light
HOTPLATES
indicator light
TIMER
knob*
*
Only available in certain models.
Control panel
GRILL rack
DRIPPING PAN
GUIDE RAILS
for the sliding racks
position 3
position 2
position 1
Glass
ceramic hob
Adjustable foot
Adjustable foot
position 5
position 4
HOTPLATES
knobs
SELECTOR
knob
THERMOSTAT
knob
THERMOSTAT
indicator light
HOTPLATES
indicator light
TIMER
ELECTRONIC*
HOTPLATES
knobs
SELECTOR
knob
THERMOSTAT
knob
THERMOSTAT
indicator light
HOTPLATES
indicator light
TIMER
knob*
GB
5
Start-up and use
Using the oven
! The first time you use your appliance, heat the
empty oven with its door closed at its maximum
temperature for at least half an hour. Ensure that the
room is well ventilated before switching the oven off
and opening the oven door. The appliance may emit
a slightly unpleasant odour caused by protective
substances used during the manufacturing process
burning away.
! Before operating the product, remove all plastic
film from the sides of the appliance.
! Never put objects directly on the bottom of the
oven; this will avoid the enamel coating being
damaged.
1. Select the desired cooking mode by turning the
SELECTOR knob.
2. Select the recommended temperature for the
cooking mode or the desired temperature by turning
the THERMOSTAT knob.
A list detailing cooking modes and suggested
cooking temperatures can be found in the relevant
table (
see Oven cooking advice table
).
During cooking it is always possible to:
• Change the cooking mode by turning the
SELECTOR knob.
• Change the temperature by turning the
THERMOSTAT knob.
• Stop cooking by turning the SELECTOR knob to
the “0” position.
! Always place cookware on the rack(s) provided.
THERMOSTAT indicator light
When this is illuminated, the oven is generating
heat. It switches off when the inside of the oven
reaches the selected temperature. At this point the
light illuminates and switches off alternately,
indicating that the thermostat is working and is
maintaining the temperature at a constant level.
Oven light
This is switched on by turning the SELECTOR knob
to any position other than “0”. It remains lit as long
as the oven is operating. By selecting
88
88
8 with the
knob, the light is switched on without any of the
heating elements being activated.
Timer*
To activate the Timer proceed as follows:
1. Turn the TIMER knob in a clockwise direction 4
for almost one complete revolution to set the buzzer.
2. Turn the TIMER knob in an anticlockwise direction
5 to set the desired length of time.
*
Only available in certain models.
Electronic timer*
The electronic timer displays the time and the timer
function with countdown.
NoteNote
NoteNote
Note: all the functions are operative approximately 7
seconds after they are stet.
How to reset the clock
After the appliance has been connected to the
power supply, or when the power has gone out, the
clock display will automatically reset to
0:000:00
0:000:00
0:00 and
begin to blink.
0 000 00
0 000 00
0 00
• Press the
button, and then use the
and buttons to set the correct time. To move the
time forward quickly, keep the buttons pressed.
Whenever the time must be reset, follow this same
procedure.
Timer Feature
Press the button to access this function. The
symbol "
" will appear on the display. Each time
you press button
, the time will increase by 10
seconds until 99 minutes and 50 seconds. If you
continue to press it, the time will increase from
minute to minute up to a maximum of 10 hours.
Use button
to go backwards.
After setting the desired time, start the countdown.
When the time has elapsed, the buzzer will sound,
and it can be interrupted by pressing any of the
buttons.
You can display the time by pressing button
, and
symbol "
" indicates the timer function has been
set. After approximately 7 seconds, the display
automatically goes back to indicating the timer.
To cancel a previous setting
Press button
up until
00
00
0 •
0000
0000
00.
Using the cooking timer*
1. To set the buzzer, turn the COOKING TIMER knob
clockwise almost one complete revolution.
2. Turn the knob anticlockwise to set the desired time:
align the minutes shown on the COOKING TIMER knob
with the indicator on the control panel.
3. When the selected time has elapsed, a buzzer sounds
and the oven turns off.
4. When the oven is off the cooking timer can be used as a
normal timer.
! To use the oven manually, in other words when you do
not wish to use the end of cooking timer, turn the
COOKING TIMER knob until it reaches the 9 symbol.
6
GB
Cooking modes
BAKING BAKING
BAKING BAKING
BAKING mode
Temperature: any temperature between 50°C and Max.
The rear heating element and the fan come on,
guaranteeing delicate heat distributed uniformly
throughout the oven.
This mode is ideal for baking and cooking delicate
foods - especially cakes that need to rise - and for
the preparation of certain tartlets on 3 shelves at the
same time. Here are a few examples: cream puffs,
sweet and savoury biscuits, savoury puffs, Swiss
rolls and small portions of vegetables au gratin,
etc…..
CONVECTION CONVECTION
CONVECTION CONVECTION
CONVECTION mode
Temperature: any temperature between 50°C and Max.
On this setting, the top and bottom heating
elements come on. This is the classic, traditional
type of oven which has been perfected, with
exceptional heat distribution and reduced energy
consumption. The convection oven is still unequalled
when it comes to cooking dishes made up of several
ingredients, e.g. cabbage with ribs, Spanish style
cod, Ancona style stockfish, tender veal strips with
rice, etc. Excellent results are achieved when
preparing veal or beef-based dishes as well (braised
meats, stew, goulash, wild game, ham etc.) which
need to cook slowly and require basting or the
addition of liquid. It nonetheless remains the best
system for baking cakes as well as fruit and cooking
using covered casserole dishes for oven baking.
When cooking in convection mode, only use one
dripping pan or cooking rack at a time, otherwise the
heat distribution will be uneven. Using the different
rack heights available, you can balance the amount
of heat between the top and the bottom of the oven.
Select from among the various rack heights based
on whether the dish needs more or less heat from
the top.
FAN ASSISTEDFAN ASSISTED
FAN ASSISTEDFAN ASSISTED
FAN ASSISTED mode
Temperature: any temperature between 50°C and Max.
The heating elements, as well as the fan, will come
on. Since the heat remains constant and uniform
throughout the oven, the air cooks and browns food
uniformly over its entire surface. With this mode, you
can also cook various dishes at the same time, as
long as their respective cooking temperatures are
the same. A maximum of 2 racks can be used at the
same time, following the instructions in the section
entitled: “Cooking On More Than One Rack”.
This fan assisted mode is particularly recommended
for dishes requiring a gratin finish or for those
requiring considerably prolonged cooking times,
such as for example: lasagne, pasta bakes, roast
chicken and potatoes, etc… Moreover, the excellent
heat distribution makes it possible to use lower
temperatures when cooking roasts. This results in
less loss of juices, meat which is more tender and a
decrease in the loss of weight for the roast. The fan
assisted mode is especially suited for cooking fish,
which can be prepared with the addition of a limited
amount of condiments, thus maintaining their flavour
and appearance.
Desserts: the fan assisted mode is also perfect for
baking leavened cakes.
Moreover, this mode can also be used to thaw
quickly white or red meat and bread by setting the
temperature to 80 °C. To thaw more delicate foods,
set the thermostat to 60°C or use only the cold air
circulation feature by setting the thermostat to 0°C.
TOP OVEN TOP OVEN
TOP OVEN TOP OVEN
TOP OVEN mode
Temperature: any temperature between 50°C and Max.
The top heating element comes on.
This mode can be used to brown food at the end of
cooking.
GRILLGRILL
GRILLGRILL
GRILL
mode
Temperature: any temperature between 50°C and Max.
The top heating element and the turnspit come on.
The extremely high and direct temperature of the grill
makes it possible to brown the surface of meats and
roasts while locking in the juices to keep them
tender. The grill is also highly recommended for
dishes that require a high temperature on the
surface: such as beef steaks, veal, rib steak, filets,
hamburgers etc...
Always leave the oven door ajar during cooking,
except when using the turnspit.
Some grilling examples are included in the “Practical
Cooking Advice” paragraph..
FAN ASSISTED GRILL mode
Temperature: any temperature between 50°C and 200°C.
The top central heating element and the fan come on.
This combination of features increases the
effectiveness of the unidirectional thermal radiation of
the heating elements through forced circulation of the
air throughout the oven. This helps prevent food from
burning on the surface, allowing the heat to penetrate
right into the food. Excellent results are achieved
with kebabs made with meats and vegetables,
sausages, ribs, lamb chops, chicken in a spicy
sauce, quail, pork chops, etc.
This mode is also ideal for cooking fish steaks, like
swordfish, tuna, grouper, stuffed cuttlefish etc.
GB
7
! The TOP OVEN, GRILL and FAN ASSISTED GRILL
cooking modes must be performed with the oven
door shut.
! When using the TOP OVEN and GRILL cooking
modes, place the rack in position 5 and the dripping
pan in position 1 to collect cooking residues (fat
and/or grease). When using the FAN ASSISTED
GRILL cooking mode, place the rack in position 2 or
3 and the dripping pan in position 1 to collect
cooking residues.
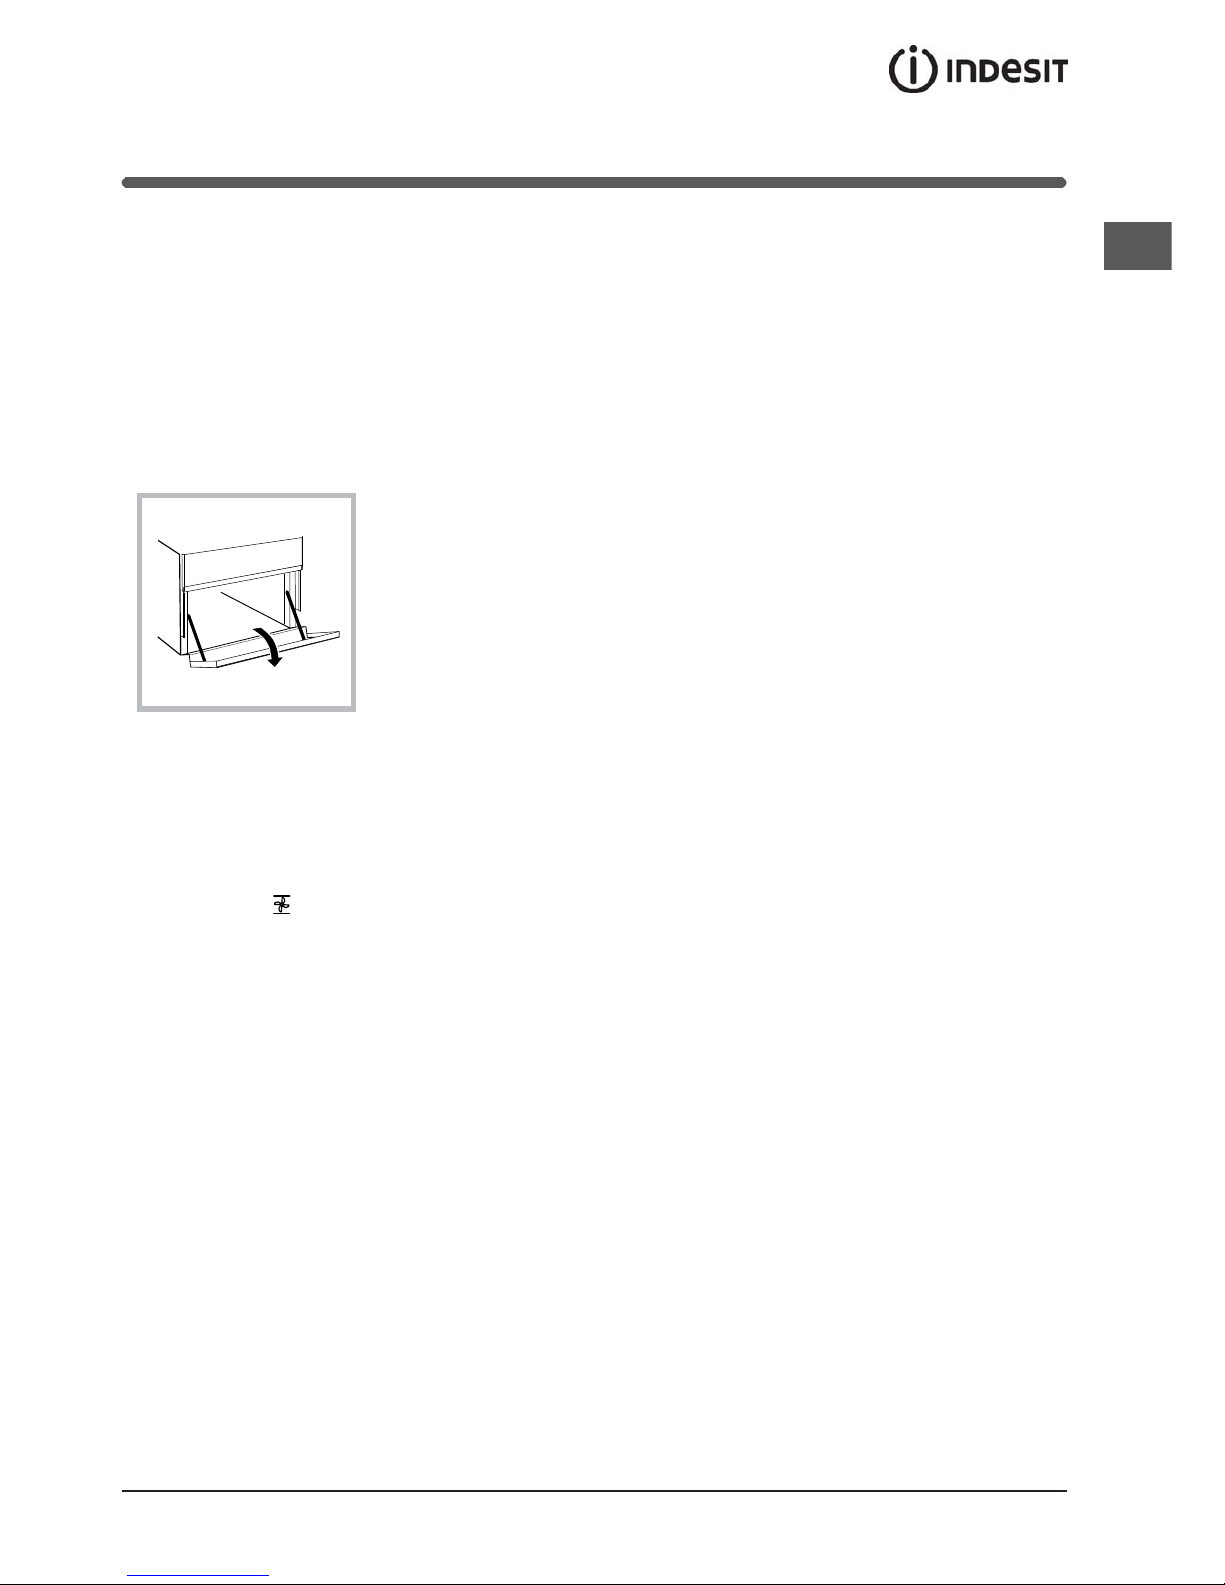
Lower oven compartment
There is a compartment
underneath the oven
that may be used to
storeoven accessories or
deep dishes. To open
the door pull it
downwards (
see
figure
).
! Do not place flammable materials in the lower oven
compartment.
! The internal surfaces of the compartment (where
present) may become hot.
Cooking on several shelves simultaneously
If it is necessary to use two racks, use the FAN
ASSITED mode
, as this is the only cooking mode
suited to this type of cooking. We also recommend
that:
• Positions 1 and 5 are not used. This is because
excessive direct heat can burn temperature
sensitive foods.
• Positions 2 and 4 are used and that food that
requires more heat is placed on the rack in
position 2.
• When cooking foods that require different cooking
times and temperatures, set a temperature that is
halfway between the two recommended
temperatures (
see Oven cooking advice table
)
and place the more delicate food on the rack in
position 4. Remove the food that requires a
shorter cooking time first.
• When cooking pizzas on several racks with the
temperature set to 220°C, the oven is preheated
for 15 minutes. Generally speaking, cooking on
the rack in position 4 takes longer: we
recommend that the pizza cooked on the lowest
rack position is removed first, followed by the
pizza cooked in position 4 a few minutes later.
• Place the dripping pan on the bottom and the rack
on top.

8
GB
Oven cooking advice table
Selector knob
setting
Food to be cooked Weight
(in kg)
Cooking rack
position from
bottom
Preheating time
(minutes)
Thermostat
knob
setting
Cooking
time
(minutes)
Baking
Tarts
Fruit cakes
Plum cake
Sponge cake
Stuffed pancakes (on 2
racks)
Small cakes (on 2 racks)
Cheese puffs (on 2
racks)
Cream puffs (on 3 racks)
Biscuits (on 3 racks)
Meringues (on 3 racks)
0.5
1
0.7
0.5
1.2
0.6
0.4
0.7
0.7
0.5
3
2/3
3
3
2-4
2-4
2-4
1-3-5
1-3-5
1-3-5
15
15
15
15
15
15
15
15
15
15
180
180
180
160
200
190
210
180
180
90
20-30
40-45
40-50
25-30
30-35
20-25
15-20
20-25
20-25
180
Convection
Duck
Roast veal or beef
Pork roast
Biscuits (short pastry)
Tarts
1
1
1
1
3
3
3
3
3
15
15
15
15
15
200
200
200
180
180
65-75
70-75
70-80
15-20
30-35
Fan assisted
Pizza (on 2 racks)
Lasagne
Lamb
Roast chicken +
potatoes Mackerel
Plum-cake
Cream puffs (on 2 racks)
Biscuits (on 2 racks)
Sponge cake (on 1 rack)
Sponge cake (on 2
racks)
Savoury pies
1
1
1
1
1
1
0.5
0.5
0.5
1.0
1.5
2-4
3
2
2-4
2
2
2-4
2-4
2
2-4
3
15
10
10
10
10
10
10
10
10
10
15
220
200
180
180
180
170
190
180
170
170
200
15-20
30-35
50-60
60-75
30-35
40-50
20-25
10-15
15-20
20-25
25-30
Top Oven
Browning food to perfect
cooking
- 3/4 15 220 -
Grill
Soles and cuttlefish
Squid and prawn
kebabs
Cod filet
Grilled vegetables
Veal steak
Cutlets
Hamburgers
Mackerels
Toasted sandwiches
1
1
1
1
1
1
1
1
n.° 4
4
4
4
3/4
4
4
4
4
4
5
5
5
5
5
5
5
5
5
Max
Max
Max
Max
Max
Max
Max
Max
Max
8-10
6-8
10
10-15
15-20
15-20
7-10
15-20
2-3
Fan assisted
grill
Grilled chicken
Cuttlefish
1.5
1.5
3
3
5
5
200
200
55-60
30-35
! cooking times are approximate and may vary according to personal taste. When cooking using the grill or fan
assisted grill, the dripping pan must always be placed on the 1st oven rack from the bottom.

GB
9
Using the glass ceramic hob
! The glue applied on the gaskets leaves traces of
grease on the glass. Before using the appliance, we
recommend you remove these with a special nonabrasive cleaning product. During the first few hours
of use there may be a smell of rubber which will
disappear very quickly.
Switching the cooking zones on and off
To switch on a cooking zone, turn the corresponding
knob in a clockwise direction.
To switch it off again, turn the knob in an
anticlockwise direction until it is in the “0” position.
If the ELECTRIC HOTPLATE ON indicator light is lit,
this shows that at least one hotplate on the hob is
switched on.
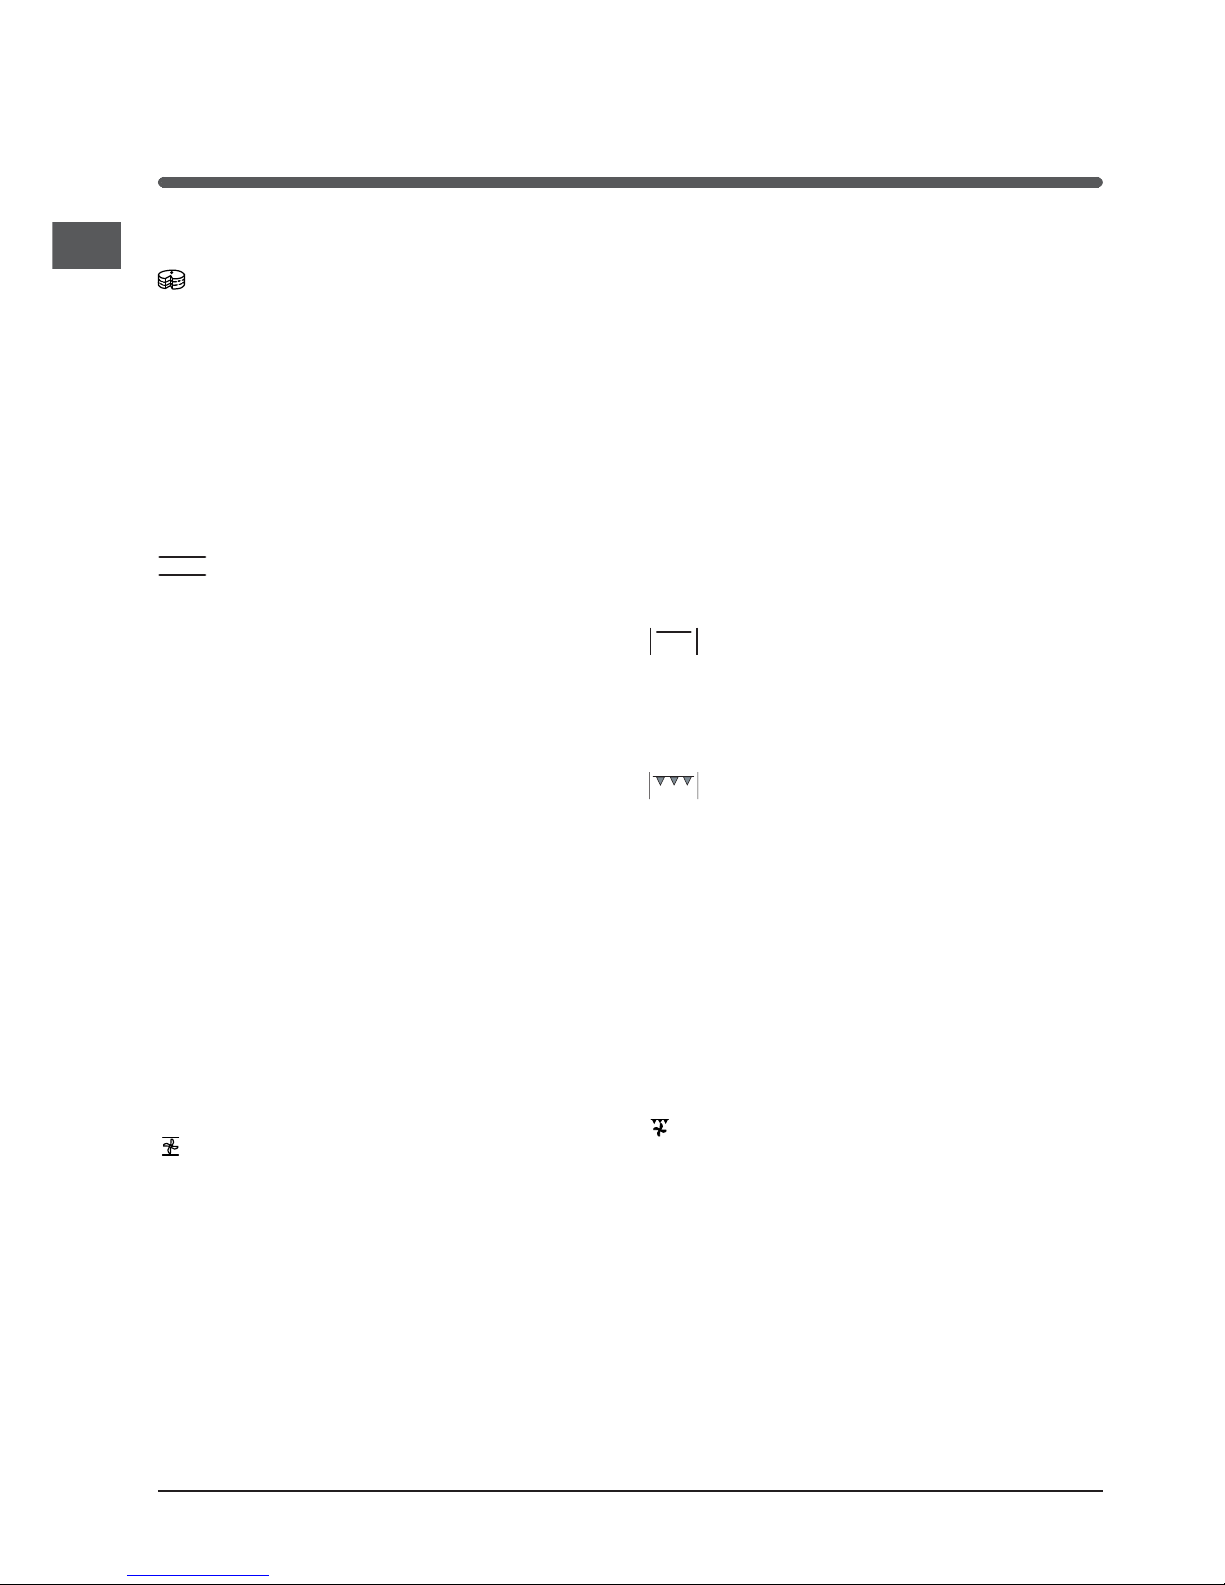
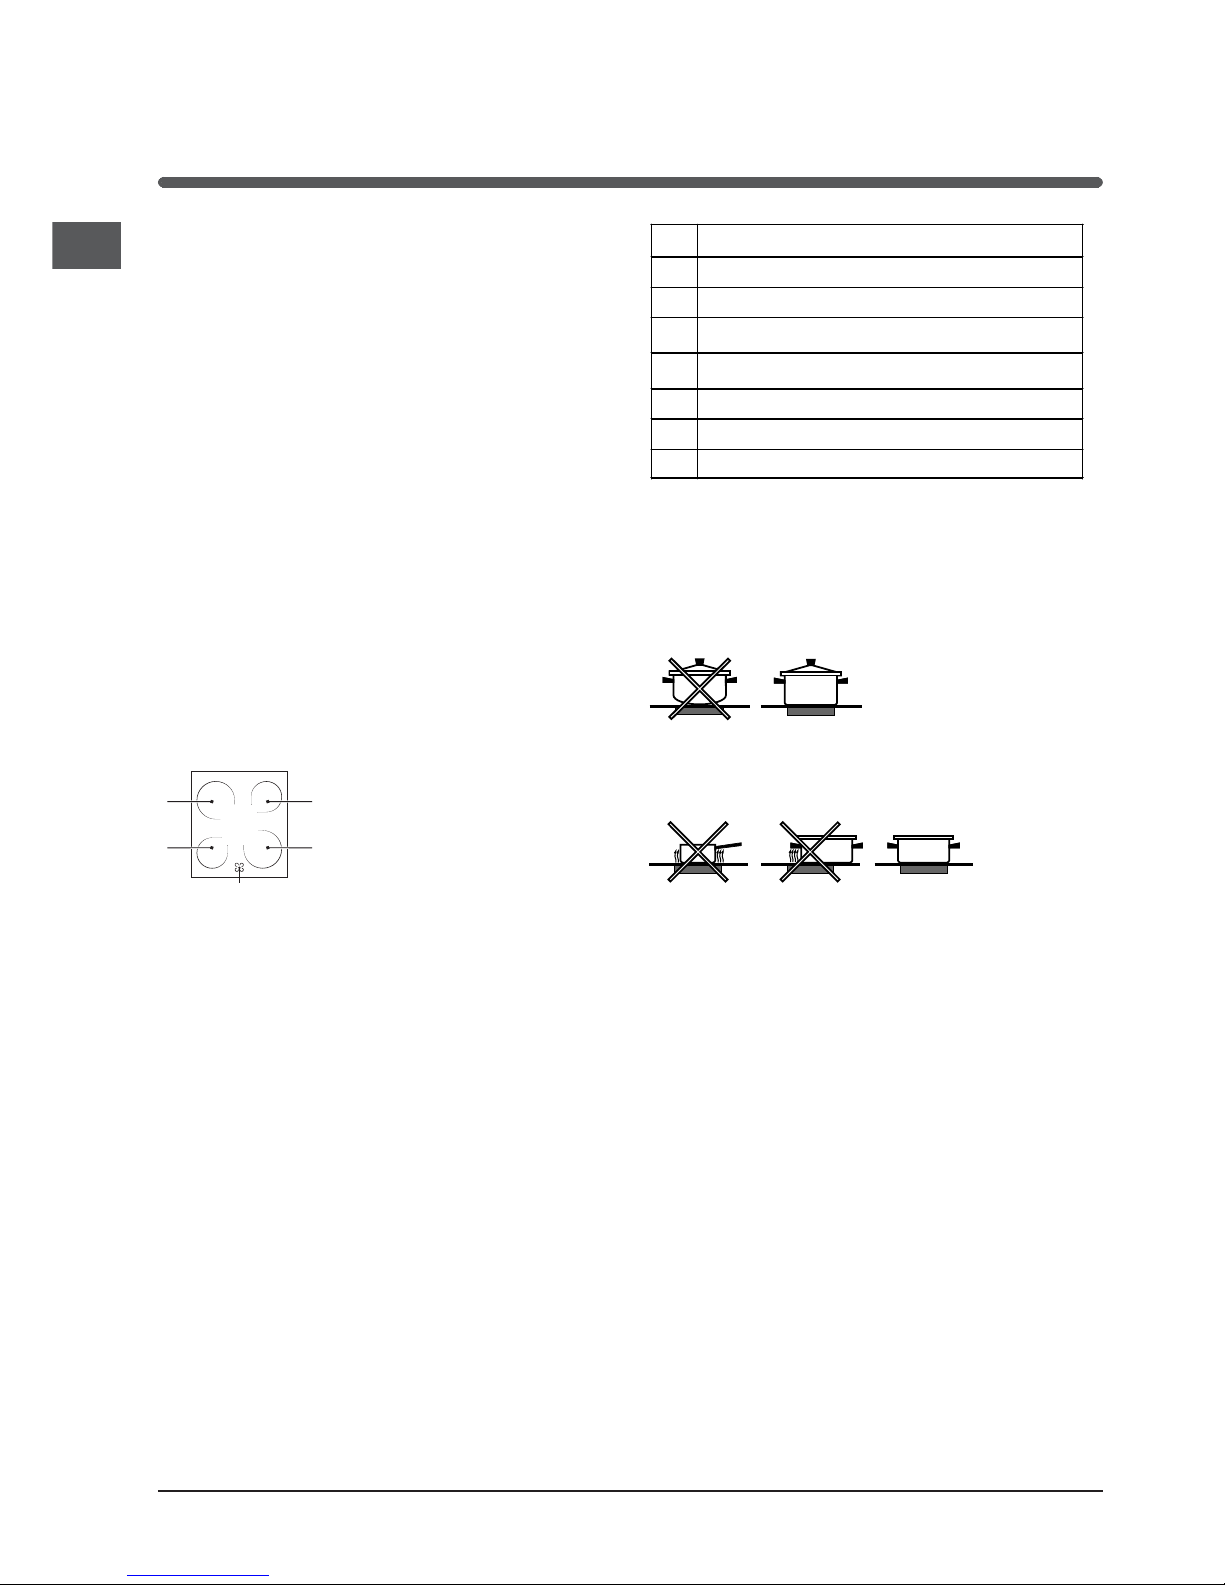
Cooking zones
The hob is equipped with electric radiant heating
elements. When they are in
use the following items on the
hob become red.
A. The cooking zone.
B. The residual heat indicator
light: this indicates that the
temperature of the corresponding cooking zone is
greater than 60°C, even when the heating element
has been switched off but is still hot.
Cooking zones with radiant heating elements
They have similar properties to gas burners: they are
easy to control and reach set temperatures quickly,
allowing you to actually see the power they are
providing.
Turn the corresponding knob in a clockwise
direction, to a position between 1 and 6.
Off
Cooking vegetables, fish
Cooking potatoes (using steam) soups,
chickpeas, beans.
Continuing the cooking of large quantities of
food, minestrone
For roasting (average)
For roasting (above average)
For browning and reaching a boil in a short
time.
Practical advice on using the hob
• Use pans with a thick, flat base to ensure that
they adhere perfectly to the cooking zone.
• Always use pans with a diameter that is large
enough to cover the hotplate fully, in order to use
all the heat produced.
• Always make sure that the base of the pan is
completely clean and dry: this ensures that the
pans adhere perfectly to the cooking zones and
that both the pans and the hob last for a longer
period of time.
• Avoid using the same cookware that is used on
gas burners: the heat concentration on gas
burners may have warped the base of the pan,
causing it not to adhere to the surface correctly.
• Never leave a cooking zone switched on without a
pan on top of it, as doing so may cause the zone
to become damaged.
A
A
A
A
B

10
GB
Precautions and tips
! This appliance has been designed and manufactured in
compliance with international safety standards.
The following warnings are provided for safety reasons and must
be read carefully.
General safety
• The glass ceramic hob is resistant to temperature fluctuations
and shocks. It is, however, wise to remember that blades or
cooking utensils may ruin the surface of the hob. If this
happens, remove the plug of the cooker from the electricity
socket and contact an authorised Technical Assistance
Centre in order to request original spare parts. Failure to
comply with the above may compromise the safety of the
appliance.
• The appliance was designed for domestic use inside the home
and is not intended for commercial or industrial use.
• The appliance must not be installed outdoors, even in covered
areas. It is extremely dangerous to leave the appliance exposed
to rain and storms.
• Do not touch the appliance with bare feet or with wet or damp
hands and feet.
• The appliance must be used by adults only for
the preparation of food, in accordance with the
instructions outlined in this booklet. Any other
use of the appliance (e.g. for heating the room)
constitutes improper use and is dangerous.
The manufacturer may not be held liable for
any damage resulting from improper, incorrect
and unreasonable use of the appliance
• The instruction booklet accompanies a class 1 (insulated) or
class 2 - subclass 1 (recessed between 2 cupboards)
appliance.
• Keep children away from the oven.
• Make sure that the power supply cables of other electrical
appliances do not come into contact with the hot parts of the
oven.
• The openings used for the ventilation and dispersion of heat
must never be covered.
• Always use oven gloves when placing cookware in the oven or
when removing it.
• Do not use flammable liquids (alcohol, petrol, etc...) near the
appliance while it is in use.
• Do not place flammable material in the lower storage
compartment or in the oven itself. If the appliance is switched
on accidentally, it could catch fire.
• Always make sure the knobs are in the
• position when the
appliance is not in use.
• When unplugging the appliance, always pull the plug from the
mains socket; do not pull on the cable.
• Never perform any cleaning or maintenance work without
having disconnected the appliance from the electricity mains.
• If the appliance breaks down, under no circumstances should
you attempt to repair the appliance yourself. Repairs carried
out by inexperienced persons may cause injury or further
malfunctioning of the appliance. Contact Assistance.
• Do not rest heavy objects on the open oven door.
• Do not allow the cooker to be used unsupervised by children
or persons unfamiliar with it.
Disposal
• When disposing of packaging material: observe local legislation so
that the packaging may be reused.
• The European Directive 2002/96/EC relating to Waste
Electrical and Electronic Equipment (WEEE) states that
household appliances should not be disposed of using the
normal solid urban waste cycle. Exhausted appliances should
be collected separately in order to optimise the cost of reusing and recycling the materials inside the machine, while
preventing potential damage to the atmosphere and to public
health. The crossed-out dustbin is marked on all products to
remind the owner of their obligations regarding separated
waste collection.
Exhausted appliances may be collected by the public waste
collection service, taken to suitable collection areas in the
area or, if permitted by current national legislation, they may
be returned to the dealers as part of an exchange deal for a
new equivalent product.
All major manufacturers of household appliances participate in
the creation and organisation of systems for the collection and
disposal of old and disused appliances.
Respecting and conserving the
environment
• You can help to reduce the peak load of the electricity supply
network companies by using the oven in the hours between
late afternoon and the early hours of the morning.
• Always keep the oven door closed when using the GRILL
modes. This will achieve better results while saving energy
(approximately 10%).
• Check the door seals regularly and wipe them clean to ensure
they are free of debris so that they adhere properly to the
door, thus avoiding heat dispersion.
GB
11
Switching the appliance off
Disconnect your appliance from the electricity supply
before carrying out any work on it.
Cleaning the oven
! Do not use steam jets to clean the appliance.
• The stainless steel or enamel-coated external parts
and the rubber seals may be cleaned using a
sponge that has been soaked in lukewarm water
and neutral soap. Use specialised products for the
removal of stubborn stains. After cleaning, rinse and
dry thoroughly. Do not use abrasive powders or
corrosive substances.
• The inside of the oven should ideally be cleaned
after each use, while it is still lukewarm. Use hot
water and detergent, then rinse well and dry with a
soft cloth. Do not use abrasive products.
• Clean the glass part of the oven door using a
sponge and a non-abrasive cleaning product, then
dry thoroughly with a soft cloth. Do not use rough
abrasive material or sharp metal scrapers as these
could scratch the surface and cause the glass to
crack.
• The accessories can be washed like everyday
crockery, and are even dishwasher safe.
• Dirt and grease should be removed from the control
panel using a non-abrasive sponge or a soft cloth.
Inspecting the oven sealsInspecting the oven seals
Inspecting the oven sealsInspecting the oven seals
Inspecting the oven seals
Check the door seals around the oven regularly. If the
seals are damaged, please contact your nearest Aftersales Service Centre. We recommend that the oven is
not used until the seals have been replaced.
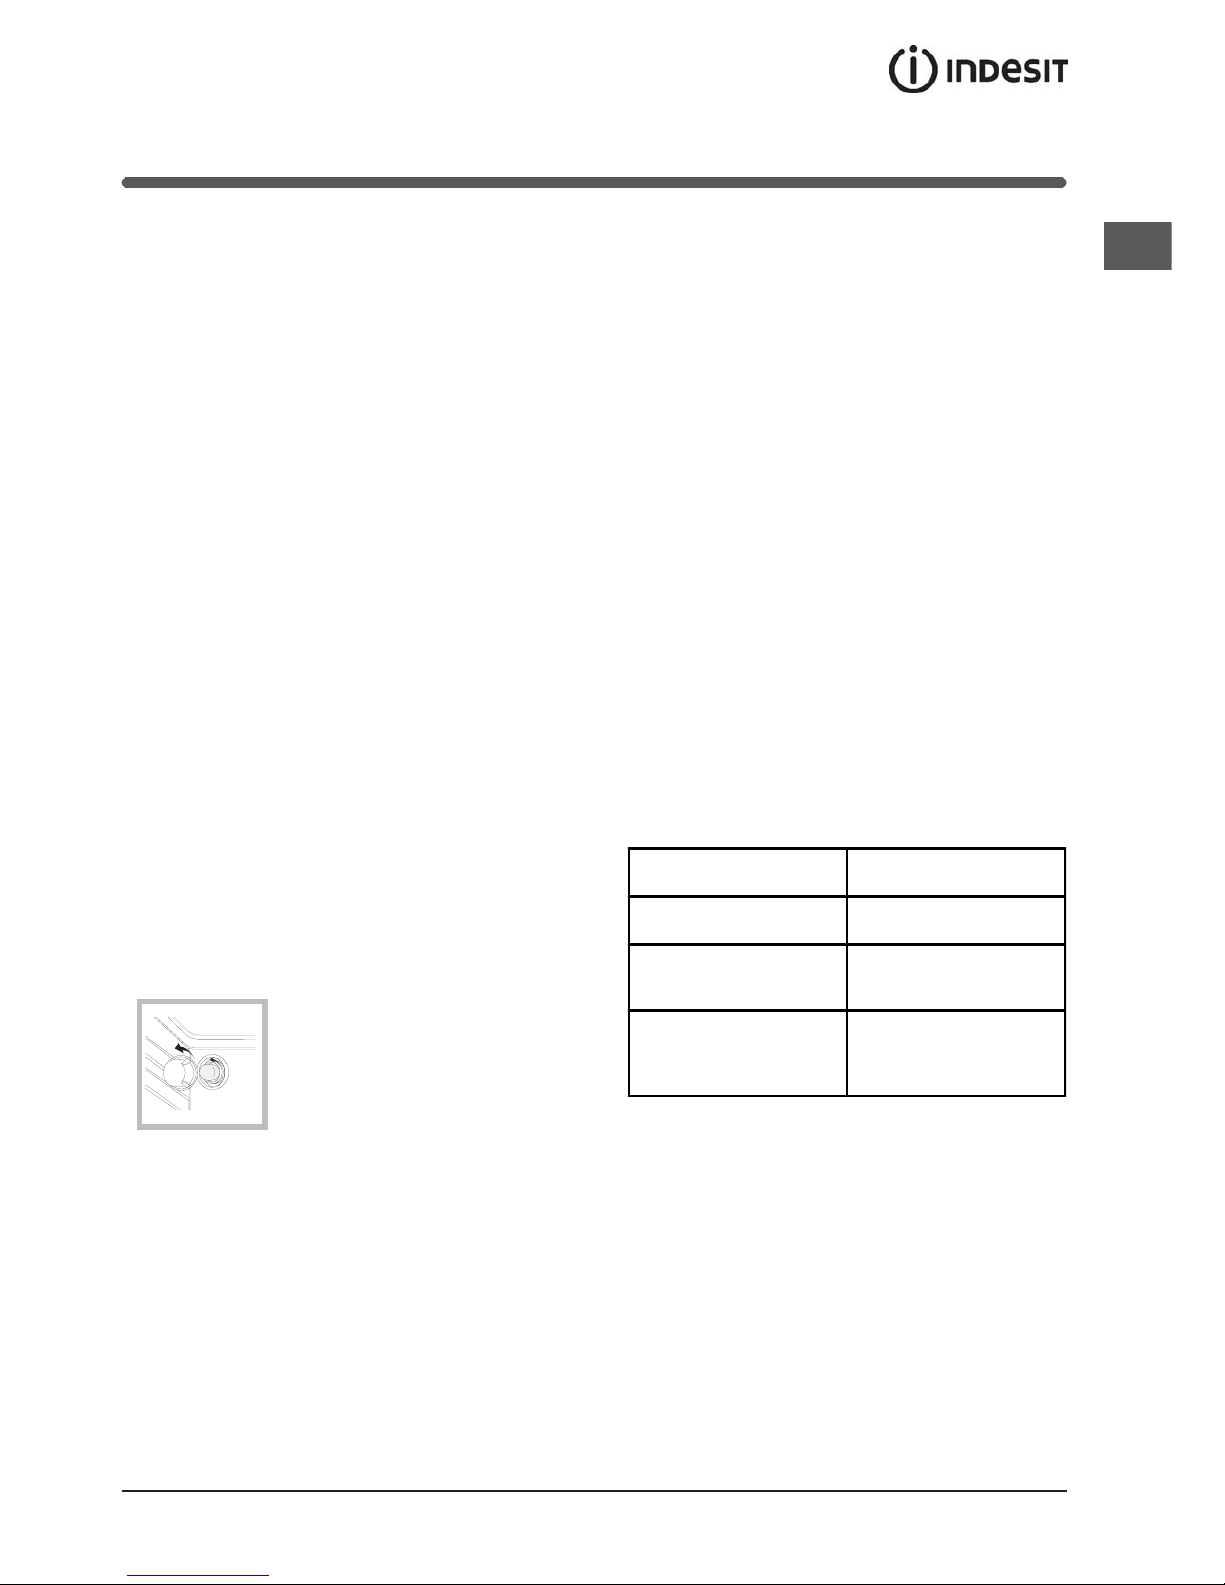
Replacing the oven light
bulb
1. After disconnecting the oven from
the electricity mains, remove the
glass lid covering the lamp socket
(
see figure
).
2. Remove the light bulb and
replace it with a similar one: voltage 230 V, wattage 25
W, cap E 14.
3. Replace the lid and reconnect the oven to the
electricity supply.
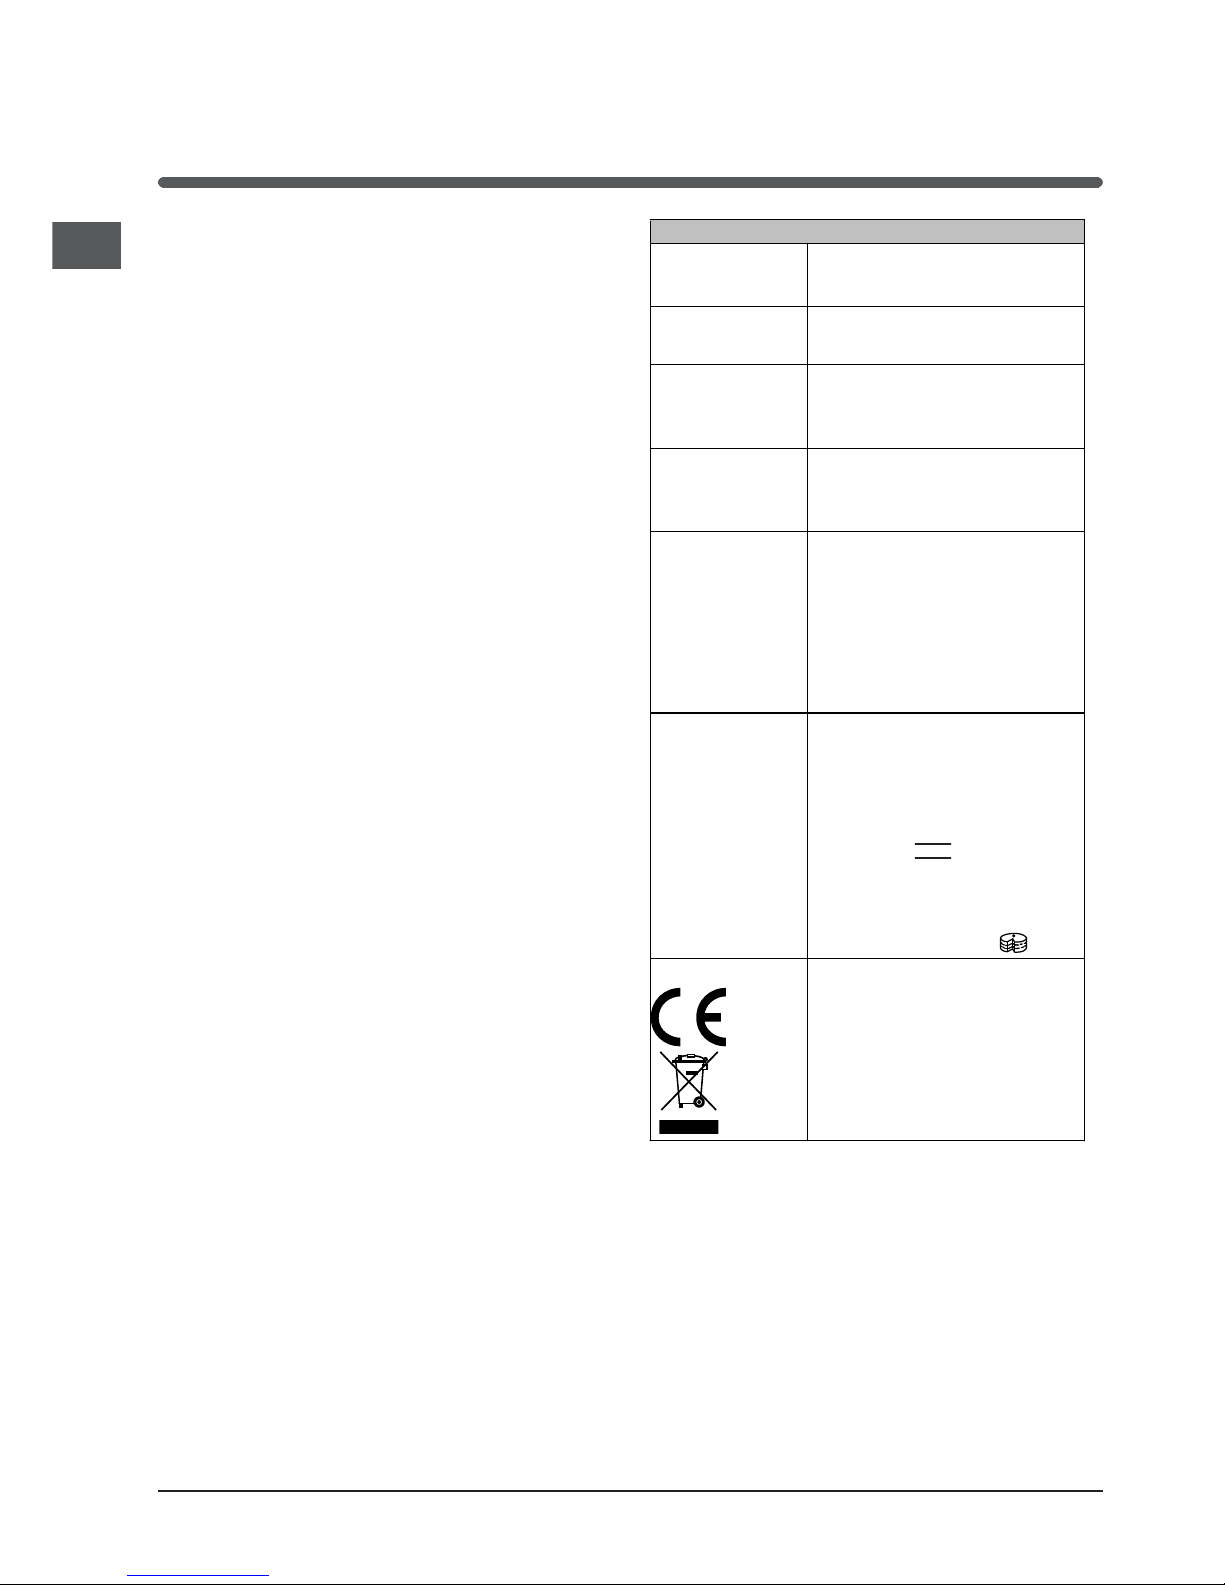
Cleaning the glass ceramic hobCleaning the glass ceramic hob
Cleaning the glass ceramic hobCleaning the glass ceramic hob
Cleaning the glass ceramic hob
! Do not use abrasive or corrosive detergents (for
example, products in spray cans for cleaning
barbecues and ovens), stain removers, anti-rust
products, powder detergents or sponges with abrasive
surfaces: these may scratch the surface beyond
repair.
• It is usually sufficient simply to wash the hob using
a damp sponge and dry it with absorbent kitchen
roll.
• If the hob is particularly dirty, rub it with a special
glass ceramic cleaning product, then rinse well and
dry thoroughly.
• To remove more stubborn dirt, use a suitable
scraper (this is not supplied with the appliance).
Remove spills as soon as possible, without waiting
for the appliance to cool, to avoid residues forming
crusty deposits. You can obtain excellent results by
using a rustproof steel wire sponge - specifically
designed for glass ceramic surfaces - soaked in
soapy water.
• If plastic or sugary substances have accidentally
been melted on the hob, remove them immediately
with the scraper, while the surface is still hot.
• Once it is clean, the hob may be treated with a
special protective maintenance product: the
invisible film left by this product protects the
surface from drips during cooking. This
maintenance should be carried out while the
appliance is warm (not hot) or cold.
• Always remember to rinse the appliance well with
clean water and dry it thoroughly: residues can
become encrusted during subsequent cooking
processes.
lasseramio
leaners
ailalerom
Window scraper Razor blade
scrapers
DIY Stores
Replacement blad es DIY Stores,
supermarkets,
chemists
COLLO luneta
HOB BRITE
Hob Clean
SWISSCLEANER
Boots, Co-op stores,
department stores, Regional
Electricity Company shops,
supermarkets
Cleaning stainless steelCleaning stainless steel
Cleaning stainless steelCleaning stainless steel
Cleaning stainless steel
Stainless steel can be marked by hard water that has
been left on the surface for a long time, or by
aggressive detergents that contain phosphorus. We
recommend that the steel surfaces are rinsed well then
dried thoroughly.
Assistance
Please have the following information handy:
• The appliance model (Mod.).
• The serial number (S/N).
This information can be found on the data plate located
on the appliance and/or on the packaging.
Care and maintenance
KUCHENKA I PIEKARNIK
Spis treści
Instalacja, 13-14
Ustawienie i wypoziomowanie
Połączenia elektryczne
Dane techniczne
Opis urządzenia, 15
Widok ogólny
Panel sterowania
Uruchomienie i użytkowanie, 16-19
Użytkowanie piekarnika
Programy
Tabela pieczenia w piekarniku
Użytkowanie szklano-ceramicznej płyty
grzejnej, 20
Włączanie i wyłączanie stref pieczenia
Strefy pieczenia
Zalecenia i środki ostrożności, 21
Ogólne zasady bezpieczeństwa
Utylizacja
Oszczędność i ochrona środowiska
Konserwacja i utrzymanie, 22
Odłączenie prądu elektrycznego
Czyszczenie urządzenia
Wymiana żarówki oświetleniowej w piekarniku
Czyszczenie szklano-ceramicznej płyty grzejnej
Serwis Techniczny
Instrukcja obsługi
English, 1
PL
Polski, 12
GB
Magyar, 23
HU
Русскии, 34
RS
Česky, 56
CZ
Slovensko, 45
SL
PL
K3C51.A /U
KN3C62A/U
KN3C65A/U

PL
13
! Należy zachować niniejszą instrukcję, aby móc z
niej skorzystać w każdej chwili. W przypadku
sprzedaży, odstąpienia lub przeniesienia urządzenia,
należy się upewnić, czy instrukcja została
przekazana wraz z nim.
! Należy uważnie przeczytać instrukcję: zawiera ona
ważne informacje dotyczące instalacji, użytkowania i
bezpieczeństwa.
! Instalacja urządzenia powinna zostać wykonana
zgodnie z niniejszymi instrukcjami przez
wykwalifikowany personel.
! Wszelkie działania w zakresie regulacji lub
konserwacji muszą być wykonywane przy kuchence
odłączonej od zasilania elektrycznego.
Ustawienie i wypoziomowanie
! Możliwe jest zainstalowanie urządzenia obok mebli,
których wysokość nie przekracza wysokości płyty
roboczej.
! Należy się upewnić, czy ściana stykająca się z
tyłem urządzenia wykonana jest z materiału
niepalnego i odpornego na ciepło (T 90°C).
W celu umożliwienia prawidłowej instalacji:
• ustawić urządzenie w kuchni, w jadalni lub w
innym pomieszczeniu (nie w łazience);
• jeśli płyta kuchenki jest wyższa w stosunku do
mebli, powinny one znajdować się w odległości co
najmniej 200 mm od urządzenia;
• jeśli kuchenka
zainstalowana jest pod
szafką wiszącą, szafka
powinna się znajdować
w odległości co najmniej
420 mm nad płytą
kuchenki.
Odległość ta powinna
wynosić 700 mm, jeśli
szafki wiszące są
łatwopalne (patrz
rysunek);
• nie umieszczać zasłon za kuchenką ani w
odległości mniejszej niż 200 mm od jej krawędzi;
• ewentualne okapy powinny zostać zainstalowane
według wskazówek zawartych w ich instrukcji.
Wypoziomowanie
Jeśli konieczne jest
wypoziomowanie urządzenia,
należy przykręcić nóżki
regulacyjne, dostarczane jako
wyposażenie, w odpowiednich
gniazdach umieszczonych w
rogach podstawy kuchenki
(patrz rysunek).
Nóżki* mocowane są w
otworach pod podstawą
kuchenki.
Podłączenie elektryczne
Montaż przewodu zasilającego
Przewód należy dostosować do danego rodzaju
podłączenia elektrycznego, według następującego
schematu podłączeniowego:
W celu zamontowania przewodu zasilającego:
1. Odkręcić śrubę V ze
skrzynki zaciskowej i w
celu otwarcia zdjąć
pokrywę (patrz
rysunek).
2. umieścić śrubę
łącznikową „U” A (patrz
rysunek) zgodnie z
powyższym
schematem
podłączeniowym.
Skrzynka zaciskowa
dostosowana jest do
podłączenia
Instalacja
HOOD
420
Min.
min.
650
mm. with hood
min.
700
mm. without hood
mm.
600
Min. mm.
420
Min. mm.
V
1
2
3
N
A
B
*
Znajduje się tylko w niektórych modelach.
1 2
3
4
5
12345
1
2
3
4
5
R
S
T
N
R
S
N
R
N
400 3N
H05RR-F 5x2.5 CEI-UNEL 35363
400V 2N
H05RR-F 4x4 CEI-UNEL 35363
230V
H05RR-F 3x4 CEI-UNEL 35363
H05VV-F 3x4 CEI-UNEL 35746
H05VV-F 4x4 CEI-UNEL 35746
H05VV-F 5x2.5 CEI-UNEL 35746
14
PL
jednofazowego 230V: zaciski 1,2, i 3 są ze sobą
połączone ; mostek 4-5 znajduje się w dolnej części
skrzynki zaciskowej.
3. Umieścić przewody N oraz
66
66
6 zgodnie ze
schematem (patrz rysunek) i wykonać podłączenie
dokręcając mocno śruby zacisków.
4. umieścić pozostałe przewody w zaciskach 1-2-3 i
dokręcić śruby.
5. zamocować przewód zasilający w odpowiedniej
prowadnicy.
6. zamknąć pokrywę skrzynki zaciskowej
przykręcając śrubę V.
Podłączenie przewodu zasilającego do sieci
Zamontować na przewodzie znormalizowaną wtyczkę
dostosowaną do obciążeń wskazanych na tabliczce
znamionowej umieszczonej na urządzeniu (patrz
tabela Dane techniczne).
Urządzenie należy podłączyć bezpośrednio do sieci
przy użyciu wyłącznika wielobiegunowego o
odległości styków co najmniej 3 mm, instalowanego
pomiędzy urządzeniem a siecią. Wyłącznik musi
być dostosowany do wskazanych obciążeń i musi
odpowiadać normom NFC 15-100 (przewód
uziemienia nie powinien być przerwany przez
wyłącznik). Przewód zasilania powinien być
umieszczony tak, aby w żadnym punkcie nie był
narażony na temperaturę przekraczającą 50° C.
Przed wykonaniem podłączenia należy się upewnić,
czy:
• gniazdko posiada odpowiednie uziemienie i czy jest
zgodne z obowiązującymi przepisami;
• gniazdko jest w stanie wytrzymać maksymalne
obciążenie mocy urządzenia, wskazane na
tabliczce znamionowej;
• napięcie zasilania odpowiada wartościom podanym
na tabliczce znamionowej;
• gniazdko jest kompatybilne z wtyczką urządzenia.
Jeśli gniazdko nie jest kompatybilne z wtyczką,
należy się zwrócić do autoryzowanego technika w
celu dokonania wymiany. Nie stosować
przedłużaczy ani rozgałęziaczy.
! Po zainstalowaniu urządzenia przewód elektryczny
i gniazdko prądu powinny być łatwo dostępne.
! Przewód nie powinien być pozaginany ani
przygnieciony.
! Przewód powinien być okresowo sprawdzany i
wymieniany wyłącznie przez autoryzowanych
techników.
! Producent nie ponosi żadnej
odpowiedzialności, jeśli powyższe normy nie
będą przestrzegane.
*
Znajduje się tylko w niektórych modelach.
TABELA CHARAKTERYSTYK
Wymiar y
szerokość 44 cm
wysokość 34 cm
głębokość 38 cm
Obj ętość
54 l
Wymiar y użytk owe
szuflady
podgrzewania
potraw
szerokość 42 cm
wysokość 23 cm
głębokość 44 cm
Napięcie i
częstotliwość
zasilania
elektrycznego
patrz tabliczka znamionowa
Płyta grzejna ze
szkła ceramicznego
Przód lewa
Tył lewa
Tył prawa
Przód prawa
Moc pochłaniana
przez ceramiczne
płyt y grzejne Max
1200 W
1700 W
1200 W
1700 W
5800 W
ENERGY LABEL
Dyrektywa 2002/40/WE na etykietce
piekarników elektrycznych
Norma EN 50304
Zużycie energii konwekcja naturalna —
funkcja ogrzewania:
Tradycyj ny
Zużycie energii deklaracja Klasy
konwekcja wymuszona - funkcj a
ogrzewani a:
Piekarnik do wypieku ciast
Niniejsze urządzenie jest zgodne z
następującymi dyrektywami unijnymi:
2006/95/EC z dnia 12.12.06 (ni skie
napięcie) z późniejszymi zmianami -
04/108EE z dnia 15/12/04 (zgodność
elekt romagnetyczna) z późniejszymi
zmianami - 93/68/CEE z dnia 22/07/93
z późniejszymi zmianami
2002/96/CEE
PL
15
Opis urządzenia
Widok ogólny
Panel sterowania
*
Znajduje się tylko w niektórych modelach.
Pokrętło
PŁYT
Pokrętło
PROGRAMÓW
Pokrętło
TERMOSTATU
Kontrolka
TERMOSTAT
Kontrolka
PŁYTY
Pokrętło
REGULATOR
CZASOWY*
Kontrolka
TERMOSTAT
PROGRAMATOR
ELEKTRONICZNY*
Kontrolka
TERMOSTAT
16
PL
Uruchomienie i użytkowanie
Użytkowanie piekarnika
! Przy pierwszym włączeniu należy uruchomić pusty
piekarnik na przynajmniej jedną godzinę, z
termostatem ustawionym na maksimum i z
zamkniętymi drzwiczkami. Następnie wyłączyć
urządzenie, otworzyć drzwiczki piekarnika i
przewietrzyć pomieszczenie. Zapach, jaki się
wytworzy, jest skutkiem parowania substancji
zastosowanych w celu zabezpieczenia piekarnika.
! Przed przystąpieniem do użytkowania urządzenia
należy obowiązkowo usunąć plastikową folię z jego
ścianek!
! Nigdy nie należy stawiać żadnych przedmiotów
bezpośrednio na dnie piekarnika, gdyż grozi to
uszkodzeniem emalii.
1. Wybrać żądany program pieczenia obracając
pokrętłem PROGRAMY.
2. Wybrać temperaturę zalecaną dla danego
programu, lub inną żądaną temperaturę, obracając
pokrętłem TERMOSTAT.
Wykaz potraw z zalecanymi dla nich temperaturami
znajduje się w odpowiedniej tabeli (patrz Tabela
pieczenia w piekarniku).
Podczas pieczenia można zawsze:
• zmienić program pieczenia posługując się
pokrętłem PROGRAMY;
• zmienić temperaturę posługując się pokrętłem
TERMOSTAT;
• przerwać pieczenie obracając pokrętło
PROGRAMY na pozycję „0”.
! Naczynia do pieczenia stawiać zawsze na ruszcie
znajdującym się w wyposażeniu piekarnika.
Kontrolka TERMOSTAT
Jej zaświecenie się sygnalizuje, że piekarnik jest w
trakcie pracy. Gaśnie, kiedy wewnątrz piekarnika
zostanie osiągnięta ustawiona temperatura. W tym
momencie kontrolka zapala się i gaśnie
naprzemiennie, wskazując, że termostat pracuje i
utrzymuje stałą temperaturę.
Oświetlenie piekarnika
Włącza się je, obracając pokrętło PROGRAMY na
pozycję inną niż „0”. Pozostaje włączone dopóki
piekarnik jest w trakcie pracy. Po wybraniu
88
88
8 przy
pomocy pokrętła, światło zapala się bez
uruchamiania żadnego elementu grzewczego.
Regulator czasowy analogwy*
W celu uruchomienia Regulatora czasowego
(Minutnika) należy wykonać następujące czynności:
1. wykonać prawie pełny obrót pokrętłem TIMER w
kierunku zgodnym z ruchem wskazówek zegara 4 w
celu nastawienia dzwonka;
2. obracać w kierunku przeciwnym do ruchu
wskazówek zegara 5 pokrętłem TIMER, ustawiając
żądany czas.
*
Znajduje się tylko w niektórych modelach.
Stosowanie regulatora czasowego
końca pieczenia*
1. Należy przede wszystkim nakręcić dzwonek
obracając pokrętło REGULATOR CZASOWY KOŃCA
PIECZENIA o pełny obrót w kierunku ruchu wskazówek
zegara.
2. Cofając się w kierunku przeciwnym do ruchu
wskazówek ustawić żądany czas uzgadniając minuty
wskazane na pokrętle REGULATORA CZASOWEGO
KOŃCA PIECZENIA z oznaczeniem stałym na panel.
3. Po upływie czasu wydaje sygnał akustyczny i
wyłącza piekarnik.
4. Gdy piekarnik jest wyłączony regulator czasowy
końca pieczenia może zostać wykorzystany jako
zwykły minutnik.
! W celu użytkowania piekarnika w trybie ręcznym, to
znaczy z wyłączeniem regulatora czasowego końca
pieczenia, należy obrócić pokrętło REGULATORA
CZASOWEGO KOŃCA PIECZENIA do symbolu 9.
Zegar Elektroniczny*
Elektroniczny minutnik pokazuje czas i funkcje
odliczania.
USTAWIENIA ZEGARA
Po podlaczeniu do zasilania lub w przypadku
przerwy w zasilaniu, zegar zostaje
automatycznie skasowany (ustawi sie na 0:00) i
zaczyna migac.
Trzymajac wcisniety przycisk
za pomoca +/- i
nalezy ustawic wlasciwy czas. Przytrzymanie
przyciskow w pozycji wcisnietej powoduje
szybkie przewijanie czasu.
MINUTNIK
Minutnik umozliwia odliczanie ustalonego
okresu czasu. Funkcja ta nie wlacza piekarnika jedynie sygnalizuje uplyniecie ustawionego
czasu.
W celu uruchomienia tej funkcji nalezy wcisnac
przycisk
, - na wyswietlaczu pojawi sie symbol .
Po kazdym wcisnieciu przycisku + czas bedzie
zwiekszal sie o 10 sek. aż do 99min i 50sek. Dalsze
wciskanie tego przycisku
bedzie zwiekszalo czas o
minute do osiagniecia 10 godzin. Wciskanie
przycisku _ powoduje zmniejszanie czasu. Po
ustawiwniu czasu rozpocznie sie odliczanie.
Zakonczenie odliczania sygnalizuje sygnal
PL
17
Programy
Program PIEKARNIK DO WYPIEKU CIAST
Temperatura: dowolna od 50°C do Max.
Włącza się tylny element grzejny oraz wentylator,
zapewniając delikatne i równomierne ciepło wewnątrz
piekarnika.
Ta funkcja jest przeznaczona do pieczenia
delikatnych potraw, w szczególności ciast
drożdżowych i niektórych potraw „mignon” na 3
poziomach jednocześnie. Niektóre przykłady: ptysie,
herbatniki słodkie i słone, ciasteczka ze słonego
ciasta francuskiego, biszkopt zawijany i małe kawałki
zapiekanych jarzyn, itp… .
Tradycyjny
Temperatura: dowolna od 50°C do maks.
W tej pozycji włączają się dwa elementy grzejne:
dolny i górny. Jest to klasyczny piekarnik babuni,
jednak z udoskonaleniami w postaci wyjątkowego
poziomu rozkładu ciepła i ograniczenia zużycia
energii. Piekarnik statyczny pozostaje niezastąpiony
w przypadkach, kiedy trzeba przygotować dania
składające się z dwóch lub więcej elementów, jak na
przykład: kapusta z żeberkami, wędzony dorsz po
hiszpańsku, sztokfisz po ankońsku, pierś cielęca z
ryżem, itp. Doskonałe rezultaty uzyskuje się
przygotowując w ten sposób dania na bazie wołowiny
lub cielęciny, takie jak: mięsa duszone, potrawki,
gulasze, dziczyzna, udziec i comber wieprzowy, itp.,
które wymagają wolnego gotowania oraz ciągłego
dodawania płynów. Pozostaje też najlepszym
systemem do pieczenia ciast, owoców i potraw
przykrywanych podczas pieczenia w piekarniku.
Podczas pieczenia w piekarniku statycznym zaleca
się korzystanie tylko z jednego poziomu, ponieważ
użycie ich większej liczby powoduje niewłaściwy
rozkład temperatury. Wykorzystując różne poziomy,
jakie są do dyspozycji, można równomiernie
podzielić ciepło pomiędzy górną i dolną część
piekarnika. Jeśli pieczenie wymaga większej ilości
ciepła od spodu lub z góry, wówczas należy wybrać
odpowiednio dolny lub górny poziom.
Piekarnik z wentylacją
Temperatura: dowolna od 50°C do maks.
Uruchamiają się elementy grzejne i zaczyna
pracować wentylator. Ponieważ ciepło jest stałe i
równomierne w całym piekarniku, powietrze piecze i
rumieni potrawę w jednakowy sposób w każdym jej
punkcie. Można piec jednocześnie różne potrawy, ale
pod warunkiem, że będą one wymagały podobnej
temperatury pieczenia. Jednocześnie można
korzystać z maksymalnie dwóch poziomów, zgodnie
z uwagami zawartymi w rozdziale „Pieczenie na kilku
poziomach jednocześnie”.
Funkcja ta jest szczególnie wskazana w przypadku
dań, które wymagają zapiekania lub dosyć długiego
pieczenia, na przykład: lasagne, makaron zapiekany,
pieczony kurczak i pieczone ziemniaki, itp. Znaczne
korzyści uzyskuje się ponadto podczas pieczenia
mięsa, ponieważ lepszy rozkład temperatury pozwala
na zastosowanie niższych temperatur, które
zmniejszają parowanie, powodując, że mięso jest
bardziej miękkie i mniej traci na wadze. Pieczenie z
wentylacją jest szczególnie przydatne przy pieczeniu
ryb, które mogą być przyrządzane z minimalną
ilością dodatków przyprawowych, dzięki czemu ich
wygląd i smak pozostaje niezmieniony.
Desery: dobre wyniki otrzymuje się przy pieczeniu
ciast drożdżowych.
Funkcja „wentylacji” może być również stosowana do
szybkiego rozmrażania białego i czerwonego mięsa
oraz chleba, przy temperaturze ustawionej na 80°C.
Aby rozmrozić bardziej delikatne potrawy, można
ustawić temperaturę na 60°C lub zastosować jedynie
funkcję termoobiegu z zimnym powietrzem,
ustawiając pokrętło termostatu na 0°C.
Program PIEKARNIK GÓRNY
Temperatura: dowolna od 50°C do maks.
Uruchamiany jest górny element grzejny.
Ta funkcja może być stosowana do dokończenia
pieczenia.
Program GRILL
Temperatura: dowolna od 50°C do maks.
Włącza się górny element grzejny oraz rożen.
Dość wysoka temperatura skierowana bezpośrednio
na grill umożliwia bardzo szybkie opiekanie
powierzchni mięs, co zapobiega utracie soków, dzięki
czemu mięso jest bardziej miękkie. Pieczenie w
trybie grilla jest szczególnie zalecane do tych dań,
które wymagają wysokich temperatur na powierzchni:
steków cielęcych i wołowych, antrykotu, polędwicy,
hamburgerów, itp.
Podczas pieczenia drzwi piekarnika powinny być
półotwarte, z wyjątkiem pieczenia z wykorzystaniem
rożna.
dzwiekowy. Przycisniecie dowolnego przycisku
powoduje wylaczenie sygnalu alarmowego. Przez
wcisniecie przycisku
mozna odczytac czas.
Wyswietllony symbol
informuje o wlaczonej
funkcji minutnika. Po ok. 7 sek. wyswietlacz powroci
do pokazywania odliczania.
KASOWANIE USTAWIEN
Wcisnac i przytrzymac przycisk - do momentu
wyswietlania 0:00
REGULACJA GLOSNOSCI SYGNALU
DZWIEKOWEGO- po ustawieniu i zatwierdzeniu
ustawien zegara przyciskiem - mozna dokonac
regulacji poziomu glosnosci sygnalu alarmowego (3
poziomy)
*
Znajduje się tylko w niektórych modelach.

18
PL
Niektóre przykłady użytkowania podane są w
rozdziale „Praktyczne porady dotyczące pieczenia”.
Program GRILL Z WENTYLACJĄ
Temperatura: dowolna od 50°C do 200°C.
Włącza się środkowy górny element grzejny oraz
wentylator. Łączy wymuszoną cyrkulację powietrza
wewnątrz piekarnika z jednokierunkowym
promieniowaniem cieplnym. Zapobiega to przypalaniu
powierzchni potraw, umożliwiając właściwą
penetrację ciepła. Doskonałe wyniki uzyskuje się
wykorzystując grill z wentylacją do przygotowania
szaszłyków z różnych mięs i warzyw, kiełbasek,
żeberek, kotlecików jagnięcych, kurczaka „alla
diavola”, przepiórek z szałwią, filetów wieprzowych,
itp.
Jeśli chodzi o ryby, grill z wentylacją jest najlepszym
sposobem na pieczenie granika, tuńczyka, ryby
szpady, mątw faszerowanych, itp.
!!
!!
! Pieczenia PIEKARNIK GÓRNY, GRILL oraz GRILL
Z WENTYLACJĄ powinny być wykonywane przy
zamkniętych drzwiczkach.
!!
!!
! Podczas pieczenia PIEKARNIK GÓRNY I GRILL
ustawiać ruszt w pozycji 5, a brytfannę w pozycji 1 w
celu zebrania pozostałości po pieczeniu (sosów i/lub
tłuszczu). Podczas pieczenia GRILL Z
WENTYLACJĄ ustawiać ruszt w pozycji 2 lub 3, a
brytfannę w pozycji 1 w celu zebrania pozostałości
po pieczeniu.
Dolna komora
Pod piekarnikiem
znajduje się komora,
która może być
wykorzystana jako
schowek na akcesoria
lub rondle. W celu
otwarcia drzwiczek
obrócić je ku dołowi
(patrz rysunek).
! Nie umieszczać w dolnej komorze materiałów
łatwopalnych.
! Wewnętrzne powierzchnie szuflady (jeśli jest w
danym modelu) mogą się nagrzewać.
Pieczenie jednocześnie na kilku poziomach
Jeśli konieczne jest użycie dwóch poziomów, należy
korzystać z programu
Z WENTYLACJĄ,
ponieważ jest to jedyny program odpowiedni dla tego
typu pieczenia. Ponadto dobrze jest:
• nie korzystać z pozycji 1 i 5: gorące powietrze
działa bezpośrednio na nie, co mogłoby
spowodować przypalenie delikatnych potraw.
• wykorzystywać pozycje 2 i 4, umieszczając w
pozycji 2 potrawy wymagające wyższej
temperatury.
• w przypadku przygotowywania potraw
wymagających różnego czasu i temperatury
pieczenia, ustawić temperaturę pośrednią
pomiędzy dwoma zalecanymi (patrz Tabela
pieczenia w piekarniku) i umieścić delikatniejszą
potrawę w pozycji 4. Wyjąć wcześniej tę potrawę,
która wymaga krótszego czasu pieczenia.
• w przypadku pieczenia pizzy na kilku poziomach
w temperaturze ustawionej na 220°C, należy
wstępnie nagrzewać piekarnik przez 15 minut.
Zasadniczo pieczenie w pozycji 4 trwa dłużej:
dlatego zaleca się najpierw wyjąć pizzę pieczoną
na niższym poziomie, a następnie, po kilku
minutach, tę pieczoną w pozycji 4.
• Ustawić brytfannę na dole, a ruszt na górze.

PL
19
Tabela pieczenia w piekarniku
Położenie
pokrętła
wyboru
Przygotowywana potrawa Waga
(kg)
Położenie
pieczenia
ruszt od
dołu
Czas
wstępnego
ogrzewania
(minuty)
Położenie
pokrętła
termostatu
Czas
pieczenia
(minuty)
Piekarnia.
Kruche ciasta
Ciasta owocowe
Ciasto śliwkowe
Ciasto biszkoptowe
Naleśniki nadziewane (na 2
półkach)
Małe ciastka (na 2 półkach)
Słone ciastka francuskie z
serem (na 2 półkach)
Ptysie (na 3 półkach)
Herbatniki (na 3 półkach)
Bezy (na 3 rusztach)
0.5
1
0.7
0.5
1.2
0.6
0.4
0.7
0.7
0.5
3
2/3
3
3
2-4
2-4
2-4
1-3-5
1-3-5
1-3-5
15
15
15
15
15
15
15
15
15
15
180
180
180
160
200
190
210
180
180
90
20-30
40-45
40-50
25-30
30-35
20-25
15-20
20-25
20-25
180
Statyczna
Kaczka
Pieczeń cielęca lub wołowa
Pieczeń wieprzowa
Biszkopty
Kruche ciasta
1
1
1
-
1
3
3
3
3
3
15
15
15
15
15
200
200
200
180
180
65-75
70-75
70-80
15-20
30-35
Wentylowana
Pizza (na 2 półkach)
Lasagne
Jagnięcina
Kurczak pieczony + ziemniaki
Makrele
Ciasto śliwkowe
Ptysie (na 2 półkach)
Herbatniki (na 2 półkach)
Ciasto biszkoptowe (na 1
półce)
Ciasto biszkoptowe (na 2
półkach)
Słone ciasta
1
1
1
1
1
1
0.5
0.5
0.5
1.0
1.5
2-4
3
2
2-4
2
2
2-4
2-4
2
2-4
3
15
10
10
10
10
10
10
10
10
10
15
220
200
180
180
180
170
190
180
170
170
200
15-20
30-35
50-60
60-75
30-35
40-50
20-25
10-15
15-20
20-25
25-30
Podgrzewanie
górne
Poprawki pieczenia - 3/4 15 220 -
Grill Sole i mątwy
Szaszłyki z kalmarów i rak ów
Filet z dorsza
Warzywa z rusztu
Bistecche di vitello
Kotlet
Hamburgers
Makrele
Tost
1
1
1
1
1
1
1
1
szt. 4
4
4
4
3/4
4
4
4
4
4
5
5
5
5
5
5
5
5
5
Max
Max
Max
Max
Max
Max
Max
Max
Max
8-10
6-8
10
10-15
15-20
15-20
7-10
15-20
2-3
Grill z
wentylacją
Kurczak z rusztu
Mątwy
1.5
1.5
3
3
5
5
200
200
55-60
30-35
! Wskazany czas jest tylko czasem przykładowycm i może być zmieniany według osobistych upodobañ. W systemie
gotowania „Gril” lub „gril z wentylacją” brytfannę należy ustawić na 1 poziomie licząc od dołu.
20
PL
Użytkowanie
szklano-ceramicznej płyty grzejnej
! Klej stosowany do uszczelnień pozostawia na szkle
tłuste plamy. Przed przystąpieniem do eksploatacji
urządzenia zaleca się usunąć te plamy przy pomocy
odpowiedniego produktu nieposiadającego
właściwości ściernych. Podczas pierwszych godzin
działania urządzenia może być wyczuwalny zapach
gumy, który jednak szybko zanika.
Włączanie i wyłączanie stref pieczenia
W celu włączenia strefy pieczenia należy przekręcić
odpowiednie pokrętło zgodnie z ruchem wskazówek
zegara.
W celu wyłączenia obrócić pokrętło w kierunku
przeciwnym do ruchu wskazówek zegara aż do
pozycji „0”.
Zaświecenie się kontrolki działania PŁYT
ELEKTRYCZNYCH sygnalizuje, że przynajmniej
jedna z płyt na płycie grzejnej jest włączona.
Strefy pieczenia
Na płycie grzejnej znajdują się
elektryczne radiacyjne
elementy grzejne. Podczas
pracy ich kolor zmienia się na
czerwony:
A. Strefa pieczenia.
B. Kontrolka ciepła: sygnalizuje, że temperatura
danej strefy pieczenia przekracza 60°C, także
wówczas, gdy element jest wyłączony, lecz jeszcze
gorący.
Strefy pieczenia z elementami radiacyjnymi
Charakteryzują się właściwościami
przypominającymi typowe właściwości kuchenek
gazowych: szybką reakcją na sterowanie i
wyświetlaniem mocy chwilowej.
Obracać odpowiednim pokrętłem w kierunku ruchu
wskazówek zegara od 1 do 6.
A
A
A
A
B
Praktyczne porady związane z użytkowaniem
płyty grzejnej
• Stosować garnki z płaskim dnem i znacznej
grubości, aby mieć pewność, że dokładnie
przylegają do strefy grzejnej;
• stosować garnki o średnicy wystarczającej do
całkowitego przykrycia strefy grzejnej, tak aby
zapewnić wykorzystanie całego ciepła;
• upewnić się, że dna garnków są zawsze dokładnie
oczyszczone i suche; dzięki temu uzyska się
optymalne przyleganie do stref grzejnych i
zarówno garnki, jak i płyta grzejna będą miały
większą trwałość;
• unikać stosowania tych samych garnków co
używane na palnikach gazowych: skupienie ciepła
w przypadku palników gazowych może
odkształcić dno garnka, przez co nie będzie on
dokładnie przylegać;
• nie pozostawiać nigdy strefy gotowania włączonej
bez garnka, gdyż może ona ulec uszkodzeniu.
Poz. Płyta normalna lub szybka
0
Wyłączona
1
Gotowanie jarzyn, ryb
2
Gotowanie ziemniaków (na parze), zup, ciecierzycy,
fasoli
3
Kontynuacja gotowania dużych ilości potraw, gęstych
zup
4
Pieczenie (średnie)
5
Pieczenie (mocne)
6
Przyrumienianie lub szybkie doprowadzanie do wrzenia

PL
21
Zalecenia i środki ostrożności
! Urządzenie zostało zaprojektowane i wyprodukowane
zgodnie z międzynarodowymi normami bezpieczeństwa.
Poniższe zalecenia dotyczą zasad bezpieczeństwa i
należy je uważnie przeczytać.
Ogólne zasady bezpieczeństwa
• Szklano-ceramiczna płyta grzejna jest odporna na
wahania temperatury i na uderzenia. Jeżeli jednak
zostanie uderzona czymś ostrym, jak nóż czy inne
narzędzia kuchenne, może pęknąć. Jeśli zdarzy się
coś takiego, należy natychmiast wyjąć wtyczkę z
gniazdka sieciowego i zwrócić się wyłącznie do
autoryzowanego centrum obsługi technicznej z
prośbą o naprawę przy użyciu oryginalnych części
zamiennych. Niezastosowanie się do tej zasady
może spowodować, że urządzenie nie będzie
bezpieczne.
• Niniejsze urządzenie przeznaczone jest do użytku
domowego.
• Nie należy instalować urządzenia na zewnątrz,
nawet w zadaszonym miejscu. Wystawienie go na
działanie deszczu i burz jest bardzo niebezpieczne.
• Nie dotykać urządzenia stojąc przy nim boso lub
mając mokre albo wilgotne ręce bądź stopy.
•
Urządzenie powinno być używane przez osoby dorosłe
jedynie w celach kulinarnych, zgodnie ze
wskazówkami zawartymi w instrukcji użytkownika.
Wszelkie inne próby użycia urządzenia (np. do
ogrzewania pomieszczeń) uważa się za niewłaściwe i
niebezpieczne. Producent nie ponosi odpowiedzialności
za uszkodzenia wynikające z niewłaściwej i
nierozsądnej eksploatacji urządzenia
• Instrukcja dotyczy urządzenia klasy 1
(wolnostojącego) lub klasy 2 – podklasa 1
(zabudowanego pomiędzy dwoma meblami).
• Nie pozwalać, aby dzieci zbliżały się do urządzenia.
• Uważać, aby przewody zasilające pozostałe domowe
urządzenia elektryczne nie stykały się z
rozgrzanymi elementami kuchenki.
• Nie zasłaniać otworów wentylacyjnych i
odprowadzających ciepło.
• Do wyjmowania i wkładania naczyń do/z piekarnika
należy zawsze używać rękawic ochronnych.
• Nie stosować płynów łatwopalnych (alkohol,
benzyna, itp.) w pobliżu działającego urządzenia.
• Nie umieszczać materiałów łatwopalnych w dolnej
komorze lub w piekarniku; jeśli urządzenie zostanie
niespodziewanie uruchomione, mogłoby się zapalić.
• Kiedy urządzenie nie jest używane, zawsze należy
się upewnić, czy pokrętła znajdują się w pozycji
•.
• Nie wyciągać wtyczki z gniazdka ciągnąc za kabel:
należy przytrzymać wtyczkę.
• Nie czyścić urządzenia ani nie wykonywać
czynności konserwacyjnych bez uprzedniego
odłączenia wtyczki od sieci elektrycznej.
• Jeśli urządzenie zepsuje się, nigdy nie należy
podejmować prób jego samodzielnej naprawy.
Naprawy wykonywane przez osoby nieposiadające
odpowiednich kwalifikacji mogą być przyczyną
szkód i wystąpienia dodatkowych usterek w
działaniu urządzenia. Skontaktować się z
Serwisem.
• Nie stawiać ciężkich przedmiotów na otwartych
drzwiczkach piekarnika.
• Nie zezwalać na samodzielne korzystanie z
kuchenki dzieciom oraz osobom nieposiadającym
doświadczenia w obsłudze tego typu urządzeń.
Utylizacja
• Utylizacja opakowania: należy stosować się do
lokalnych przepisów, dzięki temu opakowania będą
mogły zostać poddane reutylizacji.
• Dyrektywa europejska 2002/96/WE w sprawie
zużytego sprzętu elektrycznego oraz
elektronicznego (RAEE) przewiduje, że domowe
urządzenia elektryczne nie mogą podlegać
zwykłemu cyklowi utylizacji stałych odpadów
miejskich. Zużyte urządzenia powinny być zbierane
oddzielnie w celu optymalizacji stopnia odzysku i
recyrkulacji ich materiałów składowych oraz aby
zapobiec potencjalnym szkodom dla zdrowia i
środowiska. Symbol przekreślonego kosza
umieszczony na wszystkich produktach przypomina
o obowiązku selektywnego gromadzenia tych
odpadów.
Zużyte domowe urządzenia elektryczne można
dostarczać do publicznych punktów zbiórki
surowców wtórnych, składować je w odpowiednich
obszarach komunalnych, lub, jeśli przewiduje to
przedmiotowe prawo krajowe, przekazywać je
sprzedawcom przy zakupie nowego wyrobu
podobnego typu.
Wszyscy główni producenci elektrycznego sprzętu
gospodarstwa domowego prowadzą aktywną
działalność w zakresie tworzenia i zarządzania
systemów zbiórki i utylizacji zużytych urządzeń.
Oszczędność i ochrona środowiska
• Korzystając z piekarnika w godzinach od późnego
popołudnia do pierwszych godzin porannych można
przyczynić się do zmniejszenia obciążenia zakładów
energetycznych.
• Zaleca się, aby pieczenie w trybie GRILL było
wykonywane zawsze przy zamkniętych
drzwiczkach: w ten sposób można uzyskać zarówno
lepsze wyniki pieczenia, jak i znaczną oszczędność
energii elektrycznej (około 10%).
• Należy dbać o sprawność i czystość uszczelek, tak
aby dokładnie przylegały one do drzwiczek i nie
powodowały utraty ciepła.
 Loading...