How it Works
Log In / Sign Up
Buy Points
How it Works
FAQ
Contact Us
Questions and Suggestions
Users
INDESIT
Loading...
D
DFG 03
DFG 04 TK
DFG 050
2
DFG 0507
DFG 050M (EX) 60 HZ
DFG 051
5
DFG 0515
DFG 051 EU
11
DFG 051 S
DFG 051 S EU
DFG054
DFG 13B10 TK
DFG 14B10 TK
DFG 151
DFG 15B1
9
DFG 15B10
8
DFG 15B10 ES
5
DFG 15B10 EU
19
DFG 15B10 S EU
13
DFG 15B1.1 UK
DFG-15B1-A
DFG 15B1 A EU
11
DFG 15B1 FR
2
DFG 15B1 IT
DFG15B1K
DFG 15B1 K UK
DFG 15B1 PL
DFG 15B1 S
2
DFG 15B1 S IT
3
DFG 15B1 SK
DFG 15B1 S UK
DFG 15B1 UK
4
DFG 15M10
DFG250
2
DFG 251
DFG254
DFG254BFR
DFG 254BS
DFG254SFR
DFG 255
DFG255FR
DFG 261
DFG 262
10
DFG 2622
DFG 2622 EU
4
DFG 2627
DFG 262 EU
15
DFG 262 NX EU
DFG262SEU
2
DFG 2631M
2
DFG 2635
3
DFG 26B1
4
DFG 26B10
4
DFG 26 B 10 EU
15
DFG 26B10 NX EU
3
DFG 26B16 FR
DFG26B16NX FR
DFG 26B17 FR
DFG 26B1 EU
12
DFG 26B1 NX
3
DFG 26B1 NX EU
20
DFG 26B1 S UK
DFG 26B1 UK
DFG 26M10
DFG 26M1 A S IT
4
DFG 26T1
DFGL 17B19 UK
DFM 4180 S
DFM 4200 W
DFM 5180 W
DFO 3C23 A
7
DFO 3C23 ACX UK 60HZ
3
DFO 3C23 A X
7
DFO 3C23 X UK
3
DFO 3C26
10
DFO 3C26 X
10
DFO3T133AF
12
DFO 3T133 A F X
12
DFP 272
3
DFP 2727
3
DFP 272 EU
DFP 273
3
DFP 2731M
DFP 274B S FR
DFP 275
DFP 275 NX
DFP 27B1
DFP 27B10
2
DFP 27B16 NX FR
DFP 27B1 A
DFP 27B1 SK
DFP 27B1 UK
3
DFP 27B+96
DFP 27B+96 Z
7
DFP 27M10 NX TK
DFP 27T94
4
DFP 27T94 A EU
12
DFP 27T94 A NX EU
2
DFP 27T94 A UK
DFP 27T96 Z UK
2
Loading...
Loading...
Nothing found
DFG 26B10 NX EU
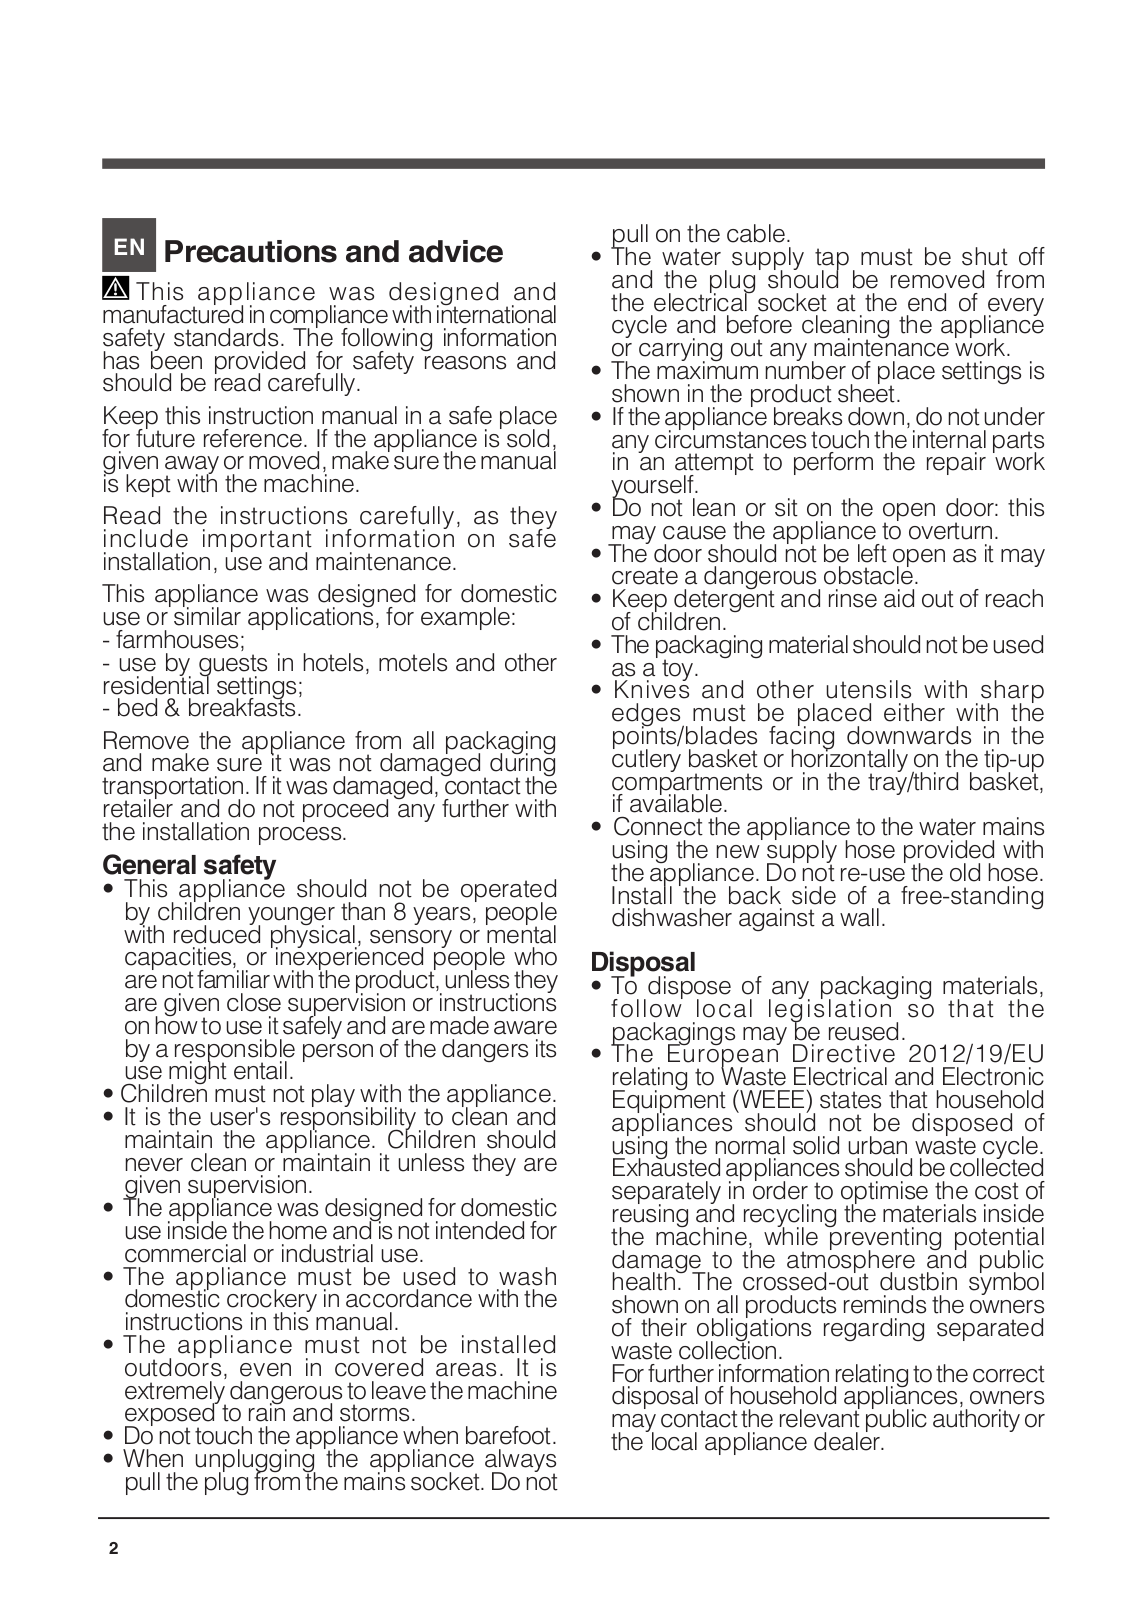
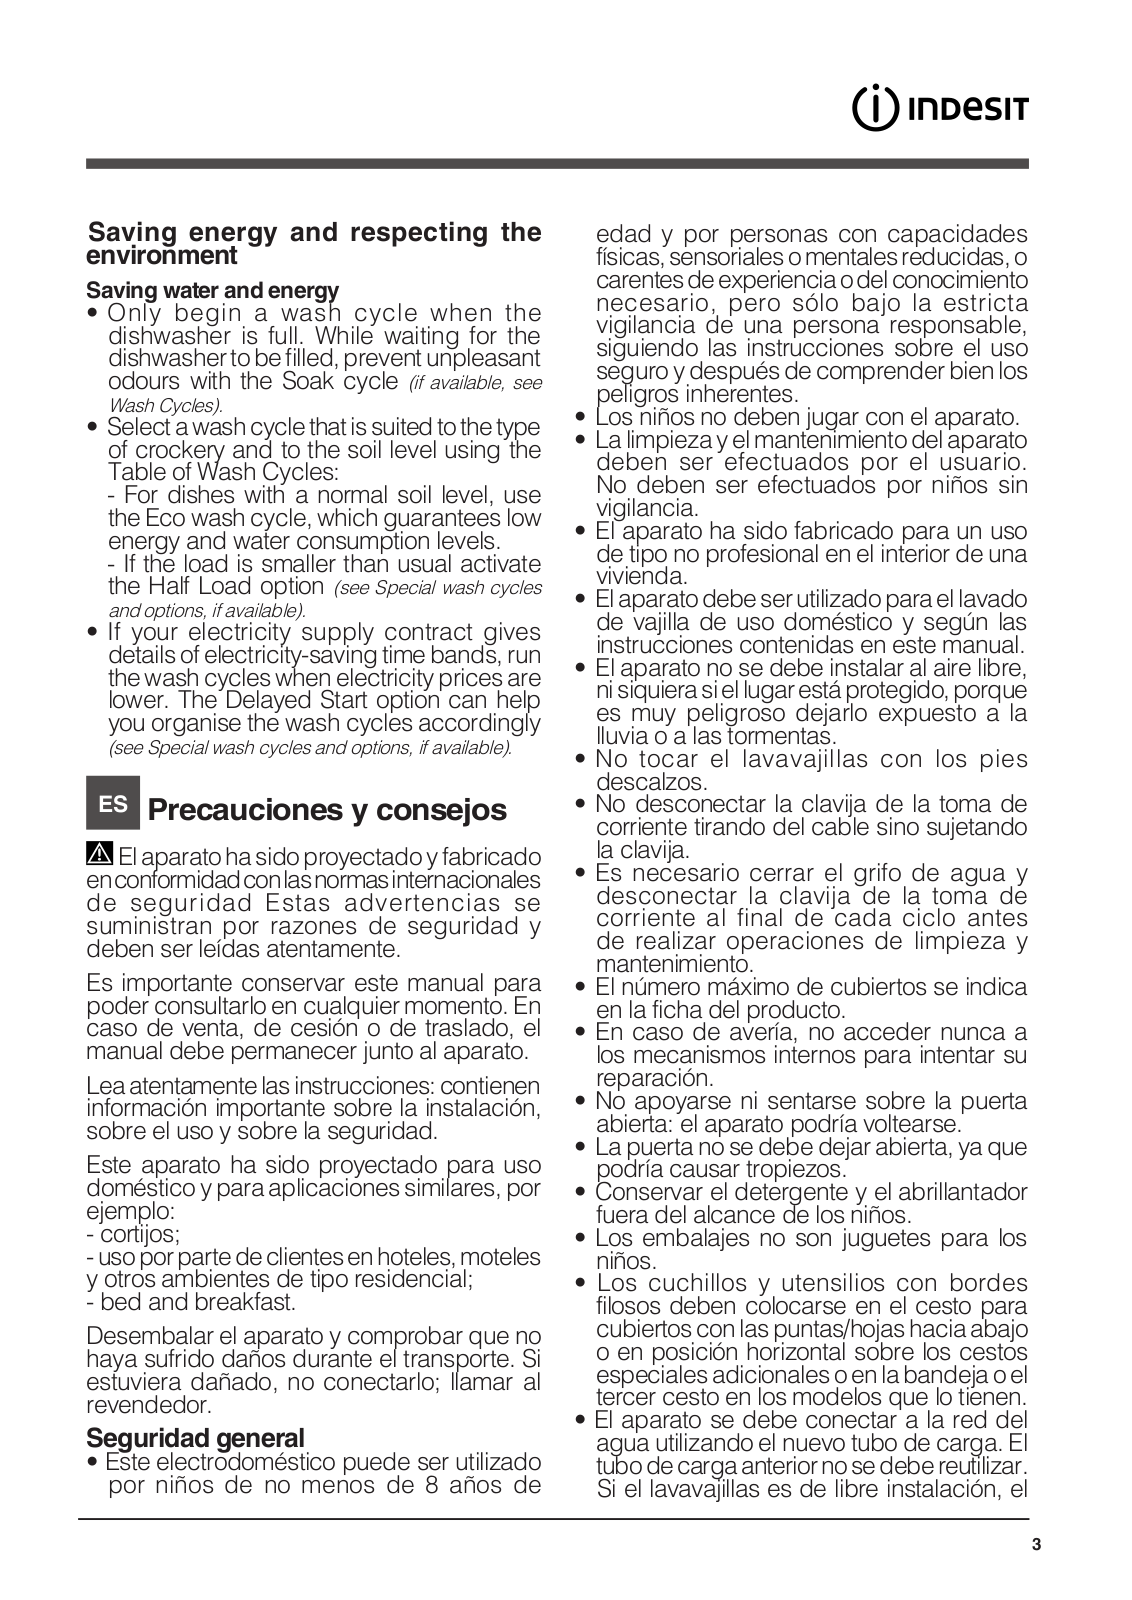
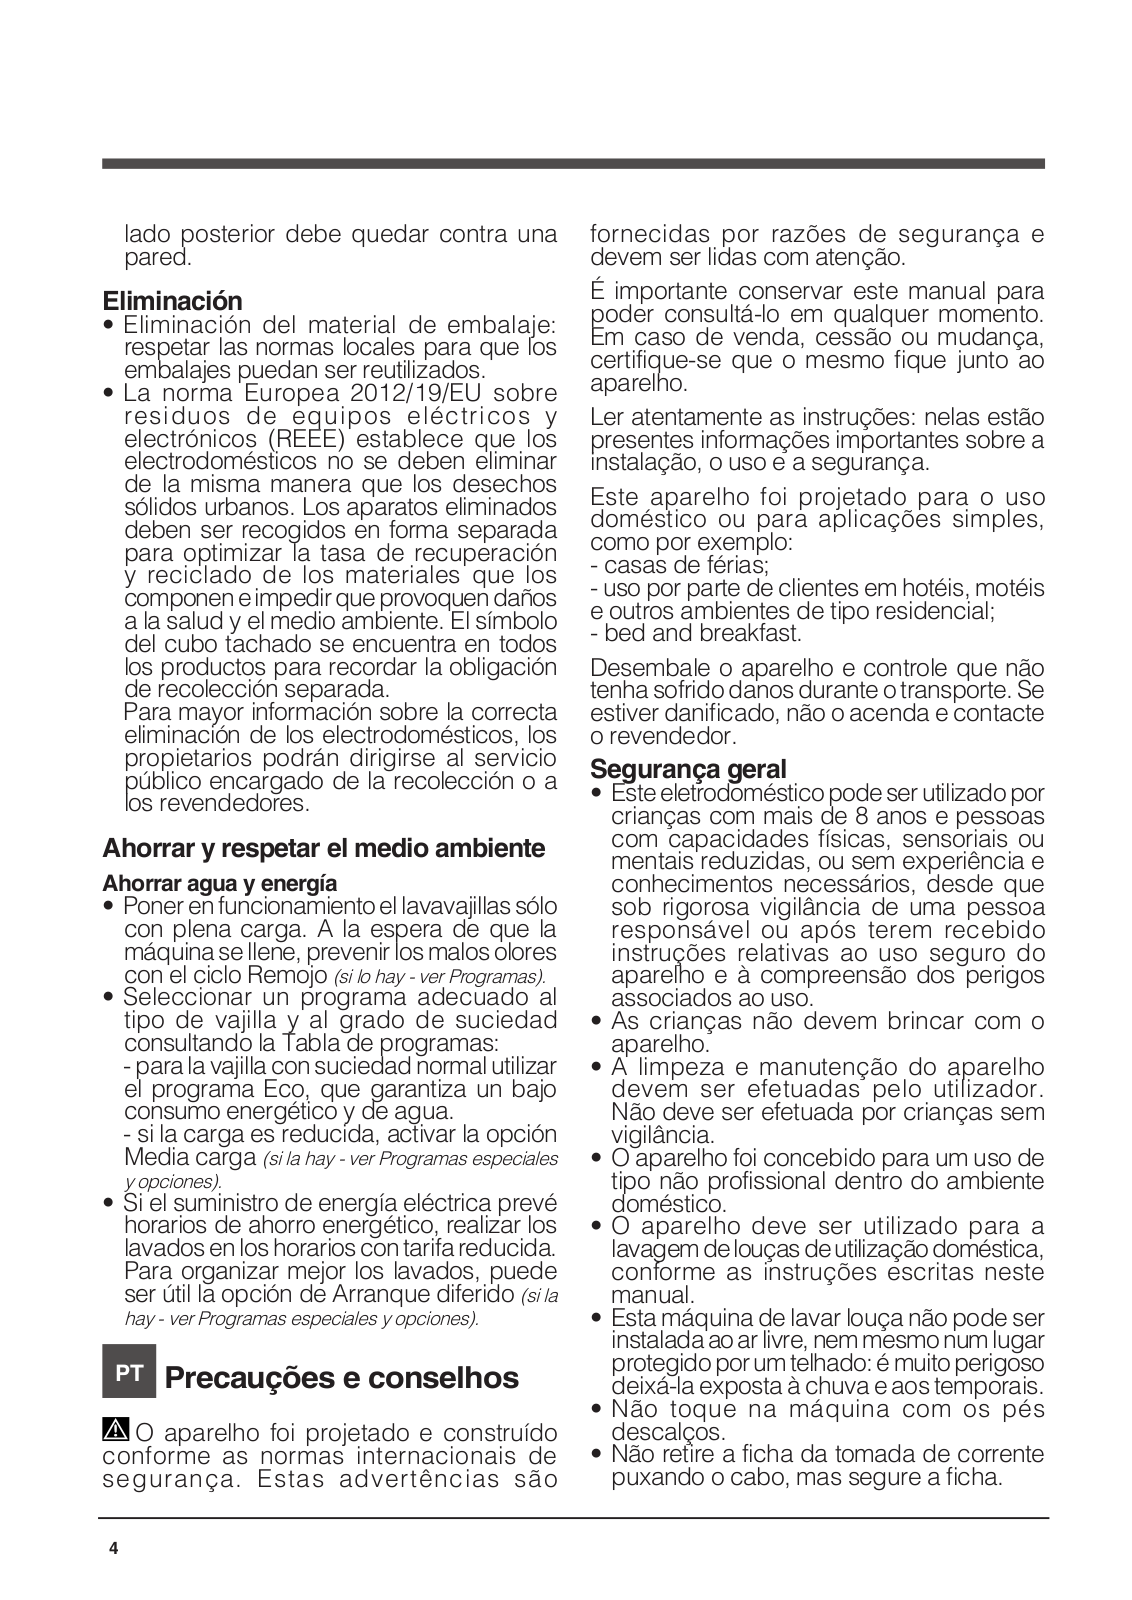
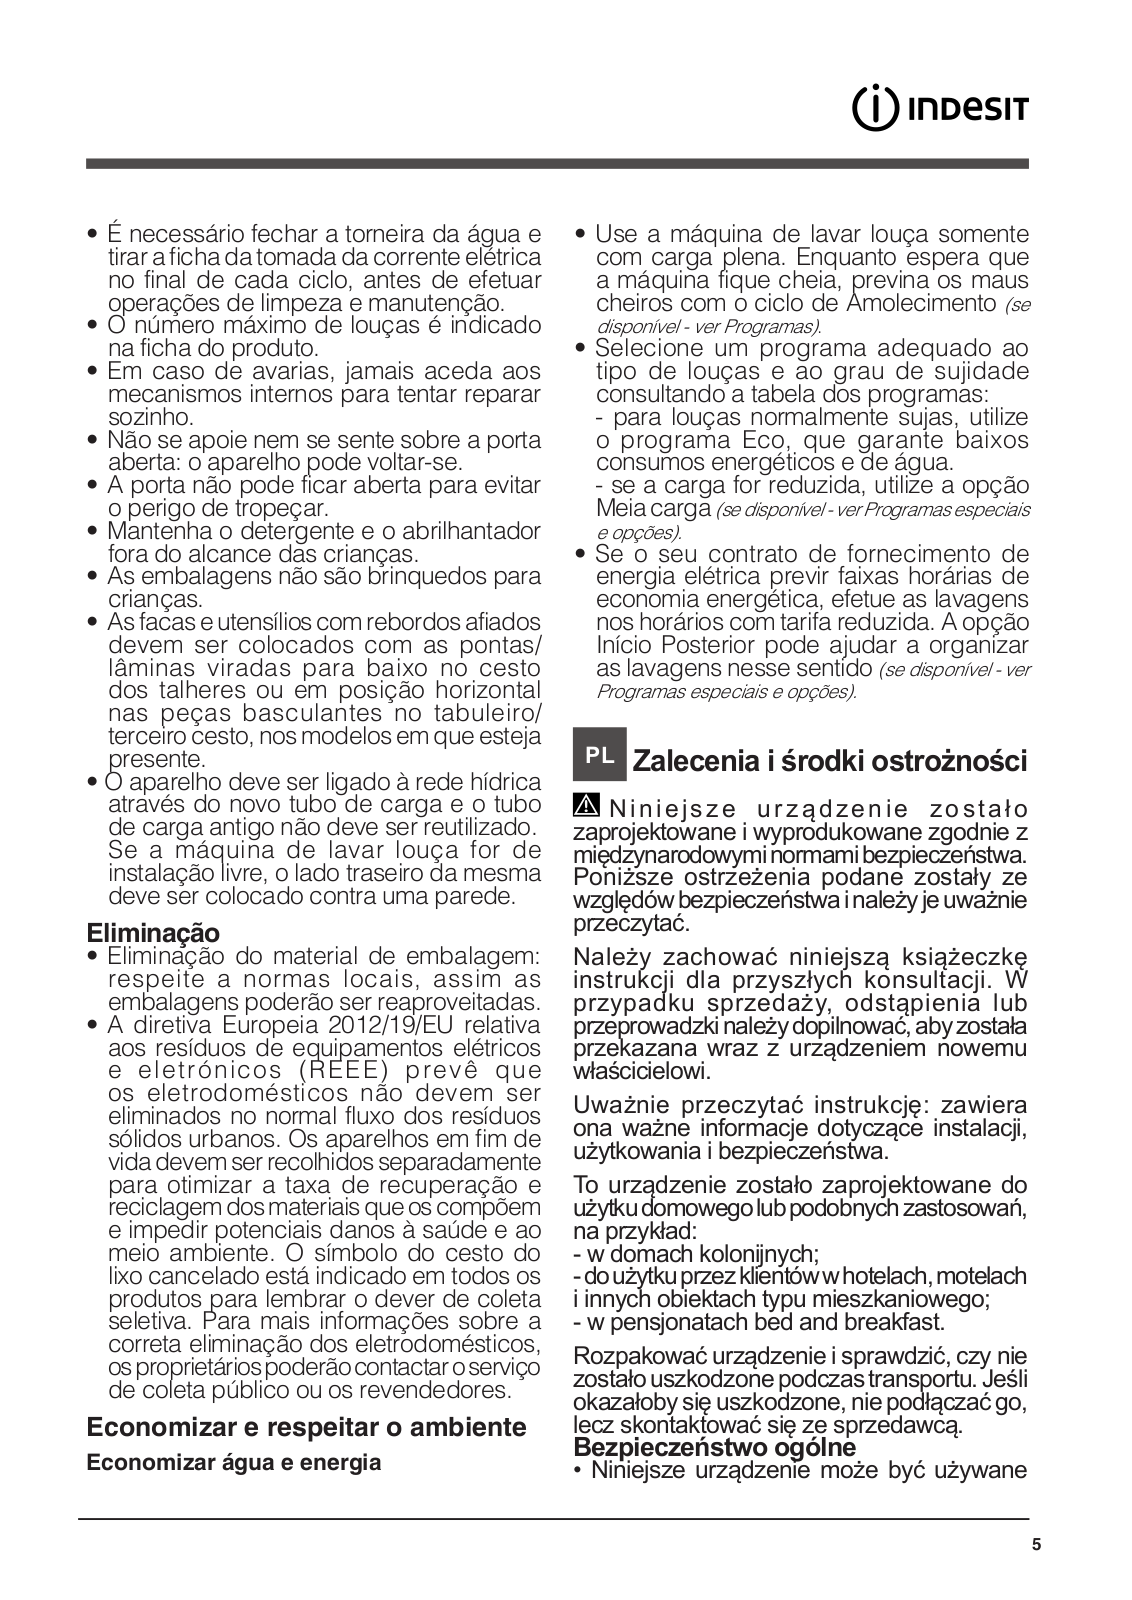
Operating Instructions
44 pgs
9.04 Mb
0
User Manual
28 pgs
4.63 Mb
0
User Manual
68 pgs
15.01 Mb
0
Table of contents
Loading...
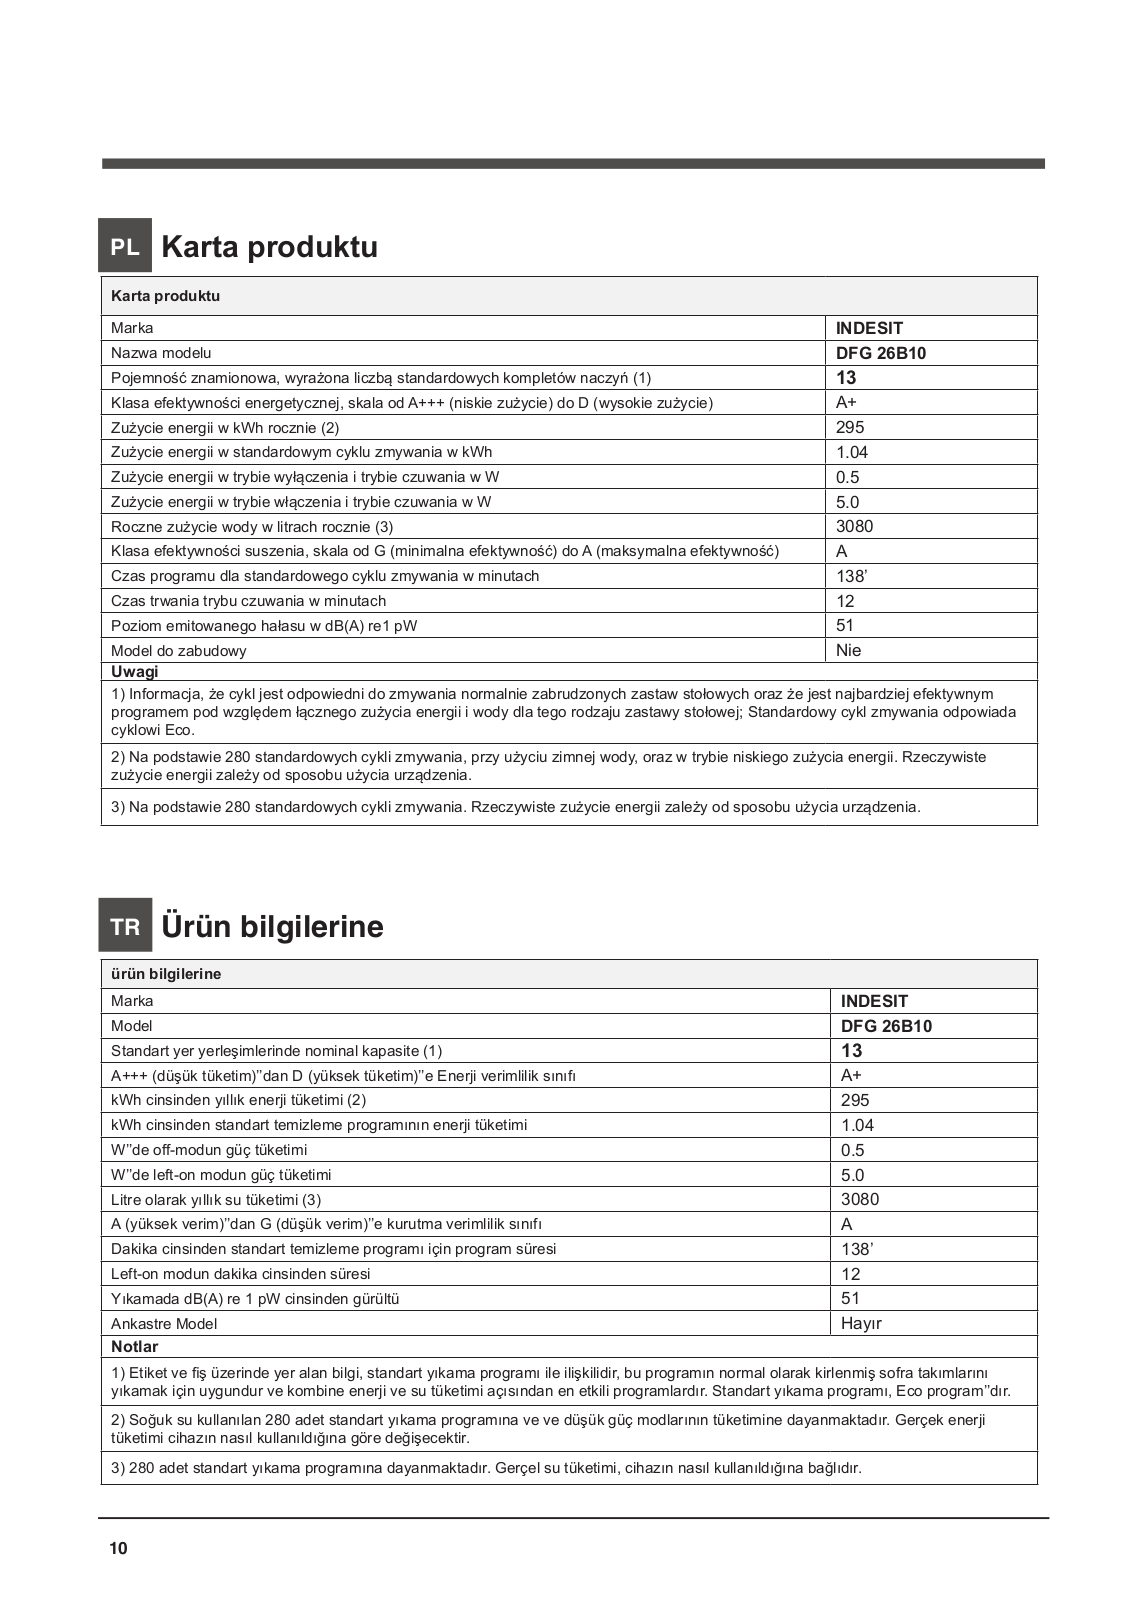
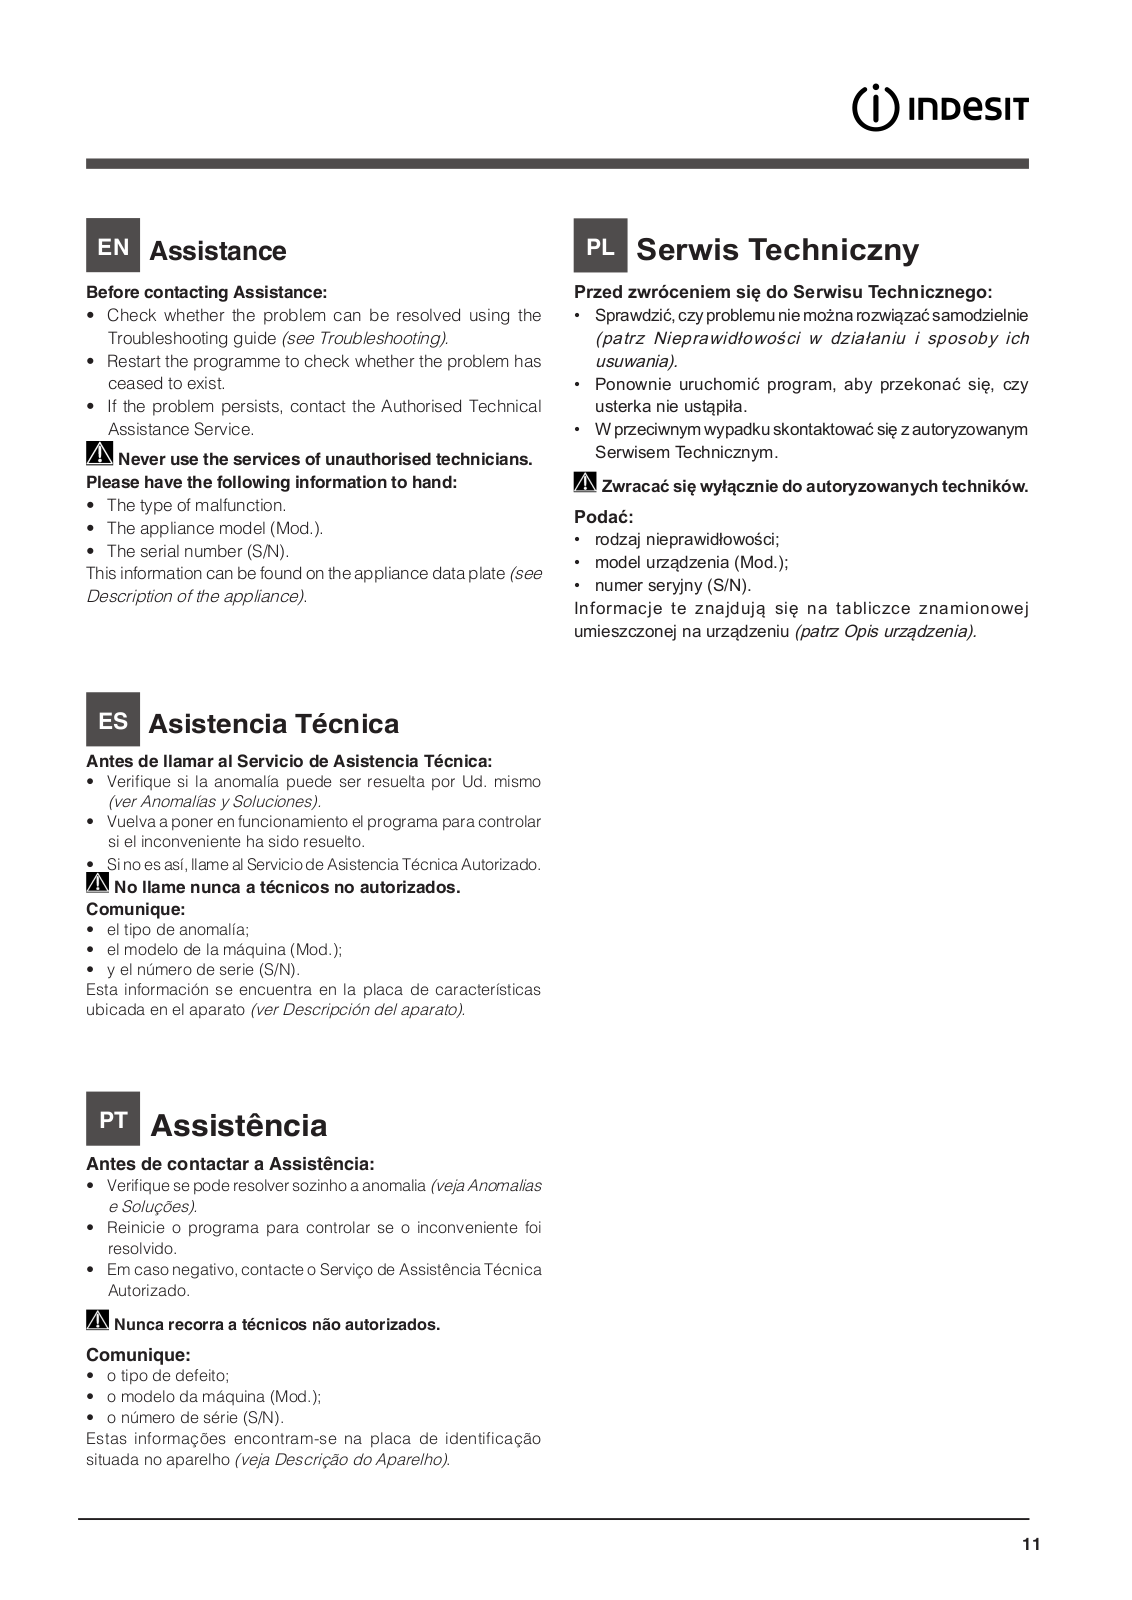
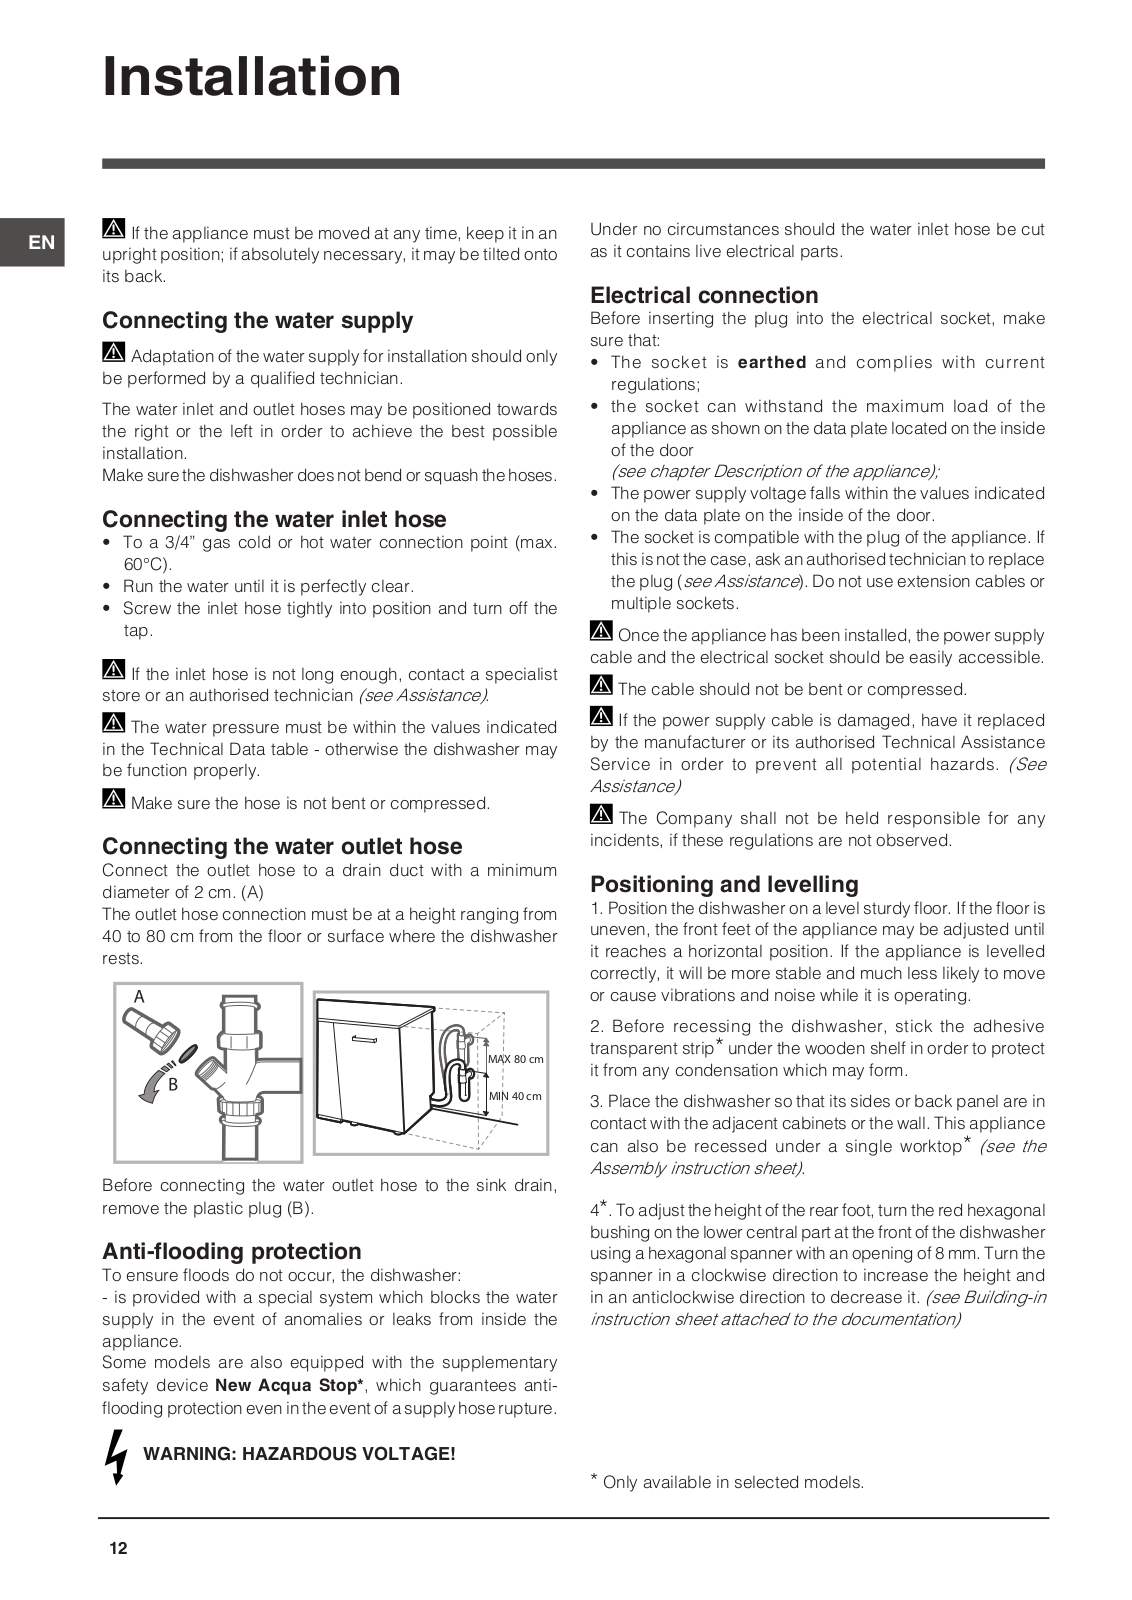
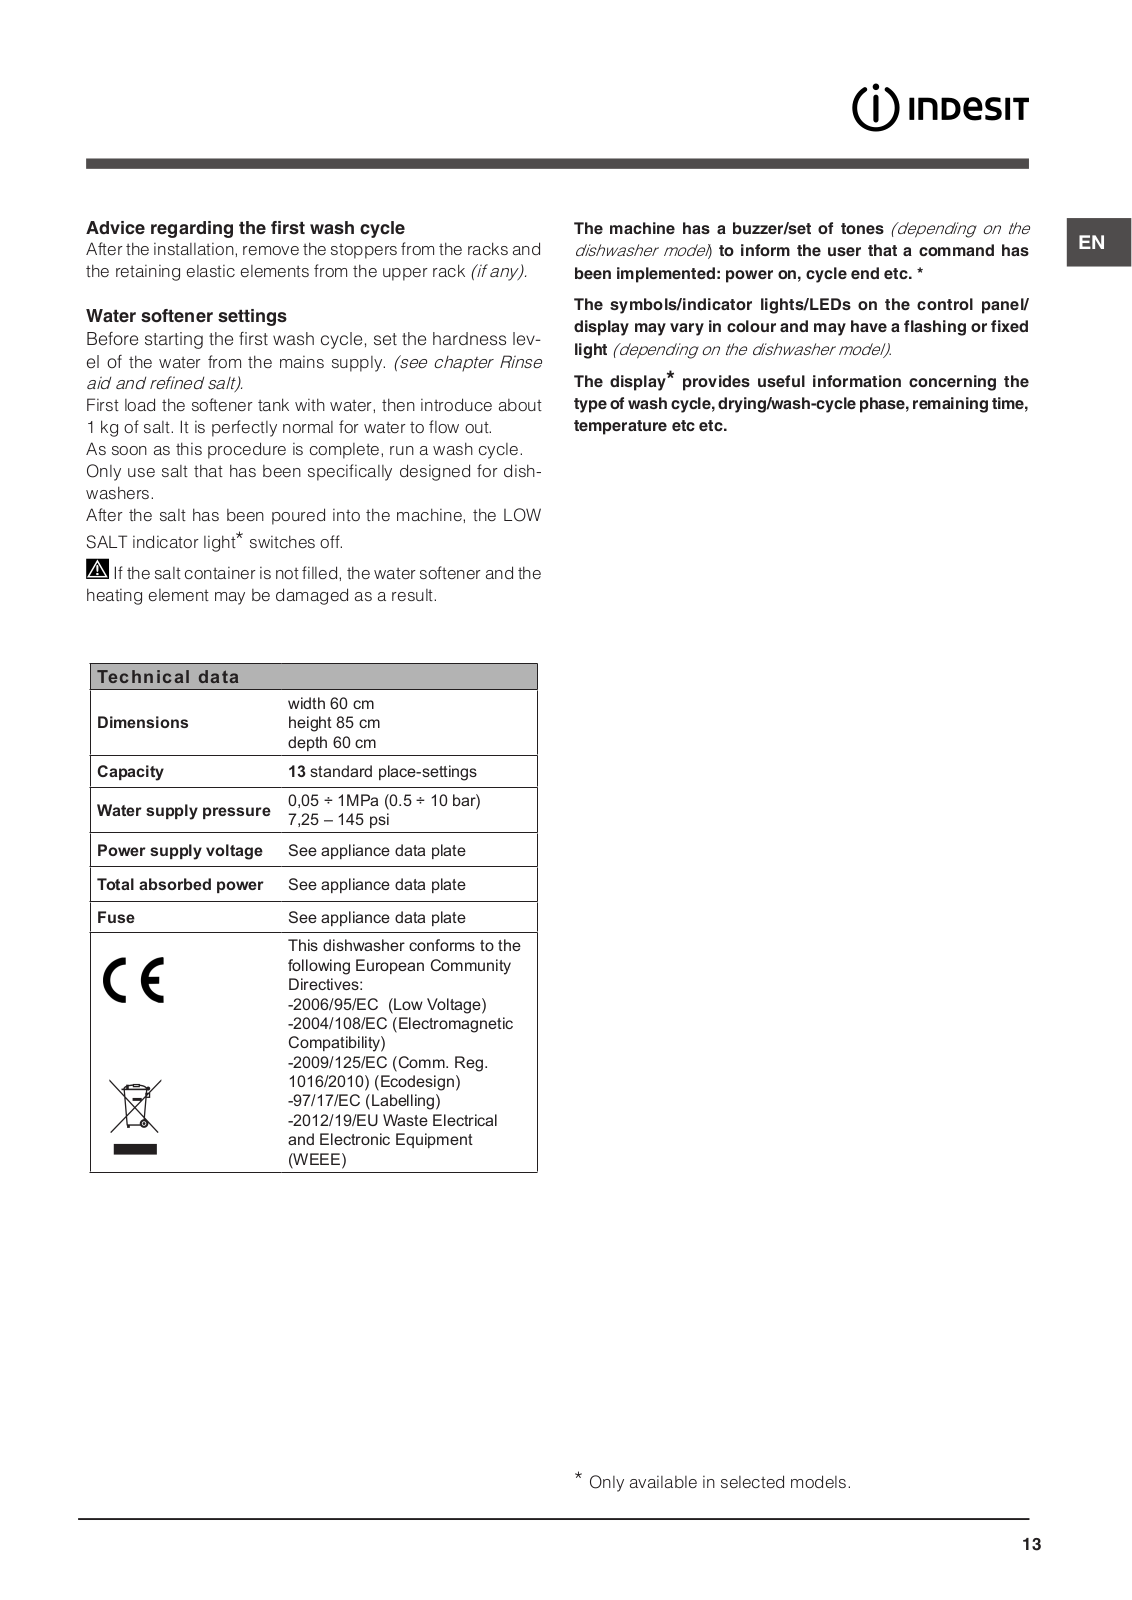
INDESIT DFG 26B10 NX EU User Manual
...
INDESIT User Manual
Download
Specifications and Main Features
Frequently Asked Questions
User Manual
Download
Loading...
+
47
hidden pages
Unhide
You need points to download manuals.
1 point = 1 manual.
You can buy points or you can get point for every manual you upload.
Buy points
Upload your manuals
 Loading...