

Page 1

NUTID
GB
FR
DE
MWC 6
IT
NL
ES
PT
SE
DK
NO
FI
HU
CZ
PL
RU
SK
GR
1
Page 2

2
Page 3

GB
ENGLISH 4
FR
DE
IT
NL
ES
PT
SE
DK
NO
FI
HU
CZ
PL
RU
FRANÇAIS 29
DEUTSCH 54
ITALIANO 79
NEDERLANDS 104
ESPAÑOL 129
PORTUGUÊS 154
SVENSKA 179
DANSK 204
NORSK 229
SUOMI 254
MAGYAR 279
ĆESKY 304
POLSKI 329
РУССКИЙ 354
SK
GR
SLOVENSKY 379
ΕΛΛΣΑ 404
3
Page 4
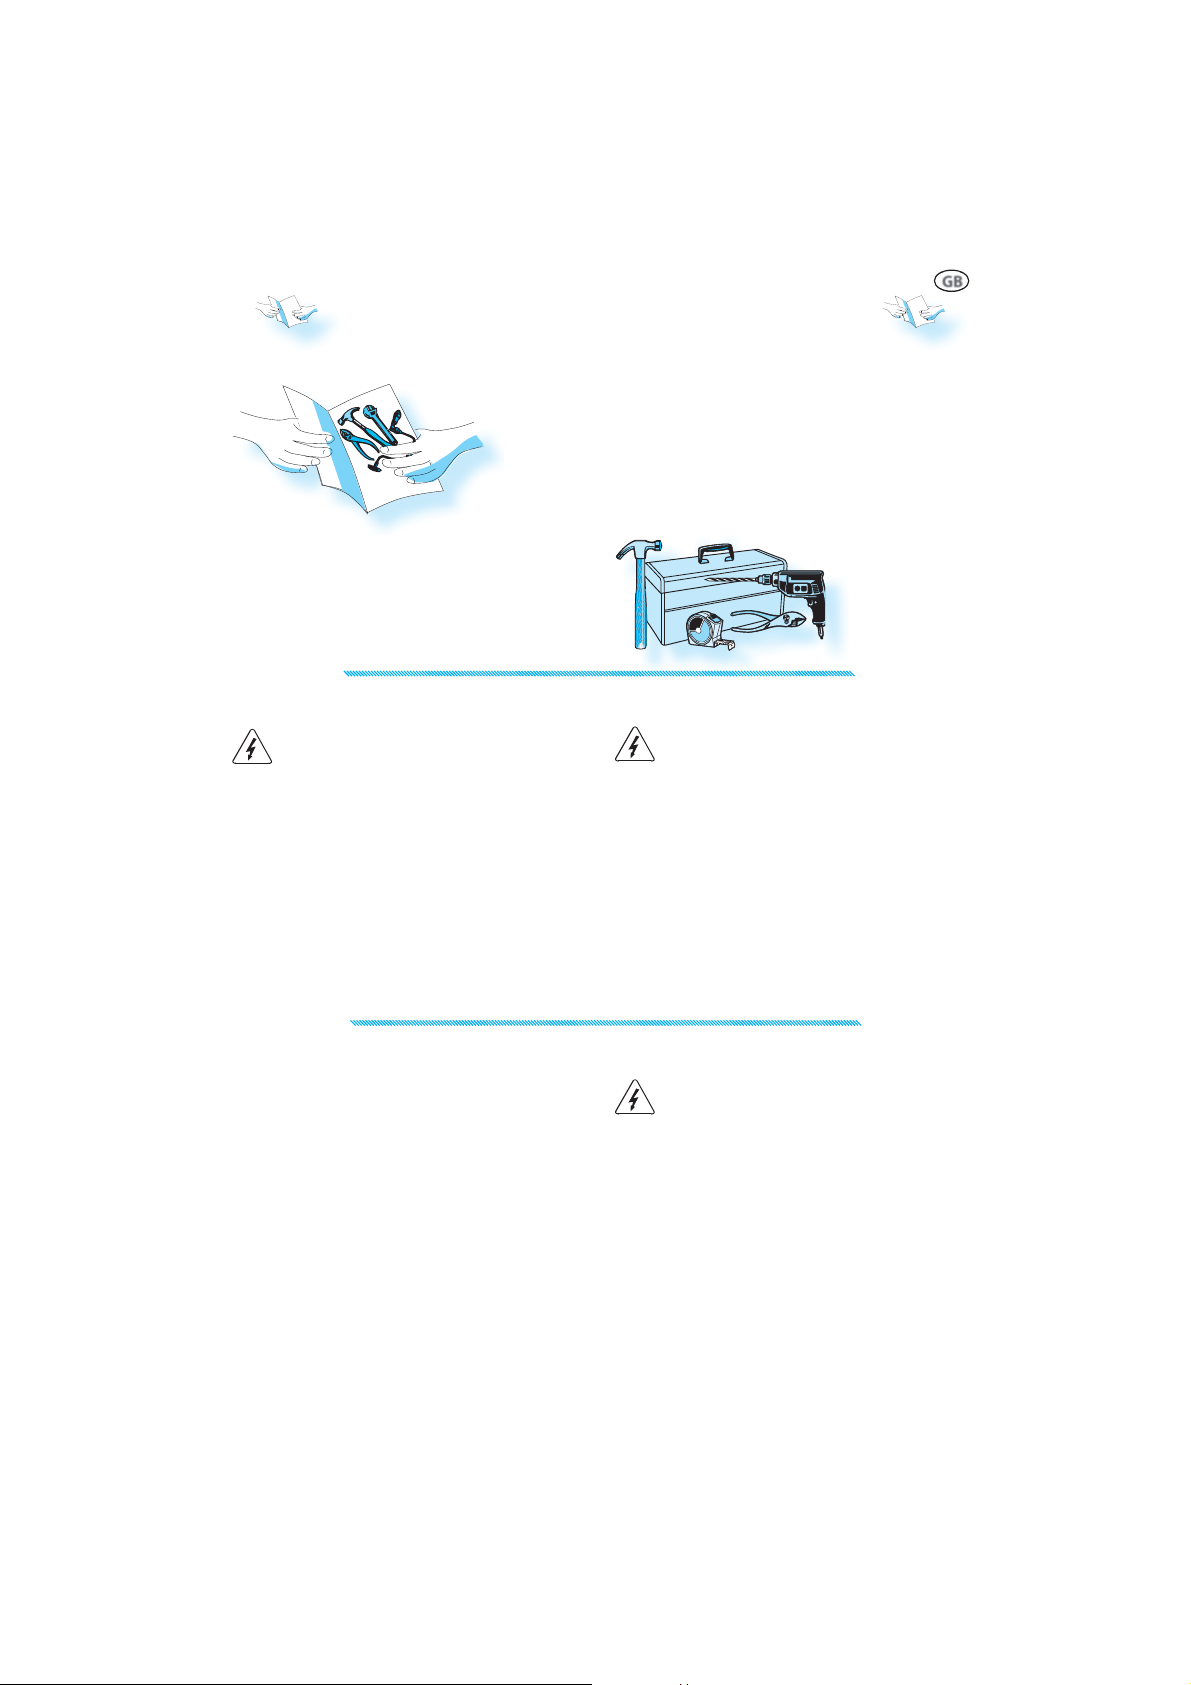
INSTALLATION
MOUNTING THE APPLIANCE
FOLLOW THE SUPPLIED separate mounting instructions when installing the appliance.
PRIOR TO CONNECTING
CHECK THAT THE VOLTAGE on the rating
plate corresponds to the voltage in your
home.
NSURE the oven cavity is empty before mount-
E
ing.
E
NSURE THAT THE APPLIANCE IS NOT DAMAGED. Check
that the oven door closes firmly against the
door support. Empty the oven and clean the
interior with a soft, damp cloth.
ENGLISH
D
O NOT OPERATE THIS APPLIANCE if it has a
GB
damaged mains cord or plug, if it is not
working properly, or if it has been damaged or dropped. Do not immerse the
mains cord or plug in water. Keep the
cord away from hot surfaces. Electrical
shock, fi re or other hazards may result.
AFTER CONNECTING
T
HE OVEN CAN BE OPERATED ONLY if the oven door is
firmly closed.
The manufacturers are not liable for any problems caused by the user’s failure to observe
these instructions.
4
HE EARTHING OF THIS APPLIANCE is compulso-
T
ry. The manufacturer will accept no responsibility for injury to persons, animals
or damage to objects arising from the
non-observance of this requirement.
Page 5
IMPORTANT SAFETY INSTRUCTIONS
READ CAREFULLY AND KEEP FOR FUTURE REFERENCE
DO NOT HEAT, OR USE FL AMMABLE MATERIALS in
or near the oven. Fumes can create a fi re
hazard or explosion.
D
O NOT USE YOUR MICROWAVE oven for drying
textiles, paper, spices, herbs, wood, fl owers, fruit or other combustible materials.
Fire could result.
I
F MATERIAL INSIDE / OUTSIDE THE OVEN SHOULD
IGNITE OR SMOKE IS OBSERVED, keep oven
door closed and turn the oven off . Disconnect the power cord or shut off power at the fuse or circuit breaker panel.
D
O NOT OVER-CO OK FOOD. Fire could result.
O NOT LEAVE THE OVEN UNATTENDED, espe-
D
cially when using paper, plastic or other combustible materials in the cooking process. Paper can char or burn and
some plastics can melt if used when
heating foods.
ONLY ALLOW CHILDREN to use the appliance
under adult supervision and after adequate instructions have been given, so that
the child is able to use the appliance in a
safe way and understands the hazards of
improper use.
HIS APPLIANCE IS NOT INTENDED FOR use by per-
T
sons (including children) with reduced
physical, sensory or mental capabilities,
unless used under the supervision of a person responsible for their safety.
ACCESSI BLE PART S MAY BECOME HOT during use,
young children should be kept away
O NOT USE YOUR MICROWAVE
D
oven for heating anything in
airtight sealed containers. The pressure increases
and may cause damage when opening or
may explode.
O NOT USE corrosive chemicals or va-
D
pors in this appliance. This type of oven
is specifi cally designed to heat or cook
food. It is not designed for industrial or
laboratory use.
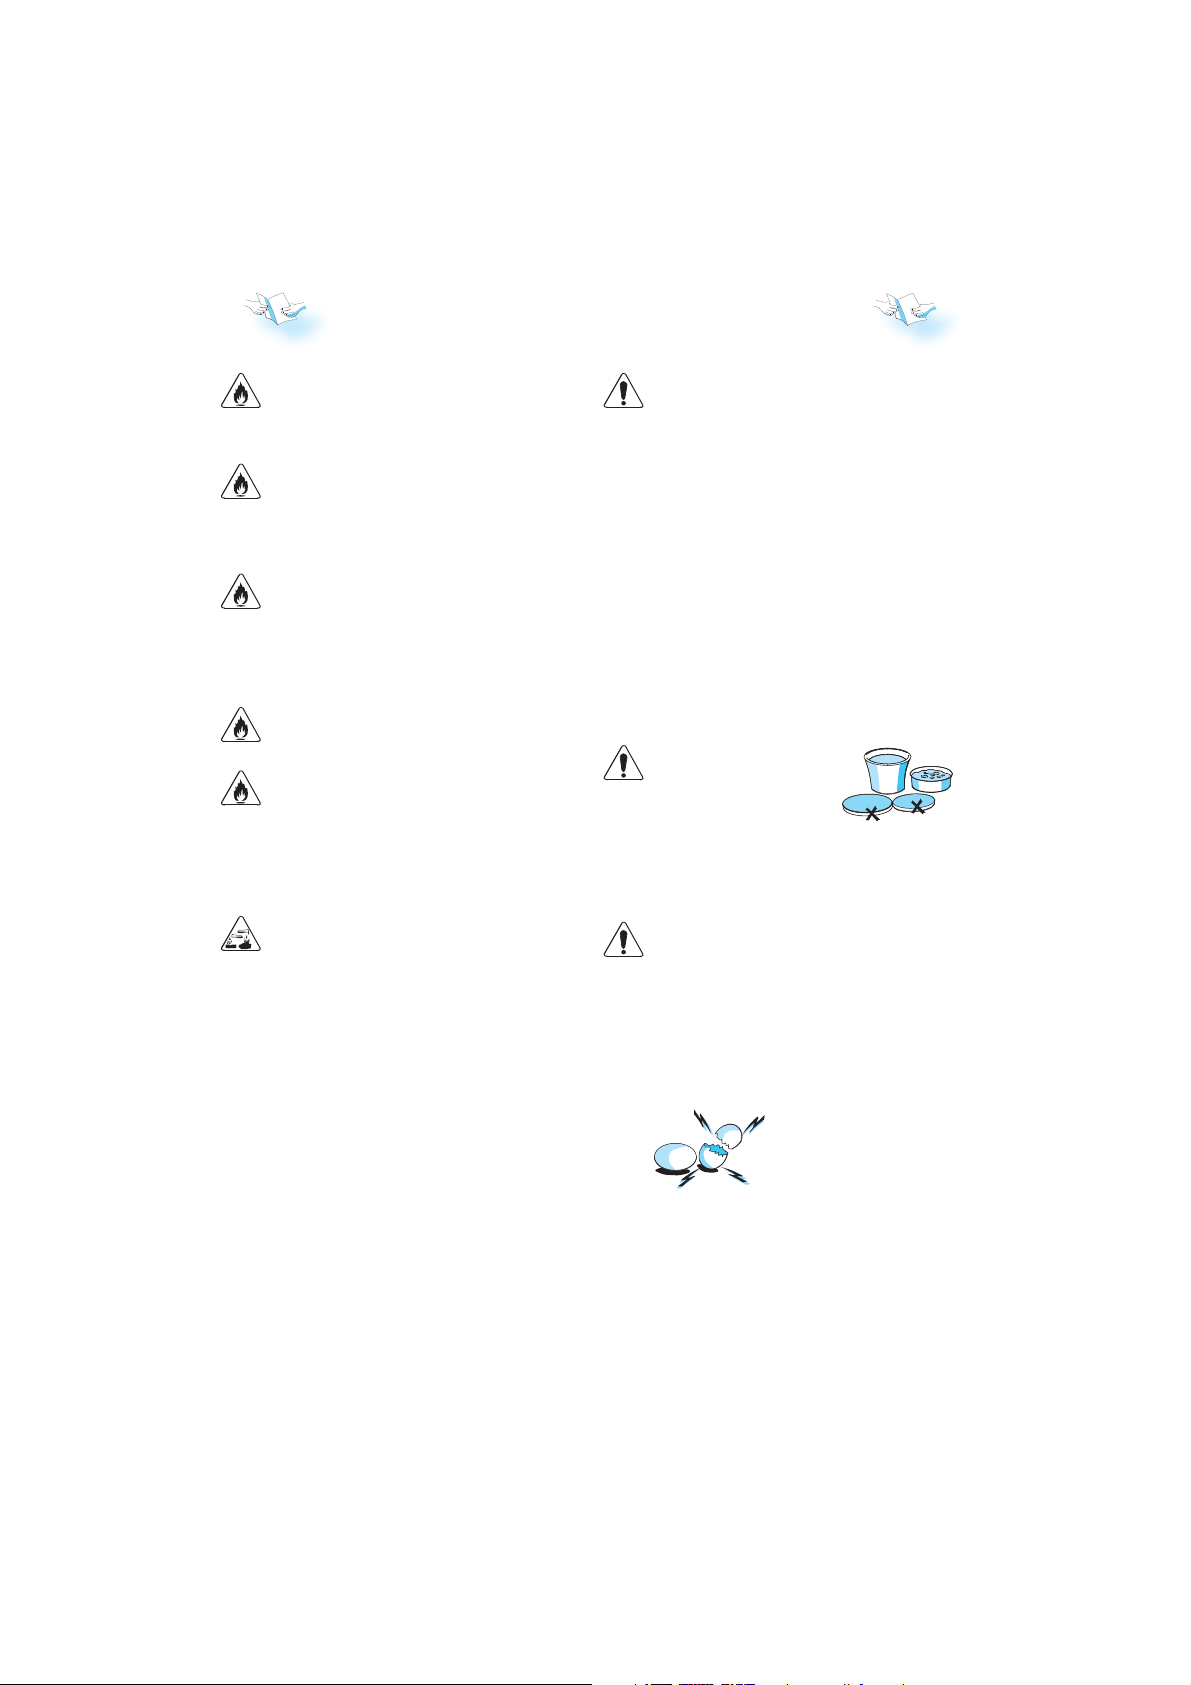
EGGS
D
O NOT USE YOUR MICROWAVE oven for
cooking or reheating whole eggs
with or without shell since they
may explode even after microwave heating has ended.
HE DOOR SEALS AND THE DOOR SEAL AREAS must
T
be regularly inspected for damage. If these
areas are damaged the appliance should
not be operated until it has been repaired
by a trained service technician.
5
Page 6
PRECAUTIONS
GENERAL
HIS APPLIANCE IS DESIGNED FOR DOMESTIC USE ONLY!
T
HE APPLIANCE SHOULD NOT BE OPERATED without food
T
in the oven when using microwaves. Operation in
this manner is likely to damage the appliance.
F YOU PRAC TICE OPERATING the oven, put a glass
I
of water inside. The water will absorb the microwave energy and the oven will not be damaged.
O NOT USE THE CAVITY for any storage purposes.
D
EMOVE WIRE TWIST-TIES from paper or
R
plastic bags before placing bag in
the oven.
DEEPFRYING
D
O NOT USE YOUR MICROWAVE oven for deep-frying,
because the oil temperature cannot be
controlled.
USE HOT PADS OR OVEN MITTS to prevent
burns, when touching containers, oven
parts, and pan after cooking.
LIQUIDS
G. BEVERAGES OR WATER. Overheating the liquid
E.
beyond boiling point can occur
without evidence of bubbling.
This could result in a sudden
boil over of the hot liquid.
To prevent this possibility the
following steps should be taken:
1. Avoid using straight-sided containers with
narrow necks.
2. Stir the liquid before placing the container
in the oven and let the teaspoon remain
in the container.
3. After heating, allow standing for a short
time, stirring again before carefully removing the container from the oven.
CAREFUL
A
LWAYS REFER to a microwave cookbook for de-
tails. Especially, if cooking or reheating food
that contains alcohol.
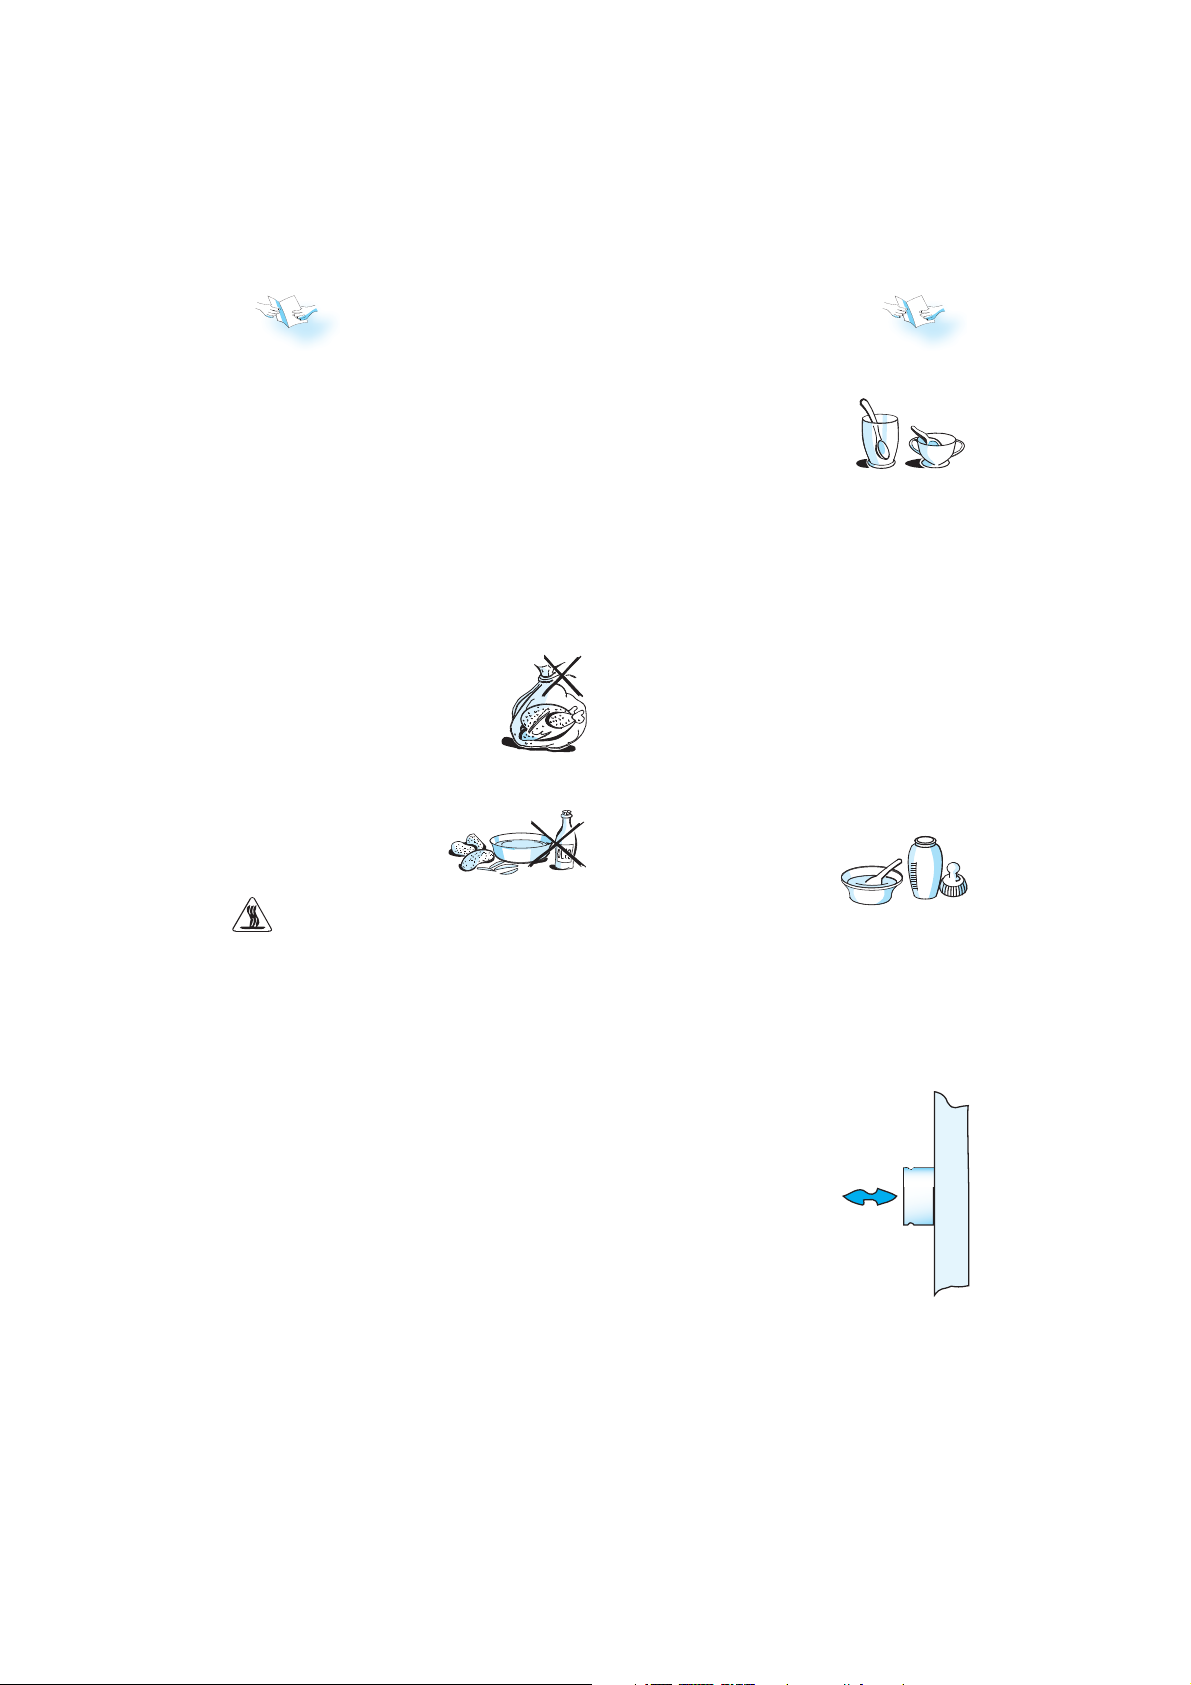
A
FTER HEATING BABY FOOD or liquids in a
baby bottle or in a baby food
jar, always stir and check the
temperature before serving.
This will ensure that the heat is evenly distributed
and the risk of scalding or burns can be avoided.
Ensure the Lid and the Teat is removed before heating!
PUSH PUSH KNOBS
THE KNOBS OF THIS OVEN are aligned with the
buttons on the panel, at delivery. The
knobs will slide out if pushed and their
various functions can be accessed. It
is not necessary to have them
protruding from the panel during operation. Simply
push them back into the panel when
you are done with the setting and continue to operate the oven.
6
Page 7
ACCESSORIES
GENERAL
T
HERE ARE a number of accessories available on
the market. Before you buy, ensure they are
suitable for microwave use.
NSURE THAT THE UTENSILS YOU USE are oven proof
E
and allow microwaves to
pass through them before
cooking.
HEN YOU PUT FOOD AND ACC ESSORIES in the micro-
W
wave oven, ensure that they do not come in
contact with the interior of the oven.
This is especially important with accessories made of metal or metal parts.
I
F ACCESSOR IES CONTAIN ING METAL comes in contact
with the oven interior, while the oven is in operation, sparking can occur and the oven could
be damaged.
A
LWAYS ENSURE that the turntable is able to turn
freely before starting the oven.
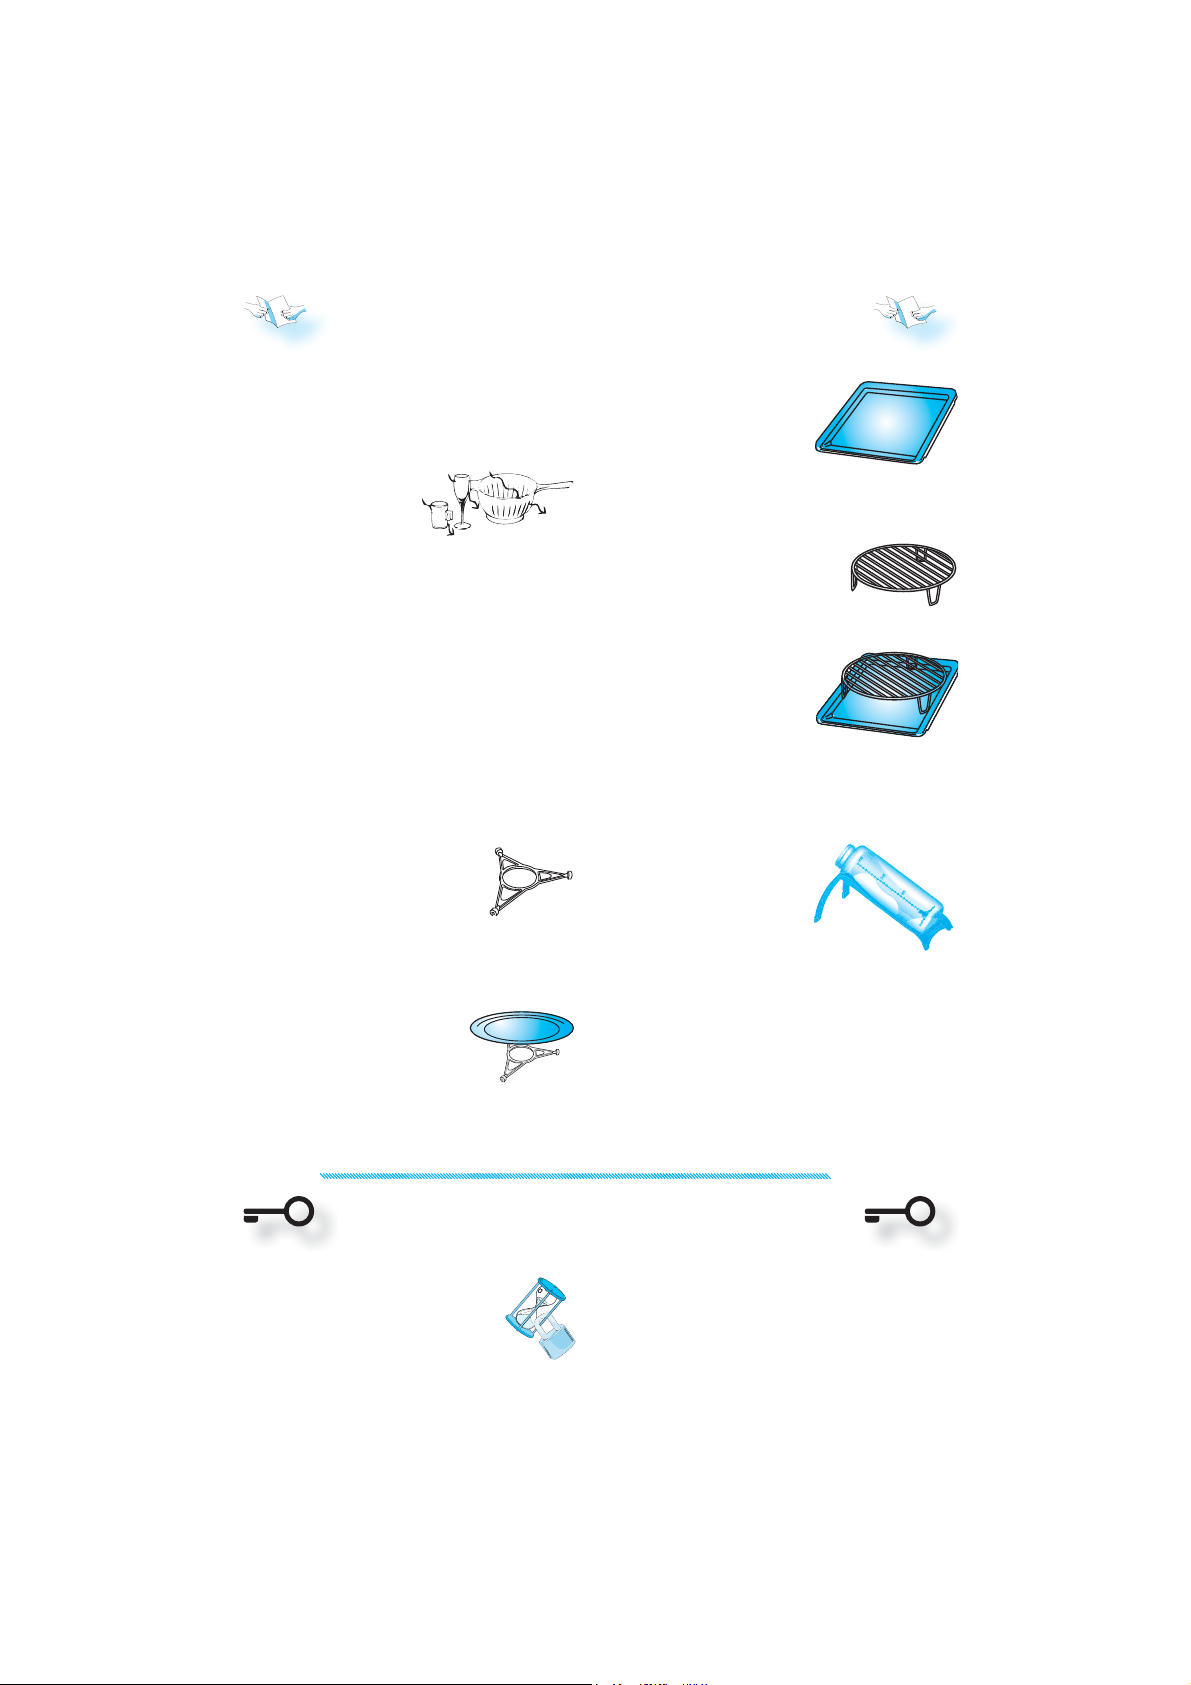
TURNTABLE SUPPORT
USE THE TURNTABLE SUPPORT under the
Glass turntable. Never put any other utensils on the turntable support.
Fit the turntable support in the oven.
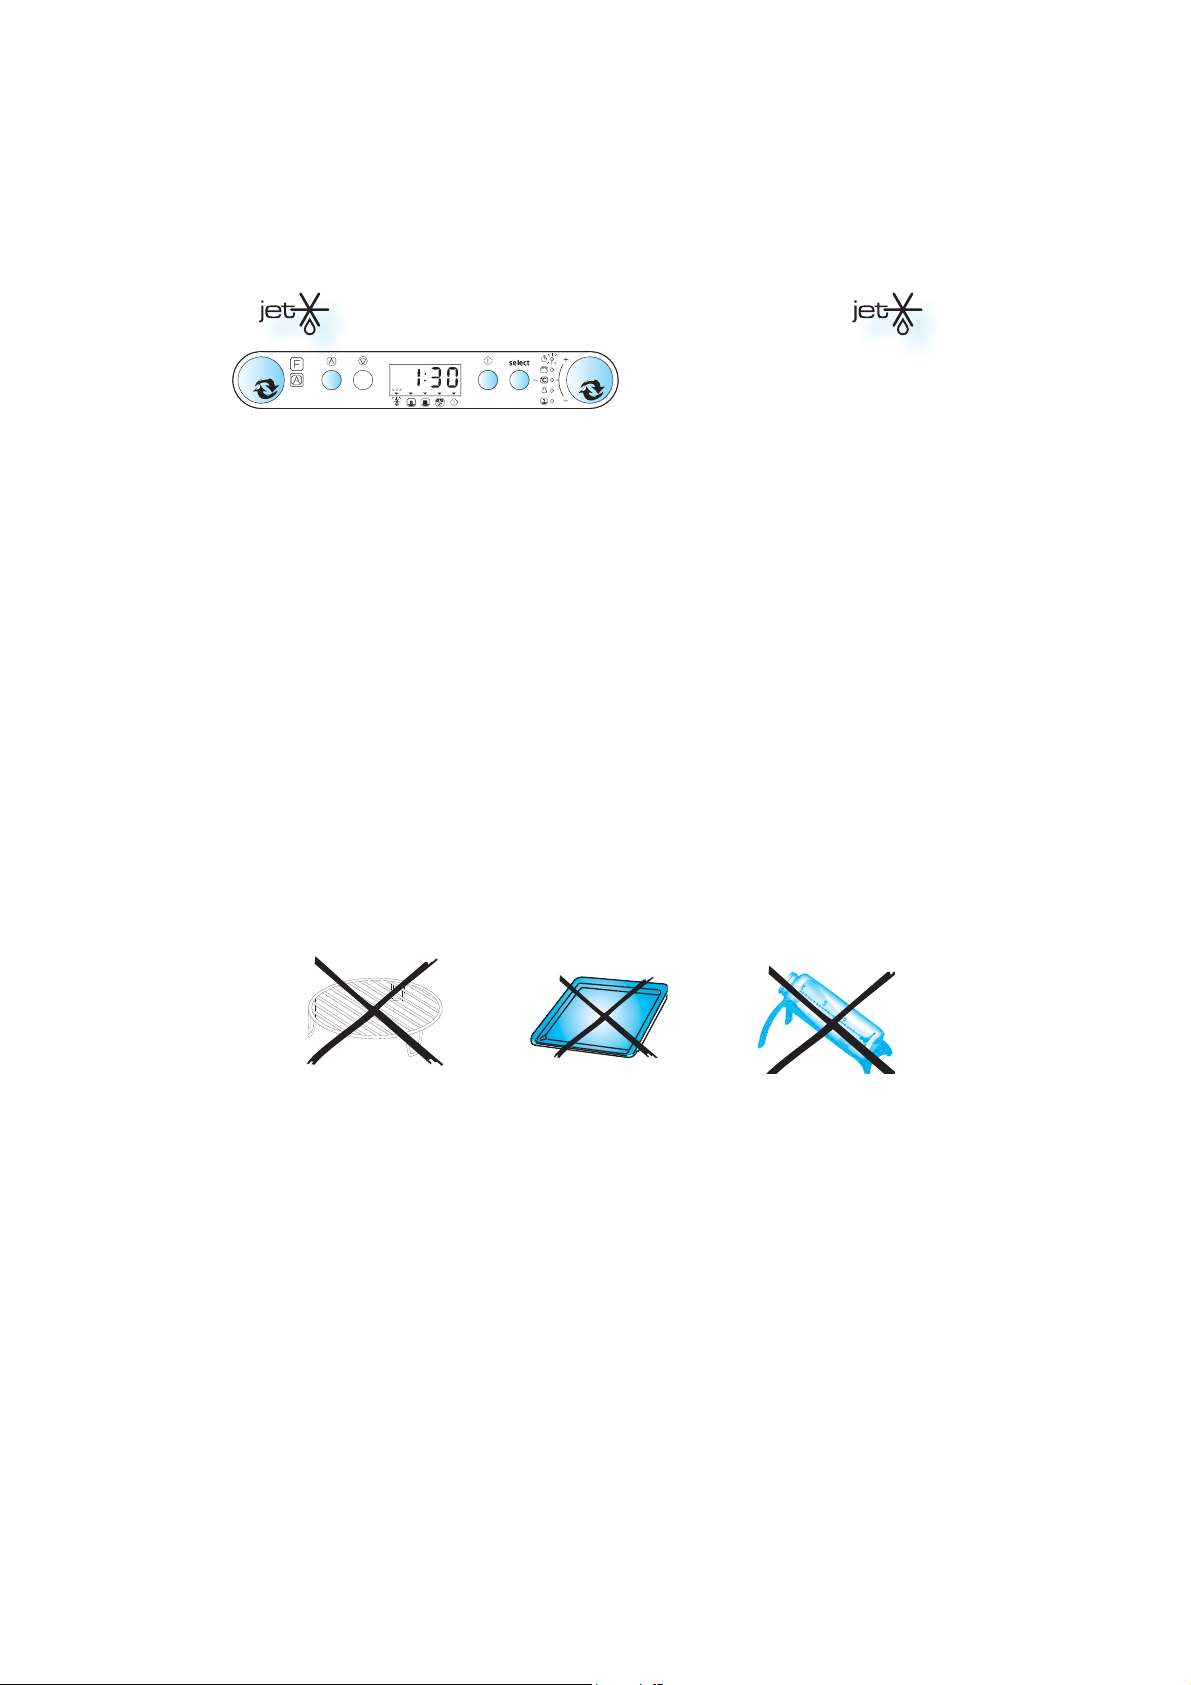
GLASS TURNTABLE
USE THE GLASS TURNTABLE with all cooking methods. It collects the dripping juices and food particles that otherwise would stain and soil the interior of the oven.
Place the Glass turntable on the turntable
support.
BAKING PLATE
USE THE BAKINGPLATE when
cooking in forced air only
or when grilling. Never use
it in combination with microwaves.
WIRE RACK
U
SE THE WIRE RACK when cook-
ing and baking with Forced Air,
Grill, Forced Air Combi, Auto
Forced Air Combi or Turbo Grill Combi.
WHEN GRILLING WITHOUT MICRO-
WAVES, place the wire rack
on the baking plate in order to elevate the food
closer to the grill element
in the ceiling.
BABY BOTTLE HOLDER
SE THE BABY BOTTLE HOLD-
U
ER when heating baby food
in bottles that are too tall
to stand-alone in the oven.
Please see also, the chapter ”Precautions”,
for more information about heating baby food.
START PROTECTION / CHILD LOCK
THIS AUTOMATIC SAFETY FU NCTION IS ACTIVATED ONE
MINUTE AFTER the oven has returned to
“stand by mode“. (The oven is in
“stand by” when the 24-hour clock is
displayed or if the clock has not been
set, when the display is blank).
T
HE DOOR MUST BE OPENED AND CLOSED e.g. putting
food into it, before the safety lock is released.
Else the display will show “DOOR“.
dOOR
7
Page 8
PAUSE OR STOP COOKING
TO PAUSE COO KING:
THE COOKING CAN BE PAUS ED to
check, turn or stir the food
by opening the door. The
setting will be maintained
for 10 minutes.
O CONTIN UE COOKIN G:
T
C
LOSE THE DOOR and press the
Start button ONCE. The cooking is resumed from where it was
paused.
PRESSING THE START BUTTON TWICE will increase the time by 30 seconds.
I
F YOU DON’T WAN T TO CONTINUE COOKING:
REMOVE THE FOOD, close the door
and press the STOP button
BEEP WILL SIGNAL once a minute for 10 min-
A
utes when the cooking is finished. Press the STOP button or open the door to cancel the signal.
NOTE: The oven will only hold the settings for
60 seconds if the door is opened and then
closed after the cooking is finished.
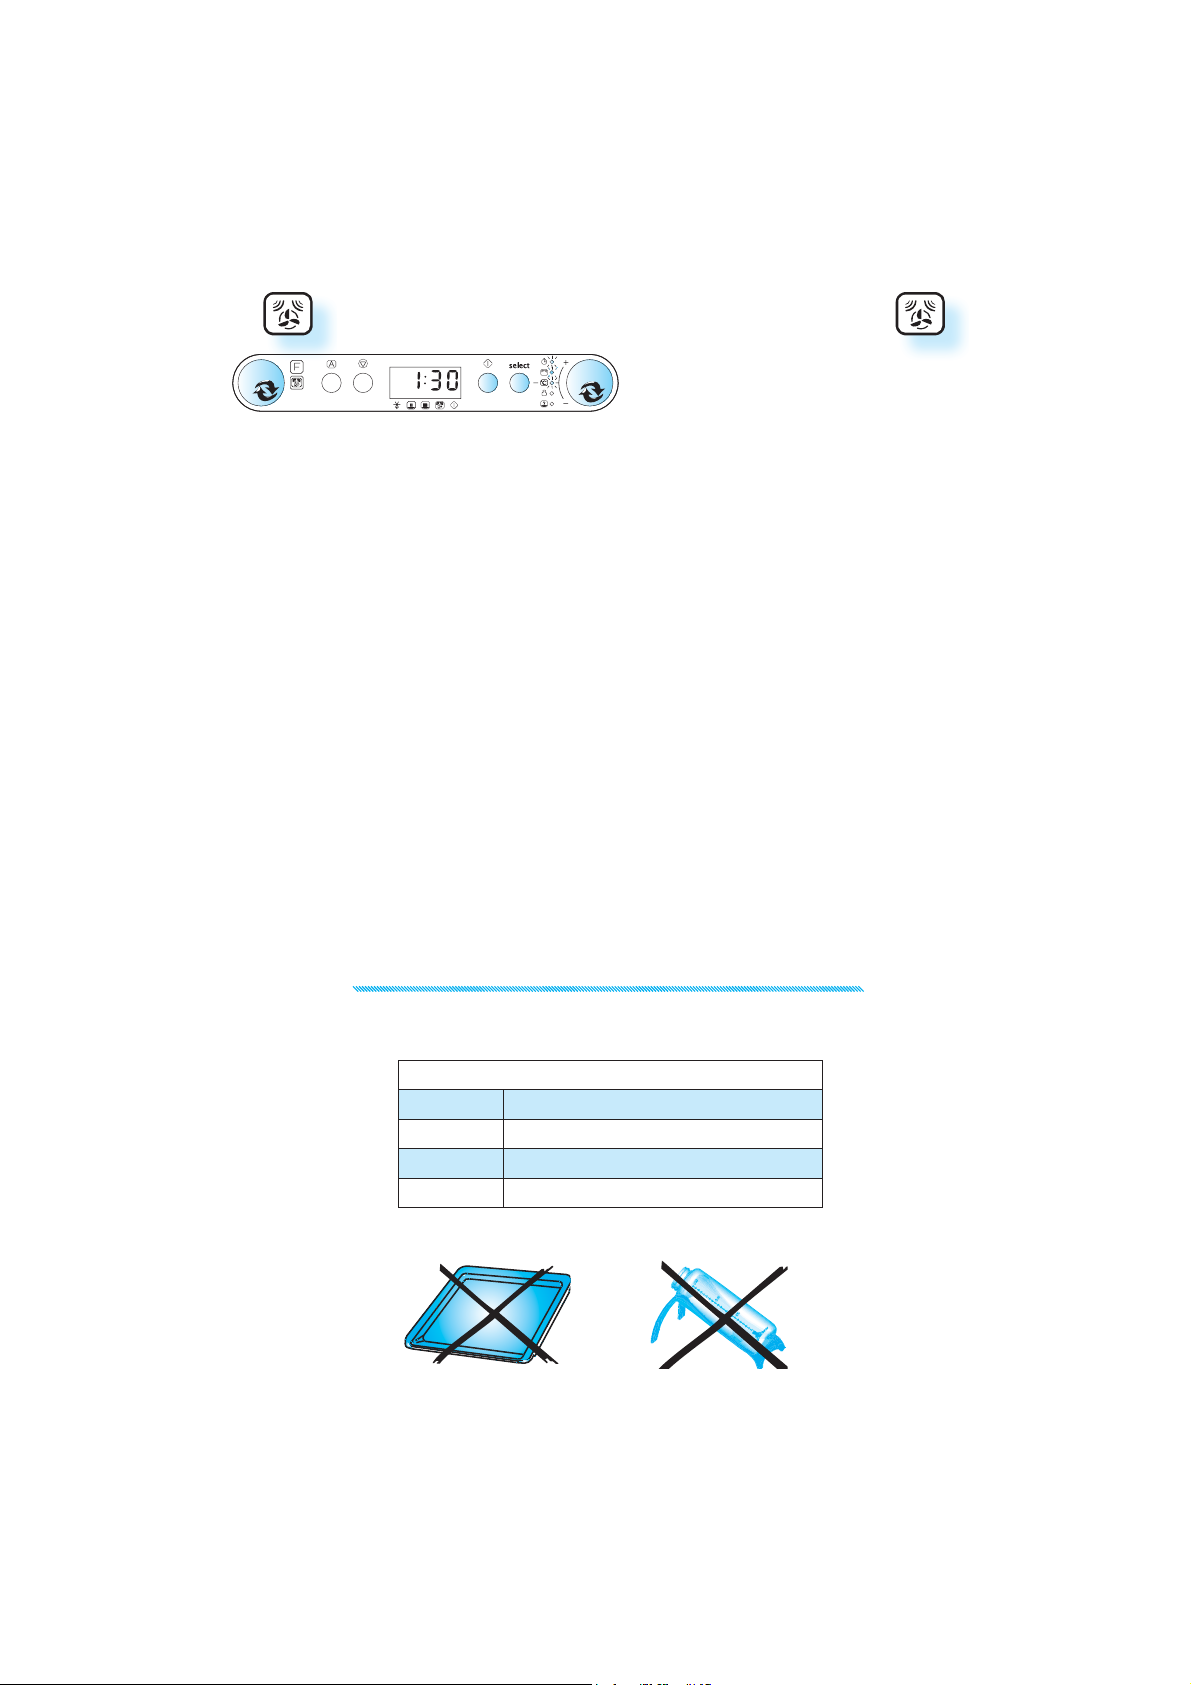
DONENESS
DONENESS IS AVAIL ABLE IN THE FOLLOW ING FUNCTIONS:
AUTO REHEAT
AUTO COOK
AUTO FORCED AIR COMBI
IN THE ABOVE functions, you have the possibili-
ty to personally control the end result through
the Adjust doneness feature. This feature enables you to achieve higher or lower end temperature compared to the default standard
setting.
DONENESS
EVEL EFFECT
L
Hi 2
Hi 1
- - - Lo 1
Lo 2
YIELDS HIGHEST END TEMPERATURE
YIELDS HIGHER END TEMPERATURE
DEFAULT STANDARD SETTING
YIELDS LOWER END TEMPERATURE
YIELDS LOWEST END TEMPERATURE
COOLING DOWN
WHEN A FUNCTION IS FIN ISHED, the oven carries out
a cooling procedure. This is normal.
After this procedure the oven switches off automatically.
8
WHEN USING one of these functions the oven
chooses the default standard setting. This setting normally gives you the best result. But if
the food you heated became too warm to eat
at once, you can easily adjust this before you
use that function the next time. This is done
by selecting a Doneness level with the adjust
knob right after you have pressed the Start
button.
NOTE:
THE DONENESS can only be set or altered during
the first 20 seconds of operation.
THE COOLING PROCED URE can be interrupted without any harm to the oven by opening the door.
Page 9
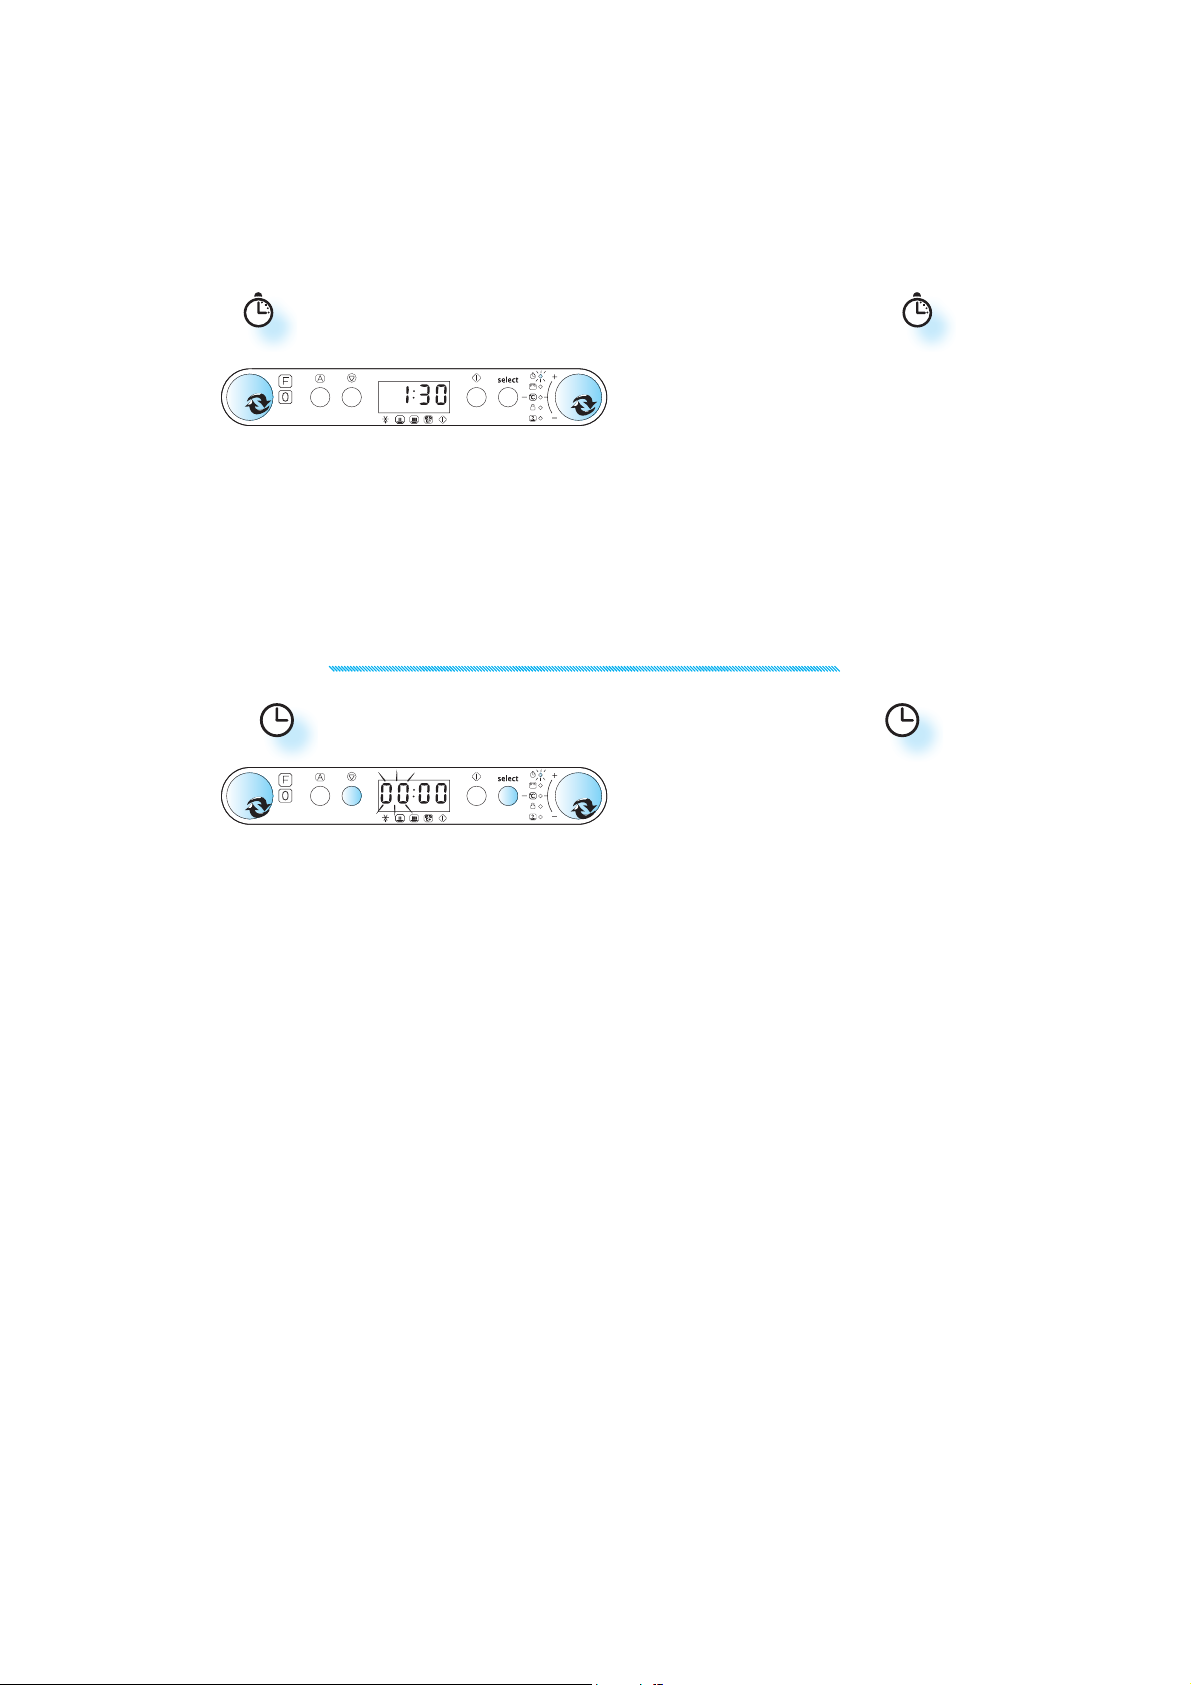
KITCHEN TIMER
USE THIS FUNCTIO N when you need a kitchen
timer to measure exact time for various purposes such as cooking eggs or letting the
TURN THE MULTIFUNCTION KNOB to the zero position.
TURN THE ADJUST KNOB to set the time to measure.
T
HE TIMER AUTOMATI CALLY STARTS the countdown after 1 second.
AN ACOUSTI C SIGNAL will be heard when the timer has finished to
count down.
dough rise before baking etc.
CLOCK
WHEN THE APPLIANCE IS FIRST PLUGGED IN or after a power failure, the display is blank. If
the clock is not set, the display will remain
blank until the cooking time is set.
TURN THE MULTIFUNCTION KNOB to the zero position.
PRESS THE SELECT BUTTON (3 seconds) until the left-hand digit
(hour’s) flicker.
TURN THE ADJUST KNOB to set the hours.
PRESS THE SELECT BUTTON again. (The two right hand digits (min-
utes) flicker).
TURN THE ADJUST KNOB to set the minutes.
PRESS THE SELECT BUTTON again.
T
HE CLOCK IS SET and in operation.
IF YOU WISH TO REMOVE THE CLOCK from the display once it has been set,
simply press the Select button again for 3 seconds and then press
the Stop button.
TO REINSTATE THE CLOCK, follow the above procedure.
NOTE: KEEP THE DOOR OPEN WHILE SETTING THE CLOCK. This gives you 10
minutes to complete the setting of the Clock. Otherwise, each step
must be accomplished within 60 seconds.
9
Page 10
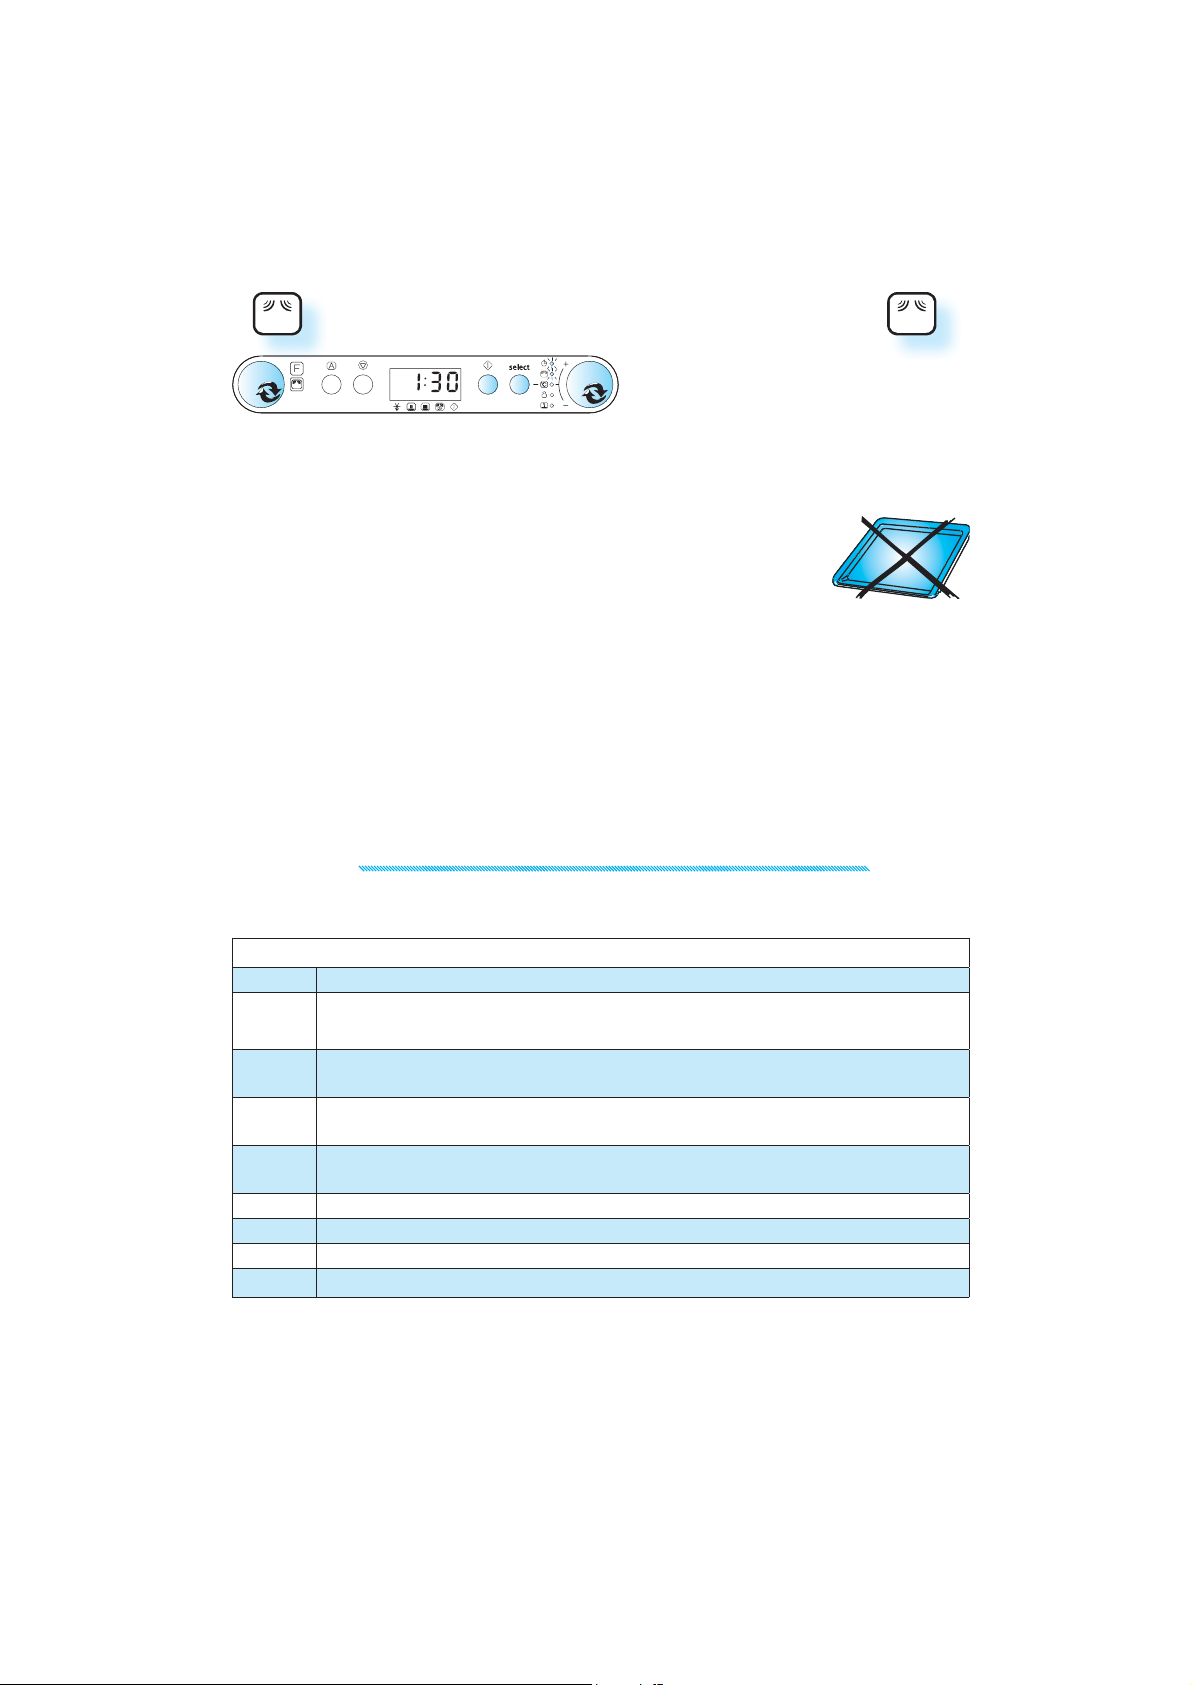
COOK & REHEAT WITH MICROWAVES
USE THIS FUNCTIO N for normal cooking and reheating, such as vegetables, fish, potatoes
and meat.
TURN THE MULTIFUNCTION KNOB to the microwave position.
TURN THE ADJUST KNOB to set the cooking time.
PRESS THE SELECT BUTTON to select power level.
TURN THE ADJUST KNOB to set the preferred power level.
PRESS THE START BUTTON.
NCE THE COOKIN G PROCESS HAS BEEN STARTED:
O
The time can easily be increased in 30-second steps by pressing
the Start button. Each press increases the time with 30 seconds.
You may also alter the time by turning the adjust knob to increase
or decrease the time.
BY PRESSING THE SELECT BUTTON you may switch between cooking
time and power level. Both can be altered during cooking by turning the adjust knob after selection.
CHOOSING POWER LEVEL
MICROWAVES ONLY
P
OWER SUGGESTED USE:
J
ET
(900 W)
REHEATING OF BEVERAGES, water, clear soups, coffee, tea or other food with a high water
content. If the food contains egg or cream choose a lower power.
750 W C
650 W C
500 W
350 W S
160 W D
90 W K
0 W SETTING the standing time.
10
OOKING OF fish, meat, vegetables etc.
OOKING dishes not possible to stir.
ORE CAREFUL COOKING e.g. high protein sauces, cheese and egg dishes and to finish
M
cooking casseroles.
IMMERING STEWS, melting butter.
EFROSTING. Softening butter, cheeses.
EEP WARM
Page 11
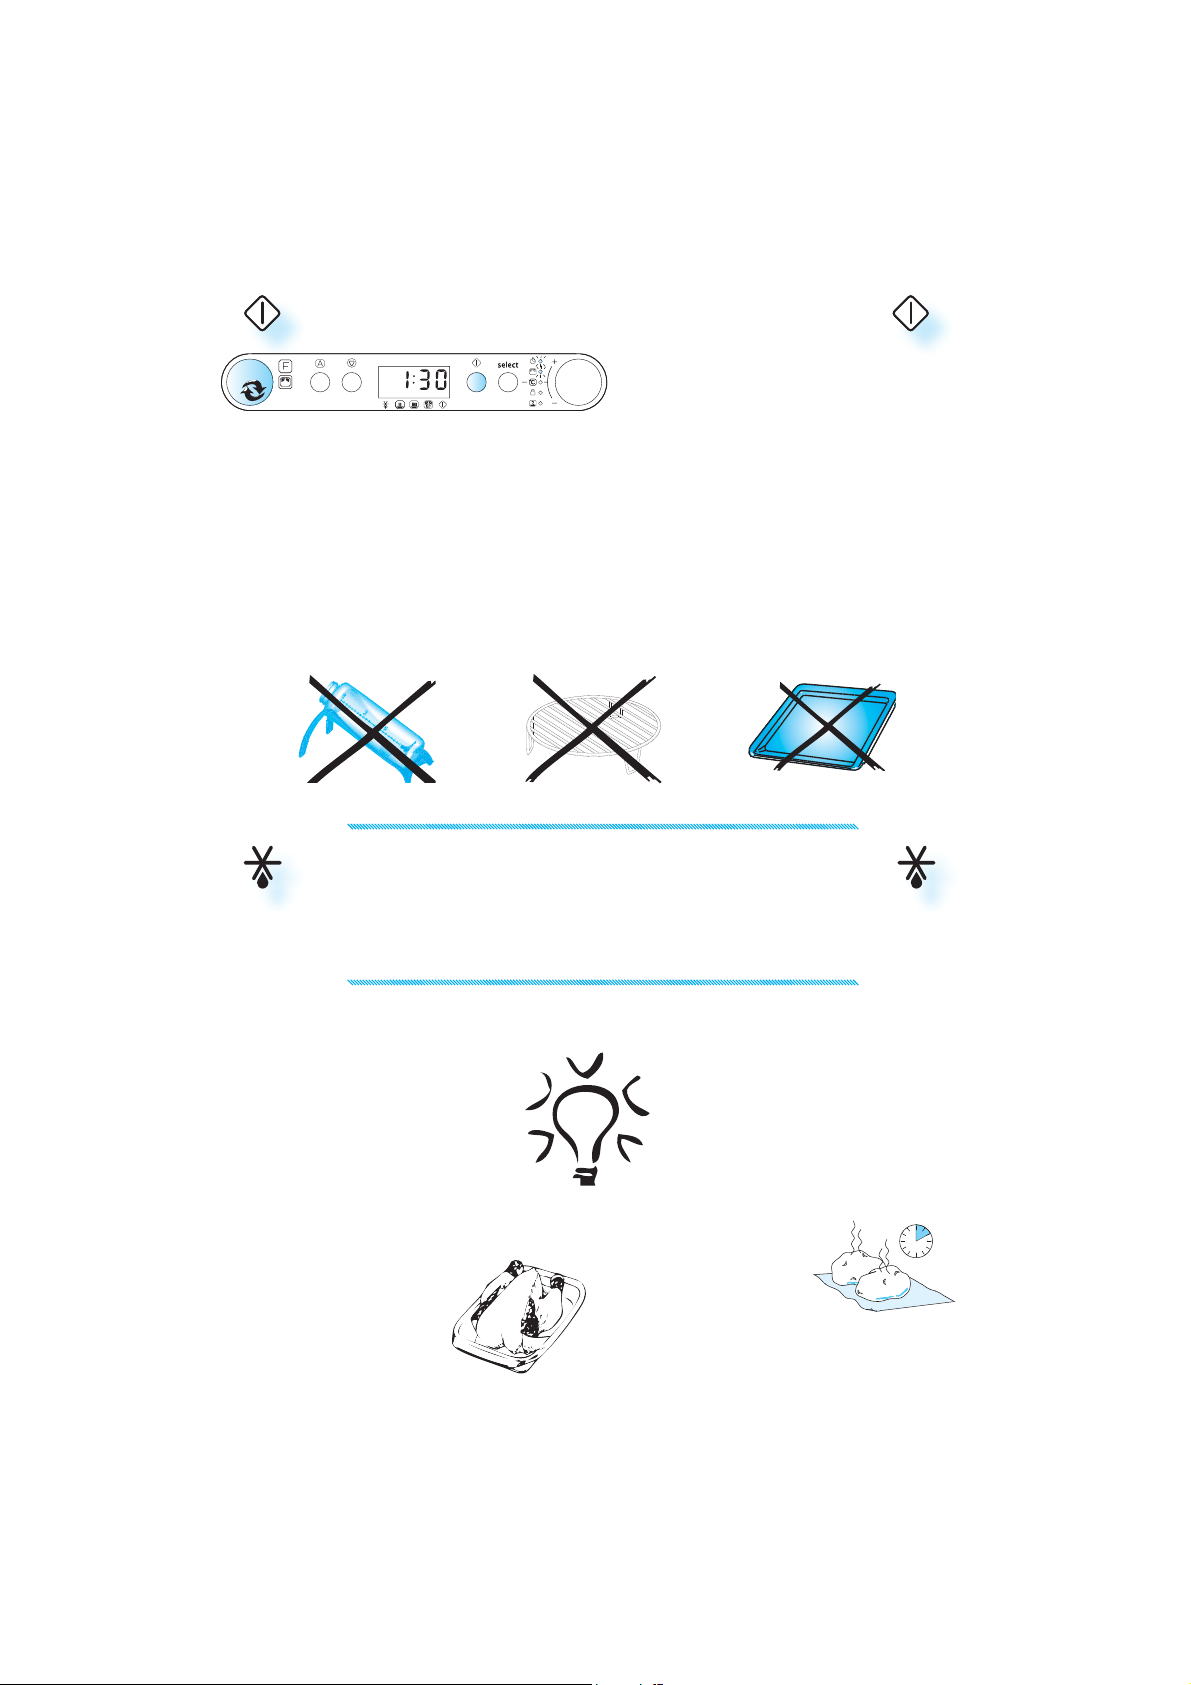
JET START
THIS FUNCTION IS USED for quick reheating of
food with a high water content such as clear
soups, coffee or tea.
TURN THE MULTIFUNCTION KNOB to the microwave position.
PRESS THE START BUTTON.
THIS FUNCTION AUTO MATICALLY STARTS with maximum microwave power
level and the cooking time set to 30 seconds. Each additional press
increases the time with 30 seconds. You may also alter the time by
turning the adjust knob to increase or decrease the time after the
function has started.
MANUAL DEFROST
FOLLOW THE PROCEDURE for “cook & reheat with
microwaves” and choose power level 160 W
when defrosting manually.
FROZEN FOOD IN PLASTIC BAGS, plastic films or cardboard packages can be placed directly in the
oven as long as the package has no metal parts (e.g. metal twist ties).
T
HE SHAPE OF THE PACKAG E alters the de-
frosting time. Shallow packets defrost
more quickly than a deep block.
EPARATE PIECES as they begin to defrost.
S
Individual slices defrost more easily.
S
HIELD AREAS OF FOOD with small
pieces of aluminum foil if they
start to become warm (e.g.
chicken legs and wing tips).
CHECK AND INSPECT THE FOOD REGULARLY. Experi-
ence will give you the times needed for various amounts.
URN LARGE JOINTS halfway through the defrost-
T
ing process.
B
OILED FOOD, STEWS AND MEAT SAUCES defrost
better if stirred during defrosting time.
W
HEN DEFROSTING it is better to under-
thaw the food slightly and allow the
process to finish during standing time.
S
TAN DIN G TIME AFTER DEFROSTING ALWAYS IMPROVES
the result since the temperature will then be evenly distributed throughout
the food.
11
Page 12
JET DEFROST
TURN THE MULTIFUNCTION KNOB to the Auto position.
PRESS THE AUTO BUTTON to select the desired auto function.
TURN THE ADJUST KNOB to choose desired food class.
PRESS THE SELECT BUTTON (DEFAULT WEIG HT IS DISPLAYED).
TURN THE ADJUST KNOB to set the weight of the food.
PRESS THE START BUTTON.
IDWAY THROUGH THE DEFROSTING PROCESS the oven stops and prompts
M
you to TURN FOOD.
Open the door.
Turn the food.
Close the door and restart by pressing the Start button.
N
OTE: The oven continues automatically after 2 min. if the food
hasn’t been turned. The defrosting time will be longer in this case.
USE THIS FUNCTIO N only if the net weight is between 100 g- 3 Kg.
ALWAYS PLACE THE FOOD on the glass turntable.
12
Page 13
JET DEFROST
THIS FUNCTION NEEDS TO KNOW the net weight of the food.
FROZEN FOODS:
I
F THE WEIGHT IS LESSER OR GREATER THAN REC-
OMMENDED WEIGHT: Follow the procedure
for “Cook & Reheat with microwaves”
and choose 160 W when defrosting.
FOOD AMOUNT HINTS
FROZEN FOODS:
F THE FOOD IS WARMER than deep-freeze
I
temperature (-18°C), choose lower
weight of the food.
IF THE FOOD IS COLD ER than deep-freeze
temperature (-18°C), choose higher
weight of the food.
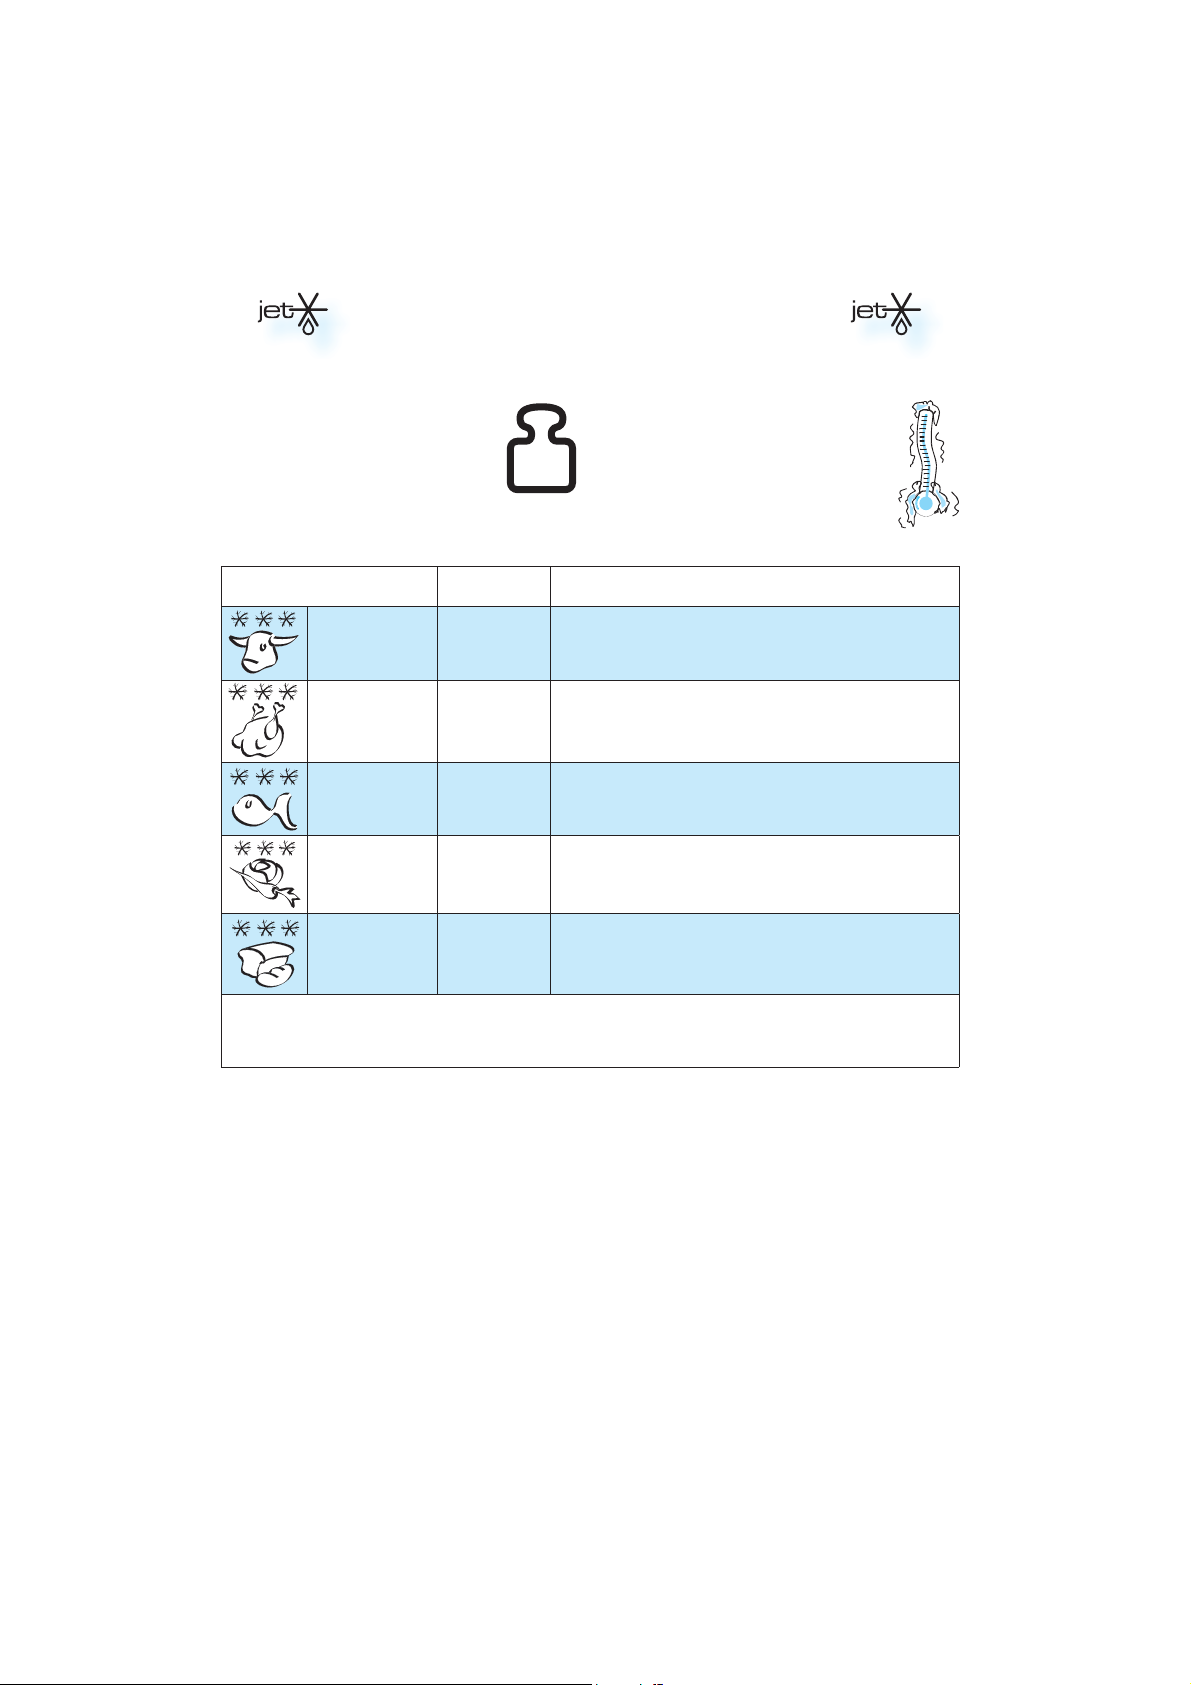
MEAT
POULTRY
FISH
VEGETABLES
BREAD
F
OR FOOD NOT LISTED IN THIS TABL E and if the weight is lesser or greater than recommended weight,
you should follow the procedure for “Cook and reheat with microwaves” and choose 160 W when
defrosting.
100 G - 2KG Minced meat, cutlets, steaks or roasts.
G - 3KG Chicken whole, pieces or fi llets.
100
G - 2KG Whole, steaks or fi llets.
100
G - 2KG Mixed vegetables, peas, broccoli etc.
100
G - 2KG Loaf, buns or rolls.
100
13
Page 14
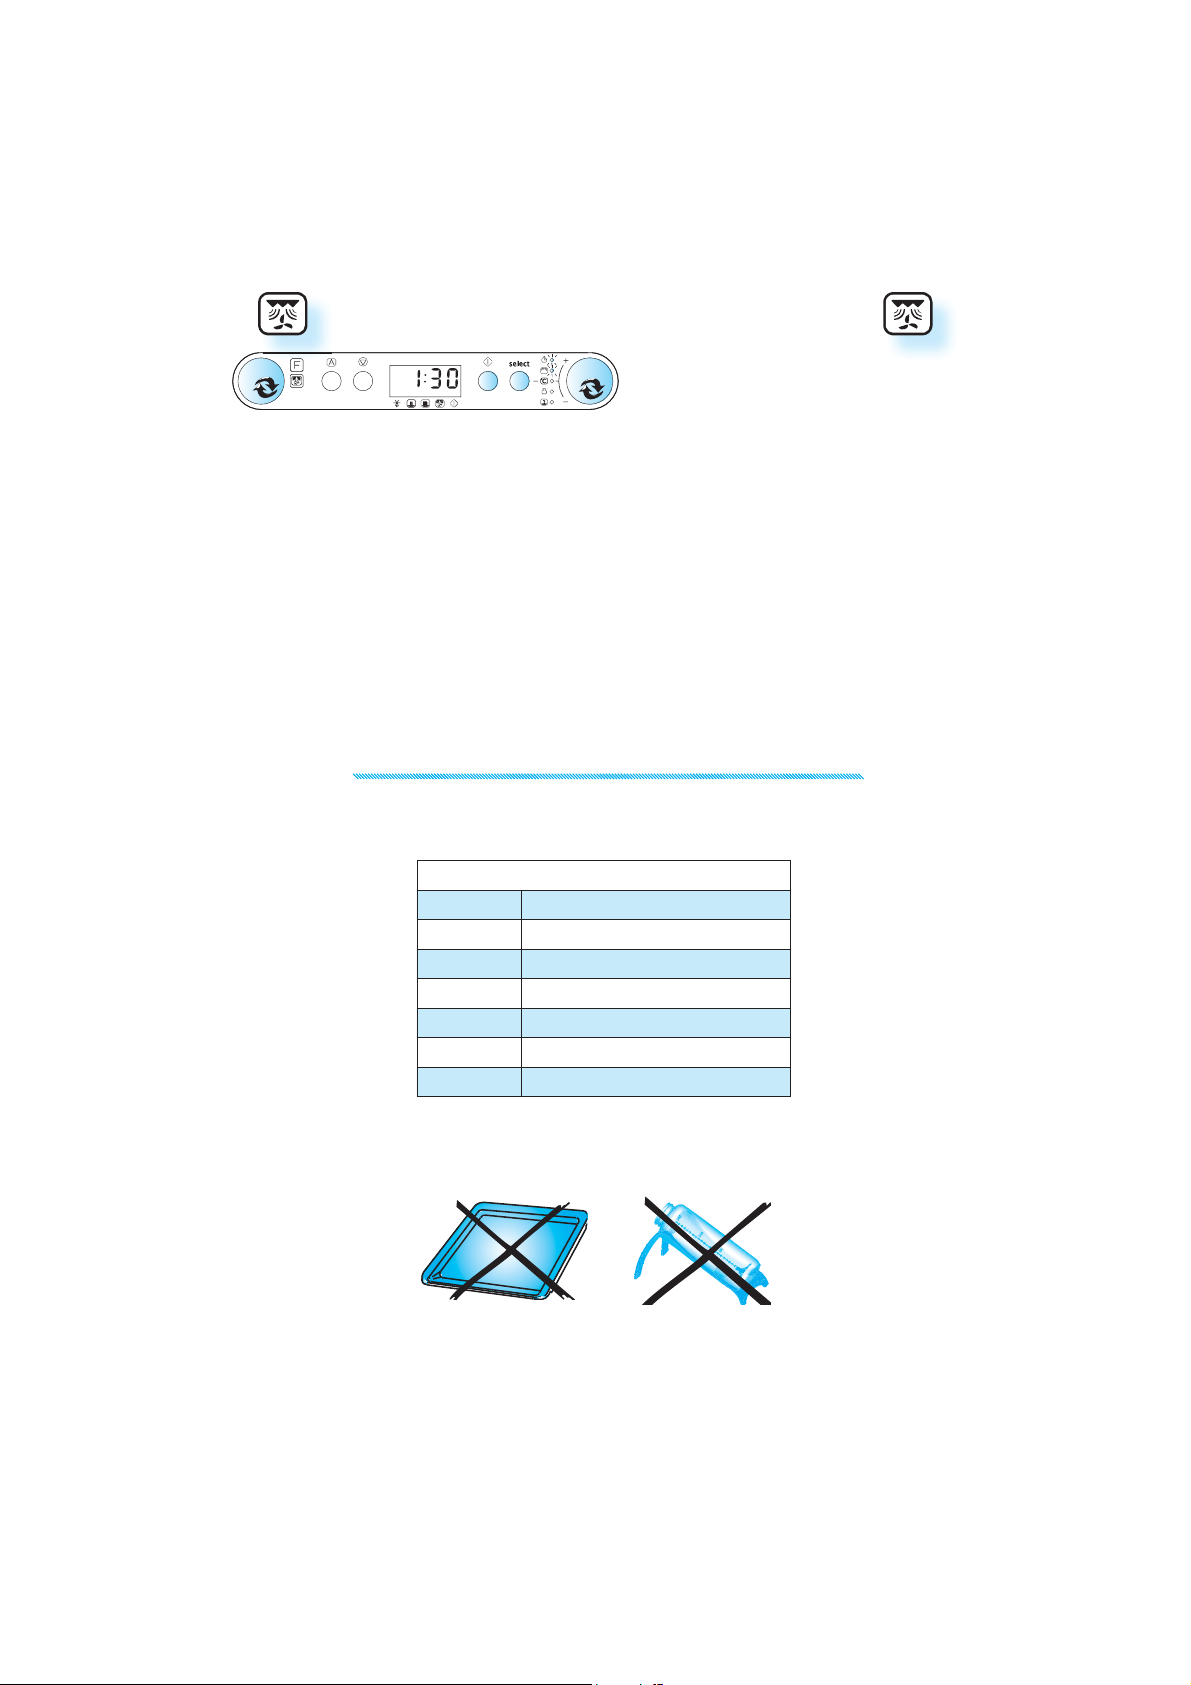
TURN THE MULTIFUNCTION KNOB to the grill position.
TURN THE ADJUST KNOB to set the cooking time.
PRESS THE START BUTTON.
O NOT LEAVE THE OVEN DOOR OPEN for long periods when the Grill is in
D
operation, as this will cause a drop in temperature.
ENSURE THAT THE UTENSILS used are heat resistant and ovenproof before grilling with them.
D
O NOT USE PLASTIC utensils when grilling. They will melt. Items of
wood or paper are not suitable either.
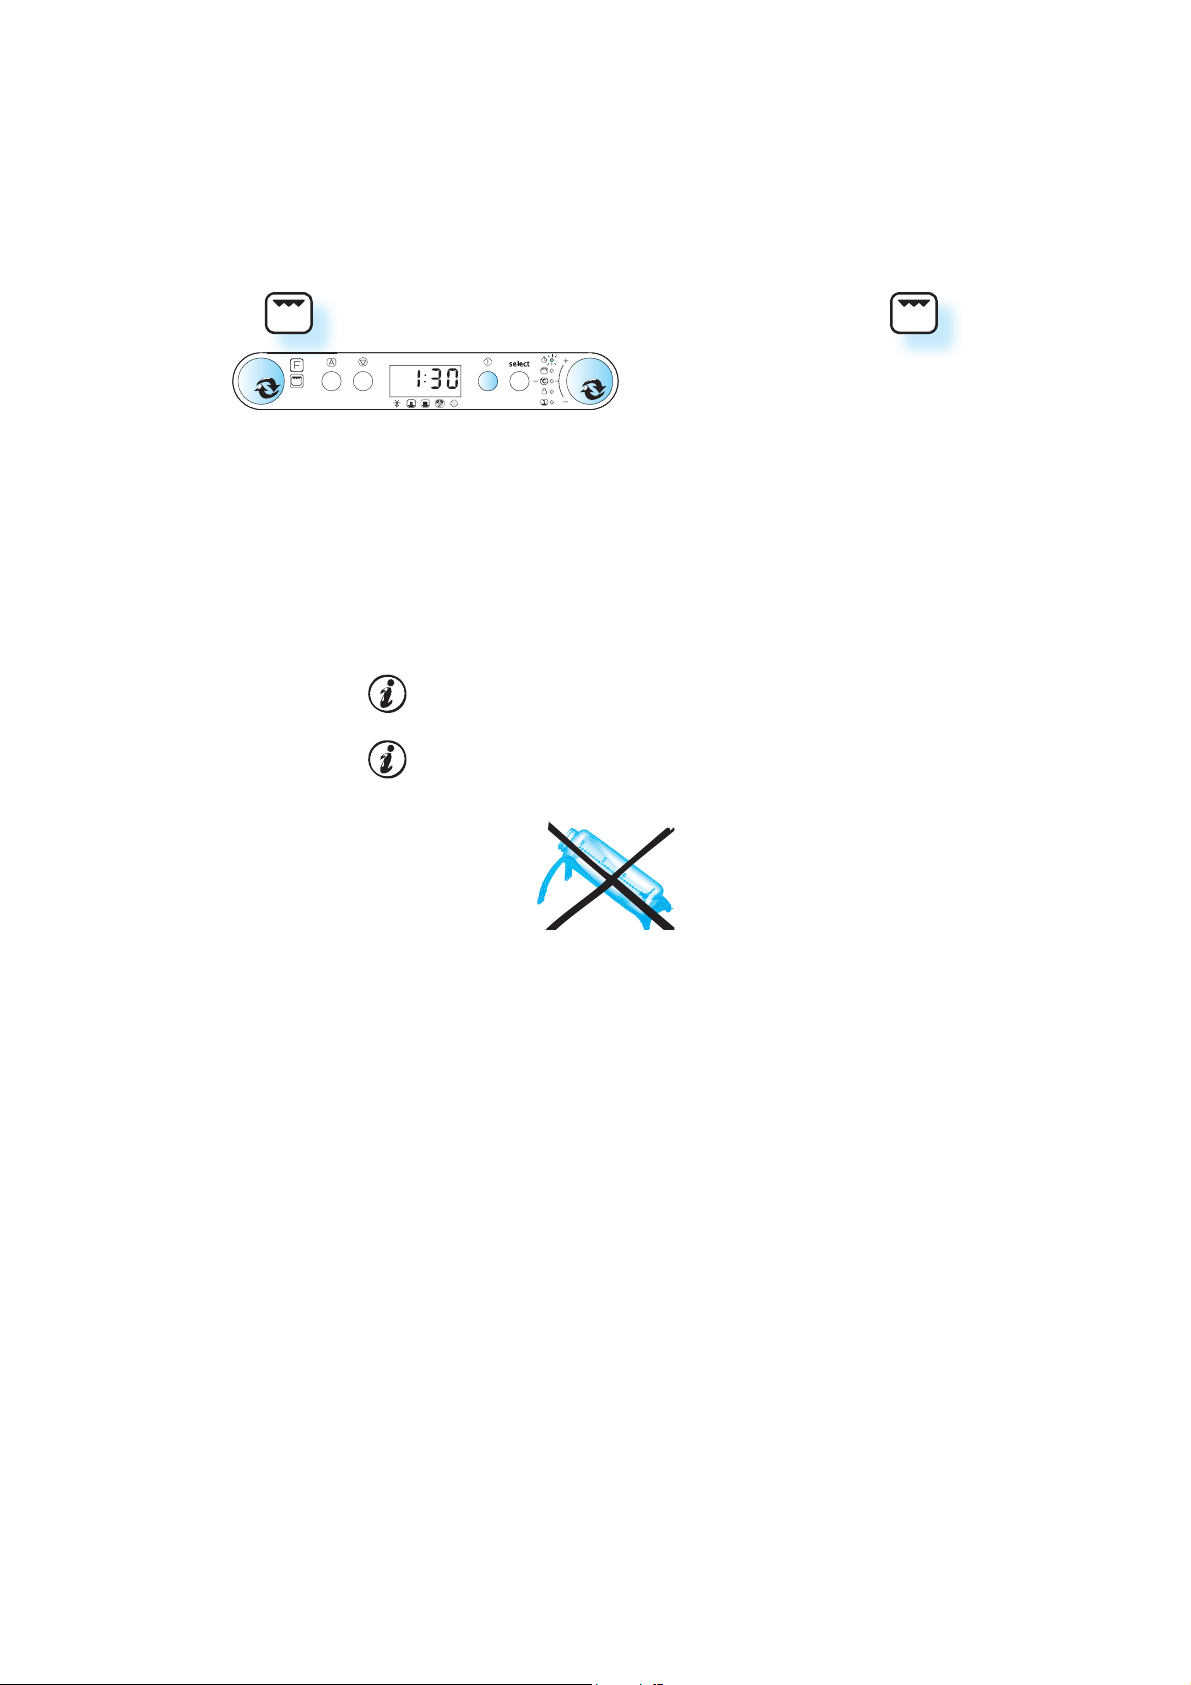
GRILL
USE THIS FUNCTIO N TO quickly give a pleasant
brown surface to the food.
FOR FOOD LIKE CHEESE, TOAST, STEAKS AND SAUSAG-
ES, place the wire grid on top of the bak-
ing plate.
14
Page 15
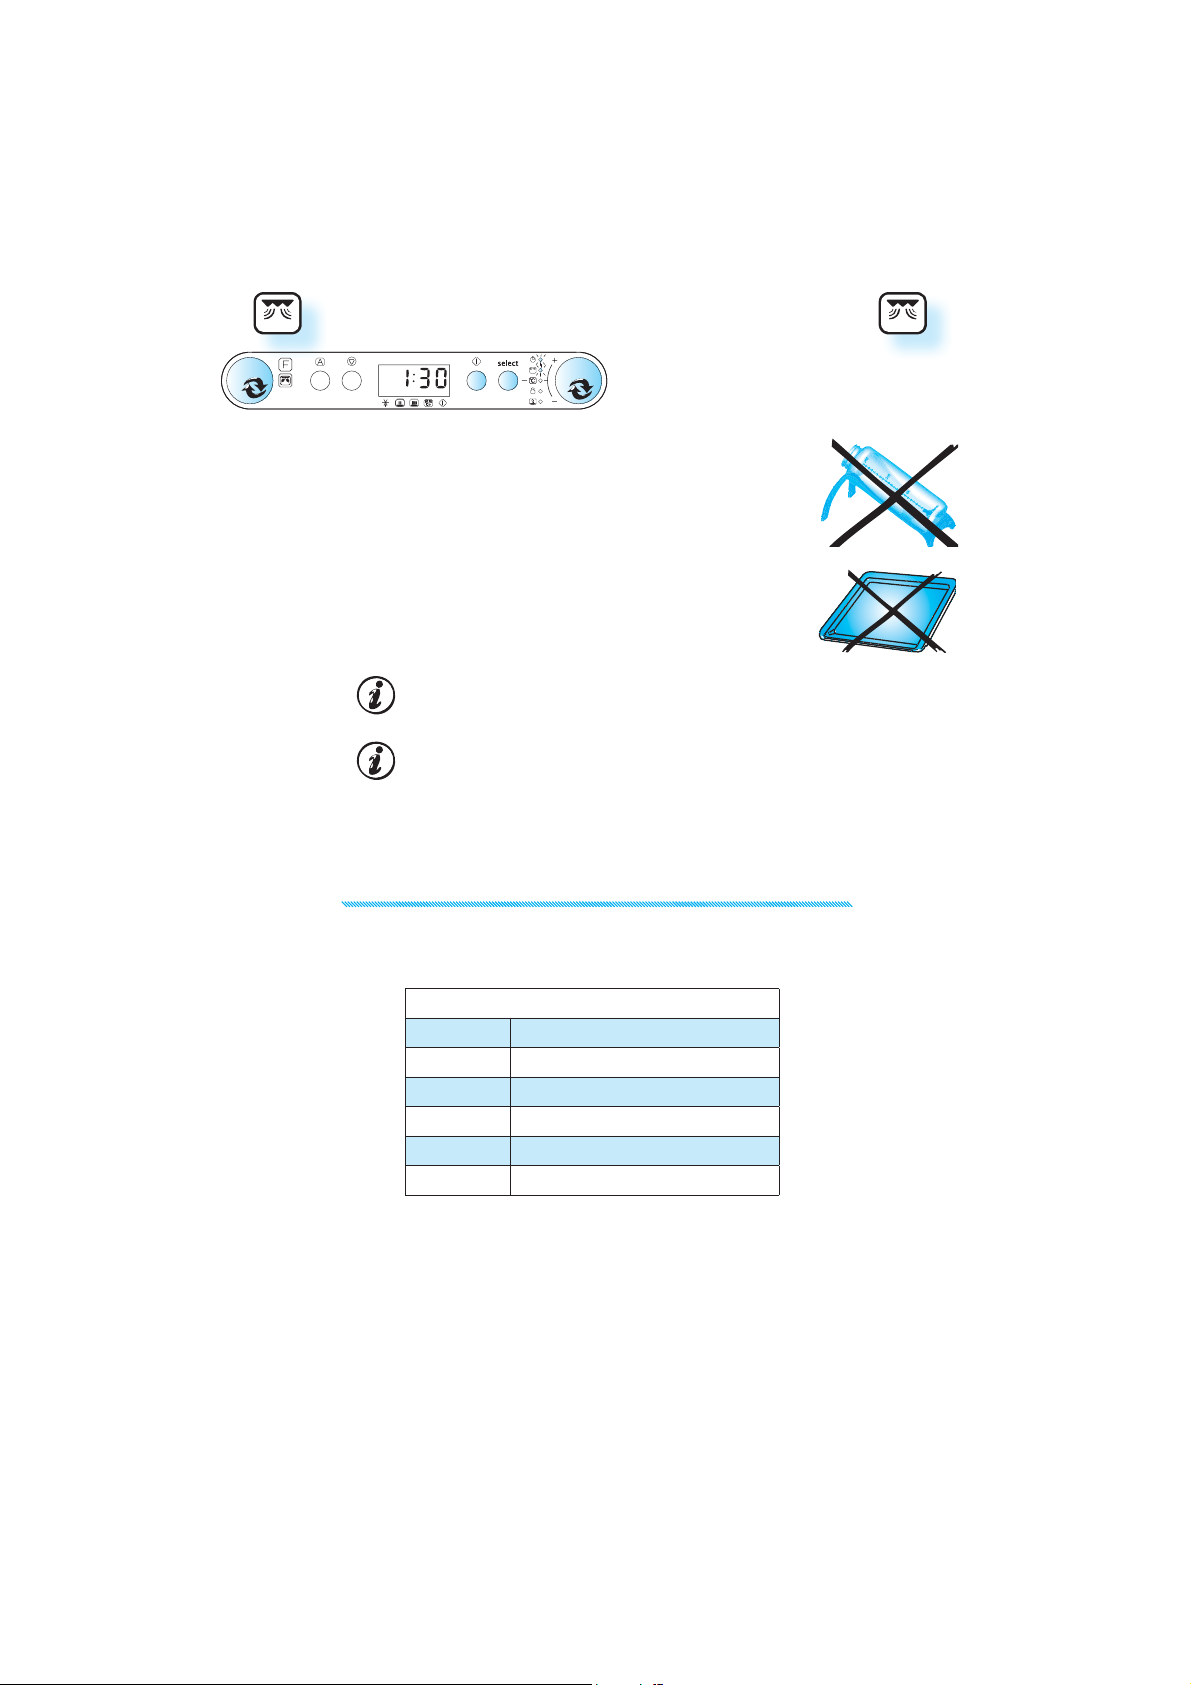
GRILL COMBI
USE THIS FUNCTIO N TO quickly give a pleasant
brown surface to the food at the same time
as the food is cooked by the microwaves.
TURN THE MULTIFUNCTION KNOB to the Grill Combi position.
TURN THE ADJUST KNOB to set the power level.
PRESS THE SELECT BUTTON to select cooking time.
TURN THE ADJUST KNOB to set the cooking time.
PRESS THE START BUTTON.
E
NSURE THAT THE UTENSILS used are heat resistant and ovenproof be-
fore grilling with them.
D
O NOT USE PLASTIC utensils when grilling. They will melt. Items of
wood or paper are not suitable either.
HE MAX. POSSIBLE MICROWAVE POWER LEVEL when using the Grill is limit-
T
ed to a factory-preset level.
USE THE WIRE RACK to put food on to allow the air to circulate proper-
ly around the food.
CHOOSING POWER LEVEL
GRILL COMBI
OWER SUGGESTED USE:
P
650 W C
350 - 500 W C
160 - 350 W C
160 W C
90 W G
OOKING Vegetables & Gratins
OOKING Poultry & Lasagne
OOKING Fish & frozen gratins
OOKING Meat
RATINATING fruit
15
Page 16
TURBO GRILL COMBI
TURN THE MULTIFUNCTION KNOB to the Turbo Grill position.
TURN THE ADJUST KNOB to set the power level.
PRESS THE SELECT BUTTON to select cooking time.
TURN THE ADJUST KNOB to set the cooking time.
PRESS THE START BUTTON.
T
HE MAX. POSSIBLE MICROWAVE POWER LEVEL when using the Grill is limit-
ed to a factory-preset level.
CHOOSING POWER LEVEL
TURBOGRILL COMBI
OWER SUGGESTED USE:
P
650 W C
350 - 500 W C
160 - 350 W C
160 W C
90 W G
0 W B
OOKING Vegetables & Gratins
OOKING Poultry & Lasagne
OOKING Fish & frozen gratins
OOKING Meat
RATINATING fruit
ROWNING only during cooking
USE THIS FUNCTIO N TO cook such food as Gra-
tin’s, Lasagne, Poultry and Baked potatoes.
PLACE FOOD ON THE WIRE RACK or on the glass
turntable when cooking with this function.
16
Page 17
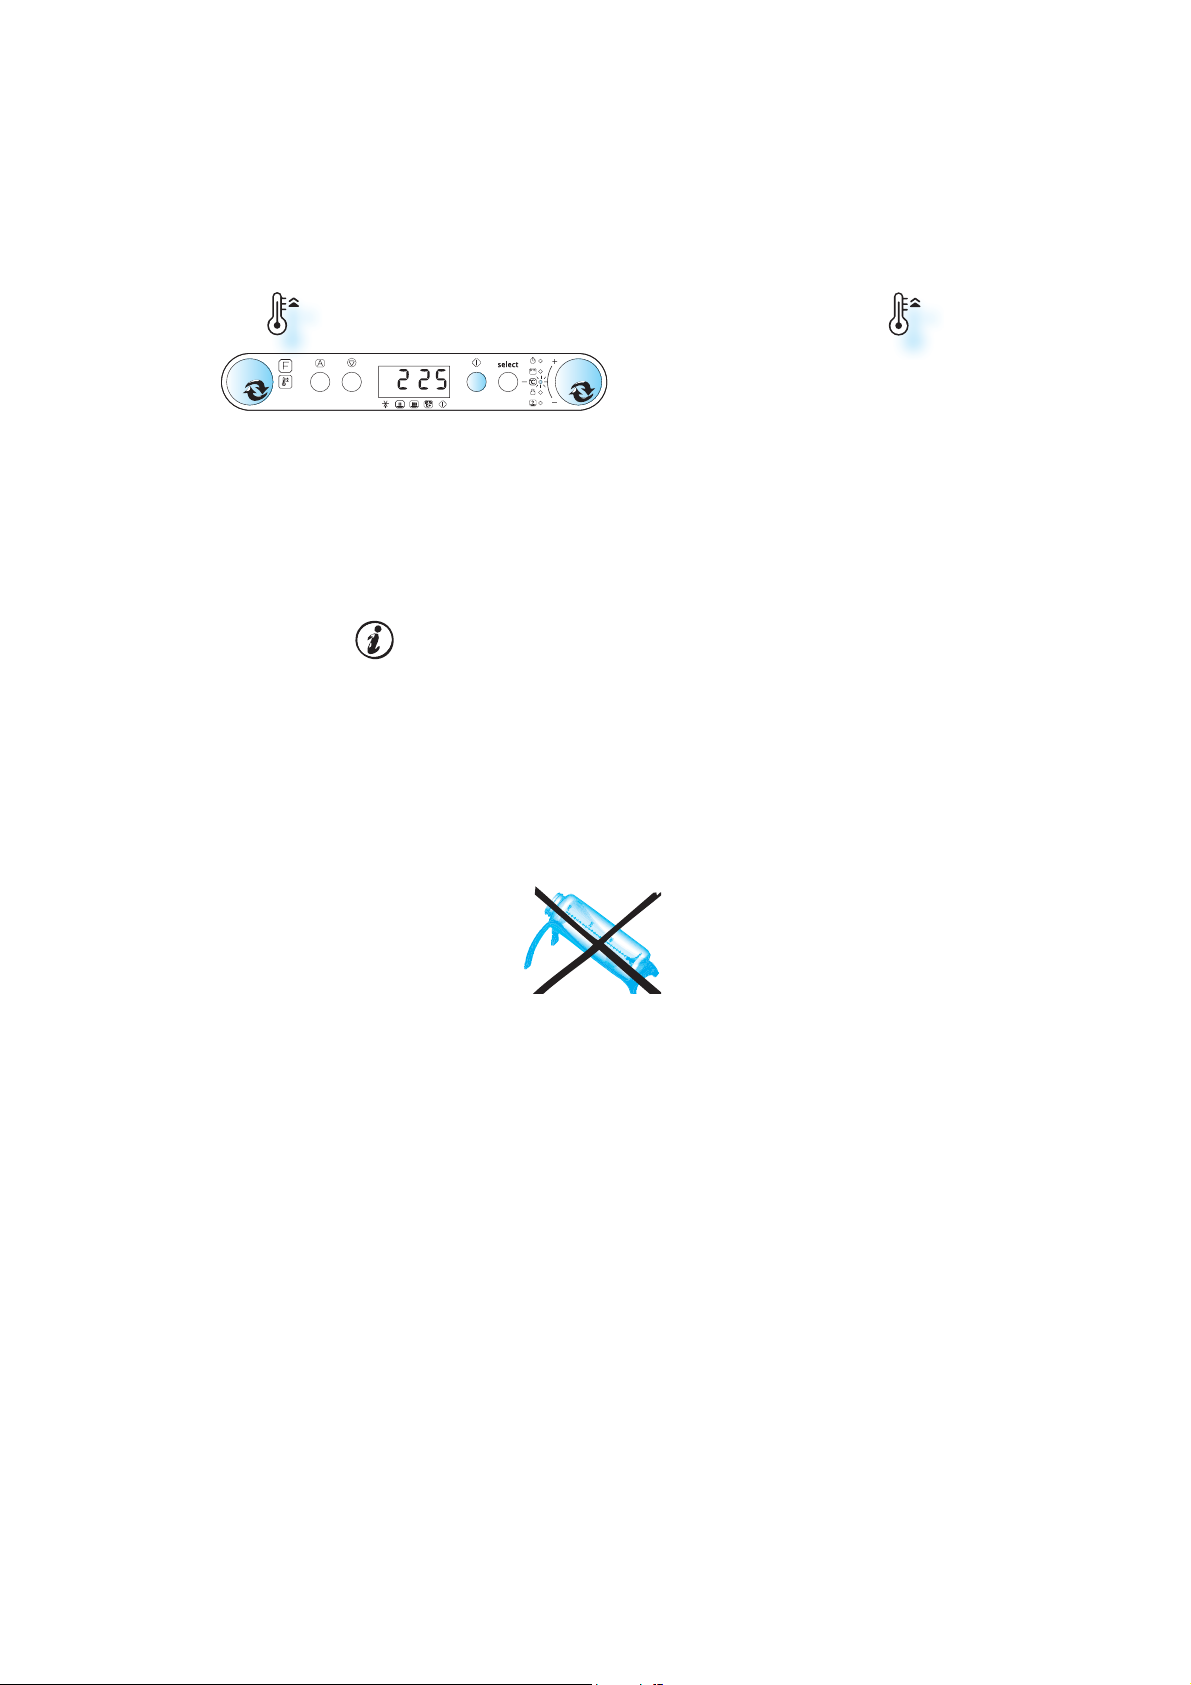
QUICK HEAT
TURN THE MULTIFUNCTION KNOB to the Quick heat position.
TURN THE ADJUST KNOB to set the temperature.
PRESS THE START BUTTON.
URING THE HEATING PROCESS the digits flicker and PRE- HEAT is
D
displayed at intervals until the set temperature is reached.
O
NCE THE HEATING PROCESS has been started the temperature can easily
be adjusted by turning the multifunction knob.
T
HE OVEN THEN KEEPS the set temperature for 10 minutes before switch-
ing off. During this time, it is waiting for you to, insert food and
choose a Forced Air function to begin cooking.
P
REHEATING is always done with the oven empty.
USE THIS FUNCTIO N to preheat the empty oven.
O NOT PLACE FOOD before or during preheat-
D
ing in the oven. It will be burned from the
intense heat.
17
Page 18
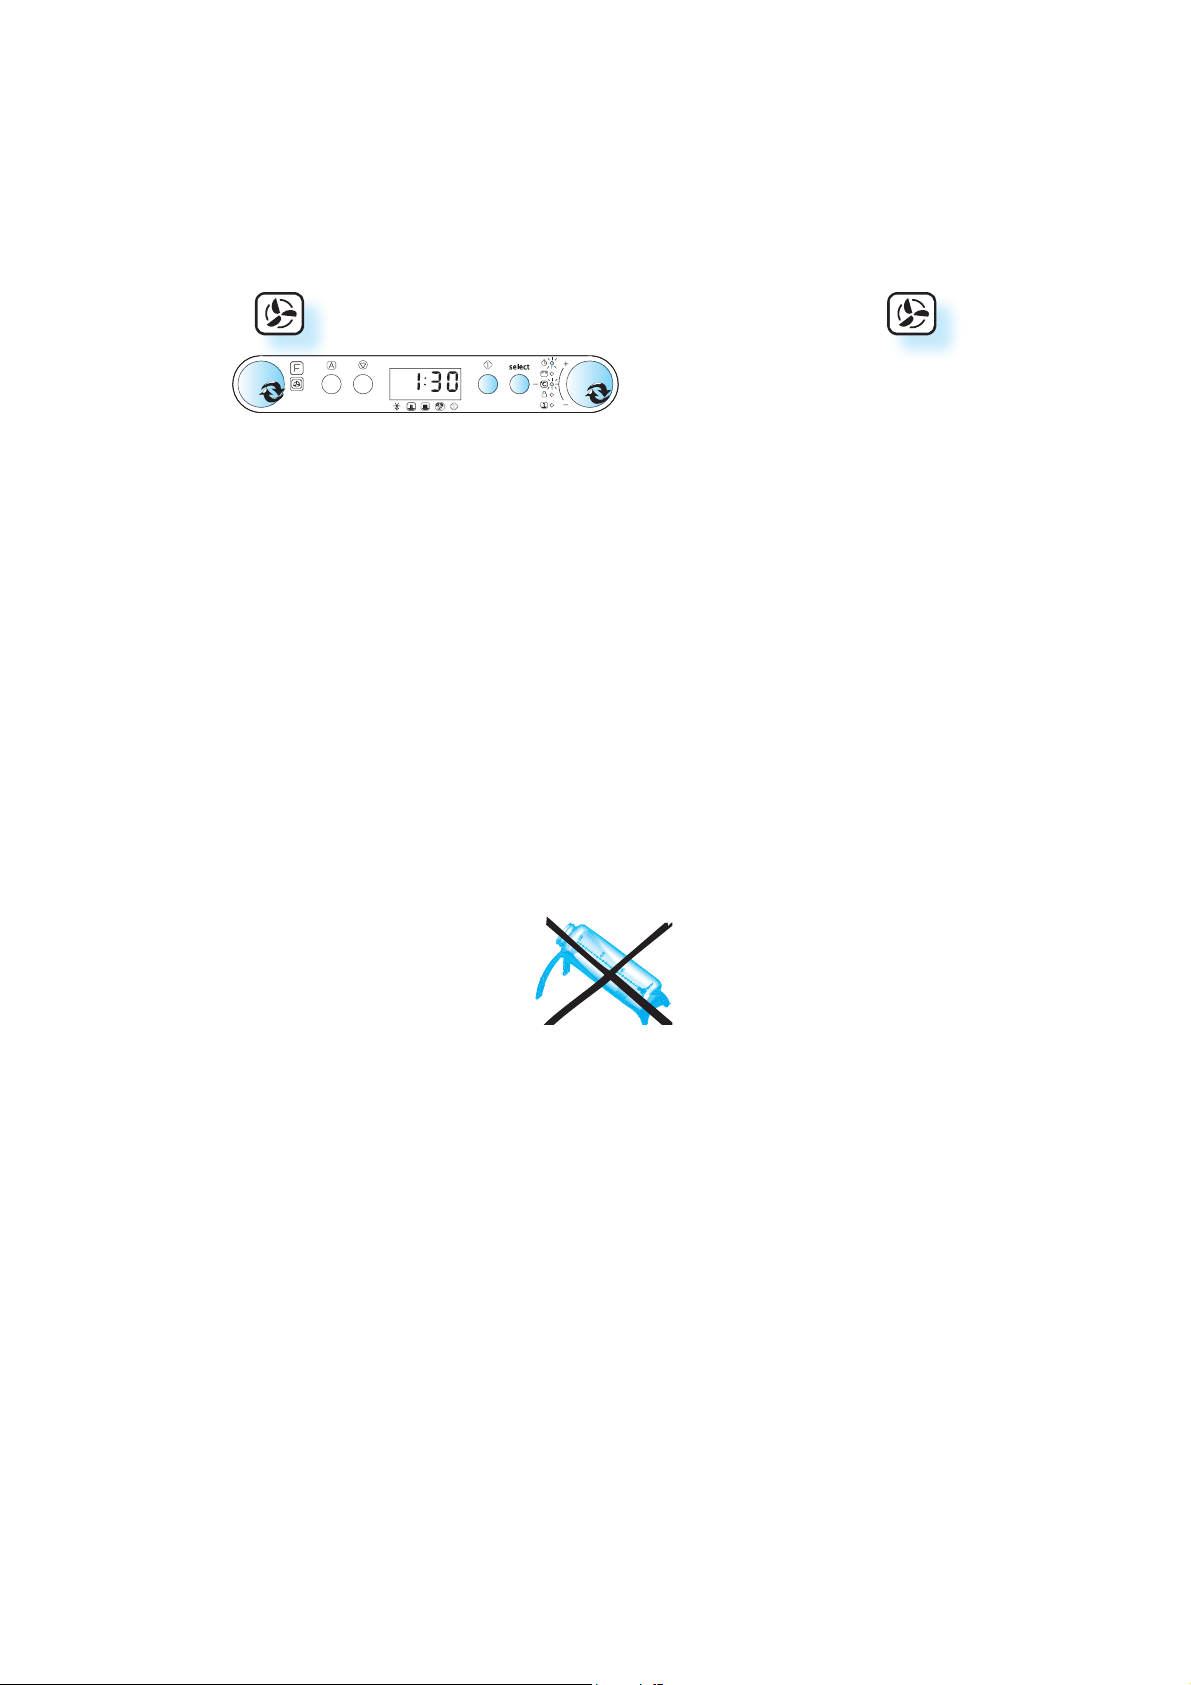
FORCED AIR
USE THIS FUNCTIO N to cook meringues, pastry,
sponge cakes, soufflés, poultry and roast
meats.
TURN THE MULTIFUNCTION KNOB to the Forced Air position.
TURN THE ADJUST KNOB to set the temperature.
PRESS THE SELECT BUTTON to select cooking time.
TURN THE ADJUST KNOB to set the cooking time.
PRESS THE START BUTTON.
HE DEFAULT SETTING when selecting Forced Air is 175°C
T
SE THE WIRE RACK to put food on to allow the air to circulate proper-
U
ly around the food.
SE THE BAKING PLATE when baking small items like cookies or rolls.
U
URING THE HEATING PROCESS the digits flicker until the set temperature is
D
reached.
ONCE THE HEATING PROCESS HAS BEEN STARTED THE TEMPERATURE CAN EASILY BE AD-
JUSTED BY TURNING THE ADJUST KNOB.
18
Page 19

FORCED AIR COMBI
USE THIS FUNCTIO N to cook roast meats, poultry, and jacket potatoes, frozen convenience
foods, sponge cakes, pastry, fish and puddings.
TURN THE MULTIFUNCTION KNOB to the Forced Air Combi position.
TURN THE ADJUST KNOB to set the temperature.
PRESS THE SELECT BUTTON to select microwave power.
TURN THE ADJUST KNOB to set the power level.
PRESS THE SELECT BUTTON to select cooking time.
TURN THE ADJUST KNOB to set the cooking time.
PRESS THE START BUTTON.
U
SE THE WIRE RACK to put food on to allow the air to circulate proper-
ly around the food.
D
URING THE HEATING PROCESS the digits flicker until the set temperature
is reached.
NCE THE HEATING PROCESS HAS BEEN STARTED the temperature can easily
O
be adjusted by turning the Adjust knob. Also the microwave power
level is possible to change. The Max. possible microwave power level
when using the Forced air is limited to a factory-preset level.
CHOOSING POWER LEVEL
FORCED AIR COMBI
OWER SUGGESTED USE:
P
350 W C
160 W C
90 W B
OOKING Poultry, Fish & Gratins
OOKING Roasts
AKING Bread & Cakes
19
Page 20
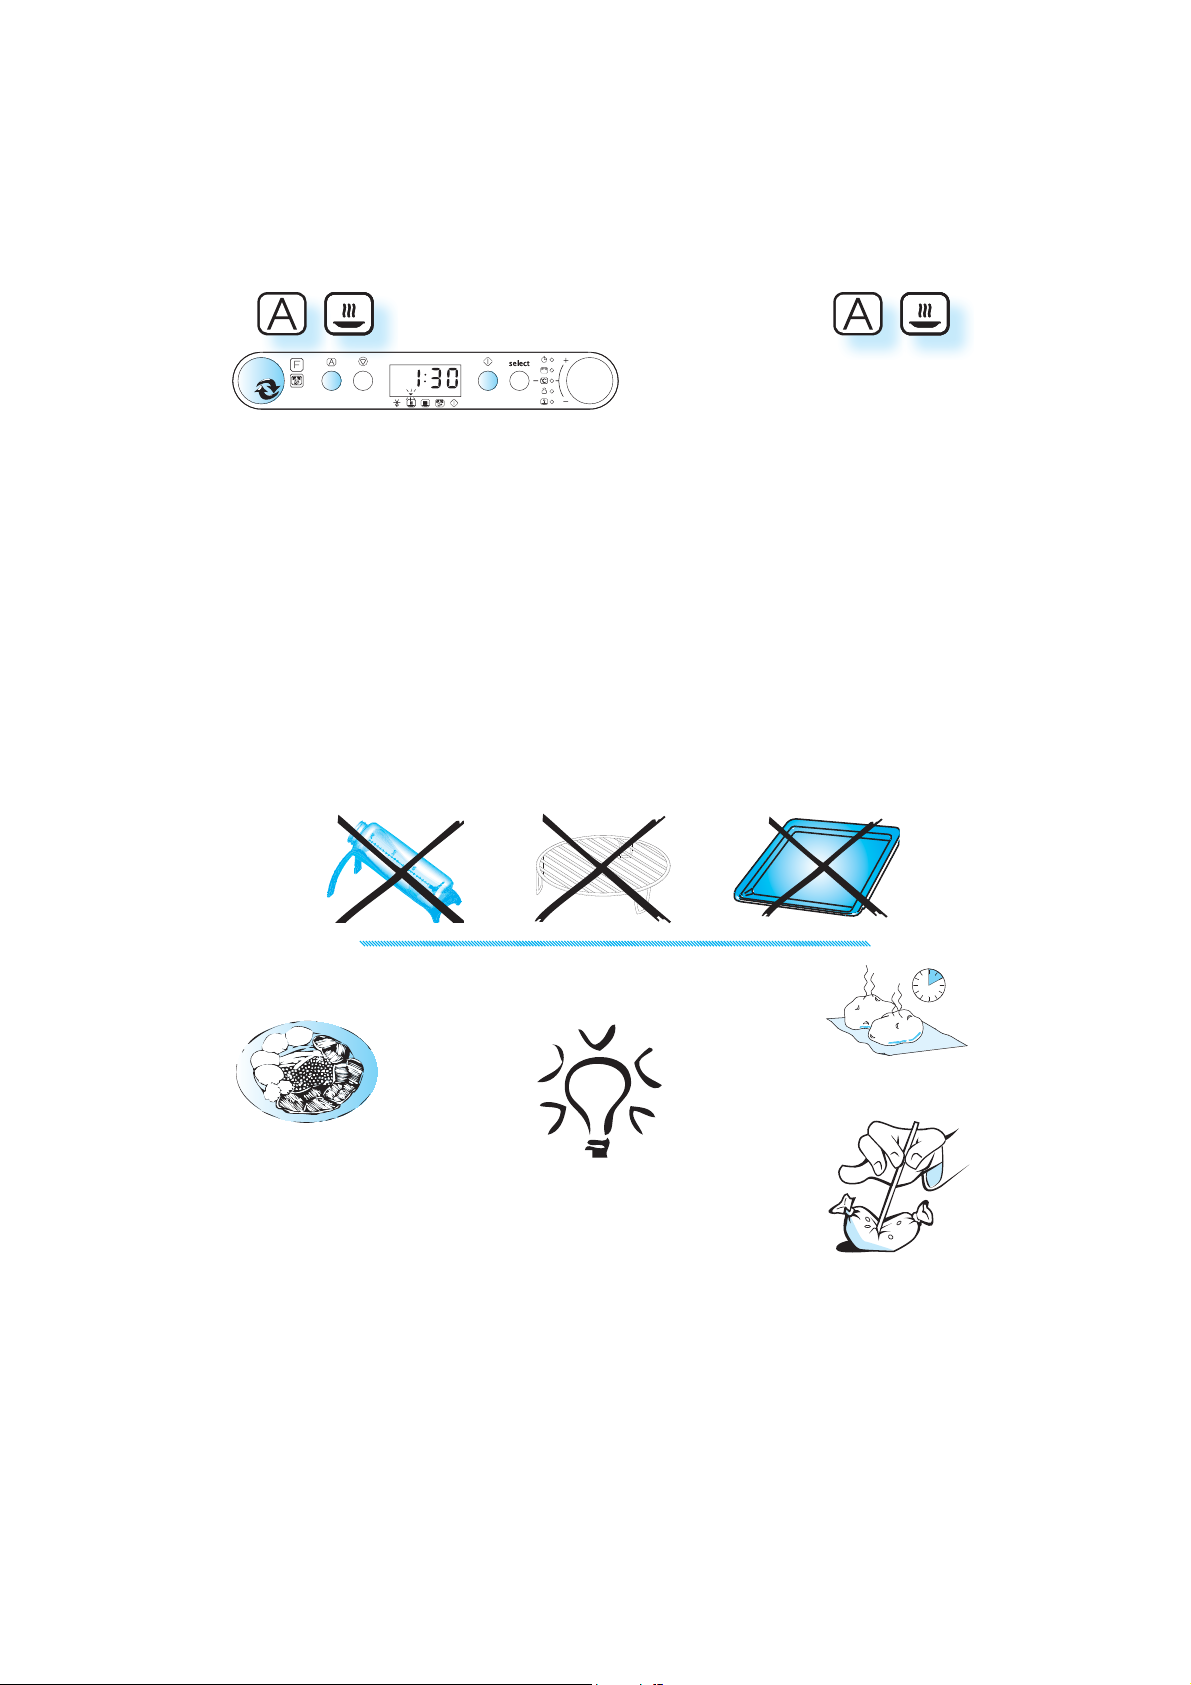
AUTO REHEAT
TURN THE MULTIFUNCTION KNOB to the Auto position.
PRESS THE AUTO BUTTON to select the desired auto function.
PRESS THE START BUTTON.
IDWAY THRU THE COOKI NG PROCESS the oven stops and prompts you to
M
STIR FOOD.
Open the door.
Stir or turn the food.
Close the door and restart by pressing the Start button.
NOTE: THE OVEN CON TINUES AUT OMATICALLY AFTER 2 MIN if the food hasn’t
been turned / stirred.
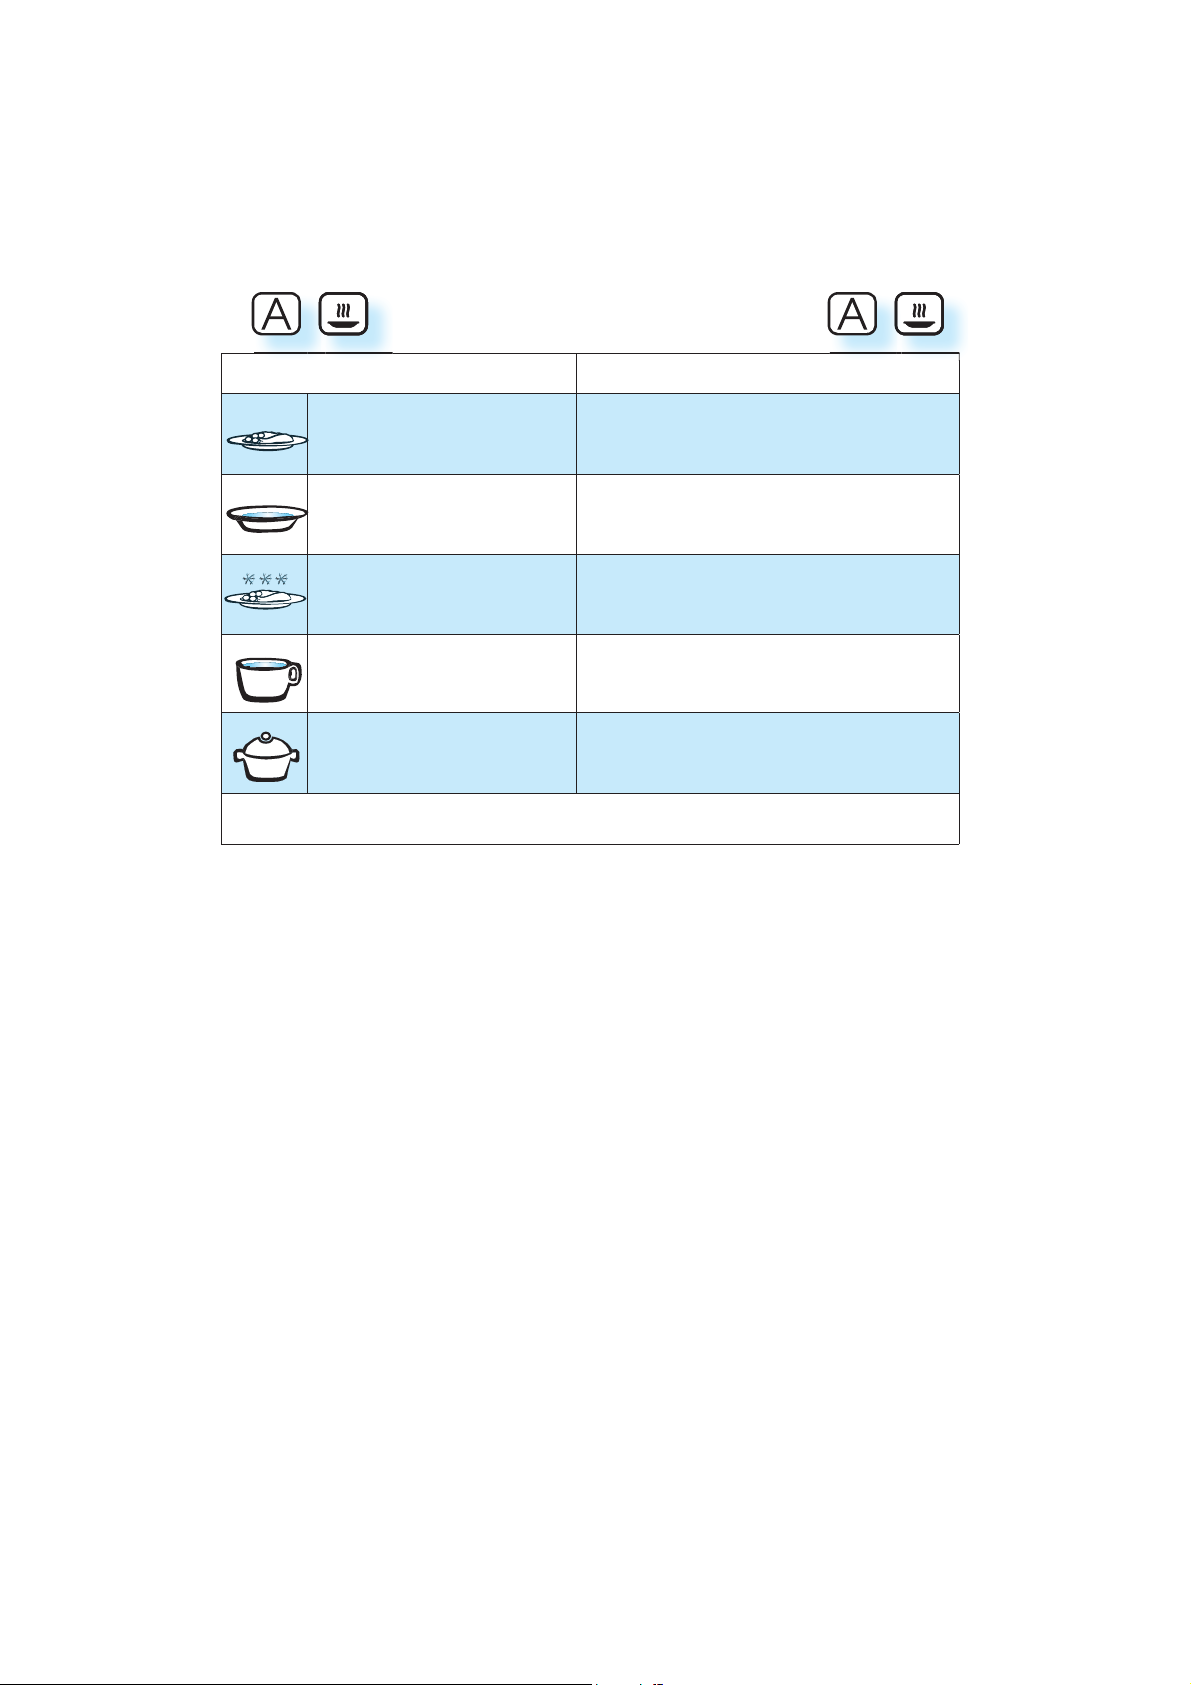
USE THIS FUNCTIO N when reheating readymade food either frozen or chilled.
PLACE FOOD onto a microwave-safe heat
proof dinner plate or dish.
WHEN YOU ARE SAVING a meal in the refrigerator
or ”plating” a meal for reheating, arrange the
thicker, denser food to the
outside of the plate
and the thinner or
less dense food in
the middle.
P
LACE THIN SLICES of meat on top of each other
or interlace them.
THICKER SLICES such as meat loaf and sausages
have to be placed close to each other.
20
MINUTES STANDING TIME ALWAYS
1-2
IMPROVES the result, especially
for frozen food.
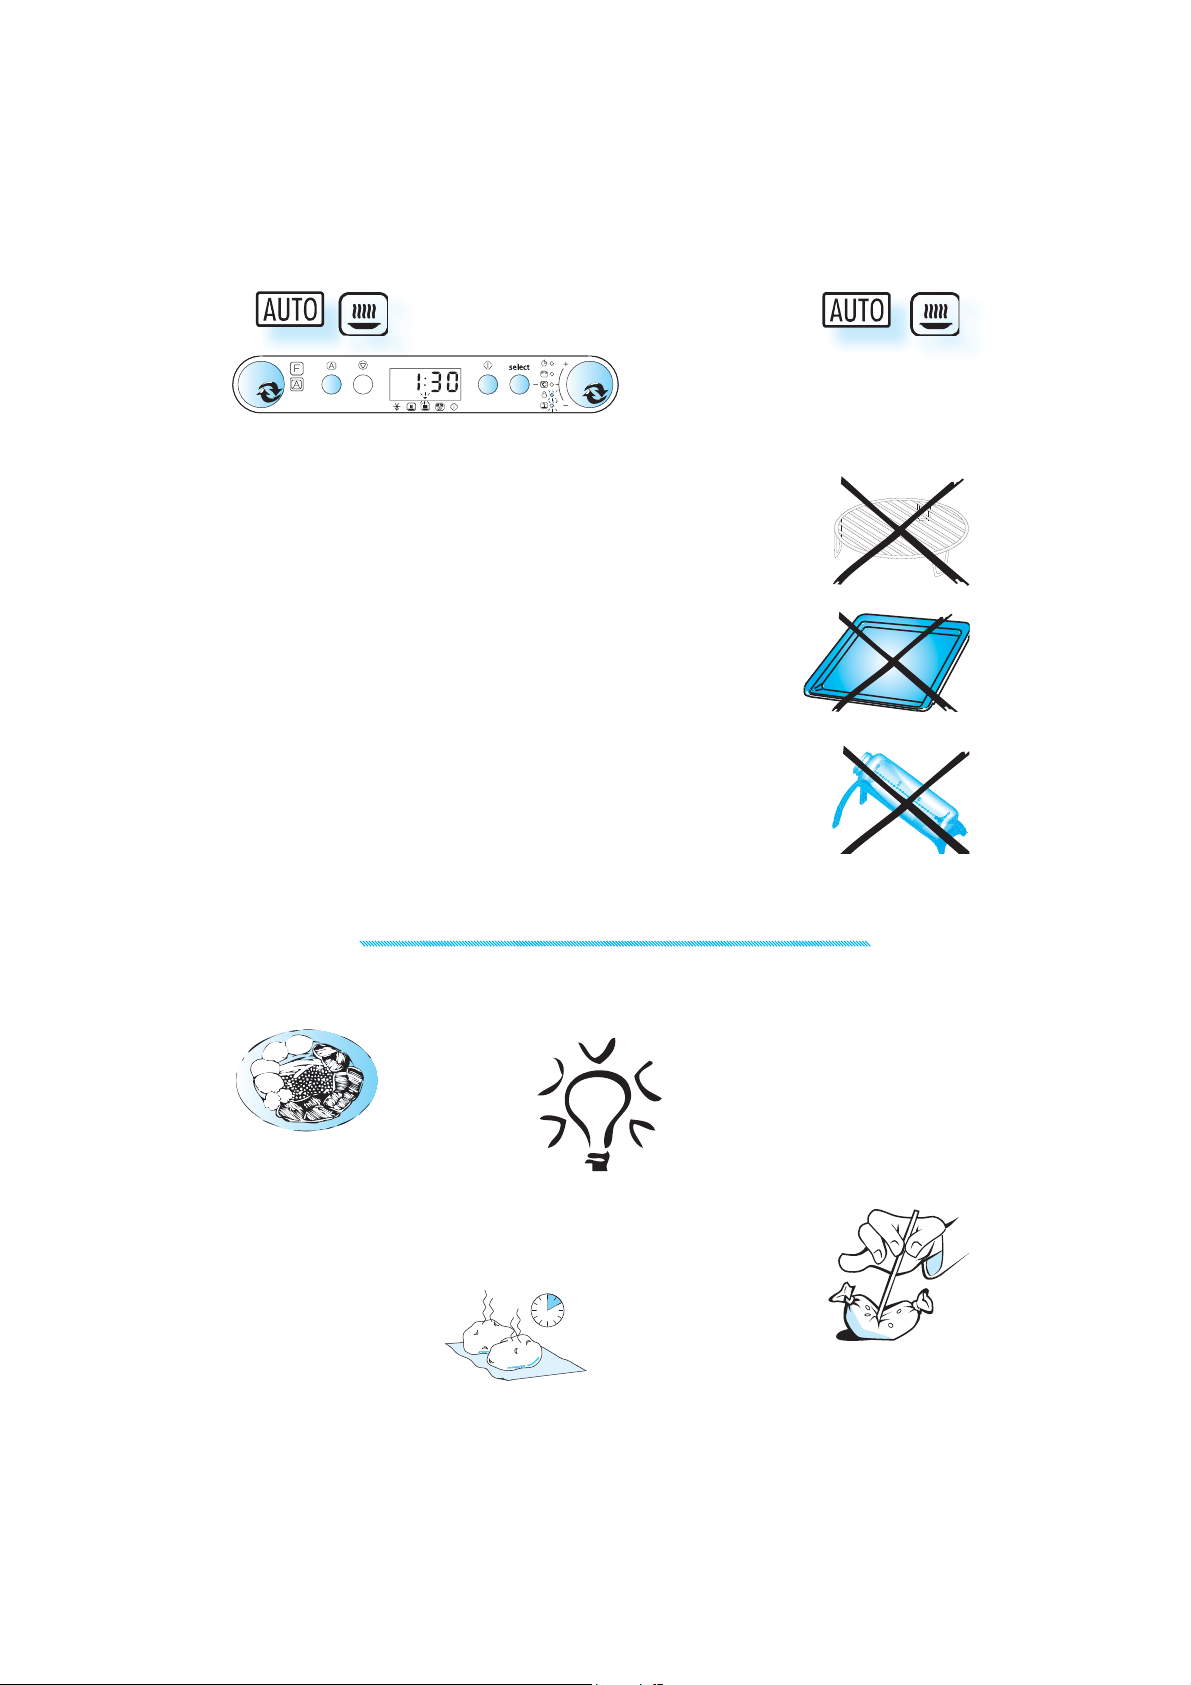
LASTIC FOIL should be
P
scored or pricked with a
fork, to relieve the pressure
and to prevent bursting,
as steam builds-up during
cooking.
Page 21
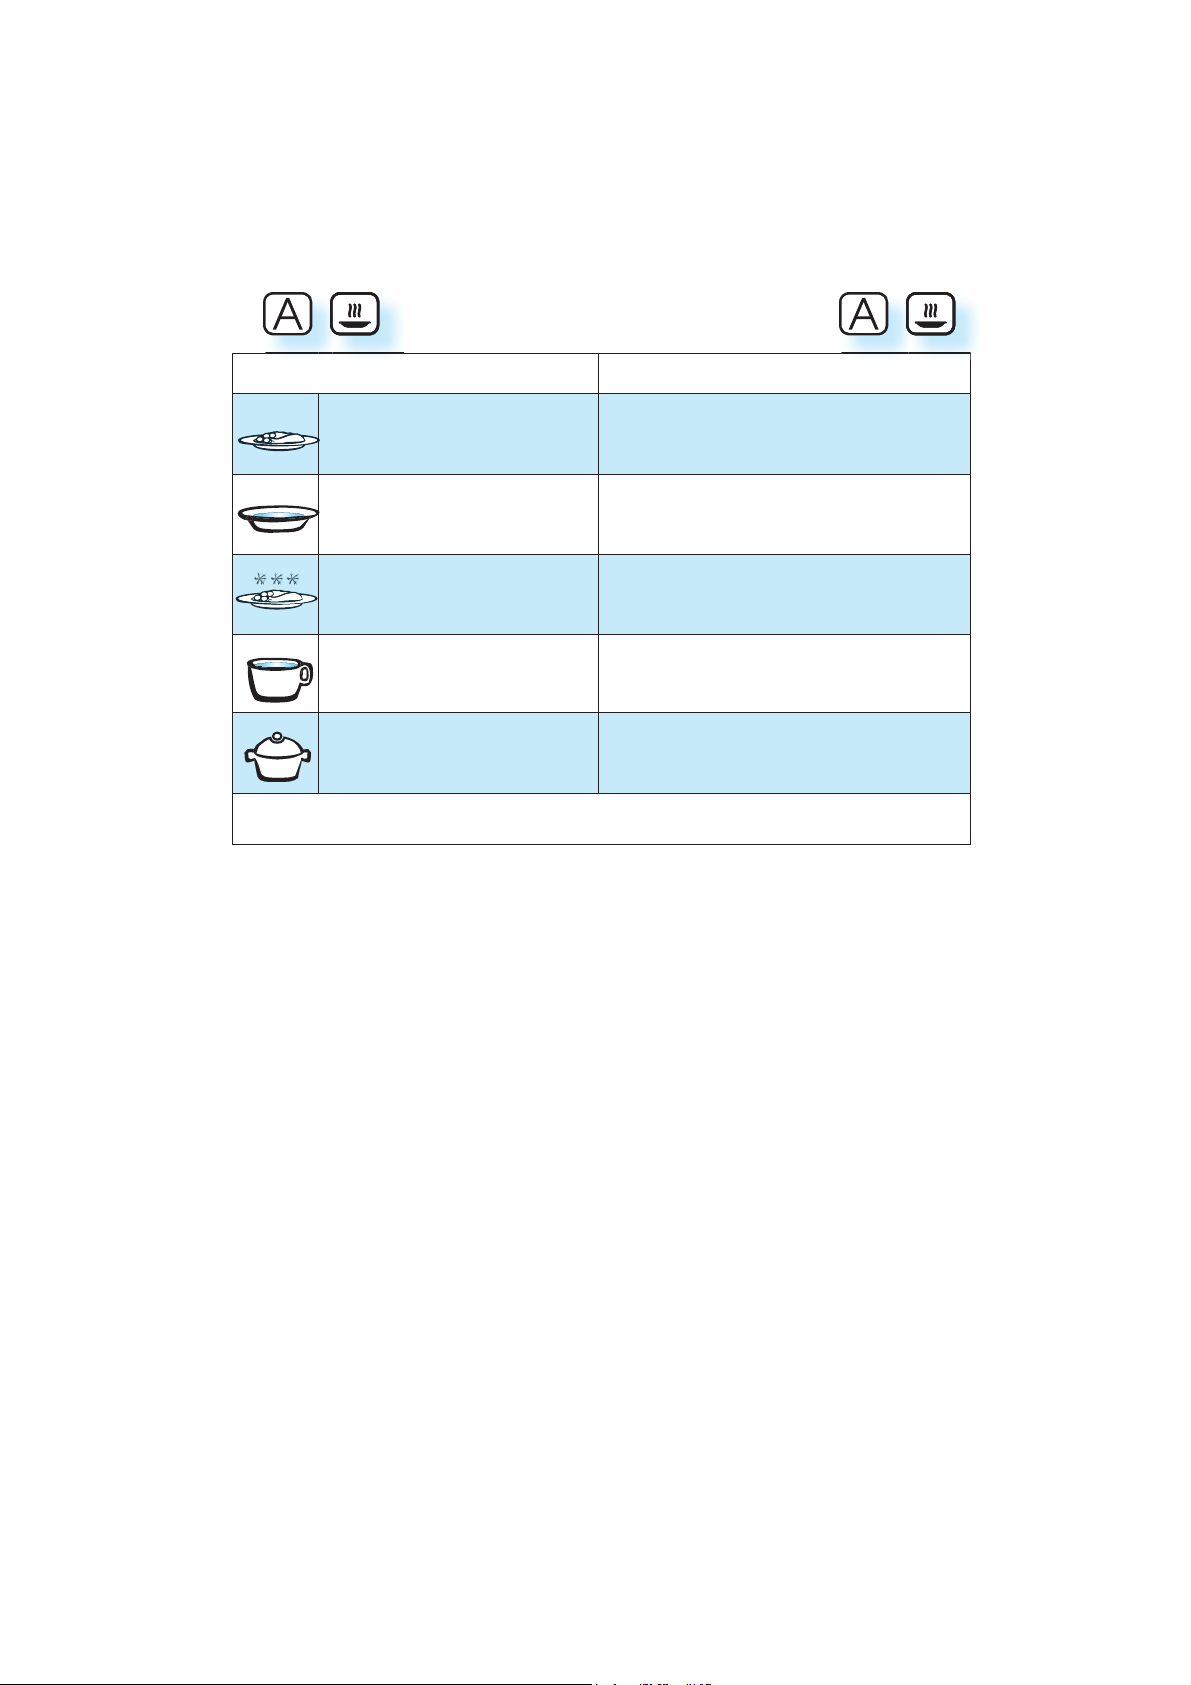
AUTO REHEAT
FOOD HINTS
REPARE FOOD in line with recommendations above.
DINNER PLATE (250g - 600g)
SOUP (200g - 800g)
FROZEN PORTION (250g - 600g)
MILK (100g - 500 g)
CASSEROLE (200g - 800g)
OR FOOD NOT LISTED IN THIS TABL E and if the weight is lesser or greater than recommended weight,
F
you should follow the procedure for ”Cook & Reheat with microwaves”.
P
Heat under cover.
EHEAT UNCOVERED in separate bowls or in a large
R
one.
OLLOW THE DIRECTIONS ON PACK AGE, IE. ventilation,
F
pricking and so on.
EAT UNCOVERED and use a metal spoon in a mug
H
or cup.
EHEAT UNDER COVER.
R
21
Page 22
AUTO COOK
TURN THE MULTIFUNCTION KNOB to the Auto position.
PRESS THE AUTO BUTTON to select the desired auto function.
TURN THE ADJUST KNOB to choose desired food class.
PRESS THE SELECT BUTTON (default weight is displayed).
TURN THE ADJUST KNOB to set the weight of the food.
PRESS THE START BUTTON.
IDWAY THRU THE COOKI NG PROCESS the oven stops and prompts you to
M
STIR FOOD or TURN FOOD.
Open the door.
Stir or turn the food.
Close the door and restart by pressing the Start button.
OTE: THE OVEN CONT INUES AUTO MATICALLY AFTER 2 MIN if the food hasn’t
N
been turned / stirred.
USE THIS FUNCTIO N FOR cooking ONLY. Auto
Cook can only be used for food belonging
to the categories listed in the table.
PLACE FOOD onto a microwave-safe heat
proof dinner plate or dish.
HEN YOU ARE SAVING a meal in the refrigerator
W
or ”plating” a meal for reheating, arrange the
thicker, denser food to
the outside of the
plate and the thinner or less dense
food in the middle.
P
LACE THIN SLICES of meat on top of each other
or interlace them.
THICKER SLICES such as meat loaf and sausages
have to be placed close to each other.
1-2
MINUTES STANDING TIME ALWAYS
IMPROVES the result, especially
for frozen food.
22
ALWAYS USE A COVE R with this function except
when reheating chilled soups in which case
the cover is not needed! If the food is pack-
aged in such way that it isn’t possible to
use a cover, the package should be cut
with 2-3 score to allow for excess pres-
sure to escape during reheating.
PLASTIC FOIL should be scored or
pricked with a fork, to relieve
the pressure and to prevent
bursting, as steam builds-up
during cooking.
Page 23
AUTO COOK
FOOD AMOUNT HINTS
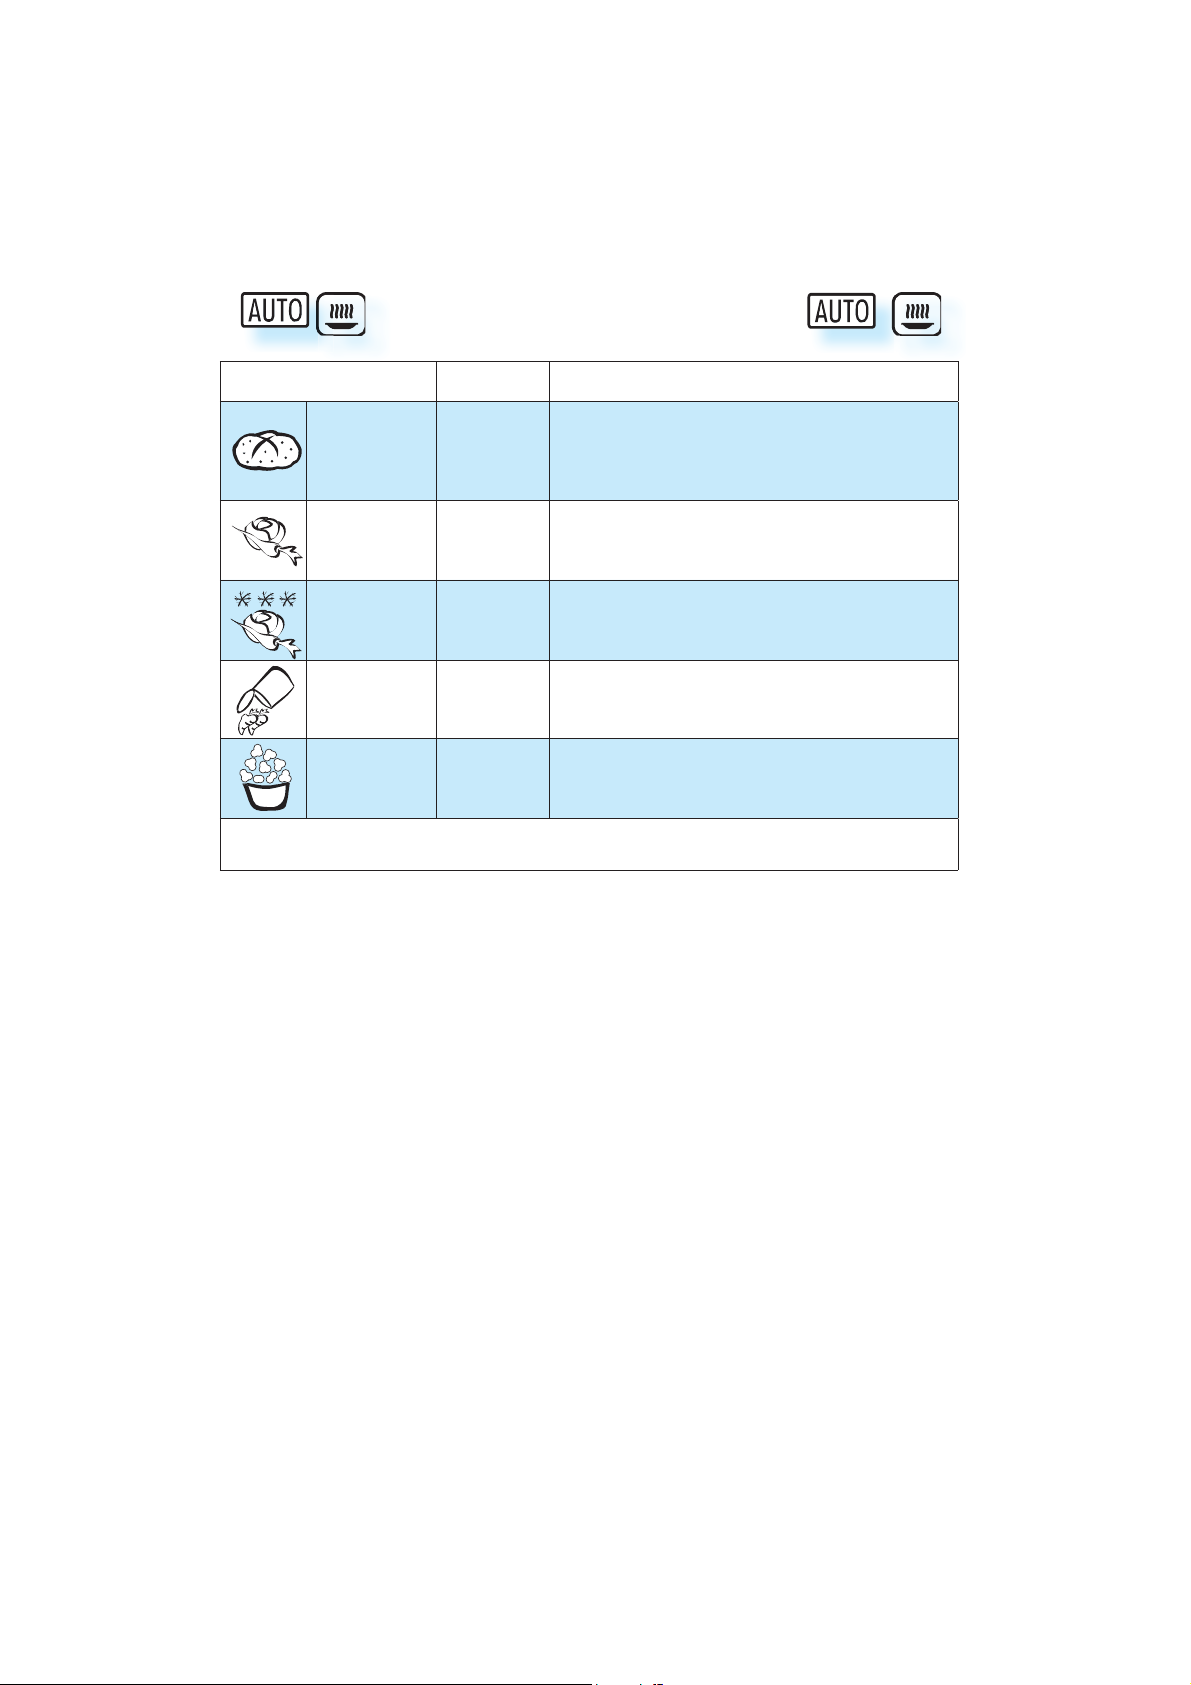
P
RICK THE POTATOES and place them in a microwave safe
BAKED POTA-
TOES
200g - 1Kg
and oven proof dish. Turn the potatoes when the
oven beeps. Please be aware that the oven, dish and
food are hot.
FRESH VEGETA-
BLES
FROZEN VEGE-
TAB LES
CANNED VEGE-
TAB LES
POPCORN
OR FOOD NOT LISTED IN THIS TABL E and if the weight is lesser or greater than recommended weight,
F
you should follow the procedure for ”Cook & Reheat with microwaves”.
200g - 800g
200g - 800g COOK UNDER COVER. Stir when oven beeps.
200g - 600g
90g - 100g
UT VEGETABLES into even size pieces. Add 2-4 table
C
spoons water and cover. Stir when oven beeps.
POUR AWAY most of the liquid and cook in a microwave
safe dish with cover.
ONLY COOK ONE BAG at the time. If more popcorn is
needed, cook the bags one after another.
23
Page 24

AUTO FORCED AIR COMBI
USE THIS FUNCTIO N for cooking from raw or
frozen.
TURN THE MULTIFUNCTION KNOB to the Auto position.
PRESS THE AUTO BUTTON to select the desired auto function.
TURN THE ADJUST KNOB to choose desired food class.
PRESS THE SELECT BUTTON (DEFAULT WEIG HT IS DISPLAYED).
TURN THE ADJUST KNOB to set the weight of the food.
PRESS THE START BUTTON.
FOR CHICKEN AND LASAGNE; ensure that the dish you use, is oven proof
and allow microwaves to pass through it before cooking. Else, you
may obtain a poor end result.
LWAYS USE the baking plate when making cookies
A
and canned or frozen rolls.
GREASE THE BAKING PLATE lightely or cover it with
baking paper.
24
URING USE OF THE PROGRAMS for cookies and canned or frozen rolls the
D
oven needs to pre-heat before you can put food in it. When the correct temperature is reached, the oven will prompt you to put the
food in.
Open the door.
Place the baking plate with food on the guides situ-
ated on the cavity walls.
add
Close the door and restart by pressing the Start but-
ton.
food
Page 25
AUTO FORCED AIR COMBI
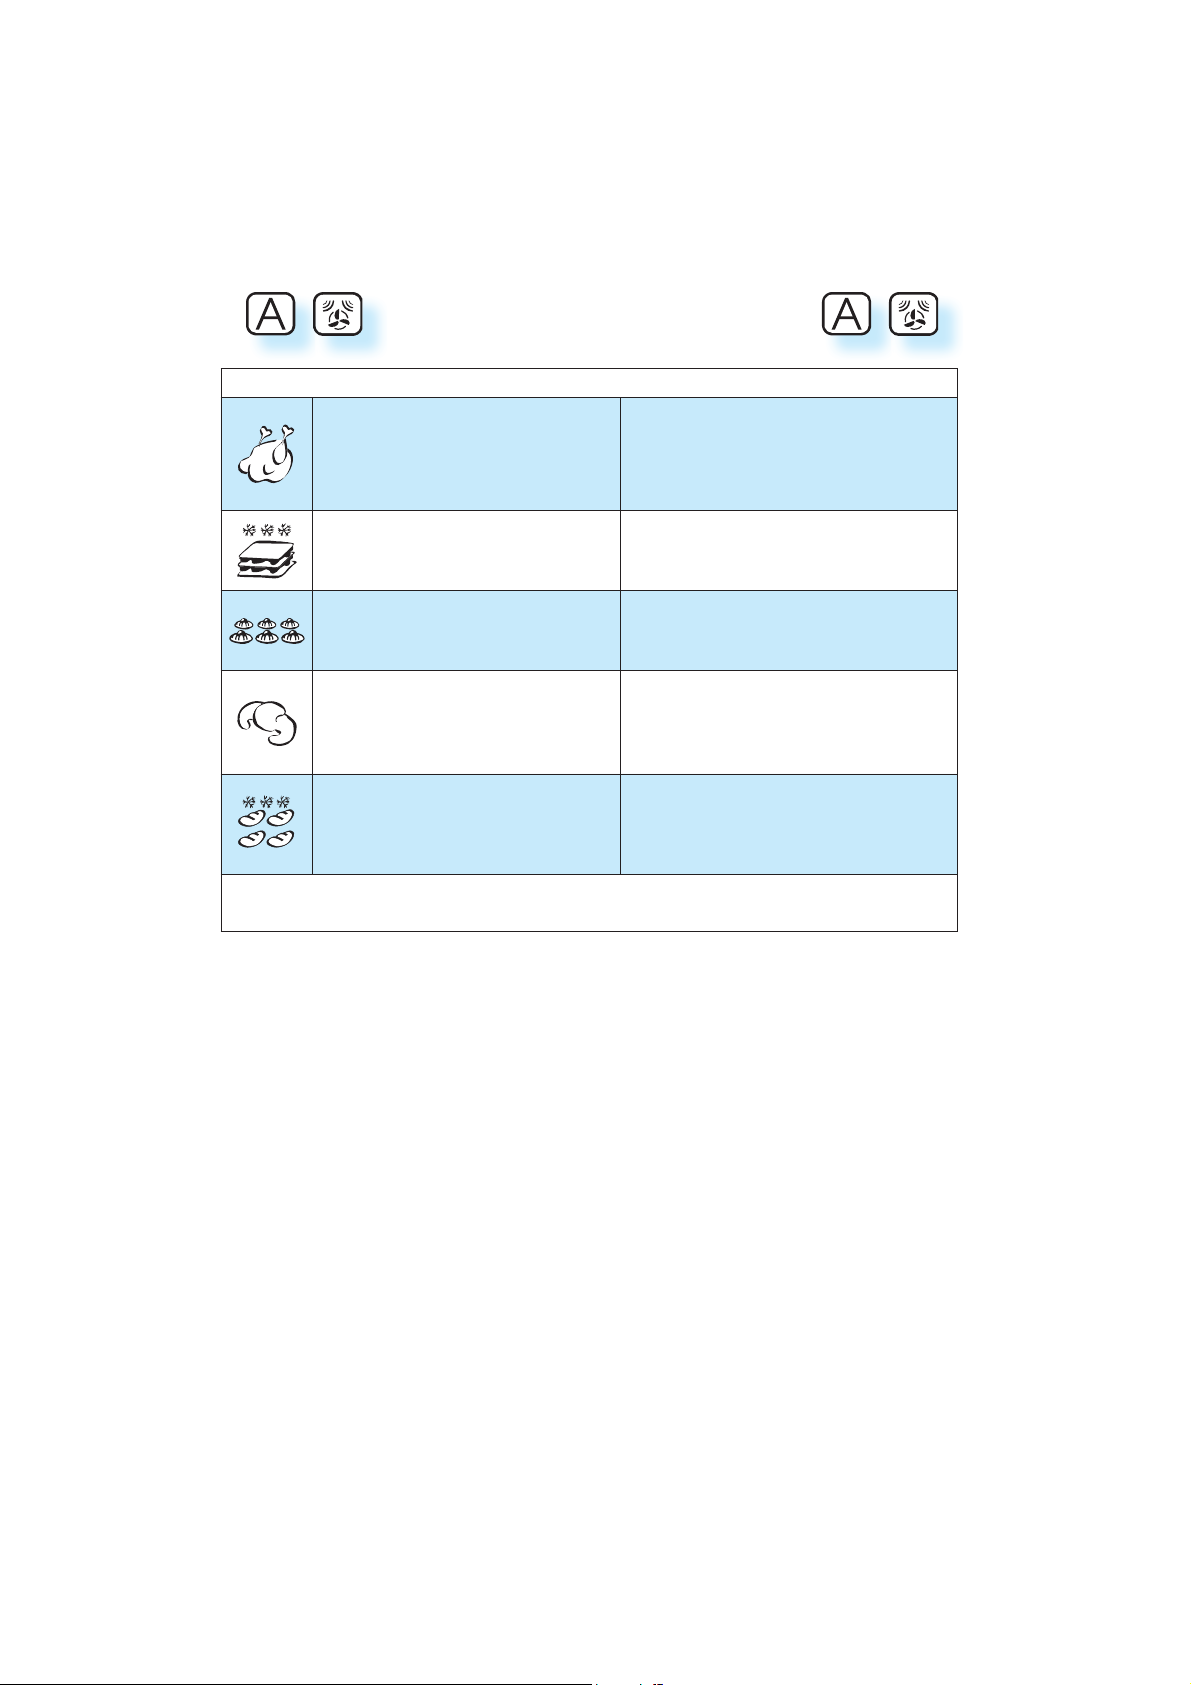
CHICKEN (800G - 1½KG)
FROZEN LASAGNE (400G - 1KG)
COOKIES (9-12 pieces)
CANNED BREAD DOUGH
FROZEN ROLLS
RECOMMENDED WEIGHTS
S
PRINKLE THE CHICKE N with salt and spices.
Brush with oil if needed. Place on an ovenproof and microwave safe dish. Place the
dish on the wire rack.
LACE IN an ovenproof and microwave safe
P
dish. Place the dish on the wire rack.
LACE ON the lightely greased baking plate.
P
Put the plate in the oven when it promts
you to “Add food”.
TO BE USED FOR items like croissants and
rolls. Place the unbaked bread on the baking plate. Put the plate in the oven when it
promts you to “Add food”.
TO BE USED FOR ready baked frozen rolls. Place
the rolls on the baking plate. Put the plate
in the oven when it promts you to “Add
food”.
F
OR FOOD NOT LISTED IN THIS TABL E and if the weight is lesser or greater than recommended weight,
you should follow the procedure for “Forced air or Forced Air Combi”
25
Page 26

MAINTENANCE & CLEANING
CLEANING IS THE ONLY MAINTENANCE normally re-
quired.
FAILURE TO MAINTAIN THE OVEN in a clean condition
could lead to deterioration of the surface that
could adversely affect the life of the appliance
and possibly result in a hazardous situation.
O NOT USE METAL SCOURING PAD S, ABRASIVE
D
CLEANSERS, steel-wool pads, grit-
ty washcloths, etc. which
can damage the control
panel, and the interior
and exterior oven surfaces. Use a sponge with a mild detergent or a
paper towel with spray glass cleaner. Apply
spray glass cleaner to a paper towel.
DO NOT SPRAY directly on the oven.
AT REGULAR INTERVALS, especially if spill
overs have occurred, remove the
turntable, the turntable support
and wipe the base of the oven
clean.
THIS OVEN IS DESIGNED to operate with the turntable in place.
DO NOT operate the microwave oven
when the turntable has been removed
for cleaning.
USE A MILD DETERGENT, water and a soft cloth to
clean the interior surfaces, front and rear of the
door and the door opening.
DO NOT ALLOW GREASE or food particles to
build up around the door.
FOR STUBBORN STAINS, boil a cup of water in the
oven for 2 or 3 minutes. Steam will soften the
marks.
ADDING SOME LEMON JUICE to a cup of water, placing this on the turntable and boiling for a few
minutes can eliminate odors inside the oven.
O NOT USE STEAM CLEANING APPLIANCES when
D
cleaning your microwave oven.
THE GRILL ELEMENT does not need cleaning since
the intense heat will burn off any splashes, but
the ceiling above it may need regular cleaning.
This should be done with warm water, detergent and a sponge. If the Grill is not used regularly, it should be run for 10 minutes a month
to burn off any splashes,
in order to reduce the
risk of fire.
Push the fastening
thread gently towards the back of
the ceiling and then
lower it to release
the grill element.
Return the fastening
thread to its original
position after cleaning.
DISHWASHER SAFE:
T
URNTABLE SUPPORT.
LASS TURNTABLE.
G
W
IRE RACK.
BAKING PLATE
26
BABY BOTTLE HOLDER
Page 27

TROUBLE SHOOTING GUIDE
IF THE OVEN DOES NOT WORK, do not make a service
call until you have made the following checks:
The Turntable and turntable support is in
place.
The Plug is properly inserted in the wall
socket.
The Door is properly closed.
Check your Fuses and ensure that there is
power available.
Check that the oven has ample ventilation.
Wait for 10 minutes, then try to operate the
oven once more.
Open and then close the door before you
try again.
THIS IS TO AVOID unnecessary calls for which you
will be charged.
When calling for Service, please give the serial
number and type number of the oven (see Service label). Consult your warranty booklet for
further advice.
I
F THE MAINS CORD NEEDS REPLACING it should
be replaced by the original
mains cord, which is available
via our service organization. The mains cord may
only be replaced by a trained
service technician.
ERVICE ONLY TO BE CARRIED OUT
S
BY A TRAINED SERVICE TECHNICIAN .
It is hazardous for anyone other than a trained person to carry
out any service or repair operation, which involves the removal of any cover, which gives protection against exposure to microwave
energy.
DO NOT REMOVE ANY COVER.
27
Page 28
ENVIRONMENTAL HINTS
THE PACKIN G BOX may be fully recycled as confirmed by the recycling symbol. Follow local disposal regulations. Keep
potentially hazardous packaging (plastic bags, polystyrene etc.) out of the reach of children.
HIS APPLIANCE is marked according to the Euro-
T
pean directive 2002/96/EC on Waste Electrical
and Electronic Equipment (WEEE). By ensuring
this product is disposed of correctly, you will
help prevent potential negative consequences
for the environment and human health, which
could otherwise be caused by inappropriate
waste handling of this product.
T
HE SYMBOL on the product, or on the docu-
ments accompanying the
product, indicates that this
appliance may not be treated
as household waste. Instead
it shall be handed over to the
applicable collection point
for the recycling of electrical
and electronic equipment.
ISPOSAL must be carried
D
out in accordance with local environmental regulations for waste disposal.
OR MORE DETAILED INFORMATION about treatment,
F
recovery and recycling of this product, please
contact your local city office, your household
waste disposal service or the shop where you
purchased the product.
B
EFORE SCRAPPING, cut off the mains cord so that
the appliance cannot be connected to the
mains.
I
N ACCORDAN CE WITH IEC 60705.
THE INTERNATIONAL ELECTROTECHNICAL COMMISSION has developed a standard for comparative testing of
heating performance of different microwave ovens. We recommend the following for this oven:
Test Amount Approx. time Power level Container
12.3.1 1000 g 11 min 750 W Pyrex 3.227
12.3.2 475 g 5 min 750 W Pyrex 3.827
12.3.3 900 g 15 min 750 W Pyrex 3.838
12.3.4 1100 g 28-30 min Forced air 200 ºC + 350 W Pyrex 3.827
12.3.5 700 g 25 min Forced air 200 ºC + 90 W Pyrex 3.827
12.3.6 1000 g 30-32 min Forced air 225 ºC + 350 W Pyrex 3.827
13.3 500 g 2 min 12 sec Jet defrost
28
TECHNICAL SPECIFICATION
SUPPLY VOLTAGE 230 V/50 HZ
RATE D POWER INPUT 2800 W
USE 16 A (UK 13 A)
F
OUTPUT POWER 900 W
MW
UTER DIMENSIONS (HXWXD) 455 X 595 X 560
O
NNER DIMENSIONS (HXWXD) 210 X 450 X 420
I
Page 29

INSTALLATION
INSTALLATION DE L’APPAREIL
LORS DE L’INSTALLATION DE L’APPAREIL, respect-
ez les instructions fournies séparément.
AVANT DE BRANCHER L’APPAREIL
VÉRIFIEZ QUE LA TENSION INDIQUÉE sur la
plaque signalétique correspond bien à
celle de votre habitation.
VANT DE CO MMENCER L’INSTALLATION, vérifiez que la
A
cavité du four est vide.
A
SSUREZ-VOUS QUE L’APPAREIL N’EST PAS ENDOMMAGÉ.
Vérifiez que la porte du four ferme correctement contre l’encadrement. Enlevez les accessoires du four et essuyez l’intérieur avec un
chiffon doux et humide.
FRANÇAIS
N’
UTILISEZ EN AUCUN CAS CET APPAREIL si le
FR
cordon d’alimentation ou la prise de
courant est endommagé, si l’appareil
ne fonctionne pas correctement ou s’il
a été endommagé ou est tombé. Ne
plongez jamais le cordon d’alimentation
ou la prise dans l’eau. Éloignez le cordon des surfaces chaudes sous peine
d’électrocution, d’incendie ou de risques
du même type.
APRÈS LE BRANCHEMENT DE L’APPAREIL
L
E FOUR NE PEUT ÊTRE UTILISÉ QUE si la porte est cor-
rectement fermée.
Le fabricant décline toute responsabilité
si l’utilisateur ne respecte pas ces instructions.
A MISE À LA TERRE DE L’APPAREIL est obliga-
L
toire. Le fabricant décline toute responsabilité en cas de blessures infl igées à
des personnes, à des animaux, ou de
dommages matériels qui découleraient
du non-respect de cette obligation.
29
Page 30
CONSIGNES DE SÉCURITÉ IMPORTANTES
LISEZ CES CONSIGNES ATTENTIVEMENT ET CONSERVEZLES EN LIEU SÛR POUR TOUTE CONSULTA
TION ULTÉRIEURE
VEILLEZ À NE PAS CHAUFFER OU UTILISER DE MATÉRI-
AUX INFLAMMABLES à l’intérieur ou à proximi-
té du four. Les vapeurs dégagées peuvent
provoquer un incendie ou une explosion.
UTILISEZ JAMAIS VOT RE FOUR MICRO-ONDES
N’
pour sécher des textiles, du papier, des
épices, des herbes, du bois, des fl eurs,
des fruits ou d’autres produits combustibles. Ils pourraient s’enfl ammer.
I CE QUI SE TROUVE À L’INTÉRIEUR OU À
S
L’EXTÉRIEUR DU FOUR PREND FEU, OU QUE
VOUS CON STATEZ DE LA FUMÉE, n’ouvrez
pas la porte, mais arrêtez le four et
la ventilation. Débranchez le cordon
d’alimentation ou coupez le courant au
fusible ou au disjoncteur.
E CUISEZ PAS LES ALIMENTS DE FAÇON EXCESSIVE.
N
Ils pourraient s’enfl ammer.
E LAISSEZ PAS LE FOU R SANS SURVEILLANCE,
N
surtout si vous utilisez du papier, du
plastique ou d’autres matériaux combustibles pour la cuisson. Le papier peut carboniser ou brûler et certains plastiques
peuvent fondre lorsqu’ils sont utilisés
pour réchauff er des aliments.
N’
UTILISEZ PAS de produits chimiques ou
de vapeurs corrosifs dans cet appareil.
Ce type de four a été spécialement conçu pour réchauff er ou cuire des aliments.
Il n’est pas prévu pour un usage industriel ou de laboratoire.
NE LAISSEZ LES ENFANTS utiliser l’appareil que
sous la surveillance d’un adulte et qu’après
que des instructions appropriées leur ont
été données afi n qu’ils puissent l’utiliser
de façon sûre et comprennent les dangers
d’un usage incorrect
ET APPAREIL N’EST PAS CONÇU pour être utilisé
C
par des personnes (y compris des enfants)
dont les facultés physiques, sensorielles
ou mentales sont réduites, à moins qu’une
personne responsable de leur sécurité ne
les supervise.
LES PARTI ES ACCESSIBLES PEUVENT CHAUFFER au
cours de l’utilisation, les enfants ne doivent
pas s’en approcher.
N’
UTILISEZ PAS LE FOUR MICRO-
ONDES pour chauff er des al-
iments ou des liquides
dans des récipients hermétiques. L’augmentation de la pression
peut les endommager lors de l’ouverture
ou les faire exploser.
ONTRÔLEZ RÉGULIÈREMENT L’ÉTAT DES JOINTS
C
et de l’encadrement de la porte. Si ces
zones sont endommagées, n’utilisez plus
l’appareil et faites-le réparer par un technicien spécialisé.
30
ŒUFS
N’UTILISEZ PAS VOTRE FOU R MICRO-ONDES pour cuire
ou réchauffer des œufs avec ou sans coquille, car ils peuvent exploser même
si la cuisson est terminée.
Page 31

PRÉCAUTIONS
GÉNÉRALITÉS
UTILISEZ CET APPAREIL QUE POUR UN USAGE DOMES-
N’
TIQUE !
E FOUR NE DOIT JAMAIS ÊTRE UTILISÉ à vide avec
L
la fonction micro-ondes. Cela risquerait de
l’endommager.
I VOUS VOUS EXERCEZ À LE PROGRAM MER, placez
S
un verre d’eau à l’intérieur. L’eau absorbera
l’énergie des micro-ondes et le four ne sera
pas abîmé.
UTILISEZ PAS LA CAVITÉ DU FOUR pour y ranger des
N’
objets.
NLEVEZ LES FERMETURES MÉTALLIQUES des
E
sachets en papier ou en plastique
avant de les placer dans le four.
FRITURE
N’
UTILISEZ PAS LE FOUR MICRO-ONDES pour frire, car
il ne permet pas de contrôler la température de l’huile.
AFIN D’ÉVITER DE VOUS BRÛLER, UTILISEZ DES
GANTS ISOLANTS OU DES MANIQUES pour
toucher les récipients ou les parties du
four après la cuisson.
LIQUIDES
AR EX. BOISSONS OU EAU. Dans un four à micro-
P
ondes, les liquides peuvent
bouillir sans produire de bulles.
Dans ce cas, ils peuvent déborder brusquement.
Afi n d’éviter cet inconvénient,
prenez les précautions suivantes :
1. Évitez d’utiliser des récipients à bord droit
et col étroit.
2. Remuez le liquide avant de placer le
récipient dans le four et laissez la cuillère
à café dans le récipient.
3. Après avoir chauff é, attendez un court instant et remuez de nouveau avant de sortir le récipient du four avec précaution.
AT TE NTI ON
REPORTEZ-VOUS SYSTÉMATIQUEMENT à un livre de
recettes pour plus de détails sur la cuisson au
four micro-ondes en particulier si vous cuisez ou réchauffez des aliments contenant de
l’alcool.
A
PRÈS AVOIR R ÉCHAUFFÉ DES ALIMENTS POUR
BÉBÉ (biberons, petits pots),
remuez toujours et vérifi ez
la température avant de servir. Vous assurez ainsi une bonne répartition
de la chaleur et évitez les risques de brûlure ou
d’ébouillantage.
Enlevez la tétine et le couvercle avant de
réchauff er !
BOUTONS
À
LA LIVRAISON DU FOUR, SES BOUTONS sont
encastrés au raz du bandeau de commandes. Il suffit d’appuyer sur ces boutons pour les faire sortir et accéder
à leurs fonctions. Il n’est pas
nécessaire que ces boutons
ressortent au cours du fonctionnement du four. Une fois les réglages terminés, appuyez sur ces boutons pour les encastrer dans le bandeau
de commandes et continuez à utiliser le
four.
31
Page 32

ACCESSOIRES
GÉNÉRALITÉS
E NOMBREUX accessoires sont disponibles sur
D
le marché. Avant de les acheter, assurez-vous
qu’ils conviennent bien aux micro-ondes.
ÉRIFIEZ QUE LE S USTENSILES UTI LISÉS sont résistants à la
V
chaleur et perméables aux micro-ondes avant de les utiliser.
L
ORSQUE VOUS PLACEZ DES ALIMENTS ET DES ACCE S-
SOIRES dans le four micro-ondes, assurez-vous
que ceux-ci ne sont pas en contact direct avec
l’intérieur du four.
Ceci est particulièrement important pour
les accessoires en métal ou avec des parties
métalliques.
I DES USTENSILES MÉTALLIQUES entrent en con-
S
tact avec les parois du four pendant son fonctionnement, ils peuvent provoquer des étincelles et endommager le four.
ASSUREZ-VOUS TOUJOURS que le plateau tournant peut tourner librement avant de mettre
l’appareil en marche.
SUPPORT DU PLATEAU TOURNANT
UTILISEZ LE SUPPORT DU PLATEAU TOUR-
NANT sous le plateau tournant en
verre. Ne placez jamais d’autres
ustensiles que le plateau tournant
directement sur le support.
Installez le support du plateau tournant
dans le four.
PLATEAU TOURNANT EN VERRE
TILISEZ LE PLATEAU TOURNANT EN
U
VERRE pour tous les types de cui-
sson. Il permet de récupérer les
jus de cuisson et les particules d’aliments qui
pourraient salir l’intérieur du four.
Placez le plateau tournant en verre sur son
support.
PLAQUE À PÂTISSERIE
UTILISEZ LA PLAQUE À PÂTIS SER-
IE uniquement lors de la cuis-
son avec la chaleur pulsée
ou avec la fonction gril. Ne
l’utilisez jamais avec les micro-ondes.
GRILLE MÉTALLIQUE
TILISEZ LA GRILLE MÉTALLIQUE avec
U
les fonctions chaleur pulsée,
gril, chaleur pulsée et microondes, chaleur pulsée combinée automatique
ou turbo gril combiné.
LORSQUE VOUS UTILISEZ LA
FONCTIO N GRIL SANS LES MICRO-
ONDES, placez la grille mé-
tallique sur la plaque à pâtisserie de manière à rapprocher les aliments
de l’élément chauffant du gril près de la voûte.
PORTEBIBERON
TILISEZ LE PORTE BIBERON
U
lorsque vous réchauffez
des aliments pour bébé
dans des biberons trop
grands pour tenir tout seuls dans le four.
Voir également le chapitre “Précautions” pour
plus d’informations sur la cuisson d’aliments
pour bébé.
PROTECTION CONTRE UNE MISE EN MARCHE DU
FOUR À VIDE / SÉCURITÉ ENFANTS
CETTE FONCTION DE SÉCUR ITÉ AUTOM ATIQUE EST AC-
TIVÉE UNE MINUTE après le retour du four
en “mode veille”. (Le four est en mode
“veille” si l’heure est affichée ou si
l’horloge n’a pas été programmée
lorsque l’écran est vide.)
32
C
ELA SIGNIFIE QUE VOUS DEVEZ OUVRIR et refermer la
porte, pour y introduire un plat, afin d’annuler
la sécurité enfants. Sinon l’afficheur indique
“DOOR” (PORTE).
door
Page 33

INTERRUPTION OU ARRÊT DE LA CUISSON
POUR INTERROMPRE LA CUISSON :
SI VOUS SOUHAITEZ VÉRIFIER, mé-
langer ou retourner les aliments, ouvrez la porte : la
cuisson s’arrêtera automatiquement. Les réglages sont
conservés pendant 10 minutes.
OUR POURSUIVRE LA CUISSON :
P
FERMEZ LA PORTE et appuyez UNE FOIS sur la
touche Start (Démarrage). La cuisson
reprend là où elle a été interrompue.
SI VOUS APPUYEZ DEUX FOIS sur la touche Start (Démarrage), le temps de
cuisson est augmenté de 30 secondes.
DEGRÉ DE CUISSON
I VOUS NE SOUHAITEZ PAS CONTINU ER LA CUISSON :
S
SORTEZ LES ALIMENTS, fermez la porte
et appuyez sur la touche STOP
(ARRÊT).
UN SIGNAL SONORE RETENTIT toutes les minutes
pendant 10 minutes en fin
de cuisson. Pour désactiver
le signal, appuyez sur la touche STOP (ARRÊT) ou ouvrez la porte.
REMARQUE : Les sélections ne restent affichées
que 60 secondes, si l’on ouvre et referme la
porte à la fin de la cuisson.
LE DEGRÉ DE CUISSON EST DISPONIBLE AVEC LES FO NC-
TIONS SUIVANTES :
RÉCHAUFF. AUTO
AUTO COOK (CUISSON AUTOMATIQU E)
CHALEUR PULSÉE COM BINÉE AUTO MATIQUE
LORS DE L’UTILISATION DES FONCTIONS CI-DESSUS, vous
avez la possibilité de contrôler le résultat final au
moyen de la fonction Réglage du degré de cuisson (Adjust Doneness). Cette fonction permet
d’augmenter ou de baisser la température finale
par rapport à la valeur par défaut standard.
DEGRÉ DE CUISSON
IVEAU EFFET
N
Hi 2
Hi 1
- - - -
Lo 1
Lo 2
PERMET D’ATT EI NDR E LA TEMPÉRATURE
FINALE LA PLUS ÉLEVÉE
PERMET D’ATT EI NDR E UNE TEMPÉRATURE
FINALE ÉLEVÉE
VALEUR PAR DÉFAUT STANDARD
PERMET D’ATT EI NDR E UNE TEMPÉRATURE
FINALE BASSE
PERMET D’ATT EI NDR E LA TEMPÉRATURE
FINALE LA PLUS BASSE
PHASE REFROIDISSEMENT
LORSQUE LE FOUR A TERMINÉ DE FONCTI ONNER, il
exécute une procédure de refroidissement.
Cela est normal.
Après cette procédure, le four s’arrête automatiquement.
SI VOUS UTILISEZ l’une de ces fonctions, le four
choisit automatiquement la valeur par défaut.
Ce réglage donne normalement le meilleur résultat. Mais si les aliments que vous venez de
réchauffer sont trop chauds pour être consommés immédiatement, vous pouvez facilement
résoudre ce problème avant de réutiliser cette
fonction. Pour ce faire, sélectionnez le degré
de cuisson en utilisant le bouton de réglage
juste après avoir appuyé sur la touche Start.
EMARQUE :
R
LE DEGRÉ DE CUISSON ne peut être réglé ou modi-
fié que pendant les 20 premières secondes du
fonctionnement.
A PROCÉDURE DE REFROIDISSEMENT peut être inter-
L
rompue, sans aucun dommage pour le four, en
ouvrant la porte.
33
Page 34

MINUTEUR
UTILISEZ CETTE FONC TION si vous devez mesurer
un temps avec précision, par exemple pour
la cuisson des œufs ou pour faire lever une
AMENEZ LE BOUTON MULTIFONCTIONS sur la position zéro.
TOURNEZ LE BOUTON DE RÉGLAGE pour régler le temps à mesurer.
PRÈS 1 SECONDE, le minuteur commence automatiquement le
A
compte à rebours.
UN SIGNAL SONORE vous avertit lorsque le minuteur a terminé le
compte à rebours.
pâte avant de la cuire, etc.
HORLOGE
À LA PREMIÈRE UTILISATION ou après une panne
de courant, l’écran est vide. Si l’horloge
n’est pas réglée, l’écran reste vide jusqu’au
réglage d’un temps de cuisson.
AMENEZ LE BOUTON MULTIFONCTIONS sur la position zéro.
APPUY EZ SUR LA TOUCHE SELECT (SÉLECTION) pendant 3 secondes,
jusqu’à ce que le chiffre de gauche (heures) clignote.
TOURNEZ LE BOUTON DE RÉGLAGE pour régler les heures.
APPUY EZ DE NOUVEAU SUR LA TOUCHE SELECT (SÉLECTION) . Les deux
chiffres de droite (minutes) clignotent.
TOURNEZ LE BOUTON DE RÉGLAGE pour régler les minutes.
APPUY EZ DE NOUVEAU SUR LA TOUCHE Select (Sélection)
L’
HORLOGE EST RÉGLÉE et fonctionne.
SI VOUS SOUHAITEZ SUPPRI MER L’AFFICHAGE DE L’HEURE après le réglage de
l’horloge, appuyez à nouveau sur la touche Select pendant 3 secondes, puis sur Stop (Arrêt).
POUR RÉAFFICHER L’HORLOGE, suivez la procédure ci-dessus.
REMARQUE : MAINTENEZ LA PORTE OUVERTE PENDANT LE RÉGLAGE DE L’HORLOGE.
Vous disposez ainsi de 10 minutes pour effectuer cette opération. Si-
non, chaque opération doit être effectuée en moins de 60 secondes.
34
.
Page 35

CUISSON ET RÉCHAUFFAGE AVEC LA FONCTION
MICROONDES
UTILISEZ CETTE FONC TION POUR la cuisson normale ou le réchauffage rapide d’aliments
tels que les légumes, le poisson, les pommes
AMENEZ LE BOUTON MULTIFONCTIONS sur la position micro-ondes.
TOURNEZ LE BOUTON DE RÉGLAGE pour régler le temps de cuisson.
APPUY EZ SUR LA TOUCHE SELECT (SÉLECTION) pour sélectionner la puissance.
TOURNEZ LE BOUTON DE RÉGLAGE pour régler la puissance.
APPUY EZ SUR LA TOUCHE START (DÉMARRAGE).
ORSQUE LA CUISSON A DÉMARRÉ :
L
Le temps de cuisson peut être augmenté facilement par paliers de 30
secondes en appuyant sur la touche Start (Démarrage). Chaque pression augmente le temps de 30 secondes. Vous pouvez également
augmenter ou diminuer le temps de cuisson en tournant le bouton
de réglage.
EN APPUYANT SUR LA TOUCHE SELECT (SÉLECTION) , vous pouvez basculer entre le temps de cuisson et la puissance. Ces deux réglages peuvent
être modifiés pendant la cuisson à l’aide du bouton de réglage.
de terre et la viande.
SÉLECTION DU NIVEAU DE PUISSANCE
FONCTION MICROONDES UNIQUEMENT
UISSANCE UTILISATION CONSEILLÉE :
P
ÉCHAUFFAGE DE BOISSONS, eau, potages, café, thé ou autres aliments à haute teneur en
JET
(900 W)
750 W C
650 W C
500 W
350 W C
160 W D
90 W C
0 W RÉGLAGE du temps de repos.
R
eau. Pour les plats préparés avec des œufs ou de la crème, choisir une puissance inférieure.
UISSON DE poisson, légumes, viandes, etc.
UISSON de plats qui ne peuvent pas être remués.
UISSON ATTE NT IVE , par ex. des plats préparés avec de la sauce, du fromage et des œufs et
C
fin de cuisson des ragoûts.
UISSON LENTE DE RAGOÛTS, ramollissement de beurre.
ÉCONGÉLATION. Ramollissement du beurre, des fromages.
ONSERVEZ AU CHAUD
35
Page 36

FONCTION JET START
UTILISEZ CETTE FONC TION pour réchauffer rapidement des aliments à forte teneur en eau,
tels que les potages, le café ou le thé.
AMENEZ LE BOUTON MULTIFONCTIONS sur la position micro-ondes.
APPUY EZ SUR LA TOUCHE START (DÉMARRAGE).
CETTE FONCTION DÉMARRE AU TOMATIQUE MENT à pleine puissance avec le
temps de cuisson réglé sur 30 secondes. Chaque nouvelle pression
augmente le temps de 30 secondes. Vous pouvez également augmenter ou diminuer le temps de cuisson en tournant le bouton de
réglage après le démarrage de la fonction.
DÉCONGÉLATION MANUELLE
POUR UNE DÉCONGÉLATION MANUELLE, procédez comme
pour la “Cuisson et réchauffage aux micro-ondes”
et choisissez une puissance de 160 W.
L
ES ALIMENTS CONGEL ÉS, CONTE NUS DANS DES SACHETS EN
PLASTIQUE , du film plastique ou des emballag-
es en carton, pourront être placés directement dans le four, pourvu que l’emballage
n’ait aucune partie en métal (par exemple, des fermetures métalliques).
LE TEMPS DE DÉCONGÉLATION dépend de la
forme de l’emballage. Les paquets plats se
décongèlent plus rapidement qu’un gros bloc.
S
ÉPAREZ LES MORCEAUX dès qu’ils commencent à
se décongeler.
Les tranches individuelles se décongèlent plus
facilement.
NVELOPPEZ CERTAINES ZONES DES ALI-
E
MENTS dans de petits morceaux
de papier aluminium quand
elles commencent à roussir
(par exemple, les ailes et les
cuisses de poulet).
36
EXAMINEZ LES ALIMENTS RÉGULIÈREMENT POUR VÉRIFIER
LEUR ÉTAT. La pratique vous enseignera combi-
en de temps il faut pour décongeler ou ramollir différentes quantités.
R
ETOURNEZ LES GROS MORCEAUX vers la moitié du
processus de décongélation.
LES ALIMENTS BOUILLIS , LES RAGOÛTS ET LES
SAUCES DE VIANDE se décongèlent mieux
s’ils sont remués durant la décongéla-
tion.
ORSQUE VOUS DÉCONGELEZ, il est conseillé de
L
ne pas décongeler complètement les aliments
et de laisser se terminer le processus durant le
temps de repos.
UELQUES MINUTES DE REPOS APRÈS LA DÉCONGÉLATION
Q
AMÉLIORENT TOUJOURS le résultat,
permettant à la température
d’être répartie uniformément dans les aliments.
Page 37

DÉCONGÉLATION RAPIDE
UTILISEZ CETTE FONC TION que si le poids net des
aliments se situe entre 100 g- 3 kg.
PLACEZ TOUJOURS LES ALIMENTS sur le plateau
AMENEZ LE BOUTON MULTIFONCTIONS sur la position Auto.
APPUY EZ SUR LA TOUCHE AUTO pour sélectionner la fonction automatique souhaitée.
TOURNEZ LE BOUTON DE RÉGLAGE
APPUY EZ SUR LA TOUCHE SELECT (SÉLECTION) : LE POIDS PAR DÉFAUT S’AFFI CHE.
TOURNEZ LE BOUTON DE RÉGLAGE pour régler le poids des aliments.
APPUY EZ SUR LA TOUCHE START (DÉMARRAGE).
LA MOITIÉ DU PROCESSUS DE DÉCONGÉLATION, le four s’arrête et vous in-
À
vite à retourner les aliments “TURN FOOD”.
pour choisir la classe d’aliments.
tournant en verre.
Ouvrez la porte.
Retournez les aliments.
Fermez la porte et redémarrez le four en appuyant sur la touche
Start (Démarrage).
R
EMARQUE : Le four continue automatiquement après 2 minutes si
vous n’avez pas retourné les aliments. Dans ce cas, la durée de décongélation est allongée.
37
Page 38

DÉCONGÉLATION RAPIDE
POUR UTILISER CETTE FONCTIO N, vous devez connaître le poids net des aliments.
ALIMENTS SURGELÉS :
S
I LE POIDS DES ALIMENTS EST INFÉRIEUR OU
SUPÉRIEUR AU POIDS CONSEI LLÉ : pour la dé-
congélation, procédez comme indiqué au paragraphe “Cuisson et
Réchauffage aux micro-ondes” et réglez la puissance sur 160 W.
ALIMENTS QUANTITÉ CONSEILS
ALIMENTS SURGELÉS :
OUR LES ALIMENTS PLUS CHAUDS que la
P
température de surgélation (-18 °C),
choisissez un poids d’aliment inférieur.
POUR LES ALIMENTS PLUS FROIDS que la température de surgélation (-18 °C), choisissez un poids supérieur.
VIANDE
VOLAILLES
POISSON
LÉGUMES
PAIN
P
OUR LES ALIMENTS NON INDIQUÉS DANS LE TAB LEA U ou si leur poids est inférieur ou supérieur au poids
conseillé, procédez comme indiqué au paragraphe “Cuisson et réchauffage aux micro-ondes” et
réglez la puissance sur 160 W pour la décongélation.
100 G - 2 KG Viande hachée, côtelettes, biftecks ou rôtis.
G - 3 KG Poulet entier, fi lets ou morceaux.
100
G - 2 KG Poissons entiers, darnes ou fi lets.
100
G - 2 KG Juliennes, petits pois, brocolis, etc.
100
G - 2 KG Pain, petits pains longs ou ronds.
100
38
Page 39

GRIL
UTILISEZ CETTE FONC TION pour dorer rapidement la surface des aliments.
POUR LES ALIMENTS TELS QUE FROMAGE, TOASTS ,
AMENEZ LE BOUTON MULTIFONCTIONS sur la position Gril.
TOURNEZ LE BOUTON DE RÉGLAGE pour régler le temps de cuisson.
APPUY EZ SUR LA TOUCHE START (DÉMARRAGE).
NE LAISSEZ PAS LA PORTE DU FOUR OUVERTE pendant de longues périodes
lorsque le gril est allumé, car ceci provoque une chute de température.
EILLEZ À CE QUE LES USTENSILES que vous utilisez soient à la fois résis-
V
tants à la chaleur et au four avant de les utiliser pour griller.
N’
UTILISEZ PAS D’USTENSILES EN PLASTIQUE pour la fonction Gril. Ils fond-
ent. Le bois et le papier doivent également être évités.
BIFTECKS OU SAUCISSES, placez la grille métal-
lique au-dessus de la plaque à pâtisserie.
39
Page 40

GRIL COMBI
UTILISEZ CETTE FONC TION pour dorer rapidement la surface des aliments pendant leur
cuisson aux micro-ondes.
AMENEZ LE BOUTON MULTIFONCTIONS sur la position Gril Combi.
TOURNEZ LE BOUTON DE RÉGLAGE pour régler la puissance.
APPUY EZ SUR LA TOUCHE SELECT (SÉLECTION) pour sélectionner le
temps de cuisson.
TOURNEZ LE BOUTON DE RÉGLAGE pour régler le temps de cuisson.
APPUY EZ SUR LA TOUCHE START (DÉMARRAGE).
EILLEZ À CE QUE LES USTENSILES que vous utilisez soient à la fois résis-
V
tants à la chaleur et au four avant de les utiliser pour griller.
N’
ent. Le bois et le papier doivent également être évités.
E NIVEAU DE PUISSANCE MAXIMUM DU MICRO-ONDES, lors de l’utilisation du
L
Grill, est limité à un niveau prédéfini en usine.
POSEZ LES ALIMENTS SUR LA GRILLE MÉTALLIQUE, afin que l’air circule correctement autour des aliments.
UTILISEZ PAS D’USTENSILES EN PLASTIQUE pour la fonction Gril. Ils fond-
SÉLECTION DU NIVEAU DE PUISSANCE
GRIL COMBI
UISSANCE UTILISATION CONSEILLÉE :
P
650 W C
350 - 500 W C
160 - 350 W C
160 W C
90 W G
UISSON des légumes et des gratins
UISSON de volailles et lasagnes
UISSON du poisson et des gratins surgelés
UISSON de la viande
RATINS de fruits
40
Page 41

TURBO GRIL COMBINÉ
UTILISEZ CETTE FONC TION pour cuire gratins, lasagnes, volailles, pommes de terre au four,
etc.
AMENEZ LE BOUTON MULTIFONCTIONS sur la position Turbo Gril.
TOURNEZ LE BOUTON DE RÉGLAGE pour régler la puissance.
APPUY EZ SUR LA TOUCHE SELECT (SÉLECTION) pour sélectionner le
temps de cuisson.
TOURNEZ LE BOUTON DE RÉGLAGE pour régler le temps de cuisson.
APPUY EZ SUR LA TOUCHE START (DÉMARRAGE).
L
E NIVEAU DE PUISSANCE MAXIMUM DU MICRO-ONDES, lors de l’utilisation du
Grill, est limité à un niveau prédéfini en usine.
PLACEZ LES ALIMENTS sur la grille métallique
ou sur le plateau tournant en verre lorsque
vous utilisez cette fonction.
SÉLECTION DU NIVEAU DE PUISSANCE
TURBOGRIL COMBI
UISSANCE UTILISATION CONSEILLÉE :
P
650 W C
350 - 500 W C
160 - 350 W C
160 W C
90 W G
0 W B
UISSON des légumes et des gratins
UISSON de volailles et lasagnes
UISSON du poisson et des gratins surgelés
UISSON de la viande
RATINS de fruits
RUNISSAGE uniquement pendant la cuisson
41
Page 42

CHAUFFAGE RAPIDE
UTILISEZ CETTE FONC TION pour réchauffer le
four vide.
N’INTRODUISEZ PAS D’ALIMENTS dans le four
avant ou pendant son préchauffage. En ef-
fet, la haute température dégagée risquerait de les brûler.
AMENEZ LE BOUTON MULTIFONCTIONS sur la position Réchauff. rapide.
TOURNEZ LE BOUTON DE RÉGLAGE pour régler la température.
APPUY EZ SUR LA TOUCHE START (DÉMARRAGE).
ENDANT LE PRÉCHAUFFAGE les chiffres clignotent et l’indication
P
PRE-H EA T (préchauffage) est affichée à intervalles tant que
la température voulue n’est pas atteinte.
L
A TEMPÉRATURE PEUT ÊTRE FACILE MENT RÉGLÉE au cours du processus en
tournant le bouton multifonctions.
L
E FOUR MAINTIENT ensuite la température réglée pendant 10 minutes
avant de s’éteindre. Ce laps de temps sert à vous permettre d’enfiler
les aliments dans le four et de sélectionner la fonction chaleur pulsée pour commencer à cuire.
42
A
U COURS DU PRÉCH AUFFAGE, le four doit être toujours vide.
Page 43

CHALEUR PULSÉE
UTILISEZ CETTE FONC TION pour cuire des meringues, des pâtisseries, des gâteaux de
savoie, des soufflés, de la volaille et des
rôtis.
AMENEZ LE BOUTON MULTIFONCTIONS sur la position Chaleur pulsée.
TOURNEZ LE BOUTON DE RÉGLAGE pour régler la température.
APPUY EZ SUR LA TOUCHE SELECT (SÉLECTION) pour sélectionner le
temps de cuisson.
TOURNEZ LE BOUTON DE RÉGLAGE pour régler le temps de cuisson.
APPUY EZ SUR LA TOUCHE START (DÉMARRAGE).
A TEMPÉRATURE PAR DÉFAUT de la Chaleur Pulsée est de 175 °C
L
OSEZ LES ALIMENTS SUR LA GRILLE MÉ TALLIQ UE, afin que l’air circule cor-
P
rectement autour des aliments.
TILISEZ LA PLAQUE À PÂTIS SERI E pour cuire de petits aliments tels les bis-
U
cuits et les petits pains.
PENDANT LE PRÉCHAUFFAGE les chiffres clignotent tant que la température
voulue n’est pas atteinte.
LA TEMPÉRATURE PEUT ÊTRE FACIL EMEN T RÉGLÉE EN COURS DE CUISSON EN TOURNANT LE
BOUTON DE RÉGLAGE.
43
Page 44
CHALEUR PULSÉE COMBINÉE
UTILISEZ CETTE FONC TION pour la cuisson de
rôtis, volailles, pommes de terre en robe des
champs, plats préparés congelés, gâteaux
de Savoie, pâtisseries, poisson et puddings.
AMENEZ LE BOUTON MULTIFONCTIONS sur la position Chaleur pulsée combinée.
TOURNEZ LE BOUTON DE RÉGLAGE pour régler la température.
APPUY EZ SUR LA TOUCHE SELECT (SÉLECTION) pour sélectionner la puissance des mi-
cro-ondes.
TOURNEZ LE BOUTON DE RÉGLAGE pour régler la puissance.
APPUY EZ SUR LA TOUCHE SELECT (SÉLECTION) pour sélectionner le temps de cuisson.
TOURNEZ LE BOUTON DE RÉGLAGE pour régler le temps de cuisson.
APPUY EZ SUR LA TOUCHE START (DÉMARRAGE).
P
OSEZ LES ALIMENTS SUR LA GRILLE MÉ TALLIQ UE, afin que l’air circule cor-
rectement autour des aliments.
P
ENDANT LE PRÉCHAUFFAGE les chiffres clignotent tant que la tempéra-
ture voulue n’est pas atteinte.
A TEMPÉRATURE PEUT ÊTRE FACILE MENT RÉGLÉE en cours de préchauffage en
L
tournant le bouton de réglage. Il est également possible de modifier la puissance. Le niveau de puissance maximum du micro-ondes,
lors de l’utilisation de la Chaleur pulsée est limité à un niveau prédéfini en usine.
44
SÉLECTION DU NIVEAU DE PUISSANCE
CHALEUR PULSÉE COMBINÉE
UISSANCE UTILISATION CONSEILLÉE :
P
350 W C
160 W C
90 W C
UISSON de volailles, poisson et gratins
UISSON de rôtis
UISSON de pain et de gâteaux
Page 45

RÉCHAUFF. AUTO
UTILISEZ CETTE FONC TION pour réchauffer des
plats précuisinés surgelés ou frais.
DISPOSEZ LES ALIMENTS sur un plat résistant à la
chaleur et adapté aux micro-ondes.
AMENEZ LE BOUTON MULTIFONCTIONS sur la position Auto.
APPUY EZ SUR LA TOUCHE AUTO pour sélectionner la fonction au-
tomatique souhaitée.
APPUY EZ SUR LA TOUCHE START (DÉMARRAGE).
LA MOITIÉ DU PROCESSUS DE CUISSON, le four s’arrête et vous invite à re-
À
muer les aliments STIR FOOD.
Ouvrez la porte.
Remuez ou retournez les aliments.
Fermez la porte et redémarrez le four en appuyant sur la touche
Start (Démarrage).
REMARQUE : LE FOUR CONT INUE AUTOM ATIQUEME NT APRÈS 2 MIN vous n’avez
pas retourné / remué les aliments.
LORSQUE VOUS CONS ERVEZ un repas au réfrigérateur ou que vous le disposez sur un plat pour
le réchauffer, placez les aliments les plus
épais et les plus dens-
es à l’extérieur et
les aliments les
moins épais et
moins denses au
milieu.
P
LACEZ DE FINES TRANCHES de viande l’une sur
l’autre ou entrelacées.
LES TRANCHES LES PLUS ÉPAISSES comme le pain de
viande et les saucisses doivent être placées les
unes à côté des autres.
OUR UN MEILLEUR RÉSULTAT, il est
P
conseillé de toujours lais-
ser reposer les aliments
pendant 1-2 minutes, notamment s’il s’agit
d’aliments surgelés.
V
EILLEZ À PERFORE R LE FILM
PLASTIQUE avec une four-
chette ou un cure-dent pour
permettre à la pression de
s’échapper et éviter les risques d’éclatement lorsque
de la vapeur se forme à l’intérieur pendant la
cuisson.
45
Page 46
RÉCHAUFF. AUTO
ALIMENTS CONSEILS
RÉPAREZ LES ALIMENTS comme indiqué ci-dessus.
GRANDE ASSIETTE (250 g - 600 g)
SOUPE (200 g - 800 g)
PORTION SURGELÉE (250 g - 600 g)
LAIT (100g - 500 g)
CASSEROLE (200g - 800 g)
OUR LES ALIMENTS NON INDIQUÉS DANS LE TAB LEA U ou si leur poids est inférieur ou supérieur au poids
P
conseillé, procédez comme indiqué au paragraphe “Cuisson et réchauffage aux micro-ondes”.
P
Chauffez sous un couvercle.
ÉCHAUFFEZ SANS COUVE RCLE dans des bols séparés
R
ou dans un grand récipient.
UIVEZ LES INDICATIONS REPORTÉES SUR L’EMBALLAGE, soit
S
ventilation, perforation, etc.
AITES CHAUFFER SANS COUVR IR et utilisez une cuillère
F
en métal dans un bol ou une tasse.
ÉCHAUFFEZ AVEC UN COUVERCL E.
R
46
Page 47

CUISSON AUTOMATIQUE AUTO COOK
UTILISEZ CETTE FONCTION UNIQUEMENT POUR la
cuisson. La fonction Auto Cook (cuisson automatique) ne peut être utilisée qu’avec les fa-
AMENEZ LE BOUTON MULTIFONCTIONS sur la position Auto.
APPUY EZ SUR LA TOUCHE AUTO pour sélectionner la fonction automa-
tique souhaitée.
TOURNEZ LE BOUTON DE RÉGLAGE pour choisir la classe d’aliments.
APPUY EZ SUR LA TOUCHE SELECT (SÉLECTION) : le poids par défaut s’affiche.
TOURNEZ LE BOUTON DE RÉGLAGE pour régler le poids des aliments.
APPUY EZ SUR LA TOUCHE START (DÉMARRAGE).
À
LA MOITIÉ DU PROCESSUS DE CUISSON, le four s’arrête et vous invite à re-
muer les aliments STIR FOOD ou à les retourner TURN FOOD.
milles d’aliments indiquées dans le tableau.
ISPOSEZ LES ALIMENTS sur un plat résistant à la
D
chaleur et adapté aux micro-ondes.
Ouvrez la porte.
Remuez ou retournez les aliments.
Fermez la porte et redémarrez le four en appuyant sur la touche
Start (Démarrage).
R
EMARQUE : LE FOUR CONTI NUE AUTOMATI QUEMEN T APRÈS 2 MIN vous n’avez
pas retourné / remué les aliments.
L
ORSQUE VOUS CONS ERVEZ un repas au réfrigéra-
teur ou que vous le disposez sur un plat pour
le réchauffer, placez les aliments les plus
épais et les plus dens-
es à l’extérieur et
les aliments les
moins épais et
moins denses au
milieu.
P
LACEZ DE FINES TRANCHES de viande l’une sur
l’autre ou entrelacées.
LES TRANCHES LES PLUS ÉPAISSES comme le pain de
viande et les saucisses doivent être placées les
unes à côté des autres.
OUR UN MEILLEUR RÉSULTAT, il est con- seil-
P
lé de toujours laisser reposer les
aliments pendant 1-2 minutes, notamment s’il s’agit
d’aliments surgelés.
UTILISEZ TOUJOURS un couvercle avec cette fonction, sauf lorsque vous réchauffez des soupes
! Si les aliments sont emballés et que leur
taille ne vous permet pas d’utiliser un
couvercle, faites 2 ou 3 entailles dans
l’emballage pour que l’excédent
de pression s’échappe pendant le
réchauffage.
EILLEZ À PERFORE R LE FILM PLAS-
V
TIQUE avec une fourchette ou un
cure-dent pour permettre
à la pression de s’échapper
et éviter les risques
d’éclatement lorsque de la
vapeur se forme à l’intérieur
pendant la cuisson.
47
Page 48

CUISSON AUTOMATIQUE AUTO COOK
ALIMENTS QUANTITÉ CONSEILS
P
IQUEZ LES POMMES DE TERRE À L’AIDE D’UNE FOURCHETTE et
POMMES DE TERRE
AU FOUR
LÉGUMES FRAIS
200 g - 1 kg
200 g - 800 g
disposez-les dans un plat pour micro-ondes, résistant à la chaleur. Retournez les pommes de terre
lorsque le four sonne. Faites attention à ne pas vous
brûler : le four, le plat et les aliments sont chauds.
COUPEZ LES LÉGUMES en morceaux uniformes. Ajoutez
2-4 cuillérées à soupe d’eau et couvrez. Mélangez
lorsque le four sonne.
LÉGUMES
SURGELÉS
LÉGUM ES EN CON-
SERVE
POPCORN
P
OUR LES ALIMENTS NON INDIQUÉS DANS LE TAB LEA U ou si leur poids est inférieur ou supérieur au poids
conseillé, procédez comme indiqué au paragraphe “Cuisson et réchauffage aux micro-ondes”.
200 g - 800 g
200 g - 600 g
90 g - 100 g
COUVRIR DURANT LA CUISSON. Mélangez lorsque le four
sonne.
VIDEZ PRESQUE TOUT LE LIQUIDE , disposez dans un plat
adapté aux micro-ondes et couvrez.
PLACEZ UN SEUL SACHET à la fois dans le four à mi-
cro-ondes. Si la quantité de popcorn ne suffit pas,
placez un autre sachet lorsque le premier est prêt.
48
Page 49

CHALEUR PULSÉE COMBINÉE AUTOMATIQUE
UTILISEZ CETTE FONC TION POUR cuire les aliments
crus ou surgelés.
AMENEZ LE BOUTON MULTIFONCTIONS sur la position Auto.
APPUY EZ SUR LA TOUCHE AUTO pour sélectionner la fonction automa-
TOURNEZ LE BOUTON DE RÉGLAGE
APPUY EZ SUR LA TOUCHE SELECT (SÉLECTION) : LE POIDS PAR DÉFAUT S’AFFI CHE.
TOURNEZ LE BOUTON DE RÉGLAGE pour régler le poids des aliments.
APPUY EZ SUR LA TOUCHE START (DÉMARRAGE).
tique souhaitée.
P
OUR POULETS ET LASAGNE ; assurez-vous que le plat que vous allez
utiliser est résistant à la chaleur et qu’il est perméable aux microondes avant de l’utiliser. Sinon vous risquez d’obtenir de piètres résultats.
TILISEZ TOUJOURS la plaque à pâtisserie pour cuire des
U
biscuits et des petits pains prêts à cuire ou surgelés.
ENDUIRE LA PLAQUE À PÂTIS SERI E d’une légère couche
de graisse ou la recouvrir de papier cuisson.
pour choisir la classe d’aliments.
I VOUS UTILISEZ LES PROGR AMMES pour les petits pains prêts à cuire ou
S
surgelés, le four doit être préchauffé avant d’y introduire les aliments. Une fois que le four aura atteint la température voulue, il
vous demandera d’introduire les aliments.
Ouvrez la porte.
Placez la plaque à pâtisserie avec les aliments sur les
guides situés contre les parois de la cavité du four.
add
Fermez la porte et redémarrez le four en appuyant
sur la touche Start (Démarrage).
food
49
Page 50

CHALEUR PULSÉE COMBINÉE AUTOMATIQUE
POIDS CONSEILLÉS
SSAISONNEZ LE POULET avec du sel et des épic-
A
es. Enduisez-le, si nécessaire, d’huile. Placez-
POULET (800 G - 1½ KG)
2 LASAGNES SURGELÉES (400 G - 1 KG)
BISCUITS (9-12 biscuits)
PÂTE À PAI N PRÊTE À CUIRE
PETITS PAIN S SURGELÉS
le dans un plat pour micro-ondes, résistant au four. Placez le plat sur la grille métallique.
LACEZ-LES dans un plat pour micro-ondes,
P
résistant à la chaleur. Placez le plat sur la
grille métallique.
LACEZ sur la plaque à pâtisserie enduite
P
d’une légère couche de graisse. Enfilez la
plaque à pâtisserie dans le four lorsqu’il
vous y invite “Add food”.
À UTILISER pour des aliments genre croissants ou petits pains. Placez les petits pains
sur la plaque à pâtisserie. Enfilez la plaque à
pâtisserie dans le four lorsqu’il vous y invite
“Add food”.
À UTILISER pour les petits pains déjà cuits,
mais surgelés. Placez les petits pains sur la
plaque à pâtisserie. Enfilez la plaque à pâtisserie dans le four lorsqu’il vous y invite
“Add food”.
P
OUR LES ALIMENTS NON INDIQUÉS DANS LE TABLE AU ou si leur poids est inférieur ou supérieur au poids conseillé,
procédez comme indiqué au paragraphe “Chaleur pulsée ou Chaleur pulsée combinée” .
50
Page 51

ENTRETIEN ET NETTOYAGE
L’ENTRETIEN DE CET APPAREIL se limite à son nettoyage.
SI LE FOUR N’EST PAS MAINTENU PROPRE , cela peut en-
traîner la détérioration de la surface, affecter la
durée de vie de l’appareil et provoquer des situations de danger.
UTILISEZ PAS DE TAMPO N S À RÉCURER EN MÉTAL, NET-
N’
TOYANTS ABRASIFS, tampons en laine de verre,
chiff ons rugueux, etc. car ils
peuvent abîmer le bandeau
de commandes, ainsi que
les surfaces intérieures et
extérieures du four. Utilisez
une éponge avec un détergent doux ou une
serviette en papier avec un nettoyant pour vitres. Vaporisez le produit sur la serviette en papier.
NE LE VAPO RIS EZ PAS directement
sur le four.
À INTERVALLES RÉGULIERS, notamment en cas de débordements,
enlevez le plateau tournant, le support du plateau tournant et essuyez la base du four.
CE FOUR EST CONÇU pour fonctionner avec le
plateau tournant.
NE METTEZ PAS le four en marche si le plateau
tournant a été enlevé pour le nettoyage.
UTILISEZ UN DÉTERGENT DOUX, de l’eau et un chiffon
doux pour nettoyer l’intérieur du four, les deux
faces de la porte et l’encadrement de la porte.
EMPÊCHEZ QUE DE LA GRAISSE ou des parti-
cules alimentaires ne s’accumulent autour de la porte.
POUR LES SALISSURES TENACES, faites bouillir une tasse
d’eau dans le four pendant 2 ou 3 minutes. La vapeur facilitera l’élimination des salissures.
ÉLIMINEZ LES ODEURS ÉVENT UELLES en faisant bouillir
une tasse d’eau avec deux rondelles de citron,
placée sur le plateau tournant.
N’
UTILISEZ PAS D’APPAREIL DE NETTOYAGE À VAPEU R
pour nettoyer votre four micro-ondes.
L
E GRIL ne nécessite aucun nettoyage, la cha-
leur intense brûlant toutes les éclaboussures.
Toutefois il convient de nettoyer régulière-
ment la voûte du four. Pour ce faire, utilisez du
détergent, de l’eau chaude et une éponge. Si la
fonction Gril n’est pas utilisée régulièrement,
elle doit être activée au
moins 10 minutes par
mois pour brûler toute
trace d’éclaboussure et
réduire ainsi le risque
d’incendie.
Poussez délicate-
ment le fi let de fi xation vers l’arrière de la
voûte du four etabaissez-le pour dégager
le gril.
Remettez le fi let de
fi xation en place
après le nettoyage.
NETTOYAGE AU LAVEVAISSELLE :
UPPORT DU PLATEAU TOURNANT.
S
LATEAU TOUR NANT EN VERRE.
P
RILLE MÉTALLIQUE.
G
LAQUE À PÂTIS SER IE.
P
ORTE-BIBERON.
P
51
Page 52

DIAGNOSTIC DES PANNES
SI LE FOUR NE FONCTI ONNE PAS, avant de contacter
votre Revendeur, veuillez vérifier si :
Le plateau tournant et support du plateau
tournant sont en place.
La prise de courant est bien branchée.
La porte est correctement fermée.
Les fusibles sont en bon état et la puis-
sance de l’installation est adaptée.
Le four est bien ventilé.
Attendez 10 minutes et essayez à nouveau.
Ouvrez et refermez la porte avant d’essayer
à nouveau.
CELA VOUS ÉVITERA peut-être des interventions
inutiles qui vous seraient facturées.
Lorsque vous contactez le Service après-vente,
veuillez préciser le modèle et le numéro de série du four (voir l’étiquette Service). Consultez
le livret de garantie pour de plus amples informations à ce sujet.
S
I LE CORDO N D’ALIMEN TATION DOIT ÊTRE REM-
PLACÉ, utilisez un cordon
d’origine disponible auprès
du Service Après-Vente. Le
cordon d’alimentation doit
être remplacé par un technicien spécialisé du Service
après-vente.
E SERVICE APRÈS-VENTE NE DOIT
L
ÊTRE EFFECTUÉ QUE PAR DES TECH-
NICIENS SPÉCIALISÉS. Il est dan-
gereux pour quiconque n’est
pas un technicien spécialisé
d’assurer le service après-vente ou d’eff ectuer des opérations impliquant
le démontage des panneaux de protection contre l’exposition à l’énergie des micro-ondes.
NE DÉMONTEZ AUCUN PANNEAU.
L
ES MATÉRIAUX D’EMBALLAGE sont en-
tièrement recyclables comme
l’indique le symbole de recyclage. Suivez les réglementations locales en vigueur
en matière d’élimination des
déchets. Ne laissez pas les éléments
d’emballage potentiellement dangereux (sachets en plastique, éléments en polystyrène,
etc.) à la portée des enfants.
CET APPAREIL porte le symbole du recyclage conformément à la Directive européenne 2002/96/EC relative aux déchets
d’équipements électriques et électroniques
(DEEE ou WEEE- Waste Electrical and Electronic Equipment). En procédant correctement à la
mise au rebut de cet appareil, vous contribuerez à empêcher toute conséquence nuisible
pour l’environnement et la santé.
52
Page 53

INFORMATIONS POUR LE RECYCLAGE
P
LE SYMBOLE présent sur l’appareil ou sur la
documentation qui
l’accompagne indique que
ce produit ne peut en aucun cas être traité comme
un déchet ménager. Il doit
par conséquent être remis à
un centre de collecte des
déchets chargé du recyclage des équipements
électriques et électroniques.
L
A MISE AU REBUT doit être
effectuée conformément aux réglementations
locales en vigueur en matière de protection de
l’environnement.
S
ELON LA NORME IEC 60705 (CEI 60705).
LA COMMISSION ÉLECTROTECHNIQUE INTERNATIONALE a établi une norme relative à des essais de perfor-
mance comparatifs effectués sur différents fours micro-ondes. NOus recommandons ce qui suit
pour ce four :
Test Quantité Durée approx. Niveau de puissance Récipient
12.3.1 1000
12. 3 .2 475
12.3.3 900
12. 3 .4 110 0
12. 3 .5 70 0
12.3.6 1000
13. 3 5 00
G 11 MIN 750 W Pyrex 3.227
G 5 MIN 750 W Pyrex 3.827
G 15 MIN 750 W Pyrex 3.838
G 28-30 MIN CHALEUR PULSÉE 200 ºC + 350 W Pyrex 3.827
G 25 MIN CHALEUR PULSÉE 200 ºC + 90 W Pyrex 3.827
G 30-32 MIN CHALEUR PULSÉE 225 ºC + 350 W Pyrex 3.827
G 2 MIN 12 S DÉCONGÉLATION RAPIDE
OUR OBTENIR DE PLUS AMPLES DÉTAILS au sujet du trait-
ement, de la récupération et du recyclage de cet
appareil, veuillez vous adresser au bureau compétent de votre commune, à la société de collecte
des déchets ou directement à votre revendeur.
A
VANT DE VO US SÉPARER DE L’APPAREIL, rendez-le in-
utilisable en coupant le cordon d’alimentation,
de manière à ne plus pouvoir raccorder
l’appareil au réseau électrique.
SPÉCIFICATIONS TECHNIQUES
TENSION D’ALIMENTATION 230 V / 50 HZ
PUISSANCE NOMINALE 2800 W
USIBLE 16 A (RU 13 A)
F
UISSANCE MO 900 W
P
DIMENSIONS EXTERNES (HXLXP) 455 X 595 X 560
IMENSIONS INTERNES (HXLXP) 210 X 450 X 420
D
53
Page 54

AUFSTELLUNG
MONTAGE DES GERÄTES
DIE MITGELIEFERTE separate Einbauanleitung
zum Aufbau des Geräts befolgen.
VOR DEM ANSCHLIESSEN
DIE SPAN NUNG AUF DEM TYPENSCHILD MUSS DER
SPANN UNG SVER SOR GUNG in Ihrem Haus ent-
sprechen.
OR DER MONTAGE muss der Garraum des Geräts
V
leer sein.
V
ERGEWISSERN SIE SICH, DASS DAS GERÄT NICHT BES-
CHÄDIGT IST. Kontrollieren Sie, dass die Tür dicht
mit dem Rahmen abschließt. Entfernen Sie alle
Gegenstände aus dem Gerät und reinigen Sie
die Innenflächen mit einem weichen, feuchten
Tuc h.
DEUTSCH
D
AS GERÄT NICHT VERWENDEN, wenn Kabel
DE
oder Stecker beschädigt sind, es nicht
einwandfrei funktioniert, heruntergefallen ist oder in irgendeiner Weise beschädigt wurde. Tauchen Sie das Stromkabel oder den Stecker nicht in Wasser.
Halten Sie das Kabel von heißen Flächen
fern. Stromschlag, Brand oder sonstige
Gefährdungen könnten sonst die Folge
sein.
NACH DEM ANSCHLIESSEN
AS GERÄT KANN NUR IN BETRIEB GENOMMEN WERDEN ,
D
wenn die Tür richtig (fest anliegend) geschlossen ist.
Der Hersteller ist für Probleme, die sich aus der
Nichtbeachtung dieser Anweisungen durch
den Nutzer ergeben, nicht verantwortlich.
54
IE ERDUNG DIESES GERÄTES ist gesetzlich
D
vorgeschrieben. Der Hersteller haftet
nicht für Verletzungen von Personen
oder Tieren und für Sachschäden, die infolge Missachtung der o.g. Vorschriften
entstehen sollten.
Page 55

WICHTIGE SICHERHEITSHINWEISE
LESEN SIE DIE BEDIENUNGSANLEITUNG SORGFÄLTIG DURCH UND BEWAHREN SIE SIE ZUM
SPÄTEREN NACHSCHLAGEN AUF
KEINE BRENNBAREN MATERIALIEN in dem Gerät
selbst oder in seiner Nähe erhitzen oder
verwenden. Rauchentwicklung kann zu
Brand oder Explosion führen.
D
AS MIKROWELLENGE RÄT NICHT zum Trock-
nen von Textilien, Papier, Gewürzen,
Kräutern, Holz, Blumen, Früchten oder
anderen brennbaren Materialien verwenden. Es besteht Brandgefahr.
W
ENN MATE RIA L INNERHALB ODER AUSSERH ALB
DES GARRAUMS ZU BRENNEN ANFÄNGT, müssen
Sie die Gerätetür geschlossen halten und
das Gerät ausschalten. Ziehen Sie den
Netzstecker oder drehen Sie die Sicherung im Schaltkasten heraus.
AREN SIE DIE SPEISEN NICHT LÄNGER ALS NÖTIG.
G
Es besteht Brandgefahr.
AS GERÄT NICHT UNBEAUFSICHTIGT LASSEN,
D
insbesondere dann, wenn beim Garen
Papier, Kunststoff oder andere brennbare Materialien verwendet werden. Papier kann verkohlen oder Feuer fangen.
Einige Kunststoff e können schmelzen,
wenn sie zusammen mit den Speisen erhitzt werden.
EINE ÄTZE ND EN Chemikalien oder Dämp-
K
fe in diesem Gerät verwenden. Dieser
Gerätetyp wurde speziell zum Aufwärmen oder Garen von Lebensmitteln entwickelt. Er eignet sich nicht für industrielle Zwecke oder Laborzwecke.
KINDER dürfen das Mikrowellengerät nur
unter Aufsicht von Erwachsenen benutzen, und nur dann, wenn sie ausreichend
eingewiesen wurden und sich der Gefahren
eines unsachgemäßen Gebrauchs bewusst
sind.
D
IESES GERÄT DAR von Personen (einschl.
Kindern) mit eingeschränkten physischen,
sensorischen oder mentalen Fähigkeiten
nur unter Aufsicht durch eine für ihre
Sicherheit verantwortliche Person verwendet werden.
BEI DER BENUTZUNG DES GERÄTES KÖNNEN ZUGÄN-
GLICHE TEILE SEHR HEISS WERDEN, halten Sie da-
her kleine Kinder fern.
VERWENDEN SIE DAS
MIKROWELLENGERÄT NIEMALS
zum Erhitzen von Speisen
oder Flüssigkeiten in luftdicht verschlossenen Behältern. Der Druck
im Behälter nimmt zu. Das kann beim
Öff nen des Behälters zu Verletzungen oder
zu einer Explosion führen.
D
IE TÜRDICHTUNG UND DIE UMLIEGENDEN
BEREICHE regelmäßig auf Beschädigungen
überprüfen. Nehmen Sie bei einer
Beschädigung das Gerät erst wieder in
Betrieb, nachdem es von einem qualifi zierten Kundendiensttechniker repariert
wurde.
EIER
AS MIKROWELLENGE RÄT NICHT zum Garen oder
D
Aufwärmen ganzer Eier mit oder
ohne Schale benutzen, da diese
auch nach Beenden des Garoder Aufwärmvorgangs explodieren können.
55
Page 56

VORSICHTSMASSNAHMEN
ALLGEMEINES
AS GERÄT IST AUSSCHLIESSLICH FÜR DIE VERWENDUNG IM
D
HAUSHALT BESTIMMT!
B
EI NUTZUNG DER MIKROWELLENFUNKTIONEN DARF DAS
GERÄT NUR EINGESCHALTET WERDEN, wenn sich Speisen
im Garraum befi nden. Andernfalls kann es zu
Schäden am Gerät kommen.
Z
UM VERTRAUTMACHEN mit den Gerätefunktionen
ein Glas Wasser in den Garraum stellen. Das
Wasser absorbiert die Energie der Mikrowellen,
so dass der Herd nicht beschädigt wird.
ERWENDEN SIE DEN GARRAUM nicht als Ablage.
V
LLE METALLTEILE (Z. B. VERSCHLÜSSE)
A
von Papier- oder Plastikbeuteln ent-
fernen, bevor diese in den Garraum
gelegt werden.
FRITTIEREN
D
AS MIKROWELLENGE RÄT DARF NICHT zum Frittieren
verwendet werden, da die Temperatur
des Frittieröls nicht kontrolliert werden kann.
VERWENDEN SIE STETS TOPFLAPPEN ODER HAND-
SCHUHE, wenn Sie nach dem Kochen Be-
hälter, Geräteteile und Schalen berühren. Es besteht Verbrennungsgefahr.
BEDIENKNÖPFE
D
IE KNÖPFE DIESES GERÄTS befinden sich
im Lieferzustand in einer Höhe mit dem
Tasten auf dem Bedienfeld. Werden die
Knöpfe gedrückt, dann gleiten sie heraus
und ermöglichen den Zugriff auf die
verschiedenen Funktionen.
Wenn das Gerät in Betrieb
ist, müssen die Bedienknöpfe nicht
mehr aus dem Bedienfeld herausragen.
Drücken Sie die Knöpfe einfach in das
Bedienfeld zurück, wenn alle Einstellungen vorgenommen wurden, und nehmen Sie
das Gerät in Betrieb.
FLÜSSIGKEITEN
ETRÄNKE ODER WASSER. Flüssigkeiten kön-
Z. B. G
nen über den Siedepunkt
hinaus erhitzt werden, ohne
dass es zu einer sichtbaren Blasenbildung kommt. Das kann
dazu führen, dass die heiße
Flüssigkeit plötzlich überkocht.
Um dies zu vermeiden, ergreifen Sie folgende
Vorsichtsmaßnahmen:
1. Verwenden Sie möglichst keine hohen,
schmalen Gefäße mit engem Hals.
2. Rühren Sie die Flüssigkeit um, bevor Sie
das Gefäß in den Garraum stellen, und
lassen Sie einen Teelöff el im Gefäß.
3. Lassen Sie die Flüssigkeit nach dem Erhitzen kurz stehen, rühren Sie nochmals um,
bevor Sie das Gefäß vorsichtig aus dem
Gerät nehmen.
ACHTUNG
G
ENAUERE INFORMATIONEN dazu finden Sie im Mi-
krowellenkochbuch. Dies gilt besonders für
das Garen oder Erhitzen von alkoholhaltigen
Speisen.
B
ABYNAHRUNG in Gläsern oder Getränke
in Babyfl aschen müssen
nach dem Erwärmen immer
umgerührt und auf die richtige
Temperatur überprüft werden. Dadurch wird eine
gleichmäßige Wärmeverteilung sichergestellt
und das Risiko des Verbrühens oder Verbrennens
vermieden.
Nehmen Sie den Deckel bzw. Sauger unbedingt vor dem Erwärmen ab!
56
Page 57

ZUBEHÖR
ALLGEMEINES
E
INE REIHE von Zubehörteilen kann käuflich er-
worben werden. Prüfen Sie vor dem Kauf, ob
sie für das Mikrowellengerät geeignet sind.
N
UR HITZEBESTÄNDIGES und mik-
rowellengeeignetes Kochgeschirr verwenden.
S
PEISEN UND ZUBEHÖRTEILE dürfen nicht beim Hin-
einstellen in die Mikrowelle mit den Innenwänden des Gerätes in Berührung kommen.
Das gilt besonders dann, wenn die
Zubehörteile aus Metall oder Metallteilen
bestehen.
ENN SOLCHE TEILE mit den Innenwänden des
W
Garraums in Berührung kommen, während die
Mikrowelle in Betrieb ist, können Funken entstehen und das Gerät beschädigen.
EVOR SIE DAS GERÄT EINSCHALTEN , prüfen Sie stets, ob
B
sich der Drehteller ungehindert drehen kann.
DREHTELLERAUFLAGE
D
IE DREHTELLERAUFLAGE MUSS IM-
MER unter dem Glasdrehteller an-
gebracht werden. Legen Sie keine anderen Gegenstände auf die
Drehtellerauflage.
Setzen Sie die Drehtelleraufl age in das
Gerät ein.
GLASDREHTELLER
ENUTZEN SIE DEN GLASDREHTELLER-
B
bei allen Zubereitungsarten. Er
fängt heruntertropfende Flüssigkeiten und Speiseteilchen
auf, so dass eine unnötige Verschmutzung des Innenraums vermieden wird.
Stellen Sie den Glasdrehteller auf die
Drehtelleraufl age.
BACKBLECH
D
AS BACKBLECH nur beim Heißluft-
oder Grillbetrieb verwenden.
Niemals im Kombinationsbetrieb mit Mikrowelle verwenden.
GRILLROST
D
EN GRILLROST beim Garen und
Backen mit den Funktionen
Heißluftbetrieb, Grill, Kombinationsbetrieb mit Heißluft, Automatischer
Kombinationsbetrieb mit
Heißluft oder Kombinationsbetrieb mit Turbogrill
verwenden.
BEIM REINEN GRILLBETRIEB den
Grillrost auf das Backblech setzen, damit sich
die Speise näher am Grillelement in der Garraumoberwand befindet.
FLÄSCHCHENHALTER
D
EN FLÄSCHCHENHALTER ZUM
Aufwärmen von Babynah-
rung in hohen Flaschen
verwenden, die nicht allein
in der Mikrowelle stehen bleiben. Im Kapitel “Vorsichtsmaßnahmen” finden Sie weitere Informationen zum Erwärmen von Babynahrung.
STARTSCHUTZ/KINDERSICHERUNG
DIESE AUTOMATIS CHE SICHERHEITSFUNKTION WIRD EINE
Minute nach Rücksetzung des Gerätes in
den “Bereitschaftsmodus” aktiviert”.
(Das Gerät befindet sich im “Wartezustand”, wenn die 24-Stunden-Uhr angezeigt wird, oder, falls die Uhr nicht eingestellt wurde, wenn das Display dunkel ist).
DIE SICHERHEITSVERRIEGELUNG WIRD ERST DANN
FREIGEGEBEN, wenn die Tür geöffnet oder ge-
schlossen wird, z. B. wenn Speisen in die Mikrowelle gestellt werden. Anderenfalls zeigt das
Display die Meldung”DOOR” (Tür).
door
57
Page 58

UNTERBRECHUNG ODER ABBRUCH DES GARVORGANGS
UNTERBRECHUNG DES GARVORGANGS:
DER GARVORGANG KANN DURCH
ÖFFNEN DER GERÄTETÜR UN-
TERBROCHEN werden, um die
Speisen zu kontrollieren, zu
wenden oder umzurühren. Die Einstellungen
werden 10 Minuten lang beibehalten.
ORTSETZEN DES GARVORGANGS:
F
D
IE TÜR SCHLIESSEN und die Start-
taste EINMAL drücken. Der Garvorgang wird an der Stelle fortgesetzt, an der er unterbrochen wurde.
URCH ZWEIMALIGES Drücken der Starttaste
D
wird die Garzeit um weitere 30 Sekunden verlängert.
GARSTUFE
BBRUCH DES GARVORGANGS:
A
EHMEN SIE DAS GERICHT HERAUS,
N
schließen Sie die Gerätetür und
drücken die Stopptaste.
E
IN PIEPTON SIGNALISIERT , dass der Garvorgang
beendet ist. Er ertönt nach
Ablauf der Garzeit 10 Minuten lang einmal pro Minute. Um den Piepton abzuschalten, drücken Sie
die Stopptaste oder öffnen Sie die Gerätetür.
HINWEIS: Das Gerät speichert die Einstellungen
nur für 60 Sekunden, wenn die Tür nach Beendigung des Garvorgangs geöffnet und anschließend wieder geschlossen wird.
DIE GARSTUFE IST FÜR FOLGEN DE FUNKTIONEN VERFÜG-
BAR:
AUTOMATISCHES AUFWÄRMEN
AUTOMATISCHES GAREN
AUTOMATISCHER KOMBINATIONSBETRIEB MIT HEISSLUFT
BEI DEN OBEN GENANNTEN Funktionen kann das
Endergebnis über die Option “Garstufe einstellen” beeinflusst werden. Im Unterschied zu
den standardmäßigen Voreinstellungen lässt
sich damit eine höhere oder niedrigere Endtemperatur festlegen.
GARSTUFE
BENE WIRKUNG
E
Hi 2
Hi 1
- - - Lo 1
Lo 2
ERZIELT HÖCHSTE ENDTEMPERATUR
ERZIELT HÖHERE ENDTEMPERATUR
STAND ARD -VOREINSTELLUNG
ERZIELT NIEDRIGERE ENDTEMPERATUR
ERZIELT NIEDRIGSTE ENDTEMPERATUR
ABKÜHLEN
NACH BEENDEN EINER FUNKTION kühlt das Gerät
selbsttätig ab. Das ist normal.
Nach diesem Vorgang schaltet sich das Gerät
automatisch ab.
58
BEI DER VERWENDUNG einer dieser Funktionen
verwendet der Ofen die Standardeinstellung.
Diese Einstellung liefert normalerweise das
beste Ergebnis. Wenn die erhitzte Speise für
den Verzehr zu heiß geworden ist, können Sie
die Einstellung das nächste Mal korrigieren,
wenn Sie diese Funktion verwenden. Dies erfolgt durch Wahl einer Garstufe mit dem Regelknopf, nachdem die Starttaste bedient
wurde.
INWEIS:
H
DIE GARSTUFE kann nur während der ersten
20 Sekunden des Betriebs eingestellt oder
geändert werden.
DER ABKÜHLVORGANG kann ohne Schaden für das
Gerät unterbrochen werden. Dazu die Tür öffnen.
Page 59

ZEITSCHALTUHR
VERWENDEN SIE DIESE FUNKTION , wenn Sie eine
Zeitschaltuhr zur genauen Messung der
Zeit für verschiedene Vorgänge benötigen,
DEN MU LTIFUNKTI ONSKNOPF auf null stellen.
DREHEN SIE DEN EINSTELLKNOPF , um die Zeit einzustellen.
D
IE ZEITSCHALTUHR ZÄHLT nach einer Sekunde automatisch rückwärts.
NACH ABLAUF DER EINGESTELLTEN Zeit ertönt ein Signalton .
z. B. zum Kochen von Eiern oder zum Gehen
lassen von Teig vor dem Backen.
UHR
WENN DAS GERÄT ZUM ERSTEN MAL AN DAS STROM-
NETZ ANGESCHLOSSEN oder nach einem Stro-
mausfall eingeschaltet wird, bleibt das Dis-
play dunkel. Wenn die Uhr nicht eingestellt
wird, bleibt das Display dunkel, bis die Garzeit eingestellt wird.
DEN MU LTIFUNKTI ONSKNOPF auf null stellen.
DIE SELECT TA STE (AUSWAHLTASTE) 3 Sekunden lang drücken, bis
die linke Ziffer (für die Stunden) blinkt.
STELLEN SIE DIE STUNDEN mit dem Einstellknopf ein.
DIE SELECT TA STE (AUSWAHLTASTE) erneut drücken. (Die beiden re-
chten Ziffern (Minutenanzeige) blinken).
STELLEN SIE DIE MINUTEN mit dem Einstellknopf ein.
DIE SELECT TA STE (AUSWAHLTASTE) erneut drücken.
D
IE UHR IST NUN EINGESTELLT und betriebsbereit.
WENN NACH DER EINSTELLUNG DER UHR die Zeitanzeige auf dem Display
nicht mehr gewünscht wird, drücken Sie einfach die Zeittaste erneut drei Sekunden lang und anschließend die Stopptaste
UM DIE UHR NEU EINZUSTELLEN , wie vorstehend beschrieben vorgehen.
INWEIS: BEIM EINSTELLEN DER UHR DIE TÜR GEÖFFNET LASSEN. Dann bleiben
H
10 Minuten Zeit, um die Uhr einzustellen. Anderenfalls muss jeder
Schritt innerhalb von 60 Sekunden ausgeführt werden.
59
Page 60

GAREN UND AUFWÄRMEN MIT MIKROWELLEN
DIESE FUNKTION dient zum normalen Garen
und Aufwärmen von Gemüse, Fisch, Kartoffeln und Fleisch.
DEN MU LTIFUNKTI ONSKNOPF in Stellung Mikrowelle drehen.
DREHEN SIE DEN EINSTELLKNOPF , um die Garzeit einzustellen.
DIE SELECT TA STE (AUSWAHLTASTE) DRÜCKEN , um die Leistungsstufe aufzurufen.
DREHEN SIE DEN EINSTELLKNOPF , um die MW-Leistung einzustellen.
DRÜCKEN SIE DIE START TAST E.
ÄHREND DES GARVORGANGS:
W
Die Garzeit kann problemlos durch Drücken der Starttaste in
30-Sekunden-Schritten verlängert werden. Mit jedem Tastendruck
wird die Garzeit um 30 Sekunden verlängert. Die Garzeit lässt sich
auch durch Drehen des Einstellknopfes verlängern bzw. verkürzen.
DURCH DRÜCKEN DER AUSWAHLTASTE kann zwischen Garzeit und Leis-
tungsstufe umgeschaltet werden. Nach getroffener Auswahl kann
während des Garvorgangs durch Drehen der Einstelltaste umgeschaltet werden.
WAHL DER LEISTUNGSSTUFE
NUR MIKROWELLE
EISTUNG VORGESCHLAGENE VERWENDUNG:
L
ET
J
(900 W)
ZUM AUFWÄRMEN von Getränken, Wasser, klaren Suppen, Kaffee, Tee oder anderen Nah-
rungsmitteln mit hohem Wassergehalt. Wählen Sie eine niedrigere Leistungsstufe,
falls die Speise Ei oder Sahne enthält.
750 W Z
650 W F
500 W
350 W Z
160 W Z
90 W WARMHALTEN
0 W ZUM EINSTELLE N der Stehzeit.
60
UM GAREN VON Fisch, Fleisch, Gemüse etc.
ÜR SPEISEN , die sich nicht umrühren lassen.
CHONENDER E ZUBEREITUNG , z. B. bei Saucen mit hohem Eiweißgehalt, Käse und Eier-
S
speisen, sowie zum Fertigkochen von Eintopfgerichten.
UM KÖCHELN von Eintopfgerichten und zum Schmelzen von Butter.
UM AUFTAUEN. Zum Anwärmen von Butter und Käse.
Page 61

SCHNELLSTARTFUNKTION
DIESE FUNKTION dient zum schnellen Aufwärmen von Speisen mit einem hohen Wassergehalt, z. B. klare Suppen, Kaffee oder
Tee .
DEN MU LTIFUNKTI ONSKNOPF in Stellung Mikrowelle drehen.
DRÜCKEN SIE DIE START TAST E.
DIESE FUNKTION STARTET AUTOMATISCH mit der höchsten Mikrowellenleistung und einer Garzeit von 30 Sekunden. Mit jedem weiteren
Tastendruck wird die Zeit um 30 Sekunden verlängert. Die Garzeit
lässt sich auch durch Drehen des Einstellknopfes verlängern bzw.
verkürzen, nachdem Sie die Funktion gestartet haben.
MANUELLES AUFTAUEN
GEHEN SIE BEIM manuellen Auftauen entsprechend dem Kapitel “Garen und Aufwärmen mit
der Mikrowelle” vor und stellen Sie die Leistung auf 160 W ein.
TIEFKÜHLKOST IN PLASTIKBEUTELN , Klarsichtfolie
oder Kartons können Sie direkt mit der Verpackung auftauen, solange diese Verpackungen keine Metallteile (z. B. Drahtverschlüsse) enthalten.
D
IE AUFTAUZEIT WIRD AUCH DURCH DIE VER-
PACKU NGS FORM beeinflusst. Speisen in
flachen Verpackungen tauen schneller
auf als dicke Blöcke.
RENNEN SIE EINZELNE SPEISESTÜCKE sobald diese
T
antauen.
Einzelne Scheiben tauen schneller auf.
B
ESTIMMTE SPEISEBEREICHE (z. B.
Hähnchenschenkel oder -flügel)
mit kleinen Stückchen Alufolie abdecken, sobald diese
anfangen, warm zu werden.
ÜBERPRÜFEN SIE DEN AUFTAUGRAD DER SPEISEN IN RE-
GELMÄSSIGEN ABSTÄNDEN. Mit der Zeit wissen Sie
aus Erfahrung, welche Einstellungen die unterschiedlichen Mengen benötigen.
W
ENDEN SIE GROSSE SPEISESTÜCKE nach halber
Auftauzeit.
EKOCHTES, GESCHMORTES UND FLEISCHSOSSEN
G
tauen besser auf, wenn sie während des
Auftauprozesses umgerührt werden.
D
IE AUFTAUZEIT sollte lieber etwas ger-
inger bemessen und der Auftauprozess
während der Stehzeit abgeschlossen werden.
IT EINER STEHZEIT VON EINIGEN MINUTEN ergibt
M
sich immer ein besseres Auftau- ergebnis, da sich die Temperatur gleichmäßiger in der Speise verteilen kann.
61
Page 62

SCHNELLAUFTAUEN
DIESE FUNKTION sollte nur für Speisen mit einem Nettogewicht von 100 g bis 3 kg genutzt werden.
DEN MU LTIFUNKTI ONSKNOPF in Automatikstellung drehen.
DIE AUTOMATIKTASTE drücken, um die gewünschte Automatikfunktion auszuwählen.
DREHEN SIE DEN EINSTELLKNOPF , um die Speiseart zu wählen.
DRÜCKEN SIE DIE AUSWAHLTASTE (DAS STAN DAR DGE WIC HT WIR D ANGEZEIGT).
DREHEN SIE DEN EINSTELLKNOPF, um das Gewicht einzustellen.
DRÜCKEN SIE DIE START TAST E.
N DER MITTE DES AUFTAUVORGANGS hält das Gerät an und es erscheint
I
die Meldung “TURN food” (Speise wenden).
DIE SPEISE stets auf den Glasdrehteller stellen.
Öff nen Sie die Tür.
Wenden Sie die Speise.
Schließen Sie die Tür und nehmen Sie das Gerät durch Drücken
der Starttaste wieder in Betrieb.
HINWEIS: Das Gerät startet automatisch wieder nach 2 Minuten wenn
die Speisen nicht gewendet werden. Das Auftauen dauert in diesem
Fall länger.
62
Page 63

SCHNELLAUFTAUEN
BEI DIESER FUNKTION muss das Gewicht der Speise bekannt sein.
TIEFGEKÜHLTE SPEISEN:
B
EI LEBENSMITTELN, DIE EIN GERINGERES
ODER HÖHERES GEWICHT ALS EMPFOHLEN HA-
BEN, verfahren Sie entsprechend dem
Kapitel “Garen und Aufwärmen mit
der Mikrowelle” und wählen Sie zum
Auftauen 160 W.
LEBENSMITTEL MENGE TIPPS
TIEFGEKÜHLTE SPEISEN:
W
ÄHLEN SIE EIN NIEDRIGERES GEWICHT, falls
die Speisen wärmer als die Tiefkühltemperatur (-18 °C) sind.
ENN DIE SPEISEN KÄLTER als die Tiefküh-
W
ltemperatur (-18 °C) sind, wählen Sie
ein höheres Gewicht.
FLEISCH
GEFLÜGEL
FISCH
GEMÜSE
BROT
B
EI LEBENSMITTELN, DIE NICHT IN DER TABELLE enthalten sind und die ein geringeres oder höheres Ge-
wicht als empfohlen haben, verfahren Sie entsprechend dem Kapitel “Garen und Aufwärmen mit
der Mikrowelle” und wählen Sie zum Auftauen 160 W.
100 G BIS 2 KG HACKFLEI SCH, KOTELETTS, STEAKS ODER BRATEN.
G BIS 3 KG GANZE HÄHNCHEN, HÄHNCHENSTÜCKE ODER HÄHNCHENFILETS.
100
G BIS 2 KG GANZE FISCHE, STEAKS ODER FILETS.
100
G BIS 2 KG MISCHGE MÜSE, ERBSEN, BROKKOLI USW.
100
G BIS 2 KG BROTLAIBE, SÜSSE ODER HERZHAFTE BRÖTCHEN.
100
63
Page 64

GRILLFUNKTION
DEN MU LTIFUNKTI ONSKNOPF in Stellung Grill drehen.
DREHEN SIE DEN EINSTELLKNOPF , um die Garzeit einzustellen.
DRÜCKEN SIE DIE START TAST E.
L
ASSEN SIE DIE GERÄTETÜR nicht zu lange offen, während der Grill in Be-
trieb ist, da die Temperatur sehr schnell absinkt.
N
UR HITZEBESTÄNDIGES und grillfestes Kochgeschirr verwenden.
Z
UM GRILLEN DÜRFEN KEINE Gegenstände aus Kunststoff verwendet
werden. Sie würden schmelzen. Auch Papier oder Gegenstände
aus Holz sind dafür nicht geeignet.
MIT DER GRILLFUNK TION erhalten Ihre Gerichte
schnell eine knusprig-braune Kruste.
BEI SPEISEN WIE Käse, Toasts, Steaks und
Würstchen den Grillrost auf das Backblech
setzen.
64
Page 65

KOMBINATIONSBETRIEB MIT GRILL
MIT DIESER FUNKTION erhalten Gerichte schnell
eine knusprige, braune Kruste, während
sie gleichzeitig in der Mikrowelle gegart
werden.
DEN MU LTIFUNKTI ONSKNOPF in Stellung Kombinationsbetrieb mit Grill
drehen.
DREHEN SIE DEN EINSTELLKNOPF , um die MW-Leistung einzustellen.
DRÜCKEN SIE DIE AUSWAHLTASTE , um die Garzeit aufzurufen.
DREHEN SIE DEN EINSTELLKNOPF , um die Garzeit einzustellen.
DRÜCKEN SIE DIE START TAST E.
N
UR HITZEBESTÄNDIGES und grillfestes Kochgeschirr verwenden.
Z
UM GRILLEN DÜRFEN KEINE Gegenstände aus Kunststoff verwendet
werden. Sie würden schmelzen. Auch Papier oder Gegenstände
aus Holz sind dafür nicht geeignet.
D
IE MAXIMALE LEISTUNGSSTUFE DER MIKROWELLE BEI GLEICHZEITIGEM Ge-
brauch des Grills ist auf einen vom Hersteller voreingestellten Wert
begrenzt.
LEGEN SIE DIE SPEISEN AU F DEN GRILLROST , damit die heiße Luft unge-
hindert um die Speisen zirkulieren kann.
WAHL DER LEISTUNGSSTUFE
KOMBINATIONSBETRIEB MIT GRILL
EISTUNG VORGESCHLAGENE VERWENDUNG:
L
650 W G
350 - 500 W G
160 - 350 W G
160 W G
90 W G
AREN von Gemüse, Gratins
AREN von Geflügel und Lasagne
AREN VON Fisch und tiefgekühlten Gratins
AREN VON Fleisch
RATINIEREN VON Obst
65
Page 66

KOMBINATIONSBETRIEB MIT TURBOGRILL
DIESE FUNKTION EIGNET SICH ZUR Zubereitung
von Speisen wie Gratins, Lasagne, Geflügel
und Ofenkartoffeln.
B
DEN MU LTIFUNKTI ONSKNOPF in Stellung Turbogrill drehen.
DREHEN SIE DEN EINSTELLKNOPF , um die MW-Leistung einzustellen.
DIE AUSWAHLTASTE DRÜCKEN , um die Garzeit aufzurufen.
DREHEN SIE DEN EINSTELLKNOPF , um die Garzeit einzustellen.
DRÜCKEN SIE DIE START TAST E.
IE MAXIMALE LEISTUNGSSTUFE DER MIKROWELLE BEI GLEICHZEITIGEM Gebrauch
D
des Grills ist auf einen vom Hersteller voreingestellten Wert begrenzt.
EI DIESER FUNKTION die Speise auf den Grill-
rost oder auf den Glasdrehteller stellen
bzw. legen.
WAHL DER LEISTUNGSSTUFE
KOMBINATIONSBETRIEB MIT TURBOGRILL
EISTUNG VORGESCHLAGENE VERWENDUNG:
L
650 W G
350 - 500 W G
160 - 350 W G
160 W G
90 W G
0 W B
AREN von Gemüse, Gratins
AREN von Geflügel und Lasagne
AREN VON Fisch und tiefgekühlten Gratins
AREN VON Fleisch
RATINIEREN VON Obst
RÄUNEN nur während des Garvorgangs
66
Page 67

SCHNELLAUFHEIZEN
DIE FUNKTION eignet sich zum Vorheizen des
leeren Garraums.
STELLEN SIE KEINE SPEISEN vor oder während
des Vorheizens in den Garraum. Sie kön-
nen durch die starke Hitzeentwicklung verbrannt werden.
DEN MU LTIFUNKTI ONSKNOPF in Stellung Schnellaufheizen drehen.
DREHEN SIE DEN EINSTELLKNOPF , um die Temperatur einzustellen.
DRÜCKEN SIE DIE START TAST E.
WÄHREND DES AUFHEIZVORGANGS blinken die Ziffern, und es erscheint in Intervallen die Meldung PRE-H E A T (Vorheizen), bis
die eingestellte Temperatur erreicht ist.
N
ACH DEM BEGINN DES AUFHEIZVORGANGS kann die Temperatur noch durch
Drehen des Multifunktionsknopfes nachgestellt werden.
D
AS GERÄT BEHÄLT die eingestellte Temperatur 10 Minuten lang bei
und schaltet sich anschließend ab. In dieser Zeit muss die Speise hineingegeben und eine Heißluftfunktion ausgewählt werden, damit
der Garvorgang beginnt.
EIM VORHEIZEN muss der Garraum leer sein.
B
67
Page 68

HEISSLUFT
DIESE FUNKTION dient zur Zubereitung von
Baisers, Gebäck, Rühr- und Biskuitkuchen,
Aufläufen, Geflügel und Braten.
DEN MU LTIFUNKTI ONSKNOPF in Stellung Heißluft drehen.
DREHEN SIE DEN EINSTELLKNOPF , um die Temperatur einzustellen.
DIE AUSWAHLTASTE DRÜCKEN , um die Garzeit aufzurufen.
DREHEN SIE DEN EINSTELLKNOPF , um die Garzeit einzustellen.
DRÜCKEN SIE DIE START TAST E.
IE STANDA RD EIN STE LLU NG beim Heißluftbetrieb ist 175 °C
D
EGEN SIE DIE SPEISEN AUF DEN GRILLROST , damit die heiße Luft unge-
L
hindert um die Speisen zirkulieren kann.
UM BACKEN VON KLEINBACKWAREN, z. B. Plätzchen oder Brötchen, das Back-
Z
blech verwenden.
ÄHREND DES AUFHEIZVORGANGS blinken die Ziffern, bis die eingestellte
W
Temperatur erreicht ist.
NACH DEM BEGINN DES VORHEIZVORGANGS KANN DIE TEMPERATUR NOCH DURCH DRE-
HEN DES EINSTELLKNOPFES NACHGESTELLT WERDEN.
68
Page 69

KOMBINATIONSBETRIEB MIT HEISSLUFT
VERWENDEN SIE DIESE FUNKTION zum Garen von
Bratenfleisch, Geflügel, gebackenen Kartoffeln, Tiefkühlgerichten, Rührkuchen, Gebäck, Fisch und Pudding.
DEN MU LTIFUNKTI ONSKNOPF in Stellung Heißluft drehen.
DREHEN SIE DEN EINSTELLKNOPF , um die Temperatur einzustellen.
DIE AUSWAHLTASTE DRÜCKEN , um die Mikrowellen-Leistungsstufe aufzurufen.
DREHEN SIE DEN EINSTELLKNOPF , um die MW-Leistung einzustellen.
DIE AUSWAHLTASTE DRÜCKEN , um die Garzeit aufzurufen.
DREHEN SIE DEN EINSTELLKNOPF , um die Garzeit einzustellen.
DRÜCKEN SIE DIE START TAST E.
L
EGEN SIE DIE SPEISEN AUF DEN GRILLROST , damit die heiße Luft unge-
hindert um die Speisen zirkulieren kann.
W
ÄHREND DES AUFHEIZVORGANGS blinken die Ziffern, bis die eingestellte
Temperatur erreicht ist.
ACH DEM BEGINN DES VORHEIZVORGANGS kann die Temperatur noch
N
durch Drehen des Einstellknopfes nachgestellt werden. Die Mikrowellen-Leistungsstufe kann ebenfalls geändert werden. Die maximale Leistungsstufe wurde für den Heißluftbetrieb werkseitig begrenzt.
WAHL DER LEISTUNGSSTUFE
KOMBINATIONSBETRIEB MIT HEISSLUFT
EISTUNG VORGESCHLAGENE VERWENDUNG:
L
350 W Z
160 W Z
90 W B
UBEREITUNG von Geflügel, Fisch und Gratins
UBEREITUNG von Braten
ACKEN von Kuchen, Brot
69
Page 70

AUTOMATISCHES AUFWÄRMEN
DIESE FUNKTION dient zum Aufwärmen von tiefgekühlten oder gekühlten Fertiggerichten.
D
DEN MU LTIFUNKTI ONSKNOPF in Automatikstellung drehen.
DIE AUTOMATIKTASTE drücken, um die gewünschte Automatik-
funktion auszuwählen.
DRÜCKEN SIE DIE START TAST E.
ÄHREND des Auftauvorgangs STOPPT das Mikrowellengerät und
W
zeigt die Meldung STIR FOOD (Speise umrühren) an.
IE SPEISE auf einen mikrowellengeeigneten
und hitzebeständigen Essteller oder in ein
entsprechendes Kochgeschirr geben.
Öff nen Sie die Tür.
Speise umrühren bzw. wenden.
Schließen Sie die Tür und nehmen Sie das Gerät durch Drücken
der Starttaste wieder in Betrieb.
HINWEIS: DAS GERÄT SETZT SICH AUTOMATIS CH NACH 2 MINUTE wieder in
Gang, wenn die Speise nicht gewendet bzw. umgerührt wurde.
WENN EINE SPEISE im Kühlschrank aufbewahrt
wurde oder zum Aufwärmen auf einen Tell-
er gegeben wird, die dick-
eren, dichteren Teile
an der Außenseite
und die dünneren,
weniger dichten
Teile in der Mitte des
Tellers arrangieren.
EGEN SIE DÜNNE FLEISCHSCHEIBEN übereinander
L
oder ordnen Sie sie in Schichten an.
DICKERE FLEISCHSTÜCKE wie Hackbraten und
Würstchen sollten eng aneinander angeordnet werden.
70
INE STEHZEIT VON 1 BIS 2 MINUTEN
E
VERBESSERT DAS ERGEBNIS , vor al-
lem bei Tiefkühlkost.
K
UNSTSTOFFFOLIE vor dem
Garen mit einer Gabel oder
einem Zahnstocher einstechen, damit der sich aufbauende Druck entweichen kann
und die Folie durch den entstehenden Dampf nicht
platzt.
Page 71

AUTOM. AUFWÄRMEN
LEBENSMITTEL TIPPS
IE SPEISE entsprechend o. g. Empfehlungen
D
ESSTELLER(250 G - 600 G)
SUPPE (200 bis 800 g)
vorbereiten.
Abgedeckt aufwärmen.
N MEHREREN SCHÜSSELN oder einer großen Schüssel
I
aufwärmen, dabei nicht abdecken.
TIEFGEKÜHLTE PORTION
(250 g - 600 g)
MILCH (100 bis 500 g)
EINTOPFGERICHT (200g - 800 g)
EI SPEISEN, DIE NICHT IN DER TABELLE enthalten sind und die ein geringeres oder höheres Gewicht als
B
empfohlen haben, entsprechend dem Kapitel “Garen und Aufwärmen mit der Mikrowelle” vorgehen.
NWEISUNGEN AUF DER VERPACKUNG BEFOLGEN, z.B. d. h.
A
Belüftung, Einstechen usw.
EIM AUFWÄRMEN nicht abdecken und einen Metall-
B
löffel in den Becher bzw. die Tasse stellen.
IT ABDECKHAUBE AUFWÄRMEN.
M
71
Page 72

AUTOM. GAREN
DIESE FUNKTION DARF NUR zum Garen verwendet werden. Die automatische Garfunktion eignet sich ausschließlich für Speisen
DIE SPEISE auf einen mikrowellengeeigneten und hitzebeständigen Essteller oder in ein entsprechendes Kochgeschirr geben.
DEN MU LTIFUNKTI ONSKNOPF in Automatikstellung drehen.
DIE AUTOMATIKTASTE drücken, um die gewünschte Automatikfunktion
auszuwählen.
DREHEN SIE DEN EINSTELLKNOPF , um die Speiseart zu wählen.
DRÜCKEN SIE DIE AUSWAHLTASTE (das Standardgewicht wird angezeigt).
DREHEN SIE DEN EINSTELLKNOPF, um das Gewicht einzustellen.
DRÜCKEN SIE DIE START TAST E.
WÄHREND des Auftauvorgangs STOPPT das Mikrowellengerät und
zeigt die Meldung STIR FOOD (Speise umrühren) oder
TURN FOOD (Speise wenden) an.
der hier aufgeführten Nahrungsmittelkategorien.
Öff nen Sie die Tür.
Speise umrühren bzw. wenden.
Schließen Sie die Tür und nehmen Sie das Gerät durch Drücken
der Starttaste wieder in Betrieb.
H
INWEIS: DAS GERÄT SETZT SICH AUTOMATIS CH NACH 2 MINUTE wieder in Gang,
wenn die Speise nicht gewendet bzw. umgerührt wurde.
W
ENN EINE SPEISE IM KÜHLSCHRANK AUFBEWAHR T
wurde oder zum Aufwärmen auf einen Teller
gegeben wird, die dick-
eren, dichteren Teile
an der Außenseite und die dün-
neren, weniger
dichten Teile in der
Mitte des Tellers arrangieren.
L
EGEN SIE DÜNNE FLEISCHSCHEIBEN übereinander
oder ordnen Sie sie in Schichten an.
DICKERE FLEISCHSTÜCKE wie Hackbraten und
Würstchen sollten eng aneinander angeordnet werden.
EINE STEHZEIT VON 1 BIS 2 MINUTEN
VERBESSERT DAS ERGEBNIS , vor al-
lem bei Tiefkühlkost.
72
BEI DIESER FUNKTION immer die mitgelieferte Abdeckhaube verwenden. Lediglich beim Auf-
wärmen von gekühlten Suppen ist die Ab-
deckhaube nicht erforderlich! Sind
die Speisen so verpackt, dass die Ab-
deckhaube nicht verwendet werden
kann, die Verpackung zwei- bis dreimal
anstechen, damit der beim Aufwärmen
entstehende Druck entweichen kann.
K
UNSTSTOFFFOLIE vor dem Gar-
en mit einer Gabel oder einem Zahnstocher einstechen, damit der sich aufbauende Druck entweichen kann
und die Folie durch den entstehenden Dampf nicht
platzt.
Page 73

AUTOM. GAREN
LEBENSMITTEL MENGE TIPPS
D
IE KARTOFFELN anstechen und in mikrowellengee-
OFENKAR TOFFELN
FRISCHES
GEMÜSE
200 g - 1kg
200 bis 800 g
ignetes und herdfestes Geschirr geben. Wenn ein
Signalton ertönt, die Kartoffeln wenden. Vorsicht:
Gerät, Geschirr und Gargut sind heiß.
DAS GEMÜSE in sechs gleich große Stücke schneiden. 2 - 4 Esslöffel Wasser hinzugeben und
die Abdeckhaube aufsetzen. Wenn ein Signalton
ertönt, das Gemüse umrühren.
TIEFGEKÜHLTES
GEMÜSE
DOSENGEMÜSE
POPCORN
B
EI SPEISEN, DIE NICHT IN DER TABELLE enthalten sind und die ein geringeres oder höheres Gewicht als
empfohlen haben, entsprechend dem Kapitel “Garen und Aufwärmen mit der Mikrowelle” vorgehen.
200 bis 800 g
200 - 600 g
90 g bis 100 g
ABGEDECKT GAREN. Wenn ein Signalton ertönt, das
Gemüse umrühren.
DIE MEISTE FLÜSSIGKEIT abgießen und das Gemüse
in mikrowellengeeignetem Geschirr mit Abdeckhaube garen.
IMMER NUR EINE TÜTE garen. Wird mehr Popcorn
benötigt, die Tüten nacheinander garen.
73
Page 74

AUTOMATISCHER KOMBINATIONSBETRIEB
MIT HEISSLUFT
DIESE FUNKTION DIENT ZUM Garen von rohen
oder tiefgekühlten Speisen.
DEN MU LTIFUNKTI ONSKNOPF in Automatikstellung drehen.
DIE AUTOMATIKTASTE drücken, um die gewünschte Automatikfunktion
DREHEN SIE DEN EINSTELLKNOPF , um die Speiseart zu wählen.
DRÜCKEN SIE DIE AUSWAHLTASTE (DAS STAN DAR DGE WIC HT WIR D ANGEZEIGT).
DREHEN SIE DEN EINSTELLKNOPF, um das Gewicht einzustellen.
DRÜCKEN SIE DIE START TAST E.
auszuwählen.
B
Kochgeschirr hitzebeständig und für Mikrowellen geeignet ist, bevor Sie die Speise garen. Andernfalls ist das Endergebnis möglicherweise unbefriedigend.
BEI PLÄTZCHEN und Brötchen aus der Dose bzw. tief-
gekühlten Brötchen stets das Backblech verwenden.
DAS BLECH leicht einfetten oder mit Backpapier
abdecken.
B
der Dose bzw. tiefgekühlte Brötchen muss das Gerät
vorgeheizt werden. Wenn die richtige Temperatur erreicht ist, erscheint die Aufforderung, die Speise hineinzugeben.
EI HÄHNCHEN UND LASAGNE; Stellen Sie sicher, dass das verwendete
EI DEN PROGRAMMEN für Plätzchen und Brötchenteig aus
Öff nen Sie die Tür.
Backblech mit der Speise auf die Führungen im Gar-
raum setzen.
Schließen Sie die Tür und nehmen Sie das Gerät
durch Drücken der Starttaste wieder in Betrieb.
add
food
74
Page 75

AUTOMATISCHER KOMBINATIONSBETRIEB
MIT HEISSLUFT
EMPFOHLENES GEWICHT
HÄHNCHEN (800 G - 1½ KG)
TIEFGEKÜHLTE LASAGNE (400 G - 1 KG)
PLÄTZCHEN (9-12 Stück)
BROTTEIG AUS DER DOSE
TIEFGEKÜHLTE BRÖTCHEN
B
ESTREUEN SIE DAS HÄHNCHEN mit Salz und
Gewürzen. Ggf. mit Öl einstreichen. Das
Hähnchen in hitzebeständiges und mikrowellengeeignetes Kochgeschirr geben.
Das Kochgeschirr auf den Grillrost stellen.
D
IE LASAGNE in hitzebeständiges und mik-
rowellengeeignetes Kochgeschirr geben.
Das Kochgeschirr auf den Grillrost stellen.
A
UF DAS LEICHT GEFETTETE BACKBLEC H legen. Das
Backblech in das Gerät schieben, wenn die
Meldung “ADD FOOD” (Speise hineingeben) erscheint.
GEEIGNET FÜR Croissants und Brötchen. Den
Teig auf das Backblech geben. Das Backblech in das Gerät schieben, wenn die Meldung “ADD FOOD” (Speise hineingeben) erscheint.
GEEIGNET FÜR fertig gebackene tiefgekühlte
Brötchen. Den Teig auf das Backblech geben. Das Backblech in das Gerät schieben,
wenn die Meldung “ADD FOOD” (Speise hineingeben) erscheint.
EI LEBENSMITTELN, DIE NICHT IN DER TABELLE enthalten sind und die ein geringeres oder höheres Ge-
B
wicht als empfohlen haben, verfahren Sie entsprechend den Kapiteln “Heißluft” und “Kombibetrieb mit Heißluft”
75
Page 76

WARTUNG UND PFLEGE
IM NORMALFALL MUSS DASS GERÄT nur gereinigt
werden.
WIRD DAS GERÄT NICHT SAUBER GEHALTEN, kann dies
zu Abnutzung der Oberfläche führen, was die
Lebensdauer des Geräts verringern und möglicherweise zu gefährlichen Situationen führen
kann.
K
EINE TOPFREINIGER AUS METALL, SCHEUERMITTEL ,
Stahlwolle grobe Waschlappen o.ä.
zum Reinigen des Garraums
verwenden, durch die das
Bedienfeld und die Innenund Außenoberfl ächen des
Gerätes beschädigt werden können. Benutzen
Sie zum Reinigen einen Schwamm und ein mildes Reinigungsmittel oder ein Papiertuch und
Glasreinigerspray. Sprühen Sie den Glasreiniger
auf ein Papiertuch.
NIEMALS direkt in das Gerät sprühen.
ENTFERNEN SIE IN REGELMÄSSIGEN ABSTÄNDEN,
besonders wenn etwas übergelaufen ist, den Drehteller und den
Drehtellerhalter und reinigen Sie
den Boden des Gerätes.
DAS MIKROWELLENGER ÄT DARF NUR mit eingesetz-
tem Drehteller verwendet werden.
DIE MIKROWELLE ERST WIEDER IN BETRIEB NEHM-
EN , wenn der Drehteller nach der Reini-
gung wieder eingesetzt ist.
NUR MILDE REINIGUNGSMITTEL, Wasser und ein
weiches Wischtuch zum Reinigen der Innenraumflächen sowie der Innen- und Außenseite
der Gerätetür verwenden.
FETTSPRITZER oder Speisereste dürfen sich
nicht an der Tür festsetzen.
BEI HARTNÄCKIGER VERSCHMUTZUNG empfiehlt es
sich, ein Glas Wasser 2 bis 3 Minuten lang im
Garraum zu erhitzen. Der Dampf weicht den
Schmutz auf.
UNANGENEHMER GERUCH im Garraum lässt sich beseitigen, wenn ein Glas Wasser mit Zitronensaft auf den Drehteller gestellt wird und das
Wasser einige Minuten lang kocht.
VERWENDEN SIE ZUR REINIGUNG DES GERÄTES
keine Dampfreiniger.
ER GRILLSTAB braucht nicht gereinigt zu
D
werden, da durch die starke Hitze eventuell vorhandene Fettspritzer verbrennen. Die
obere Wand des Garraums muss jedoch regelmäßig gereinigt werden. Verwenden Sie
dazu warmes Wasser, ein Reinigungsmittel
und einen Schwamm. Wenn der Grill nicht regelmäßig verwendet
wird, sollte er einmal im
Monat für 10 Minuten
eingeschaltet werden,
um Spritzer verdampfen zu lassen und somit
die Brandgefahr zu reduzieren.
Drücken Sie das Hal-
terungsseil vorsich-
tig zur Hinterseite der
Decke und dann nach
unten, um den Grill-
stab zu lösen.
Bringen Sie das Halte-
rungsseil nach der Reinigung wieder in die
Ausgangsposition zurück.
SPÜLMASCHINENFESTES ZUBEHÖR:
G
LASDREHTELLER .
RILLROST.
G
ACKBLE CH.
B
LÄSCHCHENHALTER.
F
76
D
REHTELLERAUFLAGE.
Page 77

ERST EINMAL SELBST PRÜFEN
WENN DAS GERÄT NICHT EINWANDFREI FUNKTION IERT ,
zunächst folgende Punkte überprüfen, bevor
der Kundendiensttechniker gerufen wird:
Sind Drehtelleraufl age und Drehteller rich-
tig eingesetzt.
Steckt der Netzstecker richtig in der
Steckdose.
Ist die Gerätetür richtig geschlossen.
Sind die Sicherungen in Ordnung und
ist Strom vorhanden.
Wird das Gerät ausreichend belüftet.
Warten Sie 10 Minuten und versuchen Sie
dann erneut, das Gerät in Betrieb zu nehmen.
Vor einem erneuten Versuch die Tür öff nen
und wieder schließen.
AUF DIESE WEISE LASSEN SICH unnötige Anfahrten
des Kundendiensttechnikers und damit verbundene Kosten vermeiden.
Wenn Sie den Kundendienst anrufen, müssen
Sie Seriennummer und Typenbezeichnung des
Gerätes angeben (siehe Aufkleber). Weitere
Hinweise finden Sie im Garantieheft.
AS NETZKABEL DARF NUR GEGEN EIN ORIG-
D
INALKABEL ausgetauscht
werden, das über unseren
Kundendienst bezogen
werden kann. Der Austausch des Netzkabels darf
nur durch den Kundendienst
erfolgen.
EPARATUREN AM GERÄT DÜR-
R
FEN NUR VON EINEM QUALIFI-
ZIERTEN KUNDENDIENSTTECHNIKER
VORGENO MMEN WERDEN.
Laien bringen sich durch
Reparaturversuche in
Gefahr, bei denen die zum Schutz vor
Mikrowellenstrahlung am Gerät angebrachten Abdeckungen oder Gehäuseteile
entfernt werden müssen.
ENTFERNEN SIE KEINE GERÄTEABDECKUNGEN.
HINWEISE ZUM UMWELTSCHUTZ
D
IE VERPACKUNG besteht aus 100 %
recycelbarem Material und ist
durch das Recycling-Symbol
gekennzeichnet. Beachten
Sie bei der Entsorgung die
örtlichen Bestimmungen. Bewahren Sie Verpackungsmaterial,
das eine potentielle Gefahr darstellt (Plastikbeutel, Styropor usw.), nicht in der Reichweite
von Kindern auf.
N ÜBEREINSTIMMUNG mit den Anforderungen der
I
Europäischen Richtlinie 2002/96/EC über Elektro- und Elektronik-Altgeräte (WEEE) ist dieses
Gerät mit einer Markierung versehen. Durch
eine vorschriftsmäßige Entsorgung tragen Sie
zum Umweltschutz bei und vermeiden potentielle Unfallgefahren, die bei einer unsachgemäßen Entsorgung des Produktes entstehen können.
77
Page 78

HINWEISE ZUM UMWELTSCHUTZ
DAS SYMBOL auf dem
Produkt oder der beiliegenden Produktdokumentation weist darauf hin,
dass dieses Gerät nicht
als normaler Hausmüll
behandelt werden darf.
Übergeben Sie daher das
alte Gerät den zuständi-
B
ITTE WENDEN SIE SICH AN DIE ZUSTÄNDIGEN BEHÖRDEN
Ihrer Gemeindeverwaltung, an den lokalen Re-
cyclinghof für Hausmüll oder an den Händler,
bei dem Sie dieses Gerät erworben haben, um
weitere Informationen über die Behandlung,
Verwertung und Wiederverwendung dieses
Produkts zu erhalten.
D
AS GERÄT VOR DEM VERSCHROTTEN durch Absch-
neiden des Netzkabels unbrauchbar machen.
gen Sammelstellen für die
Wiederverwertung von
elektrischen und elektronischen Geräten.
D
IE ENTSORGUNG muss gemäß den örtlichen
Bestimmungen zur Abfallbeseitigung erfolgen.
E
RFÜLLT IEC 60705.
DIE INTERNATIONALE ELEKTROTECHN ISCHE KOMMISSION hat einen Standard für Vergleichstests der Heizleis-
tung verschiedener Mikrowellengeräte entwickelt. Für dieses Gerät empfehlen wir Folgendes:
Testen Menge Ungefähre Dauer Leistungsstufe Behälter/Gefäß
12.3.1 1000 g 11 min 750 W Pyrex 3.227
12.3.2 475 g 5 min 750 W Pyrex 3.827
12.3.3 900 g 15 min 750 W Pyrex 3.838
12.3.4 1100 g 28-30 min Heißluft 200 ºC + 350 W Pyrex 3.827
12.3.5 700 g 25 min Heißluft 200 ºC + 90 W Pyrex 3.827
12.3.6 1000 g 30-32 min Heißluft 225 ºC + 350 W Pyrex 3.827
13.3 500 g 2 min 12 s Schnellauftauen
78
TECHNISCHE DATEN
NETZSPANNUNG 230 V/50 HZ
EINGANGSNENNLEISTUNG 2800 W
ICHERUNG 16 A (GB 13 A)
S
USGANGSLEISTUNG MW 900 W
A
USSENABMESSUNGEN (H X B X T) 455 X 595 X 560
A
NNENABMESSUNGEN (H X B X T) 210 X 450 X 420
I
Page 79
INSTALLAZIONE
MONTAGGIO DELL’APPARECCHIO
DURANTE L’INSTALLAZIONE, seguire le istruzioni
per il montaggio fornite separatamente.
PRIMA DI COLLEGARE L’APPARECCHIO
CONTROLLARE CHE LA TENSIONE indicata sulla
targhetta matricola corrisponda alla tensione dell’abitazione.
SSICURAR SI prima dell’installazione che il for-
A
no sia vuoto.
A
SSICURAR SI CHE L’APPARECCHIO NON SIA DANNEGGIATO.
Verificare che la porta del forno si chiuda perfettamente. Vuotare il forno e pulire l’interno
con un panno morbido e umido.
ITALIANO
N
ON FAR FUNZI ONARE L’APPARECCHIO con il
IT
cavo di alimentazione o la spina danneggiati, se non funziona correttamente o
se ha subito danni o è caduto. NOn immergere il cavo di alimentazione o la spina in acqua. Tenere lontano il cavo di alimentazione da superfi ci calde. Potrebbero verifi carsi scosse elettriche, incendi
o altre situazioni pericolose.
DOPO IL COLLEGAMENTO
I
L FORNO FUNZI ONA SOLO se la porta è stata chiusa
correttamente.
I produttori non sono responsabili per problemi causati dall’inosservanza
dell’utente delle presenti istruzioni.
A MESSA A TERRA DELL’APPARECCHIO È OBBLIG-
L
ATO RIA a termini di legge. Il fabbricante
declina qualsiasi responsabilità per eventuali danni a persone, animali o cose,
derivanti dalla mancata osservanza di
questa norma.
79
Page 80

IMPORTANTI PRECAUZIONI DI SICUREZZA
LEGGERE ATTENTAMENTE E CONSERVARE PER ULTERIORI CONSULTAZIONI
NON RISCALDARE O USARE MATERIALI INFIAMMA-
BILI all’interno o vicino al forno. I vapori
potrebbero causare incendi o esplosioni.
ON USARE IL FORNO A MICROONDE per asci-
N
ugare tessuti, carta, spezie, erbe, legno,
fi ori, frutta o altro materiale combustibile. Potrebbero innescarsi incendi.
S
E IL MATERIALE ALL’INTERNO O ALL’ESTERNO
DEL FORNO DOVESSE INCENDIARSI O SE SI NOTA
FUMO, tenere chiusa la porta e spegne-
re il forno. Staccare la spina dalla presa
di corrente o disinserire l’alimentazione
generale dell’abitazione.
N
ON CUOCERE TROPPO GLI ALIMENTI. Potreb-
bero innescarsi incendi.
NON LASCIARE IL FORNO SENZA SORVEGLIANZA ,
specialmente quando si usa carta, plastica o altri materiali combustibili durante
il processo di cottura. La carta si potrebbe carbonizzare o bruciare e alcuni tipi
di plastica potrebbero sciogliersi con il
calore.
N
ON USARE prodotti chimici corrosivi o
prodotti vaporizzati su quest’apparecchio.
Questo tipo di forno è stato progettato per
riscaldare o cuocere alimenti. NOn deve essere usato a scopo industriale o di laboratorio.
UOVA
N
ON USARE IL FORNO A MICROONDE per cucinare
o riscaldare uova intere, con o senza guscio,
poiché potrebbero esplodere anche
dopo che il processo di riscaldamento a microonde è terminato.
CONSENTIRE AI BAMBINI di utilizzare
l’apparecchio solo in presenza di adulti,
dopo avere impartito loro adeguate istruzioni e dopo essersi accertati che abbiano
compreso i pericoli di un uso improprio.
UESTO APPARECCHIO NON È DESTINATO ad essere
Q
utilizzato da persone (bambini compresi) con capacità fi siche, sensoriali o mentali
ridotte, salvo siano controllati da una persona responsabile della loro sicurezza.
POICHÈ LE PARTI RAGGIUNGIBILI POSSONO DIVEN-
TAR E INCANDESCENTI durante l’utilizzo, tenere
fuori dalla portata dei bambini.
N
ON USARE IL FORNO A MI-
CROONDE per riscaldare al-
imenti o liquidi in
contenitori sigillati. L’aumento di pressione potrebbe causare danni al momento
dell’apertura del contenitore, che potrebbe
anche esplodere.
L
E GUARNIZIONI DELLA PORTA E DELLE ZONE CIR-
COSTANTI devono essere controllate periodi-
camente. In caso di danni non utilizzare
l’apparecchio, fi nché non sia stato riparato
da un tecnico qualifi cato.
80
Page 81

PRECAUZIONI
SUGGERIMENTI GENERALI
UESTO APPARECCHIO È DESTINATO ESCLUSIVAMENTE
Q
ALL’USO DOMESTICO!
ON LA FUNZIONE MICROONDE INSERITA, questo appar-
C
ecchio non deve mai essere messo in funzione
senza alimenti. Potrebbe essere danneggiato.
UANDO SI FA NNO PROVE DI PROGR AMMAZIONE, met-
Q
tere all’interno un bicchiere di acqua. L’acqua
assorbirà le microonde e il forno non si rovinerà.
ON USARE LA CAVITÀ come dispensa.
N
OGLIERE I LACCI DI CHIUSURA dai sacchet-
T
ti di plastica o carta prima di metterli in forno.
FRITTURA A BAGNO D’OLIO
N
ON USARE IL FORNO A MICROONDE per fritture a ba-
gno d’olio, poiché è impossibile controllare la temperatura
dell’olio.
PER EVITARE DI BRUCIARSI indossare sempre
guanti da forno per manipolare contenitori, toccare il forno e togliere le casseruole.
LIQUIDI
S. BEVANDE O ACQUA. Quando si riscaldano liq-
E
uidi come bevande o acqua,
questi si possono surriscaldare
oltre il punto di ebollizione
senza che appaiano bollicine.
Ciò potrebbe determinare un
traboccamento improvviso di liquido bollente.
Per prevenire questa possibilità, procedere
come segue:
1. Evitare l’uso di contenitori con pareti verticali e con colli stretti.
2. Mescolare il liquido prima di mettere il recipiente nel forno e lasciarvi immerso un
cucchiaino da tè.
3. Dopo il riscaldamento, prevedere un tempo di riposo, mescolando ancora prima di
togliere il recipiente dal forno.
AT TE NZI ON E
P
ER MAGGIORI dettagli fare sempre riferimen-
to ad un libro di ricette per forno a microonde,
specialmente se gli alimenti da cuocere o
riscaldare contengono alcool.
D
OPO AVER RISCALDATO gli alimenti per
bambini o liquidi nel biberon,
oppure in contenitori per omogeneizzati, agitare e controllare
sempre la temperatura prima di servire. Questo
favorirà la distribuzione omogenea del calore evitando il rischio di bruciature.
Togliere il coperchio e la tettarella dal biberon prima di riscaldarli!
MANOPOLE A PRESSIONE
LLA CONSE GNA, le manopole di ques-
A
to forno sono allineate con i tasti del
pannello. Le manopole fuoriusciranno
se premute e consentiranno di accedere alle varie funzioni.
NOn è necessario che sporgano dal pannello durante il funzionamento. È sufficiente premerle verso l’interno del pannello al termine delle impostazioni e continuare ad utilizzare il forno.
81
Page 82

ACCESSORI
SUGGERIMENTI GENERALI
N COMME RCIO sono disponibili diversi accessori.
I
Prima di acquistarli, accertarsi che siano specifici per la cottura a microonde.
SSICURAR SI CHE GLI UTENSILI USATI SIANO RESISTENTI AL
A
CALORE DEL FORNO e trasparenti
alle microonde.
N
EL MOMENTO IN CUI SI RIPONGONO L’ALIMENTO E GLI AC-
CESSORI nel forno a microonde, accertarsi che
non tocchino le pareti interne del forno.
Questa precauzione è particolarmente importante per gli accessori metallici o con
componenti metallici.
S
E GLI ACCESSOR I METALLICI VENGONO in contatto con le
pareti interne mentre il forno è in funzione, si produrranno scintille ed il forno ne risulterà danneggiato.
SSICURAR SI SEMPRE che sempre che il piatto ro-
A
tante sia in grado di ruotare liberamente prima
di avviare il forno.
GUIDA PER PIATTO ROTANTE
S
ERVIRSI DEL SUPPORTO DEL PIATTO RO-
TANT E sotto al piatto rotante in vet-
ro. NOn appoggiare altri utensili sopra la guida per piatto rotante.
Montare la guida per il piatto rotante nel for-
no.
PIATTO ROTANTE IN VETRO
USARE IL PIATTO ROTANTE IN VETRO con tutti i meto-
di di cottura. Il piatto rotante
raccoglie i sughi di cottura e le
particelle di cibo che altrimenti
macchierebbero e sporcherebbero l’interno del forno.
Posizionare il piatto rotante in vetro sopra
la guida.
PIATTO DA FORNO
USARE IL PIATTO DA FORNO per la cottura con le
sole funzioni Ventilato o quando è attiva la funzione Grill.
NOn usarlo mai in combinazione con le microonde.
GRIGLIA DI COTTURA
TILIZZARE LA GRIGLIA DI COTTU-
U
RA per la cottura con le funzio-
ni Ventilato, Grill, Ventilato combi, Ventilato automatico combi o Turbo grill
combi.
PER GRIGLIARE SENZA LE MI-
CROONDE, porre la griglia di
cottura sul piatto da forno
per avvicinare il cibo al grill
sulla parte alta del forno.
PORTABIBERON
U
SARE IL PORTABIBERON per
riscaldare alimenti per
bambini in contenitori
troppo alti per essere posti in posizione eretta all’interno del forno.
Fare anche riferimento al capitolo “Precauzioni” per ulteriori informazioni per il riscaldamento di alimenti per bambini.
PROTEZIONE ANTIAVVIO / SICUREZZA BAMBINI
QUESTA FUNZION E DI SICUREZZA SI ATTI VA AUTOMATIC A-
MENTE UN MINUTO DOPO che il forno viene a trovar-
si nella fase di attesa “standby”. (Il forno si
trova in modalità “stand by” quando appare visualizzato l’orologio a 24 ore oppure, se l’orologio non è stato impostato,
quando il display è vuoto).
82
LA PORTA DEL FORNO deve essere aperta e poi
richiusa per esempio per inserire il cibo per
sbloccare il meccanismo di sicurezza. In caso
diverso sul display apparirà la dicitura ”DOOR”
(porta).
door
Page 83

SOSPENSIONE O INTERRUZIONE DELLA COTTURA
PER SOSPENDERE IL PROCESSO DI COTTU RA:
PER CONTRO LLARE, mescolare
o girare l’alimento, aprire la
porta ed il processo di cottura si interromperà automaticamente. La funzione rimane
impostata per 10 minuti.
P
ER RIPRENDERE IL PROCESSO DI COTTUR A:
CHIUDERE LA PORTA e premere il tasto
Start (avvio) UNA SOLA VOLTA. Il
processo di cottura riprende da
dove era stato interrotto.
PREMENDO IL TAST O START (AVVI O) DUE
VOLTE si determina un incremento del tempo
di cottura di 30 secondi.
GRADO DI COTTURA
P
ER NON CONTINUA RE LA COTTURA :
TOGLIERE L’ALIMEN TO, chiudere la por-
ta e premere il tasto di Arresto.
AL COMPLE TAMENTO DEL PROCESSO DI COT TURA , il segnale acustico del forno suona
ogni minuto per 10 minuti.
Premere il tasto STOP
(Arresto) o aprire la porta per far cessare il segnale.
NOTA: Se si apre e chiude la porta al termine del
processo di cottura, le impostazioni rimangono memorizzate per 60 secondi.
IL GRADO DI COTTUR A È DISPONIBILE SOLO NELLE SEGUEN-
TI FUNZIONI :
RISCALDAMENTO AUTOMATICO
COTTURA AUTO MATICA
FUNZIONE AUTOMATIC A VENTILATO COM BI
NELLE FUNZIO NI ILLUSTRATE SOPRA , è possibile con-
trollare personalmente il risultato finale mediante la funzione Regolazione grado di cottura.
Questa funzione consente di raggiungere livelli di temperature inferiori o superiori alle impostazioni standard.
GRADO DI COTTURA
IVELLO EFFET TO
L
RAGGI UNGE LA MASSIMA TEMPERATURA
Hi 2
FINALE
Hi 1
RAGGI UNGE TEMPERATURE FINALI SUPER IORI
- - - Lo 1
IMPOSTAZIONE STANDARD PR EDEFINITA
RAGGI UNGE TEMPERATURE FINALI INFERIORI
RAGGI UNGE LA MINIMA TEMPERATURA
Lo 2
FINALE
RAFFREDDAMENTO
AL TERMINE DI UNA FUNZIONE, il forno inizia un ciclo di
raffreddamento. Ciò è da ritenersi del tutto normale.
Alla fine del ciclo di raffreddamento il forno si
spegne automaticamente.
SCEGLIENDO una di queste funzioni si sceglie
l’impostazione standard. Questa impostazione
normalmente garantisce il miglior risultato.
Se il cibo riscaldato è troppo caldo è possibile
regolare facilmente la temperatura secondo
le preferenze personali prima di usare un’altra
volta la stessa funzione. Selezionare un livello
di grado cottura tramite la manopola di regolazione subito dopo aver premuto il tasto Start.
OTA:
N
IL GRADO COTTUR A può essere impostato o mod-
ificato durante i primi 20 secondi di funzionamento.
IL CICLO DI RAFFREDDAMENTO può essere interrot-
to senza provocare danni al forno aprendo la
porta.
83
Page 84

TIMER
UTILIZZARE QUESTA FUNZIONE per indicare sul
timer di cucina il tempo desiderato, ad esempio per cuocere uova, pasta o far lievita-
RUOTARE LA MANOPOLA MULTIFUNZIONE sulla posizione zero.
RUOTARE LA MANOPOLA DI REGOLAZIONE per impostare il tempo di
misurazione.
I
L TIMER INIZIA AUTOMATIC AMENTE il conto alla rovescia dopo un secondo.
ALLO SCADERE DEL TEMPO IMPOSTATO sul timer, il forno a microonde
emette un segnale acustico.
re la pasta prima di cuocerla e così via.
OROLOGIO
QUANDO L’APPARECCHIO VIENE COLLEGATO
ELETTRICAMENTE PER LA PRIMA VOLTA o dopo
un’interruzione di corrente, sul display non
RUOTARE LA MANOPOLA MULTIFUNZIONE sulla posizione zero.
PREMERE IL TAS TO DI SELEZIONE SELECT (3 secondi) fino a quando la cifra a sinistra
(ore) inizia a lampeggiare.
GIR ARE LA MANOPOLA DI REGOLAZIONE per impostare le ore.
PREMERE DI NUOVO IL TAST O SELECT . (Le due cifre a destra, i minuti, lampeggiano).
RUOTARE LA MANOPOLA DI REGOLAZIONE per impostare i minuti.
PREMERE DI NUOVO il tasto di Select.
compare nessuna indicazione. Se l’orologio
non è impostato, il display resterà vuoto finché non verrà impostato un tempo di cottura.
84
L’
OROLOGIO È IMPOSTATO ed è in funzione.
PER RIMUOVERE LA FUNZIONE OROLOGIO dal visualizzatore dopo averla
programmata, premere nuovamente il tasto Select per 3 secondi e
poi il tasto Stop.
PER REINSERIRE LA FUNZIONE OROLOGIO, seguire la procedura sopra descritta.
NOTA: TENERE LA PORTA DEL FORNO APERTA QUANDO SI IMPOSTA L’OROLOGIO.
In questo modo si hanno a disposizione 10 minuti per compiere
l’intera operazione. Se la porta viene tenuta chiusa, è necessario
completare ognuna delle sequenze entro 60 secondi.
Page 85

COTTURA E RISCALDAMENTO CON LE MICROONDE
UTILIZZARE QUESTA FUNZIONE per normali operazioni di cottura e riscaldamento di verdure,
pesce, patate e carne.
RUOTARE LA MANOPOLA multifunzione sulla posizione Microonde.
RUOTARE LA MANOPOLA DI REGOLAZIONE per impostare il tempo di cottura.
PREMERE IL TAS TO SELECT per selezionare il livello di potenza.
RUOTARE LA MANOPOLA DI REGOLAZIONE per impostare il livello di potenza de-
siderato.
PREMERE DI NUOVO IL TAST O START.
UNA VOLTA CHE IL PROCESSO DI COTTUR A È INIZIATO:
Il tempo può essere facilmente incrementato di 30 secondi alla
volta premendo il tasto d’avvio. Ogni successiva pressione determi-
na un incremento del tempo di cottura di ulteriori 30 secondi. Si
può anche aumentare o ridurre il tempo ruotando la manopola di
regolazione.
PREMENDO IL TAST O SELECT si può alternare fra il tempo di cottura e il
livello della potenza. Entrambi possono essere modificati durante
la cottura ruotando la manopola di regolazione dopo aver effettuato la selezione.
COME SCEGLIERE IL LIVELLO DI POTENZA
SOLO MICROONDE
OTENZA USO SUGGERITO:
P
JET
(900 W)
R
ISCALDAMENTO DI BEVANDE, acqua, zuppe non dense, caffè, tè o altri alimenti ad alto con-
tenuto di acqua. Se l’alimento contiene uova o panna, scegliere una potenza inferiore.
750 W C
650 W C
500 W
350 W F
160 W S
90 W TENERE IN CALDO
0 W IMPOSTARE il tempo di attesa.
OTTURA DI PESCE, carne, piatti gratinati, ecc.
OTTURA di alimenti che non si possono mescolare
OTTURA ACCUR ATA DI SALSE altamente proteiche, piatti a base di uova e formaggio e per
C
terminare la cottura di piatti in umido.
AR BOLLIRE LENTAMENTE STUFATI , e per sciogliere il burro.
CONGE LAMENTO Per ammorbidire burro e formaggi.
85
Page 86

FUNZIONE JET START
QUESTA FUNZIONE serve per riscaldare rapidamente alimenti ad alto contenuto d’acqua
come zuppe non dense, caffè o tè.
RUOTARE LA MANOPOLA multifunzione sulla posizione Microonde.
PREMERE DI NUOVO IL TAST O START.
QUESTA FUNZIONE SI AV VIA AUT OMATICAM ENTE alla potenza massima per
le microonde e tempo di cottura impostato a 30 secondi. Ogni ulte-
riore pressione incrementa il tempo di 30 secondi. Si può anche modificare il tempo ruotando la manopola di regolazione per aumentare o diminuire il tempo, dopo l’avvio della funzione.
FUNZIONE DI SCONGELAMENTO MANUALE
SEGUITE LA PROCEDURA DESCRITTA PER LA ”Funzione
di cottura e riscaldamento a microonde” e per
effettuare lo scongelamento manuale selezionare il livello di potenza 160 W.
ALIMENTI CON GELATI CONFE ZIONATI IN SACCHETTI DI
PLASTICA , pellicola in plastica o scatole di
cartone possono essere messi in cottura direttamente purché la confezione
non contenga parti metalliche (es. lacci
di chiusura in metallo).
A FORMA DEL CONTENITOR E IN CUI È CONFEZIO N-
L
ATO l’alimento interagisce sui tempi di scongela-
mento. Confezioni di basso spessore scongelano
più rapidamente rispetto a blocchi più spessi.
R
ICORDARSI DI STACCARE L’UNA DALL’ALTRA LE PART I
dell’alimento quando cominciano a scongelarsi.
Le fette separate una ad una scongelano più
rapidamente.
S
E DURANTE LO SCONGE LAMENTO si nota che alcune
parti di alimento iniziano a cuocere
(es. cosce di pollo ed estremità
delle ali), è bene coprirle con
dei pezzetti di foglio di alluminio.
86
CONTROLLARE COSTANTEMEN TE L’ALIMENTO. Con
l’esperienza si apprenderanno i giusti tempi
per le varie quantità.
G
IRARE I PEZZI PIÙ GROSSI A METÀ tempo nel corso
del processo di scongelamento.
ALIMENTI LESSATI, STUFATI E RAGÙ DI CARNE
SCONGELANO meglio se vengono mesco-
lati di tanto in tanto per l’intera durata
del processo.
P
ER UN PERFETTO RISULTATO DI SCONGELAMENTO, è
sempre preferibile non scongelare completamente l’alimento e prevedere sempre un tempo di riposo adeguato.
A
LCUNI MINUTI DI RIPOSO DOPO LO SCON -
GELAMENTO MIGLIORANO sempre il ri-
sultato in quanto la temperatura interna dell’alimento
viene distribuita con maggiore uniformità.
Page 87

FUNZIONE JET DEFROST
FUNZIONE ADATTA solo per alimenti con peso
netto compreso tra 100 g- 3 Kg.
DISPORRE SEMPRE il cibo sul piatto rotante in
RUOTARE la manopola multifunzione sulla posizione Auto.
PREMERE IL TAS TO AUTO per selezionare la funzione automatica.
RUOTARE LA MANOPOLA DI REGOLAZIONE per scegliere la categoria di alimenti
desiderata.
PREMERE IL TAS TO SELECT (APPARE IL PESO PREDETERMINATO).
RUOTARE LA MANOPOLA DI REGOLAZIONE per impostare il peso degli alimenti.
PREMERE DI NUOVO IL TAST O START.
METÀ DEL PROCESSO DI SCONGELAMENTO il forno si arresta e invita a girare
A
l’alimento attraverso il messaggio TURN FOOD.
vetro.
Aprire la porta.
Girare l’alimento.
Chiudere la porta e riavviare premendo il tasto Start.
N
OTA: IL FORNO RIPRENDERÀ A FUNZIONARE AUTOMATICAM ENTE DOPO 2 MINUTI
se il cibo non è stato girato. In questo caso sarà richiesto un tempo
di scongelamento maggiore.
87
Page 88

FUNZIONE JET DEFROST
PER QUESTA FUNZIONE È NECESSARIO indicare il peso netto del cibo.
CIBI SURGELATI:
S
E IL PESO È INFERIORE O SUPERIORE AL PESO
CONSI GLIATO, seguire la procedura de-
scritta in “Cottura e riscaldamento
a microonde” e scegliere la potenza
160 W per lo scongelamento.
ALIMENTO QUANTITÀ SUGGERIMENTI
CIBI SURGELATI:
SE L’ALIMENTO È A TE MPERATURA PIÙ ALTA di
quella di surgelamento (-18°C), selezionare un peso inferiore.
E L’ALIMENTO È A TEMPER ATUR A PIÙ BASSA di
S
quella di surgelamento (-18 °C), selezionare un peso superiore.
CARNE
POLLAME
PESCE
VERDURA
PANE
P
ER I CIBI NON ELENCATI IN QUESTA TABELLA e se il peso è inferiore o superiore al peso consigliato, seguite
la procedura descritta in “Cottura e riscaldamento con le microonde” e scegliete la potenza 160
W per lo scongelamento.
100 G - 2 KG Carne macinata, cotolette, bistecche o arrosti.
G - 3KG Pollo intero, a pezzi o fi letti.
100
G - 2 KG Bistecche o fi letti interi.
100
G - 2 KG Verdure miste, piselli, broccoli ecc.
100
G - 2 KG Pagnotte, focaccine o panini.
100
88
Page 89

FUNZIONE GRILL
UTILIZZARE QUESTA FUNZIONE per dorare rapidamente la superficie dell’alimento.
PER CIBI QUALI FORMAGGIO, TOAST, BISTECCHE E SAL-
RUOTARE LA MANOPOLA MULTIFUNZIONE sulla posizione Grill.
RUOTARE LA MANOPOLA DI REGOLAZIONE per impostare il tempo di
cottura.
PREMERE DI NUOVO IL TAST O START.
UANDO IL GRILL È IN FUNZI ONE NON LASCIARE aperta la porta del for-
Q
no a lungo, in modo da evitare la diminuzione della temperatura
all’interno del forno.
RIMA DI UTILIZZARE QUALSIASI UTENSILE , assicurarsi che sia resistente al
P
calore sviluppato dal forno.
N
ON USARE UTENSILI DI PLASTICA con la funzione Grill, in quanto il cal-
ore sviluppato li scioglierebbe. Anche la carta o il legno sono
sconsigliati.
SICCE, porre la griglia di cottura sul piatto da
forno.
89
Page 90

GRILL COMBI
UTILIZZARE questa funzione per dorare rapidamente la superficie dell’alimento contemporaneamente alla cottura a microonde.
RUOTARE LA MANOPOLA MULTIFUNZIONE sulla posizione Grill combi.
RUOTARE LA MANOPOLA DI REGOLAZIONE per impostare il livello di potenza.
PREMERE IL TAS TO SELECT per selezionare il tempo di cottura.
RUOTARE LA MANOPOLA DI REGOLAZIONE per impostare il tempo di cottura.
PREMERE DI NUOVO IL TAST O START.
P
RIMA DI UTILIZZARE QUALSIASI UTENSILE , assicurarsi che sia resistente al
calore sviluppato dal forno.
N
ON USARE UTENSILI DI PLASTICA con la funzione Grill, in quanto il cal-
ore sviluppato li scioglierebbe. Anche la carta o il legno sono
sconsigliati.
I
L LIVELLO MASSIMO POSSIBILE DI POTENZA DELLE MICROONDE DURANTE l’uso del
Grill combi è limitato al livello impostato in fabbrica.
UTILIZZARE LA GRIGLIA DI COTTU RA per appoggiarvi il cibo e consentire la
circolazione dell’aria attorno ad esso.
90
COME SCEGLIERE IL LIVELLO DI POTENZA
GRILL COMBI
OTENZA USO SUGGERITO:
P
650 W C
350 - 500 W C
160 - 350 W C
160 W C
90 W G
OTTURA e gratinatura verdure
OTTURA pollame e lasagne
OTTURA pesce e gratin surgelati
OTTURA DI carne
RATINATURA frutta
Page 91

TURBO GRILL COMBI
USARE QUESTA FUNZIONE PER CUOCER E PIETANZE
GR ATI NATE , LASAGNE, POLLAME E PATATE AL FORNO.
DISPORRE IL CIBO sulla griglia di cottura o sul
RUOTARE LA MANOPOLA MULTIFUNZIONE sulla posizione Turbo Grill.
RUOTARE LA MANOPOLA DI REGOLAZIONE per impostare il livello di potenza.
PREMERE IL TAS TO SELECT per selezionare il tempo di cottura.
RUOTARE LA MANOPOLA DI REGOLAZIONE per impostare il tempo di cottura.
PREMERE DI NUOVO IL TAST O START.
I
L LIVELLO MASSIMO POSSIBILE DI POTENZA DELLE MICROONDE DURANTE l’uso del
Grill è limitato al livello impostato in fabbrica.
piatto rotante in vetro quando si cuoce con
questa funzione.
COME SCEGLIERE IL LIVELLO DI POTENZA
TURBOGRILL COMBI
OTENZA USO SUGGERITO:
P
650 W C
350 - 500 W C
160 - 350 W C
160 W C
90 W G
0 W D
OTTURA e gratinatura verdure
OTTURA pollame e lasagne
OTTURA pesce e gratin surgelati
OTTURA DI carne
RATINATURA frutta
ORATURA solo durante la cottura
91
Page 92
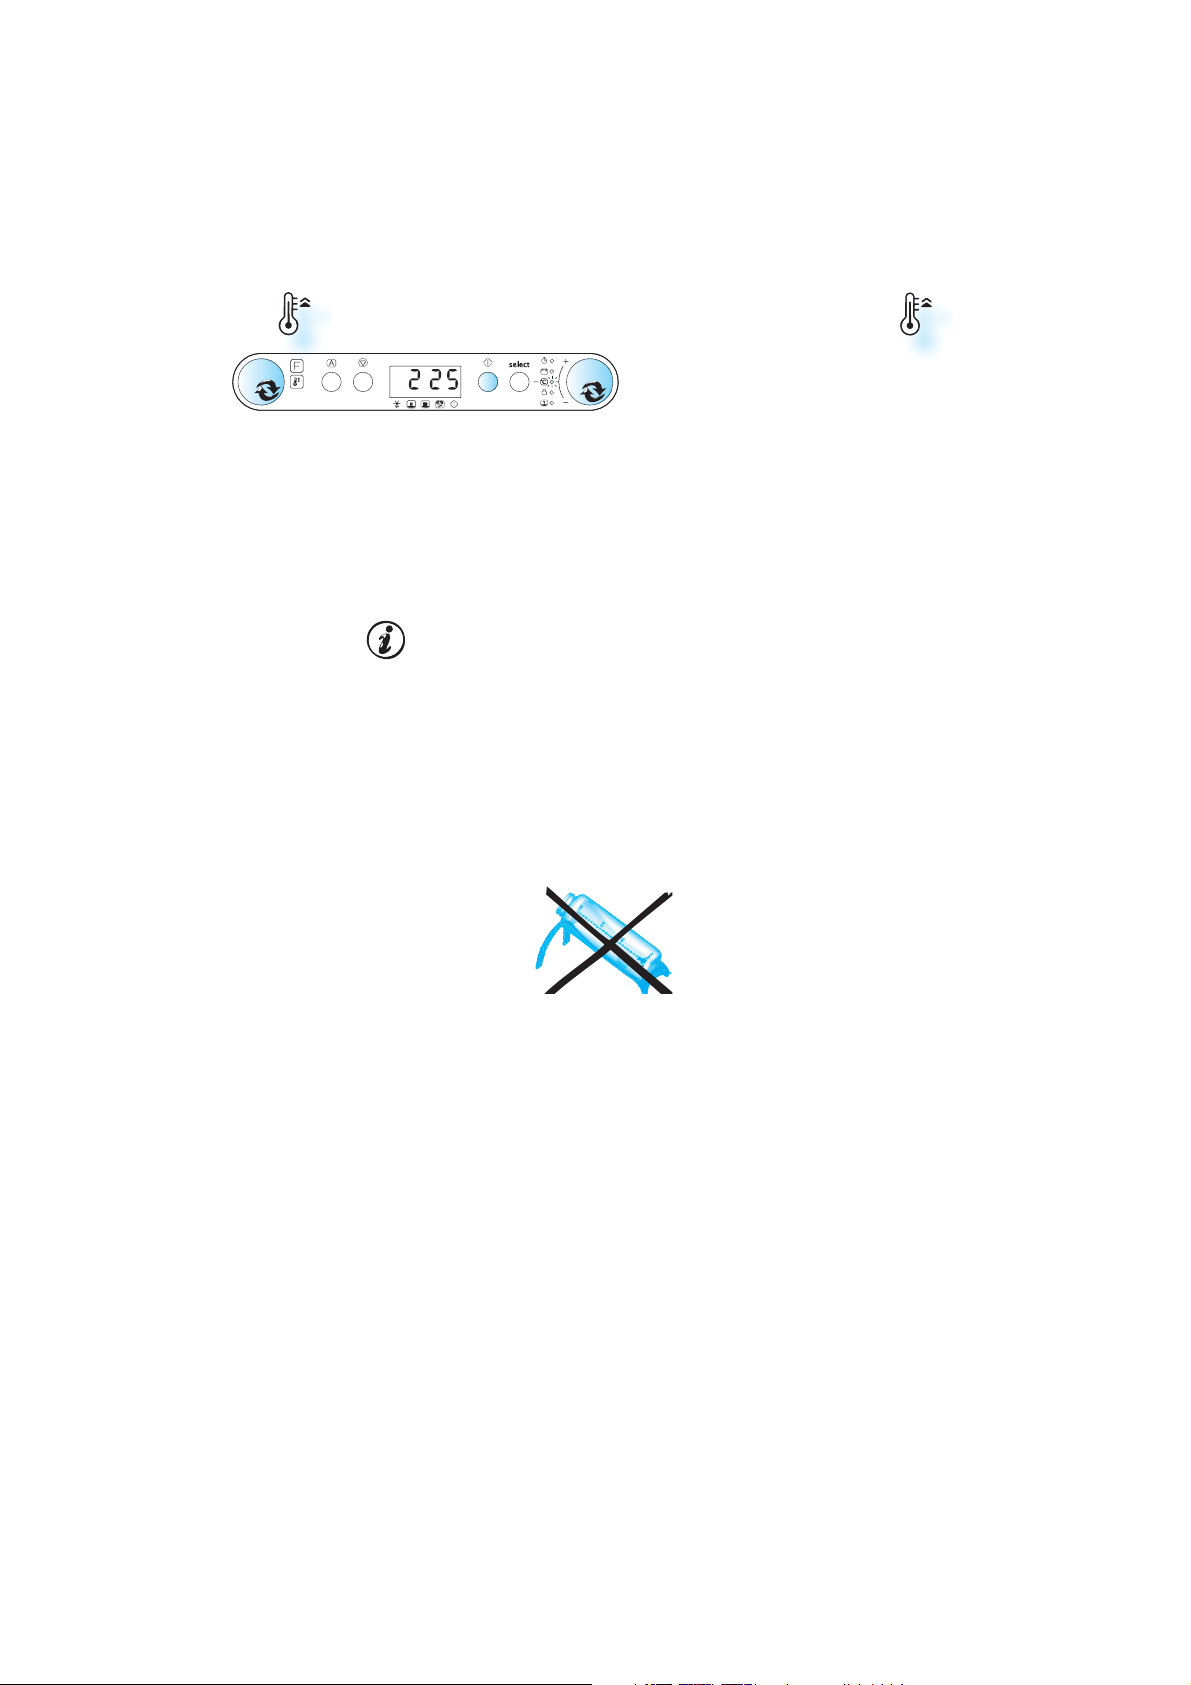
RISCALD. RAPIDO
USARE QUESTA FUNZIONE per preriscaldare il forno vuoto.
PRIMA DI METTERE L’ALIMENTO NEL FORN O attende-
re che venga completata la fase di preriscal-
damento. Il calore intenso potrebbe farlo
bruciare.
RUOTARE LA MANOPOLA MULTIFUNZIONE sulla posizione Riscaldamento rapido.
RUOTARE LA MANOPOLA DI REGOLAZIONE per impostare la temperatura.
PREMERE DI NUOVO IL TAST O START.
DURANTE LA FASE DI RISCALDAMENTO le cifre lampeggiano e ad intervalli appare la dicitura “PRE-H EA T” (preriscaldamento)
fino a quando viene raggiunta la temperatura impostata.
U
NA VOLTA AVVI ATO IL PROCESSO DI RISCALDAMENTO , la temperatura può es-
sere facilmente regolata ruotando la manopola multifunzione.
L FORNO QUINDI MANTIENE la temperatura impostata per 10 minuti prima
I
di spegnersi. In questo tempo, il forno attende l’inserimento del cibo
e la selezione di una funzione Ventilato per iniziare la cottura.
I
L PRERISCALDAMENTO deve sempre avvenire a forno vuoto.
92
Page 93

FUNZIONE VENTILATO
UTILIZZARE questa funzione per cuocere meringhe, pasticceria, torte tipo pan di Spagna,
soufflé, pollame e arrosti di carne.
RUOTARE LA MANOPOLA MULTIFUNZIONE sulla posizione Ventilato.
RUOTARE LA MANOPOLA DI REGOLAZIONE PER impostare la temperatura.
PREMERE IL TAS TO SELECT per selezionare il tempo di cottura.
RUOTARE LA MANOPOLA DI REGOLAZIONE per impostare il tempo di cottura.
PREMERE DI NUOVO IL TAST O START.
IMPOSTAZIONE PREDEFINITA quando si seleziona Ventilato è 175°C
L’
TILIZZARE LA GRIGLIA DI COTTUR A per appoggiarvi il cibo e consentire la
U
circolazione dell’aria attorno ad esso.
TILIZZARE IL PIATTO DA FORNO per la cottura di pezzetti piccoli, come
U
biscotti o panini.
D
URANTE LA FASE DI RISCALDAMENTO le cifre lampeggiano fino a quando non
viene raggiunta la temperatura impostata.
UNA VOLTA AVVI ATO IL PROCESSO DI RISCALDAMENTO LA TE MPERATURA PUÒ ESSERE
FACIL MENT E REGOLATA RUOTANDO LA MANOPOLA MULTIFUNZIONE.
93
Page 94

FUNZIONE VENTILATO COMBI
USARE QUESTA FUNZIONE per cuocere arrosti di carne, pollame e patate con la buccia,
alimenti veloci surgelati, torte tipo pan di
Spagna, pasticceria, pesce e dolci.
RUOTATE LA MANOPOLA MULTIFUNZIONE sulla posizione Ventilato combi.
RUOTARE LA MANOPOLA DI REGOLAZIONE PER impostare la temperatura.
PREMERE IL TAS TO SELECT per selezionare la potenza delle microonde.
RUOTARE LA MANOPOLA DI REGOLAZIONE per impostare il livello di potenza.
PREMERE IL TAS TO SELECT per selezionare il tempo di cottura.
RUOTARE LA MANOPOLA DI REGOLAZIONE per impostare il tempo di cottura.
PREMERE DI NUOVO IL TAST O START.
U
TILIZZARE LA GRIGLIA DI COTTUR A per appoggiarvi il cibo e consentire la
circolazione dell’aria attorno ad esso.
D
URANTE LA FASE DI RISCALDAMENTO le cifre lampeggiano fino a quando
non viene raggiunta la temperatura impostata.
NA VOLTA AVVI ATO IL PROCESSO DI RISCALDAMENTO LA TEMPERATURA può es-
U
sere facilmente regolata ruotando la manopola multifunzione. È
possibile modificare anche il livello di potenza delle microonde. Il
livello massimo possibile di potenza delle microonde durante l’uso
della funzione Ventilato è limitato al livello impostato in fabbrica.
94
COME SCEGLIERE IL LIVELLO DI POTENZA
FUNZIONE VENTILATO COMBI
OTENZA USO SUGGERITO:
P
350 W C
160 W C
90 W C
OTTURA pollame, pesce e gratin surgelati
OTTURA di arrosti
OTTURA DI pane e torte
Page 95

RISCALDAMENTO AUTOMATICO
USARE QUESTA FUNZIONE per riscaldare cibo già
pronto congelato o freddo.
DISPORRE IL CIBO su un piatto da portata resistente al calore.
RUOTARE la manopola multifunzione sulla posizione Auto.
PREMERE IL TAS TO AUTO per selezionare la funzione automatica.
PREMERE DI NUOVO IL TAST O START.
METÀ del processo di scongelamento, il forno si arresta e girare gli
A
alimenti attraverso il messaggio “STIR FOOD”.
Aprire la porta.
Mescolare o girare gli alimenti.
Chiudere la porta e riavviare premendo il tasto Start.
NOTA: IL FORNO RIPRENDERÀ A FUNZIONAR E AUTOMATICA MENTE DOPO 2 MINUTO
se il cibo non è stato girato o mescolato.
QUANDO SI RIPONE UN PIATTO nel frigorifero o si
preparano porzioni da riscaldare, disporre le
porzioni più grandi o i
cibi più densi ver-
so l’esterno del piatto e al centro le
pozioni più piccole
o i cibi meno densi.
S
ISTEMARE LE FETTINE SOTTILI DI CARNE l’una sopra
all’altra oppure inframmezzate.
LE FETTE TAG LIAT E PIÙ SPESSE , come ad esempio
polpettone e salsicce, andranno sistemate
l’una accanto all’altra.
N PAIO DI MINUTI DI RIPOSO mi-
U
gliorano sempre il risulta-
to, in particolare per i cibi
surgelati.
ERFORARE O INCIDERE la pel-
P
licola con una forchetta
per sfiatare la pressione ed
evitare lo scoppio, in quanto
si accumula vapore durante
la cottura.
95
Page 96

RISCALDAMENTO AUTOMATICO
ALIMENTO SUGGERIMENTI
REPARARE il cibo seguendo le raccomandazioni so-
P
PIATTO UNICO (250g - 600g)
ZUPPE (200 G - 800 g)
pra indicate.
C
UOCERE COPERT O.
R
ISCALDARE SCOPERTO in fondine separate o in una
zuppiera grande.
PORZIONE SURGELATA
(250g - 600g)
LAT TE (100 g - 500 g)
STUFATO (200g - 800g)
ER I CIBI NON ELENCATI IN QUESTA TABELLA e se il peso è inferiore o superiore al peso consigliato, seguite
P
la procedura descritta in “Cottura e riscaldamento a microonde”.
EGUIRE LE ISTRUZIONI SULLA CONFEZIONE, IE. ventilazi-
S
one, perforazione, ecc.
R
ISCALDARE SCOPERTO e mettere un cucchiaio in
metallo nella tazza.
R
ISCALDARE COPERTO.
96
Page 97

FUNZIONE COTTURA AUTOMATICA
UTILIZZARE QUESTA FUNZIONE SOLAMENTE per
cuocere. La cottura automatica può essere
usata solo per gli alimenti che rientrano
RUOTARE la manopola multifunzione sulla posizione Auto.
PREMERE IL TAS TO AUTO per selezionare la funzione automatica.
RUOTARE LA MANOPOLA DI REGOLAZIONE per scegliere la categoria di
alimenti desiderata.
PREMERE IL TAS TO SELECT (appare il peso predeterminato).
RUOTARE LA MANOPOLA DI REGOLAZIONE per impostare il peso degli
alimenti.
PREMERE DI NUOVO IL TAST O START.
A
METÀ del processo di cottura, il forno si arresta e invita a girare o
mescolare gli alimenti visualizzando rispettivamente i messaggi
STIR FOOD o TURN FOOD.
nelle categorie elencate nella tabella.
ISPORRE IL CIBO su un piatto da portata resis-
D
tente al calore.
Aprire la porta.
Mescolare o girare gli alimenti.
Chiudere la porta e riavviare premendo il tasto Start.
NOTA: IL FORNO RIPRENDERÀ A FUNZIONAR E AUTOMATICA MENTE DOPO 2 MINUTO se
il cibo non è stato girato o mescolato.
Q
UANDO SI RIPONE un piatto nel frigorifero o si
preparano porzioni da riscaldare, disporre le
porzioni più grandi o i
cibi più densi verso
l’esterno del piatto
e al centro le pozi-
oni più piccole o i
cibi meno densi.
S
ISTEMARE LE FETTINE sottili di carne l’una sopra
all’altra oppure inframmezzate.
LE FETTE TAG LIAT E PIÙ SPESSE, come ad esempio
polpettone e salsicce, andranno sistemate
l’una accanto all’altra.
U
N PAIO DI MINUTI DI RIPOSO miglio-
rano sempre il risultato, in particolare per i cibi surgelati.
USATE SEMPRE IL COPERCHIO in dotazione con questa funzione, ad eccezione di quando si riscal-
dano zuppe, nel qual caso il coperchio non
è necessario. Se l’alimento è avvolto in
un involucro e non è possibile usare il
coperchio, si consiglia di eseguire 2-3
incisioni nell’involucro onde consentire
alla pressione di fuoriuscire durante il
riscaldamento.
PERFORARE O INCIDERE la pellicola
con una forchetta per sfiatare la
pressione ed evitare lo scoppio, in quanto si accumula
vapore durante la cottura.
97
Page 98

FUNZIONE COTTURA AUTOMATICA
ALIMENTO QUANTITÀ SUGGERIMENTI
UNZECCHIARE LE PATATE e disporle su un piatto adat-
P
PATATE AL
FORNO
200 g - 1 kg
to sia per il forno a microonde che per il forno tradizionale. Girare le patate al segnale acustico del forno. Fare attenzione perché il forno, il piatto e il cibo
sono caldi.
VERDURE
FRESCHE
VERDURE
SURGELATE
VERDURE IN
SCATOLA
POP-CORN
ER I CIBI NON ELENCATI IN QUESTA TABELLA e se il peso è inferiore o superiore al peso consigliato, seguite
P
la procedura descritta in “Cottura e riscaldamento a microonde”.
200 g - 800 g
200 g - 800 g
200g - 600g
90 g - 100 g
TAGLIARE LE VERDURE in pezzetti uniformi. Aggiungere
2-4 cucchiai di acqua e coprire. Mescolare al segnale
acustico del forno.
CUOCERE COPERTO. Mescolare al segnale acustico del
forno.
ELIMINARE la maggior parte del liquido e cuocere coperto in un piatto adatto per forno a microonde.
CUOCERE UN SOLO sacchetto alla volta. Per una maggiore quantità di pop-corn, cuocere i sacchetti separatamente.
98
Page 99

FUNZIONE AUTOMATICA VENTILATO COMBI
UTILIZZARE QUESTA FUNZIONE per cuocere cibi
crudi o surgelati.
RUOTARE la manopola multifunzione sulla posizione Auto.
PREMERE IL TAS TO AUTO per selezionare la funzione automatica.
RUOTARE LA MANOPOLA DI REGOLAZIONE per scegliere la categoria di alimenti
PREMERE IL TAS TO SELECT (APPARE IL PESO PREDETERMINATO).
RUOTARE LA MANOPOLA DI REGOLAZIONE per impostare il peso degli alimenti.
PREMERE DI NUOVO IL TAST O START.
desiderata.
P
ER POLLO E LASAGNE; Prima di iniziare la cottura, assicurarsi che il piat-
to utilizzato sia adatto per il forno e consenta il passaggio delle microonde. In caso contrario, il risultato finale potrebbe essere deludente.
U
TILIZZARE SEMPRE il piatto da forno per la cottura di
biscotti o di panini surgelati o in scatola.
UNGERE LEGGERMENTE il piatto da forno o coprirlo
con carta da forno.
ER USARE I PROGRAMM I per i biscotti o i panini surgelati o in scatola, il
P
forno deve essere preriscaldato prima di inserire il cibo. Quando si è
raggiunta la temperatura esatta, si può inserire il cibo nel forno.
Aprire la porta.
Riporre il piatto da forno con il cibo sulle guide che si
trovano sulle pareti del forno.
Add
Chiudere la porta e riavviare premendo il tasto Start.
Food
99
Page 100

FUNZIONE AUTOMATICA VENTILATO COMBI
PESI CONSIGLIATI
I
NSAPORIRE IL POLLO CON sale e spezie.
POLLO (800G - 1½KG)
LASAGNE SURGELATE (400G - 1KG)
BISCOTTI (9-12 pezzi)
PASTA PER IL PANE CONFEZIO NATA
PANINI SURGELATI
Spennellare con olio a piacere. Porre su un
piatto adatto per le microonde e per il forno tradizionale. Porre il piatto sulla griglia.
ISPORRE SU UN PIATTO adatto sia per il forno
D
a microonde che per il forno tradizionale.
Porre il piatto sulla griglia.
ISPORLI su una teglia da forno leggermente
D
unta. Inserire il piatto nel forno alla richiesta
di aggiunta del cibo (“Add food”).
DA USARE PER cibi quali croissant e panini.
Porre il pane da cuocere sul piatto di
cottura. Inserire il piatto nel forno alla richiesta di aggiunta del cibo (“Add food”).
DA USARE PER panini surgelati pronti per
la cottura. Porre i panini sul piatto di
cottura. Inserire il piatto nel forno alla richiesta di aggiunta del cibo (“Add food”).
ER I CIBI NON ELENCATI IN QUESTA TABELLA e se il peso è inferiore o superiore al peso consigliato,
P
seguire la procedura descritta in “Funzione Ventilato o Ventilato combi”.
100
 Loading...