

Page 1

Operator′s manual
Manual de instrucciones
Gebruiksaanwijzing
Instruções para o uso
Bedienungsanweisung
Manuel d’utilisation
I
struzioni per l’uso
√‰ËÁ›Â˜ ¯Ú‹Ûˆ˜
LB448S
LB548S e
Please read the operator’s manual carefully and make sure you understand the instructions before using the machine.
Neem de gebruiksaanwijzing grondig door en gebruik de machine niet voor u alles duidelijk heeft begrepen.
Prima di usare la macchina, leggere per intero le istruzioni per l’uso e accertarsi di averne compreso il contenuto.
Lea detenidamente el manual de instrucciones y asegúrese de entender su contenido antes de utilizar la máquina.
Lesen Sie die Bedienungsanweisung sorgfältig durch und machen Sie sich mit dem Inhalt ver traut, bevor Sie das Gerät benutzen.
Leia as instruções para o uso com toda a atenção e compreenda o seu conteúdo antes de fazer uso da máquina.
¢И·Я¿ЫЩВ ЪФЫВОЩИО¿ ЩИ˜ √‰ЛБ›В˜ ¯Ъ‹ЫВˆ˜ О·И О·Щ·УФ‹ЫЩВ ЩФ ВЪИВ¯fiМВУФ ЪИУ ¯ЪЛЫИМФФИ‹ЫВЩВ ЩФ МЛ¯¿УЛМ·.
Lire attentivement et bien assimiler le manuel d’utilisation avant d’utiliser la machine.
2-18
EN
119-35
FR 11
36-52
NL
IIT
53-69
ES
70-86
DE
87-103
PT
104-120
121-137
GGRR
Page 2
!
!
DANGER
2
W
W
W
CA
NO
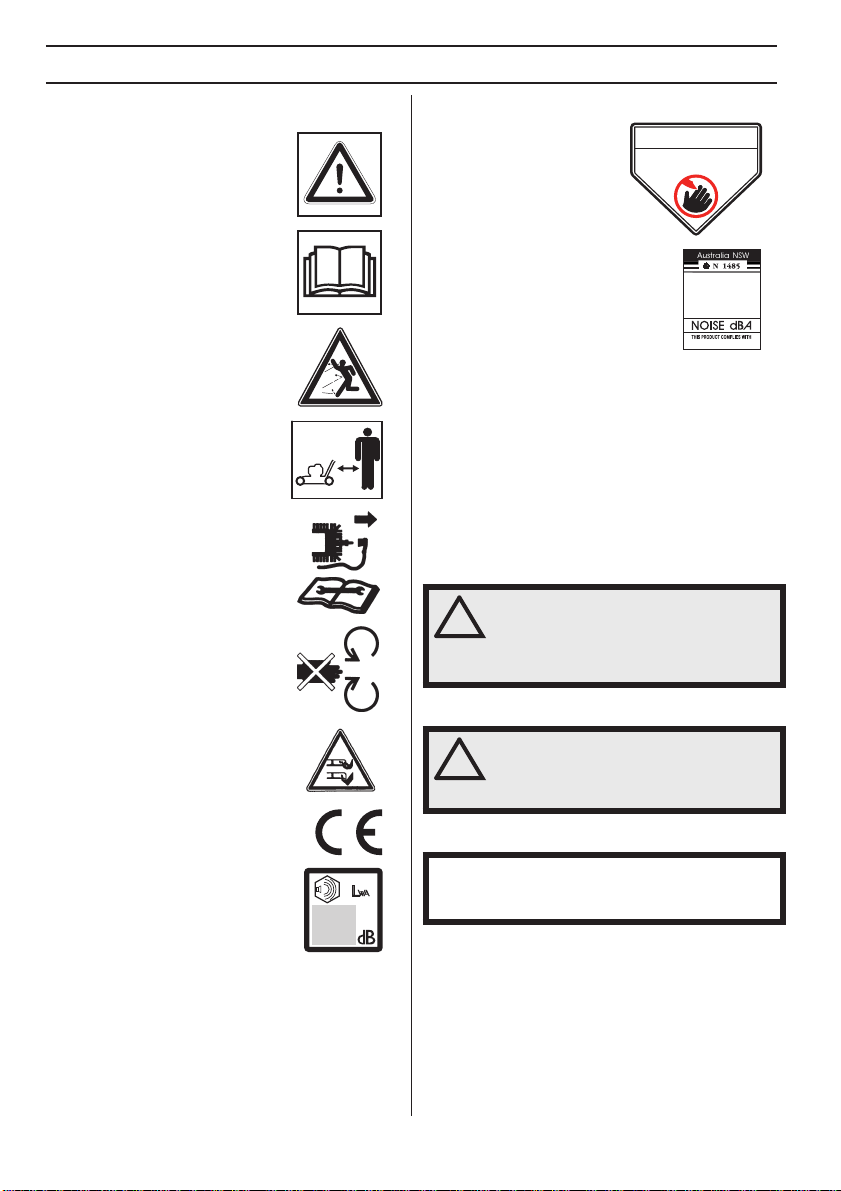
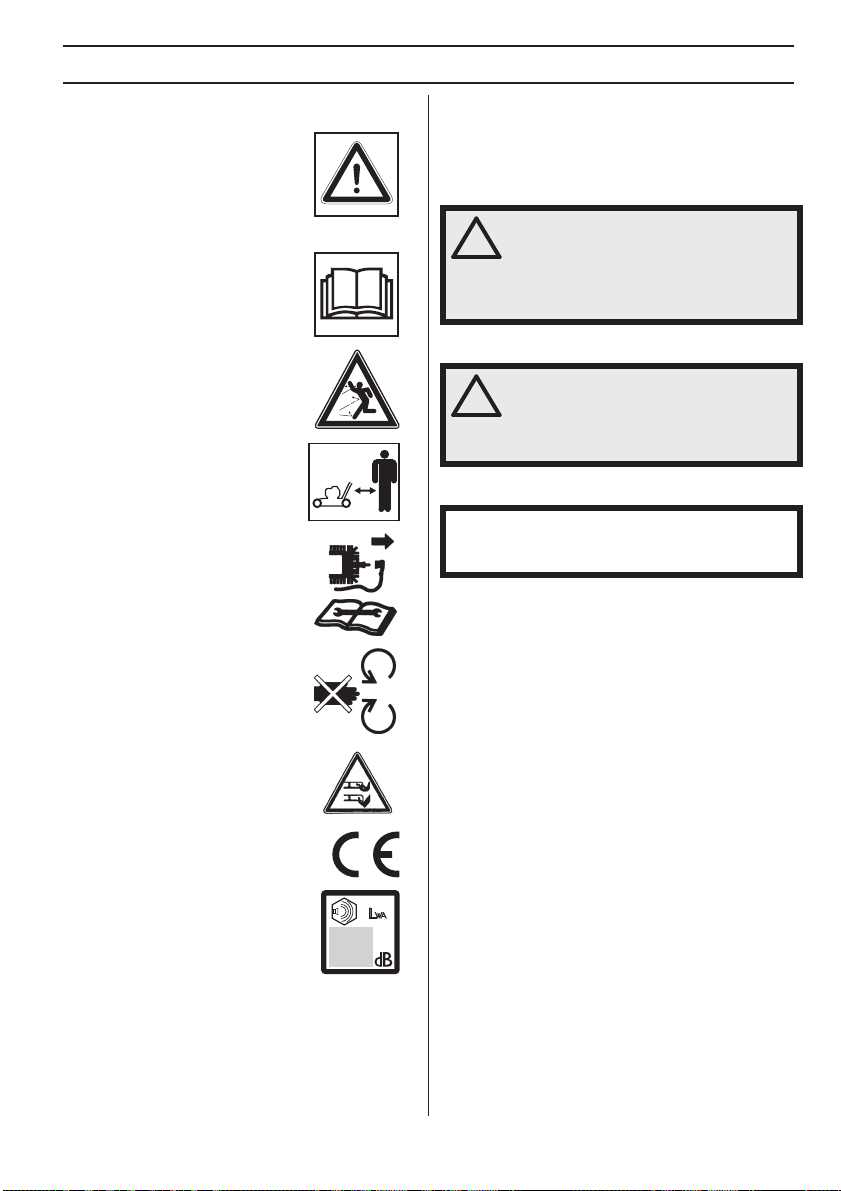
Symbols on the mac hine:
ARNING! The machine can be a
dangerous tool if used incorrectly or
carelessly, which can cause serious or
fatal injury to the operator or others.
Please read the operator’s manual
carefully and make sure you
understand the instructions before
using the machine.
Watch out for thrown objects and
ricochets.
Keep people and animals well away
from the working area.
Prevent unintentional starting by
removing the ignition cable from the
spark plug.
KEY T O SYMBOLS
For Australia and New Zealand only.
Never place your hands or
feet close to or under the
body when the machine is
in operation.
For Australia and New
Zealand only.
Sound pressure level at the
bystander´s position.
Explanation of warning levels
The w arnings are graded in three levels.
ARNING!
DANGER
KEEP HANDS AND FEET AWAY
GARDEZ LES MAINS ET LES PIEDS A DISTANCE
MANTENGA LAS MANOS Y LOS PIES A DISTANCIA
`
70
Australian Standard AS 2657 - 1985
Warning: rotating cutter. Keep hands
and feet clear.
Make sure that your hands and feet do
not come near the cutting attachment
when the engine is running.
This product is in accordance with
applicable EC directives.
Noise emission to the environment
according to the European
Community’s Directive. The machine’s
emission is specified in the Technical
data chapter and on the label.
– English
ARNING! Used if there is a risk of
serious injury or death for the operator
or damage to the surroundings if the
instructions in the manual are not
followed.
CAUTION!
UTION! Used if there is a risk of injury
to the operator or damage to the
surroundings if the instructions in the
manual are not followed.
NOTICE!
TICE! Used if there is a risk of damage to materials
or the machine if the instructions in the manual are not
followed.
Page 3

MA
P
T
CONTENTS
Contents
KEY TO SYMBOLS
Symbols on the machine: ..................................... 2
Explanation of warning levels ............................... 2
CONTENTS
Contents ............................................................... 3
PRESENT ATION
Dear Customer , .................................................... 4
Steps before using a new lawn mower ................. 4
WHA T IS WHAT?
What is what on the la wn mower? ........................ 5
CHINE´S SAFETY EQUIPMENT
Gener al ................................................................. 6
Cutting cover and protective cover ....................... 6
Engine brake handle ............................................ 6
Vibration damping system .................................... 6
Muffler .................................................................. 7
Cutting equipment ................................................ 7
ASSEMBL Y
Fitting the handlebar ............................................. 8
Adjusting the clutch wire ...................................... 8
Dismantling and assembling the cutter ................ 8
Assembling the mulcher plugs .............................. 9
FUEL HANDLING
Gener al ................................................................. 10
Fuel ...................................................................... 10
Fueling .................................................................. 10
Transport and storage .......................................... 10
SAFETY INSTR UCTIONS
ersonal protection ............................................... 11
General safety precautions ................................... 11
Basic working techniques ..................................... 12
Transport and storage .......................................... 12
OPERA TING
Adjusting the cutting height .................................. 13
Starting and stopping ........................................... 13
MAINTENANCE
Maintenance ......................................................... 14
Air filter ................................................................. 14
Spark plug ............................................................ 14
Muffler .................................................................. 14
Cutter .................................................................... 14
Changing the oil ................................................... 15
Drive and gearbox ................................................ 15
Cleaning ............................................................... 16
Trouble shooting ................................................... 16
Daily maintenance ................................................ 16
Weekly maintenance ............................................ 16
Monthly maintenance ........................................... 16
TECHNICAL D ATA
echnical data ....................................................... 17
EC Declaration of Conformity ............................... 18
English
–
3
Page 4

!
!
!
4
′
′
′
•
W
PRESENT A TION
W
W
Dear Customer ,
Cong ratulations on your choice to buy a Husqvarna
product! Husqvarna is based on a tradition that dates
back to 1689, when the Swedish King Karl XI ordered the
construction of a factory on the banks of the Husqvarna
River, for production of muskets. The location was logical,
since water power was harnessed from the Huskvarna
River to create the water-powered plant. During the more
than 300 years in existence, the Husqvarna factory has
produced a lot of different products, from wood stoves to
modern kitchen appliances, sewing machines, bicycles,
motorcycles etc. In 1956, the first motor driven lawn
mowers appeared, followed by chain saws in 1959, and it
is within this area Husqvarna is working today.
Today Husqvarna is one of the leading manufacturers in
the world of forest and garden products, with quality as
our highest priority. The business concept is to develop,
manufacture and market motor-driven products for
forestry and gardening, as well as for the building and
construction industry. Husqvarna
front edge for ergonomics, usability, security and
environmental protection. That is the reason why we have
developed many different features to add to our products
within these areas.
We are convinced that you will appreciate with great
satisfaction the quality and performance of our product for
a very long time to come. The purchase of one of our
products gives you access to professional help with
repairs and service whenever this may be necessary. If
the retailer who sells your machine is not one of our
authorised dealers, ask for the address of your nearest
service workshop.
It is our wish that you will be satisfied with your product
and that it will be your companion for a long time. Think of
this operator
following its content (usage, service, maintenance, etc),
the life span and the second-hand value of the machine
can be extended. If you sell this machine, make sure that
the operator
Thank you for using a Husqvarna product.
Husqvarna AB has a policy of continuous product
development and therefore reserves the right to modify
the design and appearance of products without prior
notice.
s manual as a valuable document. By
s manual is passed on to the buyer.
s aim is also to be at the
Steps bef ore using a new lawn mower
Please read the operator's manual carefully.
• Check that the cutting equipment is correctly fitted
and adjusted. See instructions under the heading
Assembly.
• Fill with fuel and oil in the engine. A container with
sufficient oil quantity is supplied with the machine.
See the instructions under the heading fuel handling.
ARNING! Under no circumstances may
the design of the machine be modified
without the permission of the
manufacturer. Always use original
accessories. Non-authorized
modifications and/or accessories can
result in serious personal injury or the
death of the operator or others.
ARNING! A lawn mower is a dangerous
tool if used carelessly or incorrectly and
can cause serious, even fatal injuries. It
is extremely important that you read and
understand the contents of this
operator's manual.
ARNING! Long-term inhalation of the
engine's exhaust fumes can represent a
health hazard.
Husqvarna AB has a policy of continuous product
development and therefore reserves the right to modify
the design and appearance of products without prior
notice.
– English
Page 5
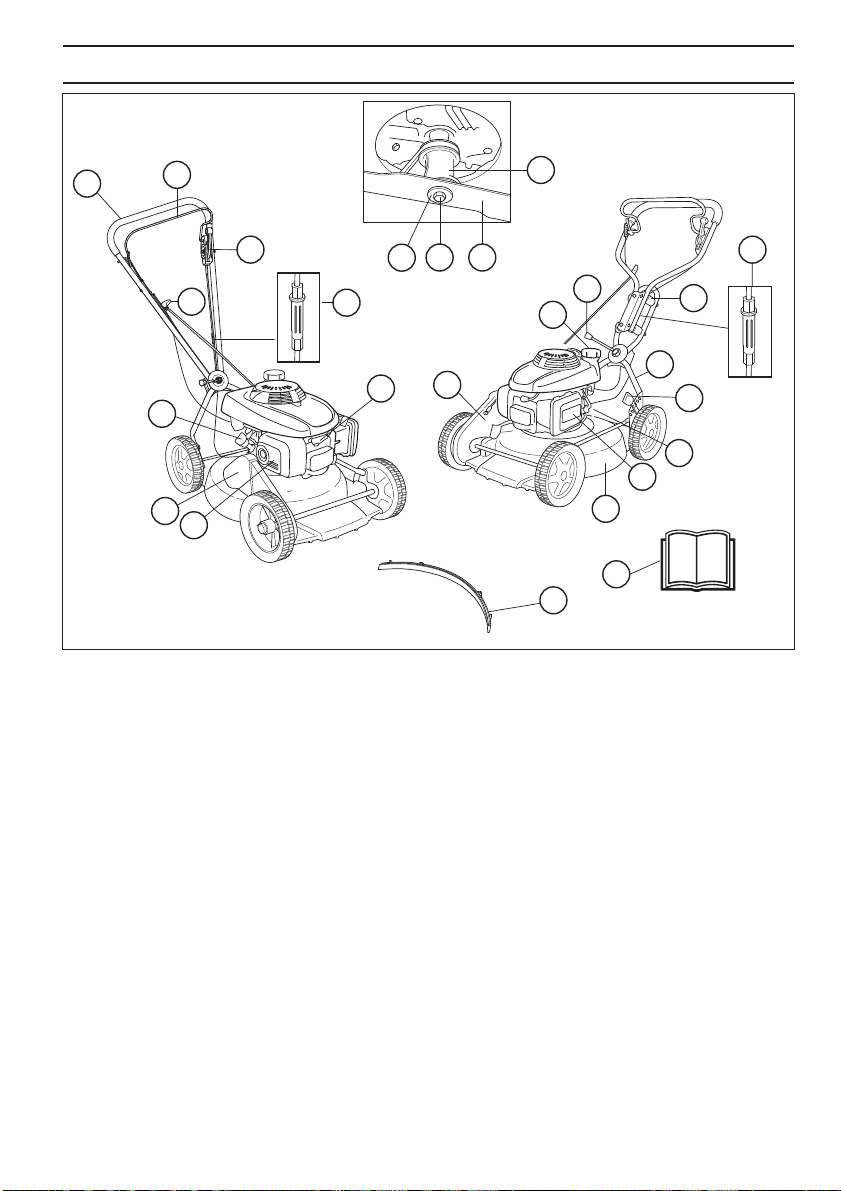
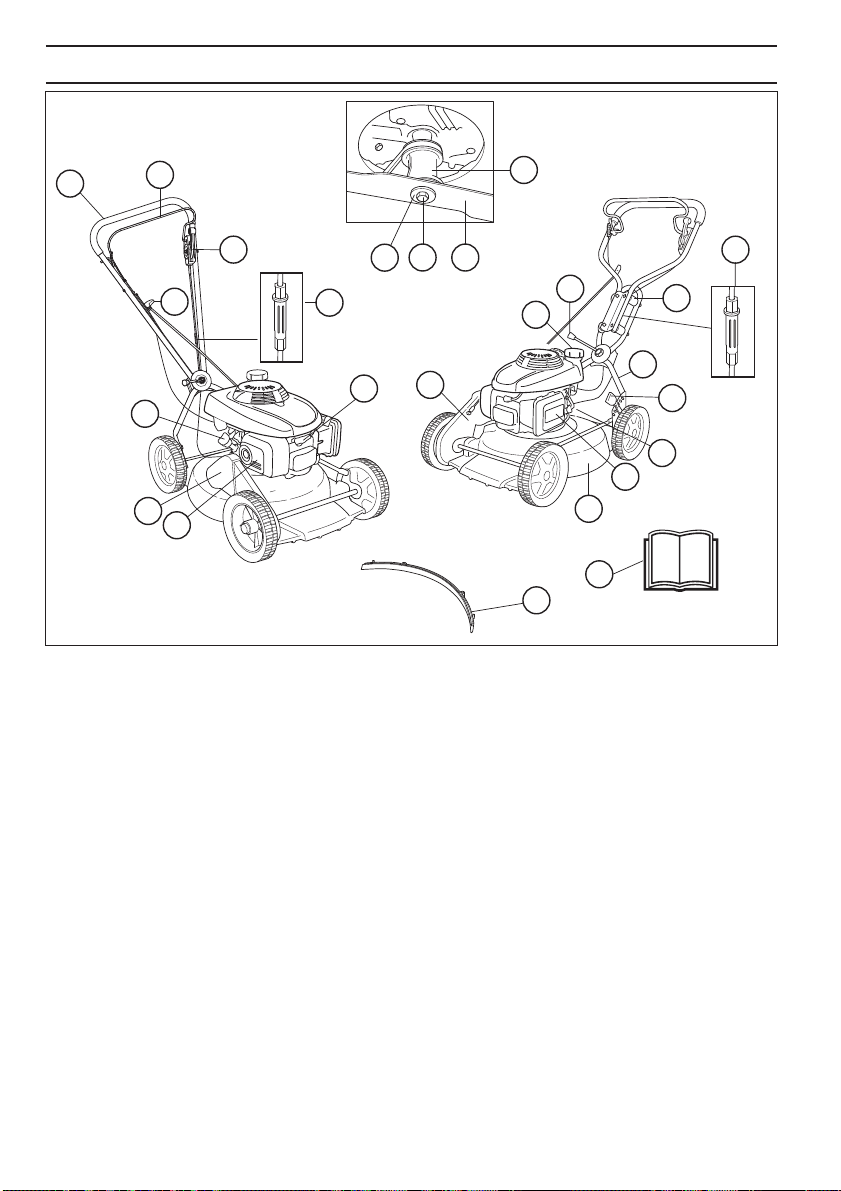
WHA T IS WHA T?
1
LB548S eLB448S
1
2
3
4
5
6
7
What is what on the la wn mower?
Handle / handlebar
2 Engine brake handle
3 Clutch lever
4 Starter handle
5 Oil tank
6 Belt guard
7 Muffler
8 Spark plug
9 Belt guard
10 Fuel tank
11 Angle adjustment handle
12 Vibration damper
13
22
212019
11
13
12
10
14
8
9
15
16
17
18
24
23
13 Adjusting the clutch wire
14 Lower handlebar
15 Cutting height control
16 Fuel tap
17 Air filter
18 Cutting cover
19 Spring washer
20 Cutter bolt
21 Cutter/cutting equipment
22 Cutter bracket
23 Mulching plug
24 Operator ′ s manual
English – 5
Page 6
MA
!
CHINE´S SAFETY EQ UIPMENT
6
Y
′
W
W
W
General
This section descr ibes the machine ′ s safety equipment,
its purpose, and how checks and maintenance should be
carried out to ensure that it operates correctly. See the
”What is what?” section to locate where this equipment is
positioned on your machine.
ARNING! Never use a machine with
faulty safety equipment. The machine's
!
safety equipment must be checked and
maintained as described in this section.
If your machine fails any of these checks
contact your service agent to get it
repaired.
ARNING! Never use a machine that has
faulty safety equipment! Carry out the
!
inspection, maintenance and service
routines listed in this section.
Cutting co ver and protective cover
The cutting co ver is designed to reduce vibration and to
reduce the risk of cuts. Make sure the cutting cover is not
damaged and that there are no visible defects such as
cracks.
The protective cover is designed to reduce the risk of
crush injuries and to catch a broken drive belt. Check that
the protective cover is undamaged and that it is properly
secured.
Engine brake handle
The engine br ake is designed to stop the engine. When
the grip on the engine brake handle is released the engine
should stop.
Check the engine brake as follows:
Apply full throttle and then release the brake handle. The
engine should stop and the drive should disengage.
The engine brake should always be adjusted so that the
engine stops within 3 seconds.
Vibration damping system
our machine is equipped with a vibration damping
system that is designed to minimize vibration and make
operation easier.
The handlebar system's steel tube and the cutting cover
are designed to minimise the vibrations from the engine.
The machine ′ s vibration damping system reduces the
transfer of vibration between the engine unit/cutting
equipment and the machine
LB448S This model also has 4 vibration dampers fitted on
the handlebar unit to further reduce vibrations.
s handle unit.
Check that the handles and vibration damping elements
are not damaged.
ARNING! Overexposure to vibration
can lead to circulatory damage or nerve
damage in people who have impaired
circulation. Contact your doctor if you
experience symptoms of overexposure
to vibration. These symptoms include
numbness, loss of feeling, tingling,
pricking, pain, loss of strength, changes
in skin colour or condition. These
symptoms normally appear in the
fingers, hands or wrists.
– English
Page 7
CHINE´S SAFETY EQ UIPMENT
Muffl er
The m uffler is designed to keep noise levels to a minimum
and to direct exhaust fumes away from the user.
ARNING! The exhaust fumes from the
engine are hot and may contain sparks
!
which can start a fire. Never start the
machine indoors or near combustible
material! The muffler gets very hot in use
and remains so for a short time
afterwards. Do not touch the muffler if it
is hot!
Never use a machine that has a faulty muffler.
Regularly check that the muffler is securely attached to
the machine.
Cutting equipment
Mak e sure the cutter does not hit foreign objects such as
stones, roots or the like. This can make the cutter dull and
bend the engine shaft.
Check the cutting attachment for damage or cracks. A
damaged cutting attachment should always be replaced.
Always ensure the cutter is well ground and balanced
correctly.
Also check that the cutter bolt is undamaged and that the
engine shaft is not bent.
MA
W
English
–
7
Page 8
ASSEMBLY
!
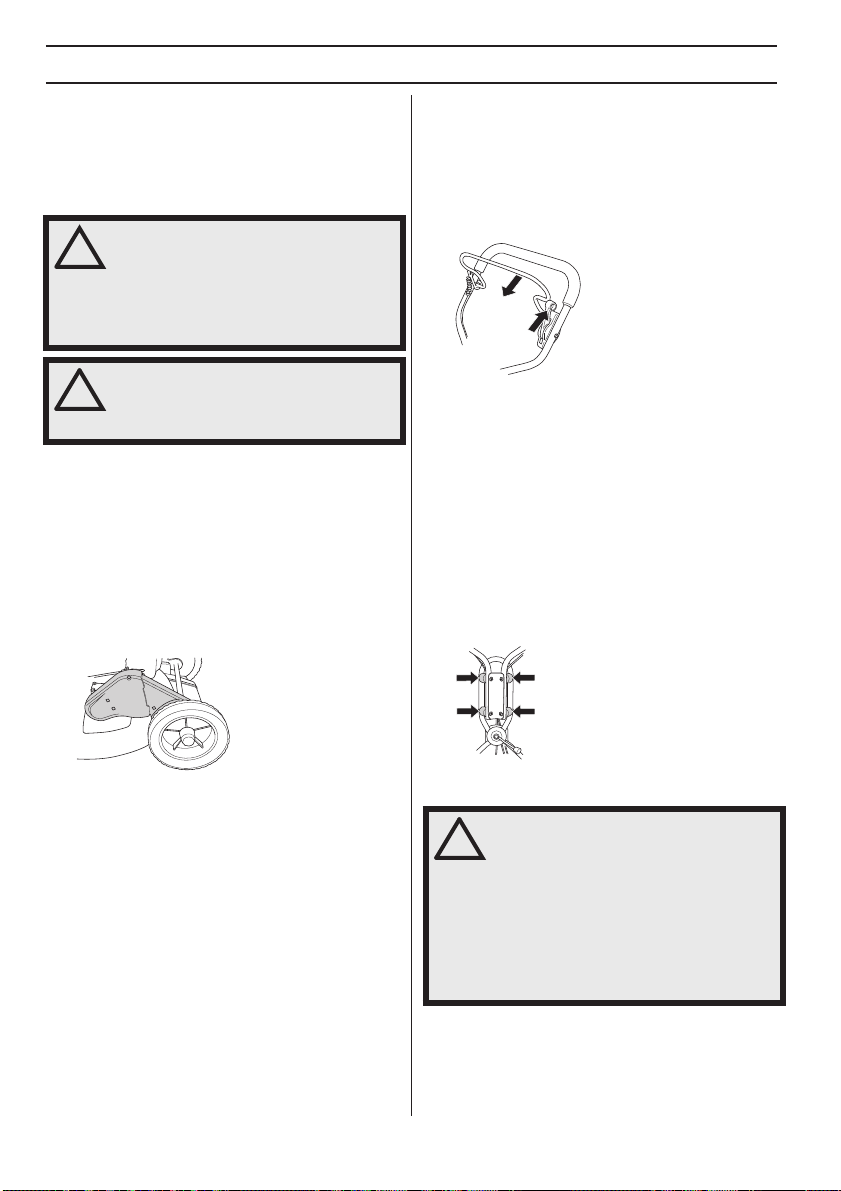
Fitting the handlebar
Take care not to damage the cables and wires when you
fold the handlebar.
The upper part of the handlebar is attached with a sturdy
handle nut on the baffle plate. Don't forget the washer
between the plate and the handle nut.
• Adjust the wire using the adjuster screw. Unscrew the
screw clockwise or counter clockwise to extend or
shorten the wire.
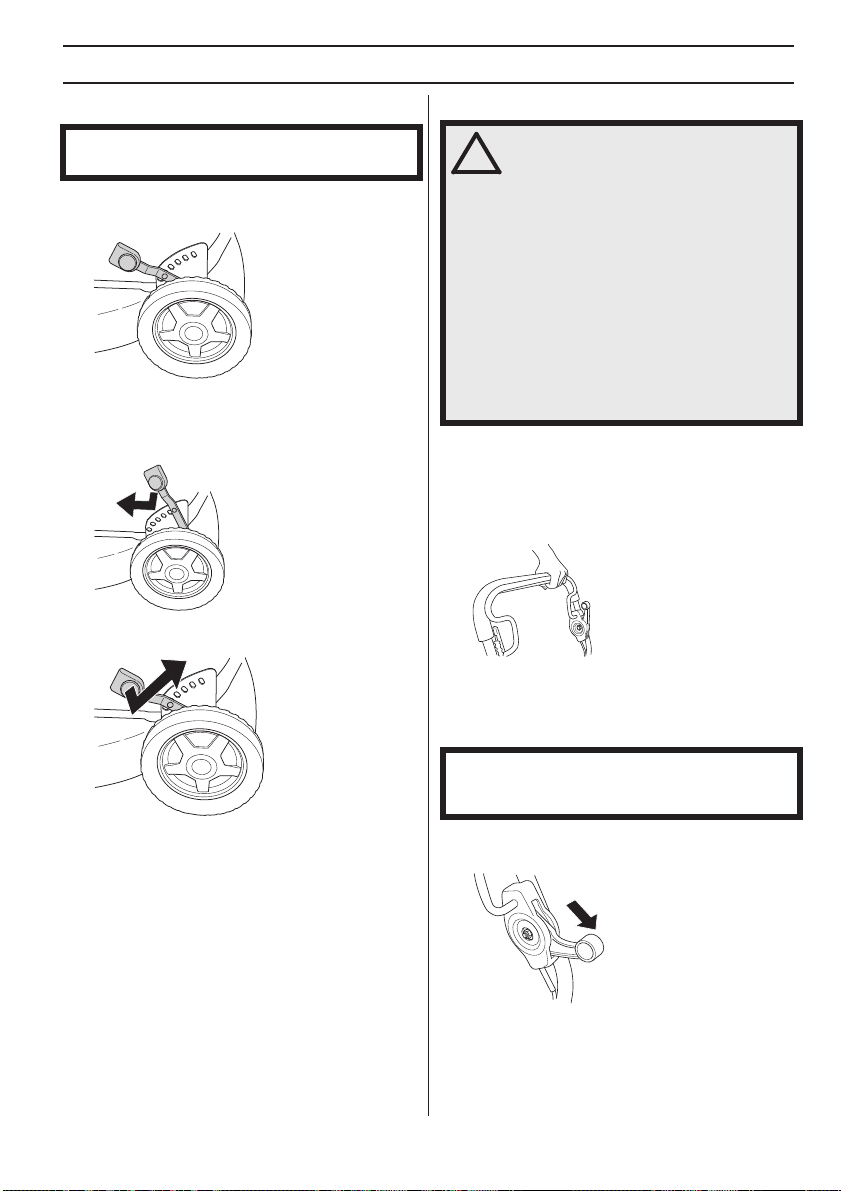
If necessary, the handle can be turned slightly sideways
with the handle joint. The handle can be set to different
positions to achieve the best driving position, e.g. when
mowing next to hedges or house walls.
The handle can also be adjusted vertically by turning the
wheels by the attachment fitting on the chassis
Adjusting the clutch wire
The clutch wire must be adjusted after the first 8 hours of
operation and subsequently when necessary.
The wire is properly adjusted when the wire bracket is
aligned with the nut.
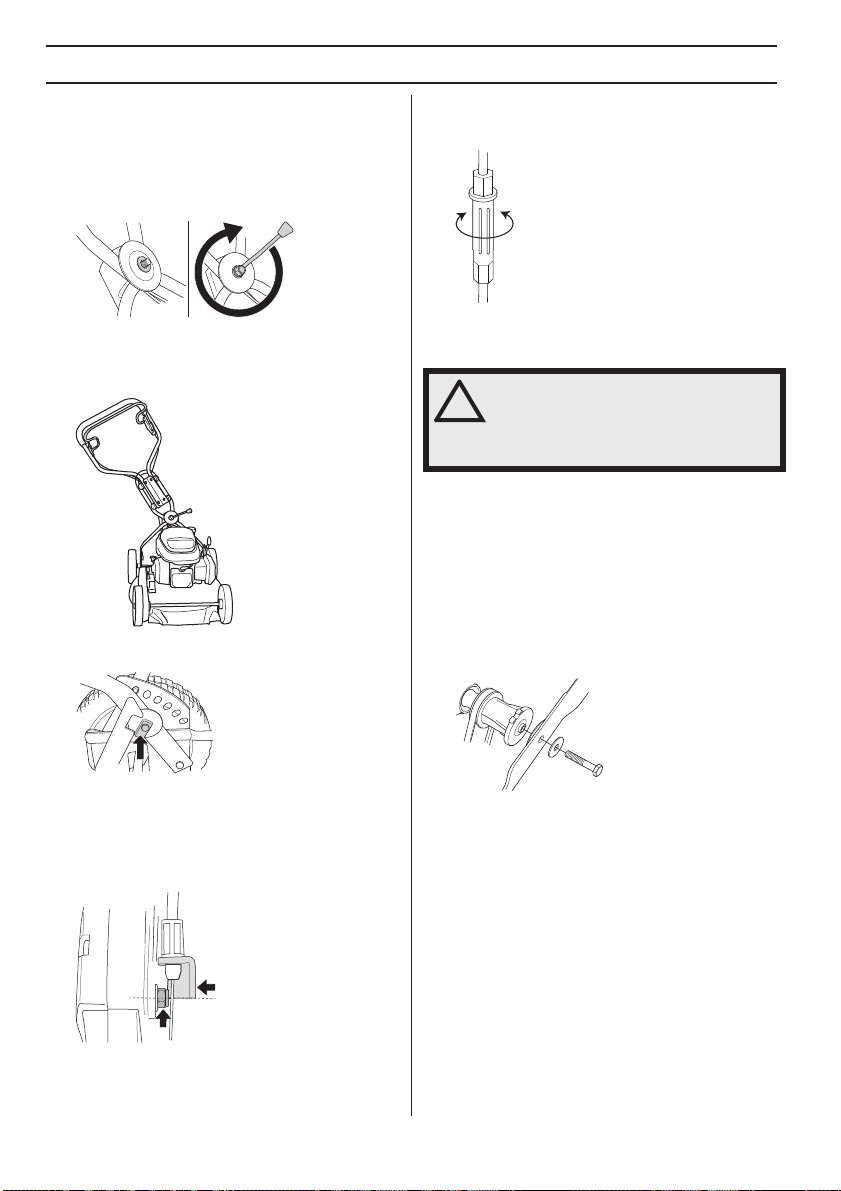
Dismantling and assembling the cutter
WARNING! Always wear heavy-duty
gloves when servicing and maintaining
the cutting equipment. The cutters are
very sharp and cuts can occur very
easily.
The ignition lead should always be removed from the
spark plug before repair, cleaning or maintenance work.
Position the cutter with the spark plug upwards when
servicing the machine.
Always empty the fuel tank before you place the lawn
mower on its side.
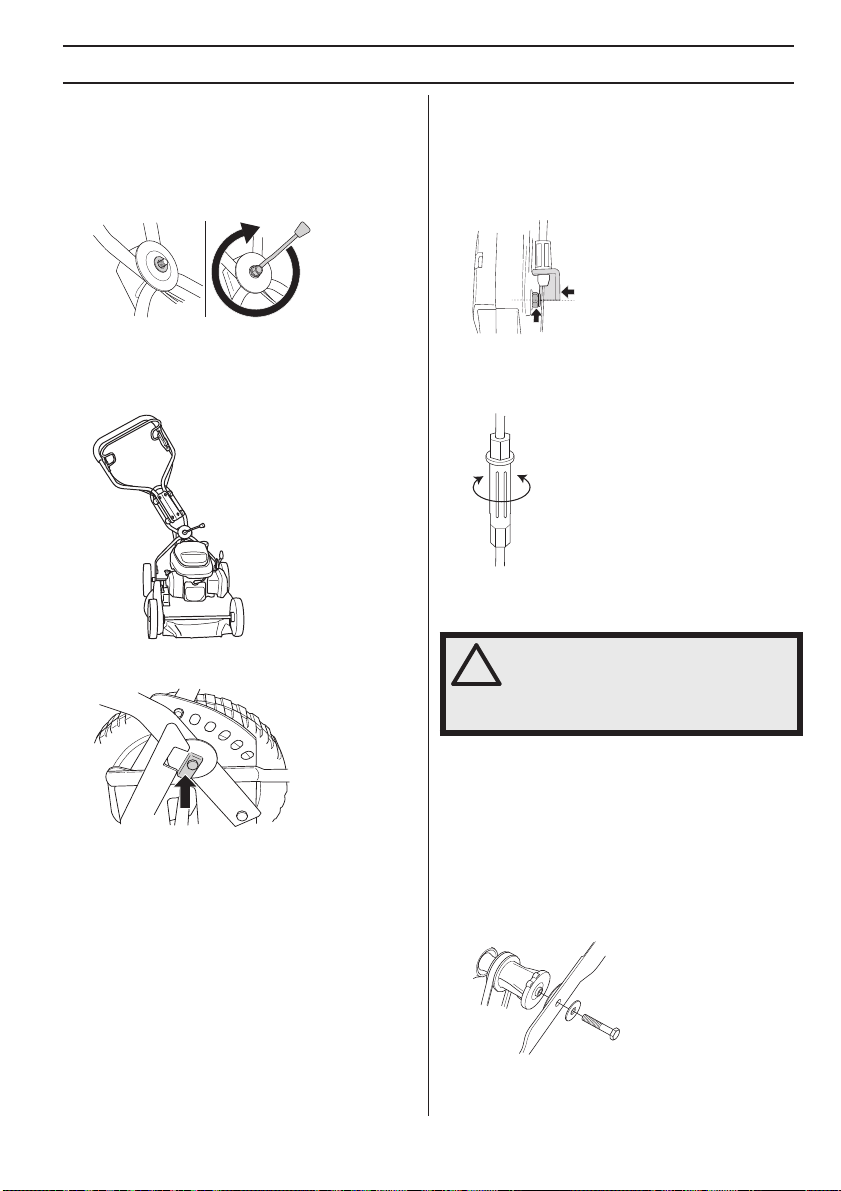
Dismantling
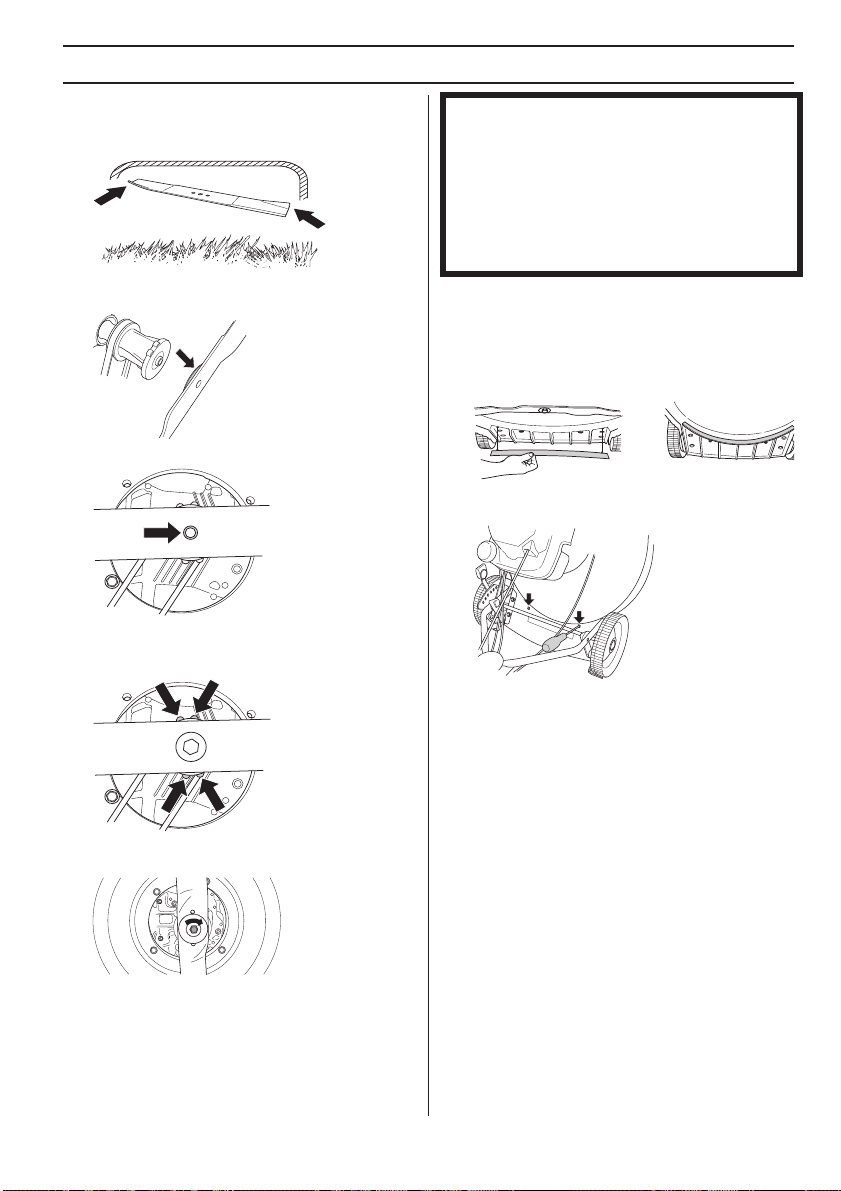
• Unscrew the bolt holding the cutter.
• Remove the bolt, spring washer and cutter.
8 – English
Page 9
ASSEMBLY
Assembly
The blade must be mounted with the angled ends pointing
up towards the cover.
• Place the cutter with the friction washer against the
cutter bracket.
• Make sure the cutter centres correctly on the shaft.
• To avoid vibrations, place the mower cutter so that the
cutter bracket marking can be seen on the sides of the
cutter.
IMPORTANT!
Always exercise care and use your common sense.
Avoid all situations which you consider to be beyond
your capability. If you still feel uncertain about operating
procedures after reading these instructions, you should
consult an expert before continuing. Contact an
authorised service workshop.
Always use genuine parts. For more information, see
the ”Technical data” section.
Assembling the mulcher plugs
• Disconnect the HT lead from the spark plug.
• Position the cutter with the spark plug upwards when
servicing the machine.
• Fit the leader pins into the holes on the cutting cover.
• Fasten the mulcher plugs from the top of the cutting
cover.
• Fit the washer and tighten the bolt correctly. The bolt
should be tightened with a torque of 70 Nm.
English – 9
Page 10

FUEL HANDLING
!
General
WARNING! Running an engine in a
confined or badly ventilated area can
!
result in death due to asphyxiation or
carbon monoxide poisoning.
Fuel and fuel fumes are highly
inflammable and can cause serious
injury when inhaled or allowed to come
in contact with the skin. For this reason
observe caution when handling fuel and
make sure there is adequate ventilation.
The exhaust fumes from the engine are
hot and may contain sparks which can
start a fire. Never start the machine
indoors or near combustible material!
Do not smoke and do not place any hot
objects in the vicinity of fuel.
Fuel
NOTICE! The machine is equipped with a four-stroke
engine. Make sure that there is always sufficient oil in
the oil tank.
Petrol
• Use good quality unleaded or leaded petrol.
• The lowest octane recommended is 90 (RON). If you
run the engine on a lower octane grade than 90 socalled knocking can occur. This gives rise to a high
engine temperature, which can result in serious
engine damage.
• Use low-emission petrol, also known as alkylate
petrol, if it is available.
Engine oil
NOTICE! Check the oil level before starting the lawn
mower. A too low oil level can cause serious damage to
the engine.
• See instructions in the section "Maintenance".
• The engine oil should be changed the first time after 5
hours running time. Refer to Technical Data for
recommendations on which oil type to use. Never use
oil intended for two-stroke engines.
Fueling
WARNING! Always stop the engine and
let it cool for a few minutes before
refuelling. The engine should be
switched off, and the stop switch in
STOP position.
Use a petrol can at all times to avoid
spillage.
When refuelling, open the fuel cap slowly
so that any excess pressure is released
gently.
Clean the area around the fuel cap.
Tighten the fuel cap carefully after
refuelling. Negligence may lead to the
start of a fire.
Move the machine at least 3 m from the
refuelling point before starting it.
Never start the machine:
• If you have spilled fuel or engine oil on the machine.
Wipe off the spill and allow the remaining fuel to
evaporate.
• If you have spilled fuel on yourself or your clothes,
change your clothes. Wash any part of your body that
has come in contact with fuel. Use soap and water.
• If the machine is leaking fuel. Check regularly for
leaks from the fuel cap and fuel lines.
Transport and storage
• Store and transport the machine and fuel so that there
is no risk of any leakage or fumes coming into contact
with sparks or open flames, for example, from
electrical machinery, electric motors, electrical relays/
switches or boilers.
• When storing and transporting fuel always use
approved containers intended for this purpose.
Long-term storage
• When storing the machine for long periods the fuel
tank must be emptied. Contact your local petrol
station to find out where to dispose of excess fuel.
10 – English
Page 11

SAFETY INSTRUCTIONS
!
!
Personal protection
WARNING! You must use personal
protection whenever you use the
!
machine.
• Gloves must be worn when required, for example
when fitting, inspecting or cleaning cutting
attachments.
• Always wear heavy, long pants. Do not wear shorts,
sandals or go barefoot.
• Wear sturdy, non-slip boots or shoes.
Generally clothes should be close-fitting without
restricting your freedom of movement.
General safety precautions
This section describes basic safety directions for using
the machine. This information is never a substitute for
professional skills and experience.
• Please read the operator’s manual carefully and make
sure you understand the instructions before using the
machine.
• Keep in mind that the operator is responsible for
accidents or hazards occurring to other people or their
property.
• The machine must be kept clean. Signs and stickers
must be fully legible.
Always use common sense
It is not possible to cover every conceivable situation you
can face. Always exercise care and use your common
sense. Avoid all situations which you consider to be
beyond your capability. If you still feel uncertain about
operating procedures after reading these instructions,
you should consult an expert before continuing. Contact
your dealer, service agent or an experienced user. Avoid
all usage which you consider to be beyond your capability.
WARNING! This machine produces an
electromagnetic field during operation.
!
This field may under some
circumstances interfere with active or
passive medical implants. To reduce the
risk of serious or fatal injury, we
recommend persons with medical
implants to consult their physician and
the medical implant manufacturer before
operating this machine.
WARNING! The machine can be a
dangerous tool if used incorrectly or
carelessly, which can cause serious or
fatal injury to the operator or others.
Never allow children or other persons
not trained in the use of the machine to
use or service it.
The machine should not be used by
people with reduced physical or mental
capacities or people who are unsuitable
for health reasons to operate the
machine, without supervision of a
person responsible for their safety.
Never allow anyone else to use the
machine without first ensuring that they
have read and understood the contents
of the operator’s manual.
Never use the machine if you are tired, if
you have drunk alcohol, or if you are
taking medication that could affect your
vision, your judgement or your coordination.
WARNING! Unauthorized modifications
and/or accessories may lead to serious
injury or death to the user or others.
Under no circumstances may the design
of the machine be modified without the
permission of the manufacturer.
Do not modify this product or use it if it
appears to have been modified by others.
Never use a machine that is faulty. Carry
out the safety checks, maintenance and
service instructions described in this
manual. Some maintenance and service
measures must be carried out by trained
and qualified specialists. See
instructions under the Maintenance
heading.
Always use genuine accessories.
English – 11
Page 12

SAFETY INSTRUCTIONS
Work area safety
• Branches, twigs, stones, etc. should be removed from
the lawn before you start to mow.
• Objects hitting against the cutting attachment could
be thrown and cause damage to people and objects.
Keep people and animals well away.
• Never use the machine in bad weather, for instance in
fog, in rain, damp or in wet locations,strong winds,
intense cold, risk of lightning, etc. Working in bad
weather is tiring and can lead to dangerous
conditions, e.g. slippery surfaces.
• Observe your surroundings to ensure that nothing can
affect your control of the machine.
• Beware of roots, stones, twigs, pits, ditches etc. Tall
grass can hide obstacles.
• Mowing slopes can be dangerous. Do not use the
lawn mower on very steep slopes. The lawn mower
should not be used on inclines greater than 15
degrees.
• On sloping ground you should work along the slope. It
is much easier to work along a slope than it is to work
up and down it.
• Be careful when you are approaching hidden corners
and objects that could block your view.
Work safety
• A lawn mower is only designed to mow lawns. All
other use is forbidden.
• Wear personal protective equipment. See instructions
under the ”Personal protective equipment” heading.
• Do not start a lawn mower unless the cutter and all
covers are fitted correctly. Otherwise the cutter could
come loose and cause personal injuries.
• Make sure the cutter does not hit foreign objects such
as stones, roots or the like. This can make the cutter
dull and bend the engine shaft. A bent axle gives
imbalance and heavy vibration, which results in a
great risk of the cutter becoming loose.
• The brake handle must never be permanently
anchored in handle when the machine is running.
• Place the lawn mower on firm, flat surface and start it.
Make sure that the cutter cannot come into contact
with the ground or other objects.
• Always place yourself behind the machine. Allow all
the wheels to remain on the ground and keep both
hands on the handle when mowing. Keep your hands
and feet away from the rotating blades.
• Do not tilt the machine when the engine is running.
• Walk with the machine, do not run.
• Pay particular attention when pulling the machine
towards you during work.
• Never lift up the lawn mower or carry it around when
the engine is running. If you must lift the lawn mower,
first switch off the engine and disconnect the ignition
lead from the spark plug.
• Do not mow the lawn while walking backwards.
• The engine should be switched off when moving over
ground that is not to be mowed. For example, gravel
paths, stone, shingle, asphalt, etc.
• Shut down the engine before changing the cutting
height. Never make adjustments with the engine
running.
• Never leave the machine unsupervised with the motor
running. Turn off the motor. Ensure the cutting
attachment has stopped rotating.
• If any foreign object is hit or if vibrations occur stop the
machine immediately. Disconnect the HT lead from
the spark plug. Check that the machine is not
damaged. Repair any damage.
Basic working techniques
• Always cut with a sharp blade for optimal results. A
dull blade gives an uneven cut and the grass becomes
yellow on the surface of the cut.
• Never mow more than 1/3 of the length of the grass.
This especially applies during dry periods. Mow first
with the cutting height set high. Then check the result
and lower to an appropriate height. If the grass is
really long, drive slowly and mow twice if necessary.
• Cut in different directions each time in order to avoid
stripes in the lawn.
• Before pulling the machine towards you, disengage
the drive and push the machine forward approx. 10
cm.
• Make sure to disengage the drive when approaching
an obstacle.
Transport and storage
• Secure the equipment during transportation in order
to avoid transport damage and accidents.
• Store the equipment in a lockable area so that it is out
of reach of children and unauthorized persons.
• Store the machine and its equipment in a dry and frost
proof place.
• For transport and storage of fuel, see the section
"Fuel handling".
12 – English
Page 13
OPERATING
!
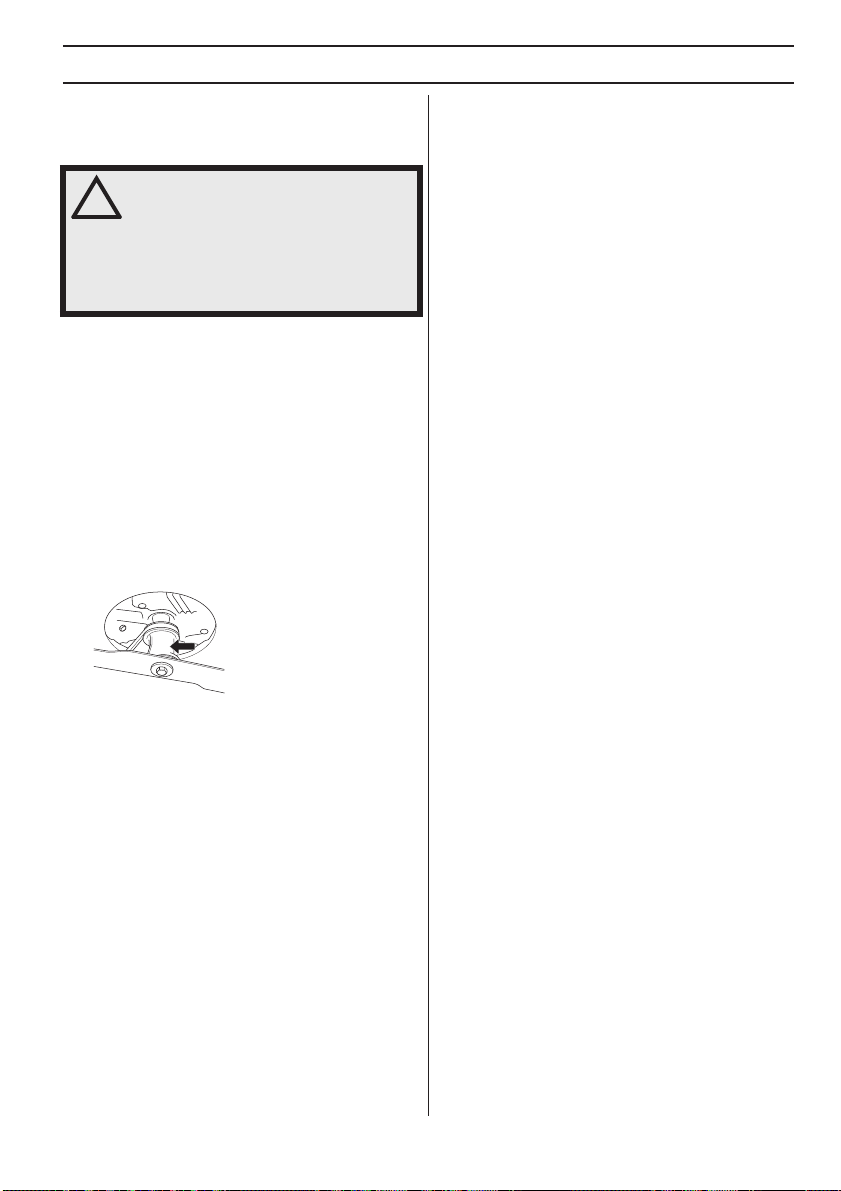
Adjusting the cutting height
IMPORTANT! Shut down the engine before changing
the cutting height.
The cutting height adjustment is spring assisted. The
cutting height can be adjusted in 6 different steps.
Do not set the cutting height too low as there is a risk that
the cutters might hit ground with unevenness.
• To raise the cutting height move the lever to the left
and then forward.
• To lower the cutting height move the lever to the left
and then backward.
Starting and stopping
WARNING! Note the following before
starting:
Do not start a lawn mower unless the
cutter and all covers are fitted correctly.
Otherwise the cutter could come loose
and cause personal injuries.
Always move the machine away from the
refuelling area and source before
starting.
Place the machine on a flat surface.
Ensure the cutting attachment cannot
come into contact with any object.
Keep people and animals well away from
the working area.
Ensure the ignition lead sits correctly on the spark plug.
Starting
• Open the fuel tap.
• Pull the engine brake handle against the upper
handlebar with your left hand.
• Grip the starter handle, slowly pull out the cord with
your right hand until you feel some resistance (the
starter pawls grip), now quickly and powerfully pull the
cord.
Never twist the starter cord around your
hand.
CAUTION! Do not pull the starter cord all the way out
and do not let go of the starter handle when the cord is
fully extended. This can damage the machine.
Drive
To engage the drive, push the clutch lever forwards.
Stopping
• Stop the engine by releasing the engine brake handle.
The drive is also disengaged when you release the
brake handle. By releasing the brake lever a bit only
the drive will be disengaged.
• Close the fuel tap.
English – 13
Page 14
MAINTENANCE
!
!
Maintenance
WARNING! Make sure the cutting
attachment has stopped before cleaning,
!
carrying out repairs or an inspection.
Disconnect the spark plug cap from the
spark plug.
Note that the drive belts will set during the first running-in
period (5h) and it might be neccesary to adjust the
tension. See instructions:
Air filter
The air filter must be regularly cleaned to remove dust
and dirt in order to avoid:
• Carburettor malfunctions.
• Starting problems.
• Loss of engine power.
• Unnecessary wear to engine parts.
• Excessive fuel consumption.
Clean the air filter daily, or more often in demanding
conditions.
The air filter is dismantled once the air filter cover has
been lifted off. Press in the catches on the top of the air
filter cover and lower the cover.
Spark plug
WARNING! The muffler gets very hot in
use and remains so for a short time
afterwards. Do not touch the muffler if it
is hot!
If the machine is low on power, difficult to start or runs
poorly at idle speed: always check the spark plug first
before taking any further action. If the spark plug is dirty,
clean it and check that the electrode gap is 0.7-0.8 mm.
The spark plug should be replaced after about a month in
operation or earlier if necessary.
CAUTION! Always use the recommended spark plug
type! Use of the wrong spark plug can damage the piston/
cylinder.
Muffler
The muffler is designed to reduce the noise level and to
direct the exhaust gases away from the operator. The
exhaust gases are hot and can contain sparks, which may
cause fire if directed against dry and combustible
material.
Regularly check that the muffler is securely attached to
the machine. Never use a machine that has a faulty
muffler.
Cutter
WARNING! Always wear heavy-duty
gloves when repairing the cutting
attachment. The blades are very sharp
and can easily cause cuts.
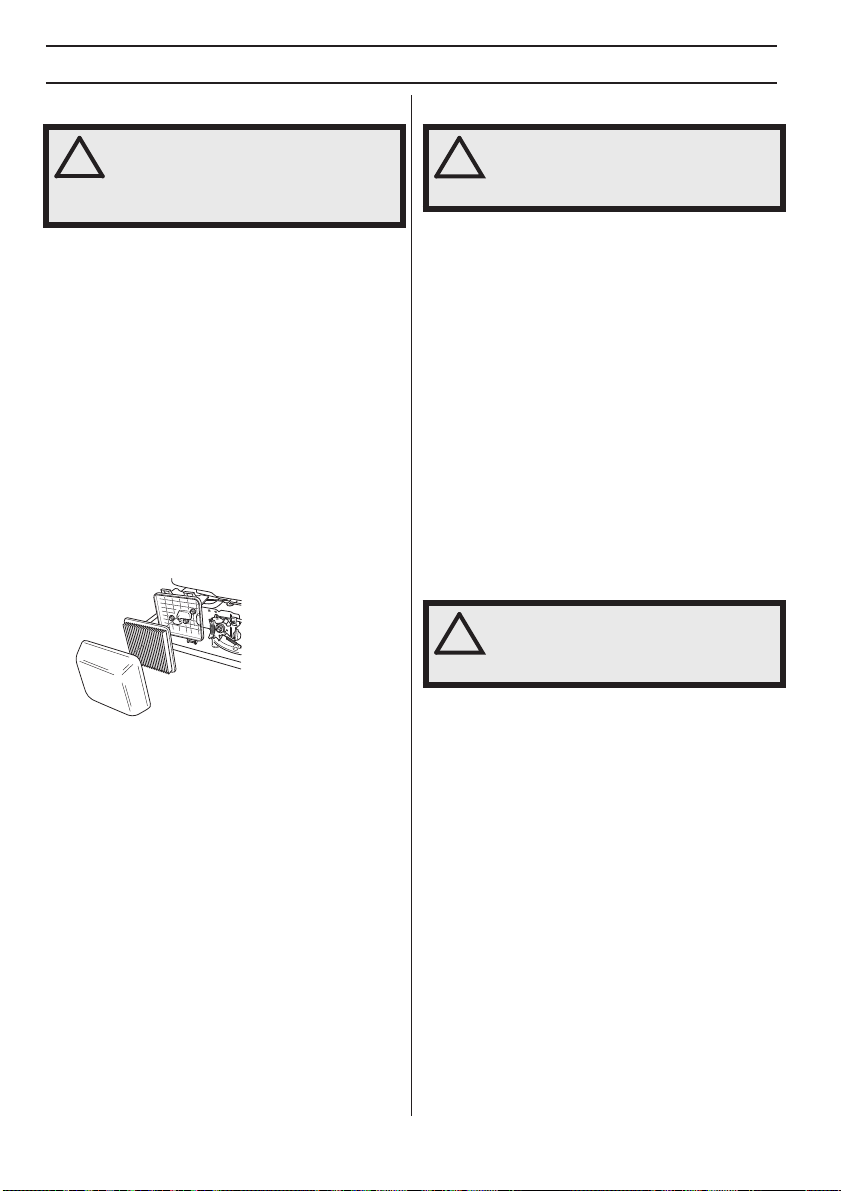
Remove the air filter and check that it is undamaged.
Replace with a new air filter if you believe it to be
defective.
Clean the filter by knocking the filter carefully against a
hard surface and blowing with compressed air from
inside. Never brush the dirt away. Replace the air filter if it
is very dirty.
An air filter that has been in use for a long time cannot be
cleaned completely. The filter must therefore be replaced
with a new one at regular intervals.
must always be replaced.
When reassembling, make sure that the filter completely
seals against the filter holder.
14 – English
A damaged air filter
It is important to have a sharp and correctly balanced
cutter. Loosen the bolt holding the cutter and leave the
cutter at a service workshop at least once a year for
grinding and balancing. An appropriate time to do this is
after the mowing season has finished.
If the cutter or cutter bracket need to be changed you
must replace the cutter bolt, washer and friction washer at
the same time.
The bolt should be tightened with a torque of 45-60 Nm
when you fit the cutter again. See instructions under the
heading Assembly.
If the cutter hits foreign objects such as stones, roots or
the like the cutter will slip against the cutter bracket. This
may mean that the contact surface of the cutter bracket
appears slightly worn, which is completely normal. This is
a safety device, which reduces the risk of the engine shaft
becoming bent.
Page 15

MAINTENANCE
Changing the oil
The engine oil should be changed the first time after 5
hours running time.
The engine oil should be changed each year and every 25
working hours.
When changing the oil proceed as follows::
• Disconnect the HT lead from the spark plug.
• Empty the fuel tank.
• Close the fuel tap.
• Unscrew the oil filler cap.
Place a suitable vessel to collect the oil in.
• Drain the oil by tipping the engine so that the oil runs
out through the filler pipe.
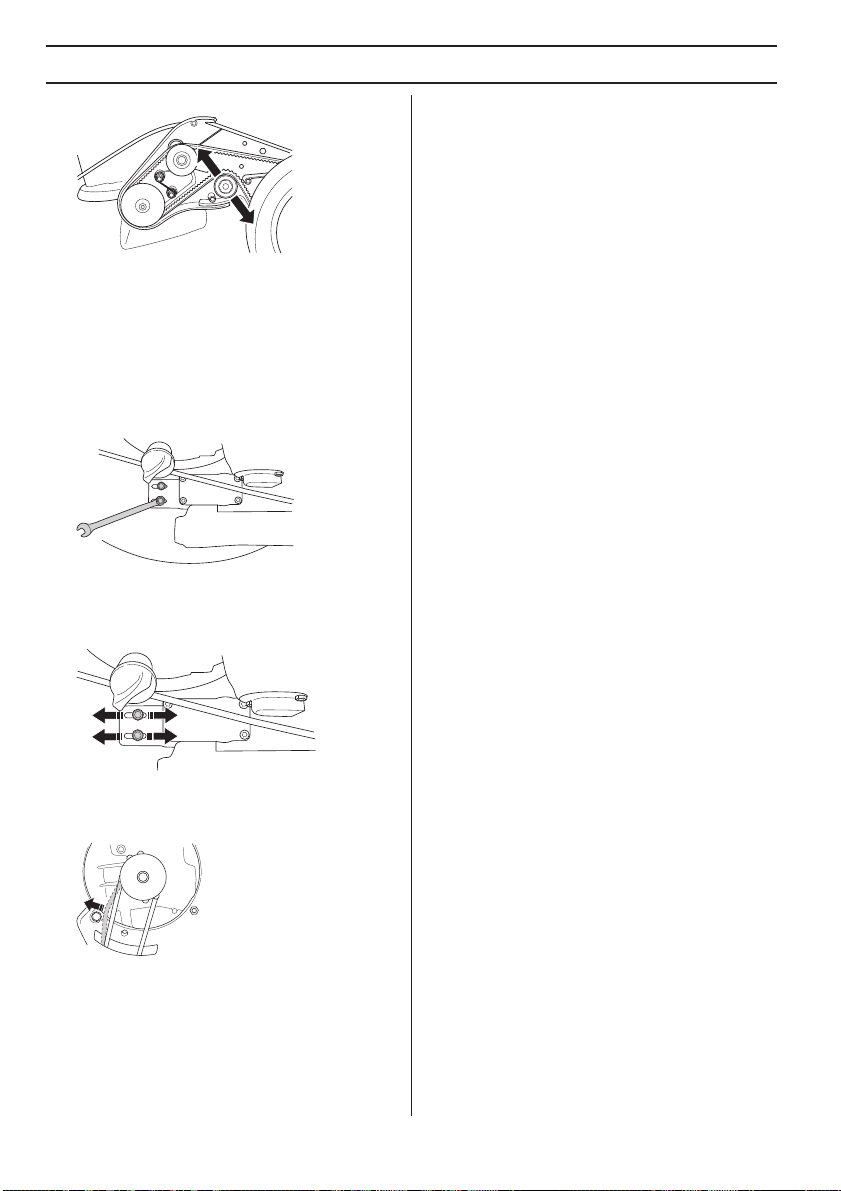
Drive and gearbox
Ensure the wheels and wheel axles are clean and free
from leaves, grass, etc. It is also important to keep clean
around the drive gearbox.
• Remove the protective cover by unscrewing the
screws.
• Clean the gearbox with a brush. Also check that the
drive belt and belt pulley are undamaged, for example,
no cracks.
Replacing and adjusting the V-belt
• Remove the protective cover by unscrewing the
screws.
• Remove the hubcap on the front wheel by the
gearbox, prize carefully with a screwdriver. Unscrew
the carriage bolt and remove the wheel.
• Ask where you can dispose of surplus engine oil at
your local petrol station.
• Fill with new engine oil of a good quality. See the
Technical data section.
• Now insert the dipstick again, without tightening it.
Check the oil level with the dipstick on the oil filler cap.
If the oil level is low, fill using engine oil up to the upper
level on the dipstick.
• Screw on the oil filler cap.
• Remove the belt from the deck belt pulley. Check that
the deck belt pulleys move easily on the axle, spray
with penetrating oil between and behind the pulleys
and grease the axle.
• Fit the new belt and make sure it fits correctly by the
ball-bearing before adjusting the belt.
English – 15
Page 16
MAINTENANCE
• Adjust the belt by moving the ball-bearing up or down.
• A new belt stretches and becomes longer, so adjust
the belt again after a few hours of operation.
• Screw on the belt cover and test run the machine.
Replacing and adjusting the centre belt
The centre belt runs between the engine shaft and the
gearbox.
• Remove the cutter. (only when replacing belt)
• Unscrew the adjuster screws a few turns.
• Replace the belt with a new one and tighten the
adjustment screws a little. (only when replacing belt)
• Adjust the belt by moving the gear forwards or
backwards.
• The belt should be stretched so that it can move 610mm in the centre. That corresponds to a pull of
approx. 3 kg. Use a fishing scale to check.
• Tighten the adjustment screws properly. (3 Nm)
• Check the drive operation, as adjustment of the gear
affects the belt tension in the gearbox.
Cleaning
Do not use a high pressure washer to clean the machine.
Never flush water directly on the engine.
When cleaning under the cutting deck, turn the machine
with the spark plug upwards. Empty the fuel tank.
Trouble shooting
If the engine does not start, check the following:
• Replace the fuel with new, clean fuel.
• Check that the fuel valve is open.
• Check that the engine brake works correctly and is
undamaged.
• Clean the spark plug. Check that the electrode gap is
0.7-0.8 mm.
• Check the airfilter and clean it when it´s necessary.
• If the engine does not start after taking these actions,
contact the nearest authorised service agent.
• If the cutting result is not satisfactory and the grass
straws are fuzzy on the cut face, replace the cutter.
Below you will find some general maintenance
instructions.
Daily maintenance
1 Check that the engine brake handle works safely.
2 Brush leaves, grass and the like off of the lawn mower.
3 Clean the air intake on the starter. Check the starter
and starter cord.
4 Check the oil level.
5 Clean the air filter. Replace if necessary.
6 Check that nuts and screws are tight.
7 Check the cutting attachment. Never use blades that
are dull, cracked or damaged.
Weekly maintenance
1 Clean the spark plug. Check that the electrode gap is
0.7-0.8 mm.
2 Clean the cooling fins on the cylinder.
Monthly maintenance
1 Check that drive belt is not damaged and is not visibly
defective.
2 Clean the gearbox.
3 Check the fuel filter and the fuel hose. Replace if
necessary.
4 Clean the inside of the fuel tank.
5 Lubricate the drive control.
6 Change the engine oil.
7 Inspect the clutch wire. See instructions under the
heading Assembly.
16 – English
Page 17

TECHNICAL DATA
Technical data
LB448S LB548S e
Engine
Engine manufacturer Honda Honda
Cylinder displacement, cm
Speed, rpm 2900 2900
Nominal engine output, kW (see note 1) 2,8 2,8
Ignition system
Spark plug NGK - BPR5ES NGK - BPR5ES
Electrode gap, mm 0,7 - 0,8 0,7 - 0,8
Fuel and lubrication system
Fuel tank capacity, litre 0,9 0,9
Oil tank capacity, litre 0,55 0,55
Engine oil
Weight
Lawn mower with empty tanks, kg 31 33
Noise emissions (see note 2)
Sound power level, measured dB (A) 92 90
Sound power level, guaranteed dB(A) 93 92
Sound power level, guaranteed dB(A)
For Australia and New Zeeland only (see note 3)
Sound level (see note 4)
Sound pressure level at the operators ear, dB(A) 79 77
Vibration levels (see note 5)
Vibration levels on the handles, m/s
Cutting equipment
Cutting system BioClip BioClip
Cutting height 30-60 30-60
Cutting width, mm 48 48
Cutter Mulcher, 48 cm Mulcher, 48 cm
Article number 5028813-10 5028813-10
Drive
Speed, km/h 4,5 4,5
Note 1: The power rating of the engine indicated is the average net output (at specified rpm) of a typical production
engine for the engine model measured to SAE standard J1349/ISO1585. Mass production engines may differ from this
value. Actual power output for the engine installed on the final machine will depend on the operating speed,
environmental conditions and other values. Note 2: Noise emissions in the environment measured as sound power (L
in conformity with EC directive 2000/14/EC. Note 3: Measured according to Australian Standard AS 3534 Note 4: Noise
pressure level according to EN ISO 5395. Reported data for noise pressure level has a typical statistical dispersion
(standard deviation) of 1.2 dB(A). Note 5: Vibration level according to EN ISO 5395. Reported data for vibration level
has a typical statistical dispersion (standard deviation) of 0.2 m/s
3
2
160 160
Service classification SG SH; SAE 10W -30
70 70
4,5 4,8
2
(steering wheel) and 0.8 m/s2 (seat).
Service classification SG SH; SAE 10W -30
WA
)
English – 17
Page 18

TECHNICAL DATA
EC Declaration of Conformity
(Applies to Europe only)
Husqvarna AB, SE-561 82 Huskvarna, Sweden, tel: +46-36-146500, declares under sole responsibility that the lawn
mowers
Husqvarna LB448S and LB548S e from the serial numbers 15XXXXX and onwards comply with the
requirements of the COUNCIL’S DIRECTIVE:
of May 17, 2006 ”relating to machinery” 2006/42/EC.
of February 26, 2014 ”relating to electromagnetic compatibility” 2014/30/EU.
of May 8, 2000 ”relating to the noise emissions in the environment” 2000/14/EC.
For information relating to noise emissions, see the Technical data chapter.
The following standards have been applied: ISO 5395, ISO 11094, EN 55012.
Notified body: 0404, SMP Svensk Maskinprovning AB, Box 7035, SE-750 07 Uppsala, has issued reports regarding
the assessment of conformity according to annex VI of the COUNCIL’S DIRECTIVE of May 8, 2000 ”relating to the noise
emissions in the environment” 2000/14/EC.
Huskvarna 6 July 2015.
Claes Losdal, Development Manager/Garden Products
(Authorized representative for Husqvarna AB and responsible for technical documentation.)
18 – English
Page 19
EXPLICATION DES SYMBOLES
!
!
Symboles sur la machine:
AVERTISSEMENT! La machine
utilisée de manière imprudente ou
inadéquate peut devenir un outil
dangereux, pouvant causer des
blessures graves voire mortelles à
l’utilisateur et aux autres personnes
présentes.
Lire attentivement et bien assimiler le
manuel d’utilisation avant d’utiliser la
machine.
Attention: projections et ricochets.
Veiller à ce qu’aucune personne non
autorisée ne se trouve dans la zone
la travail.
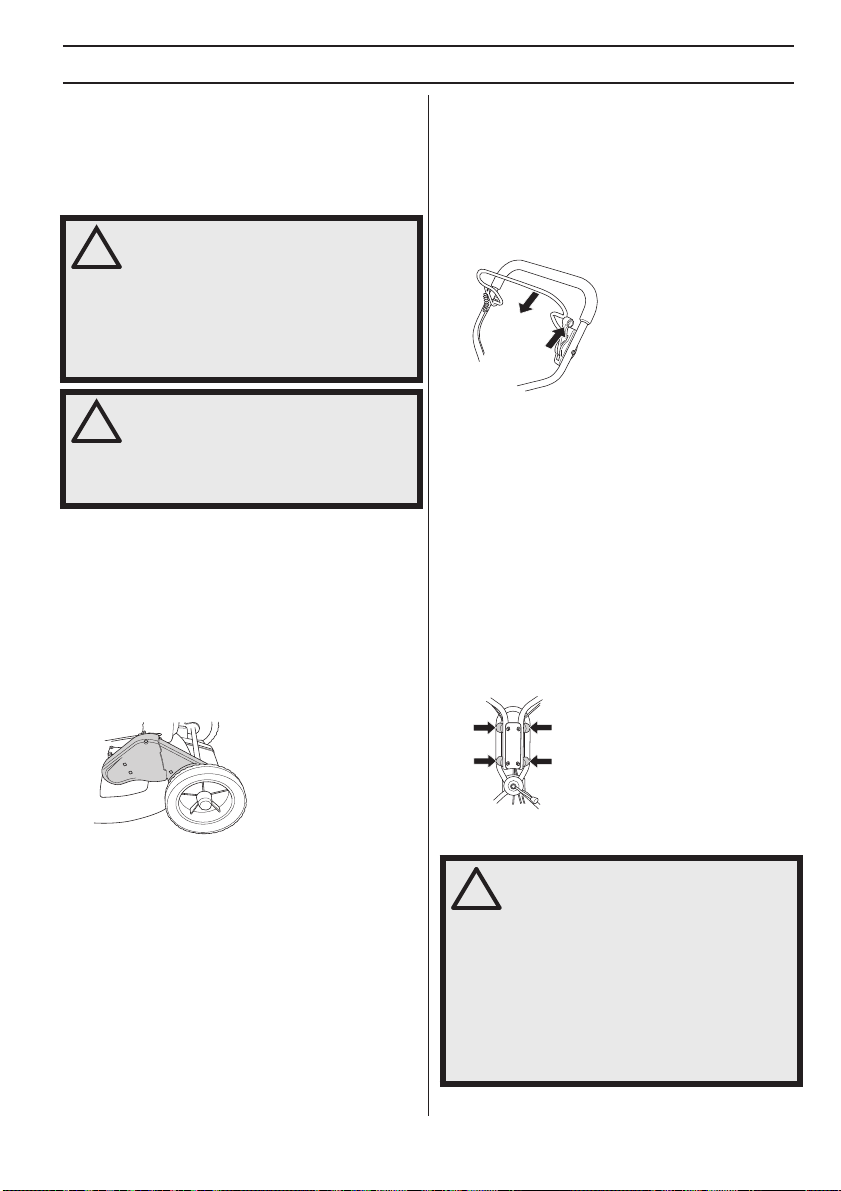
Évitez un démarrage accidentel en
retirant le câble d'allumage de la
bougie.
Attention au couteau en rotation.
Attention aux pieds et aux mains.
Explication des niveaux d'avertissement
Il existe trois niveaux d'avertissement.
AVERTISSEMENT!
AVERTISSEMENT! Symbole utilisé en
cas de risque de blessures très graves
ou de mort pour l'utilisateur ou de
dommages pour les environs si les
instructions du manuel ne sont pas
suivies.
REMARQUE !
REMARQUE ! Symbole utilisé en cas de
risque de blessures pour l'utilisateur ou
de dommages pour les environs si les
instructions du manuel ne sont pas
suivies.
ATTENTION !
ATTENTION ! Symbole utilisé en cas de risque de
dommages pour les matériaux ou la machine si les
instructions du manuel ne sont pas suivies.
Veiller à ce que ni les mains ni les
pieds ne soient en contact avec
l’équipement de coupe quand le
moteur tourne.
Ce produit est conforme aux
directives CE en vigueur.
Émissions sonores dans
l’environnement selon la directive de la
Communauté européenne. Les
émissions de la machine sont
indiquées au chapitre Caractéristiques
techniques et sur les autocollants.
French – 19
Page 20

SOMMAIRE
Sommaire
EXPLICATION DES SYMBOLES
Symboles sur la machine: ..................................... 19
Explication des niveaux d'avertissement .............. 19
SOMMAIRE
Sommaire ............................................................. 20
PRÉSENTATION
Cher client, ............................................................ 21
Mesures à prendre avant d'utiliser une tondeuse
neuve ....................................................................
QUELS SONT LES COMPOSANTS?
Quels sont les composants de la tondeuse ? ....... 22
ÉQUIPEMENT DE SÉCURITÉ DE LA MACHINE
Généralités ........................................................... 23
Carter de coupe et carter de protection ................ 23
Étrier du frein moteur ............................................ 23
Système anti-vibrations ........................................ 23
Silencieux ............................................................. 24
Équipement de coupe ........................................... 24
MONTAGE
Montage du guidon ............................................... 25
Réglage du câble d’embrayage ........................... 25
Démontage et montage des lames de couteau .... 25
Assemblage des obturateurs pour le broyage ..... 26
MANIPULATION DU CARBURANT
Généralités ........................................................... 27
Carburant .............................................................. 27
Remplissage de carburant .................................... 27
Transport et rangement ......................................... 27
INSTRUCTIONS DE SÉCURITÉ
Protection personnelle .......................................... 28
Instructions générales de sécurité ........................ 28
Techniques de travail de base .............................. 29
Transport et rangement ......................................... 29
COMMANDE
Réglage de la hauteur de coupe ........................... 30
Démarrage et arrêt ............................................... 30
ENTRETIEN
Entretien ............................................................... 31
Filtre à air .............................................................. 31
Bougie ................................................................... 31
Silencieux ............................................................. 31
Couteau ................................................................ 31
Vidange de l'huile ................................................. 31
Entraînement et boîte de vitesses ........................ 32
Nettoyage .............................................................. 33
Recherche de pannes ........................................... 33
Entretien quotidien ................................................ 33
Entretien hebdomadaire ....................................... 33
Entretien mensuel ................................................ 33
CARACTÉRISTIQUES TECHNIQUES
Caractéristiques techniques ................................. 34
Déclaration CE de conformité .............................. 35
21
20 – French
Page 21
PRÉSENTATION
!
!
!
Cher client,
Félicitations pour ce choix d’un produit Husqvarna.
Husqvarna a vu le jour en 1689 lorsque le roi Karl XI
décida de construire un arsenal pour la fabrication des
mousquets au bord de la rivière Huskvarna. Le choix de
l’emplacement était logique puisque la rivière Huskvarna
servait à produire de l’énergie hydraulique et constituait
donc une sorte de centrale hydraulique. En plus de 300
ans d’existence, l’usine Husqvarna a fabriqué de
nombreux produits, depuis les cuisinières à bois
jusqu’aux équipements de cuisine modernes, sans
oublier les machines à coudre, les bicyclettes, les motos,
etc. La première tondeuse à moteur a été lancée en 1956,
suivie en 1959 de la première tronçonneuse. C’est dans
ce secteur que Husqvarna est actif aujourd’hui.
Husqvarna est aujourd’hui un des plus grands fabricants
du monde de produits destinés à l’entretien des forêts et
des jardins. La qualité et les performances sont nos
priorités. Notre concept d’affaires est de développer,
fabriquer et commercialiser des produits à moteur pour
l’entretien des forêts et des jardins et pour les entreprises
de construction et d’aménagement des sols. L’objectif
d’Husqvarna est aussi d’être à la pointe du progrès en
matière d’ergonomie, de facilité d’utilisation, de sécurité
et de protection de l’environnement; un grand nombre
d’innovations ont été développées pour améliorer les
produits dans ces domaines.
Nous sommes persuadés que vous apprécierez la qualité
et les performances de nos produits pendant de longues
années. L’achat d’un de nos produits vous garantit une
assistance professionnelle au niveau du service et des
réparations en cas de besoin. Si la machine n’a pas été
achetée chez un de nos revendeurs autorisés, demandez
à un revendeur l’adresse de l’atelier d’entretien le plus
proche.
Nous espérons que cette machine vous donnera toute
satisfaction et qu’elle vous accompagnera pendant de
longues années. N’oubliez pas que ce manuel
d’utilisation est important. En suivant les instructions qu’il
contient (utilisation, révision, entretien, etc.), il est
possible d’allonger considérablement la durée de vie de
la machine et d’augmenter sa valeur sur le marché de
l’occasion. En cas de vente de la machine, ne pas oublier
de remettre le manuel d’utilisation au nouveau
propriétaire.
Nous vous remercions d'utiliser un produit Husqvarna !
Husqvarna AB travaille continuellement au
développement de ses produits et se réserve le droit d’en
modifier, entre autres, la conception et l’aspect sans
préavis.
Mesures à prendre avant d'utiliser une tondeuse neuve
• Lire attentivement le manuel d’utilisation.
• Vérifier le montage et le réglage de l’outil de coupe.
Voir les instructions au chapitre Montage.
• Faire le plein d'essence et d'huile. La machine est
livrée avec un réservoir contenant une quantité
suffisante d'huile. Voir les instructions au chapitre
Manipulation du carburant.
AVERTISSEMENT! Ne jamais modifier
sous aucun prétexte la machine sans
l’autorisation du fabricant. N’utiliser que
des accessoires et des pièces d’origine.
Des modifications non-autorisées et
l’emploi d’accessoires non-homologués
peuvent provoquer des accidents graves
et même mortels, à l’utilisateur ou
d’autres personnes.
AVERTISSEMENT! Une tondeuse à gazon
utilisée de manière erronée ou
négligente peut être un outil dangereux
pouvant occasionner des blessures
personnelles graves, voire mortelles. Il
importe donc de lire attentivement et de
bien assimiler le contenu de ce manuel
d'utilisation.
AVERTISSEMENT! Une inhalation
prolongée des gaz d'échappement du
moteur peut constituer un danger pour la
santé.
Husqvarna AB travaille continuellement au
développement de ses produits et se réserve le droit d’en
modifier, entre autres, la conception et l’aspect sans
préavis.
French – 21
Page 22
QUELS SONT LES COMPOSANTS?
LB548S eLB448S
1
2
3
4
13
5
6
7
Quels sont les composants de la tondeuse ?
1 Poignée / guidon
2 Étrier du frein moteur
3 Levier d'embrayage
4 Poignée de lanceur
5 Réservoir d'huile
6 Protection de la courroie
7 Silencieux
8 Bougie
9 Protection de la courroie
10 Réservoir d’essence
11 Poignée du réglage de l’angle
12 Système antivibrations
22
212019
11
13
12
10
14
8
9
15
16
17
18
24
23
13 Réglage du câble d’embrayage
14 Guidon inférieur
15 Commande de la hauteur de coupe
16 Robinet à essence
17 Filtre à air
18 Carter de coupe
19 Rondelle élastique
20 Boulon de couteau
21 Couteau/équipement de coupe
22 Fixation de couteau
23 Obturateur pour le broyage
24 Manuel d’utilisation
22 – French
Page 23
ÉQUIPEMENT DE SÉCURITÉ DE LA MACHINE
!
Généralités
Ce chapitre présente les équipements de sécurité de la
machine, leur fonction, comment les utiliser et les
maintenir en bon état. Voir au chapitre Quels sont les
composants? pour trouver leur emplacement sur la
machine.
AVERTISSEMENT! Ne jamais utiliser une
machine dont les équipements de
!
sécurité sont défectueux. Contrôler et
entretenir les équipements de sécurité
de la machine conformément aux
instructions données dans ce chapitre.
Si les contrôles ne donnent pas de
résultat positif, confier la machine à un
atelier spécialisé.
AVERTISSEMENT! Ne jamais utiliser une
machine dont les équipements de
!
sécurité sont défectueux. Suivre les
directives de maintenance, d’entretien et
les instructions de réparation indiquées
dans ce chapitre.
Carter de coupe et carter de protection
Le carter de coupe est conçu pour réduire les vibrations
et minimiser le risque de coupures. Contrôler que le
carter de coupe est intact et sans défaut visible (fissure ou
autre).
Le carter de protection est conçu pour minimiser le risque
de blessures par écrasement et pour rattraper une
courroie d'entraînement brisée. Contrôler que le carter de
protection est intact et correctement vissé.
Étrier du frein moteur
L'étrier du frein moteur est conçu pour arrêter le moteur.
Lorsque l'étrier du frein moteur est relâché, le moteur doit
s'arrêter.
Vérifier le frein moteur de la manière suivante.
Donner les pleins gaz et relâcher ensuite l’arceau de
freinage. Le moteur doit s’arrêter et l’entraînement doit
être déconnecté.
Le frein moteur doit toujours être réglé de manière à ce
que le moteur s’arrête dans les 3 secondes.
Système anti-vibrations
La machine est équipée d’un système anti-vibrations
conçu pour assurer une utilisation aussi confortable que
possible.
Le tube en acier du système de poignée et le carter de
coupe sont construits pour minimiser les vibrations en
provenance du moteur.
Le système anti-vibrations réduit la transmission des
vibrations de l’unité moteur/l’équipement de coupe à
l’unité que constituent les poignées.
LB448S Ce modèle dispose également de 4
amortisseurs montés sur la poignée pour réduire
davantage les vibrations.
S'assurer que les poignées et les blocs anti-vibrants ne
sont pas endommagés.
AVERTISSEMENT! Une exposition
excessive aux vibrations peut entraîner
des troubles circulatoires ou nerveux
chez les personnes sujettes à des
troubles cardio-vasculaires. Consulter
un médecin en cas de symptômes liés
aux vibrations, tels qu’insensibilisation
ou irritation locale, douleur,
chatouillements, faiblesse musculaire,
décoloration ou modification
épidermique. Ces symptômes affectent
généralement les doigts, les mains ou
les poignets.
French – 23
Page 24
ÉQUIPEMENT DE SÉCURITÉ DE LA MACHINE
Silencieux
Le silencieux est conçu pour réduire au maximum le
niveau sonore et détourner les gaz d’échappement loin
de l’utilisateur.
AVERTISSEMENT! Les gaz
d’échappement du moteur sont très
!
chauds et peuvent contenir des
étincelles pouvant provoquer un
incendie. Par conséquent, ne jamais
démarrer la machine dans un local clos
ou à proximité de matériaux
inflammables! Durant l’utilisation et un
certain temps après, le silencieux est
très chaud. Ne pas toucher le silencieux
s’il est chaud!
Ne jamais utiliser une machine dont le silencieux est
défectueux.
Vérifier régulièrement la fixation du silencieux dans la
machine.
Équipement de coupe
Éviter de cogner le couteau contre des objets étrangers
(cailloux, racines, etc.). Ceci risque d'émousser le
couteau et de tordre l'arbre du moteur.
Inspecter l’équipement de coupe afin de détecter
d’éventuels dommages ou fissures. Toujours remplacer
un équipement de coupe endommagé. Veiller à ce que le
couteau soit toujours bien affûté et correctement
équilibré.
Contrôler également que le boulon de couteau est intact
et que l'arbre du moteur n'est pas tordu.
24 – French
Page 25
MONTAGE
!
Montage du guidon
Observer la plus grande prudence en repliant le guidon
afin de ne pas endommager les câbles et fils.
La partie supérieure du guidon est fixée au moyen d'un
solide écrou sur la plaque articulée. Ne pas oublier la
rondelle entre la plaque et l'écrou de la poignée.
Si besoin est, la poignée peut être tournée latéralement à
l'aide de son articulation. La poignée peut être réglée sur
diverses positions pour obtenir la meilleure position de
conduite, par exemple pour la coupe le long de haies ou
de murs.
La poignée peut également être réglée en hauteur au
châssis en faisant tourner les roues.
Réglage du câble d’embrayage
Il convient d’ajuster le câble d’embrayage après les 8
premières heures d’utilisation, puis ultérieurement si
nécessaire.
Le câble est ajusté correctement lorsque le support de
câble est aligné avec l’écrou.
• Ajustez le câble à l’aide de la vis de réglage. Dévissez
la vis dans le sens des aiguilles d’une montre ou dans
le sens inverse pour respectivement rallonger ou
raccourcir le câble.
Démontage et montage des lames de couteau
AVERTISSEMENT! Toujours utiliser des
gants épais lors des travaux de service
et d'entretien de l'équipement de coupe.
Les couteaux sont très tranchants et il
est très facile de se couper.
Toujours débrancher le câble d’allumage de la bougie
avec toute mesure de réparation, nettoyage ou entretien.
Placer la coupe avec la bougie vers le haut lors de
l'entretien de la machine.
Toujours vider le réservoir de carburant avant de coucher
la tondeuse sur le côté.
Démontage
• Retirer le boulon qui maintient le couteau.
• Ôtez le boulon, la rondelle et le couteau.
French – 25
Page 26

MONTAGE
Montage
La lame doit être montée en orientant les extrémités en
biseau vers le capot.
• Placez le couleau et la rondelle de friction contre
l'attache du couteau.
• Veiller à ce que le couteau soit bien centré sur l'axe.
• Pour éviter les vibrations, il convient de placer le
couteau de façon à ce que le marquage de l'attache
soit visible sur les côtés du couteau.
IMPORTANT!
Soyez toujours vigilant et utilisez l’appareil avec bon
sens. Évitez toutes les situations pour lesquelles vous
ne vous estimez pas suffisamment qualifié. Si, après
avoir lu ces instructions, vous ne vous sentez toujours
pas à l’aise quant à la manière de procéder, il convient
de consulter un expert avant de poursuivre. Contactez
un atelier d'entretien agréé.
Utiliser toujours des pièces de rechange d’origine. Pour
de plus amples informations, consultez la rubrique «
Caractéristiques techniques ».
Assemblage des obturateurs pour le broyage
• Débrancher le câble d’allumage de la bougie.
• Placer la coupe avec la bougie vers le haut lors de
l'entretien de la machine.
• Placer les colonnes de guidage dans les trous sur le
carter de l'unité de coupe.
• Fixer les obturateurs pour le broyage à partir du
sommet du carter de l'unité de coupe.
• Monter la rondelle et visser correctement le boulon.
Serrer le boulon au couple de 70 Nm.
26 – French
Page 27
MANIPULATION DU CARBURANT
!
Généralités
AVERTISSEMENT! Faire tourner un
moteur dans un local fermé ou mal aéré
!
peut causer la mort par asphyxie ou
empoisonnement au monoxyde de
carbone.
Le carburant et les vapeurs de carburant
sont très inflammables et peuvent causer
des blessures graves en cas d’inhalation
ou de contact avec la peau. Il convient
donc d’observer la plus grande prudence
lors de la manipulation du carburant et
de veiller à disposer d’une bonne
aération.
Les gaz d’échappement du moteur sont
très chauds et peuvent contenir des
étincelles pouvant provoquer un
incendie. Par conséquent, ne jamais
démarrer la machine dans un local clos
ou à proximité de matériaux
inflammables!
Ne fumez jamais ni ne placez d’objet
chaud à proximité du carburant.
Carburant
ATTENTION ! La machine est équipée d’un moteur à
quatre temps. Veiller à ce que le réservoir d'huile
contienne toujours suffisamment d'huile.
Essence
• Utiliser une essence de qualité, avec ou sans plomb.
• Le taux d’octane minimum recommandé est de 90
(RON). Si l’on fait tourner le moteur avec une essence
d’un taux d’octane inférieur à 90, un cognement
risque de se produire, résultant en une augmentation
de la température du moteur pouvant causer de
graves avaries du moteur.
• Choisissez de l’essence écologique (alkylat) si vous
pouvez vous en procurer.
Huile moteur
ATTENTION ! Contrôler le niveau d'huile avec de
démarrer la tondeuse. Un niveau d'huile trop bas risque
de causer de graves avaries du moteur.
• Voir les instructions au chapitre « Entretien ».
• L’huile moteur doit être remplacée pour la première
fois après 5 heures d’utilisation. Consulter les
caractéristiques techniques pour obtenir des
recommandations sur le type d’huile qu’il convient
d’utiliser. Ne jamais utiliser d’huile pour moteurs à
deux temps.
Remplissage de carburant
AVERTISSEMENT! Arrêter le moteur et le
laisser refroidir pendant quelques
minutes avant de faire le plein. Le moteur
doit être éteint et le bouton d'arrêt en
position STOP.
Toujours utiliser un bidon d'essence
pour éviter tout déversement accidentel.
Ouvrir le bouchon du réservoir lentement
pour laisser baisser la surpression
pouvant régner dans le réservoir.
Nettoyez le pourtour du bouchon de
réservoir.
Serrer soigneusement le bouchon du
réservoir après le remplissage. Toute
négligence peut entraîner le départ d'un
incendie.
Avant de mettre la machine en marche, la
déplacer à au moins 3 mètres de l’endroit
où a été fait le plein.
Ne jamais démarrer la machine:
• Si du carburant ou de l'huile moteur ont été répandus
sur la machine. Essuyer soigneusement toutes les
éclaboussures et laisser les restes d'essence
s'évaporer.
• Si vous avez renversé du carburant sur vous ou sur
vos vêtements, changez de vêtements. Lavez les
parties du corps qui ont été en contact avec le
carburant. Utilisez de l’eau et du savon.
• S’il y a fuite de carburant. Vérifier régulièrement que
le bouchon du réservoir et la conduite de carburant ne
fuient pas.
Transport et rangement
• Transporter et ranger la machine et le carburant de
façon à éviter que toute fuite ou émanation éventuelle
entre en contact avec une flamme vive ou une
étincelle: machine électrique, moteur électrique,
contact/interrupteur électrique ou chaudière.
• Lors du stockage et du transport de carburant,
toujours utiliser un récipient homologué et conçu à cet
effet.
Remisage prolongé
• Lors des remisages de la machine, vider le réservoir
de carburant. S’informer auprès d’une station-service
comment se débarrasser du carburant résiduel.
French – 27
Page 28
INSTRUCTIONS DE SÉCURITÉ
!
!
Protection personnelle
AVERTISSEMENT! Lorsque la machine
est utilisée, un équipement de protection
!
personnelle doit être utilisé.
• Au besoin, utiliser des gants, par ex. lors du montage,
de l’inspection ou du nettoyage de l’équipement de
coupe.
• Toujours utiliser des pantalons longs et robustes. Ne
pas porter de shorts ou de sandales et ne pas
marcher pieds nus.
• Utiliser des bottes ou chaussures anti-dérapantes et
stables.
Porter des vêtements près du corps et ne risquant pas de
gêner les mouvements.
Instructions générales de sécurité
Le présent chapitre décrit les consignes de sécurité de
base relatives à l’utilisation de la machine. Aucune de ces
informations ne peut remplacer l’expérience et le savoirfaire d’un professionnel.
• Lire attentivement et bien assimiler le manuel
d’utilisation avant d’utiliser la machine.
• N’oubliez pas que l’opérateur est responsable des
accidents ou dangers aux tiers et à leurs biens.
• La machine doit rester propre. Les signes et
autocollants doivent être parfaitement lisibles.
Utilisez toujours votre bon sens
Il est impossible de mentionner toutes les situations
auxquelles vous pouvez être confronté. Soyez toujours
vigilant et utilisez l’appareil avec bon sens. Évitez toutes
les situations pour lesquelles vous ne vous estimez pas
suffisamment qualifié. Si, après avoir lu ces instructions,
vous ne vous sentez toujours pas à l’aise quant à la
manière de procéder, il convient de consulter un expert
avant de poursuivre. Veillez contacter votre revendeur,
votre atelier de réparation ou un utilisateur expérimenté.
Évitez les tâches pour lesquelles vous ne vous sentez
pas suffisamment qualifié.
AVERTISSEMENT! Cette machine génère
un champ électromagnétique en
!
fonctionnement. Ce champ peut dans
certaines circonstances perturber le
fonctionnement d’implants médicaux
actifs ou passifs. Pour réduire le risque
de blessures graves ou mortelles, les
personnes portant des implants
médicaux doivent consulter leur
médecin et le fabricant de leur implant
avant d’utiliser cette machine.
AVERTISSEMENT! La machine utilisée
de manière imprudente ou inadéquate
peut devenir un outil dangereux, pouvant
causer des blessures graves voire
mortelles à l’utilisateur et aux autres
personnes présentes.
Ne jamais permettre à des enfants ou à
des personnes ne possédant pas la
formation nécessaire d’utiliser ou
d’entretenir la machine.
La machine ne doit pas être utilisée par
des personnes aux facultés physiques et
mentales réduites ou par des personnes
incapables de manipuler la machine pour
des raisons de santé, sans la
surveillance d'une personne responsable
de leur sécurité.
Ne jamais laisser d’autres personnes
utiliser la machine sans s’être assuré au
préalable que ces personnes ont bien
compris le contenu du mode d’emploi.
Éviter d’utiliser la machine en cas de
fatigue, d’absorption d’alcool ou de prise
de médicaments susceptibles d’affecter
l’acuité visuelle, le jugement ou la
maîtrise du corps.
AVERTISSEMENT! Toute modification
non autorisée et/ou tout emploi
d’accessoires non homologués peuvent
provoquer des accidents graves voire
mortels pour l’utilisateur et les autres. Ne
jamais modifier sous aucun prétexte la
machine sans l’autorisation du fabricant.
Ne modifiez jamais cette machine de
façon à ce qu’elle ne soit plus conforme
au modèle d’origine et n’utilisez jamais
une machine qui semble avoir été
modifiée.
Ne jamais utiliser une machine qui n’est
pas en parfait état de marche. Appliquer
les instructions de maintenance et
d’entretien ainsi que les contrôles de
sécurité indiqués dans ce manuel
d’utilisation. Certaines mesures de
maintenance et d’entretien doivent être
confiées à un spécialiste dûment formé
et qualifié. Voir les instructions à la
section Maintenance.
N’utiliser que des accessoires et des
pièces d’origine.
28 – French
Page 29

INSTRUCTIONS DE SÉCURITÉ
Sécurité dans l'espace de travail
• Avant de commencer le travail, éliminer du gazon les
branches, cailloux, etc..
• Des objets venant frapper l'équipement de coupe
risquent d'être projetés et de causer des blessures
physiques et des dégâts matériels. Veillez à maintenir
les personnes et les animaux bien à distance.
• N'utilisez jamais la machine par mauvais temps, par
exemple en cas de brouillard, de pluie, d'humidité, de
vent violent, de froid intense, de risque d'éclair, etc.
Travailler par mauvais temps est fatiguant et peut
créer des conditions de travail dangereuses telles que
le verglas.
• Observez la zone environnante et assurez-vous
qu'aucun facteur ne risque d'affecter votre contrôle de
la machine.
• Faites attention aux racines, pierres, brindilles,
fosses, fossés, etc. L’herbe haute peut dissimuler des
obstacles.
• La tonte de pentes peut être dangereuse. Ne pas
utiliser la tondeuse dans des pentes très accentuées.
Ne pas utiliser la tondeuse dans une pente supérieure
à 15 degrés.
• Si le terrain est en pente, déterminer le parcours de
manière qu’il soit perpendiculaire à la pente. Il est
beaucoup moins fatiguant de marcher en travers
d’une pente, plutôt que de la descendre et de la
remonter constamment.
• Soyez prudent lorsque vous vous approchez de coins
cachés et d'objets qui pourraient vous boucher la vue.
Sécurité du travail
• Une tondeuse est uniquement destinée à la coupe du
gazon. Toute autre utilisation est interdite.
• Utiliser les équipements de protection personnelle.
Voir au chapitre Ӄquipement de protection
personnelle”.
• Ne pas démarrer la tondeuse si le couteau et tous les
carters ne sont pas montés. Sinon, le couteau risque
de se détacher et de provoquer des blessures
personnelles.
• Éviter de cogner le couteau contre des objets
étrangers (cailloux, racines, etc.). Ceci risque
d'émousser le couteau et de tordre l'arbre du moteur.
Un arbre tordu entraîne un déséquilibre et de fortes
vibrations, ce qui à son tour risque d'entraîner le
détachement du couteau.
• L'étrier de frein ne doit jamais être fixé de façon
permanente dans la poignée lorsque la machine est
en marche.
• Placer la tondeuse sur une surface solide et la
démarrer. Vérifier que le couteau ne peut pas entrer
en contact avec le sol ou un objet quelconque.
• Placez-vous toujours derrière la machine. Laissez
toutes les roues en contact avec le sol et gardez les
deux mains sur la poignée de commande lors de la
tonte. Maintenez les mains et les pieds à distance des
lames en rotation.
• N'inclinez pas la machine lorsque le moteur tourne.
• Marchez avec la machine, ne courez pas.
• Il convient d'être particulièrement attentif lorsque l'on
tire la machine vers soi au cours de la tonte.
• Ne jamais soulever la tondeuse ou la porter lorsque le
moteur est en marche. Avant de soulever la tondeuse,
arrêter le moteur et débrancher le câble d'allumage de
la bougie.
• Ne tondez pas la pelouse en marche arrière.
• Arrêter le moteur lors du déplacement sur du terrain
ne devant pas être tondu. Par exemple gravier,
cailloux, galets, asphalte, etc.
• Arrêter le moteur avant de modifier la hauteur de
coupe. Ne jamais effectuer de réglages avec le
moteur en marche.
• Ne laissez jamais la machine sans surveillance avec
le moteur en marche. Arrêter le moteur. Assurez-vous
que l'équipement de coupe a cessé de tourner.
• Arrêter immédiatement la machine si elle bute sur un
objet ou si des vibrations se produisent. Débrancher
le câble de la bougie. Vérifier que la machine n’a subi
aucun dommage. Réparer tout éventuel dommage.
Techniques de travail de base
• Utilisez toujours une lame acérée pour obtenir des
résultats de qualité optimale. Une lame non-acérée
donnera une coupe inégale et l'herbe jaunira à la
surface de la coupe.
• Ne jamais couper plus d’1/3 de la longueur de l’herbe.
Cela vaut tout particulièrement pendant les périodes
sèches. Commencer par tondre avec une hauteur de
coupe élevée. Contrôler ensuite le résultat et abaisser
à une hauteur appropriée. Si l’herbe est
particulièrement haute, conduire lentement et, si
nécessaire, tondre deux fois.
• Tondez toujours dans différentes directions afin
d'éviter de faire des lignes dans la pelouse.
• Avant de tirer la machine vers vous, désengagez
l’entraînement et poussez la machine d’environ 10
vers l’avant.
• Veillez à désengager l’entraînement lorsque vous
vous approchez d’un obstacle.
cm
Transport et rangement
• Sécurisez l'équipement lors du transport afin d'éviter
tout dommage ou accident.
• Stockez l'équipement dans un endroit verrouillé afin
de le maintenir hors de portée des enfants et de toute
personne incompétente.
• Rangez la machine et ses équipements dans un
endroit sec et à l'abri du gel.
• Pour le transport et le remisage du carburant, voir la
rubrique «
Manipulation du carburant ».
French – 29
Page 30

COMMANDE
!
Réglage de la hauteur de coupe
IMPORTANT! Arrêter le moteur avant de modifier la
hauteur de coupe.
Le dispositif de réglage de la hauteur de coupe est sur
ressort. Il y a 6 hauteurs de coupe différentes possibles.
Ne pas régler la hauteur de coupe trop bas afin que la
machine ne se cogne contre le sol en cas d'irrégularités
de terrain.
• Pour augmenter la hauteur de coupe, déplacer le
levier vers la gauche puis vers l’avant.
Démarrage et arrêt
AVERTISSEMENT! Contrôler les points
suivants avant la mise en marche:
Ne pas démarrer la tondeuse si le couteau et
tous les carters ne sont pas montés. Sinon, le
couteau risque de se détacher et de
provoquer des blessures personnelles.
Éloignez toujours la machine de la zone
et de la source du plein en carburant
avant de la mettre en marche.
Placer la machine sur une surface plane.
S’assurer que l’équipement de coupe ne
risque pas de rencontrer un obstacle.
Veiller à ce qu’aucune personne non
autorisée ne se trouve dans la zone la travail.
S’assurer que le câble d’allumage est correctement
branché à la bougie.
Démarrage
• Ouvrir le robinet d'essence.
• Tirer de la main gauche l'étrier du frein moteur tout
contre la poignée supérieure.
• Pour diminuer la hauteur de coupe, déplacer le levier
vers la gauche puis vers l’arrière.
30 – French
• Saisir ensuite la poignée de démarrage de la main
droite et tirer lentement sur le lanceur jusqu’à ce
qu’une résistance se fasse sentir (les cliquets
d’entraînement grippent), puis tirer énergiquement et
rapidement sur le lanceur.
corde du lanceur autour de la main.
REMARQUE! Ne pas sortir complètement la corde du lanceur
et ne pas lâcher la poignée avec la corde du lanceur
complètement sortie. Cela pourrait endommager la machine.
Ne jamais enrouler la
Entraînement
Pour utiliser l'entraînement, pousser le levier
d'embrayage vers l'avant.
Arrêt
• Relâcher l’étrier du frein moteur pour arrêter le
moteur. De plus, l'entraînement se coupe lorsque l'on
relâche l'anneau de frein. Pour débrayer
l'entraînement, il suffit de relâcher légèrement le levier
de frein.
• Fermer le robinet d'essence.
Page 31

ENTRETIEN
!
Entretien
AVERTISSEMENT! Avant de commencer
les travaux de nettoyage, de réparation
!
ou d’inspection, s’assurer que
l’équipement de coupe est arrêté.
Débrancher le câble d’allumage de la
bougie.
Notez que les courroies d’entraînement sont réglées au
cours de la première période de rodage (5h) et il peut être
nécessaire d’ajuster la tension. Voir les instructions
Filtre à air
Le filtre à air doit être maintenu propre pour éviter:
• Un mauvais fonctionnement du carburateur.
• Des problèmes de démarrage.
• Une perte de puissance.
• Une usure prématurée des éléments du moteur.
• Une consommation anormalement élevée de
carburant
Nettoyer le filtre tous les jours, et même plus souvent si
l’environnement est très poussiéreux.
Pour déposer le filtre à air, commencer par retirer le
couvercle du filtre. Enfoncer les blocages sur le dessus du
couvercle du filtre à air et abaisser le couvercle.
Retirer le filtre à air et contrôler qu’il est intact. S’il
présente des défauts, remplacer par un filtre à air neuf.
Nettoyer le filtre en le tapant avec précaution contre une
surface dure et nettoyer l'intérieur avec de l'air comprimé.
Ne jamais nettoyer à l'aide du brosse. Remplacer le filtre
à air s'il est très sale.
Un filtre ayant servi longtemps ne peut plus être
complètement nettoyé. Le filtre à air doit donc être
remplacé à intervalles réguliers.
doit être remplacé immédiatement.
Lors du montage, veiller à ce que le filtre à air assure une
bonne étanchéité au niveau du support de filtre.
Tout filtre endommagé
Bougie
AVERTISSEMENT! Durant l’utilisation et
un certain temps après, le silencieux est
!
très chaud. Ne pas toucher le silencieux
s’il est chaud!
Si la puissance de la machine est trop faible, si la machine
est difficile à mettre en marche ou si le ralenti est
irrégulier, toujours commencer par contrôler l’état de la
bougie avant de prendre d’autres mesures. Si la bougie
est encrassée, la nettoyer et vérifier que l’écartement des
électrodes est de 0,7-0,8 mm. Remplacer la bougie une
fois par mois ou plus souvent si nécessaire.
:
REMARQUE! Toujours utiliser le type de bougie
recommandé! Une bougie incorrecte peut endommager
le piston/le cylindre.
Silencieux
Le silencieux est conçu pour atténuer le bruit et dévier le
flux des gaz d’échappement loin de l’utilisateur. Ces gaz
sont chauds et peuvent transporter des étincelles
risquant de causer un incendie si elles entrent en contact
avec un matériau sec et inflammable.
Vérifier régulièrement la fixation du silencieux dans la
machine. Ne jamais utiliser une machine dont le
silencieux est défectueux.
Couteau
AVERTISSEMENT! Toujours utiliser des
gants de protection pour réparer
l’équipement de coupe. Les couteaux
sont très tranchants et peuvent
facilement provoquer des coupures.
Il est important que le couteau soit affûté et correctement
équilibré. Desserrer le boulon qui maintient le couteau et
porter le couteau à un atelier de réparation au moins une
fois par an pour affûtage et équilibrage. Ceci peut être
effectué après la saison de tonte.
S'il est nécessaire de remplacer le couteau ou l'attache, il
convient également de remplacer le boulon, la rondelle et
la rondelle de friction.
Lors du remontage du couteau, serrer le boulon à un
couple de 45-60 Nm. Voir les instructions au chapitre
Montage.
En cas de contact avec des corps étrangers tels que des
pierres, des racines ou tout autre élément similaire, le
couteau frotte contre sa fixation. La surface de contact de
la fixation peut donc sembler un peu usée, ce qui est tout
à fait normal. Il s’agit là d’un dispositif de sécurité qui
réduit le risque de déformation de l’arbre du moteur.
Vidange de l'huile
L’huile moteur doit être remplacée pour la première fois
après 5 heures d’utilisation.
L’huile moteur doit être vidangée tous les ans et toutes les
25 heures de travail.
Procéder comme suit pour vidanger l'huile:
• Débrancher le câble d’allumage de la bougie.
• Vider le réservoir de carburant.
• Fermer le robinet d'essence.
French – 31
Page 32

ENTRETIEN
• Dévisser le couvercle de remplissage d'huile.
Placer un réservoir approprié pour récolter l'huile.
• Vidanger l'huile en inclinant le moteur afin que l'huile
s'écoule par le tube de remplissage.
• S’informer auprès d’une station-service comment se
débarrasser de l'huile moteur résiduelle.
• Remplir d'huile moteur neuve de bonne qualité. Voir le
chapitre Caractéristiques techniques.
• Introduire ensuite de nouveau la jauge sans la
visser.
. Contrôler le niveau d’huile à l’aide de la jauge
située sur le couvercle de remplissage d’huile. Si le
niveau d'huile est bas, remplir d'huile moteur jusqu'au
niveau supérieur de la jauge d'huile.
Remplacement et réglage de la courroie trapézoïdale
• Retirer le carter de protection en desserrant les vis.
• Retirer le chapeau de la roue avant près de la boîte de
vitesses, soulever délicatement à l'aide d'un
tournevis. Desserrer la vis de blocage puis retirer la
roue.
• Enlever la courroie de sa poulie. Vérifier que les
poulies tournent bien sur leur axe. Dans le cas
contraire, vaporiser avec un lubrifiant antirouille entre
et derrière les poulies et graisser légèrement l'axe.
• Placer la nouvelle courroie et veiller à ce qu'elle
vienne parfaitement près du roulement à bille avant
de procéder à son ajustage.
• Visser le couvercle de remplissage d'huile.
Entraînement et boîte de vitesses
S'assurer que les roues et essieux sont propres et ne
comportent pas de feuilles, herbe, etc. Il est également
important de maintenir propre le pourtour de la boîte de
vitesses de l'entraînement.
• Retirer le carter de protection en desserrant les vis.
• Nettoyer la boîte de vitesses à l'aide d'une brosse.
Contrôler également que la courroie d'entraînement
et la poulie de la courroie ne présentent pas de
dommages (fissures, etc.).
32 – French
• Ajuster la courroie en déplaçant le roulement vers le
haut ou vers le bas.
• Aprés quelques heures dutilisation, la courroie est
détendue. Il est alors nécessaire de procéder à un
nouveau réglage de la courroie.
• Fixer le carter de courroie et tester la machine.
Page 33
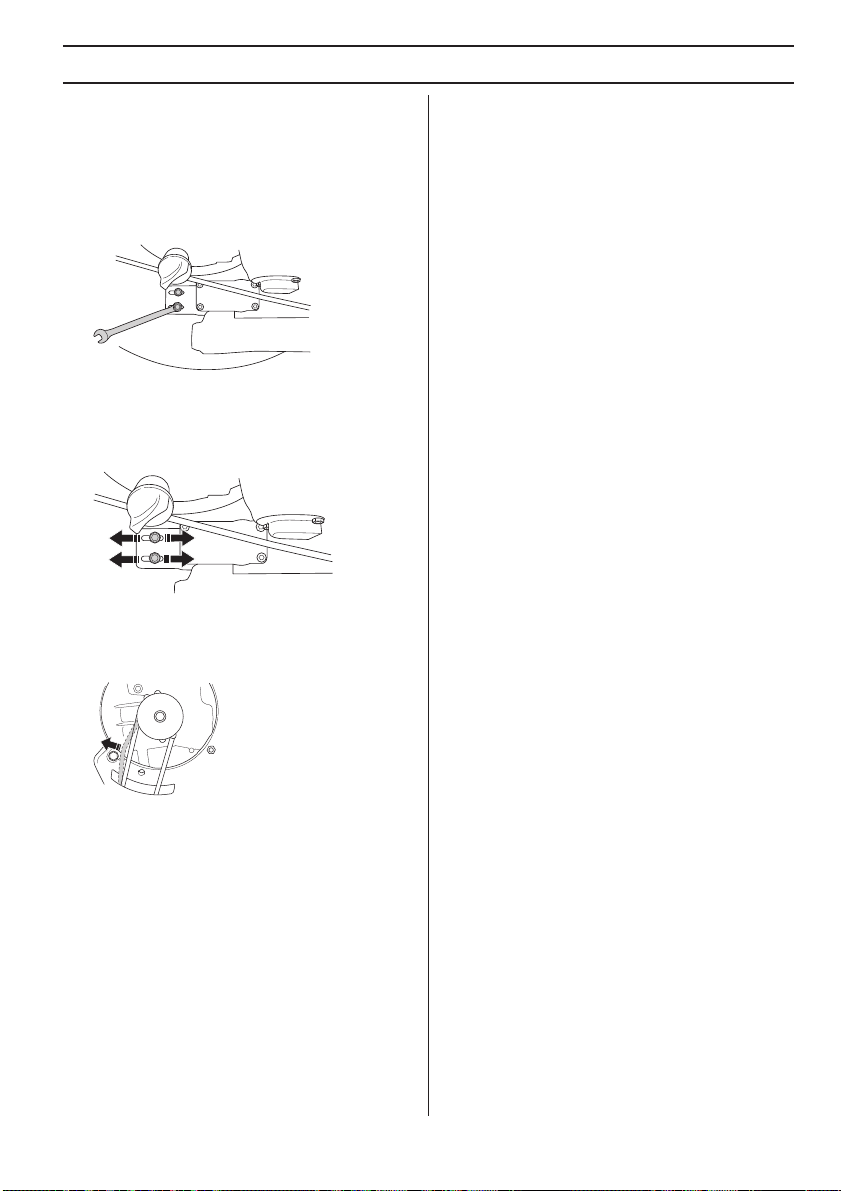
ENTRETIEN
Remplacement et réglage de la courroie intermédiaire.
La courroie intermédiaire court entre l'arbre du moteur et
la boîte de vitesses.
• Retirer le couteau. (uniquement en cas de
remplacement de la courroie)
• Dévisser les vis de réglage de quelques tours.
• Remplacer la courroie par une nouvelle et serrer
légèrement les vis de réglage. (uniquement en cas de
remplacement de la courroie)
• Ajuster la courroie en bougeant le réducteur vers
l'avant ou l'arrière.
• La courroie doit être tendue de façon à pouvoir fléchir
de 6-10 mm au centre. Cela correspond à une force
de traction d'environ 3 kg. Pour le contrôle, il convient
d'utiliser une balance.
• Serrer les vis de réglage comme il se doit. (3 Nm)
• Contrôler la fonction d'entraînement dans la mesure
où le réglage du réducteur influe sur la tension de la
courroie dans la boîte de vitesses.
Nettoyage
Ne pas utiliser de nettoyeur haute pression pour le
nettoyage de la machine.
Ne jamais arroser le moteur d'eau.
Lors du nettoyage sous le carter de coupe, placer la
machine avec la bougie tournée vers le haut. Vidanger le
réservoir d’essence.
Recherche de pannes
Si le moteur ne démarre pas, vérifier les points suivants :
• Changer l'essence contre de l'essence propre
nouvelle.
• Vérifier que le robinet d'essence est bien ouvert.
• Contrôler que l'étrier du frein moteur fonctionne
correctement et est intact.
• Nettoyer la bougie. Vérifier que l'écartement des
électrodes est de 0,7-0,8 mm.
• Vérifiez le filtre à air et nettoyez-le si nécessaire.
• Si le moteur devait ne pas démarrer pour l'une de ces
raisons, il convient de prendre contact avec l'atelier de
réparation agréé le plus proche.
• Si les résultats de coupe ne sont pas satisfaisants et
si l'herbe n'est pas coupée nettement, remplacer la
coupe.
Nous donnons ici quelques conseils d’entretien à
caractère général.
Entretien quotidien
1 Contrôler que l'étrier du frein moteur fonctionne en
toute sécurité.
2 Brosser la tondeuse pour retirer feuilles, herbe, etc.
3 Nettoyer la prise d’air du lanceur. Contrôler le lanceur
et sa corde.
4 Contrôler le niveau d’huile.
5 Nettoyer le filtre à air. Le remplacer si nécessaire.
6 S’assurer que toutes les vis et tous les écrous sont
bien serrés.
7 Vérifier l’équipement de coupe. Ne jamais utiliser des
couteaux émoussés, craquelés ou abîmés.
Entretien hebdomadaire
1 Nettoyer la bougie. Vérifier que l'écartement des
électrodes est de 0,7-0,8 mm.
2 Nettoyer les ailettes de refroidissement du cylindre.
Entretien mensuel
1 Contrôler que la courroie d'entraînement est intacte et
ne présente pas de défauts.
2 Nettoyer la boîte de vitesses.
3 Contrôler le filtre à carburant et le tuyau à carburant.
Remplacer au besoin.
4 Nettoyer l’intérieur du réservoir d’essence.
5 Graisser la commande d’entraînement.
6 Vidanger l'huile du moteur.
7 Inspectez le câble d’embrayage. Voir les instructions
au chapitre Montage.
French – 33
Page 34

CARACTÉRISTIQUES TECHNIQUES
Caractéristiques techniques
LB448S LB548S e
Moteur
Fabricant du moteur Honda Honda
Cylindrée, cm
Régime, rpm 2900 2900
Puissance nominale moteur, en kW (voir remarque 1) 2,8 2,8
Système d’allumage
Bougie NGK - BPR5ES NGK - BPR5ES
Écartement des électrodes, mm 0,7 - 0,8 0,7 - 0,8
Système de graissage/de carburant
Contenance du réservoir de carburant, litres 0,9 0,9
Contenance du réservoir d’huile, litres 0,55 0,55
Huile moteur
Poids
Tondeuse avec réservoirs vides, kg 31 33
Émissions sonores (voir remarque 2)
Niveau de puissance sonore mesuré dB(A) 92 90
Niveau de puissance sonore garanti dB(A) 93 92
Niveau sonore (voir remarque 3)
Niveau de pression acoustique au niveau des oreilles
de l’utilisateur, dB(A)
Niveaux de vibrations (voir remarque 4)
Niveau de vibrations au niveau des poignées, m/s24,5 4,8
Équipement de coupe
Système de coupe BioClip BioClip
Hauteur de coupe 30-60 30-60
Largeur de coupe, mm 48 48
Couteau Mulcher, 48 cm Mulcher, 48 cm
Numéro d’article 5028813-10 5028813-10
Entraînement
Vitesse, km/h 4,5 4,5
Remarque 1: La puissance nominale du moteur indiquée est la puissance nette moyenne (à un régime en tr/min spécifié)
d'un moteur de production typique pour le modèle de moteur mesuré selon la norme SAE J1349/ISO1585. Cette valeur
peut différer pour les moteurs de production de masse. La puissance effective du moteur installé sur la machine finale
dépendra de la vitesse de fonctionnement, des conditions environnementales et d'autres valeurs. Remarque 2:
Émission sonore dans l’environnement mesurée comme puissance acoustique (L
Remarque 3: Niveau de pression sonore conformément à EN ISO 5395. Les données reportées pour le niveau de
pression sonore montrent une dispersion statistique typique (déviation standard) de 1,2 dB (A). Remarque 4: Niveau de
vibrations conformément à EN ISO 5395. Les données reportées pour le niveau de vibrations montrent une dispersion
statistique typique (déviation standard) de 0,2 m/s
3
160 160
Service classification SG SH; SAE 10W -30
79 77
2
.
Service classification SG SH; SAE 10W -30
) selon la directive UE 2000/14/CE.
WA
34 – French
Page 35

CARACTÉRISTIQUES TECHNIQUES
Déclaration CE de conformité
(Concerne seulement l’Europe)
Husqvarna AB, SE-561 82 Huskvarna, Suède, tél.: +46-36-146500, déclarons que les tondeuses à gazon à moteur
Husqvarna LB448S et LB548S e
dispositions des DIRECTIVES DU CONSEIL:
du 17 mai 2006 ”directive machines” 2006/42/CE.
du 26 février 2014 ”compatibilité électromagnétique” 2014/30/UE.
du 8 mai 2000 ”émissions sonores dans l’environnement” 2000/14/CE.
Pour des informations sur les émissions sonores, voir le chapitre Caractéristiques techniques.
Les normes harmonisées suivantes ont été appliquées: ISO 5395, ISO 11094, EN 55012.
L’organisme notifié: 0404, SMP Svensk Maskinprovning AB, Box 7035, SE-750 07 Uppsala, a établi un rapport
d’évaluation de conformité, selon l’annexe VI de la DIRECTIVE 2000/14/CE DU CONSEIL du 8 mai 2000 concernant
les émissions sonores dans l’environnement.
Huskvarna, le 6 juillet 2015.
Claes Losdal, Directeur du développement/Produits pour le jardin
(Représentant autorisé d’Husqvarna AB et responsable de la documentation technique.)
à partir des numéros de série 15XXXXX et ultérieurement sont conformes aux
French – 35
Page 36

VERKLARING VAN DE SYMBOLEN
!
!
Symbolen op de machine:
WAARSCHUWING! Wanneer de
machine onjuist of slordig wordt
gebruikt, kan het een gevaarlijk
gereedschap zijn, dat ernstig letsel of
overlijden van de gebruiker of anderen
kan veroorzaken.
Neem de gebruiksaanwijzing grondig
door en gebruik de machine niet voor
u alles duidelijk heeft begrepen.
Waarschuwing voor weggeslingerde
en afgeketste voorwerpen.
Hou onbevoegden uit het
werkgebied.
Voorkom onbedoeld starten door de
ontstekingskabel uit de bougie te
verwijderen.
Waarschuwing voor draaiende
messen. Let op uw handen en voeten.
Toelichting op de waarschuwingsniveaus
De waarschuwingen zijn onderverdeeld in drie niveaus.
WAARSCHUWING!
WAARSCHUWING! Wordt gebruikt indien
er een risico bestaat op ernstig of fataal
letsel voor de gebruiker of schade aan de
omgeving wanneer de instructies in de
handleiding niet worden gevolgd.
VOORZICHTIG!
VOORZICHTIG! Wordt gebruikt indien er
een risico bestaat op letsel voor de
gebruiker of schade aan de omgeving
wanneer de instructies in de handleiding
niet worden gevolgd.
LET OP!
LET OP! Wordt gebruikt indien er een risico bestaat op
schade aan materialen of de machine wanneer de
instructies in de handleiding niet worden gevolgd.
Zorg ervoor dat uw handen en voeten
niet bij de snijuitrusting komen als de
motor draait.
Dit product voldoet aan de geldende
CE-richtlijnen.
Geluidsemissie naar de omgeving
volgens de richtlijnen van de Europese
Gemeenschap. De emissie van de
machine wordt aangegeven in het
hoofdstuk Technische gegevens en op
plaatjes.
36 – Dutch
Page 37

INHOUD
Inhoud
VERKLARING VAN DE SYMBOLEN
Symbolen op de machine: .................................... 36
Toelichting op de waarschuwingsniveaus ............. 36
INHOUD
Inhoud .................................................................. 37
PRESENTATIE
Beste klant! ........................................................... 38
Maatregelen voor het gebruik van een nieuwe
grasmaaier ...........................................................
WAT IS WAT?
Wat is wat op de grasmaaier? .............................. 39
VEILIGHEIDSUITRUSTING VOOR DE MACHINE
Algemeen ............................................................. 40
Maaikap en beschermkap .................................... 40
Motorrembeugel ................................................... 40
Trillingdempingssysteem ...................................... 40
Geluiddemper ....................................................... 41
Snijuitrusting ......................................................... 41
MONTEREN
Stuur monteren ..................................................... 42
De koppelingskabel afstellen ............................... 42
Demonteren en monteren van mesblad ............... 42
Montage van de mulchpluggen ............................ 43
BRANDSTOFHANTERING
Algemeen ............................................................. 44
Brandstof .............................................................. 44
Tanken .................................................................. 44
Transport en opbergen ......................................... 44
VEILIGHEIDSINSTRUCTIES
Persoonlijke bescherming .................................... 45
Algemene veiligheidsinstructies ........................... 45
Basistechniek ....................................................... 46
Transport en opbergen ......................................... 46
BEDIENING
Instelling van maaihoogte ..................................... 47
Starten en stoppen ............................................... 47
ONDERHOUD
Onderhoud ........................................................... 48
Luchtfilter .............................................................. 48
Bougie .................................................................. 48
Geluiddemper ....................................................... 48
Mes ....................................................................... 48
Olie verversen ...................................................... 48
Aandrijving en versnellingsbak ............................. 49
Schoonmaken ...................................................... 50
Opsporen van storingen ....................................... 50
Dagelijks onderhoud ............................................. 50
Wekelijks onderhoud ............................................ 50
Maandelijks onderhoud ......................................... 50
TECHNISCHE GEGEVENS
Technische gegevens ........................................... 51
EG-verklaring van overeenstemming .................... 52
38
Dutch – 37
Page 38

PRESENTATIE
!
!
!
Beste klant!
Gefeliciteerd met de aankoop van een Husqvarnaproduct! Husqvarna heeft een geschiedenis die
terugvoert tot 1689 toen koning Karl XI aan het strand van
het riviertje Huskvarna een fabriek liet bouwen voor de
productie van musketten. De locatie aan de Huskvarna
was logisch omdat het riviertje werd gebruikt om
waterkracht op te wekken en op die manier een
waterkrachtcentrale vormde. In de meer dan 300 jaar van
het bestaan van de Husqvarna-fabriek zijn ontelbare
producten geproduceerd, van houtfornuizen tot moderne
keukenmachines, naaimachines, fietsen, motorfietsen
enz. In 1956 werd de eerste motormaaier geïntroduceerd,
die in 1959 werd gevolgd door een motorkettingzaag. Het
is op dit terrein dat Husqvarna tegenwoordig actief is.
Husqvarna is heden ten dage een van de meest
vooraanstaande producenten ter wereld van producten
voor bos en tuin met kwaliteit en prestatie als de hoogste
prioriteit. De missie is het ontwikkelen, produceren en op
de markt brengen van gemotoriseerde producten voor
bos- en tuinbouw en de bouw- en constructie-industrie.
Het doel van Husqvarna is ook voorop te lopen met
betrekking tot ergonomie, gebruikersvriendelijkheid,
veiligheid en milieubewustzijn. Daarom is een grote
hoeveelheid verschillende snufjes ontwikkeld om de
producten op deze terreinen te verbeteren.
We zijn ervan overtuigd dat u de kwaliteit en prestaties
van ons product gedurende een lange periode naar volle
tevredenheid zult waarderen. Door de aankoop van één
van onze producten krijgt u de beschikking over
professionele hulp bij reparaties en service mocht er toch
iets gebeuren. Wanneer u de machine niet heeft gekocht
bij een van onze erkende dealers, kunt u hen vragen naar
de dichtstbijzijnde servicewerkplaats.
Wij hopen dat u tevreden zult zijn met uw machine en dat
deze u gedurende lange tijd zal vergezellen. Denk erom
dat deze gebruiksaanwijzing een waardevol document is.
Door de inhoud (gebruik, service, onderhoud enz.) te
volgen kunt u de levensduur van uw machine én de
tweedehands waarde aanzienlijk verlengen. Mocht u uw
machine verkopen moet u ervoor zorgen de
gebruiksaanwijzing aan de nieuwe eigenaar over te
dragen.
Hartelijk dank voor het feit dat u een Husqvarna-product
gebruikt!
Husqvarna AB werkt voortdurend aan het verder
ontwikkelen van haar producten en houdt zich dan ook
het recht voor om zonder aankondiging vooraf wijzigingen
in o.a. vorm en uiterlijk door te voeren.
Maatregelen voor het gebruik van een nieuwe grasmaaier
• Lees de gebruiksaanwijzing aandachtig.
• Controleer de montage en de afstelling van de
snijuitrusting. Zie de instructies in het hoofdstuk
Monteren.
• Tank en vul olie bij in de motor. Een tank met een
voldoende hoeveelheid olie wordt met de machine
meegeleverd. Zie de instructies onder de kop
brandstofhantering.
WAARSCHUWING! De oorspronkelijke
vormgeving van de machine mag in geen
enkel geval gewijzigd worden zonder
toestemming van de fabrikant. Men moet
altijd originele onderdelen gebruiken.
Niet goedgekeurde wijzigingen en/of
niet-originele onderdelen kunnen tot
ernstige verwondingen of de dood van
zowel gebruiker als omstanders leiden.
WAARSCHUWING! Een grasmaaier kan
bij verkeerd of slordig gebruik een
gevaarlijk gereedschap zijn, dat ernstige,
zelfs levensbedreigende, verwondingen
kan veroorzaken Het is zeer belangrijk
dat u de inhoud van deze
gebruiksaanwijzing doorleest en
begrijpt.
WAARSCHUWING! Langdurige
inademing van de uitlaatgassen van de
motor kan een gezondheidsrisico
vormen.
Husqvarna AB werkt voortdurend aan het verder
ontwikkelen van haar producten en houdt zich dan ook
het recht voor om zonder aankondiging vooraf wijzigingen
in o.a. vorm en uiterlijk door te voeren.
38 – Dutch
Page 39

WAT IS WAT?
LB548S eLB448S
1
2
4
5
6
7
Wat is wat op de grasmaaier?
1 Handgreep/stuur
2 Motorrembeugel
3 Koppelingshendel
4 Starthendel
5 Olietank
6 Riembescherming
7 Geluiddemper
8 Bougie
9 Riembescherming
10 Brandstoftank
11 Handvat hoekafstelling
12 Trillingsdemper
22
3
13
212019
11
10
13
12
14
8
9
15
16
17
18
24
23
13 De koppelingskabel afstellen
14 Onderste stuur
15 Maaihoogtehendel
16 Benzinekraan
17 Luchtfilter
18 Maaikap
19 Veerring
20 Mesbout
21 Mes/snijuitrusting
22 Meshouder
23 Mulchplug
24 Gebruiksaanwijzing
Dutch – 39
Page 40

VEILIGHEIDSUITRUSTING VOOR DE MACHINE
!
Algemeen
In dit hoofdstuk wordt verklaard wat de
veiligheidsonderdelen van de machine zijn, welke functie
ze hebben en hoe de controle en het onderhoud moeten
uitgevoerd worden om hun goede werking veilig te stellen.
Bekijk het hoofdstuk Wat is wat? om te zien waar deze
onderdelen zich bevinden op uw machine.
WAARSCHUWING! Gebruik de machine
nooit wanneer de veiligheidsuitrusting
!
defect is. De veiligheidsuitrusting van de
machine moet gecontrolleerd en
onderhouden worden zoals beschreven
in dit hofdstuk. Als uw machine niet door
alle controles komt, moet u ermee naar
uw servicewerkplaats voor reparatie.
WAARSCHUWING! Gebruik nooit een
machine als de veiligheidsonderdelen
!
kapot zijn. Volg de controle-,
onderhouds- en service-instructies die in
dit hoofdstuk beschreven worden.
Maaikap en beschermkap
De maaikap is geconstrueerd om trillingen te reduceren
en het risico van snijwonden te verminderen. Controleer
of de maaikap heel en zonder zichbare defecten, bijv.
scheuren in het materiaal, is.
De beschermkap is geconstrueerd om het risico van
letsel door beknelling te verminderen en om een
gebroken aandrijfriem op te vangen. Controleer of de
beschermkap heel is en of hij goed vastgeschroefd is.
Motorrembeugel
De motorrem is ontworpen om de motor te stoppen.
Wanneer u de handgreep van de motorrembeugel loslaat,
moet de motor stoppen.
Controleer het motorblok op de volgende manier.
Geef volgas en laat de rembeugel vervolgens los. De
motor moet dan afslaan en de aandrijving moet
uitgeschakeld worden.
De motorrem moet altijd zo afgesteld zijn dat de motor
binnen 3 seconden start.
Trillingdempingssysteem
Uw machine is uitgerust met een trillingdempingssysteem
dat geconstrueerd is om zo trillingvrij en comfortabel
mogelijk met de zaag te kunnen werken.
De stalen buizen van het handvatsysteem en de maaikap
zijn ontworpen om de trillingen van de motor te stoppen.
Het trillingdempingssysteem van de machine reduceert
het overbrengen van de trillingen van de motoreenheid/
snijuitrusting op de handvateenheid van de machine.
LB448S Dit model wordt ook geleverd met 4
trillingsdempers gemonteerd op de handgreepeenheid,
zodat de trillingen nog verder worden gereduceerd.
40 – Dutch
Controleer of de handgrepen en trillingsisolatoren niet
beschadigd zijn.
WAARSCHUWING! Als men teveel wordt
blootgesteld aan trillingen, kan dit tot
bloedvat- en zenuwbeschadigingen
leiden bij personen die een slechte
bloedcirculatie hebben. Consulteer uw
dokter wanneer u symptomen heeft die
daarop wijzen. Zulke symptomen zijn:
slapende vingers e.d., geen gevoel,
”kriebelend” gevoel, ”speldeprikken”,
pijn, geen of weinig kracht,
huidverkleuringen of veranderingen van
het huidoppervlak. Deze symptomen
hebben meestal betrekking op vingers,
handen of polsen.
Page 41

VEILIGHEIDSUITRUSTING VOOR DE MACHINE
Geluiddemper
De geluiddemper werd ontworpen om het geluidsniveau
zo laag mogelijk te houden, en om de uitlaatgassen weg
te richten van de gebruiker.
WAARSCHUWING! De uitlaatgassen van
de motor zijn heet en kunnen vonken
!
bevatten die brand kunnen veroorzaken.
Start de machine daarom nooit
binnenshuis of in de buurt van licht
ontvlambaar materiaal! Tijdens het
gebruik en een tijdje daarna is de
geluiddemper erg warm. Raak de
geluiddemper niet aan wanneer hij warm
is!
Gebruik de machine nooit wanneer de geluiddemper
defect is.
Controleer regelmatig of de geluiddemper vastzit in de
machine.
Snijuitrusting
Voorkom dat het mes tegen vreemde voorwerpen slaat
zoals stenen, wortels of iets dergelijks. Dit kan ertoe
leiden dat het mes bot wordt en dat de motoras krom
wordt.
Controleer de snijuitrusting op beschadigingen en
barsten. Een beschadigde snijuitrusting moet altijd
vervangen worden. Let goed op dat u altijd een goed
geslepen en correct gebalanceerd mes hebt.
Controleer ook of de mesbout heel en de motoras niet
krom is.
Dutch – 41
Page 42

MONTEREN
!
Stuur monteren
Wanneer u het stuur inklapt, moet u voorzichtig zijn om
geen leidingen en kabels te beschadigen.
Het bovendeel van het stuur wordt met een sterke
handgreepmoer vastgezet aan de scharnierende plaat.
Vergeet niet de ring tussen de plaat en de
handgreepmoer te plaatsen.
Indien gewenst kan de handgreep iets naar opzij worden
gedraaid met behulp van het handgreepscharnier. De
handgreep kan op verschillende standen worden
ingesteld om de beste rijhouding te verkrijgen,
bijvoorbeeld als u vlakbij een heg of een muur maait.
De handgreep kan ook in hoogte worden versteld door te
draaien aan de knoppen bij de bevestigingen op het
chassis.
De koppelingskabel afstellen
De koppelingskabel moet na de eerste 8 bedrijfsuren
worden afgesteld en daarna enkel indien nodig.
De kabel is correct afgesteld wanneer de kabelsteun in
één lijn staat met de moer.
• Stel de kabel af met behulp van de stelschroef. Draai
de schroef rechtsom of linksom om de kabel te
verlengen dan wel in te korten.
Demonteren en monteren van mesblad
WAARSCHUWING! Gebruik altijd sterke
handschoenen bij service en onderhoud
van de snijuitrusting. De messen zijn
zeer scherp en snijwonden kunnen
makkelijk ontstaan.
De ontstekingskabel moet altijd worden losgemaakt van
de bougie voor reparatie, schoonmaken of
onderhoudswerkzaamheden.
Plaats de maaier met de bougie omhoog wanneer u
onderhoudswerkzaamheden aan de machine uitvoert.
Leeg altijd de brandstoftank voordat u de grasmaaier op
zijn zij legt.
Demonteren
• Schroef de bout los waarmee het mes vastzit.
• Verwijder de bout, veerring en het mes.
42 – Dutch
Page 43

MONTEREN
Monteren
Het blad moet zodanig worden gemonteerd dat de
schuine uiteinden omhoog wijzen in de richting van de
kap.
• Plaats het mes met de glijring tegen de meshouder
aan.
• Zorg ervoor dat het mes goed gecentreerd boven de
as wordt geplaatst.
BELANGRIJK!
Wees altijd voorzichtig en gebruik uw gezond verstand.
Vermijd situaties die uw capaciteiten te boven gaan. Als
u na het lezen van deze instructies nog vragen hebt over
de bedieningsprocedures dient u een expert te
raadplegen voordat u verder gaat. Neem contact op met
een erkende servicedealer.
Er moeten altijd originele reserve-onderdelen worden
gebruikt. Zie de sectie "Technische gegevens" voor
meer informatie.
Montage van de mulchpluggen
• Haal de bougiekabel van de bougie.
• Plaats de maaier met de bougie omhoog wanneer u
onderhoudswerkzaamheden aan de machine
uitvoert.
• Breng de zoekpennen aan in de gaten in het
maaideksel.
• Bevestig de mulchpluggen vanaf de bovenkant van
het maaideksel.
• Om trillingen te vermijden moet het mes zo worden
geplaatst dat de markering van de meshouder boven
de zijkant van het mes te zien is.
• Monteer de ring en schroef de bout goed vast. De
bout moet worden vastgezet met een moment van 70
Nm.
Dutch – 43
Page 44

BRANDSTOFHANTERING
!
Algemeen
WAARSCHUWING! Een motor laten
lopen in een afgesloten of slecht
!
geventileerde ruimte kan dodelijke
ongelukken veroorzaken door
verstikking of koolmonoxidevergiftiging.
Brandstof en brandstofdampen zijn zeer
brandgevaarlijk en kunnen leiden tot
ernstig letsel bij inademing en contact
met de huid. Wees daarom voorzichtig
wanneer u met brandstof werkt en zorg
voor goede luchtventilatie bij de
brandstofhantering.
De uitlaatgassen van de motor zijn heet
en kunnen vonken bevatten die brand
kunnen veroorzaken. Start de machine
daarom nooit binnenshuis of in de buurt
van licht ontvlambaar materiaal!
Rook niet en plaats ook geen warm
voorwerp in de buurt van de brandstof.
Brandstof
LET OP! De machine heeft een viertaktmotor. Zorg
ervoor dat er altijd voldoende olie in de olietank zit.
Benzine
• Gebruik loodvrije of gelode benzine van een hoge
kwaliteit.
• Het aanbevolen laagste octaangehalte is 90 (RON).
Indien u de motor laat lopen op benzine met een lager
octaangehalte dan 90, kan het zogenaamde kloppen
optreden. Hierdoor stijgt de motortemperatuur wat tot
zware motorbeschadigingen kan leiden.
• Waar milieuvriendelijke benzine, de zog.
alkylaatbenzine, verkrijgbaar is, moet deze gebruikt
worden.
Motorolie
LET OP! Controleer het oliepeil voordat de grasmaaier
wordt gestart. Een te laag oliepeil kan ernstige
beschadigingen aan de motor veroorzaken.
• Zie de instructies in het hoofdstuk "Onderhoud".
• De motorolie moet de eerste keer vervangen worden
na 5 uur bedrijfstijd. Zie Technische gegevens voor
informatie over het aanbevolen type olie. Gebruik
nooit olie bedoeld voor tweetaktmotoren.
Tanken
WAARSCHUWING! Stop de motor en laat
hem voor het tanken enkele minuten
afkoelen. Zorg dat de motor is
uitgeschakeld en dat de stopschakelaar
in de STOP-stand staat.
Gebruik altijd een benzinekan om
morsen te voorkomen.
Open de dop van de tank voorzichtig
wanneer u wilt tanken zodat eventuele
overdruk langzaam verdwijnt.
Maak de omgeving rond de tankdop
schoon.
Draai de dop van de tank goed vast na
het tanken. Door nalatigheid kan er
brand ontstaan.
Verplaats de machine ten minste 3 m van
de tankplaats voor u de motor start.
Start de machine nooit:
• Indien u brandstof of motorolie op de machine hebt
gemorst. Droog alles af en laat de benzineresten
verdampen.
• Als u brandstof op uzelf of op uw kleding gemorst
heeft, trek schone kleding aan. Was de lichaamsdelen
die in contact zijn geweest met brandstof. Gebruik
water en zeep.
• Als de machine brandstof lekt. Controleer de tankdop
en de brandstofleidingen regelmatig op lekkage.
Transport en opbergen
• Bewaar en vervoer de machine en brandstof zo, dat
eventuele lekkage en dampen niet in contact kunnen
komen met vonken of open vuur, bijvoorbeeld van
elektrische machines, elektrische motoren,
stopcontacten/schakelaars, verwarmingsketels e.d.
• Bij opslag en vervoer van brandstof moeten altijd
speciaal voor dat doel bestemde en goedgekeurde
tanks worden gebruikt.
Opslag voor lange tijd
• Als de machine gedurende lange tijd niet gebruikt zal
worden, moet de brandstoftank leeggemaakt worden.
Vraag bij uw tankstation of bij de gemeente waar u de
afgetapte brandstof kwijt kan.
44 – Dutch
Page 45

VEILIGHEIDSINSTRUCTIES
!
!
Persoonlijke bescherming
WAARSCHUWING! Bij al het gebruik van
de machine moet persoonlijke
!
bescherming worden gebruikt.
• Draag handschoenen indien nodig, b.v. wanneer u de
snijuitrusting monteert, inspecteert of schoonmaakt.
• Gebruik altijd een stevige lange broek. Draag geen
korte broek of sandalen en loop niet op blote voeten.
• Gebruik slipvaste en stevige laarzen of schoenen.
Verder moet de kleding goed aansluiten zonder u in uw
bewegingen te belemmeren.
Algemene veiligheidsinstructies
In dit hoofdstuk worden de basisveiligheidsregels voor het
gebruik van de machine behandeld. De gegeven
informatie kan nooit de kennis vervangen die een vakman
via opleidingen en praktische ervaring heeft verworven.
• Neem de gebruiksaanwijzing grondig door en gebruik
de machine niet voor u alles duidelijk heeft begrepen.
• Denk erom dat de operator verantwoordelijk is voor
ongelukken of beschadigingen van andere mensen of
hun eigendommen.
• Houd de machine schoon. Aanduidingen en stickers
moeten volledig leesbaar zijn.
Gebruik altijd uw gezond verstand
Het is niet mogelijk om elke mogelijk situatie te
vermelden. Wees altijd voorzichtig en gebruik uw gezond
verstand. Vermijd situaties die uw capaciteiten te boven
gaan. Als u na het lezen van deze instructies nog vragen
hebt over de bedieningsprocedures dient u een expert te
raadplegen voordat u verder gaat. Wend u tot uw dealer,
uw servicewerkplaats of een ervaren gebruiker. Gebruik
de machine nooit voor taken waarvoor u niet voldoende
gekwalificeerd bent.
WAARSCHUWING! Deze machine
produceert tijdens bedrijf een
!
elektromagnetisch veld. Dit veld kan
onder bepaalde omstandigheden de
werking van actieve of passieve
medische implantaten verstoren. Om het
risico op ernstig of fataal letsel te
beperken, raden we personen met een
medisch implantaat aan om contact op te
nemen met hun arts en de fabrikant van
het medische implantaat voordat ze deze
machine gaan bedienen.
WAARSCHUWING! Wanneer de machine
onjuist of slordig wordt gebruikt, kan het
een gevaarlijk gereedschap zijn, dat
ernstig letsel of overlijden van de
gebruiker of anderen kan veroorzaken.
Laat kinderen of andere personen die
niet zijn opgeleid om met de machine om
te gaan, deze nooit gebruiken of
onderhouden.
De machine mag niet worden gebruikt
door personen met lichamelijke of
geestelijke beperkingen of door
personen die om gezondheidsredenen
niet geschikt zijn om de machine te
bedienen, tenzij onder toezicht van een
persoon die verantwoordelijk is voor hun
veiligheid.
Laat nooit een ander de machine
gebruiken zonder u ervan te verzekeren
dat ze de inhoud van de
gebruiksaanwijzing hebben begrepen.
Gebruik de machine nooit als u moe
bent, alcohol heeft gedronken of
medicijnen heeft ingenomen die uw
gezichtsvermogen,
beoordelingsvermogen of
coördinatievermogen negatief
beïnvloeden.
WAARSCHUWING! Niet goedgekeurde
wijzigingen en/of niet-originele
onderdelen kunnen tot ernstige
verwondingen of het overlijden van
zowel gebruiker of anderen leiden. De
oorspronkelijke vormgeving van de
machine mag in geen enkel geval
gewijzigd worden zonder toestemming
van de fabrikant.
Wijzig deze machine nooit zo dat hij niet
langer overeenstemt met de originele
uitvoering, en gebruik de machine niet
als u denkt dat anderen hem hebben
gewijzigd.
Gebruik nooit een machine die defect is.
Voer de in deze handleiding beschreven
veiligheidscontroles en de onderhoudsen service-instructies uit. Bepaalde
onderhouds- en servicemaatregelen
moeten door opgeleide en
gekwalificeerde specialisten worden
uitgevoerd. Zie de instructies in het
hoofdstuk Onderhoud.
Men moet altijd originele onderdelen
gebruiken.
Dutch – 45
Page 46

VEILIGHEIDSINSTRUCTIES
Veiligheid op de werkplek
• Voordat u begint met maaien moeten takken, stenen
enz. van het gazon worden verwijderd.
• Voorwerpen die tegen de snijuitrusting botsen kunnen
worden weggeslingerd en schade aanrichten aan
mensen en andere voorwerpen. Houd mensen en
dieren op afstand.
• Gebruik de machine nooit bij slecht weer, zoals mist,
regen, op vochtige of natte plekken, bij krachtige wind,
strenge kou, kans op blikseminslag enz. Werken in
slechte weersomstandigheden is vermoeiend en kan
tot gevaarlijke situaties leiden, zoals een gladde
ondergrond.
• Houd uw omgeving in de gaten om ervoor te zorgen
dat u de macht over de machine niet verliest door
onverwachte gebeurtenissen.
• Let goed op wortels, stenen, twijgen, putten, sloten
enz. Hoog gras kan hindernissen verbergen.
• Het maaien van hellingen kan gevaarlijk zijn. Gebruik
de grasmaaier niet op zeer steile hellingen. De
grasmaaier mag niet worden gebruikt op een helling
van meer dan 15 graden.
• Op hellend terrein moet u de paden loodrecht ten
opzichte van de helling laten lopen. Het is veel
makkelijker om dwars over een helling te lopen dan op
en neer.
• Wees voorzichtig wanneer u in de buurt komt van
onoverzichtelijke bochten en voorwerpen die uw zicht
kunnen belemmeren.
Werkveiligheid
• Een grasmaaier is alleen geconstrueerd voor het
maaien van gazons. Alle overige gebruik is niet
toegestaan.
• Draag altijd persoonlijke veiligheidsuitrusting. Zie
instructies in het hoofdstuk ”Persoonlijke
veiligheidsuitrusting”.
• Start de grasmaaier niet zonder dat mes en alle
kappen zijn gemonteerd. Het mes kan anders
losraken en persoonlijk letsel veroorzaken.
• Voorkom dat het mes tegen vreemde voorwerpen
slaat zoals stenen, wortels of iets dergelijks. Dit kan
ertoe leiden dat het mes bot wordt en dat de motoras
krom wordt. Een kromme as zorgt voor onbalans en
sterke trillingen, hetgeen leidt tot een groot risico van
het losraken van het mes.
• De rembeugel mag nooit permanent in de handgreep
verankerd zijn, wanneer de machine loopt.
• Plaats de grasmaaier op een stabiele ondergrond en
start hem. Zorg ervoor dat het mes niet in contact kan
komen met de grond of een ander voorwerp.
• Ga altijd achter de machine staan. Laat alle wielen op
de grond en houd beide handen op de handgreep
tijdens het maaien. Houd uw handen en voeten uit de
buurt van de draaiende bladen.
• Kantel de machine niet terwijl de motor draait.
• U dient uitsluitend met de machine te lopen, en nooit
te rennen.
• Let vooral ook op wanneer u de machine tijdens de
werkzaamheden naar u toe trekt.
• Til de grasmaaier nooit op en draag deze niet
wanneer de motor is gestart. Indien u de grasmaaier
moet optillen, moet u eerst de motor stoppen en de
ontstekingskabel van de bougie halen.
• Maai het gazon niet terwijl u achteruitloopt.
• De motor moet worden uitgezet bij verplaatsing over
terrein dat niet moet worden gemaaid. Bijvoorbeeld
paden, steen, grind, asfalt enz.
• Zet de motor uit voordat u de maaihoogte wijzigt. Voer
nooit afstellingen uit terwijl de motor draait.
• Laat de machine nooit zonder toezicht met draaiende
motor achter. Zet de motor uit. Controleer of de
snijuitrusting is gestopt met draaien.
• Als er een voorwerp geraakt wordt of er trillingen
ontstaan, moet u de machine stoppen. Haal de
bougiekabel van de bougie. Controleer of de machine
niet beschadigd is. Repareer eventuele
beschadigingen.
Basistechniek
• Maai altijd met een scherp blad, voor optimaal
resultaat. Een bot blad levert ongelijkmatig
maairesultaat op, en het gras vergeelt waar het is
afgemaaid.
• Maai nooit meer dan 1/3 van de lengte van het gras.
Dit geldt vooral in periodes van droogte. Maai eerst op
een grote maaihoogte. Controleer daarna het
resultaat en ga naar een geschikte hoogte. Indien het
gras extra lang is, moet u langzaam rijden en
eventueel twee keer maaien.
• Maai elke keer in een andere richting, om het ontstaan
van strepen in het gazon te voorkomen.
• Schakel, voordat u de machine naar u toe trekt, de
aandrijving uit en duw de machine ca. 10 cm naar
voren.
• Zorg ervoor dat de aandrijving is uitgeschakeld zodra
u een obstakel nadert.
Transport en opbergen
• Zet de apparatuur tijdens vervoer goed vast om
transportschade en ongelukken te voorkomen.
• Sla de apparatuur op in een afsluitbare ruimte zodat
het buiten het bereik is van kinderen en onbevoegde
personen.
• Berg de machine en bijbehorende apparatuur op in
een droge en vorstvrije ruimte.
• Zie het hoofdstuk "Brandstofhantering" voor
informatie over het vervoer en opslaan van brandstof.
46 – Dutch
Page 47

BEDIENING
!
Instelling van maaihoogte
BELANGRIJK! Zet de motor uit voordat u de
maaihoogte wijzigt.
Het instellen van de maaihoogte werkt veerondersteund.
De maaihoogte kan op 6 verschillende standen worden
ingesteld.
Stel de maaihoogte niet te laag af, omdat dan het risico
bestaat dat de messen bij onregelmatigheden in de aarde
lopen.
• Breng de hendel naar links en dan naar voren om een
hogere maaihoogte te krijgen.
• Breng de hendel naar links en dan naar achteren om
een lagere maaihoogte te krijgen.
Starten en stoppen
WAARSCHUWING! Voor het starten moet u
rekening houden met de volgende punten:
Start de grasmaaier niet zonder dat mes
en alle kappen zijn gemonteerd. Het mes
kan anders losraken en persoonlijk letsel
veroorzaken.
Haal de machine altijd weg van de
tankplaats en -bron voordat u hem start.
Plaats de machine op een vaste
ondergrond. Let erop dat de
snijuitrusting geen voorwerp kan raken.
Hou onbevoegden uit het werkgebied.
Zorg ervoor dat de ontstekingskabel goed op de bougie
zit.
Starten
• Open de benzinekraan.
• Trek de motorrembeugel met uw linkerhand helemaal
naar de bovenste handgreep.
• Pak de starthendel beet, trek met uw rechterhand het
starterkoord langzaam uit tot u weerstand voelt (de
starthaken grijpen in) en maak vervolgens snelle en
krachtige trekbewegingen.
Wikkel het startkoord nooit rond uw hand.
N.B.! Trek het starterkoord niet volledig uit en laat de
starthendel niet zomaar los wanneer het volledig
uitgetrokken is. Dit kan tot beschadigingen van de
machine leiden.
Aandrijving
Om de aandrijving te gebruiken schuift u de
koppelingshendel naar voren.
Stoppen
• De motor wordt gestopt door de motorrembeugel los
te laten. De aandrijving wordt ook uitgeschakeld, als
men de rembeugel loslaat. Alleen de aandrijving kan
worden uitgeschakeld door de remhendel iets
omhoog te lichten.
• Draai de benzinekraan dicht.
Dutch – 47
Page 48

ONDERHOUD
!
Onderhoud
WAARSCHUWING! Vóór reinigen,
repareren of inspecteren moet u erop
!
letten dat de snijuitrusting gestopt is.
Haal de startkabel van de bougie.
Houd er rekening mee dat de aandrijfriemen zich zullen
stellen tijdens de eerste inloopperiode (5u). Het kan nodig
zijn om de spanning aan te passen. Zie instructies:
Luchtfilter
Het luchtfilter dient regelmatig te worden schoongemaakt
(stof en vuil verwijderen) om de volgende problemen te
vermijden:
• Storingen van de carburateur.
• Moeilijkheden bij het starten.
• Vermogensverlies.
• Onnodige slijtage van de motoronderdelen.
• Abnormaal hoog brandstofverbruik
Maak het filter dagelijks of vaker schoon wanneer u in een
stoffige atmosfeer werkt.
Het luchtfilter wordt gedemonteerd nadat de luchtfilterkap
eraf is getild. Druk de vergrendelingen op de bovenkant
van de luchtfilterkap in en klap de kap naar beneden.
Verwijder het luchtfilter en controleer of het heel is.
Vervang door een nieuw luchtfilter wanneer u merkt dat
het gebreken vertoont.
Maak het filter schoon door het filter voorzichtig tegen een
hard oppervlak te kloppen en met perslucht aan de
binnenkant schoon te blazen. Borstel het vuil nooit weg.
Vervang het luchtfilter als het zeer vuil is.
Na een lange gebruiksperiode kan het luchtfilter niet meer
worden gereinigd. Daarom moet het filter regelmatig
vervangen worden.
altijd vervangen worden.
Bij montage moet u ervoor zorgen dat het luchtfilter
helemaal aansluit op de filterhouder.
Bougie
!
Wanneer de machine te weinig vermogen heeft, moeilijk
start of onregelmatig onbelast draait, dient u altijd eerst
de bougie te controleren voor u andere maatregelen
neemt. Maak de bougie schoon als ze verstopt is en
controleer of de afstand tussen de elektroden 0,7-0,8 mm
bedraagt. De bougie moet na een maand gebruik, of
eerder indien nodig, vervangen worden.
Een beschadigd luchtfilter moet
WAARSCHUWING! Tijdens het gebruik
en een tijdje daarna is de geluiddemper
erg warm. Raak de geluiddemper niet
aan wanneer hij warm is!
N.B.! Gebruik steeds het correcte bougietype! Andere
types kunnen de zuiger/cilinder beschadigen.
Geluiddemper
De geluiddemper is ontworpen om het geluid van de
machine te reduceren, en om de uitlaatgassen van de
gebruiker weg te richten. De uitlaatgassen zijn zeer heet
en bevatten vonken die droge en ontvlambare materialen
in brand kunnen steken.
Controleer regelmatig of de geluiddemper vastzit in de
machine. Gebruik de machine nooit wanneer de
geluiddemper defect is.
Mes
WAARSCHUWING! Draag altijd stevige
handschoenen bij het repareren van de
snijuitrusting. De messen zijn uiterst
scherp en kunnen al snel snijwonden
veroorzaken.
Het is belangrijk om een scherp en correct gebalanceerd
mes te hebben. Maak de bout los waarmee het mes
vastzit en lever het mes ten minste een keer per jaar in bij
een servicewerkplaats voor slijpen en balanceren. Een
geschikt tijdstip hiervoor is het einde van het
maaiseizoen.
Als mes of meshouder moeten worden vervangen, moet
u tegelijkertijd de mesbout, ring en glijveer vervangen.
Wanneer u het mes weer monteerd, moet de bout worden
vastgezet met een moment van 45-60 Nm. Zie de
instructies in het hoofdstuk Monteren.
Wanneer het mes vreemde voorwerpen zoals stenen,
wortels en dergelijke raakt, slaat het mes tegen de
meshouder. Daarom kan het oppervlak van de
meshouder er wat versleten uit zien, wat verder oké is. Dit
is een veiligheidsvoorziening die het risico vermindert dat
de motoras krom wordt.
Olie verversen
De motorolie moet de eerste keer vervangen worden na 5
uur bedrijfstijd.
De motorolie moet ieder jaar en om de 25 bedrijfsuren
worden ververst.
Ga als volgt te werk om olie te verversen:
• Haal de bougiekabel van de bougie.
• Leeg de brandstoftank.
• Draai de benzinekraan dicht.
48 – Dutch
Page 49

ONDERHOUD
• Schroef het olievuldeksel eraf.
Plaats een geschikt vat om de olie in op te vangen.
• Tap de olie af door de motor te kantelen zodat de olie
uit de vulbuis loopt.
• Vraag het dichtstbijzijnde benzinestation waar u het
teveel aan motorolie kunt laten.
• Vul bij met nieuwe motorolie van goede kwaliteit. Zie
hoofdstuk Technische gegevens.
• Doe de peilstok vervolgens weer in het gat, zonder
hem in te schroeven.
peilstok op het olievuldeksel. Is het oliepeil laag, vult
u bij met motorolie tot het bovenste niveau op de
peilstok.
Controleer het oliepeil met de
Vervanging en afstelling van V-snaar.
• Verwijder de beschermkap door de bouten weg te
schroeven.
• Verwijder de naafdop van het voorwiel bij de
versnellingsbak door deze voorzichtig met een
schroevendraaier los te wrikken. Verwijder de
borgschroef en vervolgens het wiel.
• Verwijder de riem van de poelie. Controleer of de
poelies gemakkelijk op de as draaien en zo niet, spuit
roestoplossende olie tussen en achter de schroeven
en smeer een beetje vet op de as.
• Leg de nieuwe riem erop en zorg ervoor dat deze
goed ligt ten opzichte van het kogellager voordat u de
riem afstelt.
• Schroef het olievuldeksel vast.
Aandrijving en versnellingsbak
Zorg ervoor dat wielen en wielassen schoon en vrij van
blad, gras enz. zijn. Het is belangrijk om het rond de
versnellingsbak naar de aandrijving schoon te houden.
• Verwijder de beschermkap door de bouten weg te
schroeven.
• Maak de versnellingsbak schoon met een borstel.
Controleer ook of de aandrijfriem en de poelie vrij zijn
van defecten zoals bijvoorbeeld barsten.
• Stel de riem af door het kogellager op of neer te
bewegen.
• Een nieuwe riem zal nog uitrekken en langer worden.
Stel de riem daarom opnieuw af na enkele rijuren.
• Monteer de riembescherming en test de machine.
Dutch – 49
Page 50

ONDERHOUD
Vervanging en afstelling van tussenriem.
De tussenriem loopt tussen de motoras en de
versnellingsbak.
• Verwijder het mes. (alleen bij vervanging van riem)
• Schroef de afstelschroeven enkele slagen omhoog.
• Vervang de riem door een nieuwe en draai de
stelschroeven iets aan. (alleen bij vervanging van
riem)
• Stel de riem af door de versnelling naar voren of naar
achteren te bewegen.
• De riem moet zo worden aangespannen dat deze 610 mm naar het midden toe kan worden bewogen. Dit
vertegenwoordigt een draagvermogen van ongeveer
3 kg. U kunt een visloodje gebruiken om dit te
controleren.
• Draai de stelschroeven goed vast. (3 Nm)
• Controleer de aandrijvingsfunctie, aangezien de
afstelling van de versnelling de riemspanning in de
versnellingsbak beïnvloedt.
Schoonmaken
Gebruik geen hogedrukspuit om de machine te reinigen.
Gooi nooit water direct op de motor.
Draai de machine met de bougie naar boven, als u onder
de maaikap schoonmaakt. Maak de benzinetank leeg.
Opsporen van storingen
Als de motor niet start, neemt u de volgende
maatregelen:
• Vervang de benzine door schone benzine.
• Controleer of de benzinekraan open staat.
• Controleer of de motorrem goed werkt en
onbeschadigd is.
• Maak de bougie schoon. Controleer of de
elektrodenafstand 0,7-0,8 mm bedraagt.
• Controleer het luchtfilter en reinig het zo nodig.
• Start de motor na deze maatregelen nog steeds niet,
neem dan contact op met de dichtstbijzijnde erkende
servicewerkplaats.
• Als het maairesultaat onvoldoende is en de
grassprieten een rafelig snijvlak vertonen, moet het
maaimes worden vervangen.
Hieronder worden algemene
onderhoudsvoorschriften opgesomd.
Dagelijks onderhoud
1 Controleer of de motormesbeugel werkt uit
veiligheidsoogpunt.
2 Borstel de grasmaaier schoon en verwijder bald, gras
en dergelijke.
3 Maak de luchtinlaat van de starter schoon. Controleer
de starter en het starterkoord.
4 Controleer het oliepeil.
5 Maak het luchtfilter schoon. Vervang het indien nodig.
6 Controleer of de bouten en moeren en vastgedraaid
zijn.
7 Controleer de snijuitrusting. Gebruik nooit botte,
gebarsten of beschadigde messen.
Wekelijks onderhoud
1 Maak de bougie schoon. Controleer of de
elektrodenafstand 0,7-0,8 mm bedraagt.
2 Maak de koelflenzen op de cilinder schoon.
Maandelijks onderhoud
1 Controleer of de aandrijfriem heel en zonder zichtbare
defecten is.
2 Maak de versnellingsbak schoon.
3 Controleer het brandstoffilter en de
brandstofleidingen. Vervang indien nodig.
4 Maak de buitenkant van de brandstoftank schoon.
5 Smeer de aandrijfhendel.
6 Ververs de motorolie.
7 Inspecteer de koppelingskabel. Zie de instructies in
het hoofdstuk Monteren.
50 – Dutch
Page 51

TECHNISCHE GEGEVENS
Technische gegevens
LB448S LB548S e
Motor
Motorfabrikant Honda Honda
Cilinderinhoud, cm
Toerental, rpm 2900 2900
Nominaal uitgangsvermogen motor, kW (zie
opmerking 1)
Ontstekingssysteem
Bougie NGK - BPR5ES NGK - BPR5ES
Elektrodenafstand, mm 0,7 - 0,8 0,7 - 0,8
Brandstof-/smeersysteem
Inhoud benzinetank, liter 0,9 0,9
Inhoud olietank, liter 0,55 0,55
Motorolie
Gewicht
Grasmaaier met lege tanks, kg 31 33
Lawaai-emissie (zie opm. 2)
Geluidsvermogen, gemeten dB(A) 92 90
Geluidsvermogen, gegarandeerd dB(A) 93 92
Geluidsniveau (zie opm. 3)
Niveau geluidsdruk bij het oor van de gebruiker,dB(A) 79 77
Trillingsniveau (zie opm. 4)
Trillingsniveaus in handvat, m/s
Snijuitrusting
Maaisysteem BioClip BioClip
Maaihoogte 30-60 30-60
Maaibreedte, mm 48 48
Mes Mulcher, 48 cm Mulcher, 48 cm
Item 5028813-10 5028813-10
Aandrijving
Snelheid, km/h 4,5 4,5
Opm. 1: Het aangegeven nominale vermogen van de motor heeft betrekking op het gemiddelde nettovermogen (bij het
opgegeven toerental) van een typische productiemotor voor het betreffende motormodel, gemeten volgens de SAEnorm J1349/ISO 1585. In massa geproduceerde motoren kunnen een afwijkende waarde geven. Het werkelijk geleverde
vermogen van de geïnstalleerde motor op de uiteindelijke machine hangt af van de bedrijfssnelheid, de
omgevingscondities en andere waarden. Opm. 2: Emissie van geluid naar de omgeving gemeten als geluidsvermogen
(L
) volgens EG-richtlijn 2000/14/EG. Opm. 3: Geluidsdrukniveau volgens EN ISO 5395. De gerapporteerde gegevens
WA
voor het geluidsdrukniveau vertonen een typische statistische spreiding (standaardafwijking) van 1,2 dB (A). Opm. 4:
Trillingsniveau volgens EN ISO 5395. De gerapporteerde gegevens voor het trillingsniveau vertonen een typische
statistische spreiding (standaardafwijking) van 0,2 m/s
3
2
160 160
2,8 2,8
Service classification SG SH; SAE 10W -30
4,5 4,8
2
.
Service classification SG SH; SAE 10W -30
Dutch – 51
Page 52

TECHNISCHE GEGEVENS
EG-verklaring van overeenstemming
(Alleen geldig voor Europa)
Husqvarna AB, SE-561 82 Huskvarna, Zweden, tel: +46-36-146500, verklaart hiermee dat de motormaaiers
Husqvarna LB448S en LB548S e
RICHTLIJNEN VAN DE RAAD:
van 17 mei 2006 "betreffende machines" 2006/42/EG.
van 26 februari 2014 ”betreffende elektromagnetische compatibiliteit” 2014/30/EU.
van 8 mei 2000 ”betreffende geluidsemissie door materieel voor gebruik buitenshuis” 2000/14/EG.
Voor informatie betreffende lawaaiemissies, zie hoofdstuk Technische gegevens.
De volgende normen zijn van toepassing: ISO 5395, ISO 11094, EN 55012.
Aangemelde instantie: 0404, SMP Svensk Maskinprovning AB, Box 7035, SE-750 07 Uppsala, heeft rapporten
opgesteld inzake een beoordeling van de overeenstemming met bijlage VI van Richtlijn 2000/14/EG van de Raad van 8
mei 2000 betreffende "de geluidsemissie door materieel voor gebruik buitenshuis".
Huskvarna, 6 juli 2015.
Claes Losdal, Manager R/Tuinproducten
(erkende vertegenwoordiger voor Husqvarna AB en verantwoordelijk voor technische documentatie.)
vanaf serienummer 15XXXXX en verder overeenkomen met de voorschriften in de
52 – Dutch
Page 53

SIMBOLOGIA
!
!
I simboli sulla macchina:
AVVERTENZA! Se utilizzata in modo
improprio o non corretto, la macchina
può essere un attrezzo pericoloso in
grado di provocare gravi lesioni o
morte dell’operatore , o di altre
persone.
Prima di usare la macchina, leggere
per intero le istruzioni per l’uso e
accertarsi di averne compreso il
contenuto.
Pericolo di proiezione di oggetti e
particelle.
Osservare che non vi siano non
addetti ai lavori nelle vicinanze.
Prevenire la messa in funzione
accidentale rimuovendo il cavo di
accensione dalla candela.
Attenzione al coltello in rotazione.
Attenzione a mani e piedi.
Spiegazione dei livelli di avvertenza
Le avvertenze sono suddivise in tre livelli.
AVVERTENZA!
AVVERTENZA! Utilizzato se è presente
un rischio di gravi lesioni, morte
dell'operatore oppure danni all'ambiente
circostante nel caso in cui le istruzioni
del manuale non vengano rispettate.
ATTENZIONE!
ATTENZIONE! Utilizzato se è presente un
rischio di lesioni per l'operatore oppure
danni all'ambiente circostante nel caso
in cui le istruzioni del manuale non
vengano rispettate.
NOTA!
NOTA! Utilizzato se è presente un rischio di danni ai
materiali oppure alla macchina nel caso in cui le
istruzioni del manuale non vengano rispettate.
Accertarsi che mani e piedi non
tocchino il gruppo di taglio a motore
acceso.
Il presente prodotto è conforme alle
vigenti direttive CEE.
Emissioni di rumore nell’ambiente in
base alla direttiva della Comunità
Europea. L’emissione della macchina è
indicata al capitolo Dati tecnici e sulla
decalcomania.
Italian – 53
Page 54

INDICE
Indice
SIMBOLOGIA
I simboli sulla macchina: ....................................... 53
Spiegazione dei livelli di avvertenza ..................... 53
INDICE
Indice .................................................................... 54
PRESENTAZIONE
Alla gentile clientela .............................................. 55
Interventi prima di usare un nuovo rasaerba ........ 55
CHE COSA C’È?
Che cosa c'è nel rasaerba? .................................. 56
DISPOSITIVI DI SICUREZZA DELLA
MACCHINA
Generalità ............................................................. 57
Carter del gruppo di taglio e scocca di protezione 57
Manopola del freno del motore ............................. 57
Sistema di smorzamento delle vibrazioni ............. 57
Marmitta ................................................................ 58
Attrezzatura di taglio ............................................. 58
MONTAGGIO
Montaggio del manubrio ....................................... 59
Regolazione del filo di frizione ............................. 59
Smontaggio e montaggio della lama del coltello .. 59
Montaggio delle prese del mulcher ....................... 60
OPERAZIONI CON IL CARBURANTE
Generalità ............................................................. 61
Carburante ............................................................ 61
Rifornimento ......................................................... 61
Trasporto e rimessaggio ....................................... 61
NORME DI SICUREZZA
Protezione personale ............................................ 62
Norme generali di sicurezza ................................. 62
Tecnica fondamentale di lavoro ............................ 63
Trasporto e rimessaggio ....................................... 63
FUNZIONAMENTO
Regolazione dell’altezza di taglio .......................... 64
Avviamento e arresto ............................................ 64
MANUTENZIONE
Manutenzione ....................................................... 65
Filtro dell’aria ........................................................ 65
Candela ................................................................ 65
Marmitta ................................................................ 65
Coltello .................................................................. 65
Cambio dell'olio .................................................... 65
Trasmissione e scatola del cambio ....................... 66
Pulizia ................................................................... 67
Ricerca dei guasti ................................................. 67
Manutenzione giornaliera ..................................... 67
Manutenzione settimanale .................................... 67
Manutenzione mensile ......................................... 67
CARATTERISTICHE TECNICHE
Caratteristiche tecniche ........................................ 68
Dichiarazione di conformità CE ............................ 69
54 – Italian
Page 55

PRESENTAZIONE
!
!
!
Alla gentile clientela
Congratulazioni per aver scelto di acquistare un prodotto
Husqvarna! Le origini della Husqvarna risalgono al 1689
quando il re Karl XI fece costruire una fabbrica sulle rive
del fiume Huskvarnaån per la produzione di moschetti. La
posizione sul fiume Huskvarnaån è spiegata dal fatto che
il fiume veniva usato per produrre energia,
rappresentando così una vera e propria centrale
idroelettrica. Durante gli oltre 300 anni della sua
esistenza, l'azienda Husqvarna ha fabbricato
innumerevoli prodotti, dalle stufe a legna fino ai moderni
elettrodomestici, dalle macchine da cucire alle biciclette e
alle motociclette. Nel 1956 venne lanciato il primo
rasaerba a motore, seguito dalla motosega nel 1959 ed è
proprio questo il settore di competenza odierno della
Husqvarna.
La Husqvarna è oggi uno dei leader mondiali nella
produzione di articoli per giardinaggio e silvicultura, con
qualità e prestazioni come priorità assoluta. L'idea
commerciale si basa sullo sviluppo, la produzione e la
commercializzazione di prodotti a motore destinati a
giardinaggio e silvicultura ed anche al settore edilizio e a
quello dell'installazione di impianti. La Husqvarna vuole
inoltre essere all'avanguardia per quanto concerne
l'ergonomia, le esigenze dell'operatore, la sicurezza e il
rispetto dell'ambiente, motivi per cui sono state introdotte
una serie di innovazioni tecnologiche al fine di migliorare
i prodotti da questi punti di vista.
Siamo convinti che sarete pienamente soddisfatti della
qualità e delle prestazioni del nostro prodotto per un
lungo tempo a venire. L'acquisto di uno dei nostri prodotti
vi garantisce l'accesso alla competenza di personale
qualificato per l'assistenza e le riparazioni in caso di
necessità. Se non avete acquistato la macchina presso
uno dei nostri rivenditori autorizzati, rivolgetevi alla più
vicina officina di assistenza.
Ci auguriamo che rimarrete soddisfatti della vostra
macchina e speriamo di potervi servire per molto tempo
in futuro. Non dimenticate che questo manuale delle
istruzioni è un documento di valore. Seguendone il
contenuto (uso, assistenza, manutenzione ecc.) potrete
aumentare notevolmente la durata della vostra macchina
e anche il suo valore di usato. Se vendete la macchina,
ricordate di consegnare il manuale delle istruzioni al
nuovo proprietario.
La ringraziamo per aver scelto un prodotto Husqvarna.
La Husqvarna AB procede costantemente allo sviluppo
dei propri prodotti e si riserva quindi il diritto di apportare,
senza alcun preavviso, modifiche riguardanti fra l’altro la
forma e l’aspetto esteriore.
Interventi prima di usare un nuovo rasaerba
• Leggere accuratamente le istruzioni per l’uso.
• Controllare il montaggio e la messa a punto
dell’attrezzatura di taglio. Vedi istruzioni alla voce
Montaggio.
• Far rifornimento di carburante e rabboccare l'olio del
motore. Alla consegna troverete in dotazione un
contenitore con una quantità d'olio sufficiente. Vedi
istruzioni alla voce Operazioni con il carburante.
AVVERTENZA! Evitare assolutamente di
modificare la versione originale della
macchina senza l’autorizzazione del
fabbricante. Usare sempre accessori
originali. Modifiche e/o accessori non
autorizzati possono causare lesioni gravi
o mortali all’operatore o a terzi.
AVVERTENZA! Se utilizzato in modo
improprio o non corretto, il rasaerba può
essere un attrezzo pericoloso, in grado
di provocare lesioni gravi e persino
mortali all’utilizzatore o a terzi. È
importantissimo leggere attentamente e
capire queste istruzioni per l'uso.
AVVERTENZA! L'aspirazione prolungata
dei gas di scarico del motore può essere
pericolosa per la salute.
La Husqvarna AB procede costantemente allo sviluppo
dei propri prodotti e si riserva quindi il diritto di apportare,
senza alcun preavviso, modifiche riguardanti fra l’altro la
forma e l’aspetto esteriore.
Italian – 55
Page 56

CHE COSA C’È?
LB548S eLB448S
1
2
3
4
5
6
7
Che cosa c'è nel rasaerba?
1 Impugnatura /manubrio
2 Manopola del freno del motore
3 Leva della frizione
4 Maniglia di avviamento
5 Serbatoio dell'olio
6 Protezione della cinghia
7 Marmitta
8 Candela
9 Protezione della cinghia
10 Serbatoio carburante
11 Impugnatura regolazione angolatura
12 Ammortizzatori
13
22
212019
11
13
12
10
14
8
9
15
16
17
18
24
23
13 Regolazione del filo di frizione
14 Manubrio inferiore
15 Regolazione dell'altezza di taglio
16 Rubinetto benzina
17 Filtro dell’aria
18 Carter del gruppo di taglio
19 Rondella elastica
20 Bullone del coltello
21 Coltello/gruppo di taglio
22 Attacco del coltello
23 Tassello di pacciamatura
24 Istruzioni per l’uso
56 – Italian
Page 57

DISPOSITIVI DI SICUREZZA DELLA MACCHINA
!
Generalità
In questo capitolo vengono presentati i dispositivi di
sicurezza della macchina, la loro funzione, il controllo e la
manutenzione necessari per assicurarne una funzione
ottimale. Vedi al capitolo Che cosa c’è?, per individuare la
posizione di questi componenti sulla macchina.
AVVERTENZA! Non usare mai una
macchina con dispositivi di sicurezza
!
guasti. Questi dispositivi vanno
controllati e sottoposti a manutenzione
secondo quanto descritto in questo
capitolo. Se la macchina non supera tutti
i controlli, contattare un’officina per le
necessarie riparazioni.
AVVERTENZA! Non usare mai una
macchina con dispositivi di sicurezza
!
difettosi. Seguire le istruzioni per il
controllo, la manutenzione e il servizio.
Carter del gruppo di taglio e scocca di protezione
Il carter del gruppo di taglio è concepito per ridurre le
vibrazioni e per ridurre il rischio di ferite da taglio.
Controllare che il carter del gruppo di taglio sia integro e
che non presenti difetti visibili, ad esempio incrinature del
materiale.
La scocca di protezione è concepita per ridurre il rischio
di intrappolarsi e per estrarre la cinghia di trasmissione in
caso di rottura. Controllare che la scoca di protezione sia
integra e che sia ben avvitata.
Manopola del freno del motore
Il freno del motore è concepito per arrestare il motore.
Rilasciando la presa della manopola il motore deve
arrestarsi.
Controllare il freno motore nel seguente modo:
Accelerare a fondo e rilasciare quindi il dispositivo del
freno. Il motore deve fermarsi e la trasmissione
disinserirsi.
Il freno del motore deve sempre essere regolato in modo
che il motore si arresti entro 3 secondi.
Sistema di smorzamento delle vibrazioni
Il sistema di smorzamento delle vibrazioni adottato,
elimina la maggior parte delle vibrazioni che si sviluppano
durante l’uso della macchina.
Il tubo in acciaio del sistema delle impugnature e il carter
del gruppo di taglio sono costruiti in modo da ridurre al
minimo le vibrazioni provenienti dal motore.
Il sistema di smorzamento delle vibrazioni della macchina
ne riduce la propagazione tra gruppo motore/gruppo di
taglio e impugnature.
LB448S Questo modello dispone anche di 4 smorzatori
inseriti nel corpo della maniglia per ridurre ulteriormente
le vibrazioni
Controllare che le impugnature e gli elementi
antivibrazioni non siano danneggiati.
AVVERTENZA! L’esposizione eccessiva
alle vibrazioni può causare lesioni neurovascolari a chi soffre di disturbi
circolatori. In caso di sintomi riferibili ad
un’esposizione eccessiva alle vibrazioni,
contattare il medico. Tali sintomi
possono essere torpore, perdita della
sensibilità, punture, prurito, dolore,
riduzione o perdita della forza,
decolorazioni della pelle o modifiche
strutturali della sua superficie. tali
sintomi si riscontrano soprattutto nelle
mani, nei polsi e alle dita.
Italian – 57
Page 58

DISPOSITIVI DI SICUREZZA DELLA MACCHINA
Marmitta
La marmitta è costruita in modo da assicurare il minimo
livello di rumorosità e da allotanare i gas di scarico del
motore dall’operatore.
AVVERTENZA! I gas di scarico del
motore sono molto caldi e possono
!
contenere scintille in grado di provocare
incendi. Non avviare mai la macchina in
ambienti chiusi o vicino a materiale
infiammabile! La marmitta rimane molto
calda anche dopo aver spento il motore.
Non toccare la marmitta se è ancora
calda!
Non usare mai la macchina se la marmitta è in cattive
condizioni.
Controllare con regolarità che la marmitta sia ben fissa
nella macchina.
Attrezzatura di taglio
Evitare che il coltello colpisca corpi estranei, ad esempio
radici o simili. Questo può comportare una perdita di
affilatura del coltello e il piegamento dell'albero motore.
Controllare il gruppo di taglio per individuare danni o
incrinature. Un gruppo di taglio danneggiato dev’essere
sostituito. Accertarsi che il coltello sia sempre ben affilato
e ben equilibrato.
Controllare inoltre che il bullone del coltello sia integro e
che l'albero motore non sia piegato.
58 – Italian
Page 59

MONTAGGIO
!
Montaggio del manubrio
Richiudendo il manubrio, fare attenzione a a non
danneggiare cavi e fili.
La parte superiore del manubrio è fissata con un robusto
dado a ruota sulla piastra del deflettore. Non dimenticare
la rondella fra la piastra e il dado a ruota.
Se necessario, il manubrio può essere girato
leggermente di fianco mediante l'apposito snodo. Il
manubrio può essere regolato su diverse posizioni in
modo da ottenere la migliore posizione di guida, ad es.
quando si taglia in prossimità di siepi o recinzioni.
Il cavo è regolato correttamente quando la staffa del cavo
è allineata al dado.
• Per regolare il cavo, usare la vite di regolazione.
Girare la vite in senso orario o antiorario per allungare
o accorciare il cavo.
Smontaggio e montaggio della lama del coltello
AVVERTENZA! Usare sempre dei guanti
robusti durante le operazioni di
assistenza e manutenzione del gruppo di
taglio. I coltelli sono molto taglienti e ci
si può ferire facilmente.
Il manubrio può anche essere regolato in verticale
girando le ruote presso il punto di fissaggio sul telaio
Regolazione del filo di frizione
Il cavo della frizione deve essere regolato dopo le prime 8
ore di funzionamento e successivamente secondo
necessità.
Staccare sempre il cavo di accensione dalla candela
prima di qualsiasi operazione di riparazione, pulizia o
manutenzione.
Durante la manutenzione della macchina posizionare la
taglierina con la candela rivolta verso l’alto.
Vuotare sempre il serbatoio del carburante prima di
appoggiare il rasaerba su un lato.
Smontaggio
• Svitare il bullone che fissa il coltello.
• Togliere il bullone, la rondella elastica e il tagliente.
Italian – 59
Page 60

MONTAGGIO
Montaggio
La lama deve essere montata con le estremità ad angolo
rivolte verso il coperchio.
• Mettere il tagliente con la rondella di frizione contro la
staffa del tagliente.
• Assicurarsi che il tagliente sia correttamente centrato
sull'albero.
• Per evitare vibrazioni, mettere il tagliente del rasaerba
in modo che il segno sulla staffa del tagliente sia
visibile sui lati del tagliente stesso.
IMPORTANTE!
Prestare sempre attenzione e usare il buon senso.
Evitate tutte le situazioni che ritenete essere superiori
alle vostre capacità. Se dopo aver letto le presenti
istruzioni avete ancora dubbi in merito alle procedure
operative, rivolgetevi a un esperto prima di continuare.
Contattare il rivenditore autorizzato per l'assistenza.
Usare sempre ricambi originali. Per ulteriori
informazioni, consultare la sezione "Dati tecnici".
Montaggio delle prese del mulcher
• Se corpi estranei rimangono impigliati nelle lame
mentre l’utensile di taglio è in funzione, spegnere il
motore ed attendere che l’utensile di taglio si sia
arrestato completamente prima di pulire le lame.
Staccare il cavo dalla candela.
• Durante la manutenzione della macchina posizionare
la taglierina con la candela rivolta verso l’alto.
• Infilare i perni di guida nei fori sul coperchio di taglio.
• Fissare le prese del mulcher dalla parte superiore del
coperchio di taglio.
• Montare la rondella e avvitare bene il bullone. Serrare
il bullone con una coppia di 60 Nm.
60 – Italian
Page 61

OPERAZIONI CON IL CARBURANTE
!
Generalità
AVVERTENZA! Un motore acceso in un
ambiente chiuso o mal ventilato può
!
essere causa di morte per soffocamento
o avvelenamento da monossido di
carbonio.
Il carburante e i vapori tossici sono
altamente infiammabili e la loro
inalazione o il contatto cutaneo possono
provocare gravi lesioni. Agire dunque
con cautela maneggiando il carburante e
assicurare una buona ventilazione
dell'ambiente durante l'operazione.
I gas di scarico del motore sono molto
caldi e possono contenere scintille in
grado di provocare incendi. Non avviare
mai la macchina in ambienti chiusi o
vicino a materiale infiammabile!
Non fumare né collocare oggetti caldi
nelle vicinanze del carburante.
Carburante
NOTA! La macchina è dotata di motore a quattro tempi.
Accertarsi che ci sia sempre olio a sufficienza nel
serbatoio dell'olio.
Benzina
• Usare benzina di buona qualità, con o senza piombo.
• Il numero minimo di ottani raccomandato è 90 (RON).
Se si utilizza una benzina con un numero di ottani
inferiore a 90, il motore può strappare. In tal caso la
temperatura del motore aumenta e possono
verificarsi gravi avarie.
• Usare nei casi in cui sia possibile una benzina
ecologica, la cosiddetta benzina alchilata.
Olio motore
NOTA! Controllare il livello dell'olio prima di avviare il
rasaerba. Un livello dell'olio troppo basso può provocare
seri danni al motore.
• Consultare le istruzioni nella sezione "Manutenzione".
• L’olio motore deve essere sostituito dopo le prime 5
ore. Fare riferimento ai dati tecnici per le indicazioni
del tipo di olio da utilizzare. Non usare mai olio per
motori a due tempi.
Rifornimento
AVVERTENZA! Spegnere il motore e
lasciarlo raffreddare alcuni minuti prima
del rifornimento. Il motore deve essere
spento e l'interruttore di arresto deve
essere in posizione di arresto (STOP).
Utilizzare sempre una latta di benzina per
evitare il rischio di sversamento.
Aprire il tappo del serbatoio con cautela,
per eliminare eventuali sovrappressioni.
Pulire intorno al tappo del serbatoio
carburante.
Dopo il rifornimento chiudere bene il
tappo. La negligenza potrebbe provocare
un incendio.
Prima di avviare la macchina spostarla di
almeno 3 metri dal luogo del
rifornimento.
Non accendere mai la macchina:
• Se avete versato del carburante o dell'olio per motore
sulla macchina: Asciugare il versato e lasciar
evaporare i residui di benzina.
• Se avete versato del carburante su voi stessi o sui
vostri abiti, cambiare abiti. Lavare le parti del corpo
che sono venute a contatto con il carburante. Usare
acqua e sapone.
• Se vi sono perdite di carburante nella macchina.
Controllare con regolarità la presenza di eventuali
perdite dal tappo del serbatoio o dai tubi di
alimentazione.
Trasporto e rimessaggio
• Il rimessaggio e il trasporto della macchina e del
carburante devono essere eseguiti in modo che
eventuali perdite o vapori non rischino di venire a
contatto con scintille o fiamme aperte, generate ad
esempio da macchine elettriche, motori elettrici,
contatti/interruttori o caldaie.
• Per il rimessaggio e il trasporto del carburante usare
recipienti adeguati ed omologati per tale scopo.
Lunghi periodi di rimessaggio
• In caso di rimessaggio della macchina per un periodo
prolungato il serbatoio del carburante va svuotato. Per
l’eliminazione dei resti inutilizzati di carburante
rivolgersi al più vicino distributore di benzina.
Italian – 61
Page 62

NORME DI SICUREZZA
!
!
Protezione personale
AVVERTENZA! Lavorando con la
macchina usare sempre protezione
!
personale.
• Usare i guanti in caso di necessità, ad esempio
durante il montaggio, il controllo o la pulizia del gruppo
di taglio.
• Usare sempre pantaloni lunghi robusti. Non indossare
pantaloni corti o sandali e non camminare a piedi
scalzi.
• Usare scarpe o stivali robusti e antisdrucciolo.
L’abbigliamento in generale deve essere tale da non
ostacolare la libertà di movimento.
Norme generali di sicurezza
Questa sezione elenca le norme basilari per un uso
sicuro della mototroncatrice per muri. Queste
informazioni non potranno mai sostituire la competenza di
un professionista, costituita sia da formazione
professionale che da esperienza pratica.
• Prima di usare la macchina, leggere per intero le
istruzioni per l’uso e accertarsi di averne compreso il
contenuto.
• Tenere presente che l’operatore è responsabile di
eventuali incidenti o pericoli per gli altri o le cose.
• La macchina deve rimanere pulita. I segnali e gli
adesivi devono essere interamente leggibili.
Impiegare sempre il buon senso
Non è possibile coprire tutte le situazioni immaginabili che
potreste affrontare. Prestare sempre attenzione e usare il
buon senso. Evitate tutte le situazioni che ritenete essere
superiori alle vostre capacità. Se dopo aver letto le
presenti istruzioni avete ancora dubbi in merito alle
procedure operative, rivolgetevi a un esperto prima di
continuare. Contattate il vostro rivenditore o un operatore
che abbia esperienza della macchina. Evitare qualsiasi
lavoro per il quale non ci si sente sufficientemente
qualificati.
AVVERTENZA! Questa macchina genera
un campo elettromagnetico durante il
!
funzionamento che in determinate
circostanze può interferire con impianti
medici attivi o passivi. Per ridurre il
rischio di gravi lesioni personali o
mortali, i portatori di tali impianti devono
consultare il proprio medico e il relativo
produttore prima di utilizzare la
macchina.
AVVERTENZA! Se utilizzata in modo
improprio o non corretto, la macchina
può essere un attrezzo pericoloso in
grado di provocare gravi lesioni o morte
dell’operatore , o di altre persone.
Non permettere mai a bambini o persone
non autorizzate di utilizzare o sottoporre
a manutenzione la macchina.
La macchina non deve essere utilizzata
da persone con capacità psicofisiche
ridotte o persone che, per motivi di
salute, non sono nella posizione di
poterla utilizzare senza la supervisione
di una persona responsabile della loro
sicurezza.
Non consentire mai ad altri l’utilizzo della
macchina senza accertarsi che abbiano
capito il contenuto del manuale di
istruzioni.
Non usare la macchina in condizioni di
stanchezza o sotto l’effetto si alcool o
medicinali in grado di compromettere il
vostro stato psichico e il controllo dei
vostri atti.
AVVERTENZA! Modifiche e/o utilizzo di
accessori non autorizzati possono
causare gravi lesioni e la morte
dell’operatore o altre persone. Evitare
assolutamente di modificare la versione
originale della macchina senza
l’autorizzazione del fabbricante.
Non modificare mai la macchina né
utilizzarla se sembra essere stata
modificata da altri.
Non usare mai una macchina difettosa.
Effettuare i controlli di sicurezza e
attenersi alle istruzioni di manutenzione
e riparazione riportate nel presente
manuale. Alcuni interventi devono
essere eseguiti da personale
specializzato. Vedere le istruzioni alla
sezione Manutenzione.
Usare sempre accessori originali.
62 – Italian
Page 63

NORME DI SICUREZZA
Sicurezza dell’area di lavoro
• Prima di iniziare le operazioni, ripulire il prato da rami,
ramoscelli, sassi ecc.
• Gli oggetti che urtano il gruppo di taglio potrebbero
essere proiettati e causare danni a cose e persone.
Tenere lontano da animali e persone.
• Non utilizzare mai la macchina in condizioni
meteorologiche sfavorevoli, ad esempio nebbia,
pioggia, umidità o luoghi molto umidi, vento forte,
freddo intenso, rischio di fulmini ecc. Lavorare nel
maltempo è faticoso e può creare situazioni di
pericolo, ad esempio un terreno sdrucciolevole.
• Osservare l'ambiente circostante per accertarsi che
non ci siano elementi che possano influire sul
controllo della macchina.
• Prestare attenzione a radici, pietre, rametti, fossi,
canali ecc. L’erba alta può nascondere ostacoli.
• La rasatura sui pendii può essere pericolosa. Non
usare il rasaerba sui tereni molto scoscesi. Non è
consigliabile usare il rasaerba su terreni con angolo di
pendenza superiore a 15 gradi.
• In caso di terreni in pendenza il percorso dovrebbe
essere ad angolo retto rispetto al pendio. È molto più
facile procedere trasversalmente su un pendio che in
salita e discesa.
• Prestare attenzione in prossimità di angoli e oggetti
nascosti, potrebbero ostacolare la visuale.
Sicurezza sul lavoro
• Il rasaerba è concepito esclusivamente per la rasatura
di superfici erbose. Non utilizzare la macchina per altri
scopi.
• Usare sempre abbigliamento protettivo. Vedi istruzioni
alla voce Abbigliamento protettivo.
• Non avviare mai il rasaerba prima di aver montato il
coltello e tutti i carter. Il coltello potrebbe staccarsi e
causare danni alle persone.
• Evitare che il coltello colpisca corpi estranei, ad
esempio radici o simili. Questo può comportare una
perdita di affilatura del coltello e il piegamento
dell'albero motore. Un albero piegato implica un
cattivo equilibrio e forti vibrazioni, il che comporta un
grave rischio che il coltello si stacchi.
• La manopola del freno non dev'essere mai fissata in
modo permanente all'impugnatura quando la
macchina è in funzione.
• Situare il rasaerba su una superficie piana e metterlo
in moto. Accertarsi che il coltello non venga a contatto
con il suolo o con corpi estranei.
• Posizionarsi sempre dietro la macchina. Consentire a
tutte le ruote di restare a contatto con il suolo e tenere
entrambe le mani sull'impugnatura durante il taglio.
Tenere le mani e i piedi lontani dai dischi rotanti.
• Non ribaltare la macchina a motore in moto.
• Camminare con la macchina, non correre.
• Prestare la massima attenzione nel tirare la macchina
verso di sé durante l’operazione.
• Non sollevare o trasportare mai un rasaerba con il
motore acceso. Se dovete sollevare il rasaerba,
spegnere prima il motore e staccare il cavo di
accensione dalla candela.
• Non tagliare il prato camminando all'indietro.
• Spegnere il motore in caso di spostamento della
macchina su un terreno che non dev'essere rasato.
Ad esempio vialetti ghiaiosi, pietre, sassi, asfalto ecc.
• Spegnere il motore prima di modificare l'altezza di
taglio. Non effettuare mai regolazioni a motore
acceso.
• Non lasciare mai la macchina incustodita a motore
acceso. Spegnere il motore. Verificare che il gruppo di
taglio non abbia smesso di ruotare.
• In caso di collisione con un oggetto o all’insorgere di
vibrazioni fermare la macchina. Togliere il cavo di
accensione dalla candela. Controllare che la
macchina non presenti danni. Riparare
eventualmente ogni danno riscontrato.
Tecnica fondamentale di lavoro
• Utilizzare sempre un disco affilato per ottenere
risultati ottimali. Un disco non tagliente è causa di un
taglio non uniforme e l'erba ingiallisce sulla superficie
di taglio.
• Non tagliare mai più di 1/3 della lunghezza dell'erba.
Questo vale particolarmente nei periodi di siccità.
Iniziare a tagliare con un'altezza di taglio elevata.
Controllare poi il risultato e regolare l'altezza in modo
adeguato. Se l'erba è particolarmente lunga, eseguire
l'operazione lentamente e ripeterla se necessario.
• Tagliare sempre in direzioni diverse per evitare il
formarsi di strisce sul prato.
• Prima di tirare la macchina verso di sé, disinnestare
l’azionamento e spingere la macchina in avanti di
circa 10 cm.
• Accertarsi di aver disinserito l’unità quando ci si
avvicina a un ostacolo.
Trasporto e rimessaggio
• Assicurare le attrezzature durante il trasporto per
evitare danni di trasporto e incidenti.
• Conservate l'attrezzatura in un luogo chiuso a chiave
e quindi lontano dalla portata di bambini e di persone
non autorizzate.
• Conservare la macchina e i suoi accessori in un luogo
asciutto e protetto dal gelo.
• Per il trasporto e la conservazione del carburante,
vedere la sezione "Operazioni con il carburante".
Italian – 63
Page 64

FUNZIONAMENTO
!
Regolazione dell’altezza di taglio
IMPORTANTE! Spegnere il motore prima di modificare
l'altezza di taglio.
La regolazione dell' altezza di taglio avviene mediante
una molla. L'altezza di taglio può essere regolata su 6
diverse posizioni.
Non impostare l'altezza di taglio ad un livello troppo basso
poiché esiste il rischio che i coltelli colpiscano il terreno in
caso di irregolarità.
• Per aumentare l'altezza di taglio spingere la leva
verso sinistra e poi in avanti.
• Per ridurre l'altezza di taglio spingere la leva a sinistra
e poi all'indietro.
Avviamento e arresto
AVVERTENZA! Prima dell’avviamento
osservare quanto segue:
Non avviare mai il rasaerba prima di aver
montato il coltello e tutti i carter. Il
coltello potrebbe staccarsi e causare
danni alle persone.
Allontanare sempre la macchina dal
luogo e dalla fonte di rifornimento prima
della messa in moto.
Collocare la macchina su una solida
base d’appoggio. Controllare che il
gruppo di taglio non possa venire a
contatto con corpi solidi.
Osservare che non vi siano non addetti
ai lavori nelle vicinanze.
Accertarsi che il cavo di accensione sia ben collegato alla
candela.
Avviamento
• Aprire il rubinetto della benzina.
• Con la mano sinistra tirare completamente la
manopola del freno del motore verso l'impugnatura
superiore.
• Afferrare la manopola di avviamento, estrarre
lentamente la cordicella di avviamento con la mano
destra fino a quando si avverte resistenza (i ganci di
avviamento entrano in azione) e tirare con movimenti
rapidi e decisi.
avviamento intorno alla mano.
N.B! Non estrarre completamente la cordicella e non
lasciare la maniglia di avviamento con la cordicella
estratta. Questo potrebbe danneggiare la macchina.
Non avvolgere mai la cordicella di
64 – Italian
Trasmissione
Per inserire la marcia, premere in avanti la leva della
frizione.
Arresto
• Il motore si arresta rilasciando la manopola del freno
del motore. La marcia si disinserisce anche quando si
rilascia la manopola del freno È possibile sganciare
solo la ruota motrice rilasciando leggermente la leva
del freno.
• Chiudere il rubinetto della benzina.
Page 65

MANUTENZIONE
!
Manutenzione
AVVERTENZA! Accertarsi sempre che il
gruppo di taglio si sia fermato prima di
!
eseguire pulizia, riparazioni o controlli.
Staccare il cavo di accensione dalla
candela.
Notare che le cinghie di trasmissione si sistemano
durante il primo periodo di rodaggio (5 ore) e potrebbe
essere necessario regolarne la tensione. Vedere le
istruzioni:
Filtro dell’aria
Pulire regolarmente il filtro dell’aria per evitare :
• Disturbi di carburazione.
• Problemi di messa in moto.
• Riduzione della potenza sviluppata.
• Inutile usura dei componenti del motore
• Consumi più elevati.
Pulire il filtro almeno una volta al giorno o più spesso in
ambienti difficili.
Smontare il filtro dell'aria dopo averne rimosso il
coperchio. Premere i fermi sulla sezione superiore del
coperchio del filtro dell'aria e aprire il coperchio.
Togliere il filtro dell'aria e controllare che sia integro.
Sostituire il filtro se vi sembra difettoso.
Pulire il filtro scuotendolo con cautela contro una
superficie piana e soffiarvi aria compressa dall'interno.
Non pulire mai il filtro con una spazzola. Sostituire il filtro
se è molto sporco.
Il filtro non ritorna mai completamente pulito. Pertanto va
sostituito periodicamente con uno nuovo.
danneggiato va sostituito immediatamente.
Durante il montaggio, accertarsi che il filtro dell'aria sia
del tutto aderente al portafiltro.
Un filtro
Candela
AVVERTENZA! La marmitta rimane molto
calda anche dopo aver spento il motore.
!
Non toccare la marmitta se è ancora
calda!
Se la macchina ha potenza insoddisfacente, difficoltà di
messa in moto o il minimo irregolare, controllare
innanzitutto la candela. Se questa è incrostata, pulirla e
controllare la distanza tra gli elettrodi, che deve essere
0,7-0,8 mm. La candela andrebbe cambiata di regola
dopo circa un mese di esercizio o prima se necessario.
N.B! Usare candele originali o di tipo raccomandato! Altre
candele possono danneggiare cilindro e pistone.
Marmitta
La marmitta è dimensionata in modo da diminuire la
rumorosità e per allontanare i gas di scarico
dall’operatore. I gas di scarico sono caldi e possono
contenere scintille, pericolose in presenza di materiale
infiammabile.
Controllare con regolarità che la marmitta sia ben fissa
nella macchina. Non usare mai la macchina se la
marmitta è in cattive condizioni.
Coltello
AVVERTENZA! Usare sempre guanti
robusti durante la riparazione del gruppo
di taglio. I coltelli sono molto taglienti e
ci si può ferire molto facilmente
È importante che il coltello sia affilato e correttamente
equilibrato. Svitare il bullone che fissa il coltello e
consegnare il coltello all'officina di assistenza almeno una
volta all'anno per l'affilatura e l'equilibratura. Il periodo
adatto per far questo è al termine della stagione di lavoro.
Se bisogna cambiare il tagliente o la staffa del tagliente,
sostituire il bullone, la rondella e la rondella di frizione allo
stesso tempo.
Rimontando il coltello serrare il bullone con una coppia di
45-60 Nm. Vedi istruzioni alla voce Montaggio.
Colpendo un corpo estraneo come pietre, radici o simili, il
coltello slitta contro l'attacco. Per questo motivo la
superficie di contatto dell'attacco del coltello può apparire
leggermente usurata, il che rientra nella normalità. Si
tratta di un dispositivo di sicurezza per ridurre il rischio di
deformazione dell'albero motore.
Cambio dell'olio
L’olio motore deve essere sostituito dopo le prime 5 ore.
L'olio del motore dev'essere cambiato ogni anno e ogni
25 ore di esercizio.
Per eseguire il cambio dell'olio procedere come segue:
• Se corpi estranei rimangono impigliati nelle lame
mentre l’utensile di taglio è in funzione, spegnere il
motore ed attendere che l’utensile di taglio si sia
arrestato completamente prima di pulire le lame.
Staccare il cavo dalla candela.
• Vuotare il serbatoio del carburante.
• Chiudere il rubinetto della benzina.
Italian – 65
Page 66

MANUTENZIONE
• Svitare il tappo del serbatoio dell'olio.
Usare un recipiente idoneo per raccogliere il lubrificante.
• Far uscire l'olio facendolo scolare dal tubo di
rifornimento dopo aver inclinato il motore.
• Rivolgersi alla più vicina stazione di servizio per lo
smaltimento dell'olio per motore in eccesso.
• Riempire con nuovo olio motore di buona qualità. Vedi
istruzioni alla voce Caratteristiche tecniche.
• Reinfilare l’astina, senza avvitarla. Controllare il
livello dell'olio con l'asticella fissata al tappo del
serbatoio. Se il livello dell'olio è basso, rabboccare
con olio per motore fino al marchio superiore
dell'asticella.
Sostituzione e regolazione della cinghia trapezoidale
• Togliere la scocca di protezione svitando le viti.
• Rimuovere il coprimozzo della ruota anteriore sulla
trasmissione, facendo leva leggermente con un
cacciavite. Svitare il bullone di trasporto e rimuovere
la ruota.
• Smontare la cinghia dalla puleggia della cinghia
piatta. Controllare che le pulegge della cinghia si
muovano con facilità sull'asse, applicare lubrificante
spray tra le pulegge e dietro di esse e ingrassare
l'asse.
• Montare la nuova cinghia e assicurarsi che si adatti
correttamente sul cuscinetto a sfere prima di
regolarla.
• Avvitare il tappo del serbatoio dell'olio.
Trasmissione e scatola del cambio
Accertarsi che le ruote e gli assi delle ruote siano puliti e
privi di foglie, erba ecc. È inoltre importante mantenere
pulita la zona intorno alla scatola del cambio della
trasmissione.
• Togliere la scocca di protezione svitando le viti.
• Pulire la scatola del cambio con una spazzola.
Controllare anche che la cinghia di trasmissione e la
puleggia della cinghia siano prive di difetti, ad
esempio incrinature.
66 – Italian
• Regolare la cinghia muovendo il cuscinetto in alto o in
basso.
• Le cinghie nuove tendono ad allungarsi, quindi la
regolazione va ripetuta dopo alcune ore di
funzionamento.
• Avvitare il coperchio della cinghia e provare la
macchina.
Page 67

MANUTENZIONE
Sostituzione e regolazione della cinghia centrale
La cinghia centrale scorre fra l'albero motore e la
trasmissione.
• Togliere il coltello. (solo quando si sostituisce la
cinghia)
• Allentare di alcuni giri le viti di registro.
• Sostituire la cinghia con una nuova e stringere
leggermente le viti di regolazione. (solo quando si
sostituisce la cinghia)
• Regolare la cinghia muovendo la marcia avanti o
indietro.
• La cinghia va tesa in modo che possa muoversi di 610 mm al centro. Ciò corrisponde a una forza di circa
3 kg. Usare un dinamometro per la verifica.
• Serrare correttamente le viti di regolazione. (3 Nm)
• Verificare il funzionamento della marcia, dato che la
regolazione della trasmissione influisce sulla tensione
della cinghia di trasmissione.
Pulizia
Non utilizzare una lancia ad alta pressione per pulire la
macchina.
Non dirigere mai getti d'acqua sul motore.
Durante la pulizia sotto lo scomparto di taglio, girare la
macchina mettendola con le candele verso l'alto.
Svuotare il serbatoio del carburante.
Ricerca dei guasti
Se il motore non parte, verificare quanto segue:
• sostituire il carburante con carburante nuovo e pulito;
• controllare che la valvola del carburante sia aperta;
• Controllare che il freno del motore funzioni
adeguatamente e che non sia danneggiato.
• Pulire la candela. Controllare che la distanza fra gli
elettrodi sia 0,7-0,8 mm.
• Controllare il filtro d'aria e pulirlo se necessario
• Se il motore non parte dopo aver intrapreso queste
azioni, contattare l'officina autorizzata più vicina.
• Se il risultato del taglio non è soddisfacente e sono
presenti pagliuzze di erba sfilacciate sul lato di taglio,
sostituire la taglierina.
Seguono alcuni consigli di manutenzione.
Manutenzione giornaliera
1 Controllare che la manopola del freno del motore sia
conforme alle norme di sicurezza.
2 Ripulire il rasaerba da foglie, erba e simili usando una
spazzola.
3 Pulire la presa dell’aria del dispositivo di avviamento.
Controllare il dispositivo di avviamento e la cordicella.
4 Controllare il livello dell'olio.
5 Pulire il filtro dell’aria. Sostituire se necessario.
6 Controllare che dadi e viti siano ben serrati.
7 Controllare il gruppo di taglio. Non usare mai dei
coltelli non taglienti, spezzati o danneggiati.
Manutenzione settimanale
1 Pulire la candela. Controllare che la distanza fra gli
elettrodi sia 0,7-0,8 mm.
2 Pulire le flange di raffreddamento sul cilindro.
Manutenzione mensile
1 Controllare che la cinghia di trasmissione sia integra
e che non presenti difetti visibili.
2 Pulire la scatola del cambio.
3 Controllare il filtro del carburante e il tubo di
alimentazione. Sostituire se necessario.
4 Pulire internamente il serbatoio del carburante.
5 Lubrificare l'ingranaggio conduttore.
6 Sostituire l’olio motore.
7 Ispezionare il cavo della frizione. Vedi istruzioni alla
voce Montaggio.
Italian – 67
Page 68

CARATTERISTICHE TECNICHE
Caratteristiche tecniche
LB448S LB548S e
Motore
Produttore del motore Honda Honda
Cilindrata, cm
Regime, rpm 2900 2900
Potenza nominale motore, kW (vedi nota 1) 2,8 2,8
Sistema di accensione
Candela NGK - BPR5ES NGK - BPR5ES
Distanza all’elettrodo, mm 0,7 - 0,8 0,7 - 0,8
Carburante, lubrificazione
Capacità serbatoio carburante, litri 0,9 0,9
Capacità serbatoio olio, litri 0,55 0,55
Olio motore
Peso
Rasaerba con i serbatoi vuoti, kg 31 33
Emissioni di rumore (vedi nota 2)
Livello potenza acustica, misurato dB(A) 92 90
Livello potenza acustica, garantito dB(A) 93 92
Livello acustico (vedi nota 3)
Livello pressione acustica all’udito dell’operatore,
dB(A)
Livelli di vibrazioni (Vedere nota 4)
Livello di vibrazioni del munbrio, m/s
Attrezzatura di taglio
Sistema di taglio BioClip BioClip
Altezza di taglio 30-60 30-60
Larghezza di taglio, mm 48 48
Coltello Mulcher, 48 cm Mulcher, 48 cm
Codice 5028813-10 5028813-10
Trasmissione
Velocità, km/h 4,5 4,5
Nota 1: La potenza nominale del motore indicata corrisponde alla potenza netta media (al rapporto giri/min. specificato)
di un tipico motore in fase di produzione per il modello di motore misurato dalla normativa SAE J1349/ISO1585. I motori
per produzione di massa potrebbero presentare un valore diverso da questo. L'uscita di potenza effettiva del motore
installata nella macchina finale dipende dalla velocità di funzionamento, dalle condizioni ambientali e da altri valori. Nota
2: Emissione di rumore nell’ambiente misurato come potenza acustica (L
3: Livello di pressione acustica in ottemperanza alla norma EN ISO 5395. I dati riportati per il livello di pressione acustica
hanno una dispersione statistica tipica (deviazione standard) di 1,2 dB(A). Nota 4: Livello di vibrazioni in ottemperanza
alla norma EN ISO 5395. I dati riportati per il livello di vibrazione hanno una dispersione statistica tipica (deviazione
standard) di 0,2 m/s
3
2
2
.
160 160
Service classification SG SH; SAE 10W -30
79 77
4,5 4,8
) in base alla direttiva CE 2000/14/CE. Nota
WA
Service classification SG SH; SAE 10W -30
68 – Italian
Page 69

CARATTERISTICHE TECNICHE
Dichiarazione di conformità CE
(Solo per l’Europa)
Husqvarna AB, SE-561 82 Huskvarna, Svezia, tel: +46-36-146500, dichiara con la presente che i rasaerba a motore
Husqvarna LB448S e LB548S
DIRETTIVA DEL CONSIGLIO:
del 17 maggio 2006 "sulle macchine" 2006/42/CE.
del 26 febbraio 2014 ”sulla compatibilità elettromagnetica” 2014/30/UE.
dell’8 maggio 2000 ”sull’emissione di rumore nell’ambiente” 2000/14/CE.
Per informazioni relative alle emissioni di rumore, vedi capitolo Dati tecnici.
Sono state applicate le seguenti norme: ISO 5395, ISO 11094, EN 55012.
Organo competente: 0404, SMP Svensk Maskinprovning AB, Box 7035, SE-750 07 Uppsala, ha pubblicato rapporti
relativi all’attestazione della conformità in base all’allegato VI della DIRETTIVA DEL CONSIGLIO dell’8 maggio 2000
”sull’emissione di rumore nell’ambiente” 2000/14/CE.
Huskvarna, 6 luglio 2015.
Claes Losdal, Direttore sviluppo/Prodotti per giardini
(Rappresentante autorizzato per Husqvarna AB e responsabile della documentazione tecnica.)
a partire dal numero di serie 15XXXXX in poi, sono conformi alle disposizioni della
Italian – 69
Page 70

ACLARACIÓN DE LOS SÍMBOLOS
!
!
Símbolos en la máquina:
¡ATENCIÓN! La máquina, si se utiliza
de forma errónea o descuidada,
puede ser una herramienta peligrosa
que puede causar daños graves e
incluso la muerte al usuario y a otras
personas.
Lea detenidamente el manual de
instrucciones y asegúrese de
entender su contenido antes de
utilizar la máquina.
Cuidado con los objetos lanzados o
rebotados.
Asegúrese de que no haya terceros
desautorizados en la zona de
trabajo.
Evite el arranque accidental
retirando el cable de encendido de la
bujía.
Advertencia de cuchilla rotativa.
Cuidado con las manos y los pies.
Explicación de los niveles de advertencia
Las advertencias se clasifican en tres niveles.
¡ATENCIÓN!
¡ATENCIÓN! Indica un riesgo de daños
graves para el usuario o incluso muerte,
o bien daños al entorno, si no se siguen
las instrucciones del manual.
¡NOTA!
¡NOTA! Indica un riesgo de lesiones para
el usuario o daños al entorno si no se
siguen las instrucciones del manual.
AVISO
AVISO Indica un riesgo de daños en los materiales o en
la máquina si no se siguen las instrucciones del manual.
Cerciórese de mantener las manos y
los pies alejados del equipo de corte
mientras el motor está en marcha.
Este producto cumple con la directiva
CE vigente.
Las emisiones sonoras en el entorno
según la directiva de la Comunidad
Europea. Las emisiones de la máquina
se indican en el capítulo Datos
técnicos y en la etiqueta.
70 – Spanish
Page 71

ÍNDICE
Índice
ACLARACIÓN DE LOS SÍMBOLOS
Símbolos en la máquina: ...................................... 70
Explicación de los niveles de advertencia ............ 70
ÍNDICE
Índice .................................................................... 71
PRESENTACIÓN
Apreciado cliente: ................................................. 72
Preparativos para el empleo de un cortacésped
nuevo ....................................................................
¿QUÉ ES QUÉ?
Componentes del cortacésped? .......................... 73
EQUIPO DE SEGURIDAD DE LA MÁQUINA
Generalidades ...................................................... 74
Cubierta de corte y cubierta protectora ................ 74
Horquilla del freno de motor ................................. 74
Sistema amortiguador de vibraciones .................. 74
Silenciador ............................................................ 75
Equipo de corte .................................................... 75
MONTAJE
Montaje del manillar ............................................. 76
Ajuste del cable del embrague ............................ 76
Desmontaje y montaje de cuchillas ...................... 76
Montaje de los enchufes para trituradora ............. 77
MANIPULACION DEL COMBUSTIBLE
Generalidades ...................................................... 78
Carburante ............................................................ 78
Repostaje ............................................................. 78
Transporte y almacenamiento .............................. 78
INSTRUCCIONES DE SEGURIDAD
Protección personal .............................................. 79
Instrucciones generales de seguridad .................. 79
Técnica básica de trabajo .................................... 80
Transporte y almacenamiento .............................. 80
FUNCIONAMIENTO
Ajuste de la altura de corte .................................. 81
Arranque y parada ................................................ 81
MANTENIMIENTO
Mantenimiento ...................................................... 82
Filtro de aire ......................................................... 82
Bujía ..................................................................... 82
Silenciador ............................................................ 82
Cuchilla ................................................................. 82
Cambio de aceite ................................................. 82
Transmisión y reductor ......................................... 83
Limpieza ............................................................... 84
Localización de averías ........................................ 84
Mantenimiento diario ............................................ 84
Mantenimiento semanal ....................................... 84
Mantenimiento mensual ........................................ 84
DATOS TECNICOS
Datos técnicos ...................................................... 85
Declaración CE de conformidad ........................... 86
72
Spanish – 71
Page 72

PRESENTACIÓN
!
!
!
Apreciado cliente:
¡Felicidades por haber adquirido un producto Husqvarna!
La historia de Husqvarna data del año 1689, cuando el
Rey Karl XI encargó la construcción de una fábrica en la
ribera del río Huskvarna para la fabricación de
mosquetes. La ubicación junto al río Huskvarna era lógica
dado que el río se utilizaba para generar energía
hidráulica. Durante los más de 300 años de existencia de
la fábrica Husqvarna, se han fabricado productos
innumerables; desde estufas de leña hasta modernas
máquinas de cocina, máquinas de coser, bicicletas,
motocicletas, etc. En 1956 se introdujo el primer
cortacésped motorizado, seguido de la motosierra en
1959; y es en este segmento en el que actualmente
trabaja Husqvarna.
Husqvarna es hoy uno de los principales fabricantes del
mundo de productos de bosque y jardín, con la calidad y
las prestaciones como principal prioridad. La idea de
negocio es desarrollar, fabricar y comercializar productos
motorizados para silvicultura y jardinería, así como para
las industrias de construcción y obras públicas.
Husqvarna tiene como objetivo estar en la vanguardia por
lo que respecta a ergonomía, facilidad de empleo,
seguridad y consideración ambiental; motivo por el cual
ha desarrollado una serie de detalles para mejorar los
productos en estas áreas.
Estamos convencidos de que usted apreciará con
satisfacción la calidad y prestaciones de nuestro producto
por mucho tiempo en adelante. Con la adquisición de
alguno de nuestros productos, usted dispone de
asistencia profesional con reparaciones y servicio en
caso de ocurrir algo. Si ha adquirido el producto en un
punto de compra que no es uno de nuestros
concesionarios autorizados, pregúnteles por el taller de
servicio más cercano.
Esperamos que su máquina le proporcione plena
satisfacción y le sirva de ayuda por mucho tiempo en
adelante. Tenga en cuenta que este manual de
instrucciones es un documento de valor. Siguiendo sus
instrucciones (de uso, servicio, mantenimiento, etcétera)
puede alargar considerablemente la vida útil de la
máquina e incrementar su valor de reventa. Si vende su
máquina, entregue el manual de instrucciones al nuevo
propietario.
¡Gracias por utilizar un producto Husqvarna!
Husqvarna AB trabaja constantemente para perfeccionar
sus productos y se reserva, por lo tanto, el derecho a
introducir modificaciones en la construcción y el diseño
sin previo aviso.
Preparativos para el empleo de un cortacésped nuevo
• Lea detenidamente el manual de instrucciones.
• Compruebe el montaje y ajuste del equipo de corte.
Vea las instrucciones bajo el título Montaje.
• Reposte combustible y ponga aceite en el motor. La
entrega de la máquina incluye un recipiente con
cantidad de aceite suficiente. Vea las instrucciones
del apartado referente a la manipulación de
combustible.
¡ATENCIÓN! Bajo ninguna circunstancia
debe modificarse la configuración
original de la máquina sin autorización
del fabricante. Utilizar siempre
recambios originales. Las
modificaciones y/o la utilización de
accesorios no autorizadas pueden
ocasionar accidentes graves o incluso la
muerte del operador o de terceros.
¡ATENCIÓN! Un cortacésped utilizado de
forma errónea o negligente puede ser
una herramienta peligrosa que puede
causar daños graves e incluso con
peligro de muerte. Es sumamente
importante que lea estas instrucciones y
comprenda el contenido de este manual.
¡ATENCIÓN! La inhalación prolongada de
los gases de escape del motor comporta
riesgos para la salud.
Husqvarna AB trabaja constantemente para perfeccionar
sus productos y se reserva, por lo tanto, el derecho a
introducir modificaciones en la construcción y el diseño
sin previo aviso.
72 – Spanish
Page 73

¿QUÉ ES QUÉ?
LB548S eLB448S
1
2
3
4
5
6
7
Componentes del cortacésped?
1 Empuñadura / manillar
2 Horquilla de freno de motor
3 Palanca de embrague
4 Empuñadura de arranque
5 Depósito de aceite
6 Protección de correa
7 Silenciador
8 Bujía
9 Protección de correa
10 Depósito de combustible
11 Mango para ajuste de ángulo
12 Amortiguador de vibraciones
13
22
212019
11
13
12
10
14
8
9
15
16
17
18
24
23
13 Ajuste del cable del embrague
14 Manillar inferior
15 Palanca de ajuste de la altura de corte
16 Grifo de gasolina
17 Filtro de aire
18 Cubierta de corte
19 Arandela elástica.
20 Tornillo de cuchilla
21 Cuchilla / equipo de corte
22 Soporte de cuchilla
23 Enchufe para trituradora
24 Manual de instrucciones
Spanish – 73
Page 74

EQUIPO DE SEGURIDAD DE LA MÁQUINA
!
Generalidades
En este capítulo se describen los componentes de
seguridad de la máquina, su función y el modo de
efectuar el control y el mantenimiento para garantizar un
funcionamiento óptimo. En cuanto a la ubicación de estos
componentes en su máquina, vea el capítulo Qué es qué.
¡ATENCIÓN! Nunca utilice una máquina
que tenga un equipo de seguridad
!
defectuoso. Efectúe el control y
mantenimiento del equipo de seguridad
de la máquina como se describió en este
capítulo. Si su máquina no pasa todos
los controles, entréguela a un taller de
servicio para su reparación.
¡ATENCIÓN! Nunca utilice una máquina
con componentes de seguridad
!
defectuosos. Siga las instrucciones de
control, mantenimiento y servicio
indicadas en este capítulo.
Cubierta de corte y cubierta protectora
La cubierta de corte está construida para reducir las
vibraciones y el riesgo de lesiones por corte. Compruebe
que la cubierta de corte está intacta y no presenta
defectos visibles como, por ejemplo, grietas.
La cubierta protectora está construida para reducir el
riesgo de daños por apriete y para captar la correa de
transmisión si se rompe. Compruebe que la cubierta
protectora está intacta y bien atornillada.
Horquilla del freno de motor
El freno de motor está diseñado para parar el motor.
Cuando se suelta la horquilla del freno de motor, éste
debe parar.
Compruebe el freno del motor de la siguiente manera:
Acelere al máximo y seguidamente suelte la horquilla del
freno. Debe pararse el motor y desacoplarse la
transmisión.
El freno de motor debe estar siempre ajustado para que
el motor se pare en un lapso de 3 segundos.
Sistema amortiguador de vibraciones
Su máquina incorpora un sistema amortiguador diseñado
para reducir al máximo posible las vibraciones y optimizar
la comodidad de uso.
El tubo de acero del sistema de empuñadura y la cubierta
de corte están construidos para minimizar las vibraciones
del motor.
El sistema amortiguador de vibraciones de la máquina
reduce la transmisión de vibraciones entre la parte del
motor/equipo de corte y la parte de los mangos de la
máquina.
LB448S Este modelo dispone también de cuatro
amortiguadores de vibraciones, instalados en el mango
para reducir en mayor medida las vibraciones.
74 – Spanish
Compruebe que las empuñaduras y los aisladores de
vibraciones están intactos.
¡ATENCIÓN! La sobreexposición a las
vibraciones puede producir trastornos
vasculares o nerviosos en personas que
adolecen de deficiencia circulatoria. Si
advierte síntomas que puedan
relacionarse con la sobreexposición a
las vibraciones, consulte a un médico.
Ejemplos de estos síntomas son:
entumecimiento, pérdida de sensibilidad,
”hormigueo”, ”puntadas”, dolor, pérdida
o reducción de la fuerza normal, y
cambios en el color o la superficie de la
piel. Normalmente estos síntomas se
presentan en los dedos, las manos y las
muñecas.
Page 75

EQUIPO DE SEGURIDAD DE LA MÁQUINA
Silenciador
El silenciador está diseñado para reducir al máximo
posible el nivel sonoro y para apartar los gases de escape
del usuario.
¡ATENCIÓN! Los gases de escape del
motor están calientes y pueden contener
!
chispas que pueden provocar incendio.
Por esa razón, ¡nunca arranque la
máquina en interiores o cerca de
material inflamable! Durante y un rato
después del uso, el silenciador sigue
estando muy caliente. ¡No toque el
silenciador si está caliente!
Nunca utilice una máquina que tenga un silenciador
defectuoso.
Compruebe regularmente que el silenciador esté
firmemente montado en la máquina.
Equipo de corte
Evite que la cuchilla toque en objetos extraños como
piedras, raíces y similares. Ello puede dañar el filo de la
cuchilla y doblar el eje del motor.
Revise el equipo de corte para ver si está dañado o
agrietado. Un equipo de corte dañado debe ser siempre
reemplazado. Procure que la cuchilla esté siempre bien
afilada y correctamente equilibrada.
Compruebe que el tornillo de cuchilla está intacto y que
el eje del motor no está doblado.
Spanish – 75
Page 76

MONTAJE
!
Montaje del manillar
Al abatir el manillar proceda con cuidado para no dañar
los cables.
La parte superior del manillar se fija con una sólida tuerca
de mango en la placa deflectora. No olvide que debe
haber una arandela entre la placa y la tuerca de mango.
Si es necesario, el mango puede girarse ligeramente
hacia los lados gracias a la junta de mango. El mango
puede colocarse en diferentes posiciones para conseguir
la posición más cómoda para conducir, por ejemplo
cuando se corta cerca de setos o las paredes de una
casa.
El mango también se puede ajustar verticalmente girando
las ruedas con el elemento de enganche del chasis.
Ajuste del cable del embrague
El cable del embrague debe ajustarse tras las 8 primeras
horas de funcionamiento y, posteriormente, cuando sea
necesario.
El cable está bien ajustado cuando el soporte de este
está alineado con la tuerca.
• Ajuste el cable con ayuda del tornillo correspondiente.
Extraiga el tornillo girándolo en el sentido de las
agujas del reloj o en el contrario para ampliar o reducir
el cable.
Desmontaje y montaje de cuchillas
¡ATENCIÓN! Use siempre guantes
fuertes para efectuar los trabajos de
servicio y mantenimiento del equipo de
corte. Las cuchillas son muy agudas y
pueden producir fácilmente lesiones por
corte.
El cable de encendido debe soltarse siempre de la bujía
antes de efectuar trabajos de reparación, limpieza o
mantenimiento.
Coloque la cortadora con la bujía hacia arriba al realizar
el mantenimiento de la máquina.
Vacíe siempre el depósito de combustible antes de
abandonar el cortacésped.
Desmontaje
• Quite el tornillo de fijación de la cuchilla.
• Retire el perno, la arandela del muelle y la cortadora.
76 – Spanish
Page 77

MONTAJE
Montaje
La cuchilla debe montarse con los extremos en ángulo
mirando hacia la tapa.
• Coloque la cortadora con la arandela de fricción
contra el soporte de la cortadora.
• Asegúrese de que la cortadora se centra
correctamente con el eje.
• Para evitar las vibraciones, coloque la cortadora del
cortacésped de manera que la marca del soporte de
la cortadora pueda verse a los lados de la cortadora.
¡IMPORTANTE!
Utilice siempre el equipo con cuidado y sentido común.
Evite todas aquellas situaciones que considere que
sobrepasan sus capacidades. Si, después de leer estas
instrucciones, no está seguro del procedimiento que
debe seguir, consulte a un experto antes de utilizar el
equipo. Póngase en contacto con un taller de servicio
autorizado.
Utilice simpre piezas de repuesto originales. Si desea
obtener más información, consulte el apartado de
«Datos técnicos».
Montaje de los enchufes para trituradora
• Desconecte el cable de encendido de la bujía.
• Coloque la cortadora con la bujía hacia arriba al
realizar el mantenimiento de la máquina.
• Ajuste los pasadores guía en los orificios en la
cubierta de corte.
• Apriete los enchufes para trituradora desde la parte
superior de la cubierta de corte.
• Ponga la arandela y apriete bien el tornillo. El tornillo
debe apretarse con un par de 70 Nm.
Spanish – 77
Page 78

MANIPULACION DEL COMBUSTIBLE
!
Generalidades
¡ATENCIÓN! Si se hace funcionar el
motor en un local cerrado o mal
!
ventilado, se corre riesgo de muerte por
asfixia o intoxicación con monóxido de
carbono.
El combustible y los vapores de
combustible son muy inflamables y
pueden causar daños graves por
inhalación y contacto con la piel. Por
consiguiente, al manipular combustible
proceda con cuidado y procure que haya
buena ventilación.
Los gases de escape del motor están
calientes y pueden contener chispas que
pueden provocar incendio. Por esa
razón, ¡nunca arranque la máquina en
interiores o cerca de material inflamable!
No fume ni ponga objetos calientes
cerca del combustible.
Carburante
AVISO La máquina tiene motor de cuatro tiempos.
Procure que haya siempre aceite suficiente en el
depósito de aceite.
Gasolina
• Utilice gasolina sin plomo o gasolina con plomo de
alta calidad.
• El octanaje mínimo recomendado es 90 (RON). Si se
hace funcionar el motor con gasolina de octanaje
inferior a 90, puede producirse clavazón. Esto
aumenta la temperatura del motor, con el
consiguiente riesgo de averías.
• Si hay disponible gasolina menos nociva para el
medio ambiente, denominada gasolina de alquilato,
se debe usar este tipo de gasolina.
Aceite de motor
AVISO Controle el nivel de aceite antes de poner en
marcha el cortacésped. Un nivel de aceite demasiado
bajo puede causar averías graves del motor.
• Consulte las instrucciones bajo el título
«Mantenimiento».
• El primer cambio del aceite del motor debe hacerse
después de 5 horas de funcionamiento. Consulte los
datos técnicos para saber qué tipo de aceite es más
recomendable. No utilice nunca aceite para motores
de dos tiempos.
Repostaje
¡ATENCIÓN! Apague el motor y deje que
se enfríe unos minutos antes de
repostar. El motor debe apagarse y el
botón de parada debe colocarse en la
posición de parada.
Utilice siempre una lata de gasolina para
evitar derrames.
Para repostar, abra despacio la tapa del
depósito de combustible para evacuar
lentamente la eventual sobrepresión.
Limpie alrededor del tapón de
combustible.
Después de repostar, apriete bien la tapa
del depósito de combustible. Una
actuación negligente puede provocar un
incendio.
Antes de arrancar, aparte la máquina a 3
m como mínimo del lugar de repostaje.
Nunca arranque la máquina:
• Si ha derramado combustible o aceite de motor en la
máquina. Limpie todos los derrames y deje evaporar
los restos de gasolina.
• Si se salpicó el cuerpo o las ropas, cambie de ropas.
Lave las partes del cuerpo que han entrado en
contacto con el combustible. Use agua y jabón.
• Si hay fugas de combustible en la máquina.
Compruebe regularmente si hay fugas en la tapa del
depósito o en los conductos de combustible.
Transporte y almacenamiento
• Almacene y transporte la máquina y el combustible de
manera que eventuales fugas o vapores no puedan
entrar en contacto con chispas o llamas, por ejemplo,
máquinas eléctricas, motores eléctricos, contactos
eléctricos/interruptores de corriente o calderas.
• Para almacenar y transportar combustible se deben
utilizar recipientes diseñados y homologados para tal
efecto.
Almacenamiento prolongado
• Si la máquina se va a almacenar por un período largo,
se debe vaciar el depósito de combustible. Pregunte
en la estación de servicio más cercana qué hacer con
el combustible sobrante.
78 – Spanish
Page 79

INSTRUCCIONES DE SEGURIDAD
!
!
Protección personal
¡ATENCIÓN! Siempre que se usa la
máquina debe emplearse equipo de
!
protección personal.
• Se deben utilizar guantes cuando sea necesario, por
ejemplo en el montaje, inspección o limpieza del
equipo de corte.
• Utilice siempre pantalones largos fuertes. No use
pantalones cortos ni sandalias, ni trabaje descalzo.
• Utilice botas o zapatos antirresbalantes y fuertes.
Utilice prendas ajustadas que no limiten su movilidad.
Instrucciones generales de seguridad
Este apartado trata las normas de seguridad básicas
para trabajar con el dispositivo. Esta información no
sustituye en ningún caso los conocimientos y la
experiencia de un profesional.
• Lea detenidamente el manual de instrucciones y
asegúrese de entender su contenido antes de utilizar
la máquina.
• Debe tenerse en cuenta que el operador es
responsable de los accidentes o riesgos que ocurran
a otras personas o a su propiedad.
• La máquina debe mantenerse limpia. Los letreros y
las pegatinas deben ser legibles en su totalidad.
Emplee siempre el sentido común
Es imposible abarcar todas las situaciones en las que
puede encontrarse. Utilice siempre el equipo con cuidado
y sentido común. Evite todas aquellas situaciones que
considere que sobrepasan sus capacidades. Si, después
de leer estas instrucciones, no está seguro del
procedimiento que debe seguir, consulte a un experto
antes de utilizar el equipo. Consulte a su distribuidor, al
taller de servicio técnico o a un usuario experimentado.
Evite todo uso para el cual no se sienta suficientemente
calificado.
¡ATENCIÓN! Esta máquina genera un
campo electromagnético durante el
!
funcionamiento. Este campo magnético
puede, en determinadas circunstancias,
interferir con implantes médicos activos
o pasivos. Para reducir el riesgo de
lesiones graves o letales, las personas
que utilizan implantes médicos deben
consultar a su médico y al fabricante del
implante antes de emplear esta máquina.
¡ATENCIÓN! La máquina, si se utiliza de
forma errónea o descuidada, puede ser
una herramienta peligrosa que puede
causar daños graves e incluso la muerte
al usuario y a otras personas.
No permita bajo ningún concepto el
empleo o mantenimiento de la máquina
por los niños u otras personas no
instruidas en el manejo de la misma.
La máquina no debe ser utilizada por
personas con capacidades mentales o
físicas reducidas, o bien por personas
que no puedan manipularla por
cuestiones de salud, sin la supervisión
de una persona responsable de su
seguridad.
Nunca deje que terceros utilicen la
máquina sin asegurarse primero de que
hayan entendido el contenido de este
manual de instrucciones.
Nunca utilice la máquina si está
cansado, si ha ingerido alcohol o si toma
medicamentos que puedan afectarle la
vista, su capacidad de discernimiento o
el control del cuerpo.
¡ATENCIÓN! Las modificaciones y/o el
uso de accesorios no autorizados
comportan riesgo de daöos personales
graves y peligro de muerte para el
usuario y otras personas. Bajo ninguna
circunstancia debe modificarse la
configuración original de la máquina sin
autorización del fabricante.
No modifique nunca esta máquina de
forma que se desvíe de la versión
original, y no la utilice si parece haber
sido modificada por otras personas.
No utilice nunca una máquina
defectuosa. Lleve a cabo las
comprobaciones de seguridad y siga las
instrucciones de mantenimiento y
servicio de este manual. Algunas
medidas de mantenimiento y servicio
deben ser efectuadas por especialistas
formados y cualificados. Consulte las
instrucciones del apartado
Mantenimiento.
Utilizar siempre recambios originales.
Spanish – 79
Page 80

INSTRUCCIONES DE SEGURIDAD
Seguridad en el área de trabajo
• Antes de iniciar el corte, limpie el césped de ramas
grandes y pequeñas, piedras, etc.
• Los objetos que golpeen el equipo de corte podrían
salir despedidos y causar daños a personas u otros
objetos. Mantenga a personas y animales a una
distancia considerable.
• No utilice nunca la máquina en condiciones climáticas
desfavorables, como niebla, lluvia, humedad, lugares
mojados, viento fuerte, frío intenso, posibilidad de
relámpagos, etc. Trabajar con mal tiempo es
cansador y puede crear condiciones peligrosas, por
ejemplo suelo resbaladizo.
• Compruebe el entorno para asegurarse de que nada
pueda influir en su control de la máquina.
• Tenga cuidado con las raíces, piedras, ramas, hoyos,
zanjas, etcétera. La hierba alta puede ocultar
obstáculos.
• Puede ser peligroso cortar césped en pendientes. No
utilice el cortacésped en pendientes muy
pronunciadas. El cortacésped no debe utilizarse en
inclinaciones de más de 15 grados.
• En terrenos escarpados, el trayecto de avance debe
ser perpendicular a la pendiente. Es mucho más facil
deplazarse por una pendiente de lado que subirla y
bajarla.
• Tenga cuidado cuando se acerque a esquinas y
objetos que podrían bloquear su campo de visión.
Seguridad en el trabajo
• Un cortacésped sólo está construido para el corte de
céspedes. Está prohibida cualquier otra aplicación.
• Utilice el equipo de protección personal. Vea las
instrucciones bajo el título ”Equipo de protección
personal”.
• No ponga en marcha el cortacésped sin que estén
montadas la cuchilla y todas las cubiertas. De lo
contrario, la cuchilla puede soltarse y causar daños
personales.
• Evite que la cuchilla toque en objetos extraños como
piedras, raíces y similares. Ello puede dañar el filo de
la cuchilla y doblar el eje del motor. Un eje doblado
crea desequilibrio y vibraciones fuertes, con el riesgo
consiguiente de que se suelte la cuchilla.
• La horquilla de freno no debe estar fijada de forma
permanente cuando la máquina está en marcha.
• Coloque el cortacésped sobre una superficie plana y
firme, y póngalo en marcha. Asegúrese de que la
cuchilla no pueda entrar en contacto con el suelo o
algún objeto.
• Colóquese siempre detrás de la máquina. Permita
que todas las ruedas reposen en el suelo y mantenga
ambas manos en la empuñadura durante la
operación de corte. Mantenga alejados las manos y
los pies de las hojas giratorias.
• No incline la máquina con el motor en marcha.
• Camine con la máquina, no corra.
• Debe prestarse especial atención al tirar de la
máquina cuando esté en funcionamiento.
• No levante ni lleve nunca el cortacésped con el motor
en marcha. Si es necesario levantar el cortacésped,
pare primero el motor y quite el cable de encendido de
la bujía.
• No corte el césped mientras camina hacia atrás.
• El motor debe pararse para desplazar la máquina en
terreno que no se va a cortar. Por ejemplo, senderos
de gres, piedras, grava, asfalto, etc.
• Pare el motor antes de cambiar la altura de corte. No
haga nunca ajustes con el motor en marcha.
• No abandonar nunca la máquina sin vigilar, con el
motor en marcha. Pare el motor. Compruebe que el
equipo de corte ha dejado de girar.
• Si choca con algún objeto o si se producen
vibraciones fuertes, pare la máquina. Desconecte el
cable de encendido de la bujía. Controle que la
máquina no esté dañada. Repare posibles averías.
Técnica básica de trabajo
• Corte siempre con una hoja afilada para obtener
resultados óptimos. Una hoja desafilada proporciona
un corte desigual, y la hierba adquiere un tono
amarillo en la superficie de corte.
• No corte nunca más de 1/3 de la altura de la hierba.
Especialmente en temporada seca. Empiece
cortando con una altura de corte alta. Seguidamente,
controle el resultado y baje a una altura adecuada. Si
la hierba es muy alta, avance despacio y, si es
necesario, corte dos veces.
• Corte en direcciones distintas cada vez para evitar
crear rayas en el césped.
• Antes de tirar de la máquina hacia usted, desacople
la transmisión y empuje la máquina hacia adelante
unos 10 cm.
• Asegúrese de desacoplar la transmisión cuando se
acerque a un obstáculo.
Transporte y almacenamiento
• Sujete bien el equipo durante el transporte para evitar
daños y accidentes.
• Guarde el equipo en un lugar seguro fuera del
alcance de los niños y las personas no autorizadas.
• Guarde la máquina y el equipo en un lugar seco y
protegido de la escarcha.
• Para obtener más detalles sobre el transporte y el
almacenamiento del combustible, consulte el
apartado «Manipulación del combustible ».
80 – Spanish
Page 81

FUNCIONAMIENTO
!
Ajuste de la altura de corte
¡IMPORTANTE! Pare el motor antes de cambiar la
altura de corte.
El ajuste de la altura de corte se lleva a cabo mediante un
muelle. La altura de corte puede ajustarse a seis
posiciones diferentes.
No emplee una altura de corte demasiado baja debido al
riesgo de que las cuchillas toquen en el suelo en las
irregularidades.
• Para aumentar la altura de corte, mueva la palanca
hacia la izquierda y hacia delante.
• Pare reducir la altura de corte, mueva la palanca
hacia la izquierda y hacia atrás.
Arranque y parada
¡ATENCIÓN! Antes de arrancar, observe
lo siguiente:
No ponga en marcha el cortacésped sin
que estén montadas la cuchilla y todas las
cubiertas. De lo contrario, la cuchilla puede
soltarse y causar daños personales.
Antes de arrancar, aparte siempre la máquina
del lugar y de la fuente de repostaje.
Coloque la máquina sobre una base
firme. Controle que el equipo de corte no
pueda atascarse en algún objeto.
Asegúrese de que no haya terceros
desautorizados en la zona de trabajo.
Asegúrese de que el cable está bien colocado en la bujía.
Arranque
• Abra el grifo de combustible.
• Tire totalmente de la horquilla del freno de motor
contra la empuñadura superior con la mano izquierda.
• Agarre la empuñadura de arranque y tire despacio de
la cuerda con la mano derecha, hasta sentir una
resistencia (los dientes de arranque engranan), y
después tire rápido y con fuerza.
cordón de arranque alrededor de la mano.
Nunca enrosque el
¡NOTA! No extraiga el cordón de arranque al máximo, y
no suelte la empuñadura de arranque si ha extraido
todo el cordón. Ello puede ocasionar averías en la
máquina.
Transmisión
Para accionar el motor, empuje hacia delante la palanca
de embrague.
Parada
• El motor se para al soltar la horquilla de freno de
motor. El motor se desactiva al soltar la palanca del
freno. Solo puede desacoplarse el motor soltando un
poco la palanca de freno.
• Cierre el grifo de combustible.
Spanish – 81
Page 82

MANTENIMIENTO
!
Mantenimiento
¡ATENCIÓN! Antes de la limpieza,
reparación o inspección, cerciórese de
!
que el equipo de corte se haya detenido.
Desconecte el cable de encendido de la
bujía.
Tenga en cuenta que las correas de transmisión se
ajustarán durante el periodo de rodaje inicial (5 horas) y
es posible que sea necesario ajustar la tensión. Consulte
las instrucciones:
Filtro de aire
El filtro de aire debe limpiarse regularmente de polvo y
suciedad para evitar:
• Fallos del carburador.
• Problemas de arranque.
• Reducción de la potencia.
• Desgaste innecesario de las piezas del motor.
• Un consumo de combustible excesivo.
Limpie el filtro una vez al día. En condiciones difíciles,
límpielo con más frecuencia.
Para desmontar el filtro de aire hay que desmontar
primero la cubierta del mismo. Presione los fiadores de la
parte superior de la cubierta del filtro de aire y baje ésta.
Desmonte el filtro de aire y controle que está intacto. Si
el filtro presenta defectos cámbielo por uno nuevo.
Limpie el filtro golpeándolo con cuidado contra una
superficie dura y soplando con aire comprimido desde el
interior. No utilice nunca un cepillo para limpiar la
suciedad. Cambie el filtro de aire si está muy sucio.
Un filtro utilizado durante mucho tiempo no puede
limpiarse del todo. Por tanto, hay que cambiarlo a
intervalos regulares.
cambiarse.
Al montar, compruebe que el filtro queda estanco contra
el soporte.
Bujía
!
Si la potencia de la máquina es demasiado baja, si es
difícil arrancar la máquina o si el ralentí es irregular:
revise primero la bujía antes de tomar otras medidas. Si
la bujía está muy sucia, límpiela y compruebe que la
separación de los electrodos sea de 0,7-0,8 mm. La bujía
debe cambiarse aproximadamente después de un mes
de funcionamiento o más a menudo si es necesario.
Un filtro de aire averiado debe
¡ATENCIÓN! Durante y un rato después
del uso, el silenciador sigue estando
muy caliente. ¡No toque el silenciador si
está caliente!
¡NOTA! ¡Utilice siempre el tipo de bujía recomendado!
Una bujía incorrecta puede arruinar el pistón y el cilindro.
Silenciador
El silenciador está diseñado para amortiguar el ruido y
para apartar del usuario los gases de escape. Los gases
de escape están calientes y pueden contener chispas
que pueden ocasionar incendios si se dirigen los gases a
materiales secos e inflamables.
Compruebe regularmente que el silenciador esté
firmemente montado en la máquina. Nunca utilice una
máquina que tenga un silenciador defectuoso.
Cuchilla
¡ATENCIÓN! Utilice siempre guantes
resistentes al reparar el equipo de corte.
Las cuchillas son muy filosas y pueden
provocar cortes muy fácilmente.
Es importante usar una cuchilla afilada y correctamente
equilibrada. Afloje el tornillo de fijación de la cuchilla y
lleve ésta a un taller de servicio como mínimo una vez al
año para afilar y equilibrar. Es adecuado hacer esta
operación al finalizar la temporada de corte.
Si debe cambiar la cortadora o el soporte de la cortadora,
tendrá que cambiar al mismo tiempo el perno, la arandela
y la arandela de fricción de la cortadora.
Al montar de nuevo la cuchilla, el tornillo debe apretarse
con un par de 45-60 Nm. Vea las instrucciones bajo el
título Montaje.
Si la cuchilla toca en objetos como piedras, raíces o
similares, la cuchilla patina contra su soporte. Por ello, la
superficie de contacto del soporte de cuchilla puede tener
un aspecto algo gastado, lo cual es completamente
normal. Este es un dispositivo de seguridad que reduce
el riesgo de que se doble el eje del motor.
Cambio de aceite
El primer cambio del aceite del motor debe hacerse
después de 5 horas de funcionamiento.
El aceite del motor debe cambiarse cada año y cada 25
horas de trabajo.
Procedimiento de cambio del aceite:
• Desconecte el cable de encendido de la bujía.
• Vacíe el depósito de combustible.
• Cierre el grifo de combustible.
82 – Spanish
Page 83

MANTENIMIENTO
• Quite el tapón de llenado de aceite.
Coloque un recipiente adecuado para recoger el aceite.
• Incline el motor y vacíe el aceite por el tubo de
llenado.
• Consulte con la gasolinera más cercana acerca de
qué hacer con el aceite de motor sobrante.
• Ponga aceite de motor nuevo, de buena calidad. Vea
el capítulo Datos técnicos.
• Vuelva a introducir la varilla de nivel sin enroscarla.
Controle el nivel de aceite con la varilla de medición
del tapón de llenado. Si el nivel de aceite es
demasiado bajo, ponga aceite de motor hasta la
marca de nivel superior de la varilla de medición.
Cambio y ajuste de la correa trapezoidal
• Desmonte la cubierta protectora, quitando los
tornillos.
• Retire el tapacubos de la rueda delantera junto a la
caja de cambios haciendo palanca cuidadosamente
con un destornillador. Desatornille el tornillo y quite la
rueda.
• Saque la correa de la polea de la correa del equipo.
Compruebe que las poleas de las correas del equipo
se mueven sin problemas sobre el eje, pulverice
aceite de penetración entre las poleas y detrás de
estas y lubrique el eje.
• Coloque la correa nueva y asegúrese de que se
adapta perfectamente al cojinete de bolas antes de
ajustarla.
• Enrosque el tapón de llenado de aceite.
Transmisión y reductor
Procure que las ruedas y los ejes de ruedas estén limpios
de hojas, hierba, etc. También es importante mantener
limpios los alrededores del reductor de la transmisión.
• Desmonte la cubierta protectora, quitando los
tornillos.
• Limpie la caja del reductor con un cepillo. Compruebe
también que la correa de transmisión y la polea no
tengan defectos como, por ejemplo, grietas.
• Ajuste la correa moviendo el cojinete de bolas hacia
arriba o hacia abajo.
• Dado que las correas nuevas se estiran y se alargan,
ajústela de nuevo después de unas pocas horas de
funcionamiento.
• Atornille la cubierta de la correa y accione la máquina
para probarla.
Spanish – 83
Page 84

MANTENIMIENTO
Cambio y ajuste de la correa central
La correa central se encuentra entre el eje del motor y la
caja de cambios.
• Desmontar la cuchilla. (solo al cambiar la correa)
• Desenrosque los tornillos de ajuste unas vueltas.
• Cambie la correa por una nueva y apriete un poco los
tornillos de ajuste. (solo al cambiar la correa)
• Ajuste la correa moviendo el engranaje hacia delante
o hacia atrás.
• La correa debe estar estirada, de manera que pueda
moverse 6-10 mm en el centro. Esto se corresponde
con una tracción de aproximadamente 3 kg. Utilice
una balanza de pesca para comprobarlo.
• Apriete bien los tornillos de ajuste. (3 Nm)
• Compruebe el funcionamiento del motor, ya que el
ajuste del engranaje afecta a la tensión de la correa
de la caja de cambios.
Limpieza
No utilice un equipo de limpieza a alta presión para
limpiar la máquina.
Nunca vierta agua directamente sobre el motor.
Cuando limpie bajo la cubierta de corte, gire la máquina
con la bujía hacia arriba. Vacíe el depósito de
combustible.
Localización de averías
Si el motor no arranca, lleve a cabo las siguientes
comprobaciones:
• Cambie el combustible por combustible nuevo y
limpio.
• Compruebe que el paso de combustible está abierto.
• Controle que el freno de motor funciona bien y está
intacto.
• Limpie la bujía. Controle que la separación entre
electrodos es de 0,7-0,8 mm.
• Compruebe el filtro de aire y límpielo, si es necesario.
• Si el motor no arranca después de llevar a cabo estas
acciones, póngase en contacto con el taller de
servicio autorizado más cercano.
• Si el resultado del corte no es satisfactorio y los tallos
de hierba están cubiertos de pelusa en la cara
cortada, cambie la cortadora.
A continuación, se indican algunas instrucciones
generales de mantenimiento.
Mantenimiento diario
1 Compruebe que la horquilla del freno de motor
funciona de forma segura.
2 Limpie el cortacésped de hojas, hierba y similar, con
un cepillo.
3 Limpie la toma de aire del mecanismo de arranque.
Revise el mecanismo y el cordón de arranque.
4 Controle el nivel de aceite.
5 Limpie el filtro de aire. Cámbielo si es necesario.
6 Compruebe que los tornillos y las tuercas estén
apretados.
7 Controle el equipo de corte. Nunca utilice cuchillas
romas, agrietadas o dañadas.
Mantenimiento semanal
1 Limpie la bujía. Controle que la separación entre
electrodos es de 0,7-0,8 mm.
2 Limpie las aletas de enfriamiento del cilindro.
Mantenimiento mensual
1 Compruebe que la correa de transmisión está intacta
y no presenta defectos visibles.
2 Limpie la caja del reductor.
3 Revise el filtro y el conducto de combustible.
Cámbielos si es necesario.
4 Limpie el interior del depósito de combustible.
5 Lubrique el mando de transmisión.
6 Cambie el aceite del motor.
7 Examine el cable del embrague. Vea las instrucciones
bajo el título Montaje.
84 – Spanish
Page 85

DATOS TECNICOS
Datos técnicos
LB448S LB548S e
Motor
Fabricante del motor Honda Honda
Cilindrada, cm
Velocidad, r/min 2900 2900
Potencia nominal del motor, kW (véase la nota 1) 2,8 2,8
Sistema de encendido
Bujía NGK - BPR5ES NGK - BPR5ES
Distancia de electrodos, mm 0,7 - 0,8 0,7 - 0,8
Sistema de combustible y lubricación
Capacidad del depósito de gasolina, litros 0,9 0,9
Capacidad del depósito de aceite, litros 0,55 0,55
Aceite de motor
Peso
Cortacésped con depósitos vacíos, kg 31 33
Emisiones de ruido (vea la nota 2)
Nivel de potencia acústica medido dB(A) 92 90
Nivel de potencia acústica garantizado dB(A) 93 92
Nivel sonoro (vea la nota 3)
Nivel de presión acústica en el oído del usuario, dB(A) 79 77
Niveles de vibraciones (ver la nota 4)
Nivel de vibración en la empuñadura en m/s
Equipo de corte
Sistema de corte BioClip BioClip
Altura de corte 30-60 30-60
Anchura de corte, mm 48 48
Cuchilla Mulcher, 48 cm Mulcher, 48 cm
N.° de referencia 5028813-10 5028813-10
Transmisión
Velocidad, km/h 4,5 4,5
Nota 1: La potencia de salida del motor indicada es la potencia neta media (a la velocidad especificada) de un motor
de producción típico para el modelo de motor conforme a la norma SAE J1349 / ISO1585. Los motores fabricados en
serie podrían presentar valores diferentes. La potencia de salida real del motor instalado en la máquina final dependerá
de la velocidad de funcionamiento, las condiciones medioambientales y otros valores. Nota 2: Emisiones sonoras en el
entorno medidas como potencia acústica (L
conforme a EN
(desviación típica) de 1,2
vibración poseen una dispersión estadística habitual (desviación típica) de 0,2 m/s
3
2
) según la directiva CE 2000/14/CE. Nota 3: Nivel de presión sonora
ISO 5395. Los datos referidos del nivel de presión sonora tienen una dispersión estadística habitual
dB (A). Nota 4: Nivel de vibración conforme a EN ISO 5395. Los datos referidos del nivel de
WA
160 160
Service classification SG SH; SAE 10W -30
4,5 4,8
Service classification SG SH; SAE 10W -30
2
.
Spanish – 85
Page 86

DATOS TECNICOS
Declaración CE de conformidad
(Rige sólo para Europa)
Husqvarna AB, SE-561 82 Huskvarna, Suecia, teléfono +46-36-146500, declara por la presente que los cortacéspedes
a motor
Husqvarna LB448S y LB548S e, a partir del número de serie 15XXXXX cumplen con las disposiciones de las
DIRECTIVAS DEL CONSEJO:
2006/42/CE «relativa a máquinas» del 17 de mayo de 2006.
2014/30/UE, ”referente a compatibilidad electromagnética”, del 26 de febrero de 2014.
2000/14/CE, ”sobre emisiones sonoras en el entorno” del 8 de mayo de 2000.
Para más información sobre las emisiones sonoras, consulte el capítulo Datos técnicos.
Se han aplicado las siguientes normas: ISO 5395, ISO 11094, EN 55012.
Organismo inscripto: 0404, SMP Svensk Maskinprovning AB, Box 7035, SE-750 07 Uppsala, ha elaborado informes
sobre la evaluación de la conformidad con el Anexo VI de la Directiva del Consejo 2000/14/CE del 8 de mayo de 2000
sobre emisiones sonoras en el entorno.
Huskvarna, 6 de julio de 2015.
Claes Losdal, Jefe de Desarrollo/Productos para jardín
(Presentante autorizado de Husqvarna AB y responsable de la documentación técnica.)
86 – Spanish
Page 87

SYMBOLERKLÄRUNG
!
!
Symbole am Gerät:
WARNUNG! Das Gerät kann falsch
oder nachlässig angewendet
gefährlich sein und zu schweren oder
gar lebensgefährlichen Verletzungen
des Benutzers oder anderer Personen
führen.
Lesen Sie die Bedienungsanweisung
sorgfältig durch und machen Sie sich
mit dem Inhalt vertraut, bevor Sie das
Gerät benutzen.
Warnung vor hochgeschleuderten
und abprallenden Gegenständen.
Sorgen Sie dafür, dass sich im
Arbeitsbereich keine Unbefugten
aufhalten.
Durch Trennen des Zündkabels von
der Zündkerze versehentliches
Starten vermeiden.
Warnung vor rotierenden Messern.
Auf Hände und Füße Acht geben.
Erläuterung der Warnstufen
Es bestehen drei unterschiedliche Warnstufen.
WARNUNG!
WARNUNG! Nichtbeachtung der
Anweisungen in diesem Handbuch kann
zu Verletzungen bzw. zum Tod des
Bedieners oder zu Beschädigungen in
der Umgebung führen.
ACHTUNG!
ACHTUNG! Nichtbeachtung der
Anweisungen in diesem Handbuch kann
zur Verletzung des Bedieners bzw. zu
Beschädigungen in der Umgebung
führen.
HINWEIS!
HINWEIS! Nichtbeachtung der Anweisungen in diesem
Handbuch kann zu Beschädigungen der Umgebung
bzw. der Maschine führen.
Dafür sorgen, dass Hände und Füße
nicht an die Schneidausrüstung
kommen, wenn der Motor läuft.
Dieses Produkt stimmt mit den
geltenden CE-Richtlinien überein.
Umweltbelastende
Geräuschemissionen gemäß der
Richtlinie der Europäischen
Gemeinschaft. Die Emission des
Gerätes ist im Kapitel Technische
Daten und auf dem Geräteschild
angegeben.
German – 87
Page 88

INHALT
Inhalt
SYMBOLERKLÄRUNG
Symbole am Gerät: ............................................... 87
Erläuterung der Warnstufen .................................. 87
INHALT
Inhalt ..................................................................... 88
VORSTELLUNG
Sehr geehrter Kunde! ........................................... 89
Maßnahmen vor Gebrauch eines neuen
Rasenmähers .......................................................
WAS IST WAS?
Was ist was am Rasenmäher? ............................. 90
SICHERHEITSAUSRÜSTUNG DES GERÄTES
Allgemeines .......................................................... 91
Mähdeck und Schutzabdeckung ........................... 91
Motorbremsbügel .................................................. 91
Antivibrationssystem ............................................. 91
Schalldämpfer ....................................................... 92
Schneidausrüstung ............................................... 92
MONTAGE
Montage des Lenkers ........................................... 93
Justieren des Kupplungsdrahts ............................ 93
Aus- und Einbau der Klingen ................................ 93
Montage der Mulchkeile ........................................ 94
UMGANG MIT KRAFTSTOFF
Allgemeines .......................................................... 95
Kraftstoff ............................................................... 95
Tanken .................................................................. 95
Transport und Aufbewahrung ................................ 95
SICHERHEITSVORSCHRIFTEN
Persönlicher Schutz .............................................. 96
Allgemeine Sicherheitsvorschriften ....................... 96
Grundlegende Arbeitstechnik ............................... 97
Transport und Aufbewahrung ................................ 97
BETRIEB
Einstellung der Schnitthöhe .................................. 98
Starten und stoppen ............................................. 98
WARTUNG
Wartung ................................................................ 99
Luftfilter ................................................................. 99
Zündkerze ............................................................. 99
Schalldämpfer ....................................................... 99
Messer .................................................................. 99
Ölwechsel ............................................................. 99
Antrieb und Getriebe ............................................ 100
Reinigung .............................................................. 101
Fehlersuche .......................................................... 101
Tägliche Wartung .................................................. 101
Wöchentliche Wartung .......................................... 101
Monatliche Wartung ............................................. 101
TECHNISCHE DATEN
Technische Daten ................................................. 102
EG-Konformitätserklärung .................................... 103
89
88 – German
Page 89

VORSTELLUNG
!
!
!
Sehr geehrter Kunde!
Herzlichen Glückwunsch zu Ihrem Kauf eines
Husqvarna-Produkts!Husqvarnas Geschichte reicht bis
ins Jahr 1689 zurück, als König Karl XI eine Fabrik an den
Ufern des Flusses Huskvarna errichten ließ, in der
Musketen gefertigt werden sollten.Die Lage am
Huskvarna bot sich an, da der Fluss zur Erzeugung von
Wasserkraft verwendet wurde und so als
Wasserkraftwerk diente.In den mehr als 300 Jahren seit
dem Bestehen des Husqvarna-Werks wurden unzählige
Produkte hergestellt, angefangen von Holzöfen bis hin zu
modernen Küchenmaschinen, Nähmaschinen, Fahr- und
Motorrädern usw.1956 wurde der erste Motorrasenmäher
auf den Markt gebracht, gefolgt von der Motorsäge 1959,
und in diesem Bereich ist Husqvarnas auch heute tätig.
Husqvarna ist gegenwärtig einer der weltführenden
Hersteller von Forst- und Gartenmaschinen und legt vor
allem Wert auf Qualität und Leistungskraft.Das
Unternehmenskonzept umfasst die Entwicklung,
Herstellung und den Vertrieb von Produkten für den
Einsatz in Wald und Garten sowie in der
Bauindustrie.Husqvarnas Ziel ist es, auch in den
Bereichen Ergonomie, Benutzerfreundlichkeit, Sicherheit
und Umwelt führend zu sein – dies lässt sich an vielen
Details erkennen, die aus diesen Gesichtspunkten
heraus entwickelt wurden.
Wir sind überzeugt, dass Sie mit der Qualität und
Leistung unserer Produkte über lange Jahre mehr als
zufrieden sein werden. Mit dem Erwerb unserer Produkte
erhalten Sie professionelle Hilfe bei Reparaturen und
Service, falls doch einmal etwas passieren sollte. Haben
Sie die Maschine nicht bei einem unserer Ver tragshändler
gekauft, fragen Sie dort nach der nächsten
Servicewerkstatt.
Wir hoffen, dass Sie mit Ihrer Maschine über lange Jahre
zufrieden sein werden. Denken Sie daran, diese
Bedienungsanleitung sicher aufzubewahren.Die genaue
Befolgung ihres Inhalts (Verwendung, Service, Wartung
usw.) verlängert die Lebensdauer der Maschine erheblich
und erhöht zudem ihren Wiederverkaufswert.Sollten Sie
Ihre Maschine verkaufen, händigen Sie dem neuen
Besitzer bitte auch die Bedienungsanleitung aus.
Vielen Dank, dass Sie sich für ein Husqvarna-Produkt
entschieden haben.
Die Husqvarna AB arbeitet ständig an der
Weiterentwicklung ihrer Produkte und behält sich daher
das Recht auf Änderungen ohne vorherige Ankündigung,
z. B. von Form und Aussehen, vor.
Maßnahmen vor Gebrauch eines neuen Rasenmähers
• Die Bedienungsanweisung sorgfältig durchlesen.
• Montage und Einstellung der Schneidausrüstung
kontrollieren. Siehe die Anweisungen unter der
Überschrift Montage.
• Tanken und Öl im Motor auffüllen. Ein Behälter mit
ausreichender Ölmenge ist im Lieferumfang der
Maschine enthalten. Siehe die Anweisungen unter
der Überschrift Umgang mit Kraftstoff.
WARNUNG! Unter keinen Umständen
darf die ursprüngliche Konstruktion des
Gerätes ohne Genehmigung des
Herstellers geändert werden. Es ist
immer Originalzubehör zu verwenden.
Unzulässige Änderungen und/oder
unzulässiges Zubehör können zu
schweren oder sogar tödlichen
Verletzungen des Anwenders oder
anderer Personen führen.
WARNUNG! Ein unsachgemäß oder
nachlässig verwendeter Rasenmäher
kann zu einem gefährlichen Gerät
werden und schwere oder gar
lebensgefährliche Verletzungen
verursachen. Es ist sehr wichtig, dass
Sie den Inhalt dieser
Bedienungsanweisung lesen und
verstehen.
WARNUNG! Das Einatmen von
Motorabgasen über einen längeren
Zeitraum kann Gefahren für die
Gesundheit mit sich bringen.
Die Husqvarna AB arbeitet ständig an der
Weiterentwicklung ihrer Produkte und behält sich daher
das Recht auf Änderungen ohne vorherige Ankündigung,
z. B. von Form und Aussehen, vor.
German – 89
Page 90

WAS IST WAS?
LB548S eLB448S
1
2
4
5
6
7
Was ist was am Rasenmäher?
1 Griff/Führungsholm
2 Motorbremsbügel
3 Kupplungshebel
4 Starthandgriff
5 Öltank
6 Riemenschutz
7 Schalldämpfer
8 Zündkerze
9 Riemenschutz
10 Kraftstofftank
11 Handgriff Winkeleinstellung
12 Vibrationsdämpfer
22
3
13
212019
11
10
13
12
14
8
9
15
16
17
18
24
23
13 Justieren des Kupplungsdrahts
14 Unterer Führungsholm
15 Schnitthöhenhebel
16 Benzinhahn
17 Luftfilter
18 Mähdeck
19 Federscheibe
20 Messerbolzen
21 Messer/Schneidausrüstung
22 Messerbefestigung
23 Mulcheinsatz
24 Bedienungsanweisung
90 – German
Page 91

SICHERHEITSAUSRÜSTUNG DES GERÄTES
!
Allgemeines
In diesem Abschnitt werden einzelnen Teile der
Sicherheitsausrüstung des Gerätes beschrieben, welche
Funktion sie haben und wie ihre Kontrolle und Wartung
ausgeführt werden sollen, um sicherzustellen, dass sie
funktionsfähig sind. (Siehe Kapitel Was ist was? um
herauszufinden, wo die Sicherheitsdetails an Ihrem Gerät
zu finden sind).
WARNUNG! Benutzen Sie nie ein Gerät
mit defekter Sicherheitsausrüstung. Die
!
Sicherheitsausrüstung des Gerätes
muss so kontrolliert und gewartet
werden, wie dies in diesem Abschnitt
beschrieben wird. Wenn Ihr Gerät den
Kontrollanforderungen nicht entspricht,
muss eine Servicewerkstatt aufgesucht
werden.
WARNUNG! Benutzen Sie nie ein Gerät
mit defekter Sicherheitsausrüstung.
!
Befolgen Sie die in diesem Abschnitt
aufgeführten Kontroll-, Wartungs- und
Serviceanweisungen.
Mähdeck und Schutzabdeckung
Das Mähdeck soll Vibrationen reduzieren und die Gefahr
von Schnittverletzungen mindern. Überprüfen, dass das
Mähdeck intakt ist und keine sichtbaren Defekte, z. B.
Risse im Material, aufweist.
Die Schutzabdeckung soll die Klemmgefahr reduzieren
und einen zerborstenen Antriebsriemen abfangen.
Prüfen, dass die Schutzabdeckung intakt und
ordnungsgemäß festgeschraubt ist.
Motorbremsbügel
Die Motorbremse stoppt den Motor. Wird der Griff um den
Motorbremsbügel gelockert, soll der Motor stoppen.
Kontrollieren Sie die Motorbremse wie folgt:
Vollgas geben und dann den Bremsbügel loslassen.Der
Motor muss stoppen und der Antrieb ausgeschaltet
werden.
Die Motorbremse muss stets so eingestellt sein, dass der
Motor innerhalb von 3 Sekunden stoppt.
Antivibrationssystem
Das Gerät ist mit einem Antivibrationssystem
ausgerüstet, das die Vibrationen wirkungsvoll dämpft und
so für angenehmere Arbeitsbedingungen sorgt.
Die Konstruktion des Stahlrohrs des Handgriffsystems
und des Mähdecks minimiert die Vibrationen des Motors.
Das Antivibrationssystem reduziert die Übertragung von
Vibrationen zwischen Motoreinheit/Schneidausrüstung
und dem Handgriffsystem des Gerätes.
LB448S Dieses Model ist an der Handgriffeinheit zudem
mit 4 Vibrationsdämpfern ausgestattet, um die
Vibrationen noch weiter zu dämpfen.
Griffe und Vibrationsdämpfer auf Beschädigung
überprüfen.
WARNUNG! Personen mit
Kreislaufstörungen, die zu oft
Vibrationen ausgesetzt werden, laufen
Gefahr, Schäden an den Blutgefäßen
oder am Nervensystem davonzutragen.
Gehen Sie zum Arzt, wenn Sie an Ihrem
Körper Symptome feststellen, die auf
Vibrationsschäden deuten. Beispiele
solcher Symptome sind: Einschlafen von
Körperteilen, Gefühlsverlust, Kitzeln,
Stechen, Schmerz, Verlust oder
Beeinträchtigung der normalen
Körperkraft, Veränderungen der
Hautfarbe oder der Haut. Diese
Symptome treten am häufigsten in den
Fingern, Händen oder Handgelenken auf.
German – 91
Page 92

SICHERHEITSAUSRÜSTUNG DES GERÄTES
Schalldämpfer
Der Schalldämpfer soll den Geräuschpegel so weit wie
möglich senken und die Abgase des Motors vom
Anwender fernhalten.
WARNUNG! Die Motorabgase sind heiß
und können Funken enthalten, die einen
!
Brand verursachen können. Aus diesem
Grunde sollte das Gerät niemals im
Innenbereich oder in der Nähe von
feuergefährlichen Stoffen gestartet
werden! Während und kurze Zeit nach
der Benutzung ist der Schalldämpfer
sehr heiß. Den Schalldämpfer nicht
berühren, solange er heiß ist!
Niemals ein Gerät mit defektem Schalldämpfer benutzen.
Regelmäßig kontrollieren, ob der Schalldämpfer fest am
Gerät montiert ist.
Schneidausrüstung
Es ist zu vermeiden, dass das Messer gegen
Gegenstände wie Steine, Wurzeln usw. schlägt. Dies
kann dazu führen, dass das Messer stumpf wird und sich
die Motorachse verformt.
Die Schneidausrüstung auf Beschädigung und Risse
kontrollieren. Beschädigte Schneidausrüstungen sind
grundsätzlich auszutauschen. Sicherstellen, dass stets
ein gut geschliffenes und korrekt ausgewuchtetes Messer
verwendet wird.
Außerdem prüfen, dass der Messerbolzen intakt und die
Motorachse nicht verbogen ist.
92 – German
Page 93

MONTAGE
!
Montage des Lenkers
Beim Einklappen des Führungsholms vorsichtig
vorgehen, um Kabel und Regelzüge nicht zu
beschädigen.
Das Oberteil des Lenkers wird mit einer starken
Griffmutter an der Drehplatte befestigt. Die
Unterlegscheibe zwischen der Platte und der Griffmutter
nicht vergessen.
Bei Bedarf kann der Handgriff etwas zur Seite gedreht
werden. Der Handgriff lässt sich in verschiedene
Positionen verstellen, um z. B. bei Arbeiten an Hecken
oder Hauswänden die optimale Fahrstellung zu erzielen.
Der Handgriff lässt sich auch in der Höhe verstellen,
indem die Drehräder an den Befestigungen am
Fahrgestell angepasst werden.
Justieren des Kupplungsdrahts
Das Kupplungsseil muss nach 8 Betriebsstunden – und
im Anschluss nach Notwendigkeit
Das Seil ist richtig eingestellt, wenn die Seilhalterung an
der Mutter ausgerichtet ist.
• Das Seil mithilfe der Spannschraube anpassen. Die
Spannschraube durch Drehen im bzw. entgegen dem
Uhrzeigersinn lösen, um das Kupplungsseil zu
verlängern oder zu kürzen.
– angepasst werden.
Aus- und Einbau der Klingen
WARNUNG! Bei Service und Wartung der
Schneidausrüstung immer feste
Handschuhe anziehen. Die Messer sind
sehr scharf und können sehr leicht
Schnittwunden verursachen.
Vor Reparaturen, Reinigungs- oder Wartungsarbeiten ist
das Zündkabel stets von der Zündkerze zu lösen.
Beim Warten der Maschine den Mäher mit der Zündkerze
nach oben platzieren.
Stets den Kraftstofftank leeren, bevor der Rasenmäher
auf die Seite gelegt wird.
Demontage
• Den Bolzen, der das Messer hält, lösen.
• Schraube, Federscheibe und Messer ausbauen.
German – 93
Page 94

MONTAGE
Montage
Die Klinge ist mit den abgewinkelten Enden nach oben in
Richtung Abdeckung anzubringen.
• Messer mit der Reibscheibe am Messerhalter
positionieren.
• Sicherstellen, dass das Messer mittig auf der Welle
sitzt.
• Zur Vermeidung von Vibrationen das Messer so
positionieren, dass die Markierung des Messerhalters
an den Seiten des Messers sichtbar ist.
WICHTIG!
Gehen Sie stets mit Vorsicht und Vernunft vor.
Vermeiden Sie Situationen, für die Sie sich nicht
ausreichend qualifiziert fühlen. Falls Sie sich auch nach
dem Lesen dieser Anweisungen nicht über die richtige
Vorgehensweise im Klaren sind, sollten Sie einen
Fachmann zu Rate ziehen, bevor Sie fortfahren.
Wenden Sie sich bitte an einen autorisierten
Servicehändler.
Es sind stets Original-Ersatzteile zu verwenden.
Weitere Informationen finden Sie im Abschnitt
„Technische Daten“.
Montage der Mulchkeile
• Das Zündkerzenkabel von der Zündkerze abziehen.
• Beim Warten der Maschine den Mäher mit der
Zündkerze nach oben platzieren.
• Stecken Sie die Führungsstifte in die Löcher auf der
Schneidwerkabdeckung.
• Befestigen Sie die Mulchkeile oben an der
Schneidwerkabdeckung.
• Scheibe anbringen und Bolzen gut festschrauben.
Der Bolzen ist mit einem Moment von 70 Nm
anzuziehen.
94 – German
Page 95

UMGANG MIT KRAFTSTOFF
!
Allgemeines
WARNUNG! Einen Motor in einem
geschlossenen oder schlecht belüfteten
!
Raum laufen zu lassen, kann zum Tod
durch Ersticken oder
Kohlenmonoxidvergiftung führen.
Kraftstoff und Kraftstoffdämpfe sind
sehr feuergefährlich und können beim
Einatmen und auf der Haut schwere
Schäden verursachen.Beim Umgang mit
Kraftstoff ist daher Vorsicht geboten und
für eine gute Belüftung zu sorgen.
Die Motorabgase sind heiß und können
Funken enthalten, die einen Brand
verursachen können. Aus diesem
Grunde sollte das Gerät niemals im
Innenbereich oder in der Nähe von
feuergefährlichen Stoffen gestartet
werden!
Beim Tanken nicht rauchen und jegliche
Wärmequellen vom Kraftstoff fernhalten.
Kraftstoff
HINWEIS! Die Maschine ist mit einem Viertaktmotor
ausgerüstet. Dafür sorgen, dass sich stets ausreichend
Öl im Öltank befindet.
Benzin
• Bleifreies oder verbleites Qualitätsbenzin verwenden.
• Als niedrigste Oktanzahl wird ROZ 90 empfohlen.
Wenn der Motor mit Benzin einer niedrigeren
Oktanzahl als 90 betrieben wird, läuft er nicht
einwandfrei. Das führt zu erhöhten
Motortemperaturen, die schwere Motorschäden
verursachen können.
• Wenn umweltgerechtes sog. Alkylatbenzin zur
Verfügung steht, ist dieses zu verwenden.
Motoröl
HINWEIS! Vor dem Starten des Rasenmähers Ölstand
prüfen. Ein zu niedriger Ölstand kann zu schweren
Motorschäden führen.
• Siehe die Anweisungen im Abschnitt "Wartung".
• Das Motoröl ist erstmalig nach 5 Betriebsstunden zu
wechseln. Welche Ölsorte verwendet werden muss,
kann den technische Daten entnommen werden.
Niemals Öl für Zweitaktmotoren verwenden.
Tanken
WARNUNG! Den Motor abstellen und vor
dem Tanken einige Minuten abkühlen
lassen. Das Gerät muss nach dem
Betrieb ausgeschaltet werden. Der
Stoppschalter wird dazu in die Position
STOP gebracht.
Verwenden Sie jederzeit einen
Benzinkanister, um Verschüttung zu
vermeiden.
Den Tankdeckel stets vorsichtig öffnen,
so dass sich ein evtl. vorhandener
Überdruck langsam abbauen kann.
Wischen Sie eventuelle
Verschmutzungen um den Tankdeckel
ab.
Den Tankdeckel nach dem Tanken wieder
sorgfältig zudrehen. Fahrlässiges
Handeln erhöht die Brandgefahr.
Das Gerät vor dem Starten mindestens 3
m von der Stelle entfernen, an der
getankt wurde.
Das Gerät niemals starten, wenn:
• Wenn Kraftstoff oder Motoröl auf die Maschine
verschüttet wurde: Alles abwischen und restliches
Benzin verdunsten lassen.
• Wenn Sie Kraftstoff über sich selbst oder Ihre
Kleidung verschüttet haben, ziehen Sie sich um.
Waschen Sie die Körperteile, die mit dem Kraftstoff in
Berührung gekommen sind. Wasser und Seife
verwenden.
• Wenn es Kraftstoff leckt. Tankdeckel und
Tankleitungen regelmäßig auf Undichtigkeiten
überprüfen.
Transport und Aufbewahrung
• Das Gerät und den Kraftstoff so transportieren und
aufbewahren, dass bei eventuellen Undichtigkeiten
entweichende Dämpfe oder Kraftstoff nicht mit
Funken oder offenem Feuer in Kontakt kommen
können, z. B. von Elektrogeräten, Elektromotoren,
elektrischen Kontakten/Schaltern oder Heizkesseln.
• Zum Transport und zur Aufbewahrung von Kraftstoff
sind speziell für diesen Zweck vorgesehene und
zugelassene Behälter zu verwenden.
Langzeitaufbewahrung
• Bei längerer Aufbewahrung des Geräts ist der
Kraftstofftank zu leeren. An der nächsten Tankstelle
können Sie erfahren, wie Sie überschüssigen
Kraftstoff am besten entsorgen.
German – 95
Page 96

SICHERHEITSVORSCHRIFTEN
!
!
Persönlicher Schutz
WARNUNG! Beim Gebrauch der
Maschine ist stets eine persönliche
!
Schutzausrüstung zu verwenden.
• Handschuhe sind zu tragen, wenn dies notwendig ist,
z. B. bei der Montage, Inspektion oder Reinigung der
Schneidausrüstung.
• Stets kräftige lange Hosen tragen. Keine kurzen
Hosen oder Sandalen tragen und nicht barfuß gehen.
• Rutschfeste und stabile Stiefel oder Schuhe tragen.
Die übrige Arbeitskleidung sollte dicht anliegen, ohne die
Bewegungsfreiheit zu begrenzen.
Allgemeine Sicherheitsvorschriften
In diesem Abschnitt werden grundlegende
Sicherheitsregeln vorgestellt. Die folgenden
Informationen sind kein Ersatz für das Wissen, das ein
professioneller Anwender durch seine Ausbildung und
praktische Erfahrung erworben hat.
• Lesen Sie die Bedienungsanweisung sorgfältig durch
und machen Sie sich mit dem Inhalt vertraut, bevor
Sie das Gerät benutzen.
• Daran denken, dass der Bediener für Unfälle oder
Gefahrensituationen verantwortlich ist, die anderen
Personen oder deren Eigentum widerfahren.
• Die Maschine ist sauber zu halten. Die Lesbarkeit
aller Schilder und Aufkleber muss gewährleistet
werden.
Stets mit gesundem Menschenverstand arbeiten!
Es ist unmöglich, alle denkbaren Situationen
abzudecken, die beim Gebrauch des Geräts auftreten
könnten. Gehen Sie stets mit Vorsicht und Vernunft vor.
Vermeiden Sie Situationen, für die Sie sich nicht
ausreichend qualifiziert fühlen. Falls Sie sich auch nach
dem Lesen dieser Anweisungen nicht über die richtige
Vorgehensweise im Klaren sind, sollten Sie einen
Fachmann zu Rate ziehen, bevor Sie fortfahren. Fragen
Sie Ihren Fachhändler, Ihre Servicewerkstatt oder einen
erfahrenen Anwender. Vermeiden Sie, Arbeiten
auszuführen, denen Sie sich nicht gewachsen fühlen.
WARNUNG! Diese Maschine erzeugt
beim Betrieb ein elektromagnetisches
!
Feld. Dieses Feld kann sich unter
bestimmten Bedingungen auf die
Funktionsweise aktiver oder passiver
medizinischer Implantate auswirken. Um
die Gefahr für schwere oder tödliche
Verletzungen auszuschließen, sollten
Personen mit einem medizinischen
Implantat vor der Nutzung dieser
Maschine ihren Arzt und den Hersteller
des Implantats konsultieren.
WARNUNG! Das Gerät kann falsch oder
nachlässig angewendet gefährlich sein
und zu schweren oder gar
lebensgefährlichen Verletzungen des
Benutzers oder anderer Personen
führen.
Niemals Kinder oder andere Personen,
die nicht mit der Handhabung der
Maschine vertraut sind, die Maschine
bedienen oder warten lassen.
Die Maschine sollte nicht ohne eine
Aufsichtsperson von Personen mit
körperlicher oder geistiger Behinderung
oder Personen, die aufgrund
gesundheitlicher Beschwerden nicht in
der Lage sind, die Maschine zu bedienen,
benutzt werden.
Lassen Sie niemals jemand anderen das
Gerät benutzen, ohne sich zu
vergewissern, dass die Person den Inhalt
der Bedienungsanweisung verstanden
hat.
Arbeiten Sie niemals mit dem Gerät,
wenn Sie müde sind, Alkohol getrunken
oder Medikamente eingenommen haben,
da hierdurch Sehkraft, Urteilsvermögen
oder Körperkontrolle beeinträchtigt
werden können.
WARNUNG! Unzulässige Änderungen
und/oder Zubehörteile können zu
schweren Verletzungen oder tödlichen
Unfällen von Anwendern oder anderen
Personen führen. Unter keinen
Umständen darf die ursprüngliche
Konstruktion des Gerätes ohne
Genehmigung des Herstellers geändert
werden.
Das Gerät nicht so modifizieren, dass es
nicht länger mit der Originalausführung
übereinstimmt, und nicht benutzen,
wenn es scheinbar von anderen
modifiziert wurde.
Niemals mit einem defekten Gerät
arbeiten. Die Kontroll-, Wartungs- und
Serviceanweisungen in dieser
Bedienungsanweisung sind genau zu
befolgen. Gewisse Wartungs- und
Servicemaßnahmen sind von
geschulten, qualifizierten Fachleuten
auszuführen. Siehe Anweisungen unter
dem Titel Wartung.
Es ist immer Originalzubehör zu
verwenden.
96 – German
Page 97

SICHERHEITSVORSCHRIFTEN
Sicherheit im Arbeitsbereich
• Vor dem Mähen sind Äste, Zweige, Steine usw. vom
Rasen zu entfernen.
• Objekte, die von der Klinge erfasst werden, könnten
durch die Luft geschleudert werden, und Personen
oder Objekten in der Umgebung Schaden zufügen.
Sorgen Sie dafür, dass sich keine weiteren Personen
oder Tiere in unmittelbarer Nähe aufhalten.
• Die Verwendung des Geräts bei schlechtem Wetter, u.
a. bei Nebel, Regen, Nässe oder feuchter
Umgebung, starkem Wind, großer Kälte,
Gewittergefahr usw., sollte vermieden werden. Das
Arbeiten bei schlechtem Wetter ist sehr ermüdend
und kann gefährliche Umstände herbeiführen, z. B.
Rutschgefahr.
• Überprüfen Sie Ihre Umgebung auf mögliche
Störquellen hin, die Ihre Aufmerksamkeit ablenken
könnten.
• Achten Sie besonders auf Wurzeln, Steine, Zweige,
Gräben etc. Hohes Gras kann Hindernisse verbergen.
• Das Mähen von Hängen kann gefährlich sein. Den
Rasenmäher nicht auf steilen Hängen benutzen. Der
Rasenmäher sollte nicht auf Gelände mit mehr als 15
Grad Neigung verwendet werden.
• In hügeligem Gelände sollten die Arbeitswege im
rechten Winkel zur Neigung verlaufen. Es ist viel
einfacher, am Hang entlang zu gehen als hinauf und
hinunter.
• Seien Sie besonders vorsichtig, wenn Sie um Ecken
oder Objekte herum fahren, die Ihre Sicht
beeinträchtigen.
Arbeitssicherheit
• Ein Rasenmäher ist nur für das Mähen von Rasen
konstruiert. Alle anderen Einsätze sind unzulässig.
• Tragen Sie persönliche Schutzausrüstung. Siehe die
Anweisungen unter der Überschrift ”Persönliche
Schutzausrüstung”.
• Den Rasenmäher niemals ohne montierte Messer
und Abdeckungen starten. Andernfalls kann sich das
Messer lösen und Verletzungen verursachen.
• Es ist zu vermeiden, dass das Messer gegen
Gegenstände wie Steine, Wurzeln usw. schlägt. Dies
kann dazu führen, dass das Messer stumpf wird und
sich die Motorachse verformt. Eine verbogene Achse
erzeugt Unwucht und starke Vibrationen, wodurch
sich das Messer sehr leicht lösen kann.
• Der Bremsbügel darf niemals dauerhaft im Handgriff
verankert sein, wenn die Maschine in Betrieb ist.
• Den Rasenmäher auf stabilem Untergrund abstellen
und starten. Sicherstellen, dass das Messer nicht mit
dem Boden oder anderen Gegenständen Kontakt hat.
• Stellen Sie sich zum Bedienen der Maschine immer
hinter das Gerät. Achten Sie beim Mähen darauf,
dass alle Räder der Maschine auf dem Untergrund
bleiben und Sie den Griff stets mit beiden Händen
halten. Halten Sie Hände und Füße von den
rotierenden Rasenmäherklingen fern.
• Kippen Sie die Maschine nicht, wenn der Motor läuft.
• Gehen Sie mit dem Gerät – laufen Sie nicht.
• Besondere Vorsicht ist geboten, wenn Sie die
Maschine während des Arbeitens zu sich
heranziehen.
• Rasenmäher niemals mit laufendem Motor
hochheben oder umhertragen. Soll der Rasenmäher
gehoben werden, zuerst den Motor abstellen und das
Zündkabel von der Zündkerze abziehen.
• Rasen nicht in Rückwärtsbewegung mähen.
• Beim Bewegen über nicht zu mähendes Gelände ist
der Motor abzustellen. Beispiele: Kies, Stein,
Schotter, Asphalt usw.
• Den Motor vor der Änderung der Schnitthöhe
abstellen. Niemals Einstellungen bei laufendem Motor
durchführen.
• Niemals das Gerät unbeaufsichtigt mit laufendem
Motor stehen lassen. Motor abstellen. Achten Sie
darauf, dass die Schneidausrüstung nicht mehr
rotiert.
• Wenn ein Fremdkörper getroffen wird oder
Vibrationen auftreten, müssen Sie das Gerät
abstellen. Das Zündkerzenkabel von der Zündkerze
abziehen. Kontrollieren, ob das Gerät beschädigt ist.
Eventuelle Schäden reparieren.
Grundlegende Arbeitstechnik
• Um optimale Ergebnisse zu erzielen, verwenden Sie
stets eine scharfe Klinge. Eine stumpfe Klinge
schneidet ungleichmäßig und sorgt dafür, dass das
Gras an der Oberfläche gelb wird.
• Niemals mehr als 1/3 der Graslänge mähen. Dies gilt
besonders während Trockenperioden. Zuerst mit
einer großen Schnitthöhe mähen. Das Ergebnis
prüfen und auf eine geeignete Höhe senken. Ist das
Gras besonders lang, langsam fahren und eventuell
zweimal mähen.
• Mähen Sie bei jedem Mal in eine andere Richtung, um
Streifen auf dem Rasen zu vermeiden.
• Bevor Sie die Maschine zu sich heranziehen, schalten
Sie den Antrieb aus und drücken Sie die Maschine ca.
10
cm nach vorne.
• Kuppeln Sie aus, wenn Sie sich einem Hindernis
nähern.
Transport und Aufbewahrung
• Achten Sie beim Transport der Schneideausrüstung
darauf, dass diese nicht beschädigt wird.
• Bewahren Sie das Gerät für Kinder und Unbefugte
unzugänglich in einem abschließbaren Raum auf.
• Lagern Sie die Maschine und die dazugehörigen
Werkzeuge an einem trockenen, frostsicheren Ort.
• Anweisungen zum Transport und Aufbewahren von
Kraftstoff finden Sie im Abschnitt "Handhabung von
Kraftstoff".
German – 97
Page 98

BETRIEB
!
Einstellung der Schnitthöhe
WICHTIG! Den Motor vor der Änderung der Schnitthöhe
abstellen.
Die Schnitthöheneinstellung ist federgestützt. Die
Schnitthöhe ist 6fach verstellbar.
Die Schnitthöhe nicht zu niedrig einstellen, da sonst die
Messer bei unebenem Gelände auf den Boden treffen
können.
• Für eine höhere Schnitthöhe den Hebel nach links
und dann nach vorne führen.
• Für eine niedrigere Schnitthöhe den Hebel nach links
und dann nach hinten führen.
Starten und stoppen
WARNUNG! Vor dem Start ist Folgendes
zu beachten:
Den Rasenmäher niemals ohne montierte
Messer und Abdeckungen starten.
Andernfalls kann sich das Messer lösen
und Verletzungen verursachen.
Die Maschine vor dem Start immer aus
dem Auftankbereich und von der
Auftankquelle weg bewegen.
Das Gerät auf festem Untergrund abstellen.
Darauf achten, dass die Schneidausrüstung
keine Gegenstände berührt.
Sorgen Sie dafür, dass sich im
Arbeitsbereich keine Unbefugten aufhalten.
Beachten, dass das Zündkabel korrekt an der Zündkerze
sitzt.
Starten
• Kraftstoffhahn öffnen.
• Den Motorbremsbügel mit der linken Hand ganz zum
oberen Handgriff ziehen.
• Mit der rechten Hand den Starthandgriff fassen und
das Startseil langsam herausziehen, bis ein
Widerstand spürbar wird (die Starthaken greifen), und
dann schnell und kräftig ziehen.
niemals um die Hand wickeln.
ACHTUNG! Das Startseil nicht ganz herausziehen und
den Startgriff aus ganz herausgezogener Lage nicht
loslassen. Schäden am Gerät könnten die Folge sein.
Das Startseil
98 – German
Antrieb
Zur Verwendung des Antriebs den Kupplungshebel nach
vorne schieben.
Stoppen
• Zum Abstellen des Motors den Motorbremsbügel
loslassen. Auch der Antrieb wird durch Loslassen des
Bremshebels abgeschaltet. Der Antrieb kann allein
ausgekuppelt werden, indem der Bremshebel etwas
gelöst wird.
• Kraftstoffhahn schließen.
Page 99

Wartung
!
WARNUNG! Vor Reinigung, Reparatur
oder Inspektion müssen Sie darauf
!
achten, dass die Schneidausrüstung
zum Stillstand gekommen ist. Das
Zündkerzenkabel von der Zündkerze
abziehen.
Bitte beachten Sie, dass sich die Treibriemen bei der
ersten Einfahrzeit (5
Spannung eventuell korrigieren müssen. Siehe
Anweisungen:
Stunden) einstellen und dass Sie die
Luftfilter
Luftfilter regelmäßig von Staub und Schmutz reinigen, zur
Vermeidung von:
• Vergaserstörungen.
• Startschwierigkeiten.
• Leistungsminderung.
• Unnötigem Verschleiß der Motorteile.
• Unnormal hohem Kraftstoffverbrauch.
Luftfilter täglich reinigen, bei schwierigen Verhältnissen öfter
Vor dem Ausbau des Luftfilters ist der Luftfilterdeckel zu
entfernen. Die Sperren auf der Oberseite des
Luftfilterdeckels eindrücken und den Deckel
herunterklappen.
Luftfilter entfernen und prüfen, dass er intakt ist. Bei
Defekten einen neuen Luftfilter einsetzen.
Filter reinigen, dazu vorsichtig auf einer harten Fläche
ausklopfen und mit Druckluft von innen sauber blasen.
Niemals den Schmutz abbürsten. Luftfilter austauschen,
wenn er sehr schmutzig ist.
Ein Luftfilter, der längere Zeit verwendet wurde, wird nie
vollkommen sauber. Der Luftfilter ist daher in
regelmäßigen Abständen auszuwechseln.
Filter sind immer auszuwechseln.
Beim Einbau darauf achten, dass der Luftfilter völlig zum
Filterhalter hin abdichtet.
Zündkerze
WARNUNG! Während und kurze Zeit
nach der Benutzung ist der
!
Schalldämpfer sehr heiß. Den
Schalldämpfer nicht berühren, solange
er heiß ist!
Bei schwacher Leistung, wenn das Gerät schwer zu
starten ist oder im Leerlauf ungleichmäßig läuft, immer
zuerst die Zündkerze prüfen, bevor andere Maßnahmen
eingeleitet werden. Ist die Zündkerze verschmutzt, so ist
sie zu reinigen; gleichzeitig ist zu prüfen, ob der
Elektrodenabstand 0,7-0,8 mm beträgt. Die Zündkerze ist
nach ungefähr einem Monat in Betrieb oder bei Bedarf
öfter auszuwechseln.
WARTUNG
Beschädigte
ACHTUNG! Stets den vom Hersteller empfohlenen
Zündkerzentyp verwenden! Eine ungeeignete Zündkerze
kann Kolben und Zylinder zerstören.
Schalldämpfer
Der Schalldämpfer hat die Aufgabe, den Schallpegel zu
dämpfen und die Abgase vom Anwender wegzuleiten.
Die Abgase sind heiß und können Funken enthalten, die
einen Brand verursachen können, wenn die Abgase auf
trockenes und brennbares Material gerichtet werden.
Regelmäßig kontrollieren, ob der Schalldämpfer fest am
Gerät montiert ist. Niemals ein Gerät mit defektem
Schalldämpfer benutzen.
Messer
WARNUNG! Bei Reparaturen der
Schneidausrüstung immer feste
Handschuhe tragen. Die Messer sind
sehr scharf und können sehr leicht
.
Ein scharfes und korrekt ausgewuchtetes Messer ist von
großer Bedeutung. Messerbolzen lösen und das Messer
mindestens einmal im Jahr einer Servicewerkstatt zum
Schleifen und Auswuchten überlassen. Ein geeigneter
Zeitpunkt hierfür ist nach dem Ende der Mähsaison.
Bei einem Austausch des Messers oder Messerhalters
müssen auch die Messerschraube, Unterlegscheibe und
Reibscheibe erneuert werden.
Beim Wiedereinbau des Messers muss der Bolzen mit
einem Moment von 45-60 Nm angezogen werden. Siehe
die Anweisungen unter der Überschrift Montage.
Stößt das Messer gegen fremde Gegenstände wie
Steine, Wurzeln o. Ä., wird das Messer gegen die
Messerbefestigung geschleudert.Daher kann die
Anliegefläche der Messerbefestigung ein wenig
abgenutzt aussehen, dies hat aber keinerlei negative
Auswirkungen.Es handelt sich dabei um eine
Sicherheitsvorrichtung, die die Gefahr einer verbogenen
Motorwelle reduziert.
Schnittwunden verursachen.
Ölwechsel
Das Motoröl ist erstmalig nach 5 Betriebsstunden zu
wechseln.
Das Motoröl ist jährlich und alle 25 Betriebsstunden zu
wechseln.
Beim Ölwechsel wie folgt vorgehen:
• Das Zündkerzenkabel von der Zündkerze abziehen.
• Kraftstofftank leeren.
• Kraftstoffhahn schließen.
German – 99
Page 100

WARTUNG
• Öleinfülldeckel abschrauben.
Einen geeigneten Behälter aufstellen, um das Öl
aufzufangen.
• Motor neigen, sodass das Öl aus dem Einfüllrohr
rinnen kann, und das Öl ablassen.
• Die nächste Tankstelle informiert über die
bestmögliche Entsorgung von überschüssigem
Motoröl.
• Neues Motoröl guter Qualität einfüllen. Siehe das
Kapitel Technische Daten.
• Messstab ohne zu schrauben wieder einführen.
Ölstand mit dem Messstab am Öleinfülldeckel
kontrollieren. Bei niedrigem Ölstand mit Motoröl bis
zur oberen Markierung am Ölmessstab einfüllen.
Keilriemen auswechseln und einstellen
• Schrauben der Schutzabdeckung abschrauben und
Abdeckung entfernen.
• Radkappe des Vorderrads am Getriebe vorsichtig
mithilfe eines Schraubendrehers abheben.
Befestigungsschraube herausdrehen und Rad
abnehmen.
• Riemen von der Riemenscheibe abnehmen.
Kontrollieren, dass die Riemenscheiben leichtgängig
auf der Welle laufen. Falls nicht, Rostlösungsmittel
zwischen und hinter die Scheiben sprühen und etwas
Fett auf die Achse auftragen.
• Den neuen Riemen aufziehen und vor der
Riemeneinstellung sicherstellen, dass er richtig am
Kugellager sitzt.
• Öleinfülldeckel aufschrauben.
Antrieb und Getriebe
Sicherstellen, dass Räder und Radachsen sauber und
frei von Laub, Gras usw. sind.Es ist zudem wichtig, dass
der Bereich um das Getriebe des Antriebs sauber
gehalten wird.
• Schrauben der Schutzabdeckung abschrauben und
Abdeckung entfernen.
• Getriebe mit einer Bürste reinigen. Außerdem prüfen,
dass Antriebsriemen und Antriebsrad intakt sind und
keine Schäden wie z. B. Risse aufweisen.
100 – German
• Riemen durch Verschieben des Kugellagers nach
oben oder unten einstellen.
• Ein neuer Riemen dehnt und verlängert sich, deshalb
den Riemen nach ein paar Stunden Fahrbetrieb
nachjustieren.
• Riemenschutz anschrauben und die Maschine Probe
fahren.
 Loading...