

Page 1

EchoLife HG556 Home Gateway
User Guide
HUAWEI TECHNOLOGIES CO., LTD.
Page 2

EchoLife HG556 Home Gateway
V100R001
User Guide
Issue
Date
Part Number
01
2009-08-26
202157
Huawei Proprietary and Confidential
Copyright © Huawei Technologies Co., Ltd.
Page 3

Huawei Technologies Co., Ltd. provides customers with comprehensive technical
support and service. For any assistance, please contact our local office or company
headquarters.
Huawei Technologies Co., Ltd.
Address: Huawei Industrial Base
Bantian, Longgang
Shenzhen 518129
People's Republic of China
Website:
Email: terminal@huawei.com
http://www.huawei.com
Copyright © Huawei Technologies Co., Ltd. 2009. All rights reserved.
No part of this document may be reproduced or transmitted in any form or by
any means without prior written consent of Huawei Technologies Co., Ltd.
The product described in this manual may include copyrighted software of
Huawei Technologies Co., Ltd and possible licensors. Customers shall not in
any manner reproduce, distribute, modify, decompile, disassemble, decrypt,
extract, reverse engineer, lease, assign, or sublicense the said software, unless
such restrictions are prohibited by applicable laws or such actions are approved
by respective copyright holders under licenses.
Trademarks and Permissions
, HUAWEI, and are trademarks or registered trademarks of Huawei
Technologies Co., Ltd.
Other trademarks, product, service and company names mentioned are the
property of their respective owners.
Huawei Proprietary and Confidential
Copyright © Huawei Technologies Co., Ltd.
Page 4

Notice
Some features of the product and its accessories described herein rely on the
software installed, capacities and settings of local network, and may not be
activated or may be limited by local network operators or network service
providers, thus the descriptions herein may not exactly match the product or its
accessories you purchase.
Huawei Technologies Co., Ltd reserves the right to change or modify any
information or specifications contained in this manual without prior notice or
obligation.
NO WARRANTY
THE CONTENTS OF THIS MANUAL ARE PROVIDED “AS IS”. EXCEPT AS
REQUIRED BY APPLICABLE LAWS, NO WARRANTIES OF ANY KIND,
EITHER EXPRESS OR IMPLIED, INCLUDING BUT NOT LIMITED TO, THE
IMPLIED WARRANTIES OF MERCHANTABILITY AND FITNESS FOR A
PARTICULAR PURPOSE, ARE MADE IN RELATION TO THE ACCURACY,
RELIABILITY OR CONTENTS OF THIS MANUAL.
TO THE MAXIMUM EXTENT PERMITTED BY APPLICABLE LAW, IN NO
CASE SHALL HUAWEI TECHNOLOGIES CO., LTD BE LIABLE FOR ANY
SPECIAL, INCIDENTAL, INDIRECT, OR CONSEQUENTIAL DAMAGES, OR
LOST PROFITS, BUSINESS, REVENUE, DATA, GOODWILL OR
ANTICIPATED SAVINGS.
Import and Export Regulations
Customers shall comply with all applicable export or import laws and regulations
and will obtain all necessary governmental permits and licenses in order to
export, re-export or import the product mentioned in this manual including the
software and technical data therein.
Huawei Proprietary and Confidential
Copyright © Huawei Technologies Co., Ltd.
Page 5

EchoLife HG556 Home Gateway
User Guide
Contents
Contents
1 Safety Precautions ................................................................................................ 1-1
2 Product Overview................................................................................................. 2-1
2.1 Product Features.......................................................................................................... 2-1
2.2 Network Application................................................................................................... 2-2
2.3 Indicators, Interfaces and Buttons ............................................................................... 2-3
2.3.1 Indicators......................................................................................................... 2-3
2.3.2 Interfaces and Buttons..................................................................................... 2-2
2.4 System Requirements.................................................................................................. 2-3
3 Product Installation.............................................................................................. 3-1
3.1 Selecting the Installation Position ...............................................................................3-1
3.2 Connecting the Cables................................................................................................. 3-1
4 Configuring the HG556 .......................................................................................4-1
4.1 Accessing the Web Configuration Page ...................................................................... 4-1
4.2 Changing the Administrator Password........................................................................ 4-1
5 Data Services .........................................................................................................5-1
5.1 Introduction................................................................................................................. 5-1
5.2 Configuring the HSPA uplink ..................................................................................... 5-1
5.3 Configuring the ADSL uplink..................................................................................... 5-2
5.3.2 Configuring the PPPoE Mode .........................................................................5-2
Configuring the PPPoE Mode for the WAN Interface .............................................5-3
Configuring the Work Parameters of the LAN Interface .........................................5-3
5.3.3 Configuring the Bridge Mode ......................................................................... 5-4
6 Voice Services........................................................................................................6-1
6.1 Introduction................................................................................................................. 6-1
6.2 Voice Service Configuration....................................................................................... 6-1
6.2.1 Networking ..................................................................................................... 6-1
6.2.2 Getting Started ................................................................................................6-2
6.2.3 Configuration Procedure .................................................................................6-3
Huawei Proprietary and Confidential
Copyright © Huawei Technologies Co., Ltd.
i
Page 6

EchoLife HG556 Home Gateway
Contents
User Guide
7 Wireless Services .................................................................................................. 7-1
7.1 Introduction................................................................................................................. 7-1
7.2 Wireless Service Configuration................................................................................... 7-1
7.3 Configuring the MSSID Service ................................................................................. 7-2
7.3.1 Function .......................................................................................................... 7-2
7.3.2 Configuration Steps......................................................................................... 7-2
8 FAQs........................................................................................................................ 8-1
8.1 How can I configure a computer to use a static IP address?........................................ 8-1
8.2 What can I do if I cannot visit Web sites through the terminal?.................................. 8-2
8.3 What can I do if the terminal cannot access the Internet through a wireless network
adapter?............................................................................................................................. 8-3
8.4 What can I do if sometimes the terminal cannot access the Internet through a wireless
network adapter or if the WLAN connection is unsteady?................................................ 8-4
8.5 What can I do if the WLAN of the terminal is not encrypted and the computer cannot
access the WLAN?............................................................................................................ 8-5
8.6 Is there any restriction on the number of the computers that access a WLAN through
wireless network adapters?................................................................................................ 8-5
8.7 What can I do if I cannot access the terminal configuration page?.............................. 8-5
8.8 What can I do if Web pages often cannot be displayed during Web page browsing and
can be displayed after the terminal is restarted? ................................................................ 8-6
8.9 What can I do if noises exist during telephone calls?.................................................. 8-6
8.10 After a broadband terminal is installed, does Internet access degrade call quality or do
telephone calls lower the Internet access rate?.................................................................. 8-6
ii Huawei Proprietary and Confidential
Copyright © Huawei Technologies Co., Ltd.
Page 7

EchoLife HG556 Home Gateway
User Guide
Figures
Figure 2-1 Network application of the HG556................................................................. 2-2
Figure 2-2 Indicators ........................................................................................................2-3
Figure 2-3 Interfaces and buttons..................................................................................... 2-2
Figure 3-1 Connecting the HG556 ................................................................................... 3-2
Figure 6-1 Network model of voice services.................................................................... 6-2
Tables
Table 2-1 Description of the elements for the network application diagram ..................... 2-3
Table 2-2 Meanings of the indicators ................................................................................ 2-3
Table 2-3 Functions of the interfaces and buttons .............................................................2-2
Table 5-1 Work mode of the WAN interface ..................................................................... 5-2
Table 5-2 Configuration information to be collected before configuring the PPPoE mode5-2
Table 5-3 Configuration information to be collected before configuring the bridge mode 5-4
Table 6-1 Description of the equipment in voice service networking................................ 6-2
Table 6-2 Configuration information to be collected before configuring voice services... 6-2
Table 7-1 Configuration information to be collected before configuring wireless service 7-1
Figures
Huawei Proprietary and Confidential
Copyright © Huawei Technologies Co., Ltd.
iii
Page 8

EchoLife HG556 Home Gateway
User Guide
For safety purposes, carefully read through these safety precautions and observe them
during operation.
Safety Precautions
1 Safety Precautions
Basic R
Enviro
Operat
equirements
z
Keep the device dry during storage, transportation, and operation of the device.
z
Prevent collision of the device with other objects during storage, transportation, and
operation of the device.
z
Do not attempt to dismantle the device. In case of any fault, contact the authorized
maintenance center for assistance or repair.
z
Without prior written consent, no organization or individual is permitted to make any
change to the structure, safety, and performance design of the device.
z
While using the device, observe all applicable laws, directives and regulations, and
respect the legal rights of o
ther people.
nmental Requirements
z
Place the device in a well-ventilated place.
sunlight.
z
Keep the device clean, free of dust an
z
Do not place the device near a water source or in a damp area.
z
Place the device on a stable surface.
z
Do not place any object on the top of the device. Reserve a minimum spac
d stain.
at the four sides and on the top of the device for heat dissipation.
z
Do not place the device on or near inflammable materials such as foam.
z
Keep the device away from heat source or fire, such as a radiator or a candle.
z
Keep the device away from any household appliances with strong magnetic field o
electric field, such as
microwave oven, refrigerator, or mobile phone.
Do not expose the device to direct
ion Requirements
z
Do not allow children to play with the device or accessories. Swallowing the
accessories may be fatal.
z
Use the accessories such as the power adaptor and battery provided or authorized
only by the manufacturer.
z
Make sure that the device does not get wet. If water gets into the device, disconnect
the power supply immediately and unplug all the cables connected to the device,
e of 10 cm
r
Huawei Proprietary and Confidential
Copyright © Huawei Technologies Co., Ltd.
1-1
Page 9

Safety Precautions
such as the power cable, telephone cable, and RF cable, and then contact the
authorized m
z
The power supply of the device must meet the requirements of the input voltage of
the device.
z
Before plugging or unplugging any cable, shut down the device and disconne
power supply.
z
While plugging or unplugging any cab
z
Do not step on, pull, or stretch any
leading to malfunction of the device.
z
Do not use old or damaged cables.
z
Keep the power plug clean and dry, to prevent electric shock or other dangers.
z
During lightning
cables connected to the device, such as the power cable, telephone cable, to prevent
lightning strike.
z
If the devic
all the cables connected to the device, such as the power cable, telephone cable, and
RF cable.
z
Do not stare at the op
or the infrared transmitting interface on the remote control. Otherwise, your eyes
may get injured.
z
If smoke, sound, or smell is emitted from the device, stop using the dev
immediately, disconnect the power supply, unplug the power supply and other cables,
and remove the ba
z
Make sure that no object (such as metal shavings) enters the device through the heat
dissipation vent.
z
Do not scratch or abrade th
allergy or malfunctions of the device. If the shed painting material drops into the host,
a short circuit may occur.
EchoLife HG556 Home Gateway
User Guide
aintenance center.
ct the
le, make sure that your hands are dry.
cable. Otherwise, the cable may get damaged,
, disconnect the device from the power supply and unplug all the
e is not used for a long time, disconnect the power supply and unplug the
tical interface and the laser-transmitting interface on the device,
ice
tteries. Contact the authorized maintenance center for repair.
e shell of the device. The shed painting may lead to skin
Cleaning
Requirements
z
Before cleaning the device, stop using it, disconnect the power supply, and unplug
all the cables connected to the device, such as
z
Do not clean the device cover with any cleaning solution or cleanser spray. Use a
the power cable, and telephone cable.
piece of soft cloth to clean the device cover.
Wireless P
roduct Usage Requirements
z
Keep the device away from magnetic storage devices (e.g., a magnetic card or a
floppy disk), to prevent loss of the stored information.
z
Stop using the device or disconnect the power supply in situations where wireless
device is prohibited or using of a wireless device leads to interference or dang
z
The user who uses an electronic assistant medical-treatment device needs to confirm
with the service center regard
1-2 Huawei Proprietary and Confidential
Copyright © Huawei Technologies Co., Ltd.
ing the effects of the radio wave on this device.
er.
Page 10
EchoLife HG556 Home Gateway
User Guide
z
Do not take the device to the operation theater, Intensive Care Unit (ICU) or the
Coronary Care
z
When using the device maintain distance of 3 cm between your body and the antenna
Unit (CCU).
of the device.
z
In the area with inflammable or explosive materials, turn off your wireless device,
and follow the relevant instructions given in the label, to prevent explosion or fire.
z
Protect the wireless dev
environment. Make sure that the wireless device does not come
or a cigarette that is lit.
z
Make sure that the wireless device and its accessories are dry.
z
Do not drop, throw or try to bend your wireless device.
z
Do not place the wirel
Safety Precautions
ice and its accessories, and use it in a clean and dust-free
in contact with flame
ess device and its accessories in high temperature areas.
Environmental P
REACH
EU Reg
Declaration
This device is in compliant with the REACH regulation(Regulation 1907/2006/E
For more information about the device
www.huaweidevice.com/certification. You are recommended to visit the Web site
regularly for up-to-date inform
ulatory Conformance
The antenna(s) used for this transmitter must be installed to provid
of at least 20cm from all persons.
This euipment may be operated in all European countries.
France: Outdoor use limited to 10 mW e.i.r.p. within the band 2454-2483.5 MHz
Italy: For private use, a general authorisation is required if WAS/RLAN’s are u
outside own premises. For public use, a general authorisation is required
Luxembourg: General authorisation required for network and service supply
rotection
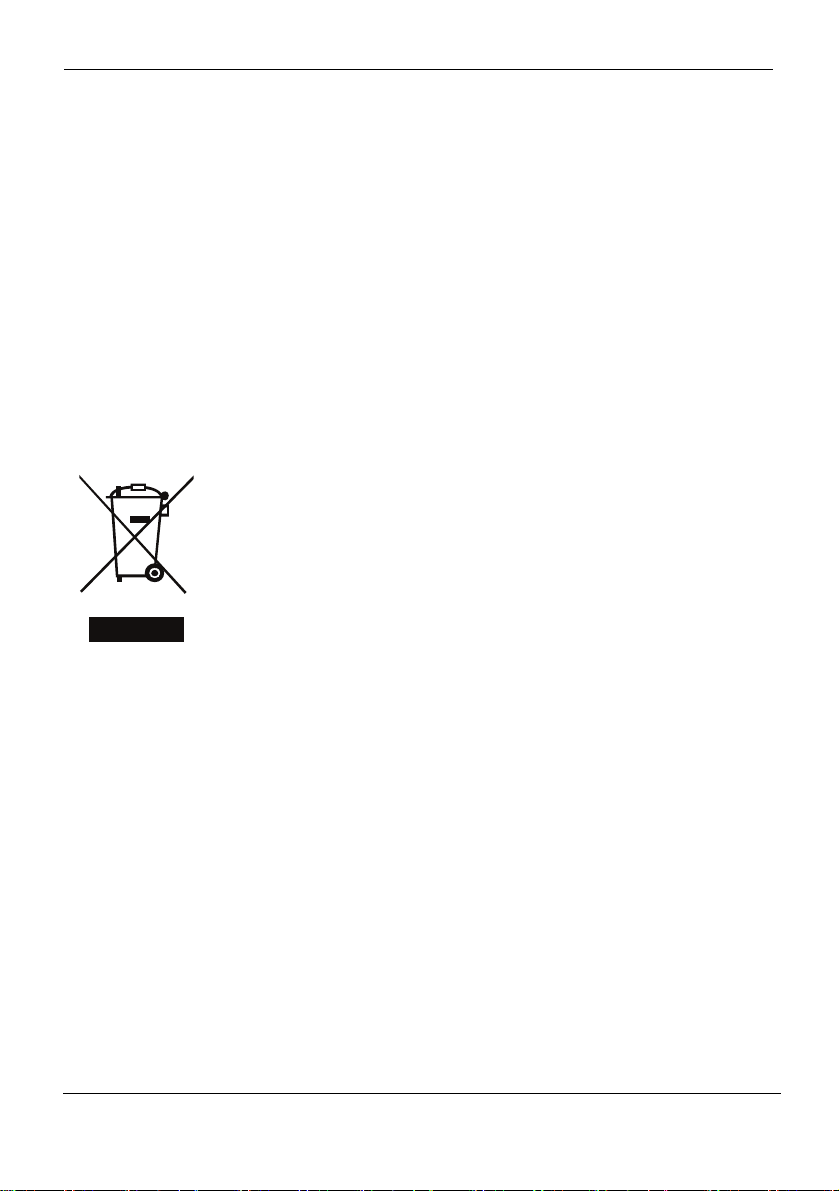
This marking on the device (and any included batteries) indicates that they
should not be disposed of as normal household garbage. Do not dispose of
this device or batteries as unsorted munici
batteries) should be handed over to a certified collection point for recycling
or proper disposal at the end of their life.
For more detailed information about the recycling
please contact your local city office, the household waste disposal service or
the retail store where you purchased this device.
The disposal of this device is subject to the Waste from Electrical and
Electronic Equipment (WEEE) directive of the European Union. The reason
for separating WEEE and batteries from
potential environmental impacts and effects on human health of any
hazard
ous substances that may be present.
's REACH compliance, please visit
ation.
pal waste. The device (and any
of the device or batteries,
other waste is to minimize the
C).
e a separation distance
sed
Huawei Proprietary and Confidential
Copyright © Huawei Technologies Co., Ltd.
1-3
Page 11
Safety Precautions
Norway: This subsection does not apply for the geographical area within a radius of 20
km from the centre of Ny-Ålesund
Hereby, Huawei Te
the essential requirements
EchoLife HG556 Home Gateway
User Guide
chnologies Co., Ltd., declares that this product is in compliance with
and other relevant provisions of Directive 1999/5/EC.
0678
The declaration of conformity may be consulted at
www.huaweidevice.com/certification.
Federa tement
l Communications Commission(FCC) Sta
This device complies with part 15 of the FCC Rules. Operation is subject to the
following two conditions:
(1) This device may not cause harmful interference, and
(2) this device must accept any interference received, including interference that may
cause undesired operation.
Note: This equipment has been tested and found to comply with the limits for a Class B
digital device, pursuant to part 15 of the FCC Rules. These limits are designed to provid
reasonable protection against harmful interference in a residential installation. This
equipment generates, u
and used in accordance with the instructions, may cause harmful interference to radio
communications. However, there is no guarantee that interference will not occur in a
particular installation.
If this equipment does cause harmful interfere
can be determined by turning the equipment off and on, the use
correct the interference by one or more of the following measures:
• Reorient or relocate th
• Increase the separation between the equipment and receiver.
• Connect the
receiver is conn
• Consult the dealer or
equipment into an outlet on a circuit different from that to which the
ected.
ses and can radiate radio frequency energy and, if not installed
nce to radio or television reception, which
r is encouraged to try to
e receiving antenna.
an experienced radio/TV technician for help.
e
Warning: Changes or modifications made to this device not expressly approved by
Huawei Technologies Co., Ltd. may void the FCC authorization to operate this device.
This device complies with part 68 of the FCC Rules.
The antenna(s) used for this transmitter must be installed to provide a separation distance
of at least 20cm from all persons.
1-4 Huawei Proprietary and Confidential
Copyright © Huawei Technologies Co., Ltd.
Page 12

EchoLife HG556 Home Gateway
User Guide
Product Overview
2 Product Overview
2.1 Pr
oduct Features
The EchoLife HG556 (hereinafter referred to as the HG556) is a high-performance
Asymmetrical Digital Subscriber Line (ADSL) voice gateway designed for home users
and small office and home office (SOHO) users. This section describes the features of
the HG556.
Flexible R
z
z
z
Abund
Outsta
Standar
ant Service Interfaces
z
z
z
z
z
nding Voice Functions
Providing VoIP service and T.38 facsimile serv
d TR-069 Management Capability
z
z
z
outing
Providing an embedded Point to Point Proto
Supporting the Dynamic Host Configuration
Supporting simultaneous m
Providing four high-speed Ethernet interfaces
Supporting the routing mode and the bridge mode
Providing the voice function through the Plain Old Telephone Service (POTS)
interface
Supporting the multi-service set identifier (MSSID) of Wireless F
which enables users to use wireless networks conveniently and securely
Providing mobile storage capab
Providing complete compatibility with the TR-069
Subscriber Line (DSL) Forum
Providing complete remote management and diagnosis
Providing a zero-configuration solution, which significantly lowers the
and maintenance costs and can be combined with the automatic upgrade
provisioning processes to conveniently distribute customized services
ulti-user access
ility through the USB host interface
col over Ethernet (PPPoE)
Protocol (DHCP) server
ice
standard of the Digital
dialer
ity (WiFi),
idel
operation
and service
Huawei Proprietary and Confidential
Copyright © Huawei Technologies Co., Ltd.
2-1
Page 13

Product Overview
ADSL/
ADSL2+ Interface
z
z
z
EchoLife HG556 Home Gateway
Providing embedded ADSL/ADSL2+ broadband network functio
Supporting the ITU-T G.994.1 (G.hs) handshake protocol
Providing compatibility with Annex A ANSI T1.4
13 Issue 2, ITU-T G.992.1
(G.dmt), G.992.3 (ADSL2), and G.992.5 (ADSL2+)
User Guide
ns
Wide A
2.2 N
rea Network (WAN) Protocol
z
Supporting multiple AAL5 proto
z
Supporting PPPoE (RFC2516)
z
Supporting routing and bridging in conformance with RFC 2684
cols, such as LLC and VC-MUX (RFC1483/2684)
etwork Application
Figure 2-1 HG556.
Figure 2-1 Network application of the HG556
shows the network application of the
2-2 Huawei Proprietary and Confidential
Copyright © Huawei Technologies Co., Ltd.
Page 14

EchoLife HG556 Home Gateway
User Guide
: indicates an actual network connection.
: indicates a logical management channel.
:
indicates a wireless connection.
T describes the elements sh 1.
able 2-1 own in Figure 2-
Product Overview
Table 2-1 Description of the elemen on diagram
ts for the network applicati
Name Full Spelling
NGN Next Generation Network
Internet IPTV Internet Protocol Television
BRAS erver Broadband Remote Access S
DSLAM ss Multiplexer Digital Subscriber Line Acce
OSS Operations Support System
ACS Auto-Configuration Server
STB Set-Top Box
Notebook Computer -
2.3 Indicators, Interfaces and Buttons
2.3.1 Indicator. s
The indicators of the HG556 are located on the front panel, as shown in Figure 2-2
Figure 2-2 Indicators
able 2-2 describes the meanings of the indicators.
T
Table 2-2 Meanings of the indicators
Huawei Proprietary and Confidential
Copyright © Huawei Technologies Co., Ltd.
2-3
Page 15

EchoLife HG556 Home Gateway
User Guide
Indicator Status Meaning
On
Off The HG556 is powered off.
WIFI
On
Blinking
Off
ADSL
On
Blinking slowly
at 2 Hz
Blinking quickly
at 4 Hz
Off The HG556 is powered off or faulty.
LAN
On
Blinking Data is being transmitted over the LAN.
Off
On VOIP
Off
INTERNET
On
Blinking
Off
Product Overview
The HG556 is powered on. POWER
The WLAN connection is normal but no data is
being transmitted.
The WLAN connection is normal and data is
being transmitted.
The HG556 is powered off, the wireless
function is disabled, or the WLAN module is
faulty.
The ADSL connection is established and
activated.
The ADSL connection is being activated.
The software of the HG556 is being upgraded.
At least one Ethernet interface is connected
normally but no data is being transmitted.
The HG556 is powered off or the network cable
is not connected properly.
The HG556 is successfully registered with at
least one SIP server.
The HG556 is powered off or fails to be
registered with the SIP server.
The WAN connection is successfully
established but no data is being transmitted.
The WAN connection is successfully
established (the HG556 has obtained an IP
address through IPoE or PPPoE) and data is
being transmitted.
The HG556 is powered off or the WAN
connection is not yet established.
z WLAN = Wireless Local Area Network
z SIP = Session Initiation Protocol
z IPoE = IP over Ethernet
Huawei Proprietary and Confidential
Copyright © Huawei Technologies Co., Ltd.
2-1
Page 16

Product Overview
2.3.2 Interfaces and Buttons
The interfaces and buttons of the HG556 are located on the rear panel and side panel, as
shown in
Figure 2-3 Interfaces and buttons
Figure 2-3.
EchoLife HG556 Home Gateway
User Guide
z The rear panel of the HG556 is shown on the left side of Figure 2-3. The following
interfaces are located on the rear panel: ADSL, PHONE1, PHONE2,
LAN1–LAN4, USB, RESET, and POWER.
z The side panel of the HG556 is shown on the right side of Figure 2-3. The USB
interface and the WLAN button.
z The rear panel view and side panel view are for reference only. The actual
appearance may differ.
Table 2-3 lists the functions of the interfaces and buttons.
Table 2-3 Functions of the interfaces and buttons
Interface or
Function
Button
ADSL Connects a splitter.
PHONE1,
Connects a phone.
PHONE2
LAN1–LAN4 Connect PCs, switches, or other equipment.
POWER Connects a power adapter.
2-2 Huawei Proprietary and Confidential
Copyright © Huawei Technologies Co., Ltd.
Page 17

EchoLife HG556 Home Gateway
User Guide
Interface or
Function
Button
USB Connects a USB storage device, such as a USB disk.
RESET
Restarts the equipment if this button is pressed and held for three
to six seconds; restores the factory settings of the equipment if
held for more than six seconds.
NOTE
After you restore the default settings, the customized data will be lost.
Therefore, press the RESET button with caution.
WLAN Start the WiFi function.
2.4 System Requirements
Make sure that the following requirements are met before using the HG556.
Operating System Requirements
The operating system (OS) requirements are as follows:
z
Windows 98
z
Windows Me
z
Microsoft NT4
z
Windows 2000
z
Windows XP
z
Windows Vista
Product Overview
PC Hardware Configuration
The requirements for the hardware configuration of the device are as follows:
z
Memory: greater than 64 MB
z
Remaining space of disk C: greater than 128 MB
z
CD-ROM drive
Web Browser
Internet Explorer (IE) 6.0 or later versions, including FireFox2.0
Huawei Proprietary and Confidential
Copyright © Huawei Technologies Co., Ltd.
2-3
Page 18

EchoLife HG556 Home Gateway
User Guide
Product Installation
3 Product Installation
3.1 Se
lecting the Installation Position
Place the HG556 in a ventilated and shaded area according to the instructions given i
"Safety Precautions."
If you need to use the WLAN function of the HG556, pay attention to the following
requirements when selecting the installation position of the HG556:
z
Obstacles, such as cement walls and wooden plate walls, would affect the radio
signal propagation effect of wireless netw
HG556 be installed in an open space so that no obstacles exist between the PC and
the HG556 to block signal propagation.
z
Ensure that the HG556 and the PC are placed away from electrical appliances
generating a strong magnetic or electric field, such as microwave ovens.
3.2 Connecting the Cables
Before connecting the cables, power off all equipment connected to it including the
HG556, the PC, and the switch.
Connect the other equipment, such as the PC and the telephone, to the HG556 according
to Figure 3-1.
n
orks. Therefore, it is recommended that the
Huawei Proprietary and Confidential
Copyright © Huawei Technologies Co., Ltd.
3-1
Page 19

Product Installation
Figure 3-1 Connecting the HG556
EchoLife HG556 Home Gateway
User Guide
1 Telephone jack on the wall 2 Phone 3 PC
4 Set-top box 5 Power adapter 6 USB disk
3-2 Huawei Proprietary and Confidential
Copyright © Huawei Technologies Co., Ltd.
Page 20

EchoLife HG556 Home Gateway
User Guide
Configuring the HG556
4 Configuring the HG556
4.1 Ac
Step 1
Step 2
Step 3
4.2 Ch
Step 1
Step 2
Step 3
Step 4
cessing the Web Configuration Page
through which
by default) in the
admin
you can check and configure the working parameters of
To log in to the Web configuration page, do as follows:
Start the Internet Explorer on the PC.
Enter
http://192.168.1.1
.
Enter
Enter the administrator name (
page, and then click
Login
in the address bar of the Internet Explorer, and then press
by default) and password (
admin
.
Login
uration pages, The HG556 provides simple and easy-to-use Web config
the HG556.
anging the Administrator Password
For safety reasons or to make the passwo
administrator password after logging in t
To change the password, do as follows:
Log in to the Web-based configuration utility.
Choose
Maintenance > Account
Enter the current password and the n
the
Confirm Password
Click
After you change the password successfully, next time log in to the Web-based
configuration u
If you forget the password that has been changed, you can restore the default settings of the
HG556 by pressing and holding the RESET button for over six seconds. Then, the user name
and password that are used for logging in t
to default values. After you restore the default settings, however, your customized data is lost.
Therefore, use this function with caution.
to save the settings.
Submit
tility, enter the new password, and then click Login.
text box fo
rd easy to remember, you can change the
o the Web-based configuration utility.
in the navigation tree to display the account page.
ew password. Then
r confirmation.
o the Web-based configuration utility are restored
enter the new password again in
Huawei Proprietary and Confidential
Copyright © Huawei Technologies Co., Ltd.
4-1
Page 21

EchoLife HG556 Home Gateway
User Guide
Data Services
5 Data Services
5.1 In
5.2 Co
Step 1
Step 2
Step 3
Step 4
Step 5
Step 6
Step 7
Step 8
Step 1
Step 2
Step 3
troduction
The HG556 supports ADSL2+ uplink and High-Speed Packet Access (HSPA) uplink
through Huawei HSPA datacard. Realizes dyna
services through the DSL link and HSPA link.
mic mutual backup of voice and data
nfiguring the HSPA uplink
When the HG556 is working through Huawei HSPA datacard, you need to install th
Huawei HSPA datacard on the HG556 so that y
through HSPA uplink. To create a HSPA uplink
Log in to the Web-based configuration utility.
Click
Basic > WAN
Click New to create a new
In
Access type
In
WAN connection
Enter the APN that are provided by the network operator in the
in the
Dial number
Enter the user name and password in the
can configure.
Click the
If you want to verify the PIN code of your SIM card, then do as follows:
Click
Enter the original PIN number in the
New PIN
Click the
Submit
Advanced > PIN
text box and confirm the new PIN number again.
Submit
in the navigation tree to d
WAN Con
, choose
UMTS
, select
Enable
text box.
button to finish the UMTS settings.
in the navigation tree to display the
button to finish the settings on the
nection
option button.
.
PIN
our PC can connect to the In
connection, do as follows:
isplay th
setting.
User name
text box. Enter the new
e
WAN Connection
APN
an
d
Password
PIN
Page.
PIN
Page.
PIN number in the
ternet
Page.
text box, enter *99#
text boxes that you
e
Use the default values for the other parameters. In general, they do not need to be configured.
Huawei Proprietary and Confidential
Copyright © Huawei Technologies Co., Ltd.
5-1
Page 22

Data Services
5.3 Configuring the ADSL uplink
When the HG556 is working throug the WAN interface of the HG556
supports multiple work modes, as lis y of them as
required.
h ADSL uplink,
ted in Table 5-1. You can select an
EchoLife HG556 Home Gateway
User Guide
5.3.2 C
Table 5-1 Work mode of the WAN i
nterface
Work Mode Description
Route
Bridge
z
The HG556 serves as a router.
z
There are five connection types:
DHCP, Sta
z
The HG556 serves as a network bridge.
z
Dialing is performed through the PPP dialer
tic, PPPoE, IPoA, PPPoA.
software installed on the PC.
N
OTE
DHCP = Dynamic Host Configuration Protocol
PPPoE = Point to Point Protocol over Ethernet
IPoA =
IP over ATM
PP = Point to Point Protocol
P
PPoA = Point to Point Protocol over ATM
P
The steps of configuring the five types of Route mode are similar. So just take the steps of
configuring the PPPoE mode for example.
onfiguring the PPPoE Mode
In PPPoE mode
and serves
, the HG556 performs dialing through the embedded PPP dialer software
as a router to connect user PCs to the Internet.
Getting Started
T nfiguration informatio ollected before configuring the
able 5-2 lists the co n to be c
P e.
PPoE mod
T n information to be
able 5-2 Configuratio collected before configuring the PPPoE mode
Item Description
Connection mode PPPoE
VPI/VCI It is provided by the service provider.
Encapsulation mode It is provided by the service provider.
5-2 Huawei Proprietary and Confidential
Copyright © Huawei Technologies Co., Ltd.
Page 23

EchoLife HG556 Home Gateway
User Guide
Item Description
User name and password for PPPoE
It is provided by the service provider.
dialing
Authentication mode It is provided by the service provider.
LAN IP address and subnet mask of
556
the HG
Default gateway address
z
Default LAN interf
192.168.1.1.
z
Default subnet mask: 255.255.255.0.
It is recommended that the default gateway
address be automatically obtained.
DNS address
It is recommended
automatically obtained.
NOTE
DNS = Domain Name Server
Configuring the PPPoE Mode for the WAN Interface
To configure the PPPoE mode for the WAN interface, do as follows:
Log in to the Web-based configuration utility.
Step 1
Step 2
Step 3
Step 4
Step 5
Step 6
Click
Basic > WAN
Enter the VPI and VCI that are prov
in the navigation
text boxes.
Choose the encapsulation mode required by the service provider
Encapsulation Mode
drop-down list box, and configure the other param
to the requirements of the service provider.
Enter the user name and password provided by the service provider for
and then finish the configuration.
Click
to save the settings.
Submit
tree to display the
WAN Connection
ided by the network operator in the
Data Services
ace IP address:
that the DNS address be
Page.
and
VPI
VCI
from the
eters according
PPPoE dialing,
Configurin
Step 1
Step 2
Step 3
Huawei Proprietary and Confidential
g the Work Parameters of the LAN Interface
To c rk parameters of the LAN interface, do as follows:
onfigure the wo
Click
Bas
ic > LAN
Configure the of LAN interface on the HG556.
Select En
able
The DHCP function is enabled to
default setting.
in the navigation tree to display the
IP address and subnet mask
DHCP Server
Copyright © Huawei Technologies Co., Ltd.
and configure the relevant parameters.
allocate IP addresses to PCs in the LAN. Generally, use the
DHCP
page.
5-3
Page 24

Data Services
z You can skip this step if only one
has been specified for the PC.
z It is recommended that the DHCP service be enabled if multiple PCs access the
Internet through the HG556.
Step 4
Click
to save the settings.
Submit
Next, you need to configure only the network adapter on the PC so that the PC can
automaticall
y obtain the IP address, gateway, DNS and other relevant information to
access the Internet through the HG556.
5.3.3 Configuring the Bridge Mode
When the
a network bridge. In this case, each u d to the HG556 can dynamically
o ing to the ation of the upper-layer equipment or can
btain an IP address accord
b dialer software s the Internet.
e installed with PPP
WAN interface of the HG556 is working in bridge mode, the HG556 serves as
ser PC connecte
configur
to acces
EchoLife HG556 Home Gateway
User Guide
PC is located in the LAN and a static IP address
Getting
Started
able 5-3 lists the configuration information to be collected before configuring the
T
bridge mode.
Table 5-3 Configuration information to be collected before co
Item Description
Connection mode Bridge
VPI/VCI It is provided by the service provider.
Encapsulation mode It is provided by the service provider.
Configuring the Bridge Mode for the WAN Interface
The steps for configuring the bridge mode for the WAN interface are similar to those for
configuring the PPPoE mode. The difference is that you should select Bridge from the
Connection mode drop-down list box on the WA N page displayed after you choose
Basic > WA N .
For details, see section "
Interface
".
Configuring the PPPoE Mode for the WAN
Creating a PPP Dialup Connection on the PC
When the gateway is working in bridge mode, you need to instal
on your PC so that your PC can dial-up to the Internet. If the operating system (OS
installed on the PC is Windows XP, the PC can also dial up to the Internet through
PPP dialer software provided by Windows XP. Take Windows XP as an example. To
create a dialup connection, do as follows:
nfiguring the bridge mode
l the PPP dialer software
)
the
5-4 Huawei Proprietary and Confidential
Copyright © Huawei Technologies Co., Ltd.
Page 25

EchoLife HG556 Home Gateway
User Guide
In the task bar, choose Start > All Programs > Accessories >
Step 1
Network Connections.
Step 2
Step 3
Step 4
Step 5
Step 6
Network Tasks
Select
Connect to the Internet
Select
Set up my connection manually
Select
Connect using a broadband connection that requires a user name and
password
, and then click
Enter the name of the dialup connection (you can enter any name) in the
In the
box, and then click
Select
Step 7
Step 8
Step 9
Anyone's use
Enter the user name and password provided by the service provider for dialing, and then
click
Next
.
Select Add a shortcut to this connection to my desktop, and finally click Finish.
area, choose
Next
.
Next
or
My use only
Create a new connection,
, and then click
Next
, and then click
.
, and then click
Communications >
.
.
Next
.
Next
Data Services
and then click
ISP Name
Next
.
text
Huawei Proprietary and Confidential
Copyright © Huawei Technologies Co., Ltd.
5-5
Page 26

EchoLife HG556 Home Gateway
User Guide
Voice Services
6 Voice Services
6.1 In
troduction
The HG556 supports voice services based on the Session Initiation Protocol (SIP).
The SIP is an application layer protocol used to create, modify, or end multimedia
sessions. Based on text coding, the SIP references the Hyper Text Transport Protocol
(HTTP) and the Simple Mail Transfer Protocol (SMTP), and can cooperate with othe
protocols, such as the Real-time Transport Protocol (RTP), the Real-time Transport
Control Protocol (RTCP), the Session Description Protocol (SDP), and the Domain
Name Server (DNS) protocol to implement voice services and the facsimile service.
The HG556 enables voice service interworking between the Voice over Internet Protocol
(VoIP) and the Public Switched Telephone Network (PSTN).
6.2 Voice Servic
6.2.1 N
etworking
Figure 6-1 shows the network model of voice services.
r
e Configuration
Huawei Proprietary and Confidential
Copyright © Huawei Technologies Co., Ltd.
6-1
Page 27

Voice Services
Figure 6-1 Network model of voice services
Table 6-1 describes the equipment in voice service networking.
EchoLife HG556 Home Gateway
User Guide
Table 6-1 Description of the equipment in voice service networking
Equipment Description
Proxy Server
A server that forwards requests or responses in
place of the client
Registrar Server A server that receives registration requests
BRAS Broadband Remote Access Server
DSLAM Digital Subscriber Line Access Multiplexer
6.2.2 Getting Started
Table 6-2 lists the configuration information to be collected before configuring voice
services.
Table 6-2 Configuration information to be collected before configuring voice services
6-2 Huawei Proprietary and Confidential
Copyright © Huawei Technologies Co., Ltd.
Page 28

EchoLife HG556 Home Gateway
User Guide
Item Description
SIP account number It is the SIP account number of the gateway.
User name and Password
Local SIP port It is provided by the service provider.
Caller ID display mode
Proxy server address and Proxy
server port
Server
Registration server address It is provided by the service provider.
Registration server port
SIP server domain name
Voice Services
The user name and the password of the SIP
account, it is provided by the service
provider.
It is used to select a mode for displaying the
caller ID among
Privacy
.
Display, Anonymous
, and
It is provided by the service provider. If the
service provider does not provide the port
number, the default value should be used.
It is used to select the primary server or the
secondary server.
It is provided by the service provider. If the
service provider does not provide the port
number, the default value should be used.
After you set the domain name, the server
address in the packet is displayed as a
domain name.
6.2.3 Configuration Procedure
To configure voice services, do as follows:
Configure the WAN interface. For details, see section
Step 1
If you want to configure the VoIP service, you should choose VOICE, VOICE_INTERNET,
VOICE_TR069 or VOICE_TR069_INTERNET from the Server list drop-down list box on
the WAN Connection page.
Configure the SIP user.
Step 2
1. Choose Basic > VoIP in the navigation tree to display the VoIP page.
2. Click New to create a new SIP account.
3. Enter the SIP account number of the gateway provided by the service provider in the
SIP account number text box.
4. Enable the SIP user.
5. Enter the user name and the password of the SIP account provided by the service
provider in the User name and the Password text box.
6. Enter the port of the SIP account provided by the service provider in the Local SIP
port text box.
Huawei Proprietary and Confidential
Copyright © Huawei Technologies Co., Ltd.
5 "Data Services".
6-3
Page 29

Voice Services
Configure the SIP server.
Step 3
1. Enter the address and the port of the proxy server provided by the service provider in
2. Choose the primary server or secondary server from the Server drop-down list box.
3. Enter the address and the port of the registration server provided by the service
4. Enter the home domain name of the SIP user in the SIP Server domain name box.
Click
Step 4
EchoLife HG556 Home Gateway
User Guide
the Proxy server address and the Proxy server port text box.
provider in the Registration server address and the Registration server port text
box.
Enter the home domain name of the SIP user according to the actual conditions:
z If the service provider does not provide the home domain name of the SIP user, you
can enter the same name as in the Registration Server Address text box or leave
the SIP Server domain name text box blank.
z If the service provider has provided the home domain name of the SIP user, you
must enter it in the relevant text box.
to save the settings.
Submit
If you want to call out by the VoIP service, you should bind the call out line and the call out
number.
You can use the default value for this parameter. In general, this parameter does not need to be
configured.
6-4 Huawei Proprietary and Confidential
Copyright © Huawei Technologies Co., Ltd.
Page 30

EchoLife HG556 Home Gateway
User Guide
Wireless Services
7 Wireless Services
7.1 In
7.2 W
troduction
The HG556 supports 802.11n and provides wireless networking and interconnection at
home. To access the WLAN through the wireless data card
activate the wireless network function on the HG556.
on your PC, you only need to
ireless Service Configuration
1 lists the configuration information to be collected before configuring wireless
Table 7service.
Table 7-1 Configuration info cted before configuring wireless service
Item Description
SSID
Security
WPS
rmation to be colle
Indicates the ID of a service area in the wireless network.
The initial value is provided by the service provider.
It is used to enable or disable the network authenticatio
function.
z
Open: Any wireless device can access the WLAN.
z
Shared: The simplified Shared authentication mode.
The HG552 encrypts all the communications by using
the WEP key.
z
WPA-PSK: The simplified WPA authentication mode.
The HG552 encrypts all the communications by using
the WPA pre-shared key.
z
WPA2-PSK: The simplified WPA2 authentication
mode. The HG552 encrypts all the communications by
using the WPA2 pre-shared key.
z
Mixed WPA2/WPA-PSK: The mixed authentication
mode of WPA2-PSK and WPA-PSK.
It is used to specify whether to enable the WPS function
only the first SSID provides the WPS function.
n
,
Huawei Proprietary and Confidential
Copyright © Huawei Technologies Co., Ltd.
7-1
Page 31

Wireless Services
7.3 Configuring the MSSID Service
7.3.1 Function
The HG556 supports the multi-service set identifier (MSSID) function. You can
configure encryption parameters separately for each service set identifier (SSID).
With the MSSID function, you can virtualize multiple independent access points (APs)
used in wireless networks. In terms of the wireless network, client each virtualized
wireless AP is equivalent to a physical wireless AP. Each wireless AP has its own SSID.
The HG556 supports four SSIDs, which can be configured through the Web
configuration page of the HG556 or configured remotely through the management
system of the HG556.
7.3.2 Configuration Steps
To configure the SSIDs of the HG556, do as follows:
Step 1
Step 2
Step 3
Step 4
Step 5
Step 6
Choose
Basic > LAN > WLAN
page.
settings
Select
Enable WLAN
to enable the WLAN function.
Select an appropriate channel in the
WLAN.
To avoid signal interference, channels allocated to each AP should be different. You are
recommended to select Auto in the Channel text box.
Select SSID1 in the
want in the
Select
Select the security mode in the
SSID
Enable
SSID index
text box.
to enable the selected SSID.
on the Web configuration page to show the
Channel
text box based on the settings of the
drop-down list box. Specify the name of the SSID you
Security
drop-down list box.
EchoLife HG556 Home Gateway
User Guide
wireless
When you specify the security mode, the gateway supports the corresponding WPA
pre-shared key and WPA encryption mode for the SSID. You can also specify the WPA
pre-shared key and must remember it.
Click
Step 7
7-2 Huawei Proprietary and Confidential
Submit
On the WLAN Filtering page, you can configure MAC address filtering for the WiFi.
to save the settings.
Copyright © Huawei Technologies Co., Ltd.
Page 32

EchoLife HG556 Home Gateway
User Guide
8 FAQs
8.1 How can I configure a computer to use a static IP
addre
Step 1
Step 2
Step 3
Step 4
Step 5
ss?
Take a computer that runs Windows XP as an example. To configure the computer to use
a static IP address, do as follows:
In the Control Panel window, double-click Network Connections to display the Network
Connections window.
In the
Network Connections
and choose
In the
Connection Properties dialog box, select Internet Protocol (TCP/IP). Click Properties.
Select Use the following IP address.
Set the IP address of the computer and ensure that the IP address is in the same network
segment as the local area network (LAN) IP address of the terminal.
Assume that the default LAN IP address of the terminal is 192.168.1.1. To set the IP
address of the computer, do as follows:
1. In IP ad
Properties
This connection uses the follo
dress, enter 192.168
used by ther computers.
o
window, right-click the working
.
wing items
.1.100. Ensure that this IP address is unique and not
Local Area Con
group box of the Local Area
nection
FAQs
The configurable static IP address ranges f
2. In Subnet mask, enter 255.255.255.0.
3. In Default gateway, enter 192.168.1.1.
Consult your network service provider about the IP address of the domain name server
Step 6
(DNS). In
If you configure the static IP address for the purposes of accessing the W
configuration page of the terminal, you can skip this step.
In the Internet Protocol (TCP/IP) Properties dialog box, click OK. Then in the Local
Step 7
Area Connection Properties dialog box, click OK.
Huawei Proprietary and Confidential
Preferred DNS server
Copyright © Huawei Technologies Co., Ltd.
and
rom 192.168.1.2 to 192.168.1.254.
Alternate DNS server
, enter the IP address.
eb
8-1
Page 33

EchoLife HG556 Home Gateway
FAQs
8.2 W tes through
the te
Step 1
Step 2
Step 3
Step 4
8-2 Huawei Proprietary and Confidential
hat can I do if I cannot visit Web si
rminal?
Ch
eck whether the POWER indicator of the terminal is on.
If the POWER indicator is off, perform further checks as follows:
Ensure th
1. at the power switch of the terminal is turned on.
2. Ensure that electricity comes from the socket and that the input power of th
meets the requirements described on the label of the terminal power adapter. If the
voltage is unsteady, for example, if the voltage is too high or too low, do not use the
terminal. Wait until the voltage rest
3. Ensure that the terminal is properly connected to the socket through the
adapter.
If the POWER indicator is still off, contact an authorized maintenance center.
t hree minutes. Then check whether the
er powering on the terminal, wait for about t
Af
ADSL indicator of the termin
If the ADSL indicator blinks for a long time, perform further checks as fol
1. Ensure that telephone lines are properly connected.
2. Ensure that terminal cables or telephone lines are far from th
generate strong magnetic or electric fields.
3. Replace telephone lines.
If t icator still blinks, contact your network service provider.
he ADSL ind
Check whether the LAN indicator of the terminal is on.
If the LAN indicator is off, perform further checks as follows:
1. Ensure that the network adapter of the computer is enabled.
2. Ensure that the network cable between the terminal and the computer is properly
connected.
3. Remove and then insert the network cable or replace the network
If the LAN indicator is still off, contact an authorized maintenance center.
Ch he driver for the network adapter is properly installed.
eck whether t
k
Ta e a computer that runs Windows XP as an example. To check whether the driver for
the network adapter is installed, do as follows:
1. On the desktop, right-click My Computer and choose Manage.
2. In the navigation tree of the Computer Management window, choose Device
Manager.
3. In the right pane of the Computer Management window, click Network adapters
to view the information about the network adapter of the computer.
If no network adapter is detected or if a question mark (?) or an exclamation mark (!) is
displayed next to the icon of the network adapter, you can infer that the driver for the
network adapter is not properly installed. In this case, re-install the driver for the network
adapter of the computer.
Copyright © Huawei Technologies Co., Ltd.
al is on.
ores to its normal level, and then use the terminal.
e electric appliances that
User Guide
e socket
lows:
cable.
power
Page 34

EchoLife HG556 Home Gateway
User Guide
For details about how to set the parameters, see the description of the PPP dialing
software.
Ensure that you have entered the correct user name and user password that are required
Step 5
P dialing software.
ck whether you can use the PPP dialing software to dial successfully (t
power on the terminal and use the PPP dialing software to dial again.
re the default settings of the terminal.
Start the Internet Explorer.
box, ensure that Use a proxy server for your LAN (These settings will no
to dial-up or VPN connections) is not selected.
Step 6
Step 7
Step 8
by the PP
The user name and the user password are provided by your network service provider.
Che he terminal is
configured as Bridge mode).
If you cannot use the PPP dialing software to dial successfully, p
follows:
1. Stop the PPP dialing software and then power off the terminal. After five minu
2. Resto
If the problem persists, contact your ne
Check whether the proxy server of the Web browser is correctly conf
Internet Explorer installed on a computer that runs Windows XP as a
check whether the proxy server of the Web browser is correctly configured, do
follows:
1.
2. Choose Tools > Internet Options.
3. In the Internet Options dialog box, click the Connections tab.
4. In the Local Area Network (LAN) settings group box, click LAN settings.
5. In the Proxy server group box of the Local Area Network (LAN) Settings dialog
Try to access multiple other Web sites to check whether the terminal ca
If the terminal still cannot access other Web sites, contact your network service provider.
FAQs
erform further checks as
tes,
twork service provider.
igured. Take the
n example. To
as
t apply
n access.
8.3 W
Internet through a wire
Step 1
Step 2
Step 3
Huawei Proprietary and Confidential
hat can I do if the terminal cannot access the
less network adapter?
Ensure that the power cables and telephone lines of the terminal are properly connected.
Check whether the WIFI indicator of the terminal is on.
If the WIFI indicator is off, you can infer that the wireless local area network (WLAN)
function of the terminal is disabled. In this case, enable the WLA
For details about how to enable the WLAN function, see the manual of the terminal.
See the des
check whether the wireless network adapter supports the
If the wireless network adapter does not support the 802.11b an
replace it with the network adapter that supports the protocols.
cription of the wireless network adapter that is installed on the computer and
Copyright © Huawei Technologies Co., Ltd.
N function.
802.11b and 802.11g protocols.
d 802.11g protocols,
8-3
Page 35

FAQs
Step 4
Step 5
Step 6
Step 7
Step 8
EchoLife HG556 Home Gateway
Check whether the driver for the wireless network adapter is properly installed on the
com
puter.
If the driver is improperly installed, install it properly.
eck whether the computer can receive the sig
Ch nals of a WLAN.
Take a computer that runs Windows XP as an example. To check whether the computer
can receive the signals of a WLAN, do as follows:
1. In the Control Panel window, double-click Network Connections to disp
Network Connections window.
2. In the Network Connections window, right-click Wireless Network Connection and
choose View
If the computer cannot detect a WLAN, place the computer close to the terminal and
ensure that no obstacles suc
wireless client and the terminal.
whether the computer accesses the WLAN of the terminal successfully.
Check
Check the list of wireless network connections and ensure that the terminal is connected
to the WLAN.
Check whether you can use the PPP dialing software to dial successfully (the terminal is
configured as Bridge mode).
Try to access multiple Web sites to check whether the terminal can access other Web
sites.
If the terminal cannot access other Web sites either, restore t
terminal. If the problem persists, contact your network service provider.
Available Wireless Network.
h as cement or wooden walls are present between the
he default settings of the
User Guide
lay the
8.4 What can I do if sometimes the terminal cannot
acces
or if t
Step 1
Step 2
Step 3
Step 4
Step 5
s the Internet through a wireless network adapter
he WLAN connection is unsteady?
Check the positions of your terminal and computer. Ensur
electric appliances such as microwave ovens
generate strong magnetic or electric fields.
Place your terminal in an open position.
Although radio signals can pass through obstacles, the transmission
radio signals are affected if radio signals pass through too many obstacles such as cement
or wooden walls.
Place your computer close to your terminal.
If your computer is far from your terminal, the effects of the WLAN are affected.
Place your terminal and computer in another direction.
Do not use your terminal to access a WLAN during thunderstorms.
8-4 Huawei Proprietary and Confidential
Copyright © Huawei Technologies Co., Ltd.
, refrigerators, or cordless telephones that
e that they are far from the
effects of WLAN
Page 36

EchoLife HG556 Home Gateway
User Guide
8.5 W
encry
Step 1
Step 2
hat can I do if the WLAN of the terminal is not
pted and the computer cannot access the WLAN?
l
ete the settings of wDe ireless network connections from your computer.
k
Ta e a computer that runs Windows XP as an example. To delete the settings of wireless
network connections, do as follows:
1. In the Control Panel window, double-click Network Connections to display the
Network Connections window.
2. ork Connections window, right-click Wireless Network Connection and
In the Netw
choose Prop
3. In the Wireless Network Connection Properties dialo
Networks tab.
4. In the Preferred Networks group box, select the latest wireless network connection
saved on your computer. Then click Remove.
5. Delete all the other wireless network connections from the Preferred Net
group box.
6. Click OK.
Create a wireless networ
erties.
FAQs
g box, click the Wireless
works
k connection that is not encrypted.
8.6 Is
there any restriction on the number of the
computers that access a WLAN through wireless
network adapters?
Theoretically, the terminal supports hundreds of concurrent computers tha
Internet through wireless ne
the high performance of a wireless network, the number of the concurrent computers that
connect to the terminal should not exceed five.
twork adapters. In practical applications, for the purposes of
8.7 What can I do if I cannot access the terminal configuration page?
See the answer to 8.2 "What can I do if I cannot visit Web sites through the terminal?"
Step 1
and ensure that the power supply of the terminal works properly an
lines and network cables of the terminal are properly connected.
Check the IP address of your computer and ensure that this IP address is in the same
Step 2
network segment as the LAN IP address of the terminal.
Ensure that your Web browser does not use a proxy server.
Step 3
Ensure that you have entered the correct user name and user password that are used for
Step 4
accessing the terminal configuration page.
If the problem persists, restore the default settings of the terminal.
Step 5
Huawei Proprietary and Confidential
Copyright © Huawei Technologies Co., Ltd.
d that the telephone
t access the
8-5
Page 37

EchoLife HG556 Home Gateway
FAQs
User Guide
8.8 What can I do if Web pages often cannot be displayed during Web page browsing and can be displayed after the terminal is restarted?
Ensure that the terminal and other devices such as telephones or fax machines are
Step 1
connected to the telephone line through a splitter.
For details about how to install a splitter, see the related description in the manual.
Ensure that telephone lines are properly connected.
Step 2
If the telephone lines are improperly connected, the stability of the network connection is
affected.
Check the positions of your terminal and computer. Ensure that they are far from the
Step 3
electric appliances such as microwave ovens, refrigerators, or cordless telephones that
generate strong magnetic or electric fields.
If the problem persists, contact your service provider.
8.9 What can I do if noises exist during telephone calls?
Ensure that a splitter is installed.
Step 1
A splitter helps to protect the call quality of the asymmetric digital subscriber line
(ADSL) from being affected due to the interference of other type of signals.
Ensure that telephone lines are properly connected.
Step 2
Replace telephone lines and ensure that the telephone lines are not faulty.
Step 3
8.10 After a broadband terminal is installed, does Internet access degrade call quality or do telephone calls lower the Internet access rate?
No. The terminal uses the frequency division multiplexing (FDM) and splitter
technologies to separate voice signals from data signals. Although the two types of
signals are transmitted through one telephone line, they are carried by different
frequency bands. Therefore, they do not interfere with each other. In this case, you can
make a telephone call and access the Internet at the same time, without degrading call
quality or lowering the Internet access rate.
8-6 Huawei Proprietary and Confidential
Copyright © Huawei Technologies Co., Ltd.
Page 38

HUAWEI TECHNOLOGIES CO., LTD.
Huawei Industrial Base
Bantian, Longgang
Shenzhen 518129
People's Republic of China
www.huawei.com
Part Number: 202157
 Loading...