

Page 1
HP Media Vault
User's Guide
Revision C
Page 2

The information contained herein is subject to change without notice. The only warranties for HP products and
services are set forth in the express warranty statements accompanying such products and services. Nothing
herein should be construed as constituting an additional warranty. HP shall not be liable for technical or editorial
errors or omissions contained herein.
This document contains proprietary information that is protected by copyright. No part of this document may be
photocopied, reproduced, or translated to another language without the prior written consent of HP.
Hewlett-Packard Company
P.O. Box 4010
Cupertino, CA 95015-4010 USA
Copyright ©2006 Hewlett-Packard Development Company, L.P.
Microsoft and Windows are U.S. registered trademarks of Microsoft Corporation.
HP supports lawful use of technology and does not endorse or encourage the use of its products for purposed
other than those permitted by copyright law.
The information in this document is subject to change without notice..
Copyright
Page 3
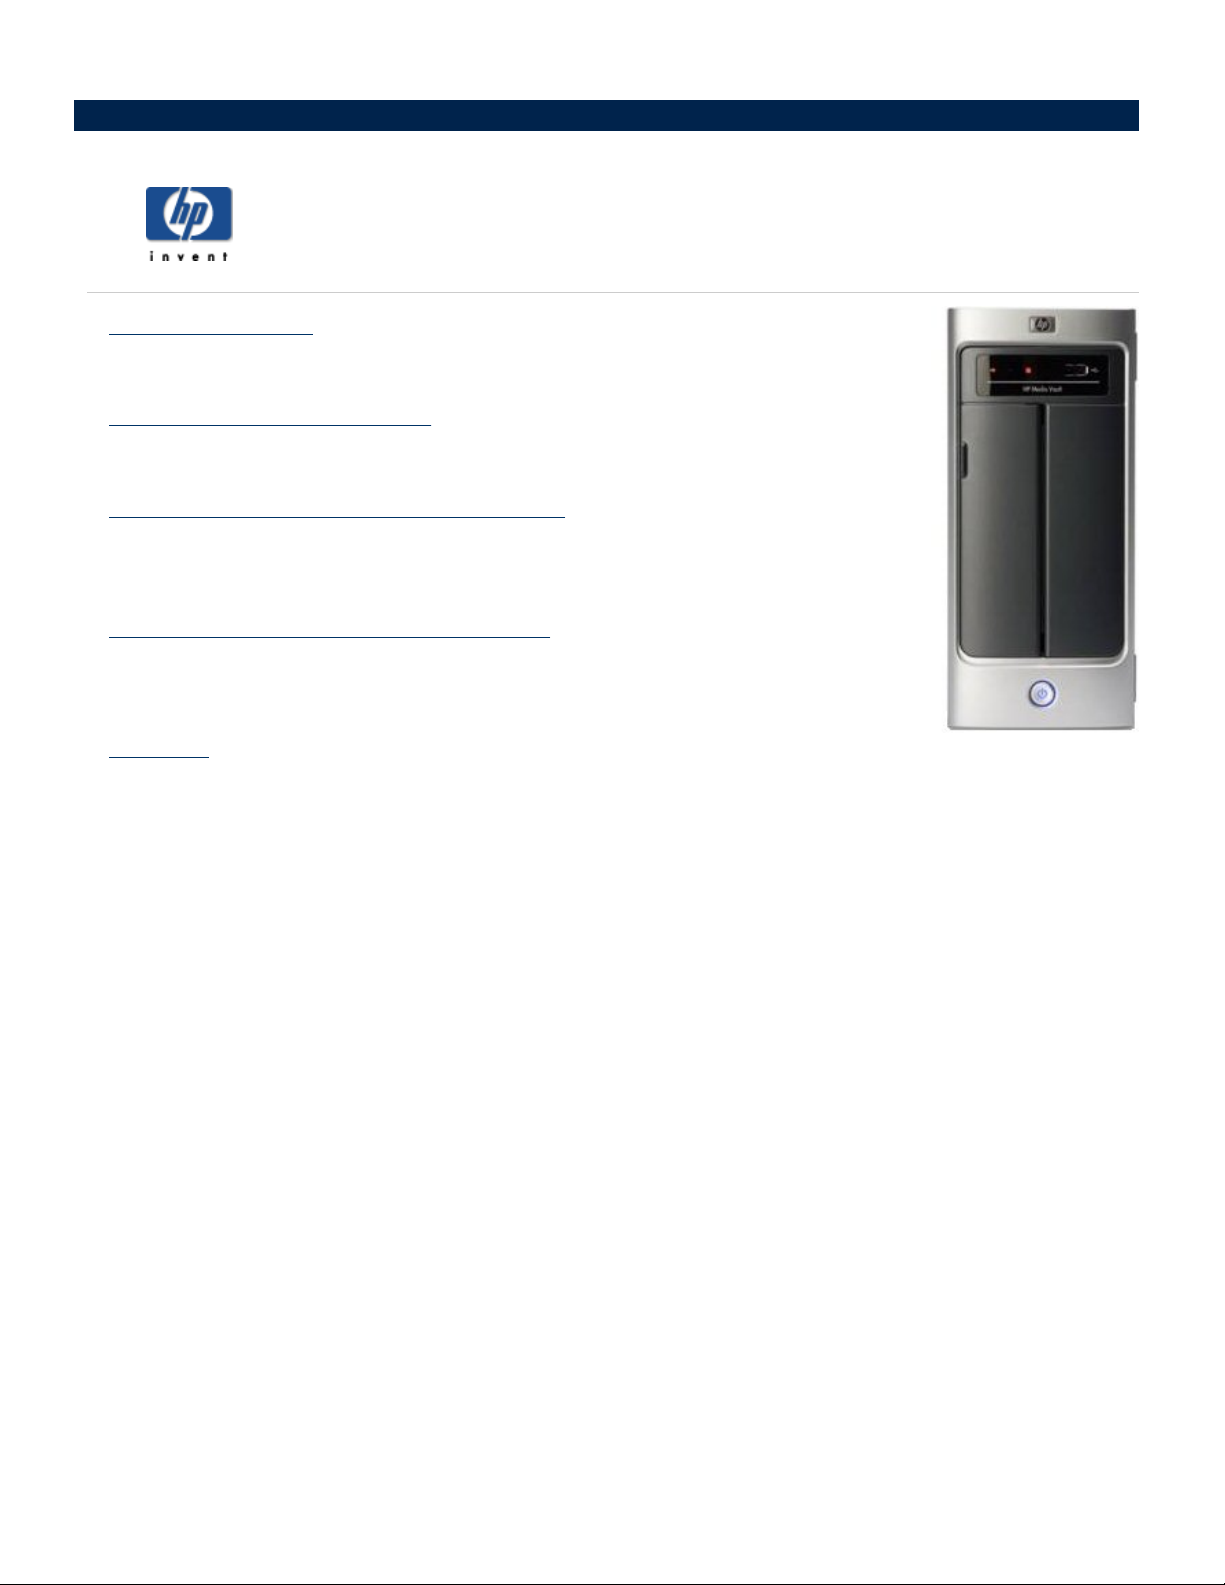
» Get started topics
Start using your HP Media Vault quickly and efficiently.
» How to backup and restore
Learn how to use the HP Media Vault's suite of flexible backup and restore applications.
» How to configure your HP Media Vault
Explore the HP MediaVault's more advanced options, such as configuring hard disks,
securing Shared Folders, and modifying system settings.
» Troubleshooting your HP Media Vault
Troubleshoot problems with installation, connections, printer setup, and media
streaming.
»
Glossary
Provides definitions for a better understanding of your HP Media Vault's features and capabilities.
Welcome to the HP Media Vault
Page 4

» How to get started
Learn how to use Shared Folders for storing and sharing files and folders.
» How to change the time zone on your HP Media Vault
Learn how to set your HP Media Vault to your time zone.
» How to browse, access, and save your files
Learn how to save files to your HP Media Vault for quick and easy access.
» How to map drive letters to Shared Folders
Learn how to map drive letters to your Shared Folders.
» How to organize your files
Learn how to organize your folders and files on the Media Vault.
» How to secure your HP Media Vault from intruders
Get started topics
Learn how to keep intruders from accessing your HP Media Vault's files and folders.
» How to use the HP Media Vault to transfer files from an old PC to a new PC
Learn how to conveniently transfer files using your HP Media Vault.
» How to connect to the HP Media Vault from a Linux system
Learn how to access the Shared Folders and configuration screens on the HP Media Vault
» How to connect to the HP Media Vault from a Macintosh
Learn how to set up a Macintosh computer to access the Shared Folders and configuration
Media Vault.
from a Linux system.
screens on the HP
Page 5

The HP Media Vault allows you to store all of your important documents, pictures, music, and video files
location –
able to access the media vault’s folders and files. You can also share a USB printer with the other computers on
your network by connecting a printer to your media vault. (For more information on attaching printers, see
a printer
Backup software and other applications are included with the media vault, but you can get started saving
the media vault immediately after installation. (For more information on
and restore
To help you get started saving and organizing your files, the media vault comes configured with three
Folders
and other folders (called
the Shared Folders and all of their files and sub-folders can be accessed by network users.
The following table offers suggestions on which types of files to save to the media vault’s Shared Folders.
Recommendations
Shared Folders Recommended Files
on the media vault! After you install the media vault on your network, the PCs on your network are
.)
.)
: FileShare, MediaShare and Backup. Shared Folders are special “top-level” folders where you store files
How to get started
in one
Install
files to
using the backup software, see
sub-folders). As long as the media vault is powered on and connected to the network,
Backup
Shared
FileShare
MediaShare
Backup
The media vault comes pre-configured
store files and other folders (called
network, the Shared Folders and all of their files and sub-folders can be accessed by network users.
Use this folder to store any important files that you want to share across your
network.
HP configured this folder to allow media streaming to home entertainment
centers. HP does not recommend renaming or deleting this Shared Folder if
you are considering using this feature now or at some point in the future to
store your music, videos, movies, and digital pictures.
(For more information, see
NTI's DriveBackup! defaults to this Shared Folder
files. These are large files containing all of your
information, see
In addition, HP Easy Backup also defaults to this Shared
and file backups. (For more information, see
HP does not recommend renaming or deleting this Shared Folder if you
on using HP Easy Backup or NTI's DriveBackup!
Create a drive backup
with three
sub-folders
Stream media to your entertainment center
to store PC system backup
hard drive's data. (For more
.)
Folder to store folder
Use Easy Backup
Shared Folders
). As long as the media vault is powered on and connected to the
, which
are special “top-level” folders where you
.)
.)
plan
Page 6

The three Shared Folders are named:
FileShare
MediaShare
Backup
During the installation process, an HP drive mapping application gives you the opportunity to
the Shared
map drive letters
Folders on your media vault. Mapping drive letters means assigning “letters” to folder names. This
to
makes it easier to manage files because you can save files and folders to mapped drive letters just as you can to
other drive letters on your computer such as the C: and D: drives.
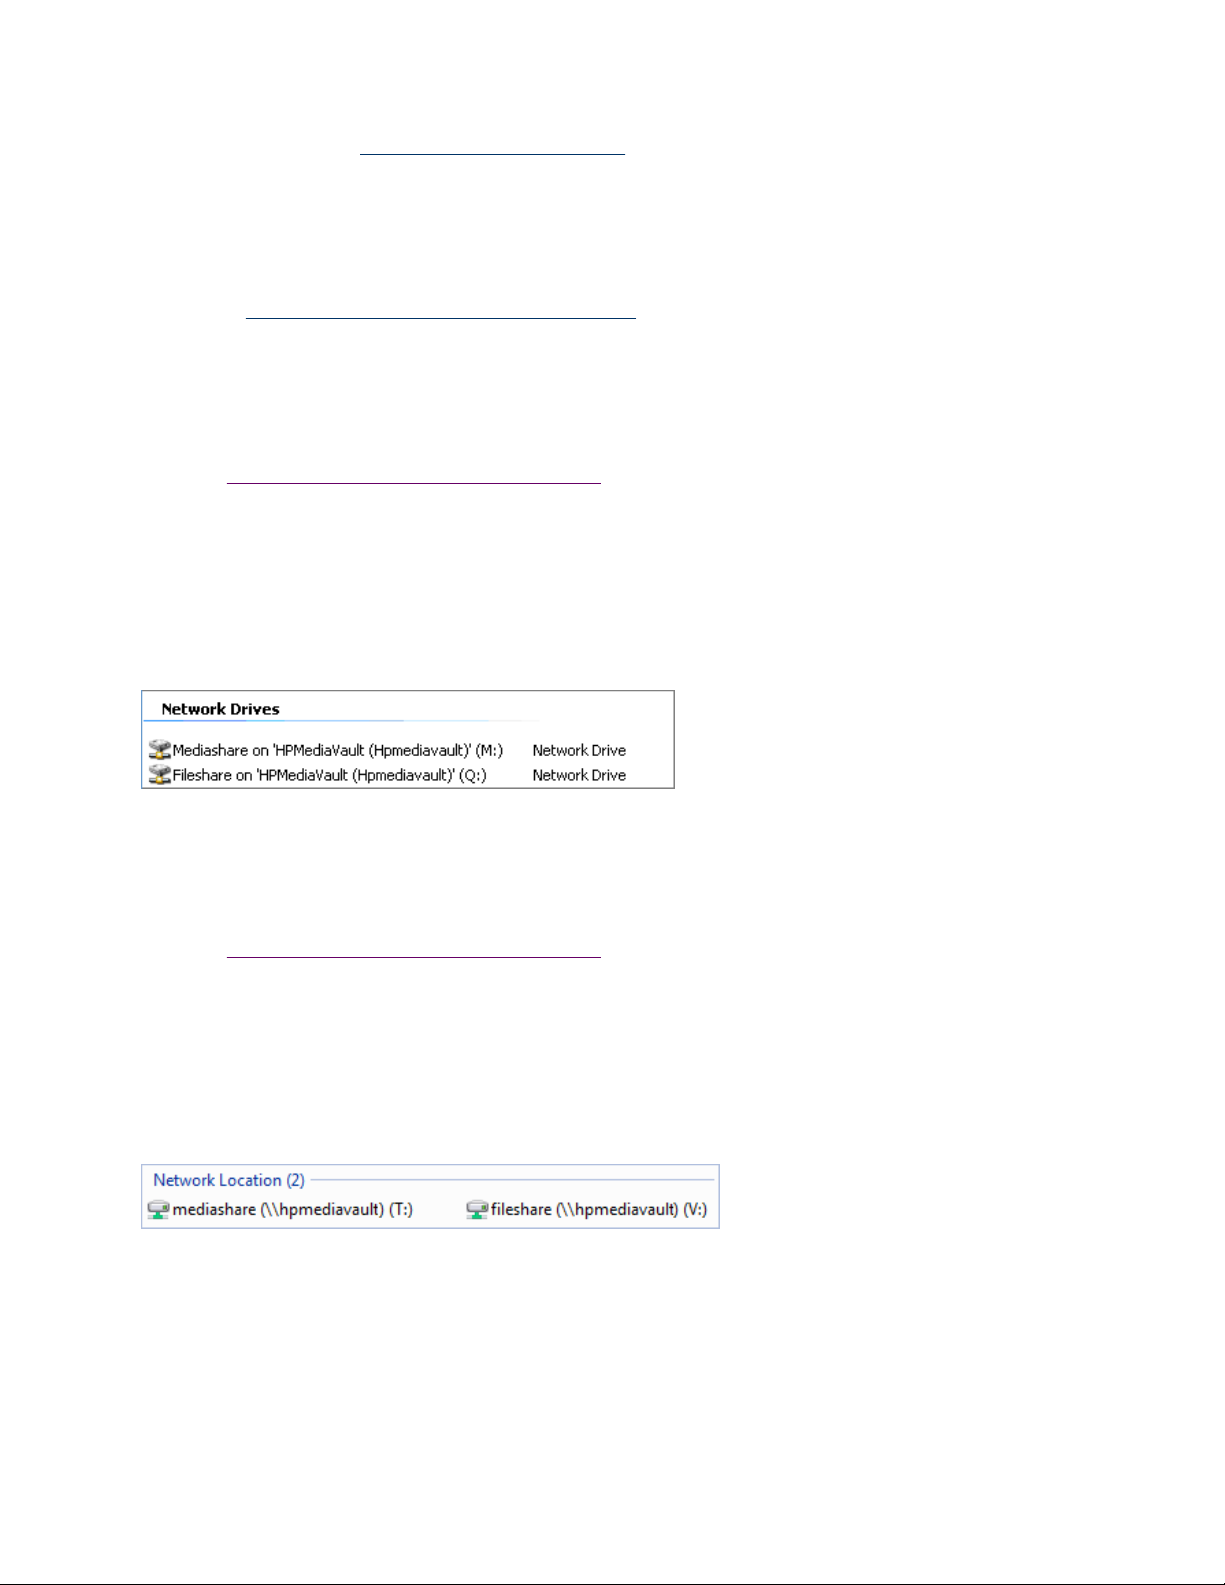
My
Let’s say you mapped the letter “Z” to FileShare. In Windows XP, when you open
this folder listed under
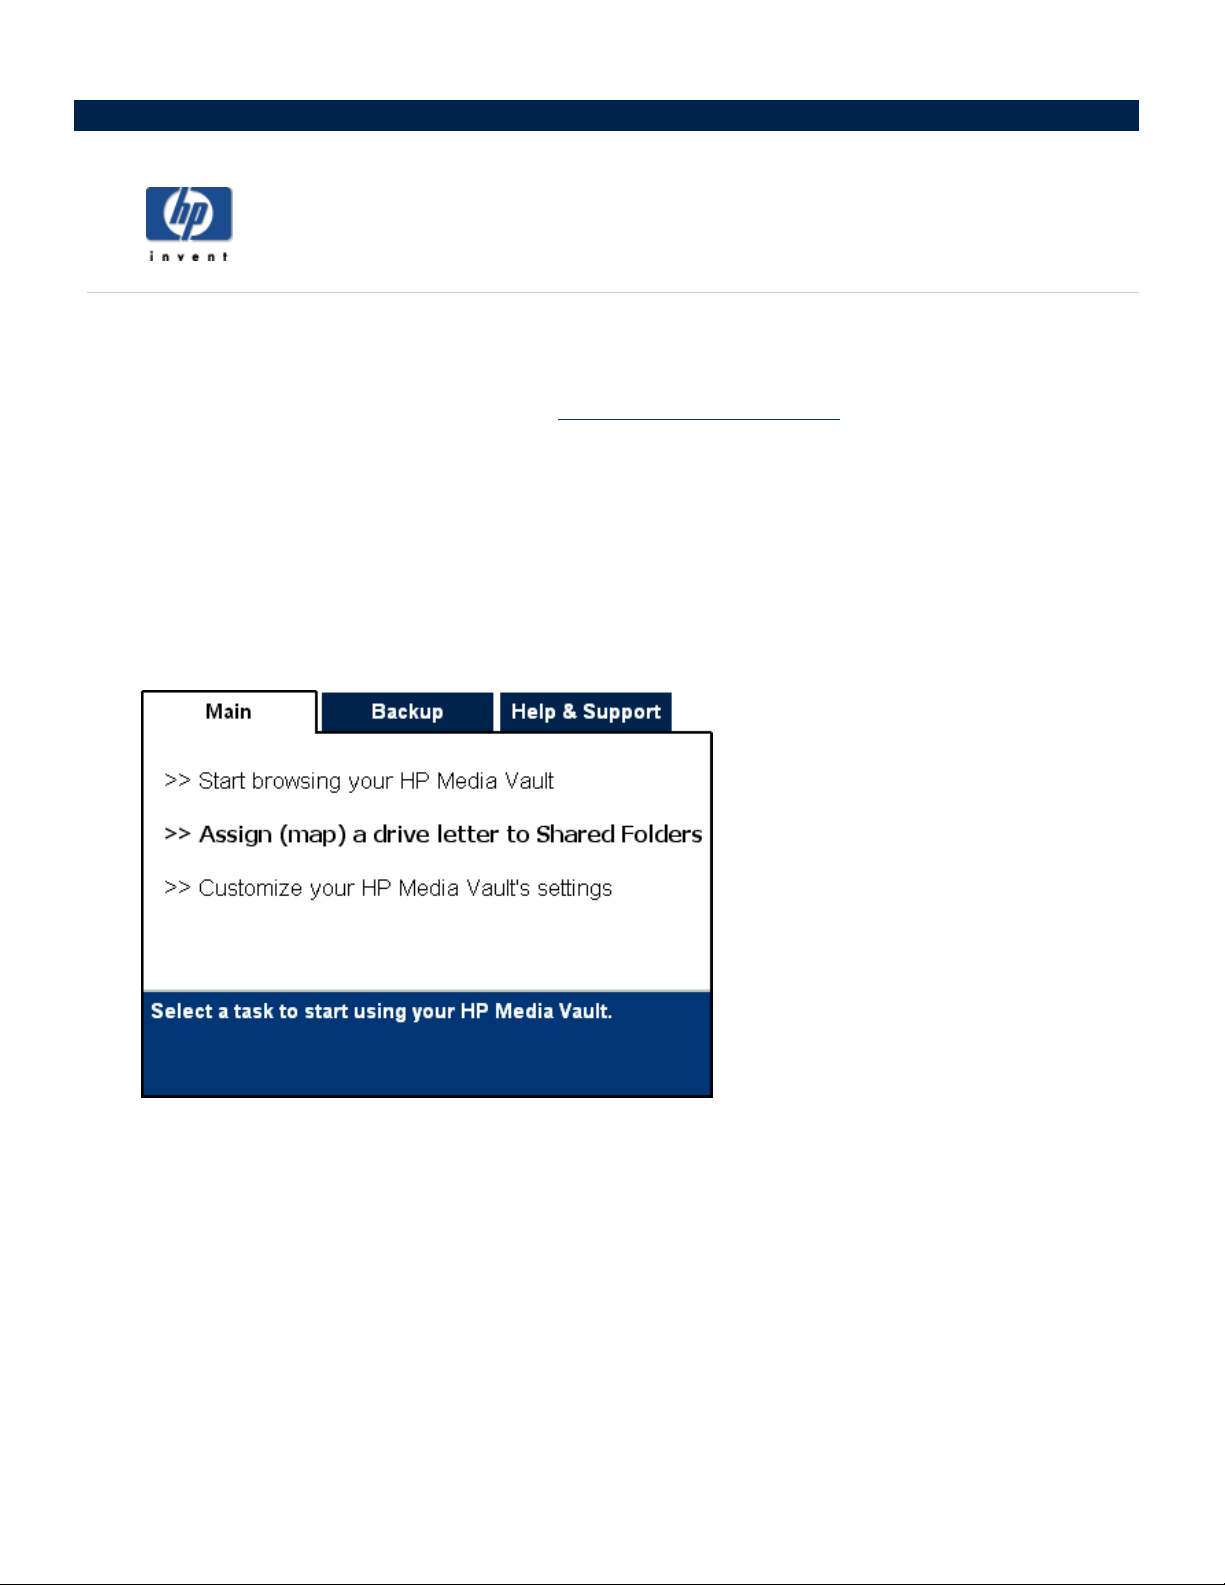
Window Vista, when you open
Network Drives
Computer
fileshare (\\HPMediaVault) (Z:)
.
FileShare on‘HPMediaVault (Hpmediavault)’ (
as
, you will see this folder listed under
If you’re already familiar with networking, you might have used Shared Folders on a networked PC.
Computer,
you will see
Network Location
Note that
Z:)
as
. In
the term Shared Folders used in reference to the media vault are different folders from those stored on a
networked PC. However, the term Shared
Folders means the same in both cases: Folders that you set up on a
network that are accessible to all network users.
If familiar with networking terms, you might also have heard the phrase “mapping a
a Shared Folder. A “Share” means the same as “Shared Folder,” and you can use
A Share is
other folders. For more information on how to organize your
a top-level folder that stores other folders within it. For example, File
Shared Folders, see
Share” rather than mapping
these terms interchangeably.
Share
and Media
Organize your files
Share
.
can store
For more information on mapping drive letters, see
For information on
your files
.
Recommendations for using the
Run automatic backups for important files
browsing, accessing, and saving files to the HP Media Vault, see
Backup
Shared Folder are found at the following links:
, and
Create a drive backup
Map drive letters to Shared Folders
Browse, access, and save
.
.
Organize your
files
,
Page 7

How to change the time zone on your HP Media Vault
The HP
Media Vault is set to Mountain Standard Time (MST) (USA
To access the System Settings screen:
Double-click the
Customize your HP Media Vault’s setting
Click
Welcome Screen
If the
Click the
System Settings
HP Media Vault
appears, click
tab.
icon on your desktop.
Configure Device
To reset the time zone on your media vault:
1. Click
2.
3.
4.
Clock Settings
Click the
Select Time Zone
.
drop-down list. Select a
If you don’t live in a Daylight-Savings Time zone, click
Savings Time
Time
changes.
selected, your media vault will automatically update its clock
If finished, click
accepted.)
to clear it. If you keep
Accept
Cancel.
or
Automatically Adjust Clock for Daylight Savings
(If you click
+ Canada).
.
.
new time zone.
Automatically Adjust Clock for Daylight
for the spring and autumn time
Cancel,
the changes that you made will not
be
For
more information on changing your time and date settings, see
Set the date and time
.
Page 8
On your PC, you
PC to
browse
Folders, you can save folders and files to them.
You can use several methods to browse to and access your media vault’s Shared Folders.
Use HP software to browse:
1.
On your desktop, double-click the
2.
On the
browse
to the Shared Folders on your HP Media Vault. After browsing to your media vault’s Shared
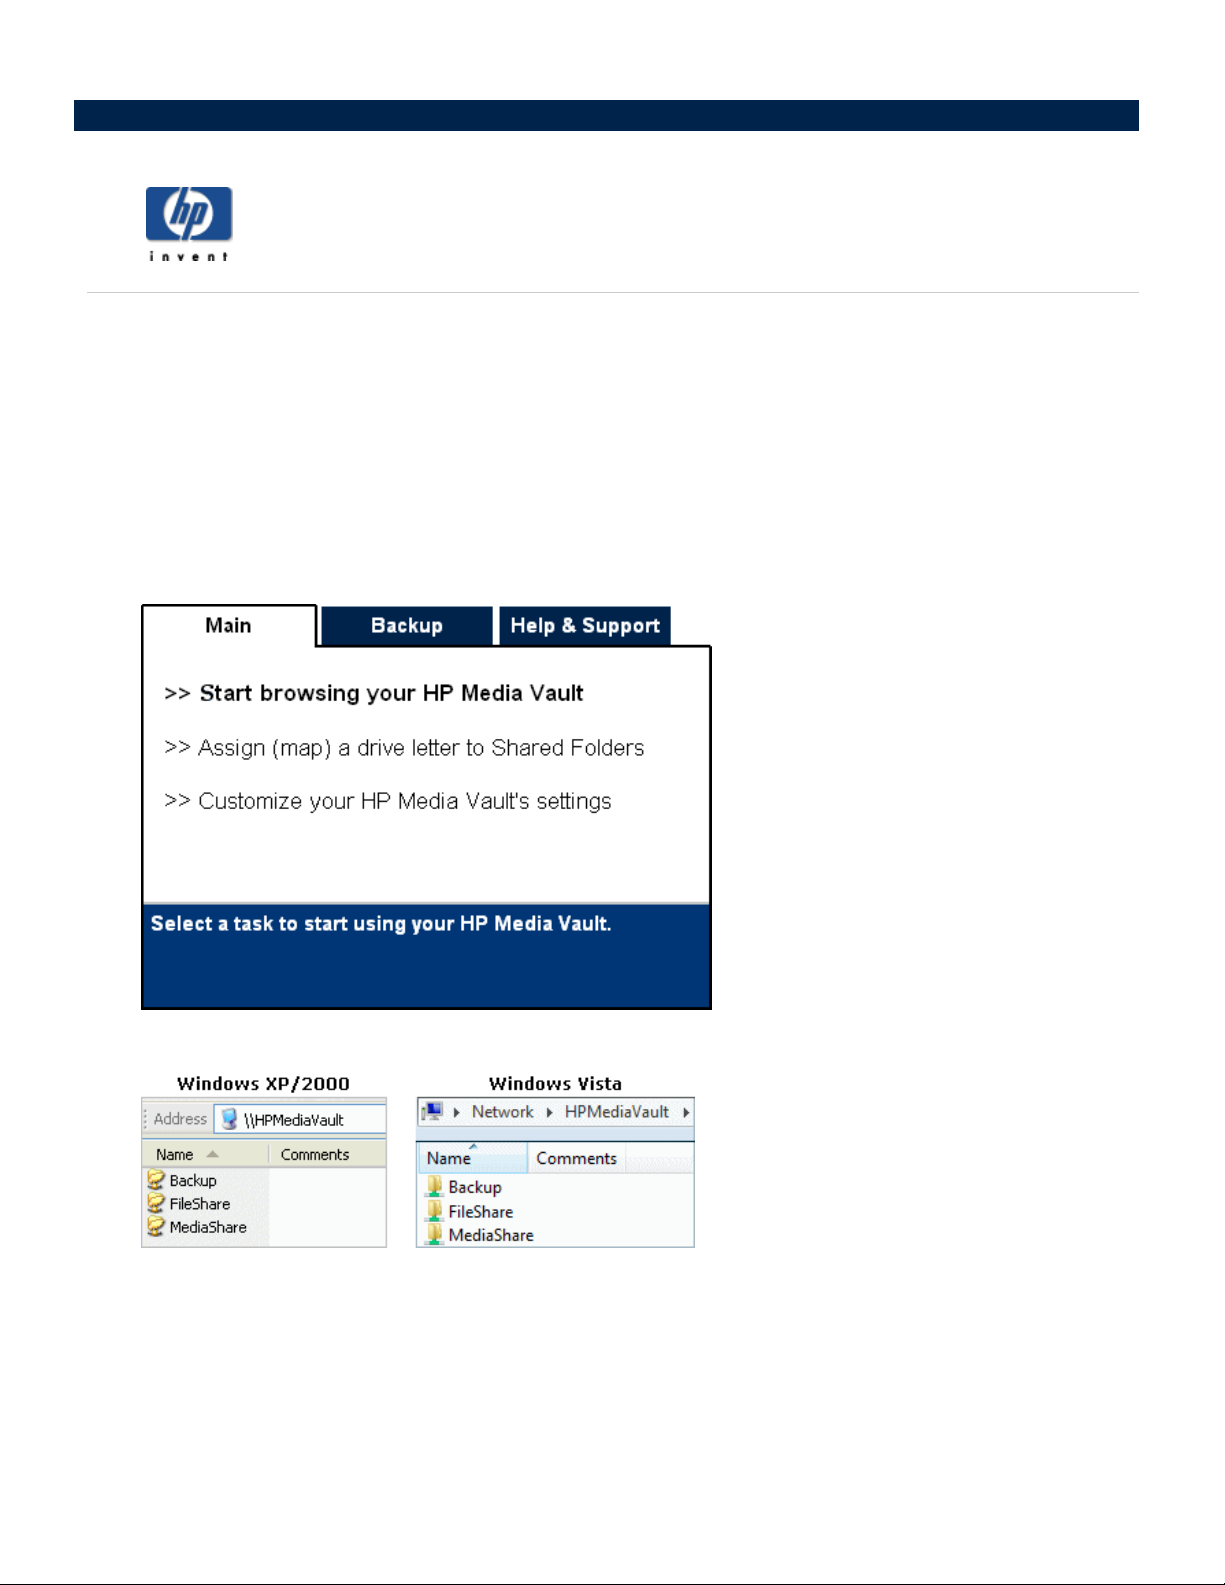
Main
How to browse, access, and save your files
your file system to find, open and save files to your hard drive.
tab, click
HP Media Vault
Start browsing your HP Media Vault
icon.
.
You can also use your
3.
A browser window opens showing you a list of your Shared Folders.
4.
Double-click the name of a Shared Folder to open a screen showing you the files saved to the folder. (If
you haven’t saved any files to the Shared Folder, the folder will be empty.)
Use
My Network Places in Windows XP or Windows 2000 to browse:
1. Click
2.
Start,My Computer,My Network Places
In the Name column, locate the Shared Folder you want to open. For example, if opening FileShare,
.
Page 9
Windows lists the name as
FileShare on HPMediaVault (HPmediavault)
.
3. Click
4.
Use Network in Windows Vista to browse:
1. Click
2.
3.
FileShare on HPMediaVault (HPmediavault)
have stored in this folder. (If you haven’t yet saved any files to FileShare, the
empty; otherwise you will see your saved files.)
After opening FileShare, look at the Windows
media vault, which is:
Start
menu,
If network discovery is turned off, you will see a notification bar. Click this bar, and then click
network discovery and file sharin
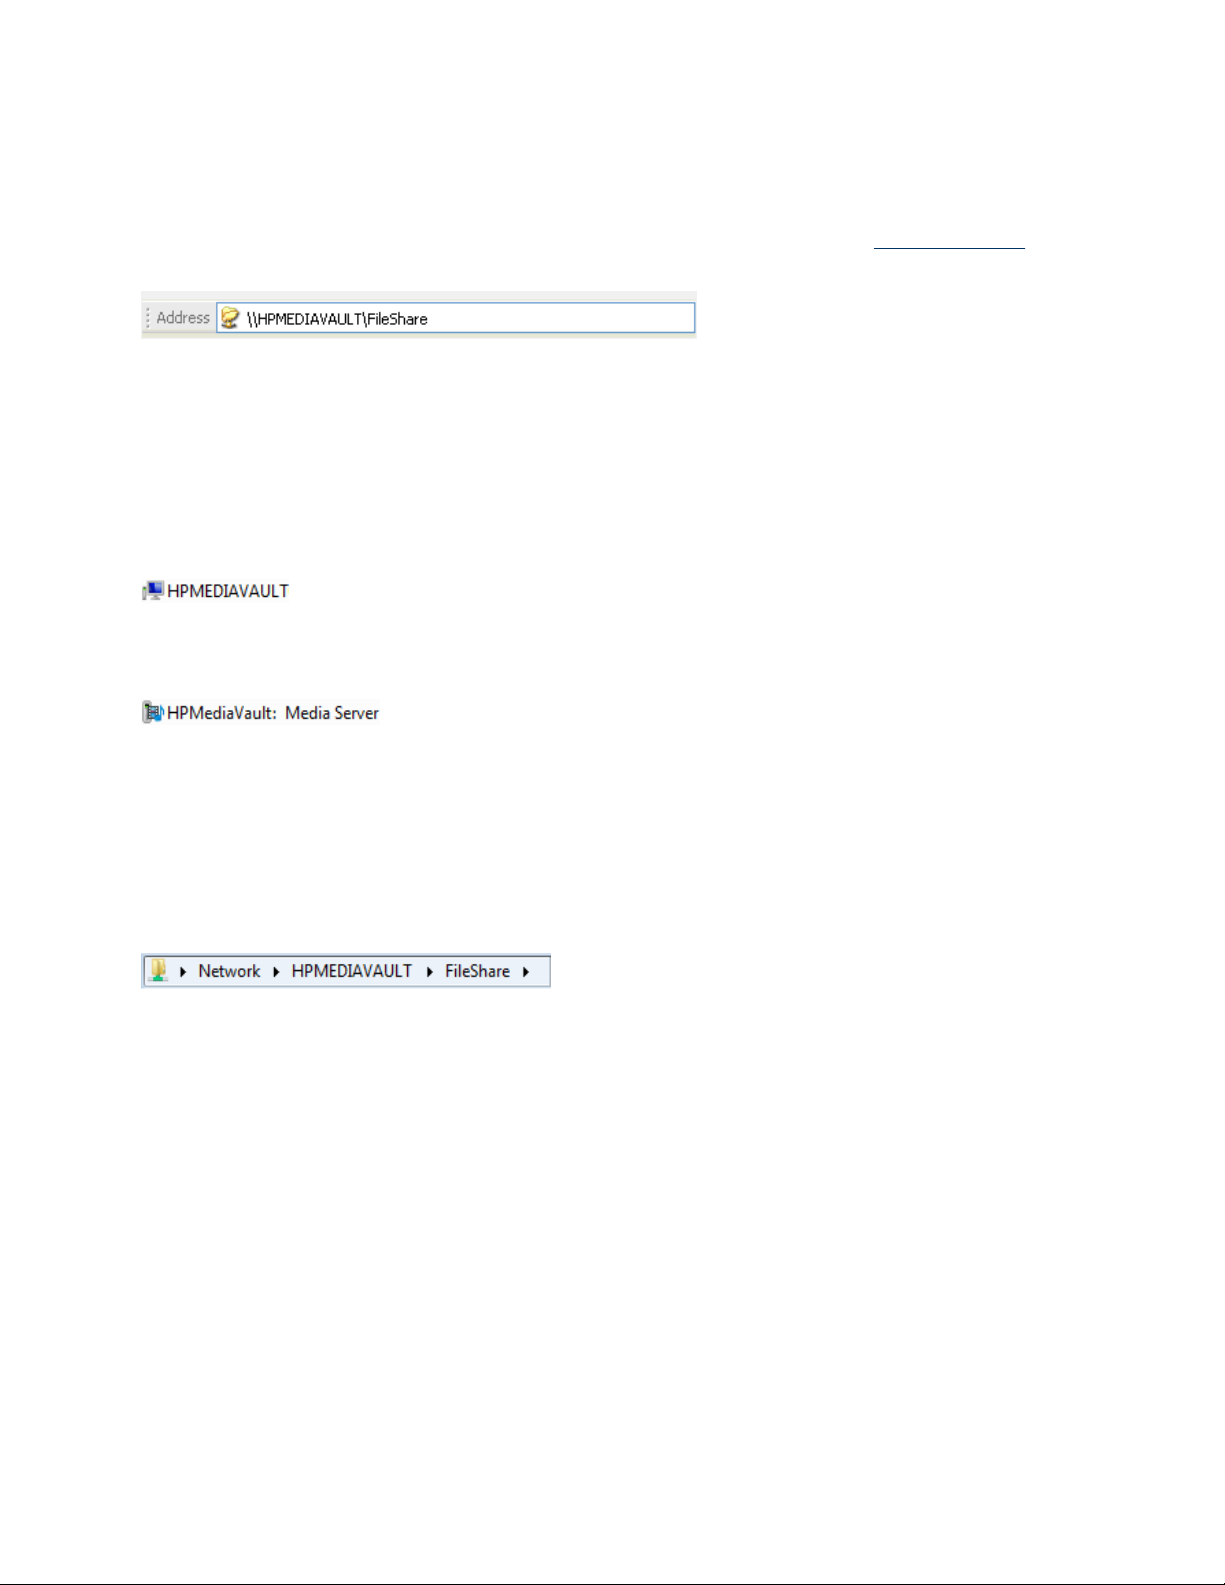
Double-click the name of your media vault. For example:
Note:
below. Be sure to click the
The Network window may also display the name of the HP Media Vault media server, as shown
\\HPMediaVault\FileShare
Network
.
media vault, not the media server.
g.
Address
to open FileShare and see what files you
window that appears will be
bar. You will see the
.
network address
of your
Turn on
3.
Double-click the name of a Shared Folder.
4. Click
5.
Network addressing
Network addressing means that you can access resources on your network by entering their “addresses” in a
browser’s
1.
2.
3.
FileShare
saved any files to FileShare, the
files.)
After opening FileShare, look at the Windows
vault.
Address
Delete the address in the
A
screen opens showing you the folders and files saved to the MediaShare folder
you haven’t saved anything to MediaShare, the screen will be empty.)
Close
this window.
Open a standard browser window, such as Internet Explorer, Netscape, or Firefox.
to open FileShare and see what files you have stored in this folder. (If you haven’t yet
window that appears will be empty; otherwise you will see your saved
bar.
Address
bar, and in its place enter
Address
bar. You will see the network path of your media
\\HPMediaVault\MediaShare
on your media vault. (If
.
4.
Delete everything in the
5.
In the Address bar, enter
files in the FileShare folder on your media
Address
\\HPMediaVault\FileShare
bar.
vault.
, and then press
Enter
. You will see any saved
Page 10
Note:
In Windows Vista, you can use this method from any window containing an Address bar.
Network addressing uses the
\\device name\share name
the Shared Folder or “share
used instead of “Shared Folder.”)
Note:
media vault, see
Use Windows Explorer to browse:
When you installed the media vault, you had the choice of mapping drive letters to FileShare, MediaShare and
Backup. If you mapped drive letters to those Shared Folders, you can
Explorer. (See
The media vault comes pre-configured with the name:
Change the name of your HP Media Vault
Map drive
1. Click
2.
Start, All Programs, Accessories, Windows Explorer, My Computer
Double-click
the name. (If you haven’t saved any files to your Shared Folders, the next screen that appears
empty.)
In this example, MediaShare is mapped to drive letter “M.” FileShare is
the name of the Shared Folder you want to open. The drive letter will be located at the
Uniform Naming Convention
. In this example,
name.
letters to your Shared Folders
” (
For those more familiar with
(UNC) format. This format looks like the following:
HPMediaVault
networking terms, the word “Share” is often
HPMediaVault
.
browse to those folders using Windows
. )
is the device name, and
. To change
mapped to drive letter “Q."
FileShare
the name of your
.
will be
is
end of
Use Windows Vista Explorer to browse:
When you installed the media vault, you had the choice of mapping drive letters to FileShare, MediaShare and
Backup. If you mapped drive letters to those Shared Folders, you can
Explorer. (See
1. Click
2.
Double-click
the name. (If you haven’t saved any files to your Shared Folders, the next screen that appears
empty.)
In this example, MediaShare is mapped to drive letter “T.” FileShare is
Map drive
Start,
letters to your Shared Folders
Computer
the name of the Shared Folder you want to open. The drive letter will be located at the
.
. )
browse
to those folders using Windows
end of
will be
mapped to drive letter “V."
Page 11
Mapping drive letters means assigning “letters” to the names of Shared Folders. Mapping drive letters is one of
the easiest ways to manage files because you can save files and folders to mapped drive letters just as you can
to other drive letters on your computer, such as the C and D drives. (For more information on browsing,
accessing, and saving files to the media vault, see
When you installed the HP Media Vault, you had the choice of mapping drive letters to FileShare, MediaShare
and Backup. If you didn’t map drive letters during installation, you can map letters by using one of the following
methods:
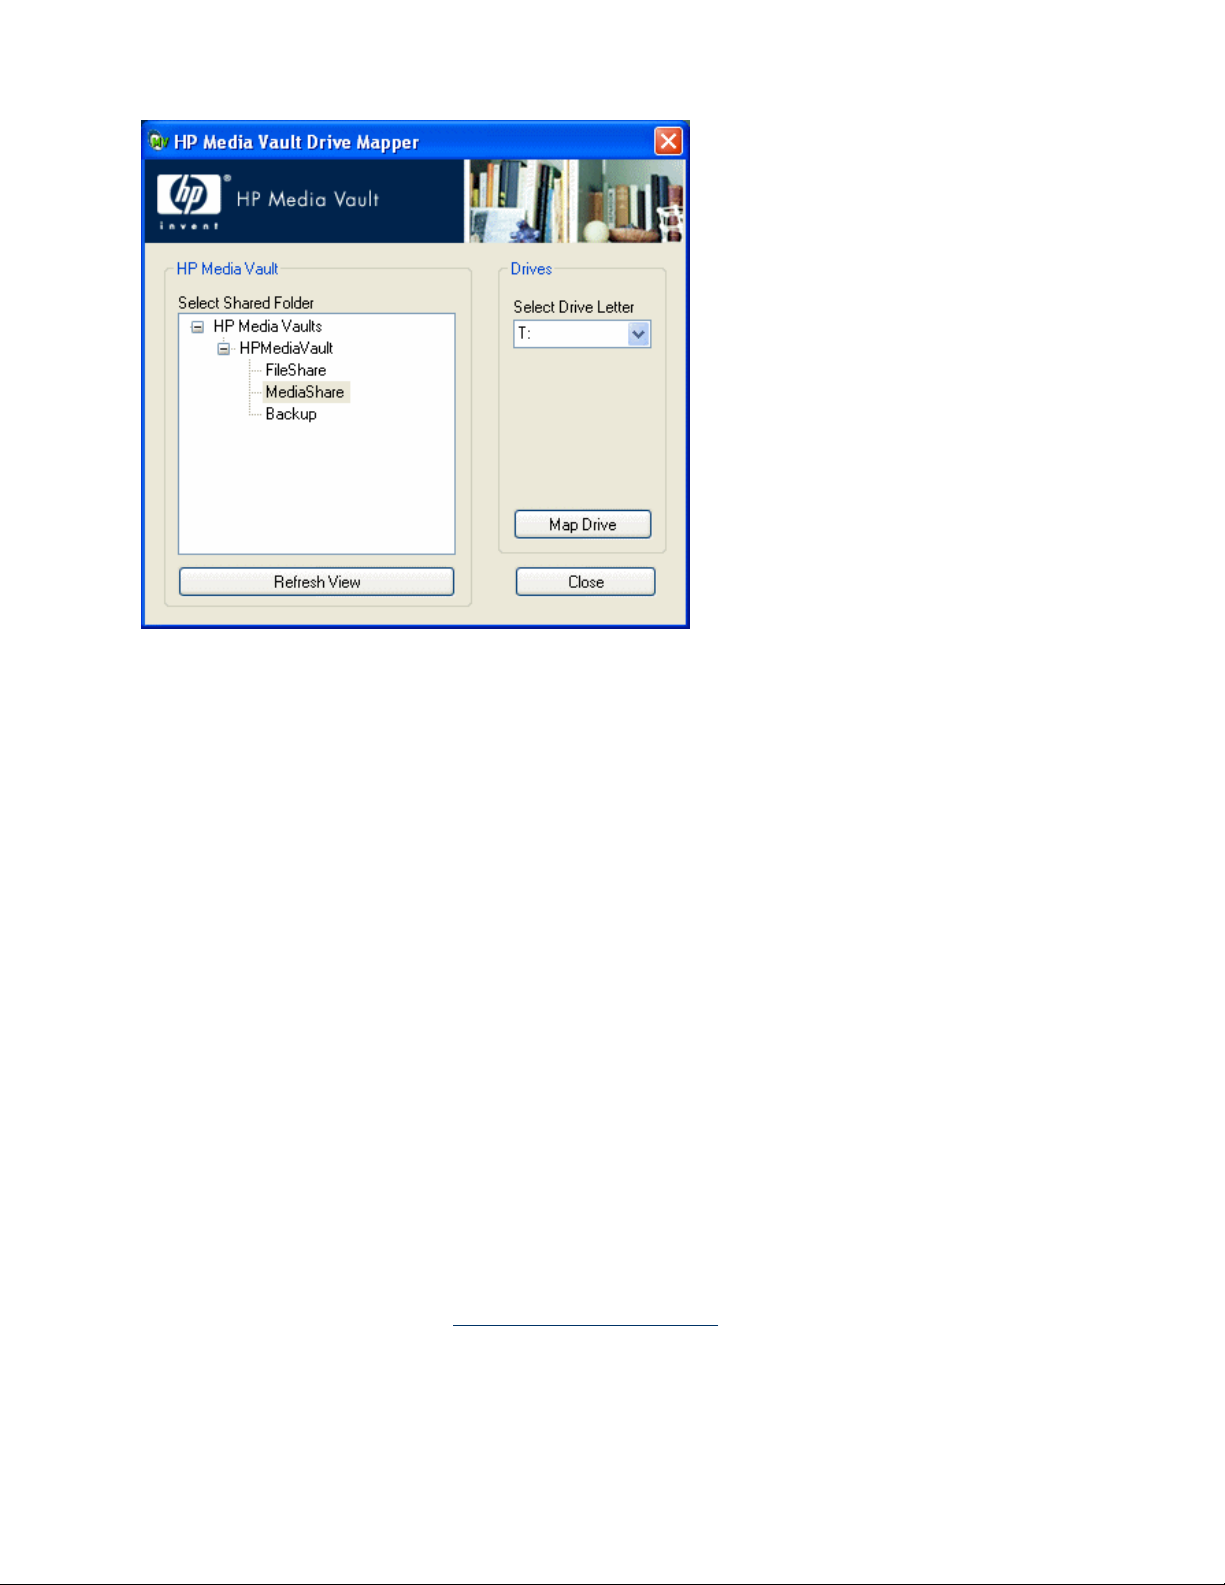
To map a drive letter using HP software:
1.
On your desktop, double-click the
2.
On the
Main
How to map drive letters to Shared Folders
tab, click
Browse, access, and save files
HP Media Vault
Assign (map) a drive letter to Shared Folders
icon.
.)
.
Page 12
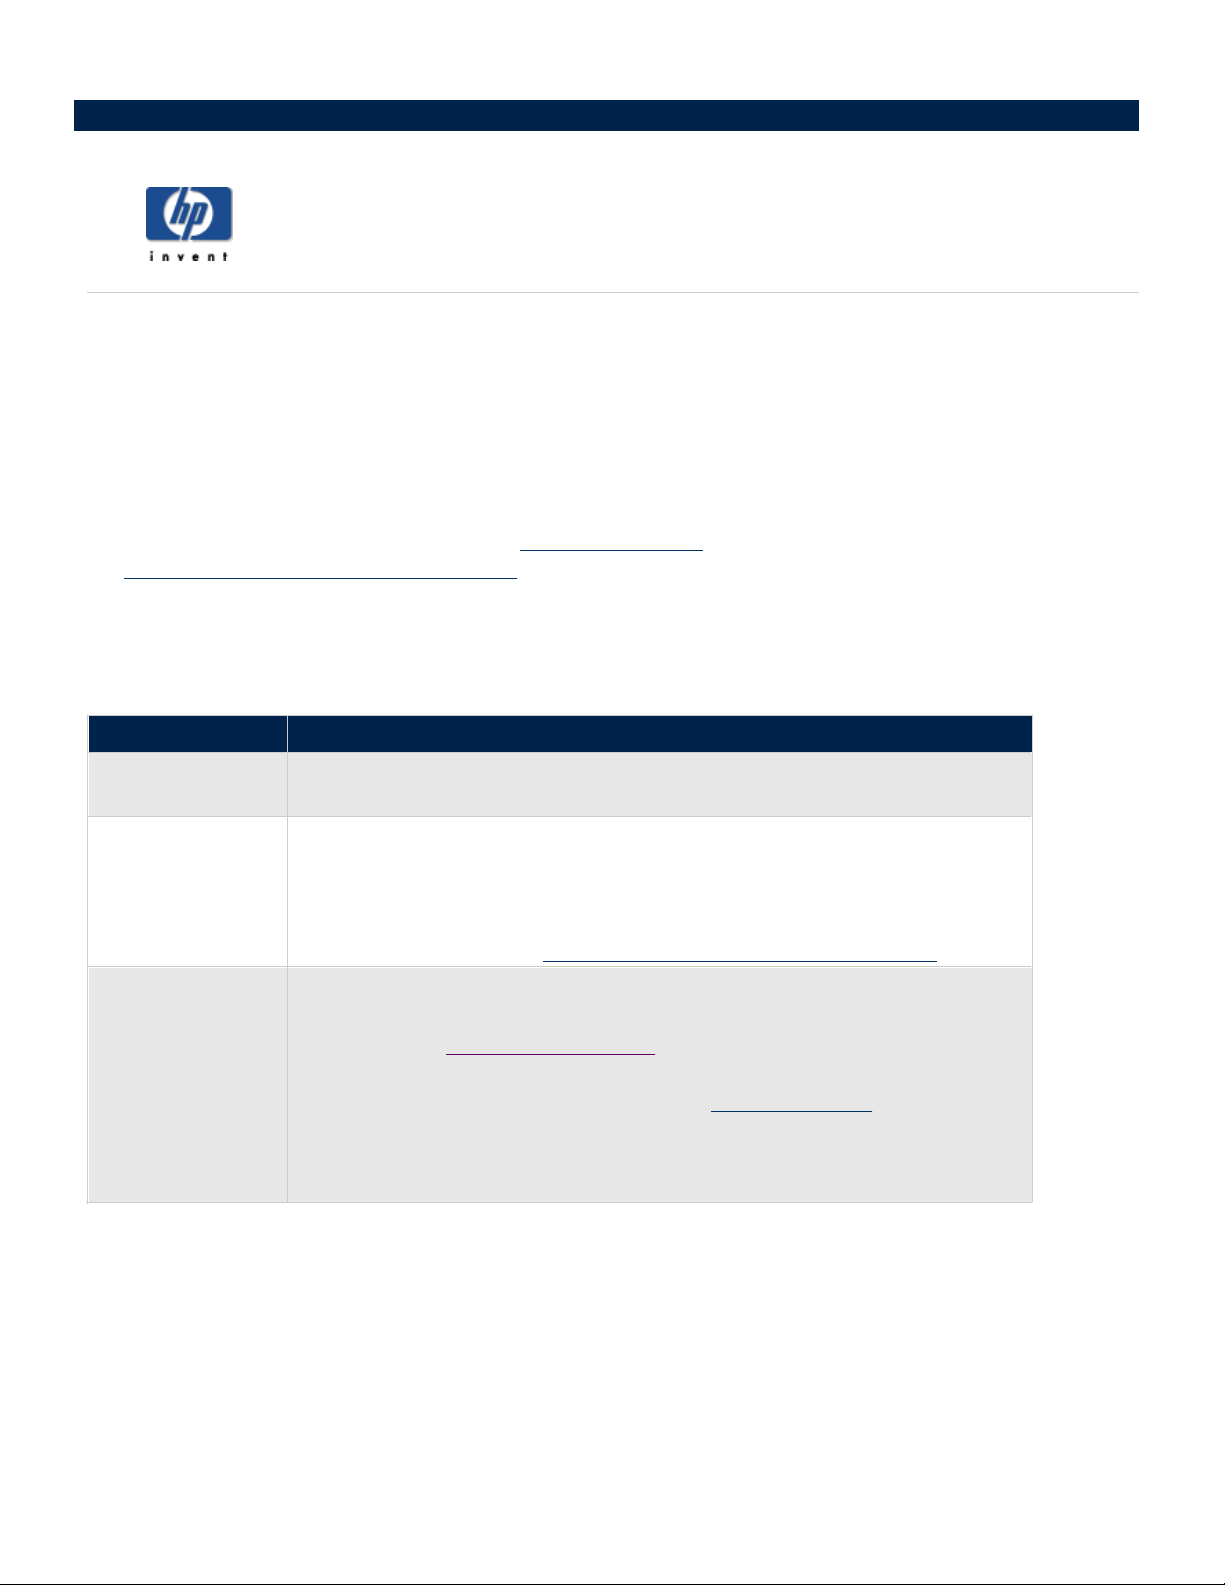
3.
The HP Media Vault Drive Mapper opens. Follow these steps to map a drive letter:
a.
Click a Shared Folder in the
b.
Select a drive letter from the
to the letter Z:, but you can select any drive letter.)
Click
Map Drive
Close
when you are finished mapping drive letters to Shared Folders.
.
c. Click
d.
Select Shared Folder
Select Drive Letter
drop-down list. (Mapping drives usually defaults
box.
Map a drive letter using Windows XP or Windows 2000:
1. Click
2. Click
3.
4.
Start, All Programs, Accessories, Windows Explorer, My Computer
the
Tools
menu,
Map Network Drive...
Mapping drives usually defaults to the letter Z:. but you can select another
next two steps:
a.
To view a list of available drive letters, click the
b.
Click a drive letter to select it.
To enter the Shared Folder in the
Click the
find the folder, click
Folder
Browse
box.
Drive
drop-down list.
Folder
box, you have two
options:
button and then use Windows Explorer to locate the Shared
to highlight it, and then click OK. The path to the folder
.
drive letter by following the
Folder. After you
will appear in the
5. Select
6. Click
Folder
In the
Folder you want to map. For example: enter
box, use the
Uniform Naming Convention
\\HPMediaVault\FileShare
(UNC) to enter the path to the Shared
device name; FileShare is the name of the Shared Folder.)
Reconnect at logon
Finish
.
. Windows will re-establish the mapped drive every time you start Windows.
(HPMediaVault
is the
Page 13

Special considerations when mapping a drive letter:
If you change the name of your media vault, you will enter the new name instead of HPMediaVault in
4
above.
When mapping drive letters to Shared Folders that are password protected, you must
additional step: You will have to enter the Shared Folder’s password when
information on password protecting Shared Folders, see
If your media vault is configured for user-based security and you map drive letters to Shared
might have to enter a username and password. You will not have to enter a
have already logged onto your Windows PC with a
based mode, see
complete an
prompted. (For more
Enhance security on your Shared Folders
username and password if you
username/password. (For more information on user
Enhance
security on your Shared Folders
.)
If you mapped a drive letter, but now want to disconnect it:
1. Click
2.
3. Click
Start, All Programs, Accessories, Windows Explorer, My Computer
Right-click on the icon for the mapped drive.
Disconnect
.
This only removes the drive letter; you can still access the resource
from My Network Places.
.
Map a drive letter using Windows Vista
step
.)
Folders, you
-
Before taking the following steps be sure that Network discovery is turned on. For more information, see
that Network Discovery is turned on
1. Click
2.
3.
Start
menu,
In the tool bar, click
Mapping drives usually defaults to the letter Z:, but you can
next two steps:
a.
To view a list of available drive letters, click the
b.
Click a drive letter to select it.
4.
To enter the Shared Folder in the
Click the
Computer
Browse
find the folder, click to highlight it, and then
Folder
In the
dialog box.
Folder
box, use the
Folder you want to
device name; FileShare is the name of the Shared Folder.)
5. Select
Reconnect at logon
.
.
.
select another drive letter by following the
Drive
drop-down list.
Folder
button and then use
box, you have
two options:
Browse For Folder
OK
click
to locate
the Shared Folder. After you
. The path to the folder will appear in the
Uniform
map. For example: enter
Naming Convention
\\HPMediaVault\FileShare
(UNC) to enter the path to the Shared
(HPMediaVault
. Windows will re-establish the mapped drive every time you start Windows.
Ensure
is the
6. Click
Finish
.
Page 14
The HP Media Vault comes pre-configured with three Shared Folders: FileShare, MediaShare, and Backup.
These folders are pre-named to help you get started saving and organizing your files for quick
Additionally, the names of these top-level folders are useful because the
media vault
You should
Backup. Folders beneath the top-level folders are called sub-folders. For
media streaming. You could create sub-folders in MediaShare with names such as: “Photos
and “Movies.”
see
Stream media to your entertainment center
You can rename or delete FileShare, MediaShare, and Backup folders. Before doing so, please read the
recommendations in the following table:
Recommendations
Shared Folders Recommended Files
FileShare
and streaming media
consider creating
See the examples below under
How to organize your files
and easy access.
backup application that comes with the
feature rely on the specific folder names.
other folders and saving them in the top-level folders: FileShare, MediaShare,
example, MediaShare is enabled for
” “
Music
” “
Creating sub-folders
.)
Use this folder to store any important files that you want to share across your
network.
. (For more information on
media streaming,
Video
and
”
MediaShare
Backup
Creating sub-folders
Creating folders on your PC and saving them to the MediaShare folder on your media vault provides an easy
way to organize your media files. Follow the example below to learn how to create sub-folders and save them to
the MediaShare.
In this example, you will create sub-folders in the MediaShare folder for
HP configured this folder to allow media streaming to home entertainment
centers. HP does not recommend renaming or deleting this Shared Folder if
you are considering using this feature now or at some point in the future to
store your music, videos, movies, and digital pictures.
(For more information, see
NTI's DriveBackup! defaults to this Shared Folder
files. These are large files containing all of your
information, see
In addition, HP Easy Backup also defaults to this Shared
and file backups. (For more information, see
HP does not recommend renaming or deleting this Shared Folder if you
on using HP Easy Backup or NTI's DriveBackup!
Create a drive backup
Stream media to your entertainment center
to store PC system backup
hard drive's data. (For more
.)
Folder to store folder
Use Easy Backup
storing your music files.
.)
.)
plan
Page 15
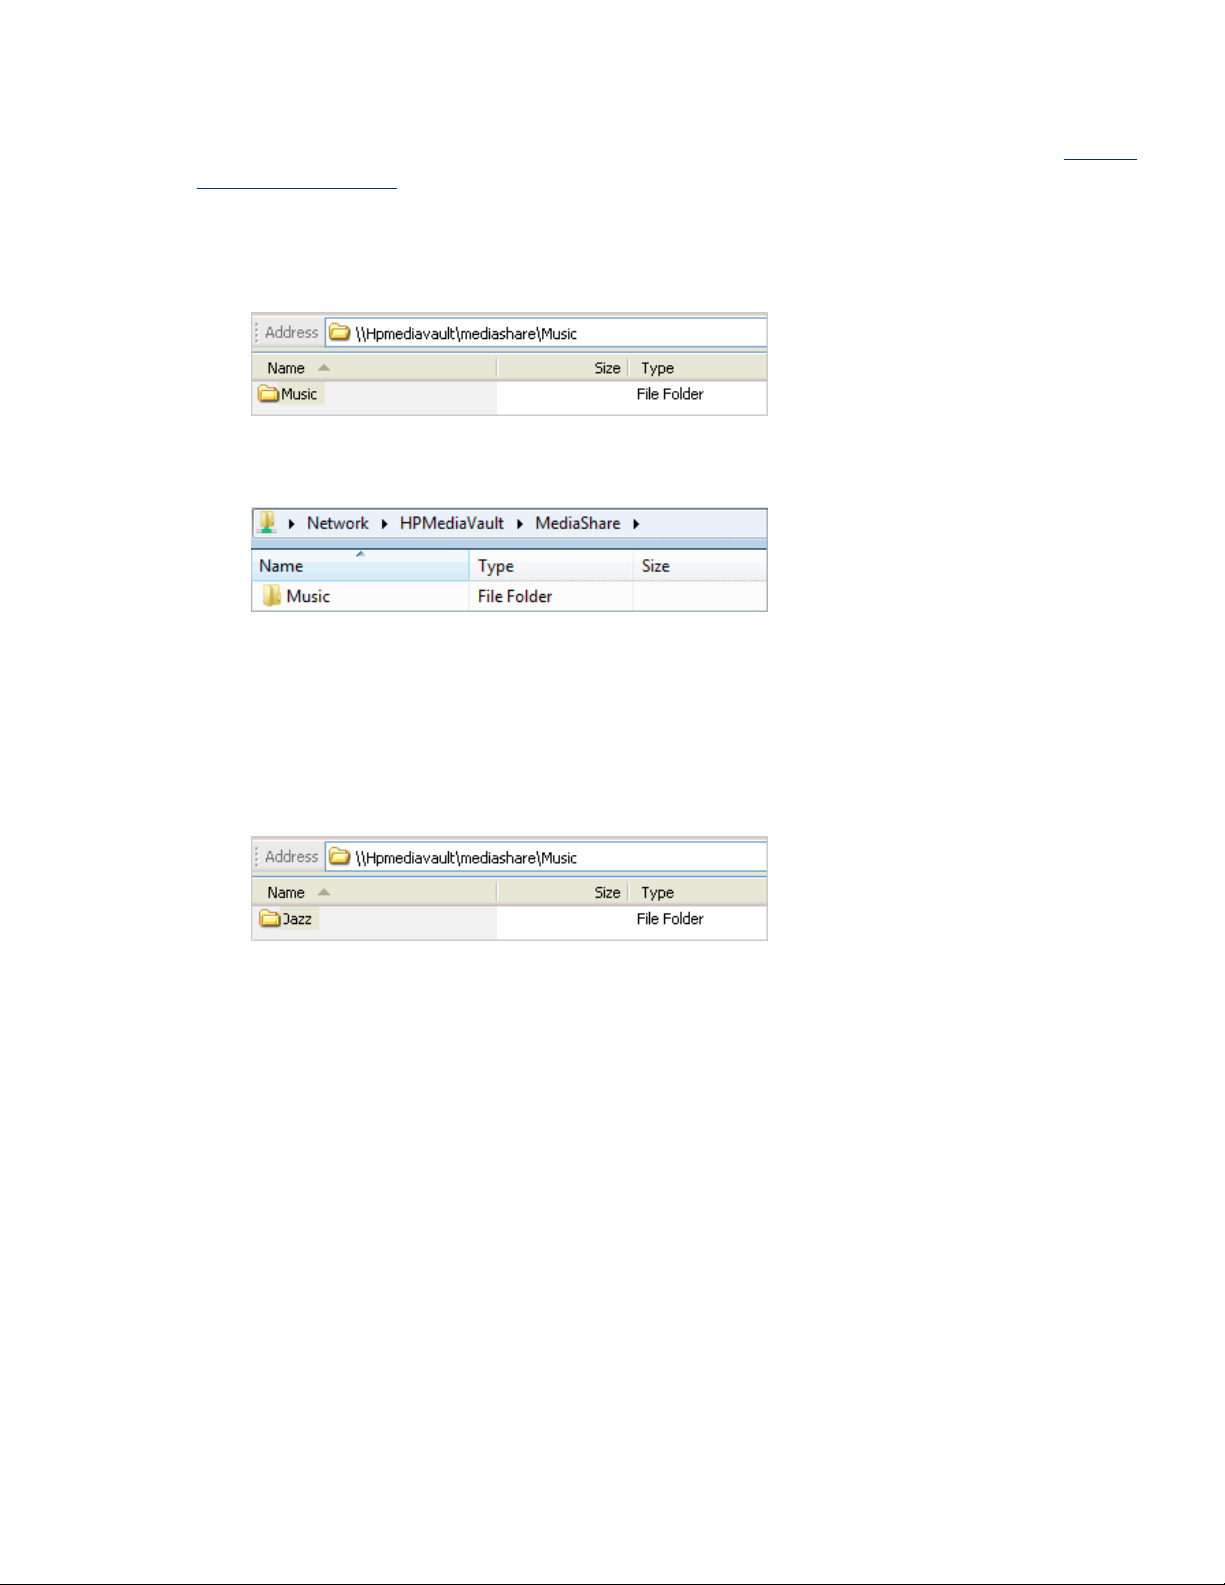
1.
Create a sub-folder called
a.
On your PC, browse to MediaShare. (For information on how to
access,
b.
Do one of the following:
and save files
Music
.
:
browse to MediaShare, see
Browse,
Windows XP or Windows 2000:
Music
enter
Windows Vista:
in the highlighted box. Click somewhere else to clear the highlight.
Click the
the highlighted box. Click somewhere else to clear the highlight.
2.
Create two separate sub-folders within your
a.
Double-click
b.
To create the first folder, do one of the following:
Windows XP or Windows 2000:
Jazz
Music
the
folder to open it.
in the highlighted box. Click somewhere else to clear the highlight.
Organize
Music
Click the
menu, click
folder:
Click
the
File
menu, click
New
File
menu,
Folder
click
New,Folder
, and then enter
New,Folder
, and then
Music
in
, and enter
Page 16
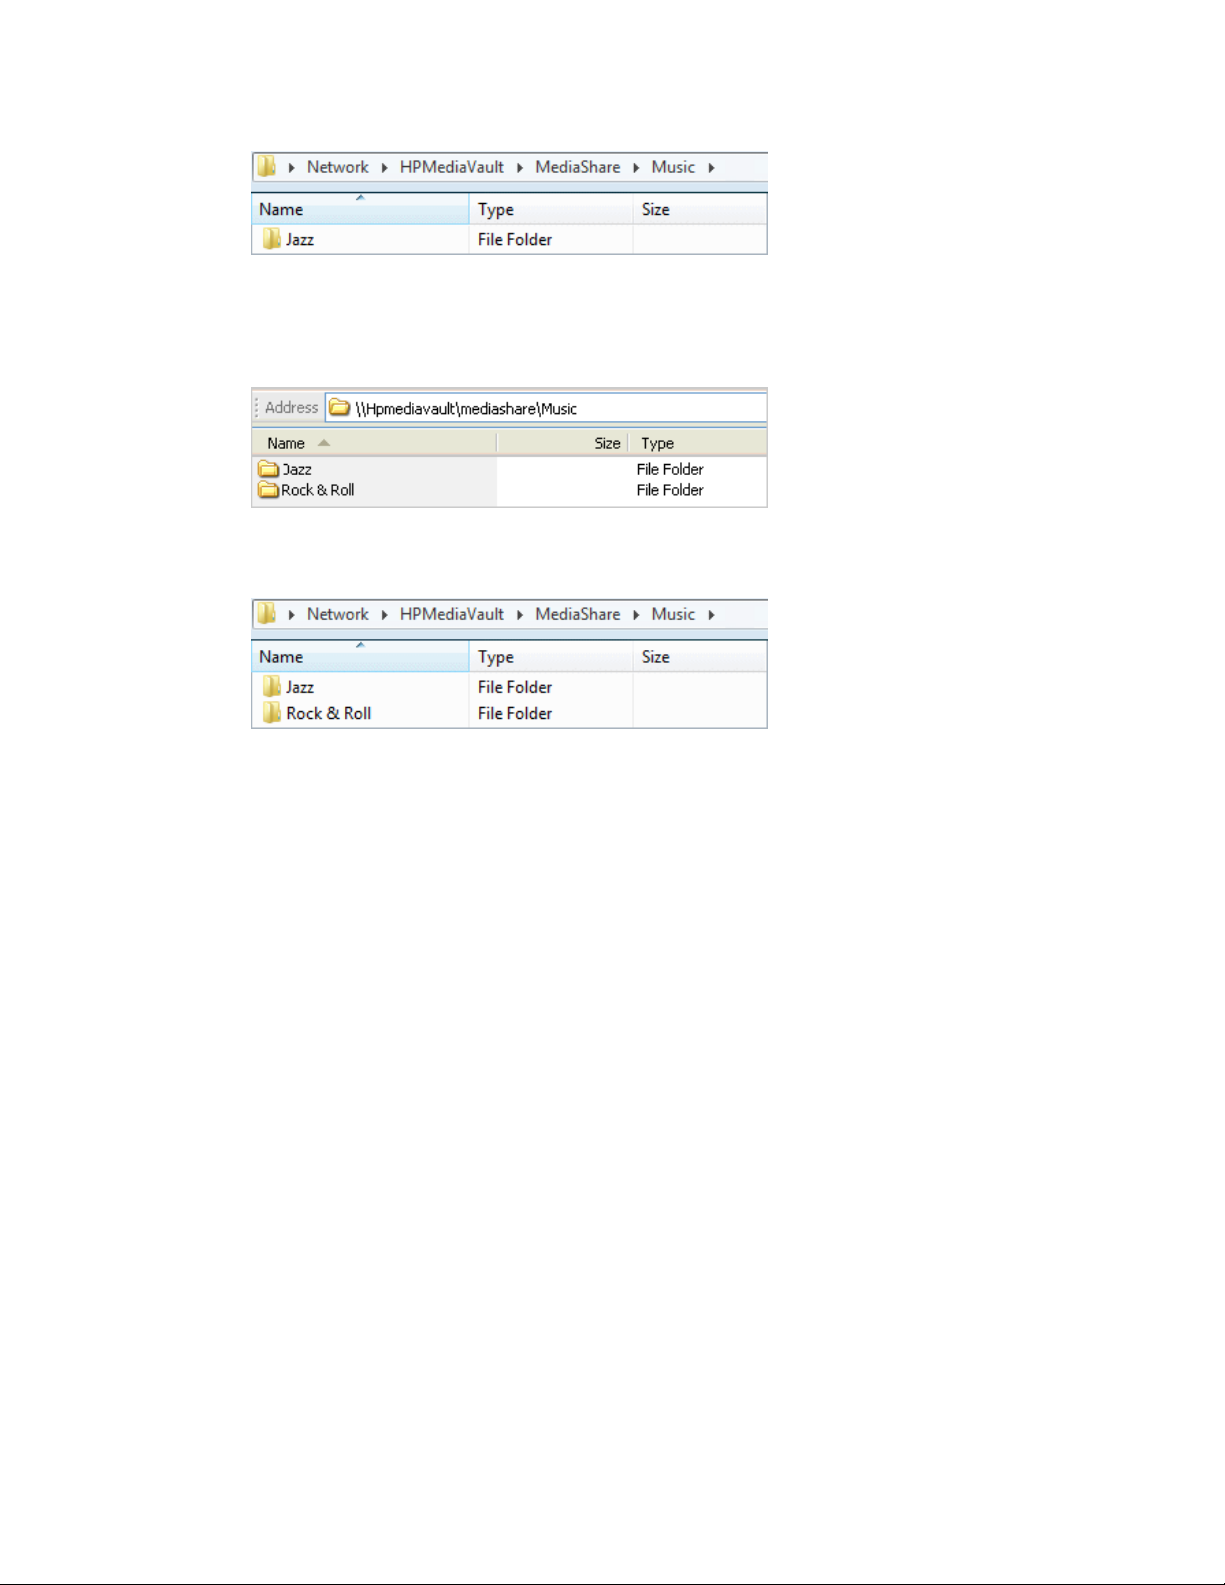
Windows Vista:
Click
Organize
the
highlighted box. Click somewhere else to clear the highlight.
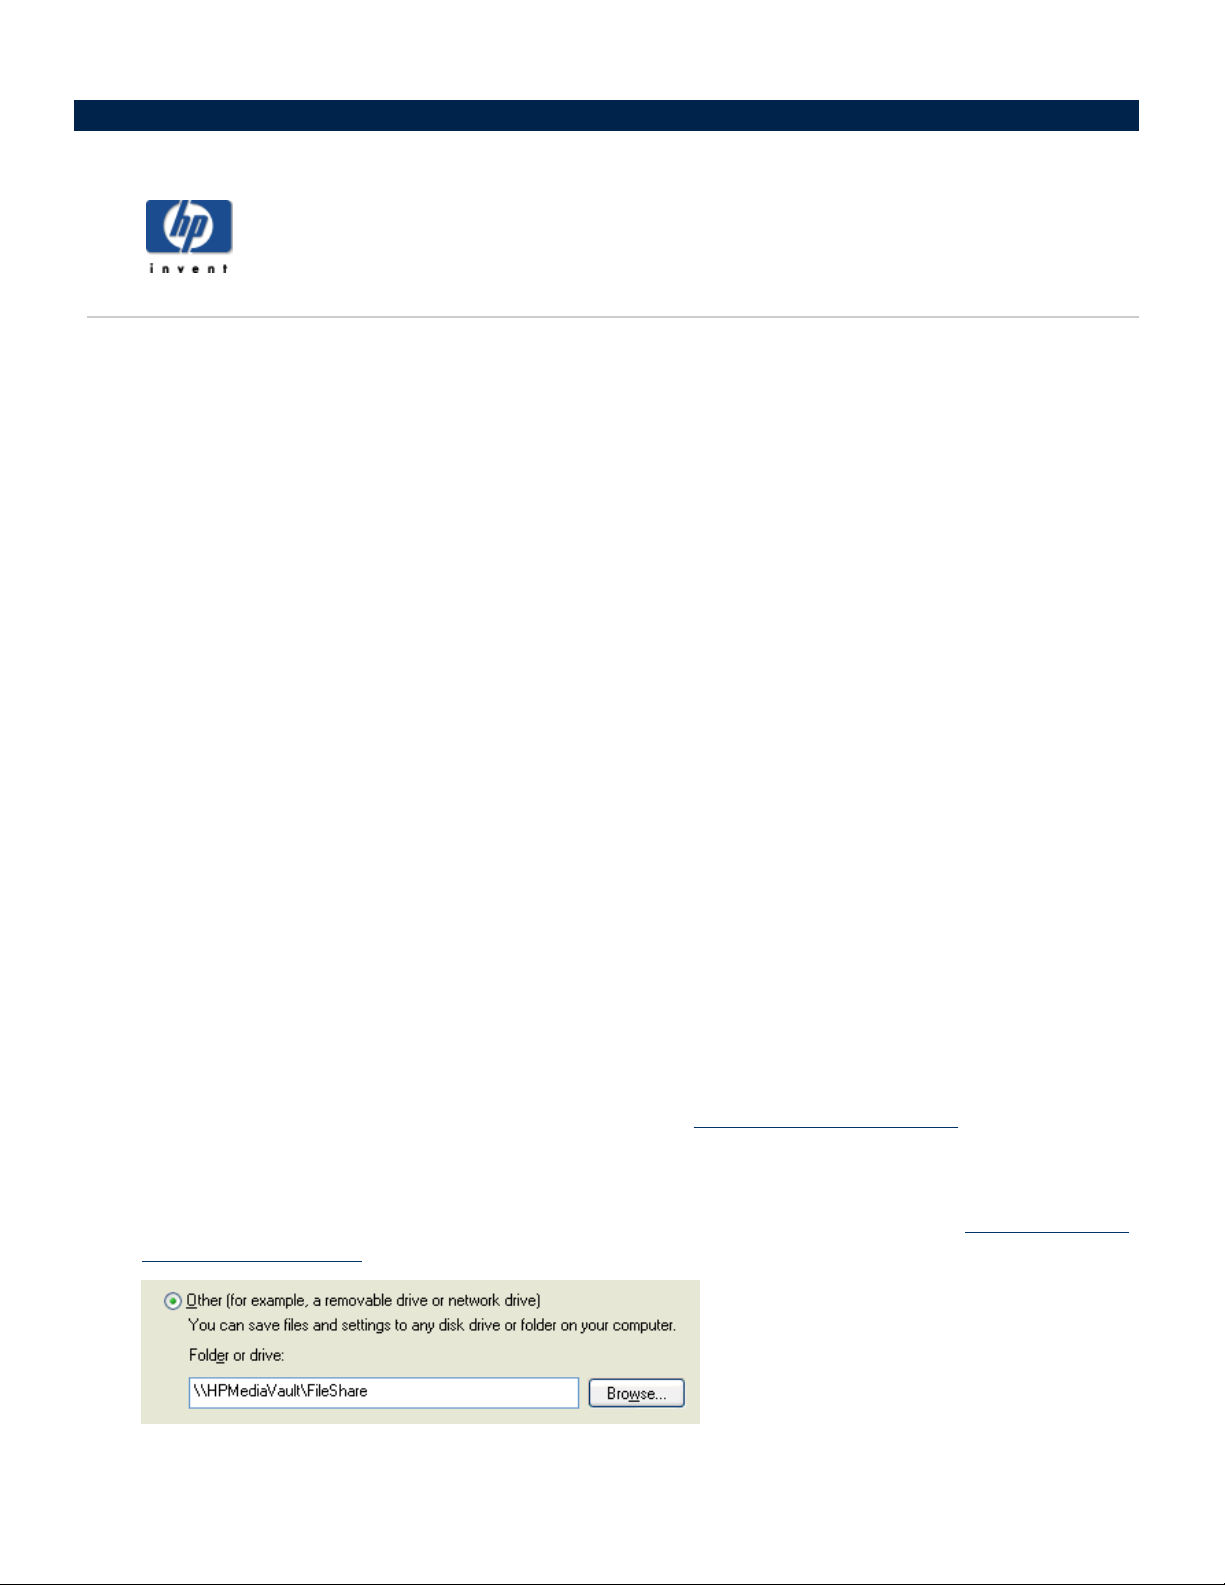
c.
To create the second folder, do one of the following:
menu,
New Folder
click
, and enter
Jazz
in the
Windows XP or Windows 2000:
Rock & Roll
Windows Vista:
in the highlighted box. Click somewhere else to clear the highlight.
Click
Organize
the
in the highlighted box. Click somewhere else to clear the highlight.
You should now have two folders, Jazz and Rock
considered
sub-folders to MediaShare.
Click
the
File
menu, click
New,Folder,
and enter
menu, click
New Folder,
and enter
Rock & Roll
&
Roll, saved to your Music folder. All three folders are
Page 17

How to secure your HP Media Vault from intruders
The HP Media Vault is designed as an
your network users need or want them. But a network device that is set up for
security risks. Because the media vault can
you'll want to ensure that unauthorized users can't access your media vault and
If your network comes
(WAP). A
security settings are toggled off by default and
settings are toggled off, anyone can get into your media vault as well as any computer
or other devices on your network.
networks.
Most wireless networking equipment supports two forms of data encryption as security features:
Privacy
your wireless network, see the user's guide that came with your networking equipment.
Anti-virus software
You should install
scan
Shared Folders to enable the
letters to your Shared Folders, see
WAP can come within an
or WEP and Wi-
all the
Shared Folders
with wireless capability, it has a piece of equipment called a
Fi Protected Access
anti-virus software
on your media vault. You might be required to assign (
anti-virus software to scan the media vault. (For information on how to map drive
"always on" device, which comes in handy for accessing files any time
file sharing also presents certain
be used on a network that has both wireless and wired functionality,
your files stored on it.
Wireless Access Point
all-in-one-gateway,router
you must manually turn on the security settings.
Firewalls and anti-virus
or WPA. For more information on how to configure the security for
on one or more computers on your network, and configure the software to
Map drive letters to Shared Folders
, or as a standalone unit. In many cases, an AP's
If the security
software do not keep intruders out of wireless
Wired Equivalent
map
) drive letters to all your
.)
Remember to keep your anti-virus definitions up-to-date.
Establishing an administrator username and password
Setting up an administrator username and password is one way to safeguard your folders and files. If you do set
up a username and password, you will be prompted to enter this information each time you enter the
Configuration screens. For information on setting up a username and password, see
username and password
screens
Securing the HP Media Vault’s Shared Folders on your LAN
The
information on Shared Folder and user security on your
Shared Folders
.
media vault offers additional security options for your network users and specific Shared Folders. For more
.
. For information on entering the Configuration screens, see
local area network
Change the administrator
Access the configuration
(LAN), see
Enhance security on your
Page 18
How to use the HP Media Vault to transfer files from an old PC to a new PC
Your HP
computer.
Using a
Settings Transfer Wizard
Express in addition to desktop and display settings, dial-up connections, and
your media vault. On the new computer, you
and files
The Windows
on both your old and new computers.
Windows Vista
for using this feature are in the Windows Vista help. Because Windows Easy Transfer copies files directly from
the old computer, you do not need to use the media vault for this process.
Steps for Windows XP and Windows 2000:
On your old PC:
Media Vault can help you simplify transferring files and settings from an old
feature found in the Windows XP and Windows 2000 operating systems called the
, you
can transfer files, folders, and settings for Internet Explorer and Outlook
other types of settings to a file on
access this file stored on your media vault and transfer the settings
to your new computer.
Files and Settings Transfer Wizard
: A similar feature exists in Windows Vista called
1. Click
Start, All Programs,Accessories,System Tools,Files & Settings Wizard
Wizard’s first dialog box will appear.
must be available on the Windows operating system
Windows Easy Transfer
computer to a new
Files and
. Instructions
. The
2. Click
3. Click
4. Click
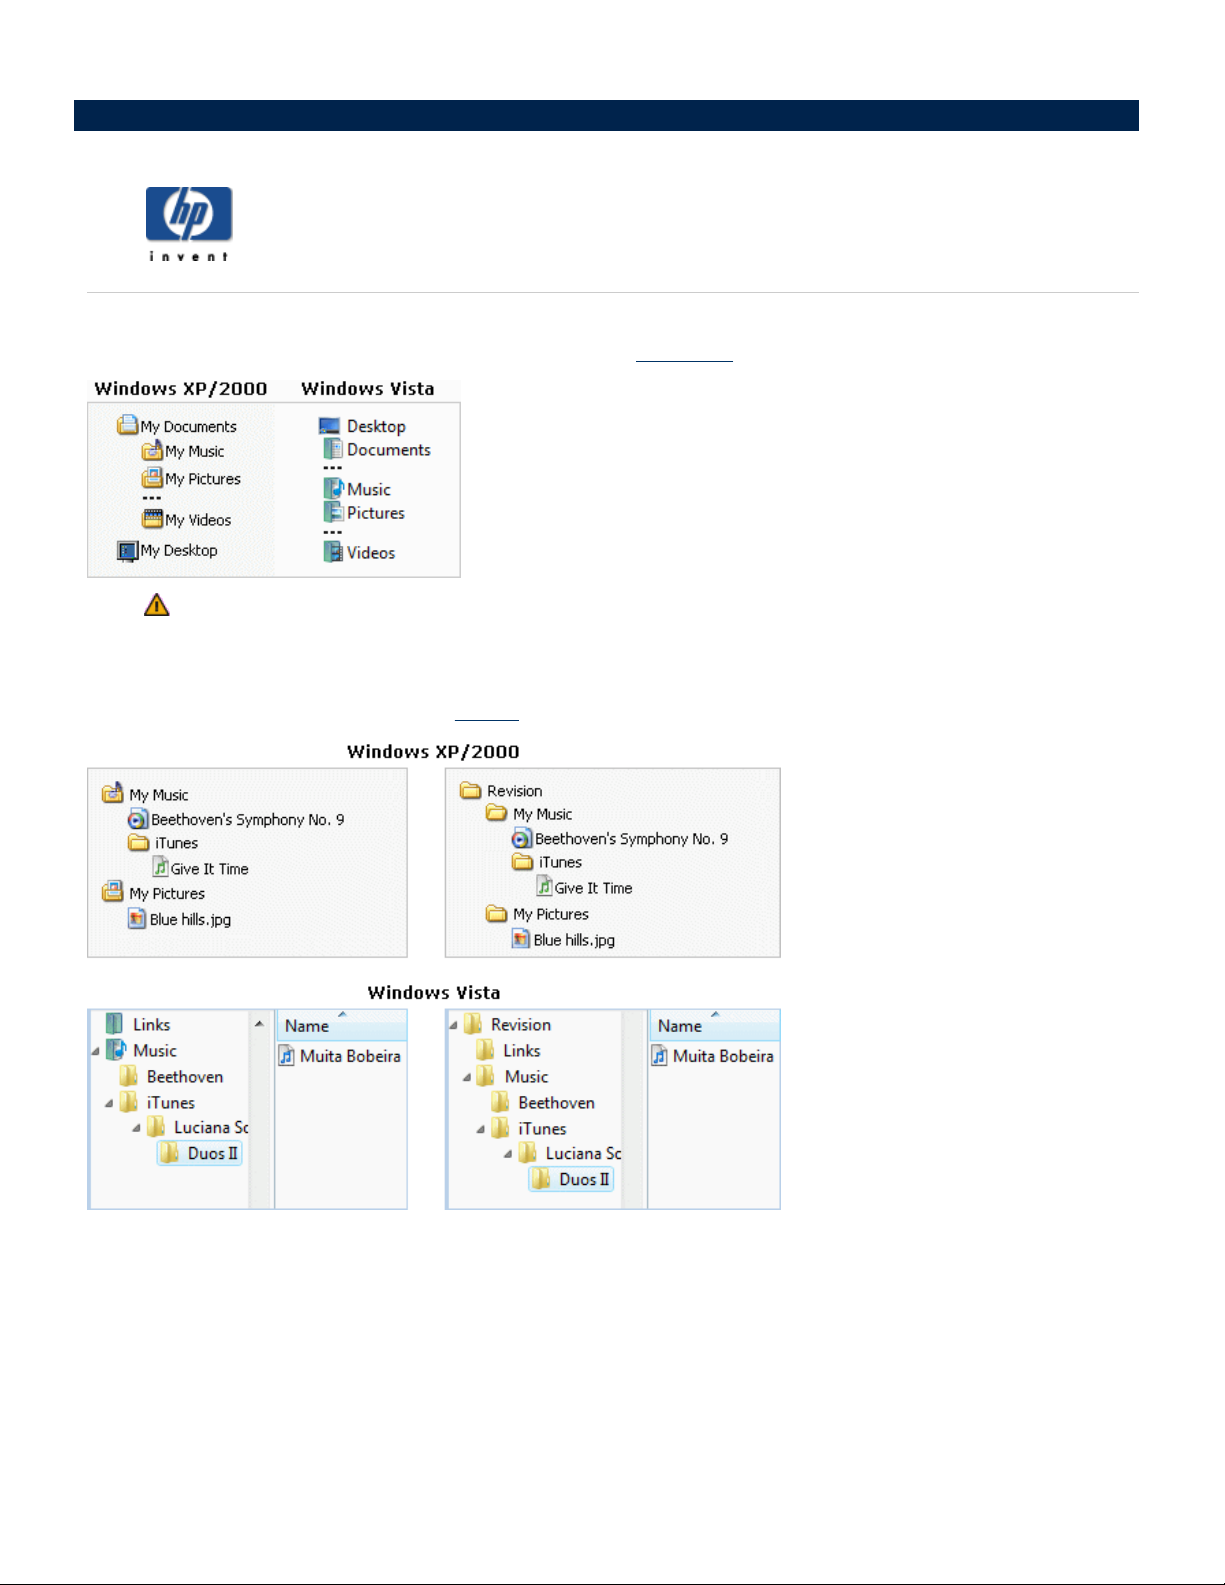
5. Click
6.
7. Click
Next
.
Old Computer
Next
.
Other
Browse
Either
the path. For example, to save your settings to FileShare, type in the
\\HPMediaVault\FileShare
(HPMediaVault is
of your HP Media Vault
Next
.
to a folder on your media vault, or use the
.
.
Uniform Naming Convention
.
the name of your media vault. To change the media vault’s name, see
.)
Folder or drive:
(UNC) to type in
:
box
Change the name
Page 19

8.
Click one of the following:
Settings only
Files only
Both files and settings
Let me select a custom list of files and settings when I click Next (for advanced
users.)
If
and File Types
9. Click
10. Click
11.
Next
.
Next
after reading any messages that appear on this screen.
Wait while the wizard collects your files and settings. Depending on the size and type of the files you’re
saving, this could take several minutes. Click
you click on this option, you will be asked to select specific
that you wish to transfer.
Finish
.
Settings,Folders,Files
On your new PC:
1.
Follow steps 1-2 above to run the
2. Click
3. Click
New Computer
.
I don’t need the Wizard Disk, I have already collected my files and settings
from my old computer
Files & Settings Wizard
.
on your new PC.
4. Click
5. Click
Next.
Other.Browse
to or type in the path that you entered in
step 6
above. This path directs the new
computer to the Shared Folder on your media vault where you stored your files, folders and settings. If you
used the example above, the path is the same:
6. Click
7.
Next
.
Wait while the wizard transfers your files and settings to your new PC. Depending on the size and type of
the files you’re transferring, this could take several minutes. Click
\\HPMediaVault\FileShare
Finish
.
.
Page 20

How to connect to the HP Media Vault from a Linux system
This topic provides general guidelines and instructions on how to access the Shared Folders and configuration
screens on the HP Media Vault from a Linux system. The particular steps needed to configure a Linux system for
connection to the media vault may vary depending on the particular Linux installation.
To connect to HP Media Vault using Samba
Samba provides a simple and secure way of connecting a Linux computer to the media vault using the SMB
(Server Message Block) and CIFS (Common Internet File System) protocols. The SMB network protocol is the
native file-sharing protocol for Windows. CIFS defines a standard remote file-system access protocol for use over
a network.
To use Samba, the Linux system must have Samba installed. For information about how to install Samba, see the
documentation or man pages included with the Linux distribution.
Using a Linux graphical interface to connect
Linux distributions have numerous versions and graphical interfaces. Consequently, it is not possible to provide
specific steps when using a graphical interface to connect a Linux system to the media vault. General steps for
connection include using a network browser to find the media vault.
Note:
The path to the media vault is as follows:
If any of these default names have changed, use the new name.
Using an IP Address or NetBIOS name to access the HP Media Vault
Connecting to the media vault requires either the media vault's IP address or NetBIOS name. NetBIOS is an
acronym for Network Basic Input/Output System. The advantage of using the NetBIOS name is that even if the
media vault's IP address changes, the Linux system can find the media vault. The following two sections describe
each method.
If a firewall is running, turn it off or configure the system to allow Samba to connect to the SMB Shares.
Domain
1.
Workgroup
2.
Machines
3.
-
default, Windows Network
-
default, MSHome
-
default, HPMediaVault
Obtaining the HP Media Vault's IP address
The IP address for the media vault can be found on the router's configuration screens, usually under
Client Table
Show Connected Devices
or
.
DHCP
Page 21

Using the NetBIOS name instead of the IP address
Some Linux installations, such as Ubuntu®,may not be able to find the media vault by name without additional
configuration. The default NetBIOS name for the HP Media Vault is HPMediaVault. To use the NetBIOS name,
take the following steps:
1.
First, check
a.
b.
if the Linux system can already resolve the NetBIOS name of the media vault.
Open a terminal session.
Enter
ping hpmediavault
2.
If pinging fails, edit the
a.
Become root.
b.
In a terminal session, edit the
c.
3.
Install
4.
To ensure that the installation works, ping the media vault:
ping hpmediavault
It is now much easier to mount volumes or access configuration screens because the IP address does not have to
be known.
Connecting to HP Media Vault using Samba command lines
The method described here is not persistent. To have the Linux system automatically connect to the media vault
every time it is rebooted, see the documentation or man pages for the Linux distribution.
nsswitch.conf
In the
hosts: files dns
so it reads
hosts: wins files dns
winbind
, which provides Name Service Switch capability.
nsswitch.conf
/etc/nsswitch.conf
file, add
file, as follows:
wins
to the following line:
file.
Take the following steps to connect a Linux system to the media vault:
1.
Open a Terminal session.
2.
Become root.
3.
If necessary install the Samba plugin.
4.
Create a directory for the shared files.
Example:
5.
Mount the media vault Shared Folder to the Linux computer, using the following syntax:
mount -t smbfs //hpmediavault/sharename /mountpoint/sharedirectory
NetBIOS name example:
IP address example:
Note:
FileShare is one of the default Shared Folders on the Media Vault.
mkdir /mnt/sharefiles
mount -t smbfs //hpmediavault/FileShare /mnt/sharefiles
mount -t smbfs //192.168.1.102/FileShare /mnt/sharefiles
Page 22

Connecting to HP Media Vault using NFS
NFS (Network File System) is a file system that allows users to access files across a network and treat them as if
they resided in a local file directory. NFS is native to all Linux distributions. Unlike, Samba, no installation is
necessary. To use NFS, take the following steps:
1.
Open a Terminal session.
2.
Become root.
3.
Create a directory for the shared files.
Example:
4.
Mount the media vault Shared Folder to the Linux computer, using the following syntax:
mount -t nfs hpmediavault:/shares/Volumename/Sharename/ mountpoint
NetBIOS name example:
IP address example:
Note:
IP Address or NetBIOS name to access the HP Media Vault
mkdir /mnt/sharefiles
mount -t nfs hpmediavault:/shares/Volume1/FileShare/ mnt/fileshares
mount -t nfs 192.168.1.102:/shares/Volume1/FileShare/ mnt/fileshares
For information on using the NetBIOS name or obtaining the media vault's IP address, see
Be sure to include
media vault.
Volume1
is the default name for the media vault's internal hard drive. (To view the volume name,
shares
above.
in the path as it is part of the absolute path to the Shared Folder on the
access the Disk Setting tab in the configuration screens. For information on how to access
configuration screens, see
FileShare
is the name of one of the default Shared Folders.
Access the HP Media Vault's configuration screens
Access the HP Media Vault's configuration screens
To access the media vault's configuration screen, use a
browser such as FireFox or Konqueror.
Using an
.)
1.
Open the web browser.
2.
In the Location box, enter the IP address or name of the media vault.
IP address example:
NetBIOS name example:
Note:
If the web browser cannot find the media vault with the NetBIOS name, the firewall may be
http://192.168.1.100
http://hpmediavault
blocking the request. If the Linux system has just been configured to use the NetBIOS name, the web
browser may require restarting.
Depending on the media vault settings, the web browser displays either The Welcome Page or the Shared
Folders tab.
Page 23

How to connect to the HP Media Vault from a Macintosh
You can configure a Macintosh computer to access the Shared
Media Vault. These instructions apply only to computers with the latest Macintosh
To map Shared Folders from a Macintosh
1.
In the Finder, click Go,
2.
In the Connect to Server dialog box, click
3.
In the Network window, click
Note: Mshome
name.
4.
In the panel that shows the available shares, click
5.
In the drop-down list on the Shared Volume window, select a shared volume, then click OK.
6.
In the SMB/CIFS File System Authentication window, do one of the following:
If the shared folder is password protected, enter the appropriate password, then click OK.
If the shared folder is not password protected, click OK.
7.
Repeat steps 5 and 6 for each shared folder.
Connect to Server
Mshome,HPMediaVault
is the default name of the workgroup. If this name has been changed, use the new
.
Browse
Connect
Folders and configuration screens on the HP
OS X operating system.
.
.
.
To access the HP Media Vault's configuration screens
1.
Open a web browser, such as Safari or Firefox.
2.
In the Location box, enter the IP address or name of the media vault.
3.
IP address example:
4.
Name example:
Note:
under
Depending on the media vault settings, the web browser displays either The Welcome Page or the Shared
Folders tab.
The IP address for the media vault can be found on your router's configuration screens, usually
DHCP Client Table
http://192.168.1.101
http://hpmediavault
Show Connected Devices
or
.
Page 24

» How to use HP Easy Backup
Quickly, easily, and automatically back up
My Desktop
and
» How to run automatic backups for important files
Use NTI Shadow for more advanced backup capabilities.
» How to create a drive backup
Use NTI Backup to protect your system files and data by backing up an entire hard drive or
» How to modify a backup job
Change the settings on previously created
» How to restore a drive backup
Restore the data that you have backed up using NTI Backup.
» How to use the PC Restore Disc
How to backup and restore
My Documents,My Pictures,My Music, My Videos
.
backup jobs, enable or disable jobs, and delete jobs.
partition
,
.
Use the PC Restore Disc to restore a system drive.
Page 25
Using HP Easy Backup is a good way to get started in protecting your data. Easy Backup provides a way for
you to easily back up the following folders (including their
HP Easy Backup will back up only the My Desktop, My Pictures, My Music, My Videos, and My
Documents folders that are installed by Windows for each User Account.
After configuring Easy Backup, each file will be backed up every time you make a change to the file.
Additionally, Easy Backup creates one
How to use HP Easy Backup
version
sub-folders
of each file and places that file in a directory called
):
Revision
.
To back up your files using Easy Backup:
1.
Start the software:
a.
Double-click the
b.
Click the
c. Click
HP Media Vault
Backup
Back up your important files
tab.
desktop icon.
.
Page 26

2.
NTI Shadow
If the
application appears, click
Switch to HP Easy Backup
corner of the screen. Otherwise, continue to the next step.
, located in the lower-left
Note:
HP Easy Backup
3.
In the Easy Backup screen, click
4.
Select one or more of the following options:
To change whether Easy Backup or NTI Shadow is launched, see
below.
Simple Selection
Note:
My Documents
Only the following folders and their sub-folders are backed up.
The default folder for documents, graphics, and other personal files. Many programs automatically
save data files to this folder.
My Music
The default folder for audio files, such as those you download from the Internet or save on your
hard drive.
My Pictures
The default folder for photographs. Many digital-camera and photo-editing software programs
automatically create a sub-folder in this folder to which they save their pictures.
My Videos
The default folder for video clips, such as those you download from the Internet or saved on
your hard drive.
To switch to NTI Shadow from
.
My Desktop
All files and folders on the Desktop are backed up, including shortcuts. Note that backing up a
shortcut does not backup the program that the shortcut opens.
Note:
Any file stored in one of the above folders is backed up regardless of its type. For example, a
document file stored in
5. Click
Start
.
My Music
will be backed up.
The backup process will start. Your first back up could take some time, depending on the amount of data.
Note:
If you need more backup capability, see
Run automatic backups for important files
.
Switch between Simple (HP Easy Backup) or Custom (NTI Shadow) backup
To change whether HP Easy Backup or NTI Shadow is launched from the
Backup
tab:
To switch to HP Easy Backup from NTI Shadow:
1.
2.
NTI Shadow
From
HP Easy Backup
In the
Note:
If you want Easy Backup to be launched each time you click
, click
from the HP Software, under
the future (always go directly to NTI Shadow software)
Switch to HP Easy Backup
screen, click the
Custom Selection
Simple Selection
, clear the checkbox labeled
, located in the lower-left corner of the screen.
option.
Back up your important files
Skip this screen in
.
3.
Select the folders you want to backup, as described.
4. Click
Start
.
Page 27

To switch to NTI Shadow from HP Easy Backup:
1.
2. Click
3.
HP Easy Backup
From
Start
.
For more information, see
Note:
from the HP Software, select the checkbox labeled
directly to NTI Shadow software)
If you want NTI Shadow to be launched each time you click
, click
Run automatic backups for important files
Custom Selection
.
.
.
Back up your important files
Skip this screen in the future (always go
Page 28
Contact HP
»
Search:
How to run automatic backups for important files
Your HP Media Vault is bundled with NTI Shadow software. NTI Shadow is an easy-to-use application that lets
you run automatic backups for the important files and folders on your PC. You can back up any data you want,
including photo, music, video, and financial files. Using NTI Shadow will not disturb your computer use because
it works transparently in the background.
Note:
You can either back up your files/folders every time they change or schedule a specific time for backups.
Note:
To back up important files/folders:
If you have already created a backup job and wish to modify it, see
If you wish to back up an entire drive, see
1.
Start the software:
a.
Double-click the
b.
Click the
c. Click
HP Media Vault
Backup
Back up your important files
tab.
Create a drive backup
desktop icon.
.
Modify a backup job
.
.
2.
3.
4.
HP Easy Backup
If the
continue to the next step.
Note: HP Easy Backup
Music
In the
To back up an entire folder:
. For more information, see
NTI Shadow
Backup job wizard
In the
blue checkbox
that folder.
screen appears, click
provides a way for you to easily backup commonly used folders such as
Use HP Easy Backup
screen, click
next to the folder indicates that you have selected to backup the entire contents of
Create Backup Job
, click the checkbox next to the folder that you want to back up. A
Custom Selection
.
.
, and then
Start
. Otherwise,
My
Page 29
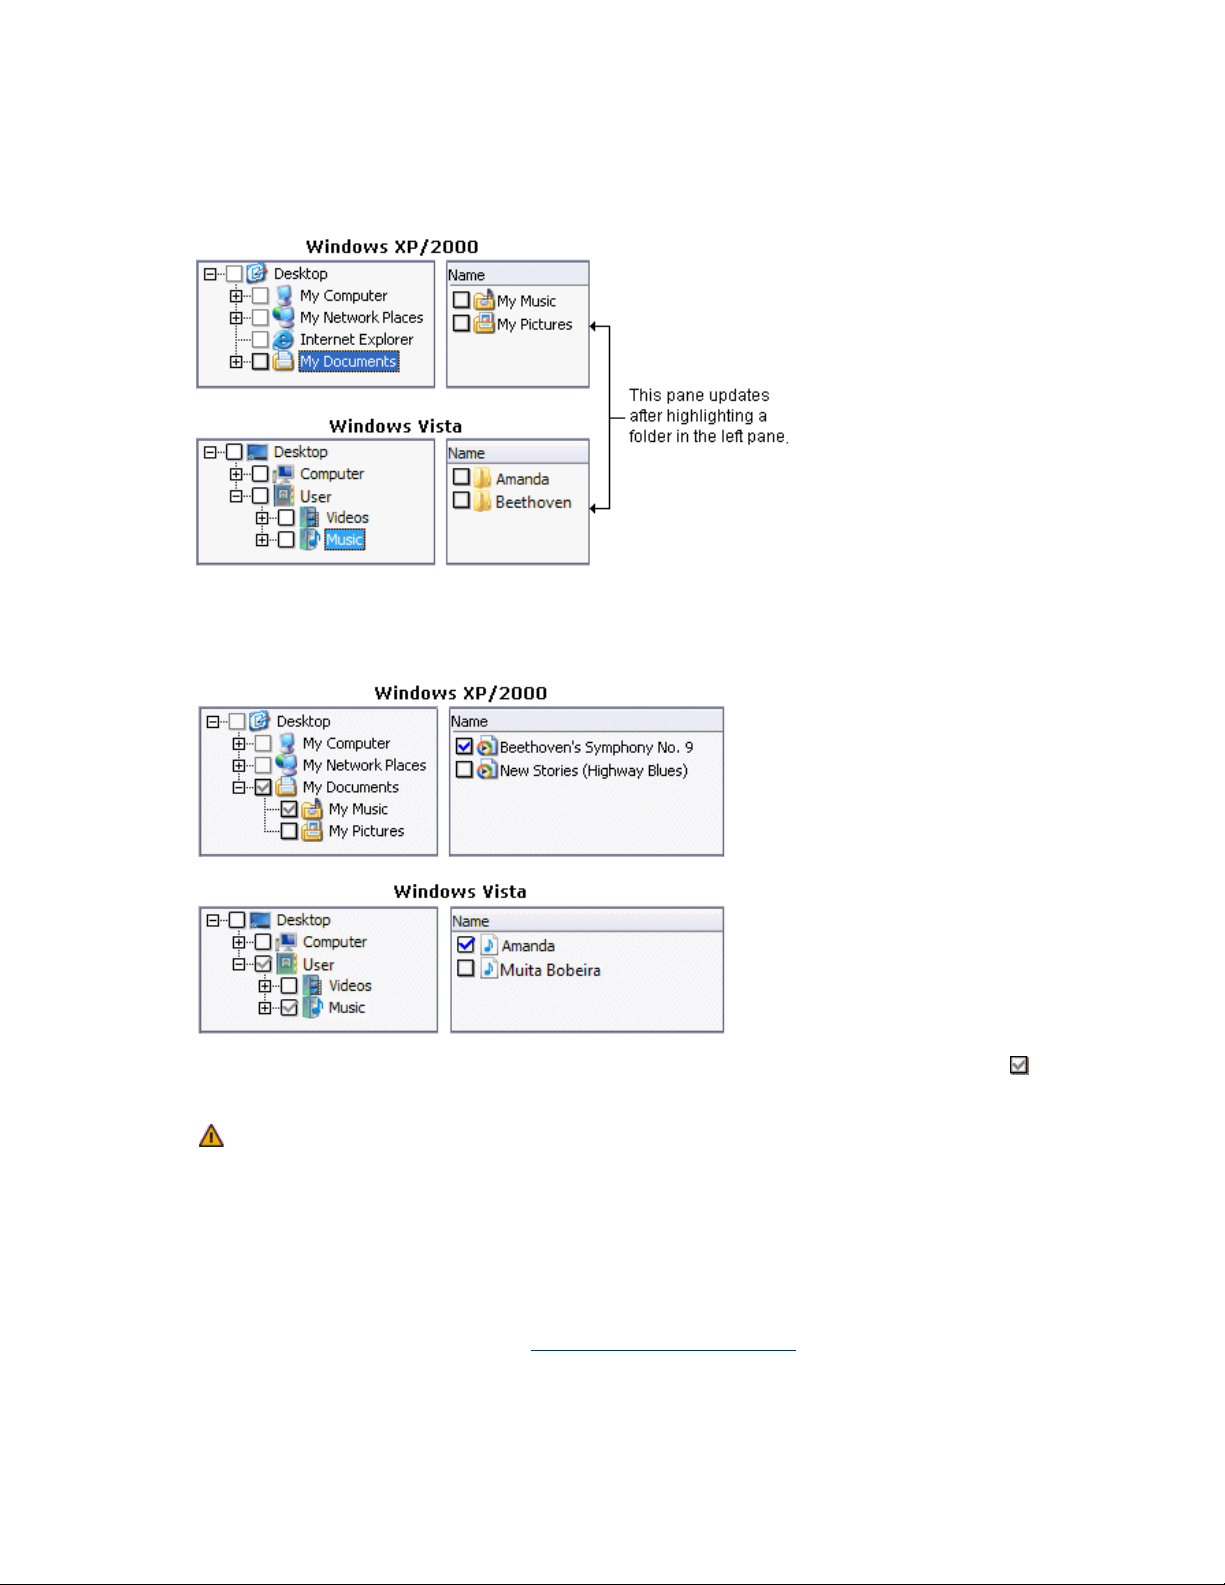
To back up specific files:
a.
In the left pane, select the folder that contains the files you want to back up.
Selecting a folder opens the folder and displays its contents in the right pane.
b.
In the right pane, select the files you want to back up.
To select a file or folder, click its associated checkbox.
In the above illustration, notice that in the left column some of the checkboxes are gray
indicates that only some of the files contained in the folder have been selected for backup.
If you add any new files to a folder that has a gray checkbox next to it, these files will not be
included in future automatic backups.
Next
Click
5.
Select your backup destination using either of the following methods:
Click
.
Browse for the backup destination.
Enter the network address using the
\\HPMediaVault\Backup
Next
.
Uniform Naming Convention
. This
(UNC) format. For example:
Page 30

6.
Schedule your backup using one of the following options:
Save your folder/file to the HP Media Vault every time you save changes to
your PC
Save your folder/file changes every
Use the drop-down lists to select the time interval for your backup in
Days
.
Save your folder/file changes every
Select one or more checkboxes for the days you want to schedule your backup
Select the
Note
: If you select a fixed schedule (specific day or time), to ensure optimum performance, choose
Hours,Minutes
a different time for each PC to back up its files. This avoids multiple backups to the media vault at the
same time.
Next
Click
7.
Select the number of previous file
Save all the previous file versions
.
Selecting this option will back up each version of your files. This options keeps all previous versions
of your files
Save a limited number of previous file versions
Selecting this option will back up the number you specify in the list box up to nine versions.
versions
Minutes,Hours
, and AM or PM (for the 12-hour clock format)
to save:
, or
Do not save any previous file version
Selecting this option will store only the latest version of the files.
Option
Allows you to delete the backup files/folders from your media vault when you delete the file from
your computer. Select
on your PC
Next
Click
8.
Backup Job Summary:
.
Name this backup job
NTI Shadow automatically names the file based on the computer name, date, and time. You can
rename the backup if desired. You should use a unique name to identify the backup.
To show the progress of the backup, click
9. Click
Finish
Start Backup
The
Select
Select
to start the backup.
Yes
No
Backup Job
button
Delete the file on the HP Media Vault when the file is deleted
, and then click OK.
box
Show progress bar
.
dialog box appears asking whether you want to start the backup now.
to start the backup immediately.
to save the backup. If you chose this option, you can
pane (see
Modify a backup job
start the backup in the
).
Modify
10.
If you have chosen to immediately start the backup, click
Note:
The NTI Shadow icon
is displayed in the computer Task Bar whenever a backup job is
Yes
to start the backup.
Page 31

configured.
How to back up specific file types
NTI Shadow backs up all file types unless you specify that you want to back up only specific kinds of files for
backup. For example, you can specify that only the audio files in a folder are backed up. You can select which
files you want to back up either by including or excluding files types:
Include
Backs up only the specified files types.
Exclude
Backs up all files except those specified.
option
option
To select specific file types for backup, follow these steps:
1.
2.
Select Files/Folders
In the
Step 1
In
, select one or more file types.
If you select
Enter "
3.
In
4. Click
To reset the
Click
*.extension type
Step 2
OK
, select
.
Select File Types
Restore Defaults
will then be backed up.
Custom types
Include
or
dialog box to the default settings:
. The checkboxes are cleared and the
screen of the
, you can enter the file extension for the type of file in the associated box.
", such as
Exclude.
Backup job wizard
*.gif
.
, click
Include
Option
.
option is selected. All files types
Feedback about this guide
© 2006 Hewlett-Packard Development Company, L.P. All rights reserved.
Page 32

Your HP Media Vault is
you backup an entire disk drive or drive
How to create a drive backup
bundled with NTI DriveBackup!. NTI DriveBackup! is an easy-to-use
partition
on your PC to ensure that all your data and programs are
protected against disaster.
Note:
information, see
You can also use DriveBackup! to restore a previous drive backup to your disk drive. For
Restore a drive backup
.
To create a drive backup, follow these steps:
1.
Start the software:
a.
Double-click the
b.
Click the
c. Click
Step 1 Select Drive to Backup
2.
In
to backup.
HP Media Vault
Backup
tab.
Back up your entire drive
, from the
desktop icon.
.
Note the amount of used space shown in this step and make sure that your media vault has enough
storage capacity for the backup.
Source drive
application that lets
more
drop-down list, select the drive you want
Step 2 Select Destination for Your Backup
3.
In
drop-down list or by browsing.
Step 3 Name Backup File
4.
In
, NTI DriveBackup! automatically names the backup file using the
, select where to store the backup either from the
computer name, date, and time. You can rename the backup if desired. You should use a unique name
identify the backup.
Step 4 Select Options
5.
In
Data Compression
Selecting this option enables NTI DriveBackup! to reduce the size of the backup.
Note:
The size reduction depends on the kind of data being compressed. Some kinds of audio and
a video files are already compressed; subsequently, further compression is negligible.
Backup Verification
If you select this option,
exist on the backup.
Password
Enable Password Protection
Click
associated boxes.
6.
To schedule your backup for a specific time, click
button.
, select the desired backup options:
NTI DriveBackup! performs a verification step to ensure that the correct files
, and then enter and confirm the passwords in the
Schedule
, otherwise go to the
next step
.
to
Page 33

Note:
When selecting a schedule, to ensure optimum performance, choose a different time for each PC to
back up its files. This avoids multiple backups to the media vault at the same time.
a.
b.
c.
Scheduler Setup
In the
Monthly
If you select
The
, or
Daily
Which Days
Click
Select one or more days of the week, and then click OK.
Start at
group changes according to the frequency you previously selected. Select the time for
the backup as follows:
Once
Select the time, month, day, and year. For example:
Weekly
Select the time and day of the week. For example:
Monthly
Select the time and day of the month. For example:
has 31 days, we suggest that you use the first day of the month for monthly backups.
Daily
Select the time of day. For example:
Note:
To set the hour and minute of the time option, you can select each column (
Minutes
the Up and
dialog box, select the frequency of the backup:
Daily
.
, you can specify the particular days of the week
you want the backup to occur.
Once,Weekly
,
.
12:00 AM, January, 20, 2007
15:15, Sunday
10:30 PM, 1
.
. Because not every month
.
21:33
.
Hours
,
, and AM or PM (for the 12-hour clock format), and then either enter the time or use
Down
arrows.
7.
To start the backup immediately, click
Create Drive Image Backup
The
backup process.
8.
After the backup finishes, you can do the following:
To view a report of the backup, click
To close the
Create Drive Image Backup
Start
.
screen appears. This screen shows the details and progress of the
View Report
.
screen, click
Close.
DriveBackup! Menus
The DriveBackup! menus provide additional functionality for backing up your drive or drive partition.
Job Menu
Provides
Options Menu
the following standard file capabilities:
Sets password protection as described in
Reports Menu
Password button
New,Open,Save,Save As,Exit
above.
.
Allows you to view or delete reports of all backup and restore operations. Every time a backup is created
or restored, DriveBackup! creates a report file that contains information to help you to trace and diagnose
problems that might occur. DriveBackup! will report all errors that have occurred in backup or restore
process in these files.
Page 34

View Backup Reports
Opens the
Backup Report
dialog box where you can
the report and selecting the appropriate button.
View Restore Reports
Opens the
Restore Report
dialog box where you can
the report and selecting the appropriate button.
Help Menu
Provides the built-in NTI help and support.
View
View
Remove
or
Remove
or
reports by highlighting
reports by highlighting
NTI Schedule Viewer
The NTI Schedule Viewer is a backup monitoring program that you can use to delete, suspend, or resume
already scheduled NTI DriveBackup!
jobs.
To access the NTI Schedule Viewer:
Click
.
Start,All Programs,NTI DriveBackup! 4,NTI Schedule Viewer
All scheduled backup jobs can be viewed from the NTI Schedule Viewer window.
To delete a scheduled backup job:
1.
2.
NTI Schedule Viewer
In the
window, right-click the job you wish to delete, then click the
In the confirmation dialog box, click
Yes
.
To suspend or resume a job:
1.
NTI Schedule Viewer
In the
context window appears.
window, right-click the backup job you wish to suspend or resume. A
Within the context window, a checkmark next to
checkmark is visible, the job will be processed normally.
2. Click
Suspend job
to suspend or resume a job.
Suspend job
Delete job
indicates that the job is suspended. If no
.
Page 35

Your HP Media Vault is bundled with NTI Shadow software. NTI Shadow is an easy-to-use application that lets
you modify any backup jobs you have previously created. You can change the settings of the job, enable or
disable
important folders or files
To modify a backup job, follow these steps:
jobs, and delete jobs. (For information about creating a backup, see
1.
Start the software.
a.
Double-click the
b.
Click the
c. Click
2.
If the
Shadow
Note: Easy Backup
Music
Back up your important files
Easy Backup
screen appears.
. For more information, see
How to modify a backup job
.)
HP Media Vault
Backup
tab.
screen appears, click
provides a way for you to easily backup commonly used folders such as
Use Easy Backup
desktop icon.
.
Custom Selection
.
Run automatic backups for
, and then
Start
. Otherwise, the
NTI
My
Modify Backup Job
The
the name of the backup job, the last time the job ran, which folder/files were backed up, and the location
of the backup folders.
3.
You can modify a backup as follows:
Edit
Opens the
backups for important folders or files
Backup job wizard
list box shows the list of backup jobs that have been created. The list includes
, where you can modify the backup as described in
.
Run automatic
Page 36

Disable/Enable
Disables or enables the selected backup job. A disabled backup will not run until it is re-enabled.
Disable All
Disables all backup jobs.
Delete
Deletes the selected backup job.
Start Backup
Immediately starts the selected backup. The backup must be enabled to start.
4.
You can also view the log file, complete the modification, and cancel some kinds of modifications:
View Log File
Displays information about the backup process.
Done
Closes the
NTI Shadow
screen. If a backup is running, it will continue to run. Changes to the
enabling or disabling of any backup jobs are saved.
Page 37

How to restore a drive backup
Your HP Media Vault is bundled with NTI DriveBackup!. NTI DriveBackup! is an easy-to-use application lets you
restore an entire disk drive or drive
DriveBackup!.( For information about creating a backup, see
If you wish to restore the
system drive
partition
on your PC that you have previously backed up using NTI
, you must use the
Create a drive backup
PC Restore Disc
.)
. A system drive cannot be restored from
the Windows operating system because it would have to write over itself.
About restoring a drive backup
Keep the following in mind when restoring from NTI DriveBackup!:
When restoring a disk drive, any content that exists on the target hard drive or drive partition will
be erased.
Restored NTFS partitions cause the Windows
chkdsk
utility to run when the system is rebooted. This utility
creates and displays a status report for a disk based on the file system. Windows 2000 SP4 or Windows
XP will run the verification process and then restart. The restored drive should be fully operational after the
computer restarts.
You cannot select a partition that is smaller than the amount of data on the original partition. However,
you may select a larger partition. In some cases, you may need to select a target partition that is the same
size as the original partition.
When you select a drive to restore, you must pay attention to the compatibility of the file systems between
the source backup and the target drive. The following table lists all compatible combinations of source and
target file systems and the resulting partition format.
Compatible Combinations
Source Partition Target Partition Resulting
Partition
NTFS NTFS NTFS
NTFS FAT16 NTFS
NTFS FAT32 NTFS
FAT16 FAT16 FAT16
FAT32 FAT32 FAT32
Any other combinations are not supported.
To restore a drive backup, follow these steps:
1.
Start the software:
a.
Double-click the
HP Media Vault
desktop icon.
Page 38

b.
Click the
Backup
tab.
c. Click
Step 1
2.
In
3. Click
Restore your entire drive
.
, from the drop-down list, select the location of the backup file you want to restore.
Browse
to find and select the specific backup file to restore. DriveBackup! files have a
.npf
extension.
The selected file appears in the box below the list box and
Step 2
4.
In
5. Click
, from the drop-down list, select the hard drive you want to restore.
Start
.
The time it takes to restore the drive or drive partition depends on the size of the backup file.
Browse
button.
DriveBackup! Menus
The DriveBackup! menus provide additional functionality for backing up your drive or drive partition.
Job Menu
This menu provides the following standard file capabilities:
Options Menu
Sets password protection
Reports Menu
.
New,Open,Save,Save As,Exit
Allows you to view or delete reports of all backup and restore operations. Every time a backup is created
or restored, DriveBackup! creates a report file that contains information to help you to trace and diagnose
problems that might occur. DriveBackup! will report all errors that have occurred in backup or restore
process in these files. By default, all report files are located in the Report Files directory found in the
installation directory for your DriveBackup! software.
file
.
View Backup Reports
Opens the Backup Report dialog box where you can view or remove reports by highlighting the
report and selecting the appropriate button.
View Restore Reports
Opens the Restore Report dialog box where you can view or remove reports by highlighting the
report and selecting the appropriate button.
Help Menu
Provides the built-in NTI help and support.
NTI Image Explorer
The NTI Image Explore allows you to restore individual folders and files from a DriveBackup! file. DriveBackup!
files have an
To restore individual folders or files from an
1.
Start NTI Image Explorer:
.npf
extension. To restore an entire
a.
b.
Start,All Programs,NTI DriveBackup! 4,NTI Image Explorer
Click
In the EasySteps 1:
from the drop-down list.
drive or
.npf
file, follow these steps:
partition
, see
Restore a drive backup
.
.
What to restore? screen, select the location of the backup file you want to restore
Page 39

c. Click
Browse
to find and select the particular backup file you want to restore.
The selected
file appears in the box below the list box and
contained in the DriveBackup! file appear in the selection panes in the bottom part of the screen.
d.
In the left pane, navigate to the folder that contains the files that you want to restore. (The selection of
folders and files is identical to that described in
e.
In the right pane, select the folder or files that you want to restore.
2. Click
3.
4. Click
EasySteps 2
.
Select one of the following options to restore the files:
To restore the files to their original location, select
To restore the files to a different location, select
EasySteps 3
.
Browse
button. The backup files
Run automatic backups for important files
Original
Other
.
and then
Browse
.
.)
5.
Select the overwrite options of the restore:
Never replace a file with its backup copy
Replace a file only if its backup copy has a newer file date and time
Always replace a file with its backup copy
6. Click
7.
Start
.
In the Operation Finished dialog box, click
View Report
.
Close;
or if you want to view a report of the restore, click
Page 40

To help you recover your system and data in the event of a disaster, HP Media Vault includes a
Disc
.
Important:
at
www.hp.com/support
To ensure that you have the latest version of the PC Restore Disc, consult the HP support web site
To use the PC Restore Disc, you must
How to use the PC Restore Disc
.
have previously created a drive backup with
DriveBackup!, you can use
PC Restore
this disc for the following:
To restore the
If you cannot use the Windows operating system to restore the system files.
The operating system will not start (boot).
For information about creating a drive backup, see
system drive
.
Create a drive backup
.
The Microsoft®Windows®Preinstallation Environment software included with this computer or software may be
used for boot, diagnostic, setup, restoration, installation, configuration, test or disaster recovery purposes only.
NOTE: THIS SOFTWARE CONTAINS A SECURITY FEATURE THAT WILL CAUSE END USER CUSTOMER'S
SYSTEM TO REBOOT WITHOUT PRIOR NOTIFICATION TO THE END USER CUSTOMER AFTER 24 HOURS
OF CONTINUOUS USE.
To recover your system and data using the bootable disc:
Note:
connect it to your
1.
PC Restore Disc
The
Insert the
Note:
PC Restore Disc
If the
does not support wireless networking.
router via a wired-LAN
into your CD/DVD drive.
PC Restore Disc
is not recognized by your computer, you may have to configure the
To restore your computer, you must
.
computer's BIOS to recognize your CD/DVD drive as a bootable device. For more information, see your
computer's documentation.
After inserting the
application to appear. Please be patient.
Note:
WINBOM
2.
When the
If the following error message
, your network adapter is not supported by the
Language Selection
PC Restore Disc
appears:
dialog box appears, select the language you want to use from the
, it may take several minutes for the NTI DriveBackup!
Failed to install network adapter--check
PC Restore Disc
.
drop-down list, and then click OK.
Step 1
3.
In
a.
, select the drive/partition that you want to restore.
Restore the C: partition
Page 41

Use this option when you have only one drive
Restore the C: and D: partition
b.
Use this option when you have only two drive partitions.
partition
.
Note:
Management
Step 2
4.
In
.npf
a
Note:
hp-0b343d9aeba9_C_Drive_01-04-2207_12-54-27PM.NPF
hp-0b343d9aeba9_C_Drive_01-04-2207_12-54-27PM_001.NPF
hp-0b343d9aeba9_C_Drive_01-04-2207_12-54-27PM_002.NPF
Step 3
5.
In
When restoring a hard drive, any content that exists on the target hard drive or drive partition will
be erased.
Note:
6. Click
Start
Note:
To verify
rebooted on restored drives with NTSF files system.
If you have more than two partitions, refer to the Microsoft documentation for
.
, select the backup file from the list or
file extension.
The backup file may be split into multiple files. Select the
, select the drive you want to restore.
To exit
If you want to exit the restore after clicking start, click the
NTI DriveBackup!
.
proper disk operation, NTI DriveBackup! runs the Windows chkdisk utility when the system is
before starting your restore, click
Browse
Disk
for the backup file. Drive backup files have
file with
Cancel
001 in the name.
Job,Exit
.
button.
The target partition may be larger than the original partition where desired. You cannot select a partition
that is smaller than the amount of data on the original partition. In some cases, such as Windows 2000,
Service Pack 2, you may need select a target partition that is the same size as the original partition.
Page 42

» Configuration screens
Access the configuration screens to change settings on your HP Media Vault.
» How to expand your storage
Install or remove an internal hard drive from your HP Media Vault; install and remove
» Manage Shared Folders and users
Manage your network user and Shared Folders on your HP Media Vault.
» How to stream media to your entertainment center
Enable media files stored on your HP Media Vault to play
» Monitor and configure the HP Media Vault's hard drives
Monitor and configure your HP Media Vault’s hard drives.
» Advanced network setting
How to configure the HP Media Vault
on your entertainment center.
an external USB drive.
Change your HP Media Vault’s network security mode and network
» How to install a printer
Connect a printer to your HP Media Vault.
settings.
Page 43

» How to access the configuration screens
Learn different ways to
» The Welcome Screen
Use the Welcome screen to access the configurations screens.
» System Settings
Change the HP Media Vault's default settings.
Configuration screens
access HP Media Vault's configuration screens.
Page 44

The HP Media Vault’s
media vault. For example, the configuration screens let you create
folders and files, stream media,
appear
PCs
in a standard
today will work with the media vault's configuration screens.)
How to access the configuration screens
configuration screens contain settings for a number of activities beyond saving
new Shared Folders, set privilege levels on
add or reformat a hard drive, and add a printer. The configuration screens
browser window, such as Microsoft Internet Explorer. (Most standard browsers installed on
To access the configuration screens from the HP Media Vault desktop icon:
Double-click the
Customize your HP Media Vault’s settings
Click
Welcome Screen
If
the
HP Media Vault
appears, click
icon on your
desktop.
Configure Device
.
.
To access the configuration screens from the Start menu:
Start, All Programs, HP Media Vault, Customize your HP Media Vault’s settings
Click
Configure Device
.
To access the configuration screens from an Internet browser:
files to the
,
1.
Open your Internet browser.
2.
Highlight the address line of the browser window up
3.
Press the
4.
Enter
5.
Press the
After
using one of these methods, your default web browser will open and you will see
Delete
key.
HPMediaVault
Enter
key.
screen, which provides basic information on your Shared Folders. This screen also allows
Shared Folders and make changes to your Shared Folders. For
Manage Shared Folders
.
to http//:
(or,
if you’ve changed the media vault’s name, enter the new name).
the Shared Folders
more information on Shared Folders, see
you to create new
Page 45
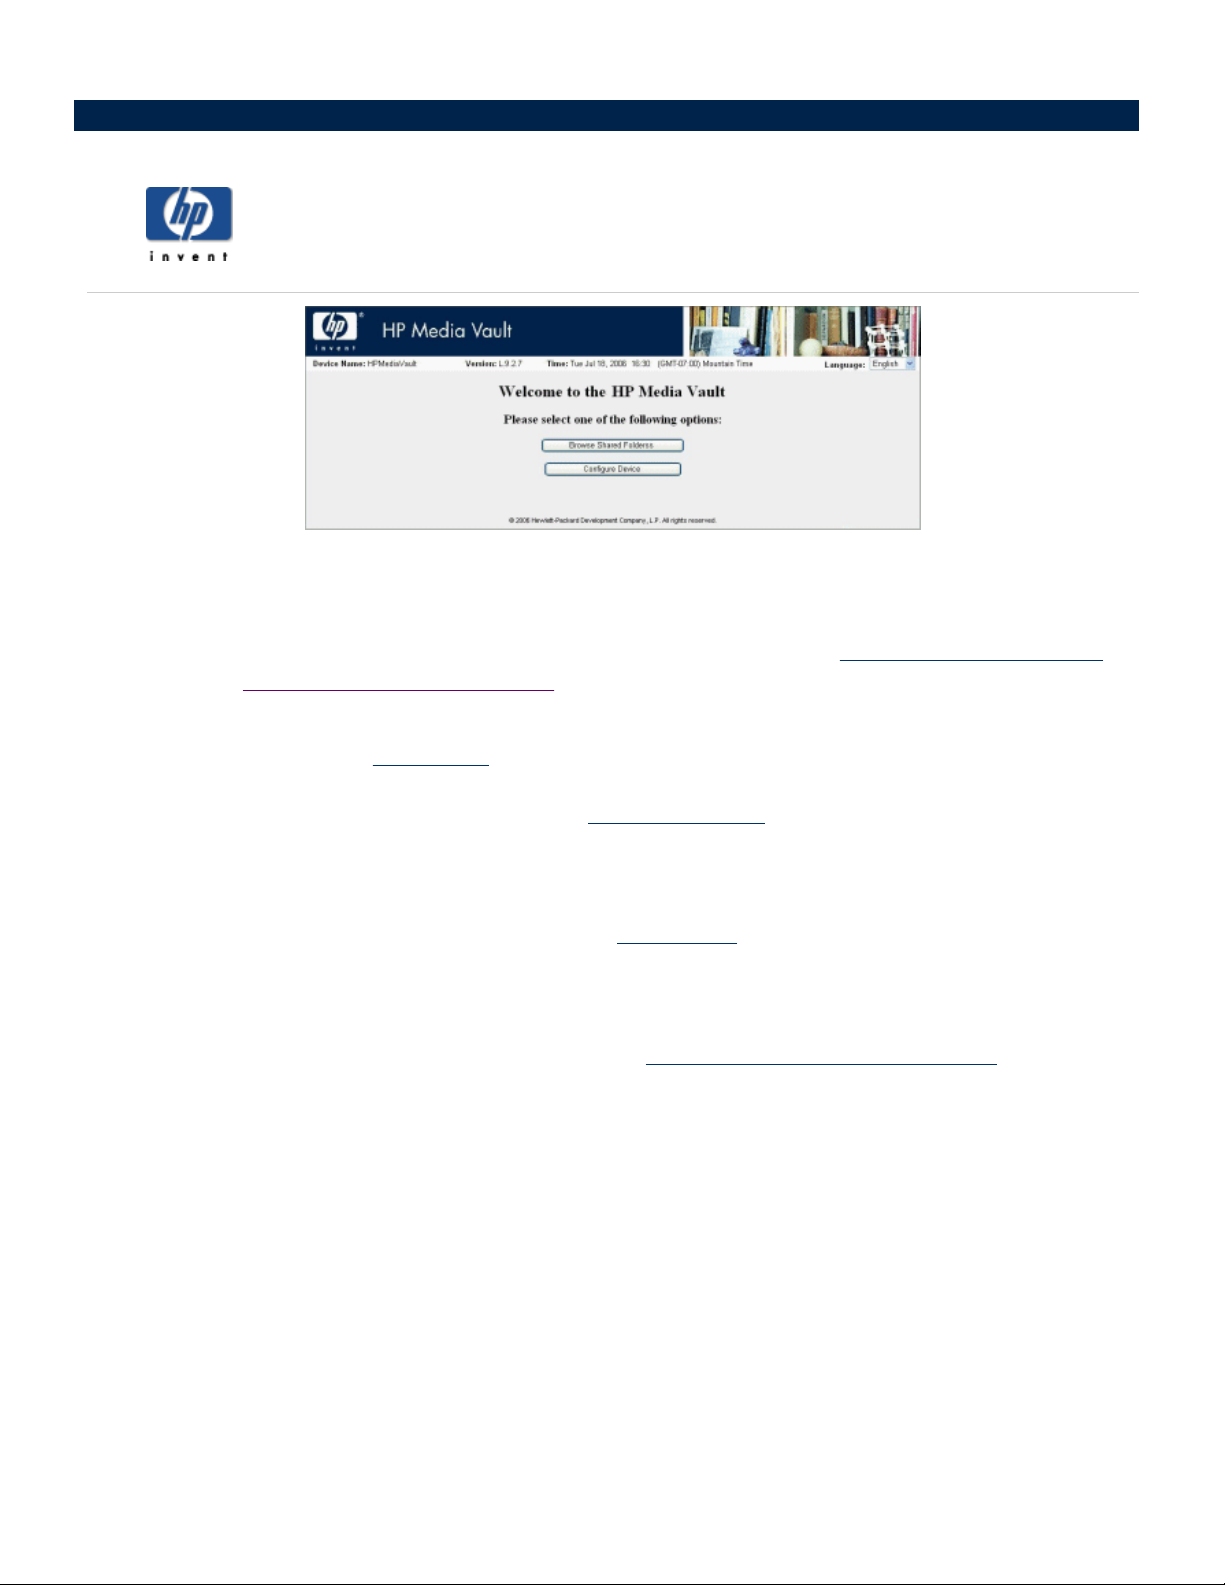
Welcome Screen
The
Welcome Screen
Your media vault defaults to
method for accessing your files. You can change to Web Browser Access on the
screen or on the
appears under
Web Browser Access refers to
a browser window. You should use HTTP access cautiously because HTTP access also lets you use a browser to
access media vault files on computers outside of your
should only enable HTTP access if you understand network security.
opens only if you have selected to allow Web Browser Access for one or more Shared Folders.
Modify an Existing Shared Folder
Permit Access to this Folder from
The Welcome Screen
allows you to select
No Access
HTTP access
Browse Shared Folders
for Web Browser access, so you must change this setting to enable this
. On both screens, the
.
. HTTP access lets you access folders and files on your media vault in
local area network
Configure Device
or
Create a new Shared Folder
Web Browser Access
(LAN). To keep your files secure, you
. The
option
Browse Shared Folders
Click to browse the contents of your media vault using a
Configure Device
Click to
option, the first screen titled
access the configuration pages, which lets you modify settings on the media vault. When you select this
Shared Folders
opens. (See
web browser
How to use the Shared Folders screen
window.
.)
Page 46
Select a topic
» What are the factory default settings?
» How to change the administrator username and password
» How to change the name of your HP Media Vault
» How to set the date and time
» How to turn off the alert beep
» How to make a language selection
» How to update the firmware
» How to enable the power-saving mode
» How to display the system event log
» How to restart and reset the HP Media Vault
System Settings
Page 47

What are the factory default settings?
What is the default network name given to the HP Media Vault?
HPMediaVault
If you have more than one media vault, the second is called HPMediaVault01, the
HPMediaVault02, and so on.
(See
Change the name of your HP Media Vault
.)
What is the default hard drive name of the HP Media Vault?
SYSTEM
(See
Hard drive settings
.)
What is the default hard drive volume name?
Volume1
(See
Hard drive settings
.)
third is called
What default time zone does the media vault use?
Mountain Standard Time (MST)
(See
Change the time zone on your HP Media Vault
.)
What are the names of the three default shares configured on the HP Media Vault?
FileShare
MediaShare
Backup
(See
Get started
.)
What is the default security mode of the HP Media Vault?
Workgroup mode
(See
Enhance security on your Shared Folders
.)
What are the three allowable user-privilege levels for Shared Folders?
Full access
Read-only access
No access
Page 48

(See
Enhance security on your Shared Folders
.)
Page 49

How to change the administrator username and password
The HP Media Vault does not come pre-set with an administrator username and password, which means that
anyone on your network can work as “administrator.” This simplifies getting started, but the lack of an
administrator username and password also gives access to all your folders and files by every network users. To
make the data stored on your media vault more secure, you can assign an administrator username and
password.
To access the User Settings screen:
Double-click the
Customize your HP Media Vault’s setting
Click
Welcome Screen
If the
Click the
User Settings
HP Media Vault
appears, click
tab.
icon on your desktop.
.
Configure Device
To change the administrator username and password:
Administrator Settings
In
1.
Enter a username in the
2.
Enter a password in the
3.Re-
4. Click
enter the password in the
Accept
or
Cancel
, complete the
following:
Administrator Username
Password
Confirm Password
. (If you click
box.
Cancel
box.
, the username and password will not be accepted.)
box.
.
Page 50

How to change the name of your HP Media Vault
You can change the name of the HP
same
network. The default network name is HPMediaVault.
Keep in mind that renaming a media
resources,
such as Shared Files and Shared Printers. Change the name of the media vault
Media Vault. This is useful if you have more than one media vault on the
vault forces all your network computers to remap their shared network
To access the Network Settings screen:
Double-click the
Customize your HP Media Vault’s settings
Click
Welcome Screen
If the
Click the
Network Settings
HP Media Vault
appears, click
tab.
icon on your desktop.
Configure Device
To change the name:
1.
Device Name
In the
box, enter the new name for the media vault. Do not include spaces in the name.
Only 15 alphanumeric characters are allowed.
2. Click
Accept
or
Cancel
. If you click
Cancel
Two or more HP Media Vaults:
only when necessary.
.
.
, you media vault will not be renamed.
If you have more than one media vault, the second is called HPMediaVault01, the third is called
HPMediaVault02,
and so on.
Page 51

To access a Clock Settings:
1.
Double-click the
2. Click
3.
4.
5. Click
You can make one or more date and time changes on the
Synchronizing the date and time
If you have Internet access on your network, the HP Media vault automatically synchronizes its date and time
with an Internet public Network Time Protocol (NTP) server. This synchronization feature called
Set Clock from Internet (NTP) Server
upper-left corner of the screen.
Customize your HP Media Vault’s setting
Welcome Screen
If the
Click the
System Settings
Clock Settings
How to set the date and time
HP Media Vault
appears, click
tab.
.
icon on your desktop.
Configure Device
Clock Settings
is set at the factory. The checkbox for this feature is located in the
.
.
screen.
Automatically
By default, the media vault connects to the first available NTP Server. Under normal circumstances, you should
not have to modify the addresses of the three pre-set NTP Servers.
If you want to set the clock manually, you should clear
Server
checks its time against the NTP sever, the NTP Server will change your manual settings.
Setting the clock manually
Other clock settings
If you do not want your media vault to automatically adjust for Daylight Saving Time, click the
Adjust Clock for Daylight Savings Time
and keep this box selected, your media vault will automatically update its clock for the Spring and Autumn time
changes.
check box.
1.
Enter the appropriate
2.
Enter the
3.
If you have set the
second bullet
4. Click
Hours,Minutes
Set Clock Manually
If you
set the clock manually without clearing this feature, the next time the media vault
Year,Month
Seconds
, and
Time Display Format
item in Other clock settings below.)
.
Day
, and
checkbox to clear it. If you live in a daylight-savings time zone,
Automatically Set Clock from Internet (NTP)
.
.
to use a 12 Hour Clock, click either AM or PM. (See the
Automatically
Page 52

To select a new time zone, click the
Accept
or
Cancel
. If you click
Select Time Zone
Cancel
, the changes that you make will not be accepted.
drop-down list. If finished making changes, click
To switch from a 24-hour clock to a 12-hour clock, click
Display Format
. The 12-hour clock starts at 0 hours at 12 a.m. and resets the hours to 1 p.m. after 12
12 Hour Clock (AM, PM)
under the
p.m. The 24-hour clock starts at 0 hours at 12 a.m. and continues for 23 hours. If finished making
changes, click
To change the date format, click the appropriate
Accept
click
To set the media vault’s time to the PC’s clock running your browser, click
Accept
Cancel
or
(You do not have to click
Cancel
or
. (If you click
Accept
. If you click
Cancel
, the changes that you make will not be accepted.
Date Display Format
Cancel
, the changes that you make will not be accepted.)
for this change to be accepted.)
. If finished making changes,
Set Clock from Browser
Time
.
Page 53

Your
HP Media Vault comes enabled with an alert beep. The alert beep notifies you of
place on the media vault. You will hear beeps for
down. However other
How to turn off the alert beep
routine functions, such as the media vault powering up or
beeps may signal potential critical problems with your media vault, such as an
hard drive error.
If
you have installed the HP software from the Software Installation Disc, you can
located in your system tray for messages when you
hear the alert beep.
To access the System Settings screen:
Double-click the
Customize your HP Media Vault’s setting
Click
Welcome Screen
If the
Click the
System Setting
HP Media Vault
appears, click
tab.
icon on your desktop.
.
Configure Device
.
To turn off the alert beep:
certain activities taking
internal
check the media vault icon
1. Click
2.
Disable Audio Alarm
When you are finished
made will not be accepted.)
.
making changes, click
Accept
or
Cancel
. (If you click
Cancel,
the change you
Page 54

How to make a language selection
To access the System Settings screen:
Double-click the
Customize your HP Media Vault’s setting
Click
Welcome Screen
If the
Click the
System Settings
HP Media Vault
appears, click
tab.
icon on your desktop.
To change the language:
1.
Click the
2.
Select a language. (You do not have to click
Language
drop-down list located in the upper-right corner of the screen.
.
Configure Device
Accept
.)
.
Page 55

How to update the firmware
To access the System Settings screen:
Double-click the
Customize your HP Media Vault’s setting
Click
Welcome Screen
If the
Click the
System Settings
HP Media Vault
appears, click
tab.
icon on your desktop.
.
Configure Device
.
To update the firmware:
1.
2. Click
3.
Select Firmware Update Package
In the
downloaded to your local PC, or click
Apply Firmware Update
.
Browse
box, enter the path to the firmware file that you've
to locate the file.
The upgrade process will take a few moments as your media vault automatically reboots to initialize the
new firmware.
Do not turn off the HP Media Vault during the firmware update process.
Page 56

Your HP Media Vault comes
internal hard disk spins down. When activity on your network again
How to enable the power-saving mode
with power-saving mode enabled. After one-hour of inactivity, your media
accesses the media vault’s hard drive, the
hard disk automatically spins up.
When you use power-saving
mode, you lower power consumption, and your media vault’s internal hard drive
experiences less wear and tear.
To access the System Settings screen:
Double-click the
Customize your HP Media Vault’s setting
Click
Welcome Screen
If the
Click the
System Settings
HP Media Vault
appears, click
tab.
icon on your desktop.
.
Configure Device
To make changes to the power-saving mode:
To change the default time settings, click
the
Hours
and
Minutes
.
drop-down lists.
vault's
To turn off power-saving mode, clear the
When you are finished
making changes, click
made will not be accepted.)
Enable Power Saving Mode
Accept
, or
Cancel
. (If you click
checkbox.
Cancel
, any changes that you
Page 57

To access system event log:
1.
Double-click the
2. Click
3.
4.
5. Click
This screen will show you a record of activity that has taken place on the HP Media Vault. Each activity will
have a time and date associated with it, a description of the activity that took place, and an activity importance
level also called a critical alert.
For example, mounting a new hard drive will be listed with a relatively minor importance, or alert, but a hard
drive failure would be listed with a critical alert. You can clear the log by clicking
Customize your HP Media Vault’s setting
Welcome Screen
If the
Click the
System Settings
Display System Event Log
How to display the system event log
HP Media Vault
appears, click
tab.
icon on your desktop.
Configure Device
.
.
.
Clear System Event Log
.
Page 58

To restart the HP Media Vault:
1.
Double-click the
2. Click
3.
4.
5. Click
Note:
pressing the restart/reset button on the back of the media vault. If you use the button located on the back of your
media vault, do not press the button for more than four to
seconds will completely
To reset the HP Media Vault:
Customize your HP Media Vault’s setting
Welcome Screen
If the
Click the
plugged it back in. You will not lose any of your current settings.
You can also
System Settings
Restart Device
How to restart and reset the HP Media Vault
HP Media Vault
appears, click
tab.
. Restarting the media vault simply turns it off and on –
Restart
the media vault by
Reset
your media vault. (See
icon on your desktop.
Configure Device
pressing the power button on the front of the media vault, or
five seconds. Pressing this button for longer than five
Troubleshooting
.
.
as if you unplugged and
.)
1.
Double-click the
2. Click
3.
4.
5. Click
Note:
To achieve a complete reset, you must press and hold
for less than 10 seconds will only
Customize your HP Media Vault’s setting
Welcome Screen
If the
Click the
failing to respond to normal commands. Many of the settings you might have changed through the media
vault’s configuration screens will be reset to their factory
passwords established in user-based mode are deleted. However, the reset device button does not alter
your Shared Folders or any file content.
You can also
System Settings
Reset Device to Factory Default.
HP Media Vault
appears, click
tab.
Reset
the media vault by pressing the restart/reset button on the
Restart
icon on your
Configure Device
your media vault. (See
desktop.
Only select this option if you have a media vault that is
in the button for at least 10 seconds. Pressing this button
.
.
default settings. For example usernames and
back of the media vault.
Troubleshooting
.)
Page 59

Select a topic
» How to install an internal hard drive in your HP Media Vault
» How to install and remove an external USB hard drive
How to expand your storage
Page 60
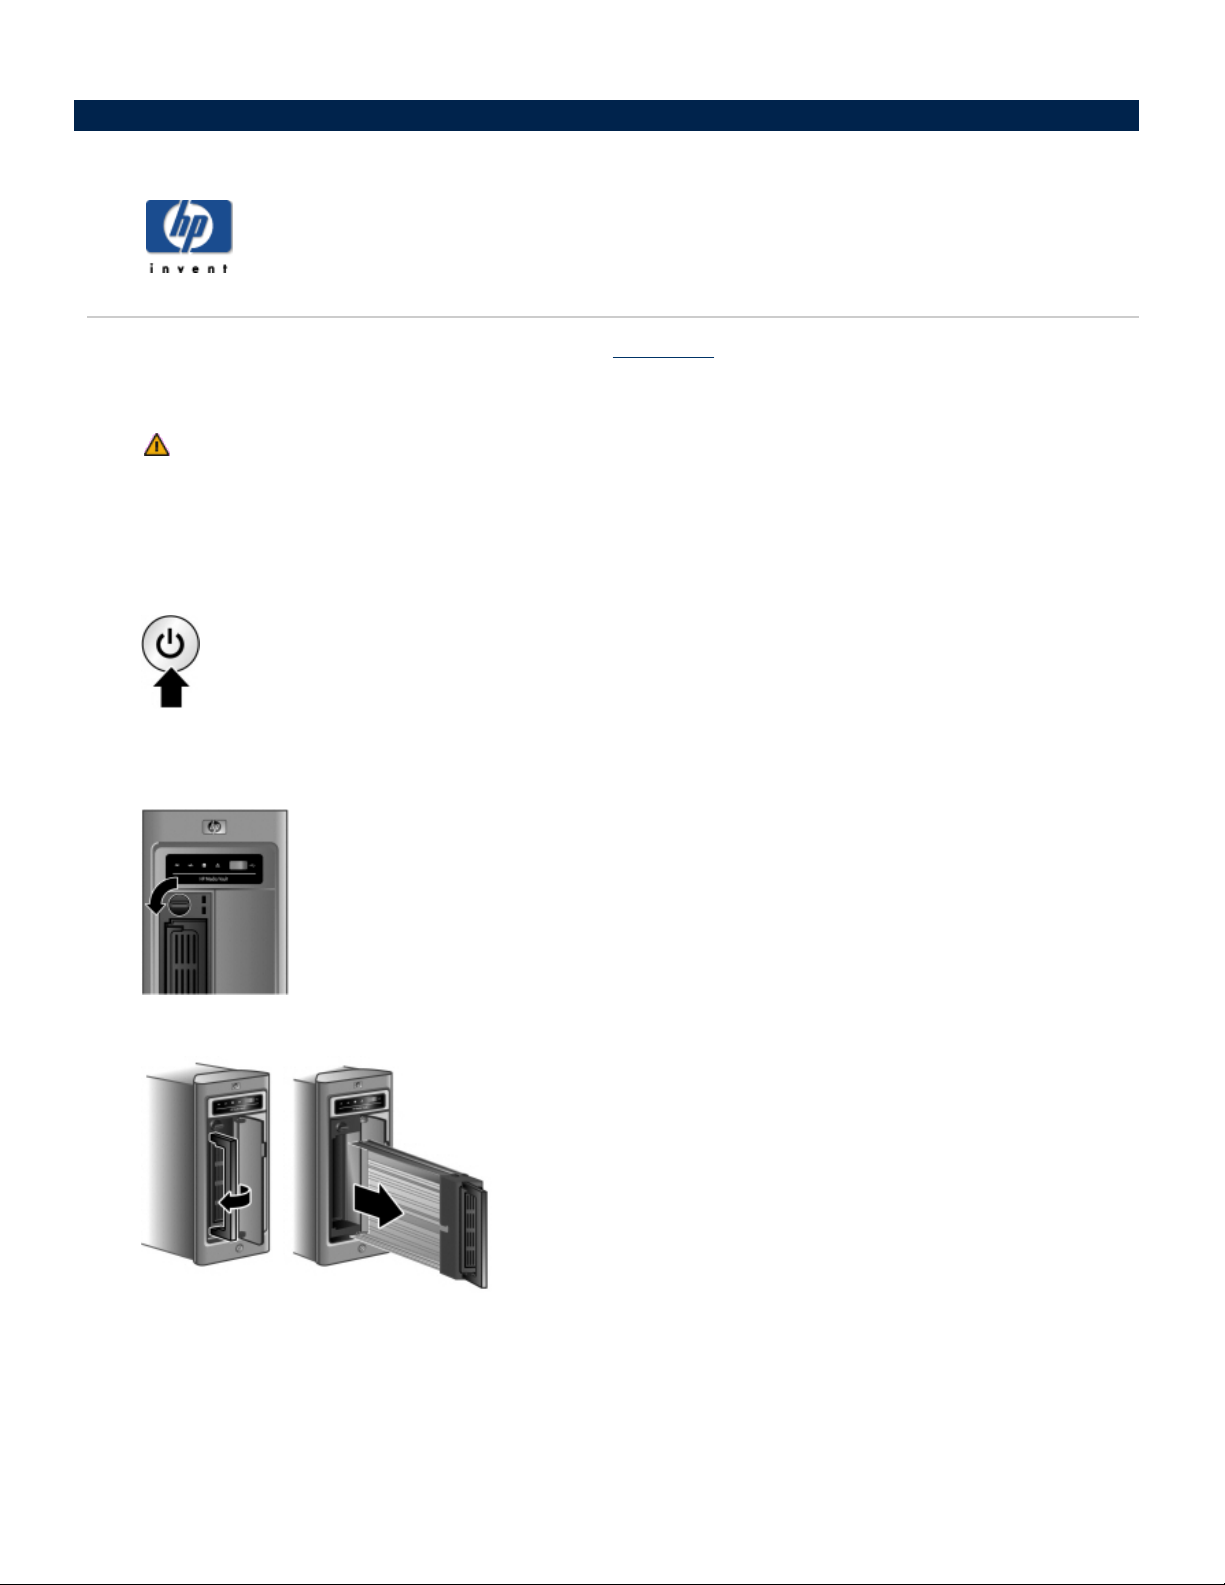
How to install and remove internal hard drive from your HP Media Vault
The HP Media Vault’s primary system hard disk uses the
will accommodate a second SATA disk. (The media vault does not support adding Integrated
(IDE) disks.)
You cannot remove or add a hard disk to the media vault while it is powered on and running.
To add a SATA disk into the expansion slot:
1.
Power down the media vault by pressing the power button on the front of the media vault and wait until it
completely shuts down.
2.
Open the front left door of the media vault.
3.
Turn the security knob on the hard drive tray counter-clockwise.
Serial ATA
(SATA) interface. The internal expansion bay
Drive Electronics
4.
Lift the drive tray handle out and gently pull the hard drive tray out of the expansion bay.
Page 61

5.
Slide the hard drive into the tray.
6.
Align the hard drive connector with the notch on the back of the tray.
7.
Use a screwdriver to attach the four screws, which secures the SATA drive to the tray.
hard drive connector is still aligned with the notch on the back of the tray after tightening the screws.
8.
Slide the tray with the inserted hard drive into the expansion bay.
9.
Turn the security knob clockwise to secure the drive tray into place.
Make sure that the
Page 62

10.
Power up the system.
You can now use the additional hard drive. (For information on formatting the hard disk, see
disk
.)
To remove an internal expansion:
1.
Power down the media vault by pressing the power button on the front of the unit and wait until
completely shuts off.
2.
Turn the security knob counter-clockwise.
3.
Lift the drive tray handle out and gently pull the hard drive tray out of the expansion bay.
4.
Use a screwdriver to unscrew the four screws.
5.
Remove the hard drive from the tray. To prevent losing the tray, insert the empty tray back into the media
vault.
6.
Power the system back up to use the single internal drive.
Removing hard disks can cause unexpected and undesirable behaviors. If the media vault has
volumes
unusable (at least until the disk is reconnected).
that span across
multiple disks, removing any one of the disks will make the whole volume
Format a
it
Page 63

How
to install and remove an external
USB hard drive
You can add external USB disks to any of the HP Media Vault’s three USB
the front). Small USB disks, such as key
cameras
any questions, check with the USB manufacturer to verify that
To connect an external USB disk:
and phones, can be attached if your system detects those devices as USB storage
The total amount of storage space connected to the media vault, for all
terabytes
Plug
in the USB cable into one of the USB ports on your media vault.
To
plug in and power up your external USB drive, see the documentation that came
.
disks and jump drives, also can be attached. Portable devices, such as
the device is classified as a USB storage device.
ports (two on the back and one on
devices. If you have
disks, cannot exceed 1.2
with your USB drive.
The addition of multiple USB disks through an external USB hub is neither recommended nor
supported.
To access the Disk setting screen:
1.
Double-click the
2. Click
3.
4.
Customize your HP Media Vault’s settings
Welcome Screen
If the
Click the
HP Media Vault
Disk Settings
appears, click
tab.
icon on your desktop.
Configure Device
.
.
Page 64

To remove an external USB disk:
1.
Select a hard disk by clicking the
2. Click
3.
4.
Safely Disconnect Disk
When the media vault is ready, you will receive a message
disconnect the
Disconnect the disk from the media vault.
disk from the system. Click OK.
Select a Disk
.
drop-down
list.
telling you that it’s okay to physically
Page 65

» Enhance security on your Shared Folders
Control who has access to your HP Media Vault files.
» How to manage Shared Folders
Create, modify, and delete Shared Folders.
» How to manage users
Create, modify, and delete HP Media Vault users.
Manage Shared Folders and users
Page 66

The HP Media Vault comes
permit everyone on your network access to all your media vault’s files,
individual folders that contain sensitive
The media vault’s two
Workgroup mode
User-based
Enhance security on your Shared Folders
with different options for securing folders and files saved to the media vault.
or you can set the access levels on
information so that only you have access to those files.
primary security modes are:
mode
Workgroup mode
The media vault’s default
security mode is workgroup mode, which is the lowest level of security for your
Folders. In workgroup mode, everyone on your network has equal access to
add one level of security in workgroup mode by
protection enabled,
network users must enter appropriate passwords before gaining access to the folders.
password protecting your Shared Folders. With password
Password protection in workgroup mode is problematic in Vista; the behavior is inconsistent.
Therefore, if you want to password protect a Shared Folder, you should switch to User-based mode
You can
Shared
all your folders. However, you can
.
To password protect Shared Folders
User-based mode
User-based mode is a more
restrictive security level because you grant "access privileges" for
network user on each Shared Folder.
To select user-based mode:
1.
Double-click the
2. Click
3.
4.
5. Click
6. Click
Customize your HP Media Vault’s setting
Welcome Screen
If the
Click the
User-based mode
AcceptorCancel
Network Settings
HP Media Vault
will not be accepted.)
appears, click
tab.
.
. (If you click
icon on your desktop.
, see
Modify a Shared Folder in workgroup mode
.
Configure Device
Cancel,
the change from workgroup mode
.
.
each defined
to user-based mode
Page 67

As
administrator, you must create usernames for each user. You must also assign one
privilege levels for every user, for every Shared Folder
on the media vault:
of the following three
Full access
Read-only access
No access
You can switch out of
this mode by going to the
Network Settings
Why switch to user-based mode?
Let's say you store all
your financial files on the media vault. All your network users store their
media vault so that they can download songs only once from
users to have access to your
giving them "Full access" to the Shared Folders containing
users on Shared
Folders that contain financial files. (See
User-based
mode requires a more thorough understanding of the media vault's networking
financial files. In this case, you would create separate usernames for each
music. You would then assign "No access" to these
Organize
and occasional maintenance of changes. Before deciding to enable
sure that you understand the configuration screens.
topic in the
Configure your HP Media Vault
section.
Before enabling this mode, read through each
tab and selecting
another mode.
music files to the
the Internet. But you don't want all your network
user
your files
.)
features,
User-based access mode, make
Page 68

Select a topic
» How to use the Shared Folder screen
» How to create a Shared Folder in workgroup mode
» How to create a Shared Folder in user-based mode
» How to modify a Shared Folder in workgroup mode
» How to modify a Shared Folder in user-based mode
» How to delete a Shared Folder
How to manage Shared Folders
Page 69

The Shared Folders screen
Vault’s primary resources shared on your network. Similar to folders on
Folders to store and share files or to
How to use the Shared Folders screen
is the opening page of the configuration screens. Shared Folders are the HP
your computer, you can set up Shared
restrict access to certain network users.
To access the Shared Folder screen:
Double-click the
Customize your HP Media Vault’s setting
Click
Welcome Screen
If the
Click the
Shared Folders
The first time you enter the
three pre-configured folders.
HP Media Vault
icon on your desktop.
.
appears, click
tab.
Configure Device
.
configuration screens and before you’ve created other Shared Folders, you see
Shared Folders table
This table contains the following:
Media
the
Shared Folder Name
The media vault comes
FileShare
MediaShare
Backup
Volume Name
The
volume name
Folder is Accessible from
The
access level for Network Computers, Web Browsers, and FTP Clients and their associated protocols is
listed below for each type of
Supported protocols:
CIFS and NFS (Network Computers)
Network computer access includes
System
) protocols. Your media vault automatically defaults to Full
NFS. These two protocols allow users access to media
computers.
HTTP (Web Browsers)
Web Browsers use the HTTP (
Access for Web browser access, so you must change this setting
your files. HTTP file access lets you access folders and files on
pre-configured with three Shared Folders:
identifies the volume on
protocol
your hard disk where a Shared Folder resides.
.
the CIFS (
Common Internet File
HyperText
Transfer Protocol
System
) and NFS (
Network
Access, which enables CIFS and
vault files from Windows, Mac or Linux
) protocol. Your media vault
defaults to No
to enable this method for accessing
your media vault using a web
File
Page 70

browser. HTTP access also lets you use a browser
your
local area network
understand how firewalls operate.
FTP (FTP Clients)
FTP clients use the FTP (
FTP access so you must change this setting to enable
access lets you access files on your media vault
LAN. To keep your files
operate.
This screen also lets you:
to access media vault files on computers outside of
(LAN). To keep your files secure, you
should only enable HTTP access if you
File
Transfer Protocol
) protocol. Your media vault
defaults to No Access for
this method for accessing your files. FTP file
within your LAN and on computers outside of your
secure, you should only enable FTP access if you understand how firewalls
Modify Selected Folder
Delete Selected Folder
Create New Shared Folder
(See
Modify a Shared Folder in
(See
Delete a Shared Folder
(See
Create a Shared Folder in
workgroup mode.
.)
workgroup mode.
)
)
Page 71

How to create a Shared Folder in workgroup mode
To access the Shared Folder screen:
Double-click the
Customize your HP Media Vault’s setting
Click
Welcome Screen
If the
Click the
Shared Folders
HP Media Vault
appears, click
tab.
icon on your desktop.
.
Configure Device
To create a Shared Folder in workgroup mode:
1. Click
2.
3.
Create New Shared Folder
New Shared Folder Name
In the
From the
Volume
drop-down list, choose the disk volume on which the new Shared Folder will reside.
.
box, enter a descriptive name.
(For more information on disk volumes, see
Hard drive settings
Before changing the default access mode from Network Computers, see
the Shared Folders screen
4.
Complete one or more of the following
Click
Network Computers(CIFS
vault automatically defaults to Full Access.
Click
Network Computers(NFS
vault automatically defaults to Full Access.
.
steps:
). Select either
Read-only
). Select either
Read-only
.
.)
access or
access or
Supported Protocols
Full Access
Full Access
at
How to use
. Your media
. Your media
Click
5.
Select a user from the
6.
To secure the
this folder
Note:
a.
b.Re-
7. Click
accepted.)
Web Browser
Click FTP
. (See
NFS does not allow
Enter a password in the
enter the password in the
Accept or Cancel
. Select either
. Select either
Select Username
Shared Folder
Read-only
so that users must use a password to access it, click
Read-only
access
drop-down list.
Enhance security on your Shared Folders
password protection.
Password
box.
Confirm Password
. (If you select
Cancel
access or
Full Access
or
Full Access
.
.
Password Protect
.)
box.
, everything that you entered on this screen will not be
Page 72

How to create a Shared Folder in user-based mode
To access the Shared Folder screen:
Double-click the
Customize your HP Media Vault’s setting
Click
Welcome Screen
If the
Click the
Shared Folders
HP Media Vault
appears, click
tab.
icon on your desktop.
.
Configure Device
To create a Shared Folder in user-based mode:
1. Click
2.
3.
Create New Shared Folder
New Shared Folder Name
In the
From the
Volume
drop-down list, choose the disk volume on which the new Shared Folder will reside.
.
box, enter a
(For more information on disk volumes, see
descriptive name.
Hard drive settings
Before changing the default access mode from Network Computers, see
the Shared Folders screen
4.
Complete one or more of the following
Click
Network Computers(CIFS
vault automatically defaults to Full Access.
Click
Network Computers(NFS
vault automatically defaults to Full Access.
.
steps:
). Select either
Read-only
). Select either
Read-only
.
.)
access or
access or
Supported Protocols
Full Access
Full Access
at
How to use
. Your media
. Your media
Click
Click FTP
Web Browser
. Select either
. Select either
Read-only
Read-only
access or
access or
Full Access
Full Access
.
.
The screen’s lower section contains an information box that lists your currently defined users and their
privilege levels. Each defined user must have a privilege level for every
assign privilege levels for
5.
Select a user from the
6.
Select a privilege level from the
7. Click
8.
9. Click
Add
.
Repeat steps 5 through 7 for each defined user.
Accept
accepted.)
or
Cancel
each user:
Select Username
Select Privilege Level
. (If you select
Cancel
drop-down list.
drop-down list.
, everything that you entered on this screen will not be
Shared Folder
you create. To
Page 73

How to modify a Shared Folder in workgroup mode
To access the Shared Folder screen:
Double-click the
Customize your HP Media Vault’s setting
Click
Welcome Screen
If the
Click the
Shared Folders
HP Media Vault
appears, click
tab.
icon on your desktop.
Configure Device
To select a Shared Folder to modify:
1.
From the
2. Click
The
your
Select a Shared Folder
Modify Selected Folder
drop-down list, select a Shared Folder to modify.
.
Modify an Existing Shared Folder
Shared Folders
. For example, you can change the name of a Shared Folder,
settings, and apply a password to a Shared Folder.
To change the name of the Shared Folder:
1.
Highlight the folder’s current name in the
2.
Enter a new name.
3.
If you’re finished modifying Shared Folders, click
section. (If you click
Cancel
, your changes will not be accepted.)
New Shared Folder Name
.
.
screen provides you with different ways to make changes to
change file access
box.
Accept
or
Cancel
. Otherwise continue to the next
To change file access settings:
Before changing the default access mode from Network Computers, see
Shared Folders screen
1.
Complete one or more of the following steps:
Click
vault automatically defaults to Full Access.
Click
vault automatically defaults to Full Access.
Click
Click FTP
.
Network Computers(CIFS
Network Computers(NFS
Web Browser
. Select either
. Select either
Read-only access
). Select either
Read-only
). Select either
Read-only
Read-only access
Full Access
or
Supported protocols
access or
access or
Full Access
or
.
in
Full Access
Full Access
.
How to use the
. Your media
. Your media
Page 74

2.
If you’re finished modifying Shared Folders, click
section. (If you click
Cancel,
your changes will not be accepted.)
Accept
or
Cancel
. Otherwise continue with the next
Note:
or FTP access, use the name of the shared folder for the user name. For example, if the name of the Share Folder
is
To apply or change the password on the Shared Folder:
By enabling this option, users must use a password to access a Shared Folder. (See
Shared Folders
Note:
In workgroup mode, if password protection is enabled on a folder that you have granted Web Browser
FileShare
NFS does not allow password protection.
1. Click
2.
Enter a password in the
3.Re-
4. Click
, enter "
.)
Password protection in workgroup mode is problematic in Vista; the behavior is inconsistent.
Therefore, if you want to password protect a Shared Folder, you should switch to User-based mode
Password Protect this folder
enter the password in the
Accept
fileshare
Cancel
or
" for the user name in the authentication dialog box.
.
Password
Confirm Password
. (If you click
box.
Cancel
box.
, your changes will not be accepted.)
Enhance security on your
.
Page 75

How to modify a Shared Folder in user-based mode
To access a Shared Folder:
Double-click the
Customize your HP Media Vault’s setting
Click
Welcome Screen
If the
Click the
Shared Folders
HP Media Vault
appears, click
tab.
icon on your desktop.
.
Configure Device
.
To select a Shared Folder to modify:
1.
Select a Shared Folder from the
2. Click
Modify
Selected Folder
Select a Shared Folder
.
drop-down list.
About modifying a Shared Folder
Modify an Existing Shared Folder
The
screen provides you with different ways to modify
Shared Folders
For example, you can change the name of a Shared Folder, change file access settings, and change a user’s
access privileges on a specific Shared Folder.
To change the name of the Shared Folder:
1.
Highlight the folder’s current name in the
New Shared Folder Name
box.
.
2.
Enter a new name.
3.
If you’re finished modifying Shared Folders, click
section. (If you click
Cancel,
your changes will not be accepted.)
Accept
or
Cancel
To change file access settings:
Before changing the default access mode from Network Computers,
Shared Folders screen
1.
Complete one or more of the following steps:
Click
vault automatically defaults to Full Access.
Click
vault automatically defaults to Full Access.
Click
.
Network Computers(CIFS
Network Computers(NFS
Web Browser
. Select either
). Select either
). Select either
Read-only
Read-only
Read-only
access
see
or
. Otherwise continue with the next
Supported protocols
access
access or
Full Access
Full Access
or
Full Access
.
in
How to use the
. Your media
. Your media
Page 76

Click FTP
. Select either
Read-only
access or
Full Access
.
2.
If you’re finished modifying Shared Folders, click
section. (If you click
Cancel,
your changes will not be accepted.)
Accept
or
Cancel
. Otherwise continue with the next
To modify a user’s access privileges:
1.
Select a user from the
2.
Select a
3. Click
4.
Repeat steps 1 through 3 for each username and privilege level you want to modify.
5.
If you’re finished modifying Shared Folders, click
privilege level
Add
.
section. (If you click
Select Username
from the
Cancel
Select Privilege Level
, your changes will not be accepted.)
drop-down list.
Accept
drop-down list.
Cancel
or
.
Otherwise continue with the next
To create new users
1. Click
2.
3.
Create New User
When you click
Create New User
Enter the username in the
User’s Name
Enter a password name in the
, you are taken to the
Password
User Settings
dialog box.
dialog box. All users
must have a password.
page.
Confirm Password
4.
In
, re-enter the password to confirm it was entered correctly.
Each defined user must have a privilege level for every Shared Folder on your HP Media Vault.
To assign Shared Folder privilege levels for the new user:
1.
Select a Shared Folder from the
2.
Select a privilege level from the
3.
Click the
4.
Repeat steps 4 through 6 for each Shared Folder on your media vault.
5. Click
Add
Accept
button.
Cancel
or
. (If you click
Select Shared Folder
Select Privilege Level
Cancel
, your changes will not be accepted.)
drop-down list.
drop-down list.
Page 77

Delete an Existing Shared Folder
The
How to delete a Shared Folder
screen provides you with
to delete, such as the total amount of files and folders saved to this
spaced used by the Shared Folder.
To access the Shared Folder screen:
Double-click the
Customize your HP Media Vault’s setting
Click
Welcome Screen
If the
Click the
Shared Folders
HP Media Vault
appears, click
tab.
icon on your
desktop.
Configure Device
.
To delete a Shared Folder:
1.
Click the
2.
Select a Shared Folder to delete from the
3. Click
Shared Folders
tab.
Delete Selected Folder
Select a Shared Folder
.
information on the folder you are about
Shared Folder
, and the amount of hard disk
.
drop-down list.
Deleting a Shared Folder automatically deletes all of the sub-folders and files
Folder.
4.
As a safety measure, you must enter the name of the Shared Folder
5. Click
Accept
or
Cancel
. (If you click
Cancel
, the selected Shared Folder will not be deleted.)
stored in that Shared
you intend to delete in the blank box.
Page 78

Select a topic
» How to create a new user
» How to modify a user
» How to delete a user
How to manage users
Page 79

How to create a new user
To access the User Settings screen:
Double-click the
Customize your HP Media Vault’s setting
Click
Welcome Screen
If the
Click the
Important:
User Settings
To create new users, you must be in user-based mode. (For more information on switching from
workgroup to user-based mode, see
HP Media Vault
appears, click
tab.
Enhance security on your Shared Folders
To create a new user:
1.
2.
3.
User Settings
In the
Enter the username in the
Enter a password in the
tab, click
User’s Name
Password
Create New User
icon on your desktop.
.
Configure Device
.
.)
.
box.
box. All users must have a password.
4.Re-
enter the password in
Confirm Password
.
Privilege level
Each user you define must have a privilege level for every
vault automatically assigns each user
create. Users keep their
Full Access
Full-Access
for each existing Shared Folder and any new folders you
privileges until you change the
Shared Folder
User’s Default Privilege Level
on your HP Media Vault. The media
To change the User’s Default Privilege Level:
1.
Select either
You can
Read-Only Access
or
No Access
also change a user’s access
.
(privilege) level
on a specific Shared Folder. For example, you
could keep a user’s default privilege level to full access on all Shared Folders except for one folder
where you have saved financial or other personal data.
2.
If you want to make specific privilege level changes, proceed to the next section.
Cancel
or
. (If you click
Cancel,
your changes will not be accepted.)
Otherwise, click
To assign a different access (privilege) level to a specific Shared Folder
1.
Select the Shared Folder from the
Select Shared Folder
drop-down list.
.
Accept
2.
Select the privilege level from the
Select Privilege Level
drop-down list.
Page 80

3.
Click the
4.
Repeat steps 1 through 3 for changing the default privilege level for each Shared Folder on your media
vault.
Add
button.
5. Click
accepted.)
Accept
or
Cancel
. (If you click
Cancel
, everything that you entered on this screen will not be
Page 81

How to modify a user
To access the User Settings screen:
Double-click the
Customize your HP Media Vault’s setting
Click
Welcome Screen
If the
Click the
User Settings
HP Media Vault
appears, click
tab.
To modify a user:
1.
Select a username from the
2. Click
Modify Selected User
a.
To change the username, highlight the name in the
b.
To change the password, highlight the password in the
Select User Name
.
password. All users must have a password.
icon on your desktop.
.
Configure Device
drop-down list.
New Name
.
Password
box and enter the new name.
box and enter the new
c.Re-
enter the password in
Each user you define must have a privilege level for every Shared Folder on your HP Media
vault automatically assigns each user
create. Users keep their
Full Access
Confirm Password
Full-Access
for each existing Shared Folder and any new folders you
.
privileges until you change the
Vault. The media
User’s Default Privilege Level.
can also change access levels on specific Shared Folders.
To change the User’s Default Privilege Level
1.
Select either
Read-Only
No Access
or
under
User’s Default Privilege Level
.
You can also change a user’s access (privilege) level on a specific Shared Folder. For example, you could
keep a user’s default privilege level to full access on
have saved financial or other personal data.
2.
If you want to make privilege level changes on a specific Shared Folder, proceed to the
Otherwise, click
Accept
or
Cancel
. (If you click
all Shared Folders except for one folder where you
next section.
Cancel
, your changes
will not be accepted.)
To assign a different access (privilege) level for a user on a specific Shared Folder:
1.
Select the Shared Folder from the
2.
Select the privilege level from the
Select Shared Folder
Select Privilege Level
drop-down list.
drop-down list.
You
3.
Click the
Add
button.
Page 82

4.
Repeat steps 1 through 3 for changing the default access level for each Shared Folder on your media
vault.
5. Click
Accept
or
Cancel
. (If you click
Cancel
, your changes will not be accepted.)
Page 83

How to delete a user
To access the User Settings screen:
Double-click the
Customize your HP Media Vault’s setting
Click
Welcome Screen
If the
Click the
User Settings
HP Media Vault
appears, click
tab.
To delete a user:
1.
Select the username you want to delete from the
2. Click
Delete Selected User
.
Make sure that you have selected the correct username to delete
drop-down
list.
icon on your desktop.
.
Configure Device
Select User Name
.
drop-down list.
from the
Select User Name
Page 84

Steaming media
How to stream media to your entertainment center
If you have a
files you store on your media vault to play on these entertainment devices. The DMA accesses your stored media
files and coordinates the streaming process between your media vault and the entertainment device.
vault’s media server will work with both
to use a wireless DMA.
Two conditions are required for media streaming with the media vault:
1.
Your DMA must use
below.)
2.
Only the media files are available for
photographs, music (audio), and video. Non-media files, such as Microsoft Word documents, are not
available for streaming.
To access the Media Streaming screen:
Double-click the
Click
Digital Media Adapter
Universal Plug and Play
HP Media Vault
Customize your HP Media Vault’s setting
(DMA) attached to your television and/or stereo, you can enable the media
wired or wireless DMAs. Your network must have wireless functionality
(UPnP) A/V streaming. (See
media streaming
icon on your desktop.
. The types of files that are considered “media” are:
.
The media
UPnP A/V streaming
explained
Page 85

Welcome Screen
If the
appears, click
Configure Device
.
Click the
Media Streaming
tab.
To configure a Shared Folder for streaming:
1.
Select a
2. Click
3.
After configuring a Shared Folder for streaming, a
Shared Folder
from the
Enable Media Streaming for Selected Folder
Select a Shared Folder
“
Yes
”
will appear next to the selected folder in the
drop-down list.
.
table. When a Shared Folder is made available or unavailable for streaming, all of its
similarly enabled or disabled.
Note:
It can take a long period of time for files that you copy to a Shared Folder to appear on your DMA
– even if the Shared Folder has been enabled for media streaming.
To disable a Shared Folder’s streaming configuration:
1.
Select the Shared Folder from the
2. Click
3.
Disable Media Streaming for Selected Folder
After disabling the streaming, a
located in the table.
Select a Shared Folder
“No”
will appear next to the selected folder in the Shared Folders table
drop-down list.
.
sub-folders
are
Reset media streaming
The media vault’s media server
titles, video names, and so on, to create a database. The
scans your stored media files
Reset media streaming
to gather information, such as artist names, song
button deletes this
database and rebuilds it. (Your data will not be deleted.) Resetting may take a long time depending on the
number of multimedia
files.
UPnP A/V streaming
UPnP
is a set of network
protocols
that allow networked devices to communicate seamlessly in a home
networking environment. The UPnP A/V streaming method currently only supports the streaming of unprotected
media files. Some files may be protected by a
Digital Rights Management
system, which may prevent the
streaming of those files. Media files purchased and downloaded from an online Internet store are most likely
protected.
Page 86

Select a topic
Monitor and configure the HP Media Vault's hard drives
» Hard drive settings
» How to rename a disk
» How to format a disk
» How to erase a disk
» How to create a new volume
» How to create a mirror
» How to remove a mirror
» How to modify an existing volume
» How to delete an existing volume
Page 87

Hard drive settings
To access the Disk Settings screen:
Double-click the
Customize your HP Media Vault’s settings
Click
Welcome Screen
If the
Click the
Disk Settings
HP Media Vault
appears, click
tab.
icon on your desktop.
Configure Device
.
.
You can manually monitor and configure your HP Media Vault’s hard drives. (The terms hard drives and hard
disks are used interchangeably.)
The
Physical Disks
section of the
Disk Settings
screen displays horizontal bar-graphs for each hard drive
connected to your media vault. The graphs are color-coded representing available space on the disk drives, and
the cross-hatched areas represent used hard disk space.
The media vault comes with one primary hard disk named SYSTEM, and one
logical volume
named Volume1.
To store and access data on your media vault’s hard disk, you must assign logical volumes to the connected
hard disks. The
Logical Volumes
section of the
Disk Settings
page contains a table that shows all volumes
currently defined on the media vault’s hard drives. The volumes are color-coded to match their corresponding
hard disks displayed in the horizontal bar graph(s) at the top of the screen.
Available hard disk space can be used to create more than one volume. (See
Logical Volumes
To configure or change hard disk settings:
1.
To select a hard disk, click the
2.
Click one of following options:
Note:
If an option is dimmed, that option is not available for the selected disk.
Select a Disk
drop-down list.
below.)
Page 88

Option Description
Rename
Disk
Format Disk
This option opens a screen that lets you assign a new name to the selected
hard disk. Assigning your hard disks unique names can help you monitor your
system when you have more than one hard disk connected to your media
vault. (You cannot rename the SYSTEM disk.) For instructions on using the
Rename Disk screen, see
This option opens a screen that lets you format a new internal hard disk or an
external USB hard drive. (You cannot format the SYSTEM disk.) For
instructions on using Format Disk screen, see
Understanding file systems for formatting hard disks
Rename a disk
.
Format a disk
. Also see
.
Erase Disk
Safely
Disconnect
Disk
Logical Volumes
To configure or change volume settings:
1.
To select a volume, click the
2.
Click one of following options:
Note:
Option Description
Create
New
Volume
Create a
Mirror
Remove
Mirror
Modify
Volume
Delete
Volume
If an option is dimmed, that option is not available for the volume.
This option opens a screen that lets you erase all content and logical volumes
from a selected hard disk. (You cannot erase the SYSTEM disk.) For
instructions on using the Erase Disk screen, see
Select this option to safely disconnect a USB disk. If you installed the HP
software from the Software Installation Disc, and you unplug a USB disk from
the media vault without safely disconnecting it, you will see a warning alert in
your computer’s system tray.
Select a Volume
This option opens a screen that lets you create a new volume from available hard
disk space. For instructions on using the Create New Volume screen, see
a new volume
This option opens a screen that lets you create a mirror of a selected volume. For
instructions on using the Create a Mirror screen, see
Understanding disk mirrors and concatenated disks
This option opens a dialog box from which you can remove a mirror. For
instructions on using the Remove a Mirror screen, see
This option opens a screen that lets you change the name and/or size of the
selected volume. For instructions on using the Modify an Existing Volume screen,
see
Modify an Existing Volume
This option opens a screen that lets you delete the selected volume. For
instructions on using the Delete an Existing Volume screen, see
Volume
.
.
When you delete a volume all Shared Folders and all files on the
volume are permanently destroyed.
drop-down list.
.
Erase a disk
Create a mirror
.
Remove a mirror
.
Create
. Also see
.
Delete an Existing
Page 89

How to rename a disk
This option allows you to assign names to your hard disks. Assigning your hard disks unique names can help you
monitor your system when you have more than one disk connected to your HP Media Vault. (You cannot rename
the SYSTEM disk.)
To access the Disk Settings screen:
Double-click the
Customize your HP Media Vault’s settings
Click
Welcome Screen
If the
Click the
Disk Settings
HP Media Vault
appears, click
tab.
icon on your desktop.
Configure Device
.
.
To rename a disk:
1.
Select a hard disk by clicking the
2. Click
Rename Disk
.
A screen opens that permits you to rename the hard disk.
Select a Disk
drop-down list.
3.
To select a different disk from the one displayed, click the
go to the next step.
4.
Enter the new disk name in the
5. Click
Accept
or
Cancel
New Disk Name
. If you click
Cancel
, your changes will not be accepted.
box.
Old Disk Name
drop-down list. Otherwise
Page 90

How to format a
This option allows you to:
Name the hard disk.
Name a
Format the disk for use on the media vault.
logical volume
on the hard disk.
To access the Disk Settings screen:
1.
Double-click the
2. Click
3.
4.
Customize your HP Media Vault’s settings
Welcome Screen
If the
Click the
Disk Settings
HP Media Vault
appears, click
tab.
To format a hard disk:
1.
Select a hard disk by clicking the
Select a Disk
disk
icon on your desktop.
Configure Device
drop-down list.
.
.
2. Click
Format Disk
.
Formatting disk drives erases all the disk’s contents, including boot records, partition tables, logical
volumes, and all Shared Folders and their sub-folders and
that it is safe to proceed.
Do not format a new disk if you want to
concatenate
(also known as
an existing volume. For more information on disk concatenation, see
concatenated disks
and
Create a mirror
.
files. Format disks only when you know
JBOD
) the hard disk’s capacity with
Understanding disk mirrors
Name the hard disk and volume:
1.
Enter the hard disk’s name in the
2.
Enter the volume’s name in the
New Disk Name
box.
New Volume Name
box.
Select one of the following format types:
Disk is dedicated for permanent use on this device. Format for best performance
(Reiser)
Formatting the disk using this file system does not allow the disk
and used on another computer—even a
disks
. This option will
.
format the disk into a proprietary Linux file system (a modified form of ReiserFS
to be disconnected from the media vault
Linux computer. See
Understanding file systems for formatting hard
).
Page 91

Disk may be disconnected from NAS and connected to a computer. Format for
maximum portability (FAT32).
This option will format the disk using the FAT32 file system.
Formatting the disk using this file system will allow you to disconnect the hard drive from the media vault
and use it on another computer.
See Understanding file systems for formatting hard disks.
Click
Accept
or
Cancel
. If you click
Cancel
, your changes will not be accepted.
Page 92

How to erase a disk
This option allows you to erase a hard disk currently connected to the HP Media Vault.
To access the Disk Settings screen:
Double-click the
Customize your HP Media Vault’s settings
Click
Welcome Screen
If the
Click the
Disk Settings
HP Media Vault
appears, click
tab.
icon on your desktop.
Configure Device
.
.
To erase a hard disk:
1.
Select a hard disk by clicking the
2. Click
Erase Disk
.
Select a Disk
drop-down list.
A screen opens that lets you erase all content and logical volumes from a selected hard disk. (You cannot
erase the SYSTEM disk.)
Erasing disk drives erases all the disk’s contents, including boot records, partition tables, logical
volumes, and all Shared Folders and their folders and files. Erase disks only when you know that it
is safe to proceed.
3.
If you are certain you want to erase a hard disk, enter
box.
4. Click
disk.
Accept
to begin the disk erase. Click
Cancel
Yes, destroy everything on this disk.
in the
to return to the Disk Settings page without erasing the
Page 93

Understanding file systems for formatting hard disks
Reiser
The HP Media Vault comes with a primary hard disk
proprietary
Linux file system
(a modified form of
ReiserFS
called SYSTEM. The SYSTEM disk is formatted into a
).
Formatting a second internal hard
performance. However, a Linux-formatted hard disk on the media vault cannot be
different computer—even a Linux computer. You can
when its connected to
FAT32
The
FAT32
versions 95, 98, 98SE and ME. Files on FAT32 disks cannot be larger than 4
hard disk in FAT32, you can disconnect the disk
However, you cannot store
NTFS
You cannot format a media vault hard disk in the
replaced the FAT32 file
Vista. If you
from the disk, not write to it.
file system allows you to read and write to the hard disk. Microsoft used
import a hard drive formatted in NTFS to the media vault, you will only be able
the media vault.
files larger than 4GB on FAT32 file systems.
system with NTFS for Windows NT, 2000, XP, Windows Server 2003, and Windows
disk into the proprietary Linux file system gives you the best read/write
only read and write data to the media vault’s hard drive
GB. If you format a media vault
and use it on Windows, Macintosh and Linux computers.
New Technology File System (
NTFS
disconnected and used in a
this file system for Windows
) format. Microsoft
to read content
Page 94

This option creates a new
How to create a
volume from the unallocated space on one or more disks. A volume is a portion
new volume
of one
or more hard disks configured to store data on the HP Media Vault. Volumes can be a defined as part of a disk
or an entire disk. You configure the
To create a new volume on a
resize the established volume to create unallocated space. (To resize volumes, see
size of a volume.
hard disk that has all of its space already allocated to a volume, you must
Modify an existing volume
first
.)
To access the Disk Settings screen:
Double-click the
Customize your HP Media Vault’s settings
Click
Welcome Screen
If the
Click the
Disk Settings
HP Media Vault
appears, click
tab.
icon on your desktop.
Configure Device
.
.
To create a new volume:
1. Click
Create New Volume
.
2.
Enter the new volume’s name in the
Note:
If the next two options are dimmed, the hard disk is already formatted
New Volume Name
4.
3.
Select one of the following format types:
Disk is dedicated for permanent use on this device. Format for best
performance (Reiser).
This option will format the disk
modified form of ReiserFS). Formatting the disk using this file system does not allow the disk to be
disconnected from the media vault and used on another computer—even a Linux computer. See
Understanding file systems for formatting hard disks
Disk may be disconnected from NAS and connected to a computer. Format for
maximum portability (FAT32).
This option will format the disk using the FAT32 file system.
.
Formatting the disk using this file system will allow you to disconnect the hard
vault and use it on another computer. See
4.
Assign a size to the new volume by completing one of the following:
Use the slider arrows to resize the volume.
Enter a new size in the
Assign All Available Space to this Volume
Click
GB Assigned
Understanding file systems for formatting hard disks
box.
box.
and you can proceed to
into a proprietary Linux file system (a
drive from the media
.
step
.
5. Click
Accept
or
Cancel
. If you click
Cancel
, your new volume will not be created.
Page 95

6.
A screen shows you that a volume has been successfully created. To continue, select one of the
options:
next
To return to the Disk Settings screen, click
To create a new Shared Folder on your new volume, click
Disk Management
.
Create Share
.
Page 96

This option creates a
portion of one or more hard disks configured
hard disk.
For more information on mirroring, see
How to create a mirror
mirror
of an existing volume or source volume on
to store data. A mirror duplicates the source volume on another
Understanding disk mirrors and concatenated disks
the HP Media Vault. A volume is a
.
When you save files to a mirrored volume, your files are saved to both hard disks. The end result is that half the
total amount of space is available to store your files. For example, two 200GB drives mirrored together result in
a mirrored volume of 200GB, not 400GB.
Note:
same size or larger than the source volume you want to mirror.
When creating a mirror, you must use a blank hard disk or unallocated space on a hard disk that is the
If any there is not enough unallocated space on
the expansion disk, you can do one of the following: erase the disk, or resize or delete one or more volumes on
the disk. For information on how to do these procedures, see
volume
.
Erase a disk,Modify a volume
, and
Delete a
Data on a mirror volume is safe unless both disks fail at the same time. If one hard disk fails, the
media vault will administer a warning. The failed hard disk should be replaced immediately.
To access the Disk Settings screen:
Double-click the
Customize your HP Media Vault’s settings
Click
Welcome Screen
If the
Click the
Disk Settings
HP Media Vault
appears, click
tab.
icon on your desktop.
Configure Device
.
.
To create a mirror:
1.
Select the volume you want to mirror by clicking the
2. Click
Create a Mirror
Note:
If the expansion disk is not blank or does not have enough unallocated space, the
.
button is dimmed. For information on how to increase unallocated space, see the
A screen opens displaying the volume you have chosen. For example:
to mirror
3.
In the
4. Click
.
Disk Assignment
Accept
or
Cancel
drop-down list, select the disk to become the mirror of the selected volume
. If you click
Cancel
Select a Volume
drop-down list.
You have chosen Volume1
, a mirror will not be created.
Create Mirror
Note
above.
This process may take several hours before the volume is completely mirrored. You can continue to use the
media vault during this time.
.
The media vault does not automatically show
the progress of the mirroring. To view the progress,
Page 97

Refresh
click
on the Disk Settings screen
or
Reload
on your browser. The progress status is indicated under Logical Volumes
.
Page 98

This option removes a
Removing a mirror erases all of your duplicated content saved to a mirrored volume.
How to remove a mirror
mirror
of an existing volume on one of the HP Media Vault’s hard disks.
When you remove a mirror,
you create unallocated storage space; however, you also lose a duplicate copy of a volume.
To access the Disk Settings screen:
Double-click the
Customize your HP Media Vault’s settings
Click
Welcome Screen
If the
Click the
Disk Settings
HP Media Vault
appears, click
tab.
icon on your desktop.
Configure Device
.
.
To remove a mirror:
1.
Select the mirrored volume you want to remove by clicking the
2. Click
3.
Remove Mirror
.
A screen shows you which mirrored volume you selected to remove. To select a different volume, click the
Remove mirrored volume
drop-down list.
Select a Volume
drop-down list.
4.
Checkboxes display the hard disks that contain the source and mirrored volumes. Click on the hard disk
from which you want to remove the mirrored volume.
Page 99

How to modify an existing volume
This option modifies the name and/or size of an existing volume. A volume is a portion of one or more hard
disks configured to store data on the HP Media Vault. Volumes can be a defined
disk. You configure the volume’s size.
as part of a disk or an entire
You will not be able to shrink the volume’s size below the size required to store all of the volume’s
current files and folders.
To access the Disk Settings screen:
Double-click the
Customize your HP Media Vault’s settings
Click
Welcome Screen
If the
Click the
Disk Settings
HP Media Vault
opens, click
tab.
icon on your desktop.
Configure Device
.
.
To select the volume to modify:
1.
Select a volume by clicking the
Select a Volume
drop-down list.
2. Click
Modify Volume
.
To change the volume’s name:
1.
Enter the volume’s new name in the
2.
If you are finished, click
Accept
Otherwise continue with the next section.
To resize the volume:
1.
Complete one of the following:
Use the slider arrows to resize the volume.
Enter a new size in the
Assign All Available Space to this Volume
Click
2. Click
Accept
or
Cancel
GB Assigned
. If you click
New Name
Cancel
or
Cancel
box.
. (If you click
Cancel
, your changes will not be accepted.)
box.
.
, your changes will not be accepted.
Page 100

This option deletes an entire
the HP Media
Vault. Volumes can be a defined as part of a disk or an entire disk.
How to delete an existing volume
volume
. A volume is a
Deleting a volume will permanently destroy all Shared Folders on the volume, including all the
folders and files saved to the Shared Folders.
To access the Disk Settings screen:
Double-click the
Customize your HP Media Vault’s settings
Click
Welcome Screen
If the
Click the
Disk Settings
HP Media Vault
opens, click
tab.
To delete a volume:
1. Select
2. Click
a volume by clicking the
Delete Volume
.
Select a Volume
portion of one or more hard disks configured to store data on
icon on your desktop.
Configure Device
drop-down list.
.
.
3.
Read
4.
If you still want to continue, enter the
5. Click
Warning
the
Accept
statement on the screen.
Cancel
or
. If you click
volume’s name in the box.
Cancel
, the selected volume will not be deleted.
 Loading...