

Page 1
HP LaserJet M1319 MFP Series
User Guide
Page 2

Page 3

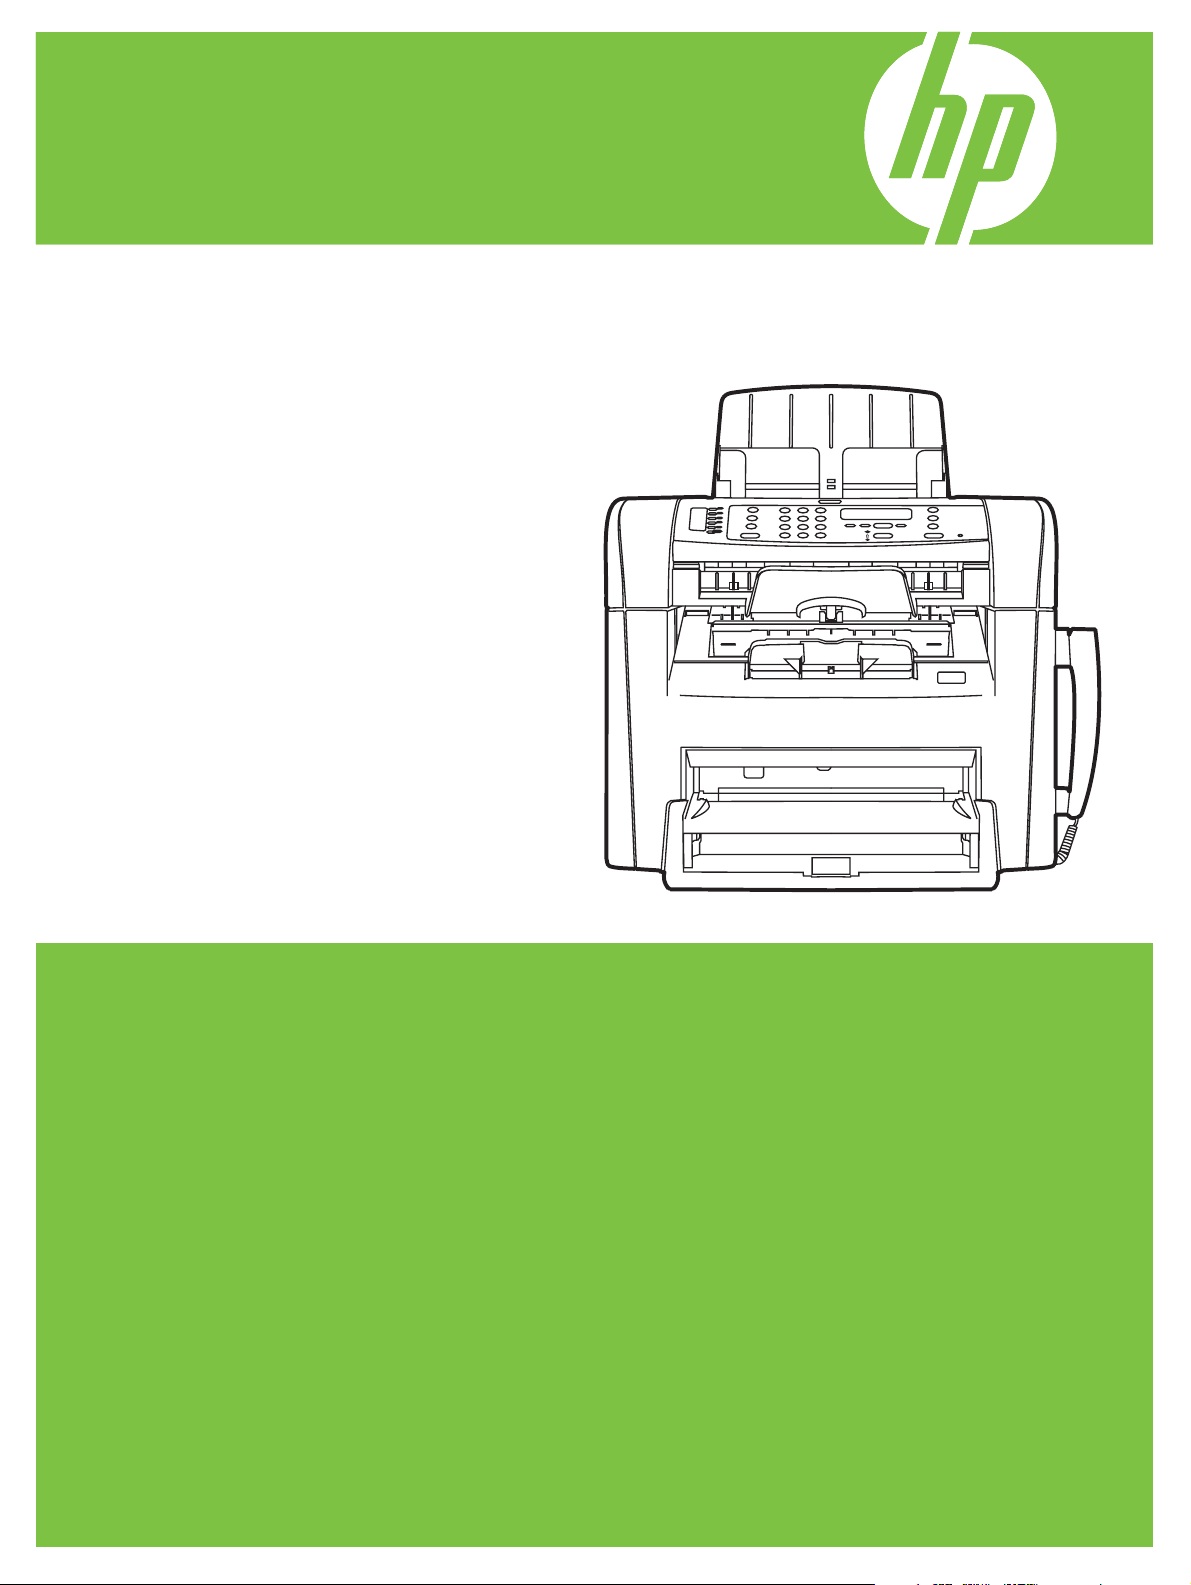
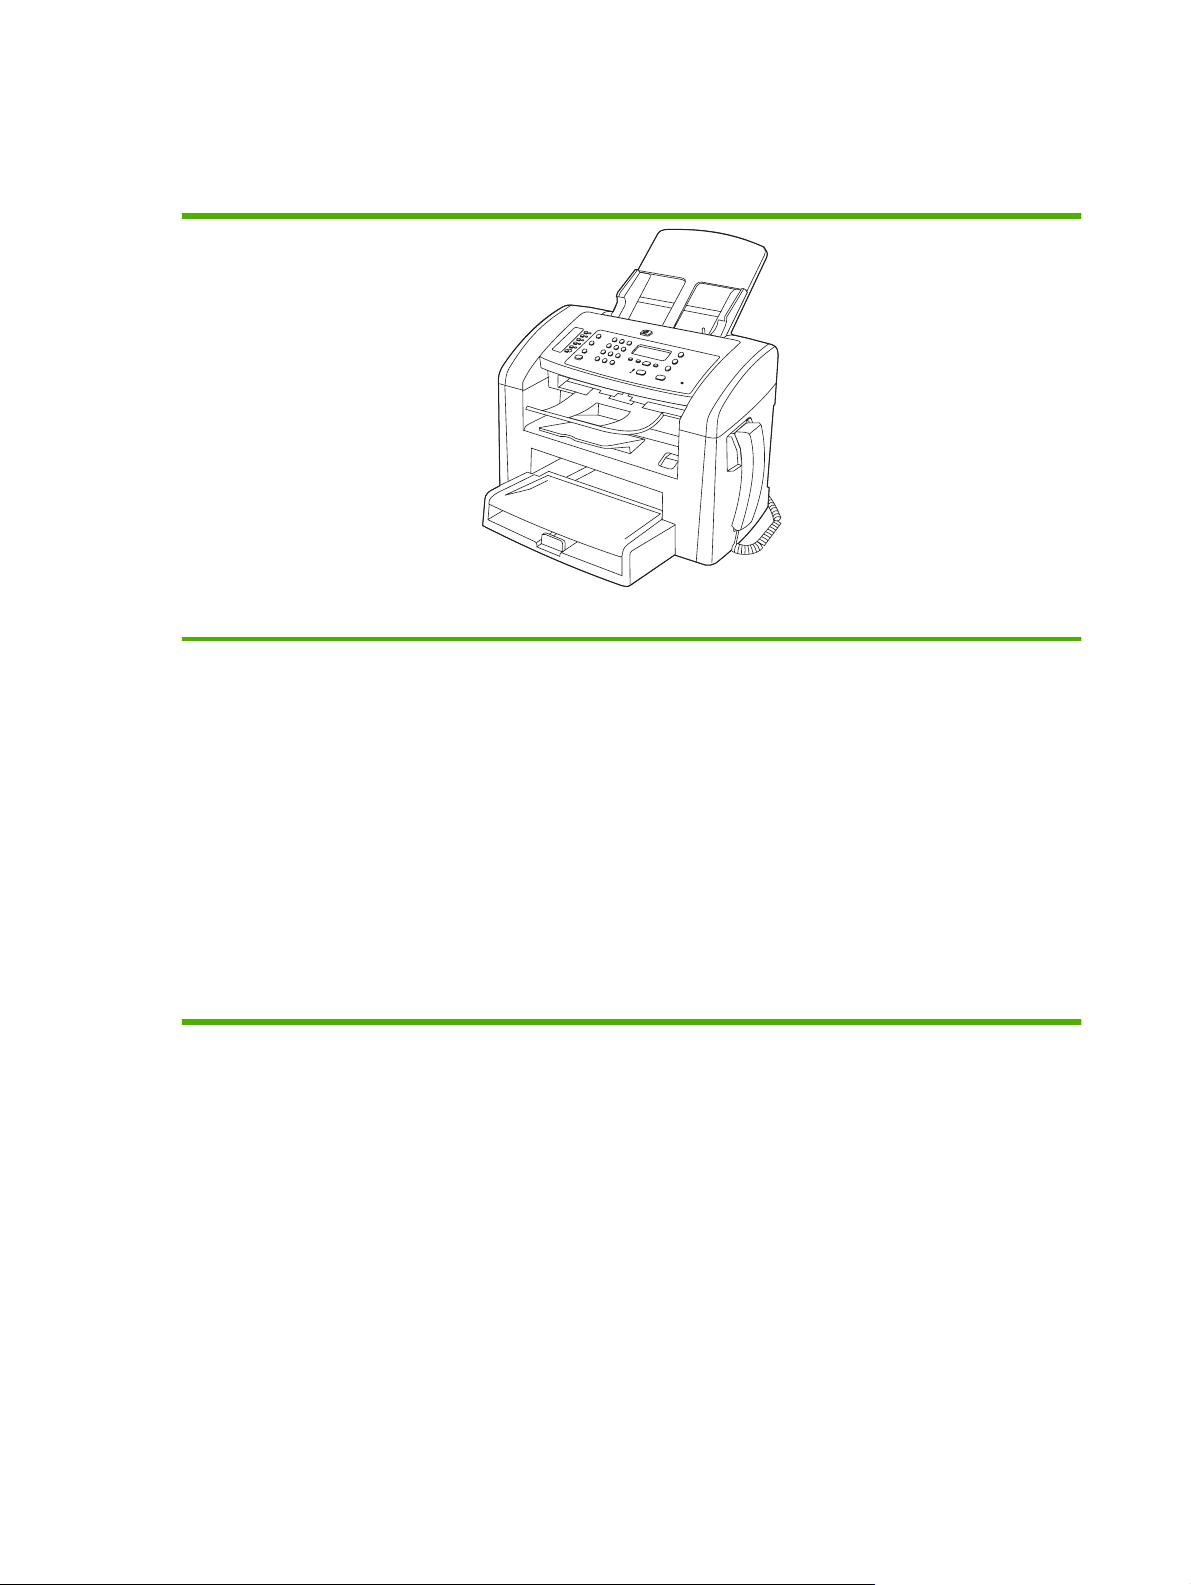
HP LaserJet M1319 MFP Series
User Guide
Page 4

Copyright and License
© 2008 Copyright Hewlett-Packard
Development Company, L.P.
Reproduction, adaptation, or translation
without prior written permission is prohibited,
except as allowed under the copyright laws.
Edition 1, 7/2008
Part number: CB536-90987
The information contained herein is subject
to change without notice.
The only warranties for HP products and
services are set forth in the express warranty
statements accompanying such products
and services. Nothing herein should be
construed as constituting an additional
warranty. HP shall not be liable for technical
or editorial errors or omissions contained
herein.
Trademark Credits
®
, Acrobat®, and PostScript® are
Adobe
trademarks of Adobe Systems Incorporated.
Microsoft
®
, Windows®, and Windows NT
®
are U.S. registered trademarks of Microsoft
Corporation.
®
is a registered trademark of The Open
UNIX
Group.
Page 5

Table of contents
1 Product basics
Product comparison ............................................................................................................................. 2
Product features ................................................................................................................................... 3
Product walkaround .............................................................................................................................. 4
Front view ............................................................................................................................ 4
Back view ............................................................................................................................. 4
Interface ports ...................................................................................................................... 5
Serial number and model number location .......................................................................... 5
Supported operating systems ............................................................................................................... 6
Supported product software ................................................................................................................. 6
Software included with the product ...................................................................................... 6
Supported printer drivers ..................................................................................................... 7
2 Control panel
Control-panel walkaround .................................................................................................................. 10
Control-panel menus .......................................................................................................................... 11
Use the control-panel menus ............................................................................................. 11
Control-panel main menus ................................................................................................. 11
3 Software for Windows
Supported operating systems for Windows ........................................................................................ 20
Printer driver ....................................................................................................................................... 20
Priority for print settings ...................................................................................................................... 20
Open the printer driver and change the print settings ........................................................................ 21
Software installation types for Windows ............................................................................................. 22
Remove software for Windows ........................................................................................................... 22
Supported utilities for Windows .......................................................................................................... 23
HP Toolbox software ......................................................................................................... 23
Status Alerts software ........................................................................................................ 23
Other Windows components and utilities ........................................................................... 23
4 Use the product with Macintosh
Software for Macintosh ....................................................................................................................... 26
ENWW iii
Page 6

Supported operating systems for Macintosh ..................................................................... 26
Supported printer drivers for Macintosh ............................................................................. 26
Priority for print settings for Macintosh .............................................................................. 26
Change printer-driver settings for Macintosh ..................................................................... 26
Software installation types for Macintosh .......................................................................... 27
Use features in the Macintosh printer driver ....................................................................................... 28
Print ................................................................................................................................... 28
Scan from the product and HP Director (Macintosh) .......................................................................... 31
Scanning tasks .................................................................................................................. 31
Fax a document from a Macintosh computer ..................................................................................... 32
5 Connectivity
Connect the product directly to a computer with USB ........................................................................ 34
6 Paper and print media
Understand paper and print media use .............................................................................................. 36
Supported paper and print media sizes .............................................................................................. 37
Special paper or print media guidelines ............................................................................................. 38
Load paper and print media ............................................................................................................... 39
Priority input tray ................................................................................................................ 39
Tray 1 ................................................................................................................................. 39
Configure trays ................................................................................................................................... 41
7 Print tasks
Change the print driver to match the media type and size ................................................................. 44
Get help for any print option ............................................................................................................... 45
Cancel a print job ............................................................................................................................... 46
Change the default settings ................................................................................................................ 47
Create booklets .................................................................................................................................. 48
Change print-quality settings .............................................................................................................. 48
Change print density .......................................................................................................................... 48
Print on special media ........................................................................................................................ 49
Use different paper and print covers .................................................................................................. 50
Print a blank first page ........................................................................................................................ 50
Resize documents .............................................................................................................................. 51
Select a paper size ............................................................................................................................. 51
Select a paper source ........................................................................................................................ 51
Select a paper type ............................................................................................................................ 51
Set the print orientation ...................................................................................................................... 52
Use watermarks ................................................................................................................................. 52
Save toner .......................................................................................................................................... 52
Print on both sides of the paper (duplex printing) ............................................................................... 53
Supported paper types and tray capacity .......................................................................... 44
iv ENWW
Page 7

8 Copy
Print multiple pages on one sheet of paper in Windows .................................................................... 55
Economy settings ............................................................................................................................... 56
EconoMode ........................................................................................................................ 56
Archive print ....................................................................................................................... 56
Load originals ..................................................................................................................................... 58
Use copy ............................................................................................................................................ 59
One-touch copy ................................................................................................................. 59
Multiple copies ................................................................................................................... 59
Cancel a copy job .............................................................................................................. 59
Reduce or enlarge copies .................................................................................................. 59
Copy settings ...................................................................................................................................... 60
Copy quality ....................................................................................................................... 60
Change copy job print density ........................................................................................... 62
Define custom copy settings .............................................................................................. 62
Copy onto media of different types and sizes .................................................................... 62
Restore the copy-settings defaults .................................................................................... 63
Duplex (two-sided) copy jobs ............................................................................................................. 64
9 Scan
10 Fax
Load originals for scanning ................................................................................................................ 68
Use scan ............................................................................................................................................ 69
Scan methods .................................................................................................................... 69
Canceling a scan job ......................................................................................................... 70
Scan settings ...................................................................................................................................... 71
Scan file format .................................................................................................................. 71
Scanner resolution and color ............................................................................................. 71
Scan quality ....................................................................................................................... 72
Fax features ....................................................................................................................................... 76
Setup .................................................................................................................................................. 77
Install and connect the hardware ....................................................................................... 77
Configure fax settings ........................................................................................................ 79
Manage the phone book .................................................................................................... 81
Set fax polling .................................................................................................................... 85
Change fax settings ............................................................................................................................ 86
Set the sound-volume settings .......................................................................................... 86
Send fax settings ............................................................................................................... 87
Receive fax settings ........................................................................................................... 90
Use fax ............................................................................................................................................... 97
Fax software ...................................................................................................................... 97
ENWW v
Page 8

Cancel a fax ....................................................................................................................... 97
Delete faxes from memory ................................................................................................. 98
Use fax on a DSL, PBX, ISDN, or VoIP system ................................................................ 98
Send a fax .......................................................................................................................... 99
Receive a fax ................................................................................................................... 107
Solve fax problems ........................................................................................................................... 109
Fax error messages ........................................................................................................ 109
Fax memory is retained when there is a loss of power .................................................... 113
Fax logs and reports ........................................................................................................ 113
Change error correction and fax speed ........................................................................... 115
Problems sending faxes .................................................................................................. 116
Problems receiving faxes ................................................................................................. 117
Performance problems .................................................................................................... 120
11 Manage and maintain the product
Information pages ............................................................................................................................. 122
Use the HP Toolbox software ........................................................................................................... 123
View HP Toolbox ............................................................................................................. 123
Status ............................................................................................................................... 124
Fax ................................................................................................................................... 125
Shop for Supplies ............................................................................................................ 128
Other Links ...................................................................................................................... 128
Manage supplies .............................................................................................................................. 129
Check and order supplies ................................................................................................ 129
Replace supplies ............................................................................................................. 131
Clean the product ............................................................................................................ 132
Firmware updates ............................................................................................................ 133
12 Problem solve
Problem-solving checklist ................................................................................................................. 136
Restore the factory-set defaults ....................................................................................................... 137
Control-panel messages .................................................................................................................. 138
Alert and warning messages .......................................................................................... 138
Critical error messages .................................................................................................... 139
Control-panel display problems ........................................................................................................ 141
Clear jams ........................................................................................................................................ 141
Causes of jams ................................................................................................................ 141
Where to look for jams ..................................................................................................... 142
Clear jams from the ADF ................................................................................................. 142
Clear jams from the input-tray areas ............................................................................... 143
Clear jams from the output bin ......................................................................................... 145
Clear jams from the print-cartridge area .......................................................................... 146
Avoid repeated jams ....................................................................................................... 147
vi ENWW
Page 9

Solve image-quality problems .......................................................................................................... 148
Print problems .................................................................................................................. 148
Copy problems ................................................................................................................. 155
Scan problems ................................................................................................................. 159
Fax problems ................................................................................................................... 161
Optimize and improve image quality ................................................................................ 161
Solve connectivity problems ............................................................................................................. 163
Solve direct-connection problems .................................................................................... 163
Solve software problems .................................................................................................................. 164
Solve common Windows problems ................................................................................. 164
Solve common Macintosh problems ................................................................................ 164
Appendix A Accessories and ordering information
Supplies ............................................................................................................................................ 168
Cable and interface accessories ...................................................................................................... 168
Appendix B Service and support
Hewlett-Packard limited warranty statement .................................................................................... 169
Customer self repair warranty service .............................................................................................. 170
Print cartridge limited warranty statement ........................................................................................ 171
Customer support ............................................................................................................................. 171
Repack the device ............................................................................................................................ 171
Appendix C Specifications
Physical specifications ..................................................................................................................... 174
Electrical specifications .................................................................................................................... 174
Power consumption .......................................................................................................................... 174
Environmental specifications ............................................................................................................ 175
Acoustic emissions ........................................................................................................................... 175
Appendix D Regulatory information
FCC compliance ............................................................................................................................... 178
Environmental product stewardship program ................................................................................... 179
Protecting the environment .............................................................................................. 179
Ozone production ............................................................................................................ 179
Power consumption ......................................................................................................... 179
Toner consumption .......................................................................................................... 179
Paper use ........................................................................................................................ 179
Plastics ............................................................................................................................ 179
HP LaserJet print supplies ............................................................................................... 179
Return and recycling instructions ..................................................................................... 180
Paper ............................................................................................................................... 180
Material restrictions .......................................................................................................... 180
ENWW vii
Page 10

Disposal of waste equipment by users in private households in the European
Union ............................................................................................................................... 181
Chemical substances ....................................................................................................... 181
Material Safety Data Sheet (MSDS) ................................................................................ 182
For more information ....................................................................................................... 182
Telephone Consumer Protection Act (United States) ...................................................................... 183
IC CS-03 requirements ..................................................................................................................... 183
EU statement for telecom operation ................................................................................................. 184
New Zealand telecom statements .................................................................................................... 184
Declaration of conformity .................................................................................................................. 185
Safety statements ............................................................................................................................. 186
Laser safety ..................................................................................................................... 186
Canadian DOC regulations .............................................................................................. 186
EMI statement (Korea) ..................................................................................................... 186
Laser statement for Finland ............................................................................................. 187
Substances table (China) ................................................................................................ 188
Glossary ........................................................................................................................................................... 189
Index ................................................................................................................................................................. 193
viii ENWW
Page 11

1 Product basics
Product comparison
●
Product features
●
Product walkaround
●
Supported operating systems
●
Supported product software
●
ENWW 1
Page 12
Product comparison
The product is available in the following configuration.
Prints letter-size pages at speeds up to 19 pages per minute (ppm) and A4-size pages at speeds up to 18 ppm.
●
Tray 1 holds up to 250 sheets of print media or up to 10 envelopes.
●
HP LaserJet M1319 MFP
The priority input tray holds up to 10 sheets of print media.
●
Manual two-sided (duplex) printing, fax receiving, and copying.
●
Hi-Speed USB 2.0 port and one telephone handset port.
●
V.34 fax modem and 4-megabyte (MB) flash fax-storage memory.
●
Two RJ-11 fax/phone cable ports.
●
32-MB random-access memory (RAM).
●
30-page automatic document feeder (ADF).
●
Integrated telephone handset.
●
2 Chapter 1 Product basics ENWW
Page 13

Product features
Print
Copy
Scan
Fax
Memory
Paper handling
Printer driver features
Interface connections
Economical printing
Prints letter-size pages at speeds up to 19 ppm and A4-size pages at speeds up to 18 ppm.
●
Prints at 600 dots per inch (dpi) and FastRes 1200 dpi.
●
Includes adjustable settings to optimize print quality.
●
Copies at 300 dots per inch (dpi).
●
Provides 600 pixels per inch (ppi) full-color scanning.
●
Full-functionality fax capabilities with a V.34 fax; includes a phone book and delayed-fax
●
features.
Includes 32-megabyte (MB) random-access memory (RAM).
●
Priority input tray holds up to 10 pages.
●
Tray 1 holds up to 250 sheets of print media or 10 envelopes.
●
Output bin holds up to 100 sheets of print media.
●
FastRes 1200 produces 1200-dots-per-inch (dpi) print quality for fast, high-quality printing
●
of business text and graphics.
Hi-Speed USB 2.0 port.
●
RJ-11 fax/phone cable ports.
●
Provides N-up printing (printing more than one page on a sheet).
●
Provides an EconoMode setting, which uses less toner.
●
Supplies
Accessibility
The product ships with a 1,000-page (average yield) starter cartridge. The average yield
●
for replacement cartridges is 2,000 pages.
Online user guide that is compatible with text screen-readers.
●
Print cartridges can be installed and removed by using one hand.
●
All doors and covers can be opened by using one hand.
●
ENWW Product features 3
Page 14
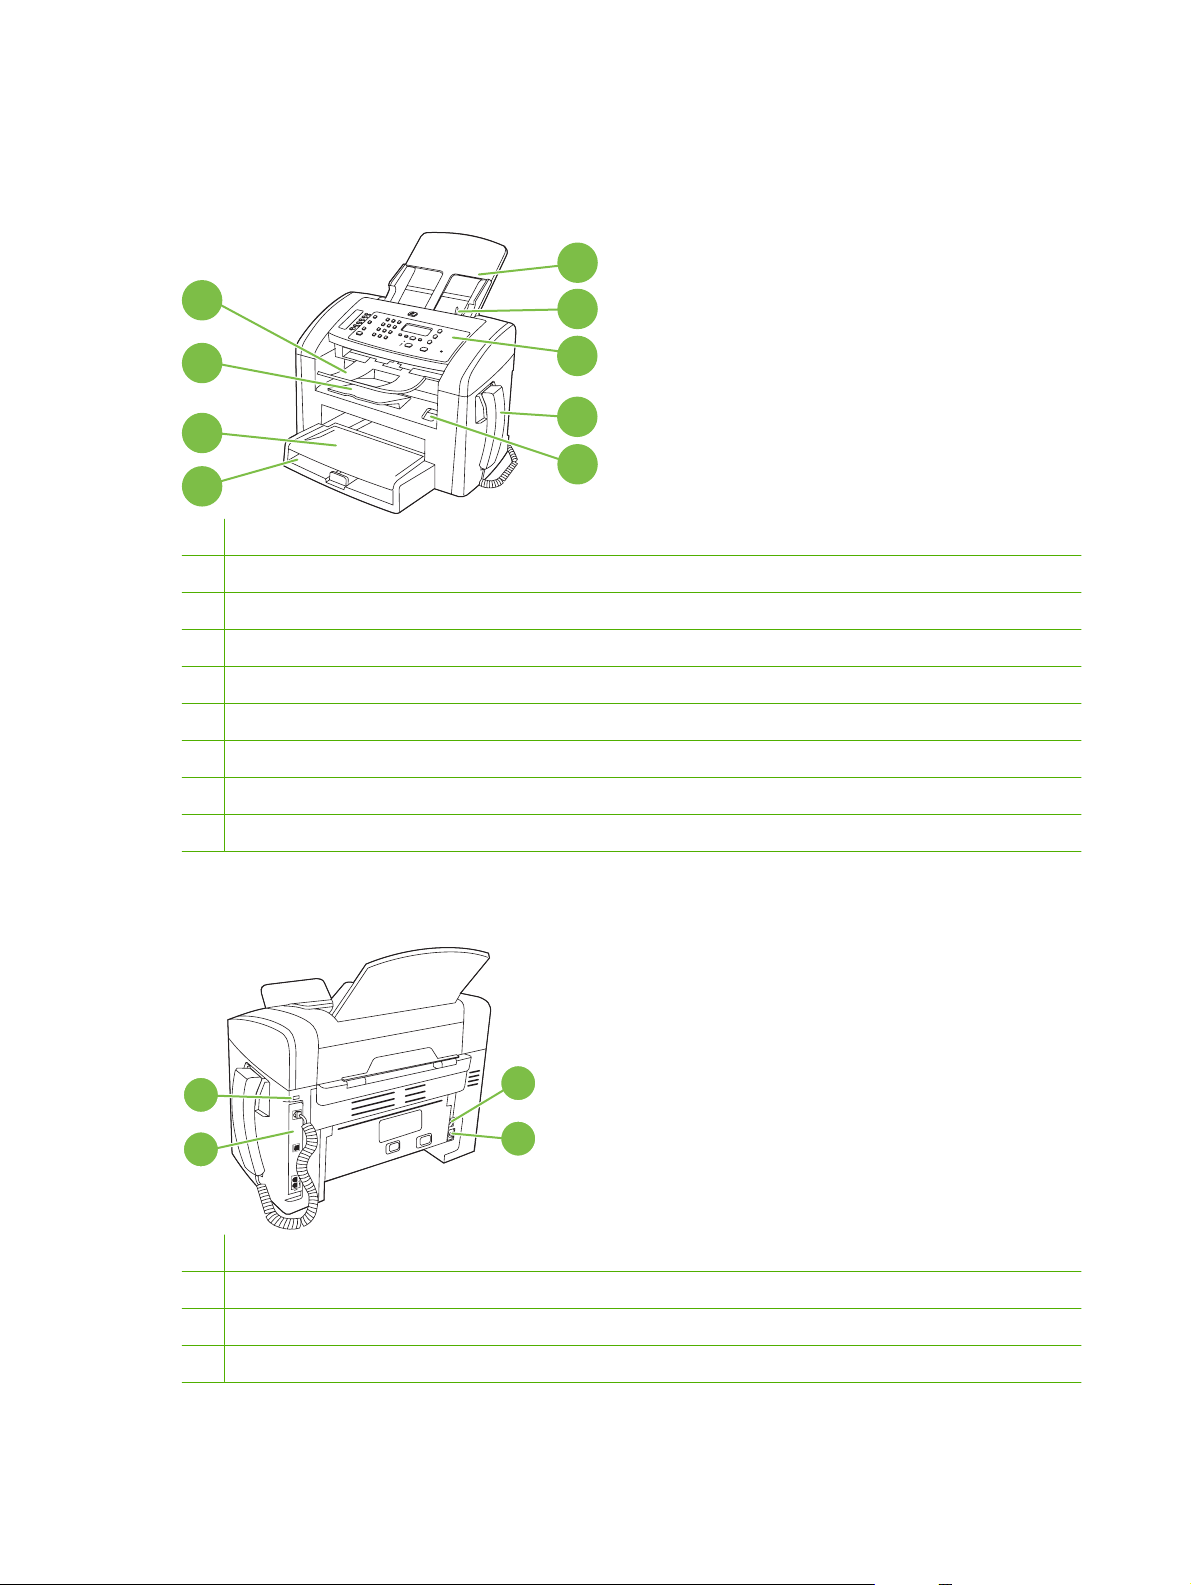
Product walkaround
Front view
5
4
3
2
1
1 Tray 1
2 Priority input tray
3 Output bin
4 Automatic document feeder (ADF) output bin
5 Automatic document feeder (ADF) input tray
6 ADF media lever
7 Control panel
8 Telephone handset
9 Print-cartridge door latch
6
7
8
9
Back view
11
10
10 Interface ports
11 Kensington lock
12 Power switch
13 Power connector
12
13
4 Chapter 1 Product basics ENWW
Page 15
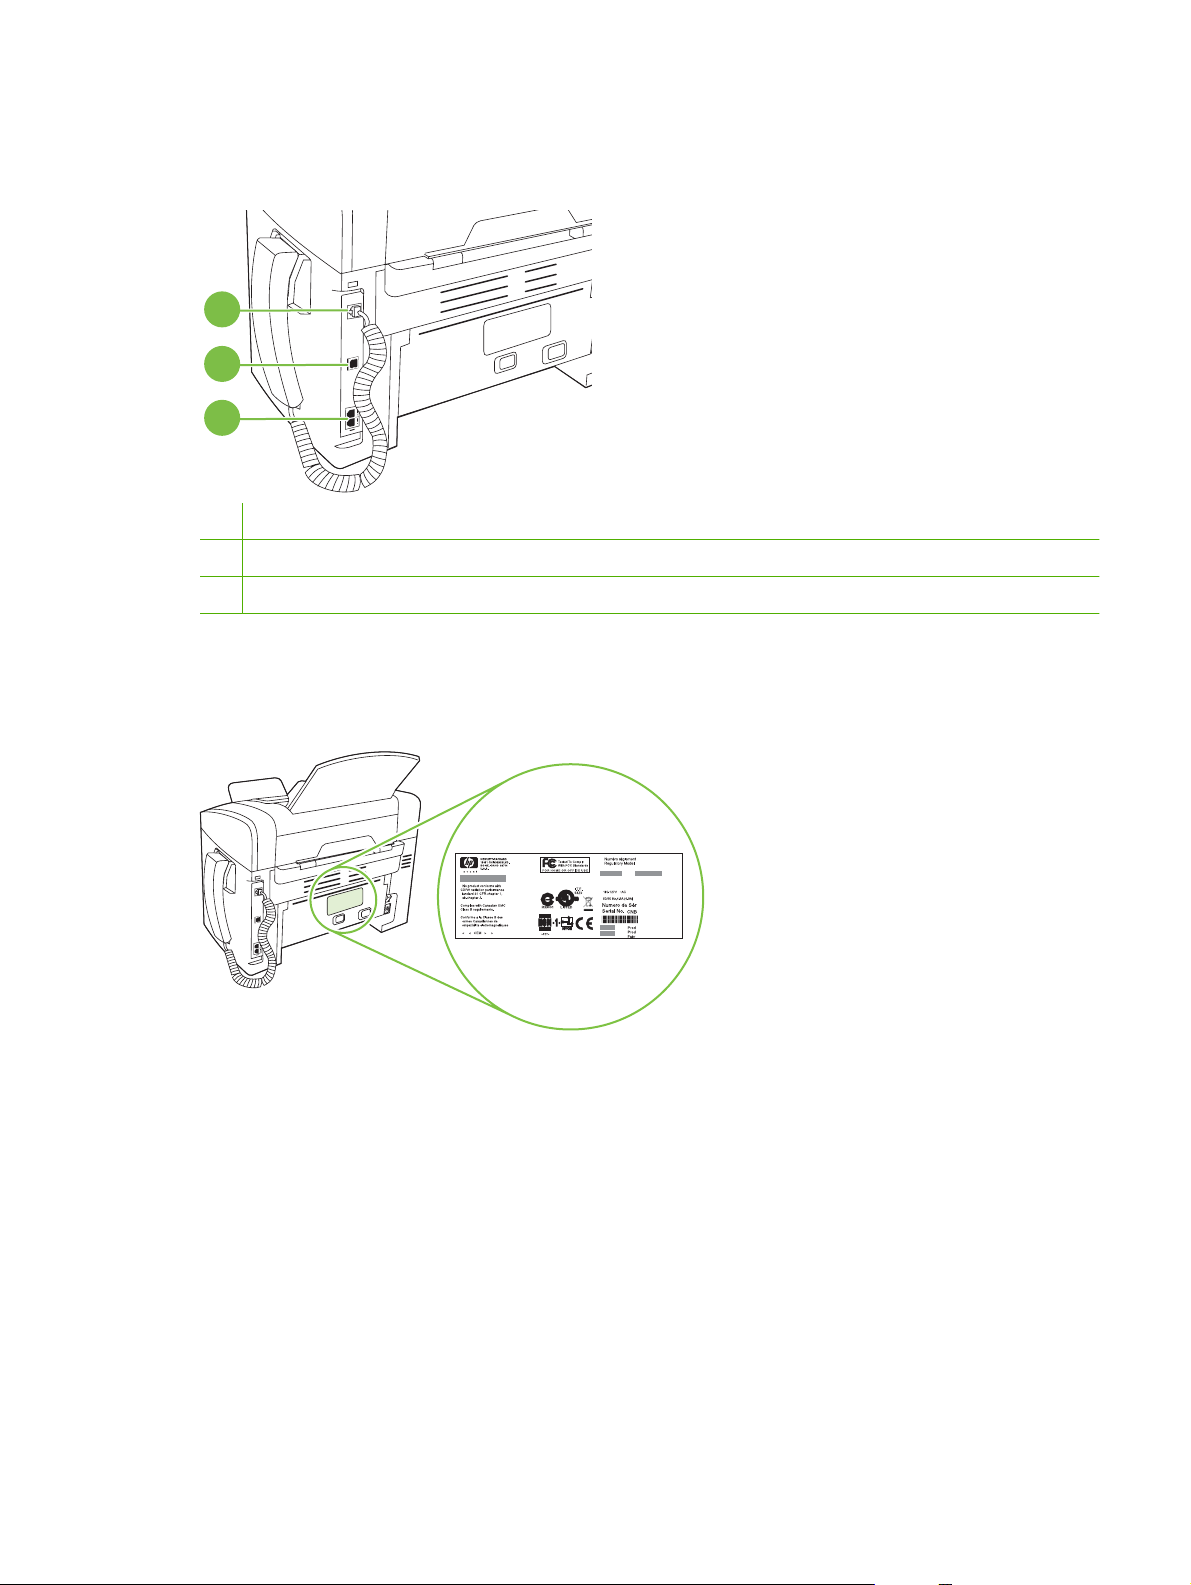
Interface ports
The product has a Hi-Speed USB 2.0 port, fax and phone ports, and a handset port.
1
2
3
1 Handset port
2 Hi-Speed USB 2.0 port
3 Fax ports
Serial number and model number location
The serial number and product model number label is at the back of the product.
ENWW Product walkaround 5
Page 16

Supported operating systems
The product supports the following operating systems:
Full software installation
Windows XP (32-bit)
●
Windows Vista (32-bit)
●
Mac OS X v10.3, v10.4, and later
●
NOTE: For Mac OS X v10.4 and later, PPC and Intel Core Processor Macs are supported.
Supported product software
Software included with the product
There are several options for completing a recommended install. Easy installation will complete the
installation with default settings. Advanced installation allows you to review the license agreements and
the default settings.
Easy installation for Windows
HP drivers
●
Print and scan drivers only
Windows XP (64-bit)
●
Windows Vista (64-bit)
●
Windows 2000
●
Windows 2003 Server (32-bit and 64-bit)
●
Printer driver
◦
Scan driver
◦
Fax driver
◦
HP MFP software
●
HP LaserJet Scan program
◦
PC Fax Send program
◦
HP Toolbox program
◦
Uninstall program
◦
Other programs
●
Readiris OCR (not installed with other software; separate installation is required)
◦
Advanced installation
Advanced installation includes all of the features that are available with the easy installation. The
HP Customer Participation program is optional.
6 Chapter 1 Product basics ENWW
Page 17

Macintosh software
HP Product Setup Assistant
●
HP Uninstaller
●
HP LaserJet software
●
HP Scan
◦
HP Director
◦
Scan to e-mail program
◦
Supported printer drivers
The product comes with software for Windows and Macintosh that allows the computer to communicate
with the product. This software is called a printer driver. Printer drivers provide access to product
features, such as printing on custom-sized paper, resizing documents, and inserting watermarks.
NOTE: The most recent drivers are available at www.hp.com/support/ljm1319. Depending on the
configuration of Windows-based computers, the installation program for the product software
automatically checks the computer for Internet access in order to obtain the latest drivers.
ENWW Supported product software 7
Page 18

8 Chapter 1 Product basics ENWW
Page 19

2 Control panel
Control-panel walkaround
●
Control-panel menus
●
ENWW 9
Page 20

Control-panel walkaround
1
1 Fax controls. Use the fax controls to change commonly used fax settings.
2 Alphanumeric buttons. Use the alphanumeric buttons to type data into the product control-panel display and dial
telephone numbers for faxing.
3 Setup and cancel controls. Use these controls to select menu options, determine the product status, and cancel the
current job.
4 Copy controls. Use these controls to change commonly used default settings and to start copying.
2 3
4
10 Chapter 2 Control panel ENWW
Page 21

Control-panel menus
Use the control-panel menus
To gain access to the control-panel menus, use the following steps.
1. Press Setup.
2. Use the arrow buttons to navigate the listings.
Press OK to select the appropriate option.
●
Press Cancel to cancel an action or return to the Ready state.
●
Control-panel main menus
These menus are available from the control-panel main menu:
Use the Fax Job status menu to display a list of all faxes that are waiting to be sent, or have been
●
received but are waiting to be printed, forwarded, or uploaded to the computer.
Use the Fax functions menu to configure fax functions such as scheduling a delayed fax,
●
cancelling the Receive to PC mode, reprinting faxes that were previously printed, or printing faxes
that are stored in memory.
Use the Copy setup menu to configure basic copy default settings such as contrast, collation, or
●
the number of copies printed.
Use the Reports menu to print reports that provide information about the product.
●
Use the Fax setup menu to configure the fax phone book, the outgoing and incoming fax options,
●
and the basic settings for all faxes.
Use the System setup menu to establish basic product settings such as language, print quality,
●
or volume levels.
Use the Service menu to restore default settings, clean the product, and activate special modes
●
that affect print output.
NOTE: To print a detailed list of the entire control-panel menu and its structure, print a menu map.
See
Information pages on page 122.
Table 2-1 Fax Job status menu
Menu item Description
Fax Job status Displays pending fax jobs, and allows you to cancel pending fax jobs.
Table 2-2 Fax functions menu
Menu item Description
Send fax later Allows a fax to be sent at a later time and date.
Stop Recv to PC Disables the Receive to PC setting that allows a computer to upload all current faxes that have
not been printed and all future faxes received by the product.
Reprint last Reprints the faxes that are stored in the product memory.
ENWW Control-panel menus 11
Page 22

Table 2-2 Fax functions menu (continued)
Menu item Description
Polling receive Allows the product to call another fax machine that has polling send enabled.
Clear saved faxs Clears all faxes in the product memory.
Table 2-3 Copy setup menu
Menu item Sub-menu item Description
Default Quality Text
Draft
Mixed
Film photo
Picture
Def. Light/dark Sets the default contrast option.
Def. # of copies (Range: 1-99) Sets the default number of copies.
Def. Reduce/Enlrg Original=100%
A4->Ltr=94%
Ltr->A4=97%
Full Page=91%
2 pages/sheet
4 pages/sheet
Custom:25-400%
Restore defaults Sets all customized copy settings to the factory default
Sets the default copy quality.
Sets the default percentage to reduce or enlarge a copied
document.
values.
Table 2-4 Reports menu
Menu Item Sub-menu item Sub-menu item Description
Demo page Prints a page that demonstrates print quality.
12 Chapter 2 Control panel ENWW
Page 23

Table 2-4 Reports menu (continued)
Menu Item Sub-menu item Sub-menu item Description
Fax Reports Fax Confirmation Never
Send fax only
Receive fax
Every fax
Fax Error report Every error
Send Error
Receive Error
Never
Last Call report Prints a detailed report of the last fax operation, either
Include 1st page On
Off
Fax Activity log Print log now
Auto Log Print
PhoneBook report Prints a list of the speed dials that have been set up for
Sets whether or not the product prints a confirmation
report after a successful sending or receiving job.
Sets whether or not the product prints a report after a
failed sending or receiving job.
sent or received.
Sets whether or not the product includes a thumbnail
image of the first page of the fax on the report.
Print log now: Prints a list of the last 50 faxes that have
been sent from or received by this product.
Auto Log Print: Select On to automatically print a report
after every fax job. Select Off to turn off the automatic
print feature.
this product.
Block Fax list Prints a list of phone numbers that are blocked from
sending faxes to this product.
All fax reports Prints all fax-related reports.
Menu structure Prints a control-panel menu layout map. The active
Config report Prints a list of all the product settings.
settings for each menu are listed.
Table 2-5 Fax setup menu
Menu Item Sub-menu item Sub-menu item Description
Fax header Your fax number
Company name
Phone Book Individual setup Add/Edit
Group setup
Delete all
Sets the identifying information that is sent to the receiving
Delete
Add/Edit group
Delete group
Del. # in group
product.
Edits the fax phone book speed dials and group-dial entries.
The product supports up to 120 phone book entries, which
can be either individual or group entries.
ENWW Control-panel menus 13
Page 24

Table 2-5 Fax setup menu (continued)
Menu Item Sub-menu item Sub-menu item Description
Fax Send setup Def. Resolution Fine
Superfine
Photo
Standard
Def. light/dark Sets the darkness of outgoing faxes.
Dialing Mode Tone
Pulse
Redial if busy On
Off
Redial-no answer On
Off
Redial Comm Err. On
Off
Dial Prefix On
Off
Detect dial tone On
Off
Sets the resolution for sent documents. Higher resolution
images have more dots per inch (dpi), so they show more
detail. Lower resolution images have fewer dots per inch and
show less detail, but the file size is smaller.
Changing the resolution setting might affect the fax speed.
Sets whether the product should use tone or pulse dialing.
Sets whether or not the product should attempt to redial if
the line is busy.
Sets whether the product should attempt to dial if the
recipient fax number does not answer.
Sets whether the product should attempt to redial the
recipient fax number if a communication error occurs.
Specifies a prefix number that must be dialed when sending
faxes from the product.
Sets whether the product should check for a dial tone before
sending a fax.
14 Chapter 2 Control panel ENWW
Page 25

Table 2-5 Fax setup menu (continued)
Menu Item Sub-menu item Sub-menu item Description
Fax Recv. setup Answer mode Automatic
Manual
Rings to answer (Range of 1-9) Sets the number of rings that must occur before the fax
Answer Ring Type All Rings
Single
Double
Triple
Double&Triple
Sets the type of answer mode. The following options are
available:
Automatic: The product automatically answers an
●
incoming call on the configured number of rings.
Manual : The user must press the Start Fax button or
●
use an extension phone to make the product answer
the incoming call.
modem answers.
Allows a user to have two or three phone numbers on a
single line, each with a different ring pattern (on a phone
system with distinctive-ring service).
All Rings: The product answers any calls that come
●
through the telephone line.
Single: The product answers any calls that produce a
●
single-ring pattern.
Double: The product answers any calls that produce a
●
double-ring pattern.
Triple: The product answers any calls that produce a
●
triple-ring pattern.
Double&Triple: The product answers any calls that
●
produce a double-ring or triple-ring pattern.
Extension Phone On
Off
Silence Detect On
Off
Fit to page On
Off
Stamp faxes On
Off
Forward fax On
Off
When this feature is enabled, the user can press the 1-2-3
buttons on the extension phone to cause the product to
answer an incoming fax call.
Sets whether the product can receive faxes from older
model fax machines that do not emit the initial fax tones used
during fax transmission.
Shrinks faxes that are larger than Letter-size or A4-size so
that they can fit onto a Letter-size or A4-size page. If this
feature is set to Off, faxes larger than Letter or A4 will print
on multiple pages.
Sets product to add the date, time, sender's phone number,
and page number to each page of the faxes that this product
receives.
Sets product to send all received faxes to another fax
machine.
ENWW Control-panel menus 15
Page 26

Table 2-5 Fax setup menu (continued)
Menu Item Sub-menu item Sub-menu item Description
Block faxes Add entry
Delete entry
Clear all
Reprint faxes On
Off
Private receive On
Off
All faxes Error correction On
Off
Fax Speed Fast(V.34)
Medium(V.17)
Modifies the blocked fax list. The blocked fax list can contain
up to 30 numbers. When the product receives a call from
one of the blocked fax numbers, it deletes the incoming fax.
It also logs the blocked fax in the activity log along with jobaccounting information.
Sets whether all received faxes stored in available memory
can be reprinted.
Setting Private receive to On requires the user to have set
a password in product security. After the password is set,
the following options are set:
Private receive is turned on.
●
All old faxes are deleted from memory.
●
Fax forwarding or Receive to PC are set to On and
●
are not allowed to be set.
All incoming faxes are stored in memory.
●
Sets whether the product sends or receives the error portion
again when a fax transmission error occurs.
Increases or decreases the allowed fax communication
speed.
Slow(V.29)
Table 2-6 System setup menu
Menu Item Sub-menu item Sub-menu item Description
Language (List of available
control-panel
display languages.)
Paper setup Def. paper size Letter
Def. paper type Lists available
Print Density (Range of 1-5) Sets how much toner the product should use to darken lines
Sets the language in which the control panel displays
A4
Legal
media types.
messages and product reports.
Sets the size for printing internal reports or any print job that
does not specify a size.
Sets the type for printing internal reports or any print job that
does not specify a type.
and edges.
16 Chapter 2 Control panel ENWW
Page 27

Table 2-6 System setup menu (continued)
Menu Item Sub-menu item Sub-menu item Description
Volume settings Alarm volume Soft
Ring volume
Key-press volume
Phoneline volume
Handset volume
Time/Date (Settings for time
format, current time,
date format, and
current date.)
Medium
Loud
Off
Sets the time and date setting for the product.
Sets the volume levels for the product.
Table 2-7 Service menu
Menu item Sub-menu item Description
Restore defaults Sets all customized settings to the factory default values.
Cleaning Mode Cleans the product when specks or other marks appear on printed
output. The cleaning process removes dust and excess toner from
the paper path.
When selected, the product prompts you to load plain Letter or A4
paper in tray 1. Press OK to begin the cleaning process. Wait until
the process completes. Discard the page that prints.
USB speed High
Full
Less paper curl On
Off
Archive print On
Off
Print T.30 trace Never
Now
If error
At end of call
Sets the USB speed.
When printed pages are consistently curled, this option sets the
product to a mode that reduces curl.
The default setting is Off.
When printing pages that will be stored for a long time, this option
sets the product to a mode that reduces toner smearing and
dusting.
The default setting is Off.
Prints or schedules a report that is used to troubleshoot fax
transmission issues.
ENWW Control-panel menus 17
Page 28

18 Chapter 2 Control panel ENWW
Page 29

3 Software for Windows
Supported operating systems for Windows
●
Printer driver
●
Priority for print settings
●
Open the printer driver and change the print settings
●
Software installation types for Windows
●
Remove software for Windows
●
Supported utilities for Windows
●
ENWW 19
Page 30

Supported operating systems for Windows
The product supports the following Windows operating systems:
Full software installation
Windows XP (32-bit)
●
Windows Vista (32-bit)
●
Printer driver
Printer drivers provide access to product features, such as printing on custom-sized paper, resizing
documents, and inserting watermarks.
NOTE: The most recent drivers are available at www.hp.com/support/ljm1319. Depending on the
configuration of Windows-based computers, the installation program for the product software
automatically checks the computer for Internet access in order to obtain the latest drivers.
Priority for print settings
Changes to print settings are prioritized depending on where the changes are made:
NOTE: The names of commands and dialog boxes might vary depending on your software program.
Print and scan drivers only
Windows XP (64-bit)
●
Windows Vista (64-bit)
●
Windows 2000
●
Windows 2003 Server (32-bit and 64-bit)
●
Page Setup dialog box: Click Page Setup or a similar command on the File menu of the program
●
you are working in to open this dialog box. Settings changed here override settings changed
anywhere else.
Print dialog box: Click Print, Print Setup, or a similar command on the File menu of the program
●
you are working in to open this dialog box. Settings changed in the Print dialog box have a lower
priority and do not override changes made in the Page Setup dialog box.
Printer Properties dialog box (printer driver): Click Properties in the Print dialog box to open
●
the printer driver. Settings changed in the Printer Properties dialog box do not override settings
anywhere else in the printing software.
Default printer driver settings: The default printer driver settings determine the settings used in
●
all print jobs, unless settings are changed in the Page Setup, Print, or Printer Properties dialog
boxes.
20 Chapter 3 Software for Windows ENWW
Page 31

Open the printer driver and change the print settings
Operating System To change the settings for all
Windows 2000, XP,
Server 2003, and
Vista
print jobs until the software
program is closed
1. On the File menu in the
software program, click
Print.
2. Select the driver, and then
click Properties or
Preferences.
The steps can vary; this
procedure is most common.
To change the default settings
for all print jobs
1. Click Start, click Settings,
and then click Printers
(Windows 2000) or
Printers and Faxes
(Windows XP Professional
and Server 2003) or
Printers and Other
Hardware Devices
(Windows XP Home).
For Windows Vista, click
Start, click Control Panel,
and then click Printer.
2. Right-click the driver icon,
and then select Printing
Preferences.
To change the device
configuration settings
1. Click Start, click Settings,
and then click Printers
(Windows 2000) or
Printers and Faxes
(Windows XP Professional
and Server 2003) or
Printers and Other
Hardware Devices
(Windows XP Home).
For Windows Vista, click
Start, click Control Panel,
and then click Printer.
2. Right-click the driver icon,
and then select
Properties.
3. Click the Configure tab.
ENWW Open the printer driver and change the print settings 21
Page 32

Software installation types for Windows
The following software installation types are available:
Easy. Installs the full software solution.
●
Advanced. Use this option to select which software and drivers to install.
●
Remove software for Windows
1. Click Start, and then click All Programs.
2. Click HP, and then click HP LaserJet M1319.
3. Click Uninstall, and then follow the onscreen instructions to remove the software.
22 Chapter 3 Software for Windows ENWW
Page 33

Supported utilities for Windows
HP Toolbox software
HP Toolbox is a software program that you can use for the following tasks:
Check the product status.
●
Configure the product settings.
●
Configure pop-up-alert messages.
●
View troubleshooting information.
●
View online documentation.
●
Status Alerts software
The Status Alerts software provides information about the current status of the product.
The software also provides pop-up alerts when certain events occur, such as an empty tray or a problem
with the product. The alert includes information about solving the problem.
Other Windows components and utilities
Software installer — automates the printing system installation
●
Online Web registration
●
ENWW Supported utilities for Windows 23
Page 34

24 Chapter 3 Software for Windows ENWW
Page 35

4 Use the product with Macintosh
Software for Macintosh
●
Use features in the Macintosh printer driver
●
Scan from the product and HP Director (Macintosh)
●
Fax a document from a Macintosh computer
●
ENWW 25
Page 36

Software for Macintosh
Supported operating systems for Macintosh
The device supports the following Macintosh operating systems:
Mac OS X v10.3, v10.4 and later
●
NOTE: For Mac OS v10.4 and later, PPC and Intel Core Processor Macs are supported.
Supported printer drivers for Macintosh
The HP installer provides PostScript® Printer Description (PPD) files, Printer Dialog Extensions (PDEs),
and the HP Printer Utility for use with Macintosh computers.
The PPDs, in combination with the Apple PostScript printer drivers, provide access to device features.
Use the Apple PostScript printer driver that comes with the computer.
Priority for print settings for Macintosh
Changes to print settings are prioritized depending on where the changes are made:
NOTE: The names of commands and dialog boxes might vary depending on your software program.
Page Setup dialog box: Click Page Setup or a similar command on the File menu of the program
●
you are working in to open this dialog box. Settings changed here override settings changed
anywhere else.
Print dialog box: Click Print, Print Setup, or a similar command on the File menu of the program
●
you are working in to open this dialog box. Settings changed in the Print dialog box have a lower
priority and do not override changes made in the Page Setup dialog box.
Printer Properties dialog box (printer driver): Click Properties in the Print dialog box to open
●
the printer driver. Settings changed in the Printer Properties dialog box do not override settings
anywhere else in the printing software.
Default printer driver settings: The default printer driver settings determine the settings used in
●
all print jobs, unless settings are changed in the Page Setup, Print, or Printer Properties dialog
boxes.
Printer control panel settings: Settings changed at the printer control panel have a lower priority
●
than changes made anywhere else.
Change printer-driver settings for Macintosh
To change the settings for all print
jobs until the software program is
closed
1. On the File menu, click Print.
2. Change the settings that you want
on the various pop-up menus.
To change the default settings for all
print jobs
1. On the File menu, click Print.
2. Change the settings that you want
on the various pop-up menus.
3. On the Presets pop-up menu, click
Save as and type a name for the
preset.
To change the device configuration
settings
1. In the Finder, on the Go menu, click
Applications.
2. Open Utilities, and then open
Printer Setup Utility.
3. Click on the print queue.
26 Chapter 4 Use the product with Macintosh ENWW
Page 37

To change the settings for all print
jobs until the software program is
closed
To change the default settings for all
print jobs
To change the device configuration
settings
These settings are saved in the
Presets menu. To use the new settings,
you must select the saved preset option
every time you open a program and print.
Software installation types for Macintosh
Install Macintosh software for direct connections (USB)
1. Connect a USB cable between the device USB port and the computer USB port. Use a standard
2-meter (6.56-foot) USB cable.
2. Insert the device CD into the CD-ROM drive and run the installer. If the CD menu does not run
automatically, double-click the CD icon on the desktop.
3. Double-click the Installer icon in the HP LaserJet Installer folder.
4. Follow the instructions on the computer screen.
USB printer queues are created automatically when the product is attached to the computer.
However, the queue will use a generic PPD if the installer has not been run before the USB cable
is connected. Complete the following steps to change the queue PPD.
4. On the Printers menu, click Show
Info.
5. Click the Installable Options
menu.
NOTE: Configuration settings might
not be available in Classic mode.
5. On the computer hard drive, open Applications, open Utilities, and then open Printer Setup
Utility.
6. Select the correct printer queue, and then click Show Info to open the Printer Info dialog box.
7. In the pop-up menu, select Printer Model, and then, in the pop-up menu in which Generic is
selected, select the correct PPD for the device.
8. Print a test page from any software program to make sure that the software is correctly installed.
If installation fails, reinstall the software. If this fails, see the installation notes or late-breaking
readme files on the device CD or the flyer that came in the box for help.
ENWW Software for Macintosh 27
Page 38

Use features in the Macintosh printer driver
Create and use printing presets in Macintosh
Use printing presets to save the current printer driver settings for reuse.
Create a printing preset
1. On the File menu, click Print.
2. Select the driver.
3. Select the print settings.
4. In the Presets box, click Save As..., and type a name for the preset.
5. Click OK.
Use printing presets
1. On the File menu, click Print.
2. Select the driver.
3. In the Presets box, select the printing preset that you want to use.
NOTE: To use printer-driver default settings, select Factory Default.
Resize documents or print on a custom paper size
You can scale a document to fit on a different size of paper.
1. On the File menu, click Print.
2. Open the Paper Handling menu.
3. In the area for Destination Paper Size, select Scale to fit paper size, and then select the size
from the drop-down list.
4. If you want to use only paper that is smaller than the document, select Scale down only.
Print a cover page
You can print a separate cover page for your document that includes a message (such as “Confidential”).
1. On the File menu, click Print.
2. Select the driver.
3. Open the Cover Page pop-up menu, and then select whether to print the cover page Before
Document or After Document.
4. In the Cover Page Type pop-up menu, select the message that you want to print on the cover
page.
NOTE: To print a blank cover page, select Standard as the Cover Page Type.
28 Chapter 4 Use the product with Macintosh ENWW
Page 39

Use watermarks
A watermark is a notice, such as “Confidential,” that is printed in the background of each page of a
document.
1. On the File menu, click Print.
2. Open the Watermarks menu.
3. Next to Mode, select the type of watermark to use. Select Watermark to print a semi-transparent
message. Select Overlay to print a message that is not transparent.
4. Next to Pages, select whether to print the watermark on all pages or on the first page only.
5. Next to Text, select one of the standard messages, or select Custom and type a new message in
the box.
6. Select options for the remaining settings.
Print multiple pages on one sheet of paper in Macintosh
You can print more than one page on a single sheet of paper. This feature provides a cost-effective way
to print draft pages.
1. On the File menu, click Print.
2. Select the driver.
3. Open the Layout pop-up menu.
4. Next to Pages per Sheet, select the number of pages that you want to print on each sheet (1, 2,
4, 6, 9, or 16).
5. Next to Layout Direction, select the order and placement of the pages on the sheet.
6. Next to Borders, select the type of border to print around each page on the sheet.
Print on both sides of the page (duplex printing)
1. On the Print dialog, select Manual Duplex.
2. In the Manual Duplex area, select Print on Both Sides (Manually).
3. Print the document.
ENWW Use features in the Macintosh printer driver 29
Page 40

4. After one side has been printed, remove the remaining media from the input tray, and set it aside
until after you finish the duplexing job.
5. Without changing the orientation, remove the printed stack from the output bin, and then straighten
the stack.
6. Maintaining the same orientation, place the stack of media in the input tray again. The printed side
should be facing down.
7. On the product control panel, press OK and wait for the second side to print.
30 Chapter 4 Use the product with Macintosh ENWW
Page 41

Scan from the product and HP Director (Macintosh)
For more information about tasks and settings described in this section, see the HP Director online Help.
Scanning tasks
To scan to a software program, scan an item using the program itself. Any TWAIN-compliant program
can scan an image. If the program is not TWAIN-compliant, save the scanned image to a file then place,
open, or import the file in the software program.
Use page-by-page scanning
1. Load the original that is to be scanned face-down in the ADF.
2. Double-click the HP Director desktop alias.
3. Click the HP Director, and then click Scan to open the HP dialog box.
4. Click Scan.
5. To scan multiple pages, load the next page and click Scan. Repeat until all pages are scanned.
6. Click Finish, and then click Destinations.
Scan to file
1. In Destinations, choose Save To File(s).
2. Name the file and specify the destination location.
3. Click Save. The original is scanned and saved.
Scan to e-mail
1. In Destinations, choose E-mail.
2. A blank e-mail opens with the scanned document as an attachment.
3. Enter an e-mail recipient, add text, or other attachments, then click Send.
ENWW Scan from the product and HP Director (Macintosh) 31
Page 42

Fax a document from a Macintosh computer
1. In the software program, on the File menu, select Print.
2. Click PDF, and then select Fax PDF.
3. Enter a fax number in the To field.
4. To include a fax cover page, select Use Cover Page, and then enter the cover page subject and
message (optional).
5. Click Fax.
32 Chapter 4 Use the product with Macintosh ENWW
Page 43

5 Connectivity
Connect the product directly to a computer with USB
●
ENWW 33
Page 44

Connect the product directly to a computer with USB
NOTE: Do not connect the USB cable from the product to the computer until the installer prompts you
to do so.
1. Insert the product CD into your computer. If the software installer does not start, navigate to the
setup.exe file on the CD and double-click the file.
2. Follow the installer instructions.
3. Allow the installation process to complete, and then restart the computer.
34 Chapter 5 Connectivity ENWW
Page 45

6 Paper and print media
Understand paper and print media use
●
Supported paper and print media sizes
●
Special paper or print media guidelines
●
Load paper and print media
●
Configure trays
●
ENWW 35
Page 46

Understand paper and print media use
This product supports a variety of paper and other print media in accordance with the guidelines in this
user guide. Paper or print media that does not meet these guidelines might cause the following problems:
Poor print quality
●
Increased jams
●
Premature wear on the product, requiring repair
●
For best results, use only HP-brand paper and print media designed for laser printers. Do not use paper
or print media made for inkjet printers. Hewlett-Packard Company cannot recommend the use of other
brands of media because HP cannot control their quality.
It is possible for paper to meet all of the guidelines in this user guide and still not produce satisfactory
results. This might be the result of improper handling, unacceptable temperature and/or humidity levels,
or other variables over which Hewlett-Packard has no control.
CAUTION: Using paper or print media that does not meet Hewlett-Packard's specifications might
cause problems for the product, requiring repair. This repair is not covered by the Hewlett-Packard
warranty or service agreements.
CAUTION: To prevent damage to the product, do not use an original that contains correction tape,
correction fluid, paper clips, or staples. Also, do not load photographs, small originals, or fragile originals
into the ADF.
36 Chapter 6 Paper and print media ENWW
Page 47

Supported paper and print media sizes
This product supports a number of paper sizes, and it adapts to various media.
NOTE: To obtain best print results, select the appropriate paper size and type in the print driver before
printing.
Table 6-1 Supported paper and print media sizes
Size Dimensions Priority input tray Tray 1
Letter 216 x 279 mm (8.5 x 11 inches)
Legal 216 x 356 mm (8.5 x 14 inches)
A4 210 x 297 mm (8.27 x 11.69 inches)
Executive 184 x 267 mm (7.24 x 10.51 inches)
A3 297 x 420 mm (11.69 x 16.54 inches)
A5 148 x 210 mm (5.83 x 8.27 inches)
A6 105 x 148 mm (4.13 x 5.83 inches)
B5 (JIS) 182 x 257 mm (7.17 x 10.12 inches)
16k 197 x 273 mm (7.75 x 10.75 inches)
16k 195 x 270 mm (7.7 x 10.6 inches)
16k 184 x 260 mm (7.25 x 10.25 inches)
8.5 x 13 216 x 330 mm (8.5 x 13 inches)
1
4 x 6
1
5 x 8
10 x 15 cm
Custom Priority input tray: Minimum—76 x127 mm (3 x
1
These sizes are supported as custom sizes.
1
107 x 152 mm (4 x 6 inches)
127 x 203 mm (5 x 8 inches)
100 x 150 mm (3.9 x 5.9 inches)
5 inches); Maximum—216 x 356 mm (8.5 x
14 inches)
Table 6-2 Supported envelopes and postcards
Size Dimensions Priority input tray Tray 1
Envelope #10 105 x 241 mm (4.13 x 9.49 inches)
Envelope DL 110 x 220 mm (4.33 x 8.66 inches)
ENWW Supported paper and print media sizes 37
Page 48

Table 6-2 Supported envelopes and postcards (continued)
Size Dimensions Priority input tray Tray 1
Envelope C5 162 x 229 mm (6.93 x 9.84 inches)
Envelope B5 176 x 250 mm (6.7 x 9.8 inches)
Envelope Monarch 98 x 191 mm (3.9 x 7.5 inches)
Postcard 100 x 148 mm (3.94 x 5.83 inches)
Double postcard 148 x 200 mm (5.83 x 7.87 inches)
Special paper or print media guidelines
This product supports printing on special media. Use the following guidelines to obtain satisfactory
results. When using special paper or print media, be sure to set the type and size in your print driver to
obtain the best print results.
CAUTION: HP LaserJet printers use fusers to bond dry toner particles to the paper in very precise
dots. HP laser paper is designed to withstand this extreme heat. Using inkjet paper not designed for this
technology could damage your printer.
Media type Do Do not
Envelopes
Labels
Transparencies
Letterhead or preprinted forms
Store envelopes flat.
●
Use envelopes where the seam
●
extends all the way to the corner of
the envelope.
Use peel-off adhesive strips that
●
are approved for use in laser
printers.
Use only labels that have no
●
exposed backing between them.
Use Labels that lie flat.
●
Use only full sheets of labels.
●
Use only transparencies that are
●
approved for use in laser printers.
Place transparencies on a flat
●
surface after removing them from
the product.
Use only letterhead or forms
●
approved for use in laser printers.
●
●
●
●
●
●
●
Do not use envelopes that are
wrinkled, nicked, stuck together, or
otherwise damaged.
Do not use envelopes that have
clasps, snaps, windows, or coated
linings.
Do not use self-stick adhesives or
other synthetic materials.
Do not use labels that have wrinkles
or bubbles, or are damaged.
Do not print partial sheets of labels.
Do not use transparent print media
not approved for laser printers.
Do not use raised or metallic
letterhead.
38 Chapter 6 Paper and print media ENWW
Page 49

Media type Do Do not
Heavy paper
Glossy or coated paper
Use only heavy paper that is
●
approved for use in laser printers
and meets the weight specifications
for this product.
Use only glossy or coated paper
●
that is approved for use in laser
printers.
Load paper and print media
Priority input tray
The priority input tray is accessed from the front of the product. The product prints from the priority input
tray before attempting to print from tray 1.
Do not use paper that is heavier
●
than the recommended media
specification for this product unless
it is HP paper that has been
approved for use in this product.
Do not use glossy or coated paper
●
designed for use in inkjet products.
Tray 1
The priority input tray holds up to 10 sheets of 75 g/m2 (20 lb) media or one envelope, one transparency,
or one card. You can use the priority input tray to print the first page on media different from the remainder
of the document.
Media guides ensure that the media is correctly fed into the product and that the print is not skewed
(crooked on the media). When loading media, adjust the media guides to match the width of the media
that you are using.
Tray 1 holds up to 250 pages of 75 g/m2 (20 lb) paper, or fewer pages of heavier media (25 mm (0.9 in)
or less stack height). Load media with the top forward and the side to be printed on facing down.
ENWW Load paper and print media 39
Page 50

Media guides ensure that the media feeds correctly into the product and that the print is not skewed.
Tray 1 has side and rear media guides. When loading media, adjust the media guides to match the
length and width of the media that you are using.
NOTE: When you add new media, make sure that you remove all of the media from the input tray and
straighten the stack of new media. Do not fan the media. This reduces jams by preventing multiple
sheets of media from feeding through the product at one time.
40 Chapter 6 Paper and print media ENWW
Page 51

Configure trays
To set the default paper size or type from the control panel, complete the following steps.
Configure trays for copy jobs
1. On the product control panel, press Setup.
2. Use the arrow buttons to select System setup, and then press OK.
3. Use the arrow keys to select Paper setup, and then press OK.
4. Use the arrow keys to select either Def. paper size or Def. paper type, and then press OK.
5. Use the arrow keys to select a default type or size for the tray, and then press OK.
NOTE: To configure the product trays for print jobs, use the printer driver.
ENWW Configure trays 41
Page 52

42 Chapter 6 Paper and print media ENWW
Page 53

7 Print tasks
This section provides information about common printing tasks.
Change the print driver to match the media type and size
●
Get help for any print option
●
Cancel a print job
●
Change the default settings
●
Create booklets
●
Change print-quality settings
●
Change print density
●
Print on special media
●
Use different paper and print covers
●
Print a blank first page
●
Resize documents
●
Select a paper size
●
Select a paper source
●
Select a paper type
●
Set the print orientation
●
Use watermarks
●
Save toner
●
Print on both sides of the paper (duplex printing)
●
Print multiple pages on one sheet of paper in Windows
●
Economy settings
●
ENWW 43
Page 54

Change the print driver to match the media type and size
Selecting media by type and size results in significantly better print quality for heavy paper, glossy paper,
and overhead transparencies. Using the wrong setting can result in unsatisfactory print quality. Always
print by Type for special print media, such as labels or transparencies. Always print by Size for
envelopes.
1. On the File menu in the software program, click Print.
2. Select the driver, and then click Properties or Preferences.
3. Click the Paper/Quality tab.
4. In the Paper Type or Paper Size list box, select the correct media type or size.
5. Click OK.
Supported paper types and tray capacity
This product has the following tray priority for feeding print media:
1. Priority input tray
2. Tray 1
Minimum media dimensions are 76 x 127 mm (3 x 5 in).
Maximum media dimensions are 216 x 356 mm (8.5 x 14 in).
To obtain the best print results, change the paper size and paper type settings in the printer driver before
printing.
Type is Media specifications Priority input tray Tray 1 capacity
Plain
Color
Preprinted
Prepunched
Recycled
Light
Envelopes
Labels Standard 1 sheet Not supported.
Bond
Rough
Transparencies 4 mm (0.1 inches) Monochrome
Heavy
75 g/m2 (20 lb) to 104 g/m2 (27 lb)
60 g/m2 (16 lb) to 75 g/m2 (20 lb)
Less than 90 g/m2 (24 lb)
75 g/m2 (20 lb) to 104 g/m2 (27 lb)
75 g/m2 (20 lb) to 104 g/m2 (27 lb)
Overhead
2
110 g/m
(33 lb)
(29 lb) to 125 g/m
Up to 10 sheets Up to 250 sheets
Up to 10 sheets Up to 260 sheets
1 envelope Up to 10 envelopes.
1 sheet Up to 250 sheets
1 sheet Up to 200 sheets
1 sheet Up to 200 sheets.
2
Up to 10 sheets Not supported.
2
44 Chapter 7 Print tasks ENWW
Page 55

Type is Media specifications Priority input tray Tray 1 capacity
2
Letterhead
2
The maximum stack height for tray 1 is 25 mm (1 inch).
2
75 g/m
(20 lb) to 104 g/m2 (27
lb)
Get help for any print option
Printer-driver Help is separate from program Help. The printer-driver help provides explanations for the
buttons, check boxes, and drop-down lists that are in the printer driver. It also includes instructions for
performing common printing tasks, such as printing on both sides, printing multiple pages on one sheet,
and printing the first page or covers on different paper.
Activate the printer-driver Help screens in one of the following ways:
Windows Macintosh
In the printer driver Properties dialog box, click the
●
Help button.
Press the F1 key on the computer keyboard.
●
Click the question-mark symbol in the upper-right corner
●
of the printer driver.
Right-click on any item in the driver, and then click What's
●
This?.
Up to 10 sheets Up to 250 sheets
In the Print dialog box, click the ? button.
ENWW Get help for any print option 45
Page 56

Cancel a print job
If the print job is currently printing, cancel it by pressing Cancel on the product control panel.
NOTE: Pressing Cancel clears the job that the product is currently processing. If more than one
process is running, pressing Cancel clears the process that currently appears on the product control
panel.
You can also cancel a print job from a software program or a print queue.
To stop the print job immediately, remove the remaining print media from the product. After printing
stops, use one of the following options:
Device control panel: To cancel the print job, press and release Cancel on the product control
●
panel.
Software program: Typically, a dialog box appears briefly on the computer screen, allowing you
●
to cancel the print job.
Windows print queue: If a print job is waiting in a print queue (computer memory) or print spooler,
●
delete the job there.
Windows 2000: Go to the Printer dialog box. Click Start, click Settings, and then click
◦
Printers. Double-click the product icon to open the window, select the print job, and then click
Delete.
Windows XP or Server 2003: Click Start, click Settings, and then click Printers and
◦
Faxes. Double-click the product icon to open the window, right-click the print job that you want
to cancel, and then click Cancel.
Windows Vista: Click Start, click Control Panel, and then, under Hardware and Sound,
◦
click Printer. Double-click the product icon to open the window, right-click the print job that
you want to cancel, and then click Cancel.
Macintosh print queue: Open the print queue by double-clicking the product icon in the dock.
●
Highlight the print job, and then click Delete.
46 Chapter 7 Print tasks ENWW
Page 57

Change the default settings
1. Click Start, click Settings, and then click Printers (Windows 2000) or Printers and Faxes
(Windows XP Professional and Server 2003) or Printers and Other Hardware Devices (Windows
XP Home).
For Windows Vista, click Start, click Control Panel, and then click Printer.
2. Right-click the driver icon, and then select Properties.
3. Click the Configure tab.
4. Change the settings, and then click OK.
ENWW Change the default settings 47
Page 58

Create booklets
You can copy two pages on one sheet of paper so you can fold the pages in the center to form a booklet.
The device arranges the pages in the correct order. For example, if the original document has eight
pages, the device prints pages 1 and 8 on the same sheet.
1. On the File menu in the software program, click Print.
2. Select the driver, and then click Properties or Preferences.
3. Click the Finishing tab.
4. Select Print On Both Sides.
5. In the drop-down box for Booklet Layout, select either Left Edge Binding or Right Edge
Binding. The Pages per Sheet setting automatically changes to 2 pages per sheet.
6. Click OK.
Change print-quality settings
1. On the File menu in the software program, click Print.
2. On the Paper/Quality tab, select the resolution or print-quality settings that you want from the Print
Quality drop-down menu.
3. Click OK.
Change print density
Increasing the print density darkens the print on the page.
1. On the File menu in the software program, click Print.
2. Select the driver, and then click Properties or Preferences.
3. Click the Device Settings tab.
4. Use the Print Density slider to change the setting.
5. Click OK.
48 Chapter 7 Print tasks ENWW
Page 59

Print on special media
Make sure that the paper or print media that you are using meets HP specifications. Generally, smoother
paper provides better results.
1. Open the media input tray and remove any media.
2. Load the media. Make sure that the top of the media is forward and the side to be printed on is
facing up.
3. Adjust the media guides to the length and width of the media.
4. On the printer driver, on the Paper tab or the Paper/Quality tab, select the media type from the
Paper Type drop-down list.
CAUTION: Be sure to set the correct media type in the product settings. The product adjusts the
fuser temperature according to the media type setting. When printing on special media such as
transparencies or labels, this adjustment prevents the fuser from damaging the media as it passes
through the product.
5. Print the document.
ENWW Print on special media 49
Page 60

Use different paper and print covers
1. On the File menu in the software program, click Print.
2. Select the driver, and then click Properties or Preferences.
3. On the Paper/Quality tab, select the appropriate paper.
4. Click Use different paper.
5. Select the pages that you want to use to print specific pages on different paper.
6. To print front or back covers, select Add Blank or Preprinted Cover.
7. Click OK.
NOTE: The paper size must be the same for all pages of the print job.
Print a blank first page
1. On the File menu in the software program, click Print.
2. Select the driver, and then click Properties or Preferences.
3. On the Paper/Quality tab, click Use different paper.
4. In the list box, click Front or Back Cover.
5. Click Add Blank or Preprinted Cover.
6. Click OK.
50 Chapter 7 Print tasks ENWW
Page 61

Resize documents
Use the document resizing options to scale a document to a percentage of its normal size. You can also
choose to print a document on a different size paper, with or without scaling.
Reduce or enlarge a document
1. On the File menu in the software program, click Print.
2. Select the driver, and then click Properties or Preferences.
3. On the Effects tab, select % of normal size, and then type the percentage by which you want to
reduce or enlarge the document.
You can also use the scroll bar to adjust the percentage.
4. Click OK.
Print a document onto a different paper size
1. On the File menu in the software program, click Print.
2. Select the driver, and then click Properties or Preferences.
3. On the Effects tab, click Print Document On.
4. Select the paper size to print on.
5. To print the document without scaling it to fit, make sure that the Scale to Fit option is not selected.
6. Click OK.
Select a paper size
1. On the File menu in the software program, click Print.
2. Select the driver, and then click Properties or Preferences.
3. On the Paper/Quality tab, select the size from the Size is drop-down list.
4. Click OK.
Select a paper source
1. On the File menu in the software program, click Print.
2. Select the driver, and then click Properties or Preferences.
3. On the Paper/Quality tab, select the source from the Source is drop-down list.
4. Click OK.
Select a paper type
1. On the File menu in the software program, click Print.
2. Select the driver, and then click Properties or Preferences.
ENWW Resize documents 51
Page 62

3. On the Paper/Quality tab, select the type from the Type is drop-down list.
4. Click OK.
Set the print orientation
1. On the File menu in the software program, click Print.
2. Select the driver, and then click Properties or Preferences.
3. On the Finishing tab, select either Portrait or Landscape in the Orientation section.
4. Click OK.
Use watermarks
A watermark is a notice, such as "Confidential," that is printed in the background of each page of a
document.
1. On the File menu in the software program, click Print.
2. Select the driver, and then click Properties or Preferences.
3. From the Effects tab, click the Watermarks drop-down list.
4. Click the watermark that you want to use.
5. If you want the watermark to appear only on the first page of the document, click First Page
Only.
6. Click OK.
To remove the watermark, click (none) in the Watermarks drop-down list.
Save toner
1. On the File menu in the software program, click Print.
2. Select the driver, and then click Properties or Preferences.
3. On the Paper/Quality tab, click EconoMode.
4. Click OK.
52 Chapter 7 Print tasks ENWW
Page 63

Print on both sides of the paper (duplex printing)
NOTE: The printer driver also contains instructions and graphics for manually duplexing.
1. In the software program, open the properties (printer driver).
2. On the Finishing tab, select Print on Both Sides (Manually).
NOTE: If the Print on Both Sides option is dimmed or unavailable, open the properties (printer
driver). On the Device Settings tab or the Configure tab, select Allow Manual Duplexing, and
then click OK. Repeat steps 1 and 2.
3. Print the document.
4. After one side has been printed, remove the remaining media from the input tray, and set it aside
until after you finish the duplexing job.
5. Without changing the orientation, remove the printed stack from the output bin, and then straighten
the stack.
ENWW Print on both sides of the paper (duplex printing) 53
Page 64

6. Maintaining the same orientation, place the stack of media in the input tray again. The printed side
should be facing down.
7. On the product control panel, press OK and wait for the second side to print.
54 Chapter 7 Print tasks ENWW
Page 65

Print multiple pages on one sheet of paper in Windows
You can print more than one page on a single sheet of paper.
1. On the File menu in the software program, click Print.
2. Select the driver, and then click Properties or Preferences.
3. Click the Finishing tab.
4. In the Document Options drop-down list, select the number of pages that you want to print on
each sheet (1, 2, 4, 6, 9, or 16).
5. If the number of pages is greater than 1, select the correct options for Print page borders and
Page order.
If you need to change the page orientation, click Portrait or Landscape.
●
6. Click OK. The product is now set to print the number of pages per sheet that you have selected.
ENWW Print multiple pages on one sheet of paper in Windows 55
Page 66

Economy settings
EconoMode
The EconoMode setting in the product printer driver conserves toner.
Archive print
Archive print produces output that is less susceptible to toner smearing and dusting. Use archive print
to create documents that you want to preserve or archive.
1. On the control panel, press Setup.
2. Use the arrow buttons to select Service, and then press OK.
3. Use the arrow buttons to select Archive print, select On or Off, and then press OK.
56 Chapter 7 Print tasks ENWW
Page 67

8Copy
Load originals
●
Use copy
●
Copy settings
●
Duplex (two-sided) copy jobs
●
ENWW 57
Page 68

Load originals
NOTE: The ADF capacity is up to 30 sheets of 80 g/m2 or 20 lb media.
CAUTION: To prevent damage to the product, do not use an original that contains correction tape,
correction fluid, paper clips, or staples. Also, do not load photographs, small originals, or fragile originals
into the ADF.
1. Insert the top-end of the stack of originals into the ADF input tray, with the media stack face-down
and the first page to be copied at the bottom of the stack.
2. Make sure that the ADF media lever is set correctly for single-page or multiple-page documents.
3. Slide the stack into the ADF until it does not move any farther.
Document loaded appears on the control-panel display.
4. Adjust the media guides until they are snug against the media.
58 Chapter 8 Copy ENWW
Page 69

Use copy
One-touch copy
1. Load the document into the ADF input tray.
2. Press Start Copy on the product control panel to start copying.
3. Repeat the process for each copy.
Multiple copies
Change the number of copies for the current job
1. On the product control panel, use the alphanumeric buttons to set the number of copies (between
1 and 99) that you want to make for the current job.
2. Press Start Copy to begin copying your job.
NOTE: The change in the setting remains active for about 2 minutes after the copy job has been
completed. During this time, Custom settings appears on the product control-panel display.
Change the default number of copies
1. On the product control panel, press Setup.
2. Use the arrow buttons to select Copy setup, and then press OK.
3. Use the arrow buttons to select Def. # of copies, and then press OK.
4. Use the arrow buttons to set the number of copies (between 1 and 99) that you want as the default.
5. Press OK to save your selection.
Cancel a copy job
To cancel a copy job, press Cancel on the product control panel. If more than one process is running,
pressing Cancel clears the process that currently appears on the product control-panel display.
Reduce or enlarge copies
Reduce or enlarge copies for the current job
1. On the product control panel, press Reduce/Enlarge.
2. Select the size to which you would like to reduce or enlarge the copies in this job.
NOTE: If you select Custom: 25-400%, use the arrow keys to set a percentage.
If you select 2 pages/sheet or 4 pages/sheet, select the orientation (portrait or landscape).
3. Press Start Copy to save the selection and immediately start the copy job, or press OK to save the
selection without starting the job.
ENWW Use copy 59
Page 70

NOTE: The change in the setting remains active for about 2 minutes after the copy job has been
completed. During this time, Custom settings appears on the product control-panel display.
You must change the default media size in the media input tray to match the output size, or part of your
copy might be cut off.
Adjust the default copy size
NOTE: The default copy size is the size to which copies are normally reduced or enlarged. If you keep
the factory default size setting of Original=100%, all copies will be the same size as the original
document.
1. Press Setup.
2. Use the arrow buttons to select Copy setup, and then press OK.
3. Use the arrow buttons to select Def. Redu/Enlrg, and then press OK.
4. Use the arrow buttons to select the option for how you normally want to reduce or enlarge copies.
NOTE: If you select Custom: 25-400%, use the arrow keys to set the percentage of the original
size that you normally want for copies.
If you select 2 pages/sheet or 4 pages/sheet, select the orientation (portrait or landscape).
5. Press OK to save the selection.
The product can reduce copies to as little as 25% of the original size or enlarge copies to as much as
400% of the original size.
Reduction/enlargement settings
Original=100%
●
A4 > Ltr=94%
●
Ltr > A4=97%
●
Full Page=91%
●
2 pages/sheet
●
4 pages/sheet
●
Custom: 25-400%
●
NOTE: When using the 2 pages/sheet or 4 pages/sheet setting, select the page orientation (portrait
or landscape).
Copy settings
Copy quality
Five copy-quality settings are available: Text, Draft, Mixed, Film photo, and Picture.
The factory-set default for copy quality is Text. This setting is the best for items that contain mostly text.
60 Chapter 8 Copy ENWW
Page 71

When making a copy of a photo or graphic, you can select the Film photo setting for photos or the
Picture setting for other graphics to increase the quality of your copy. Select the Mixed setting for
documents that include both text and graphics.
Adjust the copy quality for the current job
1. On the product control panel, press More Copy Settings twice to see the current quality setting for
the copy.
2. Use the arrow buttons to scroll through the quality setting options.
3. Select a setting, and then press Start Copy to save the selection and immediately start the copy
job, or press OK to save the selection without starting the job.
NOTE: The change in the setting remains active for about 2 minutes after the copy job has been
completed. During this time, Custom settings appears on the product control-panel display.
Adjust the default copy quality
1. On the product control panel, press Setup.
2. Use the arrow buttons to select Copy setup, and then press OK.
3. Use the arrow buttons to select Default quality, and then press OK.
4. Use the arrow buttons to select the copy quality, and then press OK to save the selection.
Adjust the lighter/darker (contrast) setting
The lighter/darker setting affects the lightness or darkness (contrast) of the copy. Use the following
procedure to change the contrast for the current copy job only.
Adjust the lighter/darker setting for the current job
1. On the product control panel, press Lighter/Darker to see the current contrast setting.
2. Use the arrow buttons to adjust the setting. Move the slider to the left to make the copy lighter than
the original, or move the slider to the right to make the copy darker than the original.
3. Press Start Copy to save the selection and immediately start the copy job, or press OK to save the
selection without starting the job.
NOTE: The change in the setting remains active for about 2 minutes after the copy job has been
completed. During this time, Custom settings appears on the product control-panel display.
Adjust the default lighter/darker setting
NOTE: The default lighter/darker setting affects all copy jobs.
1. On the product control panel, press Setup.
2. Use the arrow buttons button to select Copy setup, and then press OK.
3. Use the arrow buttons button to select Def. Light/dark, and then press OK.
ENWW Copy settings 61
Page 72

4. Use the arrow buttons button to adjust the setting. Move the slider to the left to make all of the
copies lighter than the original, or move the slider to the right to make all of the copies darker than
the original.
5. Press OK to save the selection.
Change copy job print density
Increasing the print density at the product control panel darkens the print on the page.
1. On the control panel, press Setup.
2. Use the arrow buttons to select System setup, and then press OK.
3. Use the arrow buttons to select Paper setup, and then press OK.
4. Use the arrow buttons to select Print Density, and then press OK.
5. Use the arrow buttons to increase or decrease the density setting, and then press OK.
Define custom copy settings
When you change the copy settings at the control panel, Custom settings appears on the control-panel
display. The custom settings remain in effect for approximately 2 minutes, and then the product returns
to the default settings. To immediately return to the default settings, press Cancel.
Print or copy edge-to-edge
The product cannot print fully edge-to-edge. The maximum printing area is 203.2 x 347 mm (8 x 13.7 in),
leaving a 4 mm unprintable border around the page.
Copy onto media of different types and sizes
The product is set to copy on either letter- or A4-size paper, depending on the country/region in which
it was purchased. You can change the size and type of media that you copy to for the current copy job
or for all copy jobs.
Media-size settings
Letter
●
Legal
●
A4
●
Media-type settings
Plain
●
Preprinted
●
Letterhead
●
Transparency
●
Prepunched
●
Labels
●
62 Chapter 8 Copy ENWW
Page 73

Bond
●
Recycled
●
Color
●
Light
●
Heavy
●
Cardstock
●
Envelope #10
●
Rough
●
Change the default media-size setting
1. On the product control panel, press Setup.
2. Use the arrow buttons to select System setup, and then press OK.
3. Use the arrow buttons to select Paper setup, and then press OK.
4. Use the arrow buttons to select Def. paper size, and then press OK.
5. Use the arrow buttons to select a media size, and then press OK.
6. Press OK to save the selection.
Change the default media-type setting
1. On the product control panel, press Setup.
2. Use the arrow buttons to select System setup, and then press OK.
3. Use the arrow buttons to select Paper setup, and then press OK.
4. Use the arrow buttons to select Def. paper type, and then press OK.
5. Use the arrow buttons to select a media type, and then press OK.
6. Press OK to save the selection.
Restore the copy-settings defaults
Use the control panel to restore the copy settings to the factory-set default values.
1. On the product control panel, press Setup.
2. Use the arrow buttons to select Copy setup, and then press OK.
3. Use the arrow buttons to select Restore defaults, and then press OK.
ENWW Copy settings 63
Page 74

Duplex (two-sided) copy jobs
Copy a two-sided original to a one-sided document
Copies resulting from these procedures are printed on one side, and need to be hand-collated.
1. Load the first page of the document to be copied face-down into the ADF.
2. Press Start Copy.
3. Flip the original, and then reload it into the ADF.
4. Press Start Copy.
5. Repeat steps 1 through 4 for each page until all of the original document pages have been copied.
Copying a two-sided original to a two-sided document
1. Load the first page of the document to be copied face-down into the ADF.
2. Press Start Copy.
3. Flip the original, and then reload it into the ADF.
64 Chapter 8 Copy ENWW
Page 75

4. Remove the copied page from the output bin and place it face down into the priority input tray.
5. Press Start Copy.
6. Remove the copied page from the output bin, and then set it aside for manual collating.
7. Repeat steps 1 through 6, following the original document page order, until all pages of the original
are copied.
ENWW Duplex (two-sided) copy jobs 65
Page 76

66 Chapter 8 Copy ENWW
Page 77

9 Scan
Load originals for scanning
●
Use scan
●
Scan settings
●
ENWW 67
Page 78

Load originals for scanning
NOTE: The ADF capacity is up to 30 sheets of 80 g/m2 or 20 lb media.
CAUTION: To prevent damage to the product, do not use an original that contains correction tape,
correction fluid, paper clips, or staples. Also, do not load photographs, small originals, or fragile originals
into the ADF.
1. Insert the top-end of the stack of originals into the ADF input tray, with the media stack face-down
and the first page to be copied at the bottom of the stack.
2. Make sure that the ADF media lever is set correctly for single-page or multiple-page documents.
3. Slide the stack into the ADF until it does not move any farther.
Document loaded appears on the control-panel display.
4. Adjust the media guides until they are snug against the media.
68 Chapter 9 Scan ENWW
Page 79

Use scan
Scan methods
Scan jobs can be performed in the following ways.
Scan from the computer by using HP LaserJet Scan (Windows)
●
Scanning by using HP Director (Macintosh). See
●
(Macintosh) on page 31.
Scan from TWAIN-compliant or Windows Imaging Application (WIA)-compliant software
●
NOTE: To learn about and use text-recognition software, install the Readiris program from the
software CD-ROM. Text-recognition software is also known as optical character recognition (OCR)
software.
Scan by using HP LaserJet Scan (Windows)
1. In the HP program group, select Scan to to start HP LaserJet Scan.
2. Select a scanning destination.
3. Click Scan.
NOTE: OK should indicate the action that you want to accomplish.
Scan by using other software
The product is TWAIN-compliant and Windows Imaging Application (WIA)-compliant. The product works
with Windows-based programs that support TWAIN-compliant or WIA-compliant scanning devices and
with Macintosh-based programs that support TWAIN-compliant scanning devices.
While you are in a TWAIN-compliant or WIA-compliant program, you can gain access to the scanning
feature and scan an image directly into the open program. For more information, see the Help file or the
documentation that came with your TWAIN-compliant or WIA-compliant software program.
Scan from the product and HP Director
Scan from a TWAIN-compliant program
Generally, a software program is TWAIN-compliant if it has a command such as Acquire, File
Acquire, Scan, Import New Object, Insert from, or Scanner. If you are unsure whether the program
is compliant or you do not know what the command is called, see the software program Help or
documentation.
When scanning from a TWAIN-compliant program, the HP LaserJet Scan software program might start
automatically. If the HP LaserJet Scan program starts, you can make changes while previewing the
image. If the program does not start automatically, the image goes to the TWAIN-compliant program
immediately.
Start the scan from within the TWAIN-compliant program. See the software program Help or
documentation for information about the commands and steps to use.
Scan from a WIA-compliant program (Windows XP and Vista only)
WIA is another way to scan an image directly into a software program, such as Microsoft Word. WIA
uses Microsoft software to scan, instead of HP LaserJet Scan software.
ENWW Use scan 69
Page 80

Generally, a software program is WIA-compliant if it has a command such as Picture/From Scanner
or Camera in the Insert or File menu. If you are unsure whether the program is WIA-compliant, see the
software program Help or documentation.
Start the scan from within the WIA-compliant program. See the software program Help or documentation
for information about the commands and steps to use.
-Or-
In the Cameras and Scanner folder, double-click the product icon. This opens the standard Microsoft
WIA Wizard, which enables you to scan to a file.
Scanning by using optical character recognition (OCR) software
You can use third-party OCR software to import scanned text into your preferred word-processing
program for editing.
Readiris
The Readiris OCR program is included on a separate CD-ROM that shipped with the product. To use
the Readiris program, install it from the appropriate software CD-ROM, and then follow the instructions
in the online Help.
Canceling a scan job
To cancel a scan job, use one of the following procedures.
On the product control panel, press Cancel.
●
Click the Cancel button in the onscreen dialog box.
●
70 Chapter 9 Scan ENWW
Page 81

Scan settings
Scan file format
The default file format of a scanned document or photo depends on the scan type as well as the object
being scanned.
Scanning a document or a photo to a computer results in the file being saved as a .TIF file.
●
Scanning a document to email results in the file being saved as a .PDF file.
●
Scanning a photo to e-mail results in the file being saved as a .JPEG file.
●
NOTE: Different file types can be selected when using the scan software program.
Scanner resolution and color
If you are printing a scanned image, and the quality is not what you expected, you might have selected
a resolution or color setting in the scanner software that does not match your needs. Resolution and
color affect the following features of scanned images:
Image clarity
●
Texture of gradations (smooth or rough)
●
Scan time
●
File size
●
Scanning resolution is measured in pixels per inch (ppi).
NOTE: Scanning ppi levels are not interchangeable with printing dpi (dots per inch) levels.
Color, grayscale, and black and white define the number of colors possible. You can adjust the scanner
hardware resolution to up to 1200 ppi. The software can perform an enhanced resolution up to
19,200 ppi. You can set color and grayscale at 1 bit (black and white), or at 8 bit (256 levels of gray or
color) to 24 bit (true color).
The resolution and color guidelines table lists simple tips that you can follow to meet your scanning
needs.
NOTE: Setting the resolution and color to a high value can create large files that take up disk space
and slow the scanning process. Before setting the resolution and color, determine how you are going
to use the scanned image.
ENWW Scan settings 71
Page 82

Resolution and color guidelines
The following table describes the recommended resolution and color settings for different types of scan
jobs.
Intended use Recommended resolution Recommended color settings
Color
Fax 150 ppi
E-mail 150 ppi
Edit text 300 ppi
Print (graphics or text) 600 ppi for complex graphics, or if you
want to significantly enlarge the
document
300 ppi for normal graphics and text
150 ppi for photos
Display on screen 75 ppi
Black and White
●
Black and White, if the image does not require
●
smooth gradation
Grayscale, if the image requires smooth gradation
●
Color, if the image is in color
●
Black and White
●
Black and White for text and line art
●
Grayscale for shaded or colored graphics and
●
photos
Color, if the image is in color
●
Black and White for text
●
Grayscale for graphics and photos
●
Color, if the image is in color
●
You can set the color values to the following settings when scanning.
Setting Recommended use
Color Use this setting for high-quality color photos or documents in which the color is important.
Black and White Use this setting for text documents.
Grayscale Use this setting when file size is an issue or when you want a document or photograph to
be scanned quickly.
Scan quality
Clean the scanner glass strip and platen
Over time, specks of debris might collect on the scanner glass and white platen, which can affect
performance. Use the following procedure to clean the scanner glass and white platen.
1. Use the power switch to turn off the product, and then unplug the power cord from the electrical
socket.
2. Tilt the control panel forward.
72 Chapter 9 Scan ENWW
Page 83

3. Clean the glass strip and the white platen with a soft cloth or sponge that has been moistened with
nonabrasive glass cleaner.
CAUTION: Do not use abrasives, acetone, benzene, ammonia, ethyl alcohol, or carbon
tetrachloride on any part of the product; these can damage the product. Do not place liquids directly
on the glass or platen. They might seep and damage the product.
4. Dry the glass and platen with a chamois or a cellulose sponge to prevent spotting.
5. Plug in the product, and then use the power switch to turn on the product.
ENWW Scan settings 73
Page 84

74 Chapter 9 Scan ENWW
Page 85

10 Fax
Fax features
●
Setup
●
Change fax settings
●
Use fax
●
Solve fax problems
●
For information about the fax controls on the control panel, see
Control panel on page 9.
ENWW 75
Page 86

Fax features
The product has the following fax features, which are available from the control panel or from the product
software.
Integrated telephone handset
●
Fax Setup Wizard for easy fax configuration
●
Plain-paper analog fax with 30-page automatic document feeder (ADF) and output tray of up to
●
100-page paper capacity
120-entry phone book and 10 speed dials from the control panel
●
Automatic redial
●
Digital storage of up to 500 fax pages
●
Fax forwarding
●
Delayed sending of faxes
●
Ring features: Configure rings to answer and distinctive ring compatibility (service required through
●
local telecommunications company)
Fax confirmation report
●
Junk fax blocking
●
Eight cover page templates available
●
NOTE: Not all features are listed. The product software might need to be installed for some features
to be available.
76 Chapter 10 Fax ENWW
Page 87

Setup
Install and connect the hardware
Connect to a telephone line
The product is an analog device. HP recommends using the product on a dedicated analog telephone
line. For information about using the product with other telephone environments, see
PBX, ISDN, or VoIP system on page 98.
Connect additional devices
The product includes two fax ports:
Use fax on a DSL,
●
The “line out” port (
●
The “telephone” port (
Telephones used in conjunction with the product can be employed in two ways:
An extension phone is a phone plugged into the same phone line at another location.
●
A downstream phone is one that is plugged into the product or a device that is plugged into the
●
product.
Connect additional devices in the order that is described in the following steps. The output port for each
device is connected to the input port of the next, forming a "chain". If you do not want to connect a
specific device, skip the step that explains it and continue to the next device.
NOTE: Do not connect more than three devices to the telephone line.
NOTE: Voicemail is not supported with this product.
1. Unplug the power cords for all of the devices that you want to connect.
2. If the product is not yet connected to a telephone line, see the getting started guide before
proceeding. The product should already be connected to a telephone jack.
3. Remove the plastic insert from the "telephone" port (the port that is marked with the telephone
icon).
), which connects the product to the wall telephone jack.
), which connects additional devices to the product.
ENWW Setup 77
Page 88

4. To connect an internal or external modem on a computer, plug one end of a telephone cord into
the product “telephone” port (
port.
). Plug the other end of the telephone cord into the modem “line”
NOTE: Some modems have a second “line” port to connect to a dedicated voice line. If you have
two “line” ports, see your modem documentation to make sure that you connect to the correct “line”
port.
5. To connect a caller-ID box, plug a telephone cord into the previous device’s “telephone” port. Plug
the other end of the telephone cord into the caller-ID box “line” port.
78 Chapter 10 Fax ENWW
Page 89

6. To connect an answering machine, plug a telephone cord into the previous device’s “telephone”
port. Plug the other end of the telephone cord into the answering machine “line” port.
7. To connect a telephone, plug a telephone cord into the previous device’s “telephone” port. Plug
the other end of the telephone cord into the telephone “line” port.
8. After you have finished connecting additional devices, plug all of the devices into their power
sources.
Set up fax with a telephone answering machine
Set the product rings-to-answer setting for at least one ring more than the number of rings for which
●
the answering machine is set.
If an answering machine is connected to the same telephone line but on a different jack (in another
●
room, for example), it might interfere with the product's ability to receive faxes.
Setup for stand-alone fax
1. Unpack and set up the product.
2. Set the time, date, and fax header. See
3. Set other settings as necessary to configure for the product environment.
Configure fax settings
The product fax settings can be set from the control panel, from HP Toolbox, or from HP Director. At
the initial set-up process, the HP Fax Setup Wizard can be used to configure the settings.
In the United States and many other countries/regions, setting the time, date, and other fax header
information is a legal requirement.
Configure fax settings on page 79.
ENWW Setup 79
Page 90

Use the control panel to set the fax time, date, and header
To use the control panel to set the date, time, and header, complete the following steps:
1. At the control panel, press Setup.
2. Use the arrow buttons to select System setup, and then press OK.
3. Use the arrow buttons to select Time/Date. Press OK.
4. Use the arrow buttons to select the 12-hour clock or 24-hour clock, and then press OK.
5. Use the alphanumeric buttons to enter the current time.
6. Complete one of the following:
For the 12-hour clock, use the arrow buttons to move past the fourth character. Select 1 for
●
a.m. or 2 for p.m. Press OK.
For the 24-hour clock, press OK.
●
7. Use the alphanumeric buttons to enter the current date. Use two digits to specify the month, day,
and year. Press OK.
8. Use the arrow buttons to select Fax setup, then press OK.
9. Use the arrow buttons to select Fax Header, then press OK.
10. Use the alphanumeric buttons to enter your fax number and your company name or header, and
then press OK.
NOTE: The maximum number of characters for the fax number is 20; use up to 25 characters for
the company name.
Use HP Fax Setup Wizard to set the fax time, date, and header
If you completed the software installation, you are ready to send faxes from your computer. If you did
not complete the fax setup process at the time you installed the software, you can complete it at any
time by using the Fax Setup Wizard.
1. Click Start, and then click Programs.
2. Click HP, click the name of the product, and then click HP Fax Setup Wizard.
3. Follow the onscreen instructions in the HP Fax Setup Wizard to set the time, date, and fax header,
as well as several other settings.
Use of common localized letters in fax headers
When using the control panel to enter your name in the header or to enter a name for a one-touch key,
speed-dial entry, or group-dial entry, press the appropriate alphanumeric button repeatedly until the
letter that you need appears. Then, press the > button to select that letter and move to the next space.
The following table shows which letters and numbers appear on each alphanumeric button.
80 Chapter 10 Fax ENWW
Page 91

Key number Characters
11
2 A B C a b c 2
3 D E F d e f 3
4 G H I g h i 4
5 J K L j k l 5
6 M N O m n o 6
7 P Q R S p q r s 7
8 T U V t u v 8
9 W X Y Z w x y z 9
00
* ( ) + - . / , “ * & @ R W
#
space # ,
NOTE: Use > to move the cursor on the control panel and use < to delete characters.
Manage the phone book
You can store frequently dialed fax numbers or groups of fax numbers as speed dials or group-dial
entries.
In the product phone book, a total of 120 entries are available for speed dials and group-dial entries.
For example, if you program 100 of the entries as speed-dials, the remaining 20 can be used for groupdials.
Use phone-book data from other programs
NOTE: Before a phone book from another program can be imported, you must use the export feature
in that other program.
HP Toolbox can import contact information from other software program phone books. The following
table shows which programs are supported for HP Toolbox.
Program Description
Microsoft Outlook Personal Address Book (PAB) entries, Contacts entries, or both combined may be selected.
Individuals and groups from the PAB are combined with individuals from Contacts only if the
combined option is selected.
If a Contacts entry has both a home and a business fax number, two entries will be displayed. The
“name” of these two entries will be modified. “:(B)” will be added to the name in the business entry
and “:(H)” will be added to the name in the home entry.
If a duplicate entry occurs (one from Contacts and one from the PAB with the same name and fax
number), a single entry will be displayed. However, if an entry exists in the PAB with a duplicate in
Contacts, and the Contacts entry has both a business and a home fax number, all three entries will
be displayed.
Windows Address Book The Windows Address Book (WAB), used by Outlook Express and Internet Explorer, is supported.
If an individual has both a home and a business fax number, two entries will be displayed. The
ENWW Setup 81
Page 92

Program Description
Goldmine Goldmine version 4.0 is supported. HP Toolbox imports the file last used by Goldmine.
Symantec Act! Act! versions 4.0 and 2000 are supported. HP Toolbox imports the database last used by Act!.
Complete the following steps to import a phone book:
1. Open HP Toolbox.
2. Click Fax, and then click Fax Phone Book.
3. Browse to the program phone book, and then click Import.
Delete phone book
You can delete all speed dials and group-dial entries that are programmed in the product.
CAUTION: After speed dials and group-dial entries are deleted, they cannot be recovered.
1. On the control panel, press Setup.
2. Use the arrow buttons to select Fax setup, and then press OK.
“name” of these two entries will be modified. “:(B)” will be added to the name in the business entry
and “:(H)” will be added to the name in the home entry.
3. Press OK to select Phone Book.
4. Use the arrow buttons to select Delete All, and then press OK.
5. Press OK to confirm the deletion.
Special dialing symbols and options
You can insert pauses into a fax number that you are dialing or programming to a one-touch key, speeddial entry, or group-dial entry. Pauses are often needed when dialing internationally or connecting to an
outside line.
Insert a dialing pause: Press # (Pause) repeatedly until a comma (,) appears on the control-panel
●
display, indicating that the pause will occur at that point in the dialing sequence.
Insert a pause for dial tone: Press * (Symbols) repeatedly until W appears on the control-panel
●
display to have the product wait for a dial tone before dialing the remainder of the telephone
number.
Insert a hook flash: Press * (Symbols) repeatedly until R appears on the control-panel display to
●
have the product perform a hook flash.
Manage speed dials
Create and edit speed dials
Speed dials 1 through 10 are also associated with their corresponding one-touch keys on the control
panel. The one-touch keys can be used for speed dials or group-dial entries. A maximum of 50
characters can be entered for a single fax number.
82 Chapter 10 Fax ENWW
Page 93

NOTE: To gain access to all of the speed dials, you must use the Shift button. Speed dials 6 through
10 are all available by pressing Shift and the associated one-touch key on the control panel.
Complete the following steps to program speed dials from the control panel:
1. On the control panel, press Setup.
2. Use the arrow buttons to select Fax setup, and then press OK.
3. Press OK to select Phone Book.
4. Press OK to select Individual Setup.
5. Press OK to select Add.
6. Use the alphanumeric buttons to specify the speed-dial entry number that you want to associate
with this fax number, and then press OK. Selecting a number from 1 to 10 also associates the fax
number with the corresponding one-touch key.
7. Use the alphanumeric buttons to enter the fax number. Include any pauses or other needed
numbers, such as an area code, an access code for numbers outside a PBX system (usually a 9
or 0), or a long distance prefix.
NOTE: When entering a fax number, press Pause until a comma (,) appears if you want to insert
a pause in the dialing sequence, or press * until W appears if you want the product to wait for a
dial tone.
8. Press OK.
9. Use the alphanumeric buttons to enter a name for the fax number. To do so, repeatedly press the
alphanumeric button for the letter that you need until the letter appears. (For a list of characters,
see
NOTE: To insert punctuation, press the asterisk (*) button repeatedly until the character that you
want appears, and then press the > button to go to the next space.
10. Press OK to save the information.
11. If you have more speed dials to program, repeat steps 1 through 10.
Delete speed dials
1. On the control panel, press Setup.
2. Use the arrow buttons to select Fax setup, and then press OK.
3. Press OK to select Phone Book.
4. Press OK to select Individual setup.
5. Use the arrow buttons button to select Delete, and then press OK.
6. Use the alphanumeric buttons to enter the number of the speed-dial entry you want to delete, and
then press OK.
Use of common localized letters in fax headers on page 80.)
7. Press OK to confirm the deletion.
ENWW Setup 83
Page 94

Manage group-dial entries
Create and edit group-dial entries
1. Assign a speed-dial entry to each fax number that you want in the group. (For instructions, see
Create and edit speed dials on page 82.)
2. On the control panel, press Setup.
3. Use the arrow buttons to select Fax setup, and then press OK.
4. Press OK to select Phone Book.
5. Use the arrow buttons to select Group setup, and then press OK.
6. Use the arrow buttons to select Add/Edit group, and then press OK.
7. Use the alphanumeric buttons to enter the number that you want to associate with this group, and
then press OK. Selecting 1 through 10 also associates the group with the corresponding one-touch
key.
8. Use the alphanumeric buttons to enter a name for the group, and then press OK.
9. Press a one-touch key, and then press OK again to confirm the addition. Repeat this step for each
group member you want to add.
-or-
Select Phone Book, and then select the speed-dial entry for the group member you want to add.
Press OK to confirm the addition. Repeat this step for each group member you want to add.
10. When you are finished, press OK.
11. If you have more group-dial entries to assign, press OK, and then repeat steps 1 through 10.
Delete group-dial entries
1. On the control panel, press Setup.
2. Use the arrow buttons to select Fax setup, and then press OK.
3. Press OK to select Phone Book.
4. Use the arrow buttons to select Group setup, and then press OK.
5. Use the arrow buttons to select Delete group, and then press OK.
6. Using the alphanumeric buttons, enter the number of the group-dial that you want to delete, and
then press OK.
7. Press OK to confirm the deletion.
Delete an individual from a group-dial entry
1. On the control panel, press Setup
.
the arrow buttons to select Fax setup, and then press OK.
2. Us
3. Press OK to select Phone Book.
4. Use the arrow buttons to select Group setup, and then press OK.
84 Chapter 10 Fax ENWW
e
Page 95

5. Use the arrow buttons to select Del. # in group, and then press OK.
6. Use the arrow buttons to select the individual that you want to delete from the group.
7. Press OK to confirm the deletion.
8. Repeat steps 6 and 7 to delete other individuals from the group.
-or-
Press Cancel if you are finished.
NOTE: Deleting a speed-dial entry also deletes that entry from any group-dial entries that included
that speed-dial entry.
Set fax polling
If someone else has set up a fax to be polled, you can request that the fax be sent to your product. (This
is known as polling another machine).
1. On the control panel, press Setup.
2. Use the arrow buttons to select Fax functions, and then press OK.
3. Use the arrow buttons to select Polling receive, and then press OK.
The product dials the other fax machine and requests the fax.
ENWW Setup 85
Page 96

Change fax settings
Set the sound-volume settings
Control the volume of the fax sounds from the control panel. You can make changes to the following
sounds:
The fax sounds that are associated with incoming and outgoing faxes
●
The ring for incoming faxes
●
The factory-set default for the fax-sounds volume is Soft.
Set the alert volume
1. Press Setup.
2. Use the arrow buttons to select System setup, and then press OK.
3. Use the arrow buttons to select Volume settings, and then press OK.
4. Use the arrow buttons to select Alarm volume, and then press OK.
5. Use the arrow buttons to select Off, Soft, Medium, or Loud.
6. Press OK to save the selection.
Set the fax-sounds (phone-line) volume
Complete the following steps to change the fax-sounds volume.
1. Press Setup.
2. Use the arrow buttons to select System setup, and then press OK.
3. Use the arrow buttons to select Volume settings, and then press OK.
4. Use the arrow buttons to select Phoneline volume, and then press OK.
5. Use the arrow buttons to select Off, Soft, Medium, or Loud.
6. Press OK to save the selection.
Set the ring volume
When the product is initially receiving a call, a ring alert is audible. The ring duration length is based on
the local telephone company ring-pattern length. The factory-set default for the ring volume is Soft.
1. Press Setup.
2. Use the arrow buttons to select System setup, and then press OK.
3. Use the arrow buttons to select Volume settings, and then press OK.
4. Use the arrow buttons to select Ring volume, and then press OK.
5. Use the arrow buttons to select Off, Soft, Medium, or Loud.
6. Press OK to save the selection.
86 Chapter 10 Fax ENWW
Page 97

Set the handset volume
1. Press Setup.
2. Use the arrow buttons to select System setup, and then press OK.
3. Use the arrow buttons to select Volume settings, and then press OK.
4. Use the arrow buttons to select Handset volume, and then press OK.
5. Use the arrow buttons to select Off, Soft, Medium, or Loud.
6. Press OK to save the selection.
Send fax settings
Set a dial prefix
A dial prefix is a number or group of numbers that are automatically added to the beginning of every fax
number you enter at the control panel or from the software. The maximum number of characters for a
dial prefix is 50.
The default setting is Off. You might want to turn this setting on and enter a prefix if, for example, you
have to dial a number such as 9 to get a telephone line outside of your company telephone system.
While this setting is activated, you can dial a fax number without the dial prefix by using manual dial.
For instructions, see
Manual dial faxing on page 101.
1. On the control panel, press Setup.
2. Use the arrow buttons to select Fax setup, and then press OK.
3. Use the arrow buttons to select Fax Send setup, and then press OK.
4. Use the arrow buttons to select Dial Prefix, and then press OK.
5. Use the arrow buttons to select On or Off, and then press OK.
6. If you selected On, use the alphanumeric buttons to enter the prefix, and then press OK. You can
use numbers, pauses, and dialing symbols.
Set the dial-tone detection
Normally, the product begins dialing a fax number immediately. If you are using the product on the same
line as your telephone, turn on the detect-dial-tone setting. This prevents the product from sending a
fax while someone is on the telephone.
The factory-set default for detect dial tone is On for France and Hungary, and Off for all other countries/
regions.
1. On the control panel, press Setup.
2. Use the arrow buttons to select Fax setup, and then press OK.
3. Use the arrow buttons to select Fax Send setup, and then press OK.
4. Use the arrow buttons to select Detect dial tone, and then press OK.
5. Use the arrow buttons to select On or Off, and then press OK.
ENWW Change fax settings 87
Page 98

Set autoredial
If the product was unable to send a fax because the receiving fax machine did not answer or was busy,
the product attempts to redial based on the redial-on-busy, redial-on-no-answer, and redial-oncommunication-error options. Use the procedures in this section to turn these options on or off.
Set the redial-on-busy option
If this option is turned on, the product redials automatically if it receives a busy signal. The factory-set
default for the redial-on-busy option is On.
1. On the control panel, press Setup.
2. Use the arrow buttons to select Fax setup, and then press OK.
3. Use the arrow buttons to select Fax Send setup, and then press OK.
4. Use the arrow buttons to select Redial if busy, and then press OK.
5. Use the arrow buttons to select On or Off, and then press OK.
Set the redial-on-no-answer option
If this option is turned on, the product redials automatically if the receiving machine does not answer.
The factory-set default for the redial-on-no-answer option is Off.
1. On the control panel, press Setup.
2. Use the arrow buttons to select Fax setup, and then press OK.
3. Use the arrow buttons to select Fax Send setup, and then press OK.
4. Use the arrow buttons to select Redial-no answer, and then press OK.
5. Use the arrow buttons to select On or Off, and then press OK.
Set the redial-on-communication-error option
If this option is turned on, the product redials automatically if some sort of communication error occurs.
The factory-set default for the redial-on-communication-error option is On.
1. On the control panel, press Setup.
2. Use the arrow buttons to select Fax setup, and then press OK.
3. Use the arrow buttons to select Fax Send setup, and then press OK.
4. Use the arrow buttons to select Redial Comm Err., and then press OK.
5. Use the arrow buttons to select On or
Set light/dark and resolution
Set the default light/dark (contrast) setting
f, and then press OK.
Of
The contrast affects the lightness and darkness of an outgoing fax as it is being sent.
88 Chapter 10 Fax ENWW
Page 99

The default light/dark setting is the contrast that is normally applied to items that are being faxed. The
slider is set to the middle as the default setting.
1. On the control panel, press Setup.
2. Use the arrow buttons to select Fax setup, and then press OK.
3. Use the arrow buttons to select Fax Send setup, and then press OK.
4. Use the arrow buttons to select Def. Light/dark, and then press OK.
5. Use the < button to move the slider to the left to make the fax lighter than the original, or use the
> button to move the slider to the right to make the fax darker than the original.
6. Press OK to save the selection.
Set resolution settings
NOTE: Increasing the resolution increases the fax size. Larger faxes increase the send time and could
exceed the available memory in the product.
The factory-set default resolution setting is Fine.
Use this procedure to change the default resolution for all fax jobs to one of the following settings:
Standard: This setting provides the lowest quality and the fastest transmission time.
●
Fine: This setting provides a higher resolution quality than Standard that is usually appropriate for
●
text documents.
Superfine: This setting is best used for documents that mix text and images. The transmission
●
time is slower than Fine but faster than Photo.
Photo: This setting produces the best images, but greatly increases the transmission time.
●
Set the default resolution setting
1. On the control panel, press Setup.
2. Use the arrow buttons to select Fax setup, and then press OK.
3. Use the arrow buttons to select Fax Send setup, and then press OK.
4. Use the arrow buttons to select Def. Resolution, and then press OK.
5. Use the arrow buttons to change the resolution setting.
6. Press OK to save the selection.
Set the resolution for the current fax job
1. On the control panel, press Resolution to show the current resolution setting.
2. Use the arrow buttons to select the appropriate resolution setting.
3. Press OK to save the selection.
ENWW Change fax settings 89
Page 100

Set tone-dialing or pulse-dialing
Use this procedure to set the product to tone-dialing or pulse-dialing mode. The factory-set default is
Tone. Do not change this setting unless you know that the telephone line cannot use tone dialing.
1. On the control panel, press Setup.
2. Use the arrow buttons to select Fax setup, and then press OK.
3. Use the arrow buttons to select Fax Send setup, and then press OK.
4. Use the arrow buttons to select Dialing Mode, and then press OK.
5. Use the arrow buttons to select Tone or Pulse, and then press OK to save the selection.
NOTE: The pulse-dialing option is not available in all countries/regions.
Receive fax settings
Set or change number of rings-to-answer
When the answer mode is set to Automatic, the product rings-to-answer setting determines the number
of times the telephone rings before the product answers an incoming call.
If the product is connected to a line that receives both fax and voice calls (a shared line) and that also
uses an answering machine, you might need to adjust the rings-to-answer setting. The number of ringsto-answer for the product must be greater than the rings-to-answer on the answering machine. This
allows the answering machine to answer the incoming call and record a message if it is a voice call.
When the answering machine answers the call, the product listens to the call and automatically answers
it if it detects fax tones.
The default setting for rings-to-answer is five for the U.S. and Canada, and two for other countries/
regions.
Use the rings-to-answer setting
Use the following table to determine the number of rings-to-answer to use.
Type of telephone line Recommended rings-to-answer setting
Dedicated fax line (receiving only fax calls) Set to a number of rings within the range shown on the control-
One line with two separate numbers and a ring-pattern service One or two rings. (If you have an answering machine or
Shared line (receiving both fax and voice calls) with only an
attached telephone
Shared line (receiving both fax and voice calls) with an
attached answering machine or computer voicemail
panel display. (The minimum and maximum number of rings
allowed varies by country/region.)
computer voicemail for the other telephone number, make sure
that the product is set to a greater number of rings than the
answering system. Also, use the distinctive-ring feature to
differentiate between voice and fax calls. See Set up distinctive
ring on page 92.)
Five rings or more.
Two rings more than the answering machine or computer
voicemail.
90 Chapter 10 Fax ENWW
 Loading...