

Page 1

getting started
hp iPAQ Navigation System
Page 2

Loading the application:
1
Load Disc 1 of 2 into the CD drive on your computer to activate the
Install Shield Wizard and follow the on-screen prompts to install the application.
When the installation is complete click Finish to initiate the Map Loader.
Checklist before you begin:
1 My iPAQ Pocket PC is connected to
my computer via the iPAQ Pocket PC
cradle or synchronization cable.
2 My iPAQ Pocket PC is synchronized with
my computer using ActiveSync. (See your
iPAQ Pocket PC User’s Guide for help
on synchronizing your iPAQ Pocket PC.)
3 I have the two Navigation System
installation discs.
4 I have closed all applications on my
desktop and my iPAQ Pocket PC.
get ready
application & map installation
This CD includes:
• Navigation Software
• Western U.S. and
Canada Map Data
• User’s Guide
hp iPAQ Navigation System
1
©2003 Hewlett-Packard Development Company, L.P.
First Edition September 2003
348771-001
Page 3
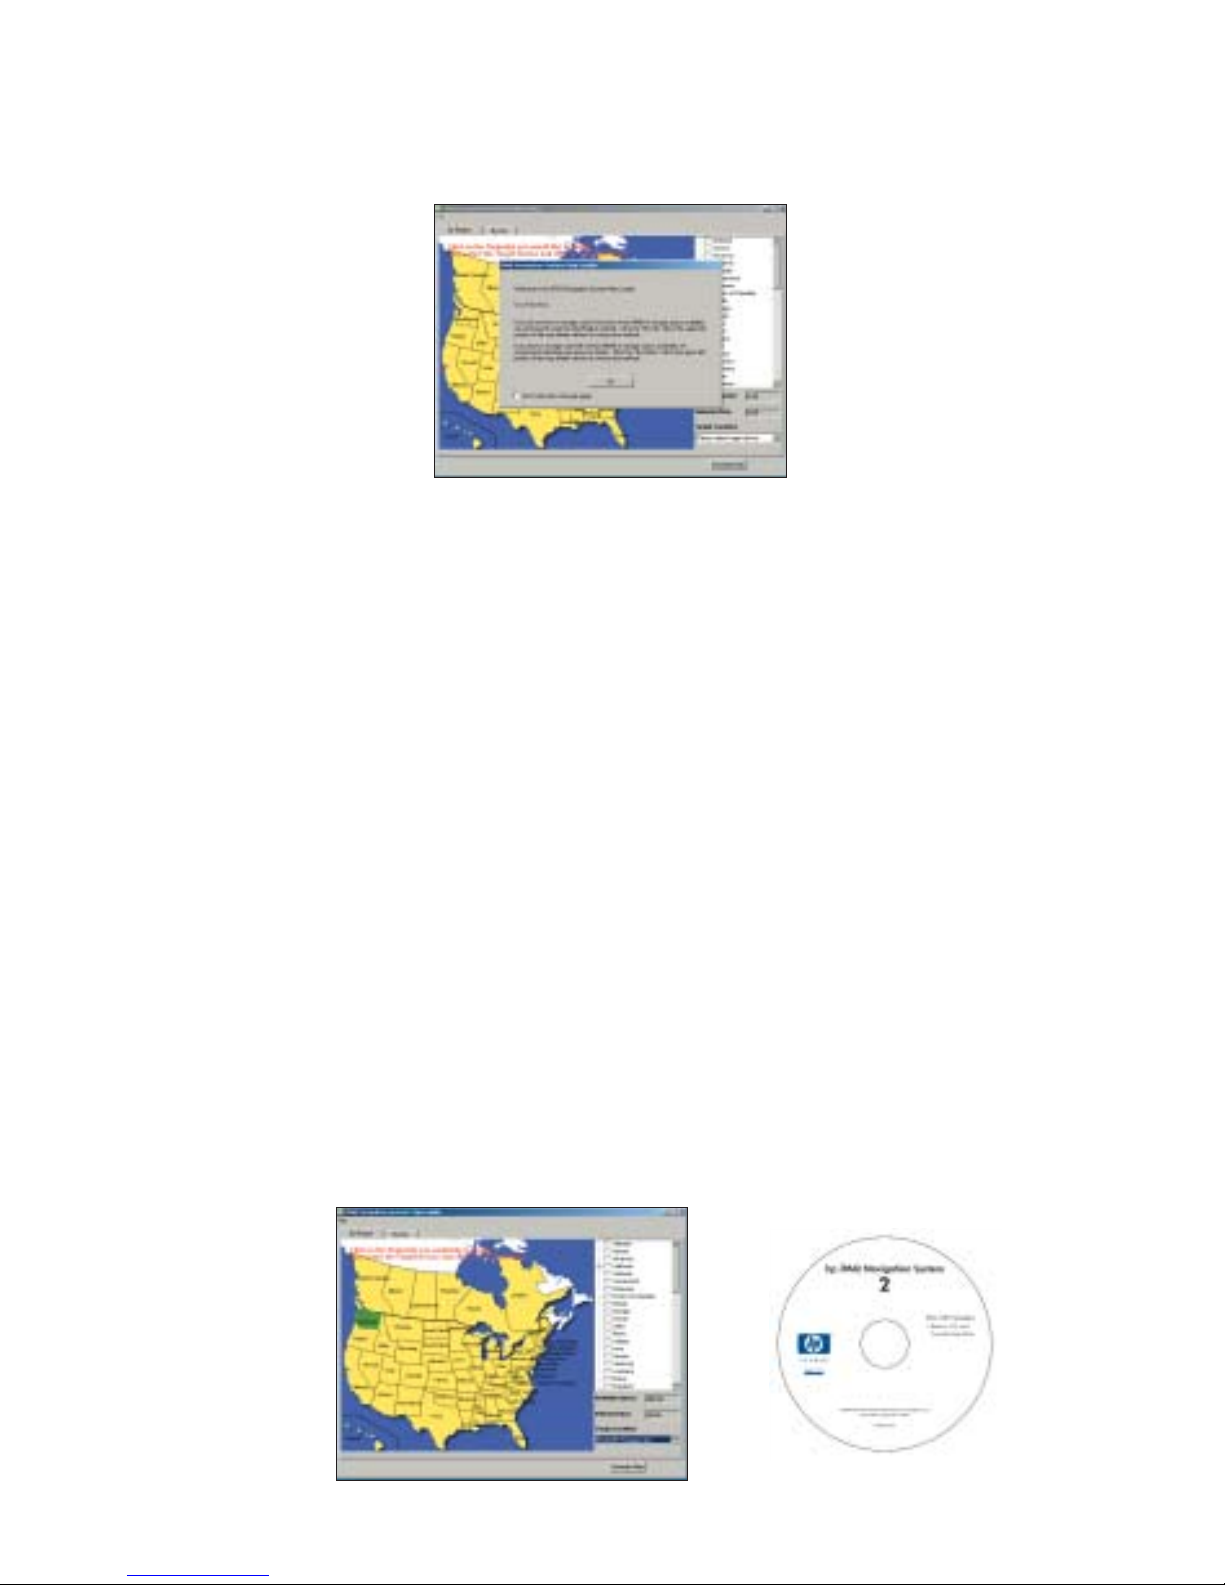
Loading maps to your iPAQ Pocket PC:
2
From the Map Loader screen, click either the tab By State or By City.
3
For By State, select state or states to download by placing a checkmark
in the box to left of the state.
In the box labeled Location, click the drop down arrow to select location where
maps reside, Pocket PC Storage Card or Pocket PC Main Memory. If you
have a storage card, it is recommended that you select the Storage Card option.
(NOTE: Selected size of map(s) should not exceed available memory space.
You can track this by referring to the Available Memory and Selected Size
boxes.)
For By City, select a state from the drop down box. Select a city from the City
drop down box. Select the radius around the city to be downloaded by moving
the map radius cursor (between 25-125 miles).
In the box labeled Location: click the drop down arrow to select Pocket PC
Main Memory or Pocket PC Storage Card.
(NOTE: You can adjust the radius around the selected city by moving the Map
Radius indicator to the right. The selected map size appears in the box labeled
Selected Size. You will be alerted if the selected map size exceeds the available
memory in the iPAQ Pocket PC Main Memory or Pocket PC Storage Card.)
4
Click Generate Map to transfer the map to your iPAQ Pocket PC.
When prompted, insert Disc 2 into your CD drive and click OK.
Page 4

Partnering the GPS to the iPAQ Pocket PC:
1
From the Today screen, tap Start. From the
Start Menu, select Programs.
2
Tap iPAQ Navigation System to launch the
application and tap OK to acknowledge your
agreement not to enter data or manipulate the
software controls while operating a vehicle.
3
The iPAQ Navigation System automatically partners
with the GPS receiver after launch on most iPAQ
devices. To check if your device has partnered,
tap the Windows icon on the top left hand of the
screen, and open the Bluetooth Manager.
4
Tap the My Shortcuts tab on the Bluetooth screen.
Two green arrows on the BT-GPS Receiver icon
indicate a connection is active. If the connection is
active, go to the “Go” section of this guide.
(NOTE: For certain devices it is necessary to
manually create a partnership. Please see the
steps on the next page for manually creating a
partnership.)
Checklist before you begin:
1 My iPAQ Pocket PC has the hp Navigation
application loaded and the power is on.
2 My Bluetooth GPS receiver is charged
and the power is on.
3 The Bluetooth radio on my iPAQ Pocket
PC is turned on.
get set
Bluetooth®connection
Page 5

Manually creating a partnership:
1
From the Today screen tap Start. Tap Settings
on the drop down menu.
2
From the Settings Menu, tap System. From the
System Menu, tap Bluetooth. Tap Turn On under
Bluetooth status to display the message Bluetooth
is On. Tap Bluetooth Manager to set connections.
3
Tap New at the bottom of the screen and tap
Connect! to display the Connection Wizard.
From the Connection Wizard, select Explore
a Bluetooth Device and tap Next.
4
Tap inside the Device box to display a list of
available Bluetooth devices.
5
Tap the icon labeled BT-GPS-xxxxxx to display
the Service Selection screen. Tap Serial xxxxxx
in the Service Selection box and tap Next.
Tap Finish.
6
Double tap the icon labeled BT-GPS-xxxxxx
to confirm connection between the iPAQ
Pocket PC and GPS receiver.
Page 6

Acquiring a satellite fix:
1
Position the hp Bluetooth GPS receiver in the vehicle
window so that the receiver has an unobstructed view
of the sky. When the green LED flashes, the satellites
have located the receiver.
(NOTE: The Bluetooth GPS receiver may take 5-10 minutes to
acquire a fix on the three satellites needed to accurately position the
vehicle. In the event that the GPS receiver does not acquire a fix
within 5-10 minutes, reposition the GPS receiver and try again.)
2
From the iPAQ Navigation System,tap View at
the bottom of the screen and tap Map. A map
display will appear centered on your current
location. Your current location is depicted as a
green arrow in a blue circle
(NOTE: A yellow arrow indicates low GPS signal; a red arrow
indicates no GPS signal. Reposition the GPS receiver and try again.)
Checklist before you begin:
1 My iPAQ Pocket PC is on.
2 My Bluetooth
®
GPS receiver is charged
and the power is on. The blue LED is
flashing and the green LED is solid.
3 The iPAQ Navigation System application
is running.
go
navigating to a destination
Page 7

3
Tap Menu and tap Destination to display the
Set Destination screen. Select type of destination
(e.g., Address, Points of Interest, Recent,
Intersection, Favorites). This Getting Started
guide covers only how to enter your destination
by address. For instructions on using other
options, please refer to the User’s Guide.
4
Tap Address to display the Select Input
Method screen.
5
Tap Street First to display the navigation keyboard on the Enter Street Name screen and tap
the letters needed to spell out the street name of
your destination and tap OK.
6
From the Enter House Number screen, use the
navigation keyboard to enter the house number
of your destination and then tap OK to display
an alphabetical list of addresses in cities that
match the street address of your destination.
7
Tap the Arrow Up or Down buttons to highlight
the address that matches your destination and
tap NAV.
8
Follow the voice prompts and map display to
your destination.
Page 8

For troubleshooting and further information:
www.hp.com/go/ipaqnavigation
1.866.4HP.NAV1
(1-866-447-6281)
348773-001
www.hp.com/go/ipaqnavigation
© 2003 Hewlett-Packard Development Company, L.P.
All product names mentioned herein may be trademarks of their respective companies. First Edition (September 2003)
 Loading...