

HP Deskjet F2200 All-in-One series
*CB683-90018*
*CB683-90018*
*CB683-90018*
1
2
a.
b.
3
HE
Setup Guide
EN
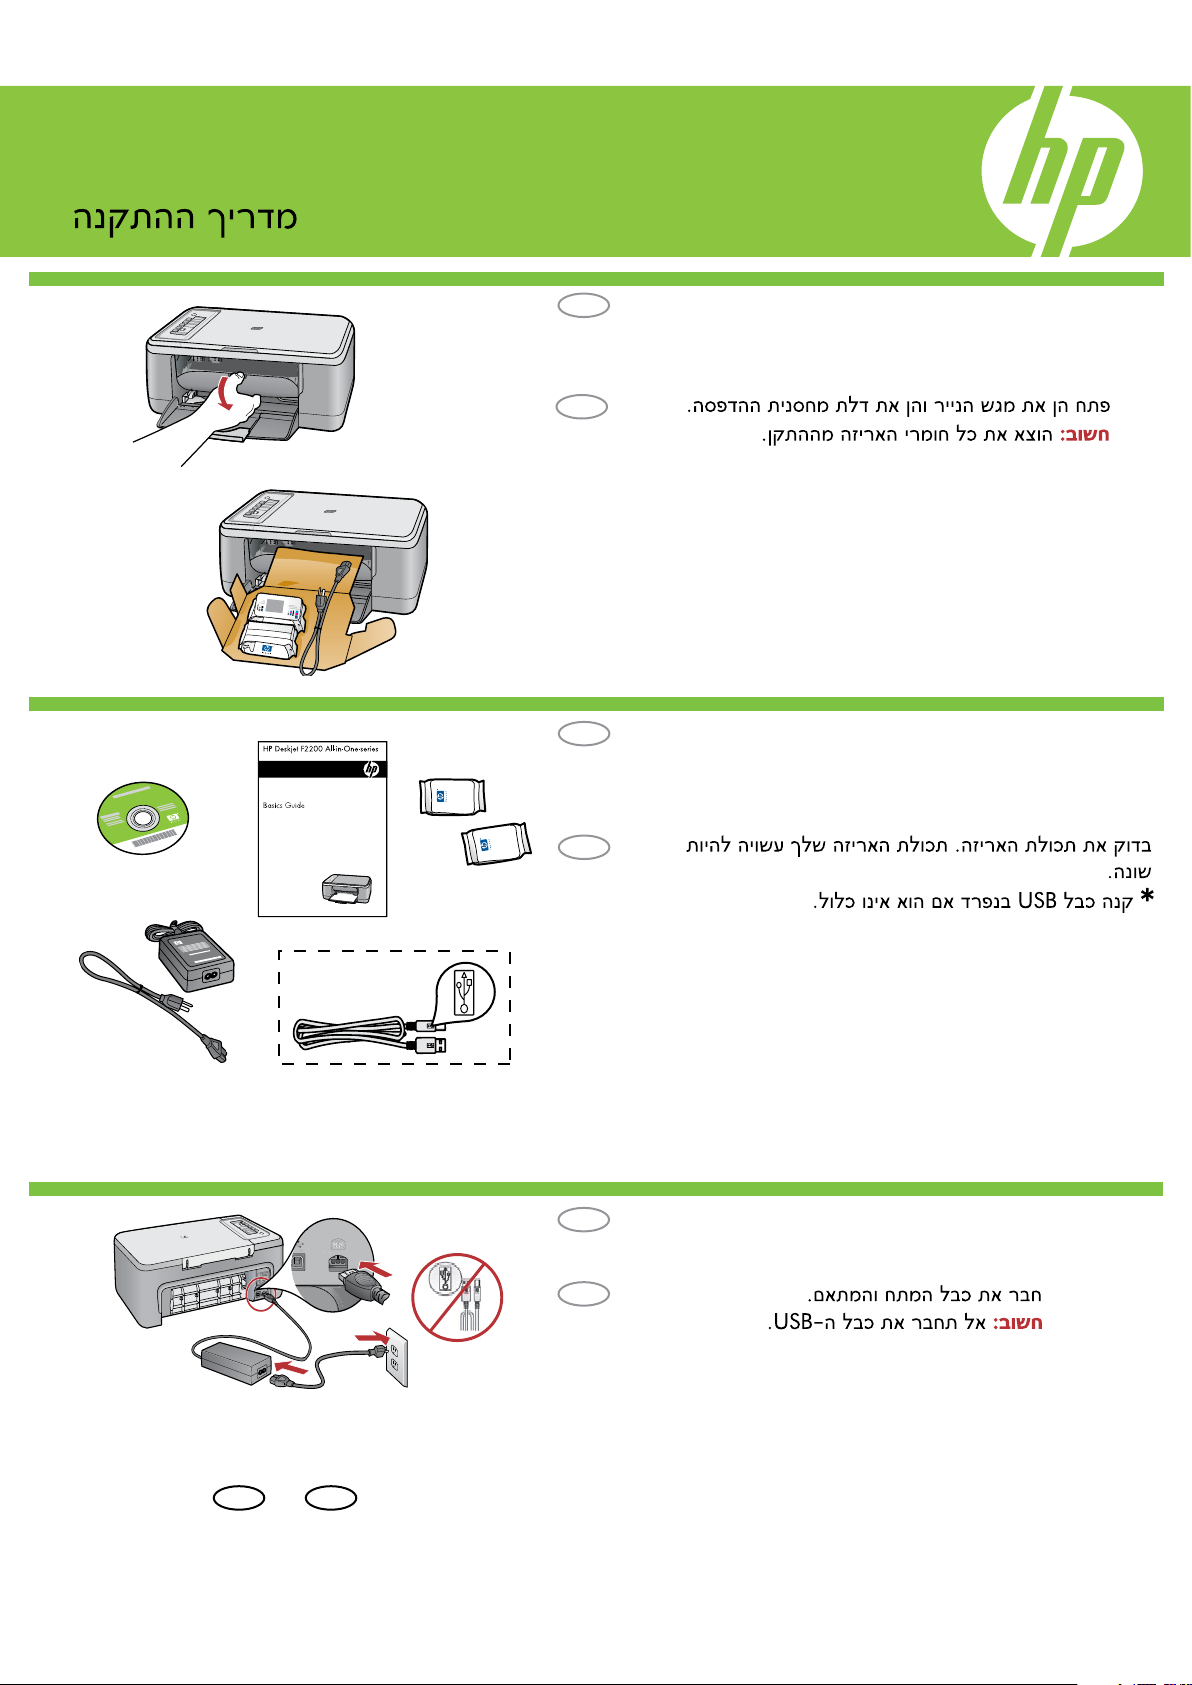
Verify the box contents. The contents of your box may
differ.
* Purchase a USB cable separately if it is not included.
Lower the paper tray and the print cartridge door.
IMPORTANT: Remove all packing material from the
device.
Connect the power cord and adapter.
IMPORTANT: Do not connect the USB cable.
HE
EN
EN
HE
HE
EN
*
USB
USB

2 • HP Deskjet F2200 All-in-One series
4
a.
d.
b.
c.
Close the print cartridge door.a.
Paper tray
Print cartridge door
Tray extension
Load plain white paper.d.
Pull out the tray extension and make sure the
paper-width guide is in its outermost position.
c.
Make sure the paper tray is open.b.
CAUTION: Do not force paper too far into the tray.
EN
HE
EN
HE
EN
HE
EN
HE
HP Deskjet F2200 All-in-One series • 3
6
5
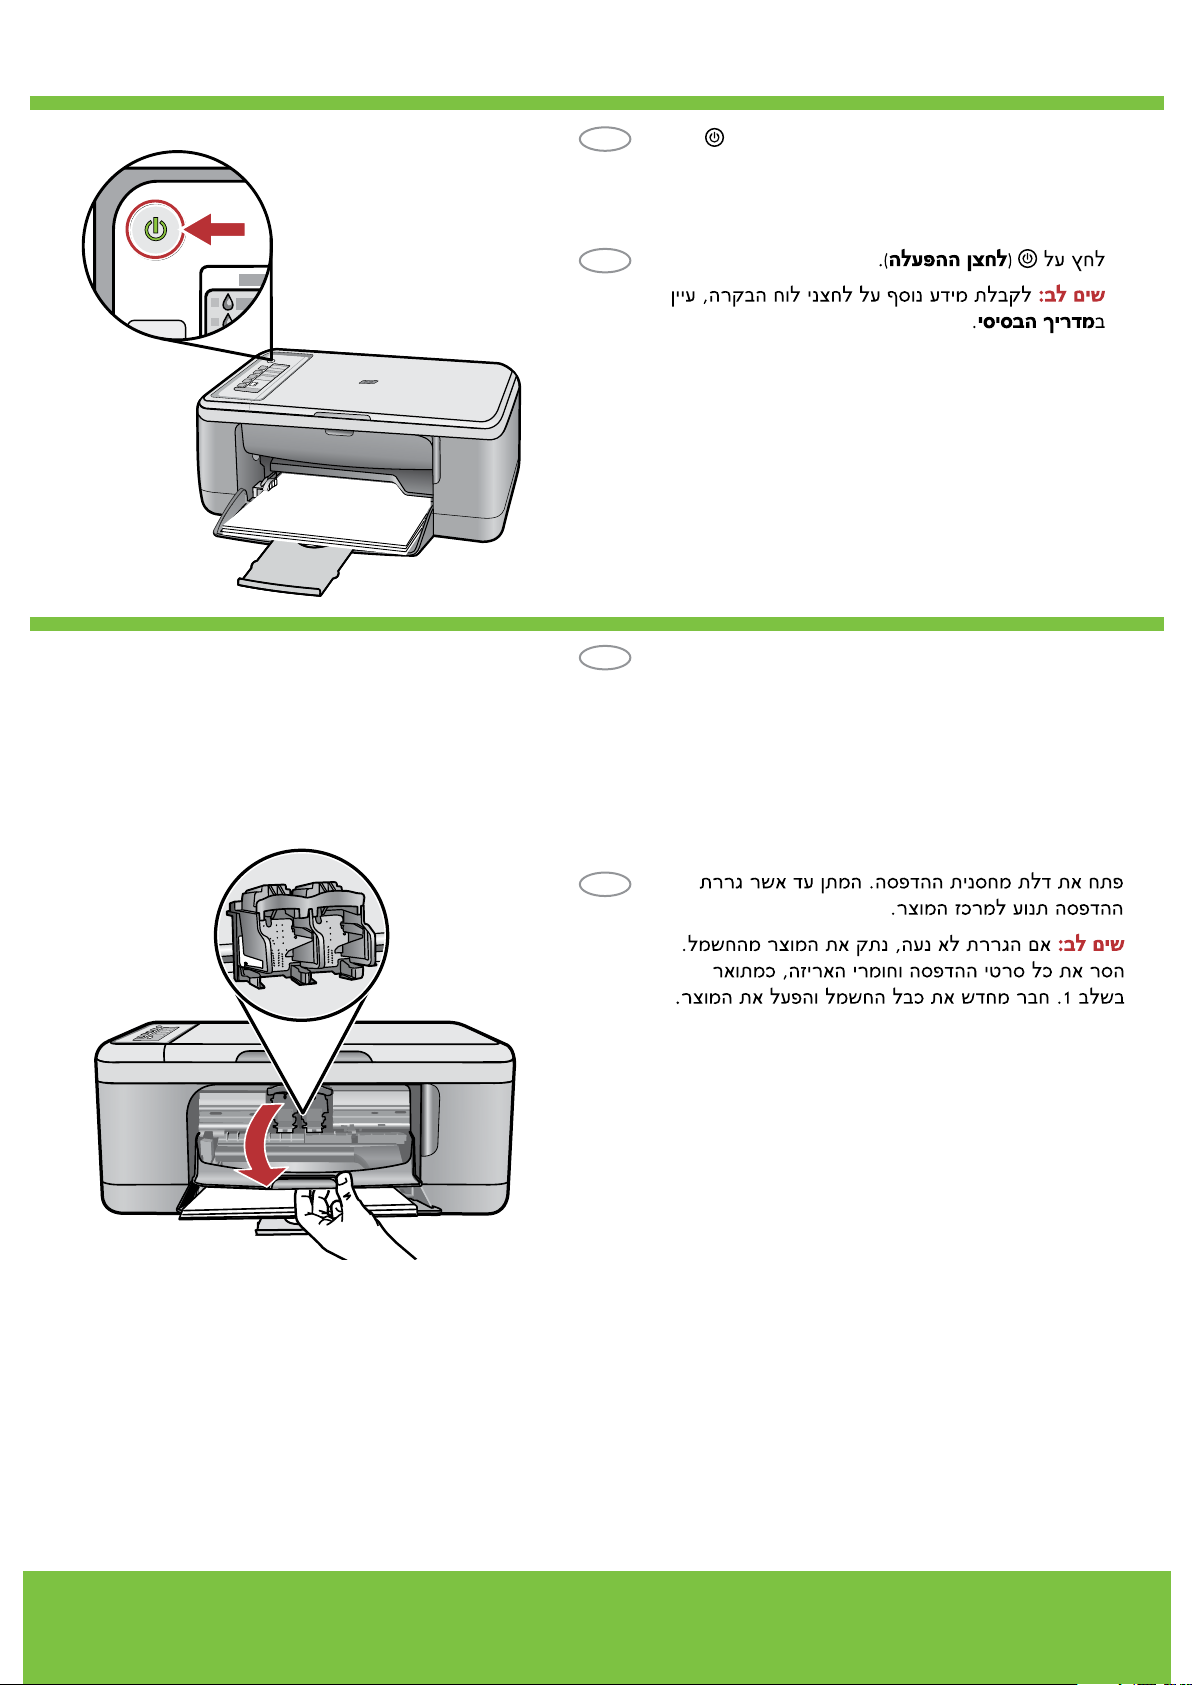
Open the print cartridge door. Wait until the print
carriage moves to the center of the product.
Note: If the carriage does not move, unplug the
product. Remove all tape and packing material,
see step 1. Reconnect the power cord and turn
on the product.
Press (On button).
Note: For more information on the control panel
buttons, see the Basics Guide.
EN
HE
EN
HE
 Loading...